1
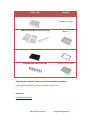
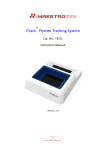
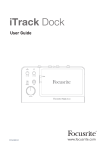
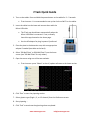
iTrack Quick Guide 1. Turn on the tablet: Press and hold the power button on the tablet for 3 – 5 seconds. First time user: it is recommended to set up the clock and Wi-Fi on the tablet. 2. Insert the tablet into the base and connect them with the Micro-USB cable The iTrack app should start automatically when the Micro-USB cable is connected. If not, manually launch the app located on the home page. Use the AC adaptor for plug-in power if preferred. 3. Place the plate in the detection area, with an appropriate adapter if needed (see table on the back). 4. Select “96-Well Plate” or 384-Well Plate” from the home screen (use “96-Well Plate” for strip tubes). 5. Open the menu using one of the two methods. First time user: press “About” to check / update software to the latest version. 6. Click “Run” to start the pipetting session. 7. Select pipette type (Single-, 8-, or 12-channel) from the Preference screen. 8. Start pipetting … 9. Click “End” to terminate the pipetting when completed. www.maestrogen.com info@ maestrogen.com Plate Type Adapter 384-well (full-skirt) plate No adapter is needed 96-well PCR plate &Low-profile tube strips adaptor A 96-well ELISA or storage plate adaptor B Full height (high profile) tube strips adaptor C (not included) Download the complete iTrack user manual on the following website: http://www.maestrogen.com/ftp/i-track/user_manual.html Contact us: [email protected] www.maestrogen.com info@ maestrogen.com