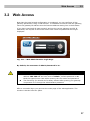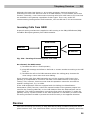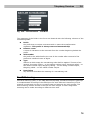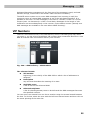
1
® 2N OfficeRoute 2N® VoiceBlue Enterprise User Manual Version Firmware 1.7.0 2.3.1 www.2n.cz The 2N TELEKOMUNIKACE joint-stock company is a Czech manufacturer and supplier of telecommunications equipment. The product family developed by 2N TELEKOMUNIKACE a.s. includes GSM gateways, private branch exchanges (PBX), and door and lift communicators. 2N TELEKOMUNIKACE a.s. has been ranked among the Czech top companies for years and represented a symbol of stability and prosperity on the telecommunications market for almost two decades. At present, we export our products into over 120 countries worldwide and have exclusive distributors on all continents. 2N® is a registered trademark of 2N TELEKOMUNIKACE a.s.. Any product and/or other names mentioned herein are registered trademarks and/or trademarks or brands protected by law. Declaration of Conformity 2N TELEKOMUNIKACE a.s. hereby declares that the 2N® OfficeRoute/2N® VoiceBlue Enterprise product complies with all basic requirements and other relevant provisions of the 1999/5/EC directive. For the full wording of the Declaration of Conformity see the CD-ROM enclosed and at www.2n.cz. 2N TELEKOMUNIKACE company is a holder of the ISO 9001:2000 certificate. All development, production and distribution processes of the company are managed by this standard and guarantee a high quality and advanced technical level of and a professional approach to all of our products. Contents 1. Product Overview............................................................... 7 1.1 Product Description ....................................................................................................... 8 Product Presentation ........................................................................................................ 8 How to Save Telephone Costs ......................................................................................... 8 Other Advantages and Applications ................................................................................. 8 RF Radiation Safety Precautions ..................................................................................... 9 1.2 Changes ........................................................................................................................ 10 1.3 Terms and Symbols Used ........................................................................................... 11 Manual Symbols ............................................................................................................. 11 2. Description and Installation ............................................ 12 2.1 Product Description ..................................................................................................... 13 2.2 Before Installation ........................................................................................................ 14 Packing List .................................................................................................................... 14 Brief Installation Guide ................................................................................................... 14 2.3 Mounting ....................................................................................................................... 16 Proper Mounting ............................................................................................................. 16 Gateway Power Supply .................................................................................................. 17 2.4 PC Connection and LAN Connection ......................................................................... 18 PC Connection ............................................................................................................... 18 LAN Connection ............................................................................................................. 19 2.5 Antenna Connection .................................................................................................... 20 2.6 SIM Card Insertion ........................................................................................................ 21 2.7 Status Indicators .......................................................................................................... 22 Power Indicator............................................................................................................... 22 GSM Indicators ............................................................................................................... 22 2.8 Console Access ............................................................................................................ 24 Serial Console Access ................................................................................................... 24 Submenus ...................................................................................................................... 24 Commands and Values .................................................................................................. 25 About Menus… ............................................................................................................... 26 Telnet Console Access ................................................................................................... 27 3. Configuration.................................................................... 29 3.1 Web Browser Configuration ........................................................................................ 30 Web Browser Access ..................................................................................................... 30 Configuration Wizard ...................................................................................................... 30 3.2 Web Access .................................................................................................................. 37 3.3 Survey of Group Tags and Menus .............................................................................. 39 3.4 Network Settings .......................................................................................................... 40 3.5 User Management ........................................................................................................ 48 3.6 Telephony Services ...................................................................................................... 52 VoIP Network Arrangement ............................................................................................ 52 Routing ........................................................................................................................... 55 Devices ........................................................................................................................... 56 SIP Lines ........................................................................................................................ 57 H.323 Lines .................................................................................................................... 59 SIM Cards ....................................................................................................................... 61 DISA Line ....................................................................................................................... 64 Fax Lines ........................................................................................................................ 66 Fxs Line .......................................................................................................................... 66 GSM ............................................................................................................................... 67 Services .......................................................................................................................... 69 Mobility Extension .......................................................................................................... 70 Fax .................................................................................................................................. 71 LCR ................................................................................................................................ 72 GSM Routing .................................................................................................................. 80 SIP Proxy........................................................................................................................ 83 3.7 Administration .............................................................................................................. 86 Main Configuration ......................................................................................................... 86 Set Time zone ................................................................................................................ 86 Synchronise Time ........................................................................................................... 87 Update Firmware ............................................................................................................ 87 Upload Licence ............................................................................................................... 88 Configuration Backup ..................................................................................................... 88 Reboot ............................................................................................................................ 88 3.8 States and Logs ............................................................................................................ 90 States ............................................................................................................................. 90 Call Accounting............................................................................................................... 91 Logs ................................................................................................................................ 92 Download Logs ............................................................................................................... 93 Connection Speedometer ............................................................................................... 93 3.9 Messaging ..................................................................................................................... 95 SMS sending .................................................................................................................. 95 SMS Delivery .................................................................................................................. 96 VIP Numbers .................................................................................................................. 98 SMTP IP Access............................................................................................................. 99 4. Function and Use ........................................................... 101 4.1 Factory Reset .............................................................................................................. 102 5. Technical Parameters .................................................... 103 5.1 Technical Parameters ................................................................................................ 104 VoIP .............................................................................................................................. 104 Mobile networks............................................................................................................ 104 Antenna ........................................................................................................................ 104 Power Supply ............................................................................................................... 104 Interface........................................................................................................................ 105 Operational Conditions ................................................................................................. 105 Others ........................................................................................................................... 105 6. Supplementary Information .......................................... 107 6.1 Regulations ................................................................................................................. 108 6.2 Troubleshooting ......................................................................................................... 109 6.3 List of Figures ............................................................................................................. 110 6.4 General Instructions and Cautions .......................................................................... 114 Electric Waste and Used Battery Pack Handling ......................................................... 115 1 1. Product Overview In this section, we introduce the 2N® OfficeRoute/2N® VoiceBlue Enterprise, outline its application options and highlight the advantages following from its use. Here is what you can find in this section: Product Description Changes Terms and Symbols Used 7 Product Description 1.1 1.1 Product Description Product Presentation The 2N® OfficeRoute/2N® VoiceBlue Enterprise gateways provide a direct interconnection of VoIP, GSM and UMTS (UMTS only in 2N® OfficeRoute) networks with the support of SIP and H.323 signalling protocols. The voice mode, i.e. outgoing or incoming calls, is the basic function of the system. The gateway is equipped with all functions necessary for such use and provides a very high comfort in this mode. The data mode, i.e. HSPA/EDGE/GPRS (for 2N® OfficeRoute) or GPRS (for 2N® VoiceBlue Enterprise) data router, gives a possibility to the device as a router, firewall and DNS proxy. It also has a DHCP server functionality. There is also a very unique feature – VRRP+ (Virtual Router Redundancy Protocol) so it can serve as a back-up route for your Internet connectivity. In addition to voice transmission, 2N® OfficeRoute/2N® VoiceBlue Enterprise can send and receive short text messages (SMS). It gives you an option to integrate the SMS functionality into your email client (i.e. MS Outlook). 2N® OfficeRoute/2N® VoiceBlue Enterprise contains a built-in SIP proxy server and can thus serve as an IP PBX for SIP telephones. No extra equipment (an external GSM telephone, etc.) is needed for normal operation. All programmable parameters are default-preset in such a manner that you can commence your telephone traffic the moment you connect the Ethernet and supply the cables, antenna and SIM card and set the IP parameters. How to Save Telephone Costs You are advised to use the most advantageous tariff of your GSM provider for your UMTS/GSM calls. You can bar selected numbers or groups of numbers in your gateway. You shall pay nothing for the calls you have barred. 2N® OfficeRoute/2N® VoiceBlue Enterprise keeps detailed records on all calls. This helps you find out easily why your bill is higher than it should be. The Least Cost Router is flexible enough to help you set rules for GSM/UMTS/SIP/H.323 calling at the lowest possible operation costs. Other Advantages and Applications 2N® OfficeRoute/2N® VoiceBlue Enterprise integrates the best of all communication technologies. With the aid of a built-in SIP proxy server you can create a complete VoIP network without additional third party products' costs. 8 Product Description 1.1 The intelligent routing of incoming calls accelerates the connection of incoming calls and makes calling more comfortable. An easily recordable DISA voice message function is available. You can use the fax whether or not you have a CO line. You will not lose any call with the internal VoiceMail and Mobility Extension features. Unlike cellular phones, this system does not expose you to the RF electromagnetic field while making calls. RF Radiation Safety Precautions Safety, warnings It is prohibited to use any transmitters, including UMTS/GSM devices, in areas where explosives are used, such as quarries. A GSM/UMTS device may affect sensitive life-saving devices in medical centres. In general, any prohibition regarding mobile phones based on RF energy radiation applies to GSM/UMTS devices. Where necessary, a 2N® OfficeRoute system may be installed at a safe distance (in the neighbouring building, e.g.) and an Ethernet cable may be carried from the system gateway to the original building. Although 2N® OfficeRoute is not intended for aeroplanes, all relevant prohibitions and regulations regarding mobile phones apply to them here 9 Changes 1.2 1.2 Changes The manufacturer reserves the right to modify the product in order to improve its qualities. Caution The manufacturer constantly improves the software contained in the product (the so-called firmware). The technology used therein helps you download the latest firmware version to 2N® OfficeRoute/2N® VoiceBlue Enterprise anytime using a standard PC. For the latest firmware version see www.2n.cz. We recommend you to apply the latest version to avoid problems that have already been eliminated. Also find the latest version of the User Manual at www.2n.cz. Check your delivery for completeness according to the packing list and study this manual carefully before installing this product. The manufacturer shall not be responsible for damage caused by any use of this product that is in contradiction with the User Manual. The warranty terms and conditions do not apply to damage incurred as a result of gross handling and/or undue storing of the product or violation of the technical parameters included herein. This manual is very much detailed and includes subsections that are irrelevant for the basic installation purposes as well as subsections referring to other 2N® OfficeRoute/2N® VoiceBlue Enterprise models. Therefore, pay attention to hints informing you which subsections are necessary for you and which are not. For more information on the 2N® OfficeRoute/2N® VoiceBlue Enterprise settings and features see faq.2n.cz 10 Terms and Symbols Used 1.3 1.3 Terms and Symbols Used Manual Symbols Safety Always abide by this information to prevent persons from injury. Warning Always abide by this information to prevent damage to the device. Caution Important information for system functionality. Tip Useful information for quick and efficient functionality. Note Additional information. 11 2 2. Description and Installation This section shows how to install the 2N® OfficeRoute/2N® VoiceBlue Enterprise gateway including all accessories. Here is what you can find in this section: Product Description Before Installation Mounting PC Conection and LAN Conection Antenna Conection SIM Card Insertion Status Indicators Console Access 12 Product Description 2.1 2.1 Product Description Before you start installing your 2N® OfficeRoute/2N® VoiceBlue Enterprise, please get familiar with its physical structure, arrangement of connectors and status indicators. Fig. 1 – Bottom View Fig. 2 – Top View 13 Before Installation 2.2 2.2 Before Installation Packing List Please check whether the contents of the package of your new 2N® OfficeRoute/2N® VoiceBlue Enterprise complies with the following list. 1x 2N® OfficeRoute – check order number, see the type label on the gateway back side 1x 12V/2.5 A mains adapter 1x USB cable 1x ETHERNET cable 1x Antenna 1x Wall mounting holder 2x Dowel 2x Screw Quick user guide Compliance certificate 2N product CD Warranty certificate Brief Installation Guide Proper mounting – 2N® OfficeRoute/2N® VoiceBlue Enterprise is designed for suspension on a vertical surface. Fit the holder included in the delivery on a wall and hang the gateway on it. For details on the prescribed working position and other recommendations refer to Section 2.4. Cable connection – connect the gateway using a patch-cable to the LAN (Local Area Network). Antenna connection – connect an internal antenna or an external antenna cable to the SMA antenna connector. Install the external antenna on a place with a good UMTS/GSM signal. Gateway power supply – the delivery includes a mains adapter. Plug in the adapter connector into the gateway and the power adapter into a mains socket (230V/50Hz). The gateway turns on immediately. SIM card insertion – insert the SIM cards in the holders on the gateway top. PC connection and initial configuration – a web browser is used for gateway configuration in normal operation. If you have not defined the IP address for the gateway, use the USB cable included in the delivery for initial configuration of the basic parameters or reach 2N® OfficeRoute/2N® VoiceBlue Enterprise on its default IP address 192.168.1.1. 14 Before Installation 2.2 Setting and monitoring – having set the basic network parameters (IP address, etc.), you can configure 2N® OfficeRoute/2N® VoiceBlue Enterprise using a standard web browser (http or https). Configuration options and essential procedures shall be discussed in detail in the respective sections. 15 Mounting 2.3 2.3 Mounting Proper Mounting The device is designed for mounting on a vertical surface. For this purpose, a wall- mounting holder is available. Just fit the holder to the wall using dowels and screws and hang the device. Fig. 2.1– Gateway Holder - Wall Mounting Fig. 2.2– Gateway Holder – Hanging It is possible to operate this device in another working position (e.g. on a desk) but it may deteriorate the GSM signal if the antenna is situated horizontally. Do not exceed the allowed working temperature and relative humidity ranges. Exceeding the recommended operating temperature values need not affect the gateway function immediately but may result in a more rapid ageing and lower reliability. 16 Mounting 2.3 The device is intended for indoor use only. It may not be exposed to rain, flowing water, condensed moisture, fog, or mist. The device may not be exposed to aggressive gas, acid vapours, solvents, etc. or aggressive liquids, during cover cleaning, for example. The device is not designed for high-vibration environments, e.g. means of transport, machine rooms, etc. Free space has to be left under and over the device for cables and agitated air to remove operational heat. Install the device on a place with a good UMTS/GSM signal. A misplacement of the GSM/UMTS device or its antenna near television, broadcasting or similar RF-sensitive devices may exercise an adverse effect upon their function. Being a source of RF energy emission, the device antenna should not be located close to human bodies. The hazard is higher than with mobile phones because the device is usually used by many people and thus employed more often. Gateway Power Supply Be sure to use only the mains adapter that is included in your 2N® OfficeRoute/2N® VoiceBlue Enterprise delivery. Caution Before plugging in the device, make sure that the mains voltage value meets the data given on the mains adapter label. Furthermore, make sure that the antenna has been connected. If you connect the device to the power supply without an antenna, the UMTS/GSM module transmitter might get damaged. Now plug the mains adapter into a mains socket and connect the adapter connector to the device. The status indicators indicate the proper operation. Fig. 2.3– Supply Adapter Connection 17 PC Connection and LAN Connection 2.4 2.4 PC Connection and LAN Connection PC Connection You need a direct interconnection of your 2N ® OfficeRoute/2N® VoiceBlue Enterprise gateway and PC especially when you do not know the gateway IP address and thus cannot configure it using a web browser. In such a case, connect the gateway directly to your PC USB port with the cable enclosed and select the basic network parameters using your console interface. After the gateway is connected using the USB cable, the PC detects new hardware. You have to choose the driver for 2N® OfficeRoute, available on the CD in the package. You can control the console interface with any terminal-emulating program according to the VT-100 specification at least such as HyperTerminal or PuTTY. Note The HyperTerminal is not installed by default in Microsoft Windows Vista. For serial connection to the gateway use an alternative program such as PuTTY. By default, the gateway serial port communication parameters are set at 921,600 bits per second, 8 data bits, no parity, 1 stop bit, no flow control. Set the communication program on the PC side identically. If you are using PuTTY for serial communication, you can use settings as shown in Fig. 2.4. It is necessary to choose the Serial connection type and the COM number on which the gateway is connected for the serial line type. The rate is 921600. Click on the Open button. Fig. 2.4– PuTTY – Serial Console Access Configuration 18 PC Connection and LAN Connection 2.4 LAN Connection 2N® OfficeRoute/2N® VoiceBlue Enterprise is connected to the 10/100BASE-T (Twisted Pair Ethernet) LAN using a standard straight (non-crossed) cable terminated with RJ-45 connectors like other types of equipment (PC, etc.). Fig. 2.5– LAN Connection 19 Antenna Connection 2.5 2.5 Antenna Connection No matter whether equipped with one UMTS and one, two or three GSM modules, 2N® OfficeRoute/2N® VoiceBlue Enterprise has just one SMA antenna connector, to which an external antenna cable is connected. This external antenna should be installed vertically on a place with a good UMTS/GSM signal. Fig. 2.6– Antenna Connector Connection Caution Tighten the antenna connector gently with your hand, never use a wrench! 20 SIM Card Insertion 2.6 2.6 SIM Card Insertion Insert your SIM card in the device and fix it with a small lock (move the lock over the inserted SIM card). Caution You cannot replace SIM cards with your device on. Fig. 2.7– SIM Card Inserting Procedure 21 Status Indicators 2.7 2.7 Status Indicators There is a panel with five LEDs on the gateway upper cover. The Power indicator signals that the gateway as a whole is in operation. The other LEDs, marked CH 1 through CH 4, indicate the status of each module. Power Indicator Basic diagnostic tests are performed automatically whenever the gateway is connected to the supply voltage. Each test step is signalled by a specific colour combination of the LEDs. The testing process is usually shorter than 0.5 sec and so it looks like a quick sequence of LED flashes at first sight. If, however, a test step fails, the indicator combination related to the failed test remains on. This provides a convenient troubleshooting tool to the technical support personnel. After all hardware tests have been completed successfully, the operating system kernel is loaded. During the process, all module indicators are off and the blue continuous Power light flashes in approximately 1-second intervals. When the operating system kernel has been loaded, the blue Power indicator keeps shining continuously. In exceptional cases, when a fatal software error occurs and the gateway stops working, the Power indicator starts flashing quickly. All you can do is disconnect the gateway from the power supply for a few seconds and then restart it. Power Indicator (blue) No light The system is not working. Flashing The system kernel is being loaded. Continuous light The system is working. Quick flashing Fatal error GSM Indicators The CH 1 - CH 4 indicators indicate the signal status of the respective GSM module. After connection to the power supply, the VoIP gateway application starts running within two minutes. During that time, the installed GSM modules and SIM cards are detected. If not detected, the respective indicator remains off. If detected, the module and SIM card initialisation process is commenced. If the process is unsuccessful, the LED goes red. If the indicator turns orange, it means that the module has not logged in to any GSM network. If the LED is off, you can make calls and send SMS via the respective module. The respective module LED flashes green quickly during call set-up or data connection in the case of UMTS module. When the connection has been established successfully, the indicator remains green during the whole call. 22 Status Indicators 2.7 GSM Indicators No light The module is ready. Red light SIM card initialisation in progress or no SIM card is in the drawer. Yellow/Orange light The SIM is not logged-in to any GSM network. Quick green blinking A call is being set up (dialled). Data connection active. Green light A call is being made. 23 Console Access 2.8 2.8 Console Access You need a direct interconnection of your 2N® OfficeRoute/2N® VoiceBlue Enterprise gateway and PC especially when you do not know the gateway IP address and thus cannot configure it using a web browser. Also you can configure the DHCP server in the gateway or the VRRP function. The console system is arranged as a set of nested menus. Entering a menu item number you either get into a submenu, or have the required operation executed, or set the selected parameter. Serial Console Access When the gateway is powered on, the main menu should get displayed after terminal connection. When you are connected by a serial console, push Enter to display the main menu. Fig. 2.8 – Serial Console Access – Main Menu Every menu consists of the following parts: Header contains (from the left) - product name, firmware version, menu name and network name assigned to the equipment. Options displays the numbers and names of available options. Value if [menu] is displayed, the item includes a submenu. Otherwise it shows the current value of the option. Description explains briefly the meaning of every option in the menu. Enter an option number…> there enter the option number. To select an option from a menu, enter its first number and push Enter for confirmation. Submenus If you select a submenu, this submenu gets displayed. Now you can select items from the selected submenu or push Esc for return. 24 Console Access 2.8 Commands and Values If you are requested to enter some information after selecting an item, you should enter one of the following values: Key word a list of one or more fixed strings. To select one, enter only so many initial characters as can distinguish it unambiguously from other key words. Enter one of [ansi,color,teletype] : a In the above mentioned case, select the key word by entering just an ‘a’, ‘c’, or ‘t’ and push Enter. String an arbitrary number of characters. The acceptable value interval may be included in the prompt. Enter a hostname from 1 to 32 characters: OfficeRoute Integer A decadic integral number. The acceptable value interval may be included in the prompt. Enter a size between 1 and 100 : 99 A hexadecimal integral number – number to be entered in the hexadecimal format using characters 0‚9 and a‚f or A‚F. Enter a hex number between 1h and ffh : 1a MAC address up to 12 hexadecimal digits of the physical address. Zeros at the beginning can be omitted. Enter the remote network address : 50C229C4E2 IP address an Internet address in the format of four digits of 0‚255 separated with dots. Enter an IP address - 192.168.22.30 As soon as the requested information is entered, the respective operation is executed and new values are displayed in the redrawn menu. Some configuration parameters may have just one of two constant values. By selecting such an item you immediately select a value opposite to that preceding the selection. Typical examples are on and off parameters. If the value is on, then it becomes off when the item is selected and vice versa. Some commands execute operations that have a serious impact on the behaviour of the entire system (such as restart). Therefore, the system usually ‘makes sure’ before execution that it is really your intention. Are you sure [y/n] : If you give an answer other than ‘y’ or ‘Y’, the command will not be executed. To cancel the command execution and quit the prompt, push the Esc key any time. 25 Console Access 2.8 About Menus… We shall discuss the serial console menus in detail in the sections devoted to the gateway parameter settings. Below is a brief survey of these menus only. Main menu appears after the USB cable is connected to the terminal (sometimes you must push Enter). Configuration menu contains six submenus - network configuration, serial console settings, command line configuration, calls and device states, reboot and settings of VRRP and DHCP. Network configuration used for setting the gateway IP address, network mask, initial router, DNS addresses, network name and domain. Fig. 2.9 – Serial Console – Network Configuration Address the IP address of the gateway. If the dynamic address obtaining function using the DHCP is enabled, the value cannot be changed manually. Network mask the network mask. If the dynamic address obtaining function using the DHCP is enabled, the value cannot be changed manually. Gateway the initial router IP address. It is used for routing the data traffic beyond the network limits. If the dynamic address obtaining function using the DHCP is enabled, the value cannot be changed manually. DNS1 IP address of the first DNS. DNS2 IP address of the second DNS. 26 Console Access 2.8 Host name the network name of the GSM gateway. Domain the domain name. Location any text describing the gateway location. This value is published through the SNMP (in special firmware versions). Contact a text containing the gateway administration contact information. This value is published through the SNMP (in special firmware versions). DHCP a mark of the dynamic address assignment function. If selected, the gateway gets its network settings from the DHCP server. If not, the values must be entered manually. Class the equipment class name that is sent in the network setting sending request. This string can help the DHCP server distinguish different types of equipment and assign configuration parameters to them accordingly. The DHCP or Address/Network mask parameters at least must be set correctly for the gateway communication to be established within the TCP/IP network. The address of one DNS at least should be set too. Serial console configuration helps set the terminal type and change the initial serial link parameters – transmission rate, data and stop bits, parity and flow control type. Command line allows you to set/change basic telephony settings – LCR, routes, SIP, devices, calls, DISA. States the states of devices (signal strength, registration status, etc.) and calls. Reboot this option restarts the device. Settings the DHCP and VRRP server settings. Telnet Console Access This is a short description of new features added to the serial console configuration. For the standard serial console configuration capabilities refer to the section 2.11. There is also a possibility of using Telnet for 2N® OfficeRoute configuration in addition to the standard serial console configuration. Connect to your 2N® OfficeRoute via the Telnet type telnet <your OfficeRoute IP address> in the command line. If successful, 2N® OfficeRoute will require authentication from you. To log in, use the valid login and password of one of the 2N® OfficeRoute users in the Administrators 27 Console Access 2.8 group. No user other than a member of the Administrator group may log in. If the login and password are entered correctly, you will be logged in. Now you will see a window similar to the standard serial console configuration window and you can work with it in the same way. To log out, get to the main menu and choose the Logout option (this option is not visible in the serial console window). There are all menus available as for the USB access. Note The Telnet function may not be enabled by default in Microsoft Windows Vista. For a Telnet console access enable the Telnet client. 28 3 3. Configuration This section describes the web browser configuration. Here is what you can find in the section: Chyba! Nenalezen zdroj odkazů. Chyba! Nenalezen zdroj odkazů. Survey of Group Tags and Menus Network Settings User Management Telephony Services Administration States and Logs Messaging 29 Web Browser Configuration 3.1 3.1 Web Browser Configuration Web Browser Access While the serial console interface enables you to change the basic gateway parameters only, the web browser gives you access to all parameter settings and services available in the 2N® OfficeRoute gateway. To establish connection with the gateway, enter the gateway IP address into the Internet address setting line in the browser, e.g.: Mozila Firefox or Internet Explorer. If you have connected all parts properly and set the correct gateway and PC IP addresses, the configuration wizard should get displayed. Configuration Wizard If you are connecting to the 2N® OfficeRoute gateway the first time or after a factory reset, the configuration wizard should appear. The configuration wizard will lead you through the 2N® OfficeRoute setting. After entering the required information you will be able to use a high speed data Internet connection, make outgoing and incoming calls to GSM and UMTS networks and benefit from the PBX features. Fig. 3.1 – Configuration Wizard - Introduction 1. Administrator Password Enter a new administrator password for login to the web interface. It is important to change the password to ensure your data security. The administrator username is Admin. Store your password (default = 2n) by clicking on the icon in the navigation bar. 30 Web Browser Configuration 3.1 Fig. 3.2 – Configuration Wizard – Administrator Password 2. Time zone Select the applicable time zone. A correct time zone setting is important for a proper working of the time-related features and call records. It also ensures a due switching of the daylight-saving time. Fig. 3.3 – Configuration Wizard – Time zone 3. PIN Codes for SIM Cards The following table lists the inserted SIM cards. If a SIM card requires a PIN code, it cannot be read until the PIN code has been entered. You will find the PIN code in the SIM card package that you received from your GSM provider. If no PIN code prompt appears for a SIM card, it is unnecessary to enter the PIN. After setting the PIN codes the gateway will restart. Please wait for the restart to complete and once again retrieve the set-up wizard page. 31 Web Browser Configuration 3.1 Fig. 3.4 – Configuration Wizard – PIN Codes 4. Data Connection In this step you can set the data connection through the UMTS SIM card. Enter the APN, username and password for data connection if prompted by the network (you will find this information in the SIM card package, or call the provider‘s information line). If you cross the ‘Automatic connection activation’ checkbox, the Internet connection will always be active, even after a restart or temporary loss of power. Caution The SIM card intended for UMTS data connection must be in the SIM1 position. If, in the future, you insert a different SIM card, it is always necessary to restart the equipment. Insert the cards for GSM voice calls in the remaining positions. Fig. 3.5 – Configuration Wizard – Data Connection 32 Web Browser Configuration 5. 3.1 Extension Number Allocation IP extensions can now be configured. Enter the number of the IP extensions that you want to establish automatically. The extensions will be assigned numbers 100, 101, 102... If you have the 2N ® OfficeRoute version with an analogue line, it will have an analogue phone with number 199. After closing the wizard, you can still change the settings any time by going into ‘User management’. Fig. 3.6 – Configuration Wizard – Extension Number Allocation 6. Passwords for Extensions When creating IP extensions remember to define a password to be used for IP phone configuring. The password will be displayed on the screen, so please take care to ensure the password security. After closing the wizard, you can change the password any time by entering ‘User management’. Fig. 3.7 – Configuration Wizard – Passwords for Extensions 33 Web Browser Configuration 7. 3.1 Outgoing Calls through VoIP Provider To use 2N® OfficeRoute for outgoing calls through a VoIP provider (it is necessary to have an allocated user account), enter the requested information as follows: SIP server address - domain or IP address of the provider’s SIP server; SIP name - allocated phone number or account name; User name - name for authentication (it can be the same as the SIP name); Password - assigned password. It is also necessary to specify the prefix for the call to be routed through the VoIP provider. Fig. 3.8 – Configuration Wizard – SIP Provider 8. Outgoing Calls through GSM/UMTS When making outgoing calls outside the office always start by dialling zero. If you have set the VoIP provider in the previous step, calls to numbers with no prefix will be routed through VoIP; all the other calls will be routed through the first vacant UMTS/GSM module. 34 Web Browser Configuration 3.1 Fig. 3.9 – Configuration Wizard – Outgoing Calls through GSM/UMTS 9. Incoming Calls Select where incoming calls should be routed. If you select To DISA line, a welcome note will be played and the caller can choose an extension number. If you select To extension, incoming calls will be directed to the extension you have selected. Fig. 3.10 – Configuration Wizard – Incoming Calls 10. Finish 2N® OfficeRoute is now ready for use. 35 Web Browser Configuration 3.1 Fig. 3.11 – Configuration Wizard – Finish Note If you want to use the wizard again, you have to perform the 2N® OfficeRoute factory reset. 36 Web Access 3.2 3.2 Web Access Now that the initial wizard configuration is completed, you can configure all the gateway parameters using a web browser. To establish connection with the gateway, enter the gateway IP address into the Internet address setting line in the browser. If you have connected all parts properly and set the correct gateway and PC IP addresses, the request to enter the access user name and password should get displayed. Fig. 3.12 – Web Administration Login Page By default, the username is Admin,Password is 2n. Caution The manufacturer supplies the gateways with a predefined default IP address 192.168.1.1 and user account Admin , default password is 2n. Mind the Upper/Lower Case while entering the user name and password! The first thing you should do for safety reasons after putting your gateway in operation is to change the administrator password After a successful login you get onto the main page of the web application. The window is divided into four parts. 37 Web Access 3.2 Fig. 3.13 – Web Interface Desktop Header bar Network, User management, Telephony services, Administration, States&Logs and Messaging. Use the tags above the header bar to select the user language and display the currently logged-in user. Group menu there is a group menu for each selection from the header bar on the left side. The tag settings are arranged in two menu levels. By selecting a Level 1 item you display the respective Level 2 subitems. If the Level 1 item contains no more subitems or if you select a subitem, the appropriate application form gets displayed on the remaining window space. 38 Survey of Group Tags and Menus 3.3 3.3 Survey of Group Tags and Menus Network IP address settings, DHCP server settings, Firewall settings, NATP settings, DNS proxy settings and HSPA/EDGE/GPRS (2N® OfficeRoute) or GPRS (2N® VoiceBlue Enterprise) data settings. User management User groups and user (extension) management. Telephony services Device (SIP, H.323, DISA lines) management, Fax, GSM incoming routing settings (provider/DISA), LCR settings, SIP proxy settings. Administration Main configuration, Time and Time zone settings, Firmware upgrade, Licence upload, Configuration back-up/restore, SNMP settings, Reboot. States&Logs States of devices and calls, Logs for debugging/troubleshooting, CDR. Messaging SMS delivery settings (web and SMTP/POP3), SMS sending web portal. This is just a basic survey of menus. For details on forms, their meanings and options see later. Parameters or new values can be added by clicking on the icon with a plus modified by the pencil icon dart , reset by the , icon, removed by the icon with a red and saved by clicking on the diskette icon . 39 Network Settings 3.4 3.4 Network Settings Main Configuration Includes 2N® OfficeRoute/2N® VoiceBlue Enterprise’s own IP address, mask, default gateway and DNS. There is also a possibility to switch on the DHCP client (when 2N® OfficeRoute/2N® VoiceBlue Enterprise does not serve as a DHCP server and there is another DHCP server in the network). It is also possible to select the main settings via a serial console or a Telnet console. Fig. 3.14 – Main Configuration Filtering Embedded firewall settings. To add a new rule, click on the icon. It is possible to set a rule for call accepting/barring according to the type of traffic, source or destination IP address or port. While creating more rules than one remember that these rules are searched from top to bottom. Fig. 3.15 – Filtering 40 Network Settings 3.4 The form in Fig. 3.15 contains the following fields: Protocol the protocol to be filtered. Action you can accept or drop packets that are filtered. Source IP address the IP address to be filtered. Destination port the destination port to be filtered. Description provides information on the rule. Port Mapping NATP setting for access devices in an internal LAN via the UMTS network (a public IP must be assigned to 2N® OfficeRoute/2N® VoiceBlue Enterprise by the provider). It is a transparent process where the network clients cannot see that port forwarding is being done. This process enables you to run a public Internet service on a machine that is otherwise hidden from the Internet by your gateway. Example: Fig. 3.16 – Port Mapping The configuration shown in Fig. 3.16 enables you to create a permanent translation entry that maps a TCP port 80 on your gateway to an IP address 10.0.0.100 and port 8088 on your private LAN. DHCP Server DHCP server settings in case 2N® OfficeRoute/2N® VoiceBlue Enterprise serves as a LAN DHCP server. 41 Network Settings 3.4 Fig. 3.17 – DHCP Server Setting Form Lease time validity of a leased IP address in seconds. Start address start of an IP address pool. End address end of an IP address pool. Subnet option subnet mask for an internal network. Router option the default gateway of subnet (typically the 2N® OfficeRoute/2N® VoiceBlue Enterprise IP address, for VRRP it is the IP address of the virtual router. Primary / Secondary DNS used only in the case of local DNSs in the LAN. DNS Proxy Used for caching DNS records in case 2N® OfficeRoute/2N® VoiceBlue Enterprise works as a UMTS/GPRS router. The DSN proxy can receive DNS queries from the local network and forward them to an Internet Domain Name Server. If the DNS Proxy is disabled, the gateway forwards all requests to the servers assigned by the UMTS (2N® OfficeRoute) or GPRS (2N® VoiceBlue Enterprise) provider. The gateway can use the DNSs from the Network settings or you can forward the DNS queries to specified servers. Fig. 3.18 – DNS Proxy Configuration 42 Network Settings 3.4 VRRP The Virtual Router Redundancy Protocol is an Internet protocol, which provides a possibility to have one or more backup routers when using a statically configured router on a local area network (LAN). The most common arrangement is to specify one router to serve as the router for forwarding packets from a group of hosts on a LAN. If the router fails, however, there is no way to use another router as a backup. Using VRRP, a virtual IP address can be specified manually or with the Dynamic Host Configuration Protocol (DHCP) by default. A virtual IP address is shared by the routers, with one designated as the master and the others as backups. In case the master fails, the virtual IP address is mapped to the backup router IP address (this backup thus becomes the master router). Fig. 3.19 – VRRP Configuration VRID provides virtual router identification. Must be unique for each virtual router. Priority the higher the number, the lower the priority. Advertisement interval indicates the time interval (in seconds) between advertisements. The default value is 1 second. This field is used for troubleshooting of misconfigured routers. Virtual router address the IP address of a virtual router. Dynamic DNS The DDNS provides a gateway that has a variable, often changing IP address with a well-known hostname resolvable by network applications through standard DNS queries. An example of use is a home user who wishes to access the computer on his or her home network while travelling. The user may be supplied with a different IP address whenever the Internet connection to the service provider is made, so there is no stable address to connect to. If the Dynamic DNS service is used to assign a fixed address to the device, then the user can, for example, establish a Virtual Private Network (VPN) to the network using that address. As a detailed example, the IP address can be 123.234.111.112 one day, 123.124.45.15 the next, but the Dynamic DNS address will always be, e.g. - office-route.dyndns.org. 43 Network Settings 3.4 Fig. 3.20 – Dynamic DNS Configuration Hostname your hostname registered with a DDNS provider. System choose your DDNS provider from the list of supported DDNS providers. Username enter your username in accordance with your DDNS account. Password enter your password in accordance with your DDNS account. Update period the period of IP address updating at the DDNS server. HTTP proxy enter the IP address of your HTTP proxy. If you have no HTTP proxy, leave the field blank. Data Connection In this menu you can see the list of inserted SIM cards and start/stop data connection by clicking on the icon. Fig. 3.21 – Data Connection – SIM Cards To modify the data connection settings click on the pencil icon. 44 Network Settings 3.4 Fig. 3.22 – Data Connection – Modify SIM Card Form Note You are strongly recommended to power off the unit before inserting/removing the SIM card. Modification of SIM card parameters: Present the checkbox indicates whether the SIM is present in the tray at the moment. SIM card number information on the SIM serial number (IMSI). Provider ID the provider’s network code. Provider name the provider´s name. USSD code for credit here you can fill in the USSD code for credit check for your prepaid SIM cards. If you fill in the proper USSD code and the SIM card is prepaid, you can obtain credit information by clicking on Get credit in the SIM cards list. Last USSD message hows the last obtained USSD message. 45 Network Settings 3.4 Last USSD message time stamp shows the last USSD message timestamp. Description user description of the SIM card. Service Centre Number enter the service centre number. It is necessary for SMS sending. Connection provider name enter any name. This field is compulsory. Dial number (optional) the number to be dialled for data connection APN (access point) this field is compulsory. Complete it in accordance with your provider´s APN name. Initial AT commands (optional) an optional field. You can define here a special AT command for Internet connection. PPP username (optional) an optional field. Enter your PPP user name if it is recommended. PPP password (optional) an optional field. Enter your PPP password if it is recommended. In order to use the SIM for data/Internet connection (for GPRS/EDGE/UMTS/HSPA) you have to set the Connection provider name and APN parameters. The other parameters depend on the network provider’s data. To obtain the data, refer to your network provider’s websites or call the provider’s helpline. SNMP The Simple Network Management Protocol (SNMP) daemon is a background server process that can be run on any Transmission Control Protocol/Internet Protocol (TCP/IP) workstation host. It helps you monitor the state of the device on the network. Fig. 3.23 – SNMP Configuration 46 Network Settings 3.4 IP address for SNMP traps the IP address to which traps are sent. Community a group to which the devices and management stations running SNMP belong. Helps you define where information is sent. The default SNMP communities are: Write = private Read = public Traps enabled you can enable traps for Calls, LCR and GSM. 47 User Management 3.5 3.5 User Management Users In this menu you can see a list of all users and the Add/Remove user item. A user is either an extension or a user allowed to send SMS. A user may log in to the gateway and make some changes (send SMS) according to the rights assigned. If a line number is assigned to a user, the user is an extension at the same time. Fig. 3.24 – List of Available Users Admin is the default user and cannot be removed. It is primarily used for device management. Emergency change of Admin password – if you are connecting 2N® OfficeRoute/2N® VoiceBlue Enterprise via a USB cable or a serial console change the Admin password (it is not necessary to know the old one). Add User To add a new user/extension click on the Add user corner. icon in the right-hand bottom 48 User Management 3.5 Fig. 3.25 – Add User Form User name the user name for login to 2N® OfficeRoute web interface and SIP authentication. New password the password for login and SIP authentication. Group select the user group. Language select the default language for the user. Default application the webpage/form after login to 2N® OfficeRoute web interface. Rights/Rights denied select rights or leave empty – the rights are assigned by group selection except for the SMS rights. Line number in case the user is both extension and user, the Line number is UID (number of extension/SIP name). Mobility Extension in case you need to set the Mobility Extension for this user, tick off the Outgoing/Incoming ME checkbox and fill in the user’s mobile phone number. VoiceMail set the PIN for entering the user VoiceMail and enter the user’s mobile phone number for receiving notification SMS. 49 User Management 3.5 Groups Groups are created to eliminate the need to specify access rights for each user individually. Upon login, the resultant set of assigned and barred rights consists of the selected rights group settings and, if necessary, corrections made during the user account creation. Fig. 3.26 – List of Available Groups Administrators is a group with all rights enabled. SMS is a group with the SMS rights enabled only. Add Group To add a new group click on the Add group icon in the right-hand bottom corner. Fig. 3.27 – Group Adding Form The form in Fig. 3.27 contains the following fields: Group name a unique identifier. Rights parts of the system to be made available. Rights denied parts of the system to be barred. Description any text that describes the meaning of a group. 50 User Management 3.5 The web interface is divided into parts to/from which access rights can be assigned/removed. The checkboxes in the above-mentioned forms, one pair per group, are used for right group and user account setting. They are as follows: USERS+LINES+LCR the whole system. USERS definition of the user accounts and groups. LINES communication line settings. LCR the Least Cost Router configuration. Ring Groups To add a ring group click on the Add group icon in the right-hand bottom corner. Fig. 3.28 – Ring Group Adding Form Tick off the checkboxes to assign the extensions and their Mobility Extension numbers to the members of a new ring group. 51 Telephony Services 3.6 3.6 Telephony Services Before the description of all items of the Telephony services menu, a short introduction about the VoIP Network Arrangement and Routing behaviours is given there. VoIP Network Arrangement VoIP telephony communication has two components – signalling and voice. Signalling is primarily used for establishing and terminating calls, telephone login to a PBX, negotiating parameters and control of the speech/voice channel. The voice channel is only used for transmission of encoded digitised voice information. Typically, VoIP telephones are operated together with a PBX, which coordinates their traffic. For a schematic arrangement see fig.39. The VoIP telephony PBX is a software application that looks like a traditional PBX. Its functions include mainly numbering plan consistence maintenance, routing, user or telephone rights, call billing, call forwarding, DISA, etc. But it can integrate more functions, e.g. voicemail. SIP telephone PBXs are usually called SIP proxies while PBXs for H.323 are called gatekeepers. Fig. 3.29 – VoIP PBX Arrangement To work properly, a VoIP PBX must process all signalling traffic. Unlike this, voice channel data are transmitted directly between the terminal points. This is, among others, a difference from the model described below. It is because a PBX is not necessarily required in the IP telephony. Signalling protocols are designed in such a manner that it is possible to call from one terminal to another directly, without any mediator. To do this, you have know the full ID of the terminal to be called, i.e. also the IP address and destination port, of course. This is the main disadvantage compared with the preceding model for multiple-telephone locations. 52 Telephony Services 3.6 Fig. 3.30 – "Point-to-Point" Arrangement If you use a PBX, the terminal points must know the PBX address only. The PBX is able to route requests according to information acquired in the process of telephone login to the PBX. With the "Point-to-Point" arrangement, all telephones must be equipped with information on surrounding telephones. This model is mostly applied in direct calling via the Internet where you do not want or cannot use services of any telecom provider. The 2N® OfficeRoute/2N® VoiceBlue Enterprise gateway is capable of working in both the types of environment, with a PBX and without a PBX. Fig. 3.31 – VoIP-to-GSM Gateway with PBX It can even replace the PBX completely for SIP telephones because it is equipped with an integrated SIP proxy. This simplifies the VoIP network structure as shown in Fig. 3.32. 53 Telephony Services 3.6 Fig. 3.32 – 2N® OfficeRoute as SIP Proxy Although call interconnection between VoIP and GSM networks is the primary function of 2N® OfficeRoute/2N® VoiceBlue Enterprise, the gateway can also be used for bridging VoIP networks with different signalling standards – SIP and H.323. For such arrangement see Fig. 3.33. Fig. 3.33 – 2N® OfficeRoute as SIP - H.323 Gateway The situation shown in fig. 43 differs from simple SIP-based call connection in that the gateway transmits both signalling and voice channels here, like in interconnecting calls from VoIP to GSM. This results in a certain limitation of the maximum number of calls due to a limited hardware pass-through capacity of the gateway. 54 Telephony Services 3.6 Routing Routing means a process of retrieving a route from the calling party to the called one. There are various routing methods according to the type of call and place from which the call is coming. Within VoIP Network Speaking of routing within a single VoIP network, we think of the activity executed by the PBX whenever a registered user initiates a new call. The result of this process is a route to another registered user based on the called number analysis. The called number can be an IP telephone, GSM gateway, PSTN gateway, another VoIP PBX, etc. Fig. 3.34 - Call Routing by VoIP PBX The routing options are dependent on the capabilities of the particular PBX. For SIPbased telephones, a SIP proxy server built in 2N® OfficeRoute/2N® VoiceBlue Enterprise can be used as a PBX. From VoIP to GSM On coming to an 2N® OfficeRoute/2N® VoiceBlue Enterprise VoIP line, a call proceeds to the Least Cost Router (LCR). The LCR decides which line the call shall use for going out. The decision depends on the called number and LCR settings. Fig. 3.35 - Routing of Incoming Calls from VoIP 55 Telephony Services 3.6 Although the Least Cost Router is, as its name suggests, designed primarily for searching the most cost-efficient route to a GSM network, it is not limited just to this function. Generally, it can interconnect incoming calls from VoIP lines to any lines that are available in the gateway regardless of their types. This is very useful for interconnecting heterogeneous VoIP networks, such as SIP and H.323 environments. Incoming Calls from GSM A special routing mechanism is applied to calls coming to the 2N® OfficeRoute/2N® VoiceBlue Enterprise gateway from GSM networks. GSM router GSM line SIP line Operator DISA H.323 line ME CLIP Fig. 3.36 - Routing of Incoming Calls from GSM As selected, the GSM router: 1) forwards the call to a fixed operator; 2) plays ME message and allow to dial local or remote number according to the ME CLIP; or 3) forwards the call to the DISA automat where the calling party chooses the route using a voice menu and tone dialling. Since incoming calls from GSM networks can only be routed to VoIP lines in the gateway it is impossible to connect a call back to the GSM network in this type of routing. This, however, does not mean that this operation cannot be executed on another routing level, e.g. in a PBX. If the VoIP telephones used are equipped with the Calling Line Identification Presentation (CLIP) function, either the internal number of the gateway output line used for the incoming GSM call, or the CLIP obtained from the GSM network can be displayed. This VoIP line parameter is set at the first option by default. To make the gateway convey a public number to the VoIP telephone it is necessary to ensure that all routing elements be able to process the CLIP correctly in the opposite direction. Devices Call interconnecting and routing in 2N® OfficeRoute/2N® VoiceBlue Enterprise takes place between lines. This means that where no line is available the gateway cannot set 56 Telephony Services 3.6 up a call. Nevertheless, the notion ‘line’ is less materialistic in VoIP gateways than in classical telephone systems. To make some equipment work as a gateway, another line at least has to be created to the VoIP environment. This line is either used for the gateway - VoIP PBX connection or a direct gateway - VoIP telephone connection. From the viewpoint of the network environment of the gateway, a VoIP line represents a virtual VoIP telephone set. It is possible to define more VoIP lines than one in the gateway. Then the gateway appears like a system of multiple virtual VoIP telephones. All line types are equal for the routing and connecting purposes. SIP Lines One or more lines can be defined in 2N® OfficeRoute/2N® VoiceBlue Enterprise for communication with some other SIP using VoIP equipment. Each line has a unique number and receiving UDP port. You can register the line at the SIP proxy or communicate directly with another VoIP terminal. The registration can be either anonymous or related to the gateway authentication. By default an internal SIP line is prepared. This line is necessary for you to make calls out of the SIP proxy. Fig. 3.37 – List of SIP Lines Modify SIP line To make calls out of the SIP proxy you have to modify the internal SIP line ID [16]. To make a trunk to a VoIP provider create a new SIP line. 57 Telephony Services 3.6 Fig. 3.38 – Modify Internal SIP Line SIP server address change the default IP to the IP that is used for the IP module. While creating a new line, enter the IP address of your VoIP provider. SIP domain it is not necessary for the internal SIP line. SIP name the internal SIP line SIP name is ‘1111’. For a new line enter the SIP name according to your VoIP provider. Display name the line name to be displayed. An optional parameter. Listen port each line has to use a different listening port. User name is unnecessary for the internal SIP line and may be deleted. For a new line enter the user name according to your VoIP provider. 58 Telephony Services 3.6 Password is unnecessary for the internal SIP line and may be deleted. For a new line enter the password according to your VoIP provider. Codecs this parameter is necessary to highlight the codecs to be used. You can shift the codecs to define their priority. Add Phone context to REGISTER request this can be useful in some special cases. Mostly it is unnecessary to fill in this item. Register expires enter the value according to your VoIP provider. Unnecessary for the internal SIP line. Register with proxy unselect this checkbox for the internal SIP line. For a new line check it according to your VoIP provider. Enable CLIP select this checkbox for the internal SIP line. Allow only one call unselect this checkbox for the internal SIP line. Get callee from this can be useful in some special cases. Mostly it is unnecessary to change these settings. Enable NAT check this item in case the VoIP module is behind the NAT or firewall. NAT port begin set which port will be used first for the RTP protocol. NAT port range set how many ports will be used for RTP packets. NAT IP address the public IP behind the PBX VoIP module. H.323 Lines Another signalling standard supported by the IP telephony is a group of protocols called H.323. It could be set only one H.323 line, but it can transfer more calls at the ssame time. This line can log in to the Gatekeeper or communicate directly with VoIP telephones or other gateways. 59 Telephony Services 3.6 Fig. 3.39 – H.323 Line Details The form contains the following fields: Call method defines how to initiate a new call. There are three options: 1. Direct – calling including identification of the fully qualified network name of the called line; 2. Gatekeeper – the selected Gatekeeper shall find the route and set up a call; 3. Gateway – calling via a selected gateway. Gatekeeper discovery method defines how to find the available Gatekeeper address. The address can be entered statically or determined by network retrieval. Gatekeeper address if not determined by network retrieval, the Gatekeeper address must be entered in this field. Gateway address the address of the gateway to be used for calling if the Gateway calling method is selected. 60 Telephony Services 3.6 Gateway prefix(es) the prefixes used by the gateway for registration. Endpoint type the gateway can register itself to the Gatekeeper either as a gateway for a prefix (destinations starting with the prefix are routed through the gateway) or as a terminal (virtual telephone). Display name the text to be displayed to the called line. Numbers numbers of the line working in the terminal mode. Listen port the TCP port on which the line receives H.323 connections. Disable Fast start the Fast start method provides a faster start of the voice stream while a new H.323 connection is being set up. Disable H.245 tunnelling disallows the use of H.245 tunnelling. Disable Early media start disallows the use of the Early media start method. This method establishes the voice channel before the call has been set up completely. It is useful for transmission of the so-called ‘progress tones’ from the GSM network. DTMF type choose the set of supported DTMF tones; either numbers only (the Signal option) or all alphanumeric characters (the Alphanum option). Codecs a list of codecs to be provided by the gateway for voice channel negotiations. Rejected call code the code that the gateway returns back to the Gatekeeper/gateway in the case of rejected call. No route code the code that the gateway returns back to the Gatekeeper/gateway in case no route (no GSM module/SIP line/H.323 line/SIP phone) is ready for a call. This is used mainly for overflow/emergency routing. Description any text that describes the meaning of the form. SIM Cards If you operate the gateway with different providers' SIM cards, you will definitely want to use a GSM provider's SIM card for GSM call routing. When a new SIM card is inserted, the gateway creates automatically a ‘SIM card – xxx’ line where xxx is the SIM card ID (typically printed on the card next to contacts). The physical location of the SIM card does not matter in call connection. Note You are strongly recommended to power off the unit before inserting/removing the SIM card. 61 Telephony Services 3.6 Each SIM card inserted in the gateway has a set of parameters of its own. Their values are bound to the card ID and remain stored in the gateway even after the SIM card is removed. Thus, if the SIM card is reinserted, the parameters need not be reset. The list of cards with available configuration parameters is displayed in a table on the introductory page of the SIM card configuration. Fig. 3.40 – List of Available SIM Cards In this menu (Fig. 3.40) you can see the list of inserted SIM cards and also get the credit on each SIM card. For this function it is necessary to define the USSD code for getting information on the SIM card credit. The code syntax depends on the provider. The columns in Fig. 3.40 include: Present in module a mark that the SIM card has been inserted in the gateway. SIM card number a unique card identifier. It is usually printed on the card next to contacts. By clicking on the number you display the card setting detail. Provider ID a mobile network provider's identifier. Provider name a mobile network provider's name. Description a text entered by the administrator. By clicking on the pencil symbol you get into the line setting detail and can change the settings. The cross is used for deleting a line. 62 Telephony Services 3.6 Modification of SIM Card Parameters Fig. 3.41 – Data Connection – Modify SIM Card Form Present indicates whether the SIM is present in the tray at the moment. SIM card number information on the SIM serial number (IMSI). Provider ID the provider’s network code. Provider name the provider´s name. USSD code for credit here you can also enter the USSD code for credit check for prepaid SIM cards. If you fill in the proper USSD code and the SIM card is prepaid, you can obtain credit information by clicking on ‘Get credit’ in the SIM card list. Last USSD message shows the last obtained USSD message. Last USSD message timestamp shows the last USSD message timestamp. Description user description of the SIM card. 63 Telephony Services 3.6 Service Centre Number enter the Service centre number. It is necessary for SMS sending. In order to use the SIM for data/Internet connection (for GPRS/EDGE/UMTS/HSPA 2N® OfficeRoute or GPRS - 2N® VoiceBlue Enterprise), you have to set the Connection provider name and APN parameters. The other parameters depend on the network provider – for information refer to your network provider’s websites or call the provider’s helpline. Connection provider name it can be any name. This field is compulsory. Dial number (optional) the number to be dialled for data connection. APN (access point) this field is compulsory. Complete it in accordance with your provider´s APN name. Initial AT commands (optional) an optional field. You can define here a special AT command for Internet connection. PPP username (optional) an optional field. Enter your PPP user name if recommended. PPP password (optional) an optional field. Enter your PPP password if recommended. DISA Line The DISA line can be a standard welcome note or a customised welcome note, VoiceMail system and basic IVR. The DISA line is used for incoming calls, mostly from a GSM network. It might also serve for incoming calls from the VoIP provider. The DISA line plays a message/dial tone and then waits for DTMF dialling. After receiving a hash (#), it dials the collected digits via a predefined SIP line. The initial screen of the DISA line configuration shows a table of defined lines. Click on the pencil icon to move to the line setting detail for changes. The symbol serves for line clearing. Below the table there is an Add DISA service line icon. Click on it to display the line defining form. There are also Upload custom DISA messages DISA/IVR package to internal Flash icons. , Upload and Upload VoiceMail language pack 64 Telephony Services 3.6 DISA Line Parameters To add a new line, use the Add icon below the form. To modify an existing line, click on the Modify icon. Upon the click, the entered data are confirmed and the execution of the relevant operation is requested. Below the form there are Reset and Back icons. The first one restores the values of all fields as before the form opening and the other moves you to the previous screen. Fig. 3.42 – DISA Line The form in Fig. 3.42 contains the following fields: Type of DISA there are five options: Basic DISA the factory-set DISA message. Basic DISA with uploaded message the basic DISA message. DISA/IVR on MMC card the DISA message saved in an external memory. DISA/IVR on internal flash DISA message saved on the internal flash memory. VoiceMail system the VoiceMail voice menu. Maximum allowed number of digits the maximum number of digits in DISA. Description any text that describes the meaning of a line. Note For examples of DISA settings refer to faq.2n.cz 65 Telephony Services 3.6 Fax Lines To add a new fax line use the Add icon below the form. To modify an existing line click on the Modify icon. Upon the click, the entered data are confirmed and the execution of the relevant operation is requested. Fig. 3.43 – FAX Line The form in Fig. 3.43 contains the following fields: Fax device choose a GSM module with an inserted SIM with the FAX service and fill in the SIM fax number. Fax number the Fax line number. Description any text describing the meaning of an item. Note For examples of FAX settings refer to faq.2n.cz Note The Fax line is implemented only with 2N® OfficeRoute Fxs Line Note The Fxs line is implemented only with 2N® OfficeRoute 66 Telephony Services 3.6 This line is set by the wizard. To change some parametres, click on the Modify icon. Fig. 3.44 – Fxs Line Fig. 3.45 – Fxs Line - Modify The form in Fig. 3.45 contains the following fields: Fxs number the Fxs line number. Dial timeout the first digit dialling timeout. Ring time the Fxs line ringing time for incoming calls. Enable line reversal polarity reversal at the call beginning and end. Enable ‘#‘ as dial end you can use a hash as the end of dialling character. Description any text that describes the meaning of an item. GSM PINs In this menu you can define the PIN code for each SIM card. 67 Telephony Services 3.6 Fig. 3.46 – GSM - PINs Audio Parametres You can define the microphone gain and the speaker gain for each module. The range is from -24dB to 42dB with a 1dB step. Fig. 3.47 – GSM – Audio Parametres CLIPs You can define the CLI function (CLIP - Calling Line Identification Presentation, or CLIR - Calling Line Identification Restriction) and also set the Auto CLIP routing in this menu. Auto CLIP Routing The AutoClip routing is used for automatic routing of incoming calls to internal extensions. Records are added to the gateway memory while outgoing calls are made and stored for a defined time. When an internal extension makes an outgoing call and the Auto CLIP routing is enabled, the new records on the calling and called numbers are saved into the internal memory. If the called number calls back in a defined time, the call is automatically routed to the internal extension that was the first to call this number. 68 Telephony Services 3.6 Fig. 3.48 – GSM – CLIPs The form in Fig. 3.48 contains the following fields: Original CLI support check this option to enable the CLI support. Auto CLIP routing check this option to enable the Auto CLIP routing function. -expiration time enter the number of hours for which the records shall be saved. -delete record after anter check this option to delete a record in the CLIP routing memory after a successful call. -add only missed calls check this option to add missed calls only to the memory. -look up both lists (call & sms) enables the Auto CallBack function after a call or after SMS sending. Disable GSM alerting detection if ticked off, the gateway does not detect alerting and sends the session progress tone immediately. Services Services provide to enable/disable ME by sending SMS. The SMS has to be send from ME user´s number filled in the user settings. To enable ME function, just send SMS to gateway: *<Service code> To disable ME function, send: #<Service code> The gateway responds responds with a confirmation SMS. 69 Telephony Services 3.6 Fig. 3.49 – Services Mobility Extension The Mobility Extension (ME) is a 2N® OfficeRoute/2N® VoiceBlue Enterprise feature that makes internal extensions available on mobile phones. Remember to define the Mobility Extension number in the user settings. For the global settings of this function see Fig. 3.49. Fig. 3.50 – Mobility Extension The form in Fig. 3.49 contains the following fields: Outgoing ME enabled check this option to enable the Mobility Extension function for outgoing calls. Incoming ME enabled check this option to enable the Mobility Extension function for incoming calls (calls from the Mobility Extension numbers defined in the user settings). Mobility Extension SIP route define which route shall be used for the outgoing ME calls. Mobility Extension DISA line the DISA message for outgoing calls. Note For examples of Mobility Extension settings refer to faq.2n.cz 70 Telephony Services 3.6 Fax Note The configuration of Fax is implemented only with 2N® OfficeRoute 2N® OfficeRoute/2N® VoiceBlue Enterprise also provides the FAX function, supporting T.38. To change some T.38 fax relay parametres, click on the Modify icon. Fig. 3.51 - T.38 Fax Relay Settings The form in Fig. 3.51 contains the following fields: Maximum fax rate the FAX bit rate for T.38 [bit/s]. T.30 message redundancy signalling redundancy. Image data redundancy image redundancy. 71 Telephony Services 3.6 LCR The Least Cost Router (LCR) is ‘the brain’ of 2N® OfficeRoute/2N® VoiceBlue Enterprise. All call routing rules (inbound and outbound) can be set there. The purpose of the Least Cost Router is to find the optimum output line for the called number. The LCR process has several stages: Input normalisation the calling and called line numbers are transformed into a normalised format before entering the LCR. Destination searching a destination means the target party to the call. The destination includes a group and type of line searching in the group. The group is searched according to the prefix of the normalised called number. Group searching a group means a logical set of lines. The group definition includes a route time limit within a week. Line searching a route can consist of one or more lines. The final line is determined according to the selected line selection algorithm. Three ways of searching are available: 1 First free line – finds the first free line; 2 Cycle – selects the free line with the earliest time of the last call; and 3 Free minutes – uses the free line with the highest number of remaining free minutes. Correct tariff rates must be selected for the lines for the method to work effectively. Output normalisation the calling and called line numbers are transformed into a normalised format before the call is forwarded to the output line. Check for barred numbers the Barred numbers table is searched for match after output normalising and before forwarding to the successfully found output line, and, if a match is found, the call is rejected. By default, the LCR connects all VoIP calls to the VoIP module without modifying the called number. 72 Telephony Services 3.6 Fig. 3.52 - List of LCR Rules Routing Rules The routing rules are the core of the LCR system. They consist of a relatively high number of parameters, which make the routing process highly flexible. A guide is available to make your configuration steps as convenient as possible. Start with clicking on the LCR item in the Telephony services tag menu. A table gets displayed with predefined routing rules and buttons that help you Add new items Shift up , Shift down Remove , Insert before , Insert after , Modify , and the existing rules. All the above-mentioned buttons except for Add are inactive in the initial status (greyish). They will not become active until one routing rule at least is selected by putting the checkmark in the second column of the respective line. By pushing the button activated in this way you get executed the operation above the routing rules selected. Add rule to open the routing rule adding form click on the Add or Insert after or Insert before key. The guide will appear in a new window. The first step is to define the destination. Basically, the destination is a set of prefixes. Looking for the appropriate routing rule, the LCR searches the allowed routing rules from top to bottom for a match between the normalised called number prefix and the destination number prefix. The first matching prefix stops the searching process and the call is routed according to the respective destination rule. 73 Telephony Services 3.6 Fig. 3.53 - LCR – Add Rule The form contains the following fields: Enabled a routing rule can be defined yet need not be used in the routing process. Enabled rules are used only. Destination name the destination must be named briefly and clearly, e.g. according to the mobile network provider or any other characteristic feature that distinguishes the destination from the others. The name may contain alphanumerical characters only. Prefix n the destination prefix where n is a serial number. The prefix is a beginning of the target telephone number. If you leave the first prefix blank and do not enter any other, then the particular destination includes all called numbers. To enter more prefixes, add new items by pressing the Add others key. Description any text that describes the meaning of a destination. Route name the outgoing route for prefixes of the destination. You can also add a new route if necessary. Priority type n the priority for the lines defined in the chosen route. Description any text that describes the meaning of a rule. Time Intervals There is a possibility to define the time interval (condition) for using a LCR route. The default time intervals are ‘weekdays’, ‘weekend’ and ‘workdays’. It is also possible to define a certain time range. 74 Telephony Services 3.6 Fig. 3.54 - Time Intervals Normalisation When we introduced the LCR operations, we mentioned modifications of numbers before input into and after output from the routing process – so-called normalising. Normalising means conditioned transformations of the called and/or calling numbers into a unified format, which facilitates definition of the routing rules. The normalising regulation is determined by the following three parameters: Normalising type defines at which process stage (input/output) and for which numbers (called/calling) normalising should be used. Condition transformation is only applied to numbers that meet a condition. The condition is specified by a prefix – a string that the number starts with. The prefix is separated automatically and the remaining part of the number is transformed only. Transformation regulativ enables to modify a number by removing a certain number of characters from the number beginning, or adding a new prefix. Fig. 3.55 - Normalisation Use the Add icon to create a new LCR normalising rule. By clicking on it you get a rule defining form. 75 Telephony Services 3.6 Fig. 3.56 - Normalisation – Add Rule The meanings of the fields in the form are identical with the following columns of the normalising table: Prefix the prefix that a number must start with to meet the transformation regulation. This prefix is always removed automatically! Remove count a count of characters to be removed from the number beginning behind the prefix. Add number the prefix to be added before the rest of the number after removal of the prefix and a defined count of digits. Type defines at which stage the normalising rules shall be applied. There are four options: Incoming calling – on the calling number input, Incoming called – on the called number input, Outgoing calling – on the calling number output, Outgoing called – on the called number output. Description any text that describes the meaning of a normalising rule. Tariff Metering Call tariff metering (AOC) in the 2N® OfficeRoute/2N® VoiceBlue Enterprise gateways is a sophisticated recording of the called time for each SIM card. Monitoring of free minutes is made with the aim to cut tariff costs and optimise the LCR process. The tariff-metering scheme divides a call into two time ranges. In each range tariff metering can be made according to different time units. 76 Telephony Services 3.6 Fig. 3 – Add LCR Tariff Form Fig. 3.57 – Add LCR Tariff Form Tariff rate name the user defined tariff rate name. Line ID the SIM or line to which a tariff rate is applied. Time intervals time when a tariff rate is applied. Restore limit every day tick off to have the call limit (free minutes) restored every day. Day to restore call limit specify a day in a month for the call limit (free minutes) to be restored. Tariff metering settings for the counting of used seconds/minutes. Free minutes, Free SMS count of minutes/SMS to be used during an accounting period (month or day). Example in Fig. 3.57: The tariff rate is applied to SIM card 89.......8413, only during weekdays and workdays (as defined in the Time intervals parameter). The limit is restored on the 1st day of each month (at a time as set in the unit). Accounting is made as follows: The first 60 seconds of the call are charged immediately, the next 30 seconds are not charged until the first 60 seconds elapse. The SIM card can be used for 300 outgoing minutes and 50 sent SMS messages per month. After the call limit is exceeded, no more outgoing calls may be made. 77 Telephony Services 3.6 Blacklist After output normalising and before switching the call to the found output line, the list of barred numbers (blacklist) is checked. If the number begins with a string included in the list the call is rejected. The list includes both whole telephone numbers and/or their initial parts (prefixes) only. Thus, e.g. all international calls or specially rated calls (erotic lines etc.) can be barred. To adjust the barred numbers use the LCR menu in the group configuration tag. Select the blacklist item to display the list of barred numbers. Fig. 4 – Blacklist Fig. 3.58 – Blacklist Regular expression the initial part of the barred number (or a whole number). Description any text that describes the meaning of an item. Routes This window includes the list of existing routes and the route adding and removing options. A route means an outgoing trunk (bundle of SIMs, modules, SIP lines or DISA lines). 78 Telephony Services 3.6 Fig. 3.59 – LCR Routes - Add Route Form There is a route named ‘Mobile Networks’ in the figure above, which contains all GSM modules. It is used at all defined time intervals without CLI restriction (CLIR may be used for mobile networks only). The form contains the following fields: Route name the route name may contain any alphanumerical characters. Refer to the LCR rules in the preceding section. Lines of route a list of available lines that form a group. To select/remove a line click on the respective item with the left-hand mouse button. You can select more list items at the same time by pushing the CTRL key along with the mouse click. The selected items are illuminated blue. Time intervals define the routing rule time validity. CLIP/CLIR enable/disable the caller’s identification. Description any text describing the meaning of an item. LCR Test The LCR test item in the Least Cost Router (LCR) menu in the Telephony services tag is used for testing changes in the LCR settings. Enter the caller's and called numbers and click on the LCR test simulation. icon below the form to initiate the LCR process 79 Telephony Services 3.6 Fig. 3.60 – LCR Test After simulation, the normalised calling and called numbers plus the name of the successfully found output line or the reason why the line search was unsuccessful are displayed. GSM Routing Incoming calls from the GSM network are processed by simply being routed to a selected number in the VoIP network. The routing rule may be set for each SIM card of the GSM module separately. While processing GSM incoming calls, the LCR first tries to find the Operator service according to the GSM module and then according to the SIM card number. After finding the service, it selects the line that is assigned to the Operator service for the incoming call. Finally, the calling number is normalised according to the normalising table. Operator To set routing click on the GSM routing reference. The Operator service must be set first. Click on the Operator item to display the table of available operators (see Fig. 3.61). Fig. 3.61 – GSM Routing – Operator To add an Operator service click on the Add button. This displays the Operator service adding form (see Fig. 3.62). 80 Telephony Services 3.6 Fig. 3.62 – GSM Routing – GSM Routing Operator Adding Form Service name the field may contain any alphanumerical characters. Operator number the VoIP network number to which the incoming GSM call is routed. VoIP Line is the line used for dialling the VoIP network number (also a DISA line). Description any text describing the meaning of the operator service. To change the Operator service select the relevant line and click on the Change button. From now on follow the same steps as mentioned above with the exception that to save the changes click on the Change item. To remove an Operator service, select the relevant line (as mentioned above) and click on Remove. SIM Click on the SIM item in the menu to the left to display the list of SIM routing rules (see Fig. 3.63). Fig. 3.63 – GSM Routing – SIM Card Routing Click on the Add routing of SIM card item to display the routing rule adding form (see Fig. 3.64). 81 Telephony Services 3.6 Fig. 3.64 – GSM Routing – SIM Card Routing Adding Form SIM card select the SIM card number in this field. The incoming calls through the SIM number will be assigned to the service selected in the Service name field. Service name the service through which the calls are to be routed into the VoIP network. Description any text describing the SIM routing rule meaning. GSM Click on the GSM item in the menu to the left to display the list of GSM routing rules. Fig. 3.65 – GSM Routing – GSM Click on the Add routing of GSM device item to display the routing rule adding rule (Fig. 3.66). Fig. 3.66 – GSM Routing – GSM Module Routing Rule GSM device enter the GSM module number. The incoming calls through this module will be assigned to the service specified in the Service name field. Service name the service through which the calls are to be routed into the VoIP network. 82 Telephony Services 3.6 Description any text describing the GSM routing rule meaning. GSM Routing Normalising The table normalises the calling (CLIP) numbers of the incoming calls from GSM network. The normalisation should be made to display the calling number on the IP telephone in such manner, which enables proper routing of the back call into the 2N VoiceBlue Enterprise gateway. If e.g. the gateway is configured to dial the calls into the GSM network by means of prefix 0 and the incoming CLIP from GSM network starts with +420, the prefix +420 must be detached and replaced by 0 (see Fig. 3.67). Example: Fig. 3.67 – GSM Routing - Normalising Adding Form SIP Proxy IP phones are registered to the internal SIP proxy. The SIP proxy serves as a registrar and location server and also as an RTP proxy for outgoing SIP proxy calls (e.g. calls to a SIP operator). Fig. 3.68 – SIP Proxy Main Screen Fig. 3.68 shows an example of a completed routing table that gets displayed when you open the SIP proxy item. Each row represents one rule. Having received a callestablishing request, the SIP proxy searches this table from top to bottom for the appropriate routing rule. 83 Telephony Services 3.6 Doing this, it compares the called destination with the value in the first table column. If the called subscriber's identifier starts with the prefix included in the If prefix field of the routing rule, the SIP proxy terminates searching and uses the rule found. The last table row represents the so-called initial routing rule. It cannot be deleted. It is applied to all calls for which no explicit routing rule has been found. The routing rule defines what the SIP proxy should do with a call. It can reject it, forward it to another host and/or port, transfer it to a gateway VoIP line (i.e. to the LCR), or search for the called subscriber in the database of logged-in SIP telephones. Before one of the above mentioned operations is executed, it is possible to modify the called subscriber's identifier by removing a certain number of characters from the left or adding a new string to its beginning (refer to the Remove and Add columns). The SIP proxy routing rules define routing (according the prefix of the dialled number). There are 2 rules by default - all dialled numbers with prefix 0 are routed to the internal SIP line and the remaining are to be looked up for registered IP phones. Add rule There is an Add rule icon below the table too. Click on it to display the rule defining form. Fig. 3.69 shows a form for setting the SIP proxy routing rules. The form fields correspond to the header of the table in Fig. 3.68. Fig. 3.69 – Proxy Routing Rule Adding Form The form and the table include the following fields: If prefix if the called subscriber's URI (Uniform Resource Identifier) starts with this string, this rule is used for routing. In the SIP environment, the URI is introduced with the "sip:" prefix, which must be included in the value in this field. Strip the number of characters following the "sip:" prefix to be removed from the URI before processing. Add the string to be inserted in the URI behind the "sip:" prefix. Do action defines what to do with a call. There are six potential actions in the pop-up menu but, in principle, there are only three of them – rejection, forwarding and connecting within the SIP proxy registrations. However, let us mention all the options briefly to have a full picture: 1 Reject – the called line gets the busy tone; 84 Telephony Services 3.6 2 Rewrite host – forwards the call to the same port of the selected host; 3 Rewrite port – forwards the call to the selected port of the same host (this can have the same effect as option 5); 4 Rewrite host and port – forwards the call to any port of the selected host; 5 Connect to LCR – connects the call to the selected gateway SIP line and thus to the LCR; and finally 6 Lookup registration – tries to search the SIP proxy registered users for the required URI and forward the call to the appropriate host. With parameter the above actions, except for the first and last ones, require a parameter to be set. This parameter is a new routing destination for call forwarding and the SIP line name for the Connection to 2N® OfficeRoute action. In the figure - routing is done according to the prefix. The action might be ‘Connect to LCR’, ‘Reject’, ‘Change host and port’ and ‘Lookup registration’. The parameter means here the routing destination of a call. There is a significant difference against the Normalising table – the prefix is not removed in the proxy rule. Switch SIP Proxy Off the proxy may be switched off when the unit is used as a UMTS router only. If the integrated SIP proxy server is switched on, it may be switched off by clicking on the Switch SIP Proxy off menu item. If the SIP proxy server is switched off, it may be switched on by clicking on Switch SIP Proxy on menu item. Registrations It is possible to monitor via the web interface which equipment units are registered at the SIP proxy. 85 Administration 3.7 3.7 Administration Main Configuration Here set the main parameters for using the device (e.g. PIN for SIM cards, DSP codecs – G.729 or G.723, Mobility Extension enable). Fig. 3.70 – Main Configuration – Administration Confirm remove a warning message before deleting settings. SIM card routing enables the SIM card as a routing object. Enable SIP session progress the SIP session process signalling. Advanced config of regular expressions regular expressions provide a concise and flexible means for identifying strings of text of interest. This checkbox is for special cases. DSP codec the type of codec used by the digital signal processor. Default language the default language for administration. Max user session time time in seconds for automatic logout from the administration after inactivity. Simple login page check this option to enable a simple login page. Set Time zone Here set the time zone for 2N® OfficeRoute/2N® VoiceBlue Enterprise. 86 Administration 3.7 Fig. 3.71 – Main Configuration – Set Time zone Synchronise Time Synchronization of the 2N® OfficeRoute/2N® VoiceBlue Enterprise time with the PC time. Fig. 3.72 – Main Configuration – Synchronise Time Update Firmware The firmware update helps you exchange the 2N® OfficeRoute/2N® VoiceBlue Enterprise firmware version. For updating, the firmware delivered by the gateway producer, or the firmware loaded from the producer’s websites has to be used exclusively. The firmware updating serves mainly for recording of repairs of potential failures or new software versions with updated functions. To update the firmware, click on the Update item and then on the Update firmware item. This displays the firmware file adding dialogue. Select the path to the firmware file by pushing the Browse button and upload the new firmware version into 2N® OfficeRoute/2N® VoiceBlue Enterprise by pushing the Update button. Fig. 3.73 – Main Configuration – Update Firmware 87 Administration 3.7 Upload Licence The licence file is necessary for switching on the purchased services provided by the 2N® OfficeRoute/2N® VoiceBlue Enterprise gateway. Every newly purchased 2N® OfficeRoute/2N® VoiceBlue Enterprise unit is without the licence file. Before uploading, save the licence file on your PC hard-disk and remember the path to it. To upload the licence file into the gateway click on the Update item in the Setting menu, and then on the Upload licence item. Then, the licence file adding dialogue will be displayed as shown in Fig. 3.74. Fig. 3.74 – Main Configuration – Upload Licence Configuration Backup This menu helps you back up the whole configuration (including the licence and IP address). While uploading configuration you can check the ‘Do not extract licence’ item in order not to overwrite the gateway licence by the licence saved in the backup file. Fig. 3.75 – Main Configuration – Configuration Backup Reboot Reboot the device. The rebooting process takes approximately 3 minutes. 88 Administration 3.7 Fig. 3.76 – Main Configuration - Reboot 89 States and Logs 3.8 3.8 States and Logs States This menu provides information on all 2N® OfficeRoute/2N® VoiceBlue Enterprise devices, registered VoIP extensions, calls and tariff metering states. Tariff Metering Count of free minutes/SMS messages. Calls Information on current calls. Fig. 3.77 – States - Calls The columns include: From the calling number. Name the calling line name. It is completed only if this function is supported by the call-initiating IP telephone. Line ID the line via which the call came to the gateway. To the called number. Name the called line name. It is completed only if this function is supported by the call-initiating IP telephone. Line ID the line via which the call left the gateway. Duration call duration time. State connection status. 90 States and Logs 3.8 Devices Signal strength and registration status with respect to external proxies. Fig. 3.78 – States - Devices Registrations Information on registered users. Fig. 3.79 – States - Registrations Call Accounting Provides detailed records on calls to mobile networks. The records on accomplished calls are saved into files in the text format. The file that the gateway currently saves call data into is called ‘current.acc’. At the end of a predefined period of time, the file is renamed automatically and the gateway starts saving new call records into an empty file. The names of the closed files correspond with the respective period of time. To display the list of saved call data files open the Call accounting menu in the States and Log tag. Fig. 5 – Call Accounting Fig. 3.80 – Call Accounting 91 States and Logs 3.8 Logs Events that come into being during the gateway operation are recorded in operation journals for subsequent error analysis purposes. The events are divided into five groups and saved into separate files: Debug extended information used for development/diagnostic purposes. GSM AT a gateway - GSM module communication record. This journal includes all AT commands sent to the GSM modules by the gateway and responses sent back. Data connection logging of communication between the module and the network between data connection. Warning events that should not occur normally but their presence has no effect on the gateway behaviour. Error errors that limit or jeopardise the gateway function. Their occurrence usually signals an approaching fatal error. Fig. 3.81 – Logs - Settings 92 States and Logs 3.8 The form in Fig. 3.81 contains the following fields: Clear debug log at start-up defines whether or not the tuning journal file should be deleted automatically upon the gateway power up. Add date to log defines whether or not the gateway should add a timestamp to the events recorded. Logs per page the number of lines to be displayed at the same time on one journal page. Rotate size (kB) if the Rotating criterion is set in the Size (see below), the journal files shall be ‘rotated off’ whenever the defined size is exceeded (in kilobytes). Files count the maximum number of ‘rotated-off’ files of each type that are stored in the gateway memory. The earlier ones are deleted automatically. Rotate by the rotation criterion. The journal files are closed and renamed when a certain condition is satisfied and a new file is used for event recording. The files can be closed at the end of a defined period of time (day, week, or month) or when the specified size is achieved. Debug log level defines which tuning record categories shall be recorded. Download Logs The viewing of the logs using a web browser as described in the preceding subsection is ineffective for complicated retrieval of events that happened in the distant past. In this case, it is more advantageous to download the journal files to your PC and view them using more sophisticated tools. To download packed log files click on Download. Fig. 3.82 – Download Logs Connection Speedometer In this section you can check your uploading and downloading speed. Also you can find here the signal strength for each module. 93 States and Logs 3.8 Fig. 3.83 – Connection Speedometer 94 Messaging 3.9 3.9 Messaging Thanks to an integrated SMS server, the 2N® OfficeRoute/2N® VoiceBlue Enterprise gateway is capable of not only sending but also receiving and delivering SMS. Sending of SMS messages from the web interface. Every user with SMS rights can log in and send or receive SMS. Fig. 3.84 – SMS – Inbox Messages There are 4 folders: Inbox a list of inbox SMS messages. Sent a list of sent messages. To send a list of stored messages that have not been sent yet. Failed a list of messages that were not sent because of an error. SMS sending Click on the envelope icon in the right-hand bottom corner of ‘Create a new message’ to create a new SMS message. Fig. 3.85 – SMS – New SMS Recipient phone number the number on which the SMS will be sent. 95 Messaging Message the text of the SMS message. Request status report tick off to get the delivery report. 3.9 SMS Delivery 2N® OfficeRoute/2N® VoiceBlue Enterprise’s internal POP3 server provides SMS downloading from the gateway via e-mail. SMS sending/receiving settings. The settings apply to both the web and SMTP/POP3 SMS sending/receiving ways. Fig. 6 – SMS Delivery The form contains the following fields: Parse contents enables SMS delivery according to the contents. Message response enables response deliveries. VIP numbers enables deliveries according to the list of VIP numbers. 96 Messaging 3.9 Save outgoing messages to Sent folder enables the saving of sent messages. Module n Deliver SMS to user - choose the default user to receive incoming SMS for the GSM module. For outgoing SMS use choose the GSM module for sending SMS. Answer arrives until set the time for answer to sent SMS messages. Within this time the incoming SMS from the same telephone number as that in the sent SMS will be routed to the user who created the SMS. After this time the SMS will be routed to the user who is defined as the default user for GSM module n. Email domain name the domain name must be equal to the POP3 domain name. The domain name is used for the SMS sender and SMS receiver for example SMS_sender_tel.number@domain name and SMS_receiver_tel.number@ domain name Delete SMS with POP3 an already read message could be deleted from the POP3 server. You can delete the message or mark it as already read (i.e. still available in the Inbox directory through the web-based interface, but the POP3 server can not see it). POP3 email subject subject of the message to be filled in according to the 2N ® OfficeRoute settings. You can use formatting strings in the text as well (%n – sender number, %u – receiver number, %d – date). Maximum number of SMS per email the SMTP server makes one or more SMS messages from incoming e-mail (the maximum count of created SMS messages is set in the web-based interface. It is possible to set from 0 to 100 messages). SMTP IP access control SMTP authentication required authentication goes through the username and password, which are used for registering to the web-based interface of 2N® OfficeRoute. Every SMS will be changed to e-mail in the Inbox directory after successful authentication. Allow 16-bit SMS the server supports only 7-bit messages encoded according to ISO-8859-1 or 16 bit Unicode UTF-8 (messages with a different encoding could be illegible if received as SMS messages). Allow SMS concatenating enables the merging of multiple SMS messages into one longer SMS message. Insert email sender in SMS enables inserting the email sender in the SMS. Insert email subject in SMS enables inserting the email subject in the SMS. The server awaits e-mail in the Text/Plain, Text/HTML, Multipart/Mixed or Multipart/Alternative formats. From a Text/HTML message only the body of the HTML message, without formatting, is put in the SMS message. From Multipart/Mixed and 97 Messaging 3.9 Multipart/Alternative messages only the first part of the message is used, enclosed between strings, mentioned in the header under the name ‘boundary’. The SMTP server makes one or more SMS messages from incoming e-mail (the maximum count of created SMS messages is set in the web-based interface. It is possible to set from 0 to 100 messages) in the form F:<sender><CRLF>S:<e-mail subject (max. 10 characters)><CRLF>e-mail body. Messages of the length of 160 characters are sent subsequently to the receiver via the Admin account (already sent SMS messages are available in the user Admin SENT directory). VIP Numbers There is a VIP numbers item in the SMS delivery menu in the SMS group tag. When you open it, you get a list of predefined VIP numbers that is searched whenever a new SMS is received if the VIP number delivery rule is active. Fig. 3.86 – SMS Delivery – VIP Numbers The columns include: VIP number beginning (or the whole) of the SMS CLIP to which a list of addressees is assigned. Description any text that describes the meaning of an item. Available users a list of users to be delivered SMS. Selected recipients a list of selected gateway users to be delivered the SMS messages that meet the specified criterion. You can move user names from one list to another using the arrows located between the lists. To do that, select the user with the left-hand mouse button and then click on the arrow pointing at the other list. 98 Messaging 3.9 SMTP IP Access The SMTP server enables the sender IP address control as well as authentication. With the help of the web-based interface you can enable or disable the IP address control as well as set the list of allowed IP addresses. Fig. 3.87 – SMS Delivery – SMTP IP Access Fig. 3.88 – SMS Delivery – List of IP Addresses Allowed for SMTP Access 99 4 4. Function and Use This section describes the basic and extending functions of the product. Here is what you can find in the section: Factory Reset 101 Factory Reset 4.1 4.1 Factory Reset If you need to do factory reset, follow the steps below: 1. Disconnect the gateway from the power supply. 2. Push and hold the Factory reset button. 3. Connect the gateway to the power supply. 4. Keep pushing the Factory reset button for at least 20 seconds. After these steps the factory reset is executed. Fig. 4.1 – Factory Reset Button 102 5 5. Technical Parameters This section describes the technical parameters of the product. 103 Technical Parameters 5.1 5.1 Technical Parameters VoIP Signalling standards SIP Number of channels 4 Codecs G.711 PCM (64 kbps) G.729A CS-ACELP (8 kbps) G.723.1 MP-MLQ/ACELP 6.3 kbps (optional) PCM quantising A-law / -law Mobile networks Mobile network type UMTS WCDMA FDD EGSM 900 phase II GSM 1800 MHz SIM cards Plug-in 3V (small) Transmission power 2W (1W) Receiver sensitivity -95 (-104) dBm Antenna Frequency UMTS WCDMA FDD 850/1900/2100 MHz GSM 850/900/1800/1900 MHz Impedance 50 Maximum output power 2W Antenna connector type SMA Power Supply Adapter 230V10%, 50/60Hz / 12V DC Supply voltage 12V / 2.5A Supply connector DC jack, 2.1 mm 104 Technical Parameters Power input up to 20W USB Connector type A and B, host and master 5.1 Interface USB 2.0 Micro SD Ethernet RJ-45 10/100 Base T Protocols IP, ICMP, TCP, UDP, DHCP, RTP, TELNET, SSH, HTTP, HTTPS, SMTP, SNMP, POP3 Operational Conditions Temperature 0C 40C Relative humidity 5 90% non-condensing Dimensions (without connectors) 25015050 mm CE certification EN 60 950:2000, EN 55 024, EN 55 022 Class B Others 105 6 6. Supplementary Information This section provides supplementary information on the product. Here is what you can find in this section Regulations; Troubleshooting; List of Figures; General Instructions and Cautions. 107 Regulations 6.1 6.1 Regulations 2N® OfficeRoute conforms to the following directives and regulations: Directive 1999/5/EC of the European Parliament and of the Council, of 9 March 1999 – on radio equipment and telecommunications terminal equipment and the mutual recognition of their conformity Directive 2006/95/EC of the European Parliament and of the Council of 12 December 2006 on the harmonisation of the laws of the Member States relating to electrical equipment designed for use within certain voltage limits Directive 2004/108/EC of the European Parliament and of the Council of 15 December 2004 on the approximation of the laws of the Member States relating to electromagnetic compatibility and repealing Directive 89/336/EEC Directive 2002/96/EC of the European Parliament and of the Council of 27 January 2003 on waste electrical and electronic equipment Regulation (EC) No 1907/2006 of the European Parliament and of the Council of 18 December 2006 concerning the Registration, Evaluation, Authorisation and Restriction of Chemicals (REACH), establishing a European Chemicals Agency, amending Directive 1999/45/EC and repealing Council Regulation (EEC) No 793/93 and Commission Regulation (EC) No 1488/94 as well as Council Directive 76/769/EEC and Commission Directives 91/155/EEC, 93/67/EEC, 93/105/EC and 2000/21/EC Directive 2002/95/EC of the European Parliament and of the Council of 27 January 2003 on the restriction of the use of certain hazardous substances in electrical and electronic equipment 108 Troubleshooting 6.2 6.2 Troubleshooting For tips for the solution of other potential problems see faq.2n.cz. 109 List of Figures 6.3 6.3 List of Figures Fig. 2.3– Gateway Holder - Wall Mounting .......................................................................................16 Fig. 2.4– Gateway Holder – Hanging ................................................................................................16 Fig. 2.5– Supply Adapter Connection ...............................................................................................17 Fig. 2.6– PuTTY – Serial Console Access Configuration .................................................................18 Fig. 2.7– LAN Connection .................................................................................................................19 Fig. 2.8– Antenna Connector Connection .........................................................................................20 Fig. 2.9– SIM Card Inserting Procedure ...........................................................................................21 Fig. 2.10 – Serial Console Access – Main Menu ..............................................................................24 Fig. 2.11 – Serial Console – Network Configuration .........................................................................26 Fig. 3.1 – Configuration Wizard - Introduction ..................................................................................30 Fig. 3.2 – Configuration Wizard – Administrator Password ..............................................................31 Fig. 3.3 – Configuration Wizard – Time zone....................................................................................31 Fig. 3.4 – Configuration Wizard – PIN Codes ...................................................................................32 Fig. 3.5 – Configuration Wizard – Data Connection .........................................................................32 Fig. 3.6 – Configuration Wizard – Extension Number Allocation ......................................................33 Fig. 3.7 – Configuration Wizard – Passwords for Extensions ...........................................................33 Fig. 3.8 – Configuration Wizard – SIP Provider ................................................................................34 Fig. 3.9 – Configuration Wizard – Outgoing Calls through GSM/UMTS ...........................................35 Fig. 3.10 – Configuration Wizard – Incoming Calls ...........................................................................35 Fig. 3.11 – Configuration Wizard – Finish .........................................................................................36 Fig. 3.12 – Web Administration Login Page......................................................................................37 Fig. 3.13 – Web Interface Desktop ...................................................................................................38 Fig. 3.14 – Main Configuration ..........................................................................................................40 Fig. 3.15 – Filtering ...........................................................................................................................40 Fig. 3.16 – Port Mapping ...................................................................................................................41 Fig. 3.17 – DHCP Server Setting Form .............................................................................................42 110 List of Figures 6.3 Fig. 3.18 – DNS Proxy Configuration ................................................................................................42 Fig. 3.19 – VRRP Configuration ........................................................................................................43 Fig. 3.20 – Dynamic DNS Configuration ...........................................................................................44 Fig. 3.21 – Data Connection – SIM Cards ........................................................................................44 Fig. 3.22 – Data Connection – Modify SIM Card Form .....................................................................45 Fig. 3.23 – SNMP Configuration .......................................................................................................46 Fig. 3.24 – List of Available Users ....................................................................................................48 Fig. 3.25 – Add User Form ................................................................................................................49 Fig. 3.26 – List of Available Groups ..................................................................................................50 Fig. 3.27 – Group Adding Form ........................................................................................................50 Fig. 3.28 – Ring Group Adding Form ................................................................................................51 Fig. 3.29 – VoIP PBX Arrangement ..................................................................................................52 Fig. 3.30 – "Point-to-Point" Arrangement ..........................................................................................53 Fig. 3.31 – VoIP-to-GSM Gateway with PBX ....................................................................................53 Fig. 3.32 – 2N® OfficeRoute as SIP Proxy .......................................................................................54 Fig. 3.33 – 2N® OfficeRoute as SIP - H.323 Gateway .....................................................................54 Fig. 3.34 - Call Routing by VoIP PBX ...............................................................................................55 Fig. 3.35 - Routing of Incoming Calls from VoIP ...............................................................................55 Fig. 3.36 - Routing of Incoming Calls from GSM ..............................................................................56 Fig. 3.37 – List of SIP Lines ..............................................................................................................57 Fig. 3.38 – Modify Internal SIP Line ..................................................................................................58 Fig. 3.39 – H.323 Line Details ...........................................................................................................60 Fig. 3.40 – List of Available SIM Cards .............................................................................................62 Fig. 3.41 – Data Connection – Modify SIM Card Form .....................................................................63 Fig. 3.42 – DISA Line ........................................................................................................................65 Fig. 3.43 – FAX Line .........................................................................................................................66 Fig. 3.44 – Fxs Line ...........................................................................................................................67 Fig. 3.45 – Fxs Line - Modify .............................................................................................................67 Fig. 3.46 – GSM - PINs .....................................................................................................................68 111 List of Figures 6.3 Fig. 3.47 – GSM – Audio Parametres ...............................................................................................68 Fig. 3.48 – GSM – CLIPs ..................................................................................................................69 Fig. 3.49 – Services ..........................................................................................................................70 Fig. 3.49 – Mobility Extension ...........................................................................................................70 Fig. 3.50 - T.38 Fax Relay Settings ..................................................................................................71 Fig. 3.51 - List of LCR Rules .............................................................................................................73 Fig. 3.52 - LCR – Add Rule ...............................................................................................................74 Fig. 3.53 - Time Intervals ..................................................................................................................75 Fig. 3.54 - Normalisation ...................................................................................................................75 Fig. 3.55 - Normalisation – Add Rule ................................................................................................76 Fig. 3.56 – Add LCR Tariff Form .......................................................................................................77 Fig. 3.57 – Blacklist ...........................................................................................................................78 Fig. 3.58 – LCR Routes - Add Route Form .......................................................................................79 Fig. 3.59 – LCR Test .........................................................................................................................80 Fig. 3.60 – GSM Routing – Operator ................................................................................................80 Fig. 3.61 – GSM Routing – GSM Routing Operator Adding Form ....................................................81 Fig. 3.62 – GSM Routing – SIM Card Routing ..................................................................................81 Fig. 3.63 – GSM Routing – SIM Card Routing Adding Form ............................................................82 Fig. 3.64 – GSM Routing – GSM ......................................................................................................82 Fig. 3.65 – GSM Routing – GSM Module Routing Rule ...................................................................82 Fig. 3.66 – GSM Routing - Normalising Adding Form ......................................................................83 Fig. 3.67 – SIP Proxy Main Screen ...................................................................................................83 Fig. 3.68 – Proxy Routing Rule Adding Form ...................................................................................84 Fig. 3.69 – Main Configuration – Administration ...............................................................................86 Fig. 3.70 – Main Configuration – Set Time zone...............................................................................87 Fig. 3.71 – Main Configuration – Synchronise Time .........................................................................87 Fig. 3.72 – Main Configuration – Update Firmware ..........................................................................87 Fig. 3.73 – Main Configuration – Upload Licence .............................................................................88 Fig. 3.74 – Main Configuration – Configuration Backup ...................................................................88 112 List of Figures 6.3 Fig. 3.75 – Main Configuration - Reboot ...........................................................................................89 Fig. 3.76 – States - Calls ...................................................................................................................90 Fig. 3.77 – States - Devices ..............................................................................................................91 Fig. 3.78 – States - Registrations ......................................................................................................91 Fig. 3.79 – Call Accounting ...............................................................................................................91 Fig. 3.80 – Logs - Settings ................................................................................................................92 Fig. 3.81 – Download Logs ...............................................................................................................93 Fig. 3.82 – Connection Speedometer ...............................................................................................94 Fig. 3.83 – SMS – Inbox Messages ..................................................................................................95 Fig. 3.84 – SMS – New SMS ............................................................................................................95 Fig. 3.86 – SMS Delivery – VIP Numbers .........................................................................................98 Fig. 3.87 – SMS Delivery – SMTP IP Access ...................................................................................99 Fig. 3.88 – SMS Delivery – List of IP Addresses Allowed for SMTP Access ...................................99 Fig. 4.1 – Factory Reset Button ......................................................................................................102 113 General Instructions and Cautions 6.4 6.4 General Instructions and Cautions Please read this User Manual carefully before using the product. Follow all instructions and recommendations included herein. Any use of the product that is in contradiction with the instructions provided herein may result in malfunction, damage or destruction of the product. The manufacturer shall not be liable and responsible for any damage incurred as a result of a use of the product other than that included herein, namely undue application and disobedience of the recommendations and warnings in contradiction herewith. Any use or connection of the product other than those included herein shall be considered undue and the manufacturer shall not be liable for any consequences arisen as a result of such misconduct. Moreover, the manufacturer shall not be liable for any damage or destruction of the product incurred as a result of misplacement, incompetent installation and/or undue operation and use of the product in contradiction herewith. The manufacturer assumes no responsibility for any malfunction, damage or destruction of the product caused by incompetent replacement of parts or due to the use of reproduction parts or components. The manufacturer shall not be liable and responsible for any loss or damage incurred as a result of a natural disaster or any other unfavourable natural condition. The manufacturer shall not be held liable for any damage of the product arising during the shipping thereof. The manufacturer shall not make any warrant with regard to data loss or damage. The manufacturer shall not be liable and responsible for any direct or indirect damage incurred as a result of a use of the product in contradiction herewith or a failure of the product due to a use in contradiction herewith. All applicable legal regulations concerning the product’s installation and use as well as provisions of technical standards on electric installations have to be obeyed. The manufacturer shall not be liable and responsible for damage or destruction of the product or damage incurred by the consumer in case the product is used and handled contrary to the said regulations and provisions. The consumer shall, at its own expense, obtain software protection of the product. The manufacturer shall not be held liable and responsible for any damage incurred as a result of the use of deficient or substandard security software. The consumer shall, without delay, change the access password for the product after installation. The manufacturer shall not be held liable or responsible for any damage incurred by the consumer in connection with the use of the original password. The manufacturer also assumes no responsibility for additional costs incurred by the consumer as a result of making calls using a line with an increased tariff. 114 General Instructions and Cautions 6.4 Electric Waste and Used Battery Pack Handling Do not place used electric devices and battery packs into municipal waste containers. An undue disposal thereof might impair the environment! Deliver your expired electric appliances and battery packs removed therefrom to dedicated dumpsites or containers or give them back to the dealer or manufacturer for environmental-friendly disposal. The dealer or manufacturer shall take the product back free of charge and without requiring another purchase. Make sure that the devices to be disposed of are complete. Do not throw battery packs into fire. Battery packs may not be taken into parts or shirt-circuited either. 115 General Instructions and Cautions 6.4 2N TELEKOMUNIKACE a.s. Modřanská 621, 143 01 Prague 4, Czech Republic Tel.: +420 261 301 500, Fax: +420 261 301 599 E-mail: [email protected] Web: www.2n.cz 116