1
V
D
X
User Manual
VDX Web Client User Manual
Abstract:
This document is a user guide to the VDX Web Client. It is provided
primarily for those responsible for operating a VDX interlibrary loan
searching and requesting system using the web environment.
VDX Version:
Based on VDX Version 2.74
Prepared by:
Jill Pangborne
Southern Ontario Library Service
INFO Operations and Training
Creation Date:
July 2006
Revision Date:
Symbols used to highlight text:
Take note indicator. A caution on best use practices or
a warning note about actions that could be damaging to
your implementation.
Suggestions and practical tips.
Prepared by Southern Ontario Library Service (July 2006) - based on VDX Version 2.7.4
2 of 75
Table of Contents
Chapter 1: Introduction
VDX Environment
Typical Daily Workflow
VDX Login
Chapter 2: Bibliographic Searching
Standard Search
Current Profile Menu
Progression of bib search against Profiles
Bibliographic Details Display
Non-INFO Search [shared] profile
Sorting search results
Saving a search
Saving hits to a saved list
Creating requests from search results
Adding Notes to a request
Service Screen
Requester Screen
What happens when you “submit” a request?
What is a Rota?
Variation: No ISBN so how do you get a Rota?
Variation: Forcing a request to specific location(s) in a Hit
(and bypassing DocFind Rota creation)
Variation: Requesting a Journal Article
Variation: Completing a Blank Request Form
27
28
29
Chapter 3: Request Administration
Ongoing Management of borrowing orders
Performing a Request Search
Work Queue - a VDX Operator’s “To Do” list
Follow up on Idle/Check Manual
Receiving an Item at Requester Location
Patron Notification for Received Items
Returning an Item to the Lending Library
Standard Returned Report
Renewing a request
Replying to a Conditional Answer
Cancelling a Request
Completing a Request
Follow up procedure for End-of-Rota Requests
32
33
35
36
37
38
39
40
41
42
43
44
45
Chapter 4: User Registration
Managing user records at your location
Searching, Modifying, Expiring User Records
48
50
Chapter 5: Location Data
Searching Location Records
52
Chapter 6: Lending Procedures
Monitoring incoming requests to your Library
Standard Pick List - Used by Responder library
Responding to New Requests for Loan
Shipping the Item
Standard Shipping Report
Cancel Pending
Renewal Pending
Conditional Reply – Yes (or No) processing
Check-In the items returned to your library
56
56
57
58
59
60
60
61
61
Prepared by Southern Ontario Library Service (July 2006) - based on VDX Version 2.7.4
6
7
8
3 of 75
10
11
12
14
15
16
16
17
19
21
22
23
25
25
26
Chapter 7: VDX Reports
Viewing and printing Standard Reports
Batch Reruns…Re-Printing Standard Reports
Explanation of Monthly ILL Statistics contents
63
64
65
Appendices
Appendix 1:
Appendix 2:
Appendix 3:
Appendix 4:
Appendix 5:
68
71
72
73
75
Service Screen Options Further Explained
Create patron record “on-the-fly”
Print screen and Audit Details
Processing Multiple Requests with Bulk Action
Communication and Support
Prepared by Southern Ontario Library Service (July 2006) - based on VDX Version 2.7.4
4 of 75
Chapter 1: Introduction
Prepared by Southern Ontario Library Service (July 2006) - based on VDX Version 2.7.4
5 of 75
The Web Client and Searching
The VDX web interface allows end users (patrons or staff) access to both local and remote
databases (or targets) through a single access point. Anonymous users can use VDX for
searching only. Logging in allows patrons to place requests for items, check the status of their
requests, and edit their user profile. Logging in as staff allows even more functionality.
The VDX Explain database records specific information about each available database. When
performing a Z39.50 search of several databases, the VDX server can determine which search
fields (access points) are available for each database selected. The search can then change the
default display of available search fields to display only those supported by the databases you
have selected to search.
Users can choose between a simple search and an advanced search. The simple search
contains only one search option for entering search criteria. It performs Z39.50 searches
matching on the title only. Users should simply enter a few words of the title for their search
criteria. The advanced search allows selection of Z39.50 searchable fields and Boolean operators
in order to construct more precise searches. As a search is performed a status button can be
checked to show details as they relate to each individual target. Items matching a user’s query
are put into a single hit list regardless of the original source database of the item.
End users (patrons) wishing to place requests for material electronically must be added to the VDX
system by administrative staff and subsequently be given a user ID and password for logging into
the VDX Web Client. The login permission level for patrons enables fewer privileges than those
for administrative staff. End user information can also be added to the VDX database from a
remote database, such as an existing circulation database, using the SIP standard if supported.
VDX components
Web Client
The Web Client allows library staff to perform tasks such as routine processing of incoming and
outgoing requests and management of user records for your own location. End users have
access to search and request facilities through use of a standard web browser interface.
Windows Administrative Client
The Windows Administrative Client runs on Windows desktop machines and is used for the initial
configuration of the VDX system and ongoing system administration.
VDX Transaction Store
The VDX Transaction Store forms the core of the VDX system. It stores and maintains all requests
and transactions and also stores individual user access details. The data supporting underlying
protocol drivers is maintained within the core database. The server includes mechanisms for
interfacing with external systems (via ISO-ILL and Z39.50 for example). A directory of information
about remote libraries and databases is held on the VDX Explain database (Z39.50 profiles and
usage restrictions for example). The server also includes the web gateway.
Z39.50
The server can act as a Z39.50 target accepting incoming item order messages from remote Z39.50
resources.
ISO-ILL Protocol
The server includes all necessary protocol states to act as a requesting location and to send
messages to supplier libraries or document providers through the ISO-ILL protocol.
Prepared by Southern Ontario Library Service (July 2006) - based on VDX Version 2.7.4
6 of 75
Typical Daily Workflow for a VDX operator
1. Check regular email
Review email for ILL relevant communications such as VDX user advisories and patron email
notification bounce backs. See Appendix 5: Communications and Support
2. Collect new borrowing orders
Collect paper requests from fax, inter-branch mail and reference information service staff .
The paper request form should include patron barcode, phone number and email (where
convenient).
3. Search INFO and create ILL requests
Perform bibliographic search in INFO. Request desired items (add notes, specify services,
link patron details and submit requests. Where a suitable bibliographic record is NOT
located in the search you can create a request in VDX using a blank form.
4. Deal with requests that have not been automatically sent by VDX
Most requests will automatically go to first location on the Rota when you submit them. If a
Rota does not get built or there are errors with the request, an operator needs to mediate
these further. See “Follow up on Idle/Check Manual (No Rota)” procedures. If you have
patrons or branch staff submitting requests under their own login the centralized location may
have to further process requests in an “Automediated: AuthManual” state. Details on this
authorization status are available through specific application training.
5. Process received items for patron pick up
Update request status to ‘Received’. Print Received Report with patron contact details.
Notify patron to pick up item (automatically by email, or manually by telephone).
6. Process returned items to go back to lender
Update request status to ‘Returned’. Print Returned Report with address label and packing
slip. Package for courier or postal delivery to lending library.
7. Ongoing Management of Borrowing Requests
On a regular basis you need to process renewals, respond to conditional answers, cancel
requests, and check for End-of-Rota requests. Best practice is to stay on top of End-of-Rota
requests that have gone through all locations in the Rota without being supplied. You may
decide to find more locations or reserve from a location that was previously “Non-Supply in
Use”. See “Follow-up procedures for End-of-Rota requests”.
8.
Perform Lending activities
Get a pick list, check local system and shelves for availability. Process Non-Supply answers
and Shipped. Place holds, respond to requests to Cancel or Renew. Follow up on overdue
items.
NOTE:
Responding to incoming requests requires regular attention. As a responder, if you do not apply a state
change, a request will expire in 4 working days (skips weekends and legal holidays) after being directed
at your location and it will move on to the next location (if any) in the Rota.
This feature is a safeguard to keep requests moving if there should be a temporary problem at a
responding location. Expiry should never be used as a “procedure” by a lending library to let the system
move requests on. Network Participation policies specify that responding libraries will provide staff to
the Interloan function such that requests will be responded to within 48 hours.
Prepared by Southern Ontario Library Service (July 2006) - based on VDX Version 2.7.4
7 of 75
VDX Login
The opening VDX screen gives the user the option to ‘BibSearch’ or to ‘Login’. VDX can be used
just for searching by clicking the ‘BibSearch’ button in the left panel menu. Login is required to
submit requests, track requests, and edit user information and profiles.
To log into VDX
1.
2.
3.
4.
Select the Login button on the left-hand menu bar.
Enter your barcode and password into the input boxes.
Select the appropriate authentication service. (INFO for Ontario Public library staff users)
Select the Login button on the bottom of the Login screen.
NOTE:
A user who is banned in VDX will not be able to log on to the Web Admin Client or to ZPORTAL. This
setting can be switched on or off in the User record in Web Admin or Windows Admin Client.
Screen Layouts
Once a staff user has logged in to VDX as an ILL Administrator, the menu bar on the left side of
the screen is expanded to include options available to that level of privilege. This menu bar
remains consistent throughout the VDX session. Note that your barcode is displayed under
‘Barcode’ in the left panel after you have logged in.
Additional buttons will also appear on the top menu bar. The top row buttons are content sensitive
and will change depending on the functions you are using within VDX.
Prepared by Southern Ontario Library Service (July 2006) - based on VDX Version 2.7.4
8 of 75
Chapter 2: Bibliographic searching
Prepared by Southern Ontario Library Service (July 2006) - based on VDX Version 2.7.4
9 of 75
Standard Search
Once a user has logged into VDX, the Standard Search screen is displayed.
Example of Standard Search screen with staff login
Standard search is a key word ANY where in the record search. In Search for: enter key
words from the title. Add the author’s last name if you wish.
i.e. Gone with the wind mitchell
Use <Enter> or Submit button to execute the search against the selected collections.
Use asterisk wildcard when you want to expand on the word you are searching.
i.e. nurs* for nurse, nurses or nursing.
Use “quotations” to phrase search for more succinct results.
i.e. “Gone fishing” acts as a term browse with these words as a phrase in the results.
To perform a more complex search with field tags and Boolean operators, select the
Advanced hyperlink at the top of the screen.
For more bib searching tips practice the examples in VDX procedure supplement
document titled: Simple or Advanced Search in VDX - When and Why?
Prepared by Southern Ontario Library Service (July 2006) - based on VDX Version 2.7.4
10 of 75
Hyperlinks along the top of search screens
Simple
default
single entry
search
screen
Advanced
complex
entry search
screen with
Boolean
operators
Profiles
create, edit
or delete
your own
custom
profiles
Results
displays the
most recent
search
results
Status
information
about the
active
search
History
summary of
searches
performed
during this
log-in
Saved List
Saved bib
hits during
this log-in
Searches
Saved
searches to
use again
Current Profile menu
1. Observe Current Profile drop down menu. A search profile presents a group of library
collections for searching. In addition to the INFO Union catalogue with the combined
holdings of 110 Ontario public libraries there are 55 SOLS libraries and 4 OLSN libraries
providing live z39.50 targets for searching. INFO system administration staff has created
default profiles based on geography. Users can not edit or delete [shared] default profiles.
The shared default profiles currently available are:
Non-INFO search [shared]
OLS-North [shared]
Ontario College & University Libraries [shared]
SOLS Bruce/Perth/Wellington [shared]
SOLS Muskoka/Simcoe/York [shared]
SOLS Niagara Peninsula [shared]
SOLS Rideau Area [shared]
SOLS Thames Area [shared]
SOLS Toronto and Eastward [shared]
2. Select Collections hyperlink to collapse list of collections that display on your screen.
3. Experiment with target selection buttons under the collections list. The Deselect all button is
handy to quickly “untick” everything on the list and then tick a specific target for a search.
Prepared by Southern Ontario Library Service (July 2006) - based on VDX Version 2.7.4
11 of 75
Progression of Bib Search against Profiles
This chart suggests the typical progression of bib searching against profiles for a SOLS library.
An OLS-N library would search the OLS-North [shared] profile first and then progress to SOLS
profiles and then Non-INFO profiles.
Typical Progression of Bib Search against Profiles
Profile
Home Profile
Typically a library
picks a profile
representing the
geographic area they
are part of as their
“Home” profile.
Used when
Every search should
first be run against a
primary search
profile.
Profile Should Contain
INFO and up to 9
additional targets
geographically closest
to you.
Notes
If you get suitable hit(s)
you need search no further.
STOP HERE. Select a bib
record and create a VDX
request.
The DocFind processor will collect ALL
locations that are a match for the ISBN
to create the rota even if you did not
search those libraries.
Other profiles
No hits from your
Home Profile
Up to 10 targets that are
not in your initial search
Home Profile.
The library selects a different
[shared] profile….And so on…
moving through all the shared
profiles if necessary.
OLS-North [shared]
No hits from any
SOLS library profiles.
INFO and the OLSN live
z39.50 target libraries.
Currently this is Greater
Sudbury, North Bay, Thunder
Bay and Timmins
Non-INFO [shared]
No hits from any
INFO profile.
Perhaps you want to
see if Library and
Archives Canada
(OONL) has a lending
copy in their
collection.
AMICUS (Non-INFO)
target
If National can not lend you a
copy they may send you Answer
Locations Provided. See
specific instructions for this
situation.
No hits from any
INFO profile. You
want to see if any
Ontario University
Library using VDX
owns the item.
Should contain all the
OCUL targets that are
currently active on VDX.
“Untick” any not wanted on the
search (perhaps because they
charge?)
Ontario College &
University Libraries
[shared]
Prepared by Southern Ontario Library Service (July 2006) - based on VDX Version 2.7.4
12 of 75
Exercise: Try a search using profiles
Imagine you are a library in the SOLS Bruce/Perth/Wellington [shared] profile. It makes
sense for you to use that profile as your day to day “home” profile for the initial search.
Your patron has requested Title: Hooked on fish tales by Author: Briggs, Richard
You try standard search:
But get O hits
Select History link at the top of the screen. Scroll to the bottom of the History listing to your
“hooked on fish tales briggs” search and select “Edit”. Your search reappears in an
Advanced Search screen. Select a different Profile from the list and Submit so your search
runs again but this time with a new group of targets.
You try a different profile
Awww shucks… O hits again
Select the History link again to access your last search. Select Edit and try:
Bingo! This title is published in Hawkesbury Ontario. Hits are from the Hawkesbury,
Ottawa and Stormont, Dundas & Glengarry targets, which are all in the SOLS Rideau Area.
You can move through pages of results by clicking on 2 or 3 etc. or
use the “arrow” to display the next 10 hits.
Prepared by Southern Ontario Library Service (July 2006) - based on VDX Version 2.7.4
13 of 75
Bibliographic Details Display
Use this button on brief results to display full bibliographic details for an item as
well as holdings information within that hit.
Check for presence of
ISBN, ISSN.
Please Understand:
It is important to understand that you are only dealing with finding an appropriate bibliographic record at
this stage. The system has not yet begun to look for an appropriate holding library from which to borrow
the item. Scrutinizing alternate bib hits to compare holding information is not necessary.
The process of finding a library from which to borrow will not even begin until after an item is 'Requested'.
The location collection process is dependent on an ISBN, LCCN, ISSN being present in the chosen record so
it is helpful to check the ‘Details’ screen to see if a number is in the record you are about to choose.
Use blue arrows to next/previous through search results.
Click the Results link at the top of the screen to return to brief display search results.
Prepared by Southern Ontario Library Service (July 2006) - based on VDX Version 2.7.4
14 of 75
Non-INFO Search [shared] profile
Imagine that you have not had success with any of the INFO profiles so now you are going to try
“outside” of INFO.
Does an AMICUS search indicate that Library and Archives Canada (OONL) has a
lending copy? If so you can request it with VDX. See VDX procedure supplement
document titled: Borrowing from Library and Archives Canada (OONL) using VDX
Can you try AMAZON to verify the details of the latest “just seen on Ophra” item?
Could a current topical request be satisfied with articles from the Globe and Mail? Try
searching the Globe and Mail target for something that you have heard on the news
recently. You can print or email the results from the Globe and Mail webpage.
Prepared by Southern Ontario Library Service (July 2006) - based on VDX Version 2.7.4
15 of 75
Things you can do with Bib Search Results
Sorting search results
Bring a specific target’s results to the top of the results list. To see Windsor results at the top of
the list, click on Windsor Public Library hyperlink.
Saving a search
Use this button at the top of the search results screen to save the search to
use again as needed.
The saved search remains available until you delete it. Practical applications? Book clubs,
school class project, or a patron that wants to read everything by one author a few at a time.
Save the search with a relevant name.
Prepared by Southern Ontario Library Service (July 2006) - based on VDX Version 2.7.4
16 of 75
Getting at your saved searches to use them again
Use the Searches link at the top of the screen to access previously saved searches. You may Re-run
the search as it was originally run or Edit it to choose a different search profile to run against or change
the search criteria. When you no longer have any use for the Saved Search you can Delete it.
Saving hits to a saved list
Use this button on specific bib hits to file in a Saved List for later processing.
Select “OK” when prompted to add result to saved list.
Warning!
The bib hits are saved for the current log on session only. If you exit VDX the Saved
List is lost.
Prepared by Southern Ontario Library Service (July 2006) - based on VDX Version 2.7.4
17 of 75
Retrieving the Saved List to process it further
Use Saved List hyperlink at the top of the screen to access the current “My Saved List”.
Delete
to delete a specific hit from the saved list
Remove
to remove selected items
Print
to print for later reference or provide a handout to patron
Email
to email to self, branch staff or patron for verification
Request
to process VDX requests in batch mode
Prepared by Southern Ontario Library Service (July 2006) - based on VDX Version 2.7.4
18 of 75
Creating requests from search results
Use the ‘Request’ button on the desired item to pull bibliographic details into a
VDX ILL Request form that you complete and submit into the VDX system.
TIP: If you selected ‘Request’ button prematurely and do not want to proceed with requesting
the item simply select Results hyperlink at the top of screen to return to search results display.
Creating requests as a batch from saved list
Alternately you can select the Saved List hyperlink at the top of the screen to access the current
“My Saved List”. Select random items or use Select all items and then use the ‘Request’ button
to parse the file of saved items into VDX ILL Request forms that you process one at a time.
Note: ( 1 of # ) indicator at the top of the screen. You can Skip that request and process the
next one or Cancel out of requesting mode completely.
The main screen shows the bibliographic citation pulled into the ILL Request form.
Prepared by Southern Ontario Library Service (July 2006) - based on VDX Version 2.7.4
19 of 75
Work the 4 buttons when creating requests
Main screen is where you start and end. Confirm Media Type is correct and
the record contains an ISBN. Add a Note if appropriate.
See “Adding Notes to a Request” for selecting appropriate Note Type.
The last thing you do is select Authorization Status before using Submit.
See “The final step … submitting the request”.
Operator does not need to visit this screen.
The Rota screen is blank on initial request creation. The rota is not built until
after a request is submitted. Under certain circumstances an operator would
enter locations for the rota.
Operator might not need to visit this screen.
The Service screen is where required services are specified. e.g. Media type,
delivery method, copyright compliance. Generally the defaults apply to most
requests for monographic material such as books, CDs, and audiotapes and
the operator does not need to visit this screen.
See Appendix 1: Service Screen Options Further Explained
Operator might not need to visit this screen.
The Requester screen is where patron information is linked to the request.
This is optional. Some libraries request everything as STAFF and keep a
paper copy of the requested item with patron contact information. Other
libraries choose to create a VDX User record and link patron information to
the request when it is created in VDX.
See The Requester Screen for specific details.
Also see Appendix 2: Create patron record “on-the-fly”
Prepared by Southern Ontario Library Service (July 2006) - based on VDX Version 2.7.4
20 of 75
Adding Notes to a Request
The requester can decide whether the note is local to the current system only, whether it should
be transmitted to the current ILL responder only or to all future responders. This is decided by
the Note type allocated to each note.
Use the New Note Type pull down box to select an appropriate note type to accompany the ILL
request message. Enter the actual note or instructions in the free text New Note box for this
request. The most recent note displays on the top along with the location source of the notes and
the state set when the note is created. For example:
Notes:
12 July 2006, 20:44 (:TEST3, Received)
The cover was damaged on arrival.
----------------------------------------------------------------------------------------------------------06 July 2006, 09:31 (:TEST3, Request)
LARGE PRINT needed please.
-----------------------------------------------------------------------------------------------------------
Note types:
Send Yes
This default setting transmits the note with the current action to current responder ONLY and
is not transmitted to subsequent responders. Used for instructions that are only relevant to
the current location. i.e. OBU please reserve if not on shelf
Client Instr.
This is a note from the end user made at the time of request creation. When the end user
places a patron initiated request they can enter a note in Client Instructions. Responders do
not see this note type from a Requester. VDX can be configured to override automatic
request processing if there are client instructions.
Request Msg.
Send this note on the first action to each responder the request is sent to. Used for
instructions that are relevant to any responder. i.e. Large Print required
Send Messages
Transmit this note with every message for this request from the requester.
Send No
This message is a Local Note that is never sent to the other side. It’s helpful for internal library
information associated with the request, such as it being for special exhibit or book club.
Prepared by Southern Ontario Library Service (July 2006) - based on VDX Version 2.7.4
21 of 75
Service Screen
Select the ‘Service’ button on a new request to modify service information if the
default settings will not be appropriate for the request.
See Appendix 1: Service Screen Options Further Explained
Prepared by Southern Ontario Library Service (July 2006) - based on VDX Version 2.7.4
22 of 75
Requester Screen
Select the ‘Requester’ button on a new request to link the request to a patron’s
user details record.
NOTE: Using this feature is optional. Some libraries choose to create patron user records in
VDX to make use of VDX generated Received Reports, patron notification by email functionality
and to be able to search request by patron name. On the other hand, some libraries choose to
request everything as “staff” and match the incoming item to a request file to obtain the
requesting patron contact details for notification.
Prior to entering patron details
the Requester details are
defaulted to the current user
creating the request (STAFF).
Enter patron’s barcode and click ‘Validate’ button to link request to the patron’s user details. If a
user record exists, the patron information over writes the STAFF default.
Patron details display in
Client Name section after you
have successfully validated
against patron user record.
NOTE:
If you get “ERROR with client barcode: no user details available” after you click on ‘Validate’
button the patron record does not exist and you will need to create one. See Appendix 2:
Create patron record “on-the-fly”
Prepared by Southern Ontario Library Service (July 2006) - based on VDX Version 2.7.4
23 of 75
The final step … submitting the request
The final step in request creation is using the Submit button.
Just prior to submitting you must check the Authorization Status of the request on the “Main”
screen. There are exceptions but in nearly every circumstance you should leave the
Authorization at the default of “To be Authorized” for new requests that contain an ISBN.
The Rota is built, based on the ISBN after you use the ‘Submit button on a “To be Authorized”
request. VDX has been configured to auto-authorize requests after the background processors
have built the Rota.
Okay… ready…set…
After you select submit you see a New Request confirmation screen indicating the request was
successfully submitted and has a system assigned request number.
New Request confirmation screen.
It can be useful to record the request number on the paper request form as verification that
request has now been entered into VDX.
Prepared by Southern Ontario Library Service (July 2006) - based on VDX Version 2.7.4
24 of 75
What happens in the background when you “submit” a request?
When you use Submit button on a “To be Authorized” request it is written to your
Requester (Outgoing Borrowing) requests file. VDX assigns a request number.
VDX passes the request to the DocFind processor, which builds a list of holding libraries
(called a Rota) according to pre-set instructions. To be successful the request must contain
an ISBN or ISSN for DocFind to be able to work with it.
What is a Rota?
The Rota is a routing system for requests. When a request is sent, it goes to the first library on
the list. If that first library cannot supply item, request goes automatically to next library and so on
until a lending library responds that it will loan item. The Rota is built by a background processor
called DocFind that collects, sifts, and sorts a rota.
1. First DocFind collects locations from all possible targets that are a match for the ISBN,
ISSN, or LCCN in the record. If there is no number in the record that has been submitted
the DocFind processor cannot work with it to collect locations.
2. Second DocFind sifts through the collected locations matching against rules that sift out
locations that do not lend a particular media type or have set up a suspension because
they are temporarily unavailable.
3. Lastly DocFind sorts the remaining locations based on a profile for your library set up at
the system administrative level. Geographic proximity and delivery methods are profile
factors.
4. If the Rota is built successfully the request is automatically authorized and sent to first
location on the Rota. The status changes from Idle to Pending until the Responder
takes action. The operator has nothing further to do.
What if a Rota does not get built?
If request does not meet requirements or a Rota is not successfully built, it remains Idle and the
Authorization becomes Check Manual. It will need to be checked and further manipulated by
the operator to get it going. See “Follow up on Idle/Check Manual”
Typical status changes on a request
The borrower is referred to as a REQUESTER, following ISO terms. As your request moves
through the system it will display the following statuses as it is processed at each stage:
Idle
Pending
Shipped
Not supplied
Received
Returned
Transaction has not started.
DocFind has authorized request to the first location in the Rota list.
Responder/lender has shipped the item to requester/borrower.
Responder/lender could not supply item.
Item has been received by the requester/borrower.
Requester/borrower has returned the item to the responder/lender.
Prepared by Southern Ontario Library Service (July 2006) - based on VDX Version 2.7.4
25 of 75
Variation: No ISBN so how do you get a Rota?
Sometimes we see hits in search results for items that do not have an ISBN or ISSN. DocFind
processor will not build a Rota for these so the operator has to “make a Rota” happen.
No ISBN
No ISSN
1. Put tick mark in “Add to Rota” box beside desirable location(s) or use “Select All” button if
appropriate.
2. Change Authorization Status to Authorized and use the submit button. DocFind will take
the location(s) you have forced into the Rota with your tick mark in “Add to Rota” and sort
them based on the groups hierarchy in your profile.
Prepared by Southern Ontario Library Service (July 2006) - based on VDX Version 2.7.4
26 of 75
Variation: Forcing a Request to specific location(s) in a Hit
(and bypassing DocFind Rota creation)
Even with an ISBN in the record, there are occasions where you want to bypass DocFind
processor building a Rota. You might want to bypass the request automatically being sent to the
first location in a Rota without you having an opportunity to see who that is.
Perhaps you have negotiated that an item is set aside for you at a specific location so you just
want the request to go there. Or perhaps that location is nearby and usually responds quickly.
To take control, the steps are:
1. Put a tick mark in the box for that location on the request screen.
2. Intentionally change the Authorization Status to Authorized on the Create Request
screen and then Submit.
3. A request number is assigned and the request upgrades to status of ‘Pending’ and
Authorization of ‘Processed’. It is engaged with the first (or only) location on the Rota.
How does this bypass DocFind?
The DocFind processor only works with “To Be Authorized” requests. By submitting the request
as “Authorized” you have bypassed the DocFind processor. The Laser processor picked up the
“Authorized” request and sent it to the first location(s) you forced into the rota with your check
mark on the request creation screen.
Warning!
Some libraries have branch display in the database. This is handy if a patron wanted to hop in
their car and drive to a branch to get an item.
When using this procedure YOU MUST BE CAREFUL that you place tick marks on locations
that are ”Main” or the centralized ILL locations. Do NOT select a branch. VDX will send the
request to the branch location if you have forced them into the Rota. The branch location does
not map to the parent location unless you are involving the DocFind processor.
The branch however is non-operative in the VDX environment and your request will sit
unattended to expire in 4 days when there is no state change when it will move on to other
locations in the rota.
Prepared by Southern Ontario Library Service (July 2006) - based on VDX Version 2.7.4
27 of 75
Variation: Requesting a Journal Article
You may request magazine articles on VDX.
1. Do a search to locate serial title. e.g. Newsweek
2. On Main ‘Create Request’ screen:
•
•
•
•
•
•
Select Material Type
Select Media Type
enter Vol/Issue
enter Author of Chapter
enter Title of Chapter
enter Pages
Seriel (sometimes it still says Monograph and you have to fix it)
Photocopy
(volume, number, date of issue)
(name of author of article)
(title of article)
(page numbers where article is located)
Enter Vol, Issue, Author, Title of article and pages on Create Request Main screen
3. On Service screen:
•
•
•
•
•
•
Service Priority
Delivery Method
Need by or Expiry
Copyright Type
Copyright Subtype
Copyright Signed
select Copy Non-Returnable
select Fax if desired, as opposed to arrival by courier or post
specify if applicable
select Copyright Cleared
select CANCOPY
blank or Not Applicable (signature not required in Canada)
4. To link this request to a patron record, select Requester button. Type in patron’s barcode
and select ‘Validate’.
5. Return to Main screen and select Authorization Status and Submit.
TIP:
If you cannot locate a serial title, follow directions for completing a blank request form. This form
can be sent to your non-located library (i.e. your designated SOLS Office) for further research.
Prepared by Southern Ontario Library Service (July 2006) - based on VDX Version 2.7.4
28 of 75
Variation: Completing a Blank Request Form
In situation where no suitable bibliographic record is located, a blank request form can be
completed and submitted to selected locations.
1. Select Create link at top of Request screen.
1. Complete form with as much bibliographic data as possible. It is mandatory to enter a title.
2. Create the Rota. You may decide to send the request to your non-located library for further
research. Or you may send the request directly to a library you know has the item but you
cannot locate in a search.
Enter location
symbols separated
by commas in the
“Add to Rota” box.
Select + Add button
to add the location(s)
to the Rota.
Use UPPERCASE.
Location symbols.
The matching facility
is case-sensitive.
The position of locations in the Rota can be adjusted using the up and down
arrows. A Rota location can be deleted using ‘Delete selection’ button.
4.
Select Service button to modify service information as required. At least one Service Type
preference and Media Type preference should exist, for example Loan and Printed
respectively.
5.
To link this request to a patron record, select Requester button. Type in patron’s barcode
and select ‘Validate’.
6.
Finally, change the Authorization Status to Authorized and Submit.
TIP:
If you must manually build a Rota, you can open a second browser window to find location
codes to facilitate easy processing. You can then click back and forth between the two screens,
one on the Rota and one on Location search screen.
See Chapter 5: Location Data
Prepared by Southern Ontario Library Service (July 2006) - based on VDX Version 2.7.4
29 of 75
Request Field Details
Field Name
Explanatory Notes
Authorization Status
Current Authorization status of this request. An end user’s request
can be Un-Authorized by the ILL Administrator if the request should
not go ahead. When a request is Authorized and picked up by a
driver it’s status is Processed; when you are the responding
location the status of incoming requests is Processed.
Material Type
When entering a new request choose the relevant type of
publication from the list box. Alternatively this data may already be
defaulted from user location defaults.
Title
The title of the requested item. Up to 2000 chars.
Subtitle
Subtitle of the requested item. Up to 2000 chars.
Author
Primary author of requested item. Up to 2000 chars.
Sponsoring Body
Sponsoring body when cataloguing items, which are conference
proceedings. Up to 2000 chars.
Edition
Edition statement of the requested item. Up to 240 chars.
Publisher
Publisher name. Up to 240 chars.
Place of publication
Place of publication of the requested item. Up to 240 chars.
Date of publication
Free text publication date of the requested item. Up to 240 chars.
ISBN
ISBN of the requested item. Up to 240 chars.
ISSN
ISSN of the requested item. Up to 240 chars.
Classmark
Classification or Call number. Up to 240 chars.
Shelfmark
Enter the shelf mark of where the item is physically located. Up to
240 chars.
Serial Title
Serial title. Up to 2000 chars.
Issue
Enter issue details directly. Up to 2000 chars.
Pagination
If an article is requested, enter page numbers. Up to 240 chars.
Additional
Other details - free text. Up to 2000 chars.
Verification Source
Verification source, free text. Up to 2000 chars.
Bibliographic number
The unique number for this item on a specific database. For
example in the UK the British Library’s British National Bibliography
number may apply.
Notes
Enter any additional note about the item if required. Up to 2000
chars.
Prepared by Southern Ontario Library Service (July 2006) - based on VDX Version 2.7.4
30 of 75
Chapter 3 – Request Administration
Prepared by Southern Ontario Library Service (July 2006) - based on VDX Version 2.7.4
31 of 75
Ongoing Management of Borrowing Orders
The Responder location(s) will action your request with shipped, not supplied, etc. which causes
the status of your request to change accordingly.
ILL Statuses (ISO)
From the point when a request is created to the point where the request is satisfied, a number of
messages may be sent between the requesting location and the Responder(s). From the
viewpoint of the requesting location, the statuses have the following meanings:
Idle
The request is new and has not yet been authorized or processed by
an ILL driver at the requesting location.
Pending
The request is picked up by an ILL driver and sent to a Responder; or
a message has been received stating that the item will be supplied or
placed on hold; or the request has been forwarded to another location.
In process
This is the status of a request when first arriving at a responding
location or when containing a new message.
Forward
The Responder has forwarded the request to another location.
Conditional
The request has reached a stage where it can only be satisfied if the
requesting location meets specified conditions.
Cancel pending
The Requester has initiated cancellation but no response to this yet
received from the Responder.
Cancelled
The request has been cancelled by the Responder.
Shipped
The item has been shipped to the Requester.
Received
The item has been received from the Responder.
Returned
The item has been shipped back to the Responder
Recall
The item has been recalled by the Responder
Renew/Overdue
A request has been made for the renewal of an item, which is overdue.
Renew / pending
A request has been made for the renewal of the item.
Lost
The item cannot be found.
Overdue
The Requester has been notified that the item is overdue.
Not supplied
The ILL transaction has reached a stage where the request cannot be
filled by the Responder.
Prepared by Southern Ontario Library Service (July 2006) - based on VDX Version 2.7.4
32 of 75
Performing a Request Search
You can perform various search strategies to retrieve requests. All searches are restricted to
requests where your own location is either the Requester or Responder.
Example of search for overdue items
•
Select Requests button in the left panel menu to get an ‘ILL Request Search’ screen.
•
Select Your Library’s Role, either:
Responder for incoming requests sent to you from other locations.
Requester for outgoing requests that you want to borrow from other locations.
•
Status field allows you to select single or multiple status types for a search.
To request multiple, hold <Ctrl> key while selecting from the list.
•
Combine elements for your search from any of the ‘Request Status’ pull-down menus.
•
Use hot key to advance in the pull-down menus and reduce scrolling.
i.e. Type “S” to advance to Shipped.
•
Make use of “Other Field” drop-down menus with Boolean operators.
•
Sort your results with Sort by options.
Prepared by Southern Ontario Library Service (July 2006) - based on VDX Version 2.7.4
33 of 75
Some practical examples using Request Search:
Role
Looking for
Formula
Requester
Find items on hold for you so you can
follow up with the lender or cancel if it
has been a long wait time.
Status = Pending
Requester
Responder
Find outstanding Microfilm orders for
your patron.
Find overdue items with due date
before the end of July that you can
update with an Overdue or Recall
message.
TIP: Use Bulk Action on results to quickly
action as Overdue
Responder
Responder
Find items that you shipped to
Waterloo Public Library between the
10th and 20th of June 2006.
Find returned items that may have
slipped by the Interloan Department
and were not processed with
‘Checked In’ for closure.
combined with
Last Action = Answer Hold-Indication
Status=Pending
combined with
(Other Fields
)
Client Barcode= OARM-06495000084646
Boolean Operator AND
Responder symbol= OTAR (Archives of Ontario)
Status = Shipped
combined with
Last Action – Received Indication
combined with
(Other Fields)
Due Date = -30 Jul 2006
Status=Shipped
combined with
(Other Fields)
Requester Symbol= OWT
Boolean Operator AND
Date Shipped= 10 Jun 2006-20 Jun 2006
Status = Shipped
combined with
Last Action = Returned-Indication
combined with
Sort By= Last Action Date ~Ascending
TIP: Ascending sort displays oldest Returns on
top to quickly see if something was
returned months ago.
Entering dates in your request searches
Other Fields Date Searches must be entered dd/mmm/yyyy.
Use – (hypen) for ranges and to indicate less than or more than.
e.g. for a date range, enter as:
e.g. for dates before, enter as:
e.g. for dates after, enter as:
01 Jan 2004-30 Jan 2004
-30 Jan 2004
30 Jan 3004-
Printing results of your request searches
Sometimes the operator would like a printout to facilitate checking on requests that need further
attention. The Format default is ‘Standard’ for screen display of search results. To print, change
Format selection to “Print”.
Format
Standard
Print
Prepared by Southern Ontario Library Service (July 2006) - based on VDX Version 2.7.4
34 of 75
Work Queue - a VDX Operator’s “To Do” list
Work Queue displays a snapshot of the current ILL workload both as a requester and responder.
The report lists the total number of requests grouped by request status. If a location has no
requests in a certain status, that status will not be on the work queue.
Total
reflects the total number of requests in that state.
Waiting
reflects a subset of the total that currently has an authorization status of
To Be Acknowledged and potentially could need operator review or response.
How to access Work Queue
From ‘Request Search’ screen – Select Work Queue link at the top of the screen.
From ‘Reports’ menu - Select Work Queue in the list.
Viewing and Processing Requests
Select the hyperlinked number in the Total or Waiting columns to display the requests in that
category. You can view or action the requests.
Tip:
When you see a number displayed in the Standard Report categories of Received, Returned,
Shipping or Pick list you can access these reports from Work Queue.
Prepared by Southern Ontario Library Service (July 2006) - based on VDX Version 2.7.4
35 of 75
Follow up on Idle/Check Manual
When you submit requests with authorization ‘To Be Authorized’ sometimes there is a hiccup.
The request is written back to the request database as Idle / Check Manual for operator
attention.
Possible reasons:
1. The Rota was not built because there was no ISBN, ISSN or other request number for
DocFind to work with.
2. Sometimes there is no Rota even with good ISBN etc. DocFind may have collected locations
for a Rota but they were all sifted out because they do not provide the services you have
requested or because their ILL service is temporarily suspended.
Follow up:
1. Select Details button on results screen to check for presence of an ISBN.
(a) If there is an ISBN look at it carefully. DocFind reads an ISBN as 10 characters followed
by a “space”. If the ISBN was polluted with a period or another character in the 11th
position delete the unwanted characters and resubmit the request To be Authorized
to run the request through the DocFind processor again.
(b) If there is no number in record perform another bibsearch to see if there is a suitable
record for the patron’s needs that does have an ISBN. If not, use the original bibhit and
force a rota. See Variation: No ISBN so how do you get a Rota?
2. Select Audit button on Details screen to see additional clues for the Idle / Check Manual
status. The only (or the last) location in the rota could be “Location currently suspended”
from responder duties at the time your request was sent to them.
3. If not pursuing the item further, an operator can select Complete button on request search
results view. This will remove the request from active request display. It is appropriate to
use ‘Complete’ because the request in not actively engaged with a responding library.
Prepared by Southern Ontario Library Service (July 2006) - based on VDX Version 2.7.4
36 of 75
Receiving an Item at Requester Location
When an ILL request item is received, the database needs to be updated with the Received
status. The item is usually accompanied by a paper copy of the request. This paperwork will
include your library’s ILL number.
Example of Standard Shipping Report printout sent from the lender with the item.
Perform Received action:
1. Search for relevant request record with any of the following:
(a) Enter your request number in ‘ILL No’ prompt in ‘Other Fields’. You should find your
request number on the accompanying paperwork.
(b) Select ‘Author’ or ‘Title’ from the ‘Other Fields’ pull down menu and enter as appropriate.
(c) Browse through the ‘Shipped’ category in your Borrower Work Queue.
2. Select Action button on desired record.
3. Select Received from ‘Actions Available’ drop down menu and Submit.
4. This displays an Action: Received screen. Change Received date if relevant. Assign a
Local Due date. Add a Note if required and Submit.
5. Proceed with patron notification and forwarding item to pickup location (circulation desk, a
branch, etc.)
TIP:
You can use Bulk Action feature when performing the Received action.
See Appendix 4: Processing Multiple Requests with Bulk Action.
Prepared by Southern Ontario Library Service (July 2006) - based on VDX Version 2.7.4
37 of 75
Patron Notification for Received Items
VDX will generate a printable report listing received items with patron contact information and
pickup location. There are up to five received item slips per page. The slips can be cut to insert
in the books for staff making telephone calls to patrons.
There are two ways to get a Standard Received Report:
1. Use the Standard Received Report indicator on the Borrower Work Queue. Select the
hyperlink number in the ‘Waiting’ column.
2. Alternately, you may select Reports in the left panel menu. Select Standard Received
Report on the Reports menu.
Received Report Details
Telephone Number
The phone number field is filled in on the report from “Client Home” section of patron’s record
if you have entered data. NOTE: Many libraries are saving steps in patron user record
creation process by adding the phone number in brackets after the patron’s surname.
Email
If your library has the optional ‘patron notification by email’ feature activated then any patrons
with an email address in their user record will automatically receive an email notification to
come to the library to pick up their item when library staff perform the ‘Received’ action on an
item. The absence of an email address on the Standard Received report indicates that a
phone call is necessary.
Pickup Point
Staff can redirect material from the centralized ILL location to the location where patron will
be picking up the item.
Due Date
Interlibrary Loan or Circulation department staff can determine patron’s due date based on
“Due to Supplier” date.
Entered By
Indicates who placed the request. In the example below the request was placed by
Middlesex County staff on Jane Doe’s behalf. If Jane Doe was using the Zportal patron
interface to VDX to place her own ILL requests then the ‘Entered By’ field would display
“Jane Doe”.
Example of Standard Received Report
Jane Doe (432-1234)
Prepared by Southern Ontario Library Service (July 2006) - based on VDX Version 2.7.4
38 of 75
Returning an Item to the Lending Library
When patron has finished with an interlibrary loan item and returned it to the borrowing library it is
processed in VDX for return to the lending institution. The request status is updated to ‘Returned’
at both the borrowing and lending view.
1. Search for relevant request record with any of the following:
(a) Enter your request number in ‘ILL No’ prompt in ‘Other Fields’.
(b) Select ‘Author’ or ‘Title’ from the ‘Other Fields’ pull down menu and enter as appropriate.
(c) Browse through the ‘Received’ category in your Borrower Work Queue.
2. Select Action button on desired record.
3. Select Returned in the ‘Actions Available’ drop down menu and Submit.
4. Make any required changes to Action: Returned form (change return date, add any notes)
and Submit.
TIP:
You can use Bulk Action feature when performing the Returned action.
See Appendix 4: Processing Multiple Requests with Bulk Action
Prepared by Southern Ontario Library Service (July 2006) - based on VDX Version 2.7.4
39 of 75
Standard Returned Report
VDX will generate a printable report listing returned items with address label for the lending library
and a “Thank you” slip with request details.
There are two ways to get a Standard Returned Report:
1. Use the Standard Returned Report indicator on the Borrower Work Queue. Select the
hyperlink number in the ‘Waiting’ column.
2. Alternately, you may select Reports in the left menu panel. Select Standard Returned
Report on the Reports menu.
Returned Report Details
This report produces a “Thank You” insert and shipping label for each item to be returned.
It prints two returned item slips per page.
Cut off the To: address block to tape to the parcel. The address block will contain SOLS Van
Route information if applicable.
TIP: Highlight Van Route information in yellow so it stands out prominently for courier
drivers. If you use mail as your delivery service disregard the van route information and send
parcel using Canada Post’s Library Book Rate. The lending library likely provided a return
postage pre-paid self addressed return label.
The responder’s request number is on this slip to facilitate “Check-In” action when they get the
item back in their possession.
Address
label to tape
to parcel
Cut line
Thank You
packing slip
to travel with
returned
item.
Prepared by Southern Ontario Library Service (July 2006) - based on VDX Version 2.7.4
40 of 75
Renewing a request
Common practice is to allow the patron to keep the interloan item while you pursue a renewal. If
the lender does not grant a renewal or if they send a ‘Recall’ status the borrowing library must
obtain the borrowed item and return it promptly.
1.
Find the request by patron enquiry, title, request number, or browse the ‘Received’ category
in your Borrower Work Queue.
2.
Select Action button on request. Select Renew from ‘Available Actions’ drop-down menu
and submit.
3.
Respond to the prompts in Action: Renew screen. Enter a Desired Due Date. Add a note
if appropriate and submit.
4.
Request status updates to “Renew/Pending” and Last Action: Renew. It will be queued
under ‘Renew/Pending’ category in your Borrower Work Queue.
5.
The lender’s renewal response reverts status to ‘Received’ and Last Action: field indicates if
renewal was granted or denied. If lender applied ‘Renew Answer-Yes’ the new due date
and notes can be viewed by selecting Print button. Print the resulting screen or just view
the details (‘Cancel’ to abort printing).
Prepared by Southern Ontario Library Service (July 2006) - based on VDX Version 2.7.4
41 of 75
Replying to a Conditional Answer
Conditional answers from potential lenders will queue under ‘Conditional’ in the Borrower Work
Queue.
TIP:
Before you respond, select print and cancel to abort printing in order to have a quick peek at
the rota on this request. Are there other locations to go to besides the current responder who is
offering you a conditional loan? It might affect your ‘Yes’ or ‘No’ decision when you reply to the
Answer Conditional-Indication.
1.
Select Action button.
2.
You will see the reason for the Conditional answer on the resulting Action ILL Request
screen. It might be “charges” or “in library use only”. If you need to consult with the patron
before responding take a print of the request as a reference.
3.
Depending on your decision, select Conditional Reply-Yes or Conditional Reply-No from
the ‘Available Actions’ drop down menu.
4.
Respond to the prompts and add notes accordingly.
(a) If you respond with Conditional Reply – No and there are other locations in the request
Rota it will be moved on to them.
(b) If you respond with Conditional Reply – Yes the lending library will follow up by shipping
the item. Your request will queue in ‘Waiting” column of the ‘In Process’ category of the
responding library’s Lender Work Queue. The status will be ‘In Process’ with ‘Last
Action: Conditional Reply-Yes-Indication’.
Prepared by Southern Ontario Library Service (July 2006) - based on VDX Version 2.7.4
42 of 75
Cancelling a Request
You can cancel a request at any time until it has been received. It is possible to use the CancelRequest Action even while the request is still Pending - potentially before the Supplier has even
seen the request!
The action of cancelling a request does not necessarily mean that it will be cancelled. The Cancel
action simply causes the system to send a request to the current responder location to cancel the
request. The Responder location may decide to accept or reject the request to cancel based on
having already shipped the item before getting the request to cancel.
When a requesting location uses the Cancel-Request Action the status of the request becomes
CANCEL PENDING until the Responder confirms cancellation Yes or No.
WARNING!
If you are canceling the request because you no longer want it at all from anyone than be
sure to go to delete all rota locations before you send your request to Cancel to the current
responder. If a responding library updates the request with Cancel Reply-Yes it will automatically
move on to the next Rota location if there is one.
The steps are:
1. Locate the relevant item and select the Action button.
a) Determine if you need to delete other locations in the rota before proceeding with the
Cancel. Select Local Change Request Details from ‘Available Actions’ drop down
menu and Submit.
b) Select Rota button.
If there are no other locations in the rota select Results link at top of screen.
You will have to select Action button again on the request to process the cancel.
If there are other locations in the rota, select them and use ‘Delete selection’ button.
IMPORTANT: Select Submit button above the line on the Rota screen for the
location deletions to “take”.
Select Results link on the resulting ‘Action Successful’ screen. You will have to
select Action button again on the request to process the cancel.
2. Select the Cancel option from ‘Available Actions’ drop down menu and Submit.
3. Make any changes to Action: Cancel form and Submit.
Prepared by Southern Ontario Library Service (July 2006) - based on VDX Version 2.7.4
43 of 75
Completing a Request
Complete requests are removed from regular request display. You can still access the request
with a search query Status = Idle or Not Supplied (whatever the case may be) combined with
Authorization Status = Complete.
Warning!
A request that is pending with a responder location should never be completed until a Request to
Cancel has been acknowledged by the responder.
Only use the Complete button on requests that are Idle or Not Supplied as they are not active
with a potential responder.
1. Locate the relevant item.
2. Select the Complete button.
3. The request will be given the authorization status of ‘Complete’.
TIP:
You can use Bulk Action feature when performing the Complete action.
See Appendix 4: Processing Multiple Requests with Bulk Action.
Certain actions in VDX have been set up to “auto-complete” requests. They are:
Action
Performed by:
Auto-Completes for:
Answer Non-Supply
Responder
Responder only
Cancel Reply-Yes
Responder
Responder only
Checked-In
Responder when item is
returned to them
both Requester and Responder
Received
Requester on a Copy-Non
Returnable
both Requester and Responder
Prepared by Southern Ontario Library Service (July 2006) - based on VDX Version 2.7.4
44 of 75
Follow up procedure for End-of-Rota Requests
Requests that have moved through all Rota locations without being satisfied become
Not Supplied / Check Manual and require further mediation by the ILL operator.
1. Search for End-of-Rota request records with either:
(a) search for Status = Not Supplied combined with Authorization Status = Check Manual
(b) browse the ‘Not Supplied’ category in Borrower Work Queue.
2. Select Details button and then Audit to see what responses you got from lending locations.
Alternately select Print button (you can print or cancel the print to view request details on
screen).
Things to look for in Audit:
Non-Supply - Lost (this location is not an option)
Non-Supply - In Use (viable, could go back to this location)
Suspended (viable, the location was skipped in rota because of service suspension)
Expired-Indication (viable, the location let request expire without a state change, but
could go back to the location to try again)
3. If you are going to retry any locations or request a reserve:
(a) Select Action button on request. ‘Request’ is the only option in drop down menu on
Request Action screen. Submit.
(b) Select Rota button. Type in location code(s) you are going to retry and use “Add to rota”
button.
(c) Select Main button. Are you resending the request to a single location? Request a
reserve from that location if item is not on shelf. Type a ‘Send Yes’ Note to this affect.
e.g. XXX please reserve if not on shelf. (Where XXX is responder’s NUC or name)
NOTE:
If you have entered multiple locations in the Rota to retry then a reserve statement is not
appropriate.
(d) Select Authorized in ‘Authorization Status’ drop down menu and Submit. The request
will update to Pending with the first (or only) location you typed into the Rota.
4. Perform a new bibsearch.
The record ISBN that you initially selected has gone through to the end of a rota. Is there a
different edition of the item, with a different ISBN that would work just as well for your patron?
If you find something suitable, make a new request. Use ‘Complete’ on the ‘Not
Supplied/Check Manual’ record to clear it.
Prepared by Southern Ontario Library Service (July 2006) - based on VDX Version 2.7.4
45 of 75
5. If you are going to send the request to your OLS office for further mediation:
(a) Select Rota button. Type in the location code for your OLS office (OHESC or OSUN)
and use ‘Add to Rota’ button.
(b) Select Services screen to specify if patron is willing to pay fee. Select No Expiry for
Expiration type.
(c) Return to Main screen.
In Notes type any special instructions to OLS staff handling your request.
e.g. Patron will pay charges up to $15
Select Authorized in ‘Authorization Status’ drop down menu and Submit.
6. If you are NOT pursuing an End-of-Rota request further…
Select Complete button. The request will disappear from active request display. You might
print the request to facilitate notifying the patron that request will not be pursued further if it is
your practice to communicate this to them.
Warning!
Remember the request will have disappeared from regular search query display after they are
‘Complete’. If there is a future patron enquiry the request will only be accessible if you select
Authorization Status = Complete as part of the search.
7. If you are undecided on your next step because you have to consult the patron or collect
other information you can “park the request” until you are ready to make a decision.
(a) Change the Authorization Status to For Manual Authorization.
(b) At a later date, you can get the request going again with step 3, 4 or 5 or ‘Complete’ the
request as in step 6.
Not Supplied / For Manual Authorization requests are retrievable by a number of
request search configurations:
Search by Request #, patron name or title
Search Status = Not Supplied combined with Authorization Status = For Manual
Authorization
Browse the ‘Not Supplied’ category in Borrower Work Queue
Prepared by Southern Ontario Library Service (July 2006) - based on VDX Version 2.7.4
46 of 75
Chapter 4: User Registration
Prepared by Southern Ontario Library Service (July 2006) - based on VDX Version 2.7.4
47 of 75
Managing user records at your location
This section describes how to use the Web Client to manage user records at your location. You
must be a user with staff level privileges in order to manage user records. When users are
registered in the VDX system, they are assigned to a specific location. You will only be able
manage users assigned to your location.
Creating patron user records enables the system to automatically incorporate patron information
into the ILL records and reports. It also ensures that each patron has been 'authorized' by his or
her respective library as a responsible user.
Creating New User Records
Click on the User button on the left-hand menu panel.
the top of the ‘User Search’ screen.
Use the Create link at
Entering User Details
1. Barcode - enter your library's location code in caps (e.g. OGAL) followed by a hyphen (no
spaces) and a unique number for the patron (can be up to 20 characters long). Usually this is
the patron’s library card number..
e.g. Innisfil patron library card number 0429 would be entered as OSTRO-0429
NOTE:
Why enter the library location code plus hyphen preface? This authenticates the barcode as
belonging to a patron of your library system. Potentially libraries could use the same
barcode numbers.
Prepared by Southern Ontario Library Service (July 2006) - based on VDX Version 2.7.4
48 of 75
2. Password - enter a standard password consistently for all user records. For security you
must enter something - DO NOT LEAVE IT BLANK. All staff creating user records should
know and use the same password.
NOTE:
Passwords are assigned to patrons because the system is designed to allow direct requesting
and tracking of requests by patrons. Direct use of VDX by patrons may not be in the
immediate future for your library (and some libraries may never want to enable this
function). However, patron passwords are set up for future use and to protect confidentiality
of patron records.
3. First Name – enter full first name. i.e. Sally or Carol or Richard. Avoid using initials.
4. Surname – enter surname. (Enter patron’s phone number in brackets after surname)
TIP:
Entering patron’s home phone after surname is a quick way to see this information for future
patron notification. It bypasses the need to go into a different Address information screens to
enter patron’s phone number. It does not “pollute” the surname field for patron enquiry by
surname because you can search on ‘any part’.
5. Email - Including an e-mail address allows patron to take advantage of automatic e-mail
notification for received items if you have opted to activate this feature for your library.
NOTE:
The patron’s phone number and email display on the Standard Received Report after you
process the Received action on items. If the ‘Patron Notification by Email’ feature is
activated for your library, and if a valid e-mail address is entered in a patron’s user record, the
patron will automatically receive an e-mail to come to the library to pick up their ILL item.
The absence of an email address on the Standard Received Report printout indicates that the
patron needs to be notified by telephone.
6. Category - select Approved Patron
7. Join Date - enter current date.
8. Expiration date - enter only if you want patron’s record to expire after a fixed length of time.
NOTE:
Setting an expiry date gives an error message when you create a request for an expired
patron. You then “un-expire” their record or leave it expired. Expiry might be useful in an
environment where patron’s pay an annual fee for library service.
9. Select ‘No’ in Banned box.
10. Has Presigned Copyright – Select ‘Yes’ for requesting photocopies for the patron.
11. Default Pickup Location – if you have branches you can select a pickup location default for
this patron.
12. Once the form is complete, select Submit button at the bottom of the screen to create a new
user record in the VDX database.
Prepared by Southern Ontario Library Service (July 2006) - based on VDX Version 2.7.4
49 of 75
Searching, Modifying, Expiring User Records
Select User button on the left-hand menu panel to display User Search screen.
Select your search criteria from Search drop-down menu. Enter your search terms into the freetext search box.
Select the appropriate radio button from the Match menu:
Exact will retrieve records matching your search terms exactly, but is not case sensitive.
Any part will retrieve matches including your search term in any part of the string.
First part will retrieve matches including your search term at the beginning of the string.
Last part will retrieve matches including your search term at the end of the string.
TIPS:
Select ‘Surname’. Enter letter “A” and set match to Any part to obtain all user records for your
location that begin with the letter “A”.
Select ‘Category’. Enter “staff” and set match to Exact to obtain all user records for your location
that have been given ‘staff’ privileges. Make sure there are no inappropriate ‘Staff’ category
records. The ‘Staff’ category allows more privileges within VDX and should only be used for
actual library staff working in VDX.
Prepared by Southern Ontario Library Service (July 2006) - based on VDX Version 2.7.4
50 of 75
Example of User Search results
Select Details button to view the user record in detail.
Select Edit button if you wish to modify the user record.
Select Expire button on the results list to expire a user record. This can also be done
entering a date in the expiration date field in the edit screen.
You can ban a patron’s record if they have abused Interlibrary loan or have unpaid fines.
Change Banned to “Yes”. VDX will alert you that patron record is banned.
Update Password synchronizes patron/user authentication service. For user records stored
on the VDX system or on a SIP server database, enter the new password in both the
password and confirm password fields. Select update password box before using Submit to
save the change.
Adding patron address information (optional)
Entering address information to a patron’s User Details record is optional. Patron contact is most
often made by telephone or email. Both of these details can be recorded on the initial User
Details screen.
1. Select New Address button at the bottom of the User Details screen.
2. You will likely choose Client Home from the Address Type drop down menu. You can select
other types of addresses for patrons such as Client Delivery, Client Billing should those
details be different than Client Home. Select ‘Save’ versus ‘Save and Close’ if entering more
than one type of address.
3. When address information has been recorded, it will display on screen under the User Details
when a User Search is performed.
Prepared by Southern Ontario Library Service (July 2006) - based on VDX Version 2.7.4
51 of 75
Chapter 5: Location Data
Prepared by Southern Ontario Library Service (July 2006) - based on VDX Version 2.7.4
52 of 75
Library Location Records
“Location” is the term used in VDX for those sites providing material to you to fill requests. A
location can be another library or a document delivery supplier. All sites that you have interlibrary
loan relationships with should have a VDX location record.
When your VDX system is installed, your organization is entered as a location and your relevant
location and service details are recorded. You can view all location records in VDX, but you will
only be able to edit your own location record.
All users are assigned to a location. Library ‘Staff’ users only are able to view and manage user
records assigned to their location.
NOTE:
New locations cannot be created using the Web Client. They must be created by the VDX system
administrator (SOLS) using the VDX Windows Administrative Client.
TIP:
If it is not convenient to leave your current activity, you can open a second window in your browser
to perform the location search. Open second window with File/ New/ Window or <CNTRL> + N.
Searching Location Records
You can look up a library’s code, address, phone and fax details and email address for the ILL
department by looking up their record in the Location database.
Select Location button on the left-hand menu panel to display Location Search
screen.
Prepared by Southern Ontario Library Service (July 2006) - based on VDX Version 2.7.4
53 of 75
Select your search criteria from Search drop-down menu:
Location Code
Location Symbol
Short Description
Long Description
OSWS
This is the unique ID used for the location by
the VDX database.
NLC-BNC: OSWS
This is the recognized code for that location
as designated by the ISO Naming Authority
which is Library and Archives Canada.
WhitchurStouf
This is the abbreviated name used to
describe the location in the VDX database.
Whitchurch-Stouffville - Main
This is the long description used to describe a
location in the VDX database.
Select the appropriate radio button from the Match menu:
Exact will retrieve records matching your search terms exactly, but is not case sensitive.
Any part will retrieve matches including your search term in any part of the string. e.g.
You enter ‘brant’ and check ‘Any part’ because you do not know if it is County of Brant or
Brant County.
First part will retrieve matches including your search term at the beginning of the string.
Last part will retrieve matches including your search term at the end of the string.
TIP:
Set to Any part and submit without any search criteria to obtain all location records.
Selecting the correct location code for a rota
If your search is to find a location code to enter into a Rota be careful to select the correct
code.
If a library has branches be sure to choose the code for the location where ILL activity is
centralized. Look for the word “Main” after the name.
Another clue is the Interlibrary Loan Status designation for the location. Lending institutions will
have the word “Responder and Requester” status.
Responder and Requester
Requesting Only
Responder Only
Not an ILL Participant
a library system’s centralized ILL location
a library that is a borrower only
a library that is a provider only (i.e. Ontario Archives)
a library (or branch) that is not active on the system
Prepared by Southern Ontario Library Service (July 2006) - based on VDX Version 2.7.4
54 of 75
Chapter 6: Lending Procedures
Prepared by Southern Ontario Library Service (July 2006) - based on VDX Version 2.7.4
55 of 75
Monitoring incoming requests to your Library
If you operate as a Responder to other organizations you will need to monitor for incoming
requests on a regular basis. All new requests for your location have a status of In Process.
There are several options for becoming aware of incoming requests:
1. Select Requests in left menu panel. Select Responder as “Your Library’s Role”.
Search with ‘Status = In Process’ combined with ‘Authorization = To be Acknowledged’
to display the requests from other libraries that need immediate attention. However, new
requests will be mixed in with requests that you may already be working on.
2. Browse In Process category in Lender Work Queue. However, new requests will be
mixed in with requests that you may already be working on.
3. Take a Standard Pick list. VDX will generate a printable list of all new requests that
have come in since the last pick list was generated.
Standard Pick List - Used by Responder library
1. Select using the Standard Pick list indicator on the Lender Work Queue. Click on the
hyperlinked number in the ‘Waiting’ column. Alternately, you may select Reports in the left
menu panel. Select Standard Pick list on the Reports menu.
2. This report prints multiple items per page. It includes requests that have been designated In
Process at your location since the last Standard Pick List was generated.
IMPORTANT: If you do not generate a Standard Pick List routinely you should be conscious
that it might contain items that you became aware of using another inquiry method and may
have already responded to the request. The “Status” field in top right corner of Pick List
might say ‘Shipped’ for instance instead of ‘In Process’.
3. The Responder can:
Use the call numbers and bibliographic information to check availability.
Observe instructional information in ‘Request Notes’. For instance - to reserve or
provide extended loan.
Observe requested format in ‘Format’ field. For instance - “Printed” or “Film-or-videorecording”.
Observe requested ‘Delivery Method’. For instance - “SOLS Van/Post” or “Faxed”.
4. The batch number is provided on the print out should there be a paper jam or some other
reason that the report needs to be viewed or printed again through Batch Reruns.
Prepared by Southern Ontario Library Service (July 2006) - based on VDX Version 2.7.4
56 of 75
5. The Responder can write availability notes on the printed Pick List and search for items that
are on shelf.
Responding to New Requests for Loan
TIP:
Use bulk action feature except on anomalies (i.e. different reason for Non-Supply, different due
date for Shipped, different reason for Will Supply-In Process). See Appendix 4: Processing
Multiple Requests with Bulk Action.
1. Process Answer Non-Supply
This response indicates that your location will not be supplying the item.
(a) Select Answer Non-supply ‘Actions Available’ pull down menu and Submit.
(b) Select Reason from pull down menu, i.e. In Use, Lost, Non-Circulating.
(c) Requests processed Non-supply, will Auto-Complete shortly after the Non-Supply
action has updated the status line. The Auto-Complete is on the responder’s side
only. The request will go to the next location in the rota if there is one.
Prepared by Southern Ontario Library Service (July 2006) - based on VDX Version 2.7.4
57 of 75
2. Process Answer Will Supply
This response confirms your intention to supply and is usually used when there will be a
short delay (a few days) before the Shipped status can be applied, such as retrieval from
stacks or a branch. It is not used when an item is “in use”.
(a) Select Answer Will Supply from ‘Actions Available’ pull down menu and Submit.
(b) Select Reason from pull down menu. i.e. “In Process”
(c) This response holds the request for further action and overrides the 4 day expiry
period.
3. Process Answer Conditional
This response is used to indicate that a condition must be agreed to before responder will
ship the item. The requester must send a Conditional Reply before responder will take
further action.
(a) Select Answer Conditional from ‘Actions Available’ pull down menu and Submit.
(b) Select Reason from pull down menu, i.e. “Library use Only” or “Charges”
(c) Indicate proposed delivery method, if appropriate.
(d) Add a Note if appropriate.
(e) Do nothing about providing the item unless you get a Conditional Answer – Yes from
the requesting library.
4. Process Answer Hold
This response is used to confirm that you have placed a hold when you have been asked
to reserve and item.
(a) Select Answer Hold from ‘Actions Available’ pull down menu and Submit.
(b) Enter a date that you estimate the item might become available.
(c) Add a Note if necessary.
Shipping the Item
1. Select Shipped from ‘Actions Available’ pull down menu and Submit.
2. A pop-up box appears and VDX recalculates any shipping costs associated with the request.
A brief message displays if this occurs, depending upon the service details between the
Requester and Responder.
3. Complete the Shipped Action form with:
Due Date
type in date, commonly 35 days hence unless otherwise requested
Ship Medium
usually “Printed” but could be “Video”, “Audio”, “Photocopy” etc.
Delivery Method
usually “SOLS Van/Post” but could be “fax”
4. Specify Ship Conditions
Commonly there are no conditions and this can be skipped. Could be “client signature”,
“library use only” etc. You can also select “Other” and type your specific conditions in Notes.
5. Continue processing shipped items until you are done. Use the ‘Standard Shipping Report’
for packing slip with request details and address label for requesting library.
TIP:
You can bulk action Shipped for items with same due date and conditions.
See Appendix 4: Processing Multiple Requests with Bulk Action.
Prepared by Southern Ontario Library Service (July 2006) - based on VDX Version 2.7.4
58 of 75
Standard Shipping Report
1. Take a Standard Shipping Report after you have processed items for shipping. VDX will
generate a printable a packing slip and address label for the requesting library for items you
have processed as shipped.
(a) There is a Standard Shipping Report indicator on the Lender Work Queue. Select the
hyperlink number in the ‘Waiting’ column.
(b) Alternately, you may select Reports in the left menu panel. Select Standard Shipping
Report on the Reports menu.
2. Cut off the To: address block above the line to tape to the parcel. The address block will
contain SOLS Van Route information if applicable.
TIP:
Highlight Van Route information in yellow so it stands out prominently for courier drivers.
If you use mail as your delivery service disregard the van route information and send parcel
using Canada Post’s Library Book Rate. Include a postage pre-paid return mailing
label inside the book.
3. Leave the From: address block (below the cut line) and packing slip details intact and include
it with the book when it is shipped. The packing slip has the borrowing library’s request
number to facilitate their ‘Received’ processing when the item arrives at their location.
Address label to
tape to parcel
Cut line
Prepared by Southern Ontario Library Service (July 2006) - based on VDX Version 2.7.4
Packing slip to
travel with
requested item.
59 of 75
Cancel Pending
Requests to cancel should be responded to in a timely fashion. The requesting library is
dependent on your response to get closure on the request.
1. Finding requests to cancel that need your attention:
(a) There is a Cancel Pending indicator on the Lender Work Queue. Select the
hyperlink number in the ‘Waiting’ column.
(b) You can also retrieve with a request search for ‘Status = Cancel Pending’ combined
with ‘Authorization Status = To be Acknowledged’.
2. Select Details button. Select Audit button to examine Audit details.
Is request still ‘In Process’ at your location? (Cancel Reply-Yes)
Have you shipped the item or answered in some way? (Cancel Reply-No)
3. Select Cancel Reply-Yes or Cancel Reply-No from ‘Actions Available’ pull down menu and
process accordingly.
If you use Cancel Reply-Yes the request will ‘auto-complete’ as a finished request.
Renewal Pending
Libraries will ask for an extended due date by sending a request for renewal. It is up to the
lending library if they wish to grant or deny a renewal.
1. Finding requests for renewal that need your attention:
(a) There is a Renew Pending indicator on the Lender Work Queue. Select the
hyperlink number in the ‘Waiting’ column.
(b) You can also retrieve with a request search for ‘Status = Renew Pending’ combined
with ‘Authorization Status = To be Acknowledged’.
2. Select Details button. Select Audit button to examine the ‘Received Date’ at the
borrowing library as well as the original due date and desired due date. Determine if you
can extend the due date for the item.
Prepared by Southern Ontario Library Service (July 2006) - based on VDX Version 2.7.4
60 of 75
3. Select Renew Answer-Yes or Renew Answer- No from ‘Actions Available’ drop down
menu.
4. If responding “Yes” complete with new due date and notes as required and submit.
5. Status updates to Shipped/ Processed/ Renew Answer-Yes
Conditional Reply – Yes (or No) processing
When a lending library actions a request with ‘Conditional Answer’ the borrowing library should
respond with a ‘Conditional Reply-Yes’ or ‘Conditional Reply-No’ to indicate to the lending library
if they accept the conditions for loan.
1. Finding Conditional Answer responses that need your attention:
(a) A lending library will find the borrowing library response queued under the
‘In Process’ category on the Lender Work Queue. Select the hyperlink number in
the ‘Waiting’ column.
(b) You can also retrieve with a request search for ‘Status = In Process’ combined with
‘Last Action = Conditional Reply-Yes-Indication’.
2. For Conditional Reply-No you do nothing. Use the ‘Complete’ button to remove request from
your active request display file.
3. For Conditional Reply-Yes follow up by shipping the item.
Check-In the items returned to your library
This is an important step, not to be skipped or overlooked. When the item you lent through
interlibrary loan is returned to your library it should be processed as ‘Checked-In’.
If you fail to do this the borrowing library is left with the request in an incomplete state.
It is the Check-in action that causes a request to “auto-complete” and be removed from
active request file for both the lender and the borrower.
It is important for the lending library to Check-In returned items to prevent them from
being declared “overdue” or missing in transit.
1. Select Action button on relevant record.
2. Select Checked-In from ‘Actions Available’ pull down menu and Submit.
3. Current date appears in ‘Check in Date’ field on Action: Checked-In screen. Change date if
necessary and Submit.
TIP:
You can perform Check-In processing with bulk action. Save the Return “Thank you” packing
slips from returned items as they are unpacked. The Request number is on the slips for entry into
a bulk action screen. See Appendix 4: Processing Multiple Requests with Bulk Action.
Prepared by Southern Ontario Library Service (July 2006) - based on VDX Version 2.7.4
61 of 75
Chapter 7: VDX Reports
Prepared by Southern Ontario Library Service (July 2006) - based on VDX Version 2.7.4
62 of 75
VDX Standard Reports
Reports Menu
Select Reports button in the left panel menu. The Reports menu includes standard activity
reports and statistical reports.
Viewing and printing Standard Reports
1. Select radio button beside the desired Standard report.
IMPORTANT: Leave the Start Date and End Date boxes blank. Do not enter dates.
2. Select Generate Report button.
3. The system will generate a PDF report of all the records not printed since the last report
of that type was generated. Each report that is generated represents a unique batch, and
will not overlap reports printed previously.
4. To print the report use Adobe Acrobat print icon or File>Print command. Each standard
report may be printed once when generated. If you need to access the report again
follow instructions for re-printing Standard Reports using Batch Rerun.
Warning!
If you have not been taking regular Standard activity reports they may contain a large number of
older items and so may not be particularly relevant to your current activity. After the first report
is generated, subsequent reports will reflect current activity.
Prepared by Southern Ontario Library Service (July 2006) - based on VDX Version 2.7.4
63 of 75
Batch Reruns…Re-Printing Standard Reports
Standard reports are printed in batches, and each report is assigned a batch number. The system
keeps track of these batches and holds them in memory. To view or print a report after it has
been generated:
1. Select Reports button in left panel menu.
2. Check the radio button beside Batch Reruns on the report menu.
IMPORTANT: Leave the Start Date and End Date boxes blank.
3. Select Generate Report button.
A Batch Reruns table will appear. For each report, the table specifies the date and time it was
generated, its batch number, the type of report, your library's user barcode, and the number of
items in the report. Batch numbers are unique for each type of report.
NOTE:
You will have a blank white screen until the Batch Rerun table loads. You may think nothing is
happening and be tempted to click Submit again. Be patient. Experiences can vary but it can take
20-30 seconds for the screen to refresh.
To view a report from Batch Rerun:
1. Check the radio button beside the desired report.
2. Select Generate Report button.
3. To print the report use Adobe Acrobat print icon or File>Print command.
Prepared by Southern Ontario Library Service (July 2006) - based on VDX Version 2.7.4
64 of 75
Interpretation of VDX Monthly ILL Statistics report
To view a statistical report
1.
2.
3.
4.
Select Reports button in the left panel menu.
Check the radio button beside ‘Monthly ILL Statistics’.
Leave the Start Date and End Date boxes blank. DO NOT ENTER DATES.
Select Generate Report button.
The report will display on your screen. To print the report, use your browser’s print command
(File > Print) or the Printer icon.
Explanation of Monthly ILL Statistics contents
The VDX monthly report is designed to provide data required in the interlibrary loan section of the
Ontario provincial “Annual Survey of Public Libraries”.
It does not count other Requester states such as Returned, Not Supplied or Cancelled. It does
not count interim Responder states such as Will Supply, Answer Hold.
Note:
It is important to remember that there is an overlap in the timelines of these reports. In the
report below, the December 2001 Requester Received figure of 88 items is not to be interpreted
as 88 of the 98 requests issued in December 2001 were received. Some of the 88 items received
in December could include requests issued in a previous month.
1
2
3
F3.21
4
5
F3.11
6
F3.22
7
F3.12
8
9
TIP:
Any ILL activity that was not performed within VDX needs to be tracked manually and added to
VDX generated figures. For instance - if you requested 6 Microfilms from the Hebrew Sciences
Library using their web request form in the month of December 2001 you would add 98 + 6 for a
total of 104 Requester Requests issued. If you received 3 of those 6 microfilms in January 2002
you would add 84 + 3 for a total of 87 Requester Received items.
Prepared by Southern Ontario Library Service (July 2006) - based on VDX Version 2.7.4
65 of 75
Column Heading
Description
1
Month
VDX adds each day’s statistics automatically just after midnight to the
monthly count. Therefore, the figures for the current day are not
included.
2
Z39.50 Searches
Of interest only. Not a required statistic.
This counts submitted Z39.50 searches in the period covered. Each
search entry submitted counts as one search even though more than
one target (data resource) is part of the overall search. For example,
entering a Simple Search for title “Emma” and clicking on INFO, Greater
Sudbury, Middlesex and Toronto Public Library targets counts as one
search.
3
Requester – Requests
[F3.21]
This counts requests created by this location that are made to other
libraries in the period covered. Unauthorized requests are included in
this count. This figure corresponds to the Provincial Annual Survey box
number F3.21.
NOTE: A request that has gone to multiple locations only counts as 1
request on the requester side.
4
Requester-Shipped Ind.
Of interest only. Not a required statistic.
This counts number of requests that had a Shipped Indication applied in
the period covered. There can be an overlap in that some of them have
subsequently been processed as Received. Some may still be in
transit.
5
Requester – Received
[F3.11]
6
Responder – Requests
[F3.22]
7
Responder – Shipped
[F3.12]
8
Responder – Not Supplied
Number of items borrowed. Counts requests that this location
processed with the Received action in the period covered. Some of
them may have been requested in the previous month.
This figure corresponds to the Provincial Annual Survey box number
F3.11.
Number of requests received from other libraries.
This is the number of incoming requests that you handled in the period
covered, regardless of whether you supply them or not.
This figure corresponds to the Provincial Annual Survey box number
F3.22.
Number of items lent. Counts requests this location processed Shipped
in the period covered, regardless of the service type, such as loan and
copy non-returnable. This figure corresponds to the Provincial Annual
Survey box number F3.12.
Of interest only. Not a required statistic.
Counts requests that this location directly processed as Not Supplied in
the period covered.
9
Responder – Expired
Of interest only. Not a required statistic.
Counts requests that this responder location allowed to expire (i.e. that
were not processed within the rota limit period for waiting for a
response, or that exceeded the overall expiration period in a need-by
date limit.
Prepared by Southern Ontario Library Service (July 2006) - based on VDX Version 2.7.4
66 of 75
Appendices
Prepared by Southern Ontario Library Service (July 2006) - based on VDX Version 2.7.4
67 of 75
Appendix 1: Service Screen Options Further Explained
The VDX Service screen has many options. Fortunately, the defaults are suitable for the majority
of requests so you don’t often need to visit this screen to make changes. System assigned
defaults are marked with * in this chart. They apply where pull-down menus are “blank”.
Prompt
Service Type 1
Service Type 2
Media Type 1
Media Type 2
Delivery Method
Service Level
Options
(most commonly used in bold)
Usage Notes
Blank = system default
Check in UK
Check Own Stock
Check world Wide
Copy non returnable
Cost Estimate
Home Reading Essential
Loan *
Locations
Microform not acceptable
Music Required
Patent Required
Responder Specific
Translation if Possible
Translation Only
WildCard
Blank (default Loan) used most often.
Blank = system default
Audio-Recording
Film-or-video-recording
Machine-Readable
Microform
Other
Photocopy
Printed *
Blank (default Printed) used most often.
Blank = system default
Electronic Mail
Facsimile (fax)
File Transfer Protocol (FTP)
Postal Delivery
SOLS Van/Post *
Will collect from Responder
Blank (default SOLS Van/Post) used most often
indicating served by SOLS van or postal delivery.
Blank = system default
Express – Local Search
Normal – Extended Search
Normal – Full Search
Normal – Local Search *
Priority – Extended Search
Priority – Local Search
Rush – Extended Search
Rush – Local Search
When Convenient – Local
Search
WildCard
Blank (default Normal – Local Search) used most often.
Select Copy non returnable when requesting
photocopies.
You can select multiple service types to indicate to a
potential responder that you would accept either.
Select Microform when requesting microfilm.
You can select multiple media types to indicate to a
potential responder that you would accept either.
Courier implies commercial courier for a $ fee.
Facsimile (fax) used to instruct that you want
photocopies faxed to you versus sent by van or mail.
Prepared by Southern Ontario Library Service (July 2006) - based on VDX Version 2.7.4
68 of 75
Prompt
Need by Date
Options
(most commonly used in bold)
Defaults to 199 days from
current date.
Leave at default or over ride
default by selecting a patron
specified deadline.
Expiration Type
This field works
in combination
with either
Expiration Days
or Need By
Date, depending
upon the type
selected in this
field.
Blank = system default
Calc From Expiry Days *
Need By Date
No Expiry
Usage Notes
VDX uses the date in Need By Date field to expire the
request’s life cycle. This does not limit the time the
request transaction waits for a response at each Rota
location.
Blank (default Calc From Expiry Days) used most often.
Blank - Leave blank if accepting 199 day Need By
default as the request expiration type. Request will
move through the Rota (4 days per stop) until satisfied
or will stop completely if reaches 199 days.
Calc from Expiry Days - Takes today’s date and adds
the number of days entered in Expiration Days field
below to set the number of days request waits for a
response from each location as a request processes
through the Rota. The global system default is 4 days.
Need by Date - Uses date in Need by Date to expire the
requests life cycle. This does not limit the time the
request transaction waits in each Rota position.
No Expiry - This choice over rides any time limit for a
request to remain at a Rota location. Use if going to
single location such as OLS office for mediation or
Library and Archives Canada or Archives of Ontario.
Expiration Days
Blank = system default
Blank (default 4 days) used most often.
If Calc From
Expiry Date is
selected above
then accept
default or enter
alternate
number of days.
System default is a count of
4 working days discounting
weekends and holidays.
This is how long a request will sit at a Rota location
without a state change before it “times out” and expires
at that location and automatically moves on to the next
Rota location.
Place on Hold
Blank = default
Yes
Responder Policy
No*
Leave at Blank (default No).
Retry
No (Leave at NO)
Yes
Do NOT select “Yes” which causes DocFind processor
to retry rota location collection from targets that are
down on initial hunt. This slows things up considerably.
Forward
No (Leave at NO)
Yes
Do NOT select “Yes”. The request Rota is built in INFO
consortia environment.
Operator types in a figure to allow a rota location more
or less than 4 days on a particular request.
e.g. Operator types “8” to allow 8 days before expiry if
going to a location that is very busy and may not have
the opportunity to respond in 4 days.
Allow request to move through all potential locations in
Rota. If later you end up going back to a single location
select “Yes” and type “Please reserve if not on shelf”
statement in request Notes field.
Prepared by Southern Ontario Library Service (July 2006) - based on VDX Version 2.7.4
69 of 75
Prompt
Options
(most commonly used in bold)
Usage Notes
Max. Cost
Enter as appropriate
Highest dollar value that will be paid.
Currency
Long list of currencies
Select as appropriate, most likely Canadian dollars or
US dollars
Recip. Agrees
Blank [no default]
Yes
No
Select as appropriate.
Blank [no default]
Yes
No
Select as appropriate.
Patron
Copyright Type
Blank
Copyright Cleared
Fair Dealing
Do NOT use this.
Used by patron when they have initiated request.
Copyright Type
Blank
Copyright Cleared
Fair Dealing
Select as appropriate when requesting copies.
Will pay fee
Used to indicate that you have (or do not have) a
reciprocal agreement with a responder for waiving ILL
transaction fees.
Used to indicate that an ILL transaction fee is
acceptable (or not).
It is the requesting library’s responsibility to
communicate to a potential lender that your library is
cleared to request copies on behalf of patrons under the
terms of your licensing.
Copyright Cleared (used in Canada)
Fair Dealing (used in U.S.)
Copyright
SubType
Blank
CANCOPY
Select as appropriate when requesting copies.
CANCOPY (used in Canada)
Copyright
Signed
Blank
Not Applicable
Signature obtained
Signature required
Select as appropriate when requesting copies.
You may select ‘Not Applicable’ or simply leave ‘blank’
because a signature is not required in Canada.
Prepared by Southern Ontario Library Service (July 2006) - based on VDX Version 2.7.4
70 of 75
Appendix 2: Create patron record “on-the-fly”
In VDX, each library patron that uses the ILLO Service can be set up by the library staff with a
user record. This enables the system to automatically incorporate patron information into the
ILLO records and reports. It also ensures that each patron has been 'authorized' by his or her
respective library as being a responsible user.
Library staff may find it easiest to enter patron records 'on-the-fly', as they make requests.
Scenario:
Validation of patron’s barcode number
results in error. You may have entered
barcode number incorrectly or the patron’s
user record has not been created.
Follow these steps:
1. Open a second window in your browser by one of the following:
(a) Selecting File / New
(b) performing a <Ctrl-N>
2. In the newly opened browser window, select 'User' in the left panel.
3.
Avoid creating a duplicate patron record. Search by ‘Barcode’ or ‘Surname’ to confirm there
is no record for this patron in case you made a typo when you entered the barcode on the
Requester screen. Be sure to enter your library code preface for a barcode search.
If found, return to primary
browser window from your
task bar, which should still
be open at 'Requester' link
screen.
4. If user record is not found, select Create link at top of screen and complete User Details
form and Submit.
5. Staff may wish to leave this second browser window open in order to be ready to add
additional patrons “on-the-fly” as they work at creating new requests.
6. Return to primary browser window by selecting it in your task bar. It should still be open at
'Requester' screen.
7. Enter patron’s barcode in Requester screen and select 'Validate'. The screen will refresh
with the patron information automatically added to the form.
Prepared by Southern Ontario Library Service (July 2006) - based on VDX Version 2.7.4
71 of 75
Appendix 3: Print screen and Audit Details
Current location in
Rota is in Bold.
Explanation on Audit in this Sample
Waterloo got request first and it Expired at that location after 4 days without a state change
Kitchener got the request next. They responded Answer Will Supply which held the request
there while they investigate availability at a branch.
Kitchener subsequently responded Answer Non Supply.
Lincoln got the request next. They responded Answer Will Supply which held the request
while they investigated availability.
Lincoln shipped the item on Nov 16
Once Shipped the borrower’s Print Display includes Shipping Details and Due Date
Prepared by Southern Ontario Library Service (July 2006) - based on VDX Version 2.7.4
72 of 75
Appendix 4: Processing Multiple Requests with Bulk Action
You may process several requests requiring the same activity using Bulk Action. All requests
to be processed together must have the same action and particulars.
For instance if you are processing multiple requests with ‘Answer Non-Supply’ you should be
selecting the same reason for non-supply for that group, such as “In Use”.
There are many VDX actions that can be efficiently processed ‘in bulk’.
Received
Returned
Answer Conditional (group being processed must be same condition)
Answer Non-Supply (group being processed must be same reason for Non-Supply)
Answer Will Supply
Answer Retry
Shipped (group being processed must be same due date and loan conditions)
Checked-In
Selecting from the request display screen:
1. Select the small ‘Bulk’ box to the right of the records activity buttons. This puts a check mark
in the box for the items you want to bulk process. You can also use other buttons labelled
Select all, Deselect all, Clear all and Reset.
button to submit selected requests for bulk authorization. A bulk action
2. Select
authorization screen will display.
Prepared by Southern Ontario Library Service (July 2006) - based on VDX Version 2.7.4
73 of 75
Example of Bulk Action / Authorization screen.
Choose a bulk action:
1. Select the desired bulk action from the Action pull down menu and Submit.
2. Respond accordingly to the next screen by entering the details for the selected action. This
information should apply to all the requests selected.
For example:
Select ‘Answer Nonsupply’ from Action pull down menu and Submit.
This displays the ILL request form for the ‘Action: Nonsupply’ state.
Update the form for ‘Reason’ for Nonsupply (i.e. in use on loan). Add a Note if
appropriate and Submit.
3. The Bulk Action/Authorization Report indicates which requests were successful. If some of
them were not, check the status.
Using Bulk Action link for a blank bulk action screen
As an alternative to placing tick marks on individual requests on a result screen an operator can
type in request numbers separated by blanks or commas on a ‘blank’ bulk action screen retrieved
by selecting the Bulk Action hyperlink at the top of the ILL Request Search screen.
TIP:
The blank bulk action screen is useful for:
typing in multiple request numbers from a Pick List that you plan to update with Answer
Non-Supply or Shipped.
typing in multiple request numbers from a stack of “Thank You for the use of this material”
slips that accompanied returned items to be updated to a ‘Checked-In’ status.
Prepared by Southern Ontario Library Service (July 2006) - based on VDX Version 2.7.4
74 of 75
Appendix 5: Communication and Support
1. Check ILL email daily
INFO HelpDesk will rely on email to send VDX announcements and procedural advisories. It
is important for library Interlibrary Loan staff to monitor their email for ILL related messages in
a timely fashion. The VDX system also uses the ILL operators email address for bounce
back patron email notifications and for responses to beyond INFO consortia generic script
interloan activity.
Warning!
It is imperative to let HelpDesk know if your email address changes so we can update your
address in the ILL lists and the VDX system administration configurations.
2. Interlibrary Loan Email Lists
Three lists are established for communication with and amongst VDX users.
[email protected]
• This is a closed list for INFO HelpDesk and VDX administration staff to
communicate with all INFO users. Only the moderator(s) can send messages to
this list.
• It is used to announce system availability and procedural advisories.
• List members are limited to interlibrary loan department staff of SOLS libraries.
Email addresses of those departments have been added to the list.
[email protected]
• List members are limited to interlibrary loan department staff of OLSN libraries.
[email protected]
• This is a voluntary sign up list that INFO users can subscribe to broadcast general
enquiries such as does anybody have an item not found in database or to solicit
feedback from one another on policy or procedural matters.
• It is available to INFO users in SOLS and OLS-North.
• For instructions on joining this list see
http://lists.library.on.ca/mailman/listinfo.cgi/infouser-l
3. Check INFO pages on SOLS Website
Check http://www.sols.org/resourcesharing/INFO/index.htm on a regular basis to see VDX
support documentation, announcements, new procedures, FAQ and other ILL related links.
Contact INFO HelpDesk for Support:
Telephone: 1-800-387-5765, ext. 4. Email: [email protected]
Website” www
Website: http://www.sols.org/resourcesharing/helpdesk/index.htm
Prepared by Southern Ontario Library Service (July 2006) - based on VDX Version 2.7.4
75 of 75

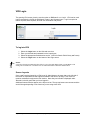

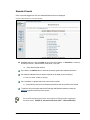
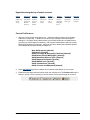
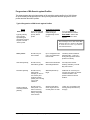
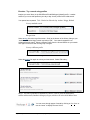
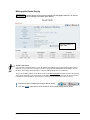
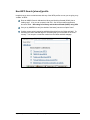
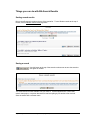
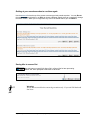
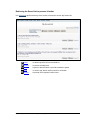
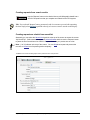
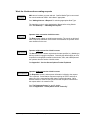

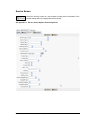
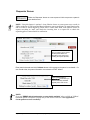
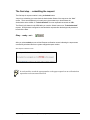

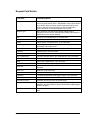

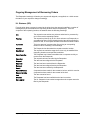
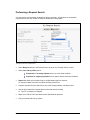
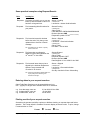
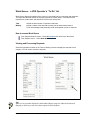
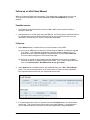

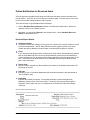
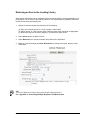


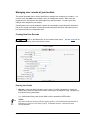
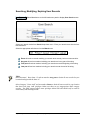
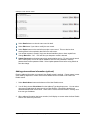

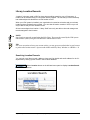
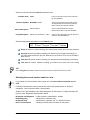

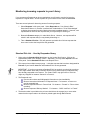
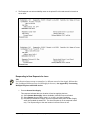


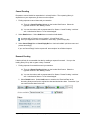

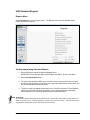
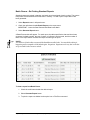
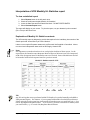
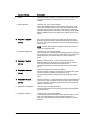

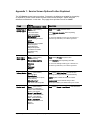
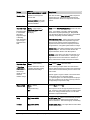

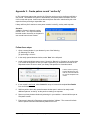
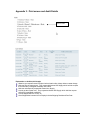
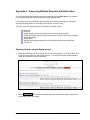
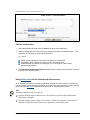

![Corel Office Document [PFP#241512617]](http://vs1.manualzilla.com/store/data/005699212_1-655f6a875c479857ca50d39f97eeaf8f-150x150.png)