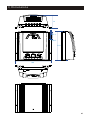
1
www.lumiax.com
Lumiax
Magic your solar life
TM
Max -MPPT series
MPPT Controller
Max-MPPT series
Solar charge controller
User Manual
User Manual_Max-MPPT series_FC
Lumiax Qingdao
CE, Rohs, ISO9001:2008
Subject to change without notice!
Real photos
Model
Max-MPPT1010
Max-MPPT1510
Max-MPPT2010
Max Current
10A
15A
20A
System Voltage
12/24V automatic recognition
Max solar voltage
95V
CAUTION: Array voltage should never exceed Max PV input voltage. Refer to the
solar module documentation to determine the highest expected array Voc (open
circuit voltage) as defined by the lowest expected ambient temperature for the
system location.
Contents
1.Safety instructions and waiver of liability............................................................................................... 2
1.1Safety Instructions
1.2Liability Exclusion
2.Pruduct Overview.............................................................................................................................................. 3
2.1Outstanding Features
2.2MPPT ..................................................................................................................................................................... 3
2.3Four Charging Stage ....................................................................................................................................... 5
3. Dimensions ........................................................................................................................... 6
4. Structure & Accessor y ........................................................................................................ 7
4.1 Structure & Characteristics
4.2Optional Accessories
5. Installation ........................................................................................................................... 8
5.1Installation Notes
5.2Mounting Location Requirements
5.3Connection.......................................................................................................................... 9
6. Starting up the controller .. ............................................................................................... 10
6.1 Self Test
6.2 System Voltage
6.3 Batter y Type
6.4 Work Mode
6.5Day/Night Threshold
7. Display Functions ............................................................................................................... 11
7.1 Batter y Capacity Display
7.2 C harge & Error D isplay(INFO)
8.Interface Description....................................................................................................................................... 12
9.Safety Features................................................................................................................................................... 13
10.Technical Datasheet....................................................................................................................................... 14
11.Conversion Efficiency Curve...................................................................................................................... 15
12.System Maintenance..................................................................................................................................... 16
13.Warranty............................................................................................................................................................. 16
1
Dear Clients,
Thanks for selecting the Max-MPPT series solar controller.
Please take the time to read this user manual, this will help you to make full use of many advantages the
controller can provide your solar system.
This manual gives important recommendations for installing and using and so on. Read it carefully in your
own interest and pay attention to the safety recommendations in it please.
1, Safety instructions and waiver of liability
1.1 Safety Instructions
The following symbols are used throughout this manual to indicate potentially dangerous conditions or
mark important safety instructions. Please take care when meeting these symbols.
WARNING: Indicates a potentially dangerous condition. Use extreme caution
when performing this task.
CAUTION: Indicates a critical procedure for safe and proper operation of the
controller.
CAUTION:
1) There are no user serviceable parts inside the controller. Do not disassemble or attempt
to repair the controller.
2) Keep children away from batteries and the charge controller.
1.2 Liability Exclusion
The manufacturer shall not be liable for damages, especially on the batter y, caused by use
other than as intended or as mentioned in this manual or if the recommendations of the
batter y manufacturer are neglected. The manufacturer shall not be liable if there has been
ser vice or repair carried out by any unauthorized person, unusual use, wrong installation, or
bad system design.
2
2, Over view
Max-MPPT series solar controller is based on an advanced maximum power point tracking (MPPT)
technology developed, dedicated to the solar system, the controller conversion efficiency up to 98%.
2.1 It comes with a number of outstanding features, such as:
Innovative MPPT technology, conversion efficiency up to 98%
Max MPPT efficiency >99%
Many choices of battery type and working mode
Clear readable display of charge/discharge, battery and error description
12V/24V automatic recognition
Temperature compensation
Perfect EMC & thermal design
Four stage charge way: MPPT, Boost, Equalize, Float
Full automatic electronic protect function
Upgraded version features
Based RS-485 standard Modbus protocol, to maximize their communication needs of different
occasions.
Support the PC monitoring software and the external display unit DU to facilitate the user to view realtime data of controller, set the control parameters.
2.2 MPPT
MPPT profile
The full name of the MPPT is maximum power point tracking. It is an advanced charging way which could
detect the real-time power of the solar Modulel and the maximum point of the I-V curve that make the
highest battery charging efficiency.
Current Boost
Under most conditions, MPPT technology will "boost" the solar charge current.
MPPT Charging:Power Into the controller (Pmax)=Power out of the controller (Pout)
Iin x Vmp= Iout x Vout
* Assuming 100% efficiency. Actually, the losses in wiring and conversion exist.
If the solar module's maximum power voltage (Vmp) is greater than the battery voltage, it follows that the
battery current must be proportionally greater than the solar input current so that input and output
power are balanced. The greater the difference between the Vmp and battery voltage, the greater the
current boost. Current boost can be substantial in systems where the solar array is of a higher nominal
voltage than the battery as described in the next section.
3
High Voltage Strings and Grid-Tie Modules
Another benefit of MPPT technology is the ability to charge batteries with solar arrays of higher nominal
voltages. For example, a 12 Volt battery bank may be charged with a 12-, 24-, 36-, or 48-Volt nominal offgrid solar array. Grid-tie solar modules may also be used as long as the solar array open circuit voltage
(Voc) rating will not exceed the maximum input voltage rating at worst-case (coldest) module temperature.
The solar module documentation should provide Voc vs. temperature data.
Higher solar input voltage results in lower solar input current for a given input power. High voltage solar
input strings allow for smaller gauge solar wiring. This is especially helpful and economical for systems
with long wiring runs between the controller and the solar array.
An Advantage Over Traditional Controllers
Traditional controllers connect the solar module directly to the battery when recharging. This requires that
the solar module operate in a voltage range that is usually below the module's Vmp. In a 12 Volt system
for example, the battery voltage may range from 10.8-15 Vdc,but the module's Vmp is typically around
16 or 17V.
Because traditional controllers do not always operate at the Vmp of the solar array, energy is wasted that
could otherwise be used to charge the battery and power system loads. The greater the difference
between battery voltage and the Vmp of the module, the more energy is wasted.
I(A)
P(W)
MPP
MPP
VI curve
VP curve
Typical
Battery
Voltage
Range
Pmax-Px
Px
PWM
Controller
Operating
Range
0
10.8V
15V 17V
V(V)
0
10.8V
15V 17V
V(V)
Nominal 12 Volt Solar Module I-V cur ve and output power graph.
Contrast with the traditional PWM controller, MPPT controller could play a maximum power of the solar
panel so that a larger charging current could be supplied. Generally speaking, the MPPT controller's
energy utilization efficiency is 15%~20% higher than PWM controller.
Conditions That Limit the Effectiveness of MPPT
The Vmp of a solar module decreases as the temperature of the module increases. In very hot weather,
the Vmp may be close or even less than battery voltage. In this situation, there will be very little or no
MPPT gain compared to traditional controllers. However, systems with modules of higher nominal voltage
than the battery bank will always have an array Vmp greater than battery voltage. Additionally, the savings
in wiring due to reduced solar current make MPPT worthwhile even in hot climates.
4
2.3 MPPT—Four Charging Stage
Max-MPPT series controller has a 4-stage battery charging algorithm for rapid, efficient, and safe battery
charging.
U(V)
Equalize
Charge
14.8V
14.5V
13.7V
Night
MPPT or Bulk
Charge
Boost
Charge
Float
Charge
Night
TIME
MPPT or Bulk Charge
In this stage, the battery voltage has not yet reached boost voltage and 100% of available solar power is
used to recharge the battery.
Boost Charge
When the battery has recharged to the Boost voltage setpoint, constant-voltage regulation is used to
prevent heating and excessive battery gassing. The Boost stage remains 120 minutes and then goes to
Float Charge. Every time when the controller is powered on, if it detects neither over discharged nor
overvoltage, the charging will enter into boost charging stage.
Float Charge
After the Boost voltage stage, the controller will reduce the battery voltage to Float voltage setpoint.
When the battery is fully recharged, there will be no more chemical reactions and all the charge current
transmits into heat and gas at this time. Then the controller reduces the voltage to the floating stage,
charging with a smaller voltage and current. It will reduce the temperature of battery and prevent the
gassing, also charging the battery slightly at the same time. The purpose of Float stage is to offset the
power consumption caused by self consumption and small loads in the whole system, while maintaining
full battery storage capacity.
In Float stage, loads can continue to draw power from the battery. In the event that the system load(s)
exceed the solar charge current, the controller will no longer be able to maintain the battery at the Float
setpoint. Should the battery voltage remains below the boost reconnect charging voltage, the controller
will exit Float stage and return to Bulk charging.
Equalize Charge
Certain types of batteries benefit from periodic equalizing charge, which can stir the electrolyte, balance
battery voltage and complete chemical reaction. Equalizing charge increases the battery voltage, higher
than the standard complement voltage, which gasifies the battery electrolyte. If it detects that the battery
is being over discharged, the solar controller will automatically turn the battery to equalization charging
stage, and the equalization charging will be 120mins. Equalizing charge and boost charge are not carried
out constantly in a full charge process to avoid too much gas precipitation or overheating of battery.
WARNING: Risk of explosion!
Equalizing flooded batter y can produce explosive gases, so well ventilation of
batter y box is necessar y.
5
3, Dimensions
73
5.8
22.5
Φ4.5
164
189
6
4, Structure & Accessor y
4.1 Structure & Characteristics
⑤
⑥
⑦
①Heat Sink
—dissipate controller heat
②Plastic Case
—Internal protection
③Info LED Indicator
—Show charging & Error status
④Battery LED Indicator
—Show Battery Capacity
⑤RJ45 interface (reserved)
—Connecting monitoring devices
⑥Temperature Sensor Port (reserved)
— Collect temperature information,
④
③
⑩
⑨
Temperature compensation.
⑦DIP switch
—Battery and mode selection.
⑧ Load Terminals
—Connected load.
⑨Battery Terminals
—Connect the battery.
⑩Solar module terminals
—Connected solar modules.
⑧
②
NO
2 1
①
⑤
⑥
⑦
4.2 Optional Accessories
4.2.1Remote Temperature Sensor (Type:RTS02)
Batter y temperature data collected to accurately charge and discharge parameters of
temperature compensation, the standard cable length is 2 meters (can also be customized
according to user needs), RTS02 connected via interface 6.
4.2.2 Remote Display Unit (Type:DU01)
Remote Display unit can display a lot of information systems work, fault information. Information via
backlit LCD display, buttons and digital display is very easy to operate and read. DU01 can be easily
installed in or on a frame on the wall, DU01 Standard Edition comes standard with a 1.5 m connection
cable (also customized according to user needs) and a mounting frame. DU01 connected via RJ45
interface controller.
7
5, Installation
CAUTION: Please read all instructions and precautions in the manual before installing!
5.1Installation Notes
⑴The solar charge controller may only be used in PV systems in accordance with this user manual and the
specifications of other modules manufacturers. No energy source other than a solar generator may be connected to the
solar charge controller.
⑵Before wiring installation and adjustment of controller, Always disconnect the solar modules and insurance or
circuit breaker of battery terminal.
⑶Only to comply with the range of the battery charge controller.
⑷Batteries store a large amount of energy, never short circuit a battery under all circumstances. We strongly
recommend connecting a fuse directly to the battery to protect any short circuit at the battery wiring.
⑸Batteries can produce flammable gases. Avoid making sparks, using fire or any naked flame. Make sure that the
battery room is ventilated.
⑹Uses insulated tools and avoid placing metal objects near the batteries.
⑺Be very careful when working with batteries. Wear eye protection. Have fresh water available to wash and clean any
contact with battery acid.
⑻Avoid touching or short circuiting wires or terminals. Be aware that the voltages on special terminals or wires can
be as much as twice the battery voltage. Use isolated tools, stand on dry ground, and keep your hands dry.
⑼Prevent water from entering the internal controller, outdoor installation should avoid direct sunlight and rain
penetration.
⑽After installation check that all connections are tight line, avoid heat accumulation caused by virtual access danger.
5.2Mounting Location Requirements
Do not mount the solar charge controller outdoors or in wet rooms. Do not subject the solar charge
controller to direct sunshine or other sources of heat. Protect the solar charge controller from dirt and
moisture. Mount upright on the wall on a non-flammable substrate. Maintain a minimum clearance of
15cm below and around the device to ensure unhindered air circulation. Mount the solar charge
controller as close as possible to the batteries.
Mark the position of the solar charge controller fastening holes on the wall, drill 4 holes
and insert dowels, fasten the solar charge controller to the wall with the cable openings
facing downwards.
>15CM
WARM AIR
COOL AIR
>15CM
8
5.3Connection
We strongly recommend connecting a fuse directly to the batter y to protect any short
circuit at the batter y wiring. Solar PV modules create current whenever light strikes them. The
current created varies with the light intensity, but even in the case of low levels of light, full
voltage is given by the modules. So, protect the solar modules from incident light during
installation. Never touch uninsulated cable ends, use only insulated tools, and make sure that
the wire diameter is in accordance with the solar charge controller ’s expected currents.
1st step: Connect the battery
Connect the battery connection cable with the correct polarity to the middle pair of terminals
on the solar charge controller (with the battery symbol). If the system is 12V, please make sure
that the battery voltage is within 10V~16V, else if the system is 24V, the battery voltage should
between 20V~30V. If the polarity is correct, the LED on the controller will begin to show.
2nd step: Connect the solar module
Ensure that the solar module is protected from incident light. Ensure that the solar module
does not exceed the maximum permissible input current. Connect the solar module connection
cable to the correct pole of the left pair of terminals on the solar charge controller (with the solar
module symbol).
3rd step: Connect loads
Connect the load cable to the correct pole of the right pair of terminals on the solar charge
controller (with the lamp symbol). To avoid any voltage on the wires, first connect the wire to the
load, then to the controller.
4th step: Final work
Fasten all cables with strain relief in the direct vicinity of the solar charge controller (clearance of
approx.15cm).
The following diagrams provide an overview of the connections and the proper order.
To avoid any voltage on the wires, first connect
the wire to the controller, then to the battery,
panel or load.
Make sure the wire length between battery and
controller is as short as possible.
Recommended minimum wire size:
10A : 2.5mm²; 15/20A : 4mm².
Be aware that the negative terminals of MaxMax-MPPT series
Solar charge controller
MPPT are connected together and therefore
have the same electrical potential. If any
grounding is required, always do this on the
negative wires.
Connecting capacitive load may trigger short
circuit protection.
③
④ ②
① ⑥
⑤
9
6, Starting up the controller
6. 1Se lf Tes t
A s soon a s the c ontr ol l er i s s up pli e d w ith b a tt e r y, i t sta rts a sel f t e s t r outi n e . T he n the
di s p la y cha nge s to norma l ope r a ti on.
6.2Sy s tem Voltag e
T he contr ol le r a d justs itsel f a ut oma ti ca ll y t o 1 2V or 2 4 V s y st em v ol ta ge . A s s oon a s the
b a tt e r y vo l ta g e a t th e ti me of sta rt- up i s withi n 1 0V t o 1 6V, the contr ol le r i mpli e s a 1 2V
s y st em, el s e i f th e b a tt e r y volta g e is wi thin 20 V t o 30V, the contr ol l er i mpl i es a 2 4V syst e m .
If the batte r y v ol ta ge i s not w ithi n th e nor ma l ope r a ting r a nge (ca .10 t o 1 6 V or ca .2 0 t o
3 0 V)a t sta rt-up, a s ta tus di s p la y a ccor di ng to th e se c ti on 7. 2 Ch ar g e & E rr or d is p la y .
6. 3B atter y Ty p e
T he Max-MPP T s e r i es con troll e r a pp li e s t o L i qui d an d G e l b a tt er y, the f a ct or y de f au l t
s e tting is su i ta bl e f or l i quid b a tt e r y.
Ple a se r e f e r t o 8. 1.2 c ha nge se tt i ng.
6. 4 Wor k Mod e
T he wo rk mode of the con troll e r i s s e l ecta bl e (Sta nda rd a nd D 2 D ), the f a ct or y de f au l t
se tting is sta n d a r d .
Ple a se r e f e r t o 8.1.1 cha nge setti ng.
Day/Night threshold
Day/Night threshold
Sunset
Sunrise
Standard
Light on
Light on
Light off
D2D(Dusk to Dawn)
6.5 Day/Night Threshold
The controller recognizes day and night based on the solar array open circuit voltage.
Default: 5.0V/10.0V
Sunrise
Sunset
5.0/10.0V
Dusk
Dawn
10
7, Display Functions
The controller is equipped with 6 LEDS.
In normal operation, the controller shows charge or discharge status, battery capacity and load status.
7.1 Batter y Capacity Display:
Yellow 2
Yellow 1
Red On, Energy of Battery <25%.
Yellow 1 On, Energy of Battery is about 25~50%.
Red
Green
Yellow 2 On, Energy of Battery is about 50~75%.
Green On, Energy of Battery is about 75~100%.
!The percentage corresponds to the available energy until low voltage disconnect in relation to a fully
charged battery.
7.2 C harge & Error D isplay(INFO):
Red
Green
INFO green flashing, that is charging (fast flash for MPPT charge state, slow flash for non
MPPT charge state); otherwise, no charge;
INFO Red On, is Error Status. For more details, please see table below.
Error
Loads
are
not
supplied
Display
Red(INFO and Bat.)
LED are lighted
Red
Red LED
is flashing
Battery is
empty
after a
short time
Red
Battery is
not being
charged
during
the day
Red
Over
voltage
protection
Does not
recognize
the system
voltage
Red LED
on
Reason
Remedy
Batter y is low
Load will reconnect as soon as
battery is recharged
Fast flash: over current/short
circuit of loads
Switch off all loads.
Remove short circuit.
Slow flash: over temperature
protection
Auto recovery when the temperature
is below set value.
Battery has low
capacity
Change batter y
Green
Green LED
is off
Solar array faulty
or wrong polarity
Batter y voltage too high
Red(INFO)
and
Green(Bat.)
LED are
lighted
All LED
Lighted
(>15.5V/31V)
Remove faulty connection/
reverse polarity
Check if other sources overcharge
the battery.
If not, controller is damaged.
Battery wires or battery fuse
damaged, battery has high
resistance
Check batter y wires, fuse and
batter y.
The batter y voltage is not
within the normal
operating rang at start-up
(10-16V, or 20-30V)
Charge or discharge the battery to
make the voltage within the normal
range
11
8, Interface Description
Reser ved
Interface
DIP Switch
8.1 DIP Switch
ON
1 2
8.1.1 DIP switch stall 1 -- Work mode (Standard and D2D) settings, the default is Standard(As shown in
figure). If slide the DIP switch to “ON”, the controller works in D2D mode.
ON
ON
D2D
Standard
1 2
1 2
8.1.2 DIP switch stall 2 -- Battery type selection, the default setting is liquid battery (As shown in figure). If
slide the DIP switch to "ON", the battery type is selected as GEL .
ON
ON
GEL
Liquid
1 2
1 2
8.2 Reser ved Interface
External temperature sensor and COM communication interface , please consult the supplier.
12
9, Safety Features
Solar terminal
Battery terminal Load terminal
Reverse polarity
Protected *1
Protected *1
Protected *2
Short circuit
Protected
Protected *3
Switches off
immediately
Switches off
with delay
Over current
Reverse Current
Over voltage
Under voltage
Over temp.
Protected
Max.100V *4
Max. 40V
Switches off
switches off the load if the temperature
reaches the set value.
*1 Controller can not protect itself in a 24V system when polarity of battery or solar is reversed.
*2 Controller can protect itself, but loads might be damaged.
*3 Battery must be protected by fuse, or battery will be permanently damaged.
*4 The solar panel voltage should not exceed this limit for a long time as voltage protection is
done by a varistor.
CAUTION:
The combination of different error conditions may cause damage to the
controller.
Always remove the error before you continue connecting the controller.
13
10, Technical Datasheet
Electric
Max-MPPT1010
Max-MPPT1510
Max-MPPT2010
Max solar current
10 A
15 A
20 A
Max load current
10 A
15 A
20 A
Max PV input power
12V:150W, 24V:300W
12V:225W, 24V:450W
12V:300W, 24V:600W
System voltage
12V/24V automatic recognition
Max conversion efficiency
>98%
Max MPPT efficiency
>99%
Max solar voltage
95 V
Max power consumption
15mA
Battery
Float voltage
13.7V/27.4V ( 25℃ )
Boost voltage
14.5V/29.0V ( 25℃ )
Equal voltage
14.8V/29.6V ( 25℃ ) (Liquid)
Load disconnect voltage
11.2~11.8V/22.4~23.6V
Load reconnect voltage
12.5V/25.0V
Day/Night threshold
5.0V/10.0V
Batter y type
Liquid, Gel
Temperature compensation -4.17 mV/K per cell (Boost、Equal), -3.33 mV/K per cell (Float)
Max batter y voltage
40 V
Others
Dimensions/Weiht
164*189*73mm / 700g
Operating temperature
-40℃ ~ +60 ℃
Storage temperature
-40℃ ~ +80 ℃
Relative humidity
10%~90%
Case protection
IP32
164*189*73mm / 900g
Non-condensation
14
11, Conversion Efficiency Cur ve
Max-MPPT 12V Efficiency
100
99
98
17V
97
Efficiency(%)
96
95
34V
94
68V
75V
93
92
91
90
89
88
0
20
40
60
80
100
120
140
160
180
200
220
240
260
280
300
Output power(W)
Max-MPPT 24V Efficiency
100
99
98
97
Efficiency(%)
96
34V
95
94
68V
93
92
85V
91
90
89
88
0
50
100
150
200
250
300
350
400
450
500
550
600
Output power(W)
15
12, System Maintenance
In order to maintain the best self-lasting performance, we recommend the following
checks twice a year.
Verify that the controller is securely mounted in a clean, dr y environment.
Confirm the airflow around the controller is not blocked to live, to remove any dirt or
debris from the heat sink .
Check all exposed wire is due to the sun, and other objects around the friction, dr y rot,
insect or rodent damage as a result of damage to the insulation. If necessar y, repair or
replace wires.
Tighten all electrical connections screw terminals on the recommendation.
Check all system components in the ground, to verify all ground wires are securely and
properly grounded.
Check all the terminals to see if there is corrosion, insulation damage, heat or burning
/ discoloration signs, tighten the terminal screws to the recommended torque.
Check for dirt, nesting insects and corrosion, as required cleanup.
If the arrester has expired, the timely replacement of failed arrester to prevent damage
caused by lightning controller even users of other devices.
CAUTION: Risk of electric shock!!!
When the above operations controller must ensure that all power is disconnected,
and then make the appropriate checks or operation!
13, Warranty
The controller is warranted to be free from defects for a period of TWO (2) years from the
date of shipment to the original end user.
Maintenance procedures:
Before calling ser vice, check user manual to determine the controller does have a
problem. If you can not solve a problem with the controller will be delivered back to the
company, freight prepaid, and provide the relevant date and place of purchase
information. In order to enjoy the detailed reasons for the rapid repair warranty ser vice,
return the product must be marked with model number, serial number, and failure, and
the type of Module and related parameters, the batter y and the load of the system; this
information to quickly resolve your maintenance is ver y important requirement .
If the reason due to customer misuse or failure to follow this manual operation, resulting
in damage to the controller, the Company shall not be responsible!
16
Lumiax
Magic your solar life!
Qingdao Skywise Technology Co., Ltd.
NO.192, Zhuzhou Road, Qingdao
Tel:0086-532-80776031 Fax: 0086-532-80776757
E-mail: [email protected]