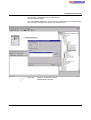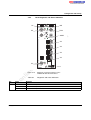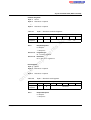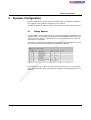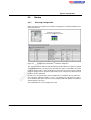
1
AUTOMATIONWORX
User Manual
m
FLS FLM PB SYS PRO UM E
co
Order No.: 26 99 07 9
on
l
in
ec
om
po
ne
nt
s.
Configuring a PROFIBUS-DP System Using Devices
in the Fieldline Product Range
s.
nt
ne
po
om
in
ec
on
l
co
m
AUTOMATIONWORX
User Manual
08/2005
FLS FLM PB SYS PRO UM E
Revision:
02
Order No.:
26 99 07 9
om
in
ec
This manual is valid for:
po
ne
Designation:
nt
s.
co
m
Configuring a PROFIBUS-DP System
Using Devices in the Fieldline Product Range
on
l
Devices of the Fieldline Product Range for the PROFIBUS-DP Bus System
6852_en_02
PHOENIX CONTACT
s.
nt
ne
po
om
in
ec
on
l
co
m
FLS FLM PB SYS PRO UM E
Please Observe the Following Notes:
In order to ensure the safe use of your device, we recommend that you read this manual
carefully. The following notes provide information on how to use this manual.
User Group of This Manual
The use of products described in this manual is oriented exclusively to Phoenix Contact
accepts no liability for erroneous handling or damage to products from Phoenix Contact or
third-party products resulting from disregard of information contained in this manual.
co
m
Explanation of Symbols Used
s.
The attention symbol refers to an operating procedure which, if not carefully followed,
could result in damage to hardware and software or personal injury.
ne
nt
The note symbol informs you of conditions that must strictly be observed to achieve
error-free operation. It also gives you tips and advice on the efficient use of hardware and
on software optimization to save you extra work.
po
The text symbol refers to detailed sources of information (manuals, data sheets,
literature, etc.) on the subject matter, product, etc. This text also provides helpful
information for the orientation in the manual.
–
THIS EQUIPMENT IS SUITABLE FOR USE IN CLASS I, DIVISION 2, GROUPS A,
B, C AND D OR IN NON-HAZARDOUS LOCATIONS ONLY.
WARNING - EXPLOSION HAZARD - SUBSTITUTION OF COMPONENTS MAY
IMPAIR SUITABILITY FOR CLASS I; DIVISION 2.
WARNING - EXPLOSION HAZARD - DO NOT DISCONNECT EQUIPMENT
UNLESS POWER HAS BEEN SWITCHED OFF OR THE AREA IS KNOWN TO BE
NON-HAZARDOUS:
ALL WIRING OF THESE DEVICES MUST BE IN ACCORDANCE WITH THE
NATIONAL ELECTRICAL CODE ARTICLE 501.4(B) FOR CLASS I, DIVISION 2.
in
ec
–
om
For use in potentially explosive areas, please observe the following:
on
l
–
6852_en_02
–
PHOENIX CONTACT
FLS FLM PB SYS PRO UM E
We Are Interested in Your Opinion
We are constantly attempting to improve the quality of our manuals.
Should you have any suggestions or recommendations for improvement of the contents
and layout of our manuals, we would appreciate it if you would send us your comments.
Please use the universal fax form at the end of the manual for this.
Statement of Legal Authority
m
This manual, including all illustrations contained herein, is copyright protected. Use of this
manual by any third party deviating from the copyright provision is forbidden.
Reproduction, translation, or electronic and photographic archiving or alteration requires
the express written consent of Phoenix Contact. Violators are liable for damages.
co
Phoenix Contact reserves the right to make any technical changes that serve the purpose
of technical progress.
Internet
on
l
in
ec
om
po
ne
nt
s.
Up-to-date information on Phoenix Contact products can be found on the Internet at
www.phoenixcontact.com.
PHOENIX CONTACT
6852_en_02
Table of Contents
1.2
Documentation for Fieldline Devices.................................................................. 1-2
1.3
PROFIBUS-DP................................................................................................... 1-3
1.3.1
Structure of PROFIBUS-DP ............................................................... 1-3
1.3.2
Address .............................................................................................. 1-5
1.3.3
Baud Rate ........................................................................................... 1-5
1.3.4
Laying the PROFIBUS Cable ............................................................. 1-6
1.3.5
Mains Termination Resistors .............................................................. 1-6
1.3.6
Assembly Guidelines for PROFIBUS Networks ................................. 1-6
1.3.7
Fieldline Modular Local Bus ............................................................... 1-7
m
The Fieldline Product Range.............................................................................. 1-1
co
Connecting Bus Cables and Setting the Address....................................................................2-1
Connection Options for the Bus ......................................................................... 2-1
2.2
Connecting the Bus and Termination Resistor................................................... 2-3
2.3
Connecting the Bus ............................................................................................ 2-5
2.4
Setting the Address ............................................................................................ 2-7
nt
s.
2.1
ne
3
1.1
Configuration and Startup........................................................................................................3-1
3.1
Configuring the PROFIBUS-DP System ............................................................ 3-1
3.2
Installation .......................................................................................................... 3-2
3.3
Configuration and Startup Using the
STEP 7® SIMATIC® Manager........................................................................... 3-3
Functions of the FLM BK PB M12 DI 8 M12 ....................................................3-15
3.4.1
Parameters .......................................................................................3-15
3.4.2
Local Diagnostic and Status Indicators ............................................ 3-21
in
ec
3.4
po
2
Fieldline at the PROFIBUS-DP................................................................................................1-1
om
1
Diagnostics.......................................................................................................3-23
3.6
Object Dictionary..............................................................................................3-27
3.6.1
Slot 0 ................................................................................................3-27
3.6.2
Slot 1 ................................................................................................3-32
3.6.3
Slot 2 to 63 .......................................................................................3-32
on
l
4
3.5
Acyclic Communication (DP/V1 and PCP) ..............................................................................4-1
6852_en_02
4.1
Acyclic Communication via C1 Master ............................................................... 4-1
4.2
Acyclic Communication via C2 Master ............................................................... 4-2
4.3
PCP Communication Basics .............................................................................. 4-3
4.4
Acyclic Communication in DP/V1 Mode ............................................................. 4-6
4.4.1
The Communication Mechanism ........................................................ 4-6
4.4.2
Examples ............................................................................................ 4-9
4.5
Acyclic Communication in DP/V0 Mode via Process Data...............................4-15
4.5.1
Mechanism for Transmission in the Process Data ...........................4-15
4.5.2
Examples of VC1 Services ...............................................................4-21
PHOENIX CONTACT
i
FLS FLM PB SYS PRO UM
B
Empty Spaces .................................................................................................... 5-1
5.2
Principle of the Dynamic Configuration .............................................................. 5-3
5.3
Startup................................................................................................................ 5-5
5.3.1
Planning Configuration ....................................................................... 5-5
5.3.2
Options for Specifying the Active Configuration ................................. 5-6
5.3.3
Specification of the Active Configuration via DP/V0 ........................... 5-7
5.3.4
Specification of the Active Configuration via DP/V1 .........................5-10
5.3.5
Summary ..........................................................................................5-11
m
5.1
Appendix................................................................................................................................. A-1
Error Codes for PCP Communication .............................................................. A-1
A2
Error Codes for DP/V1 and VC1 Communication ............................................ A-3
A3
Format of the Parameter Telegram .................................................................. A-4
co
A1
s.
A
Dynamic Configuration ............................................................................................................5-1
Appendix................................................................................................................................. B-1
Ordering Data................................................................................................... B-1
on
l
in
ec
om
po
ne
B1
nt
5
ii
PHOENIX CONTACT
6852_en_02
Fieldline at the PROFIBUS-DP
1
Fieldline at the PROFIBUS-DP
1.1
The Fieldline Product Range
The input and output devices in the Fieldline product range are designed for distributed automation tasks in harsh environmental conditions. The devices meet the requirements for
IP65/IP67 protection. They enable the direct connection of sensors and actuators in an environment close to the station.
m
The Fieldline product range includes the Fieldline Stand-Alone (FLS) and
Fieldline Modular (FLM) product groups.
co
Fieldline Stand-Alone devices cannot be extended and have a directly integrated fieldbus
connection and I/O level. They are used for distribution in the field when only a few digital
I/O points are required.
on
l
in
ec
om
po
ne
nt
s.
Fieldline Modular devices consist of a bus coupler (gateway) and I/O devices that can be
connected. They are used for special functions, primarily for applications with a high
I/O node density and complex functions.
6852_en_02
PHOENIX CONTACT
1-1
FLS FLM PB SYS PRO UM E
1.2
Documentation for Fieldline Devices
The documentation for Fieldline devices is modular, providing you with the
optimum information for your specific bus system.
This user manual describes only the PROFIBUS-specific features of the devices.
You also require the following documentation:
Installation of Devices in the Fieldline Product Range
FLS FLM SYS INST UM E (Order No. 26 98 97 3)
s.
co
m
This user manual describes the devices for all bus systems.
This includes:
– The device properties, which are the same for all bus systems
– Mounting
– The voltage supply concept and connection
nt
Device-Specific Data Sheet
on
l
in
ec
om
po
ne
The data sheet describes the specific properties of a device.
This includes:
– Function
– Local diagnostic and status indicators
– Connector pin assignment and connection example
– Configuration data
– Technical data
1-2
PHOENIX CONTACT
6852_en_02
Fieldline at the PROFIBUS-DP
1.3
PROFIBUS-DP
PROFIBUS was developed as an open fieldbus in 1983 and was standardized in
DIN 19245 in 1991. In 1996, PROFIBUS was defined as the European standard in
EN 50170.
1.3.1
Structure of PROFIBUS-DP
m
S 1
M
A
co
A
R
S 2
nt
s.
A
R e m o te b u s
in
ec
on
l
A
P B D O
8
A
po
om
R
S 2
P B D I 8
ne
P B D I 8
S 3
P B D IO
4 /4
P B D O
8
L o c a l b u s
A
L B
L B
L B
L B
L B
L B
IN
O U T
IN
O U T
IN
O U T
U L S
U L S
U L S
U L S
U L S
U L S
P B D I 8
P B D O
8
P B D IO
B K P B
4 /4
F L M
D I 8
D IO
4 /4
F L M
A I
F L M
D I 8
6 8 5 2 C 0 0 5
Figure 1-1
Typical structure of an PROFIBUS-DP system
with remote bus and local bus
Key for Figure 1-1:
6852_en_02
M
Master
A
Termination resistor
R
Repeater
R/T
Repeater with termination resistor
Sx
Segment
PHOENIX CONTACT
1-3
FLS FLM PB SYS PRO UM E
Table 1-1
Basic network specifications
Topology
Linear, active bus connection at both ends of a segment
(termination resistor); branch lines are permitted
Number of stations in a segment
32 (without repeater)
127 (with repeater)
Number of repeaters between two devices 9, maximum
Depending on the transmission speed (see Table 1-2 on page 1-5); up to
1.2 km at 93.75 Kbps, maximum; the expansion can be increased with the
help of repeaters
Transmission speed
9.6 Kbps to 12 Mbps, can be adjusted in increments
(see Table 1-2 on page 1-5).
co
m
Maximum expansion of the bus
on
l
in
ec
om
po
ne
nt
s.
Repeaters can be found in the latest Phoenix Contact INTERFACE catalog.
1-4
PHOENIX CONTACT
6852_en_02
Fieldline at the PROFIBUS-DP
1.3.2
Address
In the PROFIBUS-DP network, each device is identified by its address (device ID, station
address). For Fieldline Stand-Alone devices, all addresses between 1 and 99 are allowed,
whereas the addresses for Fieldline Modular devices are between 1 and 126. In a
PROFIBUS-DP network, an address can only be assigned once.
The device address is set using the rotary encoding switches
(see section "Setting the Address" on page 2-7).
Baud Rate
m
1.3.3
co
Fieldline devices for PROFIBUS-DP have an automatic baud rate detection function, which
therefore must not be set. After power up, the Fieldline device detects the baud rate and
stores it as long as the supply voltage is present.
s.
If you modify the baud rate of the master, you must disconnect and reconnect the supply
voltage for the Fieldline Stand-Alone device so that it detects the modified baud rate.
1200
om
Line length in
m
9.6
19.2
1200
93.75
187.5
500
1500
12000
1200
1000
400
200
100
< 6.6
None
in
ec
Length of
branch lines in
m
ne
Baud Rate in
kbps
Baud rate and line lengths
po
Table 1-2
nt
The bus cables for the PROFIBUS-DP system are specified in standard EN 50170. According to this standard, the maximum length of a bus segment depends on the baud rate.
on
l
Only one baud rate can be used at a time in a PROFIBUS system.
6852_en_02
PHOENIX CONTACT
1-5
FLS FLM PB SYS PRO UM E
1.3.4
Laying the PROFIBUS Cable
co
m
When laying a PROFIBUS cable, please observe the following:
– Do not lay signal and bus cables parallel to power cables or in bundles with power cables.
– Lay PROFIBUS cables and cables with direct voltages > 60 V and alternating voltages
> 25 V in separate bundles or cable ducts.
– Always lay signal cables and equipotential bonding together in one channel, following
the shortest route.
– Avoid extending the PROFIBUS cables with connectors.
– Do not lay PROFIBUS cables in bundles with telephone lines and cables leading to
potentially explosive areas.
– As a rule, avoid branch lines.
Mains Termination Resistors
s.
1.3.5
nt
In PROFIBUS-DP, the individual branches must each be terminated with a termination
resistor.
ne
The Fieldline devices do not have a resistor of this type.
For recommended termination resistors, please refer to the device-specific data sheet.
po
It is either screwed on to the BUS OUT connection or, if T-pieces are used (for Fieldline
Stand-Alone devices), screwed onto the open connection of the T-piece.
Assembly Guidelines for PROFIBUS Networks
om
1.3.6
in
ec
Important information on system planning, installation instructions when using PROFIBUS,
and starting up PROFIBUS systems can be found in the assembly guidelines for
PROFIBUS.
This information is published by the PROFIBUS user organization
(see also www.profibus.com).
on
l
.
1-6
PHOENIX CONTACT
If you are designing your system with Fieldline and PROFIBUS, you must observe the
information provided in the documentation in section 1.2 as well as the assembly guidelines for PROFIBUS.
6852_en_02
Fieldline at the PROFIBUS-DP
1.3.7
Fieldline Modular Local Bus
A Fieldline Modular local bus is a bus connection that branches off from a remote bus via
a bus coupler (FLM BK PB) and connects the Fieldline Modular local bus devices with each
other. The bus coupler opens a powerful local bus, which can be used to connect up to
16 more devices. Devices are Fieldline modular local bus devices used to implement a
local bus station. The bus coupler provides the power supply.
The maximum total length of a local bus is 20 m. The transmission speed can be switched
from 500 kBaud to 2 MBaud.
on
l
in
ec
om
po
ne
nt
s.
co
m
The bus coupler can be connected with up to 8 digital sensors via M12 connectors. The
slots are double-occupied. The bus coupler supplies the supply voltage for the sensors and
reads in the provided signals.
6852_en_02
PHOENIX CONTACT
1-7
on
l
in
ec
om
po
ne
nt
s.
co
m
FLS FLM PB SYS PRO UM E
1-8
PHOENIX CONTACT
6852_en_02
Connecting Bus Cables and Setting the Address
2
Connecting Bus Cables and Setting the Address
2.1
Connection Options for the Bus
In the following, a cable that conforms to the fieldbus specification must be used to
connect PROFIBUS-DP.
m
Use shielded M12 connectors to connect the bus. The thread of the M12 connector is used
to connect the shielding to functional earth ground and in some cases a pin is also used.
co
Phoenix Contact recommends the use of pre-assembled bus cables (see
Phoenix Contact AUTOMATIONWORX catalog).
nt
s.
If you assemble the cables yourself, please follow the description provided in the
Fieldline FLS FLM SYS INST UM E user manual (Order No. 26 98 97 3) and the
device-specific data sheet.
po
ne
For PROFIBUS-DP there are two ways of connecting the bus:
1. Connect the incoming PROFIBUS to the BUS IN socket and the outgoing PROFIBUS
to the BUS OUT socket.
2. When using Fieldline Stand-Alone you can also connect the PROFIBUS via a T-piece.
om
When using Fieldline Stand-Alone, the PROFIBUS-DP can be connected via the BUS IN
and BUS OUT connections or via T-pieces up to a maximum transmission speed of
1.5 Mbaud. If higher transmission speeds are used, the bus must be connected via
T-pieces with integrated series inductance.
on
l
in
ec
For transmission rates of more than 3 MBaud, series inductance is available in the
Fieldline Modular devices. For this reason we recommend to connect Fieldline Modular devices via BUS IN and BUS OUT. Please observe the installation instructions of the
PROFIBUS User Organization.
6852_en_02
PHOENIX CONTACT
2-1
FLS FLM PB SYS PRO UM E
BUS IN / BUS OUT
F L S
B U S
IN
B U S
F L M
B U S
O U T
B U S
B F
B U S
IN
B U S
X 1 0
0
2
4
U
B U S
O U T
L S
O U T
L B
2
X 1 0
O U T
4
1 2
6
8
2
4
X 1
2
5
R U N
0
1 0
3
6
B F
0
8
U S
L S
M D
O U T
6
9 8
X 1
9 0 1
U L
7
U
IN
4
IN
U L
9
8
6
2 M B D
U L S
Accessories:
Two M12 connectors
Advantage:
No additional accessories required.
When the bus is running, no devices can be removed or added
without physical interruption.
Supports transmission rates of up to 1.5 Mbaud (FLS).
s.
Disadvantage: –
nt
–
For Fieldline Stand-Alone devices, f a T-piece is used to connect the bus,
this must be connected at the BUS OUT connection.
ne
T-piece (FLS)
co
Bus connection via BUS IN / BUS OUT
m
6 8 5 2 B 0 0 2
Figure 2-1
po
To ensure IP65/IP67 protection, cover the unused connection with a protective cap (1).
1
B U S O U T
om
B U S IN
B U S
B F
B U S
X 1 0
0
2
4
IN
in
ec
U L
on
l
U
L S
9
6
9 8
X 1
0 1
8
3
7
U S
O U T
2
6
5
4
U
L S
6 8 5 2 A 0 0 3
Figure 2-2
Bus connection via T-piece
Accessories:
Two M12 connectors, 1 T-piece, 1 protective cap
Advantage:
–
–
When the bus is running, devices can be removed or added
without physical interruption. To do this, the master and the
control program must support the removal and addition of
devices.
Supports all transmission rates.
Disadvantage: Additional accessories required.
2-2
PHOENIX CONTACT
6852_en_02
Connecting Bus Cables and Setting the Address
2.2
For a Fieldline Stand-Alone device that is followed by another device, the incoming and
outgoing bus must be connected (Figure 2-3, A1 and B1). For the last device of a
PROFIBUS segment, only the incoming bus is connected (Figure 2-3, A2 and B2). A termination resistor (1) is placed in the connection for the outgoing bus. To ensure IP65/IP67
protection, cover the unused BUS IN connection with a protective cap (2).
A
A 1
B U S IN
A 2
B U S O U T
B U S
B U S IN
B U S
B F
B U S
X 1 0
0
2
2
B U S IN
2
B U S O U T
B U S
B U S
B F
X 1 0
0
2
4
IN
U L
9
U S
5
in
ec
on
l
6852_en_02
2
4
U
4
5
U
L S
L S
1
B U S
B F
X 1 0
0
2
4
IN
U L
9
O U T
6
9 8
X 1
0 1
8
2
3
7
U
L S
U S
6
5
4
U
L S
6 8 5 2 A 0 0 9
Options for connecting the bus and termination resistor of
Fieldline Stand-Alone devices
Connection via BUS IN / BUS OUT
A1
Incoming and outgoing bus
A2
Incoming bus and termination resistor
B
6
U S
E N D
B U S
3
6
Figure 2-3
A
L S
B U S IN
om
2
7
L S
B 2
O U T
6
9 8
X 1
0 1
8
U
U
L S
s.
U
nt
4
5
ne
B 1
6
O U T
2
3
7
po
B
U S
L S
6
9 8
X 1
9 0 1
U L
8
3
7
U
co
8
4
IN
O U T
6
9 8
X 1
9 0 1
U L
1
B U S
B F
X 1 0
0
2
4
IN
E N D
m
FLS
Connecting the Bus and Termination Resistor
Connection via T-piece
B1
Incoming and outgoing bus
B2
Incoming bus and termination resistor
1
Termination resistor
2
Protective cap for the unused connection
PHOENIX CONTACT
2-3
FLS FLM PB SYS PRO UM E
FLM
For a Fieldline Modular device, the incoming and the outgoing bus must be connected
(Figure 2-4, A1). For the last device of a PROFIBUS segment, only the incoming bus is
connected (Figure 2-4, A2). A termination resistor (1) is placed in the connection for the
outgoing bus.
A 1
A 2
B U S
IN
B U S
IN
X 1 0
U L
M D
B F
R U N
0
2
1 0
2
9
8
6
O U T
U L S
6
8
2
9
8
4
6
2 M B D
U L S
1
6 8 5 2 B 0 0 9
Options for connecting the bus and termination resistor of
Fieldline Modular devices
nt
Figure 2-4
O U T
4
1 2
s.
co
2 M B D
L B
2
X 1 0
X 1
4
X 1
O U T
M D
R U N
0
0
0
Connection via BUS IN / BUS OUT
ne
A
A1
Incoming and outgoing bus
A2
Incoming bus and termination resistor
Termination resistor
on
l
in
ec
om
1
po
B U S
O U T
U L
B F
1 0
6
8
B U S
IN
O U T
4
1 2
B U S
IN
L B
m
A
2-4
PHOENIX CONTACT
6852_en_02
Connecting Bus Cables and Setting the Address
2.3
Connecting the Bus
Connect the PROFIBUS via BUS IN / BUS OUT or via a T-piece (for FLS only)
(see section "Connection Options for the Bus" on page 2-1).
L B IN
L B O U T
m
6 6 2 5 A 0 0 4
Pin
IN
PROFIBUS-DP pin assignment (connections on the device)
co
Figure 2-5
OUT
Note
VP
VP
2
RxD/TxD-N (A)
RxD/TxD-N (A)
Supply voltage for active bus connection (termination resistor)
3
DGND
DGND
4
RxD/TxD-P (B)
RxD/TxD-P (B)
Reference potential of the RS-485 transceiver of the station
5
Shield
Shield
Placed directly on FE
ne
nt
s.
1
In c o m in g b u s
R x D /T x D -P (B )
5
S h ie ld
S o ld e r s id e
S h ie ld
on
l
Figure 2-6
6852_en_02
1
1
V P
R x D /T x D -N (A )
D G N D
g re e n
2
(A )
2
3
3
re d
4
3
in
ec
4
V P
R x D /T x D -N
D G N D
2
om
1
po
O u tg o in g b u s
5
5
4
R x D /T x D -P (B )
S h ie ld
S h ie ld
1
2
3
4
5
S o ld e r s id e
6 8 5 2 A 0 1 0
Connector pin assignment of the M12 connector
(connector on the cable)
The thread and pin 5 are used for shielding.
PHOENIX CONTACT
2-5
FLS FLM PB SYS PRO UM E
Pin assignment of the
local bus for Fieldline
Modular devices
L B IN
L B O U T
6 6 2 5 A 0 0 4
Pin assignment of the local bus (FLM)
LB IN
LB OUT
1
DO
DO
2
DO
DO
3
DI
4
DI
5
GND
co
Pin
m
Figure 2-7
s.
DI
nt
DI
ne
GND
po
PROFIBUS-DP cables available on the market usually have one wire pair (red and green),
which is protected by a braided shield and membrane.
The data lines are labeled A and B. If a cable with red and green wires is used, you should
select the following assignment for both the incoming and outgoing bus:
Green
Data line B
Red
on
l
Encoding of the
connections
in
ec
om
Data line A
In the PROFIBUS-DP system, the connections for the bus are B-encoded and the connections for the supply voltage are A-encoded. In this way, the bus and supply voltage cannot
be mixed up.
P in
S o c k e t
A
B
6 8 5 1 A 0 0 5
Figure 2-8
2-6
PHOENIX CONTACT
Difference between A and B-encoding
(connections on the device)
6852_en_02
Connecting Bus Cables and Setting the Address
2.4
Setting the Address
The address of a device (device ID, station address) is set using two rotary encoding
switches. Rotary encoding switch X10 is used to specify the tens and switch X1 is used to
specify the units of the device ID.
B U S
B F
X 1
2
5
4
U
2
O U T
4
6
8
2
4
X 1
9
O U T
L B
R U N
0
1 2
1 0
3
6
X 1 0
0
8
U S
L S
IN
O U T
6
9 8
X 1
9 0 1
7
U
X 1 0
4
U L
M D
B F
X 1 0
0
2
IN
U L
B U S
8
6
2 M B D
L S
U L S
co
B U S
F L M
m
F L S
6 8 5 2 B 0 0 4
Rotary encoding switches
s.
Figure 2-9
ne
X 1 0
0
2
nt
F L M
F L S
0
4
X 1 0
4
8
om
2
po
1 0
6
9 8
X 1
9 0 1
2
1 2
6
8
X 1 0
0
2
X 1
4
3
7
5
4
in
ec
6
Figure 2-10
9
8
6
6 6 5 1 B 0 3 2
Example: Setting address 46
on
l
Adjust the rotary encoding switches using a suitable screwdriver (blade width 3.5 mm).
Use of an unsuitable tool may damage the rotary encoding switches.
Set the station address immediately after installation and before connecting the supply
voltages.
The station address, which the PROFIBUS master uses to address the Fieldline StandAlone device is set in the range between 1 and 99 using both rotary encoding switches.
The station address, which the PROFIBUS master uses to address the Fieldline Modular
device is set in the range between 1 and 126 using both rotary encoding switches.
Another address cannot be set. Therefore, do not turn rotary encoding switch X10 past
position 9 (FLS) or 12 (FLM).
The station address set is read upon system startup and accepted in the device settings.
Changing the switch positions during operation has no effect on the address settings.
A new address value is only accepted upon device power up. Dynamic address modification via the fieldbus is not supported.
6852_en_02
PHOENIX CONTACT
2-7
on
l
in
ec
om
po
ne
nt
s.
co
m
FLS FLM PB SYS PRO UM E
2-8
PHOENIX CONTACT
6852_en_02
Configuration and Startup
3
Configuration and Startup
3.1
Configuring the PROFIBUS-DP System
To configure your system, proceed as follows:
•
Describe and define the task
–
–
Consider the system restrictions
•
Take into account the basic system specifications (see Table 1-1 on page 1-4)
s.
–
Select the voltage supply
–
Please refer to the information on the power supply in the
FLS FLM SYS INST UM E user manual (Order No. 26 98 97 3)
The selection of suitable voltage supplies always depends on the particular system. The following criteria should always be met for the 24 V DC voltage supply:
Nominal value:
24 V
Tolerance:
±25% (complies with EN 61131-2: -15% / +20%)
Incl. Ripple:
±5%
po
–
nt
•
Specify the devices to be installed according to the input and output signals
co
–
m
Select the devices required
ne
•
Specify the device range for the I/O devices
Specify the type and number of input and output signals
om
This corresponds to a range of 18 V to 30 V (ripple included)
in
ec
A selection of suitable voltage supplies can be found in the INTERFACE catalog from
Phoenix Contact.
on
l
•
Select PROFIBUS cables
For interference-free transmission Phoenix Contact recommends a 2-wire, twisted pair
and shielded cable, specified as cable type A in EN 50 170 Part 8-2. The cable type B
which is also described must not be used anymore.
–
–
6852_en_02
Select the type of connections for the cables to the devices (BUS IN/BUS OUT
or T-pieces (for FLS devices only), see section "Connecting the Bus" on
page 2-5)
Please observe the notes in section "Laying the PROFIBUS Cable" on page 1-6.
PHOENIX CONTACT
3-1
FLS FLM PB SYS PRO UM E
3.2
Installation
Disconnect the power supply before installing the devices.
•
•
on
l
in
ec
om
po
ne
nt
s.
•
m
•
Installing devices
See FLS FLM SYS INST UM E user manual.
Connecting the Bus
See section "Connecting the Bus" on page 2-5.
Installing mains termination resistors
See section "Mains Termination Resistors" on page 1-6.
Setting the address
See section "Setting the Address" on page 2-7.
Connecting the supply voltage
See FLS FLM SYS INST UM E user manual.
co
•
3-2
PHOENIX CONTACT
6852_en_02
Configuration and Startup
3.3
Configuration and Startup Using the
STEP 7® SIMATIC® Manager
–
–
–
–
PROFIBUS network is installed
Termination resistors are specified
PROFIBUS addresses on the device are set
Baud rate is specified
co
Requirements
m
This section describes an example of configuration and startup using the STEP 7® SIMATIC® Manager (English Version 5.1 + Service Pack 3, Release K5.1.3.0). You can
apply the procedures to other similar software.
nt
s.
If FLM devices with a data width of less than 5 bits and with the same ID and length code
are connected next to each other, they are automatically packed during auto configuration, i.e., their data is combined. If you carry out the configuration yourself using a hardware configurator, e.g., the Siemens STEP 7® SIMATIC® Manager, the automatic
configuration in the station is overwritten.
Start the STEP 7® SIMATIC® Manager under Windows.
on
l
in
ec
om
po
ne
Starting the STEP 7®
SIMATIC® Manager
6852_en_02
PHOENIX CONTACT
3-3
FLS FLM PB SYS PRO UM E
Creating a new
project
Call the "New" dialog box using the "File…New" menu item. Enter the desired name. In this
example, the name "Example" has been chosen. If necessary, change the project type and
storage location.
Confirm the entry with "OK" or "Return".
on
l
in
ec
om
po
ne
nt
s.
co
m
The project "Example" is saved.
3-4
PHOENIX CONTACT
Figure 3-1
Creating a new project
6852_en_02
Configuration and Startup
Insert a station using the "Insert...Station...SIMATIC® 300 Station" menu item.
In this example, a "SIMATIC® 300 Station" has been selected.
in
ec
om
po
ne
nt
s.
co
m
Inserting a new SIMATIC®
S7® station into the project
Inserting a new SIMATIC® S7® station into the project
on
l
Figure 3-2
6852_en_02
PHOENIX CONTACT
3-5
FLS FLM PB SYS PRO UM E
om
po
ne
nt
s.
co
m
On the left-hand side of the project window, click on the small "plus" box next to the
"Example" folder and select "SIMATIC® 300(1)".
in
ec
Figure 3-3
Selecting SIMATIC® 300(1)
The SIMATIC® Manager displays the "Hardware" object in the right-hand window.
on
l
Double-click on "Hardware" to start the hardware configurator, which can be used to edit
the configuration table.
3-6
PHOENIX CONTACT
6852_en_02
Configuration and Startup
Installing a new GSD file
The characteristic communication features of a PROFIBUS-DP device are defined in the
form of an electronic device data sheet (G S D, device database file). The GSD file for the
Fieldline devices can be found on the Internet at www.phoenixcontact.com.
If this file is not in the system, you must import the file into your configuration program.
on
l
in
ec
om
po
ne
nt
s.
co
m
Open the "PXC_07E9.gsd" file via "Tools... Install New GSD..." in the dialog box that appears.
Figure 3-4
Installing a new GSD file
The new GSD file is loaded in the appropriate directory and the hardware catalog is
updated.
6852_en_02
PHOENIX CONTACT
3-7
FLS FLM PB SYS PRO UM E
Selecting DIN rail
and power supply
Now select the DIN rail and the power supply.
For the corresponding procedures, please refer to your STEP 7® SIMATIC® Manager user
manual.
Selecting the CPU
Now select the CPU by double-clicking on the CPU folder in the right-hand window (1):
"CPU 315-2DP" in this example.
Click on the "New" button in the "Properties - PROFIBUS Interface DP Master (R0/S2.1)"
window. (2).
on
l
in
ec
om
po
ne
nt
s.
co
m
Enter the name (in this example "Sample project") in the "Properties - New Subnet PROFIBUS" dialog box (3), and confirm the entry with "OK" or "Return".
Figure 3-5
3-8
PHOENIX CONTACT
Selecting the CPU
6852_en_02
Configuration and Startup
on
l
in
ec
om
po
ne
nt
s.
co
m
Next confirm the entries in the "Properties - PROFIBUS Interface DP Master (R0/S2.1)"
window with "OK" or "Return".
6852_en_02
Figure 3-6
Properties - PROFIBUS Interface DP Master (R0/S2.1)
PHOENIX CONTACT
3-9
FLS FLM PB SYS PRO UM E
Select PROFIBUS FLM
bus coupler
Click on "Sample project: DP master system". (1)
Click with the mouse in the free slot. (2)
on
l
in
ec
om
po
ne
nt
s.
co
m
Select the FLM bus coupler from the hardware catalog (3) in the "PROFIBUS-DP... menu
Additional Field Devices... I/O... Phoenix Contact...FIELDLINE... FLM BK PB M12 DI 8
M12” by double-clicking on FLM BK PB M12 DI 8 M12.
3-10
PHOENIX CONTACT
Figure 3-7
Select the FLM bus coupler
6852_en_02
Configuration and Startup
The "Features - PROFIBUS interface" window opens
FLM BK PB M12 DI 8 M12.
on
l
in
ec
om
po
ne
nt
s.
co
m
Check the PROFIBUS address of the bus coupler in the dialog field, and if required, adjust
this according to the application. Confirm your entry with "OK".
6852_en_02
Figure 3-8
Properties - PROFIBUS Interface
FLM BK PB M12 DI 8 M12
PHOENIX CONTACT
3-11
FLS FLM PB SYS PRO UM E
Positioning the
bus coupler
Select the bus coupler by clicking on the bus coupler icon using the mouse. (1)
in
ec
om
po
ne
nt
s.
co
m
Select a free slot/line by clicking with the mouse in a free slot/row. (2)
on
l
Figure 3-9
Positioning the bus coupler
The FLM components can now be selected from the hardware catalog and assigned to the
bus coupler according to their physical position in the sequence (drag & drop).
If the FLM BK PB M12 DI 8 M12 device is not automatically inserted into the first position
by the hardware configurator, please manually select it from the hardware catalog.
3-12
PHOENIX CONTACT
6852_en_02
Configuration and Startup
in
ec
om
po
ne
nt
s.
co
m
If necessary, the I/O addresses can be changed by double-clicking on the rows of the FLM
components. Entries can be made in the "Properties - DP Slave" dialog box. Confirm your
entries with "OK" or "Return".
on
l
Figure 3-10
6852_en_02
Checking or changing I/O addresses
It is possible to connect additional PROFIBUS DP devices to the DP master system - in
this case "Example" - and parameterize and address each one according to the device
type.
PHOENIX CONTACT
3-13
FLS FLM PB SYS PRO UM E
Transfer to the S7 system
Save and translate the project using the
menu item.
button or the "Station… Save and Translate"
button or the "Target System… Load
on
l
in
ec
om
po
ne
nt
s.
co
m
Transfer the project to the S7 system using the
to Module" menu item.
Figure 3-11
Connecting additional devices to the DP master system and downloading
them
After data transmission is complete, the PROFIBUS system starts automatically.
3-14
PHOENIX CONTACT
6852_en_02
Configuration and Startup
3.4
Functions of the FLM BK PB M12 DI 8 M12
3.4.1
Parameters
Besides the PROFIBUS standard functionalities, you have the possibility to select different
additional functions in the "Parameterize" dialog of your configuration tool after having imported the GSD file as well as the configuration of the station.
in
ec
om
po
ne
nt
s.
co
m
I/O parameters
on
l
Figure 3-12
6852_en_02
Parameters for the FLM AI 4 SF M12 device
Especially for the analog I/O devices you have the option to set parameters in order to
adapt the device to the individual requirements. For example, you could preset a measuring range or a data format. This option is prepared in the GSD file and can be accessed
under the features of the corresponding I/O device.
PHOENIX CONTACT
3-15
FLS FLM PB SYS PRO UM E
Figure 3-13
po
ne
nt
s.
co
m
Replacement strategy in
local bus
Presetting substitute values
om
During errors in PROFIBUS or when the control system fails you can check the
correct future behavior of the outputs.
on
l
in
ec
Here you have the following options:
– output of the value 0,
– maintains last value,
– select substitute value (can be set).
3-16
PHOENIX CONTACT
The response monitoring on the slave must be activated so that the settings
are activated.
6852_en_02
Configuration and Startup
When using 16-channel digital devices, you have the possibility to adapt the data format to
the control system. Here, the inputs and outputs of the connectors 1 to 4 and 5 to 8 can
either be copied onto byte 1 and byte 0 or the other way around, i.e. connector 1 to 4 and
5 to 8 are copied onto byte 0 and 1.
om
po
ne
nt
s.
co
m
Adapting the data format
to the control system
Adapting the data format to the control system
on
l
in
ec
Figure 3-14
6852_en_02
PHOENIX CONTACT
3-17
FLS FLM PB SYS PRO UM E
In the event of a device failure in the local bus you can either continue to operate the remaining still available devices or you can stop the local bus until all devices are available.
Operation during device failure on the local bus
om
Figure 3-15
po
ne
nt
s.
co
m
Operation during device
failure on the local bus
on
l
in
ec
If you select restart using those devices that are still available, please note that the outputs will be temporarily reset during a restart. With the "Stop" setting, the local bus only
starts if the configuration corresponds to the presetting.
3-18
PHOENIX CONTACT
6852_en_02
Configuration and Startup
This option has been prepared for future I/O devices. If you are using a device where those
I/O errors will be reported that have to be acknowledged, this message can either be acknowledged automatically or from the application.
om
po
ne
nt
s.
co
m
Acknowledging I/O errors
Acknowledging I/O errors
on
l
in
ec
Figure 3-16
6852_en_02
PHOENIX CONTACT
3-19
FLS FLM PB SYS PRO UM E
Channel-Specific Diagnostics
om
po
ne
nt
s.
co
m
Several devices support channel-specific diagnostics. If you would like to read them, if required, please enable the diagnostics here. Please note that this procedure lengthens the
diagnostic telegram. Up to 10 diagnostics will be displayed simultaneously.
Setting the channel-specific diagnostics
on
l
in
ec
Figure 3-17
3-20
PHOENIX CONTACT
6852_en_02
Configuration and Startup
3.4.2
Local Diagnostic and Status Indicators
U L
M D
U L
M D
B F
IN
x 1 0
R U N
0
R U N
2
O U T
4
1 2
1 0
6
8
0
2
x 1
2 M B D
4
9
O U T
8
6
m
B F
L B
U L S
2 M B D
co
B U S
X X
I2
s.
I1
X X
I4
po
ne
nt
I3
I5
I6
I7
I8
X X
X X
om
IN
on
l
in
ec
U S
U S
U L S
B K P B
Figure 3-18
Diagnostic and status indicators of the
FLM BK PB M12 DI 8 M12 device
Table 3-1
Diagnostic and status indicators
Des.
Color
Meaning
UL
Green LED
Communications power
6852_en_02
7 0 0 8 A 0 0 3
ON:
Communications power present
OFF:
Communications power too low
PHOENIX CONTACT
3-21
FLS FLM PB SYS PRO UM E
Des.
Color
Meaning
BF
Red LED
No cyclic data transmission:
PROFIBUS not connected, master not active
Incorrect settings (configuration via master, station address)
Timeout expired
LED OFF:
The device is addressed by the PROFIBUS,
it received a parameterization
No power supply for the device
(In this state the "UL" LED does not light up either because of the missing 24 V
communications power.)
Device status
Green ON:
Device is ready to operate.
m
LED
green/red/yellow
co
MD
s.
Green, flashing: An error is present that can be corrected (local bus not complete).
1 Hz
Station in process data mode.
Device in selftest state.
Red ON
An error is present that cannot be corrected.
Red flashing:
1 Hz
Local bus is read, no process data transmission on local bus.
po
ne
nt
Green/red
Flashing
(flicker)
Yellow flashing: More than 64 devices configured or system restriction of 244 bytes of
1 Hz
process data/configuration data exceeded.
LED
green/red/yellow
Status of local bus communication
Green ON
om
Voltage not present.
in
ec
RUN
OFF:
Local bus is running data cycles.
Green, flashing: I/O error present.
1 Hz
Local bus stopped.
on
l
Red ON
Red/yellow
Flashing: 1 Hz
There are differences between specified and current configuration.
Flashing
green/yellow: 1
Hz
Pre-programmed error values are written to the outputs.
PLC stopped or PROFIBUS connection interrupted (cable, connector).
Yellow flashing: PCP error on an I/O device
1 Hz
US
3-22
OFF:
Voltage not present.
Green/red LED
Voltage supply for inputs IN1 to IN8
Green ON:
Voltage supply present.
Red ON:
Overload or voltage supply too low.
OFF:
Voltage supply not present.
PHOENIX CONTACT
6852_en_02
Configuration and Startup
3.5
Table 3-2
Bit 7
Diagnostics
Diagnostics FLM BK PB M12 DI 8 M12
Bit 6
Bit 5
Bit 4
Bit 3
Bit 2
Bit 1
Bit 0
Meaning
Station status 1
Station status 2
Byte 1 to 3 PROFIBUS standard
Station status 3
PROFIBUS master address
0
0
0
0
1
1
1
Manufacturer ID high-byte (07 hex)
1
1
1
0
1
0
0
1
Manufacturer ID low-byte (09 hex)
0
1
LT 8
LT 7
LT 6
LT 5
LT 4
LT 3
LT 2
LT 16
LT 15
LT 14
LT 13
LT 12
LT 11
LT 10
...
...
...
...
...
...
...
...
0
LT 63
LT 62
LT 61
LT 60
LT 59
LT 58
LT 57
0
0
1
0
0
0
0
0
1
…
on
l
0
…
ST LT 63
0
IO
0
IO
ne
s.
nt
Status type = device status
Slot (= 0 = general status of the bus
coupler)
SP
SP
ST LT 2
ST LT1
ST LT 6
ST LT 62
…
Specifier
Status, local bus device 1 to 4
ST LT 5
…
Local bus device
57 to 63
0
0
Status, local bus device 5 to 8
…
ST LT 61
…
Status, local bus device 61 to 63
Channel-specific diagnostics
(header) #1
Slot
ET
Slot
IN / OUT and channel number #1
Channel and error type #1
Channel-specific diagnostics
(header) #2
Channel
CT
1
0
…
...
Status (header)
0
Channel
0
Local bus device
9 to 16
0
CT
1
LT 9
0
ST LT 7
…
Local bus device
1 to 8
0
ST LT 3
ST LT 8
LT 1
po
0
0
in
ec
0
om
0
0
…
ID-specific diagnostics
(Header)
L = Block length
0
ST LT 4
co
L = Block length
0
m
0
ET
IN / OUT and channel number #2
Channel and error type #2
10 channel-specific diagnostics,
maximum
6852_en_02
PHOENIX CONTACT
3-23
FLS FLM PB SYS PRO UM E
Diagnostics FLM BK PB M12 DI 8 M12
Bit 6
Bit 5
Bit 4
Bit 3
Bit 2
Bit 1
Bit 0
Meaning
1
1
X
X
X
X
X
X
Revision (start with C1)
0
0
0
0
1
1
0
0
Status (header)
1
0
1
0
0
0
0
0
Reserved (header)
0
0
0
0
0
0
0
0
Reserved (header)
0
0
0
0
0
0
0
0
Reserved (header)
0
0
0
0
0
0
B
B
Baud rate local bus:
1 = 500 kbaud
2 = 2 Mbaud
X
X
X
X
X
X
X
X
Diag Location (FF = OK)
X
X
X
X
X
X
X
X
X
X
X
X
X
X
X
X
X
X
X
X
X
X
X
X
X
X
X
X
X
X
0
0
0
0
0
0
X
X
X
X
X
X
co
m
Bit 7
nt
Table 3-2
s.
User ID code,
1st local bus device with error
User length code,
1st local bus device with error
LB state (high byte)
X
LB state (low byte)
0
X
System limit violated?
X
X
Number of accessible
local bus devices
po
ne
X
om
Block 1: PROFIBUS Standard Diagnostics
Block 2: ID-Specific Diagnostics
in
ec
The table shows the faulty local bus devices. For every faulty device, a "1" is entered.
on
l
In the first byte of the block, in bit 0 up to 5 the length L of the entire ID-specific diagnostic
block including the header is given. The minimum length of this block is 2, the maximum
length is 9. The size of the ID-specific diagnostics block also depends on the number of the
configured devices.
Block 3: Status PDU (Device Status)
For every local bus device there are 2 bits for status coding:
ST LT x: 00 = Device data are valid.
ST LT x: 01 = Device data are invalid because of an error.
ST LT x: 11 = Device data are invalid because the wrong module had been connected.
ST LT x: 11 = Device data are invalid or no device has been connected (despite configuration)
The specifier (SP) equals 1 in the event of a faulty state. The specifier equals 2 if the device
changes from a faulty into an error-free state. If the specifier equals 0, the state did not
change.
3-24
PHOENIX CONTACT
6852_en_02
Configuration and Startup
SP: 0 = No evaluation
SP: 1 = An error occurs (number > 0)
SP: 2 = An error disappears (number = 0)
SP: 3 = Reserved
In the first byte of the block, in bit 0 up to 5 the length L of the entire status PDU block including the header is given. The minimum length of this block is 5, the maximum length is
20. The size of the status PDU block also depends on the number of the configured devices.
m
Block 4: Channel-Specific Diagnostics
co
Up to 10 channel errors are indicated here. Each channel error is an individual and independent error. The prerequisite for the display of the channel errors is that the I/O device
supports PCP and that the channel-specific diagnostics in the bus coupler are enabled.
= Reserved
IO: 01bin
= Input
IO: 10bin
= Output
IO: 11bin
= Input and Output
ne
nt
s.
IO: 00bin
po
Channel: Channel number of the respective channel (0 up to 63)
= Reserved
CT: 001bin
= 1 Bit
CT: 010bin
= 2 Bit
CT: 011bin
= 4 Bit
CT: 100bin
= 1 Byte
CT: 101bin
= 1 Word
CT: 110bin
= 2 Words
CT: 111bin
= Reserved
ET: 0
= Reserved
ET: 1
= Short-circuit
ET: 2
= Undervoltage
on
l
in
ec
om
CT: 000bin
6852_en_02
ET: 3
= Surge voltage
ET: 4
= Overload
ET: 5
= Overtemperature
ET: 6
= Cable break
ET: 7
= Upper limit value exceeded
ET: 8
= Lower limit value exceeded
ET: 9
= General error
PHOENIX CONTACT
3-25
FLS FLM PB SYS PRO UM E
Block 5: Revision Diagnostics
Block 6: Status PDU
The sixth block also is encoded as status PDU, however, in manufacturer-specific format.
The information stored here usually needs not be evaluated.
Byte 5 indicates the baud rate with which the local bus is operated and it indicates the
status of pin 5 of the ULS power supply (1 = 500 kbaud, 2 = 2 Mbaud).
Byte 7 and byte 8 show the ID and length code of the first faulty devices. This can be used
as additional information for blocks 2 and 3, if required.
co
Byte 12 indicates the number of available devices.
m
The value of byte 11 is 1, if the system limit was exceeded.
on
l
in
ec
om
po
ne
nt
s.
The FLM BK PB M12 DI 8 M12 is always counted as local bus device (LT). If an error
occurs on this device, the corresponding bits in the diagnostics are set for local bus device 1.
3-26
PHOENIX CONTACT
6852_en_02
Configuration and Startup
3.6
Object Dictionary
3.6.1
Slot 0
On slot 0, the following station-specific indices are implemented:
PDU Length
Function:
Data width of the virtual C1 module
(process data interface for acyclic communication) in bytes
Access:
Read
Length:
1 bytes
Note:
For DP/V0 access only
Index 4:
Master Control
Function:
Control bits for station
Access:
Write
Length:
1 bytes
Structure:
Bit 0: Restart local bus
ne
nt
s.
co
m
Index 3:
Bit 1: Acknowledge PF
po
Bit 2: Update diagnostics (evaluation of index 18 on PCP devices)
Bit 3: Unlock dynamic configuration
om
Bit 4: Reserved (set to 0)
Bit 5: Reserved (set to 0)
in
ec
Bit 6: Reserved (set to 0)
Bit 7: Reserved (set to 0)
on
l
With the help of bit 0, the local bus can be restarted anytime. If a new activation status has
been given via index 6, it is used for this restart. Please note that during reset the device
output data are reset to their device-specific reset values.
With bit 1, errors that have to be acknowledged can be set back. This function has been
prepared for future devices.
Set bit 2 if the diagnostics of all connected devices is to be read in again. This option is only
useful, if those devices are connected where object 18hex (Diag State) is implemented.
Usually this includes all Fieldline Modular devices using PCP. For this reason, check in the
respective data sheet whether the device supports PCP.
Bit 3 can be used in the context of dynamic configuration. If a new activation status has
been given via object 6 or 7 it is obligatory. If in the course of this, the connection to the
PROFIBUS master is interrupted and if the original parameterization is transmitted by the
master during restart, the activation status is maintained. The dynamic configuration needs
not to be executed again.
However, if the activation status is set back during restart, set bit 3 once after having executed a dynamic configuration via index 6 or 7.
In this way, both possibilities are available:
6852_en_02
PHOENIX CONTACT
3-27
FLS FLM PB SYS PRO UM E
–
–
Restart with original configuration
Restart with the latest dynamic configuration
Index 5:
PCP Status
Function:
Position and communication status PCP devices
Access:
Read
Length:
3 bytes per PCP device -> maximum 48 bytes
Structure:
Byte 1: Position in the station (slot number)
m
Byte 2: Status of PCP connection
00hex no connection
–
01hex connection ok
–
FFhex error during connection establishment
co
–
Enabling a Device
Function:
De-/activating I/O devices
Access:
Read and write
Length:
8 bytes
2
3
4
5
6
7
8 9
10
11
po
12
13
14
15
Bytes 3
to 7
16
...
Byte 8
57 58
59
60 61
62
63
x
in
ec
1
om
Byte 2
ne
Index 6:
Structure:
Byte 1
nt
s.
Byte 3: Reserved
Bit = 0: Device and slot inactive
on
l
Bit = 1: Device and slot active
3-28
PHOENIX CONTACT
6852_en_02
Configuration and Startup
Index 7:
Activating a Device / Restart
Function:
De-/activating I/O devices,
bus restart (write), number of devices and status (read)
Access:
Simultaneously read and write via DP/V0 with command 08
Length:
3-byte header, 1-byte length specification, up to n= 8 bytes for up to
63 devices
Structure:
m
Write:
08hex
Byte 2
00hex
Byte 3
07hex
Byte 4
Length of the following data n
Byte 5
1
s.
x
ne
Byte 4+n x
2
3
nt
...
co
Byte 1
x
4
5
6
7
8
x
x
x
x
x
po
Bit = 0: Device and slot inactive
Bit = 1: Device and slot active
on
l
in
ec
om
Read (Write-Response):
Byte 1
88hex
Byte 2
Status
Byte 3
Length of the following data m
Byte 4
Number of accessible devices (k)
Byte 5
1
2
3
4
5
6
7
8
x
x
x
x
x
x
x
x
...
Byte 3+m
Bit = 0: Device and slot inactive
Bit = 1: Device and slot active
This object is especially intended for use under DP/V0. The data length of the write is always depending on the number of configured devices. In this context, the number of de/activated devices is entirely irrelevant. If e.g., you configured 15 devices, 4 of which are to
be deactivated and 11 of which are to be activated, only the number of configured devices
is relevant. In this case you would need 2 bytes in order to display 15 devices. If 25 devices
are configured, you will need 4 bytes. On a write action, at least as many bytes are to be
used that the activation status for each device can be transmitted. It is also possible to
transmit more bytes. However, only up to 8 bytes can be transmitted because the station
can only manage a maximum of 63 devices.
6852_en_02
PHOENIX CONTACT
3-29
FLS FLM PB SYS PRO UM E
On read action, the number of data specifies the number of configured and accessible devices. If e.g., k = 18 devices are configured, you will receive the response m = 3+1 byte.
The following is valid for bytes on and behind position 5:
Status and specification are identical:
Activated and connected: Write: "1“; Read:"1“
Not activated and not connected: Write: "0“; Read:"0“
Activated but not connected: Write: "1“; Read: “0“
co
Not activated but connected: Write "0“; Read: “1“
m
Status and specification in conflict:
nt
s.
Since the specification must be identical with the connected devices, you can derive from
the comparison of the desired state in the output data with the real state in the input data
and a simple specification of the activation whether and which devices are present or not.
ne
An example for the access onto index 7 is illustrated in section 5.3.3 on page 5-7 pp.
Device Diagnostics
Function:
Station diagnostics starting with byte 7 (without standard diagnostics)
Access:
Read
Length:
72 bytes, maximum
Structure:
As described in section "Diagnostics" on page 3-23
on
l
in
ec
om
po
Index 12:
3-30
PHOENIX CONTACT
Index 20:
Cycle Count
Function:
Cycle count (all cycles)
Access:
Read and write
Length:
8 bytes
Note:
For write, all counters are set to 0 (index 20 to 25)
Index 21:
Cycle Error Count
Function:
Cycle count (all faulty cycles)
Access:
Read and write
Length:
8 bytes
Note:
For write, all counters are set to 0 (index 20 to 25)
Index 22:
ID Cycle Count
Function:
Cycle count (all ID cycles)
6852_en_02
Configuration and Startup
Read and write
Length:
8 bytes
Note:
For write, all counters are set to 0 (index 20 to 25)
Index 23:
ID Cycle Error Count
Function:
Cycle count (all faulty ID cycles)
Access:
Read and write
Length:
8 bytes
Note:
For write, all counters are set to 0 (index 20 to 25)
Index 24:
Data Cycle Count
Function:
Cycle count (all data cycles)
Access:
Read and write
Length:
8 bytes
Note:
For write, all counters are set to 0 (index 20 to 25)
Index 25:
Data Cycle Error Count
Function:
Cycle count (all faulty data cycles)
Access:
Read and write
Length:
8 bytes
om
po
ne
nt
s.
co
m
Access:
Note:
For write, all counters are set to 0 (index 20 to 25)
on
l
in
ec
The objects on slot 0 can be read and written via one individual access via DP/V1.
6852_en_02
PHOENIX CONTACT
3-31
FLS FLM PB SYS PRO UM E
3.6.2
Slot 1
On slot 1, indices are implemented with regard to the integrated DI 8.
Index 13:
PD-IN
Function:
Input data of the integrated DI 8
Access:
Read
Length:
1 bytes
Slot 2 to 63
m
3.6.3
co
On slot 2-63, indices are implemented with regard to connectable I/O devices:
PD-IN
Function:
Input data on the slot of connected devices
Access:
Read
Length:
0 up to 128 bytes
Index 47:
PCP Access
Function:
Read and write of PCP data on connected devices via DP/V1
Access:
Read and write
Length:
Depending on the command and the PCP object
Structure:
See section 4.4 on page 4-6 pp.
Note:
During access via DP/V0, the PCP objects can be accessed directly via
index 47.
on
l
in
ec
om
po
ne
nt
s.
Index 13:
3-32
PHOENIX CONTACT
6852_en_02
Acyclic Communication (DP/V1 and PCP)
4
Acyclic Communication (DP/V1 and PCP)
DP/V1
DP/V1 expands the cyclic data exchange function according to IEC 61158 to include acyclic services. This makes it easy to operate even complex devices.
PCP
PCP is used in the local bus to exchange data acyclically. Usually parameterization data
of complex devices or data with variable length (e.g., FLM DIO 16/16 M12/8-DIAG) are
used.
co
m
DP/V1 is a mechanism which corresponds to PCP and PROFIBUS.
The FLM BK PB M12 DI 8 M12 bus coupler prepares the data records, which are sent via
DP/V1 from the C1 or C2 master, for the PCP mechanism in the local bus. PCP data from
the local bus in turn are realized by the bus coupler in DP/V1 telegrams.
s.
Before programming the application, check whether your control system or configuration
tool supports DP/V1. If not, you can use the functions offered by the cyclic process data
channel (DP/V0), see section 4.5 on page 4-15 pp.
4.1
Acyclic Communication via C1 Master
The C1 master carries out parameterization during slave startup and is also the master for
cyclic data traffic. It may also be necessary to acyclically read a parameter from the device
as an option using this C1 master.
om
po
C1 master
ne
nt
The following decisions must be made regarding communication:
on
l
in
ec
Corresponding read and write accesses are therefore defined for the C1 master.
As it already has a connection to the slave during cyclic data traffic, the C1 master does
not have to establish an explicit connection (using "Initiate"), but can communicate with the
slave directly via "Read" and "Write".
6852_en_02
PHOENIX CONTACT
4-1
FLS FLM PB SYS PRO UM E
4.2
C2 master
Acyclic Communication via C2 Master
For communication in the C2 master, the data fields are identical to those of C1 communication, and it is only the SAPs (Service Access Points) which are different. The additional
effort required is the use of "Initiate" and "Abort" to establish and release the connection
via SAP49 and 50. If DP/V1 devices are already in use, the routines for connection management can be adapted easily. The C2 master can be implemented in various forms, e.g.,
in the form of a display device or operator interface. In a display device, the data is fetched
from the slave on request if, for example, a specific parameter is to be read. Access to the
operator interface is usually acyclic.
on
l
in
ec
om
po
ne
nt
s.
co
m
You can connect up to 16 PCP-compatible devices to the
FLM BK PB M12 DI 8 M12 buscoupler.
4-2
PHOENIX CONTACT
6852_en_02
Acyclic Communication (DP/V1 and PCP)
4.3
PCP Communication Basics
PCP (Peripherals Communication Protocol) controls the transmission of parameter data in
the local bus. Special PCP services are available for this purpose.
Application Example
To explain the basics of PCP communication, the following concrete PCP application is
used as an example:
co
m
A frequency inverter (FI), together with other field devices, is connected to a PLC via a bus
interface. The device versions are standardized according to the drives profile.
nt
s.
P L C
on
l
in
ec
om
po
M a s te r
ne
B u s in te r fa c e
Device parameters
6852_en_02
Figure 4-1
S la v e s
F r e q u e n c y in v e r te r
5 0 6 7 C 2 0 1
Application example
Device parameters are data from intelligent field devices (PCP devices), which is required
for the startup phase of machines and systems. Once it has been entered, this data only
has to be modified upon a change in the parameterization or in the event of an error. The
parameters are pre-configured and can be taken from the device documentation provided
by the manufacturer.
PHOENIX CONTACT
4-3
FLS FLM PB SYS PRO UM E
Parameters of a
frequency inverter
As an electrical drive controller, a key feature of a frequency inverter is that changes can
be made to process variables (e.g., speed, position, and torque) using analog or digital signals. Additional information is required to optimize the adaptation of the drive controller and
motor to the process. As well as setpoint information, the frequency inverter also requires
information about the motor type point, the minimum and maximum permissible speed of
the system, the maximum speed variation during acceleration and deceleration, starting
ramp, starting current, etc.
These types of additional information are device-specific parameters, which can be modified via the parameter data channel.
m
The parameter values for all PCP devices are the subject of communication via the parameter data channel. To enable the individual parameters to be distinguished during communication, each parameter has a number, the index.
The index is the address of the communication object. It is required to identify the object.
on
l
in
ec
om
po
ne
nt
s.
co
Index
4-4
PHOENIX CONTACT
6852_en_02
Acyclic Communication (DP/V1 and PCP)
Table 4-1
Object Description (example)
Object Description (OD)
Type
Object
Name
...
...
...
...
60 4Ahex
Ramp
Record
Speed quick stop
60 4Bhex
Integer16
Array
SetpointFactor
...
...
...
...
m
Index
Object Description
co
The object description includes all the properties of the object, such as data type, object
type, name, etc.
There are various different object types:
Simple variable
–
Simple variable type objects.
Examples include measured values, the time or status of a device.
Array
–
Array type objects, i.e., several "simple variable" objects of the same type, which are
grouped to form one object. Each element can be accessed individually.
An example of an array is a range of the same type of measured values.
Record
–
Record type objects, i.e., several "simple variable" objects of different types, which are
grouped to form one object. As for the array type, each element of a record can be accessed individually. An example of a record is the group of data in a test report, which
contains not only the actual measured value, but also additional information, e.g., the
time of the measurement.
Program invocation
in
ec
om
po
ne
nt
s.
Object types
–
Program invocation type objects, i.e., program sequences that can be run.
on
l
For additional information on PCP communication, please refer to the
IBS SYS PCP G4 UM E user manual, Order No. 27 45 16 9.
6852_en_02
PHOENIX CONTACT
4-5
FLS FLM PB SYS PRO UM E
4.4
Acyclic Communication in DP/V1 Mode
4.4.1
The Communication Mechanism
Data access types: accesses onto local bus device data or onto FLM BK PB M12 DI 8 M12
bus coupler data:
Objects on the FLM BK PB M12 DI 8 M12 bus coupler
Accessing I/O Devices Access to
FLM BK PB M12 DI 8 M12
Device
Slot
Index/
dec
–
x
Master Control
–
x
PCP Status
–
x
Enabling a Device
–
x
Enabling a Device / Restart
–
x
0
7
Device diagnostics
–
x
0
12
Cycle Count
–
x
0
20
Cycle Error Count
–
x
0
21
ID Cycle Count
–
x
0
22
ID Cycle Error Count
–
x
0
23
Data Cycle Count
–
x
0
24
Data Cycle Error Count
–
x
0
25
PD-IN
on
l
s.
ne
po
0
3
0
4
0
5
0
6
–
x
0
255
–
x
1 to 63
13
x
–
2 to 63
47
in
ec
PCP access
om
I&M0
co
PDU Length
nt
Data Type
m
Table 4-2
During the access onto the FLM BK PB M12 DI 8 M12 bus coupler use the well established
DP/V1 format. Read and write accesses can be executed in one step
(request -> response).
The PCP data from I/O devices is usually addressed via 16-bit object indices. DP/V1 only
has fields for 8-bit indices. Additional parameters have therefore been added to the data
block for use when accessing the local bus, as for PROFIDrive. A sequence involving 2
steps is used, which follows the PROFIDrive profile:
Read:
1. a) Send the request as DP/V1 Write Request (PCP Read) to slot x
b) Receiving the DP/V1 Write Response - often automatically via the master
2. a) Sending a DP/V1 Read to slot x
b) Receiving the DP/V1 Read Response - often automatically via the master
Write:
1. a) Send the request as DP/V1 Write Request (PCP Write) to slot x
b) Receiving the DP/V1 Write Response - often automatically via the master
2. a) Sending a DP/V1 Read to slot x
b) Receiving the DP/V1 Read Response - often automatically via the master
4-6
PHOENIX CONTACT
6852_en_02
Acyclic Communication (DP/V1 and PCP)
Note that when communicating with objects on local bus devices, the response should be
fetched using Read. Otherwise the result will be overwritten during the next communication. Communication is always carried out via DP/V1 index 47, and the object index and
assigned subindex of the I/O device are transmitted as part of the data field.
Request and Response
The section below provides additional information about the format of write and read accesses (Request and Response).
The format for all types of access (Request and Response (positive), Read and Write) in
DP/V1 is:
<DP/V1 header> <Data (PCP/DP/V1)>
m
The DP/V1 header for a positive DP/V1 response always has the following format:
<DP/V1 service (positive)> <Slot> <DP/V1 index> <DP/V1 length>
co
In the event of a faulty response, the format is as follows:
– For a DP/V1 error:
s.
<DP/V1 service (negative)> <Error decode> <Error code 1> <Error code 2>
– For an I/O device error:
nt
<DP/V1 service (positive)> <Slot> <DP/V1 index> <DP/V1 length> <Error data
(PCP / DP/V1)>
ne
The <Data (PCP/DP/V1)> is optional depending on the service
and has the following structure:
Structure of the data depending on the service
Access
po
Table 4-3
Service
Data
Object data
Read objects
DP/V1 Read Request
(FLM BK PB M12 DI 8 M12 DP/V1 Read Response
None
Write objects
(I/O device)
DP/V1 Write Request
(PCP Write)
Write PCP Request / Invoke ID / Index High / Index Low / Subindex / Length PCP Data / x Byte PCP Object Data
DP/V1 Write Response
None
DP/V1 Read Request
None
on
l
in
ec
om
Write objects
DP/V1 Write Request
(FLM BK PB M12 DI 8 M12 DP/V1 Write Response
Read objects
(I/O device)
None
Object data
DP/V1 Read Response
Write PCP Ack / Invoke ID / Status
DP/V1 Write Request (PCP
Read)
Read PCP Req / Invoke ID / Index High / Index Low /
Subindex
DP/V1 Write Response
None
DP/V1 Read Request
None
DP/V1 Read Response
Read PCP Ack / Invoke ID / Status /
Length of PCP data/x bytes of PCP object data
The meanings of the individual parameters are as follows:
– <DP/V1 service>:
In the request there is a distinction between DP/V1 Read (5Ehex) and DP/V1 Write
(5Fhex); in the error response there is a distinction between DEhex (Read error) and
DFhex (Write error).
6852_en_02
PHOENIX CONTACT
4-7
FLS FLM PB SYS PRO UM E
–
–
–
m
in
ec
–
co
–
s.
–
nt
–
ne
–
po
–
<Slot>:
The slot of the device to be addressed in the station. The bus coupler is addressed
with slot =0, the integrated DI 8 is addressed with slot =1 and starting with the first
connected device with slot 2 up to 63.
<DP/V1 index>:
During accesses onto the PCP objects, the local bus device is to be used as PROFIBUS index 47 dec (= 2Fhex). The PCP index is transmitted as part of the data field.
During accesses onto the bus coupler, the object index can be used directly.
<DP/V1 length>:
On a write access, the length of the subsequent data is entered here, and on a read
access, the length of the expected data is entered. On a response, this parameter contains the actual length of the DP/V1 data.
<Error decode>:
80hex indicates an error in DP/V1.
<Error code 1> and <Error code 2>:
Contain the error codes from the DP/V1 access (see "Error Codes for DP/V1 and VC1
Communication" on page A-3).
<Write PCP/Read PCP>:
This indicates whether the following object index should be written or read. Read PCP
= 06hex; Write PCP = 07hex.
<Object data>
This is only the contents of an object. The length and scope of the data has already
been described by <DP/V1 length>.
<Invoke ID>
The Invoke ID is used for some I/O devices. Check it in the respective data sheet at
hand.
<Index high and Index low>
This specifies the object index of the addressed PCP object in two bytes. For example,
for index 2300hex the value 23hex should be entered for Index high and the value 00hex
should be entered for Index low.
<Subindex>
When working with a PCP object, the subindex can be used to select a specific element from an array or record.
<Length of PCP data>
This value specifies how many bytes of PCP object data (object contents) follow.
<PCP object data>
This is the actual contents of a PCP object.
<Status>
For a positive PCP response, the status is = 00hex, in the event of an error it is 44hex.
-<Error data (PCP/DP/V1)>:
the structure of the error data is <PCP confirmation code> <Invoke ID>
<Status = 44hex> <PCP error code (4 bytes)>.
(PCP error code, see "Error Codes for DP/V1 and VC1 Communication" on page A-3).
om
–
–
on
l
–
–
–
During the access onto PCP, please note the first byte in the DP/V1 data block. With
06hex, PCP Read and with 07hex a PCP Write is executed.
4-8
PHOENIX CONTACT
6852_en_02
Acyclic Communication (DP/V1 and PCP)
4.4.2
Examples
The section below provides a few examples to aid understanding (all values in hex). These
examples indicate how objects on the bus coupler and the I/O devices can be read and
written.
m
The station structure is as follows:
– FLM BK PB M12 DI 8 M12
– FLM DIO 4/4 M12-2A
– FLM AI 4 SF M12
– FLM AO 4 SF M12
– PD/PCP x words
The FLM AI 4 SF M12 and the FLM AO 4 SF M12 are PCP-capable devices.
co
For a better understanding of the examples, the object directory of the FLM AI4 SF M12
device should be given:
A
6
L
2
Object Name
Config Table
Rights
rd/wr
rd:
Read access permitted
L:
Element length in bytes
wr:
Write access permitted
po
Number of elements
Table 4-5
Access
Read, write
Object Description:
in
ec
Config Table
Array of Unsigned 16
Index
Meaning
A:
Object
Data type
nt
Data Type
Array of Unsigned 16
om
Index
0080hex
Object Directory of the FLM AI 4 SF M12
ne
Table 4-4
s.
The FLM AI 4 SF M12 object directory contains - among others - the following object:
6 x 2 bytes
0080hex
00hex
on
l
Subindex
Write all elements
01hex
Configuration channel 1
02hex
Configuration channel 2
03hex
Configuration channel 3
04hex
Configuration channel 4
05hex
Reserved
06hex
Reserved
Length (byte)
0Chex
02hex
Subindex 00hex
Subindex 01hex to 06hex
Data
Device configuration
Objects 4 and 4 on the bus coupler are also used in these examples. For an explanation
regarding these objects, please refer to section "Object Dictionary" on page 3-27.
6852_en_02
PHOENIX CONTACT
4-9
FLS FLM PB SYS PRO UM E
Example 1:
Reading the connected local PCP devices and their status
(Slot 0, Index 5 on the bus coupler)
Read request (master -> slave)
Data
Data Structure
5E 00 05 20
DP/V1 Read / Slot / Index / Maximum Length
Read request (slave -> master)
Data Structure
5E 00 05 06 03 01 00 04 01 00
DP/V1 Read / Slot / Index / Actual Length
6 bytes object data
co
m
Data
s.
The data shows that there is one PCP device each on slot 3 and 4, and its connection status is OK, see section "Object Dictionary" on page 3-27.
ne
Write request (master -> slave)
nt
Example 2:
Writing the bus restart bit (slot 0, index 4, bit 0 on the bus coupler)
Data
Data Structure
DP/V1 Write / Slot / Index / Length /1 byte of data
po
5F 00 04 01 01
Data
om
Write response (slave -> master)
DP/V1 Write / Slot / Index / Length
in
ec
5F 00 04 01
Data Structure
on
l
The data block is only important in the request. The response indicates that the command
has been received. As can be seen in "Object Dictionary" on page 3-27, the local bus is
restarted using bit 0 (01hex) at index 4, slot 0.
4-10
PHOENIX CONTACT
6852_en_02
Acyclic Communication (DP/V1 and PCP)
3. Example:
Reading the Config Table on the connected FLM AI 4 SF (slot 3, index 0080)
Write request (master -> slave)
Data
Data Structure
5F 03 2F 05 06 00 00 80 00
DP/V1 Write / Slot / Index / Length / Read PCP
Request / Invoke ID / PCP Index high /
PCP Index low / PCP Subindex
Write response (slave -> master)
Data Structure
5F 03 2F 05
DP/V1 Write / Slot / Index / Length
co
m
Data
Read request (master -> slave)
Data Structure
5E 03 2F 20
DP/V1 Read / Slot / Index / Maximum Length
Read response (slave -> master)
Data Structure
ne
Data
nt
s.
Data
po
5E 03 2F 10 86 00 00 0C 03 01 03
00 03 01 03 00 00 00 00 00
DP/V1 Read / Slot / Index / Actual Length
PCP Read Response / Invoke ID / Status /
Length of PCP data/ 12 bytes of PCP object data
on
l
in
ec
om
In the Read Response, the user will receive the 12 bytes of object 80hex on the FLM AI 4
SF as described above.The settings on channel 1 and 3 are identical as well as of channel
2 and 4. Bytes 9 and 12 are reserved and are indicated as 0. The Invoke ID had been mirrored and the status indicates that the communication was error-free.
6852_en_02
PHOENIX CONTACT
4-11
FLS FLM PB SYS PRO UM E
4. Example:
Writing the Config Table for channel 3 on the connected FLM AI 4 SF
(Slot 3, Index 0080, Subindex 3)
Write request (master -> slave)
Data
Data Structure
5F 03 2F 08 07 00 00 80 03 02 03 01
DP/V1 Write / Slot / Index / Length / Write PCP
Request / Invoke ID / PCP Index high /
PCP Index low / PCP Subindex /
Length of the PCP object data / PCP object data
m
Write response (slave -> master)
Data Structure
5F 03 2F 08
DP/V1 Write / Slot / Index / Length
co
Data
s.
Read request (master -> slave)
Data Structure
5E 03 2F 20
DP/V1 Read / Slot / Index / Maximum Length
Data
ne
Read response (slave -> master)
nt
Data
Data Structure
po
5E 03 2F 03 87 00 00
DP/V1 Read / Slot / Index / Actual Length
Write PCP Response / Invoke ID / Status
on
l
in
ec
om
In the Read Response, the mirrored Invoke ID is the result and the status is 00.
4-12
PHOENIX CONTACT
6852_en_02
Acyclic Communication (DP/V1 and PCP)
5. Example:
In the event of an error: reading faulty object indices on the connected FLM AI 4SF
(Slot 3, Index 0180)
Write request (master -> slave)
Data
Data Structure
5F 03 2F 05 06 00 01 80 00
DP/V1 Write / Slot / Index / Length / Read PCP
Request / Invoke ID / PCP Index high /
PCP Index low / PCP Subindex
m
Write response (slave -> master)
Data Structure
5F 03 2F 05
DP/V1 Write / Slot / Index / Length
co
Data
s.
Read request (master -> slave)
Data Structure
5E 03 2F 20
DP/V1 Read / Slot / Index / Maximum Length
ne
Read response (slave -> master)
nt
Data
Data
Data Structure
po
5E 03 2F 07 86 00 44 06 07 00 00
DP/V1 Read / Slot / Index / Actual Length
PCP Read Response / Invoke ID / Status /
Error Data PCP
on
l
in
ec
om
The status byte 44hex characterizes an error during execution. In this case, the PCP Read
Request is transmitted to the I/O device first.However, the I/O device does not know this
index and acknowledges it using the error code 06 07. In accordance with the section "Error Codes for PCP Communication" on page A-1, this means that the object does not exist.The last 2 bytes are also part of the PCP error data, however, they are not used in this
example. If it does not equal zero, the respective data I/O device data sheet contains more
detailed information.
6852_en_02
PHOENIX CONTACT
4-13
FLS FLM PB SYS PRO UM E
6. Example:
In the Event of an Error: Reading an object on a device without PCP (Slot 2, Index
0080)
Write request (master -> slave)
Data
Data Structure
5F 02 2F 05 06 00 00 80 00
DP/V1 Write / Slot / Index / Length / Read PCP
Request / Invoke ID / PCP Index high /
PCP Index low / PCP Subindex
m
Write response (slave -> master)
Data Structure
DF 80 D2 00
DP/V1 Write Error / Error Decode / Error Code1 /
Error Code 2
co
Data
on
l
in
ec
om
po
ne
nt
s.
Since the addressed device does not support PCP, the request is rejected immediately.
A message from the DP/V1 occurs, in this case, the error code D2 stands for "device does
not have PCP". See also section "Error Codes for DP/V1 and VC1 Communication" on
page A-3.
4-14
PHOENIX CONTACT
6852_en_02
Acyclic Communication (DP/V1 and PCP)
4.5
Acyclic Communication in DP/V0 Mode
via Process Data
The DP/V1 communication is relatively new compared to cyclic DP/V0 communication.
However, the life of control systems and plants is so long that expansions and modifications are made. In many cases, the control system is not DP/V1-compatible, but is expected to operate complex devices.
Acyclic services
For this purpose, the operation of the acyclic services is also possible within the process
data, i.e., also control systems that does not have DP/V1 can operate more complex devices.
co
m
Additional information on PCP communication can be found in sections "PCP Communication Basics" on page 4-3 and "Acyclic Communication (DP/V1 and PCP)" on page 4-1.
Mechanism for Transmission in the Process Data
s.
4.5.1
Transmission is via a virtual C1 device (VC1 device). A C1 device should be selected in
the hardware configurator in the same way as "normal" I/O devices and therefore specified
in the configuration and parameter telegram.
nt
VC1 device
po
ne
The VC1 device is only a virtual device because the process data can be used to transmit
communication data (PCP) and is not linked to a specific device. During active process
data exchange, it is possible to assign the VC1 device sequentially to different devices with
communication objects and to exchange parameter data parallel to the process data.
The process data width occupied by the VC1 devices in the process data channel can be
selected from 4 to 16 words in increments of 2 words. This means that communication objects can be used even if resources are scarce. If there are sufficient free resources, a data
width of up to 16 words can be used, providing the same ease of operation as for DP/V1
communication.
om
Process data width
on
l
in
ec
As the data width of the VC1 devices is between 4 and 16 words, but the user data can be
up to 72 bytes (36 words) per communication, it may be necessary to split the data and
transmit it in several steps.
This leads to:
– Start fragment
– Continue fragment
– End fragment
– Error or abort fragment
Each fragment contains a service byte, which is used for the precise assignment of the
fragment. The individual fragments and the service byte are explained in detail in the following.
The VC1 device (listed as "PD PCP x words" in the GDS file) can be configured at any
position behind the FLM BK PB M12 DI 8 M12 bus coupler. We recommend to configure
the VC1 device at the last position. In this way, the configured slot and the actual slot
occupied by the I/O device will always be identical. It is not linked to any hardware, so a
device is not actually inserted.
6852_en_02
PHOENIX CONTACT
4-15
FLS FLM PB SYS PRO UM E
Start Fragment:
Byte 1:
Service
Byte 2:
Device no.
Byte 3
Invoke ID
Byte 4:
Index high
Byte 5:
Index low
Byte 6:
Subindex
Byte 7:
Length, if required
Byte 8:
Data block, if required
Byte 1 - Service in start fragment:
Byte 1
5
4
Request/
response
0
0
Fragmen
tation
2
1
0
Action
Request/response
po
Bit 7:
3
nt
6
ne
7
s.
Table 4-6
Data block, if required
co
Byte n:
m
...
0 = Request
1 = Response
Fragment type
om
Bits 6 to 5:
00 = start fragment
on
l
in
ec
Bit 4:
4-16
PHOENIX CONTACT
Fragmentation
0 = Not fragmented
1 = fragmented
Bits 3 to 0:
Action
00hex
No action (clear)
01hex up to
02hex
Reserved
03hex
Read (FLM BK PB M12 DI 8 M12)
04hex
Write (FLM BK PB M12 DI 8 M12)
05hex
Reserved
06hex
Read PCP (I/O terminal)
07hex
Write PCP (I/O terminal)
08hex
Read and Write simultaneously
(special objects only)
09hex to 0Fhex
Reserved
6852_en_02
Acyclic Communication (DP/V1 and PCP)
Continue Fragment:
Byte 1:
Service
Byte 2:
Data block, if required
...
Byte n:
Data block, if required
Table 4-7
Byte 1 - Service in continue fragment:
Byte 1
Request/
response
0
1
1 = Response
Fragment type
1
0
ne
Bits 6 to 5:
2
Fragment number (01hex - 1Fhex)
Request/response
0 = Request
3
nt
Bit 7:
4
m
5
co
6
s.
7
01 = Continue fragment
Numerator
po
Bits 4 to 0:
om
01hex up to 1Fhex fragment no.
End Fragment:
Service
in
ec
Byte 1:
Byte 2:
Data block, if required
...
on
l
Byte n:
Data block, if required
Table 4-8
Byte 1 - Service in end fragment:
Byte 1
7
6
5
Request/
response
1
0
Bit 7:
4
3
2
1
0
Reserved
Request/Response
0 = Request
1 = Response
6852_en_02
PHOENIX CONTACT
4-17
FLS FLM PB SYS PRO UM E
Bit 7:
Request/Response
Bits 6 to 5:
Fragment type
10 = Last fragment (end fragment)
Reserved
on
l
in
ec
om
po
ne
nt
s.
co
m
Bits 4 to 0:
4-18
PHOENIX CONTACT
6852_en_02
Acyclic Communication (DP/V1 and PCP)
Abort/Error Fragment:
Byte 1:
Service
Byte 2:
Error code, if required
...
Byte n:
Error code, if required
Table 4-9
Byte 1 - Service in abort/error fragment:
Byte 1
Request/
response
1
1
1 = Response
Fragment type
1
0
ne
Bits 6 to 5:
2
Reserved
Request/response
0 = Request
3
nt
Bit 7:
4
m
5
co
6
s.
7
11 = Abort/error fragment
Reserved
po
Bits 4 to 0:
on
l
in
ec
om
The communication can reset anytime using 00hex and 60hex.
6852_en_02
PHOENIX CONTACT
4-19
FLS FLM PB SYS PRO UM E
A response is sent after every request. This response indicates that the request has been
received and shows its current status:
Response Structure:
Byte 1:
Service (mirrored request with set response bit)
Byte 2:
Status, if required
Byte 3:
Length, only on first read response
...
Byte n:
Data block, if required
co
m
The status is indicated when local PCP transmission is complete and in the event of an
error. In the event of an error, the data block can provide details. An error has occurred if
the value of the status byte does not equal 00hex.
No error
44hex
Error during communication
Other errors
see "Error Codes for DP/V1 and VC1 Communication" on page A-3.
nt
s.
00hex
ne
For VC1, the parameters have the following meaning:
- <Device no.>
- <Invoke ID>
po
The FLM BK PB M12 DI 8 M12 bus coupler counts the device as 0, the integrated DI 8 as 1
and starting with the first connected node as device = 2...63.
om
The Invoke ID has a length of one byte and is used for some I/O devices only. Test it in the
respective data sheet at hand.
- <Index high and Index low>
in
ec
This specifies the object index of the addressed object in two bytes. This is also valid for
objects on the FLM BK PB M12 DI 8 M12 bus coupler,e.g., for index 5FE0hex the value
5Fhex should be entered for Index high and the value E0hex should be entered for Index
low. For index 4hex on the bus coupler, 00hex is Index high and 04hex is Index low.
on
l
- <Subindex>
When working with a PCP object, the subindex can be used to select a specific element
from an array or record. Thus the subindex is to be indicated during accesses onto I/O devices. The bus coupler has no arrays or records, so subindex 0 should be entered.
- <Length>
This value specifies how many bytes of object data (object contents) follow. Depending on
the slot, this may be bus coupler object data or I/O device object data.
4-20
PHOENIX CONTACT
6852_en_02
Acyclic Communication (DP/V1 and PCP)
- <Data block>
This is only the contents of an object. The length and scope of the data has already been
described by the <Length> parameter.
To aid understanding, the same examples are used in the following section as for DP/V1
services. This means that the description of the examples for DP/V1 communication is
valid again here, see Section "Examples" on page 4-9. See also "Error Codes for DP/V1
and VC1 Communication" on page A-3.
4.5.2
Examples of VC1 Services
co
m
1. Example:
Reading the connected local PCP devices and their status
(slot 0, index 5 on the bus coupler)
Read request (master -> slave)
Data Structure
03 00 00 00 05 00 I 00 00 00 00 00
00 00 00 00 00
Read Request (bus coupler) / Slot / Invoke ID /
Index high / Index low / Subindex /
10 Byte unused
ne
nt
s.
Data (8 Words VC1)
Read response (slave -> master)
po
Data (8 Words VC1)
83 00 06 03 01 00 04 01 00 I 00 00
00 00 00 00 00
Data Structure
Read response (bus coupler) / Status / Actual
length / 6 bytes of object data / 7 bytes unused
om
Clear request (master -> slave)
Data Structure
00 I 00 00 00 00 00 00 00 00 00 00
00 00 00 00 00
Clear Request / 15 bytes unused
in
ec
Data (8 Words VC1)
on
l
Clear response (slave -> master)
Data (8 Words VC1)
Data Structure
00 00 00 00 00 00 00 00 00 00 00 00
00 00 00 00
Clear response
The status byte equals zero. This means that the communication was correct. The data
shows that there is one PCP device each on slot 3 and 4, and its connection status is OK,
see section "Object Dictionary" on page 3-27.
Via Clear, the communication data can be reset to the initial state.
6852_en_02
PHOENIX CONTACT
4-21
FLS FLM PB SYS PRO UM E
2. Example:
Writing the bus restart bit (slot 0, index 4, bit 0 on the bus coupler)
Write request (master -> slave) - start fragment
Data (6 Words VC1)
Data structure
04 00 00 00 04 00 01 01 I 00 00 00
00
Write Request (bus coupler) / Slot / Invoke ID /
Index high / Index low / Subindex / Length /
1 data byte / 4 bytes unused
Write response (slave -> master)
Data Structure
84 00 I 00 00 00 00 00 00 00 00 00
00
Write Response (bus coupler) / Status /
10 bytes unused
co
m
Data (6 Words VC1)
s.
Clear request (master -> slave)
Data Structure
nt
Data (6 Words VC1)
Clear Request / 11 bytes unused
ne
00 I 00 00 00 00 00 00 00 00 00 00
00
po
Clear response (slave -> master)
Data (6 Words VC1)
Data Structure
om
00 00 00 00 00 00 00 00 00 00 00 00 Clear response
on
l
in
ec
The response indicates that the command has been received. Here, the status is positive
(=0) Via Clear, the communication data can be reset to the initial state.
4-22
PHOENIX CONTACT
6852_en_02
Acyclic Communication (DP/V1 and PCP)
3. Example:
Reading the Config Table on the connected FLM AI 4 SF (slot 3, index 0080)
Read request (master -> slave) - start fragment
Data (4 Words VC1)
Data Structure
06 03 00 00 80 00 I 00 00
Read Request (I/O) / Slot / Invoke ID /
Index high / Index low / Subindex /
2 Byte unused
Read response (slave -> master)
Data Structure
96 00 0C 03 01 03 00 03
Read Response / Status / Length /
5 bytes object data
co
m
Data (4 Words VC1)
Read request (master -> slave) - acknowledgment of start fragment
Data Structure
96 I 00 00 00 00 00 00 00
Acknowledgement start fragment / 7 bytes unused
Data (4 Words VC1)
nt
ne
Read response (slave -> master)
s.
Data (4 Words VC1)
Termination fragment / 7 object data bytes
po
C0 01 03 00 00 00 00 00
Data Structure
on
l
in
ec
om
In the Read Response, the user will receive the 12 bytes of object 80hex on the
FLM AI 4 SF as described above. The first 5 object data bytes are transmitted in the start
fragment. The missing 7 bytes follow in the second fragment which is already the last.
The status byte indicates that the communication was correct.
6852_en_02
PHOENIX CONTACT
4-23
FLS FLM PB SYS PRO UM E
For the bus coupler the service is finished as soon as the last fragment has been transmitted. If the next service byte differs from the previous, the process can be started right with
the next Read/Write. Alternatively, the last fragment can either be acknowledged or a Clear
can be sent.
Acknowledgement of the last fragment:
Read request (master -> slave) - acknowledgment of end fragment
Data (4 Words VC1)
Data Structure
C0 I 00 00 00 00 00 00 00
Acknowledgement end fragment / 7 bytes unused
Data Structure
00 00 00 00 00 00 00 00
Clear
s.
Or
co
Data (4 Words VC1)
m
Read response (slave -> master)
Data (4 Words VC1)
Data Structure
ne
Clear request (master -> slave)
nt
Clear:
00 I 00 00 00 00 00 00 00
Clear Request / 7 bytes unused
po
Clear Response (slave -> master)
Data Structure
00 00 00 00 00 00 00 00
Clear Response
on
l
in
ec
om
Data (4 Words VC1)
4-24
PHOENIX CONTACT
6852_en_02
Acyclic Communication (DP/V1 and PCP)
4. Example:
Writing the Config Table for channel 3 on the connected FLM AI 4 SF
(slot 3, index 0080, subindex 3)
Write request (master -> slave) - start fragment
Data (4 Words VC1)
Data Structure
17 03 00 00 80 00 0C 03
Write Request (I/O) / Slot / Invoke ID / PCP Index
high / PCP Index low / PCP Subindex / Length of
the PCP object data / 1 byte PCP object data
Write response (slave -> master)
Data Structure
17 I 00 00 00 00 00 00 00
Write Response / 7 bytes unused
co
m
Data (4 Words VC1)
Write request (master -> slave) - 1st continue fragment
Data Structure
21 00 03 01 03 00 03 01
1. Continue fragment /
7 bytes PCP object data
Data (4 Words VC1)
ne
Write response (slave -> master)
nt
s.
Data (4 Words VC1)
po
21 I 00 00 00 00 00 00 00
Data Structure
Response / 7 bytes unused
Write request (master -> slave) - end fragment
om
Data (4 Words VC1)
40 00 00 00 00 I 00 00 00
Data Structure
End fragment / 4 bytes PCP object data /
3 Byte unused
on
l
in
ec
Write response (slave -> master)
Data (4 Words VC1)
Data Structure
87 00 I 00 00 00 00 00 00
Response / Status / 6 bytes unused
Clear request (master -> slave)
Data (4 Words VC1)
Data Structure
00 I 00 00 00 00 00 00 00
Clear Request / 7 bytes unused
Clear Response (slave -> master)
Data (4 Words VC1)
Data Structure
00 00 00 00 00 00 00 00
Clear Response
Here, the Write specification is given in 3 fragments. Only after the reception of the last
fragments, the bus coupler takes over the request. The response "87" shows that the "07"
command was executed. The status "0" shows that the transmission was successful.
Via Clear, the communication data can be reset to the initial state.
6852_en_02
PHOENIX CONTACT
4-25
FLS FLM PB SYS PRO UM E
5. Example:
In the event of an error:
Reading faulty object indices on the connected FLM AI 4SF (slot 3, index 0180)
Read request (master -> slave) - start fragment
Data (4 Words VC1)
Data Structure
06 03 00 01 80 00 I 00 00
Read Request (I/O) / Slot / Invoke ID /
Index high / Index low / Subindex /
2 bytes unused
Write response (slave -> master)
Data Structure
86 44 06 07 00 00 I 00 00
Read Response / Status / 4 bytes error code /
2 bytes unused
co
m
Data (4 Words VC1)
s.
Clear request (master -> slave)
Data Structure
00 I 00 00 00 00 00 00
Clear Request / 7 bytes unused
Data (4 Words VC1)
Data Structure
Clear response
po
00 00 00 00 00 00 00 00
ne
Clear Response (slave -> master)
nt
Data (4 Words VC1)
in
ec
om
The status byte 44hex characterizes an error during execution. In this case, the PCP Read
Request is transmitted to the I/O device first. However, the I/O device does not know the
index 0180hex and acknowledges it using the error code 06 07. In accordance with the
section "Appendix" on page A-1, this means that the object does not exist. The last 2 bytes
are also part of the PCP error data, however, they are not used in this example. If it does
not equal zero, the respective data I/O device data sheet contains more detailed information.
on
l
Via Clear, the communication data can be reset to the initial state.
4-26
PHOENIX CONTACT
6852_en_02
Acyclic Communication (DP/V1 and PCP)
6. Example:
In the event of an error: reading an object on a device without PCP
(Slot 2, Index 0080)
Read request (master -> slave)
Data (4 Words VC1)
Data Structure
06 02 00 00 80 00 I 00 00
Read Request / Slot / Invoke ID / Index High /
Index Low / Subindex / 2 bytes unused
Write response (slave -> master)
Data Structure
86 D2 00 00 00 00 00 00
Read Response / Status / 6 bytes unused
m
Data (4 Words VC1)
co
Clear request (master -> slave)
Data Structure
00 I 00 00 00 00 00 00 00
Clear Request / 7 bytes unused
s.
Data (4 Words VC1)
nt
Clear Response (slave -> master)
00 00 00 00 00 00 00 00
Data Structure
Clear Response
ne
Data (4 Words VC1)
on
l
in
ec
om
po
Since the addressed device does not support PCP, the request is rejected immediately. A
message from the bus coupler - managing the PCP devices - occurs. In this case, the error
code D2 stands for "device does not have PCP". See also "Error Codes for DP/V1 and VC1
Communication" on page A-3. Via Clear, the communication data can be reset to the initial
state.
6852_en_02
PHOENIX CONTACT
4-27
on
l
in
ec
om
po
ne
nt
s.
co
m
FLS FLM PB SYS PRO UM E
4-28
PHOENIX CONTACT
6852_en_02
Dynamic Configuration
5
Dynamic Configuration
Dynamic configuration is the specification and configuration of a maximum configuration.
Any subgroup of this maximum configuration can be operated.
In addition to dynamic configuration, empty spaces can be reserved for future expansions.
5.1
Empty Spaces
co
m
It can be helpful to reserve empty spaces for a station, which may be used at different configuration levels. You can configure the maximum configuration level and thus also reserve
memory in the PLC. However, optional devices must not be connected. They can be deactivated in the configuration.
om
po
ne
nt
s.
If the station is subsequently expanded to include previously deactivated devices, the new
devices can be connected and activated in the hardware configurator.
Figure 5-1
Configuration table in the STEP 7® hardware configurator
on
l
in
ec
The configuration, e.g., in STEP 7®, is carried out in the same way as for other modular
slaves. The configuration can be created from the hardware catalog using drag & drop, see
Figure 5-1.
6852_en_02
PHOENIX CONTACT
5-1
FLS FLM PB SYS PRO UM E
DI 8 features dialog
ne
Figure 5-2
nt
s.
co
m
Open the "Properties" dialog box by double-clicking on a device.
po
The "Parameter Assignment" tab can be used to specify whether a device should be active
or inactive, see Figure 5-3.
on
l
in
ec
om
Please note that adjustments to the configuration and actual structure are also carried
out for inactive devices. A message is displayed if deactivated devices are connected.
Figure 5-3
5-2
PHOENIX CONTACT
Activating/deactivating a device
6852_en_02
Dynamic Configuration
Following activation/deactivation, the configuration can be saved, translated, and downloaded as usual.
Depending on the device type, substitute values (DO and AO) to be output in the event of
an error can also be set at this point, for example. Furthermore, inputs (AI) can be parameterized. This is also carried out via the dialog box shown in Figure 5-3.
5.2
Principle of the Dynamic Configuration
co
m
In dynamic configuration, a maximum configuration is specified during configuration. The
addresses are thus reserved in the PLC. Any subgroup of this maximum configuration can
be operated. Such a group can be selected and activated during configuration and during
run-time. The advantage is that the application can divide an identical hardware configuration into active and inactive devices.
s.
Optional devices that are only required for additional functions need not to be connected.
They can simply be deactivated by the application.
nt
If an extension is to be realized later-on, the application can activate the new devices. Prerequisite is only that they are part of the maximum configuration.
ne
All settings are stored in the volatile memory. Thus easy replacement is ensured. The device must not be parameterized in advance.
Three indices on the bus coupler are used for the handling:
po
Index 4: General control bits
Access:
Write
om
Function: Details under "Slot 0" on page 3-27 Please observe bit 0 and bit 3 during
dynamic configuration.
Length of 1 byte
in
ec
Structure:
Bit 0: Restart local bus
on
l
Bit 3: Unlock dynamic configuration
Index 6: Activation / deactivation of devices and slots
Access:
Read and Write
Function: Indicates which devices are active / inactive. Deactivation via the parameter
telegram (reservation of empty spaces) is also indicated here.
Structure:
Byte 2
Byte 1
1
2
Length of 8 bytes
3
4
5
6
7
8 9
10
Bytes 3
to 7
11
12
13
14
15
Bit = 0: Device and slot inactive
6852_en_02
16
...
Byte 8
57 58
59
60 61
62
63
x
Bit = 1: Device and slot active
PHOENIX CONTACT
5-3
FLS FLM PB SYS PRO UM E
Index 7: Activation / deactivation of devices and slots and bus reset
Access:
Only via DP/V0, command 8
Function: Indicates which devices are active / inactive. Deactivation via the parameter
telegram (reservation of empty spaces) is also indicated here. In addition, a
bus reset takes place.
Length: 5 up to a maximum of 12 bytes
08hex
00hex
Byte 3:
07hex
Byte 4:
Length of data n
Byte 5:
1
2
3
4
5
6
7
8
Byte 4+n: x
x
x
x
x
x
x
x
m
Byte 1:
Byte 2:
s.
ne
Bit = 0: Device and slot inactive
nt
...
co
Structure:
on
l
in
ec
om
po
Bit = 1: Device and slot active
5-4
PHOENIX CONTACT
6852_en_02
Dynamic Configuration
5.3
Startup
5.3.1
Planning Configuration
om
po
ne
nt
s.
co
m
Figure 5-4 shows an example of the maximum configuration, as provided. All devices are
activated by default.
Figure 5-4
Configuration in the STEP 7® hardware configurator
on
l
in
ec
The accesses onto the indices 4 and 6 described in the introduction can either be realized
via PROFIBUS DP/V1 or via the process data interface. Index 7 is intended to be used if
no DP/V1 master exists or if the specification as well as the bus restart are to be realized
using one single service in the process data interface only. If the process data interface is
used, the effort is minimized.
6852_en_02
For the access via process data, please configure the so-called VC1 process data interface. This is the "PD PCP x Words” (x = 4, 6,..., 16) module. You can specify it as first or
as last module in the station and you can select the data width and address in accordance
with the options in the CPU.
The residual devices can be configured as usual.
PHOENIX CONTACT
5-5
FLS FLM PB SYS PRO UM E
5.3.2
Options for Specifying the Active Configuration
In the following example, the 8-channel digital devices are not part of the station, i.e., these
devices are part of the maximum configuration, but are to be deactivated at this station.
There are two options for startup:
1 Deactivating devices in the hardware configuration per default
– This option can easily be realized. Having set the "Module activation" parameters to
"inactive", the configuration can be downloaded to the controller as usual, see "Activating/deactivating a device" on page 5-2.
–
–
m
co
s.
–
–
–
Via DP/V1 or DP/V0 with maximum configuration and final specification in the
application
Specify the maximum configuration in the hardware configuration and download it.
Go to cyclic data exchange.
On the I/O devices, no data are exchanged as long as the connected configuration is
not identical with the accessible, activated devices.
Specify the configuration connected to the station in a non-volatile memory via Index
6 or Index 7.
Data exchange is started
nt
2
om
po
ne
For the second option, the example from Figure page 5-5 is used and the DI 8 as well as
the DO 8 is activated via DP/V0 and DP/V1. In each case, the data are to be written is indicated. For further information on the protocol, please refer to section "Acyclic Communication in DP/V1 Mode" on page 4-6 and section "Acyclic Communication in DP/V0 Mode
via Process Data" on page 4-15. Here, you will find further examples on communication
via DP/V0 and DP/V1. The individual indices are explained in section "Slot 0" on
page 3-27.
on
l
in
ec
Which option will be used in the end, depends on the support of DP/V1 in the master. If the
DP/V1 is not (well) supported, DP/V0 should be used. For SIMATIC® STEP 7® CPU
functions are available that have been prepared by Phoenix Contact.
5-6
PHOENIX CONTACT
6852_en_02
Dynamic Configuration
5.3.3
Specification of the Active Configuration via DP/V0
For DP/V0, you can access the activation status via Index 6 or 7. There are different object
structures. Thus example accesses are illustrated for both objects.
Access via Index 6
Please observe the structure of Index 6 when accessing it:
Byte 2
Byte 1
2
3
4
5
6
7
8 9
10
11
12
13
14
15
16
...
Byte 8
57 58
59
60 61
62
63
x
co
m
1
Bytes 3
to 7
Bit = 0: Device and slot inactive
s.
Bit = 1: Device and slot active
nt
In this example there are 7 connected devices. The devices 1, 2, 3, 4, and 7 must be active.
The devices 5 and 6 are inactive.
The resulting data for object 6 are the following:
ne
F2hex, 00hex, 00hex, 00hex, 00hex, 00hex, 00hex, 00hex
po
In the following, the description of these 8 data bytes serves as example for two optional
data widths of the VC1 device.
om
If a new activation status is described via Index 6 or Index 7, it becomes only valid as
soon as the bus is restarted.
2 corresponding examples:
on
l
in
ec
If - as described in this example - the configuration and the accessible devices are not
identical, because e.g, 2 devices are not connected, the bus is read in continuously until it
is identical with the configuration. In the course of this, the activation status on Index 6 is
evaluated automatically.
6852_en_02
If the dynamic bus structure is expanded and if previously inactive devices are attached to
the end, these devices are activated via Index 6 at first. During the next bus start, the new
devices are integrated into data traffic. The bus can be started via Index 4, bit 0. Please
note that during reset the device output data are reset to their device-specific reset values.
If the continuous bus structure is expanded and previously inactive devices are attached
to the end, device activation and bus restart can simultaneously be realized via Index 7. In
the course of this, the new devices are integrated into data traffic. Please note that during
reset the device output data are reset to their device-specific reset values.
PHOENIX CONTACT
5-7
FLS FLM PB SYS PRO UM E
4 Words VC1
Write request (master -> slave) - start fragment
Data (4 Words VC1)
Data Structure
14 00 00 00 06 00 08 F2
Write / Slot / Invoke ID / Index High / Index Low /
Subindex / Length / 1 byte data
Write response (slave -> master)
Data Structure
14 I 00 00 00 00 00 00 00
Write Response / 7 bytes unused
Write request (master -> slave) - end fragment
m
Data (4 Words VC1)
Data Structure
40 00 00 00 00 00 00 00
Write/7 bytes of data
co
Data (4 Words VC1)
s.
Write response (slave -> master)
Data Structure
Write Response / Status / 6 bytes unused
ne
84 I 00 00 00 00 00 00 00
nt
Data (4 Words VC1)
po
8 Words VC1
Write request (master -> slave) - start fragment
om
Data (8 Words VC1)
14 00 00 00 06 00 08 F2 00 00 00 00
00 00 00 I 00
Data Structure
Write / Slot / Invoke ID / Index High / Index Low /
Subindex / Length/ 8 byte data / 1 byte unused
in
ec
Write response (slave -> master)
Data Structure
14 I 00 00 00 00 00 00 00 00 00 00
00 00 00 00 00
Write Response / 15 bytes unused
on
l
Data (8 Words VC1)
5-8
PHOENIX CONTACT
6852_en_02
Dynamic Configuration
Access via Index 7
Please observe the structure of Index 7 when accessing it:
Byte 1
08hex
Byte 2
00hex
Byte 3
07hex
Byte 4
Length of data n
Byte 5
1
2
3
4
5
6
7
8
x
x
x
x
x
x
x
x
Byte 4+n
m
...
co
Bit = 0: Device and slot inactive
Bit = 1: Device and slot active
nt
s.
In this example there are 7 connected devices. The devices 1, 2, 3, 4, and 7 must be active.
The devices 5 and 6 are inactive.
The resulting data for object 7 are the following:
ne
08hex, 00hex, 07hex, 01hex, F2hex
po
The fourth byte for Index 7 contains the length. Thus only as many bytes as devices to be
de-/activated need to be transmitted.
These 5 data bytes are described in the following:
om
4 Words VC1
Write request (master -> slave) - start fragment
Data Structure
08 00 07 01 F2 I 00 00 00
Read Write / Index High / Index Low / Length /
1 byte data / 3 bytes unused
in
ec
Data (4 Words VC1)
on
l
Write response (slave -> master)
6852_en_02
Data (4 Words VC1)
Data Structure
88 00 02 05 F2 I 00 00 00
Read Write Response / Status / Length /
Number of accessible devices / device status / 3
bytes unused
PHOENIX CONTACT
5-9
FLS FLM PB SYS PRO UM E
5.3.4
Specification of the Active Configuration via DP/V1
For DP/V1 you can access the activation status via Index 6. Index 7 is not supported here
because it was optimized for the access via process data interface in particular.
Access via Index 6
Please observe the structure of Index 6 when accessing it:
Byte 2
Byte 1
2
3
4
5
6
7
8 9
10
11
12
13
14
15
16
...
Byte 8
57 58
59
60 61
62
63
x
co
m
1
Bytes 3
to 7
Bit = 0: Device and slot inactive
s.
Bit = 1: Device and slot active
nt
In this example there are 7 connected devices. The devices 1, 2, 3, 4, and 7 must be active.
The devices 5 and 6 are inactive.
The resulting data for object 6 are the following:
ne
F2hex, 00hex, 00hex, 00hex, 00hex, 00hex, 00hex, 00hex
po
These 8 data bytes are transmitted via DP/V1 in the following:
om
If a new activation status is described via Index 6, it becomes only valid as soon as the
bus is restarted.
2 Corresponding Examples:
on
l
in
ec
If - as described in this example - the configuration and the accessible devices are not
identical, because e.g, 2 devices are not connected, the bus is read in continuously until it
is identical with the configuration. In the course of this, the activation status on Index 6 is
evaluated automatically.
If the dynamic bus structure is expanded and if previously inactive devices are attached to
the end, these devices are activated via Index 6 at first. During the next bus start, the new
devices are integrated into data traffic. The bus can be started via Index 4, bit 0. Please
note that during reset the device output data are reset to their device-specific reset values.
Write request (master -> slave)
Data (8 Words VC1)
Data Structure
5F 00 06 08 F2 00 00 00 00 00 00 00 Write / Slot / Index / Length Data Total /
Length / 8 bytes object data
Write response (slave -> master)
5-10
PHOENIX CONTACT
Data (8 Words VC1)
Data Structure
5F 00 06 08
Write / Slot / Index / Length
6852_en_02
Dynamic Configuration
5.3.5
Summary
According to the respective task and the prerequisites in the control system, you can use
the illustrated services (process data interface DP/V0 or DP/V1) to specify the actually operated configuration of the application. In this example the devices FLM DI 8 and FLM DO
8 have been deactivated via the illustrated services and thus must not be connected. For
further information and examples regarding the communication via the process data interface as well as DP/V1, please refer to section "Acyclic Communication (DP/V1 and PCP)"
on page 4-1.
co
m
The "PD-PCP x words" process data interface module does not have to be configured
for normal operation. You only need it if you want to access the objects such as Index 6
via the process data.
on
l
in
ec
om
po
ne
nt
s.
If you want to use the "PD PCP x words" process data interface module (VC1), you can
configure it at any position. However, we recommend to use the last position because
here the configured slot and the actual slot will always be identical.
6852_en_02
PHOENIX CONTACT
5-11
on
l
in
ec
om
po
ne
nt
s.
co
m
FLS FLM PB SYS PRO UM E
5-12
PHOENIX CONTACT
6852_en_02
Appendix
A Appendix
A1
Error Codes for PCP Communication
Table A-1
06hex/02hex (hardware fault)
Access to the object failed due to a hardware fault.
Cause
For example, no I/O voltage.
Remedy
Remove the hardware fault.
co
Table A-2
m
Meaning
06hex/03hex (object access denied)
The object has limited access rights.
Cause
It may be a read-only object or it may be password-protected.
Remedy
Check the access rights in the object description.
nt
ne
Table A-3
s.
Meaning
06hex / 05hex (object attribute inconsistent)
A service parameter has been specified with a value that is not permitted.
Cause
For example, an incorrect length specification or subindex that is not
permitted.
om
po
Meaning
Check the parameters in the object description and send the service
again with the corrected values.
on
l
in
ec
Remedy
6852_en_02
PHOENIX CONTACT
A-1
FLS FLM PB SYS PRO UM E
Communication Error Messages
Table A-4
06hex / 06hex (object access unsupported)
The service used cannot be applied to this object.
Cause
For example, a program sequence can be started or stopped, but not
read.
Remedy
Check the object description to find out which services are supported for
this object.
Table A-5
06hex / 07hex (object non-existent)
m
Meaning
The object does not exist.
Cause
The "index" parameter probably contains an invalid value.
Remedy
Check the object index in the object description and send the service
again.
nt
s.
co
Meaning
08hex /00hex (application error)
po
Table A-6
ne
Other Error Messages
Device-specific error message; no communication error.
Cause
-
om
Meaning
Refer to your device description.
in
ec
Remedy
on
l
Depending on the I/O device, other specific error codes may also be used. These codes
are listed in the relevant data sheet.
A-2
PHOENIX CONTACT
6852_en_02
Appendix
A2
Error Codes for DP/V1 and VC1 Communication
Always observe the individual displays in your working environment.
DP/V1 error:
Function code (Response) = DEhex (Error Read)
or function code (Response) = DFhex (Error Write)
Table A-7
Error codes for DP/V1 and VC1 communication
Error_Code_2
B0hex
0
B1hex
0
po
Invalid data length during writing
Invalid device number
0
Status conflict, last Read/Write not finished yet
B6hex
0
Access onto device or index not permitted
B7hex
0
Invalid parameters
C3hex
0
(Internal) resource not available
D1hex
0
PCP connection not established
D2hex
0
PCP is not supported
D4hex
0
Wrong service code
D5hex
0
Wrong sequence of fragments
D6hex
0
Wrong data length during access
D7hex
0
PCP PDU size of 64 bytes (58 bytes user data) per
communication exceeded
in
ec
on
l
6852_en_02
Index invalid
0
om
B5hex
Meaning
ne
Error_Code_1
B2hex
nt
s.
Status 44 hex characterizes an error
– for DP/V1 on byte 3 of the data block,
– for VC1 Byte 2 in the response.
co
Error with reference to I/O device:
m
Error decode = 80hex (DP/V1 communication)
DChex
0
(Internal) timeout while reading
DDhex
0
(Internal) error when transmitting a request
DEhex
0
(Internal) error when receiving a service
PHOENIX CONTACT
A-3
FLS FLM PB SYS PRO UM E
A3
Format of the Parameter Telegram
This section provides a detailed description of the format of the parameters for the bus coupler and the input and output devices. This may be useful when setting parameters using
acyclic services or if there is no interface for the simple selection of parameters.
Table A-8
Parameters for the bus coupler
Bytes 1 to 7
DP standard
Bytes 8 to 10
DP/V1
standard
Byte 11
Control byte
0: Hide channel-specific diagnostics 1: display channelspecific diagnostics
Bit 6
0: Do not turn DI32 and DO32 data
1: Turn DI32 and DO32 data
Bit 5
0: SET_PRM does not overwrite dynamic configuration
1: SET_PRM overwrites dynamic configuration
Bit 4
0: Do not turn DI16 and DO16 data
1: Turn DI16 and DO16 data
Bit 3
Reserved (set to 0)
co
s.
nt
po
Bit 1
ne
Bit 2
m
Bit 7
0: Automatically acknowledge I/O errors
1: Manually acknowledge I/O errors
0: Stop local bus during device failure
1: Operating local bus with accessible devices
om
Bit 0
Reserved (set to 0)
on
l
in
ec
The data for the configuration and the data for the fail-safe value can be found in the device-specific data sheets.
A-4
PHOENIX CONTACT
6852_en_02
Appendix
Table A-9
Byte 1
Parameters for the I/O devices byte 1
Bit 7 to bit 6
00: Start block ID for device
Bit 5 to bit 4
Configuration
00: No configuration (e.g., DO)
01: Permanent configuration
10: Temporary configuration
Bit 3 to bit 2
Fail-safe value
00: No fail-safe value (e.g., DI)
10: Value remains the same
m
01: Output zero
Bit 1
Extended functions
s.
0: No function block
co
11: Value from data field is used
1: Function block (also several)
Activation
nt
Bit 0
0: activated
ne
1: deactivated
Bit 7 to bit 6
01: Configuration block ID
Bit 5 to bit 0
Length of the data block
om
Byte x
po
Following one configuration block:
in
ec
Byte 3 to n
n data bytes
Following one fail-safe block:
on
l
Byte x
6852_en_02
Byte 3 to n
Bit 7 to bit 6
10: Fail-safe value block ID
Bit 5 to bit 0
Length of the data block
n data bytes
PHOENIX CONTACT
A-5
FLS FLM PB SYS PRO UM E
If one or several function blocks are present, a header byte follows:
Byte x Bit 7 to bit 6
Bit 5 to bit 0
11: Function block ID
Entire function block length
After that the function blocks are decoded:
a) PCP Function Block
Bit 7 to bit 6
01: PCP function block
Bit 5 to bit 0
PCP function block length
m
Byte x+1
Invoke ID
Byte x+3
Index high byte
Byte x+4
Index low byte
s.
co
Byte x+2
Byte x+5
Subindex
n data bytes
ne
nt
Byte x+6
to x+6+n
Bit 7 to bit 6
10: Additional function block
Bit 5 to bit 0
Length of the additional function block
om
Byte x+1
po
b) Additional Function Block
in
ec
Byte x+2
Bit 0
1: I/O data rotate correctly
0: I/O data do not rotate correctly
Bit 7 to bit 1
Reserved
on
l
c) ID Function Block (n <= 16)
A-6
PHOENIX CONTACT
Byte x+1
Bit 7 to bit 6
11: ID function block
Bit 5 to bit 0
Length of the ID function block
Byte x+2
Bit 7 to bit 0
Order No. (last n sign), ASCII
Byte
x+2+n
Bit 7 to bit 0
Order No. (last sign), ASCII
6852_en_02
Appendix: Ordering Data
B Appendix: Ordering Data
The Phoenix Contact AUTOMATIONWORX catalog contains the ordering data for all
Fieldline products.
co
m
This includes:
– Fieldline devices
– Bus cables
– Shielded bus connectors
– Unshielded connectors
– Other accessories
nt
s.
For additional information about Fieldline devices and accessories, visit the
Phoenix Contact e-shop at www.phoenixcontact.com.
on
l
in
ec
om
po
ne
Complete documentation for the Fieldline devices can be found on the Internet at
www.download.phoenixcontact.com.
6852_en_02
PHOENIX CONTACT
B-1
on
l
in
ec
om
po
ne
nt
s.
co
m
FLS FLM PB SYS PRO UM E
B-2
PHOENIX CONTACT
6852_en_02
We Are Interested in Your Opinion!
We would like to hear your comments and suggestions concerning this document.
We review and consider all comments for inclusion in future documentation.
Please fill out the form on the following page and fax it to us or send your comments, suggestions for improvement, etc. to the following address:
on
l
in
ec
om
po
ne
co
s.
nt
Phone +49 - (0) 52 35 - 3-00
Telefax +49 - (0) 52 35 - 3-4 20 21
E-Mail [email protected]
m
PHOENIX CONTACT GmbH & Co. KG
Documentation Services
32823 Blomberg
GERMANY
FAX Reply
PHOENIX CONTACT GmbH & Co. KG
Date:
Documentation Services
Fax No:
+49 - (0) 52 35 - 3-4 20 21
From:
Company:
Name:
City, ZIP
code:
Phone:
Country:
Fax:
nt
My Opinion on the Document
02
Order No.:
26 99 07 9
Yes
In part
No
Yes
In part
No
om
Form
Is the table of contents clearly arranged?
Revision:
po
FLS FLM PB SYS PRO UM E
ne
Document:
Designation:
co
Job function:
s.
Address:
m
Department:
Are the figures/diagrams easy to understand/helpful?
in
ec
Are the written explanations of the figures adequate?
Does the quality of the figures meet your expectations/needs?
Does the layout of the document allow you to find information easily?
on
l
Contents
Is the phraseology/terminology easy to understand?
Are the index entries easy to understand/helpful?
Are the examples practice-oriented?
Is the document easy to handle?
Is any important information missing? If yes, what?
Other Comments: