1
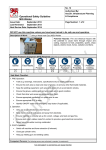
Standard Operating Procedure Title:_SOP-025 Micro-Welder PI: Art Erdman Lab Location: Mayo G217 Issue Date: 3/18/14 Revision Date: NA Prepared by: Richard Oliphant Approved by: Jon Kilgore Hazard Identification: Physical Danger Exposure Assessment: Heat Weld Area Metal conducts heat very well away from the weld spot. The entire part can get hot quickly, especially when welding small parts. With rapid spot welding, the temperature of the part(s) can get high enough to cause burns. The welding arc should be treated as an open flame source as it may ignite flammable gases or vapors. Electricity Electrical Shock The Micro-Welder uses a high voltage and current to arc between the electrode and work piece. In the case of a malfunction or bad ground, this could arc to the operator causing an unpleasant shock. UV Radiation Arc Flash The high energy of the electrical arc between the electrode and work piece can emit radiation in the UV spectrum. This can be dangerous to exposed skin, causing symptoms similar to a sunburn. It can also affect the eyes causing photokeratitis (“arc eye”), with symptoms similar to sunburned eyes. Fumes Hazardous Vapors The emission of high-energy UV light can cause surrounding air to break down into ozone. Inhaling ozone can cause respiratory problems ranging from minor inflammation to death. When heated by welding, any residue from cleaners or degreasers on the surface of the work piece will be burned and could release hazardous vapors. Control Plan: Read and become familiar with machine’s operating procedures before operating Always know where the power off switch is located in case of emergency Always turn switch to off position when not in use Always disconnect the Micro-Welder from the power source before servicing Always clean the work piece(s) of any oxidation or chemical residue near the weld area. This is also good practice to ensure a quality weld Wear thermally insulated gloves if spot welding rapidly or holding a small work piece that can get hot. Using a clamp stand to hold the work piece also avoids skin contact. If possible allow the work piece to cool between spot welds. Use the compressed air pistol to cool the work piece Never disable the automatic shutter which blocks any UV light from the operator’s eyes Work in a well-ventilated area when using this device Do not use the device near combustible materials Do not wear jewelry on the hands or wrists that could create an electrical ground to the electrode Experimental Procedures: Prepare the work piece for welding, including cleaning Adjust the stereomicroscope and tungsten electrode orientation. If using a clamp stand, arrange as desired in the work space of the Micro-Welder Open the main supply and set to between 3 to 5 liters per minute One ground clip should be attached to each separate work piece body When ready, turn on Micro-Welder and set to desired program or custom power settings. It is recommended to start low and work higher (power 1 low, 10 high) Put on insulated gloves if appropriate for the weld, remove rings, watches, bracelets, or other conductive jewelry Touch work piece to electrode to put machine into ready mode Hold work piece 1 to 2 mm from the electrode tip Press the argon button for about 3 seconds to clear the lines and flood argon Depress the foot pedal switch to begin spot welding. If the pedal is continuously depressed, the machine will fire again when ready, repeatedly. Weld spots should overlap by at least half. Be careful to not get the work piece too close to electrode tip where it may weld to the tip (see Spill and Accident Procedures) When finished, turn off the Micro-Welder main switch. Close the main supply on the argon tank Replace any gloves, clamps, etc to their proper place. Clean any mess in and around the Micro-Welder (see Waste Management Procedures) For other inquiries, see the User Manual in Appendix. Waste Management Procedures: When finished with the Micro-Welder, always clean the area. Check for any mess made inside the Micro-Welder during use. If there is a mess, clean out appropriately. Paper towels, wipes, and cleaning solution can be found in G217-12. Dispose of any leftover material or debris appropriately. Place all raw materials and chemicals back in the appropriate place. Spill and Accident Procedures: If an accident occurs, report immediately to the lab supervisor (G217-05) or other appropriate staff member. If no one is around, dial 911 on the landline phone near the door of G217-12 to reach the campus police. If there is a burn, immediately cool the affected area under cold water for 10 minutes. Do not apply any creams or ointments. Cover with a band-aid. If needed, the first aid kit is located on the wall by the sink. A first aid pamphlet from DEHS is located in all of the MDC’s first aid kits. If the tip becomes oxidized and is not firing, first try lightly scraping it against the work piece or another piece of metal. This is often enough to remove oxidation from the point of tip, and it will then fire. If this does not work, then the tip needs to be replaced. Follow the instructions below for how to do this. If the electrode tip becomes welded to the work piece, turn of the Micro-Welder and argon gas supply. If you are able, break away the work piece by gently moving it back and forth to induce a fatigue failure at the weld. Most likely the tip will have become contaminated and will not fire. The tip needs to be replaced. Follow the instructions below for how to do this. Electrode ‘Black knob’ Steel sleeve Tungsten tip How to remove and replace the tungsten tip: Make sure that the Micro-welder is turned off Slightly loosen the electrode holder by turning the ‘black knob’ counter-clockwise Pull out the electrode. It’s a tight fit, so a firm pull might be necessary Loosen the steel sleeve near the tip by turning it counter-clockwise Pull out the tungsten tip Turn the tip around to use to other end. If the other end is also contaminated, place it in the “Used tips” container and replace it with one from the “Fresh tips” container Retighten the steel sleeve, reinsert the electrode into the holder, and retighten the black knob The tungsten tip should protrude from the pink ceramic by no more than 5 mm Appendix: