1
Table of Contents
MicroWorlds 2.0
User's Guide
Windows 95
LCSI
November 11, 1997
i
Table of Contents
© Logo Computer Systems Inc. 1997
All rights reserved.
ii
Table of Contents
iii
Table of Contents
iv
Table of Contents
CREDITS
8
MICROWORLDS BASIC TECHNIQUES
9
The Centers............................................................................................................................................... 9
Tool Palette............................................................................................................................................... 9
Object Creation Tools............................................................................................................................................ 9
The Editing Tools................................................................................................................................................ 10
Menus...................................................................................................................................................... 11
File...................................................................................................................................................................... 11
Edit ..................................................................................................................................................................... 13
Text..................................................................................................................................................................... 14
Pages................................................................................................................................................................... 14
Gadgets ............................................................................................................................................................... 16
Help .................................................................................................................................................................... 16
TURTLES
18
Creating a Turtle .................................................................................................................................... 18
Moving and Turning the Turtle.............................................................................................................. 18
Pen Color and Pen Size........................................................................................................................... 18
Changing the Turtle's Shape .................................................................................................................. 19
Changing the Turtle's Size...................................................................................................................... 19
New Turtles and Turtle Names............................................................................................................... 20
Stamping a Turtle ................................................................................................................................... 20
About Real Turtles and Stamped Turtles............................................................................................... 20
Programming Turtles ............................................................................................................................. 21
Finding Programmed Turtles ................................................................................................................. 21
Animation Techniques ............................................................................................................................ 22
Removing Turtles ................................................................................................................................... 23
Copying and Pasting Turtles .................................................................................................................. 23
Talking to Turtles ................................................................................................................................... 24
Table of Contents
GRAPHICS
v
25
Background Graphics............................................................................................................................. 25
The Drawing Tools.............................................................................................................................................. 25
Undo ................................................................................................................................................................... 26
Pen size............................................................................................................................................................... 26
Colors ................................................................................................................................................................. 26
Programming Colors ........................................................................................................................................... 26
Fat Bits Window.................................................................................................................................................. 28
Selecting, Copying and Pasting Background Graphics......................................................................................... 28
Importing and Exporting Background Graphics .................................................................................................. 29
How Windows Display Setting Will Affect Your Project...................................................................................... 29
Shapes ..................................................................................................................................................... 30
Editing Shapes .................................................................................................................................................... 30
Shape Names and Numbers ................................................................................................................................. 30
Changing the Size of a Shape .............................................................................................................................. 31
Copying Shapes................................................................................................................................................... 31
Importing Shapes ................................................................................................................................................ 32
TEXT BOXES
33
Creating a Text Box................................................................................................................................ 33
Typing and Formatting Text .................................................................................................................. 33
Transparent Text Box, Name Tag, and Scroll Bar................................................................................. 34
Moving Text Boxes ................................................................................................................................. 35
Stamping Text......................................................................................................................................... 35
Copying and Pasting Text and Text Boxes............................................................................................. 36
Deleting Text and Text Boxes................................................................................................................. 36
Importing and Exporting Text ............................................................................................................... 36
Printing the Contents of a Text Box ....................................................................................................... 37
Talking to Text Boxes............................................................................................................................. 37
MULTIMEDIA OBJECTS AND OTHERS
38
Importing Music ..................................................................................................................................... 38
Melodies.................................................................................................................................................. 39
Importing Sounds ................................................................................................................................... 40
Recording................................................................................................................................................ 41
Buttons.................................................................................................................................................... 42
Sliders ..................................................................................................................................................... 43
Videos ..................................................................................................................................................... 44
Audio CDs............................................................................................................................................... 45
Table of Contents
OBJECT MANAGEMENT
vi
47
Selecting Objects..................................................................................................................................... 47
Moving Objects....................................................................................................................................... 47
Copying and Pasting ............................................................................................................................... 47
About Pasting.......................................................................................................................................... 48
Unique Names for Copied Objects ......................................................................................................... 48
Modifying Existing Objects .................................................................................................................... 48
Stamping Objects.................................................................................................................................... 49
Deleting Objects...................................................................................................................................... 49
Making Objects Larger and Smaller...................................................................................................... 49
LOGO PROGRAMMING
50
Basic Concepts........................................................................................................................................ 50
Logo Basics......................................................................................................................................................... 50
Command Center ................................................................................................................................................ 50
Commands and Reporters.................................................................................................................................... 51
Object Names as Commands or Reporters............................................................................................................ 51
Spaces in Object Names....................................................................................................................................... 51
The Procedures Page ........................................................................................................................................... 51
Formatting Your Procedures................................................................................................................................ 53
Beyond the Basics ................................................................................................................................... 53
Arithmetic........................................................................................................................................................... 53
Words and Lists .................................................................................................................................................. 54
Variables............................................................................................................................................................. 55
Local Variables ................................................................................................................................................... 55
Global Variables.................................................................................................................................................. 55
Project Variables ................................................................................................................................................. 56
Sliders as Variables ............................................................................................................................................. 56
Text Boxes as Variables ...................................................................................................................................... 56
Long Words ........................................................................................................................................................ 57
Contents of Text Boxes........................................................................................................................................ 58
Addressing Turtles and Text Boxes ..................................................................................................................... 59
Interesting Concepts & Techniques........................................................................................................ 59
Page Order .......................................................................................................................................................... 59
Startup Procedure ................................................................................................................................................ 60
Question and Answer .......................................................................................................................................... 60
Carefully ............................................................................................................................................................. 61
Protecting Your Project From Changes................................................................................................................ 62
Freezing Objects and Graphics ............................................................................................................................ 62
Advanced Concepts ................................................................................................................................ 63
Processes ............................................................................................................................................................. 63
Synchronizing Processes...................................................................................................................................... 64
Local and Global Who......................................................................................................................................... 65
Creating and Modifying Objects Under Program Control..................................................................................... 65
Table of Contents
PROJECTS
vii
70
Drag and Drop Feature .......................................................................................................................... 70
Exporting or Sharing Your Project........................................................................................................ 70
Creating Web Pages ............................................................................................................................... 70
Merging Projects .................................................................................................................................... 71
MicroWorlds Player ............................................................................................................................... 72
KEY COMBINATIONS
73
Special Key Combinations ...................................................................................................................... 73
INDEX
74
Credits
8
Credits
Software Concept:
Seymour Papert
Brian Silverman
Design Group:
Mario Bergeron
Paula Bontá
Billo Diallo
Brian Silverman
René Yelle
Software Engineers:
Billo Diallo
Mario Bergeron
Ghislain Carrier
Brian Silverman
Programmer/Tester:
René Yelle
Project Manager:
Paula Bontá
Weather Module:
Sharnee Chait
Paula Bontá
Plants Module:
Susan Einhorn
Sharnee Chait
Editing:
Geni Dresher
Graphics and Layout:
Le Groupe Flexidée
Contributions:
Martin Favreau for additional graphics,
Jessie Fenn for production,
Mike Freeman and Carmen Maclean for work on the media resources,
John Jackson for arranging the classical midis,
Daniel Lesage for additional programming.
Special thanks to Michael A. Quinn for making this project possible.
Many thanks to all the people who tested the beta version of MicroWorlds 2.0 for Windows 95,
particularly Sam Bruzzese, Frank Caggiano, Jerry W. Hubbard, Craig Kerwin, Andy Rudnitsky,
and Gary Stager. We would also like to thank everyone who was involved in the original version
of MicroWorlds, including LCSI staff members, Canadian and American teachers and students
who tested it, and special contributors.
MicroWorlds Basic Techniques
MicroWorlds Basic Techniques
The Centers
MicroWorlds has three "Centers": the Command Center, the Shapes Center, and the Drawing
Center.
In the Command Center, you type commands. Click on the
Center (if it is not already open).
to open the Command
In the Shapes Center, you can select a shape for the turtle, or change or create your own
shapes. Click on the
to open the Shapes Center. To close the Shapes Center, click on
one of the other Center icons.
The Shapes Center has one special shape — the turtle shape — and many other shapes for you
to choose from. Some of the shapes are empty. You can change or completely replace any shape
except the turtle.
Use the Drawing Center tools to draw on the background, set the turtle's pen size and pen
color, and program colors. Click on the
to open the Drawing Center. To close the
Drawing Center, click on one of the other Center icons.
The drawing tools are on the left, followed by the undo tool, the pen size selection, and the
colors. There are 10 shades for each of the 14 colors, plus black and white. Use the scroll bar to
see lighter and darker shades.
Tool Palette
Object Creation Tools
In order to create any of the Palette objects you need to click on the Palette to select that object
and then click on the page.
Creates a new turtle.
9
MicroWorlds Basic Techniques
10
Creates a text box.
Opens the Melody Editor for you to create your own melody.
Opens the Record dialog box for you to make a recording.
Creates a button. When you click on the page, the button's dialog box opens.
Creates a slider. When you click on the page, the slider's dialog box opens.
Imports a video. When you click on the page, the Import Video dialog box appears.
Creates an audio CD clip. When you click on the page, the Audio CD dialog box
appears.
The Editing Tools
Regular pointer for clicking on buttons, typing text, moving and selecting objects.
To modify any object on this page, click on the object with this icon. Then you will
be able to change that particular object's properties.
Removes any object on the page. See removing turtles and deleting objects.
Stamps a turtle, a video, or a transparent text box.
Enlarges a turtle, a button, or a text box. See making objects larger and smaller.
Shrinks a turtle, a button, or a text box. See making objects larger and smaller.
Note: Frozen objects cannot be deleted, stamped, moved, resized, etc. See freeze and unfreeze.
MicroWorlds Basic Techniques
11
Menus
File
Click on the menu item for help.
New Project
Opens a new project. If there is an open project already on the screen, you'll be asked if you want
to save it first.
Open Project
Opens a dialog box where you choose which project to open. If there is an open project already on
the screen, you'll be asked if you want to save it first.
Import
Import offers these choices:
Click on the sub-menu item for help.
See Also: Importing and Exporting Background Graphics, Importing and Exporting Shapes,
and Importing and Exporting Text.
MicroWorlds Basic Techniques
12
Import Music
Imports a MIDI file (extension .MID) and places the appropriate button icon on that page.
Import Picture
Imports a picture file and places it on the page's background graphics.
Import Sound
Imports a sound file (extension .WAV) and places the appropriate button icon on that page.
Import Text
Imports the contents of a text file into the current text box, the Command Center, or the
Procedures page, whichever contains the flashing cursor.
Import Video
Imports videos (extension .AVI).
Save Project
Saves any changes you’ve made.
Save Project As
Opens a dialog box where you choose a new location and/or name for your project.
Page Setup
Opens a dialog box where you choose the paper size and other printer details before you print.
Note: Before printing, make sure the printer is connected and turned on, and that your computer
has the right printer setting.
Print Page
Opens a dialog box to print the contents of the current page. The page will be printed just the way
it looks on the screen — except, of course, that if your printer is black and white, you can’t print
the colors! If a text box contains more text than is visible, only the text you see on the screen will
be printed. If the Procedures page is on the screen, the text will be printed.
Choose Page Setup before printing.
Choose Print Project from the File menu if you want to print all the pages in your project.
See also Printing the Contents of a Text Box.
Print Project
Opens a dialog box to print all the pages in your project, in the order shown in the Pages menu.
The Procedures page will not be printed. Choose Page Setup before printing.
Exit
Exits MicroWorlds. If you have made changes to the current project, a dialog will ask if you want
to save the project.
MicroWorlds Basic Techniques
13
Edit
Click on the menu item for help.
Undo
Undoes the last text editing operation, the last Drawing action, or the last deletion of page
elements (buttons, for example). Programmed actions can't be undone.
Cut
Cuts the selected text, graphics, turtle shape, or page element (buttons, for example) and puts it
in the Clipboard.
Copy
Copies the selected text, graphics, turtle shape, or page element and puts it in the Clipboard.
Paste
Pastes the contents of the Clipboard on the active window. Paste only works if the contents of the
Clipboard are of the right type for the current location (for example, you can't paste graphics if
the cursor is currently flashing in the Command Center).
Select All
Selects all the objects on the page, including those that are not visible. If the cursor is inside a
text box, the Command Center or the Procedures page, all the text is selected.
Clear
Clears whatever is selected. If the cursor is in a text box, the selected text is cleared. If objects
(buttons, sliders, turtles, etc.) are selected, they are cleared. If a shape in the Shapes Center is
selected, it's cleared.
Find/Change
Opens the Find/Change dialog box, where you can search for, and change, a word or a number of
words in the current location (text box, Command Center, or Procedures page).
Cancel
Selectively stops some processes while leaving others running. Choosing Cancel opens a menu
where you choose which process to cancel. Processes can be launched using launch, forever, and
when. Some processes, like clickable turtles, don't show in the Cancel list.
MicroWorlds Basic Techniques
14
Stop All
Stops all running processes, including repeating processes launched by buttons and clicked
turtles. If your programs seem to suddenly run more slowly than usual, you may have left
processes running on other pages. Choose Stop All to stop everything and then restart the
processes you really need.
Text
You can choose the font, style, size, or color for any text in text boxes, the Command Center, or
the Procedures page.
Click on the menu item for help.
Font
Opens a menu showing the text fonts, sizes, and styles you can choose from.
Color
Opens a dialog box where you can choose a text color.
Pages
Click on the menu item for help.
New Page
Opens a new page, which becomes part of the project. All the pages in a project are listed in the
Pages menu.
To remove a page, first check the Pages menu for the list of page names. Then go to the
Command Center and type:
remove "page1 Use your page name. Press Enter.
Caution: Deleting a page is permanent. Once you remove a page, you can only recover it if the
project was previously saved. If you've accidentally deleted a page from a saved project, choose
Open Project from the File menu. Click No when the Save Changes Before Closing box comes
up. Then reopen the saved version of the project.
Name Page
Opens a dialog box where you name the current page. Pages are given names by default (page1,
page2, and so on) but you can choose your own names. Be sure to use a single word as a page
name because page names can be used as commands to go from page to page.
MicroWorlds Basic Techniques
15
For example, you can create a multi-page project with four pages, called Contents, Intro, Demo,
and Exit. You can have buttons or clickable turtles on the Contents page to go to the page of your
choice. Simply use a page name as the instruction of a button or a clickable turtle.
Duplicate Page
Creates a new page which is identical to the current page. All the current page's graphics and
objects are copied.
In a multi-page project, a second page may just be a modification of the first one you did (the
background and the turtles for example). Simply duplicate the first page and make the changes
on the second page.
When you choose Duplicate Page from the Pages menu, a new identical page is created. Check
the page name on the title bar of the page, or the list of pages in the Pages menu, to see that a
new page has been added to your project.
Procedures
Displays the Procedures page.
Transitions
Sets a visual effect that occurs when the current page opens. A visual effect can smooth the
transition when you change pages. The transition you choose will affect only the page that is
open. For each page you can choose the kind of visual effect that works best for the text or
graphics on that page.
Select the transition of your choice and click OK. To test the transition, go to a different page (go
to the Procedures page if you don't have another page) and come back. The transition effect will
only be visible if you have graphics or objects on your page. To remove the transition effects,
pick the top selection.
Click on a transition to know its name.
page1
All pages in the current project are listed at the end of the Pages menu. Selecting a page displays
it. If a project contains a page named Page1, it will open with Page1 showing.
MicroWorlds Basic Techniques
16
Gadgets
Click on the menu item for help.
Tool Palette
When this is checked, the Tool Palette will be displayed.
Tool Sounds
When this is checked, some Drawing Center and Shapes Center tools will make sounds. Uncheck
this selection for quieter operation.
Command Center
When checked, the Command Center will be displayed.
Presentation Mode
Presentation Mode is for demonstrating completed projects. In Presentation Mode:
• The Command Center and the Tool Palette are hidden
• The project's title bar and MicroWorlds menus are hidden
• The project is centered on the screen and the background is filled in.
Before using Presentation Mode, make sure that your program is completely tested and working
as it should. You won't have a Command Center, so you won't be able to type commands, see
error messages, or use show to display text. Your program will have to start with a button, turtle
click, or some other object.
To get out of Presentation Mode, click outside MicroWorlds window.
Help
Click on the menu item for help.
You can also access Help by pressing the F1 key. Help will appear on the word closest to the
cursor.
MicroWorlds Help Topics
Access to the online reference manual.
Vocabulary
Displays a window that lists every primitive in MicroWorlds. Choose a command or a reporter
name and click on Help to see its definition.
MicroWorlds Basic Techniques
Last Message
Displays a window with a description of the last message that was printed in the Command
Center, and some solutions for preventing the situation that caused the message.
About MicroWorlds
Gives you detailed information about the current version of MicroWorlds that you are using.
17
Turtles
Turtles
Creating a Turtle
In MicroWorlds, turtles are everywhere. You use them to draw, decorate, act like push buttons,
and play animated scenes. Turtles have many properties: each turtle has a name, a position, a
heading, a pen size, a pen color, a shape, and even an instruction when you click on it.
You can create lots of turtles — just hatch them!
Select the
and click anywhere on the page. A new turtle appears.
Moving and Turning the Turtle
You can move the turtle by dragging it with the mouse.
With the pointer, drag the turtle.
You can change the turtle's heading by dragging its head.
Point to its head, make it spin.
You can only turn the turtle by dragging its head if the turtle has the original "turtle" shape.
When there are two turtles, you can bring one to the front by pressing the Shift key while
clicking on it. This feature is particularly useful when animating turtles in different shapes.
Click on the turtle while pressing the Shift key.
Related Logo Primitives: setpos, seth, forward, back, left, and right
Pen Color and Pen Size
When you hatch a new turtle, its pen is up. The pd command puts the turtle's pen down.
18
Turtles
You can change a turtle's color or pen size using the Drawing Center
Select the pencil.
Choose a color.
19
.
Select a pen size. Click on a turtle.
Type this in the Command Center:
pd
fd 50
The turtle will draw a line in the color and pen size that you have
selected.
This only works if the turtle has the original "turtle" shape. If the turtle has another shape, either
change its shape back to the turtle, or use commands to change the pen color and size.
Related Logo Primitives: pd, pu, setc, and setpensize
Changing the Turtle's Shape
To change the turtle's shape, open the Shapes Center
:
Click on a shape, then click on the turtle.
To see more shapes, use the scroll bar. You can also design your own shapes. See Editing
Shapes.
Original Turtle Shape
The original turtle shape is the only one that turns to show where the turtle is heading, and the
only one that changes color to show the pen color. For this reason it's sometimes easier to use the
turtle shape while you're preparing your program, then switch to the final shapes when your
program is complete. To set the turtle back to the turtle shape, click on the turtle shape in the
Shapes Center, then click on the turtle on the page.
Related Logo Primitive: setshape
Changing the Turtle's Size
You can enlarge or shrink the turtle using the magnifiers in the Tool Palette.
Select the magnifier.
Click on the turtle.
Related Logo Primitive: setsize
Turtles
20
New Turtles and Turtle Names
Select the
and click anywhere on the page. A new turtle appears. Do this a second time and
there will be two new turtles on the page.
The turtles are numbered as they appear: t1, t2, and so on.
Click on the eye tool, then click on the
turtle to find its name.
It will open its dialog box:
You can change the turtle's name in its dialog box.
See Programming Turtles. For information on how to address each turtle individually see
Talking to Turtles.
Related Logo Primitive: newturtle
Stamping a Turtle
Stamping a turtle copies its image onto the background graphics. To stamp a turtle, select the
and click on a turtle. You should hear its sound. You may think that nothing happened,
but if you drag the turtle away, you'll see that the "live" turtle moves, and the graphic image stays
behind.
Related Logo Primitive: stamp
About Real Turtles and Stamped Turtles
It can be hard to remember which turtles on the page are "live" turtles and which ones are
stamped images. To find out, select all the objects on the page. The ones with the "handles"
around them are real turtles (like the car, sun, house, and one of the trees below). The ones
without handles are stamped images (the evergreen and other tree below).
To select everything, click on the page and choose Select All from the Edit menu (Ctrl+A).
Turtles
21
Programming Turtles
You can make a turtle do something special whenever you click on it. For example, a turtle can
start moving when you click on it. These special instructions must be typed in the turtle's dialog
box. Each turtle has its own dialog box.
To open a turtle's dialog box:
Type this instruction:
Do you want the instruction to run once or should it run again and again?
Choose Once to run once.
Choose Many Times to run repeatedly.
Click on the turtle to see what happens. If you've set the instruction to Many Times it keeps
going. Click on the turtle again to stop the action.
If you are having trouble "catching" the turtle, you can also choose Stop All from the Edit menu
or press Ctrl+Break to stop.
Related Logo Primitives: clickon and clickoff
Finding Programmed Turtles
It can be hard to remember which turtles have been programmed to react to a mouse click, and
which are just plain turtles.
Turtles
22
To tell which turtles are programmed and which aren't, select the
. The turtles
programmed to react to a mouse click will show a frame around them (like the car below).
Animation Techniques
There are three types of MicroWorlds animation:
• moving (such as when a car drives across the screen)
• changing shapes (such as when a flag waves)
• both moving and changing shapes (such as when a dog runs)
The easiest method, moving, is shown in Programming Turtles. The following describes yet
another type of animation, moving and changing shapes.
Using Setshape
Look in the Shapes Center. Some of the shapes come in sets of two or three. By switching shapes,
you can make a bird or bee fly, a boy walk, or a dog run.
Here's how to make the bird fly. Hatch a new turtle or use a turtle already on the page.
•
Point the turtle toward the top, left corner of the page.
• Open the turtle's dialog box (use the
).
• As the instruction, type: setshape "bird1 fd 2 setshape "bird2 fd 2
• Click on Many Times to run the instruction again and again.
• Click OK to close the dialog box.
• Click on the turtle, and see how it changes to a flying bird.
• Click on the bird-turtle again to make it stop.
You can use this technique for any of the sets of shapes. Check the names of the shapes in the
Shapes Center. If there are three shapes in the set (as in the walking boy), add another setshape
and fd command. If the instructions are too long, write them into a procedure on the Procedures
page.
Using Setshape With a List
You have seen that setshape is used with the name of a shape (as in setshape "bird1). Setshape
can also be used with a list of shape names. In that case, the turtle will "cycle" through the list of
shapes each time it runs a fd, bk, or glide command. Try these commands in the Command
Center:
Turtles
23
setshape [bird1 bird2]
repeat 20 [fd 2 wait 2]
repeat 20 [fd 10 wait 2]
glide 100 5
In other words, you can use a single setshape command to set up the animation shapes (in a
setup procedure, for example). The next forward or back command from the Command Center,
a button, or a clickable turtle, will take care of the animation.
To stop the shape switching, give the turtle a single shape: setshape "bird1
You can also set up the shapes for an animation from the Shapes Center:
• Hold down the Shift key.
• Select a shape.
• Click on the turtle.
• With the Shift key down, select another shape.
• Click on the turtle.
• Do this for as many shapes as you want.
Then try a fd command:
repeat 20 [fd 10]
To stop shape switching, select one shape (don't hold down the Shift key this time) and click on
the turtle.
Removing Turtles
and click on the unwanted turtles.
If you have too many turtles on the page, select the
If you can't seem to be able to delete a turtle, it might be a stamped image. The scissors can't
delete graphics. Frozen objects also can't be deleted. See freeze and unfreeze.
Tip: Turtles are best when you want shapes that move or objects that you click on. They're also
useful for parts of a picture that you might want to change later. But if you want to draw a forest,
for example, it's better to stamp a turtle 25 times than to create 25 turtles. Twenty-five turtles
will use too much of the computer's memory, and limit other aspects of your project.
Related Logo Primitive: remove
Copying and Pasting Turtles
Copying turtles is a quick way of making many identical turtles. Follow these steps to copy a
turtle:
• Select the turtle using the pointer (see Selecting Objects).
• Choose Copy from the Edit menu.
• Choose Paste immediately to get a copy on the same page, or
• Go to another page and choose Paste.
When you copy a turtle, its heading and instruction in its dialog box are also copied. So, for
example, you can set up a clickable turtle of a running dog. Then by copying and pasting you can
have a pack of dogs. You can also select many turtles and follow the same steps to copy and paste
them on the same page or into another page. See also About Pasting and Unique Names for
Copied Objects
Turtles
Talking to Turtles
If you have several turtles and want them to do different things, you have to address them
individually. When you talk to someone, you might say, "George, do this." Notice the comma
after the name George. In MicroWorlds you also use a comma after a turtle's name. Hatch a
second turtle and try the following commands in the Command Center:
t1,
Talk to the turtle t1. Don't forget the comma.
setshape "house
Set its shape to a house.
t2,
Talk to the turtle t2.
fd 100
T2 moves forward.
When you have many turtles on a page, there is always one that is listening to your commands.
That turtle is:
• the last turtle that you've created
• or the last turtle on which you've clicked
• or the last turtle that you've addressed using its name followed by a comma
Also, you can talk to many turtles at once.
talkto [t1 t2]
bk 50
Related Logo Primitives: newturtle and talkto
24
Graphics
25
Graphics
Background Graphics
The Drawing Tools
Open the Drawing Center to access the following drawing tools:
Click on the drawing tool for help.
Line tool
Draws a straight line in the selected color and pen size.
Rectangle
Draws a rectangle in the selected color and pen size.
Solid rectangle
Draws a solid rectangle in the selected color.
Eraser
Erases graphics as you drag in the selected pen size. Objects such as turtles, text boxes, and
buttons are not part of the background graphics, so they are not erased. If the eraser is selected
and you click again on it, all the graphics on the page will be cleared. Use the undo tool to restore
anything you accidentally erase.
Paint can
Fills an enclosed area with the selected color. Use the undo tool to restore an area that you have
accidentally filled.
Spray can
Sprays speckles of the selected color and pen size.
Oval
Draws an oval in the selected color and pen size.
Graphics
26
Solid oval
Draws a solid oval in the selected color.
Selection tool
Selects a rectangular area of graphics. Objects such as turtles, text boxes, and buttons are not part
of the background graphics, so they are not selected. After your selection is made, you can:
1. copy or cut the graphics
2. drag one of the "handles" at the corners to expand or shrink the selection
3. move the selection by clicking inside the selected area and dragging. If you
want to leave a copy of the selection, Press the Ctrl key and click before
dragging.
Click again in the selection to open the Fat Bits window for precise editing.
Undo
Undoes the last drawing tool's action. (The Undo menu item, or Ctrl+Z, has a similar effect.)
Pen size
Determines the pen size for the empty rectangle, the empty oval, the pencil, the line tool, the
turtle's pen, and the spray can.
Colors
Besides black and white, MicroWorlds has 14 colors, each with ten shades. Use the scroll bar at
the right of the Drawing Center to see the lighter and the darker shades of the 14 colors.
Each color has a number. The colors are numbered in tens: for example, the shades of red are
numbered from 10 to 19; 15 is the "mid-tone" red that you see when you open a new project. The
blues are numbered from 100 to 109, with 105 the mid-tone blue. The mid-tone colors also have
names: gray, red, orange, brown, etc.
Black is color number 9, and white is number 0.
To find the name or number of a color, leave the mouse pointer for a while over that color. A tool
tip will appear with the number of that color. The mid-tone colors will include their names in
their tool tip.
Note: In the Shape Editor, white is actually transparent. Use the lightest color of gray for white
which is not transparent.
Programming Colors
You can program each color to react to mouse clicks or turtles. You can program the color red,
for example, so that whenever the mouse clicks on anything drawn on the page in any shade of
red, an instruction runs. Or, you can program the color so that whenever a turtle crosses over
anything drawn in red, an instruction runs.
You can tell which colors have been programmed by looking at the Drawing Center.
Programmed colors are identified by a dot.
Graphics
27
Note: Color detection works for graphics drawn on the page, not objects. You cannot detect the
color of turtles, buttons, sliders, icons, or text boxes.
Mouse Detection
Click on any color in the Drawing Center to select it. Click on it again to open its dialog box. The
color blue is used in this example.
Type a command in the Mouse instruction and click OK.
Draw a blue circle on the page (any shade of blue).
Open the Command Center and click on the blue drawing. The words "this is blue" will be
displayed. You can program different colors with different instructions. Colors can move the
turtle, play tunes, go to a different page, and so on.
Turtle Detection
Click on another color in the Drawing Center to select it. Click on it again to open its dialog box.
For this example, use red. Type the following in the Turtle instruction:
Now draw something red, just ahead of the turtle. Open the Command Center and type:
repeat 50 [fd 1]
Let the turtle run over the red area you drew. It should bounce back when the color red "senses"
the turtle.
Draw something red
in front of the turtle.
Open the Command Center
and type repeat 50 [fd 1]
See it bounce.
Graphics
28
Fat Bits Window
You can do detailed editing of background graphics with the Fat Bits window. This window
zooms into the graphic so you can see and change each screen dot, or pixel, one at a time. To
enter the Fat Bits window, use the selection tool to select a region on the background, then click
inside the region:
Pick the selection tool.
Select a region.
Click inside.
This opens a window in which you can draw one pixel at a time.
The right side of the Fat Bits window shows the graphic in its normal size. Drag the view selector
(small square) around to view or edit the rest of your selection.
Click OK or Cancel to return to normal view.
Selecting, Copying and Pasting Background Graphics
In order to select background graphics, open the Drawing Center
and pick the
Then follow these steps:
• Click on the background and drag to select a region.
• Choose Copy from the Edit menu.
• Choose where you want to paste the graphics by changing to another page (click on the page
before pasting graphics) or opening the Shapes Center and clicking on an empty shape.
• Choose Paste from the Edit menu.
Warning: If a text area is active (a text box, the Procedures Page, or the Command Center),
graphics will not be pasted.
Graphics
29
Importing and Exporting Background Graphics
Using commands or the Import menu, you can import clip art, scanned images or pictures created
in other applications into a MicroWorlds project. You can also export pictures created in
MicroWorlds to other applications, using the savepict command.
Importing Pictures
You can load a graphic created in another application onto the background of a MicroWorlds
page. MicroWorlds only "loads" the following graphic formats: BMP, JPEG, GIF, PCX, and
Targa.
1. Create a graphic using a drawing application.
2. Save it in a format that MicroWorlds can load.
3. Then, start MicroWorlds and choose Import Picture from the File menu.
The loadpict command corresponds to Import Picture except for the following:
Pictures imported using Import Picture in the menu remain selected only if they are not the same
dimensions as your project size. If a picture is selected, you can move or adjust the size of the
picture. Pictures loaded using loadpict are dropped onto the background, unselected, so you can
make a "slide show" presentation by using several loadpict instructions.
A third method for importing graphics consists of using the Windows Clipboard. Copy some
graphics from any application, start MicroWorlds, click on the page (you can only paste graphics
on the page), and choose Paste from the Edit menu.
Finally you can use the "drag and drop" functionality for importing graphics.
Exporting Pictures
You can save the background of a MicroWorlds page using the savepict command. Simply open
a page with a background that you want to save and type in the Command Center:
savepict "mypict
Use a file name of your choice.
You may want to save the file into a specific directory. To do this, choose Save Project As from
the File menu. Find the directory where you want to save the picture. Do not save your current
project! Just click Cancel when you find the directory. Savepict will save the file into this
directory.
By default it will save it in BMP format. If you want to save it in a different format (that
MicroWorlds supports) add the appropriate extension to the file name:
savepict "mypict.jpg Use a file name of your choice.
How Windows Display Setting Will Affect Your Project
All Windows color computers are capable of operating in 256 colors and higher resolution
modes. This setting is made in the Display item in the Control Panel. The 1000 colors mode is
recommended for the following reasons:
• Imported graphics, especially photographs and videos, look better in that mode.
• Some primitives will be affected by the display settings. For example, you can use decimal
numbers to set the turtle’s pen color:
setc 10
repeat 100 [setc color + 0.1 fd 100 bk 100 setx xcor + 1]
The following primitives will be affected by your display setting: bg, setbg, color, setc,
and colorunder.
Graphics
30
Shapes
Editing Shapes
To modify a shape or create your own, open the Shapes Center and click on the shape of your
choice to select it. Then click on it again to open The Shape Editor.
Use the Drawing Center tools to change color or draw dots, lines, circles, or rectangles while the
Shape Editor is open.
Note: In the Shape Editor, the color white from the Drawing Center is actually transparent. Use
the lightest color of gray for white which is not transparent.
Click on the eraser to select it. Click on it again to clear the whole shape. (If you do this by
mistake, click on the undo tool to get the shape back.)
Note that the shape has a name — you can change it if you want. Use a one-word name, with no
spaces.
To create a new shape, click on an empty shape to select it, and click again to open the Shape
Editor. Empty shapes have blank names, so name your shape after you have finished.
Related Logo Primitive: setshape
Shape Names and Numbers
Shapes have names and numbers. To find out a shape's name or number, leave the cursor over a
shape for a second. The shape's name and number will be displayed. The name also appears in
the Shape Editor.
Graphics
31
Related Logo Primitive: setshape
Changing the Size of a Shape
The size of a shape is the number of dots (called pixels) it is made of. Blank shapes and most of
the pre-defined shapes are 40 x 40 pixels. You can make shapes that are much larger, but larger
shapes use more computer memory.
and
to make a shape larger or smaller. The shapes grow or shrink by 5 pixels at a
Use
time. Watch the shape grow or shrink in the preview (in the top, right corner), and watch the
pixel size change in the height and width display.
Original size, as
seen in preview.
Make it wider.
Five pixels added
on each side.
Note: Don't confuse the shape size with the turtle size. The shape size is the number of pixels
used to draw the shape. The turtle size is how big or small it looks on the page. See Changing
the Turtle's Size.
Related Logo Primitive: setsize.
Copying Shapes
You may want to change one of the pre-defined shapes but keep a copy of the original. This is
useful when making an animated shape (two shapes that are slight modifications of each other)
or making two copies of the same shape, each with a different heading (like a cat facing left and
one facing right).
To copy a shape:
Select a shape.
Choose Paste from
the Edit menu.
Choose Copy from
the Edit menu.
Select an empty
shape.
There's the copy.
Click on it again to edit the copy.
Note that the new shape doesn't have a name. Open the Shape Editor and give it a name that is
different from any other shape's name.
Graphics
32
Importing Shapes
Using commands, you can import clip art, scanned images or pictures created in other
applications into a MicroWorlds shape. You can also export shapes created in MicroWorlds to
other applications, using the saveshape command.
Importing Shapes
You can load a graphic created in another application onto a MicroWorlds shape. MicroWorlds
only "loads" the following graphic formats: BMP, JPEG, GIF, PCX, and Targa.
1. Create a graphic using a drawing application.
2. Save it in a format that MicroWorlds can load.
3. Then, start MicroWorlds.
4. Choose the shape number where you want to import the shape.
5. Use the loadshape command. For example:
loadshape "dragon 16
The name of the shape will be dragon.
Another method for importing shapes consists of using the Windows Clipboard. Copy some
graphics from any application, start MicroWorlds, open the Shapes Center, click on the shape
where you want to paste the graphics, and choose Paste from the Edit menu.
Exporting Shapes
You can save a MicroWorlds shape using the saveshape command. Simply choose the shape
number that you want to save and type in the Command Center:
saveshape "moon 1 Use a file name of your choice.
You may want to save the file into a specific directory. To do this, choose Save Project As from
the File menu. Find the directory where you want to save the picture. Do not save your current
project! Just click Cancel when you find the directory. Saveshape will save the file into this
directory.
By default it will save it in BMP format. If you want to save it in a different format (that
MicroWorlds supports) add the appropriate extension to the file name:
saveshape "moon.jpg 1
Use a file name of your choice.
Another method for exporting shapes consists of using the Windows Clipboard. Select a shape,
use Copy from the Edit menu, start a graphic application, and paste the graphic.
Text Boxes
Text Boxes
Creating a Text Box
Text boxes are not part of the graphic image. You can move them around, change the text in
them, and shrink or expand them. You can have many text boxes on the same page.
Select the text box tool.
Drag to expand
the text box.
Typing and Formatting Text
To type text in a text box, click in the text box. When the text cursor flashes, type the text.
Text can be set to a different font, style and/or size. To do this:
Select the text.
Choose Font from the Text menu.
The Font dialog box will appear:
33
Text Boxes
34
Select a font, style and size. Then click OK.
You can change the text font, size, style, and color, as long as you keep the text selected and
make the changes one at a time.
Related Logo Primitives: setfont, setfontsize, setstyle, and settc
Transparent Text Box, Name Tag, and Scroll Bar
You can make a text box transparent so background graphics show through. To make the text
box transparent, select the eye tool and click on the text box. Its dialog box appears:
Check Transparent.
Note that you can't type or change the text in a transparent text box. You can move it by dragging
it, but to change anything else you have to open its dialog box and uncheck Transparent.
Related Logo Primitives: transparent and opaque
Uncheck Show Name to make the box's name tag invisible.
Text Boxes
Check Visible to make the text box invisible. You will need the
command to make it visible again.
35
or the showtext
Related Logo Primitives: showtext and hidetext
A Scroll Bar will automatically appear when the text box contains more text than the one actually
showing.
Moving Text Boxes
You move a text box by dragging it by its name tag.
Alternately, you can select the text box first, and drag it from any point inside the box. See
Selecting Objects.
Stamping Text
In some situations (such as labeling a map), it's better to stamp the text rather than leave
transparent text boxes on the page. That way, you won't accidentally move a text box to a
different location. Stamped text becomes part of the background graphics. Follow these steps to
stamp text:
•
•
•
•
Create a text box and type in the text you want.
Use the items in the Text menu to format your text.
Open the text box's dialog box and make it transparent.
Select the stamper, and click on your transparent text box (you should hear a sound).
Text Boxes
36
Drag the transparent text box away, and you'll see the stamped text. If you don't need the text
box, use the scissors and cut it.
See Selecting Objects, Copying and Pasting Text and Text Boxes, and Deleting Text and
Text Boxes.
Copying and Pasting Text and Text Boxes.
You can copy any text into or from text boxes, the Command Center, and the Procedures page.
To copy the text from a text box, select the text (not the text box, the text in the box). Then
choose Copy from the Edit menu.
To copy a text box, select it, then choose Copy from the Edit menu. See Selecting Objects and
Copying and Pasting.
Selected text.
Selected text box.
Deleting Text and Text Boxes
There are many ways to delete the text boxes that you have created. The easiest method is to cut
You can also select the text box and:
them with the
• Select Clear from the Edit menu.
• Press the Delete key.
can't delete
If you can't seem to be able to delete a text, it might be a stamped image. The
graphics, use the eraser in the Drawing tools. If the text box has been frozen, it can't be deleted.
Related Logo Primitives: remove, freeze, and unfreeze.
Importing and Exporting Text
Importing Text
You can load a text file created in another application into MicroWorlds.
1. In a word processing program, save a file in "Text Only" (TXT) or RTF (Rich Text Format)
format.
2. In MicroWorlds, choose Import Text from the File menu.
The text will be loaded into the current text location. This could be a text box, the Command
Center, or the Procedures page.
Alternately, you can use loadtext.
Exporting Text
Text Boxes
37
You can export the text in text boxes using the savetext command. Savetext exports the contents
of the current text box (the last one created, used, or talked to). If the Procedures page is
showing, savetext saves the text in the Procedures page.
savetext "mytext
Use a file name of your choice.
Printing the Contents of a Text Box
To print the entire contents of a text box, including text that may not be visible, click in the text
box to make it current and type printtext in the Command Center. If you have several text boxes
on the pages, you can make sure you print the correct one by typing its name followed by a
comma:
text2,
printtext
The text will print, using the full width of the page.
Talking to Text Boxes
Each text box has a name. If its name is hidden, you can see its name by opening its dialog boxes
using the
There are four ways to control which text box will be affected by your instructions.
1. Type the name of the text box, followed by a comma: text1,
2. Type talkto "text1, using the name of the text box you wish to address.
3. Click in the text box you wish to address.
4. Create a new text box. This one automatically becomes the "current" one.
For the following examples, assume there are two text boxes. You can only talk to one text box at
a time.
text1,
print "hello
text2, print "there
text1, ct
Click in the box named Text2, then click in the Command Center to type the next instruction.
print "there
Whenever you have more than one text box on a page, you can avoid confusion by starting your
procedures with a talkto or a "comma instruction."
For example, if you have two text boxes and a button that runs cleartext, clicking on the button
will clear the last text box that you used. You could easily clear the wrong text box by mistake.
Instead of having a cleartext button, write a cleanup1 procedure and make a cleanup1 button:
to cleanup1
text1,
cleartext
end
This button will only clear the text box named Text1.
Multimedia Objects and Others
38
Multimedia Objects and Others
Importing Music
To import music, choose Import Music from the File menu:
The Import Music dialog box opens. Locate and open the folder where the MIDI files are stored.
Only music files in the MIDI format (extension .MID) are displayed. Choose a music file and
click Open.
The following icon will appear on the screen:
Click on the icon to play the tune, click on it again to stop it or let it end by itself. Importing
music also creates a MicroWorlds command that plays the music. For example, if you imported a
melody named "house" you can use house as a command in a button, a procedure, or in the
Command Center to play the music.
Tunes can be played back from any page in a project. For example, if page1 of a project contains
the icon for a tune named "Spring," the spring command plays this tune from any page in your
project.
A melody can play while the turtles move, for example:
t1, forever [fd 1] house
Note that the music object has the same name as the file (the extension is excluded). If you want
to access to the music's properties, click with the
on the Music icon that you have just
created. A dialog box will appear where you can change the music's name, make its name tag
visible or not, and make the Music icon visible or not. The name of the music doesn't have to
match the name of the file.
The music file is not loaded in your MicroWorlds project; the file remains on your hard disk.
MicroWorlds has created two things:
•
an icon that will remain permanently in your project:
Multimedia Objects and Others
39
•
a link to the actual music file. MicroWorlds will remember where the music file is on your
hard disk, so the next time you try to play the tune, MicroWorlds will know where to look
for your music file.
The next time you try to play this tune, MicroWorlds will look in two places to find the music
file:
• the directory where your project is saved
• the directory from where the music file was originally imported
If the file is not in any of these locations, the tune will not play.
If you move a MicroWorlds project to a different computer, and the project contains a link to a
music file, be sure to move the music file as well.
Note: Imported Music is different from a Melody. You can edit the score of a Melody using the
Melody Editor but you can't edit the score of Imported Music.
See Selecting Objects, Moving Objects, and Deleting Objects for more information about
selecting, moving,and deleting imported music.
Melodies
To create a new melody, select the
opens.
and click anywhere on the page. The Melody Editor
Click on the piano keyboard to create a melody. The "score" of the melody appears at the top.
You can select notes in the score, and delete them, copy them, cut them, or change their duration.
You can click anywhere in the list of notes and add new notes by clicking on the piano keyboard.
If you want to play only a section of your score, select those notes in the score, then click on
.
Note that the select, copy, cut, and paste functions only work with the keys (e.g., Ctrl+C for
copy) and not the menu. To change the duration of a group of notes in the score, first select them,
then choose one of the duration notes. The group of notes all change to that duration.
A melody can use only one instrument at a time, but different melodies can use different
instruments. The maximum number of notes in a melody is 150.
Important: Use a one-word name to name the melody, so you can use the name as a command.
Multimedia Objects and Others
40
When you leave the Melody Editor, you'll see a Melody icon on the page
. Click on
the icon to play the tune, click on it again to stop it or let it end by itself. Creating a melody also
creates a MicroWorlds command that plays the melody. For example, if you create a melody
named "mytune" you can use mytune as a command in a button, a procedure, or in the Command
Center to play the melody.
Melodies can be played back from any page in a project. For example, if page1 of a project
contains the icon for a melody named "Birthday," the Birthday command plays your melody
from any page in your project.
A melody can play while the turtles move, for example:
t1, forever [fd 1] mytune
You can play only one melody at a time.
If you want to edit a melody, choose the
and click on the Melody icon that you want to
modify. The Melody Editor will reappear.
Note: Imported Music is different from a Melody. You can edit the score of a Melody but you
can't edit an Imported Music score. Another difference is that all the melodies that you create are
saved with your project while Imported Music isn't..
See Selecting Objects, Moving Objects, and Deleting Objects, for more information about
selecting, moving, and deleting melodies.
Importing Sounds
To import a Sound, choose Import Sound from the File menu.
The Import Sound dialog box opens. Locate and open the folder where the sound files are stored.
Only sound files in the WAV format are displayed. Choose a sound and click Open.
The following icon will appear on the screen:
Click on the icon to hear the sound, click on it again to stop it or let it end by itself. Importing a
sound also creates a MicroWorlds command that plays that sound. For example, if you imported
a sound named "tornado" you can use tornado as a command in a button, a procedure, or in the
Command Center to play the music.
Sounds can be played back from any page in a project. For example, if page1 of a project contains
the icon for a sound named "Boo," the boo command plays this sound from any page in your
project.
You can play a sound while moving the turtle, for example:
t1, forever [fd 1] tornado
Multimedia Objects and Others
41
You can also play a sound at the same time as a melody. You can't play a sound at the same time
as running a video.
Note that the sound object has the same name as the file (the extension is excluded). If you want
to access to the sound's properties click with the
on the Sound icon that you have just
created. The object's dialog box will appear. There you can change the sound's name, make its
name tag visible or not, and make the Sound icon visible or not. The name of the sound doesn't
have to match the name of the file.
The sound file is not loaded in your MicroWorlds project; the file remains on your hard disk.
MicroWorlds has created two things:
•
•
an icon that will remain permanently in your project:
a link to the actual sound file. MicroWorlds will remember where the sound file is on your
hard disk, so the next time you try to play the sound, MicroWorlds will know where to look
for your sound file.
The next time you try to play this sound, MicroWorlds will look in two places to find the sound
file:
• the directory where your project is saved
• the directory from where the sound was originally imported
If the file is not in any of these locations, the sound will not play.
If you move a MicroWorlds project to a different computer, and the project contains a link to a
sound file, be sure to move the sound file as well.
See Selecting Objects, Moving Objects, and Deleting Objects for more information about
selecting, moving, and deleting sounds.
Recording
If there is a microphone connected to your computer, you can record your voice, then play it back
with a command. Each new recording creates a sound file.
To record your voice:
•
Select the
•
Click on
to start recording. The duration of your recording is limited by the space
available on your hard disk. Be careful: 10 seconds of sound file takes 100 K of disk space.
•
Click
to stop recording.
•
Click
to listen to your recording.
and click on the page. The Record dialog box opens.
Multimedia Objects and Others
42
•
•
If you are not satisfied with the recording, click on
again.
Click OK when you are done. Then the Save As dialog box opens for this sound file. First
find a location — it'll be easier to find the file later if you save it in the folder where the
current project is located.
• Give a name to your recording and click OK to create the sound file.
Important: Use a one-word name, so you can use the name as a command. Also use less than 32
characters as your file name.
The sound file is not loaded in your MicroWorlds project; the file remains on your hard disk.
MicroWorlds has created two things:
•
•
an icon that will remain permanently in your project:
a link to the actual sound file. MicroWorlds will remember where the sound file is on your
hard disk, so the next time you try to play the recording, MicroWorlds will know where to
look for your sound file.
The next time you try to play this recording, MicroWorlds will look in two places to find the
sound file:
• the directory where your project is saved
• the directory where the sound was originally created
If the file is not in any of these locations, the sound will not play.
If you move a MicroWorlds project to a different computer, and the project contains a link to a
sound file, be sure to move the sound file as well.
When you leave the Record dialog box, you'll see a Recording icon on the page
Click on the icon to play the recording, click on it again to stop it or let it play until it ends.
Creating a recording also creates a MicroWorlds command that plays the recording. For example,
if you create a recording named "Welcome" you can use Welcome as a command in a button, a
procedure, or in the Command Center to play the sound.
Recordings can be played back from any page in a project. For example, if page1 of a project
contains the icon for a recording named "Boo," the boo command plays this sound from any page
in your project.
You can play a sound while moving the turtle, for example:
t1, forever [fd 1] Welcome
See Selecting Objects, Moving Objects, and Deleting Objects for more information about
selecting, moving, and deleting recordings.
Buttons
Buttons run instructions when you click on them. A button can be set to run its instruction once
(Once) or repeatedly (Many Times). While the instructions are running, you can do other things.
For example, you can type some words in a text box, type a command in the Command Center, or
click other buttons while one button's instructions are running.
Creating a Button
Select the
and click on the page. The button's dialog box opens. Type fd 5 as the
instruction and click Many Times:
Multimedia Objects and Others
43
Click on the button to try it. The turtle should be moving continuously. If it's set to Many
Times, click on the button again to stop. You can also choose Stop All from the Edit menu
or press Ctrl+Break to stop.
If a button's instruction is very long, put the instruction in a procedure, and use the name of the
procedure instead. For example, this button and this procedure go together.
to fly
setsh "bee1
fd 2
wait 3
setsh "bee2
fd 2
wait 3
end
See Selecting Objects, Moving Objects, Making Objects Larger and Smaller, and Deleting
Objects for information about editing, selecting, moving, copying, resizing, and deleting buttons.
Sliders
A slider reports a number. The number, in turn, is used as the input to a command. For example,
you can use a slider to change the speed of a jeep moving across the screen.
Creating a Slider
Select the
and click on the page. The slider's dialog box opens:
Multimedia Objects and Others
44
The slider's name reports the slider's current value. For
example, if you create a slider with the default values
shown above, you can type these commands:
show slider1
50
This number depends on the slider's value.
fd slider1
The slider's value is used as the input for fd.
setc slider1
The slider's value is used to set the color.
Important: Use a one-word name, so you can use the slider's name in an instruction.
One of the most common uses of a slider is to control the speed of a turtle. Try this:
• Create a slider and name it speed with a Minimum of 0 and a Maximum of 5.
•
Create a turtle, turn it so it will head east, and give it the shape of a jeep.
•
Open the jeep dialog box using the
. Write the following as the instruction:
• Check on Many Times, then click OK.
Click on the jeep to let it go! Use the slider to change the speed.
See Selecting Objects, Moving Objects, Copying and Pasting,and Deleting Objects for
information about editing, selecting, moving, copying, and deleting sliders. See also Sliders as
Variables for advanced techniques.
Videos
MicroWorlds projects can include video clips. The videos are not saved in your project, they are
stored in separate files on your hard disk. Your video will only play if MicroWorlds can find the
file on your hard disk.
Importing a Video
To import a video, select the
Video from the File menu.
and click on the page. Alternately, you can choose Import
Multimedia Objects and Others
45
The Import Video box opens. Locate and open the folder where the video files are stored. Only
video files in the AVI format are displayed. Choose a video; click Open and the video appears on
your page.
Click on the video to start it, click on it again to stop it. Clicking on it again will make the video
continue from where it stopped. You can also use the video name as a command in the Command
Center, in a button, in a turtle, or in a procedure. You cannot play a sound at the same time as the
video, even if the video does not contain sound.
The video object has the same name as the file (the extension is excluded). If your file name was
an invalid name (32 characters or more, a number, or it was already used), MicroWorlds will
give it another name such as Video1. If you want to access to the video's properties, click with the
eye tool on the video poster that you have just created. The video's dialog box will appear. There
you can change the video's name, make its name tag visible or not, and make the video visible or
not. The name of the video doesn't have to match the name of the file.
Important: Use a one-word name, so you can use the name as a command.
When you import a video to a project, MicroWorlds creates two things:
•
•
a "poster" that remains on the page. The poster is the first image of the video.
a link to a video file on disk. MicroWorlds will remember where the video file is on your
hard disk, so the next time you try to play it, MicroWorlds will know where to look.
The next time you try to play this video, MicroWorlds will look in two places to find the video
file:
• the directory where your project is saved
• the directory from where the video was originally imported
If the file is not in any of these locations, the video will not play.
If you bring a MicroWorlds project to a different computer and the project contains a link to a
video, be sure to bring the video file as well.
Related Logo Primitive: resetvideo
Stamping an Image From a Video
Stamping a frame from a video is a bit different than stamping other objects. Select the
and click on the video. The video can be playing. If you want to stamp a particular frame, stop
the video at the right moment, then stamp it. To see the stamped image, drag the video frame
away. You will see a graphic image that you can edit with the Drawing tools.
If you don't need the video anymore, after stamping an image, use the scissors to delete it.
See Selecting Objects, Moving Objects, and Deleting Objects for information about selecting,
moving, and deleting videos.
Audio CDs
You can add audio CD tracks, or sections of tracks, to your projects. Creating an audio CD clip
doesn't load the music into your project. It creates a MicroWorlds object that plays a portion of
the audio CD, for example, from 10:00 seconds to 20:00 seconds from track #4.
Note: When you insert an Audio CD in your CD drive, Windows automatically starts playing it.
MicroWorlds can't access the Audio CD if it is already playing. To avoid the automatic start of an
Audio CD press the Shift key while inserting the Audio CD on your CD drive. Also another way
to solve this problem, is to stop Windows'95 CD player.
Creating an Audio CD Clip
Multimedia Objects and Others
46
To create an audio CD clip, first put an audio CD in the CD ROM drive. Don't use a regular CD
ROM disk unless you are certain it contains audio tracks. Then, select the audio CD tool and
click on the page. This opens the Audio CD dialog box.
The top portion of the dialog box is like the control panel of a CD player. The controls are: Stop,
Play, Pause; Rewind and Fast Forward; Skip to Previous Track, Skip to Next Track. Browse the
CD to find the musical selection that you want.
•
To set the beginning of the music clip, click on Set Start. (You may find it easier to Pause
to hold the spot, and then click on Set Start.)
•
•
To set the end of the clip, click on
Set End.
, listen for the end of the sound clip, then click on
Click on
to stop the CD, then click on Try It to hear your Music clip. Click OK if it
is fine, otherwise, redo the steps above.
When you've clicked OK, a Music Clip icon appears on the page. Click on it to start the sound
clip, click again to stop it or let it end by itself.
Most of the time, when music is used in a multimedia presentation, it plays while something else
happens. In cases like that, the audio CD clip will be launched by a command, not by clicking the icon.
If you don't want to see the Music Clip icon, make it invisible.
Important: Be sure to use a one-word name for your audio CD clip so you can use the name as a
command. For example, if you create a music clip named "MyClip" you can use myclip in a
button, a procedure, or in the Command Center to play the music.
You can play an audio CD clip while turtles move, for example:
t1, forever [fd 1] myclip
See Selecting Objects, Moving Objects, and Deleting Objects for information about editing,
selecting, moving, and deleting an audio CD clip.
Object Management
47
Object Management
Selecting Objects
There are three ways to select an object: Ctrl-clicking on the object, dragging around the object,
and using Select All from the Edit menu. In all cases, use the pointer.
Selecting by Ctrl-Clicking
Hold down the Ctrl key and click on any text box, turtle, button, slider, melody or video icon on
the page. While the Ctrl key is down, you can continue to click on objects. Everything you click
on will be added to the selection. Objects that are selected have "handles" at their corners.
Selecting by Dragging
Using the pointer, drag a rectangle around one or more objects. When you release the mouse
button, you will see "handles" around the selected objects.
To select all the objects at once, click on the page and choose Select All from the Edit menu. The
keyboard shortcut is Ctrl+A. If you click inside a text box, in the Command Center, or on the
Procedures page, Ctrl+A will select all the text.
Moving Objects
To move objects, use the pointer
Click on the object and, while holding the mouse button
down, drag the object.
The only exception to this rule is the text box, which is dragged from its frame.
Alternately, you can select the text box first, and drag it from any point inside the box.
Copying and Pasting
Copying objects is a quick way of making many identical objects. If you need many identical
turtles, for example, first create one and set its characteristics (size, color, instruction, shape),
Object Management
48
then copy it. You can copy an object, then change pages, then paste the object. It will be pasted,
along with all its characteristics, onto the new page.
Objects
Follow these steps to copy an object:
• Select the object by dragging using the pointer.
• Choose Copy from the Edit menu.
• Choose Paste immediately to get a copy on the same page, or
• Go to another page and choose Paste.
Graphics
The pointer doesn't select graphics. Use the selection tool in the Drawing Center instead. Be sure
to click once on the page before pasting graphics. If a text area is active (a text box or the
Command Center), graphics will not be pasted.
See Selecting, Copying, and Pasting Background Graphics
Copying Text and Copying a Text Box
See Copying and Pasting Text and Text Boxes.
About Pasting
Before pasting, click in the area where the pasted object will go. For example, buttons, graphics,
or text boxes can't be pasted into the Command Center or on the Procedures page. Click on the
page before trying to paste these objects.
Similarly, text can only be pasted where text normally appears. Before pasting text, click in the
Command Center, on the Procedures page, or inside a text box.
Unique Names for Copied Objects
Each object on a page has a unique name. When you paste a copy of an object, MicroWorlds
assigns it a name of its own. For example, if you copy a slider named Slider1 and paste it on the
same page, the copy will be named Slider2. If you paste it on a page with no sliders, the copy will
have the same name as the original.
In general, after copying and pasting an object, you should open its dialog box and check the
name. If the name that's automatically provided doesn't suit your project, give the object a new
name that you prefer.
Hint: If you want to copy most of the objects from one page to a new page, it's simpler to
duplicate the page and then delete the objects you don't need. See Duplicate Page.
Modifying Existing Objects
The eye tool
has two functions. It can be used to show you how many objects you have
created, and it can be used to open the dialog box of any object on a page.
When you select the eye tool, all the objects on the page become temporarily visible, and turtles
that are programmed are framed. Use this technique to make an inventory.
In order to change an object, select the eye tool and click on any object.
Object Management
49
To modify an invisible object, you must first make it visible. Clicking on the eye tool is not
enough, it only makes it visible temporarily. While the eye tool has made an object visible, click
on it to open its dialog box. If you want to delete the object, check Visible, then click OK. Now
the scissors can delete the object.
Stamping Objects
The
can be used to stamp the turtle's shape, the text in transparent text boxes, and images
from videos. You can save on memory by stamping turtle shapes, text, and movie images rather
than leaving them as objects. For example:
• To draw a forest, stamp a tree shape 25 times instead of using 25 turtles with the tree shape.
Only use real turtles if you want to program them, animate them, or if you might change
your mind about their location or shape.
• To draw a map with many text labels, use only one text box to stamp the labels, instead of
creating many text boxes. Remember to delete the text box after you stamp or you won't be
saving as much memory as you think.
• If you need only one frame from a video, stamp it, then delete the movie.
See About Real Turtles and Stamped Turtles, Stamping an Image From a Video, Stamping
a Turtle, and Stamping Text.
Deleting Objects
There are many ways to delete the objects you have created. The easiest method is to select the
and click on the unwanted objects.
If you can't seem to be able to delete a turtle or a text box, it might be a stamped image. The
scissors can't delete graphics. Frozen objects also can't be deleted. See freeze.
Deleting Invisible Objects
To delete an invisible object, you must first make it visible. Clicking on the eye tool is not
enough, it only makes it visible temporarily. While the eye tool has made an object visible, click
on it to open its dialog box. Check Visible, then click OK. Now the scissors will delete the object.
Making Objects Larger and Smaller
Some objects can be made larger and smaller using the magnifiers, some by dragging the
handles, and some with MicroWorlds commands.
The magnifiers
and
change the size of turtles, buttons, and text boxes.
Selecting and dragging changes the size of buttons and text boxes.
There are commands to change the size of turtles (setsize), text boxes (set), text
(setfontsize), and buttons (set).
Logo Programming
50
Logo Programming
Basic Concepts
Logo Basics
MicroWorlds is based on the Logo language. Logo is a computer language, but, like a spoken
language, it has a vocabulary and rules for using the vocabulary. Where a spoken language has
sentences, Logo has instructions. Where a spoken language's rules for how to put words into
sentences can be complicated, Logo's rules for building instructions are much simpler.
In MicroWorlds, every word you type into the Command Center is interpreted as a request to do
something. Some words are built in — fd and show for example. Words that are built into
MicroWorlds are called "primitives." You can't edit or remove primitives.
When you write procedures, you're adding new words to the MicroWorlds vocabulary. Names
like start and go could be the names of procedures. You can edit or erase procedures. Each
project has a Procedures page. The procedures written on the Procedures page only stay in
memory while the project is open. Procedures in memory work like MicroWorlds primitives.
Objects like pages, buttons, sliders, turtles, melodies, and videos have names. These names are
also words in the MicroWorlds vocabulary. MySong and WinnerTune could be the names of
melodies. Text1 and Speed could be the names of a text box and a slider. These words can all be
typed in the Command Center and used in instructions.
Normally, you use no punctuation in MicroWorlds instructions. There are times when you use
punctuation characters, usually to tell MicroWorlds that a word should not be treated as an
instruction, but instead as something else.
Instructions can be typed in the Command Center and Procedures page as part of a procedure.
They can also be used in buttons, the turtle's dialog box, and color programming.
Command Center
Typing words in the Command Center tells MicroWorlds to run them as an instruction. Usually,
MicroWorlds "reads" an instruction and then runs it before "reading" the next instruction. When
MicroWorlds is busy running the current instruction, a large dot appears at the end of the
instruction in the Command Center. This dot tells you that MicroWorlds will not accept other
instructions until the current instruction is finished.
Try these instructions in the Command Center (you'll need two turtles on the page):
t1, repeat 100 [fd 1] Press Enter.
t2, repeat 100 [fd 1]
You can click in the Command Center to stop the first instruction. The dot disappears, and then
you can type in the second instruction.
There are two primitives which allow you to run instructions as independent processes.
(Instructions that are in buttons are independent processes). When you type an instruction
beginning with launch or forever, the dot in the Command Center disappears immediately, and
Logo Programming
51
you can run another instruction right away. This is because launch and forever start independent
processes. See Processes for more information.
Commands and Reporters
The MicroWorlds vocabulary can be divided into two groups: commands and reporters.
Commands do something:
Forward tells MicroWorlds to move the turtle forward a certain amount.
Setshape tells MicroWorlds to set the shape of the turtle.
Reporters provide things for commands to use. Pos, for example, reports a pair of numbers (a
turtle's xy coordinates). But pos, like every reporter, doesn't tell MicroWorlds what to do with the
numbers. You have to use a reporter with a command. If you don't, MicroWorlds will tell you:
pos
I don't know what to do with [0 0]
Use pos with a command that tells MicroWorlds what to do with the thing that's been reported:
show pos
00
Object Names as Commands or Reporters
The names of objects are words in MicroWorlds' vocabulary. Page names, the names of
recordings, sounds, audio CD clips, melodies, and videos are commands. Typing a page name in
the Command Center displays that page. The name of a melody plays the melody.
The names of text boxes and sliders are reporters. The name of a text box reports its contents.
The name of a slider reports its value. See Text Boxes as Variables and Sliders as Variables for
further information.
Spaces in Object Names
Since object names can be commands or reporters, do not use spaces in object names. If you
choose one-word names with no spaces, you can use the names as commands.
For example, if you name a melody Mytune, you can type the word mytune in the Command
Center to play the melody. If you had named the melody My Tune, typing my tune in the
Command Center would result in the message:
my tune
I don't know how to my
MicroWorlds may know the object "my tune," but it doesn't know a command named my or a
command named tune.
If an object name contains spaces, when you want to run the name in an instruction, enclose the
long word within vertical bars (|). Vertical bars tell MicroWorlds that everything inside is a
single word:
|my tune|
Be careful: When typing in dialog boxes, do not add spaces at the end of object names. A melody
named "Jingle " (note the space at the end), would not play if you typed the word jingle as an
instruction:
jingle
I don't know how to jingle
The Procedures Page
The Procedures page is where you write and edit procedures (programs). Each project has its own
Procedures page.
Logo Programming
52
Writing and Editing Procedures
To open the Procedures page, choose Procedures from the Pages menu, or press Ctrl+F.
A procedure is a list of instructions with a name. Once you've created a procedure, you just type
its name to run all the instructions it contains.
A procedure has three parts:
to go
the title line (with the name of the procedure)
t1, fd 20
instructions
t2, fd 10
end
the end line
All procedures start with to and the name of the procedure. You choose the name. Always use
one word for the name.
Things to Note About Procedures
The title line of a procedure (to, the name, and its inputs) must be on a line by itself. You must
press Enter at the end of the line. See Local Variables for an example of a procedure with an
input.
Lines of instructions within the procedure are separated by Enter.
The last line of a procedure is the word end on a line by itself.
Always press Enter after the word end.
You can insert spaces preceding to and end to facilitate formatting your procedures.
To Test Out a Procedure
Go back to your page, type the procedure's name (for example, go) in the Command Center, and
press Enter.
or
Create a button with the name of the procedure as its instruction.
Errors in Procedures
There are three common error messages that may occur when you write a procedure:
Name is already used
Missing [
Missing ]
If one of these messages occurs, the procedure will not be defined, nor will any of the procedures
following it on the Procedures page. Therefore, it is very important to correct the procedure
before continuing, to avoid more problems.
Explanations of the error messages can be found in the Last Message item in the Help menu.
A Shortcut to Making Small Changes
To save typing, you can copy the text of a procedure, paste it, then edit the copy. For example, the
animate procedure can be copied and edited to define a new procedure named fly.
Say the animate procedure is already written:
to animate
repeat 20 [setsh "tornado1
wait 3
setsh "tornado2
wait 3]
end
• Select the animate procedure by dragging over each line.
• Choose Copy from the Edit menu.
• Place the cursor at the end of the Procedures page, and choose Paste from the Edit menu.
• Edit the copied procedure:
to fly
repeat 20 [setsh "bird1
Logo Programming
53
wait 3
setsh "bird2
wait 3]
end
Formatting Your Procedures
There are two things you can do to make your procedures easier to understand. You can add
comments and you can format your procedures.
Comments
On the Procedures page, MicroWorlds treats any text between to and end as part of a procedure.
The title line (starting with to) and the end line must each be on a line of their own. The title line
should contain only the word to, the name of the procedure, and its inputs.
Any text that is not between to and end is not part of any procedure. You can use this space to
type comments.
This procedure starts an animation and plays a melody.
to trick
launch [animate]
mytune
end
Mytune is the name of a melody and animate is a subprocedure.
to animate
repeat 100 [setsh 1 wait 5 setsh 3 wait 5]
end
You can also put comments inside procedures by inserting a semicolon. Any text between a
semicolon and a carriage return is ignored.
Indenting Instructions
Long instructions which take up more than one line are sometimes difficult to read. It is also
more difficult to ensure that all square brackets are in matched pairs:
to next
question [Hall or cave... Where do you want to go?]
ifelse answer = "hall [announce [You win!]] [announce [Try again next time!]]
end
To make long instructions easier to read, split them over separate lines. Insert spaces to line up
portions of a long instruction.
to next
question [Hall or cave... Where do you want to go?]
ifelse answer = "hall [announce [You win!]]
[announce [Try again next time!]]
end
Beyond the Basics
Arithmetic
You can use MicroWorlds for many kinds of calculations, but you must keep in mind that there
are rules that control the results. If you don't pay attention to the rules, you may not get the
desired results.
Rule 1: Leave a space on each side of the arithmetic symbol:
Logo Programming
54
show 100/2
I don't know how to 100/2
MicroWorlds thought that 100/2 was one word. It didn't "see" the / sign. With spaces around the /
sign, MicroWorlds will understand what to do:
show 100 / 2
50
Rule 2: Tell MicroWorlds what to do with the answer. If you don't, MicroWorlds will display a
message:
100 / 2
I don't know what to do with 50
MicroWorlds has calculated an answer, but it doesn't know what to do with it. You can show the
answer, use it for a print instruction or a forward instruction, or whatever you choose.
show 100 / 2
50
print 100 / 2
forward 100 / 2
Rule 3: Multiplication and division are always calculated before addition and subtraction:
show 3 + 2 * 4
11
2 * 4 was calculated first. The result of the multiplication (8) was then added to 3 (total 11).
If you want to force MicroWorlds to do the calculation in a different order, you have to use
parentheses (). What is inside parentheses is always calculated first.
show (3 + 2) * 4
20
Rule 4: Arithmetic is always calculated before other commands:
For example, in an instruction like show random 6 + 1, the 6 + 1 is calculated first, and random
is calculated next. This is a common source of program "bugs," since the intention is usually to
have MicroWorlds report a random number from 0 to 5, and then add 1 to it. This simulates the
roll of a die, where the random numbers vary from 1 to 6.
What actually happens is that 1 + 6 is added first, so MicroWorlds calculates random 7, and
therefore produces random numbers from 0 through 6.
You can make MicroWorlds calculate things the way you want, by using parentheses: show
(random 6) + 1 forces random 6 to be calculated first, and the addition later, which will result in
a "proper" roll of the die.
Note: Any number greater than 999999999999 or less than -999999999999 will be transformed
to exponential notation, e.g., 1e+012 or -1e+012.
Words and Lists
A word beginning with a quotation mark is treated literally, not as a procedure name. For
example:
show "friend
friend
Displays the word friend in the Command Center.
setsh "bird1 Sets the turtle to the shape named bird1.
In the last example, if you omit the quotation mark (e.g., setsh bird1) MicroWorlds will try to
run bird1. If bird1 is not a word in MicroWorlds vocabulary, MicroWorlds will display an error
message:
I don't know how to bird1
A list is a group of words. You can even have a list of lists. A list is always enclosed in square
brackets. For example:
show [Kim Bob Lea Tom]
Kim Bob Lea Tom
Displays these words in the Command Center.
question [How are you today?] Displays these words in the question dialog box.
Logo Programming
55
In general, spaces are used to separate the components of a list. A special case is a kind of word
called a "long word," which can contain spaces. See Long Words and Object Names as
Commands or Reporters.
Variables
You can think of a variable as a container with a name on the outside and a value (a word or a
list) inside. When you create a variable, you create the container and at the same time you put the
value inside. There are three types of variables: local, global, and project variables.
Local Variables
You create a local variable when you place an input on the title line of a procedure. A local
variable holds its value only at the time MicroWorlds runs the procedure.
Here is a simple example:
to square :size
repeat 4 [fd :size rt 90]
end
The word size can be any word, but the same word must be used throughout the procedure. A
colon must precede each occurrence of the word. A colon means "I don't want the word size, I
want the value inside the container named size."
If MicroWorlds displays this message:
has no value in square
the word that seems to be missing at the beginning of the error message is in fact a space. The
cause of the problem is a space left between the colon and the word used as a variable name in
your procedure (e.g., fd : size). Remove the space and try the procedure again.
Local variables can also be created with the primitives let and local.
Global Variables
You create a global variable with the commands make or name. A global variable holds its value
even when you change projects. Global variables only lose their value when you deliberately erase
them, or when you quit MicroWorlds. Global variables are not saved with a project. The next
time you open your project, they will have to be defined again. A good way to do this is to put the
make commands into a procedure.
make "friends [Kim Bob Lea Tom]
When you need the value of a variable, place a colon in front of its name. Note the difference
between the quotation marks and the colon:
show "friends
Show the word friends.
friends
show :friends
Show the value of the variable friends.
Kim Bob Lea Tom
Logo Programming
56
Global variables are useful for keeping track of the current state of variables and objects in your
project.
Project Variables
Project variables are related to a specific project. They are cleared when you go to a different
project, but they are saved with your project. The next time that you open your project, the
variables will have retained their value.
You create project variables with the command createprojectvar:
createprojectvar "points
This adds two words to MicroWorlds' vocabulary: points and setpoints. From now on, in this
project, you can type instructions like:
setpoints 10 Set the value of points to 10.
show points
Show the current value of points.
10
setpoints points + 5 Add 5 to the value of points.
show points
Show the current value.
15
To find the names of all project variables in a project, type:
show projectvars
points
The names of the project variables in the current project.
To remove a project variable, type:
remove "points
Use the name of your project variable.
Sliders as Variables
A slider can be used as a variable, one that only reports numbers. The name of a slider reports its
current value. Using a slider as a variable has two advantages: you can usually see its value, and
you can use the mouse to change the value.
For example, create a slider and name it Speed. Set the minimum to 0 and the maximum to 10
(see Sliders). The word speed can then be used to report the current value of the slider.
forever [fd speed]
Note that there is no colon before the word speed. It's the name of a slider, not a variable. Now
change the value of the slider.
You can change the value of the slider with a command. The word set followed by the slider's
name (setspeed in this example) sets its value.
setspeed 10
The new value has to be within the slider's minimum and maximum settings.
You can also change the minimum and maximum settings by giving a list as input:
setspeed [10 100 20]
changes the minimum to 10, the maximum to 100, and the value to 20.
Text Boxes as Variables
A text box can be used as a container, just like a variable. The difference is that you can see the
text box and you can set its contents just by typing in the text or by using special commands.
For example, create a text box, name it Friends, and type in some names (see Creating a Text
Box and Typing and Formatting Text). The word friends can then be used to report the
contents of the text box.
Logo Programming
57
show friends
Kim Bob Lea Tom
You can use the cleartext, print, and insert commands to change the contents of the text box. In
addition, the word set followed by the name of the text box (setfriends in this example) can be
used to replace its contents. Note that insert and print add text to the text box without removing
any text, but set-text-box-name (setfriends) completely replaces the current text.
setfriends "Lucy
setfriends "Sam
There is one more difference between using make to create a variable and using a text box as
described above. The variable created by make in the following instruction
make "friends [Kim Bob Lea Tom]
is a list with four words in it. The name of the text box (friends) reports a long word containing
20 characters (4 names of three letters each, plus 8 characters — 2 for each new line). See Long
Words.
In general, spaces separate words. The list [Kim Bob Lea Tom], for example, contains four
words. Sometimes, MicroWorlds recognizes a series of words as a long word containing one or
many spaces. The difference between a word and a long word affects how you name objects and
how you manipulate the contents of text boxes.
Long Words
The name of a text box reports its contents. In this example, the text box is named Text1. The
word Text1 is a reporter that reports all the characters in the text box, including the spaces, as
one long word.
In computer jargon, long words are character strings. In fact, every word is a character string but
the expression is used here to emphasize that what seems to be a set of individual words is, in
fact, a set of individual characters, some of which are spaces.
show Text1
It was a dark and stormy night...
If you count everything, there are 35 characters in the text box:
show count text1
35
(The result of 35 takes into account the line feed and carriage return at the end of the line, adding
two characters.)
Since this is one long word, the first element of a word is a character:
show first text1
I
Logo Programming
58
Note: You can also make a long word with spaces without a text box, using the vertical bars:
show "|It was a dark and stormy night…|
Vertical bars can also be used to show characters that MicroWorlds Logo does not normally
show, such as square brackets.
Transforming a Long Word Into a List
If you want to do something with the contents of a text box under program control, it is usually
more convenient to report the text as a list of words, rather than as a long word containing
characters. The parse reporter turns a long word containing spaces into a list containing words.
show parse text1
It was a dark and stormy night...
It looks the same, but if you count the items, you will see the difference:
show count parse text1
7
Text1 reports a word with 35 characters, but parse text1 reports a list with 7 words.
show first parse text1
It
The first word of this list is It.
Contents of Text Boxes
There are a few special primitives that consider the contents of a text box to be a set of lines
rather than a set of characters. The next example is based on the following text box, named
Text1.
It looks like Text1 contains six lines. But the third and fourth lines, "a very long snake," are in
fact a single line that didn't fit within the width of the box. If you make the text box wider, you
will see that it contains only five lines.
Some MicroWorlds primitives understand only logical lines: lines that stop when you press
Enter.
Textcount reports the number of lines in a text box. It takes the name of a text box as input:
show textcount "text1
5
Textitem reports one line from a text box.
show textitem 3 "text1
a very long snake
Textpick reports one line from the text box, chosen at random.
show textpick "text1
Logo Programming
59
a dog
show textpick "text1
a small bird
Note that textitem and textpick report a long word, not a list.
Addressing Turtles and Text Boxes
On any page there is one turtle that is "current," meaning that it will follow your instructions
from the Command Center. There is also one text box that is current, meaning that text will be
printed in it when you use the print or insert command. (See Local and Global Who and listen
for more information.)
If there is no text box on a page, an instruction like print "hello will cause the message:
No text box found for print
You can control which turtle or text box is current by addressing it by name followed by a
comma:
t2,
or
text3,
Two turtles on the same page cannot have the same name, just as two text boxes on the same
page cannot have the same name. On different pages, though, two turtles or text boxes will often
have the same name. If you leave the names that are assigned automatically, several pages in a
project can have turtles named t1 and t2 or text boxes named text1 and text2.
If, for example, you want to print or insert text in a text box on a different page from the one
being displayed:
• you must address it with a comma instruction (or talkto), and
• make sure that there is no text box on the current page with that name
So, if there is no text box named Text3 on the page that is open, but there is such a box on
another page, you can print or insert text in it, use its name to report its contents, and use the settext-box-name command (settext3) to replace its contents.
Be careful: If the same text box name is used on two (or more) other pages, you'll cause an error
message. For example, you could have a page1 and page2 both containing a text box named
Text1. If another page is open, with no text box named Text1, any instructions such as text1,
show text1, or settext1 "hello would cause the message:
There is more than one text1
The reason is that MicroWorlds can't decide which of the two text boxes you're addressing. In
this case, rename one of the text boxes so it has a unique name.
This also applies to turtles and using sliders as variables.
Interesting Concepts & Techniques
Page Order
A project can contain many pages. The order in which these pages will appear when you open the
project depends on two factors:
1. If the project contains a page named page1, this page will appear first.
2. If there is no page named page1, the first page to appear will be the page that was showing
when the project was saved.
Therefore, if you make a project with a special opening page, name the page page1. You can also
write a startup procedure that displays the page of your choice.
Logo Programming
60
Startup Procedure
Startup is a special name for a procedure that runs the moment a project is opened. Procedures
are defined on the Procedures page. A startup procedure can't have an input.
This startup example opens a page named Welcome, then starts an animation.
to startup
welcome
announce [Welcome to my World!]
t1, clickon wait 80 clickoff
end
(T1, in the above procedure, has an animation instruction in its dialog box.)
This second startup example creates a global variable, sets a slider named Speed to 0, and clears
a text box named Comments.
to startup
make "points 0
setspeed 0
comments, ct
end
Question and Answer
Question and answer are primitives for opening a dialog box to ask a question, then using the
answer that was typed in. After a question is asked and answered, the answer primitive reports
what was typed by the user. Answer holds the answer and can report it repeatedly until you use
question again.
Type:
question [How old are you?]
Type your answer in the dialog box. After you click OK, the answer can be used repeatedly. In
the Command Center, type:
show answer
11
The number depends on what you typed.
fd answer The turtle goes forward 11 (or the number you typed) steps.
if answer > 10 [show [That's old!]]
That's old!
What answer reports is a word. It may contain spaces, but it is still only one word (see Long
Words).
It is common to ask the user to respond yes or no to a specific question. For example, if the
question is
question [Should we continue?]
the user may type Y, or Yes, or, by mistake, put a space before or after the word yes.
In this case, it is better to use member?, rather than = to check the contents of answer. The
following instruction will only work if the answer is yes, with no space before or after the word.
if answer = "yes [do.this]
The next instruction will work as long as the answer contains a y (upper or lower case):
if member? "y answer [do.this]
Sometimes you may need a specific type of answer. In the example below, if you type an answer
that is not a number, the instruction starting with if answer > 10 will produce an error message
because > (greater than) only works with numbers. In the following example, the user has typed
eleven instead of 11 in the question dialog box:
if answer > 10 [show [That's old]]
> doesn't like eleven as input
This kind of problem could stop an interactive program. To prevent that, you can check whether
the answer is the right kind of answer, and if not ask the user to try again.
Logo Programming
61
If you need a numerical answer, use a procedure like this one:
to insist :list
question :list
if number? answer [stop]
insist :list
end
If the answer is not a number, the question will be asked again.
Usually, you want to avoid cases where the user doesn't answer the question and just clicks OK. That
kind of "empty" answer could also stop your program. If you really need an answer from the user, use a
procedure like this one instead of a plain question instruction:
to insist :list
question :list
if empty? answer [insist :list]
end
If you need a one-word answer, use a procedure like this one. It checks to see if the answer
contains a space (ASCII character 32), and if so the question will be asked again:
to insist :list
question :list
if not member? char 32 answer [stop]
insist :list
end
The location where the dialog box appears can be set using the set command.
Carefully
Use carefully to run an instruction that may fail to work. If the instruction fails, the procedure
still won't stop. It is highly recommended to use carefully with caution. Debug your program
before inserting a carefully instruction, since errors will not be displayed once carefully is
inserted.
Here's an example of a problem that's solved with carefully: in an adventure game, a question
dialog box appears and asks the player where he wants to go. The player's answer is used as input
to getpage.
to next
question [Hall or cave... Where do you want to go?]
getpage answer
end
If the player makes a spelling mistake or types a word that is not one of the choices, the
procedure will stop and MicroWorlds will display an error message. In this example, the player
added an extra "s" to cave:
caves
getpage doesn't like caves as input
The instruction in next that is likely to fail is getpage answer. Use carefully on it.
Carefully has two inputs. Both are lists: the first is the instruction that may fail, in this case
[getpage answer]. The second is the instruction to run if the first one fails. In this case, the user
will be given a message, then the procedure will run again.
to next
question [Hall or cave... Where do you want to go?]
carefully [getpage answer stop]
[announce [There is no such place.]]
next
end
Logo Programming
62
Protecting Your Project From Changes
The first time you save a MicroWorlds project, you create a copy of your project on disk. Every
time you re-save your project under the same name, you save it over the copy that was there
before.
Perhaps you don't want to change the project on disk. Perhaps it's complete and you want to
protect it from accidental changes. Perhaps you want to try out some new changes to a project but
want to save the previous version "just in case." There are ways to protect project.
Using Save As
Immediately after opening a project, choose Save Project As from the File menu, and use a
different name to save the project. Once the project is saved under the new name, your changes
won't affect the original.
From Windows 95 Operating System
In Windows 95, you can protect your projects by checking Read Only in the file's property
window.
1. Exit MicroWorlds and save your project.
2. On the Desktop, click on your project's icon with the right mouse button to display its pop-up
menu.
3. Choose Properties from the pop-up menu.
4. Check Read Only.
5. Close the pop-up menu.
The next time you open this project, MicroWorlds won't let you save your changes. You can use
Save Project As and change the project name, or decide not to save changes, but either way, the
original project will remain unchanged.
Freezing Objects and Graphics
Whether your project is locked or not, you may want to "freeze" some or all of the buttons,
turtles, text boxes, sliders, and other objects. Frozen objects can't be moved, changed in size, or
removed using the mouse.
For example, if you freeze a text box, you can't move it, expand it, or cut it using the mouse. But
you can type text, delete text, or change the contents using ct, print, insert, or settext1 (set-textbox-name).
If a turtle is frozen, you cannot use the Shapes Center tools to change it, but you can open its
dialog box or use commands such as stamp, forward, and setsh.
Frozen objects are saved with the project, so the next time you open the project, the same objects
are still frozen.
Freeze takes a word or a list as input. You can freeze objects one by one, a list of objects, or an
entire page.
freeze "text1
freeze [text1 t1 slider1 mytune]
freeze "page1
Unfreeze "thaws" objects so they can be moved and changed. If you need to find an object's name
so you can use it with unfreeze, open its dialog box.
unfreeze "text1
unfreeze [text1 t1 slider1]
unfreeze "page1
Get can be used to report the names of all the objects on a given page. Use your page name
instead of Page1. The second input names the kind of object: pages, texts, sliders, buttons, turtles,
colors, melodies, music, sounds, movies, or audio CD clips.
Logo Programming
63
show get "page1 "turtles
t1 t2 t3
show get "page1 "texts
text1 text2 mytext info
unfreeze "info
Freezebg freezes the background of the current page. A frozen background cannot be erased, but
you can still add to it. If you draw over a frozen background, you can erase your new drawings,
but not those that were present when you typed freezebg. The command unfreezebg sets the
background back to normal.
Advanced Concepts
Processes
You've probably noticed that in MicroWorlds you can do many things at the same time. For
example, you can click on a button and then on a turtle; you can play a song while a bird flies.
This seems perfectly natural because this is how things happen in real life. In a programming
environment, this is called parallel processing. Each time you use a button, or program a turtle to
run an instruction by clicking on it, an independent process is launched. You can also launch
processes from procedures or the Command Center by using the launch, forever and when
primitives.
Buttons and Turtles
When you click on a button to run an instruction, a process starts up. You can then click on
another button or type an instruction in the Command Center. When you click on a turtle that's
been programmed to run an instruction, you also are starting an independent process. Clicking on
Audio CD, Melody, or Sound icons also starts independent processes.
In the buttons' and turtles' dialog boxes, you can set an instruction to run Once or Many Times.
Many Times just repeats the instruction continuously. Usually, you set a procedure or a long
instruction to run Once. A short instruction is usually set to Many Times.
Launch
Launch takes an instruction list as input. It runs the instructions as if you typed them alone on a
line. The difference is that the instructions are run as independent processes, and MicroWorlds
does not wait until they're finished before going on to the next instruction. (See Command
Center.) Try these instructions in the Command Center (you'll need two turtles):
t1, launch [repeat 100 [fd 1]]
t2, launch [repeat 100 [fd 1]]
The dot appears only for the moment when MicroWorlds is "reading" the instruction, then it
disappears so you can type in another instruction.
In short, you can use launch to start an instruction that takes a long time to run, and once it's
running you can start something else.
Forever
Forever repeats an instruction continuously while still allowing MicroWorlds to run another
instruction. Here is an example:
forever [fd 1]
Press Enter.
forever [rt 1]
Using fd 1 as a button's instruction and setting it to Many Times is similar to typing forever [fd
1] in the Command Center. You can stop the button's instruction by clicking on the button again.
Logo Programming
64
You can stop a forever instruction by selecting the instruction in the Cancel menu (in the Edit
menu) or using the cancel command.
Warning: Never use forever in a button or turtle's instruction that is set to Many Times.
Forever will keep launching processes until MicroWorlds displays a message "I can't start a new
process." If this happens, choose Stop All from the Edit menu or type stopall in the Command
Center.
When
When starts an independent process. The inputs to this command are two instruction lists. The
first list is a "condition" that must report true or false. Whenever this instruction reports true,
the second instruction list is run. In the following example, the when command sets a process
that checks if the y coordinate of the current turtle is greater than 50. If so, it moves that turtle
back 20 steps.
when [ycor > 50][bk 20]
seth 0
repeat 1000 [fd 1]
Note that you only run a when command once. If you run a when command many times, you
will, in fact, launch many processes. To stop the when process:
Choose Stop All or Cancel from the Edit menu.
Press Ctrl+Break.
Type cancel [ycor > 50]
The input for cancel is the first input to when.
Synchronizing Processes
In the following procedure, the animation and the music will start at the same time but will
probably not end at the same time.
to trick
launch [animate]
mytune
end
One way to synchronize two processes is to run the first instruction forever, then start the second
one, and cancel the first one when the second one is finished. For this to work, trick has to be
redefined:
to trick
forever [animate]
Run animate repeatedly.
mytune
Play the melody while the animation runs.
cancel [animate]
... then stop animate.
end
to animate
setsh "tornado1 wait 5 setsh "tornado2 wait 5
end
Animate changes the turtle to each of two shapes. The forever instruction (in the trick
procedure) runs animate repeatedly so the shapes keep changing.
Mytune plays the melody. Then, MicroWorlds goes to the next instruction to cancel the
animation. Make sure the instruction given as input to cancel is the same as the input to forever.
Another way to synchronize animation with music is to use the commands clickon and clickoff.
Clickon starts a turtle’s instruction just like clicking on it. Clickoff stops the instruction.
For example, type animate as the instruction in a turtle and set it to Many Times. Let’s say this
turtle is t1. If you want to play a tune and make it end at the same time as the animation, type in
the Command Center:
t1, clickon mytune clickoff
Logo Programming
65
You can also use clickon to start several turtles’ instructions at the same time. Let’s say each
turtle has its own animation dance. You want them to do their dance and then stop them:
to turtledance
everyone [clickon]
wait 80
everyone [clickoff]
end
But each dance may be a different duration. If you want the turtles to stop when the fastest dance
is over, you can use the waituntil and get or done? primitives.
to turtledance
;t1 finishes dancing first
everyone [clickon]
waituntil [not get "t1 "on?]
everyone [clickoff]
end
Local and Global Who
When you type show who in the Command Center, it reports the name of a turtle. This turtle can
be referred to as the “global who.” You do not change it when you launch a process in a button.
For example, you may have written a procedure like the following:
to greeting
t1, bow
t2, curtsy
end
(Bow and curtsy are your own animation procedures.)
While the procedure is running, the process changes the “local who” from t1 to t2. Yet after the
process is finished, the “global who” has not changed.
Usually, you do not want to change the “global who” when you are launching processes. There
are some situations, however, where you need to change the “global who” in a process. To do
this, use the listen command. You can modify the above procedure so that t2 will be the "global
who" after launching it as a process:
to greeting
t1, bow
t2, curtsy
listen
end
Creating and Modifying Objects Under Program Control
Many of the operations that can be performed with the Tool Palette and the dialog boxes —
object creating, object editing — have corresponding primitives.
With the primitives that create objects, remove objects, or change them under program control,
you can create projects that interactively modify themselves.
An adventure game is an example of such a project. Depending on the player’s interaction, new
buttons can appear, turtles’ behavior may change, or buttons may get “clicked” under program
control.
Turtles
Newturtle hatches a new turtle. The input is the turtle name. Pick a name that doesn’t already
exist. When the turtle is first hatched, it is invisible. You can set its shape, position, and heading
before making it visible. Consider the following example:
Logo Programming
66
newturtle "runner setsh "girl setpos [10 100] st
Setinstruction gives a turtle an instruction. Use launch or forever in the instruction, to
correspond to the Once and Many Times setting.
Clickon starts the turtle’s instruction. Clickoff stops the turtle’s instruction.
newturtle "runner
st
setinstruction [launch [fd 50]]
clickon
clickoff
setinstruction [forever [fd 1]]
clickon
clickoff
remove "runner
Variables can be given to turtles using the turtlesown command:
turtlesown "speed
Gives each turtle a variable named speed.
turtlesown "animal Gives each turtle a variable named animal.
The input to turtlesown becomes a variable that’s linked to each individual turtle. Initially, this
variable is empty. You assign a value to a turtle’s variable with set and the variable name:
t1, setspeed 12
Sets turtle t1’s speed variable to 12.
setanimal "horse
Sets turtle t1’s animal variable to the word horse.
t2, setspeed 10
Sets turtle t2’s speed variable to 10.
The name of the variable itself reports the value of that variable for the current turtle:
t1, show speed
12
t2, repeat 10 [fd speed]
Use the get command to report the list of variables and values for the current turtle:
show get "t1 "own
Shows the turtlesown variables for turtle t1.
speed 12 animal horse
remove "speed
Removes the speed variable from all turtles.
Other set commands can be used to control the turtle state. The following examples list all the
possibilities. The corresponding get commands report the turtle state. Portions in italics should be
replaced by values of your choice.
set "t1 "rule [launch [fd 1]] Equivalent to setinstruction.
set "t1 "on? "true
Equivalent to clickon.
set "t1 "on? "false
Equivalent to clickoff.
get "t1 "visible?
Reports true or false.
get "t1 "rule
Reports its instruction list.
get "t1 "on?
Reports its state.
get "t1 "own
Reports the current property
values for this turtle.
Text Boxes
Newtext creates a new text box. The first input is the text box name. Pick a name that doesn't
already exist. The second input is the position (the xy coordinates of the top, left corner), and the
third input is the size of the text box. Use transparent and opaque to set a text box's visibility.
The position, size and name, and the contents of an existing text box can be set individually. Note
that the text box's position and size coordinates must fit within the page boundaries.
Other set commands can be used to control a text box state. The following examples list all the
possibilities. The corresponding get commands report the text box state. Portions in italics should
be replaced by values of your choice.
newtext "text1 [90 90] [200 50]
set "text1 "text [Hi there]
Equivalent to settext1 [Hi there].
set "text1 "visible? "true
Equivalent to showtext.
Logo Programming
67
set "text1 "visible? "false
Equivalent to hidetext.
set "text1 "pos [0 0] Sets the position of the text box.
set "text1 "size [100 100]
Sets the size of the text box.
set "text1 "transparent? "true Equivalent to transparent.
set "text1 "transparent? "false Equivalent to opaque.
set "text1 "showname? "true
Displays the name tag.
set "text1 "showname? "false
Hides the name tag.
get "text1 "visible? Reports its current state.
get "text1 "pos
Reports its current state.
get "text1 "size
Reports its current size.
get "text1 "transparent?
Reports its current state.
get "text1 "showname?
Reports its current state.
get "text1 "text
Equivalent to text1 as a reporter.
Buttons
Newbutton creates a new button. The first input is the button's name. Pick a name that doesn't
exist. The second input is the position (the xy coordinates of the top, left corner), and the third
input is the button's instruction. Buttons created with newbutton are set to Once.
A button's position, size, state, and instruction can be set individually.
Use launch or forever in the instruction, to correspond to the Once and Many Times setting.
Every button has an "on?" state which is either true or false. The on? state is true if the button is
"clicked" and the instruction is being run. When the action is finished, the state returns to false.
Other set commands can be used to control the button state. The following examples list all the
possibilities. The corresponding get commands report the button state. Portions in italics should
be replaced by values of your choice.
newbutton "button1 [90 90] [fd 50]
set "button1 "pos [0 0]
Sets the position of the button.
set "button1 "size [100 100] Sets the size of the button.
set "button1 "rule [launch [fd 1]]
Sets its instruction.
set "button1 "rule [forever [fd 1]]
Sets its instruction.
set "button1 "on? "true
Turns the button on.
get "button1 "pos Reports its current position.
get "button1 "size
Reports its current size.
get "button1 "rule
Reports its current instruction.
get "button1 "on? Reports its current state.
Sliders
Newslider creates a new slider. The first input is the slider's name. Pick a name that doesn't
exist. The second input is the slider's position (the xy coordinates of the center), and the third
input is a list with three numbers: the minimum, maximum, and current value of the slider.
Other set commands can be used to control the slider state. The following examples list all the
possibilities. The corresponding get commands report the slider state. Portions in italics should
be replaced by values of your choice.
newslider "speed [90 90] [0 50 25]
set "speed "pos [0 0] Sets the position of the slider.
set "speed "showname? "true Makes the name tag visible.
set "speed "limits [0 100]
Sets the limits.
set "speed "value 50 Equivalent to setspeed.
get "speed "pos
Reports its current position.
get "speed "showname?
Reports its current state.
get "speed "limits
Reports its current limits.
get "speed "value
Equivalent to speed as a reporter.
Logo Programming
68
Sounds
You cannot create a sound under program control, but you can change many parameters. The
following examples list all the possibilities. Portions in italics should be replaced by values of
your choice.
set "sound1 "pos [50 50]
Sets the position of the Sound icon.
set "sound1 "visible? "false
Makes the icon invisible.
set "sound1 "showname? "false
Makes the name tag invisible.
set "sound1 "on? "true
Starts playing the sound.
get "sound1 "pos
Reports its current position.
get "sound1 "visible?
Reports its current state.
get "sound1 "showname?
Reports its current state.
get "sound1 "on?
Reports its current state.
Melodies
You cannot create a melody under program control, but you can change many parameters. The
following examples list all the possibilities. Portions in italics should be replaced by values of
your choice.
set "melody1 "pos [50 50]
Sets the position of the Melody icon.
set "melody1 "visible? "false Makes the icon invisible.
set "melody1 "showname? "false
Makes the name tag invisible.
set "melody1 "on? "true
Starts playing the melody.
get "melody1 "instrument
Reports the current instrument.
get "melody1 "volume
Reports the current volume.
get "melody1 "tempo
Reports the current tempo.
get "melody1 "pos
Reports its current position.
get "melody1 "visible?
Reports its current state.
get "melody1 "showname?
Reports its current state.
get "melody1 "on?
Reports its current state.
Videos
You cannot create a video under program control, but you can change many parameters. The
following examples list all the possibilities. Portions in italics should be replaced by values of
your choice.
set "video1 "pos [50 50]
Sets the position of the video.
set "video1 "visible? "false
Makes the video invisible.
set "video1 "showname? "false Makes the name tag invisible.
set "video1 "on? "true
Starts playing the video.
get "video1 "pos
Reports its current position.
get "video1 "visible?
Reports its current state.
get "video1 "showname?
Reports its current state.
get "video1 "on?
Reports its current state.
Audio CD Clips
You cannot create an audio CD clip under program control, but you can change many
parameters. The following examples list all the possibilities. Portions in italics should be replaced
by values of your choice.
set "audiocd "pos [50 50]
Sets the position of the audio CD.
set "audiocd "visible? "false Makes the audio CD invisible.
set "audiocd "showname? "false
Makes the name tag invisible.
set "audiocd "on? "true
Starts playing the audio CD.
get "audiocd "pos
Reports its current position.
get "audiocd "visible?
Reports its current state.
get "audiocd "showname?
Reports its current state.
Logo Programming
get "audiocd "on?
69
Reports its current state.
Colors
Every color can have an instruction that runs when the turtle passes over that color, as well as an
instruction that runs when the mouse clicks on the color.
Use set to set these instructions under program control. The mouseclick is the instruction to run
if a mouse clicks on the color. The turtlerule is the instruction to run if a turtle stops on the color.
The "turtlemode" Once and Each Time settings only affect the turtlerule.
Setting parameters for a given color affects all the colors in that color set. For example, setting
the color red (number 15) sets all colors numbered 10 to 19.
set "red "turtlerule [bk 50]
Sets the instruction for turtle detection.
set "red "turtlemode "once
Sets the mode.
set "red "turtlemode "eachtime Sets the mode.
set "red "mouseclick [fd 50] Sets the instruction for mouse detection.
get "red "turtlerule
Reports the instruction for turtle detection.
get "red "turtlemode
Reports the mode.
get "red "mouseclick
Reports the instruction for mouse detection.
Pages
There are no set instructions for pages. Get instructions report a list of the names of the page
elements of a given type on the specified page. As well as the examples below, the last input can
be any of the following words: sliders, melodies, sounds, music, videos, audiocds, colordemons.
show get "page2 "turtles
Reports the names of the turtles on this page.
show get "page2 "texts
Reports the names of the text boxes on this page.
show get "page2 "buttons
Reports the names of the buttons on this page.
Projects
70
Projects
Drag and Drop Feature
Instead of using Import from the File menu to import a picture, movie, sound, or MIDI music,
you can simply use the drag and drop feature from Windows 95. When you are working on a
project, go to the Desktop and drag a file onto the project.
Exporting or Sharing Your Project
When you export your project to another computer at school, or share your project on a network,
there are some important items to remember:
1. Create a folder and put your project in the folder.
2. Put all the media links in the folder. This includes sounds, music MIDI files, and movies.
Even though these media files look like they are part of your project, they are separately
stored on the hard disk.
Now your folder contains everything you need to run your project.
Creating Web Pages
MicroWorlds allows you to display your MicroWorlds 2.0 multi-page project on the World Wide
Web. In addition to posting the screen shot of each one of the pages in your project, your friends,
family, and fellow web surfers can navigate through your project pages.
Please be aware that MicroWorlds animations will not function and text in the text boxes is not
editable when viewing HTML versions of your projects. Therefore, except for buttons or turtles
that are programmed to change pages, typical "hot spots" created in MicroWorlds 2.0 do not
react to the standard clicks; sliders don't work; sound icons don't emit sound; and videos don't
play.
Note: To view your project on the Web as it is (with all its dynamic content), you can download
MicroWorlds Web Player available at our web site: http://www.lcsi.ca. MicroWorlds Web Player
only works with Internet Explorer 3.0 or Netscape 3.0.
Create as many pages in your project as you want using buttons or turtles to link the pages. For
example, let's say you have created a project with two pages, Lake and Room. In the Lake page,
there is a button that takes you to the Room page. In the Room page, there is another button that
will take you back to the Lake page.
Once you have finished your project and are ready to convert it to HTML, use the savehtml
command in the Command Center. The name of the directory is where all the pages of the project
will be saved:
savehtml "myproject
(This primitive will save an html file and a gif file for each page of your project. )
Once you have finished saving, go to the desktop and verify that you have a directory with both
an html file and gif file for each page in your project. Be sure to use a single name for your
Projects
71
directories and pages. For example, name the folder "Myproject," with four files inside:
Room.html, room.gif, Lake.html, lake.gif.
Keep the original MicroWorlds project intact, so if you want to update the project, you can simply
run savehtml again and the files will be replaced in your Myproject folder.
Start your Internet Browser and open the HTML file corresponding to the first page of your
project (so you can view the result locally.) .To put the HTML file on a Web site, or to make your
own Web site, contact your Internet Service Provider.
An interesting feature that you can add to your HTML project is linking to other web site
addresses. To do this, add a links procedure on the Procedures page of the original project. You
can make as many links as you like inside the links procedure. For example:
to links
make "lcsi "http://www.lcsi.ca
end
The first input to make is the name of the web site, and the second input is the address. One of
the pages in your project should have a button or turtle running the instruction lcsi (or the name
of the site) to link to the web site.
If you have any problems, send us an e-mail message at [email protected]. We'd also love to see
your MicroWorlds projects posted on your web site. Send us an e-mail with the address of your
web site (URL) to [email protected].
Merging Projects
You may be working on a collaborative project and want to add pages of someone else's project to
your own. To do this, use the merge primitive. But be careful when you use merge. Always save
your project before because you may run into memory problems if you are trying to import pages
which are memory-intensive.
You can import pages, the procedures, or shapes from another project. To use merge, the first
input is always the project name from which you want to import. This project must be in your
current directory. The second input depends on what you want to import.
For example:
merge "sample "pages
imports all the pages from the Sample project. If the page names are the same as the pages in
your project, they will be renamed.
merge "sample "shapes
imports all modified shapes (not the shapes that come with MicroWorlds) from the Sample
project.
merge "sample "procedures
imports the Procedures page and the project variables from the Sample project. The procedures
are added to the procedures in your project.
Different Sized Projects
Since it is possible to work in MicroWorlds under different standard screen settings, you may be
in the situation where you want to view a larger screen project with the smaller screen standard.
For example, if you open a project which was created under a screen setting of 800 by 600 when
you are currently set to 640 by 480, you will only be able to view a portion of the screen displays.
In order to see the full screen display, use merge to transfer the elements from the larger project
into the new smaller project. Follow these steps:
• Open a new blank project.
• Name Page1 Toberemoved so there is no duplication between the pages to be transferred and
the new target project.
• Type in the Command Center:
merge "oldprojectname "pages
Transfers pages into new project.
Projects
merge "oldprojectname "procedures
•
merge "oldprojectname "shapes
Remove the page Toberemoved:
remove "toberemoved
72
Transfers procedures and the project
variables to new project.
Transfers shapes to the new project.
MicroWorlds Player
MicroWorlds 2.0 Player allows you to run your MicroWorlds projects on computers that don't
have MicroWorlds. Licensed use of the MicroWorlds 2.0 Player application is subject to the
terms set out in the MicroWorlds 2.0 Player License Agreement (see Read Me First on the
MicroWorlds CD ROM).
MicroWorlds Player is especially convenient for viewing projects at home. Just copy it to your
home computer's hard disk, and then you can bring projects home to share with your family.
To start up the Player program, double-click on its icon. Use Open from the File menu to open
your project. Another way to start up is to drag a project onto the Player icon.
In MicroWorlds Player, there is no Command Center, Tool Palette or menus except for the File,
Edit, and Help menus. It is highly recommended that you try out your project with the Player
before sharing it with your friends, so you can be sure the project runs properly.
Player mode does not run the following primitives:
cc
merge
newprojectsize
printtext
procedures
saveproject
savehtml
setfooter
show (automatically changes to announce in Player mode)
Therefore, do not include these primitives in any program that you intend to run with the Player.
The following primitives only work with graphics files in the BMP format:
loadpict
savepict
loadshape
saveshape
placepicture
Use buttons to run your programs as well as to change pages in the project since there is no
Pages menu.
If you would like to view the project in Presentation mode, make a startup procedure running
the presentationmode command.
Key Combinations
73
Key Combinations
Special Key Combinations
Key
Ctrl+A
Ctrl+Break
Ctrl+C
Ctrl+D
Ctrl+F
Ctrl+L
Ctrl+N
Ctrl+O
Ctrl+P
Ctrl+S
Ctrl+U
Ctrl+V
Ctrl+X
Ctrl+Z
Del
Alt+E
Alt+F
Alt+G
Alt+H
Alt+P
Alt+T
F1
Right mouse button
Function
Selects all the objects on the page, or all the text if the cursor is flashing in a text box, the
Command Center, or the Procedures page.
Stops all processes.
Copies the selection.
Activates the Command Center.
Toggles between the Procedures page and the current page.
Opens a line.
Opens a new project. Opens the Save Changes Before Closing box if changes have been made
to the current project.
Opens a project file. Opens the Save Changes Before Closing box if changes have been made
to the current project.
Prints the current page. If the current page is the Procedures page, all the procedures are
printed.
Saves the project. Opens the Save Project As dialog box if the project hasn't been named.
Activates the page.
Pastes the Clipboard.
Cuts the selection.
Undoes the last action.
Clear
Pulls down the Edit menu.
Pulls down the File menu.
Pulls down the Gadgets menu.
Pulls down the Help menu.
Pulls down the Pages menu.
Pulls down the Text menu.
Opens Help information on the word closest to the blinking cursor.
Opens the dialog box of the object clicked on.
Index
Index
—A—
About MicroWorlds, 16
About Pasting, 48
About Real Turtles and Stamped Turtles, 19
Addressing Turtles and Text Boxes, 59
Animation Techniques, 21
Answer, 60
Arithmetic, 53
Audio CD, 45
Advanced use, 65
—B—
Background Graphics
Copying, 27
Editing, 27
Exporting, 28
Importing, 28
Pasting, 27
Selecting, 27
Button
Advanced use, 63, 65
Creating, 42
—C—
Cancel, 12
Carefully, 61
Centers, 9
Changing the Size of a Shape, 30
Changing the Turtle's Shape, 18
Changing the Turtle's Size, 18
Clear, 12
Color
Advanced use, 65
Name, 25
Number, 25
Programming, 25
Colors, 25
Command, 51
Command Center, 9, 15, 50
Commands and Reporters, 51
Contents of Text Boxes, 58
Copy, 12
Copying and Pasting, 47
Copying and Pasting Text and Text Boxes., 35
Copying and Pasting Turtles, 22
Copying Objects, 47
Copying Shapes, 30
Creating a Text Box, 32
Creating a Turtle, 17
Creating and Modifying Objects Under Program
Control, 65
Creating Web Pages, 70
Credits, 8
Cut, 12
—D—
Deleting Objects, 49
Deleting Text and Text Boxes, 35
Display Setting, 28
Drag and Drop Feature, 70
Drawing Center, 9, 24
Drawing Tools
Eraser, 24
Line Tool, 24
Oval Tool, 24
Paint Can, 24
Pencil, 24
Rectangle Tool, 24
Selection Tool, 24, 25
Solid Oval Tool, 24
Solid Rectangle Tool, 24
Spray Can, 24
Duplicate Page, 14
—E—
Editing Background Graphics, 27
Editing Shapes, 29
Exit, 10
Export, 28, 35, 70
Exporting, 31
Exporting or Sharing Your Project, 70
Eye Tool, 10
—F—
Fat Bits Window, 27
Find/Change, 12
Finding Programmed Turtles, 20
Forever, 63
Formatting Your Procedures, 53
Freezing Objects and Graphics, 62
74
Index
—G—
Global Variables, 55
Global Who, 65
—H—
How Windows Display Setting Will Affect Your
Project, 28
—I—
Icon
Drawing Center Tools, 9
Editing Tools, 10
Object Creation Tools, 9
Import, 28, 35
Music, 11, 70
Picture, 11, 70
Sound, 11, 70
Text, 11
Video, 11, 70
Importing, 31
Importing and Exporting Background Graphics, 28
Importing and Exporting Shapes, 31
Importing and Exporting Text, 35
Importing Music, 38
Importing Sounds, 40
Importing Video, 44
—L—
Last Message, 16
Launch, 63
List, 54, 57
Local and Global Who, 65
Local Variables, 55
Local Who, 65
Logo Basic Concepts, 50
Long Words, 57
—M—
Magnifiers, 10
Making Objects Larger and Smaller, 49
Melodies, 39
Advanced use, 65
Melody Editor, 39
Menus
Edit, 12
File, 10
Gadgets, 15
Help, 16
Pages, 14
Text, 13
Merging Projects, 71
MicroWorlds Help Topics, 16
MicroWorlds Player, 72
MIDI, 38
Modifying Existing Objects, 48
Moving and Turning the Turtle, 17
Moving Objects, 47
Moving Text Boxes, 34
Music, 38
—N—
Name Page, 14
Naming Copied Objects, 48
New Page, 14
New Project, 10
New Turtles and Turtle Names, 19
—O—
Object
Copying, 47
Creating, 65
Deleting, 49
Freezing, 62
Modifying, 48, 65
Moving, 47
Name as command or reporter, 51
Naming copy, 48
Pasting, 47
Selecting, 47
Size, 49
Spaces in name, 51
Stamping, 49
Object Creation Tools, 9
Object Names as Commands or Reporters, 51
Open Project, 10
—P—
Page
Advanced use, 65
Duplicating, 14
Freezing, 62
Naming, 14
New, 14
Order, 59
Page Order, 59
Page Setup, 10
Pages
Creating on Web, 70
parse, 57
Paste, 12
Pasting, 48
Pasting Objects, 47
Pen Color, 25
Pen Color and Pen Size, 17
Pen Size, 25
Player, 72
Pointer, 10
Presentation Mode, 16
75
Index
Primitive, 50
print, 12
Print Project, 10
Printing the Contents of a Text Box, 36
Procedure
Formatting, 53
Startup, 60
Procedures, 51
Procedures Page, 14, 51
Processes, 63
Programming Colors, 25
Programming Turtles, 20
Project
Exporting, 70
Merging, 71
Protecting, 62
Project Variables, 56
Protecting Your Project From Changes, 62
—Q—
Question, 60
Question and Answer, 60
—R—
Recording, 41
Removing Turtles, 22
Reporter, 51
—S—
Save Project, 10
Save Project As, 10
Scissors, 10
Select All, 12
Selecting Objects, 47
Selecting, Copying, and Pasting Background Graphics,
27
Selection tool, 25
Shape
Copying, 30
Editing, 29, 30
Export, 31
Import, 31
Name, 29
Number, 29
Size, 30
Shape Names and Numbers, 29
Shapes Center, 9
Slider
Advanced use, 65
Creating, 43
Sliders as Variables, 56
Sounds, 40, 41
Advanced use, 65
Spaces in Object Names, 51
76
Special Key Combinations, 73
Stamper, 10
Stamping a Turtle, 19
Stamping an Image From a Video, 44
Stamping Objects, 49
Stamping Text, 34
Startup Procedure, 60
Stop All, 12
Synchronizing Processes, 64
—T—
Talking to Text Boxes, 36
Talking to Turtles, 23
Text
Color, 13
Copying, 35
Deleting, 35
Edit, 12
Exporting, 35
Find, 12
Font, 13, 32
Importing, 35
Printing, 36
Size, 13, 32
Stamping, 34
Style, 13, 32
Text Box
Advanced use, 65
Contents, 58
Copying, 35
Creating, 32
Deleting, 35
Hidden, 33
Moving, 34
Name, 33
Scroll Bar, 33
Talking To, 36, 59
Transparent, 33
Visible, 33
Text Boxes as Variables, 56
The Centers, 9
The Editing Tools, 10
The Procedures Page, 51
Tool Palette, 15
Tool Sounds, 15
Transitions, 15
Transparent Text Box, Name Tag, and Scroll Bar, 33
Turtle, 19
Advanced use, 63, 65
Animation, 21
Creating, 17
Duplicating, 22
Moving, 17
Name, 19
Index
New, 19
Original Shape, 18
Pen Color, 17
Pen Size, 17
Programming, 20, 21
Removing, 22
Shape, 18
Size, 18
Stamping, 19
Talking To, 23, 59
Turning, 17
Typing and Formatting Text, 32
Global, 55
Local, 55
Project, 56
Slider as, 56
Text box as, 56
Variables, 55
Vertical Bars, 51, 57
Video
Advanced use, 65
Importing, 44
Stamping, 44
Vocabulary, 16
—U—
Undo, 12, 25
Unique Names for Copied Objects, 48
—W—
when, 63
word, 54
Words and Lists, 54
World Wide Web, 70
—V—
Variable, 55
77
Index
78


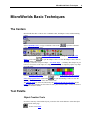


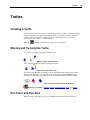


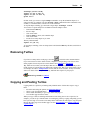
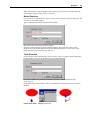


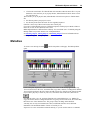
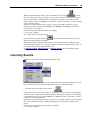

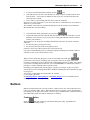

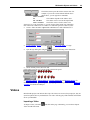


![arXiv:1306.3436v1 [hep-ph] 14 Jun 2013](http://vs1.manualzilla.com/store/data/005779061_1-09962217330e865ae44dd3cb323f6311-150x150.png)