1
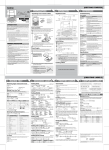
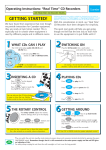
Quick Start Guide Setting up your Workspace and your Computer Read through this guide to get going as fast as possible. Introduction Getting Good Video Congratulations on the purchase of your new dynamic bike fitting system. The computer, cameras and software are valuable tools for the bike retailer, both for bike fitting and for bike and accessory sales. Camera settings As the default camera settings are out of our control, you must set these as outlined below or you will have low quality video. Using this system does require a commitment by the owners and users. Although every endeavour has been made to make the system as simple as possible for everyone in the trade, video analysis does require you to put time aside to set up and then learn the system. This Quick Start Guide is the minimal reading to get started, however, to fully understand the system you should refer to the supplied User Manual. The concept is similar for all camcorder cameras. (Note: Refer to your camera manual to guide you through these settings). 1. Connect the power to the camera and turn the camera on. 2. Connect the video cables to the cameras. This will either be the older Firewire cable (does not come with camera) or a Composite plug on one end with RCA plugs on the other (comes with camera). For this second option you will also need an AV to USB converter. See the full A+DBF Manual for more on these options. 3. Set the date and time. 4. Set the camera to Sports Mode. 5. Turn the Demo function off. 6. It is not normally needed but you can change the Focus setting and set it to manual. A few minutes here will save you a lot of time in the long run. Laying out your workspace There are many options for laying out your workspace and you will find more detailed information in the User’s Manual. The critical measurement is that the cameras need to be at least 3 m from the centre of the bike, one in front, the other to the side. This distance is a function of all video analysis systems and putting the cameras closer or adding a fish‐eye lens to the camera, distorts the video image and will cause major errors in your analysis. Smaller shops have to be creative in their camera placement, two options are shown below. Using the wall as a backdrop gives a nice video image but takes more space as the next two images show. Putting both cameras and the computer against the wall is a very efficient use of space. If you move the indoor trainer between fits you need to mark on the floor exactly where it goes. The next two images illustrate this option. Camera placement Positioning the camera is critical to get reliable accurate video. You need to set up the camera as follows before you start analysis. The camera must be: 1. Level in the forward to back and side to side directions. You should use the guidelines in the capture screen to help with this (see the User Manual for more details on this procedure). 2. At right angles to the bike centred on the bottom bracket (side camera) and in line with the seat tube and head tube of the frame (front camera). 3. About top tube height of a medium frame, you do not need to change this for different sized frames. 4. No less than 3m (10’) from the bike, but they could be more. 5. Refer to the previous ‘Laying out your workspace’ section for camera placement suggestions. Setting up the computer Computer orientation When it comes to positioning your computer there are a few things to consider, namely: Both fitter and customer must be able to see the screen clearly. The computer needs power and internet. Setting up Windows for the first time (15 min) Depending on your supplier, the computer could either come fully set up or very close to being set up so there may be a few things you need to do: 1. Unpack the computer, monitor and cameras, connect them together and connect them to the power (see the User Manual for more details). 2. Turn on the power and if the computer asks you to set up Windows please follow the instructions below. If it does not ask you to set up Windows then go straight to the Installing the Bike Fitting Software section below. a. Windows will guide you thought its setup. From then it will then take about 5 – 10 minutes to set itself up. b. Every time you start Windows it may come up with a ‘Welcome Centre’ screen or a help screen. They usually have some option you can implement to stop this. c. The computer may come with trial anti‐virus software. It is up to you how you set up your computers security but we strongly recommend some sort of protection as this computer needs to be connected to the internet. d. 3. As the bike fitting software has its own screen saver, you need to turn the Windows one off. To do this Right click on the Windows Desktop, select Personalize and then select Screen Saver. Set the screen saver to NONE and then click APPLY. Now, on the same screen, click the Change power settings link and then click on the Change plan settings link under the Balanced plan. Now set both options to 4 ‐ 5 hours and click SAVE CHANGES. Close all of the open Windows. Now you are ready to install the bike fitting software. Installing the Bike fitting Software If the bike fitting software has not already been installed you will need to do this yourself. You can tell if it is installed because there will be an icon on the desktop. If there is no icon and you need to install it by following the instructions below. The software is a download from Siliconcoach. To install the software do the following: 1. Double click on the installer to start the process. Note: Windows may ask you if you are sure you want to proceed with the installation; when asked always click YES, ALLOW, CONTINUE or a similar option. 2. The installation wizard will take you through the process. Follow the Wizards instructions when required, usually this will require you to press the NEXT key. Note: If you have a previous version on your computer it may guide you through the uninstall process first. 3. Please wait and don’t press any buttons until prompted. On some of the screens it looks like nothing is happening for 3‐4 minutes, especially when it is loading the Adobe Reader files. Please be patient, pressing buttons too early could corrupt the installation. 4. On the final installation screen you will press the FINISH button. 5. Start the software by double clicking on the new icon on your desktop. Make sure it is the software icon and not the installer icon which looks similar. 6. The software will ask to if you want to register, you must register to continue. Make sure you are connected to the internet. Enter in your first and last name and also a valid email. It is critical that this is a valid email as you will be asked to supply it to Siliconcoach and it will then be used as your software release code. You cannot change the email. 7. Depending on your computer monitor setup, you may get a Screen Resolution notice. The software looks and works the best at a screen resolution on or over 1024 vertical pixels. It is recommended that you click YES and set your display to the option that has the biggest vertical number (eg ???? x 1050) pixels using the Screen Resolution ‘slider’ in the Display Settings window that will appear. Note: You may need to click on the monitor image with the number ‘1’ on it to select it and then try moving the resolution slider. Now click APPLY and then close that Window. 8. Review the User’s Manual to see how to add your shop details to the Report and set your options for emailing Reports. 9. Close the application by clicking the ‘X’ in the upper right corner of the screen. 10. Now restart the bike fitting software using the desktop icon, now you are all set to go. Installing the AV to USB Converter Software This applies to those using the newer USB input option. With the demise of MiniDV cameras at the end of 2010 there is no longer any Firewire connection needed so you can now use most camcorders. However, because the USB output on these cameras only transfers video files and not live streaming video, we need to use the AV‐out port in the cameras to get a live feed. This is why you will be using an AV to USB coveter dongle. This dongle needs drivers loaded. Follow the instructions in the full A+DBF Manual but basically you will be using the AV to USB converter’s Drivers CD to install the drivers. NOTE: You should also see the: Hardware How do I get better video Installing the AV to USB Converter links at the Dialed in Motion Support Centre of www.siliconcoach.com. Quick Start Guide Learn how to use the Bike Fitting Software Read through this guide to get going as fast as possible. Using the Software 1. The software has been designed from the ground up specifically with the experience of a professional fit in mind. Every detail was designed with the specific challenges of retail fitting, from the time one has to learn the software, to the many ways the information could be used, distributed, and stored afterwards. No other hardware or software has these capabilities in such an easy‐to‐use package, and designed so specifically for bike retail in mind. Finding Help You can find help by: Visiting the Dialed in Motion Support Centre at www.siliconcoach.com. Pressing F1 key on the keyboard while in the software. Tool tips, hold the mouse curser over a tool for 2‐3 seconds. Selecting Help from the top menu (if you can’t see the top menu click on the logo in the very top left of any screen except the Welcome screen. Selecting the black Help button at the top right of the screen. Reading this guide and the printed User Manual. 2. Make sure you are looking at the Welcome screen and then select CUSTOMER to select a previous customer or add a new one. Click NEXT. 3. Review or enter the customer’s details on the Customer Information screen. Click NEXT. 4. Enter details on the Visit Details screen. Click NEXT. 5. In the Capture screen, capture video clips of the customer cycling (front and/or side). Click NEXT. 6. Analyze the video(s) of the customer cycling using the analysis and drawing tools in the Analyze screen. 7. Enter the results of you analysis in the Wizard form on the bottom left of the screen. 8. You must click FINISH to save your analysis. 9. To view their report click the CUSTOMER button on the Welcome screen, select SEARCH and select the customer from the list. 10. Give them a Report via print, email or as a PDF file. Key points to remember Practise over and over before using it on customers. Turn on the cameras and wait 5 sec’s before starting the software. ALWAYS start a new fit from the Welcome screen, even if it is the same person. Pressing the Finish button will give you the option to Save or Discard the fit. Your Report is not saved until you press the Finish then the Save buttons. Use Quick Analyze if you don’t want to create a Customer, a Report, or keep the video files (files are automatically deleted after 30 days). Use Customer to review an analysis, review old videos (these video files are not deleted) or start a new analysis. Access Tools and Settings by clicking on the logo on the top left of all screens except the Welcome screen. Turn off your computer and cameras at the end of each day. Double click the desktop icon to start the software (5 – 10 sec). 11. Export and compress their video files and give them to the customer. Screens you will use in the software Welcome screen (Note: the images change) Basic design concept and workflow The software has been designed to work alongside you as you step through the bike fitting process. This image outlines the process. Customer Information screen point, move the mouse to see the drawing follow and then press and release the mouse again to finish the drawing. The only tool this does not apply to is the Smoothed Line tool. To use this tool, press and hold the left mouse button down and then move the mouse to draw a smoothed line like you would with a pencil. Release the mouse button to finish. To use the Text tool, select the ‘T’ tool from the Drawing and Text toolbox and then press and release the left mouse button once on the screen to set the start point. Now start typing. Visit Details screen Capture screen Analyze screen MEASURING TOOLS: To use the angle measuring tools, select the desired angle tool from the Measuring toolbox. To start drawing, press and release the left mouse button on the starting point, move the mouse to see the drawing follow it and then press and release the mouse again to either define an angle or finish the drawing. You must calibrate the video clip before you can use any distance tools. To do this press the ‘cal’ button on the lower right of the Analyze screen. Without doing anything else, move the cursor over the first point on the video that you know the position of (eg the back axle) and press and release once, now move the cursor over the second point on the video that you know the position of (eg the front axle) and press and release once. In the small Window that appears you must enter the real world distance between these two points (e.g. 98.7 cm between axles as measured using a real tape measure). To use the distance measuring tools, select the desired distance tool from the Measuring toolbox. To start measuring, press and release the left mouse button on the starting point, move the mouse to see the drawing follow it and then press and release the mouse again to finish the measuring. Other features SELECTING, MOVING AND DELETING DRAWINGS: You can move and delete objects drawn on the video individually in the Analyze screen. Some drawings you can also rotate. To select a drawing, choose the Select tool from the Edit toolbox. Now move your mouse so it is precisely over an object, the mouse cursor will change to a four‐arrowed cross. When you see this new cursor, left mouse press and hold while you move the object around the screen. Release the mouse button to release the object. Tips: REVIEWING VIDEO FILES: You can review videos captured in previous fit sessions by selecting Customer on the Welcome screen, selecting SEARCH and then on the Customer Information screen, selecting your customer from the list and pressing the Review Videos button. CONTROLLING VIDEO PLAYBACK: In the Analyze screen you can control how the video plays in a number of ways: Press the play button on the video controller. You can change the playback speed by sliding the rate controller (found next to the video controller) from 100% to a lesser value. Use the mouse cursor to pick up and slide the playback control left (back) or right (forward). Use the left and right arrow keys on the keyboard to step‐ advance the video after it has been paused. DRAWING AND TEXT TOOLS: To use the drawing tools, select the desired tool from the Drawing and Text toolbox. To start drawing, press and release the left mouse button on the starting Once you have selected an individual object (eg a drawing, text or measurement), you can delete it by pressing the Delete key on the keyboard. Use the Scroll Wheel on your mouse to zoom in and out. Holding the space bar will give you the Move tool. Use this tool to move the video screen when you are zoomed on. Use the Select tool to capture a section of the video image (click and drag a ‘box’) to the clipboard. Use the clipboard icon above the image place holder to insert it in the Report. Press ‘Ctrl’ and ‘Z’ together on the keyboard or press the Undo button in the Edit toolbox to undo an action. Press the Redo button to Redo an action. You can delete all objects on the video by pressing the Delete All button in the Edit toolbox. Use the Select tool to double click on text to edit it.