1
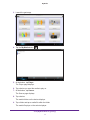
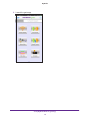
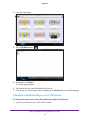
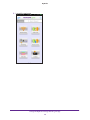
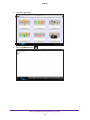
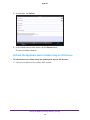
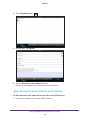
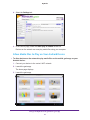
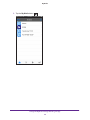
MyMedia User Manual September 2015 202-11591-01 350 East Plumeria Drive San Jose, CA 95134 USA MyMedia Support Thank you for purchasing this NETGEAR product. You can visit www.netgear.com/support to register your product, get help, access the latest downloads and user manuals, and join our community. We recommend that you use only official NETGEAR support resources. Conformity For the current EU Declaration of Conformity, visit http://kb.netgear.com/app/answers/detail/a_id/11621. Compliance For regulatory compliance information, visit http://www.netgear.com/about/regulatory. See the regulatory compliance document before connecting the power supply. Trademarks © NETGEAR, Inc. NETGEAR and the NETGEAR Logo are trademarks of NETGEAR, Inc. Any non-NETGEAR trademarks are used for reference purposes only. 2 Contents Chapter 1 Set Up MyMedia With the genie App Install the genie App . . . . . . . . . . . . . . . . . . . . . . . . . . . . . . . . . . . . . . . . . . . . . . . . . . 6 Install the NETGEAR Desktop genie App on a Computer . . . . . . . . . . . . . . . . . 6 Install the NETGEAR Mobile genie App on Smartphones and Tablets . . . . . . . 6 Use Your Device to Play Media From Your Home Network. . . . . . . . . . . . . . . . . . 7 Play Media From Your Home Network on a Computer . . . . . . . . . . . . . . . . . . . 7 Play Media From Your Home Network on an Android Device . . . . . . . . . . . . . 8 Play Media on an iOS Device. . . . . . . . . . . . . . . . . . . . . . . . . . . . . . . . . . . . . . . . 10 Use the Mobile genie App to Share Media With Chromecast . . . . . . . . . . . . . . . 12 Share Media With Chromecast Using an Android Device . . . . . . . . . . . . . . . . 12 Share Media With Chromecast Using an iOS Device . . . . . . . . . . . . . . . . . . . . 14 Chapter 2 Change the MyMedia Settings With the genie App MyMedia Views . . . . . . . . . . . . . . . . . . . . . . . . . . . . . . . . . . . . . . . . . . . . . . . . . . . . . Change the MyMedia Player . . . . . . . . . . . . . . . . . . . . . . . . . . . . . . . . . . . . . . . . . . Change the MyMedia Player on a Computer . . . . . . . . . . . . . . . . . . . . . . . . . . Change the MyMedia Player on an Android Device . . . . . . . . . . . . . . . . . . . . Change the MyMedia Player on an iOS Device . . . . . . . . . . . . . . . . . . . . . . . . Restart MyMedia Service on Mobile Devices . . . . . . . . . . . . . . . . . . . . . . . . . . . . Restart MyMedia Service Using an Android Device. . . . . . . . . . . . . . . . . . . . . Restart MyMedia Service Using an iOS Device . . . . . . . . . . . . . . . . . . . . . . . . Refresh the MyMedia Source Folders on Mobile Devices . . . . . . . . . . . . . . . . . . Refresh the MyMedia Source Folders Using an Android Device . . . . . . . . . . Refresh the MyMedia Source Folder Using an iOS Device . . . . . . . . . . . . . . . Allow Devices on the Network to Access Files . . . . . . . . . . . . . . . . . . . . . . . . . . . Allow Devices to Access Files on a Computer. . . . . . . . . . . . . . . . . . . . . . . . . . Allow Devices to Access Files on an Android Device . . . . . . . . . . . . . . . . . . . . Allow Devices to Access Files on an iOS Device . . . . . . . . . . . . . . . . . . . . . . . . Allow Media Files to Play on Your Device . . . . . . . . . . . . . . . . . . . . . . . . . . . . . . . Allow Media Files to Play on Your Computer . . . . . . . . . . . . . . . . . . . . . . . . . . Allow Media Files to Play on Your Android Device . . . . . . . . . . . . . . . . . . . . . . Allow Media Files to Play on Your iOS Device. . . . . . . . . . . . . . . . . . . . . . . . . . Change the Media File Settings Using the Desktop genie App. . . . . . . . . . . . . . Change the Video File Settings Using the Desktop genie App . . . . . . . . . . . . Change the Audio File Settings on the Using the Desktop genie App. . . . . . Change the Image File Settings Using the Desktop genie App . . . . . . . . . . . Chapter 3 19 19 19 20 21 23 23 25 28 28 30 33 33 35 36 39 39 41 42 45 45 47 49 Set Up the Router as a DLNA Media Server NETGEAR Routers That Support DLNA Media Server . . . . . . . . . . . . . . . . . . . . . 53 3 MyMedia Set Up the Router as a DLNA Media Server . . . . . . . . . . . . . . . . . . . . . . . . . . . . . Play Media on DLNA-Compliant Media Players . . . . . . . . . . . . . . . . . . . . . . . . . . Set Up the Router to Work With TiVo. . . . . . . . . . . . . . . . . . . . . . . . . . . . . . . . . . . Play Media From a USB Device on TiVo . . . . . . . . . . . . . . . . . . . . . . . . . . . . . . . . . Play Videos on TiVo. . . . . . . . . . . . . . . . . . . . . . . . . . . . . . . . . . . . . . . . . . . . . . . . Play Music or View Photos on TiVo . . . . . . . . . . . . . . . . . . . . . . . . . . . . . . . . . . 4 53 54 54 56 56 57 1. Set Up MyMedia With the genie App 1 You can use the MyMedia® feature on the genie app to play media stored on computer and WiFi devices that are connected to your NETGEAR router’s network. This chapter contains the following sections: • Install the genie App • Use Your Device to Play Media From Your Home Network • Use the Mobile genie App to Share Media With Chromecast For more information about the topics covered in this manual, visit the support website at http://support.netgear.com. For more information about the genie app, see the genie app user manual, which is available at http://downloadcenter.netgear.com. 5 MyMedia Install the genie App MyMedia is available on the desktop genie app for Windows and Mac computers and the mobile genie app for iOS and Android devices. You must download the latest version of the genie app to use the MyMedia feature. Install the NETGEAR Desktop genie App on a Computer The desktop genie app runs on Windows XP SP3, Vista, Windows 7, Windows 8, and Windows 10. To download the desktop genie app on your Windows computer: 1. Visit the NETGEAR genie web page at www.NETGEAR.com/genie. 2. Click the appropriate Download button. When you download and install the genie app, it starts automatically. If you want to use the genie app later, double-click the icon on your desktop. If you are using a Windows computer, the genie app icon also displays in your Windows taskbar. Install the NETGEAR Mobile genie App on Smartphones and Tablets The mobile genie app run on Android and iOS mobile devices like phones and tablets. You can see which smart devices are currently supported by visiting the NETGEAR genie web page. Install the Mobile genie App for Android To install the mobile genie app on an Android device: 1. Open Google Play and search for NETGEAR genie. 2. Tap the INSTALL button. 3. Tap the ACCEPT button to accept any terms. The genie app installs on your Android device. 4. To open the genie app, tap OPEN. Install the Mobile genie App for iOS To install the mobile genie app on an iOS device: 1. Open the App Store and search for NETGEAR genie. 2. Tap GET > INSTALL. The app installs on your iOS device. 3. To open the genie app, tap OPEN. Set Up MyMedia With the genie App 6 MyMedia Use Your Device to Play Media From Your Home Network Use the genie app to play media files stored on devices that are connected to your router’s home network. For you to play media from your home network on a device, the device must support the DLNA Player profile. Game consoles (like Xbox 360 or PS3) and DVRs do not support the DLNA Player profile. For this reason, they do not display as players in MyMedia. MyMedia finds only the media types supported by the player. For example, an iPad does not play Adobe Flash files because this format is not supported. If you want to access media files stored on a USB storage device connected to the router, you must set up the router as a DLNA media server. For more information, see Chapter 3, Set Up the Router as a DLNA Media Server. Play Media From Your Home Network on a Computer To play media from your home network on the desktop genie app for Windows or Mac computers: 1. Connect your computer to the router’s network with WiFi or a wired Ethernet connection. 2. Launch the genie app . Set Up MyMedia With the genie App 7 MyMedia 3. Select the My Media button. 4. Select the Player tab. The Player page displays. 5. Select a device you want the media to play on. 6. Select the Source tab. The Source page displays. 7. Double-click a device. 8. Double-click a folder and select a media file within the folder. The media plays on your computer. Play Media From Your Home Network on an Android Device To play media with the mobile genie app for Android devices: 1. Connect your Android device to the router’s WiFi network. 2. Launch the genie app. The home page displays. Set Up MyMedia With the genie App 8 MyMedia 3. Launch the genie app. 4. Tap the My Media button . 5. At the bottom, tap Player. The Player page displays. 6. Tap a device you want the media to play on. 7. At the bottom, tap Source. The Source page displays 8. Tap a device. The media folders on the device displays. 9. Tap a folder and tap a media file within the folder. The media file plays on the selected player. Set Up MyMedia With the genie App 9 MyMedia 10. To view the media file that is playing, tap Playing. The Playing page displays. Play Media on an iOS Device To play media with the mobile genie app for iOS devices: 1. Connect your iOS device to the router’s WiFi network. 2. Launch the genie app. Set Up MyMedia With the genie App 10 MyMedia 3. Tap the My Media button . 4. At the bottom, tap Player. The Player page displays. 5. Tap a device that you want the media to play on. 6. At the bottom, tap Source. The Source page displays. 7. Tap a device. The media folders on the device displays. 8. Tap a folder and tap a media file within the folder. The media file plays on the selected player. 9. To view the media file that is playing, at the bottom, tap Playing. The Playing page displays. Set Up MyMedia With the genie App 11 MyMedia Use the Mobile genie App to Share Media With Chromecast Chromecast is a media streaming device that plugs into the HDMI port on your TV. If you use Chromecast, the mobile genie app lets you use Chromecast to play media from devices in your network on your TV. Share Media With Chromecast Using an Android Device To share media on the network with Chromecast using the mobile genie app for Android devices: 1. Connect your device to the router’s WiFi network. 2. Make sure that your Chromecast is connected to your router’s network. 3. Launch the genie app. The home page displays. 4. Launch the genie app. Set Up MyMedia With the genie App 12 MyMedia 5. Tap the My Media button . 6. At the bottom, tap Options. 7. Tap the Enable Chromecast Support check box. Set Up MyMedia With the genie App 13 MyMedia 8. At the bottom, tap Player. 9. Tap Chromecast. 10. Tap Source. The Source page displays. 11. Tap a device. The media folders on the device displays. 12. Tap a folder and tap a media file within the folder. The media files play on your TV through Chromecast. 13. Use the MyMedia Play and Control modes to control how you play the media. Share Media With Chromecast Using an iOS Device To share media on the network with Chromecast using the mobile genie app for iOS devices: 1. Connect your device to the router’s WiFi network. 2. Make sure that your Chromecast is connected to your router’s network. Set Up MyMedia With the genie App 14 MyMedia 3. Launch the genie app. Set Up MyMedia With the genie App 15 MyMedia 4. Tap the My Media button . Set Up MyMedia With the genie App 16 MyMedia 5. At the bottom, tap Player. 6. Tap Chromecast. 7. Tap Source. The Source page displays. 8. Tap a device. The media folders on the device displays. 9. Tap a folder and tap a media file within the folder. The media files play on your TV through Chromecast. 10. Use the MyMedia Play and Control modes to control how you play the media. Set Up MyMedia With the genie App 17 2. Change the MyMedia Settings With the genie App This chapter contains the following sections: • MyMedia Views • Change the MyMedia Player • Restart MyMedia Service on Mobile Devices • Refresh the MyMedia Source Folders on Mobile Devices • Allow Devices on the Network to Access Files • Allow Media Files to Play on Your Device • Change the Media File Settings Using the Desktop genie App 18 2 MyMedia MyMedia Views For the mobile genie app, the MyMedia view that displays depends on which of the following items you select: • Source. View a list of devices on your network that are sharing media files. • Player. View a list of devices that can play media files over the network. • Playing. View and control media that is playing on the selected player. • Option. View the MyMedia settings. For the desktop genie app, the MyMedia view that displays depends on which of the following taps you select: • Source. View a list of devices on your network that are sharing media files. • Player. View a list of devices that can play media files over the network. • Settings. View the MyMedia settings. Change the MyMedia Player You can change the device that the media plays on. Change the MyMedia Player on a Computer To change the player device using the desktop genie app Windows or Mac computers: 1. Connect your computer to the router’s network with WiFi or a wired Ethernet connection. 2. Launch the genie app . Change the MyMedia Settings With the genie App 19 MyMedia 3. Select the My Media button. 4. Select the Player tab. The Player page displays. 5. Select a device that you want the media to play on. 6. If the device you want to select does not display, click the refresh button to refresh the page. Change the MyMedia Player on an Android Device To change the player device using the mobile genie app for Android device: 1. Connect your device to the router’s WiFi network. 2. Launch the genie app. The home page displays. Change the MyMedia Settings With the genie App 20 MyMedia 3. Launch the genie app. 4. Tap the My Media button . 5. At the bottom, tap Player. The Player page displays. 6. Tap a device that you want the media files to play on. 7. If the device you want to select does not display, tap the Refresh button to refresh the page. Change the MyMedia Player on an iOS Device To change the player device using the mobile genie app for iOS devices: 1. Connect your device to the router’s WiFi network. Change the MyMedia Settings With the genie App 21 MyMedia 2. Launch the genie app. Change the MyMedia Settings With the genie App 22 MyMedia 3. Tap the My Media button . 4. At the bottom, tap Player. The Player page displays. 5. Tap a device that you want the media files to play on. 6. If the device you want to select does not display, tap the refresh icon to refresh the page. Restart MyMedia Service on Mobile Devices On the mobile genie app, you can restart the MyMedia service if the WiFi settings change. Restart MyMedia Service Using an Android Device To restart media service using the mobile genie app for Android devices: 1. Connect your device to the router’s WiFi network. 2. Launch the genie app. The home page displays. Change the MyMedia Settings With the genie App 23 MyMedia 3. Launch the genie app. 4. Tap the My Media button . Change the MyMedia Settings With the genie App 24 MyMedia 5. At the bottom, tap Options. 6. In the Restart media service section, tap the Refresh button. The media service restarts. Restart MyMedia Service Using an iOS Device To restart media service using the mobile genie app for iOS devices: 1. Connect your device to the router’s WiFi network. Change the MyMedia Settings With the genie App 25 MyMedia 2. Launch the genie app. Change the MyMedia Settings With the genie App 26 MyMedia 3. Tap the My Media button . Change the MyMedia Settings With the genie App 27 MyMedia 4. At the bottom, tap Options. 5. Tap Restart media service. The media service restarts. Refresh the MyMedia Source Folders on Mobile Devices On the mobile genie app, you can refresh the MyMedia source folders if any changes are made to the media folders. Refresh the MyMedia Source Folders Using an Android Device To refresh the source folder using the mobile genie app for Android devices: 1. Connect your device to the router’s WiFi network. 2. Launch the genie app. The home page displays. Change the MyMedia Settings With the genie App 28 MyMedia 3. Launch the genie app. 4. Tap the My Media button . Change the MyMedia Settings With the genie App 29 MyMedia 5. At the bottom, tap Options. 6. In the Refresh source folder section, tap the Refresh button. The source folders refreshes. Refresh the MyMedia Source Folder Using an iOS Device To refresh the source folder using the mobile genie app for iOS devices: 1. Connect your device to the router’s WiFi network. Change the MyMedia Settings With the genie App 30 MyMedia 2. Launch the genie app. Change the MyMedia Settings With the genie App 31 MyMedia 3. Tap the My Media button . Change the MyMedia Settings With the genie App 32 MyMedia 4. At the bottom, tap Options. 5. Tap Refresh source folder. The source folder refreshes. Allow Devices on the Network to Access Files You can allow devices on the network to access files that are on your device. Allow Devices to Access Files on a Computer To allow devices to access files on your Windows or Mac computer using the desktop genie app: 1. Connect your computer to the router’s network with WiFi or a wired Ethernet connection. Change the MyMedia Settings With the genie App 33 MyMedia 2. Launch the genie app . 3. Select the My Media button. Change the MyMedia Settings With the genie App 34 MyMedia 4. Select the Settings tab. 5. Select the Share files in network check box. Devices in the network can now access files on this computer. Allow Devices to Access Files on an Android Device To allow devices to access files on your Android device using the mobile genie app for Android devices: 1. Connect your device to the router’s WiFi network. 2. Launch the genie app. The home page displays. 3. Launch the genie app. Change the MyMedia Settings With the genie App 35 MyMedia 4. Tap the My Media button . 5. At the bottom, tap Options. 6. Tap the Share files in the network check box. Devices in the network can now access files on this device. Allow Devices to Access Files on an iOS Device To allow devices on the network to access files on the iOS devices: 1. Connect your device to the router’s WiFi network. Change the MyMedia Settings With the genie App 36 MyMedia 2. Launch the genie app. Change the MyMedia Settings With the genie App 37 MyMedia 3. Tap the My Media button . Change the MyMedia Settings With the genie App 38 MyMedia 4. At the bottom, tap Options. 5. Slide the Share files in the network slider to the On position. Devices in the network can now access files on this device. Allow Media Files to Play on Your Device You can allow devices on the network to play media files on your device. For example, to use your smartphone or iPad to view photos on a computer or device in your network, leave the Allow play in network feature set to On. This setting controls whether the photos from other devices can be viewed on this phone or iPad. Allow Media Files to Play on Your Computer To allow devices on the network to play media files on the desktop genie app for Windows or Mac computers: 1. Connect your computer to the router’s network with WiFi or a wired Ethernet connection. Change the MyMedia Settings With the genie App 39 MyMedia 2. Launch the genie app . 3. Select the My Media button. Change the MyMedia Settings With the genie App 40 MyMedia 4. Select the Settings tab. 5. In the Service page, select the Allow play in network check box. Devices on the network can now play media files using your computer. Allow Media Files to Play on Your Android Device To allow devices on the network to play media files on the mobile genie app on your Android device: 1. Connect your device to the router’s WiFi network. 2. Launch the genie app. The home page displays. 3. Launch the genie app. Change the MyMedia Settings With the genie App 41 MyMedia 4. Tap the My Media button . 5. At the bottom, tap Options. 6. Tap the Allow play in network check box. Devices on the network can now play media files using your Android device. Allow Media Files to Play on Your iOS Device To allow devices on the network to play media files on the mobile genie app on your iOS device: 1. Connect your device to the router’s WiFi network. Change the MyMedia Settings With the genie App 42 MyMedia 2. Launch the genie app. Change the MyMedia Settings With the genie App 43 MyMedia 3. Tap the My Media button . Change the MyMedia Settings With the genie App 44 MyMedia 4. At the bottom, tap Options. 5. Slide the Allow play in the network slider to the On position. Devices on the network can now play media files using your iOS device. Change the Media File Settings Using the Desktop genie App You can change the following media file settings using the desktop genie app: • Change the video, audio, and image source folders on your computer that other devices can access. • Change the folder that files download to on your computer. • Change the amount of time images displays on your computer. Change the Video File Settings Using the Desktop genie App You can change the default video folder that other devices can access video files from and change the folder on your computer that video files are download to. Change the MyMedia Settings With the genie App 45 MyMedia To change the video file settings on your Windows or Mac computer using the desktop genie app: 1. Connect your computer to the router’s network with WiFi or a wired Ethernet connection. 2. Launch the genie app . 3. Select the My Media button. Change the MyMedia Settings With the genie App 46 MyMedia 4. Select the Settings tab. 5. On the left, select Video. 6. To change the default video folder that other devices can access video files from, in the Default Video Folder section, click the button to change the path. 7. To change the folder on your computer that video files are download to, in the Default Download Folder section, click the button to change the path. Change the Audio File Settings on the Using the Desktop genie App You can change the default audio folder that other devices can access video files from and change the folder on your computer that audio files are download to. Change the MyMedia Settings With the genie App 47 MyMedia To change the audio file settings on your Windows or Mac computer using the desktop genie app: 1. Connect your computer to the router’s network with WiFi or a wired Ethernet connection. 2. Launch the genie app . 3. Select the My Media button. Change the MyMedia Settings With the genie App 48 MyMedia 4. Select the Settings tab. 5. On the left, select Audio. 6. To change the default music folder that other devices can access audio files from, in the Default Music Folder section, click the button to change the path. 7. To change the folder on your computer that audio files are download to, in the Default Download Folder section, click the button to change the path. Change the Image File Settings Using the Desktop genie App You can change the default video folder that other devices can access image files from and change the folder on your computer that image files are download to. You can also change the amount of time images display in the desktop genie app. Change the MyMedia Settings With the genie App 49 MyMedia To change the image file settings on your Windows or Mac computer using the desktop genie app: 1. Connect your computer to the router’s network with WiFi or a wired Ethernet connection. 2. Launch the genie app . 3. Select the My Media button. Change the MyMedia Settings With the genie App 50 MyMedia 4. Select the Settings tab. 5. On the left, select Picture. 6. To change the amount of time images display in the desktop genie app, select a value from the menu. 7. To change the default image folder that other devices can access music files from, in the Default Picture Folder section, click the button to change the path. To change the folder on your computer that image files are download to, in the Default Download Folder section, click the button to change the path. Change the MyMedia Settings With the genie App 51 3. Set Up the Router as a DLNA Media Server You can set up the router as a DLNA media server. This chapter contains the following sections: • NETGEAR Routers That Support DLNA Media Server • Set Up the Router as a DLNA Media Server • Play Media on DLNA-Compliant Media Players • Set Up the Router to Work With TiVo • Play Media From a USB Device on TiVo 52 3 MyMedia NETGEAR Routers That Support DLNA Media Server To determine if your NETGEAR router can be set up as a DLNA media server, see your router’s user manual, which is available at http://downloadcenter.netgear.com. Set Up the Router as a DLNA Media Server If your router can be set up as a DLNA media server, the router’s DLNA media server lets you view movies and photos stored on an attached USB device, on DLNA-compliant or UPnP AV-compliant media players, such as Xbox360, Playstation, and NETGEAR media players. To set up your router as a DLNA media server: 8. Launch a web browser from a computer or WiFi device that is connected to your router’s network. 9. Enter http://www.routerlogin.net. A login window displays. 10. Enter the router user name and password. The user name is admin. The default password is password. The user name and password are case-sensitive. The BASIC Home page displays. 11. Select ADVANCED > USB Functions > ReadySHARE Storage. The USB Storage (Advanced Settings) page displays. Note: This navigation path might be different depending on your router. See your router’s user manual for more information. Your router’s user manual is available online at http://downloadcenter.netgear.com. Set Up the Router as a DLNA Media Server 53 MyMedia 12. Click the Media Server tab. 13. Select the Enable DLNA Media Server check box. 14. In the Media Server Device Name section, click the Edit button to change the name of the media server. 15. Click the Apply button. Your settings are saved. Play Media on DLNA-Compliant Media Players To play media on DLNA-compliant media player: 1. Visit http://kbserver.netgear.com/readyshare to check for the most up-to-date list of USB devices that your router supports. 2. Connect a USB device to a USB port on your router. If your USB device uses a power supply, you must use it when you connect the USB device to the router. When you connect the USB device to the router’s USB port, it might take up to two minutes before it is ready for sharing. By default, the USB device is available to all computers on your local area network (LAN). 3. Connect your DLNA-compliant media player (such as a Xbox360, Playstation, and NETGEAR media players) to your router’s network. You can now view the media on your USB device on your DLNA-compliant media player. Set Up the Router to Work With TiVo You can set up your TiVo to access media files stored on a USB device that is connected to your router. The TiVo must be on the same network as the router. This feature supports the following file formats: Set Up the Router as a DLNA Media Server 54 MyMedia • Video. See and play MPEG-1 and MPEG-2 files. • Music. See and play MP3 files. • Pictures. View images in .jpg format. You can use the TiVo (Series 2 and up) Home Media Option to play photos and music on your Windows or Mac computer in your TiVo user interface. To set up the router to work with TiVo: 1. Launch a web browser from a computer or WiFi device that is connected to your router’s network. 2. Enter http://www.routerlogin.net. A login window displays. 3. Enter the router user name and password. The user name is admin. The default password is password. The user name and password are case-sensitive. The BASIC Home page displays. 4. Select ADVANCED > USB Functions > ReadySHARE Storage. The USB Storage (Advanced Settings) page displays. 5. Click the Media Server tab. Note: The Media Server page navigation path might be different depending on your router. Check your router’s user manual for more information. 6. Select the Enable DLNA Media Server check box. 7. Select the Enable TiVo support check box. 8. Click the Apply button. Your settings are saved. Set Up the Router as a DLNA Media Server 55 MyMedia Play Media From a USB Device on TiVo Make sure that you set up the router to work with TiVo. For more information, see Set Up the Router to Work With TiVo on page 54. Play Videos on TiVo Note: The TiVo images used in this section were taken using a TiVo Premiere XL DVR. To play videos: 1. On the TiVo, select TiVo Central > My Shows. 2. Go to the bottom of the list and select the router. Set Up the Router as a DLNA Media Server 56 MyMedia Play Music or View Photos on TiVo Note: The TiVo images used in this section were taken using a TiVo Premiere XL DVR. To play music or view photos: 1. On the TiVo, select TiVo Central > Music, Photos, & Showcases. 2. Select an item to play or watch. Set Up the Router as a DLNA Media Server 57