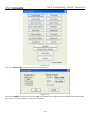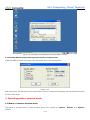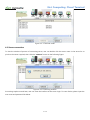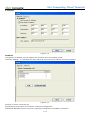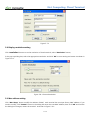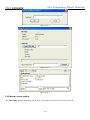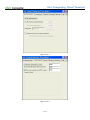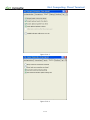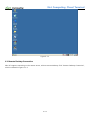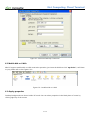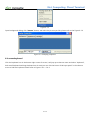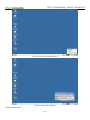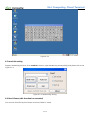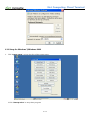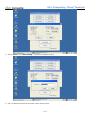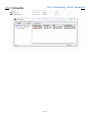
1
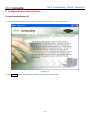
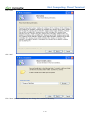
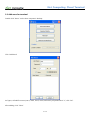
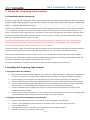
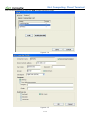
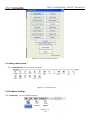
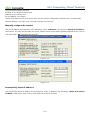
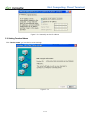
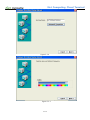
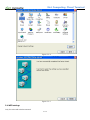
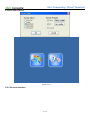
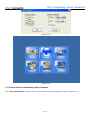
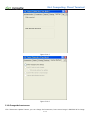
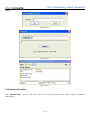
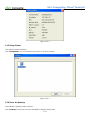
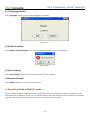
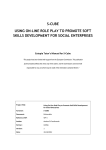
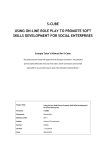
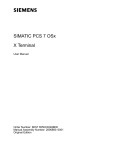
Net Computing Cloud Terminal
Net Computing(JF-ETP-310B) User Manual
1 / 48
Net Computing Cloud Terminal
Contents
1. Product Introduction ............................................................................................................................................................................... 4
1.1 Product pictures ................................................................................................................................................................................ 4
1.2 Net Computing cloud terminals product specification ..................................................................................................... 4
1.3 Net Computing cloud terminals Deployment Diagram..................................................................................................... 5
1.4 System requirement......................................................................................................................................................................... 5
Server .................................................................................................................................................................................................. 5
Network .............................................................................................................................................................................................. 5
Selecting server system................................................................................................................................................................ 5
2. Configuration for terminal server ................................................................................................................................................ 6
2.1 open terminal driver CD................................................................................................................................................................. 6
2.2 installing the patch for Multi-user terminal machine ......................................................................................................... 7
2.3 Add users for terminal ..................................................................................................................................................................10
3. Startup Net Computing cloud terminals .....................................................................................................................................11
3.1 Preparation before starting up ..................................................................................................................................................11
3.2 Installing Net Computing cloud terminals............................................................................................................................11
3.2.1 Prepare before the installing .........................................................................................................................................11
3.2.2 Express setup for Net Computing cloud terminals...............................................................................................11
3.3 Operation about the Net Computing cloud terminals.....................................................................................................12
3.4 Mode changing ...............................................................................................................................................................................13
3.4.1 Terminal mode to Mini PC independent operation mode.................................................................................13
3.4.2 Desktop Mini PC independent operation mode to terminal mode ...............................................................15
4. Operating guide in terminal mode.................................................................................................................................................15
4.1 Menus of common terminal mode..........................................................................................................................................15
4.2 Server connection...........................................................................................................................................................................16
4.3 Options ...............................................................................................................................................................................................17
4.3.1 Setup.......................................................................................................................................................................................18
4.3.2 System information ...........................................................................................................................................................20
5. System options .........................................................................................................................................................................................20
5.1 Setting control panel.....................................................................................................................................................................21
5.2 IP Address Settings ........................................................................................................................................................................21
Manually configure the network.............................................................................................................................................22
Automatically obtain IP address:.........................................................................................................................................22
5.3 Setting Terminal Name .................................................................................................................................................................23
5.4 WIFI settings .....................................................................................................................................................................................25
5.5 Change Password............................................................................................................................................................................26
5.6 Startup settings ...............................................................................................................................................................................26
5.6.1 The terminal mode for thin clients, as mentioned earlier...................................................................................27
5.6.2 Local Desktop ......................................................................................................................................................................27
5.6.3 Video mode..........................................................................................................................................................................28
5.6.4 Two Icons interface............................................................................................................................................................29
5.7 Connect server automatically restart computer .................................................................................................................30
5.8 Display resolution setting............................................................................................................................................................31
2 / 48
Net Computing Cloud Terminal
5.9 Mac address setting.......................................................................................................................................................................31
5.10 sound setting .................................................................................................................................................................................32
5.12 Monitor screen setting...............................................................................................................................................................33
5.13 Change the boot screen ............................................................................................................................................................36
5.14 System information .....................................................................................................................................................................37
5.15 Setup Printer ..................................................................................................................................................................................38
5.16 Go to the desktop ........................................................................................................................................................................38
5.17 Language selection......................................................................................................................................................................39
5.18 Clear all settings ...........................................................................................................................................................................39
5.19 Save settings ..................................................................................................................................................................................39
5.20 Restart Terminal ............................................................................................................................................................................39
6. Operating Guide in Mini PC mode..................................................................................................................................................39
6.1 Remote Desktop Connection.....................................................................................................................................................40
6.2 Mobile disk or U disk ....................................................................................................................................................................41
6.3 display properties...........................................................................................................................................................................41
6.4 screen keyboard ..............................................................................................................................................................................42
6.5 touch kit setting ..............................................................................................................................................................................44
6.6 Excel Viewer (this function has canceled)..............................................................................................................................44
6.7 Image Viewer(this function has canceled)......................................................................................................................45
6.8 Internet Explorer..............................................................................................................................................................................45
6.9 Microsoft WordPad ........................................................................................................................................................................45
6.10 Wireless network setting...........................................................................................................................................................45
3 / 48
Net Computing Cloud Terminal
1. Product Introduction
1.1 Product pictures
Figure 1-1-1 Appearance of Net Computing cloud terminals(JF-ETP-310B)
The series of Net Computing cloud terminal is very unique network computer, its appearance as shown above.
It can not only operate in Mini PC independently for web surfing, but also create B/S framework computer
network, operating network business with innovation cost advantages. The unit price of Net Computing cloud
terminals equivalent to 10%-20% of traditional PC, and the use of integrated design of hardware and software
that help maintain and easy management. Terminal Server unified management, upgrade and maintenance work
in the service side, really close to the terminal "zero" maintenance. Compact body, no cooling fan, no noise, low
radiation, green and healthy environment.
1.2 Net Computing cloud terminals product specification
Real panel:
Figure 1-2-1
4 / 48
Net Computing Cloud Terminal
1.3 Net Computing cloud terminals Deployment Diagram
There are two working mode on Net Computing cloud terminals----terminal mode and Mini PC mode. Under
terminal mode, it needs to connect to the server and operate. And under the Mini PC mode, it can be used as a
small computer to realize your simple work. Please check the Deployment Diagram as showed below:
Figure 1-3-1 Net Computing cloud terminals Deployment Diagram
1.4 System requirement
Server
operating system: Linux,Unix;
Microsoft Windows XP,Windows Vista,Windows 7;
Windows 2003 Server,Windows 2008server。
Selecting system for the server, as determined by the requirement of running applications
Hardware requirement:
Depending on what application software system and how many Net Computing cloud terminals running.
Applications:
Any applications which support multi-session (normally running in Linux/Unix or Windows server)
open ports: RDP:3389
VMware View:443/3389
VNC:5900
XDMCP:177
Telnet:23
SSH:22
Network
Protocol:TCP/IP,RDP,VDI,VNC,XDMCP,Telnet,SSH。
connecting ways:LAN、dial、DSL、Cable Modem、Wi-Fi。
Min Mbps:28.8K bps。
Selecting server system
Regarding Windows application, as Windows XP/Windows 7 is not special server system, there will have stability
problems for most users’ possibility. We recommend using Windows 2003 Server,Windows 2008server as
background server if there are more than 20 users.
5 / 48
Net Computing Cloud Terminal
2. Configuration for terminal server
2.1 open terminal driver CD
1.Put the CD into the drive, let it autorun, or open the root of the CD, click “autorun.exe”.
Figure 2-1-1
2. Click “Install”; go into related product software and product manual menu.
6 / 48
Net Computing Cloud Terminal
Figure 2-1-2
2.2 installing the patch for Multi-user terminal machine
Click “Install”, follow these steps to install:
7 / 48
Net Computing Cloud Terminal
Click “next”
click “next”
Click “Next” (default installation), can change the installation directory.
8 / 48
Net Computing Cloud Terminal
Click “Install”
Click “Finish”, the installation is successful after restart the computer.
9 / 48
Net Computing Cloud Terminal
2.3 Add users for terminal
Double-click “Nettc” on the host computer’s desktop.
Click “Add Users”
As figure, will add five users (user1, user2, user3, user4, and user5), all passwords is “1”, click “OK”.
After adding, click “Close”.
10 / 48
Net Computing Cloud Terminal
3. Startup Net Computing cloud terminals
3.1 Preparation before starting up
In order to use the Net Computing cloud terminals, you need to prepare some peripherals. First you need to
prepare display output equipment, you can select variety of output devices with VGA interface, including the
display 、projector and several LCD TV etc.
Network terminal function is the main function of the Net Computing cloud terminals, so the network connection
is very important .You need to prepare the network interface. Please prepare the clear network interface. In
order to operate the Net Computing cloud terminals, you also need to prepare the input device, the basic device
just like the keyboard with USB and the mouse. (If it is the round port of PS/2, you need a USB to PS/2 device).
You also can prepare the stereo system if need.
There is earphone and microphone interface in the Net Computing cloud terminals. You also can prepare the
earphone and the microphone to take the function of Net Computing cloud terminals. (Note: Right now the
function of the microphone connect with the server is not available)
If need the printer, please select the printer with the support of Net Computing cloud terminals and USB interface.
The printer with the support of Net Computing cloud terminals, you can refer to the related document.
If need the wireless network connect the host machine, you can select the outside USB wireless WIFI module.
If need to use the flash disk, the Net Computing cloud terminals support the mobile hard disk and the flash disk
with USB, meanwhile it can recognize the partition of FAT32 form.
The above preparation is finished; you can start to enjoy the Net Computing cloud terminals.
3.2 Installing Net Computing cloud terminals
3.2.1 Prepare before the installing
1.
2.
3.
4.
5.
6.
After prepare all the peripheral equipment, you need to confirm the product component is completed. If
it is OK, you can start to install the Net Computing cloud terminals. The steps of installing as bellow:
Connect display: put the signal line of the display to the port of Net Computing cloud terminals
Connect network: put the normal 10-100M network line to the port of Net Computing cloud terminals
Connect mouse and keyboard: put the USB line of mouse and keyboard to the port of Net Computing
cloud terminals. Or by the USB to PS/2 transform connect the mouse and the keyboard.
Connect earphone and microphone: put the line of mouse and the microphone to the port of Net
Computing cloud terminals.
Connect power: connect the power of Net Computing cloud terminals, then the power of display, press
the power button of Net Computing cloud terminals, the system is started
3.2.2 Express setup for Net Computing cloud terminals
1.
2.
3.
4.
5.
Connect the peripheral devices to the terminal of Net Computing cloud terminals
Connect Net Computing cloud terminals to the switch or the router with the internet line
Connect the power line
Open the switch of Net Computing cloud terminals, until the indicator light on
Click the “connect server” button at the screen
11 / 48
Net Computing Cloud Terminal
6.
Click and modify the name of host machine or the address of the IP, login windows will show on the
display.
3.3 Operation about the Net Computing cloud terminals
After all the line of display 、network、power、mouse and keyboard connect to the Net Computing cloud
terminals, press the power button, the Net Computing cloud terminals will boot, the progress bar will show on the
display, As show 3-3-1:
Figure 3-3-1 boot progress bar of the Net Computing cloud terminals
Normally, it will get the IP address automatically (LAN need the router) and go into the terminal mode, after
connect the net, Net Computing cloud terminals will search the host machine which open the remote desktop in
the LAN automatically .As show 2-3-2
12 / 48
Net Computing Cloud Terminal
Figure 3-3-2
3.4 Mode changing
There are two work modes----terminal mode and Mini PC independent operation mode. After the simple
operation, you can change between the two modes quickly.
3.4.1 Terminal mode to Mini PC independent operation mode
Net Computing cloud terminals work at the terminal mode in normal; refer to 2-3-2.
If it is need to work at MINI PC mode, click “System Setup”.
Figure 3-4-1
Click “system setup”; go into the face of the system setup.
13 / 48
Net Computing Cloud Terminal
Figure 3-4-2
Click the “startup setup” button, go into the terminal mode.
Figure 3-4-3
Select the “desktop” option, and then click “OK” save buttom. Net Computing cloud terminals will remind restart,
after restart it will go to MINI PC mode, show as below:
14 / 48
Net Computing Cloud Terminal
Figure 3-4-4 change to local desktop mode just MINI PC mode
3.4.2 Desktop Mini PC independent operation mode to terminal mode
Under the MINI PC mode, click setup enter the system select, click startup select
Figure 3-4-5
Select thin client, click OK return to the system select, click OK, restart Net Computing cloud terminals, then enter
the thin client mode
4. Operating guide in terminal mode
4.1 Menus of common terminal mode.
The menus in terminal mode is listed as below figure 4-1-1, consist of “Connect”, “Refresh” and “Options”
options.
15 / 48
Net Computing Cloud Terminal
Figure 4-1-1 Terminal mode
4.2 Server connection
To view the window of process of connecting server, user can double click the server name in the server list or
pitch on the server required, then click the “connect” button as the following figure.
Figure 4-2-1 Connecting window
Processing couple seconds later, user can enter the interface of the server login. To enter further, please input the
user name and password like below.
16 / 48
Net Computing Cloud Terminal
Figure 4-2-2 log on the remote server
After above operation, user can log out or exit by clicking “windows start” menu and operate “log out”
4.3 Options
Click the “Options” to view the following window.
Figure 4-3-1
Configuration: Click “Setup” can show the inner IP acquisition manner of item terminal.
Restart: click “Restart” to restart terminal.
System information: click “Info” is to tell the version of terminal, IP information etc.
System Setup: enter “System Setup” to view the detail of “cloud terminal” setup interface.
Close: click “Close” to close the current window.
17 / 48
Net Computing Cloud Terminal
4.3.1 Setup
Figure 4-3-2
IP address
Get Dynamic IP Address: user can operate this if routers are in the network system.
Use Static Address: it is advisable for users, which can be set up the IP address as normal computer.
Figure 4-3-3
Selection in Server Connection list.
AutoDetection: auto-search for the server connecting configuration
SERVER1 & SERVER2: they are for server connecting configuration of hardware connection.
18 / 48
Net Computing Cloud Terminal
Pitch on the required server and click “Edit” to edit connection profile.
Figure 4-3-4
Figure 4-3-5
19 / 48
Net Computing Cloud Terminal
Server network address: Set up the IP address of required server.
User name and password: set the user name and password for future use.
Domain name: name the domain here if domain added in the server
Disk drivers: it is available to put the cloud terminal disk into the server.
Color Depth: Currently the cloud terminal is compatible with 16 bit and 24 bit only for color depth.
Start following program: Unit will open desktop as defaulted command, user can choose the below item to set
other program as auto-start unit after system started.
Desktop size: it is advised to choose “full screen” as defaulted setup.
4.3.2 System information
Click “System Info” to view the version, name, serial number, IP address, MAC address of the cloud terminal
information etc.
Figure 4-3-6
5. System options
Click “system option”, Show interface as blows:
20 / 48
Net Computing Cloud Terminal
Figure 5-1-1 system setting interface
5.1 Setting control panel
Click “Control Panel” button, Interface as blows:
Figure 5-1-2 Control panel
5.2 IP Address Settings
Click “LAN Setup”, go into IP address settings
Figure 5-2-1
21 / 48
Net Computing Cloud Terminal
There are two network cards here
RT28701 for the wireless network card,.
DM9CE1 for an ordinary card.
Set for DM9CE1, for example:
Double-click DM9CE1 icon to set, where there are two network configuration methods, one is “automatically
obtain IP address”, the other is the "manually configure the network".
Manually configure the network
Click the IP Address Settings button in the dialog box, select "IP Address" tab, and select "Specify an IP address"
radio button, The case may be under the LAN IP address, subnet mask, default gateway and DNS server is set up
click the bottom "OK" and restart the terminal .
Figure 5-2-2
Figure 5-2-3
Automatically obtain IP address:
Click the Settings button IP address, In the dialog box, select “IP Address” tab, And select "obtain an IP address
via DHCP” radio button, Save is set up, and restart the terminal .As blows:
22 / 48
Net Computing Cloud Terminal
Figure 5-2-4 manually set the IP address
5.3 Setting Terminal Name
Click “Device name”, go into device name settings
Figure 5-3-1
23 / 48
Net Computing Cloud Terminal
Figure 5-3-2
Figure 5-3-3
24 / 48
Net Computing Cloud Terminal
Figure 5-3-4
Figure 5-3-5
5.4 WIFI settings
Only for series with wireless network
25 / 48
Net Computing Cloud Terminal
Click “WLAN Setup” button to set wireless network function
Figure 5-4-1
5.5 Change Password
Click “Device Password” button to change Password,
Figure 5-5-1 Change Password
5.6 Startup settings
Click “Startup Setup”Button to enter the startup mode setting interface.
This model have 5 starting modes, The default mode for the Thin client,Select the Startup type and click "OK"
button,Restart the system . As shown in Figure 5-6-1.
26 / 48
Net Computing Cloud Terminal
Figure 5-6-1
5.6.1 The terminal mode for thin clients, as mentioned earlier.
5.6.2 Local Desktop
MINI PC model for the desktop.
27 / 48
Net Computing Cloud Terminal
5.6.3 Video mode
Figure 5-6-2
28 / 48
Net Computing Cloud Terminal
5.6.4 Two Icons interface
Figure 5-6-3
5.6.5 Six icons interface
29 / 48
Net Computing Cloud Terminal
Figure 5-6-4
Figure 5-6-5
5.7 Connect server automatically restart computer
Click "Auto Connect Server" button; connect the terminal server automatically, as shown in Figure 5-7-1
30 / 48
Net Computing Cloud Terminal
。
Figure 5-7-1
5.8 Display resolution setting
Click “resolution” button to set the resolution of cloud terminal, select “Resolution” button,
In the pop-up dialog box, select the appropriate resolution,and click “OK” to save setting and restart. As shown in
Figure 5-8-1.
Figure 5-8-1 Screen Resolution
5.9 Mac address setting
Click “Mac Setup” button modify the address of MAC, each terminal has a unique factory MAC address, if you
need to modify, click” Custom” button in the dialog box enter the new MAC address, then click ”OK” and confirm
the dialog box changes, restart the terminal . As shown in figure 5-9-1.
31 / 48
Net Computing Cloud Terminal
Figure 5-9-1
5.10 sound setting
Click “Audio Setup” button , set the sound and volume in the dialog box,click “ OK”, and click “OK” and restart .
As shown in figure 5-10-1.
Figure 5-10-1
Figure 5-10-2 sounds settings
5.11 Update System
Click “System Update” button, Can be updated by the official update software, as shown in figure 5-11-1.
32 / 48
Net Computing Cloud Terminal
Figure 5-11-1
Figure 5-11-2
Figure 5-11-3
5.12 Monitor screen setting
Click “IPC Setup” button, you can set the terminal, and monitor terminal menu by terminal server.
33 / 48
Net Computing Cloud Terminal
Figure 5-12-1
Figure 5-12-2
34 / 48
Net Computing Cloud Terminal
Figure 5-12-3
Figure 5-12-4
35 / 48
Net Computing Cloud Terminal
Figure 5-12-5
Figure 5-12-6
5.13 Change the boot screen
Click “Bootscreen Update” button, you can change the bootscreen, boot screen image is 800*600 24 bit image
36 / 48
Net Computing Cloud Terminal
format.
Figure 5-13-1
Figure 5-13-2
Figure 5-13-3
5.14 System information
Click “Machine Info”, you can view the version of the cloud terminal, name, serial number, IP address,
MACaddress.
37 / 48
Net Computing Cloud Terminal
Figure 5-14-1
5.15 Setup Printer
Only support some of printers.
Click “SetupPrinter” you can add the local printer or set up the printer.
Figure 5-15-1
5.16 Go to the desktop
Enter MINI PC desktop mode, as follow:
Click “Desktop” button,you can enter the MINI PC desktop work mode.
38 / 48
Net Computing Cloud Terminal
5.17 Language selection
Click “Language” button to set working language of terminals.
Figure 5-17-1
5.18 Clear all settings
Click “Restore Factory Settings” button to restore factory settings of the cloud terminal.
Figure 5-18-1
5.19 Save settings
Click “Save Setting” button to save the modification of cloud terminal.
5.20 Restart Terminal
Click “Restart” button to restart the cloud terminal.
6. Operating Guide in Mini PC mode
In the interface of system configuration, click the button of enter into desktop, then the Net Computing cloud
terminals will go into Mini PC mode, you can surf the internet, work with lite edition office software, check photos,
play video and sounds and download information to U disk or mobile hard disk.
39 / 48
Net Computing Cloud Terminal
Figure 6-1-1
6.1 Remote Desktop Connection
Mini PC support connecting to the remote server, achieve remote desktop. Click “Remote Desktop Connection”,
which is showed in Figure 6-1-2.
40 / 48
Net Computing Cloud Terminal
Figure 6-1-2 Remote Desktop Connection
6.2 Mobile disk or U disk
Mini PC support mobile disk or U disk read-write operation, just insert the disk then click “my device”, it will show
to you, please refer to the Figure 6-2-1:
Figure 6-2-1 mobile disk or U disk
6.3 display properties
Desktop backgrounds can be set in Mini PC mode. You can select properties in the blank place of screen by
clicking right key of the mouse.
41 / 48
Net Computing Cloud Terminal
Figure 6-3-1
Open background dialog, click “browse” button, and select the picture you like, please refer to the Figure 6-3-2
Figure 5-3-2 display properties
6.4 screen keyboard
Click the keyboard icon in the bottom right corner of screen, it will pop up a shortcut menu and select “keyboard”,
both small keyboard and large keyboard are ok. And you can click the button “hide input panel” in the shortcut
menu to hide the keyboard. Please refer to Figure 6-4-1、6-4-2.
42 / 48
Net Computing Cloud Terminal
Figure 6-4-1 screen keyboard menu
Figure 6-4-2 screen keyboard
Large keyboard mode
43 / 48
Net Computing Cloud Terminal
Figure 6-4-3
6.5 touch kit setting
Support handwriting function, click “touch kit” shortcut, open handwriting setting dialog, and please refer to the
Figure 6-5-1.
Figure 6-5-1 hand writing setting
6.6 Excel Viewer (this function has canceled)
You can view Excel files by Excel viewer function of Mini PC mode.
44 / 48
Net Computing Cloud Terminal
6.7 Image Viewer(this function has canceled)
Support multi-image forms ,such as BMP、GIF、JPG、PNG ,etc. by image viewer function of MINI PC . And you can
also support read images from U-disk and HDD.
6.8 Internet Explorer
Under Mini PC mode, the internet explorer support usual web browser.
6.9 Microsoft WordPad
You can edit the files by WordPad function under mini PC mode. This WordPad software is similar as the editor in
PC, can edit most of the files.
6.10 Wireless network setting
Under Desktop mode, it will pop up wireless network setting automatically, or double-click the icon
bottom right corner of taskbar, see below Figure:
Double-click corresponding wireless network, you can set up the parameter of wireless network function.
Click advanced button, you can set up the wireless network mode.
45 / 48
in the
Net Computing Cloud Terminal
6.11 Setup for Windows 7/Windows 2008
1. Click “system setup”; go into the face of the system setup.,
2.Click “Startup select” to setup boot program
46 / 48
Net Computing Cloud Terminal
3.Select “Client”,click “Client Config”,input the IP address of Host.
5.Run “X:\ Multiuser\Terminal Server.exe” when start the host.
47 / 48
Net Computing Cloud Terminal
48 / 48