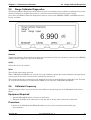
1
Maintenance Manual
POWER METER
ML2430A SERIES
MAINTENANCE MANUAL
Anritsu Company
490 Jarvis Drive
Morgan Hill, CA 95037-2809
USA
Part Number: 10585-00003
Revision: F
Published: January 2014
Copyright 2014 Anritsu Company
WARRANTY
The Anritsu product(s) listed on the title page is (are) warranted against defects in materials and workmanship for
one year from the date of shipment.
Anritsu’s obligation covers repairing or replacing products which prove to be defective during the warranty period.
Buyers shall prepay transportation charges for equipment returned to Anritsu for warranty repairs. Obligation is
limited to the original purchaser. Anritsu is not liable for consequential damages. Accessories included with this
product are not included in the standard warranty.
LIMITATION OF WARRANTY
The foregoing warranty does not apply to Anritsu connectors that have failed due to normal wear. Also, the warranty
does not apply to defects resulting from improper or inadequate maintenance, unauthorized modification or misuse,
or operation outside of the environmental specifications of the product. No other warranty is expressed or implied,
and the remedies provided herein are the Buyer’s sole and exclusive remedies.
DISCLAIMER OF WARRANTY
DISCLAIMER OF WARRANTIES. TO THE MAXIMUM EXTENT PERMITTED BY APPLICABLE LAW, ANRITSU
COMPANY AND ITS SUPPLIERS DISCLAIM ALL WARRANTIES, EITHER EXPRESSED OR IMPLIED,
INCLUDING, BUT NOT LIMITED TO, IMPLIED WARRANTIES OF MERCHANTABILITY AND FITNESS FOR A
PARTICULAR PURPOSE, WITH REGARD TO THE PRODUCT. THE USER ASSUMES THE ENTIRE RISK OF
USING THE PRODUCT. ANY LIABILITY OF PROVIDER OR MANUFACTURER WILL BE LIMITED
EXCLUSIVELY TO PRODUCT REPLACEMENT.
NO LIABILITY FOR CONSEQUENTIAL DAMAGES. TO THE MAXIMUM EXTENT PERMITTED BY
APPLICABLE LAW, IN NO EVENT SHALL ANRITSU COMPANY OR ITS SUPPLIERS BE LIABLE FOR ANY
SPECIAL, INCIDENTAL, INDIRECT, OR CONSEQUENTIAL DAMAGES WHATSOEVER (INCLUDING,
WITHOUT LIMITATION, DAMAGES FOR LOSS OF BUSINESS PROFITS, BUSINESS INTERRUPTION, LOSS
OF BUSINESS INFORMATION, OR ANY OTHER PECUNIARY LOSS) ARISING OUT OF THE USE OF OR
INABILITY TO USE THE PRODUCT, EVEN IF ANRITSU COMPANY HAS BEEN ADVISED OF THE
POSSIBILITY OF SUCH DAMAGES. BECAUSE SOME STATES AND JURISDICTIONS DO NOT ALLOW THE
EXCLUSION OR LIMITATION OF LIABILITY FOR CONSEQUENTIAL OR INCIDENTAL DAMAGES, THE
ABOVE LIMITATION MAY NOT APPLY TO YOU.
TRADEMARK ACKNOWLEDGMENTS
Windows, Windows XP, Microsoft Paint, Microsoft Word, Microsoft Access, Microsoft Excel, Microsoft PowerPoint,
and Visual Studio are all registered trademarks of Microsoft Corporation.
Acrobat Reader is a registered trademark of Adobe Corporation.
MATLAB is a a registered trademark of The MathWorks Corporation.
NI is a trademark of the National Instruments Corporation.
NOTICE
Anritsu Company has prepared this manual for use by Anritsu Company personnel and customers as a guide for the
proper installation, operation and maintenance of Anritsu Company equipment and computer programs. The
drawings, specifications, and information contained herein are the property of Anritsu Company, and any
unauthorized use or disclosure of these drawings, specifications, and information is prohibited; they shall not be
reproduced, copied, or used in whole or in part as the basis for manufacture or sale of the equipment or software
programs without the prior written consent of Anritsu Company.
UPDATES
Updates, if any, can be downloaded from the Documents area of the Anritsu Website at:
http://www.anritsu.com
For the latest service and sales contact information in your area, please visit:
http://www.anritsu.com/contact.asp
Notes On Export Management
This product and its manuals may require an Export License or approval by the government of the product
country of origin for re-export from your country.
Before you export this product or any of its manuals, please contact Anritsu Company to confirm whether or
not these items are export-controlled.
When disposing of export-controlled items, the products and manuals need to be broken or shredded to such a
degree that they cannot be unlawfully used for military purposes.
CE Conformity Marking
Anritsu affixes the CE Conformity marking onto its conforming products in accordance with Council Directives
of The Council Of The European Communities in order to indicate that these products conform to the EMC and
LVD directive of the European Union (EU).
C-tick Conformity Marking
Anritsu affixes the C-tick marking onto its conforming products in accordance with the electromagnetic
compliance regulations of Australia and New Zealand in order to indicate that these products conform to the
EMC regulations of Australia and New Zealand.
Mercury Notification
This product uses an LCD backlight lamp that contains mercury. Disposal may be regulated due to
environmental considerations. Please contact your local authorities or, within the United States, the
Electronics Industries Alliance (www.eiae.org) for disposal or recycling information.
Front-4
PN: 10585-00003 Rev. F
ML2430A MM
Table of Contents
Chapter 1—General Information
1-1
Scope Of This Manual . . . . . . . . . . . . . . . . . . . . . . . . . . . . . . . . . . . . . . . . . . . . . . . . . . . . . . . 1-1
1-2
Introduction . . . . . . . . . . . . . . . . . . . . . . . . . . . . . . . . . . . . . . . . . . . . . . . . . . . . . . . . . . . . . . . . 1-1
1-3
Related Manuals. . . . . . . . . . . . . . . . . . . . . . . . . . . . . . . . . . . . . . . . . . . . . . . . . . . . . . . . . . . . 1-1
1-4
Identification Number . . . . . . . . . . . . . . . . . . . . . . . . . . . . . . . . . . . . . . . . . . . . . . . . . . . . . . . . 1-1
1-5
Models, Options, And Accessories . . . . . . . . . . . . . . . . . . . . . . . . . . . . . . . . . . . . . . . . . . . . . . 1-2
1-6
Service Policy . . . . . . . . . . . . . . . . . . . . . . . . . . . . . . . . . . . . . . . . . . . . . . . . . . . . . . . . . . . . . . 1-2
Unit Exchange Policy. . . . . . . . . . . . . . . . . . . . . . . . . . . . . . . . . . . . . . . . . . . . . . . . . . . . . . 1-2
Spares Kit Program . . . . . . . . . . . . . . . . . . . . . . . . . . . . . . . . . . . . . . . . . . . . . . . . . . . . . . . 1-3
1-7
Spare Parts Listing . . . . . . . . . . . . . . . . . . . . . . . . . . . . . . . . . . . . . . . . . . . . . . . . . . . . . . . . . . 1-3
Chapter 2—Performance Verification
2-1
Introduction . . . . . . . . . . . . . . . . . . . . . . . . . . . . . . . . . . . . . . . . . . . . . . . . . . . . . . . . . . . . . . . . 2-1
2-2
Test Conditions. . . . . . . . . . . . . . . . . . . . . . . . . . . . . . . . . . . . . . . . . . . . . . . . . . . . . . . . . . . . . 2-1
2-3
Input Range . . . . . . . . . . . . . . . . . . . . . . . . . . . . . . . . . . . . . . . . . . . . . . . . . . . . . . . . . . . . . . . 2-1
2-4
Range Data Interpretation . . . . . . . . . . . . . . . . . . . . . . . . . . . . . . . . . . . . . . . . . . . . . . . . . . . . 2-4
dB Error Figure . . . . . . . . . . . . . . . . . . . . . . . . . . . . . . . . . . . . . . . . . . . . . . . . . . . . . . . . . . 2-4
2-5
Range Calibrator Diagnostics . . . . . . . . . . . . . . . . . . . . . . . . . . . . . . . . . . . . . . . . . . . . . . . . . . 2-5
2-6
Calibrator Frequency . . . . . . . . . . . . . . . . . . . . . . . . . . . . . . . . . . . . . . . . . . . . . . . . . . . . . . . . 2-5
2-7
Calibrator Power Level . . . . . . . . . . . . . . . . . . . . . . . . . . . . . . . . . . . . . . . . . . . . . . . . . . . . . . 2-11
2-8
ML243xa VSWR Verification Procedure. . . . . . . . . . . . . . . . . . . . . . . . . . . . . . . . . . . . . . . . .
Required Equipment:. . . . . . . . . . . . . . . . . . . . . . . . . . . . . . . . . . . . . . . . . . . . . . . . . . . . .
Mount Resistance Measurement. . . . . . . . . . . . . . . . . . . . . . . . . . . . . . . . . . . . . . . . . . . .
Find Input Voltage Reflection Coefficients Gamma 1 and Gamma 2 (Γ1 and Γ2). . . . . . .
Finding V0, V1 and Vcomp for 200 Ohms . . . . . . . . . . . . . . . . . . . . . . . . . . . . . . . . . . . .
Finding V0, V1 and Vcomp for 100 Ohms . . . . . . . . . . . . . . . . . . . . . . . . . . . . . . . . . . . . .
2-22
2-22
2-22
2-23
2-24
2-24
Chapter 3—Calibration Procedures
3-1
Introduction . . . . . . . . . . . . . . . . . . . . . . . . . . . . . . . . . . . . . . . . . . . . . . . . . . . . . . . . . . . . . . . . 3-1
3-2
Required Test Equipment . . . . . . . . . . . . . . . . . . . . . . . . . . . . . . . . . . . . . . . . . . . . . . . . . . . . . 3-1
3-3
Test Conditions. . . . . . . . . . . . . . . . . . . . . . . . . . . . . . . . . . . . . . . . . . . . . . . . . . . . . . . . . . . . . 3-1
3-4
Pre-test Setup. . . . . . . . . . . . . . . . . . . . . . . . . . . . . . . . . . . . . . . . . . . . . . . . . . . . . . . . . . . . . . 3-1
3-5
DC Reference . . . . . . . . . . . . . . . . . . . . . . . . . . . . . . . . . . . . . . . . . . . . . . . . . . . . . . . . . . . . . . 3-4
3-6
Calibrator Frequency . . . . . . . . . . . . . . . . . . . . . . . . . . . . . . . . . . . . . . . . . . . . . . . . . . . . . . . . 3-4
3-7
Calibrator Power Level . . . . . . . . . . . . . . . . . . . . . . . . . . . . . . . . . . . . . . . . . . . . . . . . . . . . . . . 3-6
Chapter 4—Theory Of Operation
4-1
Introduction . . . . . . . . . . . . . . . . . . . . . . . . . . . . . . . . . . . . . . . . . . . . . . . . . . . . . . . . . . . . . . . . 4-1
4-2
Product Overview . . . . . . . . . . . . . . . . . . . . . . . . . . . . . . . . . . . . . . . . . . . . . . . . . . . . . . . . . . . 4-1
4-3
General Operation . . . . . . . . . . . . . . . . . . . . . . . . . . . . . . . . . . . . . . . . . . . . . . . . . . . . . . . . . . 4-2
4-4
Human Interface . . . . . . . . . . . . . . . . . . . . . . . . . . . . . . . . . . . . . . . . . . . . . . . . . . . . . . . . . . . . 4-2
30SA MM
PN: 10585-00003 Rev. F
Contents-1
Table of Contents (Continued)
4-5
GPIB Operation. . . . . . . . . . . . . . . . . . . . . . . . . . . . . . . . . . . . . . . . . . . . . . . . . . . . . . . . . . . . . 4-2
4-6
Printer . . . . . . . . . . . . . . . . . . . . . . . . . . . . . . . . . . . . . . . . . . . . . . . . . . . . . . . . . . . . . . . . . . . . 4-2
4-7
Case Construction . . . . . . . . . . . . . . . . . . . . . . . . . . . . . . . . . . . . . . . . . . . . . . . . . . . . . . . . . . 4-3
4-8
Internal Construction. . . . . . . . . . . . . . . . . . . . . . . . . . . . . . . . . . . . . . . . . . . . . . . . . . . . . . . . . 4-3
4-9
Front Panel . . . . . . . . . . . . . . . . . . . . . . . . . . . . . . . . . . . . . . . . . . . . . . . . . . . . . . . . . . . . . . . . 4-4
4-10
Front Panel Connectors . . . . . . . . . . . . . . . . . . . . . . . . . . . . . . . . . . . . . . . . . . . . . . . . . . . . . . 4-4
4-11 Rear Panel Connectors. . . . . . . . . . . . . . . . . . . . . . . . . . . . . . . . . . . . . . . . . . . . . . . . . . . . . . . 4-4
4-12 Power Supply Operation . . . . . . . . . . . . . . . . . . . . . . . . . . . . . . . . . . . . . . . . . . . . . . . . . . . . . . 4-5
4-13 Battery Operation . . . . . . . . . . . . . . . . . . . . . . . . . . . . . . . . . . . . . . . . . . . . . . . . . . . . . . . . . . . 4-6
Chapter 5—Firmware Updates
5-1
Introduction . . . . . . . . . . . . . . . . . . . . . . . . . . . . . . . . . . . . . . . . . . . . . . . . . . . . . . . . . . . . . . . . 5-1
5-2
Code Loader . . . . . . . . . . . . . . . . . . . . . . . . . . . . . . . . . . . . . . . . . . . . . . . . . . . . . . . . . . . . . . . 5-1
5-3
Bootload Mode . . . . . . . . . . . . . . . . . . . . . . . . . . . . . . . . . . . . . . . . . . . . . . . . . . . . . . . . . . . . . 5-3
5-4
Serial Interface Cable . . . . . . . . . . . . . . . . . . . . . . . . . . . . . . . . . . . . . . . . . . . . . . . . . . . . . . . . 5-4
Chapter 6—Troubleshooting
6-1
Introduction . . . . . . . . . . . . . . . . . . . . . . . . . . . . . . . . . . . . . . . . . . . . . . . . . . . . . . . . . . . . . . . . 6-1
6-2
Front Panel . . . . . . . . . . . . . . . . . . . . . . . . . . . . . . . . . . . . . . . . . . . . . . . . . . . . . . . . . . . . . . . . 6-1
6-3
Rear Panel . . . . . . . . . . . . . . . . . . . . . . . . . . . . . . . . . . . . . . . . . . . . . . . . . . . . . . . . . . . . . . . . 6-3
6-4
Battery . . . . . . . . . . . . . . . . . . . . . . . . . . . . . . . . . . . . . . . . . . . . . . . . . . . . . . . . . . . . . . . . . . . 6-4
6-5
General Faults . . . . . . . . . . . . . . . . . . . . . . . . . . . . . . . . . . . . . . . . . . . . . . . . . . . . . . . . . . . . . 6-5
Chapter 7—Removal and Replacement Procedures
7-1
Introduction . . . . . . . . . . . . . . . . . . . . . . . . . . . . . . . . . . . . . . . . . . . . . . . . . . . . . . . . . . . . . . . . 7-1
7-2
Front Panel . . . . . . . . . . . . . . . . . . . . . . . . . . . . . . . . . . . . . . . . . . . . . . . . . . . . . . . . . . . . . . . 7-1
Tools Required . . . . . . . . . . . . . . . . . . . . . . . . . . . . . . . . . . . . . . . . . . . . . . . . . . . . . . . . . . 7-1
Procedure . . . . . . . . . . . . . . . . . . . . . . . . . . . . . . . . . . . . . . . . . . . . . . . . . . . . . . . . . . . . . . 7-1
7-3
Power Supply . . . . . . . . . . . . . . . . . . . . . . . . . . . . . . . . . . . . . . . . . . . . . . . . . . . . . . . . . . . . . . 7-2
Tools Required . . . . . . . . . . . . . . . . . . . . . . . . . . . . . . . . . . . . . . . . . . . . . . . . . . . . . . . . . . 7-2
Procedure . . . . . . . . . . . . . . . . . . . . . . . . . . . . . . . . . . . . . . . . . . . . . . . . . . . . . . . . . . . . . . 7-3
7-4
Main Pcb . . . . . . . . . . . . . . . . . . . . . . . . . . . . . . . . . . . . . . . . . . . . . . . . . . . . . . . . . . . . . . . . .
Tools Required . . . . . . . . . . . . . . . . . . . . . . . . . . . . . . . . . . . . . . . . . . . . . . . . . . . . . . . . . .
Removal Procedure . . . . . . . . . . . . . . . . . . . . . . . . . . . . . . . . . . . . . . . . . . . . . . . . . . . . . . .
Replacement Procedure . . . . . . . . . . . . . . . . . . . . . . . . . . . . . . . . . . . . . . . . . . . . . . . . . . .
7-5
Rear Panel . . . . . . . . . . . . . . . . . . . . . . . . . . . . . . . . . . . . . . . . . . . . . . . . . . . . . . . . . . . . . . . . 7-4
Tools Required . . . . . . . . . . . . . . . . . . . . . . . . . . . . . . . . . . . . . . . . . . . . . . . . . . . . . . . . . . 7-5
Procedure . . . . . . . . . . . . . . . . . . . . . . . . . . . . . . . . . . . . . . . . . . . . . . . . . . . . . . . . . . . . . . 7-5
7-3
7-3
7-3
7-4
Chapter 8—Service Mode
8-1
Introduction . . . . . . . . . . . . . . . . . . . . . . . . . . . . . . . . . . . . . . . . . . . . . . . . . . . . . . . . . . . . . . . . 8-1
8-2
Accessing Service Mode. . . . . . . . . . . . . . . . . . . . . . . . . . . . . . . . . . . . . . . . . . . . . . . . . . . . . . 8-1
Contents-2
PN: 10585-00003 Rev. F
ML2430A MM
Table of Contents (Continued)
8-3
Sensor Mode . . . . . . . . . . . . . . . . . . . . . . . . . . . . . . . . . . . . . . . . . . . . . . . . . . . . . . . . . . . . . .
Entering the Password . . . . . . . . . . . . . . . . . . . . . . . . . . . . . . . . . . . . . . . . . . . . . . . . . . . .
Changing the Password . . . . . . . . . . . . . . . . . . . . . . . . . . . . . . . . . . . . . . . . . . . . . . . . . . .
Sensor Serial Number . . . . . . . . . . . . . . . . . . . . . . . . . . . . . . . . . . . . . . . . . . . . . . . . . . . . .
Cal Factor Edit Menu. . . . . . . . . . . . . . . . . . . . . . . . . . . . . . . . . . . . . . . . . . . . . . . . . . . . . .
Printing the EEPROM data . . . . . . . . . . . . . . . . . . . . . . . . . . . . . . . . . . . . . . . . . . . . . . . . .
8-2
8-2
8-3
8-3
8-3
8-4
8-4
GPIB Service . . . . . . . . . . . . . . . . . . . . . . . . . . . . . . . . . . . . . . . . . . . . . . . . . . . . . . . . . . . . . .
CFFCHG . . . . . . . . . . . . . . . . . . . . . . . . . . . . . . . . . . . . . . . . . . . . . . . . . . . . . . . . . . . . . . .
CFFSAV . . . . . . . . . . . . . . . . . . . . . . . . . . . . . . . . . . . . . . . . . . . . . . . . . . . . . . . . . . . . . . .
SERHIST . . . . . . . . . . . . . . . . . . . . . . . . . . . . . . . . . . . . . . . . . . . . . . . . . . . . . . . . . . . . . . .
8-4
8-4
8-4
8-5
Appendix A—Connector Care and Handling
A-1
A-1 Introduction . . . . . . . . . . . . . . . . . . . . . . . . . . . . . . . . . . . . . . . . . . . . . . . . . . . . . . . . . . . . A-1
A-2
Connector Care And Handling . . . . . . . . . . . . . . . . . . . . . . . . . . . . . . . . . . . . . . . . . . . . . . . . .
Beware of Destructive Pin Depth of Mating Connectors . . . . . . . . . . . . . . . . . . . . . . . . . . .
Avoid Over-Torquing Connectors. . . . . . . . . . . . . . . . . . . . . . . . . . . . . . . . . . . . . . . . . . . . .
Cleaning Connectors . . . . . . . . . . . . . . . . . . . . . . . . . . . . . . . . . . . . . . . . . . . . . . . . . . . . . .
ML2430A MM
PN: 10585-00003 Rev. F
A-1
A-1
A-2
A-2
Contents-3
Contents-4
PN: 10585-00003 Rev. F
ML2430A MM
Safety Symbols
To prevent the risk of personal injury or loss related to equipment malfunction, Anritsu Company uses the
following symbols to indicate safety-related information. For your own safety, please read the information
carefully before operating the equipment.
Symbols Used in Manuals
Danger
This indicates a risk from a very dangerous condition or procedure that could result in
serious injury or death and possible loss related to equipment malfunction. Follow all
precautions and procedures to minimize this risk.
Warning
This indicates a risk from a hazardous condition or procedure that could result in
light-to-severe injury or loss related to equipment malfunction. Follow all precautions
and procedures to minimize this risk.
Caution
This indicates a risk from a hazardous procedure that could result in loss related to
equipment malfunction. Follow all precautions and procedures to minimize this risk.
Safety Symbols Used on Equipment and in Manuals
The following safety symbols are used inside or on the equipment near operation locations to provide
information about safety items and operation precautions. Ensure that you clearly understand the meanings of
the symbols and take the necessary precautions before operating the equipment. Some or all of the following
five symbols may or may not be used on all Anritsu equipment. In addition, there may be other labels attached
to products that are not shown in the diagrams in this manual.
This indicates a prohibited operation. The prohibited operation is indicated symbolically
in or near the barred circle.
This indicates a compulsory safety precaution. The required operation is indicated
symbolically in or near the circle.
This indicates a warning or caution. The contents are indicated symbolically in or near
the triangle.
This indicates a note. The contents are described in the box.
These indicate that the marked part should be recycled.
ML2430A MM
PN: 10585-00003 Rev. F
Safety-1
For Safety
Warning
Always refer to the operation manual when working near locations at which
the alert mark, shown on the left, is attached. If the operation, etc., is
performed without heeding the advice in the operation manual, there is a
risk of personal injury. In addition, the equipment performance may be
reduced.
Moreover, this alert mark is sometimes used with other marks and
descriptions indicating other dangers.
Warning
When supplying power to this equipment, connect the accessory 3-pin
power cord to a 3-pin grounded power outlet. If a grounded 3-pin outlet is
not available, use a conversion adapter and ground the green wire, or
connect the frame ground on the rear panel of the equipment to ground. If
power is supplied without grounding the equipment, there is a risk of
receiving a severe or fatal electric shock.
Warning
Caution
This equipment can not be repaired by the operator. Do not attempt to
remove the equipment covers or to disassemble internal components.
Only qualified service technicians with a knowledge of electrical fire and
shock hazards should service this equipment. There are high-voltage parts
in this equipment presenting a risk of severe injury or fatal electric shock to
untrained personnel. In addition, there is a risk of damage to precision
components.
Electrostatic Discharge (ESD) can damage the highly sensitive circuits in
the instrument. ESD is most likely to occur as test devices are being
connected to, or disconnected from, the instrument’s front and rear panel
ports and connectors. You can protect the instrument and test devices by
wearing a static-discharge wristband. Alternatively, you can ground
yourself to discharge any static charge by touching the outer chassis of the
grounded instrument before touching the instrument’s front and rear panel
ports and connectors. Avoid touching the test port center conductors
unless you are properly grounded and have eliminated the possibility of
static discharge.
Repair of damage that is found to be caused by electrostatic discharge is
not covered under warranty.
Safety-2
PN: 10585-00003 Rev. F
ML2430A MM
Chapter 1 — General Information
1-1
Scope Of This Manual
Chapter 1 — General Information
1-1
Scope Of This Manual
This manual provides general information, performance verification, calibration, theory, and service
information for the Anritsu ML2430A Series Power Meter. The ML2430A Series Power Meters are shown
below in (Figure 1-1).
Figure 1-1.
1-2
ML2430A Series Power Meters
Introduction
This chapter provides information on other related manuals, the unit identification number, instrument
options, service policies, and component handling precautions.
1-3
Related Manuals
This manual is one of a two manual set consisting of this Maintenance Manual, and the ML2430A Series
Power Meter Operation Manual (ANRITSU part number 10585-00001).
These manuals are available as Adobe Acrobat™ (*.pdf) files from www.us.anritsu.com. The files can be viewed
using Acrobat Reader™, a freeware program provided from Adobe.
1-4
Identification Number
The ML2430A Series ID number is affixed to the rear panel. Please use the complete ID number when ordering
parts or corresponding with the ANRITSU Customer Service department.
ML2430A MM
PN: 10585-00003 Rev. F
1-1
1-5
Models, Options, And Accessories
1-5
Chapter 1 — General Information
Models, Options, And Accessories
The ML2430A Series Power Meter is available with either one or two sensor inputs. Model numbers, options,
and accessories are listed below.
Table 1-1.
Models, Options, And Accessories
Models
Model No.
Number of Sensor Channels
ML2437A
Single Channel
ML2438A
Dual Channel
Options
Model No
Option
ML2400A-01
Rack Mount, single unit
ML2400A-03
Rack Mount, side-by-side
ML2400A-05
Front Bail Handle
(Options-01 thru-05 are mutually exclusive)
ML2400A-06
Rear Panel Mounted Input A
ML2400A-07
Rear Panel Mounted Input A and Reference
ML2400A-08
Rear Panel Mounted Inputs A, B, & Reference
ML2400A-09
Rear Panel Mounted Inputs A and B
(Options-06 thru-09 are mutually exclusive.)
ML2400A-11
3000 mA-h, NiMH Battery
ML2400A-12
Front Panel Cover
(Can not be used with rack mounted units.)
ML2400A-13
External Battery Charger
Accessories
Part No.
Item
760-206
Hard Sided Transit Case
D41310
Soft Sided Carry Case with shoulder strap
ML2419A
Range Calibrator
MA2418A
50 MHz, 0 dBm Reference Source
B41323
Serial Interface Cable
1-6
Service Policy
The preferred ML2430A Series Power Meter service policy is to exchange the complete unit. This policy
ensures minimum down time for the customer.
Unit Exchange Policy
The customer returns the power meter to the nearest Anritsu Customer Service Center and an identical meter
is issued in exchange. The original unit is repaired, calibrated and returned to the customer, whereupon the
customer returns the exchange unit to the Anritsu Customer Service Center. The original power meter is
returned with the same identification marks and serial number as it had before the repair.
1-2
PN: 10585-00003 Rev. F
ML2430A MM
Chapter 1 — General Information
1-7
Spare Parts Listing
Spares Kit Program
Under circumstances where unit exchange is not possible, a spares kit made up of major modular
subassemblies is available from any Anritsu Sales Center.
1-7
Spare Parts Listing
The following spare parts are available for the ML2430A Series Power Meter. Refer to Chapter 7 for Removal
and Replacement procedures. Contact your nearest Anritsu Customer Service or Sales Center for price and
availability information.
Table 1-2.
Parts Listing
Part Number
Description
ND41357
Power Supply Assembly (w/ power switch)
ND41358
Top Case Assembly
ND41359
Bottom Case Assembly
ND41401
Rear Panel Assembly (no power switch)
ND41474
Rear Panel Assembly (no power switch, rear mounted A, B, and Cal)
ND41402
Power Supply Assembly (no power switch)
ND44172
Front Panel Assembly, ML2438Ae
ND45354
Main PCB Assembly, ML2437A
ND45361
Rear Panel Assembly (w/ power switch)
ND45365
Main PCB Assembly, ML2438A
ND45368
Front Panel Assembly, ML2437A
ND41469
Battery Cover with fastener
B41294
Feet, green (as used before Feb 1998)
B41411
Feet, green (as used after Feb 1998)
B41319
Non-slip Pad, Foot Insert, Black
B41256
RF Calibrator Cable Assembly and N Connector, Front Panel
B41257
RF Calibrator Cable Assembly and N Connector, Rear Panel
551-577
Two-pin jumper for use during firmware boot loading
ML2430A MM
PN: 10585-00003 Rev. F
1-3
1-7
1-4
Spare Parts Listing
Chapter 1 — General Information
PN: 10585-00003 Rev. F
ML2430A MM
Chapter 2 — Performance Verification
2-1
Introduction
Chapter 2 — Performance Verification
2-1
Introduction
Performance of the Anritsu ML2430A Series Power Meter can be verified using the procedures in this chapter.
2-2
Test Conditions
The equipment is intended for use as calibration instruments, and as such must be operated under controlled
conditions of temperature and humidity in order to meet its specified precision and stability.
All tests must be performed at a temperature of 25° C (77° F) ± 10° C and a relative humidity of less than 75%
at 40° C (104° F), non-condensing.
Prior to making any precision measurements, allow the equipment to warm up for the manufactures specified
time period (at least 15 minutes from power on for the ML2430A), or as indicated in the procedures. If the
power supply is interrupted for any reason, allow a similar settling period.
2-3
Input Range
The Anritsu ML2419A Range Calibrator is required for this procedure as it provides a traceable series of
voltages to facilitate accuracy measurements for the power meter signal channels. The voltages are produced
by means of a precision voltage reference and a series of switchable attenuators, operated by a microcontroller.
All voltages produced are accurate, stable and low-noise such that errors inherent in the Range Calibrator
itself do not contribute significantly to the error measurements of the signal channel.
The Range Calibrator is controlled remotely using the power meter menu system, via the sensor cable(s). On
connection of a sensor cable, the meter automatically senses the presence of the Range Calibrator. From this
point, the Range Calibrator is controlled using the ML2430A keyboard and displayed menus.
The performance of the ANRITSU ML2430A Series Power Meter’s individual signal channel inputs are
verified using the following procedure. References in this procedure to sensor input B apply to model ML2438A
(dual-channel) power meters only.
1. Connect the Range Calibrator to the Power Meter using 1.5m sensor cables. The input(s) to be verified
must be connected to the corresponding connector(s) on the Range Calibrator; that is, connect Power
Meter connector A to Range Calibrator connector A, and connector B to connector B (ML2438A only).
2. On connection of the sensor cable(s), the meter automatically detects a Range Calibrator is present and
displays the performance verification menus.
Figure 2-1.
ML2430A MM
ML2419A Top Level Menu (single channel)
PN: 10585-00003 Rev. F
2-1
2-3
Input Range
Figure 2-2.
Chapter 2 — Performance Verification
ML2419A Top Level Menu (dual channel)
3. The performance verification tests will begin when the soft key for the sensor input to be verified is
selected. For single-channel power meters (ML2437A), press the A soft key. For dual-channel models
(ML2438A), press A, B, or A and B. If the A and B softkey is selected, all measurements are first taken
on sensor input A, then repeated for sensor input B. Performance verification tests for each sensor input
are performed in the following sequence:
• The signal channel input is zeroed.
• The Power Meter signal channel(s) are checked at the upper and lower levels of each measurement
range. A null is performed at each range setting prior to every measurement.
4. When all measurements have been performed on the selected inputs, the results are presented on the
screen and the following soft keys are displayed:
Figure 2-3.
ML2419A Verification Results Menu Example
SENSOR
Toggles the display to show the data for each sensor channel verified. If only one channel has been verified, the
SENSOR soft key shown in (Figure 2-3) will not be displayed.
PRINT
The verification data can be printed using the PRINT selection. The data is output through the ML2430A
Series Power Meter rear panel printer port. The printer parameters will be the same as those selected when
operating the meter in stand-alone mode. Refer to the ML2430A Series Power Meter Operation Manual
(10585-00001) for information on print commands and supported printers.
2-2
PN: 10585-00003 Rev. F
ML2430A MM
Chapter 2 — Performance Verification
2-3
Input Range
See (Figure 2-4) for an example of a printed Range Calibrator Report.
Note
The results of the Range Calibrator tests are available from the power meter via the GPIB, once
the Range Calibrator is disconnected from the power meter. Refer to the description of the RCD
command in the ML2430A Series Power Meter Operation Manual, Chapter 6, GPIB Operation.
REPEAT
The last selected performance verification sequence is repeated.
-exit Returns the user to the top-level menu (Figure 2-1) or (Figure 2-2).
Figure 2-4.
Example Range Calibrator Report
5. To exit the Range Calibrator mode, disconnect the sensor cables. The Power Meter will reset to the
default mode.
ML2430A MM
PN: 10585-00003 Rev. F
2-3
2-4
2-4
Range Data Interpretation
Chapter 2 — Performance Verification
Range Data Interpretation
dB Error Figure
The tabular data presented by the Range Calibrator consist of the values read by the meter for each range,
with one measurement taken at each end of each range. For each of these measurements, there is an expected
value. These measured values must meet the specification limits defined in the ML2419A Range Calibrator
Operation and Maintenance Manual (10585-00007)
Pass/Fail Criteria
The Range Calibrator measures the “Zero” level, and the “Upper” and “Lower” limits of each of the five ranges
(both channels on a dual-channel meter). To calculate the dB Error Figure for each level, subtract the expected
level from the measured level.
The meter should be accepted as PASSED if it meets the following conditions applied to the error figures
calculated by the above method. Note that the Excel™ spreadsheet form provided with the ML2419A Range
Calibrator can also be used to determine pass/fail status.
Range 1 and Range 3 Absolute Error and Linearity:
• The calculated absolute errors for Range 1 Upper and Range 3 Upper should each be s 0.021 dBm.
• The calculated absolute error for Range 1 Lower should differ from the Range 1 Upper error by s 0.021
dBm.
• The calculated absolute error for Range 3 Lower should differ from the Range 3 Upper error by s 0.021
dBm.
• Ranges 2, 4 and 5 Linearity:
• For Ranges 2 and 4 the absolute error (calculated as above) for the range Lower Level should differ from
that range’s Upper Level error by s 0.021 dBm.
• For Range 5, the absolute error (calculated as above) for the range Lower Level should differ from the
Upper Level by s 0.033 dB.
Range Change Error
The Range Change Error is defined as the difference between the errors for the two dB levels at the overlap
between any two ranges. The maximum Range Change Error between ranges is specified below:
• Range 1 Lower-Range 2 Upper: 0.021 dB
• Range 2 Lower-Range 3 Upper: 0.021 dB
• Range 3 Lower-Range 4 Upper: 0.021 dB
• Range 4 Lower-Range 5 Upper: 0.046 dB
If any of the Range figures are outside of specification, then proceed to the DC Reference calibration procedure
in (Chapter 3).
2-4
PN: 10585-00003 Rev. F
ML2430A MM
Chapter 2 — Performance Verification
2-5
2-5
Range Calibrator Diagnostics
Range Calibrator Diagnostics
The Range Calibrator Diagnostics mode allows the user to investigate meter problems by holding on any of the
fixed level outputs to examine the results of a particular measurement. From the top-level menu
press-more-and DIAGS. When the Diagnostics option is selected, the SENSOR, LEVEL, and ZERO soft keys
become available.
Figure 2-5.
Diagnostics Mode Menu
SENSOR
Toggles the display to show the measurements for each channel. If only one channel is connected, the SENSOR
soft key shown in Figure 2-5 will not be displayed.
LEVEL
Selects the level to be verified.
ZERO
The selected sensor input is zeroed.
When a SENSOR and LEVEL are selected, the range calibrator outputs the required signal to the appropriate
sensor input on the meter, and the meter continuously measures it.
The reading obtained for a particular range should be the same as when the full set of tests were run. To obtain
an accurate measurement, it is important to ZERO at each selection of SENSOR and LEVEL.
2-6
Calibrator Frequency
The following procedure is used to measure the Calibrator output frequency of the ML2430A Series Power
Meter.
Equipment Required:
• Anritsu MF2412B Frequency Counter or equivalent.
• RF Cable with BNC male connection at one end and an N-type male connection at other end.
Procedure:
1. Power on the ML243xA and MF2412B. Allow to warm up for 15 minutes before taking any
measurements.
ML2430A MM
PN: 10585-00003 Rev. F
2-5
2-6
Calibrator Frequency
Chapter 2 — Performance Verification
2. On the MF2412B, press the Preset key.
Figure 2-6.
MF2412B
3. On the MF2412B, press the Input key (also the number 0 key).
Figure 2-7.
2-6
MF2412B
PN: 10585-00003 Rev. F
ML2430A MM
Chapter 2 — Performance Verification
2-6
Calibrator Frequency
4. On the MF2412B, press the Left Arrow key to highlight Input CH area.
Figure 2-8.
MF2412B
5. On the MF2412B, press the Enter key until Input 2 is selected.
Figure 2-9.
ML2430A MM
MF2412B
PN: 10585-00003 Rev. F
2-7
2-6
Calibrator Frequency
Chapter 2 — Performance Verification
6. On the MF2412B, press the Right Arrow key to highlight the Impd2 area.
Figure 2-10. MF2412B
7. On the MF2412B, press the Enter key until 50 Ω is selected.
Figure 2-11. MF2412B
2-8
PN: 10585-00003 Rev. F
ML2430A MM
Chapter 2 — Performance Verification
2-6
Calibrator Frequency
8. On the MF2412B, press the Return to Meas key.
Figure 2-12. MF2412B
ML2430A MM
PN: 10585-00003 Rev. F
2-9
2-6
Calibrator Frequency
Chapter 2 — Performance Verification
9. Connect an RF cable from Input 2 of the MF2412B to the Calibrator output of the ML243xA.
Figure 2-13. MF2412B and ML243xA
10. On the ML243xA, turn on the RF calibrator by pressing the Cal / Zero key, then the More soft key, then
press the RF Off soft key so RF ON is displayed.
11. Now, the ML243xA Calibrator output should be turned on and the MF2412B frequency counter should be
reading the frequency of the Calibrator output. Record the frequency below:
Fmeas = ________ MHz
2-10
PN: 10585-00003 Rev. F
ML2430A MM
Chapter 2 — Performance Verification
2-7
Calibrator Power Level
Calibrator Frequency Uncertainty:
The sources of uncertainties of the frequency counter measurement at 50 MHz include:
• One Count: Least significant digits (LSD) of the frequency counter
• Time base accuracy from either of the following:
• GPS Disciplined Oscillator
• MF2412B Frequency Counter
• Residual error of the frequency counter:
• Normal-Mode Measurement Frequency/1x1010
• Fast-Mode Measurement Frequency/2x109
Use the following equation to determine the expanded measurement uncertainty (UF) with coverage factor
K=2, 95% level of confidence.
For the MF2412B, use the following numbers to determine UF:
• 1count =1
• Time base accuracy for the MF2412:
• TBA =7.5x10⁻⁸ with option 1
• TBA =4.5x10⁻⁸ with option 2
• TBA =1.5x10⁻⁸ with option 3
• Measurement Frequency: Fmeas = Frequency reading from the MF2412B (in Hz)
• Residual Error:
Verify the frequency of the calibrator Fmeas ±UF is within the range of 50 MHz ±10 kHz.
If the frequency is outside the 50 MHz ±10 kHz limits, then proceed to the Calibrator Frequency calibration
procedure in Chapter 3.
2-7
Calibrator Power Level
The following procedure is used to measure the Calibrator output power level of the ML2430A Series Power
Meter.
Equipment Required:
• Agilent 432A Analog Power Meter
• Agilent 34420A Nano Volt / Micro Ohm Meter or equivalent
• Agilent 8478B Power Sensor
ML2430A MM
PN: 10585-00003 Rev. F
2-11
2-7
Calibrator Power Level
Chapter 2 — Performance Verification
Procedure:
1. Connect the Agilent 34420A to the Agilent 432A using the 4-wire cable provided with the Agilent 34420A.
4-wire cable provided with the Agilent 34420A, along with two BNC to binding-posts adapters needed to connect
the four wires to the rear of the 432A power meter.
Figure 2-14. 34420A Volt Meter, 4 Wire Cable
2-12
PN: 10585-00003 Rev. F
ML2430A MM
Chapter 2 — Performance Verification
2-7
Calibrator Power Level
Connection shown to the
Agilent 34420A Volt Meter
Figure 2-15. Agilent 34420A Volt Meter
Connection shown to the rear of
the 432A Power Meter
Green = Vrf
White = GND of Vrf
Red = Vcomp
Black = GND of Vcomp
Figure 2-16. 432A Power Meter Rear Panel
ML2430A MM
PN: 10585-00003 Rev. F
2-13
2-7
Calibrator Power Level
Chapter 2 — Performance Verification
12. Connect the Agilent Power Sensor 8478B to the Agilent 432A Power Meter.
432A Power Meter shown
connected to the
8478B Power Sensor.
Figure 2-17. 423A Power Meter
13. Power on the 432A power meter and the 34420A voltmeter. Allow the units to warm up for 15 minutes
before taking any measurements.
0
2-14
PN: 10585-00003 Rev. F
ML2430A MM
Chapter 2 — Performance Verification
2-7
Calibrator Power Level
14. On the front panel of the 432A power meter, set the mount resistance to 200 Ω.
Figure 2-18. 432A Power Meter
15. On the front panel of the 432A power meter, set the calibration factor to 100.
Figure 2-19. 432A Power Meter
16. 6. After the 432A and 34420A have warmed up for 15 minutes, perform a zero of the 432A power meter
according to the instructions listed in the 432A user manual.
ML2430A MM
PN: 10585-00003 Rev. F
2-15
2-7
Calibrator Power Level
Chapter 2 — Performance Verification
17. On the front panel of the 432A power meter, set the Range to 0 dBm.
Figure 2-20. 432A Power Meter
18. On the ML243xA, set the RF Calibrator to RF OFF. This can be done by pressing the Cal/Zero hard key,
then the More soft key, and then verify the left-most soft key shows RF OFF. If it shows RF ON, then
press it once to show RF OFF.
Figure 2-21. ML243xA Power Meter
2-16
PN: 10585-00003 Rev. F
ML2430A MM
Chapter 2 — Performance Verification
2-7
Calibrator Power Level
19. Connect the 8478B power sensor to the ML243xA Calibrator.
Figure 2-22. ML243xA and 432A Power Meters and 34420A Volt Meter
20. Select DCV 1-2 on the Agilent 34420A. Record the number shown in the display of the 34420A as V0.
V0 = ____________ V
Figure 2-23. 34420A Volt Meter
ML2430A MM
PN: 10585-00003 Rev. F
2-17
2-7
Calibrator Power Level
Chapter 2 — Performance Verification
21. On the ML243xA, set the RF Calibrator to RF ON, by pressing the left-most soft key to change it from
RF OFF to RF ON.
Figure 2-24. ML243xA Power Meter
22. Record the new number on the Agilent 34420A as V1.
V1 = ____________ Volts
23. While the RF is still ON, press the DCV key on the 34420A and record this number as
Vcomp = ____________ Volts
Figure 2-25. 34420A Volt Meter
2-18
PN: 10585-00003 Rev. F
ML2430A MM
Chapter 2 — Performance Verification
2-7
Calibrator Power Level
24. Use the below equation to determine Pmeas (the Reference Calibrator output power in Watts). Start by
finding the Mismatch (M), then using this number, along with V0, V1, Vcomp, R, and EE to solve for
Pmeas.
25. After Pmeas is determined, the next step is to calculate the expanded uncertainty with coverage
factor K = 2. This is done by using the equations below to get a value for the Expanded
Uncertainty (K = 2).
(Table 2-1) on the following page, shows an uncertainty calculation of an ML243xA Reference Calibrator Power
Level. The table shows the resulting expanded uncertainty and each source of uncertainty.
ML2430A MM
PN: 10585-00003 Rev. F
2-19
2-7
Calibrator Power Level
Chapter 2 — Performance Verification
Calibrator Power Level Uncertainty:
The formula for standard uncertainty is:
The divisor of each source of uncertainty is: determined by the type of probability distribution of each
uncertainty source.
The uncertainty equations of V0, V1, Vcomp and R are obtained from the Agilent 33420A multimeter’s accuracy
specifications for 1 year, 23±5 °C as stated in the product's datasheet. The uncertainties of V0, V1, Vcomp and R
vary model to model of the multimeter used. The uncertainty of Effective Efficiency, EE, is obtained from the
thermistor mount 8478B calibration data. The uncertainty of Mismatch, M, is obtained by taking twice the
product of the reflection coefficient of the 8478B, Gd, and the reflection coefficient of the ML243XA Reference
Calibrator, Gs. The uncertainty of connector repeatability, CR, is set to 0.1% (for example, 60 dB for precision
connectors).
The sensitivity, Cix, of each source of uncertainty, except for connector repeatability CR, is the first partial
derivative of the Pmeas equation with respect to the uncertainty source variable. The equation below shows how
the sensitivity of Vcomp and CiVcomp is obtained.
:
Taking the partial first derivative of Pmeas with respect to the variable uncertainty source needs to be done to
obtain sensitivity Cix for the rest of the uncertainty, except for connector repeatability CR, which has a
sensitivity set to 0.001 W.
Table 2-1. Uncertainty Calculation of an ML243XA Reference Calibrator Output Power Level
Sources of
Uncertainty
Units
Readings
Uncertainty
Units
Divisor
Sensitivity
Units
Standard
Uncertainty
(W)
Vcomp
(V)
5.1627784
1.949 x 10⁻⁴
(V)
1.732
1.950 x 10⁻⁴
(V/Ω)
2.194 x 10⁻⁸
0.0219
V0
(V)
0.0009813
2.756 x 10⁻⁴
(V)
1.732
–1.300 x 10⁻²
(V/Ω)
–2.068 x 10⁻⁶
–2.0680
V1
V1
0.0784392
2.756 x 10⁻⁴
(V)
1.732
1.280 x 10⁻²
(V/Ω)
2.037 x 10⁻⁶
2.0369
(W/Ω)
–4.038 x 10⁻⁸
–0.0404
10–6
(Ω)
1.732
–4.996 x
1.700 x 10–3
-
1.000
1.006 x 10⁻³
W
–1.709 x 10⁻⁶
–1.7094
0.999345
9.728 x 10⁻⁴
-
1.414
–9.998 x 10⁻⁴
W
–6.877 x 10⁻⁷
–0.6877
0
1.000 x 10⁻³
-
1.000
1.000 x 10⁻³
W
1.000 x 10⁻⁶
1.0000
R
(Ω)
200
1.400 x
EE
-
99.36%
M
-
CR
-
2-20
10–2
Standard
Uncertainty
(µW)
PN: 10585-00003 Rev. F
Combined Uncertainty (µW)
3.5809
Expanded Uncertainty (K = 2) (mW)
0.00716
Expanded Uncertainty (K = 2) (%)
0.716
ML2430A MM
Chapter 2 — Performance Verification
2-7
Calibrator Power Level
Table 2-2. The standard uncertainty of each source of uncertainty in (Table 2-1) is calculated as follows:
The accuracy specification for the Reference Calibrator output power level is 1 mW ±0.012 mW/mW per year.
The maximum permissible error for the power output level, Pactual, should be within the range of
1 mW ±0.0015 mW/mW (for example: 0.9985 mW to 1.0015 mW). If Pactual is outside of the 1 mW
±0.0015 mW/mW limit, then continue to the Calibrator Power Level calibration procedure in Chapter 3.
ML2430A MM
PN: 10585-00003 Rev. F
2-21
2-8
ML243xa VSWR Verification Procedure
2-8
Chapter 2 — Performance Verification
ML243xa VSWR Verification Procedure
Required Equipment:
• Agilent 34401A Multimeter
• Agilent 432A Analog Power Meter
• Agilent 34420A Nano Volt / Micro Ohm Meter
• Agilent 8478B Thermistor Power Sensor
• MS2024B VNA Master
Procedure:
Make copy of the logsheet provided in (Table 2-3) to use when recording the following measurements.
Mount Resistance Measurement
1. With Agilent 432A power meter off, set the mount resistance switch to 200 ohms.
2. Connect the Multimeter between the center pin of the BNC VRF connector on the rear panel of the
Agilent 432A, see (Figure 2-26), to pin 1 on the thermistor mount end of the sensor cable. See
(Figure 2-27).
Center Pin
of VRF
Figure 2-26. Agilent 432A
2-22
PN: 10585-00003 Rev. F
ML2430A MM
Chapter 2 — Performance Verification
2-8
ML243xa VSWR Verification Procedure
Figure 2-27. Pin One of Sensor Cable
3. Record the resistance as R1. (Value should be approximately 200 ohms)
4. Set the Agilent 432A mount resistance switch to 100 ohms.
5. Record the resistance as R2. (Value should be approximately 100 ohms)
Find Input Voltage Reflection Coefficients Gamma 1 and Gamma 2 (Γ1 and Γ2)
6. Connect the thermistor to the sensor cable of the Agilent 432A.
7. Set the mount resistance to 200 ohms.
8. Connect the micro-volt meter to the Agilent 432A.
9. Power on the Agilent 432A and 34420A.
10. Connect the thermistor to a calibrated VNA and measure the VSWR at 50 MHz. Record this value as
VSWR200.
11. Calculate Γ1:
• Γ1=((VSWR_200-1))/((VSWR_200+1))
• Γ1 should be number near zero
12. Record Γ1.
13. Change mount resistance on Agilent 432A to 100 ohms and measure the VSWR at 50 MHz. Record this
value as VSWR100.
14. Calculate Γ2:
• Γ2=((VSWR100-1))/((VSWR100+1))
• Γ2 should be a number near 0.33
15. Record Γ2.
ML2430A MM
PN: 10585-00003 Rev. F
2-23
2-8
ML243xa VSWR Verification Procedure
Chapter 2 — Performance Verification
Finding V0, V1 and Vcomp for 200 Ohms
16. Connect the thermistor to the RF Calibrator of ML243xA. Ensure the RF Calibrator is off.
17. Set the Agilent 432A mount resistance to 200 ohms.
18. Set the Agilent 432A Range switch to Coarse Zero.
19. Adjust the front panel Coarse Zero control to obtain a zero meter indication.
20. Set the Agilent 432A Range switch to 1 mW.
21. Fine zero the Agilent 432A by pressing down the fine zero switch and hold for 2 seconds, then release
back to the original position.
22. Press the DCV1-2 button on the Agilent 34420A.
23. Record this reading as V0_200.
24. V0_200 should be less than 400 μV.
25. On the ML243xA, turn the RF Calibrator on.
26. Record the Agilent 34420A reading as V1_200.
27. V1_200 should be approximately 80 mV.
28. On the ML243xA, turn the RF Calibrator off.
29. Press the DCV button on the Agilent 34420A and record this value as Vcomp_200.
30. Vcomp_200 should be approximately 5 volts.
Finding V0, V1 and Vcomp for 100 Ohms
31. Set the Range on the Agilent 432A from 1 mW to 10 mW.
32. Switch the mount resistance from 200 ohms to 100 ohms.
33. Set the Range back to 1 mW.
34. Press the DCV 1-2 button on the Agilent 34420A and record the value as V0_100.
35. On the ML243xA, turn the RF Calibrator on.
36. Record the Agilent 34420A reading as V1_100.
37. On the ML243xA, turn the RF Calibrator off.
38. Press the DCV button on the micro-voltmeter and record this value as Vcomp_100.
39. Vcomp_100 should be approximately 4.3 volts.
All measurements are now recorded. Use the equations on the Test Results page to determine the VSWR of the
Anritsu RF Calibrator port.
Note: Due to the complexity of the equations, it’s a good idea to create a spreadsheet, for example MS Excel,
where the collected values can be entered and the spreadsheet will then calculate the VSWR.
2-24
PN: 10585-00003 Rev. F
ML2430A MM
Chapter 2 — Performance Verification
2-8
ML243xa VSWR Verification Procedure
Table 2-3. Test Results
Measurement
Measured Value
Expected Approximate Value
R1
200 ohms
R2
100 ohms
Γ1
0
Γ2
0.33
V0_200
<400 μV
V1_100
80 mV
Vcomp200
5V
Vo_100
<100 mV
V1_100
<100 mV
4.3 V
Vcomp100
P200
P100
M
Γs
ML2430A MM
PN: 10585-00003 Rev. F
2-25
2-8
ML243xa VSWR Verification Procedure
Chapter 2 — Performance Verification
One of the two numbers from the above equation should be a number between -1 and 1. This will be the correct
number to use in the below equation to get a VSWR value greater than 1.
Verify the calculated VSWR is less than 1.04.
2-26
PN: 10585-00003 Rev. F
ML2430A MM
Chapter 3 — Calibration Procedures
3-1
Introduction
Chapter 3 — Calibration Procedures
3-1
Introduction
This chapter details the process of calibrating an ANRITSU ML2430A Series Power Meter. This calibration
entails adjusting the Reference Calibrator's 50 MHz output frequency and 1 mW output power level.
The Power Meter is warmed up for 15 minutes and adjustments are made to the internal DC reference and the
RF calibrator.
Procedures in this section should be performed by qualified technical personnel only. These
procedures require access to internal test points and adjustment potentiometers, and care
should be taken to avoid contact with potentially hazardous voltages.
Note
3-2
Required Test Equipment
• The following test equipment is required to perform the procedures in this chapter.
• Anritsu MF2412B Frequency Counter
• Agilent 432A Analog Power Meter
• Agilent 34420A Nano Volt / Micro Ohm Meter or equivalent (Insure that the Agilent 34420A Meter is
warmed up for two hours prior to use)
• Agilent 8478B Power Sensor (The calibration data including measurement uncertainty for the Agilent
8478B must be available to obtain the reflection coefficient and effective efficiency)
• RF Cable with BNC male connection at one end and an N-type male connection at other end
• Adjustment tools (flat-head and hex screwdrivers)
Ensure all test equipment is within its calibration period and is traceable to national standards.
An example of traceable national standards is NIST or through an internationally recognized
accredited laboratory.
Note
3-3
Test Conditions
The ML2430A Series Power Meter must be operated under controlled conditions of temperature and humidity
in order to meet its specified precision and stability.
All tests should ideally be performed at a temperature of 25° C (77° F) ± 5° C and a relative humidity of less
than 75%, non-condensing.
Caution
3-4
Procedures in this and the following sections should be performed by qualified technical
personnel only. These procedures require access to internal test points and adjustment pots,
and care should be taken to avoid contact with potentially hazardous voltages.
Pre-test Setup
Some of the procedures in this chapter require removal of the instrument’s top cover to gain access to
adjustment points. With power disconnected, open the unit by loosening the six captive screws on the
underside, see (Figure 3-1) and separating the top half of the case from the base. Ensure that the front and
rear panels remain firmly in place during this operation.
ML2430A MM
PN: 10585-00003 Rev. F
3-1
3-4
Pre-test Setup
Chapter 3 — Calibration Procedures
Apply power to the unit using the AC inlet on the rear panel and verify that the meter has completed the
Power On Self Test (POST). Prior to making any precision measurements, allow the Power Meter to warm up
for a period of 15 minutes from power on. If the power supply is interrupted for any reason, allow a similar
settling period. Refer to the Main PCB drawing (Figure 3-2) for the location of test points and components.
Figure 3-1.
3-2
ML2430A Series Top Cover Removal
PN: 10585-00003 Rev. F
ML2430A MM
Chapter 3 — Calibration Procedures
Figure 3-2.
ML2430A MM
3-4
Pre-test Setup
ML2430A Series Main PCB
PN: 10585-00003 Rev. F
3-3
3-5
DC Reference
3-5
Chapter 3 — Calibration Procedures
DC Reference
To calibrate the DC Reference:
1. Connect a sensor via a 1.5m sensor cable to input A.
2. Connect the DVM between TP 113 (gnd) and TP 1 (+5.000V).
3. Enter the ML2430A Service Mode by pressing the front panel keys as follows:
• Press System
• Press-more• Press-more• Press-more• Press the blank soft key to the left of the-back-soft key.
• Press the number 0 on the numeric keypad.
• Press the blank soft key to the left of the-back-soft key.
4. Press CONTROL.
5. Press DSP CAL.
6. Press the number 1 key on the numeric keypad.
7. Press Enter.
8. Adjust pot R94 for a reading of 5.000V ±2 mV on the DVM.
3-6
Calibrator Frequency
The following procedure is used to adjust the Calibrator output frequency of FREQUENCY the ML2430A
Series Power Meter.
Equipment Required:
• Anritsu MF2412B Frequency Counter
• RF Cable with BNC male connection at one end and an N-type male connection at other end
• Adjustment tool
Note
When making adjustments to the reference calibrator output frequency, make sure that the
area where the following steps will be performed is ESD protected.
Procedure:
1. If the 50 MHz calibrator output frequency is outside the ±10 kHz limit, proceed as follows:
2. Power down and disconnect the AC power cord from the ML243xA.
3. Remove the six screws from the bottom of the ML243xA and remove the top cover.
4. Power the ML243xA on and allow 15 minutes for it to warm up.
3-4
PN: 10585-00003 Rev. F
ML2430A MM
Chapter 3 — Calibration Procedures
3-6
Calibrator Frequency
5. Adjust the inductor core L401 so the frequency counter reads 50 MHz, ±10 kHz.
Figure 3-3.
Note
ML2430A MM
L401 Adjustment
If a metal adjustment tool is used, it must be removed from the inductor core L401 before
reading the counter, as the metal tool could affect the frequency.
PN: 10585-00003 Rev. F
3-5
3-7
Calibrator Power Level
3-7
Chapter 3 — Calibration Procedures
Calibrator Power Level
The following procedure is used to adjust the Calibrator output power POWER LEVEL level of the ML2430A
Series Power Meter.
Equipment Required:
• Agilent 432A Analog Power Meter
• Agilent 34420A Nano Volt / Micro Ohm Meter
• Agilent 8478B Power Sensor
• Adjustment tool
Note
When making adjustments to the reference calibrator output power level, make sure that the
area where the following steps will be performed is ESD-protected.
Procedure:
1. If the Reference Calibrator output power level is outside of the 1 mW ±0.0015 mW limits, adjust R409 and
recalculate Pactual Upper and Pactual Lower with the new V0, V1, and Vcomp numbers using the same
equations in the previous section.
2. Continue doing the previous step until Pactual Lower are Upper and Pactual both within specification.
Figure 3-4.
Note
3-6
R409 Adjustment
If a metal adjustment tool is used, it must be removed from the varistor R409 before reading the
counter, as the metal tool could affect the frequency.
PN: 10585-00003 Rev. F
ML2430A MM
Chapter 4 — Theory Of Operation
4-1
Introduction
Chapter 4 — Theory Of Operation
4-1
Introduction
This chapter contains a general theory of operation and an operational block diagram for the ML2430A Series
Power Meter.
4-2
Product Overview
The ML2430A Series Power Meter is a light weight, portable instrument featuring high accuracy and fast
measurement speeds. The large front panel LCD provides a simultaneous two channel readout with an
available graphical display of pulse power measurements.
Measurement Channels
The ML2437A Power Meter features a single measurement channel. The ML2438A Power Meter adds an
optional second measurement channel. Each channel has a linear amplifier chain coupled to a DSP (Digital
Signal Processor) via an ADC (Analogue to Digital Converter). Each channel has a dynamic range of
+20 to –70 dBm with one sensor.
Sensors
Two types of sensors are available: diode and thermal. Diode sensors provide fast response speed and a wide
dynamic range (+20 dBm to –70 dBm for example). Thermal sensors provide high accuracy and stable averaged
readings, with a dynamic range of +20 dBm to –30 dBm.
Internal 50 MHz Reference
A high accuracy and stable 50 MHz reference is provided within the meter for convenient sensor calibration.
Battery
The optional rechargeable battery offers portable operation for up to nine hours.
Measurement Modes
Readout Mode: Power measurement is displayed digitally in dBm (dB milli-watts), dBμV (dB micro Volts),
dBmV (dB milli Volts), or W (Watts). Resolution can be set to 1, 2, or 3 decimal points.
Profile Mode: Power level is plotted against time in a graphical form. This allows measurement of power
pulses with nanosecond pulse width resolution. Triggering may be manual, external or internal. Display
scaling is available with cursor measurement.
Power vs. Time Mode: Similar to Profile mode but with wider dynamic range (+20 dBm to –70 dBm) and
longer time periods (approximately 20 seconds).
Source Sweep Mode: This feature allows the ML2430A Series Power Meter to be synchronized to an RF
source using the Horizontal ramp (to Analog Input) and Sequential Sync (Digital Input).
Ratio: When two channels are fitted, a ratio of A/B or B/A can be made.
External DC Volts: DC volts from 0-20V can be measured via a BNC connector on the rear panel. Resolution to
mV level.
ML2430A (OM, PM, MM, etc.)
PN: 10585-00003 Rev. F
4-1
4-3
4-3
General Operation
Chapter 4 — Theory Of Operation
General Operation
The ML2430A Series Power Meter operation is controlled by a Siemens 80C165 16-bit RISC processor clocked
at 20 MHz. The operating program is stored in FLASH memory which can be updated through an RS232 serial
link. Static RAM memory is provided for storage of unit set up status when no power is applied. A small
lithium battery with a 10 year life span provides power to the RAM memory. All unit functions including the
front panel keys, display, power supply, rear panel functions, signal processing and battery operation are
coordinated by the main processor.
Digital Signal Processor (DSP)
A dedicated processor is used to control all signal processing including measurement timing (triggering),
sensor interface, internal channel calibration, zeroing, averaging and communication to the main processor.
The DSP receives a digital output from the signal channel ADC via a direct link. At power on, the main
processor downloads the DSP operating program which runs a self test and confirms all hardware is
operational.
Signal Channel
There are two available signal channels, one is standard and the second optional. Both channels are
independent allowing ratio measurements. The sensor output is fed via a linear amplifier chain to the internal
ADCs. There are five amplifier ranges, the top two ranges are DC and the bottom three ranges are AC. AC
modulation (chopping) is used on the lower ranges to give measurement stability and noise immunity. The
signal channel automatically changes range as the level being measured varies. This range changing is
transparent.
4-4
Human Interface
The ML2430A Series Power Meter front panel has a large LCD unit, 240 pixels wide by 64 pixels high, used to
show measurement readouts and display soft key menus. The intensity of the display can be varied from just
visible to blooming by a contrast control menu. A display backlight is permanently on when using AC or
external DC power. Under battery power the backlight can be turned off to extend battery life. The display can
be configured to show a single channel or a dual channel readout.
The operations menus are driven by five main system keys. Each one of these keys produces a soft key menu on
the LCD which can be accessed by the four soft menu keys directly below the display.
On the left of the display is a key pad used to enter numeric data. The power meter may be switched to “stand
by” mode by the white ON/OFF key in the bottom left corner of the front panel.
4-5
GPIB Operation
The ML2430A Series Power Meter GPIB operation is provided by a fully integrated National Instruments
TNT4882 IC. Most power meter front panel functions are available by GPIB command. The Anritsu Power
Meter offers five modes of GPIB operation; ML24XXA Native mode, HP 436A emulation mode, HP 437B mode,
HP 438A mode, and ML4803 mode.
GPIB is not available when the unit is battery powered due to the high power requirement of the GPIB IC.
4-6
Printer
The ML2430A Series Power Meter is equipped with a standard parallel printer interface. Compatible printers
include the HP 340 Deskjet (and most other 300 and 500 Series HP Deskjet printers) and the Canon BJC80.
Many desk top Centronics printers are also compatible. Data print outs are available in all measurement
modes.
4-2
PN: 10585-00003 Rev. F
ML2430A MM
Chapter 4 — Theory Of Operation
4-7
4-7
Case Construction
Case Construction
The ML2430A Series Power Meter has a clam shell case structure. The top and bottom covers are of a rugged
molded plastic construction. The top case has raised slots which align with the feet of the bottom case to allow
unit stacking. The front and rear panels are fitted into slots in the top and bottom cases. The bottom case
features a battery compartment with a cover plate secured with two quarter-turn fasteners.
Front Panel
The front panel assembly is made up of a conductive contact rubber key pad sandwiched between the molded
plastic front panel and the LCD PCB assembly. Depending upon the option configuration selected, the front
panel may contain the signal channel input connectors and the RF calibrator reference output. Connection to
the main PCB is by ribbon cable.
Rear Panel
The rear panel is made from sheet aluminum and contains the ground stud, line power input module, printer
output connector, RS232 I/O connector, GPIB connector, four BNC I/O connectors, and the external DC Input
connector. The rear panel is attached to the main PCB and fits into slots in the top and bottom cases.
Handle and Rack Mount
An optional handle can be fitted using the two circular mounting points on each side of the unit. A special top
and bottom case are available to provide rack mounting capability.
4-8
Internal Construction
The ML2430A Series Power Meter contains the main PCB, the power supply unit, and the battery
compartment.
Main PCB
The main PCB is thicker than normally required in order to add strength to the unit construction. The
multi-layer PC board is 95% surface mount with some components through-hole mounted. One common PCB is
used for the ML2438A (dual channel) and ML2437A (single channel) units. For the ML2437A, components are
omitted from the PCB. The board is mounted on six pillars in the bottom case and secured by one centrally
located screw.
Power Supply
The power supply unit is mounted on top of the main PCB on four nylon standoffs. Connection to the main PCB
is by two 20-pin connectors. Line power is fed through an input filter module mounted on the rear panel. The
heat sink of the PSU has thermal conductive material that contacts a heat spreader mounted on the underside
of the top case.
Battery Compartment
In the lower case is a compartment where the optional battery is installed. The compartment has an access
panel secured by two quarter-turn fasteners. The battery connects to five contacts mounted in the lower case,
which in turn make contact with five spring connectors mounted on the underside of the main PCB. The
battery is firmly secured in the compartment by foam pads.
ML2430A (OM, PM, MM, etc.)
PN: 10585-00003 Rev. F
4-3
4-9
Front Panel
4-9
Chapter 4 — Theory Of Operation
Front Panel
This section describes the ML2430A Series Power Meter front panel functional description.
LCD
The large front panel Liquid Crystal Display presents measurements and operations menus. Ninety percent of
the top section of the display is for measurement readouts. The bottom 10% is a single text line for the menus.
System Keys
The operation of the ML2430A Series Power Meter is controlled by five system keys: Sensor, Channel, Trigger,
System, and Cal/Zero. Each of these keys generates a soft key menu on the bottom line of the display.
Soft Keys
The four soft keys either apply functions directly, or access second or third level menus. Each key is related to
the text displayed directly above it.
Data Entry Key Pad
The data entry key pad features the numbers 0 through 9, +/-, decimal point and clear keys. These keys are
used to enter numeric data, such as a sensor cal factor frequency.
ON/OFF Key
The soft ON/OFF key is used to turn the unit on from standby mode. The switch is a software control switch
which indicates to the PSU control circuitry what state the unit should be in. The power meter is in standby
mode when either AC line power or external DC is applied.
4-10
Front Panel Connectors
This section describes the ML2430A Series Power Meter front panel connectors.
Signal Channel Inputs
On standard model ML2430A Series Power Meters, the signal channel A and B input connectors are mounted
on the front panel. The connectors are 12-pin Hirose type. A sensor cable, provided with the meter, is used to
connect an Anritsu power sensor to the signal channel. The connectors are snap push fit and require the outer
body to be pulled to enable removal. The A and B signal channel connectors may optionally be fitted on the rear
panel. Refer to (“Models, Options, And Accessories” on page 1-2).
RF Reference Calibrator
The internal 50 MHz, 0 dBm reference provides a high stability, high accuracy level for signal channel
calibration. The output connector is a flange mounted female ‘N’ type. With the power sensor connected to the
calibrator output, a “Zero/Cal” will automatically zero the signal channel and then perform a 0 dBm
calibration. All measurements are then referenced to the 0 dBm level.
4-11
Rear Panel Connectors
This section describes the ML2430A Series Power Meter rear panel connectors.
Line Power Input
The AC line power input module is mounted on the rear panel and the supplied line power cable connects to it.
The module contains filtering elements to ensure immunity to external noise and reduce emissions. The
ML2430A Series Power Meter automatically senses the line level and internally configures itself accordingly.
The specified line power requirement is 85-264V AC, 50-440Hz. An internally mounted 2A slow blow fuse
provides fault protection. Note this fuse can NOT be changed by the operator.
4-4
PN: 10585-00003 Rev. F
ML2430A MM
Chapter 4 — Theory Of Operation
4-12
Power Supply Operation
External DC Input
An External DC jack connector is mounted on the main PCB and is accessed via a hole in the rear panel. The
specified External DC level is +12 to +24V. Greater than +21V is required to charge the internal battery. An
internally mounted diode protects against reverse connection of the supply, and a 3A slow blow fuse provides
fault protection. Damage may occur if the input voltage level exceeds +28V. Note this fuse can NOT be changed
by the operator.
Ground Stud
A ground stud provides a ground for External DC operation or an additional ground connection.
RS232 Port
A PC standard 9-pin D connector provides connection to the serial port. The serial port can be used to update
the power meter operating firmware, and to control operation of the power meter from a PC or terminal. The
hardware handshake lines RTS and CTS are used to control the flow of data. Serial control and data output
commands are entered using the same format as the GPIB interface.
GPIB
Standard General Purpose Interface Bus connector used to connect through GPIB to other test equipment and
a host computer. The ML2430A Series is compatible with IEEE-488.1/2 requirements. Refer to the ML2430A
Series Power Meter Operation Manual for information on using GPIB.
BNC I/O Ports
There are four BNC connectors mounted on the rear panel. Two are multi function outputs and two are inputs.
Printer Port
A PC standard 25-pin D connector provides an interface to a standard parallel printer. Compatible printers
include the HP 340 Deskjet and most other 300 and 500 Series HP Deskjet printers, and the Canon BJC80.
Many desk top Centronics printers are also compatible. Full data print outs are available in all measurement
modes.
4-12
Power Supply Operation
This section describes the ML2430A Series Power Meter power supply operation.
Auto Sequencing
The power supply automatically determines what types of power are available and then configures itself to use
the most suitable. This sensing is fully automatic and requires no action by the operator. If more than one type
of power is connected and the one being used is interrupted, the PSU will automatically switch to the next
available power source. Early power meters will reset and restart when switching from line or external DC to
battery power. If the power is restored the PSU automatically stops using the battery.
Supply Priority
The power meter will operate from supplied power in the following order of priority, AC line power, external
DC, and battery power.
ML2430A (OM, PM, MM, etc.)
PN: 10585-00003 Rev. F
4-5
4-13
Battery Operation
Chapter 4 — Theory Of Operation
On Off Control
There are three ways to control the operation of the ML2430A Series Power Meter. To turn the power meter on
or off.
• Connect or remove the AC line power cord, external DC power cord, or the battery.
• Use the soft ON/OFF key on the front panel of the unit.
• Use the line power switch fitted on the early model power meter rear panels.
4-13
Battery Operation
This section describes the ML2430A Series Power Meter battery operation.
Battery
The battery used in the ML2430A Series Power Meter is the 3000 mAh Duracell DR36S or 3500 mAh
Energizer NJ1020. The battery is intelligent and contains information on charge status.
Operating Time
The ML2430A Series Power Meter can operate for a maximum of nine hours on battery power with the battery
fully charged to at least 90% of maximum capacity. The display backlight must be turned off to achieve this
operating time.
Intelligent Operation
The battery retains a charge and discharge history which ensures correct charging and discharging is
performed. This is vital to ensure the maximum capacity and life of the battery is retained. The intelligent link
also allows current battery status data to be available at the operators request.
Fast Charge
The battery can be charged in the power meter in approximately two hours. The charge control is accessed
from a front panel menu. The unit can not be operated while the unit is charging. An external battery charger
is available as an option if required.
4-6
PN: 10585-00003 Rev. F
ML2430A MM
Chapter 4 — Theory Of Operation
4-13
Battery Operation
Battery Life Indicator
When operating under battery power, a battery charge indicator is displayed on the front panel LCD. If the
battery charge falls too low, the unit will automatically power down.
Figure 4-1.
ML2430A Series Power Meter Functional Block Diagram
ML2430A (OM, PM, MM, etc.)
PN: 10585-00003 Rev. F
4-7
4-13
4-8
Battery Operation
Chapter 4 — Theory Of Operation
PN: 10585-00003 Rev. F
ML2430A MM
Chapter 5 — Firmware Updates
5-1
Introduction
Chapter 5 — Firmware Updates
5-1
Introduction
The ML2430A Series Power Meters use a Flash EPROM to store the operating program. New versions of the
operating program can be installed using a personal computer connected through the Power Meter serial
interface. Firmware updates are available on disk (part number 2300-233) from your nearest ANRITSU
Customer Service Center. This chapter describes the use of the Code Loader Program and the configuration of
the required RS232 cable.
5-2
Code Loader
The Power Meter Code Loader Program is a DOS based program used to PROGRAM transfer updated
firmware into the Power Meter EPROM. The Power Meter Code Loader program requires about 1 Mb of hard
drive space.
Installation
1. On the personal computer hard drive, create a directory to contain the Code Loader Program files
(ML2430A for example).
2. Copy the BOOT.EXE file from the Code Loader Program floppy disk into this directory.
3. From within the designated directory, type: BOOT.
This will unzip the Code Loader Program files into the above designated directory. There will be seven files,
including the original BOOT.EXE.
The installation on the personal computer is now complete.
Running the Program
1. Connect the personal computer serial COM port to the ML2430A Series Program Power Meter back panel
RS232 Serial Connector, using the ANRITSU Serial Interface cable (PN: B41323) or equivalent (“Serial
Interface Cable” on page 5-4).
2. Apply power to the Power Meter and allow it to complete the POST. Power sensors need not be connected
at this time.
3. On the Power Meter front panel, press:
• System
• -more• -more• -more4. Press the blank softkey just to the left of the-back-softkey.
5. Press the 0 key on the numeric keypad.
6. Press the blank softkey just to the left of the-back-softkey.
7. Press the softkey labeled BOOT LOAD.
ML2430A MM
PN: 10585-00003 Rev. F
5-1
5-2
Code Loader
Chapter 5 — Firmware Updates
The LCD will display:
Caution
Disable Windows screen savers before attempting to run the code loader program. Do not
interrupt the down loading process as corruption of the EPROM program may result. Refer
section (“Bootload Mode” on page 5-3).
8. From a DOS Prompt on the computer select the drive and directory where the Code Loader Program was
installed.
9. Type:
BOOTLOAD n QUART_FL.
Where n is the PC COM port used (usually 1 or 2). Note the space before and after the COM port
number.
The program will proceed to download the new operating system to the Power Meter.
The program takes about eight minutes to complete the update, during which time the Power Meter LCD
screen will be dark.
When the down loading is complete, the Power Meter will reboot and be ready for normal use.
10. Disconnect the serial interface cable from the computer and the Power Meter.
11. Verify that the new firmware version was successfully installed by pressing:
• System
• -more• -more• -more• Identity
The new firmware version will be displayed on the front panel.
5-2
PN: 10585-00003 Rev. F
ML2430A MM
Chapter 5 — Firmware Updates
5-3
5-3
Bootload Mode
Bootload Mode
If power is lost during programming, or the Power Meter EPROM has been corrupted in some other way, the
Power Meter can be forced into a special “bootload” mode and reprogrammed.
Caution
The procedure in this section should be performed by qualified technical personnel only. This
procedure requires access to internal components, and care should be taken to avoid contact
with potentially hazardous voltages.
Refer to the Main PCB drawing (Figure 3-2 on page 3-3), for the location of test points and components.
1. With AC power disconnected, open the unit by loosening the six captive screws on the underside
(Figure 3-1 on page 3-2) and separate the top half of the case from the base. Ensure that the front and
rear panels remain firmly in place during this step.
2. Remove the optional Ni-Mh battery, if so equipped (Refer to the ML2430A Series Power Meter Operation
Manual, PN 10585-00001).
3. Connect the personal computer serial COM port to the ML2430A Series Power Meter back panel RS232
Serial Connector, using the ANRITSU Serial Interface cable (ANRITSU PN B41323) or equivalent (see
section 5-4).
4. Fit a jumper (ANRITSU PN 551-577) to J501 (BOOT) located to the right of the power supply on the main
PCB board. This will force the Power Meter into the Bootload Mode when power is applied.
5. Apply AC power to the Power Meter.
6. Go to Step 8 of the Running the Program instructions (“Running the Program” on page 5-1) and load the
program as described.
7. Remove power from the meter and remove the jumper.
8. Replace the top cover, taking care not to over tighten the captive screws.
9. Replace the battery (if so equipped).
ML2430A MM
PN: 10585-00003 Rev. F
5-3
5-4
5-4
Serial Interface Cable
Chapter 5 — Firmware Updates
Serial Interface Cable
The 9-pin null-modem serial interface cable necessary for upgrading the ML2430A Series Power Meter
firmware is available from the AN-RITSU Customer Service department. Order part number B41323.
The cable can also be assembled from the following readily available components:
• 2 meters of 8-conductor cable (ANRITSU PN: 800-365)
• 2 each, 9-pin female D-connectors
Assemble the cable according to the following connection diagram and description:
Figure 5-1.
Connection Diagram
Description:
Connector 1, pin 2 connected to pin 3 on connector 2
Connector 1, pin 3 connected to pin 2 on connector 2
Connector 1, pin 4 connected to pin 6 on connector 2
Connector 1, pin 5 connected to pin 5 on connector 2
Connector 1, pin 6 connected to pin 4 on connector 2
Connector 1, pin 7 connected to pin 8 on connector 2
Connector 1, pin 8 connected to pin 7 on connector 2
Connector 2, pin 5 connected to the cable shield
5-4
PN: 10585-00003 Rev. F
ML2430A MM
Chapter 6 — Troubleshooting
6-1
Introduction
Chapter 6 — Troubleshooting
6-1
Introduction
It is strongly recommend that ML2430A Series Power Meter repair be performed by qualified technical
personnel only. The preferred ML2430A Series Power Meter service policy is the unit exchange program
(“Service Policy” on page 1-2). This policy ensures minimum down time for the customer. Only when the unit
exchange method is not possible should the fault finding and repair work detailed below be used.
Refer to(“Spare Parts Listing” on page 1-3), for a listing of spare parts mentioned in this chapter. Contact your
nearest Anritsu Customer Service or Sales Center for price and availability information. See(Chapter 7) for
specific module removal and replacement instructions.
The procedures in this chapter suggest the most likely remedies in a logical order of severity. It is best to follow
the steps as presented in order to properly isolate the fault. Refer to the ML2430A Series Power Meter
Operation Manual (10585-00001) for the specific operating instructions referred to in these procedures.
Caution
6-2
The procedures in this chapter should be performed by qualified technical personnel only. These
procedures may require access to internal components, and care should be taken to avoid
contact with potentially hazardous voltages.
Front Panel
The following procedures refer to possible faults with the power meter front panel.
Fault
No measurement display.
When External DC or line power is applied, no measurement display is seen.
Recommended Action
1. Press the front panel ON/OFF key. If the unit now starts up, but did not Action when line power was
applied, replace the PSU.
2. If the unit has recently been reprogrammed, remove the top cover (Figure 3-1 on page 3-2) and confirm
that the jumper at J501 has been removed. If not, remove the jumper and reapply power.
3. If the unit still does not start up, remove the top cover and measure the voltage on the PSU connector
PL1, pins 15 (+) to 14 (gnd). Confirm a reading of +5.25V, ± 160 mV. If no voltage is present, replace the
PSU.
4. If the +5V is present, reprogram the power meter using the bootload method described in (“Bootload
Mode” on page 5-3).
5. If the unit still fails to start, replace the front panel assembly.
6. If the unit still fails to start, replace the main PCB.
Fault
Front Panel display is working, but the buttons are not working.
The front panel LCD operates normally during start up and displays a normal measurement display, but one
or all of the front panel buttons do not work.
ML2430A MM
PN: 10585-00003 Rev. F
6-1
6-2
Front Panel
Chapter 6 — Troubleshooting
Recommended Action
1. Reprogram the power meter using the bootload method described in sectio in (“Bootload Mode”
on page 5-3).
2. Replace the front panel assembly.
3. Replace the main PCB assembly.
Fault
Measurement problems with Input A or Input B.
Problems are encountered when calibrating, zeroing, or making power measurements with the Power Meter on
Input A or B.
Recommended Action
1. Remove the top cover and confirm the two flexible cables are correctly seated in J1 and J2 on the right
hand side of the main PCB. Note that to re-seat these connectors correctly the main PCB must be
removed from the lower case.
2. Confirm that the flexible cable has not become disconnected from the front panel Input A and B
connectors.
3. If the display indicates Sensor A or B are not fitted when sensors are connected to the front panel Inputs
A or B, replace the front panel assembly including the flexible signal channel cable.
4. Connect the sensor to another 0 dBm, 50 MHz source and verify proper operation. If both inputs A and B
perform a sensor zero, but will not perform a 0 dBm calibration, see Fault: RF Calibrator below.
5. For all other measurement problems with Input A and B, replace the front panel assembly.
6. If replacing the front panel assembly does not fix the problem, replace the main PCB assembly.
Fault
RF Calibrator
The frequency or power level is out of specification or the RF level is not present at all.
Recommended Action
1. If the RF Calibrator is ON, yet no power is present at the Calibrator connector, replace the N-type
connector cable assembly from the main PCB to the front panel.
2. Calibrate the RF Reference and output power as per sections (“Calibrator Frequency” on page 3-4) and
(“Calibrator Power Level” on page 3-6). If calibration is not possible, replace the main PCB.
6-2
PN: 10585-00003 Rev. F
ML2430A MM
Chapter 6 — Troubleshooting
6-3
6-3
Rear Panel
Rear Panel
The following procedures refer to possible faults with the power meter rear panel.
Fault
The power meter does not print.
When a compatible printer is connected and a print is started, no printout is generated or an incorrect printout
is made.
Recommended Action
1. Reset the unit back to factory default and try again.
2. Replace the main PCB.
Fault
The power meter will not load firmware. It is not possible to load a firmware update or bootload firmware into
the unit.
Recommended Action
1. Check that the PC configuration is correct for firmware transfer. Refer to (Chapter 5, “Firmware
Updates”).
2. Confirm that the serial cable is correctly wired and not damaged. Refer to (“Serial Interface Cable”
on page 5-4).
3. Replace the main PCB.
Fault
No GPIB communication When connected to a compatible GPIB controller no communication occurs.
Recommended Action
1. Reset the unit back to factory defaults and try again.
2. Replace the main PCB.
Fault
Incorrect operation of the rear panel BNC Inputs or Outputs One or more of the BNC connector fails to operate
correctly.
Recommended Action
1. Visually inspect all of the BNC connectors. If any physical damage is ob-Action served, replace the main
PCB.
2. If there is no physical damage, yet the BNC Inputs or Outputs do not work correctly, replace the main
PCB.
ML2430A MM
PN: 10585-00003 Rev. F
6-3
6-4
Battery
6-4
Chapter 6 — Troubleshooting
Battery
The following procedures refer to possible faults with the optional power meter battery.
Fault
Battery incorrectly detected or not detected, battery will not charge, or battery operating time is too short.
The unit will not power up when a battery is fitted. The battery status is not correct, for example, the battery
type is not shown. When a fully discharged battery is installed, it will not charge.
Recommended Action
1. Confirm the battery being used has some charge by press the charge indicator on the battery. If no charge
is shown, replace the battery.
2. If the battery is charged and still the unit will not run when the battery is installed, confirm that the
battery contacts on the lower case are mated correctly with the PCB connector. To do this, remove the
top cover and lift the left hand corner of the front panel up slightly. Shine a bright light down into the
case and verify that the contacts are mated correctly.
3. If the battery status is not shown on the front panel display, but the unit does operate with the battery,
there is a failure of the intelligent link to the battery. Confirm that the battery contacts on the lower case
are mated correctly with the PCB connector, as described above.
4. If the battery case connections are correct and the battery is charged, but the unit still does not operate
correctly, replace the PSU.
5. If the battery case connections are correct, the battery is charged, and the PSU has been replaced, but the
unit still does not operate correctly, replace the main PCB.
6. If a battery will not charge, replace the battery, PSU, or main PCB in that order.
7. If the battery operating time is too short, confirm that after charging the battery status indicates at least
80% charged. If not, discharge the battery and recharge the battery fully five times. If the battery does
not recover after this conditioning process, replace it. To extend battery operation time, turn the
backlight off during use.
6-4
PN: 10585-00003 Rev. F
ML2430A MM
Chapter 6 — Troubleshooting
6-5
6-5
General Faults
General Faults
The following procedures refer to general system faults.
Fault
The power meter loses non-volatile memory.
The power meter loses all non-volatile memory (stored setups, cal factors, cal factor tables, etc.) when powered
off for more than two minutes.
Recommended Action
1. Confirm the jumper is fitted to J500 on the two pins nearest the on-board Action Lithium battery (the
RUN position, as silkscreened on the PCB).
2. Measure the DC voltage of the Lithium battery mounted to the center of the main PCB. This battery
should measure 3.7V. If the voltage is less than 3.5V, replace the battery or the main PCB.
Fault
The buzzer does not sound.
The noise generator does not make any sound or the sound is too low.
Recommended Action
1. Reset the unit to the factory defaults and try again.
2. Replace the main PCB.
ML2430A MM
PN: 10585-00003 Rev. F
6-5
6-5
6-6
General Faults
Chapter 6 — Troubleshooting
PN: 10585-00003 Rev. F
ML2430A MM
Chapter 7 — Removal and Replacement Procedures
7-1
Introduction
Chapter 7 — Removal and Replacement
Procedures
7-1
Introduction
It is strongly recommend that ML2430A Series Power Meter repair be performed by qualified technical
personnel only. The preferred ML2430A Series Power Meter service policy is the unit exchange program
(“Service Policy” on page 1-2), as this policy ensures minimum down time for the customer. Only when the unit
exchange method is not possible should the removal and replacement procedures described in this chapter be
used.
Always verify the need for a component replacement using the troubleshooting guidelines presented in
(Chapter 6, “Troubleshooting”). Repair or replacement in the field to a level beyond the subassemblies listed in
this chapter is not recommended.
Refer to (“Spare Parts Listing” on page 1-3), for a listing of spare parts mentioned in this chapter. Contact your
nearest Anritsu Customer Service or Sales Center (www.anritsu.com) for price and availability information.
Caution
7-2
The procedures in this chapter should be performed by qualified technical personnel only. These
procedures may require access to internal components, and care should be taken to avoid
contact with potentially hazardous voltages or damage from static electricity.
Front Panel
The ML2430A Series Power Meter front panel removal instructions will vary depending upon the various
connector options installed, (“Models, Options, And Accessories” on page 1-2). Complete only those steps that
apply to the specific unit under repair.
Tools Required
• Phillips screwdriver
• 3/16. nut driver
Procedure
1. Remove the AC or DC power cord, and the battery if fitted.
2. Remove the top cover (Figure 3-1 on page 3-2).
3. Disconnect the Display Panel ribbon cable from J510 on the main PCB.
4. Disconnect the Sensor Input A flex cable from J1 on the main PCB.
5. Disconnect the Sensor Input B flex cable from J2 on the main PCB.
ML2430A MM
PN: 10585-00003 Rev. F
7-1
7-3
Power Supply
Chapter 7 — Removal and Replacement Procedures
6. Disconnect the RF Calibrator cable assembly from J400 on the main PCB.
Display Panel
Ribbon Cable
RF Calibrator
Connector J400
Sensor Input A
Connector J1
Sensor Input B
Connector J2
Figure 7-1.
Main Motherboard
7. Disconnect the green/yellow ground wire from J607 on the main PCB.
Rear Panel
Ground Stud
J607
Figure 7-2.
Front Panel Ground Wire Connection to Rear Panel Ground Stud
8. Gently pull straight up on the front panel assembly and remove. Take care to pull the ground wire free of
the back panel and under the main PCB.
Replacement is the opposite of removal.
7-3
Power Supply
The PSU is mounted on top of the main PCB on four nylon standoffs. Connection to the main PCB is by two
20-pin connectors.
Tools Required
• Phillips screwdriver
7-2
PN: 10585-00003 Rev. F
ML2430A MM
Chapter 7 — Removal and Replacement Procedures
7-4
Main Pcb
Procedure
1. Remove the AC or DC power cord, and the battery if fitted.
2. Remove the top cover (Figure 3-1 on page 3-2).
3. Disconnect the BLUE and BROWN wires connecting the AC input module to the PSU.
Blue Wire
Brown Wire
Figure 7-3.
4. Remove the four Phillips screws and nylon washers securing the PSU to the Main PCB.
5. Gently lift up on the PSU to disengage the through board connector pins at PL1 and PL2. Take care not to
damage the pins.
6. Angle the PSU so as to pull it up and away from the rear panel and remove.
Replacement is the opposite of removal.
7-4
Main Pcb
The main PCB is mounted on six pillars in the bottom case and secured by one centrally located screw.
Removal of the ML2430A Series Power Meter main PCB requires removal of the PSU. The front and rear
panels can be removed in concert with the main PCB, and detached after the assembly is clear of the case.
Tools Required
• Phillips screwdriver
Removal Procedure
1. Remove the AC or DC power cord, and the battery if fitted.
2. Remove the top cover (Figure 3-1 on page 3-2).
3. Remove the PSU (Figure 7-3).
ML2430A MM
PN: 10585-00003 Rev. F
7-3
7-5
Rear Panel
Chapter 7 — Removal and Replacement Procedures
4. Remove the Phillips screw and nylon washer that secures the main PCB to the bottom case.
Main PCB
Mounting Screw
Figure 7-4.
Main PCB Mounting Screw
5. Carefully lift the main PCB, with front and rear panels attached, straight up and clear of the bottom case.
6. Remove the front panel (“Front Panel” on page 7-1) and rear panel (“Rear Panel” on page 7-4) as
required.
Replacement Procedure
1. Install the front panel (“Front Panel” on page 7-1) and rear panel (“Rear Panel” on page 7-4) to the
Procedure main PCB.
2. Carefully lift the assembly and position the front panel into the case.
3. Lower the main PCB onto the positioning pillars in the bottom case.
Note
The battery spring connectors on the underside of the main PCB must mate correctly with the
connectors in the bottom case. Confirm that the battery connectors are correctly aligned by half
lifting the front panel out on the left hand side of the bottom case. Shine a light down into the
lower case and verify that the battery contacts fit into the main PCB connectors. Correct
alignment is most easily achieved if the ‘front’ mounting pillars are correctly engaged first.
4. Fully lower the PCB and ensure that the it fits onto all six mounting pillars and that the rear panel is
correctly positioned. The mounting pillars should be level with the top surface of the PCB. Install the
mounting screw with nylon washer in the center of the PCB and torque to 27 CNm (2.39 in/lbs).
5. Replace the PSU (“Power Supply” on page 7-2).
6. Replace the top cover (Figure 3-1 on page 3-2).
7-5
Rear Panel
Removal of the ML2430A Series Power Meter rear panel first requires removal of the PSU and the main PCB.
The rear panel can them be detached from the main PCB.
7-4
PN: 10585-00003 Rev. F
ML2430A MM
Chapter 7 — Removal and Replacement Procedures
7-5
Rear Panel
The ML2430A Series Power Meter rear panel removal instructions will vary depending upon the various
connector options installed (“Models, Options, And Accessories” on page 1-2). Complete only those steps that
apply to the specific unit under repair.
Tools Required
• Phillips screwdriver
• Slotted screwdriver
• 3/16. nut driver
• 9/16. deep socket
Procedure
1. Remove the AC or DC power cord, and the battery if fitted.
2. Remove the top cover (Figure 3-1 on page 3-2).
3. Remove the PSU (“Power Supply” on page 7-2).
4. Remove the main PCB with the front and rear panels attached (“Main Pcb” on page 7-3).
5. Disconnect the rear panel Sensor Input A flex cable from J1 on the main PCB.
6. Disconnect the rear panel Sensor Input B flex cable from J2 on the main PCB.
7. Disconnect the rear panel RF Calibrator cable assembly from J400 on the main PCB.
8. On the inside of the rear panel, remove the front panel and AC input module ground wires (green/yellow)
from the ground stud.
9. Remove the BNC connector nuts using the 9/16. deep socket.
10. Remove the jack screws from the RS232, parallel printer, and GPIB connectors. Retain all hardware for
reuse.
11. Remove the rear panel.
12. Remove the AC input module, if necessary.
13. Replacement is the opposite of removal.
ML2430A MM
PN: 10585-00003 Rev. F
7-5
7-5
7-6
Rear Panel
Chapter 7 — Removal and Replacement Procedures
PN: 10585-00003 Rev. F
ML2430A MM
Chapter 8 — Service Mode
8-1
Introduction
Chapter 8 — Service Mode
8-1
Introduction
It is strongly recommend that ML2430A Series Power Meter service be performed by qualified technical
personnel only. The preferred ML2430A Series Power Meter service policy is the unit exchange program
(“Service Policy” on page 1-2), as this policy ensures minimum down time for the customer.
This chapter describes the use of the Service Mode menus and GPIB commands.
8-2
Accessing Service Mode
The service mode is accessed through the System front panel key, using the SERVICE MODE following key
press sequence:
1. On the Power Meter front panel, press:
• System
• -more• -more• -more2. Press the blank softkey just to the left of the-back-softkey.
3. Press the 0 key on the numeric keypad.
4. Press the blank softkey just to the left of the-back-softkey.
The service menu will be displayed as shown below:
Figure 8-1.
Sensor Service Mode
The SENSOR service mode is detailed in the following section of this chapter. BOOTLOAD mode is covered in
(Chapter 5), and the CONTROL mode is used in manufacturing and not required by service personnel.
ML2430A MM
PN: 10585-00003 Rev. F
8-1
8-3
Sensor Mode
8-3
Chapter 8 — Service Mode
Sensor Mode
Pressing the SENSOR softkey selection will bring up the Service sensor SERVICE MODE menu:
Note
Figure 8-2.
A single channel meter (ML2437A) will only show the Sensor A information.
Service Sensor Password
Entering the Password
The example display above shows an ML2438A (dual channel) meter with an MA2472A power sensor
connected to input A, and no sensor connected to input B. A single channel meter (ML2437A) will only show
the Sensor A information.
The sensor serial number and other parameters are protected by a password. The default password is “1234.”
To enter the password:
1. Select the PASSWORD softkey.
2. Enter the current numeric password.
3. Press the PASSWORD softkey again.
8-2
PN: 10585-00003 Rev. F
ML2430A MM
Chapter 8 — Service Mode
8-3
Sensor Mode
This will bring up the Service sensor menu with the EDIT A, EDIT B, and EDIT PASSWD options. Pressing
the-more-key will bring up the FACTOR A, FACTOR B, PRINT A, and PRINT B options.
Figure 8-3.
Service Sensor Edit Menu
Changing the Password
To edit the password:
1. Select EDIT PASSWD.
Note
The password will not be reset when a RESET or FACTORY reset is selected from the front
panel System menu, or through the GPIB commands *RST or FRST.
2. Enter the old password and press Enter.
3. Enter the new password (1 to 4 digits) and press Enter.
4. Enter the new password again to confirm and press Enter.
The CLR key on the numeric keypad will clear the current entry. The Abort softkey will abort the password
changing process and exit this menu.
Sensor Serial Number
To edit the sensor serial number:
• Select EDIT A (or EDIT B if appropriate).
Enter the new sensor serial number using the front panel numeric keypad. Press Delete to delete entries,
Enter to accept the new serial number, or Cancel to quit without changing the sensor serial number.
When Enter is pressed to accept the new serial number, a warning message is displayed to remind the user not
to remove the sensor while the serial number is being saved. Ignoring this message and removing the sensor
while programming could corrupt the sensor data.
Cal Factor Edit Menu
Pressing the-more-softkey will bring up the FACTOR A (or FACTOR B) softkeys. With this selection, cal
factors, but not frequencies, can be changed in the factory cal factor tables stored in the sensor EEPROM. To
edit the factory cal factor tables:
ML2430A MM
PN: 10585-00003 Rev. F
8-3
8-4
GPIB Service
Chapter 8 — Service Mode
1. Select the FACTOR A (or FACTOR B) softkey.
2. Use the down and up softkeys to select the frequency/factor to change. The current selection is marked by
the >>.
3. Press the CHANGE softkey.
4. Use the numeric keypad to enter the new cal factor value.
5. Select dB or % as appropriate.
6. Use the down and up softkeys to select the next cal factor to change, or select the-exit-softkey if finished.
7. Select the SAVE softkey to save the changes to the sensor EEPROM, or select the DISCARD softkey to
discard the changes and return to the Service sensor menu. Press the CANCEL softkey to return to the
cal factor edit menu.
Printing the EEPROM data
Pressing the-more-softkey again will bring up the PRINT A (or PRINT B) softkeys. Selecting one of these
softkeys will print the first 2048 words of data from the selected sensor EEPROM to the currently selected
attached printer.
8-4
GPIB Service
The following GPIB service commands can be used to change or save factory COMMANDS cal factor data, and
to output the instrument serial number history.
CFFCHG
Change factory cal factor values.
Syntax:
CFFCHG <password>,<sensor>,<frequency>[suffix],<cal factor>,<units>
password: Password for the Service mode sensor edit control
sensor: ‘A’ or ‘B’
frequency: A Factory table frequency entry.
suffix: ‘MHz’ or ‘GHz’
cal factor: The new cal factor value for the factory frequency entry
units: ‘%’ or ‘DB’
Remarks:
This command will change the cal factor value for a frequency entry in the factory cal factor table.
Warning
Cal factors, once entered, will be available for use by the DSP. They will NOT be saved to the
sensor though, until the save command CFFSAV is executed. If the sensor is changed or power
is lost before saving, then all changes since the last save will be lost.
CFFSAV
Save the changed factory cal factor table
Syntax:
CFFSAV <password>,<sensor>
8-4
PN: 10585-00003 Rev. F
ML2430A MM
Chapter 8 — Service Mode
8-4
GPIB Service
password:Password for the Service mode sensor edit control.
sensor:AorB
Remarks:
This command saves the changed factory cal factor table to the sensor EEPROM.
SERHIST
Outputs the serial number history
Syntax:
SERHIST
Remarks:
This command returns the instrument serial number history data in a binary format.
Response:
SERHIST #3272,<first ever serial number><serial numbers>...
All serial numbers are terminated with a null character and padded with 0xFF to 16 characters. All unused
serial number positions are filled with 0xFF. The last valid serial number in the list is the current serial
number.
ML2430A MM
PN: 10585-00003 Rev. F
8-5
8-4
8-6
GPIB Service
Chapter 8 — Service Mode
PN: 10585-00003 Rev. F
ML2430A MM
Appendix A — Connector Care and Handling
A-1
A-1 Introduction
This appendix provides information on the proper care and handling of RF sensor connectors.
A-2
Connector Care And Handling
ANRITSU Power Meters are high-quality, precision laboratory device and should receive the care and respect
normally afforded such devises. Follow the precautions listed below when handling or connecting these devices.
Complying with these precautions will guarantee longer component life and less equipment downtime due to
connector or device failure. Also, such compliance will ensure that Power Meter failures are not due to misuse
or abuse—two failure modes not covered under the ANRITSU warranty.
Beware of Destructive Pin Depth of Mating Connectors
Based on RF components returned for repair, destructive pin depth of mating connectors is the major cause of
failure in the field. When a RF Mating component connector is mated with a connector having a destructive pin
depth, damage will usually occur to the RF component connector. A destructive pin depth is one that is too long
in respect to the reference plane of the connector (Figure A-1).
Figure A-1.
ML2430A MM
N Connector Pin Depth Definition
PN: 10585-00003 Rev. F
A-1
A-2
Connector Care And Handling
Appendix A — Connector Care and Handling
The center pin of a precision RF component connector has a precision tolerance measured in mils (1/1000 inch).
The mating connectors of various RF components may not be precision types. Consequently, the center pins of
these devices may not have the proper depth. The pin depth of DUT connectors should be measured to assure
compatibility before attempting to mate them with Power Meter or sensor connectors. An ANRITSU Pin Depth
Gauge (Figure A-2), or equivalent, can be used for this purpose.
Figure A-2.
Pin Depth Gauge
If the measured connector is out of tolerance in the “+” region of the outer scale, the center pin is too long
(Table A-1). Mating under this condition will likely damage the precision RF component connector. If the test
device connector measures out of tolerance in the “–” region, the center pin is too short. This should not cause
damage, but it will result in a poor connection and a consequent degradation in performance.
Table A-1. Allowable Mating Connector Pin Depth
Testy Port Connector Type
Pin Depth (Inches)
N-Male
0.207 –0.000 (tolerance +0.003)
K-Male,
+0.000
K-Female
–0.002
V-Male,
+0.000
V-Female
–0.002
Pin Depth Gauge Reading
0.207 +0.000 (tolerance –0.003)
Same as Pin Depth
Avoid Over-Torquing Connectors.
Over-torquing connectors may damage the connector center pin. Finger-tight is usually sufficient for Type N
connectors. Always use a connector torque wrench (8 inch-pounds) when tightening K, or V type connectors.
Never use pliers to tighten connectors.
Cleaning Connectors
The precise geometry that makes possible the RF component's high performance can easily be disturbed by dirt
and other contamination adhering to the connector interfaces. To clean the connector interfaces, use a clean
cotton swab that has been dampened with denatured alcohol.
Note
A-2
Most cotton swabs are too large to fit in the smaller connector types. In these cases it is
necessary to peel off most of the cotton and then twist the remaining cotton tight. Be sure that
the remaining cotton does not get stuck in the connector. Cotton swabs of the appropriate size
can be purchased through a medical laboratory-type supply center.
PN: 10585-00003 Rev. F
ML2430A MM
Appendix A — Connector Care and Handling
A-2
Connector Care And Handling
The following are some important tips on cleaning connectors:
• Use only denatured alcohol as a cleaning solvent.
• Do not use excessive amounts of alcohol as prolonged drying of the connector may be required.
• Never put lateral pressure on the center pin of the connector.
• If installed, do not disturb the Teflon washer on the center conductor pin.
• Verify that no cotton or other foreign material remains in the connector after cleaning it.
• If available, carefully use compressed air to remove foreign particles and to dry the connector.
• After cleaning, verify that the center pin has not been bent or damaged.
ML2430A MM
PN: 10585-00003 Rev. F
A-3
A-2
A-4
Connector Care And Handling
Appendix A — Connector Care and Handling
PN: 10585-00003 Rev. F
ML2430A MM
Anritsu prints on recycled paper with vegetable soybean oil ink.
Anritsu Company
490 Jarvis Drive
Morgan Hill, CA 95037-2809
USA
http://www.anritsu.com