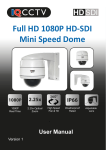
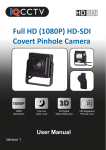
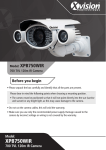
1
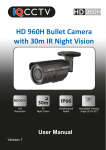
HD SDI
IQC1920B BULLET CAMERA
HD SDI
1080P
30m
1080P
Resolution
IR
Night Vision
IP66
Weatherproof
Rated
User Manual
Version 1
Wide Angle
Lens
Contents
1.
2.
3.
4.
5.
Introduction ....................................................................................
Features
...................................................................................
Package Content ...........................................................................
Connector and Direction Key ........................................................
Operation Instruction .....................................................................
Power On/Off ....................................................................
Basic Operating Instruction ...............................................
Menu and Adjustment .......................................................
Sub Menus ........................................................................
4
4
5
5
6
6
6
6
6
6. Main Menu Options
6.1 Lens Setup .................................................................. 7
6.2 Exposure ..................................................................... 7
AGC ................................................................ 7
Sens-up .......................................................... 7
Brightness ....................................................... 7
DWDR ............................................................ 7
Defog .............................................................. 7
Backlight ......................................................... 7
6.3 White Balance ............................................................. 8
6.4 Day & Night ................................................................. 8
6.8 NR ................................................................................ 9
6.9 Special ......................................................................... 9
Camera Title .................................................... 9
D-Effect ........................................................... 9
Motion ............................................................. 9
Privacy ............................................................ 10
Language ........................................................ 10
Defect .............................................................. 10
Version ............................................................ 10
6.7 Adjust ........................................................................... 10
Sharpness ....................................................... 10
Monitor ............................................................ 11
OSD ................................................................ 11
LSD ................................................................. 11
NTSC/PAL ....................................................... 11
6.8 Reset............................................................................ 11
6.9 Exit ............................................................................... 11
7. Specification ................................................................................... 12
8. Troubleshooting .............................................................................. 13
Safety Instructions
Before using this product, please read this manual carefully to ensure that the
user can correctly use this product to avoid danger. Please save this instruction
manual in a safe place for future reference.
WARNING
Input voltage should be both the SELV (Safety Extra Low Voltage) and the
limited power source with DC 12V.
• Keep away from liquid while in use.
• In the use of the product, you must be strict compliance with the electrical
safety regulations of the nation and region.
• If the product does not work properly, please contact your dealer or the
nearest service center. Never attempt to disassemble the camera yourself.
• When the product is mounted on a wall or ceiling, the device will need to be
firmly fixed.
CAUTIONS
• Make sure the power supply voltage is correct before using the camera.
• Do not drop the camera or subject it to physical shock
• If cleaning is necessary, please use a clean cloth to wipe it gently.
• Do not aim the camera at the sun or extra bright places. A blooming or smear
may occur otherwise (which is not a malfunction however) and the endurance
of the device will be affected at the same time.
• To avoid over heating good ventilation is required for the operating
environment.
• Do not place the camera in extremely hot, cold temperatures (the operating
temperature should be -10ºC-50ºC), dusty or damp locations and do not
expose it to high electromagnetism radiation.
3
1. Introduction
The IQC1920B adopts an advanced progressive CMOS sensor and supports
1080P real-time image capture and transmission. It features high definition and
sensibility & low noise and distortion, which is extremely suitable for the
application of surveillance and image processing system.
2. Features
• Supports Full HD-SDI Video
A diagonal 6mm (1/3”) 2M pixel CMOS,.
• Excellent low-illumination image quality
High sensitive colour CMOS, the camera provides a clear image quality under
even low illumination condition. The sensibility is up to 0 LUX due to the
installation of high quality built-in removable optical filter.
• DNR (Digital Noise Reduction) Function
The high-performance DSP chip effectively removes low-light gain noise to
provide clear images in dark environments.
• Day & Night Dual Mode (ICR Switch)
Automatically selects the mode that is appropriate for daytime or nighttime
conditions. The COLOUR mode operates in daytime conditions to provide
optimum colours and B/W mode operates in night conditions to enhance the
definition of the image.
• Motion Detection
The camera detects motion without any additional external sensor, you can
monitor activity more effectively. When the camera captured the moving object in
the detection area it will signal. So it is easy for users to monitor.
• Backlight Compensation (BLC)
When the back of the captured object is bright, users can set up backlight
compensation for the captured object to make it clearer.
• Privacy Masking
When it is not necessary for some areas to display in the screen, users can mask
this area.
4
• OSD
By providing 3 languages, the user-friendly OSD (On-screen Display) menu,
provides easy handling for the camera.
3. Package Content
The contents below are only for reference. Please take the real object as
standard.
(1)
(2)
(3)
(4)
Camera
User Manual
Screws and Wall Plugs
Screwdriver
4. Connector and Direction Key
1.
2.
3.
4.
(1) Direction Key
To activate the cameras OSD, you need to simply push the middle button on
the cameras joystick, will now serve as the ‘Menu’ button and the other
direction arrows are self-explanatory and will help you move about within the
OSD settings.
(2) Power Supply Connector Socket (DC 12V)
(3) BNC HD-SDI output to your DVR or HD-SDI ready equipment
(4) CVBS Video output connector
Analogue video output terminal of CVBS-Video. Use a monitor cable to test
the camera with a portable display. (For installation)
Move this switch left or right to move the cursor or change the value in the
menu.
Move this switch up or down to move the cursor on the menu.
5
Press the switch to set the function in menu. To move to a submenu item in
the menu, press this switch.
5. Operation Instruction
Power On/Off
Before starting to connect with the power cables and video cables. Please make
sure all the connections are ok. After that the system will start. Then press the OK
button to pop up the setup menu.
Remove the power cable and then the system will shut down immediately.
Basic Operating Instruction
When entering into the setup menu, users can see the pictures as shown below.
To enter into the menu, press the ‘Menu’ button for 1 second and then release.
Refer to section 4, to located the ‘Menu’ button.
Button Instructions
Menu: Press the Menu button to enter the main menu and also to
enter into the sub-menu.
UP/DOWN: Navigate UP or DOWN to choose different menu options.
LEFT/RIGHT: Change the parameter of the main menu option or
sub-menu options.
Menu and Adjustment
Press the ‘Menu’ button to enter the main menu and the options will appear on
screen as above. Use the UP/DOWN to navigate to the different options and press
the LEFT/RIGHT button to set the parameters. When finished, press the ‘Menu
button’ to exit.
Sub-Menus
If the right side of an options displays a
the sub-menu.
icon, press the ‘Menu’ button to enter
6
6. Main Menu Options
6.1 Lens Setup
Select the lens type. The camera supports, manual IRIS, DC Lens and Video Drive
lens. Please setup according to the use of lens. The default setting is ‘MANUAL’.
6.2 Exposure
Exposure setup includes: Shutter, AGC, Sens-up, Brightness, Defog and Backlight.
Shutter: Options include OFF/AUTO (x2, x4, x6, x8, x10, x15, x20, x30, x60).
AGC: When there is insufficient light, push left/right to setup its level. There are
four options: low, middle, high, off.
Sens-up: Extends the exposure time of camera. The higher the time, the lower the
frame will be. However the shadow created will be longer in dark conditions.
Please select OFF or Auto.
Brightness: Push left/right to setup the value of brightness. The default level is 50.
DWDR: Set the Digitial Wide Dynmic Range (DWDR) to High, Middle, Low or Off.
Defog: In foggy weather, you can setup this function to see the object behind fog
clearly. There are four options: low, middle, high, off.
Backlight: You can select OFF, BLC or HSBLC by pushing left/right. If OFF is
selected, the system will not compensate the image. If BLC is selected, it will
enhance the brightness of image to satisfy the monitor effect.
To enter into the submenu of BLC, press ‘Menu’ button. Here, you can setup:
GAIN: Set the Backlight area, High, Middle or Low
AREA: Select the BLC area and the compensation area size after entering the
‘Area’ menu.
DEFAULT: Choose to go back to the default setting.
7
Sub-menu of HSBLC. Here, you can select the following;
Select: Select the Backlight Compensation area. 4 areas are selectable
Display: Choose to display the selected area or not.
Level: Set the sensivity level of the compensation area
Mode: Set to Super Backlight Compensation, available only at night or all day.
Black Mask: Turn the black mask on or off. This function blacks out the lightest
images to give a clearer picture in varying light conditions.
Return: Select Return and press Enter button to return to previous interface.
6.3 White Balance
Select WHITE BAL and push left or right to choose White balance mode
including ATW, AWC SET, Indoor, outdoor and manual.
ATW: In this mode, the camera will constantly monitor the colour temperature
among about 2500-9500K of colour temp and adjust white balance
automatically.
AWC SET: Select it and press the ‘Menu’ button to go into the lock mode of
white balance. Now the camera locks the reference value of red and blue under
the current colour temperature and stops monitoring colour temperature.
Indoor: Indoor white balance mode.
Outdoor: Outdoor white balance mode.
Manual: This option allows the user to manually set the White Balance Mode.
Select this mode and press the ‘Menu’ button to setup. User can adjust the level
of the blue and red by pushing left or right button to adjust the blue or red gain.
The gains are adjustable between (0-100).
6.4 Day & Night
Select Day & Night and press the ‘Menu’ button to setup Day & Night mode and
to setup Smart IR. You can choose between Auto
, Colour, B/W
or External.
Sub-Menu of Auto. Here you can set the delay time between Day & Night
mode. You can also manually adjust the AGC between Day to Night mode and
Night to Day mode.
8
Sub-Menu of B/W. This option allows you to turn the burst off or on, turn the
Smart IR on or off and turn the LED on or off.
When turning on the Smart IR, you will be presented with 2 options. Firstly, set
the level of the Smart IR (0-15) and secondly select the areas for Smart-IR to
operate.
6.5 NR
Select the Digital Noise Reduction. Choose between 2D DNR, 3D DNR , the
sensitivity of the DNR or Smart DNR.
Sub-Menu of 3D DNR. This allows you to adjust the following;
S-Level: Set the DNR starting level (0-100)
E-Level: Set the DNR ending level (0-100)
6.6 Special
Push right/left to setup CAMERA TITLE, MOTION, PRIVACY, DEFECT etc.
Camera Title: Press Enter button to select On/Off. When selecting ‘On’ the title
edition and the position selection of the title is effective. User can press the
direction button to self-define the camera name. After selecting the single letter,
number or symbol please press ‘Enter’ button to go into the camera title position
setup. User can push the direction button to set up.
D-Effect: Setting of digital functions. Press the ‘Menu’ button to enter into the
sub-menu.
Sub-Menu of D-Effect. This allows you to set the following functions.
Freeze: Set the freeze function to on or off.
Mirror: Set the mirror function to on or off.
D-Zoom: Set the digital zoom function. You can set to x2 - x64 or on/off. If you
select on, you will be presented with anohter sub-menu allowing you to set the
PIP, adjust the digital zoom (x2 - x64), Pan/Tilt or return to default
Negative Image: Turn the negative image function on or off.
Motion: Set the motion detection functon on or off. If you turn the motion
detection function on, you will be presented with a sub-menu.
9
Sub-menu of Motion Detection. Here, you can select the following;
Display: Turn the motion detection on or off on selected areas.
Sensitivity: Adjust the sensitivity of the motion detection (0-60).
Motion View: Set a prompt for when moving objects are detected.
Default: Return to factory default settings.
Privacy: This option allows you to set the private protection area. When turning
the function on, you will enter into a sub-menu to select privact areas. Up to 8
areas are selectable.
Sub-Menu of the Privacy menu, adjust the following;
Display: Turn on the display (Position, Size) or turn off the privacy function.
Colour: Set the Colour of the privacy protection (1-16 colours).
Default: Return to factory default settings.
Language: Select your desired language. (English, Japanese, Traditional
Chinese and Simplified Chinese).
Defect: Turn this function off to correct any dead pixels. When this is turned on
you will enter into a sub-menu.
Sub-Menu of Defect will allow you to set the following:
Live DPC: Live dead pixel correction, turn this function on or off.
Level: Set the sensitivity level of the live correction function (0-60)
Static DPC: Static dead pixel correction function, turn this function on or off.
Level: Set the sensitivity level of the static correction function (0-60)
Version: Displays the software version information.
6.7 Adjust
Sharpness: Set the sharpness on or off. When turned on, you will presented
with a sub-menu.
Sub-Menu of the adjust option allows you to adjust:
Level: Adjust the level of sharpness from 0-100
Resolution: Turn the resolution on or off.
10
Monitor: Select the monitor display image (LCD or CRT). When choosing any
of these options, you will be presented with a sub-menu.
Sub-Menu of LCD. Here you can adjust the following:
Gamma: Set the Gamma characteristics (Auto, User 1, User 2, 0.45-1)
Blue Gain: Adjust the blue gain (0-100)
Red Gain: Adjust the red gain (0-100)
Sub-Menu of CRT. Here you can adjust the following:
Black Level: Set the black level (0-100)
Blue Gain: Adjust the blue gain (0-100)
Red Gain: Adjust the red gain (0-100)
OSD: Set the OSD menu characteristics.
Sub-Menu of OSD allows you to adjust the following:
Text Colour: Adjust the OSD menu text colour. 8 colours are selectable
Outline: Set the character outline, either on or off.
LSC: Turn the lens edge correction function on or off.
NTSC/PAL: Set the signal system setting either NTSC or PAL.
6.8 Reset
Select Reset and press Enter button to go into its setup interface. Then Select
Factory settings to reset the camera to factory default.
6.9 Exit
Exit the OSD menu.
11
7. Specifications
Model
1/3” Progressive Scan CMOS
2 Megapixels
Min Illumination
Colour: > 0.01 Lux, B&W: 0 Lux (IR on)
Resolution
1080P
Inferred Red Lamps
IR Range
Weather Proof
Yes
Up to 30m
IP66
OSD Functions
Automatic White Balance
Automatic Gain Control
Digital Noise Reduction (DNR)
3D DNR, Smart DNR
Backlight Compensation
Wide Dynamic Range
Privacy Masking
Motion Detection
Video System
NTSC/PAL
Scanning Type
Progressive Scan
Video Out
1ch HD-SDI, 1080P (1920x1080) 25P/
30P 1ch CVBS, BNC 1.0 VP-P, 75 Ohm
Composite
Input Voltage
DC12V
Power Consumption
<5W
Operating Temperature
-10°C-50°C
Camera
Video
Working
Environment
HD-SDI Bullet Camera
Sensor
Pixels
12
8.Troubleshooting
Problem
Nothing appears on the screen
Solution
Check that the power cord and line connection
between the camera and monitor are properly
connected.
When the cameras HD-SDI BNC output is directly
connected to the monitors BNC terminal, make sure
the monitor supports HD-SDI signal input.
When the cameras HD-SDI BNC output is
connected to the DVR: Make sure the DVR supports
HD-SDI signal input.
The image on the screen is dim
Is the lens dirty? Clean your lens with a soft micro
fibre cloth.
Set the monitor to the proper condition. If the
camera is exposed to very strong light, change the
cameras position.
The image on the screen is dark
Adjust the contrast feature of the Monitor.
The camera is not working
properly and the surface of the
camera is hot
Check that you have properly connected the camera
to an appropriate power sauce.
The Motion Detection function does
not work
Check that the Motion detection has been turned on
Colour is not correct
Check the setting of WHITE BAL SETUP menu
The screen flickers continually
Ensure the camera is not pointing towards the sun.
Is the camera framing the sun or other bright light
source?
HD-SDI Video may not appear to be normal if distance
exceeds the maximum transferrable distance.
When the BNC cable adaptor is used to combine two
or more BNC cables for distributed HD-SDI video
transfer, make sure the impedance of the adaptor is
75.
Otherwise, it may cause shorter distance or
broken video transfer.
13
Manufactured for:
TECHNICAL SUPPORT
For technical support, please contact your local distributor.
Alternatively, call 0871 222 1430
LIMITED WARRANTY
This product is supplied with a 12 month warranty. The warranty excludes products
that have been misused (including accidental damage) and damage caused by
normal wear and tear. In the unlikely event that you encounter a problem with this
product, it should be returned to the place of purchase.
IQCCTV, Unit 2 Valley Point, Beddington Farm Road, Croydon, Surrey CR0 4WP
www.iqcctv.co.uk