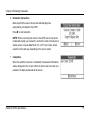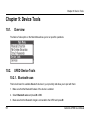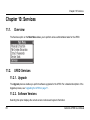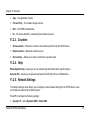
1
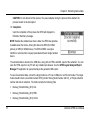
UFED (Universal Forensic Extraction Device) User Manual User Manual i LEGAL NOTICES This manual is delivered subject to the following conditions and restrictions: This manual contains proprietary information belonging to Cellebrite Mobile Synchronization Ltd. Such information is supplied solely for the purpose of assisting explicitly and properly authorized users of the UFED. No part of this content may be used for any other purpose, disclosed to any person or firm, or reproduced by any means, electronic or mechanical, without the express prior written permission of Cellebrite Ltd. The text and graphics are for the purpose of illustration and reference only. The specifications on which they are based are subject to change without notice. Information in this document is subject to change without notice. Corporate and individual names and data used in examples herein are Fictitious unless otherwise noted. Copyright 2012 Cellebrite Mobile Synchronization Ltd. All rights reserved. WARNING: The UFED should be used only with the dedicated AC/DC adapter supplied with this device. WARNING: USB, Ethernet and target and source connectors should be connected only to CE approved devices (according to IEC/EN 60065 standard). WARNING: Make sure that all external connections to other devices (except for the power adapter) are only indoor and SELV (safety extra low voltage, not exceed 42.4 V peak or 60 VDC). User Manual i Table of Contents 2.1. Initial Setup .......................................................10 Chapter 1: Introduction ............................................ 1 2.2. UFED Menu Navigation ....................................11 1.1. Overview ............................................................. 1 Chapter 3: Extracting Device Data ........................12 1.2. Supported Devices ............................................. 3 3.1. Overview ...........................................................12 1.3. UFED Kit Contents ............................................. 4 3.2. Flowchart ..........................................................12 1.4. UFED Device Overview ...................................... 7 3.3. Extracting Device Data to USB Disk Drive or SD Card ..................................................................13 1.4.1. General Overview ............................... 7 1.5. Ruggedized UFED Rubber Casing .................... 8 1.6. Power and Battery Options................................. 8 1.6.1. The Battery Components .................... 8 1.6.2. Switching to Battery Power ................. 9 1.6.3. Charging the Battery ........................... 9 1.6.4. Battery LED Indicator .......................... 9 Chapter 2: Getting Started .....................................10 User Manual 3.4. Extracting Device Data to a PC ........................20 3.5. Extracting Data from Locked Nokia Devices ....23 3.6. Smart Phones/PDA Support .............................24 3.6.1. Client Application Prompts ................24 Chapter 4: Extracting SIM/USIM Data ...................25 4.1. Overview ...........................................................25 4.2. Flowchart ..........................................................26 ii 4.3. Extracting SIM/USIM Data to USB Disk Drive or SD Card ............................................................26 Chapter 5: Cloning a SIM ID ...................................30 5.1. Overview ...........................................................30 5.2. Flowchart ..........................................................31 5.3. Cloning an Existing SIM Card...........................31 5.4. Manually Creating a Clone SIM Card ...............34 5.5. Creating a GSM Test SIM Card .......................37 Chapter 7: Performing File System Extraction ....50 7.1. Overview ...........................................................50 7.2. Flowchart ..........................................................50 7.3. Performing a File System Extraction ................51 Chapter 8: Extracting Passwords .........................54 8.1. Overview ...........................................................54 8.2. Flowchart ..........................................................54 8.3. Performing Passwords Extraction ....................55 Chapter 6: Performing Physical Extraction..........39 Chapter 9: Device Tools .........................................58 6.1. Overview ...........................................................39 9.1. Overview ...........................................................58 6.2. Flowchart ..........................................................39 6.3. Performing a Physical Extraction .....................40 6.4. Physical Extraction from a Cloned Chinese Devices .............................................................43 6.4.1. Getting Started ..................................43 6.4.2. Connecting to the Source Device .....44 6.4.3. Performing the Physical Extraction ...46 9.2. UFED Device Tools ..........................................58 9.2.1. Bluetooth scan ..................................58 9.2.2. Switch to CDMA offline mode ...........59 9.2.3. Test Peek/Poke functionality ............59 9.2.4. Activate TomTom trip log ..................59 Chapter 10: Services ..............................................60 10.1. Overview ...........................................................60 Cellebrite UFED User Manual iii 10.2. UFED Services .................................................60 12.1. Overview ...........................................................69 10.2.1. Upgrade ............................................60 12.2. Connecting the Power up cable .......................69 10.2.2. Software Versions .............................60 Chapter 13: Upgrading the UFED ..........................71 10.2.3. Counters ...........................................61 13.1. Overview ...........................................................71 10.2.4. Help ...................................................61 13.2. Upgrading from a USB Disk Drive or SD Card .72 10.2.5. Network Settings ...............................61 13.3. Upgrading from a PC ........................................73 10.2.6. Screen Settings .................................62 13.4. Upgrading from the Web ..................................75 10.2.7. Time and Date ..................................62 13.5. Setting Automatic Upgrade from the Web ........76 10.2.8. User Settings ....................................62 Appendix A: Technical Specifications ..................79 10.2.13. UFED Settings ..................................64 10.2.19. Admin Settings ..................................66 Chapter 11: Using Bluetooth Connectivity ..........67 11.1. Overview ...........................................................67 11.2. Phone Settings .................................................67 11.3. UFED Bluetooth Adapter ..................................67 11.4. Pairing with the Source Device via Bluetooth...68 Chapter 12: Using the Power up Cable.................69 User Manual iv Chapter 1: Introduction 1.1. Overview The Cellebrite Universal Forensic Extraction Device (UFED) empowers law enforcement, anti-terror and security organizations to capture critical forensic evidence from mobile phones, smartphones, PDAs, portable GPS devices and other devices. Cellebrite’s industry expertise provides reliability and ease-of-use, and ensures the broadest support for handset varieties, including updates for newly released models. UFED extracts vital data such as phonebook, images, videos, audio, text messages (SMS), call logs, ESN IMEI, ICCID and IMSI information from many handset models, including BlackBerry®, Android, iOS, Symbian, Microsoft Mobile and Palm OS devices. The UFED enables you to perform: Logical extraction of device data. Physical extraction of device memory. Physical extraction of SIM data. File system extraction. SIM ID Cloning. User Manual 1 Chapter 1: Introduction Password extraction. The UFED can extract data from a device using a cable, Bluetooth or infrared connection, or directly from a SIM card. The extracted data is copied to any standard USB drive, SD card, or a PC. The logical extraction data can be displayed by the UFED Reader application and UFED Logical Analyzer application (replacing the legacy Report Manager) on your PC, while both logical and physical extraction data can be decoded and analyzed and displayed by the UFED Physical Analyzer application on your PC. The UFED Logical Analyzer/Report Manager and UFED Physical Analyzer applications can also generate detailed reports of the extracted data that can be used as evidence. Figure 1: The UFED work flow overview 2 Cellebrite UFED User Manual Chapter 1: Introduction 1.2. Supported Devices A list of supported devices and the data extraction capabilities for each device can be found in the following places: In the UFED XXXX Supported Phone List Microsoft Excel file delivered with each version update of the UFED software. The file contains two worksheets: UFED Logical listing the supported devices for logical extraction. UFED Physical listing the supported devices for the physical, file system and password extraction. Figure 2: The supported devices list Excel file Using the UFED Phone Detective application (logical extraction only). In the Cellebrite web site, at the following addresses: Logical extraction: http://www.cellebrite.com/mobile-forensics-products/forensics-products/ ufed-logical/ufed-logical-supported-phones.html Physical extraction: http://www.cellebrite.com/mobile-forensics-products/forensics-products/ ufed-ultimate/ufed-physical-supported-phones.html Cellebrite UFED User Manual 3 Chapter 1: Introduction 1.3. UFED Kit Contents Portable and easy to operate, the UFED can be used in the forensic lab as well as the field. The UFED is a handheld device, without the need for a PC in the field. The Ruggedized version of the UFED comes with hard-sided case and battery power, for even greater mobility and flexibility and fully loaded with all needed accessories. The UFED comes equipped with all you need for mobile device analysis. The UFED Ruggedized carrying case is designed specifically for field use conditions. To open the case, flip the two latches open. NOTE: The case is air-tight sealed. When the case undergoes changes in atmospheric pressure (ex. mountain areas, after airplane flights), the latches may be hard to open. To release them, unscrew the vacuum release valve, located in the center of the case, next to the handle. Figure 3: UFED Standard Kit Figure 4: UFED Ruggedized Kit The following table lists the features and accessories that come with each kit. Some of the accessories can be purchased separately. 4 Cellebrite UFED User Manual Chapter 1: Introduction Kit Features Ruggedized Kit Standard Kit Kit Carrying Case Rugged case Soft case UFED Device √ √ UFED Device Casing Rugged rubber casing Standard UFED Protective Cover √ - Cable Organizer √ √ Data Cables Full Set Full Set Bluetooth Dongle for wireless phone connection √ √ USB Flash Drive for saving examination data √ √ Power Supply √ √ UFED Charging kit √ - 12V In-vehicle Power adapter √ √ SIM ID Cloning Cards √ √ Micro SIM adapter √ √ Memory Card Reader √ - Mobile Phone Battery Charger set √ - Faraday Bag √ - Cellebrite UFED User Manual 5 Chapter 1: Introduction 6 UFED Logical Analyzer/Report Manager viewing and printing application Logical Logical UFED Physical Analyzer application Ultimate Ultimate UFED Phone Detective application √ √ Phone Connection Cleansing Brush √ √ User Manual and Support CD √ √ Cellebrite UFED User Manual Chapter 1: Introduction 1.4. UFED Device Overview 1.4.1. General Overview 1. Power Supply (Connect to power adapter) 2. LCD Display 3. Function Keys (F1 for help; F2 for select/deselect all; F3 to continue) 4. ON/OFF Power Button 5. Target connectors (for extraction to USB disk drive) 6. SIM/Smart Card Slots (for reading SIM cards and smart cards) 7. Navigation Keys (For navigating the UFED menu) 8. Source connectors (Connect device via USB, serial or IR) 9. Cancel Button 10. SD Card Slot (for extraction to SD card) 11. USB Port Extension (for Bluetooth dongle or other external devices such as keyboard) 12. Serial connection (not in use) 13. Ethernet port (connect to network for automatic updates and for uploading data to a network hosted PC) 14. Mini-USB Port (for extraction to PC via mini-USB cable) Cellebrite UFED User Manual Figure 5: The UFED device general overview 7 Chapter 1: Introduction 1.5. Ruggedized UFED Rubber Casing The Ruggedized UFED device is encased in a rubber casing, to hold the battery house and to protect the UFED from dirt, dust, sand or other contaminants. 1.6. Power and Battery Options The UFED device can be powered by: A power-supply. A car power supply (Ruggedized Kit only). An internal battery power (Ruggedized Kit only). 1.6.1. The Battery Components 1. Battery kit and battery housing protective covering. 2. Charging switch. 3. Battery's state-of-charge test and LED indicators. Figure 6: The UFED device battery components 8 Cellebrite UFED User Manual Chapter 1: Introduction 1.6.2. Switching to Battery Power To run the UFED on battery power, flip the power switch to the right (“BAT”) position. Battery power will take over. 1.6.3. Charging the Battery To re-charge the battery, connect the device to an AC adapter (supplied with the kit), and then flip the power switch to the left (“CHG”) position. 1.6.4. Battery LED Indicator The Battery LED indicator provides a visual indication regarding the UFED power mode: LED Status Indication Red Battery charge in process Green Battery fully charged No light Flashing Red Cellebrite UFED User Manual Sleep mode (no input power source) Battery not connected Charging suspended (timer fault or thermal shutdown) Over-voltage fault Battery problem. Verify that the battery is connected properly. 9 Chapter 2: Getting Started Chapter 2: Getting Started 2.1. Initial Setup Unpack the UFED device from the kit (see “UFED Kit Contents” on page 4). Connect the power supply adapter to the UFED. “Please Wait” appears briefly on the screen, followed by a screen showing the version numbers. NOTE: When starting the UFED for the first time, you need to set the date, time and GMT. When the UFED is set and ready for use, the Main Menu will display, enabling you to access the following options. Extract Phone Data - Logical extraction from a device. See “Extracting Device Data” on page 12. Extract SIM/USIM Data – Logical extraction from a SIM/USIM card. See “Extracting SIM/USIM Data” on page 25. 10 Figure 7: The Main Menu Clone SIM ID – Clones a SIM card, enabling you to analyze the phone without it being open for incoming calls. See “Cloning a SIM ID” on page 30. Physical Extraction – Perform a physical data extraction from the device. See “Performing Physical Extraction” on page 39. File System Extraction – Extracts the file system from the device. See “Performing File System Extraction” on page 50. Cellebrite UFED User Manual Chapter 2: Getting Started Extract Passwords – Extracts various device passwords. See “Extracting Passwords” on page 54. Device Tools – Enables you to run various operations on devices such as Bluetooth scan, switch to CDMA offline mode and activate TomTom Trip log. See “Device Tools” on page 58. Services - Enables you to perform various administrative tasks or configure the default parameters within the UFED. See “Services” on page 60. 2.2. UFED Menu Navigation The UFED shows the menu options on the display. To navigate through the menu: Use the keys to move between options. To select an option, press or the OK key. To return to the previous menu, press . When additional help is available, a help icon will appear in the upper left area of the screen. Press F1 to view this help. Cellebrite UFED User Manual 11 Chapter 3: Extracting Device Data Chapter 3: Extracting Device Data 3.1. Overview Select Extract Phone Data from the Main Menu in order to copy data from a device (the source) to a PC, USB or SD card (the target). Use this function to extract phonebook, SMS text messages, pictures, videos, etc. from mobile device memory to a USB disk drive, SD card or directly to a PC. There are only slight differences in the procedure when the target is a USB disk drive or a PC. Both procedures are described below. Refer to the procedure relevant to you. 3.2. Flowchart N Define Source Define O (Device Vendor, Target (PC, USB, SD Model, T Card) E Memory location) : Figure 8: The Extract Phone Data flowchart Connect Source & Target Extract Data View Reports NOTE: The UFED Phone Detective application can assist you to make a positive identification of the device. 12 Cellebrite UFED User Manual Chapter 3: Extracting Device Data 3.3. Extracting Device Data to USB Disk Drive or SD Card Follow the steps below to perform a data extraction from a source device to a USB disk drive or an SD card. 1. Main Menu Select Extract Phone Data from the Main Menu. Use the keys to move between options. Press OK or to continue. 2. Source Vendor Select the vendor (manufacturer) of the source device. Use the keys to move between options. Select the **Recently Used** option to select a device from the list of recently used devices. Select the Auto Detect option to attempt automatic detection of a connected device. Press OK or to continue. 3. Source Model Select the source device model. Cellebrite UFED User Manual 13 Chapter 3: Extracting Device Data NOTE: If you do not know the model, you can often find the device model on a sticker beneath the battery. Use the keys to move between options. Press OK or to continue. To return to the previous menu, press . 4. Source Memory Select the source memory locations you wish to extract. Use the keys to move between options. Press OK to select the currently highlighted option, or press F2 to select all. Press to continue. NOTE: Some devices do not allow access to the SIM card data via the data cable. In these cases, you will be prompted during the process to remove the SIM card and insert it into the SIM Card Slot. 5. Source Link This step determines how the device will connect to the UFED. This message appears only if the device supports more than one connection method (Cable, Bluetooth or IrDA-Infrared). Use the keys to move between options. Press OK or to continue. 14 Cellebrite UFED User Manual Chapter 3: Extracting Device Data NOTE: For best performance, we recommend using a cable connection whenever possible. The appropriate cable number will be displayed in the Extraction Instructions (see step 9), or can be found in the UFED Phone Detective application or at the UFED supported device excel. In addition, the information extraction from the device can vary based on the link used. 6. Target Selection Select the target location where the content will be copied to: PC – The content goes directly into the UFED Logical Analyzer/Report Manager application via a mini-USB to USB cable connection between the mini-USB port on the back panel of the UFED and a the PC. See “ Cellebrite UFED User Manual 15 Chapter 3: Extracting Device Data Extracting Device Data to a PC” on page 20. USB Flash Drive - The content is stored in a separate directory on a USB disk drive connected to the TARGET USB port on the right panel of the UFED. SD Card - The content is stored in a separate directory on an SD card inserted in the SD card reader slot on the left panel of the UFED. Use the keys to move between options. Press OK or to continue. 7. Connect Target Media If you have not yet plugged the USB drive or SD card into the UFED, do it now. The UFED is ready to copy the data to the storage device. NOTE: USB disk drive storage media should be connected to right side TARGET USB port. SD card storage media should be inserted in the SD card slot on the left side of the UFED unit. 8. Content Types From the list of content types supported by the device, select content types to be extracted. Use the keys to move between options. Press OK to select an option. Press F2 to select/deselect all options. Press to continue. 16 Cellebrite UFED User Manual Chapter 3: Extracting Device Data 9. Extraction Instructions Make sure that: The source device is appropriately connected according to the source link selection (see “Source Link” on page 14): For Cable, connect the source device to the SOURCE port on the left panel of the UFED using the references cable from the cable organizer kit. For Bluetooth, see “Using Bluetooth Connectivity” on page 67. For IrDA (Infrared), place the device with its infrared port directly in front of the UFED’s source or target infrared port. The selected target is appropriately connected to the UFED (see “Target Selection” on page 15). The source device is powered on, and the data connector is clean. NOTE: When connected to the UFED, some devices will prompt you to choose an operating mode, such as “PC Suite” or “Phone Mode”. Press to start extraction. NOTE: If the device is a Smartphone or PDA, you may be prompted to install a client application on the device. Press to continue. Cellebrite UFED User Manual 17 Chapter 3: Extracting Device Data CAUTION: Do not disconnect the device or the power adaptor during the process! Once started, the process should not be interrupted. 10. Completion Upon the completion of the process the UFED will displays the Extraction Summary message. NOTE: Besides the standard user device data, the UFED also provides metadata about the device. Among this data is the ESN (for CDMA phones) or IMEI (for GSM phones). The ESN or IMEA is a unique identifier or serial number uniquely associated with each single handset device. The extracted data is stored on the USB drive, along with an HTML and XML report of the extraction. You can open the HTML report on any PC with any installed web browser. Use the UFED Logical Analyzer/Report Manager PC application to open and analyze the generated XML report. To view the extracted data, connect the target media to a PC via a USB port or an SD card reader. The target media should include a new folder named UFED_Vendor Name_Model number and OS_ a 15 digit extraction number and date of extraction. The folder contains the following files: 18 Backup_ExtractionDate_(001).CAL Backup_ExtractionDate_(001).PBB Backup_ExtractionDate_(001).CLOG Cellebrite UFED User Manual Chapter 3: Extracting Device Data Backup_ExtractionDate_(001).SMS 3 HTML files that can be accessed from a web browser named Report.html, PhoneBook_Extraction date (001).html and SMSMasseges Extraction date (001).html XML Report. The transfer process is complete and you may now disconnect the device and the PC from the UFED device. Cellebrite UFED User Manual 19 Chapter 3: Extracting Device Data 3.4. Extracting Device Data to a PC The UFED system includes the UFED Logical Analyzer/Report Manager application, which you can use to upload the extracted device data from the UFED to your PC. 1. Main Menu and Device Definitions Select Extract Phone Data from the Main Menu, and then select the device vendor, model, memory location and link method. This part of the process is identical to the USB Extraction process. (See steps 1-5 of “Extracting Device Data to USB Disk Drive or SD Card” on page 13). Use the keys to move between options. Press OK or to continue. 2. Target Selection Select PC from the target menu. Use the keys to move between options. Press OK or to continue. 20 Cellebrite UFED User Manual Chapter 3: Extracting Device Data 3. Content Types Select content types to be extracted. The UFED displays the options according to the capabilities available in the source device. (ex. If the device does not support video, the “Videos” option will not appear). Use the keys to move between options. Press OK to select an option. Press to continue. NOTE: Transfer time varies according to the data types selected. Selecting all options will increase the transfer time. 4. Transfer Instructions Make sure that: The source device is appropriately connected to the UFED according to the source link selection (see “Source Link” on page 14): For Cable, connect the source device to the SOURCE port on the left panel of the UFED using the references cable from the cable organizer kit. For Bluetooth, refer to Chapter 6 for details. For IrDA (Infrared), place the device with its infrared port directly in front of the UFED’s source or target infrared port. Make sure that the UFED is connected to the PC using the mini-USB cable to USB. Cellebrite UFED User Manual 21 Chapter 3: Extracting Device Data The source device is powered on, and the data connector is clean. NOTE: When connected to the UFED, some devices will prompt you to choose an operating mode, such as “PC Suite” or “Phone Mode”. Press to continue. The UFED now extracts the selected data to its internal memory; the following message will appear at the end of the extraction: 5. Run the UFED Logical Analyzer/Report Manager On your PC, run the UFED Logical Analyzer/Report Manager application. Select Start > Programs > Cellebrite Mobile Synchronization > UFED Logical Analyzer. Click the Read phone button. NOTE: If the extracted device is a Smartphone or PDA, you may be prompted to install a client application on the device. Press to continue. 6. Extraction The UFED now sends the extracted data from its internal memory to the PC. Upon the completion of the process you may disconnect the source device and PC from the UFED. 22 Cellebrite UFED User Manual Chapter 3: Extracting Device Data 3.5. Extracting Data from Locked Nokia Devices Cellebrite’s cable number 200 enables you to extract data from locked Nokia devices. To use cable 200: 1. Remove the device battery. 2. Connect one side of the Nokia JAF adapter to battery contacts of the device. 3. Connect the other side of the Nokia JAF adapter to Cellebrite Cable 200. 4. Continue the data extraction process as described in “Extracting Device Data to USB Disk Drive or SD Card” on page 13 and “ Cellebrite UFED User Manual 23 Chapter 3: Extracting Device Data 5. Extracting Device Data to a PC” on page 20. 3.6. Smartphones/PDA Support When extracting data from Smartphones or PDA’s, you will be prompted to upload a client application from the UFED to the phone. This application enables access to the phone memory. NOTE: Client application upload is not necessary for BlackBerry and Symbian 3rd edition phones. 3.6.1. Client Application Prompts Client Upload - When necessary, the UFED will inform you to upload the client application, as follows. Install Client Prompt - The UFED instructs you to run the installation on the device. Install and Run the client - If the device prompts you to install the client application, follow the installation steps and then run the application. You can identify the client application by the icon. NOTE: Pressing F1 on the UFED to get the exact path to the client application on the device. After completing the entire extraction process, you can uninstall the client application from the device. 24 Cellebrite UFED User Manual Chapter 4: Extracting SIM/USIM Data Chapter 4: Extracting SIM/USIM Data 4.1. Overview Your UFED is equipped an integrated SIM/USIM card reader, located at the front panel of the UFED, as shown below. Figure 9: The SIM/USIM card reader You can use this SIM reader to extract data directly from the SIM card instead of via the device, or when the SIM card is not accessible via the device. Besides the physical extraction of the SIM card data, the extracted data may include additional SIM data such as the SIM ICCID and IMSI, SMS messages, deleted SMS messages, phonebook records, and more. Cellebrite UFED User Manual 25 Chapter 4: Extracting SIM/USIM Data 4.2. Flowchart Insert Source SIM (SIM Card Reader) Select SIM Type (2G,3G,Iden) DefineTarget (PC, USB,SD Card) Extract Data View Reports Figure 10: The Extract SIM/USIM Data flowchart 4.3. Extracting SIM/USIM Data to USB Disk Drive or SD Card Follow the steps below to perform a data extraction from a SIM/USIM card: 1. Insert SIM Insert the SIM/USIM card to the SIM card reader slot (at the front panel of the UFED) as shown, with the SIM card contacts facing down. Figure 11: Insert SIM/USIM card 26 Cellebrite UFED User Manual Chapter 4: Extracting SIM/USIM Data 2. Main Menu Select Extract SIM/USIM Data from the Main Menu. Use the keys to move between options. Press OK or to continue. 3. Source Model Select the source device model. Use the keys to move between options. Press OK or to continue. To return to the previous menu, press . 4. Target Selection Select the target location where the content will be copied to: PC - The content goes directly into the UFED Logical Analyzer/Report Manager application via a mini-USB to USB cable connection between the mini-USB port on the back panel of the UFED and a the PC. USB Disk Drive - The content is stored in a separate directory on a USB disk drive connected to the TARGET USB port on the right panel of the UFED. SD Card - The content is stored in a separate directory on an SD card inserted in the SD card reader slot Cellebrite UFED User Manual 27 Chapter 4: Extracting SIM/USIM Data on the left panel of the UFED. Use the keys to move between options. Press OK or to continue. 5. Content Types Select content types to be extracted. The UFED displays the options according to the capabilities available in the device. (ex. If the device does not support video, the “Videos” option will not appear). Use the keys to move between options. Press OK to select an option. Pressing on F2 will select/deselect all options. Press to continue. 6. Extraction Instructions Make sure that the selected target is appropriately connected to the UFED (see "Target Selection" on page 15). Press to start extraction. NOTE: If the SIM card is protected with a PIN, you will be prompted to enter the PIN during the extraction process. To enter the PIN code, use the keys to move the cursor to the required digit, and press OK to select that digit. Repeat this for each digit of the PIN. To delete a digit, press the © key. When complete, press F3. 28 Cellebrite UFED User Manual Chapter 4: Extracting SIM/USIM Data 7. Completion Upon the completion of the process the UFED will displays the Extraction Summary message. The transfer process is complete and you may now disconnect the Source device and the Target media from the UFED device. To view the extracted data, connect the target media to a PC via a USB port or an SD card reader. The target media should include a new folder named in the following format UFED_SIM_CARD_2G_3G_SIM_and date of extraction. The folder contains the following files: Backup_ExtractionDate_(001).CAL, Backup_ExtractionDate_(001).PBB Backup_ExtractionDate_(001).CLOG Backup_ExtractionDate_(001).SMS Report.xml 3 HTML files that can be accessed from a web browser named Report.html, PhoneBook_Extraction date (001).html and SMSMasseges Extraction date (001).html Cellebrite UFED User Manual 29 Chapter 5: Cloning a SIM ID Chapter 5: Cloning a SIM ID 5.1. Overview Cellebrite’s UFED enables you to clone a SIM ID by utilizing the built in SIM Card Reader, providing your organization with valuable new functionality. NOTE: The SIM ID cloning process clones only the SIM IDs and not the SIM contents. The SIM ID cloning capabilities resolves many key problems facing forensic examiners today: 30 Extract Phone data while preventing the cellular device from connecting to the network - The handset will be invisible to the network with no calls or SMS messages to, or from the handset, preserving the current call and SMS messages history in the device - No Faraday Bag required to block RF signals. Extract Phone data when the original SIM is not available - ICCID or IMSI can be manually programmed into the Cloned SIM ID Card to mimic the original missing card. Extract Phone data when the SIM card is PIN locked - Cloning the identification of the original SIM card, allows the phone data to be extracted without losing critical data including call history and SMS messages. Cellebrite UFED User Manual Chapter 5: Cloning a SIM ID 5.2. Flowchart Select Cloning Function Insert Source SIM Select Card Partition Insert Target SIM Clone SIM Figure 12: The Clone SIM ID flowchart 5.3. Cloning an Existing SIM Card Follow the steps below to clone an existing SIM card: 1. Main Menu Select Clone SIM ID from the Main Menu. Use the keys to move between options. Press OK or to continue. 2. Select Source Select the Clone an Existing SIM Card option. Use the keys to move between options. Press OK or to continue. Cellebrite UFED User Manual 31 Chapter 5: Cloning a SIM ID 3. Insert Source SIM Insert the source SIM/USIM card you wish to clone to the SIM card reader slot (at the front panel of the UFED) as shown, with the SIM card contacts facing down. Figure 13: Insert Source SIM card Press to continue. 4. Select Partition to Read If the card is a 3G SIM card, you will be prompted to select the partition that will be cloned. Use the keys to move between options. Press OK or to continue. The UFED now reads the data from the source SIM card, storing it in its internal memory. 32 Cellebrite UFED User Manual Chapter 5: Cloning a SIM ID 5. Insert Target Card Remove the source SIM card from the SIM card reader slot and insert a blank UFED SIM ID Access Card to the SIM card reader slot with the SIM card contacts facing down. Press to continue. 6. Completion Upon completion of the SIM Cloning process, a successful cloning message will be displayed, detailing the ICCID and IMSI data of the cloned SIM card. You can now insert the cloned SIM card into the device and continue evaluating it. Cellebrite UFED User Manual 33 Chapter 5: Cloning a SIM ID 5.4. Manually Creating a Cloned SIM Card Follow the steps below to create a cloned SIM card by manually entering the SIM card data: 1. Main Menu Select Clone SIM ID from the Main Menu. Use the keys to move between options. Press OK or to continue. 2. Select Source Select the Manually enter SIM data option. Use the keys to move between options. Press OK or to continue. 3. Enter ICCID Enter the ICCID number (up to 20 digits). Use the keys to highlight a digit and press to enter the highlighted digit. When finished, press F3 to continue. 34 Cellebrite UFED User Manual Chapter 5: Cloning a SIM ID 4. Enter IMSI Enter the IMSI number (up to 15 digits). Use the keys to highlight a digit and press to enter the highlighted digit. When finished, press F3 to continue. 5. Language Preferences (optional) Specify the default language preference for the SIM card. Use the keys to move between options. Press OK or to continue. 6. Advanced Settings (optional) If you wish to add SPN, GID1 and GID2 settings to the SIM card, select Yes at the Advanced Settings menu. Otherwise, select No. Use the keys to move between options. Press OK or to continue. Cellebrite UFED User Manual 35 Chapter 5: Cloning a SIM ID 7. Insert Target Card Insert a blank UFED SIM ID Access Card to the SIM card reader slot (at the front panel of the UFED) as shown, with the SIM card contacts facing down. Figure 14: Insert Target SIM card Press to continue. 8. Completion Upon completion of the SIM Cloning process, a successful cloning message will be displayed, detailing the ICCID and IMSI data of the cloned SIM card. You can now insert the cloned SIM card into the device and continue evaluating it. 36 Cellebrite UFED User Manual Chapter 5: Cloning a SIM ID 5.5. Creating a GSM Test SIM Card The GSM test SIM card is used to extract phone data when the original SIM is not available – a default ICCID and IMSI are programmed into the Cloned SIM ID Card to mimic the original missing card. Follow the steps below to create a GSM test SIM card: 1. Main Menu Select Clone SIM ID from the Main Menu. Use the keys to move between options. Press OK or to continue. 2. Select Source Select the Create GSM Test SIM option. Use the keys to move between options. Press OK or to continue. 3. Insert Target Card Insert a blank UFED SIM ID Access Card to the SIM card reader slot (at the front panel of the UFED) as shown, with the SIM card contacts facing down. Cellebrite UFED User Manual 37 Chapter 5: Cloning a SIM ID Figure 15: Insert SIM card Press to continue. 4. Completion Upon completion of the SIM Cloning process, a successful cloning message will be displayed, detailing the ICCID and IMSI data of the cloned SIM card. You can now insert the cloned SIM card into the device and continue evaluating it. 38 Cellebrite UFED User Manual Chapter 6: Performing Physical Extraction Chapter 6: Performing Physical Extraction 7.1. Overview The Physical Extraction function enables you to perform a physical extraction of the source device memory to a removable drive (USB drive or SD card), or to a connected PC. NOTE: Physical extraction of iOS and portable GPS devices is performed by the UFED Physical Analyzer application (version 2.4 or higher). For more information see the video tutorials on the Cellebrite web site and the Cellebrite YouTube channel. 7.2. Flowchart Define Source (Device Vendor, Model) Define Target (PC, USB, SD Card) Connect Source & Target Physical Extraction Figure 16: The Physical Extraction flowchart Cellebrite UFED User Manual 39 Chapter 6: Performing Physical Extraction 7.3. Performing a Physical Extraction Follow the steps below to perform a physical extraction from a source device. 1. Main Menu Select Physical Extraction from the Main Menu. Use the keys to move between options. Press OK or to continue. 2. Source Vendor Select the vendor (manufacturer) of the source device. Select the **Recently Used** option to select a device from the list of recently used devices or Use the keys to move between options. Press OK or to continue. 3. Source Model Select the device model. Use the keys to move between options. Press OK or to continue. To return to the previous menu, press . 40 Cellebrite UFED User Manual Chapter 6: Performing Physical Extraction 4. Target Selection Select the target location where the content will be copied to: USB Flash Drive - The content is stored in a separate directory on a USB disk drive connected to the TARGET USB port on the right panel of the UFED. SD Card - The content is stored in a separate directory on an SD card inserted in the SD card reader slot on the left panel of the UFED. PC - The content goes directly into the UFED Physical Analyzer application via a mini-USB to USB cable connection between the mini-USB port on the back panel of the UFED and a the PC. Use the keys to move between options. Press OK or to continue. 5. Extraction Instructions Make sure that the source device and selected target are appropriately connected to the UFED. Press to start the physical extraction process. Follow the instructions displayed on the UFED screen to complete the extraction process. 6. Completion Cellebrite UFED User Manual 41 Chapter 6: Performing Physical Extraction Upon the completion of the process the UFED will display the Extraction Summary message. The transfer process is complete and you may now disconnect the source device and the Target media from the UFED device. Connect the target media to a PC via a USB port or an SD card reader. The target media should include a new folder named in the following format Physical_Vendor_Model_and date of extraction. The folder contains the following files: *.UFD - UFED Extraction file, accessed by the UFED Physical Analyzer. Image file. To view and analyze the extracted data, please open it using the UFED Physical Analyzer application. 42 Cellebrite UFED User Manual Chapter 6: Performing Physical Extraction 7.4. Physical Extraction from a Cloned Chinese Device Performing a physical extraction of a cloned Chinese device requires a special license (see “Upgrading the UFED“ on page 71) and the Cellebrite UFED CHINEX kit to connect the source device to the UFED. For more information see the video tutorials on the Cellebrite web site and the Cellebrite YouTube channel. 7.4.1. Getting Started 1. Locate the device’s power button. 2. Check if either of the two adapter cables fit the device’s data connector. 3. Find all the connecting tips that fit the device’s connectors. NOTE: Some devices use the headphone connector for data, although they have other connectors. Make sure to find all the possible tips that fit the device’s connectors, including 3.5 or 2.5 mm headphone jack. 4. Identifying the Device’s Battery Contacts Open the device battery cover. Locate the positive (‘+’) and negative (‘–’) pole markings of the battery, usually found next to the contacts area. Make sure that the battery contacts are marked clearly on the device’s body. Remove the battery in order to gain access to the device’s Cellebrite UFED User Manual 43 Chapter 6: Performing Physical Extraction battery contacts. TIP: For battery contacts which are not clearly marked on the device’s body, use the pole markings on the battery body to identify them. To do that, simply flip the battery along its contacts edge, and place it along the edge of the battery housing, then mark the device’s contacts according to those on the battery. NOTE: Use a multimeter to identify the positive and negative poles of an unmarked battery. 7.4.2. Connecting to the Source Device 1. Using the supplied USB A to B cable: Connect the Enhanced Phone Adapter (EPA) unit (figure A) to the SOURCE USB port on the left side of the UFED (figure B). Connect a target USB drive, SD card, or computer to the appropriate TARGET USB port on the right side of the UFED. Figure A Figure B 2. Connect the appropriate cable to the cable connector of the EPA unit (if not yet connected). Use either: 44 The adapter cable (1) that fits the device’s data connector. The generic cable (2), in order to use the connecting tips that were found to fit any of the device’s connectors. Cellebrite UFED User Manual Chapter 6: Performing Physical Extraction 3. Remove the device battery to expose the battery contacts. 4. Connect the RED alligator clip to the device’s positive pole (‘+’), and the Black alligator clip to the negative pole (‘–’). Make sure the alligator clips are not closing a circuit by touching each other. NOTE: A beeping alarm will sound if the exposed sections of the attached alligator clips are touching each other. 5. Connect the adapter or generic cable to appropriate device connector. When using the generic cable, connect a tip to the connector at the end of the adapter cable and then connect the tip to the appropriate connector of the device. NOTE: A tip can be connected to the adapter cable in both directions. Cellebrite UFED User Manual 45 Chapter 6: Performing Physical Extraction 7.4.3. Performing a Physical Extraction 1. Main Menu Select Physical Extraction from the Main Menu. Use the keys to move between options. Press OK or to continue. 2. Source Vendor Select the Chinese phones option. Use the keys to move between options. Press OK or to continue. 3. Source Model Select the source device model. For an unknown device, select Generic Chinese phone. Use the keys to move between options. Press OK or to continue. 46 Cellebrite UFED User Manual Chapter 6: Performing Physical Extraction 4. Target Selection Select the target location where the content will be copied to: USB Flash Drive - The content is stored in a separate directory on a USB disk drive connected to the TARGET USB port on the right panel of the UFED. SD Card - The content is stored in a separate directory on an SD card inserted in the SD card reader slot on the left panel of the UFED. PC - The content goes directly into the UFED Logical Analyzer/Report Manager application via a mini-USB to USB cable connection between the mini-USB port on the back panel of the UFED and a the PC. Use the keys to move between options. Press OK or to continue. 5. Extraction Instructions Make sure that the source device and selected target are appropriately connected to the UFED. Press to start extraction. A beep will sound when a successful connection was established between the UFED and EPA units. Cellebrite UFED User Manual 47 Chapter 6: Performing Physical Extraction 6. Power the Device Press and hold the device’s power button. Keep holding the power button pressed until the extraction process begins. 7. Starting the Process The UFED unit will try to connect with the connected device. When Connecting is displayed, release the power button. If the connecting process fails, try using a different tip (see step 5 of “Connecting to the Source Device” on page 44). Press to return to step 6 of the process. Keep trying different tips until you succeed or have exhausted all available options. 8. Completion Upon the completion of the process the UFED will displays the Extraction Summary message. To view and analyze the extracted data, please open it using the UFED Physical Analyzer application. NOTE: Chinese device physical extraction requires special license. For more information about license updating, see “Upgrading the UFED“ on page 71. 48 Cellebrite UFED User Manual Chapter 6: Performing Physical Extraction For more information about Chinese devices physical extraction, see the video tutorials on the Cellebrite website and the Cellebrite YouTube channel. Cellebrite UFED User Manual 49 Chapter 7: Performing File System Extraction Chapter 7: Performing File System Extraction 8.1. Overview The File System Extraction option extracts all the accessible files on the mobile device using a logical process. Extracting the file system is an alternative way to get data from devices, including device models that are not currently supported with physical extraction. UFED Physical Analyzer provides access, and extracts hidden files and databases inaccessible by other file system acquisition tools. From the extracted file system you can get many different types of files that can be decoded and then searched for information, such as the Contacts or SMS database files. 8.2. Flowchart Define Source (Device Vendor, Model) Define Target (PC, USB, SD Card) Connect Source & Target File System Extraction Figure 17: The File System Extraction flowchart 50 Cellebrite UFED User Manual Chapter 7: Performing File System Extraction 8.3. Performing a File System Extraction Follow the steps below to perform a file system extraction from a source device. 1. Main Menu Select File System Dump from the Main Menu. Use the keys to move between options. Press OK or to continue. 2. Source Vendor Select the vendor (manufacturer) of the source device. Use the keys to move between options. Press OK or to continue. 3. Source Model Select the device model. Use the keys to move between options. Press OK or to continue. To return to the previous menu, press . Cellebrite UFED User Manual 51 Chapter 7: Performing File System Extraction 4. Target Selection Select the target location where the content will be copied to: USB Flash Drive - The content is stored in a separate directory on a USB disk drive connected to the TARGET USB port on the right panel of the UFED. SD Card - The content is stored in a separate directory on an SD card inserted in the SD card reader slot on the left panel of the UFED. PC - The content goes directly into the UFED Physical Analyzer application via a mini-USB to USB cable connection between the mini-USB port on the back panel of the UFED and a the PC. Use the keys to move between options. Press OK or to continue. 5. Extraction Instructions Make sure that the source device and selected target are appropriately connected to the UFED. Press to start the file system extraction process. Follow the instructions displayed on the UFED screen to complete the extraction process. 52 Cellebrite UFED User Manual Chapter 7: Performing File System Extraction 6. Completion Upon the completion of the process the UFED will displays the Extraction Summary message. To view and analyze the extracted file system, please open it using the UFED Physical Analyzer application. Cellebrite UFED User Manual 53 Chapter 8: Extracting Passwords Chapter 8: Extracting Passwords 9.1. Overview The Extract Passwords feature provides quick access to the device’s user passwords without the need to analyze an extraction using the UFED Physical Analyzer application. 9.2. Flowchart Define Source (Device Vendor, Model) Define Target (PC, USB, SD Card) Connect Source & Target Extract Passwords Figure 18: The Extract Passwords flowchart 54 Cellebrite UFED User Manual Chapter 8: Extracting Passwords 9.3. Performing Passwords Extraction Follow the steps below to extract the device passwords. 1. Main Menu Select Extract Passwords from the Main Menu. Use the keys to move between options. Press OK or to continue. 2. Source Vendor Select the vendor (manufacturer) of the source device. Use the keys to move between options. Press OK or to continue. 3. Source Model Select the source device model. NOTE: If you do not know the model, you can often find the device model on a sticker beneath the battery. Use the keys to move between options. Press OK or to continue. To return to the previous menu, press . Cellebrite UFED User Manual 55 Chapter 8: Extracting Passwords 4. Target Selection Select the target location where the content will be copied to: USB Flash Drive - The extracted passwords are stored on a USB disk drive connected to the TARGET USB port on the right panel of the UFED. SD Card - The extracted passwords are stored on an SD card inserted in the SD card reader slot on the left panel of the UFED. PC - The extracted passwords are stored on the connected PC. Display Only - The extracted passwords will be displayed on the UFED screen, without storing them. Use the keys to move between options. Press OK or to continue. 5. Connect Target Media If you have not yet plugged the USB drive or SD card into the UFED, do it now. The UFED is ready to copy the data to the storage device. NOTE: USB disk drive storage media should be connected to right side Target port. SD card storage media should be inserted in the SD card slot on the left side of the UFED unit. 56 Cellebrite UFED User Manual Chapter 8: Extracting Passwords 6. Extraction Instructions Make sure that the source device and selected target are appropriately connected to the UFED. Press to start extraction. NOTE: When connecting the device to the UFED unit, some device models will prompt you to select the connection mode on the device’s display screen. Choose Data Mode, PC, or PC Sync mode. Actual selection choice will vary depending on the device model. 7. Completion When the extraction process is completed, the password information will be displayed on the screen. When the device has more than one password, multiple passwords will be shown. Cellebrite UFED User Manual 57 Chapter 9: Device Tools Chapter 9: Device Tools 10.1. Overview The Device Tools option on the Main Menu allows you to run specific operations. 10.2. UFED Device Tools 10.2.1. Bluetooth scan This tool will scan for available Bluetooth devices in your proximity and allow you to pair with them. 1. Make sure that the Bluetooth feature of the device is enabled. 2. Select Bluetooth scan and press or OK. 3. Make sure that the Bluetooth dongle is connected to the UFED and press . 58 Cellebrite UFED User Manual Chapter 9: Device Tools The UFED will scan for available devices. 4. In the list of found devices, use the keys to scroll to a device, then press . 5. To complete the pairing, enter the displayed code in the device. 10.2.2. Switch to CDMA offline mode This tool enables you to switch radio on CDMA devices to offline mode. 10.2.3. Test Peek/Poke functionality This tool enables you to perform a Peek/Poke test in order to check if the device is supported by the UFED. 10.2.4. Activate TomTom trip log This tool enables you to activate or deactivate the trip log sharing feature of a connected TomTom device, which is often disabled by the user. 1. Select Activate TomTom trip log and press or OK. 2. Use the keys to select the option (Enable or Disable), then press or OK. 3. Connect a TomTom device to the UFED, then press . Cellebrite UFED User Manual 59 Chapter 10: Services Chapter 10: Services 11.1. Overview The Services option on the Main Menu allows you to perform various administrative tasks for the UFED. 11.2. UFED Services 11.2.1. Upgrade The Upgrade process enables you perform software upgrades for the UFED. For a detailed description of the Upgrade process, see “Upgrading the UFED“on page 71. 11.2.2. Software Versions Selecting this option displays the current version numbers and system information. 60 Cellebrite UFED User Manual Chapter 10: Services App – The application version. Full and Tiny – The software image versions. S/N – The UFED Serial Number. ID – The unique identifier, used during the activation process. 11.2.3. Counters Show counters – Shows the number of transactions performed by the UFED device. Reset counters – Resets all counters to zero. Set counters – Allows you to set the counters to a specific value. 11.2.4. Help Phone Specific Help – Allows you to view various help information about specific phones. Generate File – Allows you to generate and export the full help info to a USB disk drive. 11.2.5. Network Settings The network settings option allows you to configure various network settings for the UFED device, when connected to a network via the Ethernet port. Press F1 to configure the following settings: Dynamic IP – Set to Dynamic DNS or Static DNS. Cellebrite UFED User Manual 61 Chapter 10: Services Static IP – Enter a static IP address. 11.2.6. Screen Settings Contrast – Set the contrast level of the LCD screen. Backlight – Toggle the display backlight on or off. 11.2.7. Time and Date Show Time and Date – Display the current time and date. Set Time – Set the time zone, daylight saving time mode, the time, and the time format. Set Date – Set the date and the date format. 11.2.8. User Settings 11.2.9. Connectivity Auto Detect Phones – Enable or disable the automatic detection of a connected phone feature. When disabled, the Auto Detect option will not be available in the list of vendors of the Extract Phone Data process. 11.2.10. User interface 62 Language – Set the UFED menu language. Silent Mode – Mutes all UFED sounds. Cellebrite UFED User Manual Chapter 10: Services Failure Notification – Beeps when a UFED operation fails. Connect Device Prompt – UFED prompt to connect the target device after the “reading” process. Turning this feature off will save time by eliminating prompts during the extraction process. Estimated Transfer Time – Turns on or off the extraction time estimation, which appears during the extraction process. Help Instructions – Sets how the help information are displayed: F1 only – Displayed only when the user presses the F1 key. Prompt User – Prompt the user to display the help information. 11.2.11. Global Settings Create Log file – Sets the log files creation mode: Disable – Set not to generate log files. Enable– Set to generate log files. If the transaction is very fast we won't write all the information to the log Enable blocking – the transaction will be slower in order to write to the log. Recommended in case of debugging/error situation. Restore Factory Defaults – Reset the UFED to the original factory settings. Cellebrite UFED User Manual 63 Chapter 10: Services 11.2.12. Phonebook Setting Name Order – Change between Last Name First Name and First Name Last Name ordering when copying phonebook data. 11.2.13. UFED Settings 11.2.14. Report Information If these options are enabled, it allows you to enter free text such as case/file number, examiner’s name, department, location and notes to be added to each transfer process as part of the report. The user will be prompted during the transfer process to enter the values for these fields. This data will automatically be added to the Examination Report. 11.2.15. Mobile Client Settings Client Covert mode – Rename the application client name from “Cellebrite.sis/exe” to “AAA.sis/exe”. Client Uninstall Reminder – When enabled, the UFED will prompt the user to uninstall the client from the examined smartphone. 11.2.16. Report Settings Report Language – Sets the generated reports language. Report Format – Sets the generated reports visual formats: 64 Normal – The standard report structure, suitable to standard display screens. Cellebrite UFED User Manual Chapter 10: Services Compact – A compact report structure, suitable for devices with a small display area. Show MD5 in report – Toggles the display of the MD5 values which are generated for each file in the extracted data. Create MD5 list file – Generates a Checksums.md5 file that contains all the generated MD5 values of the extracted data. Show SHA256 in report – Toggles the display of the SHA 256 values which are generated for each file in the extracted data. Report Folder Format – Sets the generated reports folder name formats: Model Serial YYYY_MM_DD – The folder name will constructed from <the model name> <the model serial> <the year in 4 digits>_<the month in 2 digits>_<the day in 2 digits> YYYYMMDD Model Serial – The folder name will be constructed from <the year in 4 digits><the month in 2 digits><the day in 2 digits> <the model name> <the model serial> Generate XML Report – Toggles the generation of XML report. Partial Data Extraction – In case of an extraction error, sets whether or not to include the partially extracted data, up to the error point, in the generated report. Extraction Notes – Sets how the known issues notes about the extracted device are logged in the generated report: Embedded Notes – Each of the device specific notes will follow the content type they refer to in the report. Cellebrite UFED User Manual 65 Chapter 10: Services Separated Notes – All the device specific notes will be added at the end of the report. Disable – Device specific notes are not included in the report. Report Thumbnails – Sets how image are linked to the generated report. When disabled, the full size original images will be linked to the report. When selected, a low resolution thumbnail will be created for high resolution JPG images, to optimize the browser memory usage. 11.2.17. Global Settings Extract SIM after Phone – Toggles the extraction order of the phone and SIM card data. When enable, the SIM data will be extracted before the phone data. Compressed Volume Size – volume size for zip files on the flash disk 11.2.18. Extraction Settings Deleted SMS Extraction – Enable or disable extraction of deleted SMS messages. 11.2.19. Admin Settings NOTE: Please contact Cellebrite's support to receive your Admin password. Change Password: Enables you to change the admin and service passwords of the UFED: 66 Change Admin Password – Sets a new administrator password to the UFED. Change Service Password – Sets a new password to the Service menu. Cellebrite UFED User Manual Chapter 11: Using Bluetooth Connectivity Chapter 11: Using Bluetooth Connectivity 12.1. Overview On some phones, the UFED enables you to use Bluetooth instead of data cables for the extraction process. When you choose Bluetooth for the connectivity type, follow these instructions: 12.2. Phone Settings On the mobile phone, you must enable the phone to connect via Bluetooth, by turning Bluetooth capabilities on. In addition, you must set the Bluetooth services to ‘Visible’ on the phone. 12.3. UFED Bluetooth Adapter The UFED kit comes with a Bluetooth USB adapter, as shown. Connect the Bluetooth adapter in either of the two USB ports at the back panel of the UFED, then press to continue. Cellebrite UFED User Manual 67 Chapter 11: Using Bluetooth Connectivity 12.4. Pairing with the Source Device via Bluetooth The UFED searches for visible Bluetooth devices within its proximity, and provides a list of all devices that it finds. Select the appropriate device from this list. Use the keys to move between options. Press to continue. The UFED then instructs you to enter "0000" in the phone to complete the paring between the devices. Once doing this, all data transfer between the UFED and the phone will be performed using Bluetooth. 68 Cellebrite UFED User Manual Chapter 12: Using the Power up Cable Chapter 12: Using the Power up Cable 13.1. Overview The Power up Cable (optional) powers the device instead of the battery while performing an extraction. The Power up Cable contains 4 parts marked as: Data, Extra power, "-", "+". 13.2. Connecting the Power up cable 1. Connect the Extra Power connector to the UFED USB Port Extension. 2. Connect the Data connector to the UFED SOURCE USB Port Extension. 3. Identifying the Device’s Battery Contacts: Open the device battery cover. Locate the positive (‘+’) and negative (‘–’) pole markings of the battery, usually found next to the contacts area. Make sure that the battery contacts are marked clearly on the device’s body. Remove the battery in order to gain access to the device’s battery contacts. Cellebrite UFED User Manual 69 Chapter 12: Using the Power up Cable TIP: For battery contacts which are not clearly marked on the device’s body, use the pole markings on the battery body to identify them. To do that, simply flip the battery along its contacts edge, and place it along the edge of the battery housing, then mark the device’s contacts according to those on the battery. NOTE: Use a multimeter to identify the positive and negative poles of an unmarked battery. 4. Connect the RED alligator clip to the device’s positive pole (‘+’), the Primary Black alligator clip to the negative pole (‘–’) and the secondary Black alligator to middle pole in case of 3 poles or to the one next to the (-) in case of 4 poles. Make sure the alligator clips are not closing a circuit by touching each other. NOTE: A beeping alarm will sound if the exposed sections of the attached alligator clips are touching each other. 5. Make sure that: The source device is appropriately connected according to the source link selection (see “Source Link” on page 14): For Cable, connect the source device to the Phone power up cable using the references cable from the cable organizer kit. For Bluetooth, see “Using Bluetooth Connectivity” on page 67. For IrDA (Infrared), place the device with its infrared port directly in front of the UFED’s source or target infrared port. 6. Power up the device and follow the selected procedure instructions on the UFED screen. 70 Cellebrite UFED User Manual Chapter 13: Upgrading the UFED Chapter 13: Upgrading the UFED 14.1. Overview Cellebrite continuously updates its UFED software, providing support for new devices as they are released by the various vendors. The Upgrade process installs these various updates on your UFED. The UFED application is constructed of three main files: Tiny Image - Core system software Full Image - Additional core system software Application - The UFED application and data, including support for the various phone models. NOTE: When upgrading, choose either Application Upgrade or Images Upgrade. The Images Upgrade option updates both the Full and Tiny images. The UFED Upgrade menu also allows you to perform: Settings upgrade - UFED Auto Upgrade, FTP, FTP Proxy, HTTP and HTTP Proxy settings. License upgrade- Installed license information and License activation. You can upgrade your UFED in one of three ways: Locally via USB Disk Drive or via SD card Cellebrite UFED User Manual 71 Chapter 13: Upgrading the UFED Locally via PC Remotely via the Internet Automatic upgrade can be done when the UFED is connected to the internet, via the Ethernet connection. NOTE: When performing an upgrade, the UFED will reset itself. Do not interrupt the process at any stage. The full upgrade process takes approximately four minutes. 14.2. Upgrading from a USB Disk Drive or SD Card 1. Main Menu Select Services > Upgrade. Press OK or to continue. 2. Upgrade Menu Use the keys to move between the following options. Upgrade Application Now – The ‘application’ refers to the UFED application data, which includes the support information for any new phones. Upgrade Image Now – The ‘image’ refers to the core software that is running on the UFED. Press OK or to continue. 3. Selecting the Upgrade Source 72 Cellebrite UFED User Manual Chapter 13: Upgrading the UFED Use the keys to move between options choose USB Disk Drive or SD Card, according to where you have copied the upgrade files. Press OK or to continue. 4. Upgrading The UFED will display a list of the available upgrade files. Use the keys to select the correct file, then press OK or to continue. The UFED now performs the upgrade. Do not interrupt the UFED until the full process is complete. 5. Finish At the end of the upgrade process, a message indicating a successful update is displayed. The UFED will then restart automatically, and return you to the Main Menu. 14.3. Upgrading from a PC In order to upgrade from PC, the Upgrade Utility is required on your PC. If it is not already installed, run the installation located in the UFED Kit CD. The process of upgrading from a PC is similar to upgrading from a removable media (USB Disk Drive or SD Card), with a few additional steps on your PC, as described below. Cellebrite UFED User Manual 73 Chapter 13: Upgrading the UFED On the UFED: 1. Select Upgrade Type and Source Select Services > Upgrade, then choose the type of upgrade (Application, Image, Settings or License) and select PC as the source for the upgrade. Use the keys to move between options. Press OK or to continue. On the PC: 2. Run the Upgrade Program Select Start > Programs > Cellebrite > Upgrade Program. 3. Selecting the Upgrade Type Select the upgrade type, according to the type that you chose in step 1. 4. Connect the UFED to the PC Use the USB to mini-USB cable provided in the kit to connect between any of the USB port on your PC and the PC mini-USB port at the back connections panel of the UFED. 5. Start the Upgrade Process Follow the steps displayed by the PC application. 6. Upgrade The UFED now performs the upgrade. Do not interrupt the UFED until the full process is complete. 74 Cellebrite UFED User Manual Chapter 13: Upgrading the UFED 7. Finish At the end of the upgrade process, a message indicating a successful update is displayed. The UFED will then restart automatically, and return you to the Main Menu. 14.4. Upgrading from the Web 1. Configure HTTP Settings (one time only) To upgrade from the web, first make sure that the FTP/HTTP settings are initialized properly. For most network environments, the UFED comes pre configured properly. In some cases where network environments require proxies and user id/passwords, set these settings as described in Section 11.5 2. Connect the UFED to the network Connect the UFED device to your network via the Ethernet port on the top of the UFED. Use a standard Ethernet cable for this connection. 3. Select Update Type and Source Select Services > Upgrade, then choose the type of upgrade (Application, Image, Settings or License) and select PC as the source for the upgrade. Use the keys to move between options. Press OK or to continue. 4. Upgrading The UFED now performs the upgrade, by fetching the upgrade files from the HTTP server. Do not interrupt Cellebrite UFED User Manual 75 Chapter 13: Upgrading the UFED the UFED until the full process is complete. 5. Finish At the end of the upgrade process, a message indicating a successful update is displayed. The UFED will then restart automatically, and return you to the Main Menu. 14.5. Setting Automatic Upgrade from the Web If your UFED is connected to the network via the Ethernet port, you can configure it to perform automatic upgrades. This enables you to keep your UFED up-to-date without requiring any ongoing interaction. We recommend using this method, as it eliminates the manual process for each upgrade, and guarantees that your UFED remains up to date. To set automatic upgrade: 1. Accessing From the Main Menu, select Services > Upgrade > Upgrade Settings. > Auto Upgrade Settings. 2. Enabling With the Enable Automatic Upgrade option selected, press OK. Use the key to move to the Enable option, then press OK to select it. Press to Save and exit back to the Auto Upgrade Settings menu. 76 Cellebrite UFED User Manual Chapter 13: Upgrading the UFED 3. Upgrade Method Use the key to move to the Method option, then press OK. Use the keys to move between the options: FTP – The UFED will access an FTP site in order to get the upgrade files HTTP – The UFED will use HTTP to access the upgrade files Press OK to select highlighted option. Press to Save and exit back to the Auto Upgrade Settings menu. Next, set the following settings according to your preferences and your network requirements, as described in the following table. Option Description Auto Upgrade: Period Choose how often you want the UFED to check for upgrades – Daily, Weekly or Monthly. FTP Settings If you chose FTP for your upgrade method, specify the following FTP details, as provided by your distributor: Cellebrite UFED User Manual 77 Chapter 13: Upgrading the UFED FTP Address Port Number Username Password Press F3 after each screen in order to continue. FTP Proxy Settings Direct Connect – Choose this if your network security does not require a proxy to access external FTP sites. Use Proxy – If a proxy is needed, choose this option. You will then be asked to provide the address and port of the proxy HTTP Settings Similar to the FTP settings, when the upgrade method is HTTP HTTP Proxy Settings Similar to FTP Proxy settings, when the upgrade method is HTTP. App – The application version Full and Tiny – The software image versions S/N – The UFED Serial Number ID – The unique identifier 78 Cellebrite UFED User Manual Appendix A: Technical Specifications Appendix A: Technical Specifications Power Supply: Input: AC 100-240V, 50/60Hz Output: DC 12V, 2A Interfaces: RJ-45 (source phone) RJ-45 (target side) USB (source phone) USB (target phone) Mini DIN to PC COM Port SIM reader IrDA (source and target) IRDA 2 Infrared transceiver modules. Supports STD IrDA speeds (up to 115kbps) Ethernet controller LAN91C111, 10/100MBPS Ethernet- controller, and an 8KB packet buffer SDRAM CPU Intel XScale micro-architecture Cellebrite UFED User Manual 79 Appendix A: Technical Specifications CPU frequency 520MHz Bus frequency 104 MHz Memory Capacity SD RAM 128 MB (RAM) Flash memory Intel StrataFlash embedded memory 64 MB density Operating System Microsoft Windows CE Operating Temperature: 0°C to 70°C / 32°F to 158°F Storage Temperature: -40°C to 80°C / -41°F to 176°F Maximum relative humidity 95% 80 Cellebrite UFED User Manual Appendix A: Technical Specifications Cellebrite UFED User Manual 81 UFED (Universal Forensic Extraction Device) User Manual User Manual Version 1.1.9.7 March 2012 1