Download Information Manual
Transcript
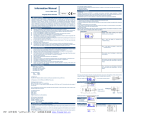
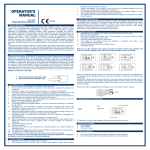
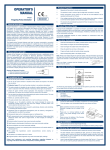
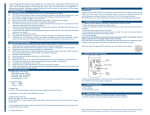
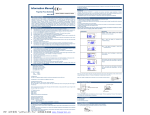
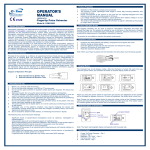
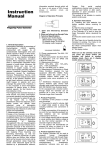
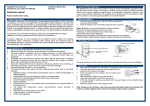
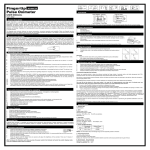
5.4 Low voltage warning will be indicated in visual window when battery voltage is so low that normal operation of the Oximeter might be influenced. Information Manual Display Mode Description Display mode when opening the device, horizontal and normal facing Version: FDA 1.0C22 Drive Medical Fingertip Pulse Oximeter Item # 18705 After one click, the display is vertical and normal facing 1.Measurement principle The Oximeter is calibrated to display functional oxygen saturation. Principle of the Oximeter is as follows: An experience formula of data process is established taking use of Lambert Beer Law according to Spectrum Absorption Characteristics of Reductive hemoglobin(R Hb) and Oxyhemoglobin (O2 Hb) in glow and near-infrared zones. Operation principle of the instrument is Photoelectric Oxyhemoglobin Inspection Technology is adopted in accordance with Capacity Pulse Scanning and Recording Technology, so that two beams of different wavelength of lights (660nm glow and 940nm near infrared light) can be focused onto human nail tip through perspective clamp finger-type sensor. Then measured signal can be obtained by a photosensitive element, information acquired through which will be shown on two groups of LEDs through process in electronic circuits and microprocessor. 2.Precautions for use l l l l l l l l l l l Operation of 18705 may be affected by the use of an electrosurgical unit (ESU). The 18705 must be able to measure the pulse properly to obtain an accurate SpO2 measurement. Verify that nothing is hindering the pulse measurement before replying on the SpO2 measurement. Do not use the 18705 in an MRI or CT environment Do not use the 18705 in situations where alarms are required. The device has no alarms. Explosion hazard: Do not use the 18705 in an explosive atmosphere. The 18705 is intended only as an adjunct in patient assessment. It must be used in conjunction with other methods of assessing clinical signs and symptoms. Check the pulse oximeter sensor application site frequently to determine the positioning of the sensor and circulation and skin sensitivity of the patient. Do not stretch the adhesive tape while applying the pulse oximeter sensor. This may cause inaccurate readings or skin blisters. Before use, carefully read the manual. The 18705 has no SpO2 alarms, it is not for continuous monitoring, as indicated by the symbol. Prolonged use or the patient’s condition may require changing the sensor site periodically. Change sensor site and check skin integrity, circulatory status, and correct alignment at least every 4 hours. 3.Inaccurate measurements may be caused by l l l l l l l l l l l l Do not sterilize the device using autoclaving, ethylene oxide sterilizing, or immersing the sensors in liquid which may cause inaccurate readings. The device is not intended for sterilization. Significant levels of dysfunctional hemoglobin’s (such as carbonxy- hemoglobin or met hemoglobin) Intravascular dyes such as indocyanine green or methylene blue SpO2 measurements may be adversely affected in the presence of high ambient light. Shield the sensor area (with a surgical towel, or direct sunlight, for example) if necessary. Excessive patient movement High-frequency electrosurgical interference and defibrillators Venous pulsations Placement of a sensor on an extremity with a blood pressure cuff, arterial catheter, or intravascular line The patient has hypotension, severe vasoconstriction, severe anemia, or hypothermia The patient is in cardiac arrest or is in shock Fingernail polish or false fingernails may cause inaccurate SpO2 readings. Follow local ordinances and recycling instructions regarding disposal or recycling of the device and device components, including batteries. 5.5 The product will automatically be powered off when no signal is in the product for longer than 8 seconds. 6. Product Intended Use Intended Use: Fingertip Pulse Oximeter 18705 is a portable non-invasive, spot-check, oxygen saturation of arterial hemoglobin (SpO2) and pulse rate of adult and pediatric patient at home, and hospital (including clinical use in an internist/surgery, Anesthesia, intensive care and etc). Not for continuously monitoring. The 18705 requires no routine calibration or maintenance other than replacement of batteries. 7. Operation Instructions 7.1 Installing two AAA batteries into battery cassette before covering its cover. 7.2 Open the clamp as illustrated in the picture below 7.3 Plug one of fingers into rubber hole of the Oximeter (it is best to plug the finger thoroughly) before releasing the clamp 7.4 Press the switch button once on front panel. 7.5 Your finger do not tremble during the Oximeter is working. Your body is not recommended in moving status 7.6 Read correspondent datum from display screen. 7.7 Two display modes. After turn on the Oximeter, each time you press the power switch, the Oximeter will switch to another display mode, there are 2 display modes shown as follows When you press the power switch for a long time (more than one second), the brightness of the Oximeter will be changed by degrees, there are 10 levels on brightness; the default level is level four. When your finger is plugged into the Oximeter, your nail surface must be upward. 8. Brief Description of Front Panel SPO2 Pulse Column PR 4.Technical Specifications 4.1 Display type: OLED display SPO2 display range: 0-99% PR display range: 30-254 BPM PR display mode: bar graph Data update time: < 15 s 4.2 LED Wavelengths Red: 660nm Infrared: 940nm 4.3 Battery life Two AAA 1.5V alkaline batteries could be continuously operated as long as 30 hours. 4.4 Resolution: ±1% for SPO2 and ±1BPM for Pulse rate 4.5 Measurement Accuracy: SPO2: 70%--99%, ±3%; ≤70% no definition. PR: 30—235 BPM, ± 2 bpm during the pulse rate range of 30-99 bpm and 2% during the pulse rate range of 100-254 bpm Power Switch Patient pulse quality signals are indicated as such by bar graph. The higher the amplitude of the bar, the higher the quality of the pulse signal. 9.Product Accessories 9.1 One Lanyard 9.2 Two batteries 9.3 One instruction manual 10.Battery Installations 10.1 Put the two AAA batteries into battery cassette in correct polarities. 10.2 Push the battery cover horizontally along the arrow shown as below: 4.6 It is equipped with a function switch, through which the Oximeter can be powered off in case no finger is the Oximeter longer than 8 seconds. 4.7 Outline dimension: Length: 58mm Width: 32mm Height: 34mm Weight: 50g (including two AAA batteries) 4.8 Environment requirements: Operation Temperature: 5-40 Storage Temperature: -20-70 Humidity : 15%-80% in operation <93% in storage Declaration: EMC of this product comply with IEC60601-1-2 standard. 5.Product Properties 5.1 Operation of the product is simple and convenient 5.2 The product is small in volume, light in weight (total weight is about 50g including batteries) and convenient in carrying 5.3 Power consumption of the product is low and the two originally-equipped two AAA batteries can be operated continuously for 30 hours. Notes: Battery polarities must be correctly installed. Otherwise, damage might be caused to device. Please put or remove batteries in right order, or is likely to damage the device bracket. Please remove the battery if the Oximeter will not be used for long time 11.Hang Lace Installations 11.1 Thread thinner end of the hang lace through the hanging hole 11.2 thread thicker and of the lace through the threaded end before pulling it tightly. 12.Maintenance and Storage 12.1 Replace the batteries timely when low voltage lamp is lighted 12.2 Clean surface of the fingertip Oximeter before it is used in diagnosis for patients 12.3 Remove the batteries inside the battery cassette if the Oximeter will not be operated for a long time 12.4 It is best to preserve the product in a place where ambient temperatures –10-40 (14-104℉) and humidity is 10%-80% It is recommended that the product should be kept in a dry environment anytime. A wet ambient might affect its lifetime and even might damage the product. Please follow the law of the local government to deal with used battery Cleaning the 18705 Please use the medical alcohol to clean the rubber touching the finger inside of Oximeter with a soft cloth dampened with 70% isopropyl alcohol, and clean the test finger using alcohol before and after each test. Do not pour or spray and liquids onto the Oximeter, and do not allow any liquid to enter any openings in the device. Allow the Oximeter to dry thoroughly before reusing. 800 MHz to 2.5 GHz Where P is the maximum output power rating of the transmitter in watts (W) according to the transmitter manufacturer and d is the recommended separation distance in metres (m). Field strengths from fixed RF transmitters, as determined by an electromagnetic site surveya, should be less than the compliance level in each frequency range. b Interference may occur in the vicinity of equipment marked with following symbol: 13.Calibrating the 18705 l l l The functional tester cannot be used to assess the accuracy of the Oximeter. Index 2 that made by Bioteck company is a function tester. Set Tech to 1, R curve to 2, and then user can use this particular calibration curve to measure the Oximeter. The test methods used to establish the SpO2 accuracy is clinical testing. The oximeter used to measure the arterial hemoglobin oxygen saturation levels and these levels are to be compared to the levels determined from arterial blood sampling with a CO-Oximeter. 14. Possible Problems and resolutions Problems Possible reason Solution SpO2% or pulse rate can not be shown normally 1. Finger is not plugged correctly 2. Patient’s SpO2value is too low to be measured 1.Retry by plugging the finger 2. There is excessive illumination 3. Measure more times, If you can make sure about no problem existing in the product. Please go to a hospital timely for exact diagnosis SpO2% or pulse rate is shown unstably 1. Finger might not be plugged deep enough 2. Excessive patient movement 1.No battery or low power of battery 2.Battery might be installed incorrectly 3. The Monitor might be damaged 1. The Oximeter is automatically powered off when no signal is detected longer than 8 seconds 2. The batteries power is too low to work 1. Err 3 means the red emission LED is damaged. 2. Err 4 means the infra-red emission LED is damaged. Err 6 means the crystal is failure Err 7 means all the emission LED or reception dioxide is damaged. The Monitor can not be powered on Indication is suddenly off “Error3” or “Error4” Displayed on screen Error 6 “Error7” displayed on screen 1. Retry by plugging the finger 2. Be calmness. 1. Please replace battery 2. Please reinstall the battery 3. Please contact with local customer service centre 1. Normal 2. Replace the battery 1. 2. Check the red emission LED Check the infra-red emission LED Change the crystal Check the emission LED and reception dioxide. 15. Declaration Guidance and Manufacture’s declaration – electromagnetic emissionsFor all EQUIPMENT and SYSTEMS Guidance and Manufacture’s declaration - electromagnetic emission Guidance and Manufacture’s declaration – electromagnetic environment specified below. The customer of the user of the Pulse Oximeter (18705) should assure that it is used in such and environment. Emission test Compliance Electromagnetic Environment – guidance RF emissions CISPR 11 Group 1 The pulse Oximeter (18705) uses RF energy only for very low and is not likely to cause interference in nearby electronic equipment. RF emissions CISPR 11 Class B The pulse Oximeter (18705) is suitable for use in all establishments, including domestic Harmonic emissions Not Applicable establishments and those directly connected IEC 61000-3-2 to the public low-voltage power supply Voltage fluctuations/ flicker Not Applicable network that supplies buildings used for emissions domestic purposes. IEC 61000-3-2 Guidance and Manufacture’s declaration – electromagnetic immunityFor all EQUIPMENT and SYSTEMS Guidance and Manufacture’s declaration - electromagnetic immunity Guidance and Manufacture’s declaration – electromagnetic environment specified below. The customer of the user of the Pulse Oximeter (18705) should assure that it is used in such an environment. Immunity test IEC 60601 test Compliance Electromagnetic Environment – guidance level Level Electrostatic +/- kV contact +/kV Floors should be wood, concrete or ceramic Discharge (ESD) +/- 8kV air contact tile. If floor are covered with synthetic IEC 61000-4-2 +/- 8kV air material, the relative humidity should be at least 30%. Power frequency (50/60 3A/m 3A/m Power frequency magnetic fields should be Hz) magnetic field at levels characteristics of a typical location IEC 61000-4-8 in a typical commercial or hospital environment. Guidance and Manufacture’s declaration – electromagnetic immunityFor all EQUIPMENT and SYSTEMS that are not LIFE-SUPPORTING Guidance and Manufacture’s declaration - electromagnetic immunity Guidance and Manufacture’s declaration – electromagnetic environment specified below. The customer of the user of the Pulse Oximeter (18705) should assure that it is used in such an environment. Immunity IEC 60601 test Compliance Electromagnetic Environment – guidance test level Level Portable and mobile RF communications equipment Radiated 3 V/m 3 V/m should be used no closer to any part of the Pulse RF 80 MHz to 2.5 Oximeter (18705), including cables, than the IEC GHz recommended separation distance calculated from the 61000-4-3 equation applicable to the frequency of the transmitter. Recommended separation distance NOTE 1 At 80 MHz and 800 MHz, the higher frequency range applies. NOTE 2 These guidelines may not apply in all situations, Electromagnetic propagation is affected by absorption and reflection structures, objects and people. Field strengths from fixed transmitters, such as base station for radio (cellular/cordless) telephones and land mobile radios, amateur radio, AM and FM radio broadcast and TV broadcast cannot be predicted theoretically with accuracy. To assess the electromagnetic environment due to fixed RF transmitters, an electromagnetic site survey should be considered. If the measured field strength in the location in which the Pulse Oximeter (18705) should be observed to verify normal operation. If abnormal performance is observed, additional measurements may be necessary, such as reorienting of the relocating the Pulse Oximeter (18705). B Over the frequency range 150 kHz to 80 MHz, fields strengths should be less than 3 V/m Recommended separation distances between portable and mobile RF communications equipment and the EQUIPMENT or SYSTEMS For all EQUIPMENT and SYSTEMS that are not LIFE-SUPPORTING Recommended separation distances between portable and mobile RF communications equipment and Pulse Oximeter (18705) The Pulse Oximeter (18705) is intended for use in electromagnetic environment in which radiated RF disturbances are controlled. The customer or the user of the Pulse Oximeter (18705) can help prevent electromagnetic interference by maintaining a minimum distance between portable and mobile RF communications equipment (transmitters) and the Pulse Oximeter (18705) as recommended below, according to the maximum output power of the communications equipment. Rated maximum output Separation distance according to frequency of transmitter (m) power of transmitter 80 MHz to 800 MHz 800 MHz to 2.5 GHz (W) 0.01 0.1167 0.2334 0.1 0.3689 0.7378 1 1.1667 2.3334 10 3.6893 7.3786 100 11.6667 23.3334 For transmitters rated at a maximum output power not listed above, the recommended sepratation distance d in metres (m) can be estimated using the equation applicable to the frequency of the transmitter, where P is the maximum output power rating of the transmitter in watts (W) according to the transmitter manufacturer. NOTE 1 At 80 MHz and 800 MHz, the separation distance for the higher frequency range applies. NOTE 2 These guidelines may not apply in all situations. Electromagnetic propagation is affected by absorption and reflection from structures, objects and people. 16. Symbol Definitions Symbol Definition The equipment type is BF Refer to user manual before application Hemoglobin saturation Heart rate (BPM) Low power indication Serial No No for continuous monitoring 2 Year Limited Warranty Your Drive brand product is warranted to be free of defects in materials and workmanship for two years of the original consumer purchaser. This device was built to exacting standards and carefully inspected prior to shipment. This 2 year Limited Warranty is an expression of our confidence in the materials and workmanship of our products and our assurance to the consumer of years of dependable service. In the event of a defect covered by this warranty, we will, at our option, repair or replace the device. This warranty does not cover device failure due to owner misuse or negligence, or normal wear and tear. If you have a question about your Drive device or this warranty, please contact an authorized Drive dealer. Drive Medical Design & Manufacturing 80 MHz to 800 MHz 99 Seaview Boulevard Port Washington, NY 11050 www.drivemedical.com - 516-998-4600


