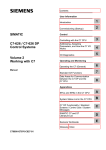
1
identSNAPSHOT
User Manual
From Version: 1.5 SP2
Date: 12/10/2014
PridaNet
identSNAPSHOT
identSNAPSHOT User Manual
Table of contents
1.
INSTALLING THE PROGRAM ............................................................................................................. 3
1.1
Preconditions ................................................................................................................................ 3
1.2
Installation ..................................................................................................................................... 3
2.
STARTING IDENTSNAPSHOT............................................................................................................. 4
3.
FUNCTIONALITY .................................................................................................................................. 4
3.1
This software offers you the possibility of: .................................................................................... 4
3.2 Program menu .............................................................................................................................. 4
3.2.1
Selecting a language .......................................................................................................... 4
3.2.2
Calling the help function ..................................................................................................... 5
3.2.3
Setting the configuration ..................................................................................................... 5
3.2.4
Registration ......................................................................................................................... 6
3.2.5
Exiting the program ............................................................................................................. 7
3.3 Function menu .............................................................................................................................. 8
3.3.1
New Machine ...................................................................................................................... 8
3.3.2
Loading a machine file ........................................................................................................ 8
3.3.3
Generating a machine file ................................................................................................... 8
3.3.4
Upload ................................................................................................................................. 8
3.3.4.1
3.3.4.2
3.3.4.3
3.3.5
3.3.6
3.3.7
3.4
4.
Uploading a machine file .............................................................................................................. 8
Mass upload ................................................................................................................................. 9
Check data ................................................................................................................................. 10
New machine type ............................................................................................................ 10
Delete machine type ......................................................................................................... 10
Create log ......................................................................................................................... 11
Structure of the input screen ....................................................................................................... 11
DATA INPUT ....................................................................................................................................... 12
4.1
Machine data ............................................................................................................................... 12
4.2 Address data ............................................................................................................................... 13
4.2.1
Loading and selecting addresses ..................................................................................... 13
4.2.2
Editing addresses (to be available soon) .......................................................................... 13
4.2.3
Managing addresses ........................................................................................................ 15
4.2.4
Exporting address data ..................................................................................................... 16
4.3 Machine parts list ........................................................................................................................ 16
4.3.1
Parts list, 2-column ........................................................................................................... 18
4.3.2
Parts list, 4-column ........................................................................................................... 18
4.3.3
Parts list, 6-column ........................................................................................................... 19
4.3.4
Parts list, 4-column EUNA ................................................................................................ 19
4.3.5
Parts list, XML SINUMERIK .............................................................................................. 19
4.3.6
Parts list column number depended e. g. from SAP......................................................... 20
4.3.7
Editing the list data............................................................................................................ 20
4.3.8
Scanner ............................................................................................................................. 22
4.3.9
Output of the machine parts list ........................................................................................ 22
4.4
Machine log ................................................................................................................................. 22
4.5
Option data of the controller ........................................................................................................ 23
4.6
Contract data of the plant ............................................................................................................ 23
5.
EXTENDING AVAILABLE LANGUAGES .......................................................................................... 23
6.
USAGE AND DATA PRIVACY CONDITIONS ................................................................................... 24
Page 2 of 24
PridaNet
DF CS MC SD
© Siemens AG, 2014. All Rights Reserved
identSNAPSHOT_User_manual_V01.05 SP2_en.docx
Status: 12/10/2014
identSNAPSHOT User Manual
1. Installing the program
1.1
Preconditions
You PC should have, as a minimum, a
•
Processor: Pentium 4; 1.0 GHz or comparable
•
Work memory of 1 GB or more
•
Free hard disk memory of 80 MB
•
Graphics card: 32 MB RAM and 32 bit color depth
•
Screen resolution of 1024 x 768 or better
•
Operating system, Microsoft Windows XP SP3, Microsoft Windows Vista SP1, Microsoft
Windows 7 or Microsoft Windows 8
•
Microsoft Excel 2003, Microsoft Excel 2007 or Microsoft Excel 2010
•
Microsoft .Net Framework Version 4.0 (or higher)
1.2
Installation
To install this program, unzip the "identSNAPSHOT.zip" file into any local drive and subdirectory of your
computer. In order to save the user specific configuration data, it is necessary to have unlimited write
access on this directory. It is not possible to install this program on a network drive. When extracting, the
specified folder structure is created with all of the necessary files.
This completes the installation. An additional installation e.g. using a Setup.EXE is not required.
Several program versions can co-exist on your computer. However, the name of the program version
must be different, e.g. identSNAPSHOT V1.3 SP3.
From software release V1.5, when powering up, a check is made for a more recent software version of
identSNAPSHOT. If yes, then you are asked if you wish to make an automatic update. An online connection is required to do this.
If you agree, the update is
downloaded and subsequently installed. For the
appropriate settings, also
see, "Setting the configuration".
Page 3 of 24
PridaNet
DF CS MC SD
© Siemens AG, 2014. All Rights Reserved
identSNAPSHOT_User_manual_V01.05 SP2_en.docx
Status: 12/10/2014
identSNAPSHOT User Manual
If a program update is to be carried out via download, your address data must be entered under “My address” for registration. Data that has already been entered is saved and re-used in the case of further
downloads. The mandatory data fields are marked with *.
2. Starting identSNAPSHOT
You can start the program by double-clicking on the "Start identSNAPSHOT" file or using a link, which
you can place on your desktop.
or
Start options, see Chapter “Setting the configuration”
3. Functionality
3.1
•
This software offers you the possibility of:
Generating and saving an XML file for a specific machine and uploading it to iBase Service
Plattform Industrie
•
Assigning address data of all of the companies involved in the manufacture, distribution and
operation of this machine
•
Loading, modifying and extending existing XML address files
•
Loading an existing parts list, e.g. in Excel or XML format
•
Manually changing machine parts lists or entering with a scanner and extending
•
Writing an electronic machine logbook
3.2
Program menu
3.2.1 Selecting a language
One of the listed operator interface languages
can be selected using the "Language" button.
Page 4 of 24
PridaNet
DF CS MC SD
© Siemens AG, 2014. All Rights Reserved
identSNAPSHOT_User_manual_V01.05 SP2_en.docx
Status: 12/10/2014
identSNAPSHOT User Manual
3.2.2 Calling the help function
With "Help" you obtain information about the software version of this program and its Operating Manual.
3.2.3 Setting the configuration
•
"My address" will open the input window for the registration data and mail addresses.
•
If "Display mail certificate list during upload" has been activated, the mail list will be displayed
before each upload. The default setting is activated.
•
Via „Change directories“ you can define where the data used and generated by this program
can be saved. You may define the folders for machine file (iBase Service Plattform Industrie),
parts list, data (address and machine templates) and export separately. This allows access to the
same data to several users. For example when stored in a common network drive.
•
With „Authorize new file names“ you can preselect if saving of changes in address data should
always be done in the original file or if a new file should be created. Default inactive.
•
As start option, it can be defined as to whether existing machine type and address data should be
automatically loaded from the existing XML files while the program starts. This is activated by setting the check mark under "Load Templates". Default active.
•
The program header can be displayed or hidden by using the ”Display header”.
•
The relevant text box or selection box can be displayed using "Display project ID", “Display
equipment ID” and "Display customer project ID". The display is activated as the default setting. Default active.
• If the "Load template data" option is set in the configuration, then address data, machine type,
project ID and additional parts list components are read from the preselected template data and
other data from the loaded machine file when importing with "Load machine file (with template)".
Default inactive.
Preconditions:
Before loading the machine file, an address, a machine type or a project ID must be selected
from the respective drop-down list.
OEM address, country of final destination for end user address and machine type are mandatory
fields and must be filled in.
If the "Load template data" option has been activated, the address data and machine types can
no longer be edited (write-protected).
If there is one valid parts list file in the "Parts" directory, then these parts list
components are added to the already available parts list without checkback.
Page 5 of 24
PridaNet
DF CS MC SD
© Siemens AG, 2014. All Rights Reserved
identSNAPSHOT_User_manual_V01.05 SP2_en.docx
Status: 12/10/2014
identSNAPSHOT User Manual
The project ID is only overwritten when the "Show project ID" field has been switched to
visible.
An appropriate message is displayed if data is missing or incorrect.
Fields that are not filled with data from the templates are overwritten with data from the
machine file.
•
When the program is started, a check is made on the server as to whether a new program version is available. This function can be enabled or disabled using "Check for updates". Default
active. The update check can be manually started at any time with "Now check for updates".
The precondition for a successful download is that your computer is connected to the Internet at
this time and your address data has been completely entered under "My address". Also refer to
the Chapter "Installation" and “Registration”.
• From a central database, using "Load new addresses" addresses dependent on the user can
be loaded when powering up. This address data is provided by your Siemens partner. Default active. You can now start to download the address data at any time using "Now load addresses" .
Also for this function, you need an Internet connection and you must register.
3.2.4 Registration
You must first register in order to upload data into the iBase Service Platform Industry database using
identSNAPSHOT. You only have to register once before the first upload. All of the required data are
saved locally on your PC. Several users can register at one PC, and therefore use identSNAPSHOT
without any restrictions.
The user can make a selection from the address data list and therefore activate his user data. This is
important, as feedback and the upload certificate are sent to this mail address.
With "My address” under "Configuration" or with "Machine infos upload", if you have still not registered, the window to manage your user address is opened. Here, an already existing user address can be
selected, or a new one created.
If all of the required address data have been entered (marked with* and written in red), then with "Save"
and with "Register" you can transfer these to identSNAPSHOT for registration. At the same time, the
input fields to enter your user ID are opened. At this time, your PC must be online and connected with the
Internet.
As response, you receive an e-mail from the identSNAPSHOT registration with your user ID in the form of
a graphic.
The numerical sequence 82489503 is shown here as example
These digits must be entered in this sequence into the input field "ID" and "Confirm ID“. The registration
is completed with "OK". If the registration was successful, the e-mail address has a gray background.
The user ID is then permanently assigned to this e-mail address, and the e-mail address can no longer be
changed.
Page 6 of 24
PridaNet
DF CS MC SD
© Siemens AG, 2014. All Rights Reserved
identSNAPSHOT_User_manual_V01.05 SP2_en.docx
Status: 12/10/2014
identSNAPSHOT User Manual
In the future, if you no longer wish to upload data to your iBase Service Platform Industry database, the
you can delete your registration data from the identSNAPSHOT registration with "Delete registration". If
it is necessary to change your data, you can use "Change registration".
In the "Mail certificate to" tab under "my address" it is possible to save several e-mail addresses for
feedback purposes. The default setting includes the e-mail addresses of the manufacturer, dealer and
end customers from the address lists, but they are not activated. The e-mail address of the registered
user is also pre-assigned and activated. The corresponding address is activated in the "Send mail" column. The active number (e.g. 2 of 6) is shown in parentheses in the tab header.
If the "mail certificate" option is set for your user ID, then after each successful upload, all the active email addresses receive feedback in the form of an e-mail about the notified SIEMENS products, including
a current product status information in the form of a "Lifecycle Information Services Upload Certificate”.
Before each upload, this option can be activated or deactivated. This does not influence your registration,
and this always remains active.
For information regarding data privacy, please refer to the corresponding Internet pages, which you can
access online by pressing the appropriate buttons.
3.2.5 Exiting the program
The program is closed using "Exit". If changed data have not been saved yet, a message is displayed
asking if they should be saved.
Page 7 of 24
PridaNet
DF CS MC SD
© Siemens AG, 2014. All Rights Reserved
identSNAPSHOT_User_manual_V01.05 SP2_en.docx
Status: 12/10/2014
identSNAPSHOT User Manual
3.3
Function menu
3.3.1 New Machine
If data from several machines are to be input one after another, then the input fields are deleted with this
button and activated for new data.
3.3.2 Loading a machine file
This button "Machine infos load" allows you to load an existing machine file to process its data. The
associated folder is opened where you can then select the required file.
Machine name, Machine type, commissioning date 1 and Plant ID cannot be altered any more.
For special functions when loading files and supplemented standard data, see "Setting configuration data", Section "Loading template data".
3.3.3 Generating a machine file
All previously entered data associated with an XML file are combined and saved in the required folder by
pressing the "Machine infos save" button. If data that are absolutely necessary have still not been entered, then a message is displayed indicating which data is still missing. "MACHINE_FILES" is recommended as the folder where data can be saved; however, any other folder can be selected.
3.3.4 Upload
Here, you have the option of selecting between various uploads and checks. An Internet connection is
always required for all upload services.
3.3.4.1 Uploading a machine file
After a machine file was generated, this can be uploaded to iBase Service Plattform Industrie using "Machine infos upload". In order to upload data, your PC must have an Internet connection, as data is
transferred to iBase Service Plattform Industrie online. A message is displayed if your PC is not online
and connected with the Internet.
If an identification has not been successfully performed, the input field “my address” is first opened to
perform an identification (see Chapter, Registration).
If the PC is used by several users to upload data, then you should ensure that you have activated your
self as user. You can select this in the address data list under “Configuration”, “my address”.
Your mail address is displayed in
the "Registered user" display field
after the selection has been made.
This is important, as feedback and
the upload certificate are sent to
this mail address.
Before transferring data into the iBase Service Plattform Industrie database, a web service checks as to
whether all SIEMENS article nos. (MLFBs with a checkmark) are valid. If invalid article numbers (does not
exist in PMD or PridaNet) are identified, for instance, due to a typing error, then a message is output listing the article numbers that are involved.
Page 8 of 24
PridaNet
DF CS MC SD
© Siemens AG, 2014. All Rights Reserved
identSNAPSHOT_User_manual_V01.05 SP2_en.docx
Status: 12/10/2014
identSNAPSHOT User Manual
These are also highlighted blue in the list and marked with Legend 1. These can be sorted by clicking on
the column heading "Legend". This has the advantage that all unknown elements are available in one
block.
Please check these for correctness and correct if necessary.
Then restart upload. If this leads to new errors, remove the ticks from these article numbers for the SIEMENS part so that they will not be checked. The lines with "non-Siemens" components are also displayed
in gray. In exceptional cases it may happen that certain article numbers are not known in the databases.
If items only containing a serial number but not an article number are available in the list, they will be
supplemented – if available – by a Web service prior to the data upload.
The following message is output after a successful upload:
If your e-mail address is set in the "my address" field
in the "Mail certificates to" list (check mark in the
"Send mail" column) you receive feedback after each
successful upload about the notified Siemens products,
including current product status information in the form
of a "Lifecycle Information Services Upload Certificate".
This option can be activated or deactivated before
each upload.
3.3.4.2
Mass upload
To upload a high number of machine files, these must be made available in a separate folder. We recommend that the machine files are first checked using "Check data" (see the next chapter) in order to
achieve the lowest possible error quota. The following window is opened after selecting "Mass upload".
Page 9 of 24
PridaNet
DF CS MC SD
© Siemens AG, 2014. All Rights Reserved
identSNAPSHOT_User_manual_V01.05 SP2_en.docx
Status: 12/10/2014
identSNAPSHOT User Manual
Here, a source folder, in which the machine files to be transferred were made available, and an export
folder must be selected. The source folder also includes files in subdirectories. The upload is started by
pressing the "+ Start" button. As long as the upload is active, the "Close" button has a gray background,
and has no function. The upload of the current file is completed and the mass upload interrupted by
pressing "Cancel". The files still to be transferred are black in the "Files for uploading" field and the files
that were interrupted with error, are shown in red. The files that were transferred error-free are shown in
green in the "Uploaded files” field. After exiting or canceling the mass upload, these are saved in the
export folder. A log file is also saved with the status of all files.
Other functions in IdentSNAPSHOT are not possible when the mass download is active.
3.3.4.3 Check data
Using "Check data” the actual parts list is checked for errors using a web-based service. Lines without
any errors remain black, for gray lines, the check mark in the "Siemens Part", is removed and blue indicates unknown Siemens parts. This means that it is now possible to identify and remove errors in machine parts lists without having to first upload.
3.3.5 New machine type
After pressing this button, the input field "Machine type entry" is opened, and closed again after input of
a new machine type.
If this new machine type is to be saved in the file provided for this, saving of the
quired after input.
machine types is re-
3.3.6 Delete machine type
Using this button you can delete the selected machine type in the list "Machine type selection".
machine types is reIf a machine type is to be deleted from the file provided for this, saving of the
quired after deletion.
Page 10 of 24
PridaNet
DF CS MC SD
© Siemens AG, 2014. All Rights Reserved
identSNAPSHOT_User_manual_V01.05 SP2_en.docx
Status: 12/10/2014
identSNAPSHOT User Manual
3.3.7 Create log
With this function you can create the complete machine log in PDF format. As contents, all data of the
machine file are considered, such as machine, address, parts list data and log entries. Please see the
Chapter “Machine log”.
3.4
Structure of the input screen
The screen is subdivided into three areas:
•
Upper area (yellow frame):
Machine name, machine type, commissioning data
•
Center (green frame):
Address data of the OEM, dealer and end customer
•
Lower area (blue frame):
Machine parts list data, logbook informations, option data, contract data
The area fields can be opened and closed using the button
work with the small displays.
(top right) in order to make it easier to
Page 11 of 24
PridaNet
DF CS MC SD
© Siemens AG, 2014. All Rights Reserved
identSNAPSHOT_User_manual_V01.05 SP2_en.docx
Status: 12/10/2014
identSNAPSHOT User Manual
4. Data input
4.1
•
Machine data
The "machine name" is directly written as text into the input line. Optionally, various machine
names of OEMs, dealers and end customers can be allocated. The machine name can be a
combination of numbers and letters.
•
The machine type can be selected from the drop-down list box "machine type selection". If no
data were loaded into the list, then load this data from the "ma_types.xml" data with
. If the
required machine type is not in the list, then a new machine type can be entered in "Machine
type input". The input is completed using the Enter key at your PC so that the data that has
been entered is accepted. A red exclamation mark is then displayed in the display
. If
the data that have been newly entered is also to be saved in "ma_types.xml", then press the
button. The red exclamation mark disappears again after saving.
•
For the machine, as a minimum, the date when it was first commissioning at the OEM should be
specified. If the machine was commissioned at the end customer, then the date for the second
commissioning must be set. The operating system language of Windows that is being used defines the language in which the calendar is displayed.
The date must be actively selected and subsequently appear gray. Only then will it be included
later when generating the XML file. Once it has been selected, it is write-protected and cannot be
changed again.
When a previously generated XML file is read, the commissioning date 1 is immediately marked
write-protected. It is now only possible to set commissioning date 2.
•
In the selection box "Project ID", a project ID, already defined and saved in an XML file ,can be
selected. This ID is used to identify special machines and to combined them to create a service
project. Siemens centrally assigns these project IDs, and when required, they can be requested
from the responsible sales person. Structure of the ID "<Customer><Country><City><Number>".
It is not possible to make a direct, manual input directly into identSNAPSHOT. The file is encrypted and cannot be edited.
You can add a project file by pressing the "Open folder" button.
Several project files can be imported. The file activated via the selection menu is always valid for
the current project (this is visible in the display field).
•
Customer-specific project IDs can be freely entered into the "Customer project ID".
•
The unique ID number is saved in the "Equipment ID" field under the Service Platform Industry.
Displaying the ID fields can be activated under "Configuration".
The project ID data are saved in the machine file and also transferred to iBase Service Plattform
Industrie.
Page 12 of 24
PridaNet
DF CS MC SD
© Siemens AG, 2014. All Rights Reserved
identSNAPSHOT_User_manual_V01.05 SP2_en.docx
Status: 12/10/2014
identSNAPSHOT User Manual
4.2
Address data
4.2.1 Loading and selecting addresses
Here, all data of the OEM, dealer and end customer addresses can be managed. Address data is saved
in the particular XML files of these groups and can be loaded from these, changed and also saved. The
functionality and handling corresponds to the previous chapter for the machine type.
After loading the address data, initially no address is selected; this is selected by opening and clicking on
the appropriate address.
. The associated address
The address group that is to be processed can be selected using the button
data are displayed in the input fields corresponding to this group selection and which address was selected from this group.
The "Name" of an address must be unique for each group and cannot be allocated twice. For instance,
the same OEM company cannot exist twice.
A final destination country can be selected even without further final destination data, and can be saved
when generating the machine file.
The address displayed in the selection field comprises the company name, street, postal code and city.
The appropriate data must be entered into these fields. If a value is missing, the new address cannot be
displayed as this would otherwise be incomplete. If there is no zip/postal code, for instance, then a space
can be entered instead.
An existing address can be deleted from the address list of the selected address group using "Delete
address". After this, do not forget to save.
4.2.2 Editing addresses (to be available soon)
Empty input fields are offered for data input in “New address”. Data input can be finalized in each field
using the enter key.
If your PC is connected to the Internet, the entry is supported by an entry and correction Wizard when
entering company name, street name, postal code, city name and country.
When entering a new address, a country should first be selected from the country list. After pressing
"New address the country list opens and you can select the required country. A country can also be selected by entering the first letter of the country.
In the next step, the postal code or the city name is entered; the postal code provides faster and more
reliable results and should therefore be the preferred approach. After entering 3 or more characters, the
wizard provides supports with a selection list from which you can select the correct city/town, possibly
with region and postal code.
Page 13 of 24
PridaNet
DF CS MC SD
© Siemens AG, 2014. All Rights Reserved
identSNAPSHOT_User_manual_V01.05 SP2_en.docx
Status: 12/10/2014
identSNAPSHOT User Manual
When entering city/town names it is possible that two selection lists are displayed one after the other. The
reason for this is that identified city/town names can be duplicated, therefore reducing the chance of selecting the correct one. While data is being queried, data entry in the input fields is locked for several seconds.
The street name can be entered once the city/town and postal code have been identified. The input wizard provides support just the same as for the city/town names. The street number should be entered before entering the first letter of the street name. After 4 letters have been entered, streets with the initial
letters that have been entered in this city/town and postal code area are listed.
Already known company names with postbox addresses etc. can also be included in the selection list.
After selecting a street, the street number is added to the street name in the syntax of the particular country and cleared from the input field.
Finally, the company name is entered. Also in this case, already known company names are listed as
suggestion. The approach is the same as for the street names.
The advantage of entering addresses with support provided by the address Wizard is that only real, validated addresses are created and assigned your data. This avoids duplicated addresses as a result of
different notations.
It goes without saying, that if the correct cities/towns, streets etc. are not provided in the section list, then
the address can be completely manually entered.
All other data, such as customer number, names of contact persons, telephone numbers etc. must be
manually entered.
For the new address data to be inserted into the address select list, a red exclamation point appears.
Confirm the input with “Apply changes”. If the data is not yet complete, Input fields marked by a star
symbol, the button is highlighted gray and cannot be selected.
Page 14 of 24
PridaNet
DF CS MC SD
© Siemens AG, 2014. All Rights Reserved
identSNAPSHOT_User_manual_V01.05 SP2_en.docx
Status: 12/10/2014
identSNAPSHOT User Manual
4.2.3 Managing addresses
In order to allow address data to be simply exchanged between several people in a company or organizational unit, SIEMENS provides a central address database function. The advantage here is that a new
address only has to be entered once, and anybody that requires it can use it directly. If a person creates a
new address, then this can be centrally saved and used by everybody else.
If somebody is a member of an appropriate user group, then when starting the program he receives a
message if new addresses or machine types have become available for his particular user group.
The prerequisite is that a user group has been setup and the registered identSNAPSHOT users defined.
Appropriately authorized SIEMENS personnel in the region can do this.
A red exclamation mark indicates that new address data are still not in the local address file that has been
saved on your PC.
This disappears as soon as the data have been locally saved by clicking on the floppy disk symbol.
The new addresses are then available as usual in the selection list.
This function is only available when online through an Internet connection.
The provision of addresses can be activated or deactivated using the configuration menu "Subsequently
load new addresses" . Calling up new addresses is possible at any time online by selecting "Subsequently load addresses now .
Addresses are also transferred when loading a machine file. A comparison is made to addresses that
have already been saved. If an address is not available, it is transferred into the list and the ! is set. If no
differences to an already existing address file are identified, this is activated without a !. If the program
identifies differences to an already existing address file (mandatory fields are the same), the loaded address data are saved in the input fields, the column in the selection field remains empty and the ! to save
is set. In this case, the user must decide which address is used; this is then saved and used for other
applications.
There are three options here:
Page 15 of 24
PridaNet
DF CS MC SD
© Siemens AG, 2014. All Rights Reserved
identSNAPSHOT_User_manual_V01.05 SP2_en.docx
Status: 12/10/2014
identSNAPSHOT User Manual
No further actions and upload -> for the actual upload, the address that has been imported is used; the
original version remains saved in the template.
Save the data and upload -> for the current upload, the address that has been imported is used; the newer (imported) version is saved in the template.
Load the saved address file from the selection menu and upload -> the newly loaded address is rejected,
and the address data (from the template) already saved in the upload is used.
4.2.4 Exporting address data
Use the "Export address data" function to export specific individual address data from an existing address
list.
To do this, select the required addresses in the list and then start export with
Several addresses can be selected and exported into a new file.
.
The generated, new file has the name "oem.xml", "dealer.xml" or "enduser.xml" – and is saved in a folder
….>.locals > data > EXPORTS (default setting). These files can then be directly imported into a "SINUMERIK HMI Operate", for example.
4.3
Machine parts list
If there is already a machine parts list, then this can be loaded into the program with "Load parts list".
Several formats can be selected as templates. .xls, .csv or .xml can be selected as file format.
Several partial part lists with different formats can also be loaded one after the other. If there are already
part list components in the machine part list of identSNAPSHOT, when attempting to load additional part
list components, you are prompted as to whether these should be added to the already existing part list
components.
If you answer this question with "No", then the existing part list components are deleted and the new part
list components are entered.
If you answer "Yes", then a check is made as to whether the new part list components are already available. Already existing part list components are listed, and you can select as to whether these should be
read in or not.
The following options are available:
• ”Add selection and close”, only the part list components with checkmark are added
• ”Add all and close”, all part list components are added
• ”Add none and close” no part list components are added
Page 16 of 24
PridaNet
DF CS MC SD
© Siemens AG, 2014. All Rights Reserved
identSNAPSHOT_User_manual_V01.05 SP2_en.docx
Status: 12/10/2014
identSNAPSHOT User Manual
The templates (menu entries) define column headers or xml tags and the file formats of the file to be
loaded.
The tooltips associated with the particular templates contain the names of the column headers or xml
tags. This means that you can check as to which columns should be taken into account for the template.
If your file does not contain a column designation, then this is simply skipped. If your file contains columns
that are not available in the template, then these are also skipped.
If additional templates are to be defined, then this can be realized using the appropriate extension of the
file "Siemens.ARSIS.Parts.Config.xml". See the following chapter for the structure of the schematic.
You can define other part list configurations yourself. The templates described here are not complete, and
are only intended to serve as examples.
The notation for article numbers refers to the ”SIEMENS manual for machine readable product codes“,
where uppercase and lowercase syntax and delimiter symbols are not relevant.
An MLFB is structured as follows:
Block
Number position
Data position
The extension with –Z is optional, and is only required if Z options are involved.
A maximum of 32 Z options are possible. For automatic data processing, Z options should be specified as follows:
Z option
Number position
Data position
Legend:
A
Alphanumeric position without "O" (for Z OPTIONS ANA without ”I” and ”O”)
N
Numerical position
Separator (hyphen)
+
Separator (plus character)
-Z
2-character mandatory character for "special versions"
Page 17 of 24
PridaNet
DF CS MC SD
© Siemens AG, 2014. All Rights Reserved
identSNAPSHOT_User_manual_V01.05 SP2_en.docx
Status: 12/10/2014
identSNAPSHOT User Manual
Z options can be read in different ways. Either these are added to the article number (for example:
6SL3120-2TE21-0AA3-Z M01+G01), or they are inserted in the table column for Z options (for example
MLFB: 6SL3120-2TE21-0AA3-Z; Z option: M01+G01 ), if you are using a template, which supports the
column: Z option.
or
The entries for “Equipment” from the parts lists will not be displayed in identSNAPSHOT because the
parts list does not refer to o n e attachment.
In order to retain any data that you have supplemented or changed also after a program update,
you should only make such changes in the configuration files in the directory
“private_configuration”.
4.3.1 Parts list, 2-column
The "Siemens.ARSIS.Parts.Config.xml" file is in the "configuration" folder. The designations for "equipment" and "MLFB" can be specified in this file for the particular language. In this case, e.g. for German,
"Anlage" and "MLFB".
Please take note that the section with the respective selected language is used. For example with the set
language “Deutsch” (German), the terms “Anlage” (Equipment) and MLFB are expected in the Excel file.
The list column in which these terms are then written is not important. The reason for this is that the program searches the list for these terms and then appropriately assigns the data to these columns.
4.3.2 Parts list, 4-column
The 4-column parts list, analog to the 2-column parts list, is structured with the additional information for
"Description" and "Quantity".
Page 18 of 24
PridaNet
DF CS MC SD
© Siemens AG, 2014. All Rights Reserved
identSNAPSHOT_User_manual_V01.05 SP2_en.docx
Status: 12/10/2014
identSNAPSHOT User Manual
4.3.3 Parts list, 6-column
For the 6-column parts list, there is also "Comment" and "Unique".
4.3.4 Parts list, 4-column EUNA
This format was specified in order to be able to directly read-in CSV files, such as those used for EUNA.
4.3.5 Parts list, XML SINUMERIK
This parts list contains information that is generated by the SINUMERIK control and is available as XML
file. These are: "Quantity", "MLFB", "Version", "Description" and "Unique".
Page 19 of 24
PridaNet
DF CS MC SD
© Siemens AG, 2014. All Rights Reserved
identSNAPSHOT_User_manual_V01.05 SP2_en.docx
Status: 12/10/2014
identSNAPSHOT User Manual
4.3.6 Parts list column number depended e. g. from SAP
This allows processing of parts lists that have been generated from SAP, for example. The data read in
are: “Quantity”, “MLFB” and “Description”. Additionally, the columns for “Equipment”, “Comment”, “Z Option”, “Version” and “Unique” may still be entered.
The corresponding column number is entered as a column parameter.
4.3.7 Editing the list data
After a list has been loaded, its data can either be manually changed or supplemented.
The text boxes open if you click on the input button of a line that was previously marked.
When entering data, the program checks the article numbers (MLFBs) as to whether these correspond to
the Syntax of a SIEMENS article number. If yes, then the "SIEMENS part" checkmark is set - or if they do
not match, then the checkmark is removed. The reason for this is that also non-SIEMENS parts can be
included in the list; however, they are not taken into account in a subsequent validity check.
•
A new line to manually enter data for a new component is attached at the end of the list using the
"New component" button.
•
A component in the list is removed using "Delete component".
•
The "Merge list" button combines lines with the same “article number” and “description” and enters the sum in the "quantity" column. Lines with values in the "serial number" column are the exception.
If there are lines with the same serial number, these are combined, the quantity remains at 1. For
several identical serial numbers and different article numbers, a message is displayed that this is
only seldom possible.
•
"Reload article number (MLFB)" is available under "Complete data" for all lines in which there
is only one material number or unique number.
Further, for a line marked, with "Reload description" the product information for the selected
part can be subsequently loaded. If a line has not been marked, then information available for all
of the lines are subsequently loaded into the machine. If a text already exists in the "Description"
column, then this is shifted into the "Comment 5" column. Depending on the number of parts, this
operation can take some time.
•
The input option ”Activate data acquisition“, ”Permanent acquisition“ allows several components to be quickly entered using a handheld scanner. A new text box is opened in which the daPage 20 of 24
PridaNet
DF CS MC SD
© Siemens AG, 2014. All Rights Reserved
identSNAPSHOT_User_manual_V01.05 SP2_en.docx
Status: 12/10/2014
identSNAPSHOT User Manual
ta that have been read-in are displayed, analyzed and depending whether article number, serial
number or both, are inserted in the relevant columns. When scanning we recommend that the
MLFBs are first scanned and then the serial numbers. Material numbers are also identified based
on the syntax, and are written to the column intended for the purpose. Also in this mode, data can
be manually entered.
After entering data into the text box, a new line is attached at the end of the list.
Data that has 1P and then the MLFB syntax - or directly start with the MLFB syntax - are recognized as article numbers (MLFBs). For instance, 6FC1234.
Serial numbers are identified as such if these start with S and have a letter as second character.
Whether the article number or the serial number is entered first is the same for each data set of a
module.
At least one serial number must be read in per list item. Article numbers – if available – are supplemented by a Web service prior to the data upload.
If at least two part or serial numbers are entered one after the other, a new line is attached for
each value.
For a combination of article number and serial number from the matrix code, the article number
must start with 1P and the serial number with S, and both must be linked with a + without any
spaces. The program then writes the data into the associated columns.
Data, which are not identified as either article number or serial number, are written as nonSIEMENS article number in the article number column.
The position number is automatically incremented, the value for "Equipment" is taken from the
previous line and the quantity is set to 1.
If a serial number is present in a line, the quantity can only have a value of 1.
•
With ”Delete BOM component“ for example, a part that has been removed can be deleted from
the parts list. This is realized as soon as the serial or article number of the part is identified in the
existing parts list. At the same time, a new logbook entry is created, in which the removal of the
part is documented. In addition to the comment, the date, name and department is also documented in the logbook entry.
If an associated serial or article number is not identified, then the message “article number or
unique number xy not in bill of material” is output and no additional action is performed.
•
For ”Add BOM components“ a new part is added to the parts list. All data are written to the columns intended for the purpose, and this is also documented as comment in the logbook. If a current logbook entry is not open, then a new logbook entry is created.
By deleting and reading in the part list element, a component replacement can be quickly documented in the logbook, and the machine parts list kept up-to-date.
•
This data acquisition mode is exited and the additional text box is closed with "Continuous recording data xy off".
The scanner must be set so that an "input signal" is also transferred at the end of the data telegram.
•
"column selection" can be used to show or hide individual columns of the parts list display.
Page 21 of 24
PridaNet
DF CS MC SD
© Siemens AG, 2014. All Rights Reserved
identSNAPSHOT_User_manual_V01.05 SP2_en.docx
Status: 12/10/2014
identSNAPSHOT User Manual
4.3.8 Scanner
We recommend that SIMATIC Ident handheld scanning systems are used to reliably determine all of the
codes of the Siemens products error-free.
SIMATIC MV320
The following are included in the scope of delivery of the SIMATIC
MV320 scanner:
● SIMATIC MV320 handheld scanner with USB cable (1.8 m)
Depending on the version ordered, the scanner is supplied with a USB
cable for the USB port.
Article number: 6GF3320-0HT01
RS 232 cable (2.4m spiral cable) for RS-232 interface is available as
accessory (power supply unit required)
Article number: 6GF3320-0AC03
Power supply unit, EU for RS 232 Article number: 6GF3020-0AC400AP2
Power supply unit, USA for RS 232 Article number: 6GF3020-0AC400AP1
Metal holder for MV320 Article number: 6GF3320-0AC07
Also see Catalog ID10 Page 5/36
SIMATIC MV325
The following are included in the scope of delivery of the SIMATIC
MV325 scanner:
● Handheld SIMATIC MV325 scanner with charging station
and USB cable (0.9 m)
The charging station is equipped with a USB host interface and Bluetooth wireless interface.
Article number: 6GF3325-0HT01
Also see Catalog ID10 Page 5/37
The current edition of the operating instructions is available on the Internet pages of the Siemens Industry
Online Support under the following entry ID:85219368
(http://support.automation.siemens.com/WW/view/en/85219368)
4.3.9 Output of the machine parts list
Outputting of the machine parts list can be executed with the menu ”Save and export”, “Export to Excel”. All information from the list is transferred to the Excel sheet in this case. This sheet can then be
saved under any name.
"Save machine parts list" saves the complete machine parts list and the associated XML machine file.
Modified address or machine data are not saved here. A complete machine file is saved if an XML file is
still not available.
4.4
Machine log
Under tab “Log information” all existing log entries are displayed.
Changing or deleting of these entries is then no longer possible.
With “New log entry” a new entry can be added. The next text box is opened in the logbook line using
the Ctrl + Return key combination. As long as identSNAPSHOT is opened with the currently operating
machine, the data entered can be changed or deleted.
With “Export log entries” log entries can be generated and exported in Excel or PDF format.
The function “Create log” generates a complete log in PDF format with the contents such as machine,
address and parts list data as well as log entries.
Page 22 of 24
PridaNet
DF CS MC SD
© Siemens AG, 2014. All Rights Reserved
identSNAPSHOT_User_manual_V01.05 SP2_en.docx
Status: 12/10/2014
identSNAPSHOT User Manual
If there is a “customer_logo.jpg” (250x130) file in the “LOGO” directory this image is integrated in the
cover sheet of the log. This enables the company logo of the OEM or customer to be transferred to the
log.
“Save log information” writes all log entries into the corresponding XML machine file. After saving and
exiting the program, changes in log entries can no longer be executed.
With "Data for end user notification“ an input window is opened, in which information regarding the final
destination notification information can be entered. This information is also saved in the associated machine file and is entered into this when generating the logbook.
All of the data in the input screen form are deleted by pressing "New machine". If a machine file that
contains data for the final destination is loaded, then this data is entered into the input screen form.
4.5
Option data of the controller
The "Option data" tab shows which options are active in a controller. The name, hardware ID and article
number (MLFB) are shown for each option.
This data can only be loaded by means of an XML file and cannot be edited.
The license key and the memory ID are also loaded from the XML file.
If there is no data for these in the file, it can be entered manually in the input fields.
This data is also written to the XML file with "Create machine file".
The option data is also written to the logbook when generating the logbook with "Create logbook".
4.6
Contract data of the plant
If there is service contract data in the file loaded from iBase Service Plattform Industrie, this is displayed
in the "Contract data" file. Contract data cannot be edited or changed manually.
If there are several contracts, the data is listed in lines.
The contract data is also written to the logbook when generating the logbook with "Create logbook".
The following is displayed:
• Contract type
• Contract subtype
• Start of contract (second commissioning)
• End of contract
• Contract partner, customer
• Contract partner, Siemens AG
• Contract status
5. Extending available languages
The following steps must be taken if a new screen language is to be included for the program:
• The xml language files for the languages that are already available are located in the "Localization" folder.
(in this case, for German and English)
•
Copy one "common_xx.xml", "identSNAPSHOT_xx.xml" and one "identSNAPSHOTApp_xx.xml"
and replace the identifier xx by the country language code of your new language. You can find
this code in the Internet under "Two letter country code ISO 3166".
e.g.: http://www.iso.org/iso/country_names_and_code_elements
•
After copying and renaming the file, open this and translate the text that is available into your new
language.
Page 23 of 24
PridaNet
DF CS MC SD
© Siemens AG, 2014. All Rights Reserved
identSNAPSHOT_User_manual_V01.05 SP2_en.docx
Status: 12/10/2014
identSNAPSHOT User Manual
•
•
•
After making the changes, save all of the texts and close the file.
After the program starts, your new language will also be displayed in the drop-down list box under
"Language" and can be selected.
The operating system language of Windows that is being used defines the language in which this
drop-down list box is displayed. The same applies for the language of the calendar used to select
the date.
If another language is also to be provided for the available machine parts lists, Chapter 4.3, then this can
be done by copying, inserting an appropriate XML area and renaming the language and the terms.
Or the language designation e.g. "en" is renamed with the new language designation. The same can be
applied to the contents in the lines under value="XXXXX".
If you wish to make these new language files accessible to other users, then you can mail these back to
headquarters in the SIEMENS Intranet using the feedback function of PridaNet
https://PridaNet.automation.siemens.com/PridaWeb/
Here, these language files are saved for further use under download
.
6. Usage and data privacy conditions
Please refer to the current Internet pages for the conditions to use this program. The same is true for the
conditions relating to data privacy.
You can reach the corresponding Internet pages when online using the buttons
at the lower edge of the program screen.
A message is displayed if your PC is not online and connected with the Internet.
Siemens AG Deutschland
Digital Factory
DF CS MC SD
Frauenauracher Str. 80
91056 Erlangen
Germany
PridaNet
DF CS MC SD
© Siemens AG, 2014. All Rights Reserved
Page 24 of 24
identSNAPSHOT_User_manual_V01.05 SP2_en.docx
All Rights
Reserved
© Siemens AG, 2014.
Status:
12/10/2014