1
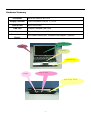
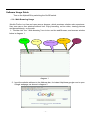
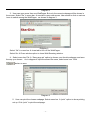
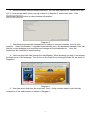
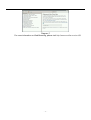
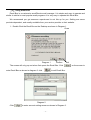
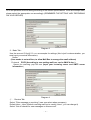
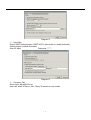
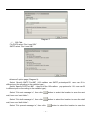
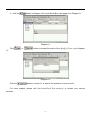
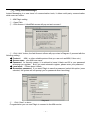
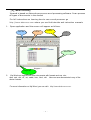
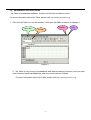
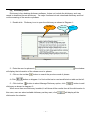
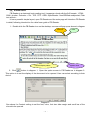
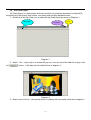
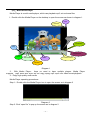
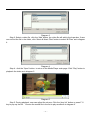
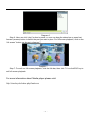
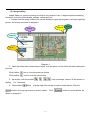
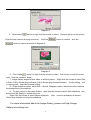
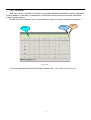
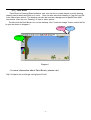
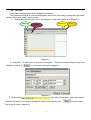
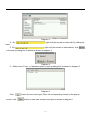
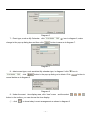
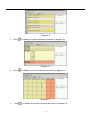
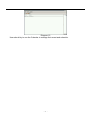
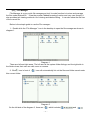
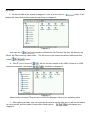
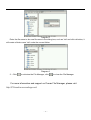
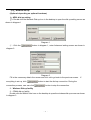
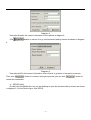
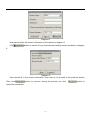
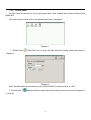
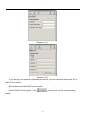
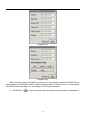
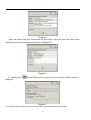
BELCO
Alpha-400 V1.0
Software User Guide
Version: 1.0.1
Table of Contents
Introduction ............................................................................................. - 2
System Highlights .................................................................................... - 3
Hardware Summary.................................................................................. - 4
Software Usage Guide .............................................................................. - 5
(1)、Web Browsing................................................................................ - 5
(2)、Using Email Box............................................................................. - 9
(3)、Using Instant Messenger............................................................... - 15
(4)、Word Processing .......................................................................... - 17
(5)、Spreadsheet ................................................................................ - 18
(6)、Dictionary Guide .......................................................................... - 19
(7)、Using PDF Reader......................................................................... - 20
(8)、E-book Guide............................................................................... - 21
(9)、Xip Flash Player ........................................................................... - 23
(10)、Multi-media Player ....................................................................... - 25
(11)、Image Gallery ............................................................................. - 28
(12)、Calculator ................................................................................... - 31
(13)、Paint Brush ................................................................................. - 32
(14)、Calendar..................................................................................... - 33
(15)、File Manager ............................................................................... - 38
(16)、Network dial-up ........................................................................... - 41
(17)、Control panel .............................................................................. - 44
- 1 -
-
Introduction
Alpha-400 is a low cost broadband access terminal for today’s world of communications
convergence and digital multimedia entertainment. It provides multimedia entertainment,
High-speed Broadband Internet Access, and Work on the go!
Equipped with various
functions, such as Electronic-Book, MP3 Player, Game Player, enlarged PDA, and common
business software such as Web browsing, word processing, spreadsheets and more. This
unique design FULL-FLASH desktop, is perfect for the light business traveler, student, and
every kid wanting to enjoy the experience of exploring the world of broadband multi-media!
The best way to learn to use your new product is to Play and Experiment, and refer to the online
help and web links provided!
Product Features:
7-INCH High resolution TFT-LCD Digital Screen
True Color Image Display
Broadband Internet Access
Linux Operating System--High Security & Virus Free
Various Xiptech Application Packages
Companion while relaxing or having fun!
•
Internet Surfing, Info Searching and News Reading
•
On-line Communicating with friends, family and colleagues
•
Movie and Music Download and Play
•
Flash Movies and Games
•
Various Simulation Games
•
Fun Pictures and Photos Sharing
Office Helper on the go, with lot of software tools:
Really Efficient!
•
Office Software Package: (calendar, word processing, spreadsheet, dictionary)
•
Email Management
•
Daily work Planner
•
PDF Viewer
- 2 -
System Highlights
Alpha-400 employs Embedded Linux as the operating system. With its excellent
functionality, adaptability and robustness, Embedded Linux Operating System provides a
stable working and software running environment
- 3 -
Hardware Summary
MIPS 400 MHz 32-BIT CPU
Processor
Display Terminal
7-INCH 800x480 COLOR TFT LCD
AC97Voice Card
Sound Card
Multiple Extended USB Ports
USB Port
Standard Keyboard and Mouse
Input
Communication
Device
10/100MB Ethernet port, Wireless LAN Adapter(optional)
LCD Displayer
speaker
Keyboard
LED Indicator
USB 接口
Ethernet RJ45
Power Supply Switch
- 4 -
Software Usage Guide
Turn on the Alpha-400 by switching the On/Off switch.
(1)、Web Browsing Usage
Mozilla Firefox is a free and open-source browser, which promises a better web experience.
User can open a few windows without limit. Enjoy browsing, on-line video, viewing pictures
and documents etc. on the web.
1、”Double click” the “ Web-browsing” icon to turn on the web Browser, see browser window
below in diagram 1.
Tool Bar
Menu Bar
Minimize
Close
Address Bar
diagram 1
2.Input the website address to the Address bar, for instant http//www.google.com to open
Google webpage, as shown in diagram 2
- 5 -
Diagram 2
3.User can open more than one WebPages. But only the current webpage will be shown in
the screen. Select “file ”in menu bar new tab to open new screen. Use mouse to click on various
icons to switch among the WebPages,as shown in diagram 3
Diagram 3
Select “file” in menu bar close tab to turn off the WebPages.
Select file Close window option to close Web Browsing window.
4.Select menu bar File “Save page as” option to choose your favorite webpage and save
the way you choose. As in diagram 4.Input the saved file name, select save icon. Click
button to save.
Diagram 4
5.User can print the chosen webpage. Select menu bar “print” option to show printing
set up. Click “print” to print the webpage.
- 6 -
6.As web browsers save personal information, you can clear this info by : Select menu bar
tool “clear private data” option, pop up screen as in diagram 5 ,select clear data – Click
button to clear personal information.
Diagram 5
7.Web Browsing bookmark management is similar to common browsers, but it is more
powerful. Select “bookmarks”->“organize bookmarks will turn o the bookmark manager. User can
add the current webpage as a bookmark and manage all the bookmarks etc. User can
experience the functions by experimenting.
8.User can play flash files through the web Browser. When browsing the web, it can display
the flash move on the webpage. Turn on the on-line flash file by clicking the flash file, as shown in
Diagram 6.
Diagram 6
9.User can select Help from the menu bar : help->help contents option to get the help
information of the web browser as shown in Diagram 7.
- 7 -
Diagram 7
For more information on Web Browsing, please visit http://www.mozilla.com/en-US/
- 8 -
(2)
)、Using
Email Box
、
Email Box is a customer’s send/Receive mail manager. It is simple and easy to operate and
similar to similar to most popular email programs. It is very easy to operate this Email Box.
We recommend you get someone experienced to set this up for you. Setting are server
provider dependant, and usually available from your service provider or their website.
1、Double Click the Email Box on the Desktop as shown in Diagram 1.
Close
Diagram 1
Confirm
Exit
The screen will only pop out when first opens the Email Box. Click
enter Email Box as shown in diagram 2. click
to exit Email Box.
Diagram 2
Click
to enter account setting screen as shown in Diagram 3.
- 9 -
on the screen to
Fill in the personal account setting according to the screen options below. There are multiple tabs,
please select the appropriate one accordingly. (REMEMBER THE SETTING VARY DEPENDING
ON YOUR SERVER)
Diagram 3
2、Basic Tab :
Use the account [email protected] as example for settings (this is just for demonstration, you
must input your actual information):
Notes:
(User needs to set mail box, to allow Mail Box to manage the email address)
Protocol:
: POP3 (According to user setting mail box, can be IMAP 4 also )
Server for receiving: pop.163.com (input your incoming server and SMTP server
information.)
Diagram 4
② 、Receive Tab:
Select “Filter message on receiving” (user can select when necessary)
Default inbox - inbox (Default receiving mail box is usually “inbox”, you can change it)
Select “Get all’ checks for new messages on this account"
- 10 -
Diagram 5
③、Send Tab:
Select SMTP Authentication (SMTP AUTH) (this option is usually selected)
Authentication method: Automatic
User ID: djlhq
Password: ******
Diagram 6
④、Compose Tab:
Direct input: [email protected]
User can select to use cc, Bcc, Reply-To based on user needs.
- 11 -
Diagram 7
⑤、 SSL Tab :
For POP3 select “Don’t use SSL”
SMTP select “Don’t use SSL”
Advanced” option page (Diagram 9):
Select “Specify SMTP Port:25” (163 mailbox use SMTP protocolport25,user can fill in
different port no according to the mailbox type)。
Select “Specify POP Port:110” (the port of the 163 mailbox pop protocol is 110,user can fill
in different port no according to the mailbox type)。
button to select the location to save the sent
Select “Put sent message in”, then click
mail, here use “sent folder”。
Select “Put draft message in”, then click
button to select the location to save the draft
mail, here use “draft folder”。
Select ”Put queued message in”, then click
- 12 -
button to select the location to save the
queue mail, here use “queue folder”.
Select “Put deleted message in”, the click
button to select the location to save the
deleted mail, here use “trash folder”.
Diagram 9
Now [email protected] mailbox setting is completed,click the
button.
3、Edit account information, as diagram 10:
Diagram 10
After steps 1 and 2 are complete, all email “accounts” will be displayed. Click on “Edit
accounts” screen,you can add any mail account by clicking
button, Edit any existing
account by clicking
,Delete any existing account by clicking
up the accounts by clicking
clicking
and
button,you can line
button, you can select any default account by
。
- 13 -
4、click the
button in Diagram 10 to enter Email Box main page as in Diagram 11.
Diagram 11
Click
or
button to accept the mails of the [email protected], as in diagram
12
Diagram 12
Click the
button in screen 12 to cancel the operation of receive mail。
For more support, please visit http://www.Email Box.sraoss.jp/ or contact your service
provider.
- 14 -
(3)
)、Using
Instant Messenger
、
Instant Messaging is a new trend of communication tools; it allows multi-party communication
while users are online.
1、AIM Pidgin setting
①、Open Pidin
②、Click Account Add/Edit screen will pop out as in screen 1.
Diagram 1
③、Click “Add “ button, the Add Account screen will pop out as in Diagram 2, proceed with the
following setting:
◆ Protocol: AIM ( or other suitable protocol that you use such as MSN, Yahoo etc..)
◆ Screen name:your AIM user name
◆ Password:for security reason, it is advised to leave it blank and fill in your password
whenever you register. But if you want automatic register, please enter your password.
◆ Local alias: Please leave it blank
◆ Remember password:If you want Pidgin to save the password, select this option (once
selected, the system will not prompt you for password when launching)
Diagram 2
④ 、Click “Save” to store。
Congratulation you can use Pidgin to connect to the AIM service。
- 15 -
①、Open Pidgin。
②、Click Accounts->Add/Edit, and repeat the steps.
For more information on your specific user settings please refer to online help at
http://pidgin.im/
- 16 -
(4)
)、Word
Processing
、
Xipword is based on Abiword open source word processing software. It can process
all types of documents in the market
For full instructions on learning how to use a word processor go
http://www.abisource.com where you can find tutorials and instruction manuals.
1、 Open application and the screen will appear as follows.
Menu Bar
Tool Bar
Minimize
Close
Status Bar
Diagram 1
Page NO.
2.
Xip Word can support and open documents with formats such as .doc,
abw, .awt, .dot, .rtf, .txt, .zabw, .htm, .html, .xht. User can save documents in any of the
above formats.
For more information on Xip Word, you can visit:http://www.abisource.com.
- 17 -
(5)、Spreadsheet user instructions
Xip Table is spreadsheet software, its style and function is similar to excel.
For more information about Xip Table, please visit http://www.gnumeric.org.
1、Click the Xip Table icon on the desktop, it will open Xip Table as shown in diagram 1.
Menu Bar
Minimiz
Close
Tool Bar
Diagram 1
2、Xip Table is very strong in spreadsheet and data processing functions, and can open
most common format spreadsheets, and save most common formats.
For more information about Xip Table, please visit http://www.gnumeric.org.
- 18 -
(6)、Dictionary Guide
Dictionary is free desktop dictionary software, it does not include the dictionary, and user
needs to download its own dictionary. Its major functions include: download dictionary and find
out the meaning of the words or phrases.
1、Double click
Dictionary icon to open the dictionary as shown in Diagram 1 :
Tool Bar
Minimize
Close
Diagram 1
2、Enter the word or phrase in
, the window
will display the information of the chosen word or phrase.
3、Click on the tool bar
4、Click
,
button to search the previous word of phrase.
button on diagram 1 to find out the last or next word listed on table on the left .
5、Click tool bar
button to select Manage Dictionary option, click
button to add
dictionary as shown in diagram 2:
When more than one dictionary is added, it will show all the results from all the dictionaries. In
this case, user can select suitable dictionary as they want, click
dictionaries for selection.
- 19 -
will display all the
(7)、Using PDF Reader
PDF Viewer is a PDF document reader, and it can also manage the printing of PDF
documents.
1、Double click the PDF Viewer icon, it will open the program, click File Open option, select
a document and press “open” button, the screen will display as shown in diagram 1.
Tool bar
minimize
Menu bar
close
Diagram 1
Select menu Help->about option to acquire help information in the PDF viewer. Click the
website address in the pop up screen.
Http://www.emma-soft.com/project/epdfview, enter to the official site of the PDF Viewer to get
more help and support.
- 20 -
(8)、E-book Guide
FB Reader is a electronic book reading tool, it supports e-book with the fb2 formats、HTML、
CHM、plucker、Palmdoc、zTxt、TCR、RTF、OEB、OpenReader、Non-DRM’ed mobipocket, Plain
text and etc,
It has a powerful simple layout, open FB Reader and the main page will introduce FB Reader
in detail, following introduction for a brief user guide of FB Reader.
1、Double click the FB Reader icon on the desktop, a screen will pop up as shown in diagram
minimize
Content display status
2、Click
close
system clock
button in diagram 1,Open the option screen in FB Reader as in diagram 2.
This option is to set the display of the document to be opened. User can select according to their
choice.
Diagram 2
See above for Content setting to set the font, color, font size side margin and scroll bar of the
e-book to be opened.
- 21 -
①、Click
button, it will show the corresponding information of the open e-book.
②、Click
button, it will search the document of the current e-book.
③、Click
④、Click
button, it will list the table of content of the e-book.
the
⑤、Click the
⑥、Click the
⑦、Click the
button, it can rotate the open e-book at the angle set by user.
button to return to the initial position when opening the e-book.
button to go backwards.
button to go forwards.
⑧、Click the
button to open a list of previous open e-book.
⑨、Click the
button, to list the tree structure of the library list
User can experience the FB Reader by just using the software and experimenting.
- 22 -
(9)、Xip Flash Player
Xip Flash Player is a flash player and main function is to playback animation for Alpha-400
equipped Xip Flash player with normal, low quality and half size playback mode.
1、Double click the Xip Flash icon to open the Xip Flash player as shown in Diagram 1.
Menu bar
minimize
close
Diagram 1
2、Select file->open option, a screen will pop out, user can select the flash file to play, click
the
button,it will play back the flash file as in diagram 2.
Diagram 2
3、Select menu Control->low quality option to display with low quality mode as in diagram 3.
- 23 -
Diagram 3
4、Select menu Control->half size option to choose the half size playback mode to play the
flash as in diagram 4.
Diagram 4
5、Select menu file->close option to stop the playback the current flash file.
For more information on Xip Flash Player, please visit http://www.xiptech.com/enmain.htm
- 24 -
(10)、Multi-media Player
Media Player is a multi-media player, which can playback mp3, avi and wma files
1、Double click the Media Player on the desktop to open the screen as shown in diagram 1.
close
minimize
Open file
Full Screen
Play
Playback list
Pause
Fast forward
Status
Volume control
Reverse
Diagram 1
2 、 With Media Player , there no need to have multiple players. Media Player
supports .mp3 .wma .wav .wmv .asf .avi .mpg .mpeg .mp2 .mp4 .mov video format playback.
3、Enjoy high quality multi-media
Media Player operating procedures:
Step 1:Double click the Media Player icon to open the screen as in diagram 2
Diagram 2
Step 2: Click “open file” to pop up the screen as in diagram 2.
- 25 -
Diagram 3
Step 3: Select a video file, click the “Add” button, the video file will add to the lower box, if user
can not find the file in the folder, click “Movie & Music Files” button to select“All Files” as in diagram
4.
Diagram 4
Step 4 : click the “Open” button,to return to the Media Player main page. Click “Play” button to
playback the video as in diagram 5.
Diagram 5
Step 5: During playback, user can adjust the volume. Click the “play list” button or press F11
key to pop up the list. Choose the media file in the list to play as shown in diagram 6.
- 26 -
Diagram 6
Step 6: User can click “play” button to pause, or user can drag the status bar or press fast
forward (reverse) button to select the part you want to plan. For full screen playback, click on the
“full screen” button, as shown in diagram 7.
Diagram 7
Step 7: For exit our full screen playback, click the title bar, then click F11 or click ESC key to
exit full screen playback.
For more information about Media player please visit:
http://xinehq.de/index.php/features
- 27 -
(11) Image Gallery
Image Gallery is a picture-viewing tool that is very simple to use, it supports picture-browsing
functions, inclusive of thumbnails, enlarge, reduce and etc
1、Double click the Image Gallery icon on the desktop to open the program, it will open tga2.tga
picture, the screen as shown in diagram 1.
Minimize
Toolbar
Close
listed file
pic lis
Diagram 1
2、Open the folder that contains the pictures, click the picture in the folder will start viewing the
pictures.
Click toolbar
icon to view the previous picture
Click toolbar
icon to view the next picture
3、As require, click the toolbar
,
,
,
icon for enlarge, reduce, fill the screen or
display 1 to 1 functions.
4、Click toolbar
button
or press right click on the mouse to select delete. Click the
button in the pop up screen to confirm delete. Click
shown in diagram 2.
- 28 -
button to cancel delete, as
Diagram 2
5、Click toolbar
button or right click the mouse to select
Enter the new name in the pop up screen, Click the
Rename option on the picture.
button to confirm,click the
button to cancel as shown in diagram 3.
Diagram 3
6、Click toolbar
button or right click the mouse to select
Full Screen, to exit full screen,
right
click the mouse to select.
7、Image Gallery supports other editor to edit the picture. Right click the mouse to select Edit
in Paint,Edit in Rotate jpeg clockwise,Edit in Rotate jpeg counterclockwise. On the editing tool
to open picture,user can proceed editing.
8、Right clicks the mouse, select Edit->Set as Wallpaper option, the picture will be used as
the background of the desktop.
9、To open picture in the mage Gallery,right click the mouse to select Start slideshow,the
pictures will be display in slideshow mode.
Right click the mouse to select Pause slideshow, click continue slideshow to resume,
Select stop slideshow to stop the slideshow
For more information about the Image Gallery, please visit http://Image
Gallery.sourceforge.net.
- 29 -
- 30 -
(12)、Calculator
User can use the “calculator” function as a standard handheld calculator. It can do arithmetic
such as addition, subtraction, multiplication, and division as well as some scientific calculation
such as square and etc
Double click the Calculator icon on the desktop to open the screen as shown in diagram 1
Minimize
Display
Close
Diagram 1
For more information about the Calculator, please visit:http://www.calculator.com.
- 31 -
(13)、Paint Brush
Paint Brush is Drawing Board software, user can use this to create simple or pretty drawing,
drawing can be black and white or in color. User can also save their drawing in .jpg and .png file
to be viewed as a picture. The drawing can also be used as a background or pasted into other
documents. User can use “Drawing” to view or edit a picture.
Double click the Paint Brush icon on the desktop, click “Load new image” button, select the file
to open as shown in diagram 1:
minimize
Tool Box
Diagram 1
For more information about Paint Brush, please visit:
http://mtpaint.sourceforge.net/rgbpaint.html.
- 32 -
close
(14)、Calendar
Calendar is a daily planner and management software.
The functions inclusive of: event management, new event, store event, open event, edit event,
delete event, move event, alarm and etc
1、Double click the Calendar icon in the desktop to open the screen as in Diagram 1.
Menu Bar
2、Select file
dialog box and click
Minimize
Tool Bar
Diagram 1
new option to pop up a dialog box.
Close
Enter the corresponding events in the
to create new event as in diagram 2
Diagram 2
3、On the event
right click the mouse to select save option,
enter the file name in the pop up dialog box, select save content, click
the file as shown in diagram 3:
- 33 -
button to save
4、On
event.
5、On
Diagram 3
right click the mouse to select edit for editing the
, right click the mouse to select delete,click
in the pop up dialog box to delete as shown in diagram 4
Diagram 4
6、Select menu Tools->Calendars option, a pop up dialog box as shown in diagram 5.
Diagram 5
Click
screen, click
button for new event type. Enter the corresponding content in the pop up
button to save new create event type as shown in diagram 6.
- 34 -
Diagram 6
7、Event type, such as My Calendar,click
change in the pop up dialog box and then click
icon in diagram 6, make
button to save as in diagram 7.
Diagram 7
8、delete event type, such as delete My calendar type, in diagram 6 click
,
click
icon in
button in the pop up dialog ox to delete. Click
button to
cancel delete as in diagram 8
Diagram 8
9、Under the event
time display area, click “view” menu
and the select
button in the toolbox, you can choose the time display.
①、click
,to show today’s event arrangement as shown in diagram 9
- 35 -
,
,
,
Diagram 9
②、Click
to display one week schedule as shown in diagram 10
Diagram 10
③、Click
to display one month schedule as shown in diagram 11.
Diagram 11
④、 click
to display all the daily schedule as shown in diagram 12
- 36 -
Diagram 12
User should try to use the Calendar to manage their event and schedule.
- 37 -
(15)、File Manager
File Manager is a very quick file management tool, its main function is to store and manage
the files under Alpha-400. It has the popular Tabbed browsing function and very user friendly. It
also provides two viewing methods: icon viewing and tabular listing. It can also show the file size
of the current file.
Below is the simple guide to use the File manager:
1、Double click the “File Manager” icon in the desktop to open the file manager as shown in
diagram 1.
Diagram 1
There are left and right areas. The left area is the system folder listings, and the right side is
the folder views, that user can edit, move or rename.
2. Click
icon in front of
icon will automatically list out the files and folder saved under
this current folder.
Diagram 2
which includes
On the left side of the diagram 2, there are
- 38 -
and
two folders
3、On the left side of the screen in diagram 2, click
icon in front of
folder, it will
display the other folder saved under this as shown in diagram 2
Diagram 3
User can see
consists of Download, My Favorite, My files, My Games, My
Music, My Photo and my video folder. The left zone on the screen shows the folders and files
under
4、Click
folder.
icon in front of
equipment inserted, it will display
will list out the contents of the USB, if there is no USB
as shown in diagram 4.
Diagram 4
Above briefly introduce Filing structure of the File Manager, below is an operation guide.
1、After opening a folder, user can right click the mouse on the right zone, it will list the folders
for use to select, here we select Create new->folder option,
will display as in
diagram 5
- 39 -
Diagram 5
Enter the file name to the new file name in the dialog box, such as “rita” and click ok button; it
will create a folder name “rita” under the current folder.
Diagram 6
2、Click
to minimize the File Manager, click
to close the File Manager
For more information and support on Pcman File Manager, please visit
http://PCmanfm.sourceforge.net/
- 40 -
(16)、Network dial-up
(Optional depending on optional hardware)
1、ADSL dial up setting
①、Double click the Network Dial-up icon in the desktop to open the dial up setting screen as
shown in diagram 1
Diagram 1
②、Click the
button in diagram 1, enter Advanced setting screen as shown in
diagram 2.
Diagram 2
Fill in the necessary data in the screen and click ok to go back to the previous screen. If
everything is set up, click
connection process, user can click
button to start the dial up connection. During the
button to stop the connection.
2、Wireless Dial-up facility
3、CDMA dial-up facility
Double click the Mobile Line icon on the desktop to open the wireless dial-up screen as shown
in diagram 3
- 41 -
Diagram 3
User should enter the correct information to the options in diagram3
Click
button on screen 3 to go into Advanced setting screen as shown in diagram
4
Diagram 4
User should fill in the correct information, then click ok to go back to the previous screen.
Then click
button to connect, during the process you can click
button to
cancel the connection.
4、GPRS Facility
Double click the Mobile link icon on the desktop to open the wireless dial-up screen as shown
in diagram 5. On the Device type, click GPRS.
- 42 -
Diagram 5
User should enter the correct information to the options in diagram 5
Click
button on screen 5 to go into Advanced setting screen as shown in diagram
8
Diagram 6
User should fill in the correct information, then click ok to go back to the previous screen.
Then click
button to connect, during the process can click
cancel the connection.
- 43 -
button to
(17)、Control panel
Control Panel allows user to set up the system time, date, network and volume setting of the
Alpha-400
First click Control Panel icon on the desktop as shown in diagram 1
Diagram 1
1、Double click
diagram 2
Date/Time icon to open the date and time setting screen as shown in
Diagram 2
Enter the data and time information, such as 09/10/2007 for date and time is 14:47.
2、Double click
Network setup to open the network setting screen as shown in diagram 3
(1) and (2).
- 44 -
Diagram 3 (1)
Diagram 3 (2)
If you set up your network in standard procedure, you can use dhcp (automatic IP) or
static IP to connect.
Below discuss on the DHCP server option
Select DHCP Server option,click
button to set up the corresponding
facility.
- 58 -
Diagram 4(1)
Diagram 4(2)
After the above steps, the DHCP can start now. User should confirm the DHCP Server
has started by checking the DHCP option is already select, if there is tick on it that means
the DHCP starts operating. You can assign IP to the same network.
3、Double click
icon to open the user information set up screen as in diagram 5.
- 59 -
Diagram 5
User can enter their own information as their liking. Here we use user Rita as an
example to set up the information as shown in diagram 6.
Diagram 6
4、Double click
Sound Setup icon to open the sound set up facility screen in
diagram 7.
Diagram 7
For Software support please refer to the relevant online links provided with each application.
- 60 -