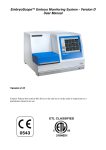
Download EmbryoViewer EmbryoViewer ryoViewer™
Transcript
EmbryoViewer
EmbryoViewer™
User manual
Caution: Federal law restricts this device to the sale on the order of a physician
EmbryoViewer 3.0
User manual v3.0
Unisense FertiliTech A/S - EmbryoViewerTM 3.0
User manual v3.0
________________________________________________________________________________________________________________________
1 IMPORTANT restrictions and warnings
The following restrictions and warnings shall ensure safe and correct use of the EmbryoViewer™
by qualified personnel in a Fertility Clinic. The EmbryoViewer™ is used together with the
EmbryoScope™ to select viable embryos for transfer in a fertility treatment. Proper evaluation and
selection of embryos for transfer is essential to provide a successful treatment to patients. All
personnel using the EmbryoViewer™ must therefore agree to read and understand this user
manual, must observe the restrictions on use, and heed the warnings below to be allowed to
operate the EmbryoViewer™.
Restrictions on use
•
•
•
•
•
•
•
•
The EmbryoViewer™ may only be used by qualified personnel trained by
Unisense FertiliTech A/S employees.
Users should contact Unisense FertiliTech A/S immediately to report any
incident and/or injury to a patient, operator, or maintenance employee that
occurred as a direct or indirect result of operating the EmbryoViewer™.
Access to the EmbryoViewer™ must be controlled, so that only qualified
trained personnel have access to the EmbryoViewer™. Untrained personnel
could inadvertently change the annotation or selection of embryos, so it is
essential that the EmbryoViewer™ is installed in a secure place not accessible
by patients or the public.
While the EmbryoScope™ facilitates safe handling and access to information
about the embryos in a particular treatment, it can only supplement and
NEVER replace proper security measures to ensure that embryos selected
and transferred belong to the proper patients. All standard procedures for
labeling and validation of identity for EVERY transfer of gametes and embryos
between vessels MUST be maintained.
Upload of data to Unisense FertiliTech A/S is a service to fertility clinics to
facilitate quality control and off site quality check of instrument
performance. It may only be initiated IF THIS IS PERMISSIBLE BY LAW AND
REGULATIONS in the country where the EmbryoViewer™ resides
The clinic shall be solely responsible for ensuring that all local rules and
regulations are observed in connection with the upload of data to Unisense
FertiliTech A/S and that patients are informed about such upload of data.
Only anonymous data may be uploaded to Unisense FertiliTech A/S. PATIENT
ID MAY ONLY BE UPLOADED IF THE ID NUMBER IS AN INTERNAL NUMBER
USED BY THE FERTILITY CLINIC. If the patient ID is a social security number or
any other traceable personal ID number it may NOT be uploaded to Unisense
FertiliTech A/S.
The data received by the EmbryoViewer™ workstation about the
Page | 2
Unisense FertiliTech A/S - EmbryoViewerTM 3.0
User manual v3.0
________________________________________________________________________________________________________________________
performance of the EmbryoScope™ instrument cannot replace an actual
monitoring of the EmbryoScope™ instrument. The performance of the
EmbryoScope™ - Embryo Monitoring System must therefore be checked on a
regular basis through control of the EmbryoScope™ itself.
Warning
•
•
•
•
The device may only be operated by trained personnel. Only trained
personnel may annotate and select embryos, as personnel that are not
properly trained could inadvertently or deliberately change the embryos that
are selected for transfer.
It is essential that the identity of embryos selected for transfer is rigorously
checked before transfer from the EmbryoSlide™ to the transfer catheter. The
appearance of the embryo in the microscope used for loading the embryo in
the catheter MUST match the appearance of the embryo on the last acquired
image as printed out on the laboratory data report. The patient ID and
patient name on the laboratory data Report, MUST match the label on the
EmbryoSlide™ AND the label on the catheter.
Backup of image and patient data MUST be performed at regular intervals.
Automated nightly backups to a safe external hard disc can be implemented
through a selection in the settings tab.
The clinic shall be solely responsible for ensuring that all local rules and
regulations are observed in connection with the upload of data to Unisense
FertiliTech A/S and that patients are informed about such upload of data.
Installation and maintenance
•
•
Installation, inspection, adjustment and wiring of the EmbryoViewer™ can
only be carried out by a certified Unisense FertiliTech A/S employee.
The EmbryoViewer™ shall remain at the location where it was installed by a
Unisense FertiliTech A/S employee and may only be moved by Unisense
FertiliTech A/S personnel or upon explicit authorization in writing.
Page | 3
Unisense FertiliTech A/S - EmbryoViewerTM 3.0
User manual v3.0
________________________________________________________________________________________________________________________
Table of contents
1
IMPORTANT restrictions and warnings ................................................................................ 2
2
Quick guide......................................................................................................................... 7
2.1
Overview of functions in the navigation panel ........................................................................ 7
2.2
Association between different ID’s ......................................................................................... 8
2.3
Colour guide .......................................................................................................................... 9
2.4
View time-lapse and score embryos ....................................................................................... 9
2.4.1
2.4.2
2.4.3
2.4.4
2.4.5
3
4
Time-lapse of all embryos ........................................................................................................................... 9
Time-lapse image series of a single embryo ............................................................................................. 10
Time-lapse of several selected embryos ................................................................................................... 10
Embryo development at specific time points ........................................................................................... 11
Grading embryos....................................................................................................................................... 11
Introduction...................................................................................................................... 12
3.1
EmbryoViewer™ introduction............................................................................................... 12
3.2
Instruction and installation................................................................................................... 13
Running ............................................................................................................................ 14
4.1
View running ....................................................................................................................... 14
4.1.1
4.1.2
5
Running slides ........................................................................................................................................... 15
Alarm status .............................................................................................................................................. 15
Patients ............................................................................................................................ 17
5.1
View all patients .................................................................................................................. 17
5.1.1
5.1.2
5.2
Searching a patient name or ID ................................................................................................................ 18
Create or delete a patient ......................................................................................................................... 18
Patient details...................................................................................................................... 19
5.2.1
5.2.2
5.2.3
5.2.4
5.2.5
5.2.6
5.2.7
5.2.8
5.2.9
5.2.10
5.2.11
5.2.12
5.2.13
5.2.14
6
Detailed patient and treatment information ............................................................................................ 19
Patient details ........................................................................................................................................... 19
Printing slide-label .................................................................................................................................... 20
Treatment information ............................................................................................................................. 20
Medication ................................................................................................................................................ 20
Oocyte information ................................................................................................................................... 21
Culture conditions ..................................................................................................................................... 21
Outcome ................................................................................................................................................... 21
Multiple slides with a treatment............................................................................................................... 21
Slide information .................................................................................................................................. 21
Linking slide and treatment ................................................................................................................. 22
Changing fertilization time ................................................................................................................... 22
Embryo specific information ................................................................................................................ 22
Save patient details .............................................................................................................................. 22
Slides ................................................................................................................................ 23
Page | 4
Unisense FertiliTech A/S - EmbryoViewerTM 3.0
User manual v3.0
________________________________________________________________________________________________________________________
6.1
View slide ............................................................................................................................ 23
6.1.1
6.1.2
6.1.3
6.1.4
6.1.5
6.1.6
6.1.7
6.1.8
6.1.9
6.1.10
6.1.11
6.2
Timeline .............................................................................................................................. 29
6.2.1
6.2.2
6.2.3
6.2.4
6.2.5
6.2.6
6.2.7
6.3
Choosing displayed time points ................................................................................................................ 30
Number of time points shown and zoom level ......................................................................................... 31
Embryo selection in “Timeline” ................................................................................................................ 32
Viewing different focal planes .................................................................................................................. 33
Magnification of images in “Timeline”...................................................................................................... 33
Morphological grade ................................................................................................................................. 34
Shortcut .................................................................................................................................................... 34
Annotate ............................................................................................................................. 34
6.3.1
6.3.2
6.3.3
6.3.4
6.3.5
6.3.6
6.3.7
6.3.8
6.3.9
6.3.10
6.3.11
6.3.12
6.3.13
6.3.14
6.3.15
6.4
6.4.1
6.4.2
6.4.3
6.4.4
6.4.5
6.4.6
6.4.7
6.4.8
6.5
6.5.1
6.5.2
6.6
6.6.1
6.6.2
Time-lapse of embryo development ......................................................................................................... 24
Different focal planes ................................................................................................................................ 25
Cell divisions.............................................................................................................................................. 26
Blastomere activity ................................................................................................................................... 27
Dynamic score ........................................................................................................................................... 27
Embryo selection buttons ......................................................................................................................... 27
Annotations regarding the slide................................................................................................................ 28
Slide type .................................................................................................................................................. 28
Saving changes .......................................................................................................................................... 29
Selecting embryos for annotation ........................................................................................................ 29
Shortcut ................................................................................................................................................ 29
Using the annotation table ....................................................................................................................... 35
Cell divisions.............................................................................................................................................. 36
Visible nuclei ............................................................................................................................................. 36
Dynamic score, Z score, and morphological grade ................................................................................... 36
Pronuclei ................................................................................................................................................... 36
Fragmentation .......................................................................................................................................... 36
Multinucleation......................................................................................................................................... 37
Blastomere size and other properties....................................................................................................... 37
Comments ................................................................................................................................................. 37
Adjusting contrast in the image ........................................................................................................... 37
Navigate to previous or next well ........................................................................................................ 38
Embryo selection in “Annotate” .......................................................................................................... 38
Time-lapse embryo development in “Annotate” ................................................................................. 38
Measuring blastomere size .................................................................................................................. 38
Saving changes ..................................................................................................................................... 39
Incubation ........................................................................................................................... 39
Inspection of running conditions .............................................................................................................. 39
Zoom of graphs ......................................................................................................................................... 40
Detailed running information ................................................................................................................... 40
Summary sheet ......................................................................................................................................... 41
Warnings sheet ......................................................................................................................................... 41
The log sheet ............................................................................................................................................. 41
The “Other” sheet ..................................................................................................................................... 42
Save QC status and comments ................................................................................................................. 42
Video ................................................................................................................................... 43
Generate video of embryo(s) .................................................................................................................... 43
Generate embryo images ......................................................................................................................... 44
Report ................................................................................................................................. 44
Laboratory data ........................................................................................................................................ 44
Instrument data ........................................................................................................................................ 46
Page | 5
Unisense FertiliTech A/S - EmbryoViewerTM 3.0
User manual v3.0
________________________________________________________________________________________________________________________
6.6.3
6.6.4
7
Database .......................................................................................................................... 49
7.1
7.1.1
7.1.2
7.1.3
7.1.4
7.1.5
7.1.6
7.2
7.2.1
7.2.2
8
View all slides ...................................................................................................................... 49
List of slides ............................................................................................................................................... 49
Overview of data for selected slide .......................................................................................................... 50
Filters and sorting of data ......................................................................................................................... 50
Importing a slide ....................................................................................................................................... 51
Deleting a slide .......................................................................................................................................... 52
Exporting data from the database ............................................................................................................ 52
Instrument........................................................................................................................... 52
List of running conditions for all slides ..................................................................................................... 52
Average incubation conditions for all slides ............................................................................................. 53
Settings ............................................................................................................................ 54
8.1
8.1.1
8.1.2
Backup and upload of data to Unisense FertiliTech A/S ......................................................... 54
EmbryoViewer™ software version ............................................................................................................ 55
Slides for data agreement ......................................................................................................................... 55
8.2
Data backup......................................................................................................................... 56
8.3
FTP connection to Unisense FertiliTech A/S........................................................................... 56
8.3.1
8.3.2
9
Patient information................................................................................................................................... 47
Print reports .............................................................................................................................................. 48
Data uploaded to Unisense FertiliTech A/S .............................................................................................. 57
Patient information uploaded to Unisense FertiliTech A/S ...................................................................... 58
Acknowledgements .......................................................................................................... 59
10 Disposal of waste.............................................................................................................. 60
11 Index ................................................................................................................................ 61
12 Contact information.......................................................................................................... 62
Page | 6
Unisense FertiliTech A/S - EmbryoViewerTM 3.0
User manual v3.0
________________________________________________________________________________________________________________________
2 Quick guide
The main navigation tool in the EmbryoViewer™ is the navigation panel (left part of the screen).
The navigation panel is fixed on all pages, allowing for easy navigation between different functions
and views. The manual is structured according to the functions (buttons) in the navigation panel.
2.1 Overview of functions in the navigation panel
Running instruments
View all running slides from all connected EmbryoScopesTM
Patient information
Patient Name
Patient ID
Lists all patients including patient details
Shows detailed patient information including e.g. diagnosis, medication and outcome data
Slide and embryo details
Treatment ID (if a patient has several treatments, these are shown)
Slide ID (if several slides belong to the same patient, these are shown)
Shows time-lapse films of embryos from the specific slide
Shows embryos from the specific slide in a timeline view
Detailed view of embryos for annotation of e.g. cleavage times
Running conditions for the specific slide e.g. incubation temperature and gas concentration
Exports video sequences and single images
Generates report sheets; laboratory data, instrument data, patient information
Database of all acquired data
Lists all slides including data on e.g. fertilization time, primary outcome data and instrument QC status
Lists all slides and primary running conditions for each slide
Backup and upload of data
Backup of data and upload of data to Unisense FertiliTech A/S
Page | 7
Unisense FertiliTech A/S - EmbryoViewerTM 3.0
User manual v3.0
________________________________________________________________________________________________________________________
2.2 Association between different ID’s
Several ID’s are used in EmbryoScope™ and EmbryoViewer™ data. Below is a description of the
different ID levels and a figure showing an overview of the association between the patient ID,
treatment ID, slide ID and embryo ID. For detailed information on how to link patient ID to
treatment and slide ID, see section 5.2.11.
Patient name and ID
Patient name and ID number can be written into the patient file both on the EmbryoScope and on
the EmbryoViewer. Adding a slide on the EmbryoScope creates a new patient with the patient
information written on the EmbryoScope. A new patient can also be created on the EmbryoViewer,
and adding a slide in the EmbryoScope with the same patient information links the patient
information from the EmbryoViewer to the slide started on the EmbryoScope.
Treatment ID
Each patient has one to several treatments. The treatment is always named “Unknown” when a
slide is started. The treatment can be renamed so it is possible to distinguish between succeeding
treatments.
Slide ID
Each slide has a unique number consisting of date, slide and instrument number. Slides can be
reallocated to treatments using the “Patient Details” page.
Embryo ID
Each embryo has an ID number which is created when a slide is added on the EmbryoScope. The
embryo ID is shown on the “Annotate” page in the blue header bar, on the “Patient Details” page
and on the Laboratory Report page.
Patient name and patient ID
Treatment ID Treatment ID Treatment ID
Slide ID
Embryo ID
Page | 8
Unisense FertiliTech A/S - EmbryoViewerTM 3.0
User manual v3.0
________________________________________________________________________________________________________________________
2.3 Colour guide
Available but not selected/active button or frame
Selected/active button or frame
Disabled button, appears dark blue when the function can be used
2.4 View time-lapse
lapse and score embryos
A quick guide on how to view
w time-lapse
time
videos and score embryos is presented below.
below For a more
detailed description and explanations of all functions
function see section 6.
2.4.1 Time-lapse of all embryos
embryo
Click
and images of all embryos in the active
ac
slide are shown.
Play the time-lapse images using
or the scroll wheel.
Select embryos for transfer, freeze, discarding
discard or later decision using
marking the embryos green, blue, red or yellow.
,
Page | 9
Unisense FertiliTech A/S - EmbryoViewerTM 3.0
User manual v3.0
________________________________________________________________________________________________________________________
2.4.2 Time-lapse image series of a single embryo
To view a single enlarged embryo time-lapse film select the embryo by double-clicking on the
embryo frame. Detailed annotation tools appear, for more information on the annotation tools
see section 6.3.
2.4.3 Time-lapse of several selected embryos
Select 2 or 3 embryos in
selected) and click
(the dark blue frame turns light blue when the embryo is
. All selected embryos are shown including the annotation tools.
Page | 10
Unisense FertiliTech A/S - EmbryoViewerTM 3.0
User manual v3.0
________________________________________________________________________________________________________________________
2.4.4 Embryo development at specific time points
Click the
button to display the embryos within the specific slide at specified time
points. The morphological grade can be typed in at the top of each embryo timeline view. The
morphological grade is also shown in the “Annotate” page.
2.4.5 Grading embryos
The time-lapse inspection and annotation tools assist the embryologist in selecting the best
embryos for transfer and freeze. The embryo grade or score can be saved using the boxes shown
below. For explanation of the “Dynamic Score”, “Z Score”, and “Morphological Grade” see section
6.3.4.
Page | 11
Unisense FertiliTech A/S - EmbryoViewerTM 3.0
User manual v3.0
________________________________________________________________________________________________________________________
3 Introduction
3.1 EmbryoViewer™ introduction
The purpose of the EmbryoViewer™ workstation is to assist the embryologist in selecting the best
embryos. The EmbryoViewer™ does not perform any diagnostics, but only shows data from the
EmbryoScope™ and data typed in by the user. The EmbryoViewer™ assists the user in selecting the
best embryos by allowing for inspection of high resolution time-lapse images of embryo
development, detailed annotation tools and inspection of EmbryoScope™ running conditions.
The EmbryoViewer™ workstation provides:
•
•
•
•
High resolution time-lapse images of single embryos
Embryo annotation tools assisting in selecting embryos
Inspection of incubation details e.g. temperature and gas conditions
Export of data for statistical analysis
The EmbryoViewer™ workstation is an accessory to the EmbryoScope™. The EmbryoScope™
provides a safe, controlled culture environment, while allowing continuous monitoring and
observation of up to 72 embryos at a time.
Data from the EmbryoScope™ can be viewed in the EmbryoViewer™. This includes embryo images,
incubation details, alarms, log files and other instrument parameters. The EmbryoViewer™
workstation can be used to review and compare synchronized time-lapse movies of different
embryos.
In addition, the EmbryoViewer™ contains a simple database which enables the user to annotate
time-lapse images for e.g. cleavage times, fragmentation, multinucleation, pronuclei and other
characteristics used for selecting the best embryo. Annotations are saved in the database and can
be exported to an Excel file for statistical analysis.
The EmbryoViewer™ also enables input of patient details, treatment data and outcome data. This
data is also stored in the database and can be exported with annotations to an Excel file.
Important
The EmbryoViewer™ software does not control any hardware components in the EmbryoScope™ and thus
has no influence on the incubation of embryos. If the EmbryoViewer™ fails or is shut down by e.g. a power
failure, the EmbryoScope™ continues to run and data is saved on the EmbryoScope™
Page | 12
Unisense FertiliTech A/S - EmbryoViewerTM 3.0
User manual v3.0
________________________________________________________________________________________________________________________
3.2 Instruction and installation
Unisense FertiliTech A/S employees will undertake device setup, installation of software and
training of personnel involved in the routine workflow using the device. Unisense FertiliTech A/S
will perform maintenance and software update to ensure efficient use of the EmbryoViewer™
workstation. Training and instruction of personnel will be performed by Unisense FertiliTech A/S
employees coincident with installation of EmbryoScope™ and/or EmbryoViewer™.
Page | 13
Unisense FertiliTech A/S - EmbryoViewerTM 3.0
User manual v3.0
________________________________________________________________________________________________________________________
4 Running
In this part of the EmbryoViewer™ it is possible to inspect running slides in EmbryoScopes™
connected to the EmbryoViewer™ workstation.
4.1 View running
Page | 14
Unisense FertiliTech A/S - EmbryoViewerTM 3.0
User manual v3.0
________________________________________________________________________________________________________________________
This page shows all running slides from all EmbryoScopes™ connected to the EmbryoViewer™.
•
Shows up to 4 connected EmbryoScopes™
•
•
•
Shows up to 6 running slides from each of the connected EmbryoScopes™
For each slide, patient name, patient ID and time since fertilization are shown
For each connected EmbryoScope™ the current incubation condition are shown (incubation
temperature and gas concentrations)
Status of the EmbryoScope™
Time for last reading of data from the EmbryoScope™
•
•
4.1.1 Running slides
Click on one of the running slides
and the corresponding slide overview is
shown. Note that running slides are not shown in the database overview pages “View All Slides”
and “Instrument”, as these slides are not completed. When a slide is ended in the EmbryoScopeTM,
all the data related to this slide will appear in the database overview.
4.1.2 Alarm status
If an alarm occurs in the EmbryoScope™ the title bar will be coloured red.
To check the alarm type click
. Below the slide boxes a red bar indicates whether it
is a temperature, CO2, O2 alarm or an alarm indicating that the connection between the
EmbryoScope™ and the EmbryoViewer™ is lost (time for last reading alarm).
Page | 15
Unisense FertiliTech A/S - EmbryoViewerTM 3.0
User manual v3.0
________________________________________________________________________________________________________________________
TM
For detailed information on how to handle the alarm on the EmbryoScope , consult the
EmbryoScopeTM user manual.
When the alarm in the EmbryoScope™ stops, (because the parameter causing the alarm is back
within accepted range) the red alarm bar, both on the title bar and on the specific parameter,
changes to yellow to indicate that an alarm has occurred.
When the alarm has been reset on the EmbryoScopeTM the colour on the title bar and on the
specific parameter changes from yellow to grey.
Page | 16
Unisense FertiliTech A/S - EmbryoViewerTM 3.0
User manual v3.0
________________________________________________________________________________________________________________________
5 Patients
Patient information
Patient Name
Patient ID
Lists all patients including patient details
Shows detailed patient information including e.g. diagnosis, medication and outcome data
This part of the EmbryoViewerTM allows the user to navigate through patient and treatment details.
The navigation panel shows patient name and patient ID of highlighted slide in the patient
overview.
NOTE: Patient information
•
•
The clinic shall be solely responsible for ensuring that all local rules and
regulations are observed in connection with upload of patient information to
Unisense FertiliTech A/S and that patients are informed about such upload of
data.
Only anonymous patient information may be uploaded to Unisense
FertiliTech A/S. PATIENT ID MAY ONLY BE UPLOADED IF THE ID NUMBER IS
AN INTERNAL NUMBER USED BY THE FERTILITY CLINIC. If the patient ID is a
social security number or any other traceable personal ID number it may NOT
be uploaded to Unisense FertiliTech A/S
5.1 View all patients
This page lists all patients in the database. The information listed is
•
•
•
•
•
•
Patient ID and name
Age
Birth year and month
Body mass index (BMI)
Diagnosis
Comments regarding the patient
Page | 17
Unisense FertiliTech A/S - EmbryoViewerTM 3.0
User manual v3.0
________________________________________________________________________________________________________________________
The data can be sorted by clicking on the header row for each column. Double clicking on a patient
row activates the
page.
5.1.1 Searching a patient name or ID
Below the patient table there is a search space
where it is possible to search for a
name or number, or alternatively part of it. Clicking
or
, moves the blue
highlight bar in the table to the next or previous row containing the name or number. Clicking
, highlights the searched name or number in the table in blue.
5.1.2 Create or delete a patient
Click
, deletes all the data related to the highlighted patient. Click
patient, which can be linked to a slide or treatment ID.
creates a new
A new patient can be created on this page before loading slides in the EmbryoScope™ and then
slide-labels with patient ID and patient name can be printed for the slide(s). When the slide(s)
associated to the patient is created on the EmbryoScope™, the EmbryoScope™ shows a list in a
drop down menu of patient name’s and patient ID’s that have previously been created in either
the EmbryoScope™ or the EmbryoViewer™. For coupling of treatment ID with slide ID see section
5.2.11.
NOTE: It is essential that the correct patient ID is chosen on the EmbryoScope™ if a new slide is
added to an existing patient.
Page | 18
Unisense FertiliTech A/S - EmbryoViewerTM 3.0
User manual v3.0
________________________________________________________________________________________________________________________
5.2 Patient details
This part of the EmbryoViewer™ provides the user with patient information, treatment and slide
information.
5.2.1 Detailed patient and treatment information
This page shows three boxes, the top box where patient information can be specified or is loaded
via connection to the EmbryoScope™, the middle box where treatment information and outcome
data can be specified, and the bottom box where slide information is shown.
5.2.2 Patient details
Information in the patient details box is:
•
•
Patient ID and name
Birth year and month
Page | 19
Unisense FertiliTech A/S - EmbryoViewerTM 3.0
User manual v3.0
________________________________________________________________________________________________________________________
•
•
•
•
Body mass index (BMI)
Basal serum FSH
Patient diagnosis
Comments related to the patient
All treatments associated with the patient are listed in the panel on the right side of the “Patient
Details” box. The highlighted treatment is the treatment shown in the middle box. Clicking on
different treatments in the “All Treatments” panel switches the middle box between the different
treatments.
Click
creates a new treatment, which can be linked to a slide using the bottom slide box,
see section 5.2.11.
5.2.3 Printing slide-label
Click
prints a slide-label with a barcode and patient name and patient ID. In order to
print the slide-label before the slide is started on the EmbryoScope™ the patient needs to be
created on the “View All Patients” page, see section 5.1.2. If the patient ID is too long for the
barcode a warning message is shown instead of a barcode.
5.2.4 Treatment information
In the treatment box (middle box), detailed information about the treatment can be specified. The
blue header bar shows the treatment name. All new treatments are named “Unknown” until
renamed by user. The grey drop down boxes has predefined values, whereas the white drop down
boxes is editable and the user can write in information. Values previously written in the white
drop down boxes are shown to make input faster.
5.2.5 Medication
In this box information related to the medication used in the patient treatment are typed in, i.e.
medication protocol, medication brand, type of triggering, total FSH dose, checkbox for indicating
LH supplement and a comment space related to medication.
Page | 20
Unisense FertiliTech A/S - EmbryoViewerTM 3.0
User manual v3.0
________________________________________________________________________________________________________________________
5.2.6 Oocyte information
In this box information related to the oocyte are typed in, i.e. oocyte source (autologous, donor,
other), oocyte history (fresh, thawed, other) and number of oocytes aspirated. If there are
embryos from the same treatment that is incubated in a standard incubator the information
should be specified in the “sibling embryos in standard incubator” box.
5.2.7 Culture conditions
In this box information on the embryos culture conditions are typed in i.e. media type, brand of
the first and second media, whether a media change are performed and a comment space related
to culture conditions.
5.2.8 Outcome
In this box the outcome data is typed in, result of the HCG test, number of gestational sacs,
number of fetal heart beats observed, number of live born babies, information of abortion and a
comment space related to abortion e.g. the type of abortion can be written in the comment space.
5.2.9 Multiple slides with a treatment
All slides associated to this treatment are listed in a panel in the right side of the treatment box.
The blue highlighted slide is the slide shown in the bottom box. Clicking on different slides in the
“Slide(s) with this treatment” panel switches between the slides shown in the bottom box.
NOTE: It is essential that the correct patient ID is chosen on the EmbryoScope™ if a new slide is
added to an existing patient.
5.2.10 Slide information
In the bottom slide box information related to the specific slide are shown, and it is possible to
associate or move slides between different treatments. Information from the EmbryoScope™ on
fertilization date and time are shown. Fertilization method and a comment can be added. In the
right side of the slide box a panel listing embryo specific information (Embryo ID, selection and
description) from the EmbryoScope™ is shown.
Page | 21
Unisense FertiliTech A/S - EmbryoViewerTM 3.0
User manual v3.0
________________________________________________________________________________________________________________________
5.2.11 Linking slide and treatment
In the slide box a slide can be linked to an existing treatment using the “Slide Treatment ID” drop
down menu.
NOTE: It is essential that the correct patient ID is chosen on the EmbryoScope™ if a new slide is
added to an existing patient or treatment.
5.2.12 Changing fertilization time
Fertilization date and time can be manually changed after the slide is ended on the EmbryoScope™.
NOTE: changing fertilization date and time and clicking “Save” overwrites the original
fertilization date and time from the EmbryoScope™. The original fertilization date and time can
only be restored by importing the raw data from the EmbryoScope™ again.
5.2.13 Embryo specific information
Information related to specific embryos (embryo ID and description) can be written when adding a
slide on the EmbryoScope™, and this information is listed in the panel. Selecting embryos for
transfer, freezing or discard will appear on this list. The “Well Description” space is editable so
additional information on specific embryos can be inserted here after a slide is ended. For example
information on location of freezing can be written here and will appear on the “Laboratory Data”
report page, section 6.6.1.
5.2.14 Save patient details
Click
and save all updated patient information in the patient details and the treatment box.
Page | 22
Unisense FertiliTech A/S - EmbryoViewerTM 3.0
User manual v3.0
________________________________________________________________________________________________________________________
6 Slides
Slide and embryo details
Treatment ID (if a patient has several treatments, these are shown)
Slide ID (if several slides belong to the same patient, these are shown)
Shows time-lapse films of embryos from the specific slide
Shows embryos from the specific slide in a timeline view
Detailed view of embryos for annotation of e.g. cleavage times
Running conditions for the specific slide e.g. incubation temperature and gas concentration
Exports video sequences and single images
Generates report sheets; laboratory data, instrument data, patient information
This part of the EmbryoViewerTM provides the user with an overview of the embryo time-lapse
information.
6.1 View slide
When clicking the
button images of all embryos in the active slide are
shown on the screen. The positions of the images on the screen are equivalent to the positions of
the embryos in the EmbryoSlideTM. The last image of each embryo taken during the incubation is
shown.
Page | 23
Unisense FertiliTech A/S - EmbryoViewerTM 3.0
User manual v3.0
________________________________________________________________________________________________________________________
6.1.1 Time-lapse of embryo development
Viewing time-lapse - scrolll wheel
The embryo development can be viewed by turning the scroll wheel (the PowerMateTM with the
blue light).
). Turning the scroll wheel clockwise displays the images of the embryo forwards
forward in time,
turning the scroll wheel counter clockwise displays the images backwards
ba
in time.
The black triangle shows which position the presently shown
shown image has in the entire film of the
embryo development illustrated by the green division chart.
Viewing time-lapse - buttons
Alternatively the time-lapse
lapse images can be viewed by using the buttons in the panel at the bottom
of the page:
•
Clicking
displays the previous images in the time-lapse
•
Clicking
plays the time-lapse
time
film for all embryos on the slide. When pressed
p
again
appears and the film pauses
•
Clicking
displays
ys the next images in the time-lapse
time
series
•
Preferred film speed can be chosen in the drop down menu:
Page | 24
Unisense FertiliTech A/S - EmbryoViewerTM 3.0
User manual v3.0
________________________________________________________________________________________________________________________
Viewing time-lapse - mouse
The displayed image can also be changed using the mouse to click on the new desired position in
the green bar.
Viewing time-lapse - right and left arrows on the keyboard
Tapping the right arrow steps the time-lapse
time
forwards, left arrow steps the time-lapse
time
backwards.
6.1.2 Different focal planes
Images are taken in different focal planes.
planes. To the right of the image a bar with tick marks indicates
indicate
this stack of images. The blue dot indicates the focal plane of the shown image. By moving the
blue dot up and down the relevant image will be displayed. Just clicking above (or
( below) the dot
displays the image plane just above (or
( below) the presently shown.
hown. If the cursor
curso is placed over
the image, arrow up (or down) moves the focal plane up or down, respectively.
respectively The scroll wheel
on the mouse can
an also be used to scroll up or down through the imagess from different planes.
Page | 25
Unisense FertiliTech A/S - EmbryoViewerTM 3.0
User manual v3.0
________________________________________________________________________________________________________________________
6.1.3 Cell divisions
When a cell division is observed it can be annotated
an
by clicking the plus or minus signs above and
below the white space in the upper left corner of the box until the relevant number of cells are
displayed. A black vertical line appears in the
the division chart to indicate the cell division.
Alternatively the annotation can be done by clicking on the white space, which opens a drop down
menu with the following options:
1, 2, 3, 4, 5, 6, 7, 8, 9+ for the number of cells
M (morula), B (blastocyst),
t), EB (expanded blastocyst), HB (hatching blastocyst) for further
development and Dead for atretic embryos.
The color code on the division chart is:
•
•
•
•
Green: 1, 2, 4, 8 cells.
Yellow: 3,5,6,7 cells.
Blue: M, B, EB, HB.
Red: Dead.
A division pattern can look like this:
Page | 26
Unisense FertiliTech A/S - EmbryoViewerTM 3.0
User manual v3.0
________________________________________________________________________________________________________________________
6.1.4 Blastomere activity
Image series are analyzed automatically in real time with the EmbryoScopeTM software.
Blastomere activity is a numerical parameter that reflects the amount of movement that has
occurred between two consecutive images in the time-lapse image series. The blastomere activity
has NO DIAGNOSTIC
STIC USE, but can be used to assist the user in identifying periods in the time series
where events of interest may be occurring. Peaks in the blastomere activity
tivity often occur when cell
divisions take place, since the cell divisions lead to movement in the image. An example is given in
the image above.
There can be other causes for peaks in the blastomere
blastomer activity than cell divisions.
6.1.5 Dynamic score
The “Dynamic Score” abbreviated “Dyn. Score” can be annotated in the “Annotate” sheet and if
annotated it is displayed to the left of the image.
6.1.6 Embryo selection buttons
Page | 27
Unisense FertiliTech A/S - EmbryoViewerTM 3.0
User manual v3.0
________________________________________________________________________________________________________________________
Buttons for marking selected embryos are listed in the panel below the images:
•
The
button marks embryos selected for transfer. Selected images get a green
background
•
The
button marks embryos selected for freezing. Selected images get a blue
background
•
The
•
The
button marks embryos where decision making is not possible at the time of
marking. Selected images get a yellow background
button marks embryos for discarding. Selected images get a red background
When for example the
button is clicked, the icon (
) is shown to the right of the cursor
indicating that the transfer tool is active. One or more embryos for transfer can now be marked by
clicking on the images, whereby the images get a green background. Return to normal cursor use
is done by clicking on the “Transfer” tool button again. The other three tools work in the same
manner.
6.1.7 Annotations regarding the slide
Spaces and drop down menus for slide description, initials of annotating personnel, status of
annotation, Slide type and an annotation comment are provided at the bottom of the screen.
6.1.8 Slide type
The drop down menu for slide type has the following options:
•
•
•
•
•
Human clinical
Human test
Animal test
Other test
Not checked.
Page | 28
Unisense FertiliTech A/S - EmbryoViewerTM 3.0
User manual v3.0
________________________________________________________________________________________________________________________
6.1.9 Saving changes
Click the
button to save all updated information on the “View Slide” page. If an
attempt is made to update or leave the page before saving, a dialog box will appear asking
whether or not the user wants to save the changes before proceeding.
6.1.10 Selecting embryos for annotation
An embryo can be selected by clicking on the image on the slide. The dark blue bar to the left will
be highlighted in a light blue colour. One, two or three images can be selected and subsequently
displayed on the “Annotation” page.
6.1.11 Shortcut
Double clicking on one of the embryo images opens the “Annotation” sheet with the chosen
embryo.
6.2 Timeline
When clicking the
at pre-specified time points.
button the embryos within the specific slide are shown
The page gives a fast overview of the embryos in the slide. Embryos that should be discarded can
be selected and not be shown on the page, leaving more space for the prevailing embryos that can
be selected for transfer, freeze or further observation.
In addition, it is possible to magnify the small images in the “Timeline”.
Page | 29
Unisense FertiliTech A/S - EmbryoViewerTM 3.0
User manual v3.0
________________________________________________________________________________________________________________________
6.2.1 Choosing displayed time points
Preferred time points can be written in the white spaces to the left of the embryo images. When
clicking on the
button at the bottom of the page, images of the embryos are
displayed at the selected time points. Time points do not need to be written chronologically, as
the update function will order them chronologically.
Page | 30
Unisense FertiliTech A/S - EmbryoViewerTM 3.0
User manual v3.0
________________________________________________________________________________________________________________________
6.2.2 Number of time points shown and zoom level
The number of time points shown can be changed in the “Time points shown” drop down menu at
the bottom of the page. Up to 10 time points can be chosen and will be displayed after clicking the
update button.
The more time points chosen, the smaller the displayed images, since the space on the screen is
limited.
The zoom level can be changed manually on the “Zoom (%)” drop down box. The larger the zoom
number, the larger the images displayed.
When more time points and/or embryos are chosen than can be displayed on the page, a scroll
bar appears to the right of the images.
Page | 31
Unisense FertiliTech A/S - EmbryoViewerTM 3.0
User manual v3.0
________________________________________________________________________________________________________________________
6.2.3 Embryo selection in “Timeline”
The four embryo selection buttons for transfer, freeze, discarding and further observation
described in section 6.1.6 are also available on the “Timeline” page.
.
Embryos that should be discarded can be marked with the
button, giving the embryos a red
background color. If the “Don’t show discarded” checkbox is checked, the discarded embryos will
no longer be shown on the page. By removing the discarded embryos from the page, more space
is available to enlarge the remaining embryos.
If some embryos have been selected for discarding on the “View Slide” page and the “Don’t show
discarded” checkbox is already checked when opening the “Timeline”, the discarded embryos are
not shown when the slide is initially opened in “Timeline”.
Page | 32
Unisense FertiliTech A/S - EmbryoViewerTM 3.0
User manual v3.0
________________________________________________________________________________________________________________________
The embryo selections are saved by pressing the
button. If an attempt is made to update
or leave the page before saving, a dialog box will appear asking whether or not the user wants to
save the changes before proceeding.
6.2.4 Viewing different focal planes
The different focal planes of the image can be viewed by placing the curser over an image (no
clicking) and scrolling with the scroll wheel on the mouse or using the up and down arrows on the
keyboard.
6.2.5
Magnification of images in “Timeline”
An image can be magnified by double clicking on the image. The image shown in the magnifying
frame can be changed to any other image by double clicking on the other image.
In the magnified view the scroll wheel and the up and down arrows can be used to change the
focal planes.
Page | 33
Unisense FertiliTech A/S - EmbryoViewerTM 3.0
User manual v3.0
________________________________________________________________________________________________________________________
6.2.6 Morphological grade
A morphological grade can be given in the box in the header, and will also be displayed in the
sheet “Annotate”.
6.2.7 Shortcut
Double clicking on one of the headers of the embryo timelines opens the “Annotation” sheet with
the chosen embryo.
6.3 Annotate
The
button becomes active when one, two or three embryos have been
selected on either the “View Slide” or “Timeline” page. Detailed annotations of the embryos can
be done on the “Annotate” page.
Page | 34
Unisense FertiliTech A/S - EmbryoViewerTM 3.0
User manual v3.0
________________________________________________________________________________________________________________________
6.3.1 Using the annotation table
When a specific annotation is done, the time and value are written in the list of annotations. The
various annotations are described below:
Cell division
Division
chart
Number
of cells
Blastomere
activity
Visible nuclei
Scores / grades
Pronuclei
Fragmentation
List of
annotations
Multinucleation
Blastomere size
Page | 35
Unisense FertiliTech A/S - EmbryoViewerTM 3.0
User manual v3.0
________________________________________________________________________________________________________________________
6.3.2 Cell divisions
The tool for annotating cell divisions on the division chart works in the same way as the tool on
the “View Slide” page (section 6.1.3).
6.3.3 Visible nuclei
The number of visible nuclei can be annotated, by clicking the plus or minus sign until the number
in the box matches the number of visible nuclei on the embryo image. Synchrony or asynchrony in
the appearance and disappearance of nuclei can be annotated using this tool.
6.3.4 Dynamic score, Z score, and morphological grade
•
•
•
Dynamic score can be used as an overall score where the time-lapse information has been
used in determining the grade
Z score can be used for grading the pattern of the pronuclei and the pattern of the nuclear
precursor bodies in the pronuclei
Morphological grade can be used as a grade based on the timeline images, the
morphological grade can also be assigned on the “Timeline”
6.3.5 Pronuclei
Number of pronuclei before first cell division can be annotated.
6.3.6 Fragmentation
The relative degree of fragmentation of the embryo can be annotated.
Page | 36
Unisense FertiliTech A/S - EmbryoViewerTM 3.0
User manual v3.0
________________________________________________________________________________________________________________________
6.3.7 Multinucleation
The number of cells in which multinucleation is observed can be annotated.
6.3.8 Blastomere size and other properties
The spatial symmetry of the blastomeres can be annotated at for instance the 2, 4, and 8
blastomere stadium.
Various other properties can be annotated by checking the check boxes. The annotations will be
shown in the list of annotations and a small red dot is shown at the bottom of the division chart to
indicate an annotation.
6.3.9 Comments
Up to 10 comments can be added to the list of annotations.
6.3.10 Adjusting contrast in the image
Image contrast can be adjusted by sliding the bar. Note this will not change the original images but
only they way the images are currently displayed.
Page | 37
Unisense FertiliTech A/S - EmbryoViewerTM 3.0
User manual v3.0
________________________________________________________________________________________________________________________
6.3.11 Navigate to previous or next well
6.3.12 Embryo selection in “Annotate”
The four embryo selection buttons described in section 6.1.6 are also available in “Annotate”.
6.3.13 Time-lapse embryo development in “Annotate”
All options for playing the embryo time-lapse film described in section 6.1.1 are available in
“Annotate”.
6.3.14 Measuring blastomere size
The ellipse tool
The distance tool
fragment.
can be used for estimating the area of a blastomere and/or fragment.
can be used for estimating the diameter of a blastomere and/or
Area and distance are shown in the list of annotations.
Page | 38
Unisense FertiliTech A/S - EmbryoViewerTM 3.0
User manual v3.0
________________________________________________________________________________________________________________________
6.3.15 Saving changes
Click the
button to save all annotations. If an attempt is made to update or leave the
page before saving, a dialog box will appear asking whether or not the user wants to save the
changes before proceeding.
6.4 Incubation
6.4.1 Inspection of running conditions
During a run on the Embryoscope™ and/or as a final quality check (QC) it is possible to inspect the
running conditions for each EmbryoScope™ instrument. Incubation details can be inspected by
clicking
or finding the slide in the instrument overview table accessed by
.
Page | 39
Unisense FertiliTech A/S - EmbryoViewerTM 3.0
User manual v3.0
________________________________________________________________________________________________________________________
Running conditions for CO2 and O2 are only shown if CO2 and O2 regulation is chosen on the
EmbryoScope™. Running conditions for temperature and gas are shown on graphs. Door openings
are indicated by a black cross on the graph.
•
•
•
Top graph: Incubation temperature (blue)
Middle graph: CO2 concentration (blue), flow (green) and pressure (pink)
Bottom graph: O2 concentration (blue), flow (green) and pressure (pink)
For all graphs, it is possible to include or exclude the parameters shown on the graph by clicking in
the checkbox.
The axis on the graph rescales automatically in accordance with the parameters chosen.
6.4.2 Zoom of graphs
To zoom on a specific part of one of the graphs drag the cursor from left to right, to zoom out drag
the cursor in the opposite direction (from right to left).
6.4.3 Detailed running information
Below the graphs detailed information on running conditions for the selected slide are shown in
different sheets.
Page | 40
Unisense FertiliTech A/S - EmbryoViewerTM 3.0
User manual v3.0
________________________________________________________________________________________________________________________
6.4.4 Summary sheet
Running conditions for incubation temperature and gas conditions (average, min, max and
standard deviation).
6.4.5 Warnings sheet
The warning sheet lists for example, incubator warnings (alarms), lost connection between the
EmbryoScope™ and the EmbryoViewer™, door openings.
6.4.6 The log sheet
The log sheet lists a number of detailed parameters of instrument functions. There are a number
of parameters that are logged during the incubation. The parameters are categorized in the
following groups which are available in a drop down menu, 1) Default: Information about timing of
slide loading, position of each image, etc. 2) Description: Information about embryo description,
slide start/end, program version, etc. 3) Camera: Information about where the best focal plane
was found. 4) Incubator settings: O2, CO2 and temperature settings. 5) Instrument parameters:
Information about all instrument specific parameters (calibrated during reset). These logs are
primarily used for trouble shooting if any problems occur with the EmbryoScope™.
Page | 41
Unisense FertiliTech A/S - EmbryoViewerTM 3.0
User manual v3.0
________________________________________________________________________________________________________________________
6.4.7 The “Other” sheet
The sheet named “other” lists a table of average, min, max and standard deviations of several
running conditions such as temperature within the EmbryoScope™ and current use of different
parts of the EmbryoScope™. The parameters are also shown graphically. The parameters can be
checked/unchecked in the graph legend. The zoom function also functions in this graph.
6.4.8 Save QC status and comments
When quality check of running conditions are performed it is possible to save the name of the
person who has performed the QC; the status (approved, disapproved, not checked) and a
comment to the QC can be added.
Click
to save this information. The QC status and comments added are also shown on the
instrument view page accessed by clicking
.
Page | 42
Unisense FertiliTech A/S - EmbryoViewerTM 3.0
User manual v3.0
________________________________________________________________________________________________________________________
6.5 Video
The
button becomes active when 1-12 embryos have been selected on
either the “View Slide” or “Timeline” page.
6.5.1 Generate video of embryo(s)
Use the “Video” sheet to specify a range of parameters for the video. The video is generated after
pressing the
button.
A header can be placed on the video showing text and the clinic’s logo:
The start and end time as well as the playback speed can be specified in the “Playback” box:
Page | 43
Unisense FertiliTech A/S - EmbryoViewerTM 3.0
User manual v3.0
________________________________________________________________________________________________________________________
6.5.2 Generate embryo images
Use the “Images” sheet to export the embryo images in jpeg format after clicking the
button.
6.6 Report
This function generates three reports based on information from the EmbryoScope™ and
information from the EmbryoViewer™.
6.6.1 Laboratory data
The laboratory data sheet is used in the laboratory to obtain an overview of the selected embryos
chosen for transfer and freezing. After use in the laboratory, the report can be enclosed in the
patient journal. All spaces are filled out automatically, except the embryo selection spaces; these
are empty and can be used for subsequently writing in initial/name of the person who performed
the embryo selection, transfer and freeze.
Page | 44
Unisense FertiliTech A/S - EmbryoViewerTM 3.0
User manual v3.0
________________________________________________________________________________________________________________________
The report shows the last image of the selected and frozen embryos, and a diagram of the slide
indicating the position of the selected and frozen embryos. At the top of the report patient name,
patient ID, treatment ID, slide ID, fertilization method and date of report printed are shown.
Page | 45
Unisense FertiliTech A/S - EmbryoViewerTM 3.0
User manual v3.0
________________________________________________________________________________________________________________________
6.6.2 Instrument data
The instrument data sheet shows a table of average, min, max and standard deviations of
temperature and gas conditions. Temperature and gas conditions are also shown graphically.
Quality check status and initials of the QC person are also shown on the report. This report can be
enclosed in the patient journal. At the top of the report patient name, patient ID, treatment ID,
slide ID and date of report printed are shown.
Page | 46
Unisense FertiliTech A/S - EmbryoViewerTM 3.0
User manual v3.0
________________________________________________________________________________________________________________________
6.6.3 Patient information
The patient information sheet includes several images of transferred embryos and a single image
of the frozen embryos. At the top of the report patient name, patient ID, treatment ID and date of
report printed are shown. This sheet can be handed out to the patient.
Page | 47
Unisense FertiliTech A/S - EmbryoViewerTM 3.0
User manual v3.0
________________________________________________________________________________________________________________________
6.6.4 Print reports
Choose all or only some of the reports to be printed in the print checkbox.
Page | 48
Unisense FertiliTech A/S - EmbryoViewerTM 3.0
User manual v3.0
________________________________________________________________________________________________________________________
7 Database
7.1 View all slides
When clicking the
button all slides are listed with information on e.g.
fertilization time, primary outcome data and instrument quality control status.
When clicking on a line it is coloured blue and throughout the EmbryoViewerTM the patient,
treatment and slide belonging to the line are now active.
7.1.1 List of slides
For each slide the following parameters from the database are displayed
•
•
•
•
•
•
•
•
•
•
Identifiers: slide ID, patient
atient ID,
ID patient name, treatment ID
Fertilization time
Start and end time of incubation in EmbryoScope™
EmbryoScope (relative to fertilization time)
Instrument and slide number
Runs: Number of times images have been taken of the embryos
Annotations: Information
ion embryo annotation status
Number of embryos selected
selec
for transfer from the slide and list of the wells
Pregnancy outcome data
Slide type
Annotation comment and QC status
Page | 49
Unisense FertiliTech A/S - EmbryoViewerTM 3.0
User manual v3.0
________________________________________________________________________________________________________________________
7.1.2 Overview of data for selected slide
The box below the list of slides gives an overview of:
•
•
•
Patient data
Embryo images: last image of each well is shown and the numbers of embryos selected for
transfer, freeze and discarding are displayed
Instrument data: average temperature and gas concentration data for the selected slide
and overall for the instrument
7.1.3 Filters and sorting of data
For each of the columns a menu will be opened if the header is clicked. The data can be sorted in
ascending or descending order and for some of the parameters the menu includes filters to
include or exclude some of the data. Filters can also be reset in the menu.
If the checkbox
below the list of all slides is checked, only human clinical
slides are displayed in the list of slides.
Page | 50
Unisense FertiliTech A/S - EmbryoViewerTM 3.0
User manual v3.0
________________________________________________________________________________________________________________________
7.1.4 Importing a slide
If the EmbryoScopeTM is connected to the EmbryoViewerTM, the finished slides are automatically
imported to the database in the EmbryoViewerTM.
If there is no connection the
button can be used to manually import the finished slides
TM
from the EmbryoScope after the datafiles have been moved to the EmbryoViewerTM using for
instance a USB stick.
Clicking the
imported.
button opens a dialog box from which one or multiple slides can be
A pop up box appears while slide data is imported.
After import the file with the slide data is saved in the database folder and a dialog box asks if the
slide data should be deleted from the folder from where it was imported. If the slide is already
present in the database a pop up box appears asking for overwriting the existing slide data or not
importing the slide.
Page | 51
Unisense FertiliTech A/S - EmbryoViewerTM 3.0
User manual v3.0
________________________________________________________________________________________________________________________
7.1.5 Deleting a slide
Clicking the
button deletes highlighted slides.
7.1.6 Exporting data from the database
Clicking the
button exports patient data and well annotation data for highlighted slides
to a Microsoft Office Excel 97-2003 worksheet.
7.2 Instrument
7.2.1 List of running conditions for all slides
To get an overview of all instruments, main running parameters and quality check status, click
. The table lists average incubation details for all slides in the database.
•
•
Average incubation temperature, gas concentration and flow
QC status and comments to the QC
Page | 52
Unisense FertiliTech A/S - EmbryoViewerTM 3.0
User manual v3.0
________________________________________________________________________________________________________________________
7.2.2 Average incubation conditions for all slides
The average incubation temperature, gas concentration and flow for all, several or a specific
instrument is calculated at the bottom of the table. The average incubation conditions for a
specific instrument are calculated by selecting the instrument in the top row
. All other
parameters can be sorted in ascending or descending order by clicking on the top row.
Page | 53
Unisense FertiliTech A/S - EmbryoViewerTM 3.0
User manual v3.0
________________________________________________________________________________________________________________________
8 Settings
Backup and upload of data
Backup of data and upload of data to Unisense FertiliTech A/S
8.1 Backup and upload of data to Unisense FertiliTech A/S
Clicking
opens a page with two frames, one related to backup of data in
the database and one related to upload of data to Unisense FertiliTech A/S.
Page | 54
Unisense FertiliTech A/S - EmbryoViewerTM 3.0
User manual v3.0
________________________________________________________________________________________________________________________
8.1.1 EmbryoViewer™ software version
Below the backup and data upload boxes the version number of the EmbryoViewer™ software is
shown.
8.1.2 Slides for data agreement
If the Fertility Clinic has signed a “Slides for Data Agreement” a check box can be clicked.
This enables an easy overview on the “View All Slides” and “Patient Details” pages of the number
of slides where the conditions for slide cost reimbursement are fulfilled (“View All Slides”) and of
the amount of data necessary to upload to fulfill the “Slides for Data Agreement” (“Patient
Details”).
On the “View All Slides” page all slides where the “Slides for Data Agreement” conditions are
fulfilled are colored green.
On the “Patient Details” page all information that are necessary to provide by the Fertility Clinic to
fulfill the “Slides for Data Agreement” are colored red, and when the information is inserted the
text is colored green, see examples below.
Page | 55
Unisense FertiliTech A/S - EmbryoViewerTM 3.0
User manual v3.0
________________________________________________________________________________________________________________________
8.2 Data backup
Data backup includes backup of the slide database and backup of the main and patient database.
It is possible to specify both a backup location and a backup time.
Data backup are performed daily on the specified time. Backup files are listed with date and time.
Clicking
performs a forced data backup. A forced data backup creates an extra backup file
and does not affect the daily data backup.
WARNING:
Backup of image and patient data MUST be performed at regular intervals.
Automated nightly backups to a safe external hard disc can be implemented
through a selection in the settings tab.
8.3 FTP connection to Unisense FertiliTech A/S
It is possible for users to upload anonymous treatment data (images, temperature and gas
readings, procedure, outcome etc.) to a secure FTP server at Unisense FertiliTech A/S to facilitate
quality control and off site quality control. Users have expressed an interest in a built-in feature to
do this automatically every night. Unisense FertiliTech A/S will keep the data on a secure server,
and will not distribute the data. The sole use of the data will be to evaluate if the instrument is
operating properly and to report back to the clinic if any advance sign of irregularities are
observed. Unisense FertiliTech A/S intends to do a technical review of the uploaded data on a
regular basis, but will not be obliged to do so. By uploading the data to Unisense FertiliTech A/S
the clinic will grant Unisense FertiliTech A/S the permission to use information derived from the
data to improve future products free of charge/royalties to the entities that have uploaded the
data.
Page | 56
Unisense FertiliTech A/S - EmbryoViewerTM 3.0
User manual v3.0
________________________________________________________________________________________________________________________
It is possible to automatically upload new data to a Unisense FertiliTech A/S FTP server every night
by selecting
, the type of connection is specified
. When there is new
data to upload, the data is uploaded to Unisense FertiliTech A/S. If the internet connection has
been lost, a forced upload of data can be performed by clicking
with date and filename.
. Uploaded files are listed
RESTRICTIONS ON USE:
The clinic shall be solely responsible for ensuring that all local rules and
regulations are observed in connection with the upload of data to Unisense
FertiliTech A/S and that patients are informed about such upload of data.
RESTRICTIONS ON USE:
Upload of data may only be initiated IF THIS IS PERMISSIBLE BY LAW AND
REGULATIONS in the country where the EmbryoViewer™ resides.
8.3.1 Data uploaded to Unisense FertiliTech A/S
Data can be uploaded with different levels of information.
NOTE: Information from the variable “Patient Name” will never be uploaded.
•
Upload only slide data, this includes embryo images,
embryo annotation e.g. cleavage patterns, an auto generated slide ID number, running conditions.
Page | 57
Unisense FertiliTech A/S - EmbryoViewerTM 3.0
User manual v3.0
________________________________________________________________________________________________________________________
8.3.2 Patient information uploaded to Unisense FertiliTech A/S
•
No patient information is uploaded
•
Upload slide data (see above) and patient treatment and outcome
data without uploading data from the “Patient ID” variable
•
Upload slide data (see above) and patient treatments and outcome
data including data from the “patient ID” variable (information from the variable “Patient Name” is
never uploaded)
RESTICTIONS ON USE:
Only anonymous data may be uploaded to Unisense FertiliTech A/S.
Patient ID may only be uploaded if the ID number is an internal number used by
the fertility clinic. If the patient ID is a social security number of any other
traceable personal ID number it may NOT be uploaded to Unisense FertiliTech A/S
Page | 58
Unisense FertiliTech A/S - EmbryoViewerTM 3.0
User manual v3.0
________________________________________________________________________________________________________________________
9 Acknowledgements
All identification numbers, names and treatment data presented in this manual is purely fictive.
We acknowledge IVI Valencia, Spain and Marcos Meseguer for providing the embryo images.
Page | 59
Unisense FertiliTech A/S - EmbryoViewerTM 3.0
User manual v3.0
________________________________________________________________________________________________________________________
10
Disposal of waste
Identification of risks associated with the disposal of the EmbryoViewer™ and its accessories. In
order to minimize the waste of electrical and electronic equipment, waste is disposed according to
the Directive 2002 / 96 / EC – Waste Electrical & Electronic Equipment (WEEE).
Page | 60
Unisense FertiliTech A/S - EmbryoViewerTM 3.0
User manual v3.0
________________________________________________________________________________________________________________________
11
Index
Acknowledgements, 59
Adjusting contrast in the image, 37
Alarm status, 15
Annotate, 34
Annotations regarding the slide, 28
Association between different ID’s, 8
Average incubation conditions for all slides, 53
Backup and upload of data to Unisense Fertilitech A/S, 54
Blastomere activity, 27
Blastomere size and other properties, 37
Cell divisions, 26, 36
Choosing displayed timepoints, 30
Colour guide, 9
Comments, 37
Contact Information, 62
Create or delete a patient, 18
Data backup, 56
Data uploaded to Unisense FertiliTech A/S, 57
Database, 49
Deleting a slide, 52
Detailed running information, 40
Disposal of Waste, 60
Dynamic score, 27
Dynamic score, Z score and morphological grade, 36
Embryo selection buttons, 27
Embryo selection in “Annotate”, 38
Embryo selection in “Timeline”, 32
EmbryoViewer™ introduction, 12
Exporting data from the database, 52
Filters and sorting of data, 50
Fragmentation, 36
FTP connection to Unisense FertiliTech, 56
Generate embryo images, 44
Generate video of embryo(s), 43
Grading embryos, 11
Importing a slide, 51
Incubation, 39
Index, 61
Inspection of running conditions, 39
Instruction and installation, 13
Instrument, 52
Instrument data, 46
Introduction, 12
Laboratory data, 44
Linking slide and treatment, 22
List of slides, 49
Magnification of images on “Timeline”, 33
Measuring blastomere size, 38
Morphological grade, 34
Multinucleation, 37
Navigate to previous or next well, 38
Number of timepoints shown and zoom level, 31
Overview of data for selected slide, 50
Overview of functions in the navigation panel, 7
Patient details, 19
Patient information, 47
Patients, 17
Print reports, 48
Printing barcode, 20
Pronuclei, 36
Quick guide, 7
Report, 44
Running, 14
Saving changes, 29, 39
Saving QC status, 42
Searching a patient name or ID, 18
Selecting embryos for annotation, 29
Settings, 54
Shortcut, 29, 34
Slide type, 28
Slides, 23
Timeline, 29
Upload of patient information to Unisense FertiliTech A/S,
58
Using the annotation chart, 35
Video, 43
View a single embryo time-lapse video, 10
View all patients, 17
View all slides, 49
View all videos simultaneously, 9
View embryo development at specific time points, 11
View running, 14
View slide, 23
View time-lapse and score embryos, 9
View time-lapse of several selected embryos, 10
Viewing, 24
Viewing different focal planes, 25, 33
Viewing patient details, 19
Viewing patient treatment information, 20
Viewing running slide, 15
Viewing time-lapse - buttons, 24
Viewing time-lapse - mouse, 25
Viewing time-lapse - right and left arrows on the keybord, 25
Viewing time-lapse - scrool wheel, 24
Viewing time-lapse embryo development in “Annotate”, 38
Visible nuclei, 36
Zoom of graphs, 40
Page | 61
Unisense FertiliTech A/S - EmbryoViewerTM 3.0
User manual v3.0
________________________________________________________________________________________________________________________
12
Contact information
Unisense FertiliTech A/S
Tueager 1
DK-8200 Aarhus N
Denmark
Telephone: +45 8944 9500
Homepage: www.fertilitech.com
Support available 24 hours, all days
In case of emergency, call our free service hotline for support
+45 7023 0500
Page | 62


