1
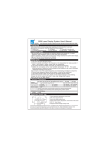
M0DEL:
FLY lNG093RG
FLY INGOgsRG
FLY I NGOgTRG
User manual
SEVEN
STARS@
((ut.
ot.rpn totu*
sc
Chapter 1 Brief introduction
Contents
Thanks for chooslng our All over the sky planet series products.
Chapter 1 Brief introduction - - - - - - - 01
1.1 Packing list - - ---01
Chapter2Notice
2.1 Safetyguide- - - --
guide-
map
3.3 Backboard sketch map -
-
---
to rules in
case
being injured or destroying system.;
.|.2 packing list
------03
-------- - --03
- - - - -------- 03
3,1 Installation guíde---3,2 Front board sketch
carefully before installation and operate according
----01
- - - - - - -01
2.2Maintenance--2,3 Warning2,4 Declare
Chapter 3 Installation
For you could use this product roundly, please read this manual
While receiving the product, please take carefully and check
whether it was been destroyed on conveyance. After that, check the
following parts.
04
1. 1x LaseÍ unit.
- - - - - - - 04
- - - - - - 04
- - - -05
2.
1x User Manuat.
3.
1X power cabte.
4. lX
D[4X cabte
Chapter 4 Technical Parameters - - - - - - - 06
4,L Technical Parameters
4.2 Software setting
4.3
Function
settins
Chapter 2 Notice
---06
----06
- - - - -07
"
2.
È
1 Safety guide
Do not disassemble or repair the system by yourself unless you
are professional in the field of electronics .If there is a problem,
please enquire or contact professional electronic engineer ,or seek
help from your local dealer.
- Page
1
^\
w
^L
w
The product should be installed by professional technician.
a\t
Ïy'}
Do not touch the system by wet hand or pull the power wire
to avoid shaking.
\ff
Vt 3
a}..
forcefully.
È th" ,y.t".
When transpod the system again, please use the original package
should be kept dry .ptease don't use the system in
fnis siqn indicates collecting in sort about electronics
and
electronically equipment
the condition of raln, wet or dust. Need waterproof equipment in
nL
w
Maintenance
the open air.
Do not turn on or off the system frequently, and avoid keeping
it
l4aintain the machine regularly and clean the lens with absorbent
working for a long time.
Installation immovably, prevents the system írom strong shàking
cotton dipping alcohol, but wet cloth or other chemic solvent .The
cleanness times depend on the usage frequency and the surrounding
or striking.
^L
w
condition of the laser display system. Suggest that the system should
Prevent outer dangerous objects into the system, or there will be
be cleaned every 15 days.
malfunction.
The system should ke,ep
lm far away fÍom the objects shined at
2.3 Warning
least.
n\
w
Please don't connect the power supper or turn on the system
È
eefore any installation and repairmen, please do cut offthe poweí
before installation.
supply.
Before switching on power, please make sure power wire jn good
È
condition.
Please warm-up
ror- mat<inq sure person and machine safe, install steady before
hanging, or that will cause person injured and equipment destroy.
for lsminutes before turning on the system.
F
No slip.ouer on the machine.
Turn off the system for 25 minutes after running continuously for
three hours. Ensure the system is able to cool down in a suitable
environment and has steady output power
2.4 Declare
The user should comply with the instructions and warning
Page 2
Page
3
Above. Any damage, which
Ís
coursed
by
3.3 backboard sketch map
incorrect
0 00
operation or not following the manual, is not in the arrange of
warranty.
If the
problems are caused by ignoring operation
.manual, the dealer will not take charge.
Chapter 3 Installation guide
1'l
,l
3.1 Installation guide
a\
v
Be sure that there is no flammable or explosive objects at the
arrange
of 1.5 meters
leastways, while installation. Keep 0.5
meter away from wall at least.
nb,
vp Before installation, please make sure the power voltage matches
the system rated voltage.
È ge sure that the fan and exhaust is not blocked.
È m" tar"r, display system should be fixed firmly.
È tt is essential to make the product grounding.
3.2 Front board sketch map
1C)
Key-press function instructions
OF3AI 25OV : Input power with internal fuse(3A)
€) DMx aDDRESS: Binary address switch
-. ,
,^f
tEr'I'tOm
^trtt[clo
rs::s:sea
!r-::=:=:--
,J
o*J o*,
rt),/
,
,.
@
IN:
DMX signal input
@ oUT:
DN4X
signal output
@ MIN-MAX: Sound sensitivity adjust knob
!l
@MIC: Control sound sensitivity
@MIC LED: Sound indicator light, red.
F
ly
i ng093RG
F
ly ing095RG
Page 4
F
:
lv ing097R0
Page
5
Chapter 4 Technical Parameters
4.1 Technical Parameters
FlyingOÍ,3RG FlyingogsRc
Model
FlyinqogTRc
+l
Scanner angel
40o
sound
.
Auto
,
R:80mw
G:35 mw
2
Rotation
revolving\strobe\trade coloí effects, The area of the
beam is variable one time broad other time narrow
and so does the speed. Red light goes with green,
makes the figure dimensional.
Flying095RG: Relieving with the entire sky stars, the
center circle appears cinquefoil and this give you an
airspace moving feeling,
you immerse ln a light airspace.
314 X 144 X140
Dimensions
Net weight
2.3KG
Gross weight
2.6KG
Control
mode
Color change
206-2s5
The center rotate
0-255
inteqrate stoD movino
8 grade speed adjust
0-39
Red
40-79
Green
Red and qreen
B0-119
Auto chanqe color
Sound chanqe color
No strobe
1,20-239
Strobe
I\4[4
clock-wisely,
240-255
0-19
20-240
241-255
Strobe with speedup
Sound stÍobe
Notice,
The channel 3 : speed adjust works only under the rotating
condition.
5 Channel
DMX Channel
define
4
Speed adjust
5
4.2 Software setting
I
131- 1s5
181-205
3
clock-wisely
while inteqrate anticlockwise
The Center rotate anticlock-wisely
while inteqrate clockwise
The Center stop rotate, while
inteqrate move anticlock-wiselv
The
Center
rotate
anticlock-wisely, while inteqrate
stop movinq
The center stop, while integrate
rotate clock-wisely
156-180
FlyingOgTRG: the integíate revolving produces a
dynamical feeling and the cross revolving makes a
static state, Strobe combine with color change makes
1
The Center Íotate
Dlvlx Control
Flyin9093RG: The light beam is radiant, having the
Channe
81- 105
Quiescence
106-130
Red and Green
Laser diode
Laser power
Effect
Anticlockwise rotate
Clockwise rotate
8s-265V AC,50/60H2
Power supply
Control mode
i
0-30
31-55
56-80
Control content
DMX
512value
0-69
shut off the laser diode
70-139
Sound change
140-209
Auto change
2lo-255
lvlanual mode, shut off
Page
6
4.3 Function setting
Remark
On the DMX 512 mode,the Laser display system will shut
off if the DMX 512 signal intermit.
Page
7
ADDRESS: DMx Address code setup:
1.
When the 10th code is oN, the function
of 1-9 codes is the
following
The 1* code is
The
2.
1*
oFF:--
code is ON
sound control mode (host Laser)
---
AUTO play mode (host Laseo
When the 10th code is OFF; DMX Control
.
The right for explanation involved items in this
manual is belongs to BIG Dipper Laser Science &
Technology Co., Ltd
.
vt.02
Page 8