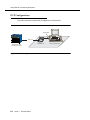
1
Avaya Softconsole™
Release 1.5
Installation and Implementation Guide
555-233-131
Issue 2
February 2003
Copyright 2003, Avaya Inc.
All Rights Reserved
Printed in USA
Notice.
While reasonable efforts were made to ensure that the information in this
book was complete and accurate at the time of printing, Avaya can
assume no responsibility for any errors. Changes and corrections to the
information contained in this document may be incorporated into future
reissues.
Your Responsibility for Your System’s Security.
Toll fraud is the unauthorized use of your telecommunications system by
an unauthorized party, for example, persons other than your company’s
employees, agents, subcontractors, or persons working on your company’s behalf. Note that there may be a risk of toll fraud associated with
your telecommunications system and, if toll fraud occurs, it can result in
substantial additional charges for your telecommunications services.
You and your system manager are responsible for the security of your system, such as programming and configuring your equipment to prevent
unauthorized use. The system manager is also responsible for reading all
installation, instruction, and system administration documents provided
with this product in order to fully understand the features that can introduce risk of toll fraud and the steps that can be taken to reduce that risk.
Avaya does not warrant that this product is immune from or will prevent
unauthorized use of common-carrier telecommunication services or facilities accessed through or connected to it. Avaya will not be responsible for
any charges that result from such unauthorized use.
Avaya Fraud Intervention.
If you suspect that you are being victimized by toll fraud and you need
technical support or assistance and are within the United States, call the
Technical Service Center Toll Fraud Intervention Hotline at 1 800 6432353. If you need technical support or assistance and are outside of the
United States, contact the equipment vendor from whom you purchased
your equipment service maintenance contract. If you need to report toll
fraud issues regarding a public telephone, contact the in-country telephone service provider.
Warranty.
Avaya provides a limited warranty on this product. Refer to the “Limited
Use Software License Agreement” card provided with your package.
Trademarks.
DEFINITY, PassageWay, and CallMaster are registered trademarks of
Avaya, Inc. Avaya, MDAccess, MasterDirectory, MultiVantage, and
Softconsole are trademarks of Avaya, Inc. Microsoft, MS-DOS,
Microsoft Access, Windows, and Windows NT are registered trademarks
of Microsoft Corporation. Pentium is a registered trademark of Intel Corporation. Other product and brand names are trademarks of their respective owners. All rights reserved.
Contents
About This Document
■
■
■
■
■
■
■
■
■
1
Introduction
Supported Connectivity and System Environments
Configuration Management
Directory Management
MasterDirectory
What’s in This Document
Related Documentation
Security Issues
Avaya Fraud Intervention
How To Get Help
Installing Softconsole
■
■
2
vii
■
1-1
Before You Begin
Hardware and Software Requirements
Requirements for IP Configurations
Requirements for DCP Configurations
Installation
Installation Checklist for IP Configurations
Installation Steps for DCP Configurations
Step 1: Review Backup Considerations
Step 2: Administer Softconsole as a
302 Attendant Console
Step 3: Connect the Computer to the Telephone
(for DCP Configurations Only)
Step 4: Connect the Computer/Telephone
Configuration to the Power Source
(for DCP Installations Only)
Step 5: Install the Softconsole Software
Configuring Softconsole for
IP Configurations
Introduction
vii
vii
ix
x
x
xi
xii
xiii
xiv
xiv
1-1
1-2
1-2
1-3
1-5
1-5
1-6
1-6
1-7
1-9
1-12
1-16
2-1
2-1
Issue 2 February 2003
iii
Contents
■
■
■
■
3
Configuring Softconsole for
DCP Configurations
■
■
■
iv
Getting Started
Initial Configuration Tasks Checklist
Step 1: Launch the Configuration Manager Wizard
Step 2: Set the Language
Step 3: Set the Password for the Configuration
Manager
Step 4: Specify Avaya Server Connectivity
Step 5: Download the Avaya Server Configuration
Step 6: Verify Trunk Configuration
Step 7: Verify Feature and Display Button
Configuration
Step 8: Configure Hundreds Groups
Step 9: Define Softconsole Display Settings
and Audible Alerts
Step 10: Create and Configure the Directories
for Softconsole
Create a Directory
Create an LDAP View
Step 11: Specifying the Available Directories
Step 12: Specify Attendant Users and
Directory Access
Step 13: Verify the Completed Configuration
Maintaining the Softconsole Configuration
Maintenance Guidelines
Log Into the Configuration Manager
Change Softconsole Administrator Password
Removing the Software
Introduction
Getting Started
Initial Configuration Tasks Checklist
Step 1: Launch the Configuration Manager Wizard
Step 2: Set the Language
Step 3: Set the Password for the Configuration
Manager
Step 4: Specify Avaya Server Connectivity
Issue 2 February 2003
2-1
2-2
2-3
2-3
2-3
2-4
2-4
2-5
2-6
2-7
2-8
2-11
2-11
2-20
2-25
2-27
2-28
2-29
2-30
2-30
2-31
2-32
3-1
3-1
3-1
3-2
3-3
3-3
3-3
3-4
Contents
■
■
4
Troubleshooting
■
■
■
■
■
■
■
A
Step 5: Download the Avaya Server Configuration
Step 6: Verify Trunk Configuration
Step 7: Verify Feature and Display Button
Configuration
Step 8: Configure Hundreds Groups
Step 9: Define Softconsole Display Settings
and Audible Alerts
Step 10: Create and Configure the Directories
for Softconsole
Create a Directory
Create an LDAP View
Step 11: Specifying the Available Directories
Step 12: Specify Attendant Users and
Directory Access
Step 13: Verify the Completed Configuration
Maintaining the Softconsole Configuration
Maintenance Guidelines
Log Into the Configuration Manager
Change Softconsole Administrator Password
Removing the Software
■
Overview
3-7
3-9
3-10
3-13
3-13
3-21
3-26
3-28
3-30
3-31
3-32
3-32
3-33
3-34
4-1
Overview
Troubleshooting IP Configuration-specific Problems
Troubleshooting DCP Configuration-specific Problems
Troubleshooting Problems with the Telephone
Troubleshooting Softconsole Operation Problems
Using the Debug Feature
Recovering from a Power Failure
Recovering from a Computer Failure
Emergency Recovery Information
System Environments Affecting
Softconsole Operation
3-5
3-6
4-1
4-2
4-2
4-2
4-5
4-8
4-9
4-10
4-10
A-1
A-1
Issue 2 February 2003
v
Contents
■
■
B
Avaya Server Connectivity Scenarios
■
■
■
C
■
vi
Overview
IP Configurations
DCP Configurations
Uninstalling PC Console
■
IN
The DCS Environment
The CAS Environment
Overview
Uninstall PC Console
Index
Issue 2 February 2003
A-2
A-3
B-1
B-1
B-2
B-4
C-1
C-1
C-1
IN-1
About This Document
Introduction
Avaya Softconsole™ is an integrated software application that offers all of the
capabilities of a hardware Attendant Console, plus the ability to share information
across your organization. Attendants can now handle calls, access shared
directories, and send mail from their computer using Softconsole.
This chapter provides an overview of Softconsole as well as the specific Avaya
call processing system connectivity and environments it supports. This chapter
also provides an introduction to Softconsole administrative functions including
configuration, directory maintenance, and database management.
Supported Connectivity and System
Environments
The Softconsole application is designed to support two types of Avaya server
connectivity: Internet Protocol (IP) or Digital Communications Protocol (DCP).
During initial configuration of the application, you will specify the type of
connectivity appropriate for your Avaya server.
For IP configurations, the computer on which the Softconsole application resides
must be able to connect to your organization’s local area network (LAN). When
Softconsole is started, it launches the Avaya iClarity IP Audio application
automatically. Avaya iClarity IP Audio is an integrated application that enables you
to log into the server and handles the voice communications when you are using
Softconsole in the “Road Warrior” (Voice over IP) configuration. Once you are
logged into the Avaya server via Avaya iClarity IP Audio, an IP connection is
established between Softconsole and the Avaya server. Softconsole uses this IP
Issue 2 February 2003
vii
About This Document
connection to exchange call control information with the Avaya server, enabling
Softconsole to handle calls.
Softconsole supports the following two IP configurations:
■
Road Warrior Configuration (Voice over IP)
The Road Warrior configuration consists of a personal computer that is
connected to the server over an IP network. In the Road Warrior
configuration, both the call signaling and the voice communications are
carried over the single network connection between the computer and the
server. Softconsole handles the call signaling, and Avaya iClarity IP Audio
(an H.323 V2-compliant audio application) handles the voice
communications. The user places and handles calls via the Softconsole
interface on the computer and uses a headset connected to the computer
(or the computer’s microphone and speakers) to speak and listen.
Avaya iClarity IP Audio runs in the background and starts automatically
when you start Softconsole.
■
Telecommuter Configuration
The Telecommuter configuration consists of a computer and a telephone
with separate connections to the server. The computer is connected to the
server over an IP network to provide the call signaling path. A standard
telephone is connected to the server over the public-switched telephone
network (PSTN) to provide a high-quality voice path. The user places and
handles calls via the Softconsole interface on the computer and uses the
telephone handset to speak and listen.
If you receive an incoming call on your separate telephone line while you
are active on a call with Softconsole, that caller will hear either ringing (if
you have call waiting on that line) or a busy signal. If you have call waiting,
you can answer the incoming calls as you would answer any other call
waiting call.
For the Telecommuter configuration, you must have a separate telephone
line available at your location. In this configuration, you only use Avaya
iClarity IP Audio to log into the server.
See Appendix B for examples of the Road Warrior configuration and
Telecommuter configuration.
For DCP configurations, additional hardware is required to connect the computer
on which the Softconsole application resides, the telephone, and the Avaya
server. Specific physical requirements for DCP configurations are described in
Chapter 1.
Softconsole can also operate in a variety of system environments, including
Distributed Communications Systems (DCS) and Centralized Attendant Service
(CAS) environments. In most cases, any impact that these environments may
have on Softconsole features or functionality is minimal. For a list of affected
features and procedures, see Appendix A.
viii
Issue 2 February 2003
Configuration Management
Configuration Management
As the Softconsole administrator, you are responsible for defining and maintaining
the system parameters required for efficient Softconsole operation. Using the
Softconsole Configuration Manager application, you can specify Avaya server
connectivity, create user profiles for multiple attendants, assign “hot keys” (that is,
keyboard accelerators) for frequently accessed features, define directories, and
customize audible alerts.
The first time you run the Configuration Manager after installing Softconsole, a
configuration wizard is available to guide you through the configuration tasks.
After initial configuration, you can make changes to Softconsole settings using the
Configuration Manager’s wizard or tab mode. Each tab within the Configuration
Manager corresponds to a specific parameter (for example, attendants) so that
you can complete maintenance tasks quickly and easily. See Chapter 2 and
Chapter 3 for more information.
Issue 2 February 2003
ix
About This Document
Directory Management
Softconsole supports up to 100 directories. As Softconsole administrator, prior to
configuration of the Softconsole application, you must create the directories that
attendants can access via Softconsole. During the configuration process, you will
identify these directories and also assign each user privileges related to the
specified directories. For example, certain attendants may have access to all
directories and certain attendants may have view-only permission for those
directories.
Using the MasterDirectory software that is included with the Softconsole
application, you can define the fields that attendants see when they access
directories via Softconsole. The MasterDirectory application allows you to
customize and manage the information in multiple directories with ease.
MasterDirectory
The MasterDirectory application, which is included with the Softconsole product,
is a powerful tool that allows you to create and manage the information contained
in the directories used by Softconsole.
Using this tool, you can develop customized directories. For example, you can
integrate information from multiple source files in a single database. One file might
contain name and address information; another might contain service records,
and yet another might contain emergency contact information. MasterDirectory
makes it easy to create a complete profile of each person in your organization.
For your convenience, you can upload information from the Avaya server’s
Integrated Directory to the MasterDirectory so that you can use this information
when you build multiple directories for Softconsole. The Avaya server’s Integrated
Directory feature enables an attendant to retrieve extension numbers from the
system directory. The directory itself contains an alphabetical listing of names and
numbers of system users. The upload feature simplifies cross-referencing and
updating comprehensive database information.
MasterDirectory also enables you to automate the update process that keeps your
critical database information synchronized. You can schedule update intervals in
advance and identify which routines are performed at each interval. For complete
information on MasterDirectory capabilities and procedures, see the
MasterDirectory online help.
x
Issue 2 February 2003
What’s in This Document
What’s in This Document
This guide describes how to install and prepare to configure the Softconsole
Release 1.5 application. This guide includes the following chapters:
■
Chapter 1, “Installing Softconsole,” provides the software and hardware
requirements of Softconsole and describes how to install the Softconsole
application.
■
Chapter 2, “Configuring Softconsole for IP Configurations,” contains
complete instructions that you should use in conjunction with the
configuration wizard to administer the Softconsole application for the first
time in an IP configuration. This information includes a configuration
checklist and directions for creating the directories that you want the
Softconsole users to access. It also include procedures for maintaining the
Softconsole configuration.
■
Chapter 3, “Configuring Softconsole for DCP Configurations,” contains
complete instructions that you should use in conjunction with the
configuration wizard to administer the Softconsole application for the first
time in a DCP configuration. This information includes directions for
verifying physical connections to the Softconsole computer, a configuration
checklist, and directions for creating the directories that you want the
Softconsole users to use. It also include procedures for maintaining the
Softconsole configuration.
■
Chapter 4, “Troubleshooting,” contains information about possible error
conditions and how to respond to them when you install and configure
Softconsole.
■
Appendix A, “System Environments Affecting Softconsole Operation,”
identifies the Avaya server system features that, when enabled, may affect
Softconsole operation.
■
Appendix B, “Avaya Server Connectivity Scenarios,” provides an overview
of several Avaya server connectivity scenarios identifying typical
installations, the source of audible alerts, and voice path termination points.
■
Appendix C, “Uninstalling PC Console,” describes how to uninstall PC
Console from the computer. If PC Console is installed on the computer, you
must uninstall it before you can install Softconsole.
Issue 2 February 2003
xi
About This Document
Related Documentation
This document provides all the information you need to install and administer
Softconsole efficiently. In addition, you can refer to the following documents:
■
Avaya Softconsole™ Release 1.5 Attendant System Features Guide - This
guide contains brief descriptions of Avaya server attendant features and
how they appear to Softconsole users. Such features include Abbreviated
Dialing, Attendant Call Waiting, Call Forwarding, Loudspeaker Paging, etc.
■
MasterDirectory 4.4 online help - This online help contains complete
instructions for using MasterDirectory to create, modify, and update
directories used within the Softconsole application.
In addition, this document assumes that you are familiar with Avaya server
console administration concepts. For more information, refer to the Administrator’s
Guide that came with your Avaya server or Avaya MultiVantage™ software.
You should also review and implement the precautions detailed in the Avaya
Security Handbook. See “Security Issues,” in the next section, for an explanation.
xii
Issue 2 February 2003
Security Issues
Security Issues
Telephone fraud is a rapidly increasing problem. Telephone toll fraud can occur in
many forms, despite the numerous efforts of telephone companies and telephone
equipment manufacturers to control it. Some individuals use electronic devices to
prevent or falsify records of these calls. Others charge calls to someone else’s
number by illegally using lost or stolen calling cards, billing innocent parties,
clipping onto someone else’s line, or breaking into someone else’s telephone
equipment physically or electronically.
Today security problems are not just limited to toll fraud. There have been sharp
increases in reported incidents of hackers: criminals skilled in reprogramming
computer systems, accessing telecommunications systems through remote
administration or maintenance ports. These ports cannot be used to place phone
calls, but hackers can gain control over the setup of the system.
This is the most dangerous type of abuse because, once in your system, the
hackers have control over all the administrative commands. While in your system,
they have been known to:
■
Turn on Remote Access or Direct Inward System Access (DISA). Hackers
have been known to change the system at 8:00 p.m. to allow fraudulent
calls. Then, at 3:00 a.m., they reprogram the system back to its original
configuration. One company was victimized three weekends consecutively
before it realized what was happening.
■
Turn off Call Detail Recording (CDR) or Station Message Detail Recording
(SMDR), make unauthorized use of your system all weekend, then turn it
back on before Monday morning. This is especially disturbing to managers
who are security conscious and check the CDR/SMDR reports every
morning looking for suspicious activity. Managers will not see records of the
calls because CDR/SMDR was turned off by the hackers. The
administrator may notice the absence of CDR/SMDR records for evening,
night, and weekend calls made by employees.
Network administrators and system administrators share the responsibility for
securing their organization’s networks and telecommunications systems. The
specific steps you can take to protect system security are provided in the Avaya
Security Handbook that came with your Avaya call processing system.
Issue 2 February 2003
xiii
About This Document
Avaya Fraud Intervention
If you suspect you are being victimized by toll fraud and you need technical
support or assistance, call Technical Service Center Toll Fraud Intervention
Hotline at 1 800 643-2353.
How To Get Help
To access software updates, the most current troubleshooting information, and
other important information, go to http://avaya.com/support.
If you have questions about or problems with Softconsole that you cannot resolve
after reading this document, contact Avaya Technical Support at 1 800 242-2121
(USA only) or your local authorized Avaya dealer.
xiv
Issue 2 February 2003
Installing Softconsole
1
Before You Begin
Before you begin to install the Softconsole software, verify that your Softconsole
installation package is complete, and that the computer on which the Softconsole
application will reside meets both the hardware and software requirements
identified in this section.
! CAUTION:
The Softconsole application will not install on computers running an
unsupported operating system or existing versions of Avaya IP Softphone or
Avaya IP Agent. In addition, the Softconsole application is not designed to
coreside on a computer with the PC Console application. You must uninstall
PC Console, Avaya IP Softphone, or Avaya IP Agent and all of the
associated configuration information. To uninstall PC Console, see
Appendix C.
Issue 2 February 2003
1-1
Installing Softconsole
Hardware and Software Requirements
This chapter provides instructions for installing the Softconsole product. To
prepare for installation, you should verify that your equipment meets the
requirements specific to the Avaya server connectivity for your configuration. For
an explanation of Avaya server connectivity scenarios, see Appendix B.
Requirements for IP Configurations
The Softconsole software requires an Avaya server running software: release 10
or Avaya MultiVantage software and an IBM-compatible computer that meets, or
exceeds, the following basic requirements:
■
Pentium®-based processor with a minimum of 400 Megahertz clock speed
NOTE:
A personal computer with higher processor speed, L2 cache, and
system bus speed will provide better performance.
■
128 MB of RAM available to the Softconsole application
NOTE:
256 MB of RAM is recommended for the Road Warrior configuration.
■
15” color monitor (17” or larger color monitor recommended)
■
CD-ROM drive
■
Microsoft® Windows® 2000 Server or Professional with Service Pack 2 or
later or Microsoft Windows XP Professional
■
Microsoft Internet Explorer 5.5 or later (to view the online help)
■
small fonts selected in the Control Panel
■
800 x 600 screen resolution with 256 colors (1024 x 768 resolution with
65,535 colors is recommended)
■
A sound device that supports full-duplex operation. Go to
http://avaya.com/support for a list of supported sound devices.
■
A headset (for the voice over IP configuration - see Appendix B). Go to
http://avaya.com/support for a list of supported headsets.
■
A network interface card (NIC) for local area network (LAN) connectivity.
NOTE:
Dial-up networking is not supported.
■
1-2
Sufficient hard disk space. You will need 30 MB of hard disk space for the
Softconsole software, plus additional space for your Softconsole directory
information. The space for your Softconsole directory information depends
upon the number of users you are supporting and the amount of
information stored for each person.
Issue 2 February 2003
Before You Begin
Refer to Table 1-1 to estimate the additional space required.
Table 1-1.
Additional Hard Disk Space Requirements
Î
200
500
1,000
5,000
10,000
20,000
200
4 MB
4.1 MB
4.2 MB
4.5 MB
5 MB
6 MB
500
4.1 MB
4.3 MB
4.5 MB
6.5 MB
9 MB
14 MB
1,000
4.2 MB
4.5 MB
5 MB
9 MB
14 MB
24 MB
5,000
4.5 MB
6.5 MB
9 MB
29 MB
54 MB
104 MB
10,000
5 MB
9 MB
14 MB
54 MB
104 MB
204 MB
20,000
6 MB
14 MB
54 MB
104 MB
204 MB
404 MB
Number of Users
Number of Characters
per User’s Record Ð
Requirements for DCP Configurations
The Softconsole software requires an Avaya server running software: release 9.5
or later or Avaya MultiVantage software and an IBM-compatible computer that
meets, or exceeds, the following basic requirements:
■
Pentium-based processor with a minimum of 400 Megahertz clock speed
■
128 MB of RAM
■
15” color monitor (17” or larger color monitor recommended)
■
CD-ROM drive
■
Microsoft Windows 2000 Server or Professional with Service Pack 2 or
later, or Microsoft Windows XP Professional
■
Microsoft Internet Explorer 5.5 or later (to view the online help)
■
small fonts selected in the Control Panel
■
800 x 600 screen resolution with 256 colors (1024 x 768 resolution with
65,535 colors is recommended)
■
A COM Port dedicated to Softconsole. (No other application may use this
port.)
■
A sound device (to generate ringing sounds). Go to
http://avaya.com/support for a list of supported sound devices.
NOTE:
A sound device is not required if you configure Softconsole to use the
ringer of the local telephone.
Issue 2 February 2003
1-3
Installing Softconsole
■
Sufficient hard disk space. You will need 30 MB of hard disk space for the
Softconsole software, plus additional space for your Softconsole directory
information. The space for your Softconsole directory information depends
upon the number of users you are supporting and the amount of
information stored for each person. See Table 1-1 to estimate the additional
space required.
Additional Hardware Required for DCP Configurations
You will need the following hardware components to install and use your
Softconsole application.
■
One of the following DCP telephones:
■
a CallMaster® VI telephone with a 2-wire DCP cord
■
an 8411D telephone with a D8W telephone cord
■
A headset and necessary adapter (to facilitate ease-of-use).
■
An EIA-232-D Connector cord (not included with the Softconsole) for
connecting the computer to the DCP telephone.
One end of the cord connects to the COM port on your computer. The
COM port typically has either a 9-pin male or a 25-pin male interface.
The other end of the cord connects to the telephone (which has a 25-pin
female interface).
The EIA-232-D Connector cord must connect to each of the two devices in
your environment. If necessary, you can purchase adapters to change one
or both ends of the cord to a different number of pins or to a different
gender.
■
a power supply:
For US installations, the DEFINITY Power Kit, containing: KS-22911
power supply, 400B2 adapter, and D6AP cord.
For US or International installations, the MSP-1 Power Supply Kit,
containing: MSP-1 power supply, and power cord.
NOTE:
The CallMaster VI is powered by the Avaya server and does not
require a separate power supply.
1-4
Issue 2 February 2003
Installation
Installation
The Softconsole software includes an installation program that guides you through
the process of installing the application on the attendant’s computer. The following
checklists summarize the installation procedure appropriate for the type of Avaya
server connectivity used by your configuration.
NOTE:
See Appendix B for a description of sample DCP and IP connectivity
scenarios.
Installation Checklist for IP Configurations
To ensure proper installation, you must perform each of the following steps for IP
configurations:
1. Review backup considerations.
NOTE:
If you plan to install the Softconsole application on a computer that is
already running PC Console, Avaya IP Softphone, or Avaya IP Agent, you
must uninstall PC Console, Avaya IP Softphone or Avaya IP Agent before
migrating to the Softconsole application. To uninstall PC Console, see
Appendix C.
2. Administer Softconsole, at the Avaya server, as an Attendant Console
(302).
3. Install the Softconsole software using the installation wizard.
When installation is complete, the installation program provides a link that allows
you to configure the Softconsole application. See Chapter 2 for instructions on
performing initial configuration. When configuration is complete, you must also
verify installation and configuration according to the procedures in this guide.
Issue 2 February 2003
1-5
Installing Softconsole
Installation Steps for DCP Configurations
To ensure proper installation, you must perform each of the following steps for
DCP configurations:
1. Review backup considerations.
NOTE:
If you plan to install the Softconsole application on a computer that is
already running the PC Console application, you must uninstall the PC
Console software before migrating to the Softconsole application. See the
DEFINITY® PC Console User’s Manual for information.
2. Administer Softconsole, at the Avaya server, as an Attendant Console
(302).
3. Connect the computer to the telephone.
4. Connect the computer/telephone configuration to the power source.
NOTE:
This step is not necessary if you are using a CallMaster VI telephone.
The CallMaster VI does not require a separate power supply.
5. Install the Softconsole software.
When installation is complete, the installation program provides a link that allows
you to configure the Softconsole application. See Chapter 3 for instructions on
performing initial configuration. When configuration is complete, you must also
verify installation and configuration according to the procedures in this guide.
Step 1: Review Backup Considerations
Regular backup procedures are an essential element in the successful operation
of your Softconsole. Consider the following measures to protect valuable data:
1-6
■
Implement a regular backup procedure. Information can be backed up
(stored) on a diskette, tape, or remote network drive.
■
Implement a circular backup routine. Keep the three most recent backup
files. Overwrite only information older than that. In the event of a disk
failure, you can still access and restore information that is relatively recent.
■
Keep accurate records of where backup information is stored. During
installation, you must specify the directory in which Softconsole software
and information is stored. If you specify a directory other than the default
Softconsole directory, make a note of the name and location of that
directory. Then, back up all information within the Softconsole directory.
Issue 2 February 2003
Installation
In addition to maintaining backups of your software, it is important to recognize the
importance of hardware-related issues.
■
If your Softconsole computer is powered by a local electrical outlet,
consider augmenting the configuration with a battery backup system. This
is particularly important if your Avaya server is supported in a similar
manner.
■
For DCP installations: If you have replaced an attendant console telephone
with the Softconsole application, you may wish to retain the original
hardware for use in the event of a computer failure.
■
For DCP installations: Consider backing up the telephone outlet to which
Softconsole is connected. If an outlet (or related wiring) should fail, it is
extremely helpful to have a second outlet available locally.
Step 2: Administer Softconsole as a
302 Attendant Console
The Avaya server must recognize the Softconsole as a 302 Attendant Console.
To administer Softconsole at the Avaya server as a 302 Attendant Console:
1. Enter the following command:
display console parameters
2. Verify that the Avaya server console parameters are configured properly for
the attendant. These should include (but are not limited to) Class of
Service, Class of Restriction, timing, and queue priorities.
3. Do one of the following:
■
If the Softconsole application is replacing an existing 302 Attendant
Console, print a copy of the associated attendant form using the
following command:
display attendant # print
where # is the number of the attendant.
■
If Softconsole application is not replacing an existing 302 Attendant
Console, use the following command to enter the data for
Softconsole as a 302 Attendant Console:
add attendant #
where # is the number of the attendant.
4. Select the appropriate options on the attendant form. Among these options
is the type of console being defined. You must specify a 302B to achieve
the greatest compatibility with the Softconsole application.
Issue 2 February 2003
1-7
Installing Softconsole
5. Make sure the following required button assignments are programmed on
the Avaya server, particularly those indicated in the “Default Button
Number” column.
Default Button
Number
Button Assignment
1
Split
6
Hold
19
Forced Release
23
Night Service
24
Position Busy
6. Make sure the following required display button assignments are
programmed on the Avaya server, particularly those that have been moved
from their default positions (indicated in the “Default Button Number”
column).
Default Button
Number
Button Assignment
1
Normal
4
Next
NOTE:
To use the Integrated Directory feature, the Integrated Directory
feature and the Next feature must be configured at the Avaya server.
The Next button must be configured on button 4 at the Avaya server.
7. Assign an extension to this station.
8. Print the attendant form using the following command. (You will need the
information it contains when configuring the Softconsole application.)
display attendant # print
where # is the number of the attendant.
1-8
Issue 2 February 2003
Installation
Step 3: Connect the Computer to the Telephone
(for DCP Configurations Only)
If you are using a CallMaster VI telephone (see Figure 1-1):
1. Plug the EIA-232-D Connector cord (including adapter, if necessary) into
the communications (COM) port on the computer. If more than one port is
available, write down the number of the port to which you physically attach
the cord. Tighten all retaining screws.
NOTE:
Attach an adapter only if the EIA-232-D Connector cord does not
conform to the COM port on the computer. You can purchase
adapters to change the number of pins and/or the gender of the
connector.
2. Plug the remaining end of the EIA-232-D Connector cord (including
adapter, if necessary) into the 9-pin interface at the top of the telephone.
Tighten all retaining screws.
NOTE:
Attach an adapter only if the EIA-232-D Connector cord does not
conform to the 9-pin female interface on the telephone. You can
purchase adapters to change the number of pins and/or the gender of
the connector.
3. Connect one end of the 2-wire DCP cord to the jack at the top of the
telephone.
4. Plug the remaining end of the 2-wire DCP cord into the wall jack.
5. Go to ‘‘Step 5: Install the Softconsole Software’’ on page 1-16.
NOTE:
The CallMaster VI is powered by the switch and does not require an
independent power supply.
Issue 2 February 2003
1-9
Installing Softconsole
Appropriate adapter
(if needed)
EIA-232-D
Appropriate adapter
(if needed)
2-wire DCP Cord
To Wall Jack
Figure 1-1.
Connecting the Computer to the CallMaster VI Telephone
If you are using an 8411D telephone (see Figure 1-2):
1. Plug the EIA-232-D Connector cord (including adapter, if necessary) into
the communications (COM) port on the computer. If more than one port is
available, write down the number of the port to which you physically attach
the cord. Tighten all retaining screws.
NOTE:
Attach an adapter only if the EIA-232-D Connector cord does not
conform to the COM port on the computer. You can purchase
adapters to change the number of pins and/or the gender of the
connector.
2. Plug the remaining end of the EIA-232-D Connector cord (including
adapter, if necessary) into the 25-pin interface on the bottom of the
telephone. Tighten all retaining screws.
NOTE:
Attach an adapter only if the EIA-232-D Connector cord does not
conform to the 25-pin female interface on the telephone. You can
purchase adapters to change the number of pins and/or the gender of
the connector.
1-10
Issue 2 February 2003
Installation
3. Connect one end of a D8W cord to the jack on the bottom of the 8411D
telephone.
4. Go to ‘‘Step 4: Connect the Computer/Telephone Configuration to the
Power Source (for DCP Installations Only)’’ on page 1-12.
Appropriate adapter
(if needed)
EIA-232-D
Appropriate adapter
(if needed)
D8W
To Power
Figure 1-2.
Connecting the Computer to the 8411D Telephone
Issue 2 February 2003
1-11
Installing Softconsole
Step 4: Connect the Computer/Telephone
Configuration to the Power Source
(for DCP Installations Only)
If you are using an 8411D telephone, you must connect the computer/telephone
configuration to a separate wall jack.
NOTE:
This step is not necessary if you are using a CallMaster VI telephone. The
CallMaster VI is powered by the Avaya server and does not require a
separate power supply.
If you are using a KS-22911,L2 power source (see Figure 1-3):
1. Plug the 400B2 Adapter into the wall jack.
2. Plug the remaining end of the D8W cord (from the computer/telephone
configuration you assembled earlier) into the bottom connector on the
400B2 adapter.
3. Plug one end of the D6AP cord into the power supply unit.
4. Plug the other end of the D6AP cord into the top connector on the 400B2
adapter.
5. Plug the power supply unit into a 120 VAC, 60 Hz outlet.
! CAUTION:
Make certain that the AC outlet to which you connect the power
supply is not controlled by a wall switch or light dimmer.
6. Go to ‘‘Step 5: Install the Softconsole Software’’ on page 1-16.
1-12
Issue 2 February 2003
Installation
AC Outlet
Wall Jack
D6AP
400B2 Adapter
D8W
To Telephone/
PC Configuration
Figure 1-3.
Attaching the KS-22911,L2 Power Source
Issue 2 February 2003
1-13
Installing Softconsole
If you are using an MSP-1 power source (see Figure 1-4):
1. Plug the remaining end of the D8W cord (from the computer/telephone
configuration you assembled earlier) into the connector labeled “Phone” on
the power supply.
2. Insert one end of the second D8W cord into the connector labeled “Line”
on the power supply.
3. Insert the remaining end of the second D8W cord into the wall jack.
4. Plug the power supply cord into the power supply unit.
5. Plug the other end of the power supply cord into an appropriate AC outlet.
If the power supply cord provided with the MSP-1 Power Supply is not
compatible with your AC outlet, you may either:
■
use an adapter to conform to local blade arrangement, or
■
use a replacement cord if an appropriate adapter is not available.
! CAUTION:
Make certain that the AC outlet to which you connect the power
supply is unswitched (for example, not controlled by a wall switch or
light dimmer).
6. Go to ‘‘Step 5: Install the Softconsole Software’’ on page 1-16.
1-14
Issue 2 February 2003
Installation
AC Outlet
To Telephone/
PC Configuration
Power
Supply
Cord
Actual connection may vary
according to the configuration
of your local AC outlet
D8W
PHONE
-7 +8
OTHER
-2 +5
LINE
D8W
Figure 1-4.
MSP-1
Power Supply
Wall Jack
Attaching the MSP-1 Power Source
Issue 2 February 2003
1-15
Installing Softconsole
Step 5: Install the Softconsole Software
NOTE:
If you plan to install the Softconsole application on a computer that is
already running PC Console, Avaya IP Softphone, or Avaya IP Agent, you
must uninstall PC Console, Avaya IP Softphone, or Avaya IP Agent first. To
uninstall PC Console, see Appendix C.
To install the Softconsole software:
1. Exit all Windows programs before running the Softconsole setup program.
2. Insert the Softconsole CD into the CD-ROM drive.
If the Autorun feature is enabled on your computer, the Softconsole Setup
dialog box appears. Go to Step 5.
3. Double-click on the My Computer icon on your desktop.
4. Double-click on the CD-ROM icon, and then double-click on setup.exe.
The Welcome dialog box appears.
5. Click the Next button.
The Choose Destination Location dialog box is displayed.
NOTE:
If an earlier version of Avaya Softconsole is currently installed, the
Choose Destination Location dialog box will display the directory in
which Avaya Softconsole is located. You must install Release 1.5 into
this directory. Go to Step 7.
6. If you want to install the Softconsole software to a directory other than the
indicated default, click the Browse button to select that location now.
!
WARNING:
Under no circumstances should you try to install or run the
Softconsole executable files off the LAN. The executable files are
specifically designed for a single user and must reside on your local
hard drive.
7. Click the Next button.
The Select Program Manager Group dialog box is displayed.
8. If you want your Softconsole icons to reside in a program group other than
the indicated default, select that program group now.
9. Click the Next button.
The Create Shortcuts dialog box appears.
10. Specify whether you want to create shortcuts for Avaya Softconsole.
1-16
Issue 2 February 2003
Installation
11. Click the Next button.
The Installing message box appears, showing the status of the installation.
When the installation process is complete, the Install dialog box appears.
12. Click the OK button.
The computer reboots.
The Softconsole application is now installed on your computer. You must
configure the application before you can use Softconsole for call handling.
NOTE:
If the Windows Dialing Properties have not been configured for the
computer, Softconsole will prompt you to access the Control Panel
window and configure these properties.
13. If you want Softconsole to use a language other than English, perform the
following steps:
a. Go to http://avaya.com/support and download the language pack
you want to use.
b. Install the language pack on the computer.
14. Perform one of the following steps:
■
If you are using an IP configuration, go to Chapter 2 for information
on performing initial configuration.
■
If you are using a DCP configuration, go to Chapter 3 for information
on performing initial configuration.
Issue 2 February 2003
1-17
Installing Softconsole
1-18
Issue 2 February 2003
Configuring Softconsole for
IP Configurations
2
Introduction
This chapter provides an overview of the steps you will complete during initial
configuration of an IP configuration, as well as procedures for maintaining the
Softconsole configuration.
Getting Started
After you have completed installation of the Softconsole software, you must
configure the application. (If you attempt to run the Softconsole application before
you complete initial configuration, you will receive an error message.) A
configuration wizard is provided with the Softconsole application to guide you
through the process of defining Softconsole settings.
NOTE:
To speed the configuration process, be sure that you have administered the
Attendant position at your call processing system (see Chapter 1) and that
you have printed copies of Avaya server Attendant administration pages
available for reference. You should also verify that all hardware connections
are secure (see Chapter 1).
You can update configuration information by accessing the Configuration Manager
and choosing wizard mode or tab mode. In tab mode, you can select an option
from the tabs displayed along the top of the Configuration Manager window to
make changes to specific aspects of the Softconsole configuration.
Issue 2 February 2003
2-1
Configuring Softconsole for IP Configurations
Initial Configuration Tasks Checklist
Initial configuration consists of the following tasks:
NOTE:
If you are migrating from the DEFINITY PC Console application, you must
administer the capabilities of Softconsole just as you would for a new
installation. Programmed information that was used for PC Console was not
saved when you uninstalled that application and replaced it with the
Softconsole software.
1. Launch the Configuration Manager wizard.
2. Set the language that will be used by the Configuration Manager,
Softconsole, and MasterDirectory.
3. Set the password for the Configuration Manager.
4. Specify IP connectivity to the Avaya server.
5. Download the Avaya server configuration.
6. Verify trunk configuration.
7. Verify feature button assignments.
8. Configure Hundreds Groups.
9. Configure Softconsole display settings and audible alerts.
10. Use MasterDirectory to create, populate, and configure the directories the
Softconsole users will access. MasterDirectory is an application that was
installed with the Softconsole software and enables you to build directories
that contain information about the people at your location, at remote sites,
and about your business contacts
11. Use the Configuration Manager wizard to configure the directories for
Softconsole.
12. Specify attendant users and the directories they can access.
13. Verify the completed configuration.
Keep in mind that while you are downloading the Avaya server configuration
information to Softconsole, the console cannot accept calls.
2-2
Issue 2 February 2003
Initial Configuration Tasks Checklist
Step 1: Launch the Configuration Manager
Wizard
1. Launch the configuration wizard in one of the following ways:
■
From the Start menu, select Programs>Avaya>Avaya
Softconsole>Configuration Manager. The Start window appears.
■
At the Desktop window, double-click on the Configuration Manager
icon. The Start window appears.
2. Click the Next button, and go to ‘‘Step 2: Set the Language’’ on page 2-3.
Step 2: Set the Language
1. From the Select Language drop-down list box in the Language Selection
area of the Avaya Softconsole Configuration Manager - Options window,
select the language that will be used by Softconsole, the Configuration
Manager, and MasterDirectory.
NOTE:
The new language setting will not take effect until you exit and restart
the applications.
2. Go to ‘‘Step 3: Set the Password for the Configuration Manager’’ on page
2-3.
Step 3: Set the Password for the Configuration
Manager
1. In the Administrator Password area of the Softconsole Configuration
Manager - Options window, enter your Softconsole administrator password
in the Password box.
2. In the Confirm password box, re-enter your Softconsole administrator
password.
You will need to know the password that you are assigning now whenever
you make administrative changes to Softconsole.
3. Click the Next button and go to ‘‘Step 4: Specify Avaya Server
Connectivity’’ on page 2-4.
Issue 2 February 2003
2-3
Configuring Softconsole for IP Configurations
Step 4: Specify Avaya Server Connectivity
The Server Connection window allows you to specify whether Softconsole uses a
DCP or IP connection to the Avaya server. These connectivity types are described
in Appendix B.
1. At the Server Connection window, click the IP Connection option button.
2. Click the Next button and go to ‘‘Step 5: Download the Avaya Server
Configuration’’ on page 2-4.
Step 5: Download the Avaya Server
Configuration
The Server Download window allows you to import the feature button information
programmed for your Avaya server. Importing this information to Softconsole
speeds the configuration process.
Perform the following steps:
1. At the Server Download window, click the Start Download button.
The Avaya iClarity IP Audio message box appears, prompting you to
configure the login settings.
2. Click the OK button, and follow the instructions in the dialog boxes to enter
your IP login information and computer sound device information.
When you are finished entering login and sound device information, the
Login window appears.
3. Click the Log in button.
After you have successfully logged in, the download process begins. The
status of this process is displayed in the Download Status box.
NOTE:
Click the Cancel Download button if you do not log into the server or
you are unable to log into the server.
When the download is complete, a message box appears.
4. Click the OK button.
5. Click the Next button and go to ‘‘Step 6: Verify Trunk Configuration’’ on
page 2-5.
2-4
Issue 2 February 2003
Initial Configuration Tasks Checklist
Step 6: Verify Trunk Configuration
The Trunks window displays the information imported from the Avaya server
download. You can add, edit, or delete trunk buttons, as well as define “hot keys”
(that is, keyboard accelerators) for the configured trunk buttons.
These buttons perform the same function as Trunk Group buttons on a
non-computer based console. Specifically, they allow the attendant to select an
outgoing trunk group. They can also be used to select a code-calling or
loudspeaker paging zone.
Refer to the Attendant Administration Form, Page 2 as you verify the Trunks
window. The Trunk Group buttons must be configured in Softconsole as they
appear on the Attendant Administration page.
NOTE:
You should not add Trunk Groups. The Trunk Groups are downloaded from
the server.
The order in which the Trunk Groups are displayed indicates the order in which
the Trunk Groups will appear on the Trunk toolbar.
To change the information for one of the administered trunk buttons, select
the button and click the Change button. Then, enter your changes.
NOTE:
You cannot use the ALT key, function keys (for example, F1), or numeric
keypad keys in any Hotkeys.
To delete one of the administered trunk buttons, select the button and click the
Delete button.
When you are finished configuring trunk buttons, click the Next button and go to
‘‘Step 7: Verify Feature and Display Button Configuration’’ on page 2-6.
Issue 2 February 2003
2-5
Configuring Softconsole for IP Configurations
Step 7: Verify Feature and Display Button
Configuration
The Server Features window displays the administered feature and display
buttons imported from the Avaya server download. You can add, edit, and delete
buttons, as well as define “hot keys” (that is, keyboard accelerators) for these
buttons, using this window.
Feature buttons are displayed on a toolbar on the attendant’s Softconsole window
and perform the same function as feature buttons on an attendant console
telephone. For example, an Integrated Directory feature button accesses the
Integrated Directory feature on the Avaya server.
NOTE:
The feature buttons required on every Softconsole are Split, Hold, Forced
Release, Night Service, and Position Busy. You should not delete these
administered buttons. (If you delete administered buttons, the attendant will
be unable to perform normal console operations from Softconsole.)
Display buttons access a specific display function. The attendant clicks the button
to perform the associated task. For example, the Next display button cycles to the
next entry in a displayed list.
NOTE:
The Normal display button is required on every Softconsole.
Each button is assigned a label (an 8-character name that appears on the
attendant’s Softconsole window), a description of its function (which is displayed
as the button’s Help Tip and in menus).
NOTE:
You cannot use the ALT key, function keys (for example, F1), or numeric
keypad keys in any Hotkeys.
You change the order of administered feature/display buttons on a toolbar and
move buttons from one toolbar to another. If you want to rearrange the buttons on
a toolbar (or move a button to another toolbar), select the feature/display button
and click on the appropriate arrow button.
NOTE:
You should not add feature/display buttons. The feature/display buttons are
downloaded from the server.
Do not add an Inspect feature button or a Timer feature button to any
toolbar.
2-6
Issue 2 February 2003
Initial Configuration Tasks Checklist
To change the information for one of the administered feature/display
buttons, select the button and click the Change button.Then, enter your changes.
To delete one of the administered feature/display buttons, select the button
and click the Delete button.
When you are finished configuring these buttons, click the Next button and go to
‘‘Step 8: Configure Hundreds Groups’’ on page 2-7.
Step 8: Configure Hundreds Groups
Refer to the Attendant Administration Form, Page 2 as you modify the information
in the Hundreds Group window.
NOTE:
You should not add Hundreds Group buttons. The Hundreds Group buttons
are downloaded from the server.
Each administered Hundreds Group button corresponds to the 100 Busy Lamp
Fields on the Softconsole Attendant window. The Hundreds Group Number you
assign to each Hundreds Group button should reflect the first digit (or group of
digits) for the associated extensions. Each Hundreds Group Number can have a
maximum of three characters.
■
If your dialing plan has three-digit extensions, you could conceivably have
1000 extensions — 000 through 999. You would therefore assign up to 10
Hundreds Group buttons at the Avaya server and duplicate their
assignments here. The first Hundreds Group button would handle
extensions 000 through 099. The second would handle extensions 100
through 199, and so forth. The extensions themselves would automatically
be labeled within the grid that is displayed to the attendant (000 through
099, and 100 through 199), and the corresponding Hundreds Group button
would be labeled with the group’s prefix — in this example, 0 and 1.
■
If your dialing plan has five-digit extensions, and you have 500 extensions
— for example 10000 through 10499, you would assign five Hundreds
Group buttons. The first Hundreds Group button would handle extensions
10000 through 10099. The second would handle extensions 10100 through
10199, and so forth. The extensions themselves would automatically be
labeled within the grid that is displayed to the attendant, and the
corresponding Hundreds Group button would be labeled with the group’s
prefix — in this example, 100 or 101.
The information you enter in the Label box for each Hundreds Group button is for
the attendant’s convenience and will not be used by the server. This information
will appear on the tab for the BLF field in Softconsole.
Issue 2 February 2003
2-7
Configuring Softconsole for IP Configurations
When you are finished modifying Hundreds Groups:
1. Click the Next button.
The Directories window appears.
NOTE:
You will not configure this information at this time.
2. Click the Next button.
The Attendants window appears.
NOTE:
You will not configure this information at this time.
3. Click the Next button and go to ‘‘Step 9: Define Softconsole Display
Settings and Audible Alerts’’ on page 2-8.
Step 9: Define Softconsole Display Settings
and Audible Alerts
The Softconsole window allows you to define the audible alerts, display features,
and call handling behavior that the Softconsole computer will use during
operation.
1. At the Softconsole window, specify the audible alerts related to various call
types listed in the Alerting Options area. Use the Browse and Play buttons
to listen to the available WAV files associated with each call type, which
include:
■
Incoming calls
■
Held calls
■
Emergency calls
■
Calls waiting
The following WAV files are located in the Softconsole folder:
■
Ringintercom.wav
■
RingWaiting.wav
■
ringIncoming.wav
■
ringHold.wav
■
ringEmergency.wav
You can create and use your own “user-defined” WAV files as long as they
are in the format PCM, 8 kilo Hertz sample channel modal, 16 bit
representation. When you select a WAV file, the format of the selected file
is checked to ensure it is in the required format.
2-8
Issue 2 February 2003
Initial Configuration Tasks Checklist
2. In the Second Party Display Handling area, select which information will be
displayed in the Second Party Display area of the Softconsole window.
■
Originator (Default) - Information for the calling party is displayed.
■
Coverage Point - Information for the called party is displayed.
NOTE:
If enabled, this information will be displayed in the associated call
appearance.
3. In the Auto Transfer area, indicate whether the Auto Transfer feature is
enabled (“On” - Default).
When this feature is enabled, the attendant can transfer an incoming call to
an extension by pressing the Transfer button and dialing the extension. The
call is automatically placed on hold during the transfer. The attendant can
temporarily disable the Auto Transfer feature to announce calls (see the
Avaya Softconsole™ Release 1.5 Attendant’s Guide for details.)
4. In the New Incoming Call Behavior area, indicate how you want
Softconsole to reflect incoming calls when the application is minimized or
hidden behind other application windows.
■
Only flash task bar icon - Select this option to have the Softconsole
window flashed on the task bar.
■
Bring to front - Select this option to have Softconsole window move
to the foreground immediately.
5. In the Attendant Queue Feature area, indicate whether you want to use this
feature and how you want it displayed.
NOTE:
The settings in Attendant Queue Feature area will be disabled if the
Attendant Queue feature is not administered on the server.
To use the Attendant Queue feature, make sure:
— the display language for the console is not administered as
user-defined (that is, language must be selected)
— either the Attendant Queue Calls feature button or the
Attendant Queue Time feature button is administered on the
console
When this feature is enabled, a display in the status bar indicates the
number of calls in the attendant queue and how long the oldest call in the
queue has been waiting. The number of calls is shown as an advancing bar
within the Calls in queue box for the status bar.
Issue 2 February 2003
2-9
Configuring Softconsole for IP Configurations
If you do not enable this feature, a simple display in the status bar indicates
the current status of the attendant queue. See the Avaya Softconsole™
Release 1.5 Attendant’s Guide for sample displays.
■
Use Attendant Queue Feature - Mark this checkbox to enable the
Attendant Queue feature.
■
Queue indicator full with calls - If you are enabling the Attendant
Queue feature, select the appropriate value from the pull-down list in
this box. This value represents the number of calls in the queue that
will cause the advancing bar to fill the status bar.
6. In the Group Select Feature area, indicate whether you want the Group
Select feature enabled. The Group Select feature enables the user to
monitor more extension groups than those defined on the Hundreds Group
page.
■
Use Group Select Feature - Mark this checkbox to enable the Group
Select feature.
■
ACP Feature Button Number - If you are enabling this feature, select
the associated ACP Feature button number from the pull-down list in
this box.
NOTE:
The settings in the Group Select Feature area will be disabled if the
Group Select feature is not administered on the server.
To use the Group Select feature, you must define the first Hundreds
Group and administer the Group Select feature button on the
console.
7. If you want to use a seven-digit dialing plan for internal calls, check the
Enable 7-digit dialing plan for internal calls check box.
8. If you want to use the Japanese font to display messages from the Avaya
server, check the Use Japanese Font check box.
9. When you have finished entering Softconsole configuration information,
click the Next button.
The Finish window appears.
10. Click the Finish button to accept the configuration information that you
have entered.
A message box appears.
11. Click the OK button.
12. Go to ‘‘Step 10: Create and Configure the Directories for Softconsole’’ on
page 2-11.
2-10
Issue 2 February 2003
Initial Configuration Tasks Checklist
Step 10: Create and Configure the Directories
for Softconsole
In this step, you will use MasterDirectory to create a new directory or LDAP view
that Softconsole will be able to access. MasterDirectory enables you to build
directories or LDAP views that contain information about the people at your
location, at remote sites, and your business contacts.
If you want to create a directory, go to ‘‘Create a Directory’’ on page 2-11.
If you want to create an LDAP view, go to ‘‘Create an LDAP View’’ on page 2-20.
Create a Directory
Perform the steps in this procedure if you want to create, populate, and configure
a directory that Softconsole will be able to access. Once you create a directory,
you will “download” the information from the Avaya server (that is, you will
populate the directory). During the download, the last name, first name, and
extension number for every user on the Avaya server will be copied into the
directory. After the download is complete, you will configure the directory for use
with Softconsole.
The structure of the directory you create will be based on the structure of the
sample directory (directory.md) that is provided with Softconsole. You can use this
sample database structure as the foundation for all of your Softconsole
directories. If you prefer you can develop customized database structures using
the MasterDirectory application.
To create a directory that contains the information from the Avaya server:
1. Start MasterDirectory by performing one of the following steps:
■
Double-click on the MasterDirectory icon on your desktop.
■
Click on the Start button, and selecting Program>Avaya>Avaya
Softconsole>MasterDirectory.
The MasterDirectory window appears.
2. From the File menu, select New.
The Create New dialog box appears.
3. Select the dBASE option button.
4. Select the Copy an existing directory’s schema option button.
5. Click the Browse button.
The Open Directory dialog box appears.
6. Select directory.md. This file is located in the data folder in the Avaya
Softconsole folder (Program Files>Avaya>Avaya Softconsole>data).
The new directory you are creating will use the schema of the sample
directory (directory.md).
Issue 2 February 2003
2-11
Configuring Softconsole for IP Configurations
7. Click the Open button.
8. Click the OK button.
The Directory Structure (Step 1 of 4) dialog box appears. Using this dialog
box, you specify the following information for the new directory:
■
the name of each field
■
the size of each field
■
the format of each field
■
the case of each field
■
whether this field can be updated
■
whether this field is required
■
whether the values are from a pick list
■
the order of the fields
9. Perform one of the following steps:
■
If you want to add a field:
a. Click the Add button.
The Field Parameters dialog box appears.
b. In the Title box, enter the title for the first field in the directory
you want to create.
c. In the Length box, enter the maximum number of characters
that will appear in this field. The minimum number of
characters that a field may contain is 1, and the maximum
number of characters a field may contain is 65.
d. In the Format box, select the type of characters that can be
entered in this field.
e. In the Case box, select the case for the characters that can
be entered in this field.
f. If you want this field to be updated, select the Allow Update
check box in the Advanced Settings area.
g. If you want this field to be required, select the Required Field
check box in the Advanced Settings area.
h. If you want the values of this field to be selected from a pick
list, select the Values come from Pick-List check box in the
Advanced Settings area.
i. Click the OK button.
The information for the field appears in the Directory
Structure (Step 1 of 4) dialog box.
2-12
Issue 2 February 2003
Initial Configuration Tasks Checklist
■
If you want to modify an existing field:
a. Select the field you want to modify, and then click the Change
button.
b. The Field Parameters dialog box appears, displaying the
information for the selected field.
c. Make your changes.
d. When you are finished modifying the selected field, click the
OK button.
The information for the field appears in the Directory
Structure (Step 1 of 4) dialog box.
10. Repeat Step 9 for any other fields you want to add or modify.
11. When you are finished adding or modifying the directory fields, click the
Next button.
The Indexes (Step 2 of 4) dialog box appears. The Index Fields box
displays the index fields for this directory.
12. If you want to specify the Index fields:
a. In the Remaining Fields box, select the field you want to use as an
index, and then click the Add button.
The selected field appears in the Index Fields box.
b. If you want an index field to be unique, select the appropriate index
field, and then select the Unique check box.
“YES” appears for the selected index field, indicating that the index
field is unique.
c. Repeat Steps a through d if you want to add other index fields.
When finished, go to Step 13.
13. Click the Next button.
The Display Fields (Step 3 of 4) dialog box appears. The Selected Fields
box displays the fields that will be displayed in the MasterDirectory window.
The order in which these fields appear in the Selected Fields box is the
order in which these fields will appear in the MasterDirectory window.
14. If you want a field to be displayed in the MasterDirectory window:
a. In the Remaining Fields box, select the field you want displayed in
the MasterDirectory window, and then click the Add button.
The selected field appears in the Selected Fields box.
b. Use the Move Up and Move Down buttons to change the location of
the selected field.
c. Repeat Steps a and b if you want another field to be displayed in the
MasterDirectory window.
Issue 2 February 2003
2-13
Configuring Softconsole for IP Configurations
15. If you want change the order in which the fields will be displayed in the
MasterDirectory window:
a. In the Selected Fields box, select the field you want to move up or
down in the order.
b. Use the Move Up and Move Down buttons to change the location of
the selected field.
c. Repeat Steps a and b if you want to change the location of another
field in the MasterDirectory window.
16. Click the Next button.
The Other Settings dialog box appears.
17. In the Directory Title box, enter the title for the directory.
18. If you want to create a timestamp field in this directory:
a. Select the Timestamp Field check box.
b. In the Title box, enter the title for the Timestamp field. (The default is
MDTS.)
c. In the Format box, enter the time and date format you want
MasterDirectory to use.
19. If you want to create an auto-index field with a prefix in this directory:
a. Select the AutoIndex Field check box.
b. In the Title box, enter the title for the AutoIndex Field. (The default is
MDID.)
c. In the Prefix box, enter the prefix for the AutoIndex field.
20. Click the Finish button.
The Save New Directory As dialog box.
21. Enter the file name for the new directory, and then click the Save button.
NOTE:
You can save MasterDirectory files on your network to allow file
sharing with other console operators. If you save the MasterDirectory
files on your network, you should also save a local copy of the
MasterDirectory files on the hard drive of each computer that may
require access to this information. In the event of a LAN failure, the
user can manually switch to the local copy of the database
information that allows it to place and receive calls.
MasterDirectory creates the new directory with the file name you entered.
The newly created directory is opened. Since the new directory is empty,
no entries are displayed.
22. From the Data Exchange menu, select Import.
The Import Maps dialog box appears.
2-14
Issue 2 February 2003
Initial Configuration Tasks Checklist
23. Click the New button.
The Import Type (Step 1 of 4) dialog box appears.
24. Select the ACP Server via IP option button, and then click Next.
The Create Import Map (Step 3 of 4) dialog box. The Fields box shows the
field labels for the source file (that is, the file from the Avaya server). The
MasterDirectory Fields box shows the fields available in the
MasterDirectory window.
25. In the Fields box, select Field1.
Field1 contains the last name information on the Avaya server.
26. In the MasterDirectory Fields box, select Last Name.
This is the field in the MasterDirectory window where you want the last
name information to appear.
27. Click the Map button.
The selected MasterDirectory field appears next to Field1 from the source
file, under the Mapped To column.
28. In the Fields box, select Field2.
Field2 contains the first name information on the Avaya server.
29. In the MasterDirectory Fields box, select First Name.
This is the field in the MasterDirectory window where you want the first
name information to appear.
30. Click the Map button.
The selected MasterDirectory field appears next to Field2 from the source
file, under the Mapped To column.
31. In the Fields box, select Field3.
Field3 contains the internal telephone number on the Avaya server.
32. In the MasterDirectory Fields box, select Switch Extension Number.
This is the field in the MasterDirectory window where you want the internal
telephone number (that is, the extension) on the Avaya server to appear.
33. Click the Map button.
The selected MasterDirectory field appears next to Field3 from the source
file, under the Mapped To column.
34. From the Last Name First Name Delimiter box, select the type of delimiter
the Avaya server uses between the fields. You can select comma, spaces,
tab, or none, or you can type in your own delimiter.
NOTE:
Comma is the most common delimiter.
Issue 2 February 2003
2-15
Configuring Softconsole for IP Configurations
35. Click the Next button.
The Import Map (Step 4 of 4) dialog box appears.
36. Click the Save Map button.
The Save As dialog box appears.
37. Enter a name for this import map, and then click the Save button.
38. Log into your company’s LAN.
39. Click the Import button.
Avaya iClarity IP Audio starts automatically, and displays the Login window.
You must be able to log into the Avaya server to import information from the
server.
40. In the Extension box, enter your extension on the server.
41. In the Password box, enter your password.
42. Click the Log in button.
Once you log into the server successfully, the data from the Avaya server
source file is imported according to the settings defined in the import map.
The Importing Data status box appears, showing the status of the import
When the import is complete, a message box appears, and you are logged
off the server.
43. Click the OK button.
The data appears in the MasterDirectory window.
44. Click the Close button.
45. Click the Close button.
A message box appears.
46. Click the Yes button.
A message box appears.
47. Click the OK button.
Now that you have imported the Avaya server information into the directory,
you must configure the directory so that it can be used by Softconsole.
48. From the Settings menu, select MDAccess Settings.
The MDAccess Settings dialog box appears, displaying the General tab.
49. In the First Name box, select First Name. (This is the directory field that
contains the first name information.)
50. In the Last Name box, select Last Name. (This is the directory field that
contains the last name information.)
2-16
Issue 2 February 2003
Initial Configuration Tasks Checklist
51. In the Dial box, select Switch Extension Number. This is the directory
field that contains the telephone number. This is the directory field that will
be dialed by default.
52. In the Switch Phone box, select Switch Extension Number. This is the
internal telephone number (that is, extension) on the Avaya server. This
telephone number will be used for the BLF and second party display in
Softconsole.
53. In the Email box, select the directory field that contains the email address.
54. In the Notes box, select the directory field that contains the Notes field.
55. Click the Display Fields tab.
The Display Fields tab appears. The left list box shows the fields that are
not displayed in MDAccess for the directory.
The right list box shows the fields that will be displayed in Softconsole for
the current directory. The order in which the fields are displayed in the right
list box indicates the order the fields will be displayed in Softconsole. You
can set the order using the Up and Down buttons.
You can use the following buttons to set the fields you want displayed in
Softconsole:
■
Add, which places the field that is selected in the left list box after
the last field in the right list box. The selected field will be displayed
in Softconsole.
■
Delete, which removes the selected field from the right list box and
places it in the left list box. The selected field will not be displayed in
Softconsole.
■
Clear All, which removes all of the fields from the right box and
places them in the left list box. None of the fields will be displayed in
Softconsole.
■
Up/Down, which moves the selected field up or down in the right list
box. Using these buttons, you can specify the order in which the
fields will be displayed in Softconsole.
56. In the left box, select a field you want to be displayed in Softconsole, and
click the Add button.
57. Repeat Step 56 for each field you want to be displayed in Softconsole.
58. Use the Up and Down buttons to specify the order in which the fields will
be displayed in Softconsole. Select the field you want to move, and then
click the Up button or Down button.
Issue 2 February 2003
2-17
Configuring Softconsole for IP Configurations
59. When finished, click the Detail Fields tab.
The Details Fields tab appears.
Using this tab, you specify which directory fields you want displayed in the
Detail Fields area of Softconsole. The fields you specify will be displayed in
the Directory display area for each directory entry in Softconsole, and each
of these fields will have a corresponding Speed Dial button. If you specify
fields that contain telephone numbers, you will be able to dial those
numbers from Softconsole by clicking the associated Speed Dial button.
The left list box shows the fields that will not be displayed in the Detail
Fields area in Softconsole.
The right list box shows the fields that will be displayed in the Detail Fields
area in Softconsole. The order in which the fields are displayed in the right
list box indicates the order the fields are displayed in the Detail Fields area
in Softconsole. You set the order using the Up and Down buttons.
You can use the following buttons to set the fields you want displayed in the
Detail Fields area in Softconsole:
■
Add, which places the field that is selected in the left list box after
the last field in the right list box. The selected field will be displayed
in Detail Fields area in Softconsole.
■
Delete, which removes the selected field from the right list box and
places it in the left list box. The selected field will not be displayed in
the Detail Fields area in Softconsole.
■
Clear All, which removes all of the fields from the right box and
places them in the left list box. None of the fields will be displayed in
the Detail Fields area in Softconsole.
■
Up/Down, which moves the selected field up or down in the right list
box. Using these buttons, you can specify the order in which the
fields will be displayed in the Detail Fields area in Softconsole.
60. In the left box, select a field you want to be displayed in the Detail Fields
area in Softconsole, and click the Add button.
61. Repeat Step 60 for each field you want to be displayed in the Detail Fields
area in Softconsole.
62. Use the Up and Down buttons to specify the order in which the fields will
be displayed in the Detail Fields area in Softconsole. Select the field you
want to move, and then click the Up button or Down button.
63. When finished, click the OK button.
64. From the File menu, select Exit to close MasterDirectory.
2-18
Issue 2 February 2003
Initial Configuration Tasks Checklist
You now have a directory that Softconsole users will be able to access and use. At
this point, you can:
■
Go to ‘‘Step 11: Specifying the Available Directories’’ on page 2-25.
■
Import information from other files in your company to the fields in
MasterDirectory that were not populated when you downloaded information
from the Avaya server. For example, if you have an Email field in the
directory, you can create an import map to import the email addresses from
another file and then import that data into the directory. See “Importing
Data” and “Importing a Source File” in the MasterDirectory help for more
information.
■
Create, build, and configure additional directories that you want
Softconsole users to access. To create, build, and configure additional
directories, you must:
a. Create a new MasterDirectory file. See “Creating a New Directory”
in the MasterDirectory online help.
b. Create import maps so you can import the data from the various
source files. The number and type of import maps you must create
depend on the number of source files that contain the data you want
to import into the new directory and the format of source file (for
example, the source file is an LDAP file). See “Importing Data” in the
MasterDirectory online help.
c. Import the data into the new directory. See “Importing a Source File”
in the MasterDirectory online help.
d. Configure the new directory for use with Softconsole. See “Setting
the Fields in MDAccess,” “Setting the Fields Displayed in
MDAccess,” and “Setting the Detail Fields Displayed in MDAccess”
in the MasterDirectory online help for more information.
When you are finished creating, building, and configuring directories, go to
‘‘Step 11: Specifying the Available Directories’’ on page 2-25.
Issue 2 February 2003
2-19
Configuring Softconsole for IP Configurations
Create an LDAP View
Perform the steps in this procedure if you want to create an LDAP view that
Softconsole will be able to access. After the LDAP view is created, you will
configure the LDAP view for use with Softconsole. Softconsole supports Microsoft
Active Directory and Netscape LDAP servers.
To create an LDAP view:
1. Start MasterDirectory by performing one of the following steps:
■
Double-click on the MasterDirectory icon on your desktop.
■
Click on the Start button, and select Program>Avaya>Avaya
Softconsole>MasterDirectory.
The MasterDirectory window appears.
2. From the File menu, select New.
The Create New dialog box appears.
3. Select the LDAP View option button.
4. Select the Create a new LDAP view option button. (If you have an existing
LDAP view, you can select the Copy an existing LDAP view option button
to create a new LDAP view that is based on the existing LDAP view.)
5. Click the OK button.
The LDAP Server Login Settings (Step 1 of 4) dialog box appears.
6. In the Directory Title box, enter the title for the LDAP view you are creating.
7. In the LDAP Vendor box, select the type of LDAP server.
8. In the Host Name box, enter the machine name or IP address of the LDAP
server (for example, ldapfile.yourcompany.com).
9. In the Port box, enter the port number of the LDAP server.
10. In the User box, enter your user name for the LDAP server (if required).
11. In the Password box, enter your password for the LDAP server (if required).
12. In the Base box, enter the root of the LDAP tree (for example,
o=yourcompany.com).
13. In the Search Timeout box, enter the maximum amount of time that you
want the search procedure to be performed.
14. In the Maximum Records box, enter the maximum number of records that
you want to be returned from a search procedure. This value also sets the
number of records that will be displayed when you open an LDAP view.
15. Click the Next button.
The LDAP Attribute (Field) Selection (Step 2 of 4) dialog box appears.
16. Using the Browse button, select the place in the LDAP tree from which you
want to start viewing entries (that is, the “start node”).
2-20
Issue 2 February 2003
Initial Configuration Tasks Checklist
17. In the Object Classes box, select the object class you want to use.
18. In the Optional Attributes box, click on each attribute you want displayed in
your LDAP view.
19. In the Filter box, specify a filter to limit the number of entries retrieved from
the LDAP data store.
NOTE:
The filter is an optional setting.
20. Click the Next button.
The Directory Structure (Step 3 of 4) dialog box appears. Using this dialog
box, you can modify the following information for the LDAP view:
■
the name of each field
■
the size of each field
■
the order of the fields
21. If you want to modify an existing field:
a. Select the field you want to modify, and then click the Change
button.
b. The Field Parameters dialog box appears, displaying the information
for the selected field.
c. Make your changes.
d. When you are finished modifying the selected field, click the OK
button.
e. The information for the field appears in the Directory Structure (Step
1 of 4) dialog box.
f. Repeat Steps a through d for any other fields you want to modify.
22. If you want to change the order of the fields, select the field you want to
move, and click the Move Up or Move Down button to place the field in the
position you want. Repeat this step for any other fields you want to move.
23. When you are finished modifying and moving the directory fields, click the
Next button.
The Display Fields (Step 4 of 4) dialog box appears. The Selected Fields
box displays the fields that will be displayed in the MasterDirectory window.
The order in which these fields appear in the Selected Fields box is the
order in which these fields will appear in the MasterDirectory window.
Issue 2 February 2003
2-21
Configuring Softconsole for IP Configurations
24. If you want a field to be displayed in the MasterDirectory window:
a. In the Remaining Fields box, select the field you want displayed in
the MasterDirectory window, and then click the Add button.
The selected field appears in the Selected Fields box.
b. Use the Move Up and Move Down buttons to change the location of
the selected field.
c. Repeat Steps a and b if you want another field to be displayed in the
MasterDirectory window.
25. If you want to change the order in which the fields will be displayed in the
MasterDirectory window:
a. In the Selected Fields box, select the field you want to move up or
down in the order.
b. Use the Move Up and Move Down buttons to change the location of
the selected field.
c. Repeat Steps a and b if you want to change the location of another
field in the MasterDirectory window.
26. Click the Next button.
The Save New Directory As dialog box.
27. Enter the file name for the new directory, and then click the Save button.
After a brief delay, the newly created directory is opened and displays the
fields you selected in the Display Fields (Step 4 of 4) dialog box.
Now that you have created the LDAP view, you must configure the directory
so that it can be used by Softconsole.
28. Search for a record in the LDAP view. At least one record must be
displayed in the LDAP view.
The LDAP record is displayed.
29. From the Settings menu, select MDAccess Settings.
The MDAccess Settings dialog box appears, displaying the General tab.
30. In the First Name box, select First Name. (This is the directory field that
contains the first name information.)
31. In the Last Name box, select Last Name. (This is the directory field that
contains the last name information.)
32. In the Dial box, select the directory field that contains the telephone
number you want dialed when you double-click on a directory entry or
press the ENTER key in Softconsole.
33. In the Switch Phone box, select the directory field that contains the internal
telephone number (that is, extension) on the Avaya server. This telephone
number will be used for the BLF and second party display in Softconsole.
34. In the Email box, select the directory field that contains the email address.
2-22
Issue 2 February 2003
Initial Configuration Tasks Checklist
35. In the Notes box, select the directory field that contains the Notes field.
36. Click the Display Fields tab.
The Display Fields tab appears. The left list box shows the fields that are
not displayed in MDAccess for the directory.
The right list box shows the fields that will be displayed in Softconsole for
the current directory. The order in which the fields are displayed in the right
list box indicates the order the fields will be displayed in Softconsole. You
can set the order using the Up and Down buttons.
You can use the following buttons to set the fields you want displayed in
Softconsole:
■
Add, which places the field that is selected in the left list box after
the last field in the right list box. The selected field will be displayed
in Softconsole.
■
Delete, which removes the selected field from the right list box and
places it in the left list box. The selected field will not be displayed in
Softconsole.
■
Clear All, which removes all of the fields from the right box and
places them in the left list box. None of the fields will be displayed in
Softconsole.
■
Up/Down, which moves the selected field up or down in the right list
box. Using these buttons, you can specify the order in which the
fields will be displayed in Softconsole.
37. In the left box, select a field you want to be displayed in Softconsole, and
click the Add button.
38. Repeat Step 37 for each field you want to be displayed in Softconsole.
39. Use the Up and Down buttons to specify the order in which the fields will
be displayed in Softconsole. Select the field you want to move, and then
click the Up button or Down button.
40. When finished, click the Detail Fields tab.
The Details Fields tab appears.
Using this tab, you specify which directory fields you want displayed in the
Detail Fields area of Softconsole. The fields you specify will be displayed in
the Directory display area for each directory entry in Softconsole, and each
of these fields will have a corresponding Speed Dial button. If you specify
fields that contain telephone numbers, you will be able to dial those
numbers from Softconsole by clicking the associated Speed Dial button.
The left list box shows the fields that will not be displayed in the Detail
Fields area in Softconsole.
The right list box shows the fields that will be displayed in the Detail Fields
area in Softconsole. The order in which the fields are displayed in the right
list box indicates the order the fields are displayed in the Detail Fields area
in Softconsole. You set the order using the Up and Down buttons.
Issue 2 February 2003
2-23
Configuring Softconsole for IP Configurations
You can use the following buttons to set the fields you want displayed in the
Detail Fields area in Softconsole:
■
Add, which places the field that is selected in the left list box after
the last field in the right list box. The selected field will be displayed
in Detail Fields area in Softconsole.
■
Delete, which removes the selected field from the right list box and
places it in the left list box. The selected field will not be displayed in
the Detail Fields area in Softconsole.
■
Clear All, which removes all of the fields from the right box and
places them in the left list box. None of the fields will be displayed in
the Detail Fields area in Softconsole.
■
Up/Down, which moves the selected field up or down in the right list
box. Using these buttons, you can specify the order in which the
fields will be displayed in the Detail Fields area in Softconsole.
41. In the left box, select a field you want to be displayed in the Detail Fields
area in Softconsole, and click the Add button.
42. Repeat Step 41 for each field you want to be displayed in the Detail Fields
area in Softconsole.
43. Use the Up and Down buttons to specify the order in which the fields will
be displayed in the Detail Fields area in Softconsole. Select the field you
want to move, and then click the Up button or Down button.
44. When finished, click the Apply button, and then click the OK button.
45. From the File menu, select Exit to close MasterDirectory.
You now have an LDAP view that Softconsole users will be able to access and
use. At this point, you can:
■
Go to ‘‘Step 11: Specifying the Available Directories’’ on page 2-25.
■
Create, build, and configure additional directories that you want
Softconsole users to access.
When you are finished creating, building, and configuring directories, go to
‘‘Step 11: Specifying the Available Directories’’ on page 2-25.
2-24
Issue 2 February 2003
Initial Configuration Tasks Checklist
Step 11: Specifying the Available Directories
As the Softconsole administrator, you must define and maintain the directories
that attendants can access via Softconsole. Be sure you have created the
necessary directories before you begin this procedure. See “Before You Begin” for
more information.
1. Launch the configuration wizard in one of the following ways:
■
From the Start menu, select Programs>Avaya>Avaya
Softconsole>Configuration Manager. The Login dialog box
appears.
■
At the Desktop window, double-click on the Configuration Manager
icon. The Login dialog box appears.
2. Enter your password, and then click the Wizard Mode button.
The Start window appears.
3. Click the Next button.
The Options window appears.
4. Click the Next button.
The Server Connection window appears.
5. Click the Next button.
The Server Download window appears.
6. Click the Next button.
The Trunks window appears.
7. Click the Next button.
The Server Features window appears.
8. Click the Next button.
The Hundreds Group window appears.
9. Click the Next button.
The Directories window appears.
10. Click the Add button.
The Add Directory dialog box appears
11. In the Add Directory dialog box, click the Browse button to locate the
directory you want to make accessible to Softconsole.
12. Select a directory from the list shown in the Directory Search dialog box,
and click the Open button.
13. In the Directory Name box, enter a unique name for this directory.
Issue 2 February 2003
2-25
Configuring Softconsole for IP Configurations
14. In the Hotkey box, define a keyboard accelerator that can be used to
access this directory. This step is optional.
NOTE:
You cannot use the ALT key or function keys (for example, F1) in any
Hotkeys.
15. To identify the specified directory as the default directory, mark the Default
Directory checkbox.
NOTE:
You should specify a default directory. Softconsole will use the
directory that you select to be the default directory to
— identify the called or calling parties and display that
information in the Second Party Display area of the
Softconsole window
— identify the user name associated with each Busy Lamp Field
on the Softconsole window
If you do not specify a default directory, Softconsole will not provide
this information. You can specify only one default directory.
16. Click the OK button.
17. Repeat steps 10 through 16 to add another directory.
18. Do one of the following:
■
If you want to edit any of the information for a particular directory,
select the appropriate directory, click the Change button, and make
your changes to the information displayed for the selected directory.
■
If you want to change the order in which the directories will be
displayed on the Softconsole window, select the directory you want
to move up or down in the order, and click the up or down arrow
keys. The directories will be displayed in the Softconsole window in
the order in which they are currently displayed in the Directories
window (that is, the directory at the top of the list will be displayed at
the top of the list in the Softconsole window, and the directory at the
bottom of the list will be displayed at the bottom of the list in the
Softconsole window, even if that directory is the default directory).
NOTE:
The default directory will be displayed at the top of the list in
the Softconsole window only if you place it at the top of the list
in the Directories window.
19. When you are finished working in the Directories window, click the Next
button and go to ‘‘Step 12: Specify Attendant Users and Directory Access’’
on page 2-27.
2-26
Issue 2 February 2003
Initial Configuration Tasks Checklist
Step 12: Specify Attendant Users and
Directory Access
The Attendants window allows you to specify who is authorized to access
Softconsole Operations. In addition, you can specify the directories that each user
can access to add, edit, and delete information.
NOTE:
If you do not assign a user permission to add, edit, and delete information in
directories, the user is allowed view-only access to directory information.
1. In the Login Settings area of the Attendants window, do one of the following
steps:
■
If only one attendant will use Softconsole, select the Single
Attendant Profile option button, and then go to step 9.
■
If multiple attendants will use Softconsole:
a. Select the Multiple Attendant Profiles option button.
b. If you want each attendant to enter a password to access
Softconsole, mark the Attendant user password required
check box.
2. Click the Add User button.
The Add Attendant User dialog box appears.
3. In the Attendant User Name box, enter a user’s name.
4. In the Attendant User Password box, enter the user’s password.
5. In the Confirm Attendant User Password box, re-enter the user’s password.
6. Click the OK button.
The user appears in the Attendant User List box.
7. Repeat steps 2 through 6 to add other users. When finished adding users,
go to step 8.
8. Select a user in the Attendant User List box.
9. Click the Add Directory button.
The Add Directory(s) Permitted to Modify dialog box appears, displaying
the directories that the selected attendant cannot yet access.
NOTE:
LDAP views are not displayed in the Add Directory(s) Permitted to
Modify dialog box.
Issue 2 February 2003
2-27
Configuring Softconsole for IP Configurations
10. Select each directory that the selected attendant will be permitted to
modify.
NOTE:
You cannot modify the information in an LDAP view.
11. Click the OK button.
The selected directories are displayed in the Directories Permitted To
Modify list box.
12. Repeat steps 8 through 11 if there will be multiple attendant users.
13. When you have finished assigning users permission to modify directories,
click the Next button.
The Softconsole window appears.
14. Click the Next button.
The Finish window appears.
15. Click the Finish button to accept the configuration information that you
have entered.
A message box appears.
16. Click the OK button.
17. Go to ‘‘Step 13: Verify the Completed Configuration’’ on page 2-28.
Step 13: Verify the Completed Configuration
Before attendants begin handling calls, you should test the configuration.
At the Desktop window, double-click on the Softconsole operations icon, log into
the Avaya server, and try a test call. (Refer to the Softconsole operations online
help.)
This completes the initial configuration process for Softconsole.
2-28
Issue 2 February 2003
Maintaining the Softconsole Configuration
Maintaining the Softconsole
Configuration
You can update configuration information by accessing the Configuration Manager
and choosing wizard mode or tab mode. In tab mode, you can select an option
from the tabs displayed along the top of the Configuration Manager window. Then,
follow the corresponding procedures provided in the previous sections of this
chapter to reconfigure a specific area.
NOTE:
If you need to change the Avaya server connectivity choice that was
specified during initial configuration (for example, you are migrating from a
DCP installation to an IP installation), log into the Configuration Manager
according to the instructions earlier in this chapter. At the Start window,
select Wizard Mode and reconfigure Softconsole for the new Avaya server
connectivity type.
In addition, you can perform these maintenance activities according to the
procedures in the following sections:
■
Change the Softconsole administrator password.
■
Uninstall Softconsole.
! WARNING:
When an attendant logs off or exits Softconsole for the first time, that
person’s “profile” is saved by Softconsole. This profile defines the toolbar
settings and positions in Softconsole. The next time that user starts
Softconsole, the saved toolbar settings and positions are displayed. All
profiles will be reset to the default settings when you change a feature
button, display button, Trunk Group button, or Hundreds Group button or you
switch between single and multiple users, and click the Apply button.
Issue 2 February 2003
2-29
Configuring Softconsole for IP Configurations
Maintenance Guidelines
To ensure that Softconsole operates efficiently, it is essential that the application
recognizes:
■
Authorized users - If new users need to access Softconsole or users leave
your organization, be sure to change the information stored in the
Attendant User List.
■
Current Avaya server configuration - If you reconfigure button functions at
the Avaya server, for example, be sure to reconfigure the corresponding
buttons in Softconsole. Remember to update the Avaya server Attendant
Administration Form and keep the form available for reference during
Softconsole configuration maintenance.
■
Administered directories - If you add or delete directories that are
accessible to Softconsole, be sure to identify new directories in the
Softconsole Directory Configuration window.
Log Into the Configuration Manager
1. Perform one of the following steps:
■
From the Start menu, select Programs>Avaya>Avaya
Softconsole>Configuration Manager. The Login dialog box
appears.
■
At the Desktop window, double-click on the Configuration Manager
icon. The Login dialog box appears.
2. In the Softconsole Configuration Manager Login dialog box, enter the
Configuration Manager password.
3. Do one of the following:
■
To launch the configuration wizard, click the Wizard Mode button.
■
To work in tab mode, click the OK button.
The Start window appears.
2-30
Issue 2 February 2003
Maintaining the Softconsole Configuration
Change Softconsole Administrator Password
The password restricts access to the Softconsole Configuration Manager. If you
specified a password during initial configuration, you can change that password.
1. Log into the Configuration Manager according to the instructions above.
2. Do one of the following:
■
If you are using the configuration wizard, click the Next button to
access the Options dialog box.
■
If you are using tab mode, click the Options tab.
3. In the Password box, enter the new password.
4. In the Confirm password box, re-enter the password.
5. Do one of the following:
■
If you are using the configuration wizard, click the Next button to
complete the configuration wizard.
■
If you are using tab mode, do one of the following:
— Click the Apply button to save the new password. You can
now select another tab to make changes to another aspect of
the configuration.
— Click the OK button to save the new password and exit the
Configuration Manager.
Issue 2 February 2003
2-31
Configuring Softconsole for IP Configurations
Removing the Software
To remove Softconsole, perform the following steps:
1. Close Softconsole.
2. From the Start menu, select Programs.
3. Select the application folder that contains Softconsole. (The default
application folder is Avaya>Avaya Softconsole.)
4. Select Uninstall Avaya Softconsole.
The Perform Uninstall dialog box appears.
5. Click the Finish button to remove the software.
2-32
Issue 2 February 2003
Configuring Softconsole for
DCP Configurations
3
Introduction
This chapter provides an overview of the steps you will complete during initial
configuration of a DCP configuration, as well as procedures for maintaining the
Softconsole configuration.
Getting Started
After you have completed installation of the Softconsole software, you must
configure the application. (If you attempt to run the Softconsole application before
you complete initial configuration, you will receive an error message.) A
configuration wizard is provided with the Softconsole application to guide you
through the process of defining Softconsole settings.
NOTE:
To speed the configuration process, be sure that you have administered the
Attendant position at your call processing system (see Chapter 1) and that
you have printed copies of Avaya server Attendant administration pages
available for reference. You should also verify that all hardware connections
are secure (see Chapter 1).
You can update configuration information by accessing the Configuration Manager
and choosing wizard mode or tab mode. In tab mode, you can select an option
from the tabs displayed along the top of the Configuration Manager window to
make changes to specific aspects of the Softconsole configuration.
Issue 2 February 2003
3-1
Configuring Softconsole for DCP Configurations
Initial Configuration Tasks Checklist
Initial configuration consists of the following tasks:
NOTE:
If you are migrating from the DEFINITY PC Console application, you must
administer the capabilities of Softconsole just as you would for a new
installation. Programmed information that was used for PC Console was not
saved when you uninstalled that application and replaced it with the
Softconsole software.
1. Launch the Configuration Manager wizard.
2. Set the password for the Configuration Manager.
3. Set the language that will be used by the Configuration Manager,
Softconsole, and MasterDirectory.
4. Specify DCP connectivity to the Avaya server.
5. Download the Avaya server configuration.
6. Verify trunk configuration.
7. Verify feature button assignments.
8. Configure Hundreds Groups.
9. Configure Softconsole display settings and audible alerts.
10. Use MasterDirectory to create, populate, and configure the directories the
Softconsole users will access. MasterDirectory is an application that was
installed with the Softconsole software and enables you to build directories
that contain information about the people at your location, at remote sites,
and about your business contacts
11. Use the Configuration Manager wizard to configure the directories for
Softconsole.
12. Specify attendant users and the directories they can access.
13. Verify the completed configuration.
Keep in mind that while you are downloading the Avaya server configuration
information to Softconsole, the console cannot accept calls.
3-2
Issue 2 February 2003
Initial Configuration Tasks Checklist
Step 1: Launch the Configuration Manager
Wizard
1. Launch the configuration wizard in one of the following ways:
■
From the Start menu, select Programs>Avaya>Avaya
Softconsole>Configuration Manager. The Start window appears.
■
At the Desktop window, double-click on the Configuration Manager
icon. The Start window appears.
2. Click the Next button, and go to ‘‘Step 2: Set the Language’’ on page 3-3.
Step 2: Set the Language
1. From the Select Language drop-down list box in the Language Selection
area of the Avaya Softconsole Configuration Manager - Options window,
select the language that will be used by Softconsole, the Configuration
Manager, and MasterDirectory.
NOTE:
The new language setting will not take effect until you exit and restart
the applications.
2. Go to ‘‘Step 3: Set the Password for the Configuration Manager’’ on page
3-3.
Step 3: Set the Password for the Configuration
Manager
1. In the Administrator Password area of the Avaya Softconsole Configuration
Manager - Options window, enter your Softconsole administrator password
in the Password box.
2. In the Confirm password box, re-enter your Softconsole administrator
password.
You will need to know the password that you are assigning now whenever
you make administrative changes to Softconsole.
3. Click the Next button and go to ‘‘Step 4: Specify Avaya Server
Connectivity’’ on page 3-4.
Issue 2 February 2003
3-3
Configuring Softconsole for DCP Configurations
Step 4: Specify Avaya Server Connectivity
The Server Connection window allows you to specify whether Softconsole uses a
DCP or IP connection to the Avaya server. These connectivity types are described
in Appendix B.
1. At the Server Connection window, click the DCP connection option button.
2. In the Phone Settings area, select the appropriate option:
■
■
µ-law (default) - permits the system to digitize voice signals
according to accepted Mu-Law standards.
A-law - permits the system to digitize voice signals according to
A-Law standards.
3. Verify that the EIA-232-D connector cable is connected to the computer
and the DCP telephone.
4. Do one of the following:
■
If you know the number of the COM port to which the DCP
telephone is connected, select that port number (for example, COM
1) from the Enter Com Port drop-down list box in the Auto Detect
Com Port area. The COM port is the port on the back of the
Softconsole computer to which the DCP telephone is physically
connected.
■
If you do not know the COM port number, click the Start Detection
button to have Softconsole identify the port number automatically.
5. Click the Next button and go to ‘‘Step 5: Download the Avaya Server
Configuration’’ on page 3-5.
3-4
Issue 2 February 2003
Initial Configuration Tasks Checklist
Step 5: Download the Avaya Server
Configuration
The Server Download window allows you to import the feature button information
programmed for your Avaya server. Importing this information to Softconsole
speeds the configuration process.
NOTE:
If this station has buttons that are not part of the View button feature, the
download procedure from the Avaya server could activate a feature button
(such as the Trunk Control feature button) or will not provide feature button
values and place the console in an unknown state.
Also, not all of the feature buttons are downloaded from the server. You must
configure those buttons manually via the Configuration Manager.
To download the Avaya server configuration:
1. Verify that the Softconsole computer is connected to the DCP telephone
via a serial cable, and that the telephone receiving power.
2. From the pull-down list in the View Button Number box, select the number
of the feature button to which Button View is assigned on the Avaya server.
3. Click Start Download to begin downloading the Avaya server
configuration. The status of this process is displayed in the Download
Status box. The Download status box displays “Ending Auto Detection”
when the download is complete.
4. When the download is complete, click the Next button and go to ‘‘Step 6:
Verify Trunk Configuration’’ on page 3-6.
NOTE:
Trunk and Hundreds Group information for this station is not automatically
downloaded by this procedure. Instructions for entering this information
manually are provided in the following sections. It is recommended that you
have the Avaya server Attendant Administration Form available for reference
for the following steps.
Issue 2 February 2003
3-5
Configuring Softconsole for DCP Configurations
Step 6: Verify Trunk Configuration
The Trunks window displays the information imported from the Avaya server
download. You can add, edit, or delete trunk buttons, as well as define “hot keys”
(that is, keyboard accelerators) for the configured trunk buttons.
These buttons perform the same function as Trunk Group buttons on a
non-computer based console. Specifically, they allow the attendant to select an
outgoing trunk group. They can also be used to select a code-calling or
loudspeaker paging zone.
Refer to the Attendant Administration Form, Page 2 as you verify the Trunks
window. The Trunk Group buttons must be configured in Softconsole as they
appear on the Attendant Administration page.
To add a Trunk Group button:
1. Click the Add button, and enter the Trunk Group button number, label, and
description.
NOTE:
You must provide the Trunk Group button number, description text, and label
text. Labels typically reflect the location associated with a Trunk Group (for
example, “Dallas,” “Paris,” “NYC”) and can be a maximum of 10 characters.
2. To specify that this Trunk Group appears on the Softconsole window as a
button as well as an option on the Trunk Group menu, make sure the Menu
Only check box is not checked.
NOTE:
You change the order of administered Trunk Group buttons on a
toolbar and move buttons from one toolbar to another. To do so,
select the Trunk Group button and click on the appropriate arrow
button.
3. To specify a keyboard accelerator to access this Trunk Group button, enter
that information in the Hotkey box.
NOTE:
You cannot use the ALT key, function keys (for example, F1), or
numeric keypad keys in any Hotkeys.
4. When you are finished entering information about the button, click the OK
button.
The information for the button is displayed. The order in which the Trunk
Groups are displayed indicates the order in which the Trunk Groups will
appear on the Trunk toolbar.
3-6
Issue 2 February 2003
Initial Configuration Tasks Checklist
To change the information for one of the administered trunk buttons, select
the button and click the Change button. Then, enter your changes.
To delete one of the administered trunk buttons, select the button and click the
Delete button.
When you are finished configuring trunk buttons, click the Next button and go to
‘‘Step 7: Verify Feature and Display Button Configuration’’ on page 3-7.
Step 7: Verify Feature and Display Button
Configuration
The Server Features window displays the administered feature and display
buttons imported from the Avaya server download. You can add, edit, and delete
buttons, as well as define “hot keys” (that is, keyboard accelerators) for these
buttons, using this window.
Feature buttons are displayed on a toolbar on the attendant’s Softconsole window
and perform the same function as feature buttons on an attendant console
telephone. For example, an Integrated Directory feature button accesses the
Integrated Directory feature on the Avaya server.
NOTE:
The feature buttons required on every Softconsole are Split, Hold, Forced
Release, Night Service, and Position Busy. You should not delete these
administered buttons. (If you delete administered buttons, the attendant will
be unable to perform normal console operations from Softconsole.)
Display buttons access a specific display function. The attendant clicks the button
to perform the associated task. For example, the Next display button cycles to the
next entry in a displayed list.
NOTE:
The Normal display button is required on every Softconsole. The Next
display button is also required for DCP configurations with the Integrated
Directory feature enabled. See “Step 9: Define Softconsole Display Settings
and Audible Alerts.”
Each button is assigned a label (an 8-character name that appears on the
attendant’s Softconsole window), a description of its function (which is displayed
as the button’s Help Tip and in menus).
Issue 2 February 2003
3-7
Configuring Softconsole for DCP Configurations
To add a feature/display button, click the Add button and enter the information
for the new button. You must provide the button type, button number, feature
name, label text (up to eight characters), and description for each button. In the
Hotkey column, you can also define a keyboard accelerator for a button.
NOTE:
You cannot use the ALT key, function keys (for example, F1), or numeric
keypad keys in any Hotkeys.
Do not add an Inspect feature button or a Timer feature button to any
toolbar.
You change the order of administered feature/display buttons on a toolbar and
move buttons from one toolbar to another.
■
If you want to rearrange the buttons on a toolbar (or move a button to
another toolbar), select the feature/display button and click on the
appropriate arrow button.
■
If you do not want a button to appear on any toolbar, specify “Yes” in the
Menu Only column.
To change the information for one of the administered feature/display
buttons, select the button and click the Change button.Then, enter your changes.
To delete one of the administered feature/display buttons, select the button
and click the Delete button.
When you are finished configuring these buttons, click the Next button and go to
‘‘Step 8: Configure Hundreds Groups’’ on page 3-9.
3-8
Issue 2 February 2003
Initial Configuration Tasks Checklist
Step 8: Configure Hundreds Groups
Refer to the Attendant Administration Form, Page 2 as you complete the
Hundreds Group window. You must enter the Hundreds Groups in the boxes
provided in the order in which they appear on the Attendant Administration Form.
Each administered Hundreds Group button corresponds to the 100 Busy Lamp
Fields on the Softconsole Attendant window. The Hundreds Group Number you
assign to each Hundreds Group button should reflect the first digit (or group of
digits) for the associated extensions. Each Hundreds Group Number can have a
maximum of three characters.
■
If your dialing plan has three-digit extensions, you could conceivably have
1000 extensions — 000 through 999. You would therefore assign up to 10
Hundreds Group buttons at the Avaya server and duplicate their
assignments here. The first Hundreds Group button would handle
extensions 000 through 099. The second would handle extensions 100
through 199, and so forth. The extensions themselves would automatically
be labeled within the grid that is displayed to the attendant (000 through
099, and 100 through 199), and the corresponding Hundreds Group button
would be labeled with the group’s prefix — in this example, 0 and 1.
■
If your dialing plan has five-digit extensions, and you have 500 extensions
— for example 10000 through 10499, you would assign five Hundreds
Group buttons. The first Hundreds Group button would handle extensions
10000 through 10099. The second would handle extensions 10100 through
10199, and so forth. The extensions themselves would automatically be
labeled within the grid that is displayed to the attendant, and the
corresponding Hundreds Group button would be labeled with the group’s
prefix — in this example, 100 or 101.
The information you enter in the Label box for each Hundreds Group button is for
the attendant’s convenience and will not be used by the server. This information
will appear on the tab for the BLF field in Softconsole.
When you are finished entering Hundreds Groups:
1. Click the Next button.
The Directories window appears.
NOTE:
You will not configure this information at this time.
2. Click the Next button.
Attendants window appears.
NOTE:
You will not configure this information at this time.
Issue 2 February 2003
3-9
Configuring Softconsole for DCP Configurations
3. Click the Next button and go to ‘‘Step 9: Define Softconsole Display
Settings and Audible Alerts’’ on page 3-10.
Step 9: Define Softconsole Display Settings
and Audible Alerts
The Softconsole window allows you to define the audible alerts, display features,
and call handling behavior that the Softconsole computer will use during
operation.
1. At the Softconsole window, select whether you want Softconsole to ring the
phone or the computer.
■
Ring at phone - Softconsole rings the phone.
■
Ring at PC - Softconsole plays audible alerts on the computer. If you
select the Ring PC option button, you must specify the audible
alerts related to various call types listed in the Call Sound Files area.
Use the Browse and Play buttons to listen to the available WAV files
associated with each call type, which include:
— Incoming calls
— Held calls
— Emergency calls
— Calls waiting
The following WAV files are located in the Softconsole folder:
— Ringintercom.wav
— RingWaiting.wav
— ringIncoming.wav
— ringHold.wav
— ringEmergency.wav
You can create and use your own “user-defined” WAV files as long
as they are in the format PCM, 8 kilo Hertz sample channel modal,
16 bit representation. When you select a WAV file, the format of the
selected file is checked to ensure it is in the required format.
2. In the Second Party Display Handling area, select which information will be
displayed in the Second Party Display area of the Softconsole window.
■
Originator (Default) - Information for the calling party is displayed.
■
Coverage Point - Information for the called party is displayed.
NOTE:
If enabled, this information will be displayed in the associated call
appearance.
3-10
Issue 2 February 2003
Initial Configuration Tasks Checklist
3. In the Auto Transfer area, indicate whether the Auto Transfer feature is
enabled (“On” - Default).
When this feature is enabled, the attendant can transfer an incoming call to
an extension by pressing the Transfer button and dialing the extension. The
call is automatically placed on hold during the transfer. The attendant can
temporarily disable the Auto Transfer feature to announce calls (see the
Avaya Softconsole™ Release 1.5 Attendant’s Guide for details.)
4. In the New Incoming Call Behavior area, indicate how you want
Softconsole to reflect incoming calls when the application is minimized or
hidden behind other application windows.
■
Only flash task bar icon - Select this option to have the Softconsole
window flashed on the task bar.
■
Bring to front - Select this option to have Softconsole window move
to the foreground immediately.
5. In the Attendant Queue Feature area, indicate whether you want to use this
feature and how you want it displayed.
NOTE:
To use the Attendant Queue feature, make sure:
— the display language for the console is not administered as
user-defined (that is, language must be selected)
— either the Attendant Queue Calls feature button or the
Attendant Queue Time feature button is administered on the
console
When this feature is enabled, a display in the status bar indicates the
number of calls in the attendant queue and how long the oldest call in the
queue has been waiting. The number of calls is shown as an advancing bar
within the Calls in queue box for the status bar.
If you do not enable this feature, a simple display in the status bar indicates
the current status of the attendant queue. See the Avaya Softconsole™
Release 1.5 Attendant’s Guide for sample displays.
■
Use Attendant Queue Feature - Mark this checkbox to enable the
Attendant Queue feature.
■
Queue indicator full with calls - If you are enabling the Attendant
Queue feature, select the appropriate value from the pull-down list in
this box. This value represents the number of calls in the queue that
will cause the advancing bar to fill the status bar.
■
ACP Feature Button Number - If you are enabling the Attendant
Queue feature, select the ACP Feature button number associated
with this feature.
Issue 2 February 2003
3-11
Configuring Softconsole for DCP Configurations
6. In the Group Select Feature area, indicate whether you want the Group
Select feature enabled. The Group Select feature enables the user to
monitor more extension groups than those defined on the Hundreds Group
page.
■
Use Group Select Feature - Mark this checkbox to enable the Group
Select feature.
■
ACP Feature Button Number - If you are enabling this feature, select
the associated ACP Feature button number from the pull-down list in
this box.
NOTE:
To use the Group Select feature, you must define the first Hundreds
Group and administer the Group Select feature button on the
console.
7. In the Directory Feature area, indicate whether you want the Integrated
Directory feature enabled. If you enable this feature, you will be able to
download the Integrated Directory information from the Avaya server to a
Softconsole directory via MasterDirectory.
■
Use Directory Feature - Mark this checkbox to enable this feature.
■
Feature/Display - If you are enabling this feature, select the
appropriate option. The Integrated Directory feature can be
administered on a feature or display button.
■
ACP Button Number - If you are enabling this feature, select the
associated ACP Feature or Display button number from the
pull-down list in this box.
8. If you want to use a seven-digit dialing plan for internal calls, check the
Enable 7-digit dialing plan for internal calls check box.
9. If you want to use the Japanese font to display messages from the Avaya
server, check the Use Japanese Font check box.
10. When you have finished entering Softconsole configuration information,
click the Next button.
The Finish window appears.
11. Click the Finish button to accept the configuration information that you
have entered.
A message box appears.
12. Click the OK button.
13. Go to ‘‘Step 10: Create and Configure the Directories for Softconsole’’ on
page 3-13.
3-12
Issue 2 February 2003
Initial Configuration Tasks Checklist
Step 10: Create and Configure the Directories
for Softconsole
In this step, you will use MasterDirectory to create a new directory or LDAP view
that Softconsole will be able to access. MasterDirectory enables you to build
directories or LDAP views that contain information about the people at your
location, at remote sites, and your business contacts.
If you want to create a directory, go to ‘‘Create a Directory’’ on page 3-13.
If you want to create an LDAP view, go to ‘‘Create an LDAP View’’ on page 3-21.
Create a Directory
Perform the steps in this procedure if you want to create, populate, and configure
a directory that Softconsole will be able to access. Once you create a directory,
you will “download” the information from the Avaya server (that is, you will
populate the directory). During the download, the last name, first name, and
extension number for every user on the Avaya server will be copied into the
directory. After the download is complete, you will configure the directory for use
with Softconsole.
The structure of the directory you create will be based on the structure of the
sample directory (directory.md) that is provided with Softconsole. You can use this
sample database structure as the foundation for all of your Softconsole
directories. If you prefer you can develop customized database structures using
the MasterDirectory application.
To create a directory that contains the information from the Avaya server:
1. Start MasterDirectory by performing one of the following steps:
■
Double-click on the MasterDirectory icon on your desktop.
■
Click on the Start button, and selecting Program>Avaya>Avaya
Softconsole>MasterDirectory.
The MasterDirectory window appears.
2. From the File menu, select New.
The Create New Directory dialog box appears.
3. Select the dBASE option button.
4. Select the Copy an existing directory’s schema option button.
5. Click the Browse button.
The Open Directory dialog box appears.
6. Select directory.md. This file is located in the data folder in the Avaya
Softconsole folder (Program Files>Avaya>Avaya Softconsole>data).
The new directory you are creating will use the schema of the sample
directory (directory.md).
Issue 2 February 2003
3-13
Configuring Softconsole for DCP Configurations
7. Click the Open button.
8. Click the OK button.
The Directory Structure (Step 1 of 4) dialog box appears. Using this dialog
box, you specify the following information for the new directory:
■
the name of each field
■
the size of each field
■
the format of each field
■
the case of each field
■
whether this field can be updated
■
whether this field is required
■
whether the values are from a pick list
■
the order of the fields
9. Perform one of the following steps:
■
If you want to add a field:
a. Click the Add button.
The Field Parameters dialog box appears.
b. In the Title box, enter the title for the first field in the directory
you want to create.
c. In the Length box, enter the maximum number of characters
that will appear in this field. The minimum number of
characters that a field may contain is 1, and the maximum
number of characters a field may contain is 65.
d. In the Format box, select the type of characters that can be
entered in this field.
e. In the Case box, select the case for the characters that can
be entered in this field.
f. If you want this field to be updated, select the Allow Update
check box in the Advanced Settings area.
g. If you want this field to be required, select the Required Field
check box in the Advanced Settings area.
h. If you want the values of this field to be selected from a pick
list, select the Values come from Pick-List check box in the
Advanced Settings area.
i. Click the OK button.
The information for the field appears in the Directory
Structure (Step 1 of 4) dialog box.
3-14
Issue 2 February 2003
Initial Configuration Tasks Checklist
■
If you want to modify an existing field:
a. Select the field you want to modify, and then click the Change
button.
b. The Field Parameters dialog box appears, displaying the
information for the selected field.
c. Make your changes.
d. When you are finished modifying the selected field, click the
OK button.
The information for the field appears in the Directory
Structure (Step 1 of 4) dialog box.
10. Repeat Step 9 for any other fields you want to add or modify.
11. When you are finished adding or modifying the directory fields, click the
Next button.
The Indexes (Step 2 of 4) dialog box appears. The Index Fields box
displays the index fields for this directory.
12. If you want to specify the Index fields:
a. In the Remaining Fields box, select the field you want to use as an
index, and then click the Add button.
The selected field appears in the Index Fields box.
b. If you want an index field to be unique, select the appropriate index
field, and then select the Unique check box.
“YES” appears for the selected index field, indicating that the index
field is unique.
c. Repeat Steps a through d if you want to add other index fields.
When finished, go to Step 13.
13. Click the Next button.
The Display Fields (Step 3 of 4) dialog box appears. The Selected Fields
box displays the fields that will be displayed in the MasterDirectory window.
The order in which these fields appear in the Selected Fields box is the
order in which these fields will appear in the MasterDirectory window.
14. If you want a field to be displayed in the MasterDirectory window:
a. In the Remaining Fields box, select the field you want displayed in
the MasterDirectory window, and then click the Add button.
The selected field appears in the Selected Fields box.
b. Use the Move Up and Move Down buttons to change the location of
the selected field.
c. Repeat Steps a and b if you want another field to be displayed in the
MasterDirectory window.
Issue 2 February 2003
3-15
Configuring Softconsole for DCP Configurations
15. If you want change the order in which the fields will be displayed in the
MasterDirectory window:
a. In the Selected Fields box, select the field you want to move up or
down in the order.
b. Use the Move Up and Move Down buttons to change the location of
the selected field.
c. Repeat Steps a and b if you want to change the location of another
field in the MasterDirectory window.
16. Click the Next button.
The Other Settings dialog box appears.
17. In the Directory Title box, enter the title for the directory.
18. If you want to create a timestamp field in this directory:
a. Select the Timestamp Field check box.
b. In the Title box, enter the title for the Timestamp field. (The default is
MDTS.)
c. In the Format box, enter the time and date format you want
MasterDirectory to use.
19. If you want to create an auto-index field with a prefix in this directory:
a. Select the AutoIndex Field check box.
b. In the Title box, enter the title for the AutoIndex Field. (The default is
MDID.)
c. In the Prefix box, enter the prefix for the AutoIndex field.
20. Click the Finish button.
The Save New Directory As dialog box.
21. Enter the file name for the new directory, and then click the Save button.
NOTE:
You can save MasterDirectory files on your network to allow file
sharing with other console operators. If you save the MasterDirectory
files on your network, you should also save a local copy of the
MasterDirectory files on the hard drive of each computer that may
require access to this information. In the event of a LAN failure, the
user can manually switch to the local copy of the database
information that allows it to place and receive calls.
MasterDirectory creates the new directory with the file name you entered.
The newly created directory is opened. Since the new directory is empty,
no entries are displayed.
3-16
Issue 2 February 2003
Initial Configuration Tasks Checklist
22. From the Data Exchange menu, select Import.
The Import Maps dialog box appears.
23. Click the New button.
The Import Type (Step 1 of 4) dialog box appears.
24. Select the ACP Server via DCP option button, and then click Next.
The Create Import Map (Step 3 of 4) dialog box. The Fields box shows the
field labels for the source file (that is, the file from the Avaya server). The
MasterDirectory Fields box shows the fields available in the
MasterDirectory window.
25. In the Fields box, select Field1.
Field1 contains the last name information on the Avaya server.
26. In the MasterDirectory Fields box, select Last Name.
This is the field in the MasterDirectory window where you want the last
name information to appear.
27. Click the Map button.
The selected MasterDirectory field appears next to Field1 from the source
file, under the Mapped To column.
28. In the Fields box, select Field2.
Field2 contains the first name information on the Avaya server.
29. In the MasterDirectory Fields box, select First Name.
This is the field in the MasterDirectory window where you want the first
name information to appear.
30. Click the Map button.
The selected MasterDirectory field appears next to Field2 from the source
file, under the Mapped To column.
31. In the Fields box, select Field3.
Field3 contains the internal telephone number on the Avaya server.
32. In the MasterDirectory Fields box, select Switch Extension Number.
This is the field in the MasterDirectory window where you want the internal
telephone number (that is, the extension) on the Avaya server to appear.
33. Click the Map button.
The selected MasterDirectory field appears next to Field3 from the source
file, under the Mapped To column.
Issue 2 February 2003
3-17
Configuring Softconsole for DCP Configurations
34. From the Last Name First Name Delimiter box, select the type of delimiter
the Avaya server uses between the fields. You can select comma, spaces,
tab, or none, or you can type in your own delimiter.
NOTE:
Comma is the most common delimiter.
35. Click the Next button.
The Import Map (Step 4 of 4) dialog box appears.
36. Click the Save Map button.
The Save As dialog box appears.
37. Enter a name for this import map, and then click the Save button.
38. Click the Import button.
The data from the Avaya server source file is imported according to the
settings defined in the import map.
The Importing Data status box appears, showing the status of the import.
When the import is complete, a message box appears.
39. Click the OK button.
The data appears in the MasterDirectory window.
40. Click the Close button.
41. Click the Close button.
A message box appears.
42. Click the Yes button.
A message box appears.
43. Click the OK button.
Now that you have imported the Avaya server information into the directory,
you must configure the directory so that it can be used by Softconsole.
44. From the Settings menu, select MDAccess Settings.
The MDAccess Settings dialog box appears, displaying the General tab.
45. In the First Name box, select First Name. (This is the directory field that
contains the first name information.)
46. In the Last Name box, select Last Name. (This is the directory field that
contains the last name information.)
47. In the Dial box, select Switch Extension Number. (This is the directory
field that contains the telephone number. This is the directory field that will
be dialed by default.)
3-18
Issue 2 February 2003
Initial Configuration Tasks Checklist
48. In the Switch Phone box, select Switch Extension Number. This is the
internal telephone number (that is, extension) on the Avaya server. This
telephone number will be used for the BLF and second party display in
Softconsole.
49. In the Email box, select the directory field that contains the email address.
50. In the Notes box, select the directory field that contains the Notes field.
51. Click the Display Fields tab.
The Display Fields tab appears. The left list box shows the fields that are
not displayed in MDAccess for the directory.
The right list box shows the fields that will be displayed in Softconsole for
the current directory. The order in which the fields are displayed in the right
list box indicates the order the fields will be displayed in Softconsole. You
can set the order using the Up and Down buttons.
You can use the following buttons to set the fields you want displayed in
Softconsole:
■
Add, which places the field that is selected in the left list box after
the last field in the right list box. The selected field will be displayed
in Softconsole.
■
Delete, which removes the selected field from the right list box and
places it in the left list box. The selected field will not be displayed in
Softconsole.
■
Clear All, which removes all of the fields from the right box and
places them in the left list box. None of the fields will be displayed in
Softconsole.
■
Up/Down, which moves the selected field up or down in the right list
box. Using these buttons, you can specify the order in which the
fields will be displayed in Softconsole.
52. In the left box, select a field you want to be displayed in Softconsole, and
click the Add button.
53. Repeat Step 52 for each field you want to be displayed in Softconsole.
54. Use the Up and Down buttons to specify the order in which the fields will
be displayed in Softconsole. Select the field you want to move, and then
click the Up button or Down button.
55. When finished, click the Detail Fields tab.
The Details Fields tab appears.
Using this tab, you specify which directory fields you want displayed in the
Detail Fields area of Softconsole. The fields you specify will be displayed in
the Directory display area for each directory entry in Softconsole, and each
of these fields will have a corresponding Speed Dial button. If you specify
fields that contain telephone numbers, you will be able to dial those
numbers from Softconsole by clicking the associated Speed Dial button.
Issue 2 February 2003
3-19
Configuring Softconsole for DCP Configurations
The left list box shows the fields that will not be displayed in the Detail
Fields area in Softconsole.
The right list box shows the fields that will be displayed in the Detail Fields
area in Softconsole. The order in which the fields are displayed in the right
list box indicates the order the fields are displayed in the Detail Fields area
in Softconsole. You set the order using the Up and Down buttons.
You can use the following buttons to set the fields you want displayed in the
Detail Fields area in Softconsole:
■
Add, which places the field that is selected in the left list box after
the last field in the right list box. The selected field will be displayed
in Detail Fields area in Softconsole.
■
Delete, which removes the selected field from the right list box and
places it in the left list box. The selected field will not be displayed in
the Detail Fields area in Softconsole.
■
Clear All, which removes all of the fields from the right box and
places them in the left list box. None of the fields will be displayed in
the Detail Fields area in Softconsole.
■
Up/Down, which moves the selected field up or down in the right list
box. Using these buttons, you can specify the order in which the
fields will be displayed in the Detail Fields area in Softconsole.
56. In the left box, select a field you want to be displayed in the Detail Fields
area in Softconsole, and click the Add button.
57. Repeat Step 56 for each field you want to be displayed in the Detail Fields
area in Softconsole.
58. Use the Up and Down buttons to specify the order in which the fields will
be displayed in the Detail Fields area in Softconsole. Select the field you
want to move, and then click the Up button or Down button.
59. When finished, click the OK button.
60. From the File menu, select Exit to close MasterDirectory.
You now have a directory that Softconsole users will be able to access and use. At
this point, you can:
3-20
■
Go to ‘‘Step 11: Specifying the Available Directories’’ on page 3-26.
■
Import information from other files in your company to the fields in
MasterDirectory that were not populated when you downloaded information
from the Avaya server. For example, if you have an Email field in the
directory, you can create an import map to import the email addresses from
another file and then import that data into the directory. See “Importing
Data” and “Importing a Source File” in the MasterDirectory help for more
information.
Issue 2 February 2003
Initial Configuration Tasks Checklist
■
Create, build, and configure additional directories that you want
Softconsole users to access. To create, build, and configure additional
directories, you must:
a. Create a new MasterDirectory file. See “Creating a New Directory”
in the MasterDirectory online help.
b. Create import maps so you can import the data from the various
source files. The number and type of import maps you must create
depend on the number of source files that contain the data you want
to import into the new directory and the format of source file (for
example, the source file is an LDAP file). See “Importing Data” in the
MasterDirectory online help.
c. Import the data into the new directory. See “Importing a Source File”
in the MasterDirectory online help.
d. Configure the new directory for use with Softconsole. See “Setting
the Fields in MDAccess,” “Setting the Fields Displayed in
MDAccess,” and “Setting the Detail Fields Displayed in MDAccess”
in the MasterDirectory online help for more information.
When you are finished creating, building, and configuring directories, go to
‘‘Step 11: Specifying the Available Directories’’ on page 3-26.
Create an LDAP View
Perform the steps in this procedure if you want to create an LDAP view that
Softconsole will be able to access. After the LDAP view is created, you will
configure the LDAP view for use with Softconsole. Softconsole supports Microsoft
Active Directory and Netscape LDAP servers.
To create an LDAP view:
1. Start MasterDirectory by performing one of the following steps:
■
Double-click on the MasterDirectory icon on your desktop.
■
Click on the Start button, and selecting Program>Avaya>Avaya
Softconsole>MasterDirectory.
The MasterDirectory window appears.
2. From the File menu, select New.
The Create New dialog box appears.
3. Select the LDAP View option button. (If you have an existing LDAP view,
you can select the Copy an existing LDAP view option button to create a
new LDAP view that is based on the existing LDAP view.)
4. Select the Create a new LDAP view option button.
5. Click the OK button.
The LDAP Server Login Settings (Step 1 of 4) dialog box appears.
Issue 2 February 2003
3-21
Configuring Softconsole for DCP Configurations
6. In the Directory Title box, enter the title for the LDAP view you are creating.
7. In the LDAP Vendor box, select the type of LDAP server.
8. In the Host Name box, enter the machine name or IP address of the LDAP
server (for example, ldapfile.yourcompany.com).
9. In the Port box, enter the port number of the LDAP server.
10. In the User box, enter your user name for the LDAP server (if required).
11. In the Password box, enter your password for the LDAP server (if required).
12. In the Base box, enter the root of the LDAP tree (for example,
o=yourcompany.com).
13. In the Search Timeout box, enter the maximum amount of time that you
want the search procedure to be performed.
14. In the Maximum Records box, enter the maximum number of records that
you want to be returned from a search procedure. This value also sets the
number of records that will be displayed when you open an LDAP view.
15. Click the Next button.
The LDAP Attribute (Field) Selection (Step 2 of 4) dialog box appears.
16. Using the Browse button, select the place in the LDAP tree from which you
want to start viewing entries (that is, the “start node”).
17. In the Object Classes box, select the object class you want to use.
18. In the Optional Attributes box, click on each attribute you want displayed in
your LDAP view.
19. In the Filter box, specify a filter to limit the number of entries retrieved from
the LDAP data store.
NOTE:
The filter is an optional setting.
20. Click the Next button.
The Directory Structure (Step 3 of 4) dialog box appears. Using this dialog
box, you can modify the following information for the LDAP view:
3-22
■
the name of each field
■
the size of each field
■
the order of the fields
Issue 2 February 2003
Initial Configuration Tasks Checklist
21. If you want to modify an existing field:
a. Select the field you want to modify, and then click the Change
button.
b. The Field Parameters dialog box appears, displaying the information
for the selected field.
c. Make your changes.
d. When you are finished modifying the selected field, click the OK
button.
e. The information for the field appears in the Directory Structure (Step
1 of 4) dialog box.
f. Repeat Steps a through d for any other fields you want to modify.
22. If you want to change the order of the fields, select the field you want to
move, and click the Move Up or Move Down button to place the field in the
position you want. Repeat this step for any other fields you want to move.
23. When you are finished modifying and moving the directory fields, click the
Next button.
The Display Fields (Step 4 of 4) dialog box appears. The Selected Fields
box displays the fields that will be displayed in the MasterDirectory window.
The order in which these fields appear in the Selected Fields box is the
order in which these fields will appear in the MasterDirectory window.
24. If you want a field to be displayed in the MasterDirectory window:
a. In the Remaining Fields box, select the field you want displayed in
the MasterDirectory window, and then click the Add button.
The selected field appears in the Selected Fields box.
b. Use the Move Up and Move Down buttons to change the location of
the selected field.
c. Repeat Steps a and b if you want another field to be displayed in the
MasterDirectory window.
25. If you want change the order in which the fields will be displayed in the
MasterDirectory window:
a. In the Selected Fields box, select the field you want to move up or
down in the order.
b. Use the Move Up and Move Down buttons to change the location of
the selected field.
c. Repeat Steps a and b if you want to change the location of another
field in the MasterDirectory window.
26. Click the Next button.
The Save New Directory As dialog box.
Issue 2 February 2003
3-23
Configuring Softconsole for DCP Configurations
27. Enter the file name for the new directory, and then click the Save button.
After a brief delay, the newly created directory is opened and displays the
fields you selected in the Display Fields (Step 4 of 4) dialog box.
Now that you have created the LDAP view, you must configure the directory
so that it can be used by Softconsole.
28. Search for a record in the LDAP view. At least one record must be
displayed in the LDAP view.
The LDAP record is displayed.
29. From the Settings menu, select MDAccess Settings.
The MDAccess Settings dialog box appears, displaying the General tab.
30. In the First Name box, select First Name. (This is the directory field that
contains the first name information.)
31. In the Last Name box, select Last Name. (This is the directory field that
contains the last name information.)
32. In the Dial box, select the directory field that contains the telephone
number you want dialed when you double-click on a directory entry or
press the ENTER key in Softconsole.
33. In the Switch Phone box, select the directory field that contains the internal
telephone number (that is, extension) on the Avaya server. This telephone
number will be used for the BLF and second party display in Softconsole.
34. In the Email box, select the directory field that contains the email address.
35. In the Notes box, select the directory field that contains the Notes field.
36. Click the Display Fields tab.
The Display Fields tab appears. The left list box shows the fields that are
not displayed in MDAccess for the directory.
The right list box shows the fields that will be displayed in Softconsole for
the current directory. The order in which the fields are displayed in the right
list box indicates the order the fields will be displayed in Softconsole. You
can set the order using the Up and Down buttons.
You can use the following buttons to set the fields you want displayed in
Softconsole:
3-24
■
Add, which places the field that is selected in the left list box after
the last field in the right list box. The selected field will be displayed
in Softconsole.
■
Delete, which removes the selected field from the right list box and
places it in the left list box. The selected field will not be displayed in
Softconsole.
■
Clear All, which removes all of the fields from the right box and
places them in the left list box. None of the fields will be displayed in
Softconsole.
Issue 2 February 2003
Initial Configuration Tasks Checklist
■
Up/Down, which moves the selected field up or down in the right list
box. Using these buttons, you can specify the order in which the
fields will be displayed in Softconsole.
37. In the left box, select a field you want to be displayed in Softconsole, and
click the Add button.
38. Repeat Step 37 for each field you want to be displayed in Softconsole.
39. Use the Up and Down buttons to specify the order in which the fields will
be displayed in Softconsole. Select the field you want to move, and then
click the Up button or Down button.
40. When finished, click the Detail Fields tab.
The Details Fields tab appears.
Using this tab, you specify which directory fields you want displayed in the
Detail Fields area of Softconsole. The fields you specify will be displayed in
the Directory display area for each directory entry in Softconsole, and each
of these fields will have a corresponding Speed Dial button. If you specify
fields that contain telephone numbers, you will be able to dial those
numbers from Softconsole by clicking the associated Speed Dial button.
The left list box shows the fields that will not be displayed in the Detail
Fields area in Softconsole.
The right list box shows the fields that will be displayed in the Detail Fields
area in Softconsole. The order in which the fields are displayed in the right
list box indicates the order the fields are displayed in the Detail Fields area
in Softconsole. You set the order using the Up and Down buttons.
You can use the following buttons to set the fields you want displayed in the
Detail Fields area in Softconsole:
■
Add, which places the field that is selected in the left list box after
the last field in the right list box. The selected field will be displayed
in Detail Fields area in Softconsole.
■
Delete, which removes the selected field from the right list box and
places it in the left list box. The selected field will not be displayed in
the Detail Fields area in Softconsole.
■
Clear All, which removes all of the fields from the right box and
places them in the left list box. None of the fields will be displayed in
the Detail Fields area in Softconsole.
■
Up/Down, which moves the selected field up or down in the right list
box. Using these buttons, you can specify the order in which the
fields will be displayed in the Detail Fields area in Softconsole.
41. In the left box, select a field you want to be displayed in the Detail Fields
area in Softconsole, and click the Add button.
42. Repeat Step 41 for each field you want to be displayed in the Detail Fields
area in Softconsole.
Issue 2 February 2003
3-25
Configuring Softconsole for DCP Configurations
43. Use the Up and Down buttons to specify the order in which the fields will
be displayed in the Detail Fields area in Softconsole. Select the field you
want to move, and then click the Up button or Down button.
44. When finished, click the Apply button, and then click the OK button.
45. From the File menu, select Exit to close MasterDirectory.
You now have an LDAP view that Softconsole users will be able to access and
use. At this point, you can:
■
Go to ‘‘Step 11: Specifying the Available Directories’’ on page 3-26.
■
Create, build, and configure additional directories that you want
Softconsole users to access.
When you are finished creating, building, and configuring directories, go to
‘‘Step 11: Specifying the Available Directories’’ on page 3-26.
Step 11: Specifying the Available Directories
As the Softconsole administrator, you must define and maintain the directories
that attendants can access via Softconsole. Be sure you have created the
necessary directories before you begin this procedure. See “Before You Begin” for
more information.
1. Launch the configuration wizard in one of the following ways:
■
From the Start menu, select Programs>Avaya>Avaya
Softconsole>Configuration Manager. The Login dialog box
appears.
■
At the Desktop window, double-click on the Configuration Manager
icon. The Login dialog box appears.
2. Enter your password, and then click the Wizard Mode button.
The Start window appears.
3. Click the Next button.
The Options window appears.
4. Click the Next button.
The Server Connection window appears.
5. Click the Next button.
The Server Download window appears.
6. Click the Next button.
The Trunks window appears.
7. Click the Next button.
The Server Features window appears.
3-26
Issue 2 February 2003
Initial Configuration Tasks Checklist
8. Click the Next button.
The Hundreds Group window appears.
9. Click the Next button.
The Directories window appears.
10. Click the Add button.
The Add Directory dialog box appears.
11. In the Add Directory dialog box, click the Browse button to locate the
directory you want to make accessible to Softconsole.
12. Select a directory from the list shown in the Directory Search dialog box,
and click the Open button.
13. In the Directory Name box, enter a unique name for this directory.
14. In the Hotkey box, define a keyboard accelerator that can be used to
access this directory. This step is optional.
NOTE:
You cannot use the ALT key or function keys (for example, F1) in any
Hotkeys.
15. To identify the specified directory as the default directory, mark the Default
Directory checkbox.
NOTE:
You should specify a default directory. Softconsole will use the
directory that you select to be the default directory to
— identify the called or calling parties and display that
information in the Second Party Display area of the
Softconsole window
— identify the user name associated with each Busy Lamp Field
on the Softconsole window
If you do not specify a default directory, Softconsole will not provide
this information. You can specify only one default directory.
16. Click the OK button.
17. Repeat steps 10 through 16 to add another directory.
18. Do one of the following:
■
If you want to edit any of the information for a particular directory,
select the appropriate directory, click the Change button, and make
your changes to the information displayed for the selected directory.
■
If you want to change the order in which the directories will be
displayed on the Softconsole window, select the directory you want
to move up or down in the order, and click the up or down arrow
keys. The directories will be displayed in the Softconsole window in
Issue 2 February 2003
3-27
Configuring Softconsole for DCP Configurations
the order in which they are currently displayed in the Directories
window (that is, the directory at the top of the list will be displayed at
the top of the list in the Softconsole window, and the directory at the
bottom of the list will be displayed at the bottom of the list in the
Softconsole window, even if that directory is the default directory).
NOTE:
The default directory will be displayed at the top of the list in
the Softconsole window only if you place it at the top of the list
in the Directories window.
19. When you are finished working in the Directories window, click the Next
button and go to ‘‘Step 12: Specify Attendant Users and Directory Access’’
on page 3-28.
Step 12: Specify Attendant Users and
Directory Access
The Attendants window allows you to specify who is authorized to access
Softconsole Operations. In addition, you can specify the directories that each user
can access to add, edit, and delete information.
NOTE:
If you do not assign a user permission to add, edit, and delete information in
directories, the user is allowed view-only access to directory information.
1. In the Login Settings area of the Attendants window, do one of the following
steps:
■
If only one attendant will use Softconsole, select the Single
Attendant Profile option button, and then go to step 9.
■
If multiple attendants will use Softconsole:
a. Select the Multiple Attendant Profiles option button.
b. If you want each attendant to enter a password to access
Softconsole, mark the Attendant user password required
check box.
2. Click the Add User button.
The Add Attendant User dialog box appears.
3. In the Attendant User Name box, enter a user’s name.
4. In the Attendant User Password box, enter the user’s password.
5. In the Confirm Attendant User Password box, re-enter the user’s password.
6. Click the OK button.
The user appears in the Attendant User List box.
3-28
Issue 2 February 2003
Initial Configuration Tasks Checklist
7. Repeat steps 2 through 6 to add other users. When finished adding users,
go to step 8.
8. Select a user in the Attendant User List box.
9. Click the Add Directory button.
The Add Directory(s) Permitted to Modify dialog box appears, displaying
the directories that the selected attendant cannot yet access.
NOTE:
LDAP views are not displayed in the Add Directory(s) Permitted to
Modify dialog box.
10. Select each directory that the selected attendant will be permitted to
modify.
NOTE:
You cannot modify the information in an LDAP view.
11. Click the OK button.
The selected directories are displayed in the Directories Permitted To
Modify list box.
12. Repeat steps 8 through 11 if there will be multiple attendant users.
13. When you have finished assigning users permission to modify directories,
click the Next button.
The Softconsole Configuration window appears.
14. Click the Next button.
The Finish window appears.
15. Click the Finish button to accept the configuration information that you
have entered.
A message box appears.
16. Click the OK button.
17. Go to ‘‘Step 13: Verify the Completed Configuration’’ on page 3-30.
Issue 2 February 2003
3-29
Configuring Softconsole for DCP Configurations
Step 13: Verify the Completed Configuration
Before attendants begin handling calls, you should test the configuration:
1. Press the Speaker button on the telephone.
NOTE:
If you are using a CallMaster VI, make sure that the indicator lamp on the
headset is not lighted (which indicates that the headset is turned off).
2. Verify that the red LED associated with this button is lighted, and that you
do not hear dial tone. (This is an indication that the Softconsole is correctly
administered as a 302 Attendant Console.)
NOTE:
The analog jack on the back of the 8411D telephone is inoperable when
used with Softconsole.
3. At the Desktop window, double-click on the Softconsole operations icon,
and try a test call. (Refer to the Softconsole operations online help.)
This completes the initial configuration process for Softconsole.
3-30
Issue 2 February 2003
Maintaining the Softconsole Configuration
Maintaining the Softconsole
Configuration
You can update configuration information by accessing the Configuration Manager
and choosing wizard mode or tab mode. In tab mode, you can select an option
from the tabs displayed along the top of the Configuration Manager window. Then,
follow the corresponding procedures provided in the previous sections of this
chapter to reconfigure a specific area.
NOTE:
If you need to change the Avaya server connectivity choice that was
specified during initial configuration (for example, you are migrating from a
DCP installation to an IP installation), log into the Configuration Manager
according to the instructions earlier in this chapter. At the Welcome window,
select Wizard Mode and reconfigure Softconsole for the new Avaya server
connectivity type.
In addition, you can perform these maintenance activities according to the
procedures in the following sections:
■
Change the Softconsole administrator password.
■
Uninstall Softconsole.
! WARNING:
When an attendant logs off or exits Softconsole for the first time, that
person’s “profile” is saved by Softconsole. This profile defines the toolbar
settings and positions in Softconsole. The next time that user starts
Softconsole, the saved toolbar settings and positions are displayed. All
profiles will be reset to the default settings when you change a feature
button, display button, Trunk Group button, or Hundreds Group button, or
you switch between single and multiple users, and click the Apply button.
Issue 2 February 2003
3-31
Configuring Softconsole for DCP Configurations
Maintenance Guidelines
To ensure that Softconsole operates efficiently, it is essential that the application
recognizes:
■
Authorized users - If new users need to access Softconsole or users leave
your organization, be sure to change the information stored in the
Attendant User List.
■
Current Avaya server configuration - If you reconfigure button functions at
the Avaya server, for example, be sure to reconfigure the corresponding
buttons in Softconsole. Remember to update the Avaya server Attendant
Administration Form and keep the form available for reference during
Softconsole configuration maintenance.
■
Administered directories - If you add or delete directories that are
accessible to Softconsole, be sure to identify new directories in the
Softconsole Directory Configuration window.
Log Into the Configuration Manager
1. Perform one of the following steps:
■
From the Start menu, select Programs>Avaya>Avaya
Softconsole>Configuration Manager. The Login dialog box
appears.
■
At the Desktop window, double-click on the Configuration Manager
icon. The Login dialog box appears.
2. In the Softconsole Configuration Manager Login dialog box, enter the
Configuration Manager password.
3. Do one of the following:
■
To launch the configuration wizard, click the Wizard Mode button.
■
To work in tab mode, click the OK button.
The Start window appears.
3-32
Issue 2 February 2003
Maintaining the Softconsole Configuration
Change Softconsole Administrator Password
The password restricts access to the Softconsole Configuration Manager. If you
specified a password during initial configuration, you can change that password.
1. Log into the Configuration Manager according to the instructions above.
2. Do one of the following:
■
If you are using the configuration wizard, click the Next button to
access the Options dialog box.
■
If you are using tab mode, click the Options tab.
3. In the Password box, enter the new password.
4. In the Confirm password box, re-enter the password.
5. Do one of the following:
■
If you are using the configuration wizard, click the Next button to
complete the configuration wizard.
■
If you are using tab mode, do one of the following:
— Click the Apply button to save the new password. You can
now select another tab to make changes to another aspect of
the configuration.
— Click the OK button to save the new password and exit the
Configuration Manager.
Issue 2 February 2003
3-33
Configuring Softconsole for DCP Configurations
Removing the Software
To remove Softconsole, perform the following steps:
1. Close Softconsole.
2. From the Start menu, select Programs.
3. Select the application folder that contains Softconsole. (The default
application folder is Avaya>Avaya Softconsole.)
4. Select Uninstall Avaya Softconsole.
The Perform Uninstall dialog box appears.
5. Click the Finish button to remove the software.
3-34
Issue 2 February 2003
Troubleshooting
4
Overview
This chapter provides procedures and recommendations that will assist you in
resolving problems.
Refer to the appropriate section in this chapter, according to the type of problem
you are attempting to identify and correct.
This chapter includes the following information in the order listed below:
■
Troubleshooting IP configuration-specific problems
■
Troubleshooting DCP configuration-specific problems
■
Troubleshooting Softconsole operation problems
■
Recovering from a power failure
■
Recovering from a computer failure
NOTE:
For information about troubleshooting Avaya server problems, see the
Avaya Softconsole™ Release 1.5 Attendant’s Guide.
Issue 2 February 2003
4-1
Troubleshooting
Troubleshooting IP
Configuration-specific Problems
If you encounter difficulties installing Softconsole specific to IP configurations,
refer to the troubleshooting information provided by the integrated iClarity Audio
online help. For the most current troubleshooting information, go to
http://avaya.com/support.
Potential problems include:
■
The caller or called party cannot hear the attendant.
■
The attendant cannot hear the caller or called party.
■
The attendant cannot hear the caller or called party clearly.
■
The caller or called party indicates that your words are not being
transmitted clearly (that is, the beginning or ending sounds of words are not
transmitted).
Troubleshooting DCP
Configuration-specific Problems
If you encounter difficulties installing Softconsole specific to DCP configurations,
consult the following tables to isolate and resolve the problem.
Troubleshooting Problems with the Telephone
Symptom
You cannot connect to the Avaya server
using an 8411D.
Recommended Solution
1. Verify the Avaya server administration for
the attendant.
2. Verify the physical wiring connections.
3. Use the Pumpware utility
(Pump8411.exe) located on the
Softconsole CD to upgrade the firmware
in the 8411D. See the file
pump_readme.txt on the Softconsole CD
for more information.
The Position Busy lamp is not lit and the
Position Available indicator is not
updated after initial installation.
This is not a problem. Click the Position
Busy button. Then, click it again to reset
these indicators.
You cannot use the DCP telephone in the
usual manner.
This is not a problem. The Softconsole
environment disables the standard
functionality of the telephone.
4-2
Issue 2 February 2003
Troubleshooting DCP Configuration-specific Problems
Symptom
Recommended Solution
Pressing the Speakerphone button on
the DCP telephone produces a dial tone.
At the Avaya server, re-administer the port to
indicate that an attendant console is in use.
Pressing the Speakerphone button on
the DCP telephone does not cause the
SPKR lamp to light.
1. Verify that your system is actually
receiving power.
2. Double-check your installation
configuration, and verify that all required
connections are correctly made. (Refer to
the configuration instructions and options
detailed in Chapter 1.)
3. If the problem persists, replace the DCP
telephone.
You can hear the incoming caller through
the speaker, but the caller cannot hear
you.
1. Use the handset on the telephone,
instead of using the speaker.
2. Add a 500A adapter and headset to your
installation. (Refer to the configuration
instructions and options detailed in
Chapter 1.)
3. Replace the DCP telephone with one that
includes a full-duplex speaker.
The lights on the 8411D or CallMaster VI
telephone do not light.
1. Verify that your system is actually
receiving power.
2. Double-check your installation
configuration, and verify that all required
connections are correctly made. (Refer to
the configuration instructions and options
detailed in Chapter 1.)
3. If the problem persists, replace the 8411D
or CallMaster VI telephone.
Issue 2 February 2003
4-3
Troubleshooting
Symptom
The red and green lights in the tenth Call
Appearance position on the 8411D
telephone, are flashing in an alternating
pattern.
Recommended Solution
1. Double-check your installation
configuration, and verify that all required
connections are correctly made. (Refer to
the configuration instructions and options
detailed in Chapter 1.)
2. If the problem persists, replace the DCP
telephone.
The red light in the tenth Call
Appearance position on the 8411D
telephone remains steadily lighted when
Softconsole is running.
1. Verify that the COM port to which the
8411D telephone is physically connected
is consistent with the port identified in the
System Parameters folder of the System
Administration window.
If it is not, either reconfigure the hardware
or change the software settings to point to
the serial port physically connected to the
8411D telephone.
Exit, then relaunch Softconsole to make
this change.
2. Verify that the port on the Avaya server is
properly administered as an attendant
console.
4-4
Issue 2 February 2003
Troubleshooting Softconsole Operation Problems
Troubleshooting Softconsole
Operation Problems
Symptom
Recommended Solution
Double-clicking on
the Softconsole
icon has no effect.
Switch to the running Softconsole application by doing one of the
following:
■
Hold down ALT and press TAB until you locate the Softconsole
application. Then, release ALT.
■
Hold down CTRL and press ESC to open a Task List on the
screen. Highlight the Softconsole application on this list, and
click Switch To.
The Configuration
Manager
password is
unavailable, lost,
or forgotten; and
the Softconsole
application is not
running.
Contact Avaya Technical Support at 1 800 242-2121 (USA only) or
your local authorized Avaya dealer.
The user
password is
unavailable, lost,
or forgotten.
You must assign a new password for the user.
The Softconsole
application is slow
in responding to
the attendant’s
commands.
1. Exit Softconsole. NOTE: If the debug feature is enabled, disable
it before exiting Softconsole. See “Using the Debug Feature”
later in this chapter for information.
2. Close all other applications, and exit Windows to free up all
memory resources.
3. If possible, correct any problems that exist on the computer hard
drive, including locating and fixing any bad sectors or lost
clusters. Depending upon your computer’s configuration, you
may be able to use the following DOS commands to clean up
your hard drive: defrag, optimize, scandisk, and chkdsk /f. For
additional information, refer to the Microsoft MS-DOS User’s
guide.
4. When you are finished, relaunch Windows, relaunch
Softconsole, and run only those applications that are necessary.
Issue 2 February 2003
4-5
Troubleshooting
Symptom
Clicking the
Group Select
feature button and
entering a valid
Hundreds Group
number changes
the BLF status
information
(background
color) but not the
text on the
associated tab
and cells.
Recommended Solution
1. Access the Configuration Manager according to the instructions
in Chapter 3.
2. Select the Softconsole Configuration tab.
3. In the Group Select Feature area, verify the following
information:
■
The checkbox is marked to enable this feature.
■
The correct Avaya server Feature Button Number is specified.
A Softconsole
directory was
populated, but
now appears
empty.
1. Restore a backup copy of the missing Softconsole Directory
database.
Softconsole does
not respond to
any Avaya
server-related
activity. For
example, call
handling and
feature buttons
are not
functioning.
1. Verify that the COM port connection to the 8411D telephone or
CallMaster VI telephone is consistent with the port identified in
the System Parameters folder of the System Administration
window.
For DCP
configurations
only
2. If a backup copy is not available, recreate the missing database.
3. Copy all other database files from the backup directory into the
new Softconsole directory (overwriting the newly created
database files) to restore your previously saved database
information.
2. If it is not, reconfigure the hardware or change the software
settings to point to the serial port physically connected to the
8411D telephone or CallMaster VI telephone. Then, exit and
relaunch Softconsole to make this change.
3. Verify that the application is communicating with the 8411D
telephone or CallMaster VI telephone.
■
If you are using an 8411D telephone, button 10 on the
telephone should be steadily lighted.
■
If this is not the case, refer to the product’s troubleshooting
documentation.
4. Verify that the port on the Avaya server is properly administered
as an attendant console.
5. Enter hyperterminal and reset the COM port. Then, launch the
Configuration Manager and initiate redetection of the COM port.
4-6
Issue 2 February 2003
Troubleshooting Softconsole Operation Problems
Symptom
Softconsole
intermittently
ignores incoming
calls or loses
messages from
the 8411D
telephone or
CallMaster VI
telephone.
For DCP
configurations
only
Recommended Solution
1. Verify that the computer meets the minimum configuration
requirements detailed in Chapter 1. If it does not, upgrade or
replace the computer.
2. Verify that the COM port to which the 8411D telephone or
CallMaster VI telephone is physically connected is consistent
with the port identified during configuration. If it is not,
reconfigure the hardware or change the software settings to
point to the serial port connected to the 8411D telephone or
CallMaster VI telephone. Then, exit and relaunch Softconsole to
make this change.
3. Verify that no other application uses the COM port used by
Softconsole. A competing application could include any modem
or fax application, TAPI software, etc.
4. Run Hyperterminal and reset the COM port by connecting to the
COM port and typing AT<cr>. Re-enter this command until the
system responds “OK.” Then, launch the Configuration Manager
and initiate redetection of the COM port.
Softconsole
consistently
ignores incoming
calls.
1. Verify that Softconsole is in the appropriate Day or Night setting
for your environment.
The feature
buttons, Trunk
Group buttons,
and/or Hundreds
Group buttons do
not work or
activate the wrong
features.
1. Re-administer the Avaya server and/or Softconsole.
Softconsole
cannot make
outgoing calls
(except through
the Integrated
Directory, if
administered).
1. Restart the computer.
2. Verify that the Position Busy feature is not activated.
2. Replace the button labels so that all elements of the
administration process are consistent.
2. While the computer is restarting, disconnect and immediately
reconnect either end of the cable between the computer and the
8411D telephone or CallMaster VI telephone. This reconnection
will force the two components to resynchronize their signals.
For DCP
configurations
only
Status lamps that
are not connected
to any stations are
lighted.
1. At the Avaya server, determine whether the status lamps are
associated with stations administered without hardware (AWOH)
translations.
2. Contact your system administrator.
Issue 2 February 2003
4-7
Troubleshooting
Using the Debug Feature
Softconsole can maintain a log containing detailed information about Softconsole
user activity that may be useful for understanding problems encountered while
using application. For example, the debug feature can record user activities, such
as lamps being turned on and off, buttons being pressed, and display text being
entered. Each event is saved along with a date and time stamp in the log.
This debug log, which is saved to files in the installation directory, allows technical
support personnel to determine the specific sequence of events that lead up to a
problem.
You can enable this feature from the System Settings option of the Softconsole
View menu.
NOTE:
Before enabling this feature, contact Avaya Technical Support at
1 800 242-2121 (USA only) or your local authorized Avaya dealer for specific
instructions.
4-8
Issue 2 February 2003
Recovering from a Power Failure
Recovering from a Power Failure
When a power failure occurs, any calls that were active or on hold are
automatically terminated. The console itself will also lose power and need to be
restored. In addition, some Avaya server features may need to be administered
again.
To recover from a power failure:
1. Bring the computer and Softconsole online. If you experience difficulty
doing so, follow the instructions in the next section, “Emergency Recovery
Information.”
2. If your environment requires them, check and/or administer the following
features. You will find complete information in the Avaya Softconsole™
Release 1.5 Attendant System Features Guide.
Locate each feature that is relevant to your environment, then follow the
procedures provided in the Avaya Softconsole™ Release 1.5 Attendant
System Features Guide to restore standard operating values. These
features include:
■
Attendant Control of Trunk Group Access
For each trunk group, loudspeaker paging zone, or code calling
zone to which Softconsole must have access, follow the procedure
to activate attendant control of trunk group access.
■
Call Forwarding All Calls
For each extension whose calls are to be forwarded to another
extension in the Avaya server, follow the procedure to activate Call
Forwarding All Calls for a particular extension.
■
Controlled Restrictions
For each telephone or group of telephones that were individually
restricted (either outward, total, station-to-station, or termination),
re-establish the appropriate restriction level. Refer to the procedure
to activate restriction.
■
Night Service
If your Avaya server was set up to direct attendant group calls to a
special console at night (or during other off-hours), you will need to
reactivate this feature. Refer to the procedure to active Night
Service.
Issue 2 February 2003
4-9
Troubleshooting
Recovering from a Computer Failure
If a power failure or hard drive crash should occur at the Softconsole computer, or
if the computer itself should become inoperable, you will need to bring the
Softconsole computer back online. You may also need to re-administer certain
Avaya server features. (Refer to the section entitled ‘‘Using the Debug Feature’’
for a list of those features.)
If you are unable to bring the Softconsole computer back online, read through the
following information; then determine and follow the best course of action.
NOTE:
It is important to note that the Softconsole computer controls the telephone
to which it is attached. If the Softconsole computer itself is inoperable, all
attached peripherals likewise become inoperable and will remain so until the
console is either restored or replaced.
Emergency Recovery Information
4-10
■
The Softconsole position will continue to receive calls, despite its current
condition. At the Avaya server, you must “busy-out” the port that is
associated with Softconsole computer. If this is not possible, turn the
attached telephone upside down and unplug the connector from the
connection labeled “LINE” on the bottom of the telephone. This action will
redirect calls intended for the Softconsole attendant according to the
system administration coverage path.
■
If a 302 Attendant Console (either 2- or 4-wire) is available, you can
reconnect this console as a temporary measure. To do so, locate the wire
that connects the Softconsole computer to the jack on the wall. Unplug this
wire from the wall receptacle. Next, locate the wire on the 302 Attendant
Console that connects the console to a wall jack, and plug that wire into the
now-available receptacle. This action will restore all normal console
functionality, including the Direct Extension Selection display, if one is
installed.
■
If you want to restore the use of the telephone connected to the
Softconsole computer, you can do so provided that two jacks are available
in the immediate vicinity, and that the second is already administered as a
generic DCP port. Plug the telephone (usually attached to the console) into
the second jack. It will now operate as a normal DCP telephone.
Issue 2 February 2003
System Environments Affecting
Softconsole Operation
A
Overview
Softconsole is designed to operate in several Avaya server system environments,
including Distributed Communications Systems (DCS) and Centralized Attendant
Service (CAS) configurations. If your organization uses a DCS or CAS
configuration, Softconsole operation may be affected. In most cases, the impact is
minimal. For example, a display color may vary from the standard color or a tone
may be delayed. Any procedures specific to a DCS or CAS system environment
are included in the Avaya Softconsole™ Release 1.5 Attendant’s Guide.
Issue 2 February 2003
A-1
System Environments Affecting Softconsole Operation
The DCS Environment
A DCS configuration consists of 2 to 20 private Avaya servers that are
interconnected. These systems may reside in different geographical locations. In
certain situations, however, the DCS configuration appears as a single system to
Softconsole. These situations occur when the following Avaya server attendant
features are enabled:
■
Attendant Call Waiting
■
Attendant Control of Trunk Group Access
■
Attendant Display
■
Automatic Circuit Assurance
■
Busy Verification of Telephones and Trunks
■
Call Forwarding All Calls
■
Direct Trunk Group Selection
■
Trunk Group Busy/Warning Indicators
Refer to the Avaya Softconsole™ Release 1.5 Attendant System Features Guide
for a description of each of these features and the impact that your system
environment may have on them.
A-2
Issue 2 February 2003
The CAS Environment
The CAS Environment
In the CAS environment, system users served by separate Avaya servers at two
or more locations can concentrate the attendant positions at one location. This
location is called the CAS main. The other locations, typically without attendants,
are called CAS branches. All locations within the CAS environment have separate
LDNs.
Incoming calls to the CAS main are handled as if the Avaya servers were a
standalone system. Any attendant-seeking calls at a CAS branch are routed to the
attendant consoles at the CAS main over Release Line Trunks (RLTs). The RLTs
are special trunks that are used only for attendant-seeking calls from the CAS
branches. The CAS attendant cannot originate a call over an RLT.
CAS calls are any calls that would usually go to the local attendant console. The
CAS attendant answers these calls and then transfers them (over the same RLT)
to the requested extension or external telephone number at the branch. When the
attendant releases the call, the RLT is free to accept another call. The transferred
call will return to a CAS console if it is not answered within a predetermined time.
Similarly, any CAS calls placed on Hold or Remote Hold also return to a CAS
console if they are not answered within a predetermined time.
The following features and procedures are affected by the CAS environment:
■
Attendant displays and audible alerts (tones)
■
Answering calls
■
Placing calls (dialing methods)
■
Placing calls on Hold and Remote Hold
■
Transferring calls to the originating branch and to other branches
These differences in feature operation and procedures are discussed throughout
the Avaya Softconsole™ Release 1.5 Attendant’s Guide. In addition, refer to the
Avaya Softconsole™ Release 1.5 Attendant System Features Guide for more
information about the impact that your system environment may have on
Softconsole operation.
Issue 2 February 2003
A-3
System Environments Affecting Softconsole Operation
A-4
Issue 2 February 2003
Avaya Server Connectivity Scenarios
B
Overview
This appendix provides examples of the different connectivity configurations
(that is, IP and DCP) in which you can use Softconsole.
Issue 2 February 2003
B-1
Avaya Server Connectivity Scenarios
IP Configurations
Figure B-1 shows Softconsole in the “Road Warrior” (voice over IP) configuration.
In this configuration, the voice and call control information use the same IP
connection.
IP
LAN
IP
IP
Avaya Server with
R10 software or later
Attendant’s Computer
Running Softconsole
Figure B-1.
B-2
Road Warrior (Voice over IP) Configuration
Issue 2 February 2003
IP Configurations
Figure B-2 shows Softconsole in the Telecommuter configuration. In this
configuration, the call control information is routed over the IP connection from
your computer to your company’s Avaya server, and the voice is routed over a
separate telephone line (IP or DCP) from the Avaya server to the telephone
number you specify. To use the Telecommuter configuration, you must have a
separate telephone line available at your location.
IP
LAN
IP
IP
Avaya Server with
R10 software or later
IP
Attendant’s Computer
Running Softconsole
IP Telephone
IP
LAN
IP
Avaya Server with
R10 software or later
DCP Line
8411 or
CallMaster VI
Figure B-2.
Attendant’s Computer
Running Softconsole
Telecommuter Configuration
Issue 2 February 2003
B-3
Avaya Server Connectivity Scenarios
DCP Configurations
Figure B-3 shows the possible DCP configurations for Softconsole.
Serial Cable
DCP Line
Avaya Server with
R9 software or later
Figure B-3.
B-4
DCP Configurations
Issue 2 February 2003
8411 or
CallMaster VI
Attendant’s Computer
Running Softconsole
Uninstalling PC Console
C
Overview
This appendix describes how to uninstall PC Console.
NOTE:
You must uninstall PC Console before you install Softconsole.
Uninstall PC Console
To uninstall PC Console:
1. From Start menu, select Programs>DEFINITY PC Console>uninstall.
The Select Uninstall Method dialog box appears.
2. Select the Automatic option button, and then click the Next button.
The Perform Uninstall dialog box appears.
3. Click the Finish button.
Issue 2 February 2003
C-1
Uninstalling PC Console
C-2
Issue 2 February 2003
Index
IN
Numerics
302 Attendant Console, 1-7
8411D Telephone connection, 1-11
A
ACP Attendant Administration Form, 3-5
ACP attendant features, A-2
ACP configuration download, 2-4
administered directories, 2-30, 3-32
Alerting Options, 2-8
Attendant administration pages, 2-1, 3-1
attendant features, A-3
attendant form, 1-8
Attendant Queue, 2-9, 3-11
Attendant Queue feature button, 3-11
audible alerts, 2-8, 3-10
Auto Transfer, 2-9, 3-11
B
backup considerations, 1-6
Busy Lamp Field, 2-7, 2-26, 3-9, 3-27
button numbers
default, 1-8
C
Call Sound Files, 2-8, 3-10
call types, 2-8, 3-10
CallMaster VI Telephone connection, 1-10
CAS environment, A-3
COM port, 1-9, 3-4, 4-7
computer failure, recovery, 4-10
configuration management, ix
Configuration Manager, ix
configuration wizard, 2-1, 2-3, 2-25, 2-30, 3-1, 3-3, 3-26,
3-32
Coverage Point, 2-9, 3-10
D
DCP configurations, viii
installation checklist, 1-6
troubleshooting, 4-2
DCP telephone
connection, 1-9
troubleshooting, 4-2
DCS environment, A-2
Debug feature, 4-5, 4-8
default button numbers, 1-8
default directory, 2-26, 3-27
DEFINITY PC Console
uninstall, C-1
dialing plan, 2-7, 3-9
seven-digit, 2-10, 3-12
directories
access, 2-27, 3-28
create, 2-11, 3-13
LDAP view, 2-20, 3-21
specifying, 2-25, 3-26
directory access, 2-27, 3-28
directory management, x
directory schema, 2-11, 3-13
disk space, 1-2
display button configuration, 2-6, 3-7
display buttons
required, 2-6, 3-7
display features, 2-8, 3-10
E
emergency recovery, 4-10
F
feature button configuration, 2-6, 3-7
feature buttons, required, 2-6, 3-7
Forced Release button, 1-8, 2-6, 3-7
G
Group Select, 2-10, 3-12
Group Select feature button, 2-10, 3-12
H
hardware requirements, 1-2
Hold button, 1-8, 2-6, 3-7
hot keys, ix, 2-26, 3-6, 3-27
Hundreds Groups configuration, 2-7, 3-9
DCP configuration requirements, 1-3
Issue 2 February 2003
IN-1
Index
I
P
iClarity IP Audio, vii, 4-2
initial DCP configuration checklist, 3-2
initial IP configuration checklist, 2-2
Integrated Directory, 3-12
ACP button number, 3-12
Integrated Directory feature, x
IP configuration
installation checklist, 1-5
IP configuration requirements, 1-2
IP configurations, vii
troubleshooting, 4-2
password, 2-3, 3-3
changing, 2-31, 3-33
lost or forgotten, 4-5
PC Console, 1-16, 2-2, 3-2
uninstall, C-1
Position Busy button, 1-8, 2-6, 3-7
Position Busy lamp, 4-2
power failure, 4-9, 4-10
power source connection, 1-13
power supply, 1-4
R
J
Road Warrior configuration, viii
Japanese font, 2-10, 3-12
S
L
LAN, vii
language
select, 2-3, 3-3
M
maintenance guidelines, 2-30, 3-32
MasterDirectory, x, 2-11, 2-20, 2-25, 2-27, 3-13, 3-21, 3-26,
3-28
N
network interface card (NIC), 1-2
Next button, 1-8, 3-7
Night Service button, 1-8, 2-6, 3-7
Normal button, 1-8, 2-6, 3-7
O
Originator, 2-9, 3-10
IN-2
Issue 2 February 2003
Second Party Display, 2-9, 2-26, 3-10, 3-27
Coverage Point, 2-9, 3-10
Originator, 2-9, 3-10
server administration, 1-7
server button assignments, 1-8
server configuration, 2-30, 3-32
server configuration download, 3-5
server connectivity, vii, 2-4, 3-4
server console parameters, 1-7
server software, 1-2, 1-3
setup program, 1-16
seven-digit dial plan, 2-10, 3-12
Softconsole, 1-16, 2-1, 3-1, 4-5
administrator password, 2-3, 3-3
authorized users, 2-27, 2-30, 3-28, 3-32
initial DCP configuration, 3-1
initial IP configuration, 2-1
password, 2-31, 3-33
removing, 2-32, 3-34
troubleshooting, 4-5
uninstall, 2-32, 3-34
Softconsole computer, 1-2
Softconsole configuration
directories, 2-11, 2-25, 3-13, 3-26
LDAP view, 2-20, 3-21
maintaining, 2-29, 3-31
verifying, 2-28, 3-30
Softconsole installation, 1-16
software
uninstalling, 2-32, 3-34
software installation, 1-16
sound device, 1-2
speaker/headset, 1-2
Index
speakerphone
troubleshooting, 4-3
Split button, 1-8, 2-6, 3-7
supported system environments, viii
supported telephones, 1-4
T
tab mode, 2-1, 3-1
Telecommuter configuration, viii
troubleshooting, 4-1, 4-5
8411D telephone, 4-3, 4-4
buttons, 4-6, 4-7
CallMaster VI telephone, 4-3
DCP telephone, 4-2
Position Busy lamp, 4-2
speakerphone, 4-3
status lamps, 4-7
Trunk Group button configuration, 2-5, 3-6
U
uninstall, 2-32, 3-34
V
verifying Softconsole configuration, 2-28, 3-30
W
WAV files, 2-8, 3-10
wizard mode, 2-1, 3-1
Issue 2 February 2003
IN-3
Index
IN-4
Issue 2 February 2003