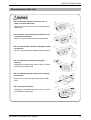
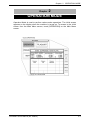
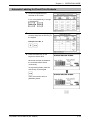
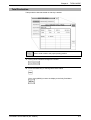
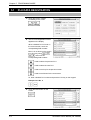
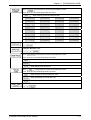
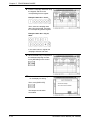
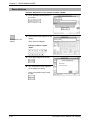
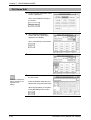
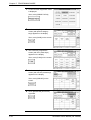
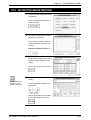
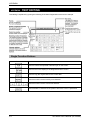
1
Automatic Scale Register SR-2000α USER’S MANUAL CAUTION READ AND UNDERSTAND THIS MANUAL • Thoroughly read and understand this manual before installing, operating, inspecting, and servicing the machine. • Keep this manual in a safe place where you can refer to it whenever necessary. • Consult your ISHIDA representative if you have any questions or comments. PN 89061 2004 ISHIDA Co., Ltd. COPYRIGHT AND COPY PERMISSION This manual shall not be copied without permission. This manual is protected by copyright and is intended solely for use in conjunction with the machine. Please notify us before copying or reproducing this manual in any manner, for any other purpose. © ISHIDA CO., LTD., 2004 SAFETY PRECAUTIONS SAFETY PRECAUTIONS Important Notice Those who handle the machine must be aware of the hazards involved. These dangers may not be obvious, so it is imperative to follow the instructions detailed in this manual when installing, operating, inspecting, or servicing the machine. Therefore, we recommend that you thoroughly read and understand this manual before installing, operating, inspecting, or servicing the machine. ISHIDA is not liable for any damage, loss or injury that results from incorrect operation, insufficient caution, unauthorized modifications to the machine, or failure to follow the instructions contained in this manual. In the recent weighing industry, the latent hazards involved with handling the machine have increased due to new materials, new processing methods, and higher processing speeds, and it is impossible to predict all of the possible dangers. Likewise, there are far too many operations which cannot or should not be performed to fully describe all of them in the manual. Please assume that any operation not specifically described in this manual should never be performed. Safety countermeasures should be carefully considered and implemented before performing any installation, operation, inspection, or maintenance procedure not specifically described in this manual or indicated on the machine itself. Change in Specifications Machine specifications and accessories may be changed at any time due to improvements or other reasons. Consult with your ISHIDA representative at any time to confirm the actual specifications of the purchased machine. Errors and Omissions The information in this manual has been carefully checked and is believed to be accurate; however, no responsibility is assumed for clerical, typographical or proofreading errors, or omissions. Limitations of Liability ISHIDA assumes no responsibility for special, indirect, or consequential damages, loss of profits or commercial loss in any way connected with the machine, whether such claim is based on contract, warranty, negligence, or strict liability. ISHIDA shall assume responsibility for problems with the machine or the system based on an individual maintenance contract. However, ISHIDA shall not be responsible for secondary problems. ISHIDA assumes no responsibility for the user's programming of this machine, or any consequence thereof. In no event shall ISHIDA be responsible for warranty, repair, or other claims regarding the machine unless ISHIDA’s analysis confirms that the machines were properly handled, stored, installed, and maintained and not subject to contamination, abuse, misuse, or inappropriate modification or repair. • Tornado and Compact-VJE are used in this machine. • Tornado is a trademark of Wind River Systems, Inc. • Compact-VJE is a trademark of VACS Corporation. SR-2000α User’s Manual (No. 0000A) i SAFETY PRECAUTIONS Meanings of Signal Words This machine is manufactured for use according to proper procedures by a qualified person and only for the purposes described in this manual. The following conventions are used to indicate and classify precautions depending on the level of danger, or seriousness of potential injury. Always heed the information provided in this manual. Failure to heed precautions can result in personal injury or property damage. The following signal words are used in this manual. Indicates a potentially hazardous situation which, if not avoided, will result in minor or moderate injury, or may result in serious injury or death. Additionally, there may be significant property damage Indicates a potentially hazardous situation where, if not avoided, may result in minor or moderate injury or in property damage. ii SR-2000α User’s Manual (No. 0000A) SAFETY PRECAUTIONS Precautions for Safe Use • Do not allow the machine, terminals, etc. to come in contact with water. Doing so may result in fire or cause the machine to break down. • Do not give a strong shock to the machine as it is a precision machine. Doing so may cause the machine to break down. • Do not disassemble, modify, or attempt to repair the machine. Doing so may damage the original safety functions. • Do not hold the cover when carrying the machine. Dropping the machine may result in injury or cause the machine to break down. • Do not hold the operation panel when carrying the machine. Doing so may cause the operation panel to break down. • Do not drop the cassette. Dropping the cassette may result in injury or cause the cassette to break down. SR-2000α User’s Manual (No. 0000A) iii SAFETY PRECAUTIONS • Handle with care when removing or inserting the cassette. Careless cassette handling may result in injury or cause the cassette to break down. • Do not block off the ventilation opening. Doing so may result in fire or cause the machine to break down. iv SR-2000α User’s Manual (No. 0000A) SAFETY PRECAUTIONS • Do not press the touch panel with an edged thing. Doing so may scratch the panel and cause the machine to break down. • Do not install any other application. Doing so may cause the machine to break down. • Use a soft cloth or the neutral detergent when cleaning this machine. Do not use thinner, benzene, etc. Doing so may deform the machine or cause it to break down. SR-2000α User’s Manual (No. 0000A) v CONTENTS CONTENTS Chapter 1 1.1 BEFORE USING THE MACHINE........................................... 1-1 PART NAMES AND FUNCTIONS............................................................................ 1-2 Front View........................................................................................................................... 1-2 Rear View ........................................................................................................................... 1-2 Keypad................................................................................................................................ 1-3 1.2 MACHINE INSTALLATION ...................................................................................... 1-4 Precautions for Installation.................................................................................................. 1-4 Level Adjustment................................................................................................................. 1-5 1.3 1.4 1.5 LABEL ROLL INSTALLATION ................................................................................ 1-6 PAPER ROLL INSTALLATION ................................................................................ 1-8 CLEANING ............................................................................................................. 1-10 Cautions for Using Cleaning Fluid......................................................................................1-10 Air Intake Filter Cleaning....................................................................................................1-11 Operation Panel and Main Body Cleaning .........................................................................1-12 Chapter 2 2.1 2.2 OPERATION MODE ............................................................... 2-1 OPERATION FLOW ................................................................................................. 2-2 BASIC SCREENS .................................................................................................... 2-3 Initial Screen ....................................................................................................................... 2-3 PLU Select Screen.............................................................................................................. 2-4 Weighing Product Screen ................................................................................................... 2-4 Fixed Price Product Screen ................................................................................................ 2-4 2.3 2.4 2.5 WEIGHING PRODUCT SALES ............................................................................... 2-5 FIXED PRICE PRODUCT SALES ........................................................................... 2-7 TARE WEIGHT SUBTRACTION.............................................................................. 2-9 Actual Tare Weight .............................................................................................................. 2-9 Input Tare Weight ................................................................................................................ 2-9 Preset Tare Keys................................................................................................................2-10 2.6 DISCOUNT OPERATIONS......................................................................................2-11 Amount Discount................................................................................................................2-11 Percent Discount................................................................................................................2-11 Special Price ......................................................................................................................2-11 2.7 TEMPORARY DATA CHANGE .............................................................................. 2-12 Unit Price Change..............................................................................................................2-12 Weighing Product Change to Fixed Price Product .............................................................2-12 Fixed Price Product Change to Weighing Product .............................................................2-13 Date Change......................................................................................................................2-13 2.8 POP MESSAGE PRINT.......................................................................................... 2-15 Unit Price Change..............................................................................................................2-15 2.9 VOID LAST TRANSACTION ................................................................................. 2-16 2.10 DAILY TOTAL DISPLAY......................................................................................... 2-17 2.11 AUTOMATIC / ADVANCED LABELING ................................................................ 2-18 Automatic Labeling for Weighing Products ........................................................................2-18 Automatic Labeling for Fixed Price Products .....................................................................2-19 Advanced Labeling for Fixed Price Products .....................................................................2-20 vi SR-2000α User’s Manual (No. 0000A) SAFETY PRECAUTIONS Chapter 3 3.1 3.2 3.3 3.4 NUMBER ADD.......................................................................................................... 3-2 WEIGHING ADD....................................................................................................... 3-5 NUMBER SUBTRACT ............................................................................................. 3-7 WEIGHING SUBTRACT ........................................................................................ 3-10 Chapter 4 4.1 TOTAL ADJUSTMENT MODE ............................................... 3-1 TOTAL MODE ........................................................................ 4-1 DAILY TOTAL ........................................................................................................... 4-2 Total Production .................................................................................................................. 4-3 Sales Per Department......................................................................................................... 4-4 Sales Per Group ................................................................................................................. 4-5 Sales By PLU...................................................................................................................... 4-6 Gross Profit By PLU............................................................................................................ 4-7 Markdown Item ................................................................................................................... 4-8 Designated PLU.................................................................................................................. 4-9 PLU Analysis......................................................................................................................4-10 Hourly Analysis ..................................................................................................................4-13 Sales per Sell Impossible PLU...........................................................................................4-15 Sales per Expired PLU.......................................................................................................4-16 Sales per Discard PLU.......................................................................................................4-17 Sales per Rewrap PLU ......................................................................................................4-18 4.2 WEEKLY TOTAL .................................................................................................... 4-19 Sales per Day ....................................................................................................................4-20 Hourly Analysis ..................................................................................................................4-21 4.3 CUMULATIVE TOTAL ............................................................................................ 4-23 Various Totals.....................................................................................................................4-24 4.4 4.5 4.6 4.7 31 DAYS TOTAL..................................................................................................... 4-26 NON-MOVEMENT PLU.......................................................................................... 4-28 PRESET REPORT.................................................................................................. 4-30 TOTAL CLEAR ....................................................................................................... 4-31 Chapter 5 5.1 PROGRAMING MODE ........................................................... 5-1 PLU DATA REGISTRATION .................................................................................... 5-2 Starting PLU Data Registration ........................................................................................... 5-2 PLU Data Registration 1/3 .................................................................................................. 5-4 PLU Data Registration 2/3 .................................................................................................. 5-8 PLU Data Registration 3/3 .................................................................................................5-10 Finishing PLU Data Registration ........................................................................................5-12 5.2 5.3 5.4 5.5 PLU PRICE CHANGE ............................................................................................ 5-13 PLU NAME REGISTRATION ................................................................................. 5-15 CAMPAIGN MESSAGE REGISTRATION ............................................................. 5-16 STORE NAME AND ADDRESS REGISTRATION................................................. 5-20 Store Name ........................................................................................................................5-20 Store Address.....................................................................................................................5-22 Print Selection of Store Name/Address..............................................................................5-23 5.6 DATE/TIME REGISTRATION................................................................................. 5-24 SR-2000α User’s Manual (No. 0000A) vii CONTENTS 5.7 PRESET KEYS REGISTRATION........................................................................... 5-25 PLU Preset Key Registration .............................................................................................5-25 PLU Name Edit ..................................................................................................................5-28 Key Color Change..............................................................................................................5-30 Key Layout Change ...........................................................................................................5-32 Function Key Registration ..................................................................................................5-35 Page Copy .........................................................................................................................5-38 Page Delete .......................................................................................................................5-40 5.8 ADVERTISEMENT MESSAGE .............................................................................. 5-42 Message Table Allocation...................................................................................................5-42 Message Edit .....................................................................................................................5-45 Message Deletion ..............................................................................................................5-47 5.9 5.10 5.11 5.12 5.13 5.14 5.15 5.16 5.17 OPERATOR NAME REGISTRATION .................................................................... 5-49 NUTRITION REGISTRATION ................................................................................ 5-51 EXTRA MESSAGE 1 - 3......................................................................................... 5-53 COUPON MESSAGE ............................................................................................. 5-55 FREE MESSAGE 1 - 5 ........................................................................................... 5-57 DEPARTMENT NAME REGISTRATION ............................................................... 5-59 GROUP NAME REGISTRATION ........................................................................... 5-61 POP MESSAGE ..................................................................................................... 5-63 CHECK LABEL ...................................................................................................... 5-65 APPENDIX TEXT EDITING ............................................................................................A-1 Single Function Buttons ...................................................................................................... A-1 Multiple Function Buttons.................................................................................................... A-2 viii SR-2000α User’s Manual (No. 0000A) Chapter 1 Chapter BEFORE USING THE MACHINE 1 BEFORE USING THE MACHINE SR-2000α User’s Manual (No. 0000A) 1-1 Chapter 1 1.1 BEFORE USING THE MACHINE PART NAMES AND FUNCTIONS This section explains the name of each part and the function of this machine. As this manual uses the following names to give further explanation, remember the part names described here, and read the following pages. Front View Rear View 1-2 SR-2000α User’s Manual (No. 0000A) Chapter 1 BEFORE USING THE MACHINE Keypad Used to change a unit price. Also used to change a fixed price product to a unit price product. Used to change a fixed price. Also used to change a unit price product to a fixed price product. Used to subtract a tare weight. Used to issue a label. Used to multiply a unit price of the fixed price product. Used to call a registered product data. Used to delete an entered numerical value. Also used to release an error condition. SR-2000α User’s Manual (No. 0000A) 1-3 Chapter 1 1.2 BEFORE USING THE MACHINE MACHINE INSTALLATION Precautions for Installation • Install the machine horizontally to use. Accurate measurements cannot be performed if it is not installed horizontally. • Do not connect the machine power input with an AC power supply exceeding the rated voltage. Doing so may cause the machine to break down and/or may result in danger such as electric shock. • Connect the grounding wire to protect against electric shock. Make sure to connect the attached grounding wire to the grounding terminal. • Do not install the machine near a TV set or radio. Doing so may cause static to the TV set and/or radio as this machine emits week electric wave. • Do not use this machine in location that receives direct sunlight for a long time. Doing so may cause the machine to break down. 1-4 SR-2000α User’s Manual (No. 0000A) Chapter 1 BEFORE USING THE MACHINE Level Adjustment Be sure to turn off the power switch before placing the machine on a stable platform, and adjust the machine inclination by turning the four level adjusters so that the level bubble is located at the center of the window. SR-2000α User’s Manual (No. 0000A) 1-5 Chapter 1 1.3 BEFORE USING THE MACHINE LABEL ROLL INSTALLATION 1. Raise the Thermal Head Cover, and pull the Cassette to draw out of the main body. 2. Load a new label roll around the Roll Holder and raise the Roll Stopper to fix the roll position. 3. Pass the roll paper 1 through 5 as shown in the figure. 4. Fix the paper end with the backing paper stopper, and gently turn the Winding Bobbin counterclockwise until the label becomes tight. Confirm that the label roll can turn gently with the space from 0.5 to 2mm between the roll and the Roll Stopper. For smoother passing, fold the paper end a little. 1-6 SR-2000α User’s Manual (No. 0000A) Chapter 1 5. Slide the Label Guide to fit the paper width. 6. Push the Cassette straight into the main body to return to its original position, and lower the Thermal Head Cover. 7. Touch [FEED] on the screen to issue a label. At this time, confirm that the label is completely peeled off. Push the Cassette slowly so as not to get your fingers caught between the Cassette and the main body. Confirm that the backing paper is wound up smoothly. If the backing paper is wound up diagonally, reconfirm on the label passing, label stop position with the Backing Paper Stopper, and the Label Guide width. SR-2000α User’s Manual (No. 0000A) BEFORE USING THE MACHINE 1-7 Chapter 1 1.4 BEFORE USING THE MACHINE PAPER ROLL INSTALLATION 1. Raise the Thermal Head Cover, and pull the Cassette to draw out of the main body. 2. Load a new paper roll around the Roll Holder and raise the roll stopper to fix the roll position. 3. Pass the paper end 1 through 3 as shown in the figure. 4. Slide the label guide to fit the paper width. Confirm that the paper roll can turn gently with the space from 0.5 to 2mm between the roll and the Roll Stopper. 1-8 SR-2000α User’s Manual (No. 0000A) Chapter 1 5. Push the Cassette straight into the main body to return to its original position, and lower the Thermal Head Cover. 6. Cut the paper that comes out of the outlet. Push the Cassette slowly so as not to get your fingers caught between the Cassette and the main body. SR-2000α User’s Manual (No. 0000A) BEFORE USING THE MACHINE 1-9 Chapter 1 1.5 BEFORE USING THE MACHINE CLEANING Cautions for Using Cleaning Fluid Use a soft cloth and a neutral detergent to clean the machine. Do not use thinner, benzene, etc. Doing so may damage the original safety functions. For some parts, use cleaning fluid (isopropyl alcohol). Read the cautions below before using the cleaning fluid. Do not use cleaning fluid near fire as the fluid is flammable. Do not use cleaning fluid in a poorly ventilated area. Always provide adequate ventilation when cleaning. Take the following actions in the event of an accident: If the fluid gets in your eye Immediately wash your eye(s) with water for at least 15 minutes, and consult your doctor. If you wear contact lenses, remove and wash them. If the fluid comes into contact with your skin Immediately rinse the area of contact with water, and then wash with soap. If you notice any skin abnormalities at the area of contact, or if any pain persists, consult your doctor. If the fumes of the fluid are inhaled Immediately move the victim to an area where fresh air is available, and have the victim lie down and keep warm. If breathing becomes difficult or stops, provide artificial respiration and seek medical attention immediately. If the fluid is swallowed Do not try to induce vomiting. Do not give the victim anything to drink, and do not rinse the mouth. If vomiting occurs naturally, have the victim lean forward to reduce risk of aspiration. Keep the victim warm and seek medical attention. 1-10 SR-2000α User’s Manual (No. 0000A) Chapter 1 BEFORE USING THE MACHINE Air Intake Filter Cleaning Clean the air intake filter at least once a month in order to be able to use the machine in good conditions. 1. Raise the operation panel as shown in the figure. 2. Hold the both end of the filter case, and pull it out. 3. Remove the air intake filter from the filter case and wash the filter. 4. Dry the filter, and return it into the filter case. Then, set it to the main body. SR-2000α User’s Manual (No. 0000A) 1-11 Chapter 1 BEFORE USING THE MACHINE Operation Panel and Main Body Cleaning This section explains about cleaning the operation panel and narrow spaces of the main body. Use a cloth or cotton swab for cleaning narrow spaces. 1. Remove stains at the top of operation panel as shown in the figure. 2. Raise the operation panel as shown in the figure. 3. Remove stains at the space between the operation panel and the main body as shown in the figure. Use a soft cloth or the neutral detergent when cleaning this machine. Do not use thinner, benzene, etc. 1-12 SR-2000α User’s Manual (No. 0000A) Chapter 2 Chapter OPERATION MODE 2 OPERATION MODE Operation Mode is used to perform various sales operations. The initial screen appears on the display when the machine is turned on. To access to the initial screen from the Main Menu screen, touch [OPERATION] on the Main Menu screen. SR-2000α User’s Manual (No. 0000A) 2-1 Chapter 2 2.1 OPERATION MODE OPERATION FLOW Operating procedure in the Operation Mode is shown as per below. 2-2 SR-2000α User’s Manual (No. 0000A) Chapter 2 2.2 OPERATION MODE BASIC SCREENS Initial Screen SR-2000α User’s Manual (No. 0000A) 2-3 Chapter 2 OPERATION MODE PLU Select Screen PLU preset keys can be freely laid out through the preset key registration. Weighing Product Screen Function preset keys (-$, -%, Special, POP, Total display, Void, etc.) can be freely laid out through the preset key registration. Fixed Price Product Screen 2-4 SR-2000α User’s Manual (No. 0000A) Chapter 2 2.3 OPERATION MODE WEIGHING PRODUCT SALES 1. Confirm that the Initial screen is displayed. When the PLU is registered in the preset key, touch the corresponding product category key. Example: Category Meat When the PLU is not registered in the preset key, enter the desired PLU number and press the PLU key on the keypad. Example: PLU number “3” In this case, skip step 2 below. 2. When a category key has been touched in step 1 above, the PLU Select screen appears on the display. Then, touch a desired PLU key to call. Example: PLU “MEAT 03” See section 2.5 “Tare Weight Subtraction” for more detailed procedure. 3. The PLU data appears on the display. 4. When a tare weight subtraction is required, perform the tare weight subtraction procedure. SR-2000α User’s Manual (No. 0000A) 2-5 Chapter 2 OPERATION MODE 5. Place a product on the weighing platter. Then, the total price is automatically calculated. Example: Net weight “0.820 lb” 6. See section 2.6“Discount Operations” for more detailed procedure. When discounting the price (Percent discount, Amount discount, Special price), perform the discount procedure. Example: $0.50 discount 7. When changing the data temporarily, perform the temporary data change procedure. 8. When printing a POP message on the label, perform the POP message print procedure. 9. Press the PRINT key on the keypad to issue a label. See section 2.7 “Temporary Data Change” for more detailed procedure. See section 2.8 “POP Message Print” for more detailed procedure. When the operator system is used, touch the [OPERATOR] preset key on the screen to issue a label. 2-6 SR-2000α User’s Manual (No. 0000A) Chapter 2 2.4 OPERATION MODE FIXED PRICE PRODUCT SALES 1. Confirm that the Initial screen is displayed. When the PLU is registered in the preset key, touch the corresponding product category key. Example: Category Meat When the PLU is not registered in the preset key, enter the desired PLU number and press the PLU key on the keypad. Example: PLU number “4” In this case, skip step 2 below. 2. When a category key has been touched in step 1 above, the PLU Select screen appears on the display. Then, touch a desired PLU key to call. Example: PLU “MEAT 04” 3. The PLU data appears on the display. 4. When selling more than one piece, enter the quantity and press [X] key on the keypad. When selling only one piece, skip this step. Example: Quantity “3 pieces”. SR-2000α User’s Manual (No. 0000A) 2-7 Chapter 2 OPERATION MODE 5. See section 2.6 “Discount Operations” for more detailed procedure. When discounting the price (Percent discount, Amount discount, Special price), perform the discount procedure. Example: $0.50 discount 6. When changing the data temporarily, perform the temporary data change procedure. 7. When printing a POP message on the label, perform the POP message print procedure. 8. Press the PRINT key on the keypad to issue a label. See section 2.7 “Temporary Data Change” for more detailed procedure. See section 2.8 “POP Message Print” for more detailed procedure. When the operator system is used, touch the [OPERATOR] preset key on the screen to issue a label. 2-8 SR-2000α User’s Manual (No. 0000A) Chapter 2 2.5 OPERATION MODE TARE WEIGHT SUBTRACTION Tare weight subtraction is performed prior to weighing a product. When the tare weight subtraction is required, select one of the following procedures to perform. Actual Tare Weight When the tare weight is unknown, weigh the tare to subtract the weight. 1. Place the tare on the weighing platter. The tare weight is displayed. 2. When canceling the tare subtraction, remove the tare from the weighing platter, enter “0”, and touch the TARE key again. Touch the TARE key on the keypad to register the tare weight. The registered tare weight appears in the TARE field. Input Tare Weight When the tare weight is known, enter the tare weight data using the keypad. 1. Enter the tare weight and press the TARE key on the keypad to register the tare weight. Example: Tare weight “0.020 lb” The registered tare weight appears in the TARE field. SR-2000α User’s Manual (No. 0000A) 2-9 Chapter 2 OPERATION MODE Preset Tare Keys When the TARE preset key is registered, simply touch the corresponding preset key. 1. Touch the TARE preset key on the screen. Example: TARE Preset key with “0.020 lb” 2-10 SR-2000α User’s Manual (No. 0000A) Chapter 2 2.6 OPERATION MODE DISCOUNT OPERATIONS Amount Discount Selling price of the displayed PLU can be temporarily discounted by amount. Example: Discount the selling price $10.23 by $0.50. 1. To perform amount discount, [-$] preset key must have been registered on the screen. Enter the discount amount using the keypad, and touch [-$] on the screen. The price after discount is displayed and the cancellation lines appear to the price before discount. Percent Discount Selling price of the displayed PLU is temporarily discounted by percentage. Example: Discount the selling price $8.50 by 10%. 1. To perform amount discount, [-%] preset key must have been registered on the screen. Enter the discount percentage using the keypad, and touch [-%] on the screen. The price after discount is displayed and the cancellation lines appear to the price before discount. Special Price Selling price of the displayed PLU is temporarily sold at the special price. Example: Special price $2.58 instead of normal selling price $3.68. 1. To perform a special price sale, [SPECIAL] preset key must have been registered on the screen. Enter the special price using the keypad, and touch [SPECIAL] on the screen. The special price is displayed and the cancellation lines appear to the normal price. SR-2000α User’s Manual (No. 0000A) 2-11 Chapter 2 2.7 OPERATION MODE TEMPORARY DATA CHANGE This section explains about each function that can change the data temporarily. Unit Price Change Unit price change cannot be performed when the machine is set not to allow open price. Unit price that is set to a PLU can be temporarily changed when a weighing product is sold. Example: Change the unit price from $12.48 to $12.00 1. Enter a new price using the keypad, and touch the U/P (Unit Price) key on the keypad or touch the Unit Price data field on the screen. T Weighing Product Change to Fixed Price Product Selling price of the displayed product can be temporarily sold with a fixed price. Example: Change the unit price $12.48 to the fixed price $8.00. 1. Confirm that the weighing product screen is displayed. 2. Enter the fixed price and press the FIX key on the keypad. 3. Press the PRINT key on the keypad or [OPERATOR] on the screen to issue the label. or 2-12 SR-2000α User’s Manual (No. 0000A) Chapter 2 OPERATION MODE Fixed Price Product Change to Weighing Product Fixed price product can be temporarily sold with a weighing unit price. Example: Change the fixed price product $3.68 to the weighing product with the unit price $3.68. 1. Confirm that the fixed price product screen is displayed. 2. Press the U/P (Unit Price) key on the keypad. Then, the display changes a weighing product screen as shown on the right. Date Change Various dates can be temporarily changed. Example: Change the packed date from August 4, 2004 to August 5, 2004 1. Touch [DATE] on the screen. 2. The date change screen appears on the display. To perform the date change, [DATE] key must have been preset on the function screen. SR-2000α User’s Manual (No. 0000A) 2-13 Chapter 2 OPERATION MODE 3. Enter a new date using the keypad, and touch the desired date field to change. Example: New date “August 5, 2004” 4. 2-14 Touch [BACK] to return the display to the previous screen. SR-2000α User’s Manual (No. 0000A) Chapter 2 2.8 OPERATION MODE POP MESSAGE PRINT Unit Price Change A message printed on the label is temporarily changed. To perform the POP message print, [POP] key must have been preset on the function screen. 1. Touch [POP] on the screen. 2. Six default messages are shown on the right. Messages can be freely created from No.7 to No.99. Touch the desired message on the screen to select. Example: Message 002 3. The selected message is shown to the right of the PLU name. 4. Press the PRINT key on the keypad to issue a label. When the operator system is used, touch the [OPERATOR] preset key on the screen to issue a label. SR-2000α User’s Manual (No. 0000A) 2-15 Chapter 2 2.9 OPERATION MODE VOID LAST TRANSACTION Void operation can be performed immediately after the previous label has been issued. Touching [VOID] will cancel the previous transaction, and the added price of the previous product is subtracted from the total. 1. The transaction is finished and the label is issued as shown on the right. 2. Touch [VOID] to cancel the above transaction. To perform the void operation, [VOID] key must have been preset on the function screen. 2-16 SR-2000α User’s Manual (No. 0000A) Chapter 2 OPERATION MODE 2.10 DAILY TOTAL DISPLAY During sales operation, the sales total of that day can be confirmed on the screen 1. Confirm that a PLU data screen is displayed. 2. Touch [Total Display] on the screen. 3. The daily total appears on the display. To perform the Daily Total Display, [Total Display] key must have been preset on the function screen. Confirm the sales totals of quantity, weight, and price for the products sold so far today. Then, touch [BACK] to return the display to the previous screen. 4. The previous screen appears on the display again. SR-2000α User’s Manual (No. 0000A) 2-17 Chapter 2 OPERATION MODE 2.11 AUTOMATIC / ADVANCED LABELING Automatic labeling can be performed both for weighing products and fixed price products. However, advanced labeling can be performed only for fixed price products. Automatic Labeling for Weighing Products 1. Confirm that [PREPACK] is selected on the screen. If not, touch [MANUAL] to change to [PREPACK]. X 2. Enter the PLU number (Weighing product) and press the PLU key on the keypad. Example: PLU No. 3 3. Place the weighing product on the weighing platter. 4. When the weighing becomes stable, the label is issued. Then, the machine return to [MANUAL] status. 2-18 SR-2000α User’s Manual (No. 0000A) Chapter 2 OPERATION MODE Automatic Labeling for Fixed Price Products 1. Confirm that [PREPACK] is selected on the screen. If not, touch [MANUAL] to change to [PREPACK]. X 2. Enter the PLU number (Weighing product) and press the PLU key on the keypad. Example: PLU No. 4 3. Press the PRINT key on the keypad to issue a label. Whenever the label is peeled off, the next label will be issued continuously. To stop issuing labels, press the CLEAR key on the keypad. Then, the machine return to [MANUAL] status. SR-2000α User’s Manual (No. 0000A) 2-19 Chapter 2 OPERATION MODE Advanced Labeling for Fixed Price Products 1. Confirm that [PREPACK] is selected on the screen. If not, touch [MANUAL] to change to [PREPACK]. X 2. Enter the PLU number (Fixed price product) and press the PLU key on the keypad. Example: PLU No. 4 3. To perform advanced labeling, [PRN QTY] key must have been allocated on the function key screen. Example: 20 labels 4. When stopping the label issue on the way, press the CLEAR key on the keypad. Enter the number of labels using the keypad and touch [PRN QTY] on the function key screen. Press the PRINT key on the keypad to issue specified number of labels. When the operator system is used, touch the [OPERATOR] preset key on the screen to issue specified number of labels. 2-20 SR-2000α User’s Manual (No. 0000A) Chapter 3 Chapter TOTAL ADJUSTMENT MODE 3 TOTAL ADJUSTMENT MODE Total Adjustment Mode is used to add or subtract product data to or from the sales total. To enter this mode from the initial screen, touch [MENU] to access to the Main Menu screen first, and touch [TOTAL ADJUST] to access to the Total Adjustment Add/Subtract Menu screen. Note: If a password is programmed for accessing to the Total Adjustment Mode, enter the 6-digit password using the keypad before touching [TOTAL ADJUST]. SR-2000α User’s Manual (No. 0000A) 3-1 Chapter 3 3.1 TOTAL ADJUSTMENT MODE NUMBER ADD When a product is to be added after checkout, input the quantity, weight, and/or price of the product to be added to the sales total. 1. Touch a desired addition type on the screen to select. 2. There are four number addition menu screens. 3. Enter the PLU number using the keypad and press the PLU key to call. Example: PLU number “5” 3-2 SR-2000α User’s Manual (No. 0000A) Chapter 3 4. TOTAL ADJUSTMENT MODE Enter the quantity, weight, and total price to be added to the sales total and touch [NUMBER SET], [WEIGHT SET], and [PRICE SET] respectively. Example: quantity “2 pieces” Example: Weight “2.450 lb” Example: Price “$5.16” 5. When a discount operation is required, touch one of the following buttons to select. 6. The entered data is displayed in the corresponding INPUT data field and the result is displayed in the corresponding CALCULATION data field. See Section 2.6 in Chapter 2 “Discount Operations” for more detailed procedure. Then, touch [ADD] on the screen. SR-2000α User’s Manual (No. 0000A) 3-3 Chapter 3 TOTAL ADJUSTMENT MODE 7. The confirmation screen appears for execution. Touch [EXECUTE] to execute these additions. Then, the label will be issued. 3-4 SR-2000α User’s Manual (No. 0000A) Chapter 3 3.2 TOTAL ADJUSTMENT MODE WEIGHING ADD When a product is to be added after checkout, actually weigh the product to calculate the total price to be added to the sales total. 1. Touch a desired addition type on the screen to select. 2. There are four weighing addition menu screens. 3. Enter the PLU number using the keypad and press the PLU key to call. Example: PLU number “5” SR-2000α User’s Manual (No. 0000A) 3-5 Chapter 3 TOTAL ADJUSTMENT MODE 4. Place the product on the weighing platter, then the total price is calculated based on the actual weight. 5. When a discount operation is required, touch one of the following buttons to select. 6. The weighed data is displayed in the corresponding data field. See Section 2.6 in Chapter 2 “Discount Operations” for more detailed procedure. Then, touch [ADD] on the screen. 7. The confirmation screen will appear for execution. Touch [EXECUTE] to execute these additions. Then, the label will be issued. 3-6 SR-2000α User’s Manual (No. 0000A) Chapter 3 3.3 TOTAL ADJUSTMENT MODE NUMBER SUBTRACT When a product is to be subtracted after checkout, input the quantity, weight, and/or price of the product to be subtracted from the sales total. 1. Touch a desired subtraction type on the screen to select. 2. There are five number subtraction menu screens. SR-2000α User’s Manual (No. 0000A) 3-7 Chapter 3 TOTAL ADJUSTMENT MODE 3. Enter the PLU number using the keypad and press the PLU key to call. Example: PLU number “5” 4. Enter the quantity, weight, and total price to be subtracted from the sales total and touch [NUMBER SET], [WEIGHT SET], and [PRICE SET] respectively. Example: quantity “2 pieces” Example: Weight “2.450 lb” Example: Price “$5.16” 5. See Section 2.6 in Chapter 2 “Discount Operations” for more detailed procedure. 3-8 When a discount operation is required, touch one of the following buttons to select. SR-2000α User’s Manual (No. 0000A) Chapter 3 6. TOTAL ADJUSTMENT MODE The entered data is displayed in the corresponding INPUT data field and the result is displayed in the corresponding CALCULATION data field. Touch [SUB] (Subtraction) on the screen. 7. The confirmation screen will appear for execution. Touch [EXECUTE] to execute these subtractions. Then, the label will be issued. SR-2000α User’s Manual (No. 0000A) 3-9 Chapter 3 3.4 TOTAL ADJUSTMENT MODE WEIGHING SUBTRACT When a product is to be subtracted after checkout, actually weigh the product to calculate the total price for subtraction. 3-10 1. Touch a desired subtraction type on the screen to select. 2. There are five weighing subtraction menu screens. SR-2000α User’s Manual (No. 0000A) Chapter 3 3. TOTAL ADJUSTMENT MODE Enter the PLU number using the keypad and press the PLU key to call. Example: PLU number “5” 4. Place the product on the weighing platter, then the total price is calculated based on the actual weight. 5. When a discount operation is required, touch one of the following buttons to select. See Section 2.6 in Chapter 2 “Discount Operations” for more detailed procedure. The weighed data is displayed in the corresponding data field. Then, touch [SUB] (Subtraction) on the screen. 6. The confirmation screen will appear for execution. Then, touch [EXECUTE] to subtract. The label will be issued. SR-2000α User’s Manual (No. 0000A) 3-11 Chapter 3 3-12 TOTAL ADJUSTMENT MODE SR-2000α User’s Manual (No. 0000A) Chapter 4 Chapter TOTAL MODE 4 TOTAL MODE Total Mode is used to obtain various transaction totals. To enter the Total Mode from the initial screen, touch [MENU] to access to the Main Menu screen first, then touch [TOTAL] to access to the Total Menu screen. Note: If a password is programmed for accessing to the Total Mode, enter the 6-digit password using the keypad before touching [TOTAL]. SR-2000α User’s Manual (No. 0000A) 4-1 Chapter 4 4.1 TOTAL MODE DAILY TOTAL Daily Total is performed at the end of the day to obtain the total of various transactions performed on that day. 4-2 SR-2000α User’s Manual (No. 0000A) Chapter 4 TOTAL MODE Total Production Total production data transacted on that day is totaled. Used to feed a label to the proper peeling position. 1. Touch [TOTAL PRODUCTION] on the screen. 2. Press the PRINT key on the keypad to issue a label. Then, touch [MENU] to return the display to the Daily Total Menu. SR-2000α User’s Manual (No. 0000A) 4-3 Chapter 4 TOTAL MODE Sales Per Department Sales data transacted on that day is totaled for each department. Used to scroll up for the previous page. Used to select the previous item. Used to select the next item. Used to scroll down for the next page. 1. Touch [SALES PER DEPT.] on the screen. 2. Press the PRINT key on the keypad to issue a label. Then, touch [MENU] to return the display to the Daily Total Menu. 4-4 SR-2000α User’s Manual (No. 0000A) Chapter 4 TOTAL MODE Sales Per Group Sales data transacted on that day is totaled for each group. 1. Touch [SALES PER GROUP] on the screen. 2. Press the PRINT key on the keypad to issue a label. Then, touch [MENU] to return the display to the Daily Total Menu. SR-2000α User’s Manual (No. 0000A) 4-5 Chapter 4 TOTAL MODE Sales By PLU Sales data transacted on that day is totaled for each PLU. 1. Touch [SALES BY PLU] on the screen. 2. Press the PRINT key on the keypad to issue a label. Then, touch [MENU] to return the display to the Daily Total Menu. 4-6 SR-2000α User’s Manual (No. 0000A) Chapter 4 TOTAL MODE Gross Profit By PLU Gross profit data transacted on that day is totaled for each PLU. 1. Touch [GROSS PROFIT BY PLU] on the screen. 2. Press the PRINT key on the keypad to issue a label. Then, touch [MENU] to return the display to the Daily Total Menu. SR-2000α User’s Manual (No. 0000A) 4-7 Chapter 4 TOTAL MODE Markdown Item Sales data transacted on that day is totaled for each markdown product. 1. Touch [MARK-DOWN ITEM] on the screen. 2. Press the PRINT key on the keypad to issue a label. Then, touch [MENU] to return the display to the Daily Total Menu. 4-8 SR-2000α User’s Manual (No. 0000A) Chapter 4 TOTAL MODE Designated PLU Sales data transacted on that day is totaled for each designated PLU. 1. Touch [DESIGNATE PLU] on the screen. 2. Enter the desired PLU number and press the PLU key to call up the data. Example: PLU number “1” 3. Press the PRINT key on the keypad to issue a label. 4. Repeat .steps 2 and 3 above for more PLUs. 5. Touch [MENU] to return the display to the Daily Total Menu. SR-2000α User’s Manual (No. 0000A) 4-9 Chapter 4 TOTAL MODE PLU Analysis PLU sales data transacted on that day is analyzed according to the selected conditions. 1. Touch [PLU ANALYSIS] on the screen. 2. Enter the report size and touch [SET]. When “0” is set, all PLUs are selected. Example: Report size “100” 3. Touch the desired classification type to select. No analysis For each department For each group 4-10 SR-2000α User’s Manual (No. 0000A) Chapter 4 4. TOTAL MODE Touch the desired analysis type to select. PLU number order Greater price order Greater weight order Greater quantity order Smaller price order Smaller weight order Smaller quantity order 5. Touch [DETAILS] to display the desired PLU analysis on the screen. 6. Press the PRINT key on the keypad to issue a label. SR-2000α User’s Manual (No. 0000A) 4-11 Chapter 4 4-12 TOTAL MODE 7. Repeat steps 2 through 6 above for more analysis. 8. Touch [RETURN] to return the display to the Daily Total PLU Analysis screen. 9. Then, touch [MENU] to return the display to the Daily Total Menu. SR-2000α User’s Manual (No. 0000A) Chapter 4 TOTAL MODE Hourly Analysis A day is delimited every hour, and the daily sales data either in price or quantity is displayed for each hourly zone in graphs. 1. Touch [HOURLY ANALYSIS] on the screen. SR-2000α User’s Manual (No. 0000A) 4-13 Chapter 4 TOTAL MODE 2. The Daily Total Hourly Analysis screen appears on the screen. Touch either [PCS] or [PRICE] to select. Example: Select [PCS] Press the PRINT key to issue the label. Example: Select [PRICE] Press the PRINT key on the keypad to issue a label. 3. 4-14 Touch [MENU] to return the display to the Daily Total Menu. SR-2000α User’s Manual (No. 0000A) Chapter 4 TOTAL MODE Sales per Sell Impossible PLU Sell-impossible PLU data found on that day is totaled. 1. Touch [SALES PER SI PLU] on the screen. 2. Press the PRINT key on the keypad to issue a label. Touch [MENU] to return the display to the Daily Total Menu. SR-2000α User’s Manual (No. 0000A) 4-15 Chapter 4 TOTAL MODE Sales per Expired PLU Expired PLU data found on that day is totaled. 1. Touch [SALES PER EX PLU] on the screen. 2. Press the PRINT key on the keypad to issue a label. Touch [MENU] to return the display to the Daily Total Menu. 4-16 SR-2000α User’s Manual (No. 0000A) Chapter 4 TOTAL MODE Sales per Discard PLU Discard PLU data found on that day is totaled. 1. Touch [SALES PER DS PLU] on the screen. 2. Press the PRINT key on the keypad to issue a label. Touch [MENU] to return the display to the Daily Total Menu. SR-2000α User’s Manual (No. 0000A) 4-17 Chapter 4 TOTAL MODE Sales per Rewrap PLU Rewrapped PLU data transacted on that day is totaled. 1. Touch [SALES PER RW PLU] on the screen. 2. Press the PRINT key on the keypad to issue a label. Touch [MENU] to return the display to the Daily Total Menu. 4-18 SR-2000α User’s Manual (No. 0000A) Chapter 4 4.2 TOTAL MODE WEEKLY TOTAL Weekly Total is performed to obtain the total of various transactions performed for a week. SR-2000α User’s Manual (No. 0000A) 4-19 Chapter 4 TOTAL MODE Sales per Day Total sales data is totaled for each day of the week. 1. Touch [SALES PER DAY] on the screen. 2. Press the PRINT key on the keypad to issue a label. Touch [MENU] to return the display to the Daily Total Menu. 4-20 SR-2000α User’s Manual (No. 0000A) Chapter 4 TOTAL MODE Hourly Analysis A day is delimited every hour, and the weekly sales data either in price or quantity is displayed for each hourly zone in graphs. Used to call the previous day of the week. Used to call the next day of the week. SR-2000α User’s Manual (No. 0000A) 4-21 Chapter 4 TOTAL MODE 1. Touch [HOURLY ANALYSIS] on the screen. 2. The Hourly Analysis of Week screen appears on the screen. Touch either [PCS] or [PRICE] to select. Example: Select [PCS] Press the PRINT key on the keypad to issue a label. Example: Select [PRICE] Press the PRINT key on the keypad to issue a label. 3. 4-22 Touch [MENU] to return the display to the Daily Total Menu. SR-2000α User’s Manual (No. 0000A) Chapter 4 4.3 TOTAL MODE CUMULATIVE TOTAL Cumulative Total is performed to obtain accumulated transactions for a specified period. SR-2000α User’s Manual (No. 0000A) 4-23 Chapter 4 TOTAL MODE Various Totals The following 6 cumulative totals are available. The operating procedure for each total is same as that of Daily Total. 4-24 CUMULATIVE GRAND TOTAL PROD. CUMULATIVE GRAND TOTAL PROD. See page 4-3 for operating procedure. See page 4-4 for operating procedure. CUMULATIVE TOTAL PER GROUP CUMULATIVE TOTAL BY PLU See page 4-5 for operating procedure. See page 4-6 for operating procedure. CUM. TOTAL GROSS BY PLU CUM. TOTAL MARKDOWN ITEM See page 4-7 for operating procedure. See page 4-8 for operating procedure. SR-2000α User’s Manual (No. 0000A) Chapter 4 TOTAL MODE CUM. TOTAL DESIGNATE PLU See page 4-9 for operating procedure. TOTAL PER PLU ANALYSIS See page 4-10 for operating procedure. X SR-2000α User’s Manual (No. 0000A) 4-25 Chapter 4 4.4 TOTAL MODE 31 DAYS TOTAL 31 Days Total is performed to obtain total data for the past 31 days. 4-26 SR-2000α User’s Manual (No. 0000A) Chapter 4 1. Touch [31 DAYS TOTAL] on the screen. 2. The Hourly Analysis of Week screen appears on the screen. TOTAL MODE Touch either [PCS] or [PRICE] to select. Example: Select [PCS] Press the PRINT key on the keypad to issue a label. Example: Select [PRICE] Press the PRINT key on the keypad to issue a label. 3. Touch [MENU] to return the display to the Daily Total Menu. SR-2000α User’s Manual (No. 0000A) 4-27 Chapter 4 4.5 TOTAL MODE NON-MOVEMENT PLU Non-Movement PLU is performed to obtain the list of the PLU data that has not been sold for the specified period. 1. Touch [NON-MOVEMENT PLU] on the screen. 2. Enter the 8-digit date (MMDDYYYY) and touch [DATE SET] on the screen. Example: Date set “JUNE-01-2004” 3. Touch either [No. ORDER] or [Date Order] to select. 4. A list of PLUs which have not been sold since the specified date appears on the screen. 5. When deleting the PLU, enter the PLU number and touch [DELETE] on the screen. Example: PLU 21 4-28 SR-2000α User’s Manual (No. 0000A) Chapter 4 6. Press the PRINT key on the keypad to issue a label. 7. Touch [MENU] to return the display to the Daily Total Menu. SR-2000α User’s Manual (No. 0000A) TOTAL MODE 4-29 Chapter 4 4.6 TOTAL MODE PRESET REPORT Preset Report is to combine various preset totals when the report is issued. This report is available for Daily and Cumulative totals. 1. Touch [PRESET REPORT] on the screen. 2. Touch either [DAILY JOIN REPORT] or [CUMULATE JOIN REPORT] to select. 3. Press the PRINT key on the keypad to issue a label. To stop printing, touch [INTERRPUT]. To resume printing. Touch [CONTINUE]. The confirmation screen appears on the screen for printing a join report. Touch [OK] on the screen to start printing. 4. 4-30 Touch [MENU] to return the display to the Daily Total Menu. SR-2000α User’s Manual (No. 0000A) Chapter 4 4.7 TOTAL MODE TOTAL CLEAR Total Clear operation is used to clear the specified total data. 1. Touch [TOTAL CLEAR] on the screen. 2. Touch a desired report type to select. Used to clear Daily Totals. Used to clear Weekly Totals. Used to clear 31 days Totals. Used to clear Cumulative Totals. 3. Touch [EXECUTE] to clear the selected total data. The confirmation screen appears on the screen for deletion. Touch [EXECUTE] on the screen to carry out total clear. 4. Touch [MENU] to return the display to the Daily Total Menu. SR-2000α User’s Manual (No. 0000A) 4-31 Chapter 4 4-32 TOTAL MODE SR-2000α User’s Manual (No. 0000A) Chapter 5 Chapter PROGRAMING MODE 5 PROGRAMING MODE Programing Mode is used to register various preset data required for normal operations. To enter the Registration Menu screen from the initial screen, touch [MENU] first, and touch [PROGRAMING] to access to the Registration Menu screen. Note: If a password is programmed for accessing to the Programing Mode, enter the 6-digit password using the keypad before touching [PROGRAMING]. SR-2000α User’s Manual (No. 0000A) 5-1 Chapter 5 5.1 PROGRAMING MODE PLU DATA REGISTRATION Starting PLU Data Registration 1. Touch [PLU FILE / PRICE CHANGE] on the screen. 2. The PLU File Registration screen appears on the display When a desired PLU is found on the current screen, touch the corresponding field to select. When it is not found on the screen, try to find it by using and touch the corresponding field to select. Used to select the previous PLU. Used to select the next PLU. Used to scroll up for the previous screen. Used to scroll down for the next screen. Or, enter a desired PLU number and press the PLU key on the keypad. Example: PLU No. 5 3. 5-2 Touch the EDIT button on the screen. SR-2000α User’s Manual (No. 0000A) Chapter 5 4. PROGRAMING MODE The PLU Data Registration (1/3) screen appears on the display. Touch [PAGE] to access to other PLU Data Registration screens. Try to find a desired item on one of three screens on the right. SR-2000α User’s Manual (No. 0000A) 5-3 Chapter 5 PROGRAMING MODE PLU Data Registration 1/3 Entry examples are shown below. Select necessary items to register. Item PLU NAME Operation 1. Touch on the screen. 2. Enter desired characters and edit the text. See Appendix “Text Editing” for further detailed edit operations. 3. When the text editing is complete, touch on the screen. Touch on the screen to access to the selection screen. Then, touch one of the following three buttons to select. Weighing product Fixed price product Weighing product with a fixed price Example: Unit price $ 5.00 When a unit price is entered, the Sales Mode becomes “Weigh” and “Fixed Price” becomes “0”. Example: Fixed price $ 8.00 When a fixed price is entered, the Sales Mode becomes “Fixed Price” and “Unit Price” becomes “0”. 5-4 SR-2000α User’s Manual (No. 0000A) Chapter 5 Touch PROGRAMING MODE on the screen to access to the selection screen. Then, touch one of the following buttons to select. Normal price Special price Amount discount (-$) Percent discount (-%) When [NORMAL] is selected in the Markdown Flag selection above, numeric data entry is not possible. When [SPECIAL] is selected in the Markdown Flag selection above, enter a special price and touch . Example: Special price $ 7.20 When [-$] is selected in the Markdown Flag selection above, enter a special price and touch . Example: Discount amount $ 2.00 When [-%] is selected in the Markdown Flag selection, enter a discount percentage and touch . Example: Discount percentage 10% Example: Fixed weight 0.260 lb Example: Pack quantity 3 pcs. Example: Nutrition number “2” Example: Tare 1 “0.075 lb” Example: Tare 2 “0.100 lb” SR-2000α User’s Manual (No. 0000A) 5-5 Chapter 5 PROGRAMING MODE Touch on the screen to access to the selection screen. Then, touch one of the following buttons to select. When referring to the set reference data When printing the pack date on the label When not printing the pack date on the label Touch (Sell-by Date Print) on the screen to access to the selection screen. Then, touch one of the following buttons to select. When referring to the set reference data When printing the sell-by date on the label When not printing the sell-by date on the label Example: “3 days” from the pack date to come to the shelf life. Touch on the screen to access to the selection screen. Then, touch one of the following buttons to select. When referring to the set reference data When printing the used by date on the label When not printing the used by date on the label Example: “5 days” to the Used-by Date Touch on the screen to access to the selection screen. Then, touch one of the following buttons to select. When referring to the set reference data When using UPC 13 When using UPC 8 When using 10 DIGITS When using 5 digit 8 When using ITF 2 of 5 When using CODE 128 When using RSS-14 When using RSS-14 ST When using RSS-14 STO When using RSS LIMITED When using RSS EXPAND 5-6 SR-2000α User’s Manual (No. 0000A) Chapter 5 Touch PROGRAMING MODE on the screen to access to the selection screen. Then, touch one of the following buttons to select. When referring to the set reference data Example: POS flag “2” Example: Barcode “123” Touch on the screen to access to the selection screen. Then, touch one of the following buttons to select. When referring to the set reference data When prohibiting the open price When allowing the open price Touch on the screen to access to the selection screen. Then, touch one of the following buttons to select. When referring to the set reference data When prohibiting the forced tare entry When allowing the forced tare entry Example: Proportional tare “3 %” SR-2000α User’s Manual (No. 0000A) 5-7 Chapter 5 PROGRAMING MODE PLU Data Registration 2/3 Entry examples are shown below. Select necessary items to register. Item Operation Example: Extra message 1 number “3” Touch on the screen to access to the selection screen. Then, touch one of the following buttons to select. When referring to the reference data setting When printing the pack time on the label When not printing the pack time on the label Example: Pack time “12:34” Touch screen. (Sell-by Time Print) on the screen to access to the selection Then, touch one of the following buttons to select. When referring to the reference data setting When printing the sell-by time on the label When not printing the sell-by time on the label Example: Sell-by time “14:24” Example: Register the message number “20” in Free Message 2. 5-8 SR-2000α User’s Manual (No. 0000A) Chapter 5 Touch PROGRAMING MODE on the screen to access to the selection screen. Then, touch one of the following buttons to select. When referring to the reference data setting When not printing the safe handling on the label When printing the safe handling on the label Example: Safe handling image number “4” Example: Coupon message number “3” Example: Logo image number “3” Example: Label format number “7” Touch on the screen to access to the selection screen. Then, touch one of the following buttons to select. When referring to the reference data setting When using the second label When not using the second label Example: Second label format number “7” SR-2000α User’s Manual (No. 0000A) 5-9 Chapter 5 PROGRAMING MODE PLU Data Registration 3/3 Entry examples are shown below. Select necessary registration items to enter. Item Operation Example: Department code “3” Example: Group code “2” Example: Item code “7232” Touch on the screen to access to the selection screen Then, touch one of the following buttons to select. When referring to the reference data setting When the unit type is not required. Example: Upper weight limit “8.950 lb” Example: Lower weight limit “8.500 lb” 5-10 SR-2000α User’s Manual (No. 0000A) Chapter 5 PROGRAMING MODE Example: Tax number “2” Example: Cost price “$2.88” Example: POP message number “1” SR-2000α User’s Manual (No. 0000A) 5-11 Chapter 5 PROGRAMING MODE Finishing PLU Data Registration 1. Touch [RETURN] on the screen. 2. The confirmation screen appears on the display for saving. Touch [EXECUTE] to save the data. 3. The data is saved, and the screen returns to the PLU File Registration screen. Then, touch [MENU] to return the display to the Registration Menu screen. 5-12 SR-2000α User’s Manual (No. 0000A) Chapter 5 5.2 PROGRAMING MODE PLU PRICE CHANGE The registered PLU price data can be changed on the PLU File Registration screen. 1. Confirm that the Registration Menu screen is displayed. Touch [PLU FILE / PRICE CHANGE] on the screen. 2. The PLU File Registration screen appears on the display. Then, find a desired PLU on the screen and touch the field to select the PLU. SR-2000α User’s Manual (No. 0000A) 5-13 Chapter 5 PROGRAMING MODE 3. When the unit price is set, the fixed price becomes “0”. When the fixed price is set, the unit price becomes “0”. Example: Unit price $2.50 4. 5-14 Enter the price using the keypad and press the [U/P] (Unit Price) key or the [FIX] key to change the price. Touch [MENU] to return the display to the Registration Menu screen. SR-2000α User’s Manual (No. 0000A) Chapter 5 5.3 PROGRAMING MODE PLU NAME REGISTRATION 1. Confirm that the Registration Menu screen is displayed. Then, touch [PLU NAME] on the screen. 2. It is also possible to call the PLU number by touching the [PLU No.] on the screen after entering the PLU number. The text edit screen appears on the display. Then, enter the desired PLU number and press the PLU key on the keypad. Example: PLU number “5” 3. See Appendix “Text Editing”. The PLU number 5 is called. Then, enter the desired characters using the screen keys. and edit the text. Example: “Roast Filet Steak” 4. When the registration is complete, touch [MENU] on the screen. The confirmation screen appears on the display for saving. Then, touch [EXECUTE] to save the text. SR-2000α User’s Manual (No. 0000A) 5-15 Chapter 5 5.4 PROGRAMING MODE CAMPAIGN MESSAGE REGISTRATION The campaign message can be registered. Message numbers 1 through 6 are default settings as follows: Therefore, messages can be registered within the range from 7 through 999. 1. Confirm that the Registration Menu screen is displayed. Then, touch [CAMPAIGN] on the screen. 2. The Campaign Registration screen appears on the display. Then, enter a desired campaign number and press the PLU key on the keypad. Example: Campaign number “7” 3. See Appendix “Text Editing”. 5-16 The selected Campaign Data Registration screen appears on the display. SR-2000α User’s Manual (No. 0000A) Chapter 5 4. PROGRAMING MODE Enter a desired PLU number and press the PLU key to register as a campaign product. Example: PLU number “1” Then, touch the corresponding Markdown Mode field. 5. The selection screen appears on the display. Then, touch the desired campaign type to select. 6. Enter the numeric data using the keypad, and touch the corresponding MD Amount field to register. Example: “$ 0.20” 7. Repeat steps 4,5 and 6 above for more campaign products. SR-2000α User’s Manual (No. 0000A) 5-17 Chapter 5 PROGRAMING MODE 8. Enter the campaign start time using the keypad, and touch the corresponding field to register. Example: Start time “10:00” Then, enter the campaign start date using the keypad, and touch the corresponding field to register. Example: Start date “July 21, 2004” In the same manner, register the campaign end time and date. 9. When the data entry is complete for the selected campaign number, touch [RETURN] on the screen. 10. The confirmation screen appears on the display for saving. Then, touch [EXECUTE]. The beeper sounds when succeeded. 5-18 SR-2000α User’s Manual (No. 0000A) Chapter 5 11. PROGRAMING MODE The Campaign Registration screen appears on the display. Repeat steps 2 through 10 for more registrations. 12. Touch [MENU] to return the display to the Registration Menu screen. SR-2000α User’s Manual (No. 0000A) 5-19 Chapter 5 5.5 PROGRAMING MODE STORE NAME AND ADDRESS REGISTRATION The store name and address can be registered. Store name and address are printed on label or receipt based on this setting. Store Name It is also possible to enter the store number by touching [STORE] on the screen after entering the store number. 5-20 1. Touch [STORE NAME] on the Registration Menu screen. 2. The Store Name/Address Registration screen is displayed. Then, enter the store number and press the PLU key on the keypad. Example: PLU number “10” SR-2000α User’s Manual (No. 0000A) Chapter 5 3. [NAME] is selected first when the Store Name/Address Registration screen is accessed. PROGRAMING MODE Touch [NAME] then [EDIT]. The Store Name Registration screen is displayed. 4. See Appendix “Text Editing”. The text edit screen appears on the display. Then, enter the characters using the screen keys and edit the text. Example: Store name “ISHIDA” 5. Touch [RETURN] on the screen. The confirmation screen is displayed for saving. 6. The confirmation screen appears on the display for saving. Then, touch [EXECUTE] on the screen. 7. Repeat steps 2 through 6 for more registrations. SR-2000α User’s Manual (No. 0000A) 5-21 Chapter 5 PROGRAMING MODE Store Address Example: Registration of the address “KYOTO, JAPAN”. 1. Touch [ADDRESS] then [EDIT] on the screen. 2. The text edit screen appears on the display. See Appendix “Text Editing”. Then, enter the address. Example: Address “Kyoto, Japan” 3. Touch [RETURN] on the screen. 4. The confirmation screen appears on the display for saving. Then, touch [EXECUTE] to save the text. 5-22 SR-2000α User’s Manual (No. 0000A) Chapter 5 PROGRAMING MODE Print Selection of Store Name/Address 1. Enter the store number, then touch [STORE] display field on the screen. Example: Store number “10” The store data to be printed on the label is selected. 2. Touch [MENU] on the screen. The store name and address will be printed on the label as shown below. SR-2000α User’s Manual (No. 0000A) 5-23 Chapter 5 5.6 PROGRAMING MODE DATE/TIME REGISTRATION 1. Confirm that the Registration Menu screen is displayed. Then, touch [DATE/TIME] on the screen. 2. The Time and Date Setting screen appears on the display. Then, enter the desired date using the keypad, and touch the DATE field to register. In the same manner, register the time. Example: 15:30 on July 21, 2004 3. Touch [MENU] on the screen. The screen returns to the Registration Menu screen. 5-24 SR-2000α User’s Manual (No. 0000A) Chapter 5 5.7 PROGRAMING MODE PRESET KEYS REGISTRATION PLU Preset Key Registration 1. Confirm that the Registration Menu screen is displayed. Then, touch [PRESET KEYS] on the screen. 2. The Preset Key Registration screen (with category keys) appears on the display. Then, touch [PAGE] on the screen. 3. The Preset Key Registration screen (with PLU buttons) appears on the display. Then, touch [PAGE] on the screen. 4. Touch [REGISTER] on the screen. SR-2000α User’s Manual (No. 0000A) 5-25 Chapter 5 PROGRAMING MODE 5. Touch the Key Type dada field on the screen. 6. The first page of preset key list appears on the display. Overwriting a data to an existing PLU preset key is not possible. In this case, delete the preset key first. Then, register a new preset key. When a data exists on the desired preset key, the data must be deleted first in order to register a new PLU data. Touch [PAGE] on the screen. 7. Repeatedly touch [PAGE] on the screen to turn pages until the desired function is found in the list. The second page of preset key list appears on the display. Then, touch [PAGE] on the screen. 8. The third page of preset key list appears on the display. Then, touch [STANDBY MODE] to select. 9. Touch the existing PLU preset key to delete. Repeatedly touch other preset keys to delete if any. 5-26 SR-2000α User’s Manual (No. 0000A) Chapter 5 PROGRAMING MODE 10. Touch the Key Type dada field on the screen. 11. The first page of preset key list appears on the display. Touch [PLU] on the screen to select. 12. The Preset Key Registration screen (with PLU preset keys) appears on the display. 13. Enter a PLU number using the keypad and touch the desired blank key on the screen to allocate the PLU data. Example: PLU “1” and “2” Repeat this step until all desired PLU allocations are complete. SR-2000α User’s Manual (No. 0000A) 5-27 Chapter 5 PROGRAMING MODE PLU Name Edit 1. Confirm that the Registration Menu screen is displayed. Then, touch [PRESET KEYS] on the screen. 2. The Preset Key Registration screen (with PLU preset keys) appears on the display. Then, touch [EDIT] on the screen. Fore more detailed text editing operations, see Appendix “Text Editing”. 3. Touch the desired PLU preset key. 4. The text edit screen appears for the PLU name. Enter the desired characters and edit the text using the screen keys. When the text editing is complete, touch [RETURN] on the screen. 5-28 SR-2000α User’s Manual (No. 0000A) Chapter 5 5. PROGRAMING MODE The confirmation screen appears for saving. Then, touch [EXECUTE] to save the data. 6. The edited text appears on the selected preset key. 7. Repeat steps 3 through 6 above for more registrations. SR-2000α User’s Manual (No. 0000A) 5-29 Chapter 5 PROGRAMING MODE Key Color Change 1. Confirm that the Registration Menu screen is displayed. Then, touch [PRESET KEYS] on the screen. 2. The Preset Key Registration screen (with PLU preset keys) appears on the display. Then, touch [KEY COLOR] on the screen. 3. Touch [COLOR CHANGE] on the screen to get the color list. 4. Touch a desired color and touch the corresponding [SET] button to select. Example: Blue key with white letters 5-30 SR-2000α User’s Manual (No. 0000A) Chapter 5 5. Touch [BACK] on the screen to return to the Preset Key Registration screen (with PLU preset keys). 6. Touch a desired PLU preset key to apply the selected colors. PROGRAMING MODE When the same coloring is applied to other PLU preset keys, repeatedly touch desired buttons. 7. When continuing to change PLU preset key coloring, repeat Steps 3 through 6 above. 8. Touch [MENU] on the screen. SR-2000α User’s Manual (No. 0000A) 5-31 Chapter 5 PROGRAMING MODE Key Layout Change 1. Confirm that the Registration Menu is displayed. Then, touch [PRESET KEYS]. 2. The Preset Key Registration screen (with product category keys) appears on the display. Then, touch [PAGE] on the screen. 3. The Preset Key Registration screen (with PLU preset keys) appears on the display. Then, touch [LAYOUT] on the screen. 5-32 SR-2000α User’s Manual (No. 0000A) Chapter 5 4. PROGRAMING MODE Touch [LARGE], [MEDIUM], or [SMALL] to select the key size. Quadruple size Double size Single size Example: Single size to double size. Example: Double size to Quadruple size. 5. When trying to make a key larger, confirm that the covering keys are all blank. If not, delete these keys first by referring to steps 1 through 9 in section 5.7 “Preset Keys Registration”. Example: “Roast Filet Steak” key to quadruple size. In this example, confirm that [LARGE] is selected in the above step. Then, delete the existing “MEAT09” key. Next, touch [ROAST FILET STEAK] key on the screen. SR-2000α User’s Manual (No. 0000A) 5-33 Chapter 5 5-34 PROGRAMING MODE 6. Repeat steps 4 and 5 above for more registrations. 7. Touch [MENU] on the screen. SR-2000α User’s Manual (No. 0000A) Chapter 5 PROGRAMING MODE Function Key Registration Various function keys can be allocated on the preset keys. Available function keys are shown in the following 3 pop-up screens. SR-2000α User’s Manual (No. 0000A) 5-35 Chapter 5 PROGRAMING MODE 1. Confirm that the Registration Menu is displayed. Then, touch [PRESET KEYS]. 2. The Preset Key Registration screen (with product category keys) appears on the display. Then, touch [PAGE] on the screen. 3. The Preset Key Registration screen (with PLU preset keys) appears on the display. Then, touch [FUNC] on the screen. 4. The Preset Key Registration screen (with function preset keys) appears on the display. Then, touch [PRESET] on the screen. 5. 5-36 Touch [REGISTER] and the Key Type field. SR-2000α User’s Manual (No. 0000A) Chapter 5 6. PROGRAMING MODE The preset key list appears on the display. When the desired function is not found in this list, repeatedly touch [PAGE] until it appears on the list. 7. Touch the desired function field to select. Example: Select [TARE]. 8. For a function key that requires numeric entry, enter a numeric data using the keypad, and touch the desired key to allocate. Example: Tare 1 “0.010 lb” Example: Tare 2 “0.020 lb” For a function key that does not require numeric entry, simply touch the desired key to allocate. 9. Repeat steps 6 through 8 for more registrations. 10. Touch [MENU] on the screen to finish this procedure. SR-2000α User’s Manual (No. 0000A) 5-37 Chapter 5 PROGRAMING MODE Page Copy 1. Confirm that the Registration Menu is displayed. Then, touch [PRESET KEYS] on the screen. 2. The Preset Key Registration screen (with product category keys) appears on the display. Then, touch [PAGE EDIT] on the screen. 3. Touch [PAGE] or [FUNC] to find out the original page to be copied. or At this time, confirm that “PAGE COPY” is displayed in the key type field, and remember the original page number. Example: Original page “3/4” 4. When copying the original page to an existing page, touch [PAGE] to display the page to which the original page is copied. Or, when copying the original page to a new page, touch [PRESET] and [NEW] buttons to display a new page. Example: Copy to a new page. 5-38 SR-2000α User’s Manual (No. 0000A) Chapter 5 5. PROGRAMING MODE The new page appears on the display. Then, touch [PAGE EDIT] on the screen. Enter the original page number and touch [COPY] on the screen. Example: Copy page 3 to the new page 6. The confirmation screen appears on the display for copying. Then, touch [EXECUTE] on the screen. 7. The original page has been copied to the current page. 8. Repeat steps 3 through 7 for more copying. 9. Touch [MENU] on the screen to finish this procedure. SR-2000α User’s Manual (No. 0000A) 5-39 Chapter 5 PROGRAMING MODE Page Delete 1. Confirm that the Registration Menu is displayed. Then, touch [PRESET KEYS] on the screen. 2. The Preset Key Registration screen (with product category keys) appears on the display. Then, touch [PAGE EDIT] on the screen. 3. Touch [PAGE] or [FUNC] to find out the page to be deleted. or Example: Delete page 3/4. 4. 5-40 Touch [S]or [T]to change the Key Type display field to “PAGE DELETE”. SR-2000α User’s Manual (No. 0000A) Chapter 5 5. Touch [DELETE] on the screen. 6. The confirmation screen appears on the display for deletion. PROGRAMING MODE Then, touch [EXECUTE] on the screen. 7. Repeat steps 3 through 6 above for more deletions. 8. Touch [MENU] on the screen to finish this procedure. SR-2000α User’s Manual (No. 0000A) 5-41 Chapter 5 5.8 PROGRAMING MODE ADVERTISEMENT MESSAGE Advertisement messages can be displayed on the customer display Message Table Allocation 1. Confirm that the Registration Menu is displayed. Then, touch [AD MSG] (Advertisement Message) on the screen to select. 2. The Advertisement Message Registration screen appears on the display. Then, enter the scroll number using the keypad, and touch the Scroll No. field. Example: Scroll number “1” 5-42 SR-2000α User’s Manual (No. 0000A) Chapter 5 3. PROGRAMING MODE Touch one of the following buttons to select the display method. A message flashes on the customer display. A message scrolls on the customer display. 4. Touch one of the following buttons to select the character size. Standard character size Wide character size 5. Touch one of the following buttons to select the display speed. Fast flashing or scrolling Medium flashing or scrolling Slow flashing or scrolling 6. Enter the number of display times using the keypad, and touch the Repeat field. Example: 3 display times SR-2000α User’s Manual (No. 0000A) 5-43 Chapter 5 PROGRAMING MODE 7. Allocate the advertisement message numbers to each desired field. Example: Message No. “1” on Basic 5-44 8. Touch [NORMAL SCREEN] to change the key display to [TOTAL SCREEN]. 9. Repeat steps 2 through 8 above for Total Screen allocation. SR-2000α User’s Manual (No. 0000A) Chapter 5 PROGRAMING MODE Message Edit 1. Confirm that the Registration Menu is displayed. Then, touch [AD MSG] (Advertisement Message) on the screen to select. 2. The Advertisement Message Registration screen appears on the display. Then, enter the scroll number using the keypad, and touch the Scroll No. field. Example: Scroll number “1” See Appendix “Text Editing” for more detailed information. 3. Touch [EDIT] on the screen. 4. The text edit screen appears on the display. Enter the desired characters and edit the text. SR-2000α User’s Manual (No. 0000A) 5-45 Chapter 5 PROGRAMING MODE 5. When the text editing is complete, touch [RETURN] on the screen. 6. The confirmation screen appears on the display for saving. See Appendix “Text Editing” for more detailed information. Then, touch [EXECUTE] to save the registered message. 5-46 SR-2000α User’s Manual (No. 0000A) Chapter 5 PROGRAMING MODE Message Deletion 1. Confirm that the Registration Menu is displayed. Then, touch [AD MSG] (Advertisement Message) on the screen to select. 2. The Advertisement Message Registration screen appears on the display. Then, enter the scroll number using the keypad, and touch the Scroll No. field. Example: Scroll number “1” 3. The Advertisement Message Registration screen with the data of the entered message number. Then, touch [DELETE] on the screen to delete the displayed text. SR-2000α User’s Manual (No. 0000A) 5-47 Chapter 5 PROGRAMING MODE 4. The confirmation screen appears for deletion. Then, touch [EXECUTE] on the screen. 5-48 SR-2000α User’s Manual (No. 0000A) Chapter 5 5.9 PROGRAMING MODE OPERATOR NAME REGISTRATION 1. Confirm that the Registration Menu is displayed. Then, touch [OPERATORS] on the screen to select. 2. The Operator Registration screen appears on the display. 3. Touch a desired field to select. Example: Operator No. “0003” 4. Touch [EDIT] on the screen. SR-2000α User’s Manual (No. 0000A) 5-49 Chapter 5 PROGRAMING MODE 5. See Appendix “Text Editing” for more detailed information. Enter the desired characters and edit the text. 6. 5-50 The text edit screen appears on the display. When the text editing is complete, touch [RETURN] on the screen. SR-2000α User’s Manual (No. 0000A) Chapter 5 PROGRAMING MODE 5.10 NUTRITION REGISTRATION 1. Confirm that the Registration Menu is displayed. Then, touch [NUTRITION] on the screen to select. 2. The Nutrition Registration screen appears on the display. Then, enter the nutrition number using the keypad, and press the PLU key. Example: Nutrition number “1” 3. The Nutrition Data Registration screen with the data of the entered nutrition number appears on the display. Then, touch [EDIT] on the screen. 4. See Appendix “Text Editing” for more detailed information. The text edit screen appears on the display. Enter the desired characters and edit the text. When the text editing is complete, touch [RETURN] on the screen. SR-2000α User’s Manual (No. 0000A) 5-51 Chapter 5 PROGRAMING MODE 5. The Nutrition Data Registration screen appears on the display. Enter a numeric data for each numeric field and touch the corresponding field to register. Example: Total calories “100” 6. Repeat step 5 above for further required items. 7. When the registration is complete, touch [RETURN] on the screen. 8. The confirmation screen appears on the display for saving. Touch [EXECUTE] on the screen. 5-52 SR-2000α User’s Manual (No. 0000A) Chapter 5 PROGRAMING MODE 5.11 EXTRA MESSAGE 1 - 3 1. Confirm that the Registration Menu is displayed. Then, touch [EXTRA MSG] on the screen to select. 2. The Extra Message Registration screen appears on the display. Then, enter the message number and press the PLU key on the keypad. Example: Message No. “1” 3. See Appendix “Text Editing” for more detailed information. The text edit screen appears on the display. Enter the desired characters and edit the text. When the text editing is complete, touch [RETURN] on the screen. 4. Repeat steps 2 and 3 above for further registrations. SR-2000α User’s Manual (No. 0000A) 5-53 Chapter 5 PROGRAMING MODE 5. 5-54 Touch [MENU] on the screen SR-2000α User’s Manual (No. 0000A) Chapter 5 PROGRAMING MODE 5.12 COUPON MESSAGE 1. Confirm that the Registration Menu is displayed. Then, touch [COUPON MSG] on the screen to select. 2. The Coupon Message Registration screen appears on the display. Then, enter the message number and press the PLU key on the keypad. Example: Message No. “1” 3. See Appendix “Text Editing” for more detailed information. The text edit screen appears on the display. Enter the desired characters and edit the text. When the text editing is complete, touch [RETURN] on the screen. 4. Repeat steps 2 and 3 above for further registrations. SR-2000α User’s Manual (No. 0000A) 5-55 Chapter 5 PROGRAMING MODE 5. 5-56 Touch [MENU] on the screen. SR-2000α User’s Manual (No. 0000A) Chapter 5 PROGRAMING MODE 5.13 FREE MESSAGE 1 - 5 Any message such as cooking recipe, calorie, etc. can be freely registered. 1. Confirm that the Registration Menu is displayed. Then, touch [FREE MSG] on the screen to select. 2. The Free Message Registration screen appears on the display. Then, enter the message number and press the PLU key on the keypad. Example: Message No. “1” 3. See Appendix “Text Editing” for more detailed information. The text edit screen appears on the display. Enter the desired characters and edit the text. When the text editing is complete, touch [RETURN] on the screen. 4. Repeat steps 2 and 3 above for further registrations. SR-2000α User’s Manual (No. 0000A) 5-57 Chapter 5 PROGRAMING MODE 5. 5-58 Touch [MENU] on the screen. SR-2000α User’s Manual (No. 0000A) Chapter 5 PROGRAMING MODE 5.14 DEPARTMENT NAME REGISTRATION Department name (fresh meat, fresh fish, daily dishes, etc.) can be registered. 1. Confirm that the second page of Registration Menu is displayed. Then, touch [DEPARTMENT] on the screen to select. 2. The Department Registration screen appears on the display. Then, enter the department number using the keypad, and press the PLU key. Example: Department No. “1” 3. See Appendix “Text Editing” for more detailed information. The text edit screen appears on the display. Enter the desired characters and edit the text. When the text editing is complete, touch [RETURN] on the screen. 4. The confirmation screen appears on the display for saving. Touch [EXECUTE] on the screen. SR-2000α User’s Manual (No. 0000A) 5-59 Chapter 5 5-60 PROGRAMING MODE 5. Repeat steps 2, 3 and 4 above for further registrations. 6. Touch [MENU] on the screen. SR-2000α User’s Manual (No. 0000A) Chapter 5 PROGRAMING MODE 5.15 GROUP NAME REGISTRATION Group name such as beef and pork, etc. can be registered. 1. Confirm that the second page of Registration Menu is displayed. Then, touch [GROUP] on the screen to select. 2. The Group Registration screen appears on the display. Then, enter the message number and press the PLU key on the keypad. Example: Group No. “1” 3. See Appendix “Text Editing” for more detailed information. The text edit screen appears on the display. Enter the desired characters and edit the text. When the text editing is complete, touch [RETURN] on the screen. 4. The confirmation screen appears on the display for saving. Touch [EXECUTE] on the screen. SR-2000α User’s Manual (No. 0000A) 5-61 Chapter 5 5-62 PROGRAMING MODE 5. Repeat steps 2, 3 and 4 above for further registrations. 6. Touch [MENU] on the screen. SR-2000α User’s Manual (No. 0000A) Chapter 5 PROGRAMING MODE 5.16 POP MESSAGE POP message can be registered within the range from message number 7 through 999. Message number 1 through 6 are default settings as follows: 1. Confirm that the second page of Registration Menu is displayed. Then, touch [POP MESSAGE] on the screen to select. 2. The POP Registration screen appears on the display. Then, enter the message number and press the PLU key on the keypad. Example: Message No. “9” SR-2000α User’s Manual (No. 0000A) 5-63 Chapter 5 PROGRAMING MODE 3. See Appendix “Text Editing” for more detailed information. The text edit screen appears on the display. Enter the desired characters and edit the text. When the text editing is complete, touch [RETURN] on the screen. 4. The confirmation screen appears on the display for saving. Touch [EXECUTE] on the screen. 5-64 5. Repeat steps 2, 3 and 4 above for further registrations. 6. Touch [MENU] on the screen. SR-2000α User’s Manual (No. 0000A) Chapter 5 PROGRAMING MODE 5.17 CHECK LABEL 1. Confirm that the second page of Registration Menu is displayed. Then, touch [CHECK LABEL] on the screen to select. 2. The Check Label screen appears on the display. 3. Enter Start PLU number using the keypad and touch the corresponding [SET]. In the same manner, enter End PLU number using the keypad and touch the corresponding [SET]. Example: Start PLU No. “10”, End PLU No. “50” 4. Touch [MENU] on the screen. SR-2000α User’s Manual (No. 0000A) 5-65 APPENDIX APPENDIX TEXT EDITING Text editing is explained by quoting the following PLU Name Registration screen as an example. Single Function Buttons Button Function Used to confirm the specified character style on the screen. Used for return the display to the Registration Menu screen. Used to copy the original data to the current data. Used to move the cursor back by one character. Used to move the cursor in an arrow direction. Used to delete a character at the position where the cursor is positioned. A-1 SR-2000α User’s Manual (No. 0000A) APPENDIX Multiple Function Buttons Button Function Used to emphasize the characters with Bold, Reverse, Underline, or Frame. Touch the TYPE1 button to select the emphasizing type, then enter the characters. Touching this button changes the display in the following order. When emphasizing the characters later, touch the INSERT/SELECT → → → button to change to SELECT, then select the characters to be emphasized by using [←] and [→] → buttons. Used to emphasize the characters with Shadow or Edge. Touch the FIX button to complete emphasizing the selected Touching this button changes the characters. display in the following order. → Used to select capital or small letter. SHIFT ON: Capital letter SHIFT OFF: Small letter / Touching this button changes the display in the following order. → Used to select black letter or red letter. Touching this button changes the display in the following order. / → Note: Available only when two-color print specification is used. Used to select either for inserting a character or selecting the characters fixed on the text display field. / Touching this button changes the display in the following order. → Used to select a character size. Touching this button changes the display in the order from FONT #1 (smallest) to FONT #13 (largest). SR-2000α User’s Manual (No. 0000A) A-2