1
High Performance
Beowulf Cluster
Environment
User Manual
Version 3.1c
2
This guide is intended for cluster users who want a quick introduction to the
Compusys Beowulf Cluster Environment. It explains how to use the MPI and
batch environments, how to submit jobs to the queuing system and how to
check your job progress.
1
The physical hardware layout of a Cluster
A Beowulf Cluster consists of a login, compile and job submission node
(called the master node) and one or more compute nodes (called slave nodes).
The master node is used to compile (MPI) code and to submit a parallel or
batch program to a job queuing system. It should almost never be necessary
for a user to login to one of the slave nodes.
The master node and slave nodes communicate with each other through
a Fast Ethernet network that can send information at a maximum rate of 100
Mbits per second. Sometimes an additional network is added to the cluster to
allow for faster communication. This faster network is mainly used for
programs that can use multiple machines in order to solve a particular
computational problem and need to exchange large amounts of information.
One such faster network layer is Myrinet. Myrinet can send information at a
maximum rate of 2000 Mbits per second.
2
Accessing the cluster
The master node is usually called ‘master’ and an alias of ‘node1’. On a
cluster with 200 slave nodes, the names of the nodes would be node2 till
node201. These names can be used to login to any of the nodes. Four
different types of login can be used: RSH, RLOGIN, Telnet and SSH. The
recommended methods for logging in from the master to the slave nodes are
rsh and rlogin as no password is necessary in order to achieve this. The
recommended method for logging into the cluster from the internet is ssh.
3
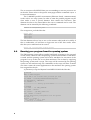
Discovering your cluster
Before you can run a parallel or batch program you will have to know what
directories are available for storing data, what queues are available for
executing programs, and how many slave nodes are part of the queuing
system. On top of that, you will have to check whether your account allows
you to run a program on the slave nodes. The following three commands will
discover that for you:
Command
qstat -q
pbsnodes -a
pexec date
Action
shows the available queues
shows the slave nodes that are part of the queuing system
executes the program ‘date’ on all the slave nodes
Four important directories can be found on the slave nodes:
3
/home/<user_name>
/usr/local/
/data/
4
Your home directory, which is NFS-mounted on the master
Program and library directories, which is NFS-mounted on the
master
Local scratch space (ask your administrator for a directory)
Running your application on the cluster
In order to use and run your application on the cluster, four steps are
necessary:
§
§
§
§
4.1
choosing your parallel environment;
compiling your application;
creating an execution-schema for the queuing system; and
submitting your application to the queuing system.
Step 1: Choosing your parallel environment
If you want run parallel code, you will have to choose a specific parallel
environment. The choices are between the different types of network, MPI
libraries and compilers.
On many Compusys clusters you can find two types of networks:
Myrinet and normal Fast Ethernet. You can select between the two networks
by selecting the correct MPI library. If your application is compiled with any
of the available MPI libraries, it will automatically choose the network.
There are three different types of MPI libraries on the cluster: LAM-MPI,
MPICH and MPICH-GM. Applications that are linked with LAM-MPI or
MPICH communicate using the TCP/IP protocol. TCP/IP is possible over
both Myrinet and Ethernet, however by default all communication using
these libraries will occur over the slower Ethernet. MPICH-GM will always
use the Myrinet network.
On most Compusys clusters you can find the GNU and Portland
compilers.
The following table summarises the commands for choosing the parallel
environment:
Command:
usechgm120-8
usechgmp120-8
usechgm121-5
usechgmp121-5
uselam632
uselamp632
uselam652
uselamp652
usech
usechp
MPI
MPICH-GM v120
MPICH-GM v120
MPICH-GM v121
MPICH-GM v121
LAM-MPI v632
LAM-MPI v632
LAM-MPI v652
LAM-MPI v652
MPICH
MPICH
Network
Myrinet
Myrinet
Myrinet
Myrinet
Ethernet
Ethernet
Ethernet
Ethernet
Ethernet
Ethernet
Compiler
GNU
Portland
GNU
Portland
GNU
Portland
GNU
Portland
GNU
Portland
It is important that both the master and slave nodes are aware which parallel
environment has been chosen. This can be achieved by editing your .bashrc
file in your home directory. Your home directory is NFS-mounted by all the
4
slave nodes, and on every occasion the Bash shell is started, the .basrhrc file is
executed. The mpirun mechanism, for instance, will always use your BASH
shell on the slave nodes to set up a parallel job.
A typical .bashrc file looks like this:
# Cluster wide .bashrc file
# User specific parallel environment
# Using Myrinet, Portland and MPICH-GM
. /usr/local/sbin/usechgm121-5
# Global memory size for MPICH
export P4_GLOBMEMSIZE=20000000
#Source global definitions
if [ -f /etc/bashrc ]; then
. /etc/bashrc
fi
Please note the space between ‘.’ and ‘/usr/local/sbin/usechgm121-5’. This
.bashrc file makes sure that you will use a combination of MPICH-GM, the
Portland compiler and the fast Myrinet network. The ‘export
P4_GLOBMEMSIZE= 20000000’ line is usually necessary for applications that
are compiled with MPICH. This line will not influence any of the settings for
the other parallel environment choices. The point of the .bashrc file is that
any cluster-wide parameter can be set here, including library locations and
paths to applications.
4.2
Step 2: Compiling your code:
The next table summarises the compiler commands on your cluster:
Language
C
C++
Fortran77
Fortran90
GNU compiler
Portland compiler
Gcc
c++
f77
pgcc
pgCC
pgf77
pgf90
-
The most common code optimisation flag for the GNU compiler is -O3 and
for the Portland compiler -fast. There is no Fortran90 GNU compiler. For
maximum application speed it is recommended to use the Portland
compilers. Please refer to the respective man-pages for more information
about optimisation for both GNU and Portland. The Portland HTML based
handbook can be found in the directory:
/usr/local/Cluster-Docs/PGI-compilers/
The commands referred to in the table are specific for batch type (single
processor) applications. For parallel applications it is preferable to use MPI
based compilers. The correct compilers are automatically available after
choosing the parallel environment. The following compiler commands are
available:
5
Code
C
C++
Fortran77
Fortran90
Compiler:
mpicc
mpic++
mpif77
mpif90
These MPI compilers are ‘wrappers’ around the GNU and Portland compilers
and ensure that the correct MPI include and library files are linked into the
application (Dynamic MPI libraries are not available on the cluster). Since
they are wrappers, the same optimisation flags can be used as with the
standard GNU or Portland compilers.
Typically, applications use a so-called Makefile that has to be adapted for
compilation. Please refer to the application’s documentation in order to adapt
the Makefile for a Beowulf cluster. Frequently, it is sufficient to choose a
Makefile specifically for a Linux MPI environment and to adapt the FC and FF
parameters in the Makefile. These parameters should point to mpicc and
mpif77 (or mpif90 in the case of F90 code) respectively.
4.3
Step 3: Executing the program
There are two methods for executing a parallel or batch program: using the
queuing system or direct from the command line. In general it is preferred to
use the queuing system, particularly in a production environment with
multiple users. However, if a quick test of the application is necessary you
can use the command line. The next two sections covers how to run an
application from the command line and how to use this in a script that can be
submitted to the queuing system.
Running a computer program from the command line:
Non-parallel programs can most easily be run straight from the slave node.
This can be achieved by logging into one of the slave nodes using rlogin or rsh,
and changing to the directory where your application resides and execute it.
It is also possible to execute a program remotely on any node by typing: rsh
<node name> <program>. For example, to run the date command on node2
type: rsh node2 date. Refer to the rsh man page for further details.
Running a parallel program is slightly more complicated. All installed
parallel MPI environments need to know on what slave nodes to run the
program. The methods for telling the program which nodes to use differ
however.
A typical command line for MPICH-GM (Myrinet based communication)
in the directory where the program can be found is the following:
mpirun.ch_gm --gm-kill 1 --gm-f configuration_file -np 4 program_name
program_options
The configuration_file consists typically of the following lines:
4
node2 2
node2 4
node3 2
6
node3 4
The first line indicates the number of processes that need to be run. Thus on
a Beowulf cluster with 8 nodes and two CPUs per node, the number of
processes would be 16 in case you would like to use the whole cluster. The
other lines indicate the node name and the port it needs to use in order to
communicate over the Myrinet network. In general, port numbers 2 and 4 are
used. The configuration_file example shows that the application using this
configuration file will be started with two processes on each node, as in the
case of dual CPU slave nodes.
The -np switch on the mpirun.ch_gm command line indicates the number
of processes to run, in this case 4. The total list of the options are:
mpirun.ch_gm [--gm-v] [-np <n>] [--gm-f <file>] [--gm-h] prog [options]
Option
--gm-v
-np <n>
--gm-np <n>
--gm-f <file>
--gm-use-shmem
--gm-shmem-file <file>
--gm-shf
--gm-h
--gm-r
--gm-w <n>
--gm-kill <n>
--gm-dryrun
--gm-recv <mode>
--gm-recv-verb
-tv
Explanation
verbose - includes comments
specifies the number of processes to run
same as -np (use one or the other)
specifies a configuration file
enable the shared memory support
specifies a shared memory file name
explicitly removes the shared memory file
generates this message
start machines in reverse order
wait n secs between starting each machine
n secs after first process exits, kill all other processes
Don’t actually execute the commands just print them
specifies the recv mode, ‘polling’, ‘blocking’ or ‘hybrid’
specifies verbose for recv mode selection
specifies totalview debugger
Certainly options --gm-use-shmem and --gm-kill are highly recommended
options to use. It is possible for a program to get ‘stuck’ on a machine and
MPI is unable to pick up the error. The problem is that the program will keep
the port locked and no other program will be able to use that Myrinet port.
The only way to fix this is to manually kill the MPI program on the slave
node. If the option --gm-kill 1 is used, MPI will try to make a better effort to
properly kill programs after a failure.
The command line for MPICH (Ethernet based communication) would
look like this:
mpirun
-machinefile
program_options
configuration_file
-np
4
program_name
The configuration file looks like this:
node2:2
node3:2
7
The :2 extension tells MPICH that you are intending to run two processes on
each node. Please refer to the specific man-pages and the command mpirun -h
for more information.
The LAM-MPI parallel environment (Ethernet based communication)
works with a two step system. In order to start the parallel program on the
slave nodes it uses a special 'daemon' that controls the execution. This
daemon first has to be started before the mpirun command can be used. The
daemon can be started by the following command:
lamboot -v configuration_file
The configuration_file looks like this:
master cpu=2
node2 cpu=2
node3 cpu=2
node4 cpu=2
The lam daemon always has to run on the master node (node 0 for MPI). If
this is undesirable, you will have to login into one of the slave nodes. After
this the mpirun command can be issued:
mpirun -np 4 program_name program_options
4.4
Running your program from the queuing system
The PBS queuing system allows parallel and batch programs to be executed
on the cluster. The user asks the queuing system for the number of machines
it needs and the queuing system will reserve machines for execution of the
program. It is up to the user to use these machines. This is done by supplying
the queuing system with a script. The script will be executed by the queuing
system on one machine only; the commands in the script will have to make
sure that it starts the actual application on the machines the queuing system
has assigned for the job.
A (extensive) script for Myrinet based MPICH-GM looks like this:
#!/bin/csh
#
#PBS -l nodes=16:ppn=2
# Tell PBS to use 16 nodes and 2 processes per node
set RUNDIR = "/home/mpi/PALLAS.RESULTS/myrinet"
set APPLICATION = "PMB-MPI1"
set RUNFLAGS = ""
#----------------- Setting up environment----------------------#
cd $RUNDIR
set nodes = `cat $PBS_NODEFILE`
set nnodes = $#nodes
set confile = ~/gm.$PBS_JOBID.conf
echo $nnodes > $confile
# Setup interleaving configuration file for Myrinet
set prev = ""
foreach i ( $nodes )
if ( ${prev} != ${i} ) then
echo ${i} 4 >>$confile
8
else
echo ${i} 2 >>$confile
endif
set prev = ${i}
end
time mpirun.ch_gm -gm-use-shmem --gm-kill 1-np $nnodes --gm-f $confile
$APPLICATION $RUNFLAGS
rm -rf $confile
#----------------------------------------------------------#
This script only works if you want 2 processes on each slave node (it lists
each node name twice and adds a ‘2’ or a ‘4’ after the node name). The script
can be found in /usr/local/sbin/ under the name of myrinet_submit.short. As can
be seen in the script, a configuration file for Myrinet is built using the
$PBS_NODEFILE variable. This variable is supplied by the queuing system and
contains the node names that are reserved by the queuing system for running
the job. The configuration file is given an unique name (gm.$PBS_JOBID.conf)
in order to make sure that you can run multiple programs concurrently.
This same script can be quite easily adapted for MPICH and LAMMPI.
4.5
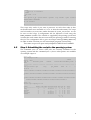
Step 4: Submitting the script to the queuing system
The command qstat -an shows what jobs are currently submitted in the
queuing system and the command qstat -q shows what queues are available
An example output is:
qstat -an:
hpc.compusys.co.uk:
Req'd
Req'd
Elap
Job ID
Username Queue
Jobname
SessID NDS TSK Memory Time S
Time
----------- -------- -------- ---------- ------ --- --- ------ ----- ----394.hpc1.servic mpi
long
pbs_submit
5525
16
--12:00 R
-node17/1+node17/0+node16/1+node16/0+node15/1+node15/0+node14/1+node14/0
+node13/1+node13/0+node12/1+node12/0+node11/1+node11/0+node10/1+node10/
0
+node9/1+node9/0+node8/1+node8/0+node7/1+node7/0+node6/1+node6/0+node5/
1
+node5/0+node4/1+node4/0+node3/1+node3/0+node2/1+node2/0
qstat -q:
server: hpc.compusys.co.uk
Queue
Memory CPU Time Walltime Node Run Que Lm
---------------- ------ -------- -------- ---- --- --- -long
--12:00:00 -0
0 10
default
----0
0 10
small
--00:20:00 -0
0 10
verylong
--72:00:00 -0
0 10
medium
--02:00:00 -0
0 10
--- --0
0
State
----E R
E R
E R
E R
E R
9
The qstat -q command in this case shows that there are 5 queues: long, default,
small, verylong and medium. The default queue is a so-called ‘routing queue’
and routes jobs to other queues depending on the needed resources. The Time
entry in the table shows the maximum time a job may be executed in a
queue. After it has been decided which queue to use, you can submit the
script to the queuing system using the qsub command. A simple command
line would be:
qsub -q long scriptname
See the respective man-page for more options.
10