1
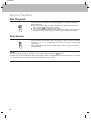
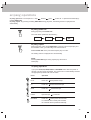
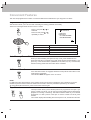
Getting Started
l
l
VN-212
User’s Manual
l
l
l
Features ............................................................2
Controls and Components ................................3
On-Screen Display ............................................6
Remote Control Unit..........................................7
Inserting and Removing Video Cassettes .........9
Connections
l
l
VCR & TV Connection ....................................10
Antenna Connection ........................................11
Setting
IMPORTANT
Please forward your warranty card to NEC
Australia Pty Ltd.
l
l
l
On-Screen Menu Programming ......................13
Setting the Clock .............................................14
Setting the Reception Channels ....................16
Playback
l
l
l
l
This instruction manual is very important. Please read
this manual carefully and completely before connecting,
operating or adjusting the VCR in order to ensure the
best performance. This instruction manual gives instructions on the effective use of your VCR. Please check
this manual before you call for help, so you may save
the cost of unnecessary service.
l
Playing Back Video Cassettes ........................24
Searching for Particular Scenes......................25
Special Playback .............................................26
ez(easy) operations.........................................27
Convenient Features .......................................28
Recording
l
l
l
l
Recording TV Programmes.............................30
Quick Start Recording (QSR)..........................31
To set colour System.......................................32
Timer Recording Using the On-Screen
Display.............................................................33
PAL
Editing
Only video cassettes marked “VHS” can be used with
this video cassette recorder.
VHS High Quality technology is incorporated into VCRs
marked “HQ”. This VCR is compatible with the conventional
VHS.
l
Important Information
l
l
l
Video Cassette Recorder
OPERATE
VN-212
CH
FC240W NA2ANN
REC/QSR
P/STILL
Dubbing Tapes ................................................38
Before Requesting Service .............................40
General Notes .................................................42
Specifications ..................................................43
WARNING:
TO PREVENT FIRE OR ELECTRIC SHOCK HAZARD,
DO NOT EXPOSE THIS UNIT TO RAIN OR MOISTURE.
FRONT
1
CAUTION:
Dangerous voltage inside. Refer internal servicing to
qualified service personnel. To prevent electric shock or fire
hazard, remove the power cord from the AC outlet prior to
connecting or disconnecting any signal lead or aerial.
Even if the VCR OPERATE button is turned off, parts of
the unit are still connected to the mains.
CAUTION:
Disconnect the power cord from the AC outlet if you will
not be using the VCR for a long period of time.
CAUTION:
TO AVOID RISK OF ELECTRIC SHOCK, DO NOT OPEN.
NOTE:
The rating plate is located at the rear of the unit.
CAUTION:
Young children and infirm persons should be supervised
when using the appliance.
Features
CHILD LOCK
Allows the user to set the VCR from the remote control,
so that the front panel functions become inoperative,
with the exception of the STOP/EJECT button.
1-MONTH/7-EVENT PROGRAMMABLE TIMER WITH
EVERY-DAY RECORDING
The VCR can be programmed to record automatically
up to seven TV shows in the coming month. There is
also an every-day programme timer.
MULTI-FUNCTION DISPLAY
Shows the VCR status, such as play, record etc. on the Multi-Function Display.
NTSC PLAYBACK ON PAL CTV
Allows you to play NTSC video tapes from overseas on most brands of
colour television receivers capable of resolving at 60 Hz video signal.
LONG PLAY
Enables tape to travel at half speed for doubling
recording and playback time on your tapes.
SKIP SEARCH
Allows you to avoid unwanted part of programme quickly.
DIAGNOSTIC ADVISING SYSTEM
Displays an operation error message if operation fault occurs during use.
QUICK START RECORDING (QSR)
Allows the VCR to be set to automatically stop recording and shut the power off.
HQ (HIGH QUALITY) VIEW SYSTEM
The “High Quality” circuit improves image sharpness and detail.
FREQUENCY SYNTHESIZED TUNER WITH 99-CHANNEL
MEMORY AUTOMATIC FEATURES
These features will function automatically as follows:
- The power of the VCR will turn on when a tape is inserted.
- The VCR starts playback when there is no safety tab on the cassette.
- The VCR starts rewinding when the tape reaches the end.
ez(easy) OPERATIONS
Allows you to operate the VCR easily.
REAL-TIME COUNTER
Shows tape travel in hours, minutes and seconds.
FULL-FUNCTION INFRARED REMOTE CONTROL
AUTO HEAD CLEANING
2
2
3
4
5
6
7
8
9
10
11
OPERATE BUTTON
This button is used to turn the unit on and off.
When this button is pressed to ON, the VCR indicator and
clock display will appear.
When this button is pressed to OFF, the VCR indicator will disappear.
NOTE: To set the VCR for unattended recordings after timer settings have been completed. When the timer is programmed and
OPERATE is turned off “TIMER” appears on the Multi-Function
Display to indicate that the VCR is set for unattended recording
and cannot be operated manually. (To return to manual operation,
press the OPERATE button once. “TIMER” indicator goes off).
STOP/EJECT BUTTON
Press this button to stop or eject the tape.
CASSETTE COMPARTMENT
Insert a cassette in the compartment, loading will be completed automatically.
NOTE: Power is turned on automatically when the cassette is
loaded. If the cassette is loaded without the safety tab in place,
the video programme will play automatically (FULL AUTO PLAY).
REWIND/REVIEW BUTTON
Press to start rewind. Press this button during playback to
see reverse playback picture at high speed.
PLAY BUTTON
Press this button to playback recorded tapes.
FAST FORWARD/CUE BUTTON
Press to activate fast forward.
Press this button during playback to see forward playback picture at high speed.
P/STILL BUTTON
Press to stop recording and to eliminate commercial breaks
or unwanted programme materials in RECORD mode.
Press to freeze the picture in PLAY mode.
RECORD/QUICK START RECORDING BUTTON
Press for recording or setting the QSR (Quick Start Recording).
REMOTE SENSOR WINDOW
To receive signals from the remote control unit.
MULTI-FUNCTION DISPLAY
The VCR’s function will be displayed on the Multi-Function Display variously.
CHANNEL BUTTONS (▲/▼)
Used to move up or down through programme numbers.
REAR
12
13
14
15
16
17
MAINS LEAD
AUDIO IN/OUT
Used to connect the video recorder to your TV or
another video recorder.
AERIAL INPUT
Connect the external aerial to this terminal.
RF OUTPUT
Connect this terminal to the AERIAL terminal on the back
of the TV, using coaxial RF cable (supplied).
VIDEO OUT
Used to connect the video recorder to your TV or another video recorder.
VIDEO IN
Connect the video output from other video equipment
(such as a Video Camera) to this jack.
Controls and Components
Front Panel
1 OPERATE Button
2 STOP/EJECT Button
4 REW Button
3 Cassette
Compartment
5 PLAY Button
6 FF Button
OPERATE
VN-212
CH
P/STILL
REC/QSR
7 P/STILL Button
8 REC/QSR Button
11 CH Buttons
9 Remote Sensor Window
10 Multi-Function Display
Rear Panel
12 Mains Lead
13 AUDIO IN/OUT Terminals
14 AERIAL Terminal
AERIAL
AV1
AUDIO
IN
OUT
RF.OUT
VIDEO
15 RF OUT Terminal
16 VIDEO OUT Terminal
17 VIDEO IN Terminal
3
Multi-Function Display
12
3
4
TIMER
REC
VCR
5
1
Cassette- in Indicator
Appears whenever there is a cassette tape in the VCR.
2
REC
Appears when the VCR is in Recording mode.
3
Switchable Display
●
Clock
●
QSR (Quick Start Recording) off time
●
Channel number
●
AV
●
Tape recording speed
●
Current tape mode
4
Timer
Appears when the VCR is set to record a programme in TIMER mode
5
VCR
Appears when the TV/VCR button is set to VCR mode.
4
Function Indicator
PLAYBACK
RECORD
REC
RECORD PAUSE
FAST FORWARD
I I I
I I I
I
I I
I I I
I I I I I
REC
REWIND
STOP
FAST FORWARD SEARCH
STILL PLAYBACK
REVERSE SEARCH
5
On-Screen Display
VCR-Operation Mode/
Tape speed/
system
Channel Programme Number/
(AV) in Audio/Video mode
PR-01
STOP
SP
AUTO
S
1.
Day/Month/Year/Day of Week
1. 2003 WED
E
M 0:02:01
Switchable Display
(Clock, Tape Counter,
Tape Remaining Length)
CH/TRK
CH/TRK
When OK button is pressed, OSD (On-Screen Display) displays VCR operation
mode, tape speed, system, channel programme number, date, year and day of the
week will appear on the TV screen. The switchable display of the current time or the
tape counter and the remaining tape length will also appear on the TV screen. After
three seconds OSD will disappear. If OK button is pressed twice in quick succession,
the clock display will remain on the TV screen. Each time OK button is pressed, you
can change the switchable display to the current time or to the tape counter and the
remaining tape length. Press OK button again to remove OSD from the TV screen.
CLK/CTR
OK
NOTES:
• If recording is taking place, these On-Screen Displays will not be recorded onto the
tape.
• The remaining tape length indicator may not be displayed correctly depending on the
type or condition of the tape. Note, the remaining tape length indicator is not
displayed just after you insert a tape.
6
G.CODE
Remote Control Unit
Almost all VCR functions can be controlled from the wireless remote control unit. The remote control must have line of
sight to the remote sensor on the front panel of the VCR and must be within an angle of 30 degrees either side of it.
The maximum operating distance is about 7.5 m (25 feet). If the operating distance decreases, the remote control may
need new batteries.
See "NOTE" below.
OPERATE
1
2
3
4
5
6
7
8
9
EJECT
11
12
13
14
SKIP
TV/VCR
AV
1
2
3
4
5
6
7
8
9
EASY OFF
EASY RPT
REW
LL
P/STI
0
PLAY
FF
STOP
LONG
PLAY
CLK/CTR
MENU
OK
i
CLEAR
15
16
17
18
19
REC/Q
SR
CH/TRK
10
CH/TRK
CHILD LOCK
20
NOTE:
The buttons with
with this VCR.
BATTERY REPLACEMENT
● Remove the battery compartment lid by sliding
it forward.
● Remove the flat batteries.
● Load new AAA batteries, taking care to align
their polarities (
and
) as indicated.
● Replace the lid.
* do not function
AAA
NOTE:
If you do not intend using the remote control unit
for an extended period of time, remove the
batteries and store them in a cool, dry place.
7
1 OPERATE
Turns the VCR ON or OFF.
2 TV/VCR
Set this button to;
VCR: To monitor, view playback or view the video recorder’s tuner.
● TV: To watch TV or view one programme while recording another programme.
●
NOTE: When you have set the TV/VCR button to TV mode, “VCR” indicator
will disappear on the Multi-Function Display.
3 AUDIO/VIDEO MODE
(AV)
Used to select the input signal.
Press once: AV will appear on the Multi-Function Display. AV is selected to
record or view signals from AUDIO IN, VIDEO IN on the rear panel.
● Press two times: AV will disappear on the Multi-Function Display. You can
now watch or record signals from the built-in tuner.
●
4 0 to 9
These buttons are used to select programmes, or to set the clock and the
timer according to the guidelines displayed on the TV screen.
5 REWIND/REVIEW (REW)
Press to start rewind.
Press this button during playback to see reverse playback picture at high speed.
6 PLAY
7 PAUSE/STILL (P/STILL)
Press to play back recorded tapes.
Press in RECORD mode to stop recording and to eliminate commercial
breaks or unwanted programme material.
Press again to resume recording.
Press in play mode to freeze the picture. Press PLAY to resume playback.
8 MENU (i)
9 CLK/CTR/OK
Used to enter into menu on the TV screen.
Press while the clock is displayed to show the tape counter.
The tape position will be stored in memory.
● Confirms menu selection.
● Calls up OSD (On Screen Display).
10 CURSOR (EDF
G)
CH/TRK(D/E)
● During OSD menu, for moving the cursor, selection bar up or down.
● Switches one channel programme up or down.
● During playback, tracking control.
● During still playback, adjusting vertical tremble.
F G
During OSD menu, for moving the cursor to the left or right.
The cursor ( F ) button can be used to clear data.
●
11 EJECT
12 SKIP GG
Press to eject a cassette.
Used to fast forward picture search through 30 seconds of recording.
13 EASY OFF
Press this button during playback to turn the VCR OFF automatically.
14 EASY REPEAT (EASY RPT) Press this button during playback to start repeat playback.
15 FAST FORWARD/CUE
Press to activate fast forward.
(FF)
Press this button during playback to see forward playback picture at high speed.
16 STOP
17 TAPE SPEED (Long Play)
Press to stop the tape.
Used to select the desired recording speed: SP (Standard Play) or LP (Long Play).
18 REC/QSR
Press to record or to set the QSR (Quick Start Recording).
19 CLEAR
Press to reset the counter to 0:00:00.
20 CHILD LOCK
Used to select child lock mode.
8
Inserting and Removing Video Cassettes
Insertion
Insert the video cassette into the compartment with the window side up and the label facing you.
●
●
●
The VCR does not have to be ON. So long as it is connected to a power outlet, it will turn itself ON and continue
the loading process.
If the cassette does not have a safety tab, the VCR will enter into PLAY mode immediately.
The cassette-in indicator
will appear on the Multi-Function Display.
Removal
●
●
Press EJECT. The cassette compartment will open and the cassette will be partially ejected.
Carefully remove the cassette from the VCR. It is not recommended to leave the cassette in the VCR when not in use.
Accidental Erasure Protection
To prevent accidental erasure
● Prevent accidental erasure of a tape by breaking off
the safety tab on the back edge of the cassette.
Video Cassette Types
Use only cassettes marked VHS.
Video Cassette
Length
Maximum Record/
Playback Time
SP MODE
To re-record
● If you later want to record over the tape, cover the
hole with cellophane tape.
LP MODE
E-240
4 hrs
8 hrs
E-180
3 hrs
6 hrs
E-120
2 hrs
4 hrs
E-90
1.5 hrs
3 hrs
E-60
1 hr
2 hrs
9
VCR and TV Connection
If your TV is equipped with an Audio/Video connector, it is possible to connect the VCR directly to the TV. The advantages
of this type of connection are superior picture and better sound quality during playback.
Aerial
Stereo TV
Coaxial cable
(supplied)
To VIDEO
OUT
terminal
To VIDEO
IN terminal
To AUDIO
OUT
terminal
To AUDIO IN
terminal
To AUDIO OUT terminal
To AUDIO IN terminal
To VIDEO IN terminal
To VIDEO OUT
To "AERIAL"
AERIAL
AV1
AUDIO
IN
OUT
RF.OUT
VIDEO
To
"RF OUT"
Connect the VCR to the TV as shown above.
1
2
3
OPERATE
Turn the VCR ON by pressing OPERATE button.
AV
CH/TRK
CH/TRK
Turn the TV ON and select the Video
CH/TRK or AV channel.
CH/TRK
CH/TRK
CH/TRK
CH/TRK
CH/TRK
10
CH/TRK
CH/TRK
Antenna Connection
In order to receive TV programmes with your VCR, an antenna must be connected as illustrated.
Aerial
TV
To aerial terminal
Coaxial cable
(Supplied)
To RF OUT
AERIAL
AV1
To AERIAL
AUDIO
IN
OUT
RF.OUT
VIDEO
To AC outlet ~110 - 240V, 50/60Hz 12W
1
Unplug the coaxial aerial cable from your TV set and plug it into the AERIAL
terminal on your VCR.
2
Using the coaxial cable supplied, connect the aerial terminal on your TV set to
the RF OUT terminal on your VCR.
11
Setting the Video
Channel on your TV
OPERATE
AV
CH/TRK
CH/TRK
1
The output channel of the VCR is set at UHF channel 68.
CH/TRK
2
CH/TRK
Turn on the TV.
CH/TRK
CH/TRK
CH/TRK
CH/TRK
3
Turn the VCR
on by pressing the OPERATE button.
AV
OPERATE
CH/TRK
CH/TRK
CH/TRK
CH/TRK
4
Insert a recorded tape and press CH/TRK
PLAY.
CH/TRK
PLAY
CH/TRK
CH/TRK
CH/TRK
CH/TRK
SKIP
CH/TRK
5
Tune your TV so that the picture of the playing tape appears on the TV screen.
NOTE: Refer to your TV user’s manual
CH/TRK when tuning the video channel.
6
If channel 68 is already occupied on your TV set, or the picture is distorted, you can
change the transmitted channel of the video recorder.
1. During power off mode (the clock indicator will be dimmed) hold down both the
“CH D” and “CH E” buttons on the VCR for more than 4 seconds.
Then, “RF 68” will be displayed on the Multi-Function Display.
2. Press either the “CH D” or “CH E” buttons on the VCR to select another video
channel, eg. between channels 22 and 68.
NOTE: If you have connected the recorder to your TV via the AV connection, set
the video channel to “OFF”.
3. Press the “OPERATE” button when you have finished.
OPERATE
VN-212
CHILD LOCK
SKIP
CHILD LOCK
12
CH
G.CODE
G.CODE
On-Screen Menu Programming
The i button on the remote control can be used to activate the menu on the TV screen.
Set-up Menu Display
Press i on the remote control. The following menu will appear on the TV screen.
OPERATE
MENU
1
AV
CH/TRK
i
CH/TRK
CH/TRK
CH/TRK
CH/TRK
CH/TRK
CH/TRK
CH/TRK
1 2
REC PRSET
A B f OSD
C ON
OSD OFF
CH/TRK
Pr-12
ACMS
OPR
TIME
DATE
VCR
SYSTEM
Dr.
REC
OK i
CH/TRK
CLK/CTR
OK
Press CURSOR (F /G) to select the desired menu and press OK.
TRK
CH/TRK
TRK
CH/TRK
CLK/CTR
OK
AV
2
CH/TRK
This function is used to record a programme with the timer (see p 33 to 37).
(2) PR SET
CH/TRK
This function is used to view stored TV stations or to set TV station information
manually (see p 16 to 18).
CH/TRK
(3) ACMS
CH/TRK
TRK
(1) REC
This feature is used for automatic setting of the TV stations (see p 19 to 20).
(4) TIME DATE
CH/TRK
This function is used to set the clock and date manually (see p 14 to 15).
SKIP
CH/TRK
(5) SYSTEM
CH/TRK
TRK
CH/TRK
This function is used to set the Colour TV System (see p 32).
(6) Dr.
This feature is used to check a problem with your VCR (see p 28).
(7) ABC OSD
CH/TRK
CH/TRK
This function is used to select the language.
● Press D/E to select from English, Deutsch, Français, Polish and Russian or
vice versa.
(8) OSD ON/OFF
CHILD LOCK
G.CODE
This feature is used to display VCR operation modes on the TV screen.
● Press D/E to select it ON or OFF.
(9) OPR
This function is used to improve the playback picture (see p 24).
(Please note you may only see OPR when playing a tape.)
G.CODE
13
G.CODE
Setting the Clock
Use the On-Screen Display and the remote control unit to set the clock.
Before You Start
●
●
●
●
The clock uses a 24-hour system.
When you first plug in your VCR, the clock will read “- - : - -”.
While you are setting the clock, a menu on the TV screen will prompt you to go through the correct procedure.
If you enter an incorrect number, press CURSOR (F/G) to clear the entry, then enter the correct number again.
PROCEDURE
1
Turn on the power of both the VCR and the TV.
2
Make sure that the TV is set to the VCR output channel.
3
Aim the remote control at the remote sensor window on the front panel of the VCR.
OPERATE
Press i on the remote control. The menu below will appear on the TV screen.
MENU
AV
CH/TRK
i
4
CH/TRK
CH/TRK
CH/TRK
CH/TRK
CH/TRK
1 2
REC PRSET
f OSD
CH/TRK ACB ON
OSD OFF
Pr-12
ACMS
TIME
DATE
VCR
SYSTEM
Dr.
REC
OK i
OPR
CH/TRK
Press CURSOR (F/G) to select “TIME DATE” and press OK.
CH/TRK
CH/TRK
5
CH/TRK
CH/TRK
CLK/CTR
OK
HH MM DD MM YY
- - :- - - - . - - . - - - - -
H/TRK
1 2
TIME
DATE
i
H/TRK
SKIP
CH/TRK
CH/TRK
14
CHILD LOCK
G.CODE
CH/TRK
OPERATE
AV
CH/TRK
CH/TRK
CH/TRK
CH/TRK
CH/TRK
CH/TRK
CH/TRK
CH/TRK
Set the hour by pressing 2 number buttons on the remote control. Enter 2 more
for the minutes (e.g. 1530 for 15:30).
CH/TRK
SKIP
6
1
2
3
4
5
6
7
8
9
CH/TRK
0
CH/TRK
HH MM DD MM YY
15 : 30 - - . - - . - - - - 1 2
TIME
DATE
CHILD LOCK
SKIP
7
1
2
3
4
5
6
7
8
9
i
G.CODE
Set the date by pressing the number buttons to enter 6 digits (day, month and year
in order). For example, “010103” for 1 January 2003. The day of the week will
appear automatically when you have entered all 6 digits for the date.
0
HH MM DD MM YY
15 : 30 - 1 . 1. 2003 WED
CHILD LOCK
G.CODE
1 2
TIME
DATE
OPERATE
8
MENU
AV
i
i
Press i to remove menu from the TV screen.
The clock starts and appears on the Multi-Function Display.
CH/TRK
CH/TRK
CH/TRK
CH/TRK
CH/TRK
CH/TRK
CH/TRK
CH/TRK
CH/TRK
CH/TRK
15
SKIP
Setting the Reception Channels
The built-in frequency-synthesized tuner in the VCR allows you to receive TV broadcasts and to record programmes
without having to turn the TV set on.
The VCR tuner can be pre-set for a maximum of 99 stations. Once you have pretuned these stations, you can select
them using CURSOR (D/E), which advances the VCR directly to the highest or lowest pre-programmed channel.
Pressing or holding down the CURSOR (D/E) button advances the VCR through the pre-programmed channels, pausing
briefly at each channel, so you can see the current programme content.
Preparation:
Turn the TV ON and select the assigned video channel.
Press OPERATE.
Press AV to select the TUNER mode.
Determine whether you need to enter the manual channel tuning section or the Auto channel Tuning section (ACMS).
Manual channel tuning is used to add more channels to the existing factory preset channels.
Auto channel tuning (ACMS) is used to reset and reprogram the reception channels.
NOTE: Entering (ACMS) will automatically delete all existing programmed channels.
●
●
●
●
●
●
Manual Channel Tuning
Manual channel tuning allows you to store channels in preferred order, as on your TV set. Programme numbers 01
to 99 can be used.
OPERATE
1
MENU
AV
i
Press i on the remote control.
The following menu will appear
on the TV screen.
CH/TRK
CH/TRK
1 2
CH/TRK
CH/TRK
REC PRSET
A B f OSD
C ON
OSD OFF
Pr-12
ACMS
VCR
TIME
DATE
SYSTEM
Dr.
REC
OK i
OPR
CH/TRK
CH/TRK
CH/TRK
CH/TRK
2
Press CURSOR (F/G) to select
CH/TRK
“PR
SET” and press OK.
The following menu will appear
CH/TRK
on the TV screen.
CH/TRK
CLK/CTR
OK
CH/TRK
PR
01
P
RSET
RK
CH
C00
MFT
+01
STATION
NBC
CHANNEL/CABLE : AV
i
RK
OPERATE
AV
3
/TRK
SKIP
/TRK
CH/TRK
CH/TRK
CH/TRK
CH/TRK
CH/TRK
Press the “AV” button to select
the type of TV channels.
● “C” for standard channels
C00-C70.
● “S” for special channels (Cable)
S01-S41.
Use the CURSOR (D/E) buttons
or useCH/TRK
the number buttons to enter
the channel number which you
CH/TRK
want to
store at this programme
number.
CH/TRK
CH/TRK
PR
01
P
RSET
CH
C 28
MFT
00
STATION
NBC
CHANNEL/CABLE : AV
i
CH/TRK
CHILD LOCK
CH/TRK
16
CH/TRK
G.CODE
AV
Press CURSOR (G) to select “MFT”.
CH/TRK
When the correct station is in view, if necessary,
adjust picture quality using the
CURSOR (D/E) buttons.
4
CH/TRK
CH/TRK
CH/TRK
CH/TRK
PR
01
CH/TRK
CH/TRK
P
RSET
CH/TRK
5
CH/TRK
CH/TRK
CH/TRK
CH/TRK
CH
C 28
MFT
00
STATION
NBC
CHANNEL/CABLE : AV
i
Press CURSOR (G) buttons to select “STATION”. If you require a channel name
for your programmed station
CH/TRK you can select from a menu or manually change a
channel name.
Press OK button once, the
CH/TRKfollowing station name list will appear on the TV
screen.
CLK/CTR
OK
K
K
CH/TRK
CH/TRK
OPERATE
AV
PR
01
CH
C28
MFT
+08
SBS
ABC
SEVEN
NINE
TEN
STATION
NBN
GWN
WIN
P
RSET
CH/TRK
CH/TRK
OK i
RK
RK
CH/TRK
1) If the station name requiredCH/TRK
is on the menu use the CURSOR (D/E) buttons
to select it. Press “OK” button.
The “TV station table menu”CH/TRK
will be displayed.
CH/TRK
CH/TRK
CH/TRK
CH/TRK
CH/TRK
G.CODE
CLK/CTR
OK
CH/TRK
PR
01
P
RSET
CH
CH/TRKMFT
C28 +08
STATION
SBS
OK i
G.CODE
2) If the desired station name is not on the menu, go to step 6.
To end the name change procedure, press the “i” button. Go to step 7.
G.CODE
SKIP
G.CODE
17
CHILD LOCK
G.CODE
AV
To manually change the name of the station, for example; change SBS to NRTV.
CH/TRK
Use the CURSOR (G) to input the station name manually.
6
CH/TRK
CH/TRK
PR
01
CH/TRK
CH/TRK
CH
C28
MFT
+08
STATION
NRTV
P
RSET
CH/TRK
OK i
1) Enter the first letter of the station name by pressing the CURSOR (D) and (E)
buttons repeatedly.
2) Now move the cursor with CURSOR (G) to the next position and write in the
next letter of the station name.
● For corrections, move the (F) and (G) buttons back and forth.
3) When you have the station name as required press the “i” button.
AV “TV station table” menu will be displayed.
The
CH/TRK
CH/TRK
OPERATE
CH/TRK
CH/TRK
7
CH/TRK
CH/TRK
01
02
03
04
05
06
07
08
CH/TRK
CH/TRK
CH/TRK
CLK/CTR
OK
OPERATE
MENU
P
RSET
AV
i
C28
--------
CH/TRK
+08
-------MOVE:
DELETE:
NRTV
----------------------------,
OK i
CH/TRK
CH/TRK
G.CODE
CH/TRK
To store other stations or correct other
names select “PR” with the CURSOR
(D/E), then press the “OK” button.
CH/TRK
The process can be repeated from step 3.
Press “i” to end manual channel tuning.
CH/TRK
CH/TRK
CH/TRK
CH/TRK
CH/TRK
SKIP
CH/TRK
CH/TRK
CH/TRK
18
CHILD LOCK
G.CODE
Auto Channel Tuning
Important: This VCR has the following channels preset when it is shipped from the factory.
Channel Indication
1
2
3
4
5
6
7
8
9
10
11-27
28
Channel Number
-
2
-
-
-
-
7
-
9
10
-
28
It must be noted that by entering the Auto Channel Tuning mode (ACMS), all factory preset channels
and manually stored channels will be automatically erased, therefore, if you wish to add any channels
to the factory preset channels, refer to the manual channel tuning section.
OPERATE
1
MENU
AV
Press i on the remote control.
The following menu will appear on the TV screen.
CH/TRK
i
CH/TRK
CH/TRK
CH/TRK
OSD OFF
CH/TRK
CH/TRK
1 2
REC PRSET
A B f OSD
CH/TRKC ON
Pr-12
ACMS
TIME
DATE
VCR
SYSTEM
Dr.
REC
OK i
OPR
CH/TRK
Press CURSOR (F/G) to select “ACMS” and press OK.
NOTE:
This will delete all previous programmed channels before storing
CH/TRK
CH/TRK
the new channels.
2
CH/TRK
CH/TRK
CLK/CTR
OK
CH/TRK
ACMS
CH/TRK
Pr-12
OK i
ACMS
Press OK to start automatic channel search.
SKIP
CH/TRK
AV
CH/TRK
3
CLK/CTR
OK
CH/TRK
CH/TRK
CH/TRK
CHILD LOCK
Pr-12
ACMS
S
E
i
G.CODE
CH/TRK
CH/TRK
CH/TRK
CH/TRK
19
CH/TRK
4
When Automatic channel tuning is complete, “TV Station table” menu appears
on the TV screen.
01
02
03
04
05
06
07
08
P
RSET
C03
C02
C11
C40
C02
----
+08
+02
-01
+03
+01
---MOVE:
DELETE:
PR-01
PR-02
PR-03
PR-04
PR-05
------------,
OK i
NOTE: AUTO SEARCH will stop if all channels are scanned or if the i button is pressed again.
20
Skipping or Scanning Channel Positions
If you want to scan the channels broadcasted in your local area, you can delete unused channels with the following
steps.
OPERATE
1
Press i on the remote control.
The following menu will appear
on the TV screen.
AV
MENU
i
CH/TRK
1 2
REC PRSET
A B f OSD
C ON
Pr-12
ACMS
OSD OFF
OPR
01
02
03
04
05
06
07
08
C03
C02
C11
C40
C02
----
VCR
TIME
DATE
SYSTEM
Dr.
REC
OK i
CH/TRK
CH/TRK
CH/TRK
CH/TRK
CH/TRK
2
Press CURSOR (F/G) to select
CH/TRK
“PR SET”, press OK and press i.
CH/TRK
CH/TRK
OPERATE/CTR
AV
MENU
CLK
OK
CH/TRK
i
CH/TRK
3
Press CURSOR (D/E) to select
the programme that you want
CH/TRK to
delete.
CH/TRK
CH/TRK
CH/TRK
CH/TRK
CH/TRK
CH/TRK
CH/TRK
01
02
03
04
05
06
07
08
+08
+02
-01
+03
+01
----
PR-01
PR-02
PR-03
PR-04
PR-05
-------------
C22
C32
C31
C40
C52
----
+08
+02
-01
+03
+01
----
CH/TRK
CH/TRK
MOVE:
DELETE:
P
RSET
OK i
,
PR-01
PR-02
PR-03
PR-04
PR-05
-------------
SKIP
MOVE:
DELETE:
P
RSET
OK i
,
CH/TRK
4
CH/TRK
Press CURSOR (F) to delete
the
channel.
The station will be cleared. To
skip other channels, repeat steps
3 and 4.
AV
CHILD LOCK
CH/TRK
01
02
03
04
05
06
07
08
CH/TRK
P
RSET
RK
RK
CH/TRK
C22
C32
C31
C52
-----
CH/TRK
+08
+02
-01
+01
----MOVE:
DELETE:
PR-01
PR-02
PR-03
PR-05
----------------,
G.CODE
OK i
CH/TRK
CH/TRK
5
OPERATE
SKIP
CH/TRK
MENU
AV
i
CH/TRK
G.CODE
Press i to end channel deleting.
CH/TRK
NOTE: Deleting a station will result in a change in the program number order.
That
is; if PR No. 9 is deleted, all Pr No’s below the deleted number will move up one
PR No. in the table. (For example : After PR No. 9 has been deleted PR No.CH/TRK
10 will
move into PR No. 9 position.)
Therefore, refer to following section on changing the programming order of the “TV
station table”.
CH/TRK
CH/TRK
CH/TRK
CH/TRK
CH/TRK CHILD LOCK
CH/TRK
G.CODE
21
CH/TRK
CH/TRK
CH/TRK
Changing the programming order of the “TV station table”
If you want to move the order of the TV stations, you can do it easily with the following steps:
OPERATE
1
MENU
AV
i
Press i on the remote control.
The following menu will appear
on the TV screen.
CH/TRK
CH/TRK
1 2
REC PRSET
A B f OSD
C ON
OSD OFF
Pr-12
ACMS
VCR
TIME
DATE
SYSTEM
Dr.
REC
OK i
OPR
CH/TRK
CH/TRK
CH/TRK
CH/TRK
CH/TRK
2
CH/TRK
Press CURSOR (F/G) to select “PR SET”, press OK and press i.
CH/TRK
CH/TRK
/TRK
01
02
03
04
05
06
07
08
/TRK
P
RSET
CH/TRK
CLK/CTR
OK
+08
+02
-01
+03
+01
---MOVE:
DELETE:
PR-01
PR-02
PR-03
PR-04
PR-05
------------,
OK i
NOTE: When changing the program order start with the highest transferred
channel number through to the lowest transferred channel number.
For example:
Transfer : PR 03 → 28 Highest
then,
PR 05 → 10 Lower
PR 04 → 09
----------------PR 02 → 02 Lowest
Press CURSOR (D/E) to select the programme you want to transfer to another
position in the menu (for example “PR No. 03”) and press CURSOR (G).
3
CH/TRK
CH/TRK
C03
C02
C11
C40
C02
----
SKIP
CH/TRK
CH/TRK
CH/TRK
01
02
03
CH/TRK
04
05
06
07
CH/TRK
08
CHILD LOCK
AV
P
RSET
CH/TRK
CH/TRK
CH/TRK
G.CODE
CH/TRK
22
CH/TRK
CH/TRK
C22
C32
C31
C40
C52
----
+08
+02
- 01
+03
+01
----
PR-01
PR-02
PR-03
PR-04
PR-05
-------------
G.CODE
OK i
OPERATE
AV
CH/TRK
CH/TRK
4
Move the cursor to place the cursor line at the position where you want to insert
the selected programme (forCH/TRK
example PR No. 04) and press OK.
The selected station will be moved to the new programme number.
CH/TRK by repeating steps 3 to 4.
Move
other stations, if you wish,
CH/TRK
CH/TRK
CH/TRK
CH/TRK
01
02
03
04
05
06
07
08
CLK/CTR
OK
P
RSET
5
OPERATE
MENU
AV
C22
C32
C40
CH/TRK
C31
C52
-CH/TRK
---
+08
+02
+03
-01
+01
---MOVE:
DELETE:
PR-01
PR-02
PR-03
PR-04
PR-05
------------,
OK i
Press i to end programming order of the “TV station table”.
CH/TRK
i
CH/TRK
SKIP
CH/TRK
CH/TRK
CH/TRK
CH/TRK
CH/TRK
CH/TRK
G.CODE
CHILD LOCK
CH/TRK
CH/TRK
SKIP
CHILD LOCK
G.CODE
23
CH/TRK
OPERATE
AV
CH/TRK
CH/TRK
CH/TRK
Playing Back Video Cassettes
CH/TRK
CH/TRK
CH/TRK
CH/TRK
Normal Playback
CH/TRK
CH/TRK
CH/TRK
CH/TRK
1
Insert a pre-recorded video cassette in the VCR.
CH/TRK
CH/TRK
2
When the cassette is inserted, press PLAY to start playback.
The display “PLAY” will appear briefly on the TV screen and on the MultiFunction Display. The playback speed of the tape will be selected automatically
by the VCR.
PLAY
SKIP
Press the STOP button to stop playback.
The display “STOP” will appear briefly on the TV screen and on the MultiFunction Display.
● When the tape reaches the end during playback, the VCR will stop and start
rewinding automatically. When the rewinding finishes, the cassette tape will be
partially ejected and the power of the VCR will be turned off automatically.
G.CODE
3
STOP
Automatic Playback
CHILD LOCK
G.CODE
If you insert a cassette tape into the VCR without the safety tab (or a piece of cellophane tape) in place, the VCR
will automatically function in sequence as follows:
● The power will be turned on.
● The VCR will start playback immediately.
● At the end of the cassette, the tape will be rewound automatically (AUTO REWIND) .
● The cassette will be ejected automatically when the rewinding is complete.
● The power will be turned off.
NOTE:
AV
CH/TRK
The cassette will be ejected when the EJECT button is pressed, even if the VCR’s power is OFF.
OPERATE
CH/TRK
OPERATE
MENU
AV
i
OPR (Optimum Picture Response)
CH/TRK
This feature automatically improves playback picture quality by adjusting your
CH/TRK
VCR to the condition of the tape.
Press i.
CH/TRK
CH/TRK
Press
F
or
G
to select OPR.
CH/TRK
Press OK.
CH/TRK
CH/TRK
Press
CH/TRK
CH/TRK
CH/TRK
CH/TRK
CLK/CTR
OK
CH/TRK
D
CH/TRK
or
E
repeatedly to select:
OFF, SOFT
CH/TRKor SHARP.
Please note you may
only set OPR
CH/TRK
when playing a tape.
CH/TRK
Press
i to return to CH/TRK
TV picture.
CH/TRK
CH/TRK
24
CH/TRK
CH/TRK
CH/TRK
1 2
REC PRSET
A B f OSD
C ON
OSD OFF
Pr-12
ACMS
OPR
TIME
DATE
VCR
SYSTEM
OFF
Dr. SOFT
NIC SHARP
OPR
i
CH/TRK
H/TRK
H/TRK
CH/TRK
CH/TRK
CH/TRK
Searching for Particular Scenes
CH/TRK
CH/TRK
This video recorder will wind a tape forward or backward quickly to search for
particular scenes on the tape.
Fast forward (FF)
REW
Pressing the fast forward (FF) button with the tape in STOP mode, the video
recorder will rapidly wind the tape forward. The display “FF” will appear on the TV
screen and on the Multi-Function Display briefly.
FF
Rewind (REW)
Pressing the rewind (REW) button with the tape in STOP mode, and the video
recorder will rapidly wind the tape backward. The display “REW” will appear on the
TV screen and on the Multi-Function Display briefly.
Logic Search
While holding down either FF(during Fast Forward mode) or REW(during Rewind
mode), from the STOP mode, the picture will be watched at 9 times (NTSC recorded
tape: 7 times) faster than the normal playback speed (SP or LP recorded tape). When
you have reached the desired point of the tape, release the button (REW or FF) and
press PLAY.
Picture Search (CUE & REVIEW)
During playback, press either of the search buttons
(REW or FF) to search for a
G.CODE
particular section of the tape. The indicator REV or CUE will appear on the
Multi-Function Display. When the desired point in the tape has been located, press
PLAY to return to the normal playback mode. Visual searching will only continue for
about 3 minutes, then it will return to playback mode.
LOCK
NOTES:
● While searching, the audio portion is automatically muted.
● While searching, noise streaks may appear in the picture.
Tracking Adjustment
When a tape recorded on another VCR is played back, noise bars and snow may appear in the picture. Use the
tracking procedures described below to stabilize the image and improve the picture quality.
Digital Auto-Tracking
When playback starts, Auto-Tracking functions automatically, optimizing the picture quality.
NOTES:
● Auto-Tracking will function during playback.
● If the quality of the recording is poor, or if the tape is damaged, the automatic tracking may not function correctly.
In such cases, you have to remove the distortions manually.
Manual Tracking
Press CH/TRK (D/E) to obtain the optimum picture. These buttons can also be used
during searching to move noise bars up or down the screen.
CH/TRK
CH/TRK
NOTE:
Tracking is automatically set to normal whenever a cassette is inserted or the VCR’s power cord is plugged in.
25
AV
CH/TRK
EC260W
CH/TRK
CH/TRK
CH/TRK
CH/TRK
CH/TRK
CH/TRK
CH/TRK
CH/TRK
CH/TRK
CH/TRK
CH/TRK
Special Playback
CH/TRK
CH/TRK
CH/TRK
Still Playback
CH/TRK
CH/TRK
LL
P/STI
Press P/STILL to freeze the picture during playback. To continue normal playback, press PLAY.
CH/TRK
● When the picture is still, unstable noise bars may appear on the TV screen
and no sound will be heard. This is normal.
● Use CURSOR (D/E) to eliminate vertical jitter.
● If the VCR is left in pause/still mode for more than 5 minutes, the VCR will be
reset automatically to play mode to protect the tape and the video heads.
Skip Search
SKIP
SKIP
During playback, press SKIP to skip commercials or other programme material.
Pressing 1, 2, 3, 4, 5 or 6 times skips 30, 60, 90, 120, 150 and 180 seconds,
respectively.
SKIP skips a full 180 seconds of commercials in a few seconds, then resumes
normal playback.
G.CODE
CHILD LOCK
NOTES:
● If distortions can be seen in the picture, remove them with the CURSOR (D/E) buttons.
● While using the special playback effects (picture/logic search or still playback) with the tape recorded in LP mode,
G.CODE
LOCK
there will be CHILD
a loss
of colour and there may be noise bars in the picture.
26
ez (easy) operations
ez (easy) power off : The sequence of “Stop
Rewind
Eject
Power Off ” is operated automatically by
pressing EASY OFF.
ez (easy) repeat : By pressing & holding EASY RPT during play back, the holding section is replayed twice
automatically.
ez (easy) power off
EASY OFF
During play back press EASY OFF.
EASY OFF
Your VCR will be operated as the following ;
STOP
REWIND
POWER
OFF
EJECT
EASY RPT
ez (easy) repeat
EASY RPT
During play back, press & hold EASY RPT at the point where repeat play is to
be concluded. Then, your VCR will go into reverse search.
Release EASY RPT at the point where repeat play is to start.
The holding section is replayed twice automatically.
OPERATE
NOTE:
Pressing EASY RPT again during repeat play, will return to
normal play.
AV
CH/TRK
CH/TRK
OPERATE
OPERATE
AV
CH/TRK
AV
CH/TRK
CH/TRK
CH/TRK
CH/TRK
CH/TRK
ez (easy) operation
CH/TRK
CH/TRK
CH/TRK
OPERATE
AV
CH/TRK
CH/TRK
If you press PLAY, FF, REW, EJECT or REC/QSR button when the power of
this unit is off and a tape is inserted. The power turns on automatically and then
the appropriate operation will work as below.
CH/TRK
CH/TRK
CH/TRK
CH/TRK
CH/TRK
CH/TRKCH/TRK
CH/TRK
CH/TRK
CH/TRK
CH/TRK
CH/TRK
CH/TRK
CH/TRK
CH/TRK
CH/TRK
CH/TRK
CH/TRK
Press
Operation
CH/TRK
CH/TRK
CH/TRK
CH/TRK
PLAY
CH/TRK
CH/TRK
CH/TRK
PLAY
Power On
Play back the tape
Power On
Fast-forward the tape
REW
Power On
Rewind the tape
EJECT
Eject the tape
CH/TRK
FF
SKIP
FF
CH/TRK
REW
SKIP
SKIP
EJECT
SKIP
CHILD LOCK
CHILD LOCK
REC/Q
SR
CHILD LOCK
G.CODE
CHILD LOCK
REC/QSR
G.CODE
Power On
G.CODE
Power Off
Enter pause record mode
If a cassette with no safety tab is loaded,
the cassette will be ejected automatically.
G.CODE
27
OPERATE
Convenient Features
AV
CH/TRK
CH/TRK
This VCR is equipped with a number of convenient features that will enhance your enjoyment of videos.
Diagnostic Advising System
OPERATE
CH/TRK
This function informs you of an error with a message for solving
problems more easily.
CH/TRK
AV
These error messages
will be shown on the TV screen.
CH/TRK
CH/TRK
OPERATE
CH/TRK
MENU
CH/TRK
AV
Press i. and press
CH/TRK
select
Dr.
i
OPERATE
AV
F
or
G
CH/TRK
to
DR
Press OK and press
repeatedly to select:
D
or
E
CH/TRK
CH/TRK
CH/TRK
CH/TRK
TAPE STATUS
CH/TRK
CH/TRK
VIDEO DOCTOR
HEAD STATUS
CH/TRK
CH/TRK
CH/TRK
CH/TRK
VCR
CH/TRK
NO. OF TIMER PROGRAMME
CH/TRK
NEXT TIMER PROGRAMME
CH/TRK
CH/TRK
i
CH/TRK
CH/TRK
CH/TRK
CH/TRK
CH/TRK
CH/TRK
CH/TRK
CH/TRK
CH/TRK
CLK/CTR
OK
CH/TRK
CH/TRK
STATUS OF DISPLAY
CH/TRK
PLEASE CLEAN
CH/TRK
NOT RECORDABLE
CH/TRK
2
CH/TRK
SBS 26 10:00~11:00 SP
SOLUTION
Clean your video heads
Insert a tape with its protection tab in place
Shows the number of timer recording
Shows the current status of timer recording
CH/TRK
Auto Memory Power Shut-off
SKIP
CH/TRK
When you start rewinding
the tape from stop mode, press OPERATE once.
CH/TRK
AV
When
the rewinding is complete, the power will be turned off automatically. If you
press any of the control buttons (OPERATE, PLAY, REW, FF, etc.) a second time,
the auto memory power shut-off function will be cancelled.
OPERATE
SKIP
Child Lock Function
SKIP
CH/TRK
SKIP
CHILD LOCK
CH/TRK
If the child lock function is engaged, all buttons except STOP and EJECT onG.CODE
the
VCR become inoperative. CH/TRK
CH/TRK
The indicator SAFE will appear on the TV screen.
CH/TRK
CHILD LOCK
CH/TRK
NOTE:
In child lock mode, all the buttons on the remote control can be used
CH/TRK to operate the VCR. Therefore it is recomG.CODE
CH/TRK control unit aside from the VCR to avoid any accidental operation
mended to put the remote
by the children.
CH/TRK
To cancel the child lock function, press CHILD LOCK button again.
G.CODE
CHILD LOCK
CH/TRK
Tape Counter
CLK/CTR
K LOCK
OCHILD
The tape counter shows you the relative positions of programmes on a tape. If you
set the counter to 0:00:00, you can see the counter reading from 0:00:00
G.CODE during
playback or recording or searching. This feature makes it easier for you to find the
programme or to find a portion of the tape. To set the counter to 0:00:00, press
CLEAR.
CLEAR
G.CODE
The counter displays the travelling time of the tape in hours, minutes and seconds.
SKIP
28
CHILD LOCK
G.CODE
CH/TRK
CH/TRK
CH/TRK
CH/TRK
CH/TRK
CH/TRK
K
CH/TRK
CH/TRK
K
CH/TRK
CH/TRK
CH/TRK
CH/TRK
OPERATE
AV
CH/TRK
Zero Stop
The Zero Stop function stops a tape automatically when the tape counter reaches 0:00:00. This feature can be usedCH/TRK
to return the tape to a preselected position quickly after recording, or to playback a portion of a tape repeatedly.
SKIP
CH/TRK
CLK/CTR
OK
1
V
CH/TRK
CH/TRK
Press OK to set the counter
mode.
The tape counter display CH/TRK
will appear on the TV screen.
CH/TRK
CH/TRK
CH/TRK
CH/TRK
CH/TRK
CH/TRK
2
K
CH/TRK
CHILD LOCK
Before playback or recording, press CLEAR to zero the counter.
The 0:00:00 indicator will appear on the TV screen.
CLEAR
CH/TRK
G.CODE
CH/TRK
OPERATE
AV
CH/TRK
CH/TRK
K
CH/TRK
3
CH/TRK
G.CODE
REC/Q
SR
Start playback or recording.
PLAY
CH/TRK
CH/TRK
CH/TRK
CH/TRK
CH/TRK
CH/TRK
CH/TRK
4
G.CODE
SKIP
STOP
Press STOP when playback or recording is complete.
CH/TRK
CH/TRK
5
SKIP
CHILD LOCK
CHILD LOCK
REW
Press REW. The tape will stop automatically when the counter
reaches 0:00:00.
G.CODE
NOTE:
G.CODE
Press OK to change the tape counter display to clock mode.
●
G.CODE
29
AV
CH/TRK
CH/TRK
Recording TV Programmes
CH/TRK
CH/TRK
CH/TRK
CH/TRK
CH/TRK
Make sure that the timer recording indicator TIMER is OFF. If the indicator appears on the Multi-Function Display,
press OPERATE once to turn it off.
● Check that the safety tab on the cassette is in place. If it has been removed, recording will not start. Full Auto
Play will take over instead.
●CH/TRK
Turn the TV on and set the TV channel to VCR output channel 68.
●
CH/TRK
CH/TRK
CH/TRK
CH/TRK
1
Insert the video cassette.
●
●
The cassette-in indicator
will appear on the Multi-Function Display.
The Multi-Function Display will light up and the channel position, number and
the clock indicator will also appear.
CH/TRK
CH/TRK
2
CH/TRK
CH/TRK
Select the desired channel by pressing CURSOR (D/E).
When recording from another source via AUDIO IN, VIDEO IN in the rear panel
(AV1), select AV mode with AV button. The AV indicator AV will appear on the
Multi-Function Display and AV will appear on the TV screen.
NOTE: Press AV to select TUNER mode, if you need to record from TUNER mode.
OPERATE
AV
CH/TRK
CH/TRK
CH/TRK
CH/TRK
L O NG
PLAY
3
G.CODE
CH/TRK
Press
LONG PLAY to select the desired tape speed: LP or SP.
CH/TRK
CH/TRK
CH/TRK
REC/Q
SR
4
G.CODE
Press CH/TRK
REC/QSR
to start video and audio recording.
The recording indicator REC will appear on the Multi-Function Display. RECORD
will also
appear on the TV screen briefly.
CH/TRK
SKIP
G.CODE
CHILD LOCK
G.CODE
30
CH/TRK
CH/TRK
CH/TRK
CH/TRK
CH/TRK
CH/TRK
CH/TRK
CH/TRK
CH/TRK
CH/TRK
CH/TRK
To Avoid Recording Unwanted Programme Materials
5
CH/TRK
LL
P/STI
Press P/STILL to stop the tape temporarily.
The indicator RECP will appear on the Multi-Function Display. RECP on the TV
screen will also appear.
● To continue recording, press P/STILL again.
CH/TRK
CH/TRK
NOTE:
SKIP 5 minutes in PAUSE mode, the VCR will automatically enter into STOP mode to protect the tape and the video
After
heads. In such a case, press REC/QSR to start recording again.
G.CODE
6
STOP
CH/TRK
CH/TRK
Press STOP to stop recording.
The recording indicator REC will disappear from the Multi-Function Display.
STOP will appear briefly on the TV screen.
If the tape reaches the end before STOP is pressed, the VCR will stop and start
rewinding the tape to the beginning automatically.
CHILD LOCK
Recording
One Programme While Watching Another
G.CODE
You can record one programme while watching another simply by choosing the desired channel with the TV channel buttons.
If two programmes that you want to watch are broadcast at the same time, you can record one while watching the other.
● Follow steps 1-4 above.
● Use the TV channel selector of the TV set to select the channel for watching.
● Do not change the VCR channel.
● You cannot watch another programme simultaneously if you record a TV programme with the VCR in AV mode.
Quick Start Recording (QSR)
Use this features to start recording quickly.
Starting Quick Start Recording
1
2
REC/Q
SR
Press REC/QSR G.CODE
to start recording.
Press REC/QSR again. 0H30 and QSR (Ouick Start Recording) will appear on the
Multi-Function Display. Each time the REC/QSR button is pressed, the recording
time will extend in steps of 30 minutes up to a maximum of 9 hours.
Cancelling Quick Start Recording
●
Press OPERATE or STOP to stop the VCR during quick start recording.
NOTE:
When quick start recording is complete, the VCR will go into STOP mode and will turn off automatically.
●
31
To set the colour system
OPERATE
AV
OPERATE
MENU
AV
i
CH/TRK
Press i.
The main menu will appear on the TV
screen.
Press F or G to select the SYSTEM and
press OK.
Press D or E to select according to the
COLOUR system used.
CH/TRK
CH/TRK
CH/TRK
CH/TRK
CH/TRK
CH/TRK
CH/TRK
CH/TRK
Press iCH/TRK
to remove the menus from the TV
screen.
CH/TRK
CH/TRK
CH/TRK
1 2
Pr-12
REC PRSET ACMS
A B f OSD
C ON
TIME SYSDATE TEM
VCR
Dr.
SYSTEM
OK i
OSD OFF
CH/TRK
CH/TRK
CH/TRK
PAL settings
CH/TRK
To record or play
CH/TRK
CH/TRK
AUTO: Allows
PAL or MESECAM signals to
be distinguished automatically.
CH/TRK
PAL: Use
when receiving PAL signals or
use when playing back a tape recored in
PAL system.
MESECAM:Use when receiving
MESECAM signals or use when playing
back a tape recorded in MESECAM system.
SKIP
1 2
Pr-12
REC PRSET ACMS
A B f OSD
C ON
TIME SYSDATE TEM
VCR
Dr.
AUTO
PAL
MESECAM
SYSTEM
i
OSD OFF
NTSC settings
SKIP
During playback:
NTSC PB: Use when playing back a tape
recorded in the NTSC system on PAL TV.
NTSC 3.58: Use when playing back a tape
recorded in the NTSC system in 3.58
mode.
NTSC 4.43: Use when playing back a tape
recorded in the NTSC system in 4.43
mode.
CHILD LOCK
CHILD LOCK
1 2
Pr-12
REC PRSET ACMS
A B f OSD
C ON
TIME SYSDATE TEM
VCR
Dr.
NTSC PB
NTSC 3.58
NTSC 4.43
SYSTEM
i
OSD OFF
G.CODE
G.CODE
Set NTSC to record (Line Recording)
NTSC 3.58: Use when recording NTSC
3.58 signals.
NTSC 4.43: Use when recording NTSC
4.43 signals.
1 2
Pr-12
REC PRSET ACMS
A B f OSD
C ON
OSD OFF
32
TIME SYSDATE TEM
VCR
Dr.
NTSC 3.58
NTSC 4.43
SYSTEM
i
Timer Recording Using the On-Screen Display
The VCR can be programmed to record up to 7 programmes within a period of 1 month. For unattended recording,
the timer needs to know the channel to be recorded and the time to start and end.
Before You Start
●
●
If you make an incorrect entry during programming, press CURSOR (F/G) to clear the entry. Then enter again.
If no entry is made for approximately 3 minutes during programming, the On-Screen menu will revert to the TV
screen automatically
1
2
Turn on the VCR and set the TV to the video channel.
Press i on the remote control. The following menu will appear on the TV screen:
OPERATE
MENU
AV
CH/TRK
i
CH/TRK
1 2
CH/TRK
CH/TRK
REC PRSET
A B f OSD
C ON
OSD OFF
Pr-12
ACMS
TIME
DATE
VCR
SYSTEM
Dr.
REC
OK i
OPR
CH/TRK
CH/TRK
CH/TRK
CH/TRK
NOTE:
The clock time must be set before setting the programme timer. If the clock time
has not been set, the display will change to the clock menu. Now you can set
the clock.
CH/TRK
Press cursor (F/G) to select “REC” and press OK.
3
CH/TRK
CH/TRK
CH/TRK
CLK/CTR
OK
PR
--------
DATE
--------
K
TIME
- - : - - ~ - -: - - - : - - ~ - -: - - - : - - ~ - -: - - - : - - ~ - -: - - - : - - ~ - -: - - - : - - ~ - -: - - - : - - ~ - -: - DELETE:
,
SP
SP
SP
SP
SP
SP
SP
OK i
K
V
Press OK to enter the timer programming mode.
SKIP
4
CLK/CTR
OK
CH/TRK
PRCH/TRKDATE
---------------
TRK
TRK
CH/TRK
CHILD LOCK
CH/TRK
TIME
- - : - - ~ - -: - - - : - - ~ - -: - - - : - - ~ - -: - - - : - - ~ - -: - - - : - - ~ - -: - - - : - - ~ - -: - - - : - - ~ - -: - -
SP
SP
SP
SP
SP
SP
SP
i
G.CODE
K
K
CH/TRK
CH/TRK
33
CH/TRK
CH/TRK
5
1
2
3
4
5
6
7
8
9
Select the programme number that you wish to record using the number buttons
(for example, 01).
NOTE:
Please enter the 2 digits for the programme number and the dates.
(For example, “01” for 1 and “02” for 2)
0
PR
DATE
PR-01 15
--------G.CODE
-----
TIME
- - : - - ~ - -: - - - : - - ~ - -: - - - : - - ~ - -: - - - : - - ~ - -: - - - : - - ~ - -: - - - : - - ~ - -: - - - : - - ~ - -: - -
SP
SP
SP
SP
SP
SP
SP
OK i
CH/TRK
CH/TRK
●
If connected, press AV for recording TV programmes from the AUDIO/VIDEO
input terminals.
If you want to change recording type (Daily or Weekly), press OK before entering
the day. Now press CURSOR (F/G) to select recording type then select it with OK.
CH/TRK
CH/TRK
CH/TRK
CH/TRK
PR
DATE
TIME
PR-01 15 - - : - - ~ - - : - --- - : - - ~ - -: - --- - : - - ~ - -: - --- - : - - ~ - -: - --- - : - - ~ - -: - -- - - - : - - ~ - -: - -- - - - : - - ~ - -: - DLY SU MO TU WE TH FR
CLK/CTR
OK
CH/TRK
SP
SP
SP
SP
SP
SP
SP
SA
OK i
CH/TRK
Daily event
For recording up to 7 programmes which are broadcast at the same time from
Monday to Friday.
RK
Weekly event
RK
For recording up to 7 programmes on a certain day of every week (from Sunday
to Saturday).
6
Enter the day using the number buttons.
1
2
3
4
5
6
7
8
9
PR
DATE
TIME
PR-01 15 - - : - - ~ - - : - --- - : - - ~ - -: - --- - : - - ~ - -: - --- - : - - ~ - -: - --- - : - - ~ - -: - -- - - - : - - ~ - -: - -- - - - : - - ~ - -: - -
0
SP
SP
SP
SP
SP
SP
SP
i
G.CODE
G.CODE
34
CH/TRK
CH/TRK
7
1
2
3
4
5
6
7
8
9
The clock uses a 24 hour system. Enter the start and end times by using the
number buttons. Enter 2 digits for the hour and 2 for the minutes (For example,
1300 for 1:00 PM).
0
PR
DATE
TIME
PR-01 15 13 : 00 ~14: 00
--- - : - - ~ - -: - --- - : - - ~ - -: - --- - : - - ~ - -: - --- - : - - ~ - -: - -- - - - : - - ~ - -: - -- - - - : - - ~ - -: - G.CODE
LP
SP
SP
SP
SP
SP
SP
i
NOTES:
● Press CURSOR (D/E) to change the recording speed mode.
LP: for Long Play.
IP: for Intellingent LP recording
SP: for Standard Play.
● Use CURSOR (F/G) to delete incorrect entries.
8
OPERATE
MENU
AV
i
Press i to store your programmes.
CH/TRK
NOTE: If the programme data is incorrect, the command “PLEASE CHECK” will
appear on the TV screen.
CH/TRK
Return to the incorrect programme and enter the correct data.
CH/TRK
CH/TRK
CH/TRK
CH/TRK
CH/TRK
PR
DATE
TIME
PR-01 15 13 : 00 ~14: 00
--- - : - - ~ - -: - --- - : - - ~ - -: - --- - : - - ~ - -: - --- - : - - ~ - -: - -- - - - : - - ~ - -: - -- - - - : - - ~ - -: - -
CH/TRK
9
10
11
DELETE:
,
LP
SP
SP
SP
SP
SP
SP
OK i
CH/TRK
Additional programmes
can now be entered by repeating steps 3 to 8.
CH/TRK
Press i to remove the menu from the TV screen.
OPERATE
When you finish specifying programmes and want to set the VCR to record
them, be sure to:
●
AV
Insert a blank cassette with a safety tab into the cassette compartment, and
press OPERATE to turn the VCR’s power off. (The timer recording indicator
TIMER will appear on the Multi-Function Display.)
Safety
tab
SKIP
CH/TRK
CH/TRK
CH/TRK
CH/TRK
CH/TRK
The VCR
is now set to record the preset programmes.
CH/TRK
NOTE: The cassette-in indicator
will blink on the Multi-Function Display, if
you finish timer programming without a tape in the cassette compartment.
CHILD LOCK
CH/TRK
CH/TRK
G.CODE
35
CH/TRK
CH/TRK
Erasing A Timer Programme
OPERATE
MENU
1
AV
CH/TRK
Press i.
i
CH/TRK
CH/TRK
2
Press CURSOR (F/G) to select the “REC” and select it with OK.
CH/TRK
CH/TRK
CH/TRK
CH/TRK
CH/TRK
CH/TRK
CH/TRK
CLK/CTR
OK
CH/TRK
RK
CH/TRK
1 2
REC PRSET
A B f OSD
C ON
Pr-12
ACMS
OSD OFF
TIME
DATE
VCR
SYSTEM
Dr.
REC
OK i
OPR
RK
H/TRK
Press CURSOR (D/E) to select the programme that you want to delete.
3
CH/TRK
CH/TRK
H/TRK
TE
/TRK
PR
DATE
TIME
PR-01 15 13 : 00 ~14: 00
--- - : - - ~ - -: - --- - : - - ~ - -: - --- - : - - ~ - -: - --- - : - - ~ - -: - -- - - - : - - ~ - -: - -- - - - : - - ~ - -: - -
SKIP
DELETE:
4
AV
OK i
CH/TRK
to be erased is displayed.
Press CURSOR (F) when the programme information
CH/TRK
CHILD LOCK
OPERATE
MENU
5
i
AV
When you finish erasing, press i again.
G.CODE
CH/TRK
CH/TRK
CH/TRK
CH/TRK
CH/TRK
/TRK
,
LP
SP
SP
SP
SP
SP
SP
G.CODE
CH/TRK
CH/TRK
CH/TRK
CH/TRK
CH/TRK
CH/TRK
CH/TRK
CH/TRK
CH/TRK
CH/TRK
CH/TRK
36
G.CODE
If Timer Recording Events Overlap...
Make sure that the preset times of the timer recording events do not overlap. If they do, the earlier programme will
always be given priority.
Example: Programme 1 is programmed to start at 10:30 and end at 11:30.
Programme 2 is programmed to start at 11:00 and end at 12:00
In this case, Programme 1 will be recorded in its entirety, but only the last 30 minutes of Programme 2
will be recorded.
10:30
11:30
PROGRAMME 1
11:00
12:00
PROGRAMME 2
OVERLAPPED
PROGRAMME
(This part will not be recorded.)
37
Dubbing Tapes
It is possible to copy recorded material from one tape to another. In order to do this, you need to connect the VCR
to another VCR as follows:
Connecting Two VCRS to Each Other
Aerial
TV
PLAYING VCR
CHANNEL
32
40
RF.OUT
VIDEO OUT
AUDIO OUT
R
L
AERIAL
To AUDIO OUT terminals
Coaxial cable
(supplied)
To VIDEO OUT terminal
RECORDING VCR
To "RF OUT"
To AUDIO IN terminals
AERIAL
AV1
AUDIO
IN
OUT
To "AERIAL"
RF.OUT
VIDEO
To VIDEO IN
Dubbing Tapes
1
OPERATE
OPERATE
CH/TRK
CH/TRK
CH/TRK
CH/TRK
CH/TRK
Press AV on the recording machine to the AV mode.
CH/TRK
CH/TRK
CH/TRK
CH/TRK
CH/TRK
38
CH/TRK
CH/TRK
CH/TRK
AV
CH/TRK
2
AV
Press OPERATE
buttons on both VCRs.
CH/TRK
CH/TRK
CH/TRK
CH/TRK
CH/TRK
3
If both VCRs have AUDIO/VIDEO terminals, connect these terminals to each
other.
Otherwise, connect the AUDIO/VIDEO OUT jacks of the playing VCR to the
VIDEO IN and AUDIO IN jacks of the recording VCR.
4
Load the pre-recorded cassette into the playing VCR. And load the blank video
cassette into the recording VCR.
5
Start playback on the playing VCR and start recording on the recording VCR.
NOTES:
● If VN-212 is the recording VCR, select the AV mode by pressing AV.
● Unauthorized recording of copyrighted television programmes, films, video tapes and other material may infringe
the right of copyright owners and be contrary to copyright laws.
Recording that you make of television broadcasts or other pre-recorded materials may not be used for any purpose
other than personal viewing without the consent of the copyright holder.
39
Before Requesting Service
Before requesting service, check the following items.
PROBLEM
CHECK
CORRECTION
No Power
Unit plugged in?
Plug in the power cord and switch on.
Video cassette cannot be inserted
Is there a video cassette already in?
Replace it.
● Insert the video cassette with the
window side up and the safety tab
facing you.
Auto Play does not work
Is erasure prevention tab intact?
Auto Play only works when erasure
prevention tab has been broken off.
TV programmes cannot be recorded
Is connection between VCR and
aerial correct?
Has the receiving channel of VCR
been tuned correctly?
Is erasure prevention tab intact?
Check and correct the connections.
Has the recording start / end times
been set correctly?
Is the timer recording
indicator TIMER lit?
Set the times correctly.
● If there is a power interruption
before or during timer recording,
timer recording will be interrupted.
Make sure the timer recording
indicator TIMER lights.
Is TV tuned to the VCR RF output
channel?
Tune the TV to the VCR’s RF output
channel.
Timer recording does not work
No playback picture
Playback picture is noisy or contains
streaks
Top of playback pictures waves
back and forth excessively
40
Tune into the channel correctly.
If broken off, fix adhesive tape over
the hole.
If the picture is still noisy, then press
CH/TRK (D/E) to set correct
tracking.
Is tracking correct?
Adjust the horizontal hold control on
the TV.
If no result, play another tape.
Power Failures
If the timer was programmed, all programmed information will be lost in the course of the failure, and if timer recording is in progress it will be interrupted.
If Tape Movement Stops Automatically
●
●
If trouble occurs during tape movement or in the mechanism inside the VCR, a safety device works to stop the
operation of the VCR. This prevents damage to the tape. If this occurs, the power will be turned off automatically.
If moisture (condensation) is present on the head drum, the VCR cannot be operated. Remove the video cassette and let the VCR remain unused, for a couple of hours.
During the winter months, when condensation may easily form, the power cord of the VCR should remain connected to the mains.
Cleaning the VCR
●
Wipe off the VCR exterior with a clean, dry cloth. Never use cleaning fluids, chemicals or wax.
Video Head Cleaning
This VCR incorporates an automatic head cleaner which operates whenever the
cassette is ejected or inserted.
Cleaning of the video and audio heads is the customer’s responsibility and is not
covered under the terms of the warranty. Always use quality tapes to reduce the
frequency of cleaning.
Dirt accumulation on the head after long periods of use can cause problems.
If high quality video tapes are used in this unit, the video heads should not normally
require cleaning. However it is possible that the heads may become clogged when
playing old or damaged tapes.
If the image on your screen contains a lot of snow when playing back tapes with
quality recordings (see illustration on left), the heads may require cleaning.
41
General Notes
●
●
●
●
After playing a video tape, remove it from the VCR if the VCR is not going to be used for a long time.
Do not transport the VCR with a video cassette inserted.
It is a good idea to save the original shipping carton and packing material. They will come in handy for moving
the VCR in the future or returning it in for service.
Disconnect the VCR from the mains during electrical storms.
Precautions
Please read these precautions before operating this unit.
●
●
●
●
●
●
Avoid extreme heat, cold, moisture and dust.
Do not use near magnetic fields (this will adversely affect the unit’s performance).
Do not wipe the surface of the case with volatile agents such as benzene, alcohol, thinner, chemically processed
cloths, etc. These could damage the surface finish or cause the coating to peel.
Use the unit only in a horizontal position. Do not place heavy objects on the VCR.
Keep the unit away from flower vases, tubs, sinks, etc. If any liquids should spill into the unit, serious damage
could occur. In this case, please disconnect the VCR from the mains and consult qualified service personnel.
Do not obstruct the ventilation holes. Even soft materials such as paper and cloth can prevent proper ventilation of
the recorder.
Moisture Condensation
When the VCR is moved from a cold place to a warm place, moisture can condense on the HEAD DRUM ASSEMBLY.
Attempting to play or record a tape in this situation could result in accidental damage to the tape.
To prevent this:
●
●
42
Plug the VCR’s electric cord into an AC power outlet.
Wait for about two hours before attempting to play or record a tape.
Specifications
Tape Format
Video Recording System
Video Signal System
Tape Width
Tape Speed
: Tape Width 1/2" (12.7 mm high density VHS tape)
: Rotary 2 heads, helical scanning system
: PAL colour format
: 12.7 mm (1/2 inch)
: 23.39 mm/sec (SP mode)
11.69 mm/sec (LP mode)
Maximum Recording Time
Fast Forward/Rewind Time
Power Source
Power Consumption
Operating Temperature
Operating Humidity
Dimensions (W x H x D)
Weight
Clock
: 4 Hours in SP mode/8 Hours in LP mode
: Less than 65(±10) secs (with E-180 cassette)
: ~110-240V, 50/60Hz
: Approx. 12 Watts
: 5°C - 35°C
: Less than 80%
: 360 x 94 x 230 (14.2" x 3.7" x 9.1")
: About 3.2Kg
: 24 hour display type
VIDEO
Input
Output
S/N Ratio
RF Modulation
: VIDEO IN (RCA type)
1.0 Vp-p, 75 ohms, unbalanced
: VIDEO OUT (RCA type)
1.0 Vp-p, 75 ohms, unbalanced
: More than 43 dB
: UHF Channel 28-68 (Adjustable)
AUDIO
Input
Output
Audio Frequency Response
: AUDIO IN (RCA type)
-6.0 dBs, More than 47 kohm
: AUDIO OUT (RCA type)
-6.0 dBs, Less than 1 kohm
: 100Hz-10KHz (+3/-6 dB)
PROVIDED ACCESSORIES
●
User’s Manual x 1
Remote Control Unit
AAA (AM-4) size 1.5 volt batteries x 2
Aerial Connection Cable
Audio & Video Cables
Designs and specifications are subject to change without notice.
43
NEC Australia Pty Ltd
A.B.N. 86 001 217 527
Personal Product Group
NEC Service Centres
New South wales
Sydney
184 Milperra Rd, Revesby, 2212
(02) 9780-8688
Newcastle
120 Parry Street, Newcastle West, 2302
(02) 4926-2466
Victoria
Melbourne
480 Princes Highway, Noble Park, 3174
(03) 9554-6245
Brisbane
116 Ipswich Road, Woollongabba, 4102
(07) 3361-5858
Southport
Shop 1, 48 Ferry Road, Southport, 4215
(07) 5591-3670
Adelaide
84A Richmond Rd, Keswick, 5053
Queensland
South Australia
(08) 8375-5710
Western Australia
Perth
45 Sarich Court, Osborne Park, 6017
(08) 9445-5901
For service in outer areas, please contact your NEC retailer for the address of the nearest NEC Australia Pty. Ltd.
Authorized Service Centre.
NEC Australia Pty Ltd
244 Beecroft Road EPPING 2121
Tel. 131-632 Fax. (02) 9930 2380
44
P/N 3834RP0092R