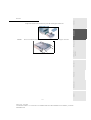
1
TELECOM
SAGEM
FAX 4640
User Manual
WELCOME
Congratulations for purchasing this SAGEM new generation communication terminal. Your Laser Fax
Machine is the answer to all your most demanding professional needs.
This User's Manual presents the model in the range:
Model
FAX 4640
Equipment
• 33.6 kbps fax.
• 16 ppm Black & White laser printer.
It combines power, user-friendliness and simplicity thanks to its navigator, its multitask access and its
direct access directory.
We recommend that you read this Manual carefully, in order to familiarise yourself with the various
features and functions of your terminal.
List of accessories1
The following additional accessories are proposed for the FAX 4640:
• Directory card.
• 500-page paper tray.
Consumables
To refer to the last page of this user manual for the references.
1.
The list of accessories is subject to change without prior notice.
Date en cours : 12 June 2006
\\osn01001\be31-doc\DOC 31 - En cours\Travaux en cours\URD31\Fax\MFL V3\LUs MFLV3 MF4640\LU 252 551 036A MFL_V3 FAX 4640
GB\2 COV Gb.fm
Control panel
1.
key: manual line taking, tone monitoring
during fax transmission.
2.
key:
scanning
transmission or copy.
4.
resolution
during
key: printing a stored fax in the fax-TAD
mode.
6.
key: access to directory and quick-dial
numbers.
7.
key: access to the last dialled numbers.
8.
key: broadcast transmission (fax).
21. × key: Shift key.
22.
key: Caps lock key.
23.
and
B
key: fax transmission or black & white
local copy.
11. copy key: local black-and-white copy.
Printer Paper Jam indicator.
D
"Toner" icon:
On: toner empty,
Blinking: toner near end, toner low.
key: stop current operation.
15. OK key: confirm displayed selection.
2
"Line" icon:
On: communication in progress,
Blinking: communication being established.
C
12. eco key: selecting the eco mode.
14. M key: access to the different functions
(MENU).
E Fax reception icon:
* On: reception possible,
* Blinking: unprinted document(s) in memory
or being received,
* Off: reception impossible.
3
4
A
B
C
D
keys: memorise a key combination.
A Scanning resolution during fax transmission
(Fine, SFine, Photo).
9. Numerical keypad.
1
key: enter or go to next line.
20. Í key: erase character before cursor.
5.
13.
keys: navigation keys.
18.Alphabetical keypad.
19.
key: contrast adjustment.
10.
or
17.
key: print the functions list.
3.
16. C key: return to previous menu and correct
data entry.
5
6 7 8
23
22
Q
A
W
E
S
D
Z
21
T
R
X
F
Y
G
C
V
18
I
U
H
B
J
O
K
L
9
E
P
1
2
3
4
5
6
7
8
9
*
0
#
M
copy
eco
N
19 16
20 21 14 13
17 12
15
11
10
Date en cours : 12 June 2006
\\osn01001\be31-doc\DOC 31 - En cours\Travaux en cours\URD31\Fax\MFL V3\LUs MFLV3 MF4640\LU 252 551 036A MFL_V3 FAX 4640
GB\Legend Gb.fm
Connections
Telephone connection
Power line connection and switch-on
2
GETTING
STARTED
Navigation methods
2-1
2-1
2-1
2-1
2-3
2-3
2-3
2-4
2-4
Presentation
The navigator
The display screen
Access to functions
Menu-driven access
Direct access by number
Functions list
3
SETTING
YOUR MACHINE
Main settings
Before transmission
Date/Time
Summer time / winter time setting
Your fax number/your name
Type of network
Geographical settings
Local prefix
Transmission report
Document feed type
Economy period
Before reception
Fax answering machine
Reception without paper
Number of copies
Relay broadcast
3-1
3-1
3-1
3-1
3-2
3-2
3-3
3-3
3-4
3-4
3-5
3-5
3-5
3-5
3-6
3-6
3-7
-1-
Date en cours : 12 June 2006
\\osn01001\be31-doc\DOC 31 - En cours\Travaux en cours\URD31\Fax\MFL V3\LUs MFLV3 MF4640\LU 252 551 036A MFL_V3 FAX 4640
GB\LU 252 551 036A MFL_V3 FAX 4640 GbTDM2.fm
Installation
Contents
Installing the printer paper tray
Installing the printer output stacker
Installing the document feeder for scanning
Installing the original document output stacker
Loading paper
Loading paper manually
Installing the second paper cassette unit (option)
Getting started
Operational precautions
Unpacking the machine parts
Description
Installing the removable parts
Setting your
machine
Installation requirements
1-1
1-1
1-1
1-2
1-4
1-6
1-7
1-7
1-8
1-9
1-9
1-10
1-11
1-12
1-14
1-15
1-15
Directory
Installing your terminal
Operation
INSTALLATION
Maintenance
1
Safety
CONTENTS
Technical parameters
4
3-7
DIRECTORY
Creating subscribers records
Adding a record
Creating subscribers lists
Adding a list
Adding or deleting a number from the list
Consulting a record or a list
Modifying a record or a list
Deleting a record or a list
Printing the directory
5
4-1
4-2
4-2
4-3
4-3
4-4
4-4
4-5
4-5
4-5
OPERATION
5-1
Sending
5-1
Document positioning
5-1
Scanner
5-1
Choosing the resolution/contrast
5-2
Resolution
5-2
Contrast
5-2
Dialling
5-2
From the directory
5-2
From the redial key
5-3
To multiple numbers
5-3
Transmission over the Public Switched Telephone Network (PSTN) 5-4
Immediate transmission
5-4
Sending in the eco mode
5-4
Delayed transmission
5-4
Transmission with auto redial
5-5
Rerouting
5-5
Tx forwarding
5-6
Transmission waiting queue
5-7
Consult or modify the waiting queue
5-7
Immediately perform transmission from the waiting queue
5-7
Printing a document in waiting or in deposit
5-8
Print the waiting queue
5-8
Deleting a transmission on hold
5-8
Cancelling a transmission in progress
5-8
Reception
5-9
Reception over the Public Switched Telephone Network (PSTN)
5-9
Copying
5-9
Local copy
5-9
Standard copy
5-9
"Sophisticated" copy
5-9
Specific copy settings
5-10
Scanner settings
5-10
Printer settings
5-12
-2-
Date en cours : 12 June 2006
\\osn01001\be31-doc\DOC 31 - En cours\Travaux en cours\URD31\Fax\MFL V3\LUs MFLV3 MF4640\LU 252 551 036A MFL_V3 FAX 4640
GB\LU 252 551 036A MFL_V3 FAX 4640 GbTDM2.fm
Use of the department codes by a department
Charge code
Entering the charge code
Mail box (MBX FAX)
MBX management
Creating an MBX
Modifying the features of a MBX
Printing the contents of a MBX
Deleting a MBX
Printing the MBX list
MBX deposit in your fax
MBX deposit in a remote fax
MBX polling from a remote fax
6
MAINTENANCE
Maintenance
General
Replacing the consumables (toner and drum)
Replacing cartridges
Cleaning
Cleaning the printer
Servicing
Scanner calibration
Incidents
Communication errors
Transmission from the feeder
Transmission from memory
Communication error codes
6-1
6-1
6-1
6-2
6-2
6-15
6-15
6-17
6-17
6-17
6-17
6-17
6-18
6-18
-3-
Date en cours : 12 June 2006
\\osn01001\be31-doc\DOC 31 - En cours\Travaux en cours\URD31\Fax\MFL V3\LUs MFLV3 MF4640\LU 252 551 036A MFL_V3 FAX 4640
GB\LU 252 551 036A MFL_V3 FAX 4640 GbTDM2.fm
Contents
Installation
Getting started
Activating the department code
Deactivating the department code
Setting the department codes
Creating a department code
Deleting a department code
Printing a department code
Printing the department report
Setting your
machine
Function management by the administrator
Directory
Department code
Operation
Entering the locking code
Locking the keyboard
Locking the numbers
5-12
5-12
5-13
5-13
5-13
5-14
5-15
5-16
5-16
5-16
5-17
5-17
5-17
5-17
5-18
5-18
5-19
5-19
5-20
5-20
5-21
5-22
5-22
5-22
5-23
5-23
5-23
5-24
5-24
5-24
5-24
5-24
5-25
Maintenance
Logs
Printing the functions list
Printing the machine settings
Memorizing a sequence of keys
Counters
Deposit and polling
Locks
Safety
Other functions
Printer errors
Error messages
Printer paper jam
Paper jam at the feeders and trays
Scanner incidents
Scanner paper jam
Miscellaneous incidents
Machine packing and transportation
Characteristics
Unit characteristics
7
SAFETY
AND
Safety
Environment
ENVIRONMENT
The packaging
Batteries and rechargeable batteries
The product
Energy Star
6-20
6-20
6-21
6-22
6-24
6-24
6-25
6-25
6-26
6-26
7-1
7-1
7-2
7-2
7-2
7-2
7-2
The mark CE attests that the products comply with the essential requirements of Directive R&TTE 1999/5/EC.
For user safety, in accordance with Directives 73/23/EC.
For electromagnetic interference, in accordance with Directive 89/336/EC.
The manufacturer declares that the products are manufactured in accordance with ANNEX II of Directive R&TTE 1999/
5/EC.
-4-
Date en cours : 12 June 2006
\\osn01001\be31-doc\DOC 31 - En cours\Travaux en cours\URD31\Fax\MFL V3\LUs MFLV3 MF4640\LU 252 551 036A MFL_V3 FAX 4640
GB\LU 252 551 036A MFL_V3 FAX 4640 GbTDM2.fm
INSTALLATION
REQUIREMENTS
Directory
INSTALLING YOUR TERMINAL
Setting your
machine
Getting started
Installation
1 INSTALLATION
Contents
Installation
Safety
Maintenance
• Choose a location that is well ventilated.
Operation
A proper location helps to ensure that your printer provides you with the long service life for
which it is designed. Double-check to make sure that the location you select has the following
characteristics:
1-1
Date en cours : 12 juin 2006
\\osn01001\be31-doc\DOC 31 - En cours\Travaux en cours\URD31\Fax\MFL V3\LUs MFLV3 MF4640\LU 252 551 036A MFL_V3 FAX 4640
GB\Installation Gb.fm
Installation
• When installing the terminal close to a wall, make sure the distance between the wall and the
upper edge of the stacker is at least 25 centimetres for easier opening of the upper cover.
• Make sure there is no chance of ammonia or other organic gasses being generated in the area.
• The grounded power outlet (refer to the safety instructions in the Safety and Environment Chapter) you plan to connect to for power should be nearby and not obstructed.
• Make sure that the printer is not exposed to direct sunlight.
• Avoid areas in the direct airflow of air conditioners, heaters, or ventilators and areas subject to
temperature and humidity extremes.
• Choose a sturdy, level surface where the printer will not be exposed to strong vibration.
• Keep the printer away from any objects that might block its heat vents.
• Do not locate the printer near curtains or other combustible objects.
• Choose an area where there is no possibility of the printer being splashed with water or other
liquids.
• Make sure that the surrounding area is clean, dry, and free of dust.
Operational precautions
Note the following important precautions whenever using the printer.
Operating environment
The following describes the operating environment required when using the printer:
• Temperature:
10°C to 35°C (50°F to 95°F) with fluctuation of 10°C (18°F) per hour.
• Humidity:
20% to 80% (no condensation) with fluctuation of 20% per hour.
1-2
Date en cours : 12 juin 2006
\\osn01001\be31-doc\DOC 31 - En cours\Travaux en cours\URD31\Fax\MFL V3\LUs MFLV3 MF4640\LU 252 551 036A MFL_V3 FAX 4640
GB\Installation Gb.fm
Terminal
The following describes precautions for using the terminal:
Contents
Installation
• Never touch the power cord when your hands are wet. Doing so creates the danger of electrical shock.
• Always unplug the power cord before moving the terminal. Failure to do so can damage the
power cord, creating the danger of fire or electrical shock.
• Always unplug the power cord if you do not plan to use the terminal for a long time.
• Never try to remove any secured panel or cover. The terminal contains high-voltage circuit
which creates the danger of electrical shock when exposed.
• Never try to modify the terminal. Doing so creates the danger of fire or electrical shock.
• Never place any heavy objects on the power cord, pull on it or bend it. Doing so creates the
danger of fire or electrical shock.
• Always make sure the terminal is not placed on the electrical cord or the communications
cables of any other electrical equipment. Also make sure that cords and cables do not get
into the terminal’s mechanism. Any of these conditions create the danger of malfunction
and fire.
Getting started
• When unplugging the power cord, always grasp the plug and never pull on the cord. A
damaged cord creates the danger of fire or electrical shock.
Setting your
machine
• Never place flammable gasses, liquids or objects that generate magnetic forces near the terminal.
Installation
• Never turn the terminal off or open any of its covers during a print operation.
• Should liquid or any piece of metal accidently get inside the printer, immediately turn it off,
unplug the power cord, and contact your dealer. Failure to take this immediate action creates the danger of fire or electrical shock.
• Whenever the terminal emits unusually high amounts of heat, smoke, an unusual odor, or
noise, immediately turn it off, unplug it, and contact your dealer. Failure to take this immediate action creates the danger of fire or electrical shock.
• Paper for printer: do not use paper previously printed by your terminal or any other
printer; the ink or toner deposited on that paper might damage the printing system of
your terminal.
Operation
• Do not allow water or other liquids to spill on or near the terminal. Fire or electrical shock
can occur should water or liquid come into contact with the terminal.
Directory
• Always take care that paper clips, staples, or other small pieces of metal do not get into the
terminal through its vents or other openings. Such objects create the danger of fire or electrical shock.
Safety
ozone is generated during normal operation of this terminal. Because of this, an unpleasant odor
may result when the printer is used for extensive printing in a poorly ventilated area. For a
comfortable, healthy, and safe operation, be sure to locate the terminal in a well-ventilated area.
Maintenance
Caution - Be sure to locate the terminal in a well-ventilated location. A minimal amount of
1-3
Date en cours : 12 juin 2006
\\osn01001\be31-doc\DOC 31 - En cours\Travaux en cours\URD31\Fax\MFL V3\LUs MFLV3 MF4640\LU 252 551 036A MFL_V3 FAX 4640
GB\Installation Gb.fm
Installation
UNPACKING THE MACHINE PARTS
Remove the plastic bags and check for the parts depicted below.
7
8
1
6
2
5
3
4
1: Scanner output stacker
2: Printer output stacker
5: Telephone line cord (model depending on
country)
3: Printer paper feed tray
6: Fax/printer terminal
4: AC power cord (model depending on
country)
7: Document feed tray for scanning
8: CD-ROM (User Manual)
1-4
Date en cours : 12 juin 2006
\\osn01001\be31-doc\DOC 31 - En cours\Travaux en cours\URD31\Fax\MFL V3\LUs MFLV3 MF4640\LU 252 551 036A MFL_V3 FAX 4640
GB\Installation Gb.fm
Press the paper size guide on the right, in order to push both paper size guides to the left or
Getting started
Installation
Pull out the two pads from the paper feed inlet.
Contents
Installation
Safety
Maintenance
Operation
Directory
Setting your
machine
to the right. Pull out the plastic tab and the shipping tape from the paper feed inlet.
1-5
Date en cours : 12 juin 2006
\\osn01001\be31-doc\DOC 31 - En cours\Travaux en cours\URD31\Fax\MFL V3\LUs MFLV3 MF4640\LU 252 551 036A MFL_V3 FAX 4640
GB\Installation Gb.fm
Installation
DESCRIPTION
Scanner
Document feed
tray for scanning
Control panel
Adjustable
paper guide
Original document
output stacker
Scanner release
button
Printer
output stacker
Printer
On/Off
switch
Printer paper
feed tray
Second cassette
paper tray
(500 pages)
Second paper
cassette (option)
Chip card
reader
AC power connector
Telephone line
connector
Phone cord
AC power cord
1-6
Date en cours : 12 juin 2006
\\osn01001\be31-doc\DOC 31 - En cours\Travaux en cours\URD31\Fax\MFL V3\LUs MFLV3 MF4640\LU 252 551 036A MFL_V3 FAX 4640
GB\Installation Gb.fm
INSTALLING THE REMOVABLE PARTS
Contents
Installation
INSTALLING
THE PRINTER PAPER TRAY
Installation
This section details the installation of the terminal's removable parts.
Getting started
Using the printer's left and right notches, gently push the tray in until it stops (as illustrated
Safety
Maintenance
Operation
Directory
Setting your
machine
below).
1-7
Date en cours : 12 juin 2006
\\osn01001\be31-doc\DOC 31 - En cours\Travaux en cours\URD31\Fax\MFL V3\LUs MFLV3 MF4640\LU 252 551 036A MFL_V3 FAX 4640
GB\Installation Gb.fm
Installation
Fit the tray cover.
INSTALLING
THE PRINTER OUTPUT STACKER
With both hands, slightly bend the centre part of the stacker upwards in order to insert its clips
into the notches located on the upper part of the printer. Release the stacker so that it recovers its
initial shape.
1-8
Date en cours : 12 juin 2006
\\osn01001\be31-doc\DOC 31 - En cours\Travaux en cours\URD31\Fax\MFL V3\LUs MFLV3 MF4640\LU 252 551 036A MFL_V3 FAX 4640
GB\Installation Gb.fm
THE DOCUMENT FEEDER FOR SCANNING
Setting your
machine
Getting started
Fit the stacker by inserting its two toes into the notches provided at the rear of the terminal.
Installation
INSTALLING
Contents
Installation
Fit the output stacker on the upper front part of the terminal by inserting its two toes into
the notches provided.
1
2
Directory
THE ORIGINAL DOCUMENT OUTPUT STACKER
1
Safety
Maintenance
2
Operation
INSTALLING
1-9
Date en cours : 12 juin 2006
\\osn01001\be31-doc\DOC 31 - En cours\Travaux en cours\URD31\Fax\MFL V3\LUs MFLV3 MF4640\LU 252 551 036A MFL_V3 FAX 4640
GB\Installation Gb.fm
Installation
LOADING
PAPER
Press the paper size guide on the right in order to push both paper size guides to the left or to the
right.
Place a stack of paper into the tray. In case of letterhead paper, be sure to place the paper printed
side up.
Secure the stack of paper by pushing the paper size guides against the right and left edges of the
stack.
Supported types of paper:
Auto-feed cassette
60 to 90 g/m2
Manual feed tray
60 to 160 g/m2
1-10
Date en cours : 12 juin 2006
\\osn01001\be31-doc\DOC 31 - En cours\Travaux en cours\URD31\Fax\MFL V3\LUs MFLV3 MF4640\LU 252 551 036A MFL_V3 FAX 4640
GB\Installation Gb.fm
Contents
Installation
PAPER MANUALLY
When printing on special paper, such as 60 to 160 g/m2 max. colour paper or transparent film
(laser printer compatible), you should load the paper manually, one sheet after the other.
To do so:
Insert your sheet of paper or film between the two feed pawls 1 and 2 located on the paper
Directory
LOADING
Setting your
machine
Getting started
Installation
Fit the paper tray cover into place.
tray cover until it stops in the printer.
Operation
Adjust the sheet or film width as appropriate by means of feed pawls 1 or 2.
Safety
2
Maintenance
1
1-11
Date en cours : 12 juin 2006
\\osn01001\be31-doc\DOC 31 - En cours\Travaux en cours\URD31\Fax\MFL V3\LUs MFLV3 MF4640\LU 252 551 036A MFL_V3 FAX 4640
GB\Installation Gb.fm
Installation
INSTALLING
THE SECOND PAPER CASSETTE UNIT
(OPTION)
Remove the second paper cassette unit and tray 2 from their packaging, including the
protective tape used to hold the various components in place.
Place the printer on top of the base unit.
Make sure to align the coupling pins of the
base unit with the holes located underneath
the printer.
Remove the cover from tray 2.
Press down on the paper lifting plate located
inside of tray 2 until it locks.
Place a stack of up to 500 sheets of paper
into tray 2 so that the side that was facing up
when the paper was unwrapped is still facing
up.
1-12
Date en cours : 12 juin 2006
\\osn01001\be31-doc\DOC 31 - En cours\Travaux en cours\URD31\Fax\MFL V3\LUs MFLV3 MF4640\LU 252 551 036A MFL_V3 FAX 4640
GB\Installation Gb.fm
Be sure to use both hands whenever tray 2 is removed from or inserted into the second paper cassette unit.
Safety
Maintenance
Operation
Directory
Setting your
machine
Remark:
Getting started
Installation
Replace the cassette cover and insert tray 2 into the second paper cassette unit.
Contents
Installation
1-13
Date en cours : 12 juin 2006
\\osn01001\be31-doc\DOC 31 - En cours\Travaux en cours\URD31\Fax\MFL V3\LUs MFLV3 MF4640\LU 252 551 036A MFL_V3 FAX 4640
GB\Installation Gb.fm
Installation
CONNECTIONS
A
B
1
2
Key to the diagram:
A: Telephone line connector
B: AC power connector
1: Line cord (model depending on country)
2: AC power cord (model depending on country)
Make sure the On/Off switch is set to 0 (Off).
1-14
Date en cours : 12 juin 2006
\\osn01001\be31-doc\DOC 31 - En cours\Travaux en cours\URD31\Fax\MFL V3\LUs MFLV3 MF4640\LU 252 551 036A MFL_V3 FAX 4640
GB\Installation Gb.fm
TELEPHONE
CONNECTION
Contents
Installation
POWER
LINE CONNECTION AND SWITCH-ON
Caution - Refer to safety procedures in the Safety and Environment Chapter.
Plug end of the main power cord (2) into the connector (B) on the fax machine, and the
other end in the wall outlet.
Set the On/Off switch to position 1 (On).
Getting started
end into the wall telephone socket.
Installation
Plug end of the telephone line (1) into the connector (A) on the fax machine, and the other
Safety
Maintenance
Operation
Directory
Setting your
machine
After a few seconds, when the printer has warmed up, the date and time will appear.
1-15
Date en cours : 12 juin 2006
\\osn01001\be31-doc\DOC 31 - En cours\Travaux en cours\URD31\Fax\MFL V3\LUs MFLV3 MF4640\LU 252 551 036A MFL_V3 FAX 4640
GB\Installation Gb.fm
Installation
1-16
Date en cours : 12 juin 2006
\\osn01001\be31-doc\DOC 31 - En cours\Travaux en cours\URD31\Fax\MFL V3\LUs MFLV3 MF4640\LU 252 551 036A MFL_V3 FAX 4640
GB\Installation Gb.fm
PRESENTATION
Directory
NAVIGATION METHODS
Setting your
machine
Getting started
Installation
2 GETTING STARTED
Contents
Getting started
The navigator gives you access to the menus visible on screen.
Operation
The navigator
Safety
Maintenance
This navigator has 5 keys and allows you to move within the menus available on your machine.
2-1
Date en cours : 12 June 2006
\\osn01001\be31-doc\DOC 31 - En cours\Travaux en cours\URD31\Fax\MFL V3\LUs MFLV3 MF4640\LU 252 551 036A MFL_V3 FAX 4640
GB\Getting started Gb.fm
Getting started
Moving within the menus
To
Use key
Symbol used
M
Enter the main menu.
Select the next line in a menu.
Select the previous line in a menu.
Confirm entry and go to the following
menu.
OK
C
Return to the previous menu.
Confirm and exit from the current menu.
Exit without confirming from the current
menu.
Moving within a data entry field
To
Use key
Symbol used
Move to the right.
Move to the left.
2-2
Date en cours : 12 June 2006
\\osn01001\be31-doc\DOC 31 - En cours\Travaux en cours\URD31\Fax\MFL V3\LUs MFLV3 MF4640\LU 252 551 036A MFL_V3 FAX 4640
GB\Getting started Gb.fm
To
Use key
Symbol used
Delete a character by moving the cursor to
the left.
Getting started
C
Confirm your entry and return to the initial
screen.
The display screen
Setting your
machine
The screen has two lines of 16 characters.
shows the line you selected.
DIRECTORY
2
SETUP
For menus with more than two choices, use the arrows
next (hidden) lines of the menu (3, 4, etc.).
ACCESS
or
of the navigator to obtain the
Directory
1
Installation
OK
Confirm your entry.
The cursor
Contents
Getting started
TO FUNCTIONS
Access to functions may be achieved in two ways.
Operation
• Menu-driven access.
• Direct function access.
Menu-driven access
You may print the functions list to know the number of a function.
DIRECTORY
2
SETUP
Use the
or
3
FAX
5
PRINT
navigator arrows to move the cursor
in front of the required function.
Validate your choice by pressing OK.
2-3
Date en cours : 12 June 2006
\\osn01001\be31-doc\DOC 31 - En cours\Travaux en cours\URD31\Fax\MFL V3\LUs MFLV3 MF4640\LU 252 551 036A MFL_V3 FAX 4640
GB\Getting started Gb.fm
Safety
1
Maintenance
Press the M key, the functions menu appears.
Getting started
When in the selected menu, use the
or
navigator arrows to move the cursor
in front
of the required sub-function.
51
FUNCTIONS LISTT
52
LOGS
Validate your choice by pressing OK.
Direct access by number
You may print the functions list (M 51 OK) to know the number of a function.
From the stand-by mode:
Press the M key, enter the number of the required function and validate your choice by
pressing OK.
FUNCTIONS LIST
MAIN MENU 1: DIRECTORY
Functions
M 11 OK
M 12 OK
M 13 OK
M 14 OK
M 15 OK
M 16 OK
161 OK
162 OK
-
NEW CONTACT
NEW LIST
MODIFY
CANCEL
PRINT
SAVE/LOAD
SAVE
LOAD
Function description
Enter a name in the directory
Enter a relay broadcast list
Modify a record or a list
Delete a record or a list
Print the directory
Store the directory on a chip card
Save the directory to a chip card
Load the directory from a chip card
Page
p. 4-2
p. 4-3
p. 4-5
p. 4-5
p. 4-5
p. 4-1
p. 4-1
MAIN MENU 2: SETUP
Functions
M 21 OK
M 22 OK
M 23 OK
231 OK
232 OK
233 OK
M 24 OK
241 OK
242 OK
M 25 OK
251 OK
M 29 OK
-
-
-
DATE/TIME
NUMBER/NAME
SEND
SEND REPORT
MEMORY SEND.
ECO PER.
RECEPTION
REC. PAPER
NBR OF COPIES
NETWORK
NETWORK TYPE
TECHNICALS
Function description
Enter the date and the time
Enter your name and your number
Transmission settings
Choose to print the communication report
(voir M 381 OK)
Send from feeder or memory
Set the economy period (see M 32 OK)
Reception settings
Accept reception without paper
Number of copies of received documents
Network settings
Select the type of network
Technical parameters
Page
p. 3-1
p. 3-2
p. 3-4
p. 3-5
p. 3-5
p. 3-6
p. 3-6
p. 3-3
p. 3-7
2-4
Date en cours : 12 June 2006
\\osn01001\be31-doc\DOC 31 - En cours\Travaux en cours\URD31\Fax\MFL V3\LUs MFLV3 MF4640\LU 252 551 036A MFL_V3 FAX 4640
GB\Getting started Gb.fm
MAIN MENU 2: SETUP
-
202 OK
203 OK
GEOGRAPHICAL
COUNTRY
NETWORK
LANGUAGE
Function description
Geographical settings
The country you select will set the corresponding
network, language and keyboard
Set the network individually
Set the language individually
Page
p. 3-3
p. 3-3
p. 3-3
p. 3-3
Installation
Functions
M 20 OK
201 OK
Contents
Getting started
-
-
-
TRANSMISSION
ECO TRANS.
POLLING RX
POLLING TX
MBX SENDING
MBX POLLING
BROADCAST
FAX ANSW.
PRINT
ACTIVATION
ANSWER CODE
REROUTING
ACTIVATION
CALL NUMBER
COPY
TX FORWARD.
ACTIVATION
CALL NUMBER
Function description
Single- and multiple-address transmission
Send a document during the economy period
Polling request
Deposit a document
Send to a mailbox
Poll a mailbox
Broadcast transmission
Control of fax answering machine
Print fax messages stored in the memory
Activating or deactivating the answering machine
Saving an access code
Rerouting of a document to a directory entry
Gateway activation
Recipient selection
Rerouted document local printing
TX forwarding function
TX forwarding activation
Recipient selection
Page
p. 5-4
p. 3-5
p. 5-15
p. 5-15
p. 5-24
p. 5-25
p. 3-7
p. 3-5
p. 3-6
p. 3-6
p. 3-6
p. 5-5
p. 5-5
p. 5-6
p. 5-6
p. 5-6
p. 5-6
Setting your
machine
-
Directory
Functions
M 31 OK
M 32 OK
M 33 OK
M 34 OK
M 35 OK
M 36 OK
M 37 OK
M 38 OK
381 OK
382 OK
383 OK
M 39 OK
3911 OK
3912 OK
3913 OK
392 OK
3921 OK
3922 OK
Getting started
MAIN MENU 3: FAX
-
FUNCTIONS LIST
LOGS
DIRECTORY
SETUP
COMMANDS
MBX LIST
Function description
Page
Print the functions list
Print the communication logs
Print the directory
Print the settings list
Print the commands list (see M 65 OK)
Print the MBX list (see M 75 OK)
p. 5-13
p. 5-12
p. 4-5
p. 5-13
p. 5-8
p. 5-24
Page
Maintenance
-
p. 5-7
p. 5-7
p. 5-8
p. 5-8
p. 5-8
p. 5-21
Safety
Functions
M 51 OK
M 52 OK
M 53 OK
M 54 OK
M 55 OK
M 56 OK
MAIN MENU 6: COMMANDS
Functions
M 61 OK
M 62 OK
M 63 OK
M 64 OK
M 65 OK
M 59 OK
-
PERFORM
MODIFY
CANCEL
PRINT
PRINT LIST
DEPART. CODES
Function description
Execute a pending command
Modify a pending command
Cancel a pending command
Print a pending document
Print the commands list
Print a department code list
2-5
Date en cours : 12 June 2006
\\osn01001\be31-doc\DOC 31 - En cours\Travaux en cours\URD31\Fax\MFL V3\LUs MFLV3 MF4640\LU 252 551 036A MFL_V3 FAX 4640
GB\Getting started Gb.fm
Operation
MAIN MENU 5: PRINT
Getting started
MAIN MENU 7: MAILBOXES
Functions
M 71 OK
M 72 OK
M 73 OK
M 74 OK
M 75 OK
-
Function description
CREATE MBX
DEPOSIT MBX
PRINT MBX
DELETE MBX
PRT MBX LIST
Create and modify a MBX
Deposit a document into a MBX
Print the contents of a MBX
Delete an empty MBX
Print the MBX list
Page
p. 5-23
p. 5-24
p. 5-24
p. 5-24
p. 5-24
MAIN MENU 8: ADVANCED FCT
Functions
M 80 OK
M 81 OK
811 OK
812 OK
813 OK
M 82 OK
821 OK
822 OK
823 OK
824 OK
M 84 OK
841 OK
842 OK
M 85 OK
88 OK
881 OK
882 OK
883 OK
884 OK
-
-
-
-
CALIBRATION
LOCK
LOCKING CODE
LOCK KEYBD.
LOCK NUMBER
COUNTERS
PRINTED PG
SCANNED PAGE
SENT PAGES
RECEIVED PG
SCAN. & PRINT
SCANNER
PRINTER
CONSUMABLES
DEPT. CODES
ACTIVATION
NEW DEPT.
DELETE
PRINT
Function description
Scanner calibration
Activate an access limitation lock
Locking code
Activate keyboard lock
Activate dialling lock
See the activity counters
Printed pages counter
Scanned pages counter
Sent pages counter
Received pages counter
Scanner and printer settings
Scanner settings
Printer settings
Status of consumables
Setting the department codes
Change the department code settings
Create or modify a department code
Delete a department code
Print a department code list
Page
p. 6-17
p. 5-16
p. 5-16
p. 5-16
p. 5-17
p. 5-14
p. 5-14
p. 5-14
p. 5-14
p. 5-14
p. 5-10
p. 6-2
p. 5-18
p. 5-19
p. 5-19
p. 5-20
2-6
Date en cours : 12 June 2006
\\osn01001\be31-doc\DOC 31 - En cours\Travaux en cours\URD31\Fax\MFL V3\LUs MFLV3 MF4640\LU 252 551 036A MFL_V3 FAX 4640
GB\Getting started Gb.fm
3 SETTING YOUR
Setting your
machine
Getting started
Installation
MACHINE
Contents
Setting your machine
At the first power on, set-up the date and time, the network type, the language and check the
others parameters shown hereafter.
TRANSMISSION
Operation
BEFORE
Directory
MAIN SETTINGS
Date/Time
At any moment you may change the date and time on your fax machine.
M 21 OK - SETUP / DATE/TIME
Enter the numbers of the required time and date one after another,
Safety
(for example November 8 2003 at 9h33, press 0 8 1 1 0 3 0 9 3 3) and press OK to
confirm.
Maintenance
To change the date and time:
3-1
Date en cours : 12 June 2006
\\osn01001\be31-doc\DOC 31 - En cours\Travaux en cours\URD31\Fax\MFL V3\LUs MFLV3 MF4640\LU 252 551 036A MFL_V3 FAX 4640
GB\Setting your machine Gb.fm
Setting your machine
Summer time / winter time setting
A menu is available from which you can choose to change to summer / winter time automatically or not.
The 21>DATE/TIME menu includes 2 submenus:
Manual mode
211 OK - SETUP / DATE/TIME / MODIFY
Your fax machine will prompt you to change the date and time via the numeric pad.
Automatic mode
212 OK - SETUP / DATE/TIME / AUTO ADJUST
If you select NO and confirm with OK, the summer / winter time will not be changed automatically
and a setting in the 211 MODIFY menu will be required from you for the machine to be set to the new
time.
If you select YES and confirm with OK, you will not have to care about any change at the end of March
and October. You will just be informed of this change by a message on the screen.
The default for this parameter is NO.
Warning message
On automatic changing to summer / winter time, a message will be displayed to inform you that the fax
time has been changed.
FRI 25 MAR 02:01
CHECK TIME
or
SUN 30 OCT 02:01
CHECK TIME
You next action on the fax keypad will cause this message to be automatically erased.
Your fax number/your name
Your fax will print out your fax number on each document it transmits if you save this number and if
the machine is set to SENDING HEADER (refer to paragraph Technical parameters, page 3-7).
To save your fax number and your name:
M 22 OK - SETUP / NUMBER/NAME
Enter your fax number (20 digits max.) and press OK to confirm.
Enter your name (20 characters max) then press OK to confirm.
3-2
Date en cours : 12 June 2006
\\osn01001\be31-doc\DOC 31 - En cours\Travaux en cours\URD31\Fax\MFL V3\LUs MFLV3 MF4640\LU 252 551 036A MFL_V3 FAX 4640
GB\Setting your machine Gb.fm
Contents
Setting your machine
Type of network
M 251 OK - SETUP / NETWORK / NETWORK TYPE
Select option PABX or PSTN then confirm your choice with OK.
Geographical settings
These settings will enable you to use your machine in different preset countries using different
languages.
Country
By choosing a country, you initialise:
Getting started
To select the type of network:
Installation
You may connect your fax to either a PSTN or private network such as private automatic branch
exchange (PABX). You must select the network which is the most convenient.
• the language by default.
To select the country:
M 201 OK - SETUP / GEOGRAPHICAL / COUNTRY
Select the required option and press the OK key to confirm.
If the required language does not appear, select the setting "Others".
Network
This setting enables you to individually set the type of public telephone network so that your
machine can communicate over the public network of the country you have chosen in
compliance with the applicable standards.
Remark:
Directory
Remark:
Setting your
machine
• the settings for the public telephone network,
These settings are different from the NETWORK TYPE (p. 3-3), which allows you to choose between public
and private network.
Language
This setting enables you to choose a language other than that imposed by the COUNTRY
setting.
To select the language:
M 203 OK - SETUP / GEOGRAPHICAL / LANGUAGE
Safety
Select the required option and press the OK key to confirm.
Maintenance
M 202 OK - SETUP / GEOGRAPHICAL / NETWORK
Select the required option and press the OK key to confirm.
Operation
To select the network:
3-3
Date en cours : 12 June 2006
\\osn01001\be31-doc\DOC 31 - En cours\Travaux en cours\URD31\Fax\MFL V3\LUs MFLV3 MF4640\LU 252 551 036A MFL_V3 FAX 4640
GB\Setting your machine Gb.fm
Setting your machine
Local prefix
This function is used when your fax is installed with a private network, behind a company’s PABX. It
allows you to program an additional automatic local prefix (to be defined), enabling you to
automatically exit the company’s telephone network system, but only under certain conditions:
• the company’s internal numbers, where a prefix is not required, must be short numbers less than
the minimal size (to be defined, for example France has 10 digits),
• the outside numbers requiring a prefix, must be long numbers greater or equal to the minimal size
(to be defined, for example France has 10 digits).
Programming your fax with the local prefix consists of two steps:
• defining the minimal size (or equal) of the company’s outside numbers,
• defining the outgoing local prefix of the company’s telephone network. This prefix will automatically be added as soon as an external number is dialled.
Caution - If you define a local prefix, do not add it to the numbers stored in the directory, it
will be automatically dialled with each number.
Defining the minimal size and the local prefix
M 252 OK - SETUP / NETWORK / PREFIX
You can change the default value for the minimal size of the company’s outside numbers and
validate with OK. The minimal size will range between 1 and 30.
Enter the outgoing local prefix of the company’s telephone network (maximum 5 characters) and
validate with OK.
Transmission report
You may print a transmission report for all communications over the telephone network (STN).
You may choose between more than one criteria for printing reports:
• WITH: a report is given when the transmission was properly performed or when it is completely
abandoned (but there is only one report per request),
• WITHOUT: no transmission report, however, your fax will note all transmissions that took place in
its log (refer to paragraph Logs, page 5-12),
• ALWAYS: a report is printed with each transmission,
• ON ERROR: a report is printed only if the transmission failed or is abandoned.
With each transmission report from memory, a reduced version of the first page is automatically
reproduced.
To select the report type:
M 231 OK - SETUP / SEND / SEND REPORT
Select the required option WITH, WITHOUT, ALWAYS or ON ERROR and confirm your choice
with OK.
3-4
Date en cours : 12 June 2006
\\osn01001\be31-doc\DOC 31 - En cours\Travaux en cours\URD31\Fax\MFL V3\LUs MFLV3 MF4640\LU 252 551 036A MFL_V3 FAX 4640
GB\Setting your machine Gb.fm
Contents
Setting your machine
Document feed type
• from memory, transmission will take place only after memory storage of the document and
dialling. It allows you to get your originals back quickly to free up the machine.
• from the feeder of the sheet-feed scanner (refer to paragraph Document positioning,
page 5-1), transmission will occur after dialling. It allows transmission of larger documents.
To select the way you want to feed your documents:
M 232 OK - SETUP / SEND / MEMORY SEND.
Installation
You may choose the way you want to feed your documents:
Economy period
This function allows you to defer a fax transmission to "off-peak hours" and thus reduce the cost
of your communications.
The economy period, via the telephone network (at off-peak hours), is preset by default from
7.00 pm to 7.30 am. Nevertheless you may change this time slot.
Modifying the economy period:
M 233 OK - SETUP / SEND / ECO PER.
Enter the hours of the new economy period and confirm your selection with the OK key.
Setting your
machine
In feeder mode, the reduced image will not appear on the transmission report.
Getting started
Select the option MEMORY or FEEDER and validate your choice with OK.
Remark:
Using the economy period:
BEFORE
RECEPTION
Fax answering machine
The Fax answering machine allows you to keep confidential documents in storage and to avoid
printing them as you receive them.
The "Fax Messages" indicator light lets you know the state of your Fax answering machine:
• Light on: the answering machine is on.
• Blinking: your fax has documents in storage or is in the process of receiving faxes.
Operation
Enter the call number and confirm with ECO.
Maintenance
or
Directory
M 32 OK - FAX / ECO TRANS.
Enter the call number and confirm with OK.
Safety
• Light off: memory full, the fax cannot receive any more documents.
3-5
Date en cours : 12 June 2006
\\osn01001\be31-doc\DOC 31 - En cours\Travaux en cours\URD31\Fax\MFL V3\LUs MFLV3 MF4640\LU 252 551 036A MFL_V3 FAX 4640
GB\Setting your machine Gb.fm
Setting your machine
You can assure document confidentiality by using the 4 digit access code. Once saved, you will require
this access code for:
• printing fax messages in memory,
• activate or deactivate the fax answering machine.
Saving an access code
M 383 OK - FAX / FAX ANSW. / ANSWER CODE
Enter the code (4 digits) and confirm with OK.
Activating or deactivating the answering machine
M 382 OK - FAX / FAX ANSW. / ACTIVATION
If you saved an access code for your fax answering machine, enter it and validate with OK.
Select the required option
WITH or WITHOUT answering machine and confirm you choice
with OK.
Print fax messages stored in the memory
M 381 OK - FAX / FAX ANSW. / PRINT
If you have defined an access code for your fax answering machine, enter it and press OK.
Documents received and stored in the memory are printed.
Reception without paper
Your fax offers you the possibility to either accept or refuse document reception if your printer is
unavailable (no paper...).
If your fax printer is unavailable, you may choose between two modes of reception:
• reception mode WITHOUT PAPER, your fax saves the incoming messages in the memory,
• reception mode WITH PAPER, your fax refuses all incoming subscribers.
To select the reception mode:
M 241 OK - SETUP / RECEPTION / REC. PAPER
Select the option WITH PAPER or WITHOUT PAPER and confirm your choice with OK.
Remark:
Paper out is indicated by a beep and a message on the screen.
Received faxes are then stored in memory (icon "Fax messages" flashing) to be printed as soon as you add paper into
the feeder.
Number of copies
You may print incoming documents more than once (1 to 99).
To set the number of each document received:
M 242 OK - SETUP / RECEPTION / NBR OF COPIES
Enter the wanted number of copies and confirm with OK.
At each document reception, your fax will print the number of copies requested.
3-6
Date en cours : 12 June 2006
\\osn01001\be31-doc\DOC 31 - En cours\Travaux en cours\URD31\Fax\MFL V3\LUs MFLV3 MF4640\LU 252 551 036A MFL_V3 FAX 4640
GB\Setting your machine Gb.fm
Contents
Setting your machine
Relay broadcast
To relay you need to supply the remote fax with the document and the relay list number. The
remote fax will then transmit this document to all subscribers on the list.
Once the relay is activated by your fax and as soon as the document is received by the remote fax,
the document is printed before relaying to all subcribers on the list.
Installation
Your fax machine (initiator) can relay a document, in other words, transmit a document to your
subscribers via a remote fax and with a precise relay list.
To do this the initiator fax and the remote fax must both have the relay function.
Insert the document to relay (refer to paragraph Document positioning, page 5-1).
Select M 37 OK - FAX / BROADCAST.
Enter the remote fax number where you will relay to or choose your dialling mode (refer
to paragraph Dialling, page 5-2) and press OK.
Getting started
To activate relay from your fax machine:
You may enter the time you wish to transmit the document next to the current time and
press OK.
If you wish to modify the document feed type, select one of the options
FEEDER or
MEMORY , then press OK.
Setting your
machine
Enter the relay list number used by the remote fax and press OK.
If you wish, you may enter the number of pages of your documents before transmitting.
Activate relay by pressing
PARAMETERS
As delivered your fax is preset by default. However, you may adjust it to meet your requirements
by resetting the technical parameters.
To set the technical parameters:
Operation
TECHNICAL
Directory
key.
The document in the feeder will be relayed either immediately or at a later time (according to your
choice) to the remote fax which will relay the document.
M 29 OK - SETUP / TECHNICALS
Safety
Maintenance
Select the desired parameter and confirm with OK.
3-7
Date en cours : 12 June 2006
\\osn01001\be31-doc\DOC 31 - En cours\Travaux en cours\URD31\Fax\MFL V3\LUs MFLV3 MF4640\LU 252 551 036A MFL_V3 FAX 4640
GB\Setting your machine Gb.fm
Setting your machine
With the keys
or
, modify the parameter settings by following the table below and
press OK.
Parameter
Setting
Signification
1 - SCANNING
MODE
1 - NORMAL
2 - FINE
3 - SFINE
4 - PHOTO
Default value of the scan mode resolution for the documents
to be transmitted.
2 - TX HEADER
1 - WITH
2 - WITHOUT
If this parameter is on, your header will appear on all
documents sent to your subscribers with your name, number,
date and number of pages.
Caution - If you send a fax from the document loader, the
transmission header will not appear on the document your
correspondent receives.
3 - TX SPEED
1 - 33600
2 - 14400
3 - 12000
4 - 9600
5 - 7200
6 - 4800
7 - 2400
Transmission speed for outgoing documents.
For a quality telephone line (compatible, no echo),
communications occur at maximum speed.
4 - ECHO PROTECT
1 - WITH
2 - WITHOUT
If this parameter is on, the on-line echo will be reduced during
long distance calls.
6 - EPT MODE
1 - WITH
2 - WITHOUT
For some long distance calls (satellite), the on-line echo may
disturb the call.
7 - COM. DISPLAY
1 - SPEED
2 - PAGE NUMBER
Choice between transmission speed displayed or number of
the page in progress.
8 - ECO ENERGY
1 - WITHOUT
2 - DELAY 5 MIN
3 - DELAY 15 MIN
4 - DELAY 30 MIN
5 - STDBY PERIOD
Choosing the printer standby delay: the printer will switch to
standby after a delay (in minutes) of NON-operation or during
the period of time of your choice.
10 - RX HEADER
1 - WITH
2 - WITHOUT
If this parameter is on, all documents received by your fax
will include the subscriber’s header with his name, number (if
available) fax print date and the page number.
11 - RX SPEED
1 - 33600
2 - 14400
3 - 9600
4 - 4800
5 - 2400
Transmission speed for incoming documents.
For a quality telephone line (compatible, no echo),
communications occur at maximum speed.
However, it may be necessary to restrict the transmission
speed for some calls.
However, it may be necessary to restrict the transmission
speed for some calls.
3-8
Date en cours : 12 June 2006
\\osn01001\be31-doc\DOC 31 - En cours\Travaux en cours\URD31\Fax\MFL V3\LUs MFLV3 MF4640\LU 252 551 036A MFL_V3 FAX 4640
GB\Setting your machine Gb.fm
Setting
Signification
12 - RINGS
2 TO 5
Number of rings to automatically start your machine.
20 - E.C.M.
1 - WITH
2 - WITHOUT
This parameter helps correct the calls made on
1 - WITH
2 - WITHOUT
Makes printing lighter to save toner cartridge ink.
Safety
Maintenance
Operation
Directory
Setting your
machine
Getting started
80 - TONER SAVE
disturbed telephone lines. It is used when the lines are weak
or too noisy. Transmission times may be longer.
Installation
Parameter
Contents
Setting your machine
3-9
Date en cours : 12 June 2006
\\osn01001\be31-doc\DOC 31 - En cours\Travaux en cours\URD31\Fax\MFL V3\LUs MFLV3 MF4640\LU 252 551 036A MFL_V3 FAX 4640
GB\Setting your machine Gb.fm
Setting your machine
3-10
Date en cours : 12 June 2006
\\osn01001\be31-doc\DOC 31 - En cours\Travaux en cours\URD31\Fax\MFL V3\LUs MFLV3 MF4640\LU 252 551 036A MFL_V3 FAX 4640
GB\Setting your machine Gb.fm
Your fax lets you create a directory by memorising subscriber records and subscriber lists.
• Your machine can store up to 250 subscriber records with names and phone numbers.
• You may also group several names to build a subscriber list with up to 24 subscriber lists.
A subscriber list is made from the subscriber records already stored.
Setting your
machine
Getting started
Installation
4 DIRECTORY
Contents
Directory
For all subscriber records or subscriber lists you may:
Directory
• create
• consult
• modify contents
• delete
Safety
Maintenance
You may save and if needed load your directory. This gives you access to functions 161 and 162
(refer to paragraph Functions list, page 2-4). To proceed, you need to contact your reseller and
purchase the optional kit "Directory card".
Operation
• print the directory
4-1
Date en cours : 12 June 2006
\\osn01001\be31-doc\DOC 31 - En cours\Travaux en cours\URD31\Fax\MFL V3\LUs MFLV3 MF4640\LU 252 551 036A MFL_V3 FAX 4640
GB\Directory Gb.fm
Directory
CREATING SUBSCRIBERS RECORDS
For each subscriber record you are not required to fill in each line, only name, tel are required:
• NAME of your subscriber,
• TEL, and fax number of your subscriber,
• RECORD NO., this number is automatically assigned by the fax, it allows quick access to the
answering machine,
• RATE for each subscriber you may choose your fax transmission speed. The available rates are
2400, 4800, 7200, 9600, 12000, 14400 and 33600 bits per second. With a good telephone connection, well adapted and without echo, the appropriate rate is the highest one.
ADDING
A RECORD
M 11 OK - DIRECTORY / NEW CONTACT
Your fax has just created a new record, fill in it by first entering your subscriber’s name then
validate with OK.
Remark:
You can stop the list creation at any time by pressing
.
Enter the person’s fax number1 and press OK to confirm.
Your subscriber’s ID number will automatically appear on the screen, if you wish to modify this
number you may do so by choosing another free number and validate with OK.
Select the option
WITH assigned key if you want to assign a letter (shortcut key) to your
subscriber. The first available letter appears by default. If you want to change it, scroll the letters
keys, and press OK to confirm.
by menas of the or
If need be, select the appropriate transmission speed to send your faxes, and confirm your choice
by pressing the OK key.
1.
If your machine is connected to a PABX, you may need to insert a pause for dial tone (symbolised by the sign / in the
number) except if a local prefix is already programmed (see § Local Prefix)
4-2
Date en cours : 12 June 2006
\\osn01001\be31-doc\DOC 31 - En cours\Travaux en cours\URD31\Fax\MFL V3\LUs MFLV3 MF4640\LU 252 551 036A MFL_V3 FAX 4640
GB\Directory Gb.fm
CREATING SUBSCRIBERS LISTS
Contents
Directory
For each list fill in the following lines:
• NAME of the list,
• NUMBER ASSIGNED to the list, this number is automatically assigned by the fax. It allows
quick access to the answering machine,
Installation
A subscriber list is made from the subscriber records already stored.
Caution - It is impossible to add one subscriber list to another subscriber list.
ADDING
A LIST
To add a list:
M 12 OK - DIRECTORY / NEW LIST
Setting your
machine
• LIST NUMBER, a number lets you identify the list filed under (L).
The same subscriber may be included in different lists.
Getting started
• LIST COMPOSITION, its lists the ID numbers assigned to the subscribers records included in
the list,
Your fax machine has just created a new list, fill it in by first entering the name of this list
You can stop a list or record creation at any time by pressing
. Also, you do not have to complete all the list
characteristics as you create it; you can save the list as it is by pressing
.
The empty field SUBSCRIBER 1 appears, you must fill in the ID numbers assigned to the
subscriber records included in this list.
Directory
then confirm with OK.
Remark:
There are three ways detailed in the table below, to choose and add one or more subscribers
From ...
Procedure
With the alphanumeric keypad enter the first
subscriber’s name
Operation
to your list. Then confirm your choice by pressing OK.
Enter directly the subscriber’s ID number.
subscriber’s ID number
Press
subscribers directory
key then select by means of the
keys.
Safety
or
Maintenance
letters of your subscriber’s name and continue
until the whole name is displayed on the screen.
4-3
Date en cours : 12 June 2006
\\osn01001\be31-doc\DOC 31 - En cours\Travaux en cours\URD31\Fax\MFL V3\LUs MFLV3 MF4640\LU 252 551 036A MFL_V3 FAX 4640
GB\Directory Gb.fm
Directory
For every subscriber included in the list repeat the above step then validate with OK.
Remark:
You can stop record creation at any time by pressing
.
The list ID number will automatically appear on the screen, if you wish to modify this number
you may do so by choosing another free number and validate with OK.
Press
ADDING
to confirm your entry.
OR DELETING A NUMBER FROM THE LIST
M 13 OK - DIRECTORY / MODIFY
Select the subscriber list (L) by means of the
or
keys and validate your choice with OK.
Press OK to display the SUBSCRIBER 1 field, and add or delete the subscriber as shown in the
table hereafter:
To ...
Procedure
Enter the subscriber ID number you wish to add and confirm
with OK.
add
Repeat this step for each added subscriber you want to add.
Place the keys
or
, on the number you wish to delete.
Press key C to delete the number assigned to the list.
delete
Repeat these 2 steps for each subscriber you wish to delete from the
list.
Confirm the new list by pressing key
.
CONSULTING A RECORD OR A LIST
Press
key.
The directory appears in alphabetical order.
Select the subscriber record or subscriber list (L) you wish to consult.
4-4
Date en cours : 12 June 2006
\\osn01001\be31-doc\DOC 31 - En cours\Travaux en cours\URD31\Fax\MFL V3\LUs MFLV3 MF4640\LU 252 551 036A MFL_V3 FAX 4640
GB\Directory Gb.fm
MODIFYING A RECORD OR A LIST
Contents
Directory
The directory appears in alphabetical order.
Use the
or
keys to select the subscriber list (L) you wish to modify and press OK
to confirm.
Modify the line or lines in the subscriber record or subscriber list and confirm each
Installation
M 13 OK - DIRECTORY / MODIFY
key , but you will exit the menu and may not be able to
DELETING A RECORD OR A LIST
M 14 OK - DIRECTORY / CANCEL
The directory appears in alphabetical order.
Use the
or
keys to select the subscriber record or subscribers list (L) you wish to
delete and confirm with OK.
Setting your
machine
You may confirm your modification by pressing
modify the following lines.
Getting started
modification with OK.
Remark:
Press again OK to confirm your deleting.
PRINTING THE DIRECTORY
You may print all the numbers stored in the directory, including all the existing subscriber records
or subscriber lists.
To print the directory:
M 15 OK - DIRECTORY / PRINT
Operation
Directory
The record or list is deleted from the directory.
Safety
Maintenance
The directory is printed in alphabetical order.
4-5
Date en cours : 12 June 2006
\\osn01001\be31-doc\DOC 31 - En cours\Travaux en cours\URD31\Fax\MFL V3\LUs MFLV3 MF4640\LU 252 551 036A MFL_V3 FAX 4640
GB\Directory Gb.fm
Directory
4-6
Date en cours : 12 June 2006
\\osn01001\be31-doc\DOC 31 - En cours\Travaux en cours\URD31\Fax\MFL V3\LUs MFLV3 MF4640\LU 252 551 036A MFL_V3 FAX 4640
GB\Directory Gb.fm
Contents
p
SENDING
DOCUMENT
POSITIONING
Directory
Setting your
Getting started
Installation
5 OPERATION
Place your original documents in the
document feeder:
- face down,
Paper
guide
- first page under the stack.
Operation
Scanner
Set the paper guide to the document
original documents back from the
document exit tray.
Maintenance
width.
Once the operation is over, take your
a blank page.
Remark:
Since the addressee’s number is generally on the document to be transmitted, you may also dial before
positioning the document.
5-1
Safety
Caution - If you forget to position the document to be transmitted, the addressee will receive
p
CHOOSING
THE RESOLUTION/CONTRAST
Resolution
You have 4 modes for document transmission.
The mode choice depends on the type of document to be transmitted:
• Normal mode, symbolised by Std at the bottom of the display screen. To be used for good quality
documents, without drawings or small details,
• Fine mode, symbolised by Fine at the bottom of the display screen. To be used for documents
with drawings or small characters,
• Super Fine mode, symbolised by SFine at the bottom of the display screen. To be used for documents with very fine or small character drawings,
• Photo mode symbolised by Photo at the bottom of the display screen. To be used for photographic documents.
To select the resolution mode:
Press
key as many times as necessary to select the required mode. A
shows the current mode.
icon on the screen
Contrast
You can set the contrast if your document is too light or too dark. If the document is light, you must
raise the contrast and if it is dark, you must reduce it.
To set the contrast:
Press
as many times as necessary to choose the desired contrast, as shown by the position of
a cursor.
DIALLING
From the directory
Dialling alphabetically
Enter the first letter of your subscriber’s name with the alphanumeric keypad, then add the
remaining letters until your subscriber’s name is complete.
5-2
Contents
p
Assigned number dialling
Press key
Your fax lists the subscribers records and lists in the Directory in alphabetical order.
Press key
Then press the letter assigned to the subscriber (refer to paragraph 11 OK - Directory /
New Contact, page 4-2).
The screen displays the corresponding name.
or
Enter the subscriber or subscriber list assigned number.
The screen displays the name of the subscriber or subscriber list assigned to this number.
From the redial key
You can redial one number among the last ten fax numbers you just dialled before.
For a fax number (Tel in the Directory)
Getting started
or
Setting your
or
of the navigator to scroll all subscribers for choice, and choose the required
Use keys
subscriber or subscriber list.
Installation
then
Press key
Use keys
or
of the navigator to select your desired number.
To multiple numbers
Directory
.
The screen displays the last number called.
Caution - This may be achieved only if the machine is parametered to send from the memory
(refer to paragraph Document feed type, page 3-5).
Enter the fax or use the Directory or key
Press key
(refer to above paragraphs).
and enter the number of the second subscriber or second subscriber list.
Operation
You may dial to send a document simultaneously to multiple call numbers.
Repeat this last step for all subscribers or subscriber lists (maximum 10 subscribers or
.
Safety
Press OK or
Maintenance
subscriber lists).
5-3
p
TRANSMISSION
PUBLIC SWITCHED TELEPHONE
NETWORK (PSTN)
OVER THE
Immediate transmission
Position the document (refer to paragraph Document positioning, page 5-1).
Enter the fax number or choose your dialling mode (refer to paragraph Dialling, page 5-2) then
press
.
The "Line" icon flashes during the call phase, it stays lit when both faxes are in communication.
At the end of transmission the initial screen is displayed.
Sending in the eco mode
Position the document (refer to paragraph Document positioning, page 5-1).
Enter the call number and press the ECO key to confirm (refer to paragraph Economy period,
page 3-5) then press
.
The "Line" icon flashes during the call phase, it stays lit when both faxes are in communication.
At the end of transmission the initial screen is displayed.
Delayed transmission
This function allows you to transmit a document at a later time.
To program a postponed transmission you need to identify the subscriber number, transmission time,
feeder type and number of pages.
To delay the transmission time of your document:
Position the document (refer to paragraph Document positioning, page 5-1).
Select M 31 OK - FAX / TRANSMISSION.
Enter the subscriber number you wish to program at a different time or choose your dialling
mode (refer to paragraph Dialling, page 5-2) and confirm with OK.
Next to the current time, enter the new time and confirm with OK.
Adjust the contrast and confirm by pressing the OK key.
Select the feed type, FEEDER or MEMORY and confirm with OK (refer to paragraph Document
feed type, page 3-5).
5-4
You may enter the number of pages before transmission and confirm with OK.
Confirm postponed transmission by pressing key
Contents
p
.
Transmission with auto redial
This function allows you to monitor the dialling operation during a fax transmission. In this case,
the maximum transmission rate will be 14400 bps.
Installation
Your document is stored and will be sent at the new time.
• to hear if the subscriber’s fax is engaged and if so, choose the moment when the line is clear
to start the document transmission,
• to control the communication progress in case of uncertain numbers, etc.
To take the line manually:
Place the document in the fax feeder.
If necessary, set the sound level with navigator
or
keys.
If not already done, enter the subscriber number (or refer to paragraph From the redial
key, page 5-3 to call back the last subscriber).
As soon as you hear the remote fax tone, the line is clear and you can start the transmission.
Press
Setting your
.
to start the document transmission.
If your machine is set in order to print a transmission report (refer to paragraph Main settings,
page 3-1), the reduced copy of the document first page will not be printed and it notifies you that
the communication is manual.
Rerouting
Directory
Press
Getting started
This function allows for example:
have to perform two operations: set the rerouting address of the fax and activate rerouting.
Activate rerouting
M 3911 OK - FAX / REROUTING / ACTIVATION
Operation
This function is used to reroute faxes received to a directory contact. To use this function, you
Confirm with the OK key.
If the function WITHOUT is selected the menus 392 and 393 will not be included in the functions overview,
when it is printed out.
Safety
Remark:
Maintenance
Using the keys or within the navigator, select option >>3911 WITH.
5-5
p
Set the re-direction contact
M 3912 OK - FAX / REROUTING / CALL NUMBER
Using the keys
and
within the navigator select the subscriber from the directory (if the
directory is empty the display will show DIRECTORY EMPTY). Enter the number of the
subscriber manually or store the name and related number in the directory
M 3913 OK - FAX / REROUTING / COPY
Local printout of the information relayed to your system
Using the keys
and
within the navigator select the COPY option (local printout of the
information relayed to your system) either WITH or WITHOUT.
Confirm with the OK key.
Tx forwarding
This function is used to configure the machine so that any document transmitted by fax is also sent to
a third party. The recipient will be selected from the entries in your machine’s directory. It may be a
fax machine number.
M 3921 OK - FAX / TX FORWARD. / ACTIVATION
Using the keys
or
within the navigator select WITH ou WITHOUT and confirm with
the OK key.
Remark:
If you choose WITHOUT, the menu 3922 won’t be displayed.
M 3922 OK - FAX / TX FORWARD. / CALL NUMBER
Select the recipient you want from the directory and confirm by pressing OK.
The function is active and from now on any documents transmitted will have a copy sent to the
selected recipient.
The transmission mode to the copied recipient depends on the type of short numbers in the
directory.
5-6
WAITING QUEUE
This function lets you obtain a recap of all documents queuing, for transmission, including those
in deposit or in delayed transmission, etc.
It allows you to:
Getting started
• consult or modify the waiting queue. In this waiting queue the documents are coded the
following way:
Order number in the queue / document status / subscriber’s telephone number.
Documents may have the following status:
Installation
TRANSMISSION
Contents
p
- TX: transmission,
- REL: relay,
- DOC: in deposit,
- POL: polling,
- MBX: send to mailbox,
- PMB: mailbox polling,
Setting your
- TR: ongoing commands.
• immediately perform a transmission from the waiting queue,
• print a document in storage, waiting to be transmitted or in deposit,
• print the waiting queue, to get the status of each document in the queue, by either:
- queue order number,
- scheduled transmission time (fax),
- operation type regarding the document: transmission from memory, delayed
transmission, deposit,
- number of pages of the document,
Directory
- document name or number,
- document size (percentage of space stored in memory),
• cancel a transmission request in the waiting queue.
Immediately perform transmission from the waiting
queue
M 61 OK - COMMANDS / PERFORM
Select the document in the waiting queue and confirm your choice with OK or
to
immediately perform the selected transmission.
M
Maintenance
Operation
Consult or modify the waiting queue
M 62 OK - COMMANDS / MODIFY
You may now modify the parameters of the given document then confirm your
modifications by pressing key
5-7
.
Safety
In the waiting queue, select the required document and confirm your choice with OK.
p
Printing a document in waiting or in deposit
M 64 OK - COMMANDS / PRINT
In the waiting queue, select the desired document and confirm your choice with OK.
Print the waiting queue
M 65 OK - COMMANDS / PRINT LIST
A document called ** COMMAND LIST ** is printed.
Deleting a transmission on hold
M 63 OK - COMMANDS / CANCEL
In the waiting queue, select the desired document and confirm your choice with OK.
CANCELLING
A TRANSMISSION IN PROGRESS
Cancelling a transmission in progress is possible whatever the type of transmission but varies
depending on whether the transmission is a single call number or a multi-call number.
• For a single call number from the memory, the document is erased from the memory
• For a multi-call number, only the call number in progress at the time of the cancellation is erased
from the transmission queue
To cancel transmission in progress:
Press key
.
A message will ask you to confirm cancellation by pressing the key
Press key
a second time.
to confirm cancellation in progress.
If your machine is set to print a transmission report (refer to paragraph Transmission report,
page 3-4), it will print that the communication was cancelled by the user.
5-8
Contents
p
RECEPTION
PUBLIC SWITCHED TELEPHONE
NETWORK (PSTN)
Getting started
OVER THE
Fax reception depends on the parameter settings of your machine:
Your fax offers to print out one more copies of one or more pages.
LOCAL
COPY
Standard copy
Position the document face down (refer to paragraph Document positioning, page 5-1).
Press key
twice.
"Sophisticated" copy
Position the document face down (refer to paragraph Document positioning, page 5-1).
Press key
Directory
Setting your
COPYING
.
Operation
RECEPTION
Installation
Reception of all documents over the telephone network is done one at a time at fax reception.
Choose FAST, QUALITY or PHOTO resolution with the keys
or
, then press OK to
confirm.
Set the desired zoom value 25% TO 400% with keys
or
and the numerical keypad,
then press OK to confirm.
Choose the copy output type between
Maintenance
Enter the desired number of copies and press OK to confirm.
COPY ASSEMBLED or NOT ASSEMBLED and
Set the required origin values with keys
confirm.
5-9
or
the numerical keypad and press OK to
Safety
press OK to confirm.
p
Set the required contrast value with keys
and press OK to confirm.
or
Set the required brightness value with keys
or
and press OK to confirm.
Choose the type of paper, NORMAL, THICK with keys
or
and press OK to confirm.
Choose the paper tray, AUTOMATIC, UPPER or LOWER with keys
or
and press OK to
confirm.
SPECIFIC
COPY SETTINGS
When the copy quality is no longer satisfactory, you can perform a calibration. To do so, refer to
paragraph Scanner calibration, page 6-17.
Moreover, a high number of controls let you improve the copy quality.
Scanner settings:
• RESOLUTION to set the photocopy resolutation.
• ZOOM settings to reduce or magnify any portion of a document by choosing the origin and value
of the zoom to apply to that portion.
• The assembly parameter to choose between ASSEMBLED or NOT ASSEMBLED copies.
• The ORIGIN parameter to choose the origin to be applied to the document.
• CONTRAST to choose the photocopy contrast.
• BRIGHTNESS is used to make your original document lighter or darker.
• L/R MARGINS to shift the margins or your original document to the left or to the right.
Printer settings:
• PAPER is used to tell your machine what type of paper you use by default.
• TRAY is used to tell your machine which paper tray shoud be used by default.
• L/R MARGINS to shift the margins of your document to the left or to the right.
Caution - All the settings performed through this menu will become the machine's default settings.
To access to the settings:
M 84 OK - ADVANCED FCT / SCAN. & PRINT
Select the SCANNER or the PRINTER to be set and press OK to confirm.
Use the keys
or
of the navigator to scroll the described hereafter settings you want to
modify.
Scanner settings
Resolution
Set the desired resolution FAST, QUALITY or PHOTO with keys
Confirm your setting by pressing key OK.
5-10
or
.
Zoom
Your fax offers to reduce or magnify a specific part of a document from 25% to 400%.
Contents
p
Enter the desired zoom value with the numerical keypad (ZOOMING).
Installation
Confirm your setting by pressing key OK.
Assembly
Choose the copy type between ASSEMBLED or NOT ASSEMBLED.
Origin
If you wish, you can change the origin of the scanner.
By entering new values of X and Y given in mm (X < 210 and Y < 286), you will move the
scanning zone as shown on the figure below.
Getting started
Confirm your choice by pressing key OK.
x
Setting your
y
Top view: scanned side down
Select the X and Y coordinates with keys
or
.
Set the required coordinates with the numeric keypad or
or
Directory
END OF SHEET
TOP OF SHEET
Scanned area
.
Confirm your setting by pressing key OK.
Contrast
or
.
Operation
Set the desired contrast with keys
Confirm your setting by pressing key OK.
Luminosity
Set the desired luminosity with keys
or
.
Maintenance
Confirm your setting by pressing key OK.
Margins
If you want to shift the side margins of your document to the left or to the right:
Adjust the left / right margins shift (in steps of 0.5 mm) with keys
or
.
Safety
Confirm your setting by pressing key OK.
5-11
p
Printer settings
Paper
Select the type of paper, NORMAL or THICK with keys
or
.
Confirm your setting by pressing key OK.
Remarks:
1) When the THICK type of paper is selected, the printing speed is slowed down..
2) Use the manual feeder for paper substances over 90 g/m2.
Paper tray
Select the paper tray to be used (AUTOMATIC, LOWER or UPPER) using keys
or
.
Confirm your setting by pressing key OK.
Margins
If you want to shift the side margins of your document to the left or to the right:
Adjust the left / right margin shift (in steps of 0.5 mm) by means of the keys
or
.
Press OK to confirm.
OTHER FUNCTIONS
LOGS
The incoming and outgoing logs list the last 30 transmissions (incoming and outgoing) made by your
machine.
An automatic print out will take place after every 30 transmissions. However, you may request a print
out at any time.
Each log (incoming or outgoing) contains a table with the following information:
• date and time of the incoming or outgoing document,
• transmission mode (Normal, Fine, SFine or Photo),
• number of pages sent or received,
• call duration,
• incoming or outgoing results: noted CORRECT if properly transmitted,
or
information codes for special calls (polling, manual subscribers, etc.),
• reason for call error (example: your subscriber does not answer).
To print the logs:
M 52 OK - PRINT / LOGS
The incoming and outgoing logs are printed on the same page.
5-12
PRINTING
THE FUNCTIONS LIST
Contents
p
Installation
You may print the functions list of your fax machine at any time:
Press the i key.
or
To print the functions list:
At any moment, you may print the list of your fax’s parameter settings to control any changes
possibly made to the default parameters.
Printing the machine settings:
M 54 OK - PRINT / SETUP
or by pressing the I key.
Your fax prints the list of stored parameters.
MEMORIZING
A SEQUENCE OF KEYS
You may memorize a sequence of keys (for example, to send a fax directly to one or multiple
subscribers, to call this subscriber or to get access to a specific menu, etc.).
Setting your
THE MACHINE SETTINGS
Directory
PRINTING
Getting started
M 51 OK - PRINT / FUNCTIONS LIST
This sequence is registered in one of the keys F1 or F2 (as you want).
To register a sequence (for example, in key F1)
Press key M, then F1: you will enter the menu option.
From this moment, all the key pressings are memorized in the key F1.
Operation
Then, by pressing one of these keys, you will execute the registered sequence.
memorizing is automatic if you have already exited the menu.
Example: To memorize a fax sending to various subscribers in key F1:
Safety
Press keys M then F1.
Maintenance
Press key F1 to register the sequence if you are still in the menus. The sequence
5-13
p
Press keys 3, 1 then OK.
Enter the subscriber fax number.
Press key
and enter the second subscriber fax number or subscribers list.
Repeat this last step for all subscribers or subscribers lists.
Press key F1: the sequence is memorized.
To send a fax directly to your subscriber (key F1 preset)
Press F1.
Position the document (refer to paragraph Document positioning, page 5-1).
Press the key
.
COUNTERS
At any time, you may consult the activity counters of your machine.
To get access to the counters of the machine:
M 82 OK - ADVANCED FCT / COUNTERS
These counters indicate the number of:
• printed pages,
M 821 OK - ADVANCED FCT / COUNTERS / PRINTED PG
• scanned pages,
M 822 OK - ADVANCED FCT / COUNTERS / SCANNED PAGE
• transmitted pages,
M 823 OK - ADVANCED FCT / COUNTERS / SENT PAGES
• received pages.
M 824 OK - ADVANCED FCT / COUNTERS / RECEIVED PG
5-14
AND POLLING
You may Deposit a document in your fax and keep it available to one or more subscribers who
can obtain a fax of this document by calling your fax with the Poll function.
Setting the machine for document deposits,
you must define the type:
• SIMPLE- it may be polled only once from the memory or feeder,
Installation
DEPOSIT
Contents
p
you must define the poll number, then depending on the type of poll you may:
• launch an immediate poll,
• program a delayed poll with a chosen time,
• launch a multi-poll, either immediately or later.
Placing a document in deposit
Insert the document to deposit in the feeder.
Select M 34 OK - FAX / POLLING TX and confirm with OK.
Choose the type, according to the table below:
Procedure
Select FEEDER or MEMORY.
SIMPLE
If necessary, adjust the contrast and confirm with OK.
Directory
Menu
Setting your
Setting the machine for polled documents,
Getting started
• MULTIPLE- it may be polled as many times as necessary from the memory.
Enter the number of pages that you wish to deposit.
Enter the number of pages that you wish to deposit.
Confirm deposit by pressing the OK key.
Operation
If necessary, adjust the contrast and confirm with OK.
MULTIPLE
M 33 OK - FAX / POLLING RX
Enter the number of the party whose document you want to poll or choose your dialing
mode (refer to paragraph Dialling, page 5-2).
You can poll several documents using the
key.
Safety
Remark:
Maintenance
Polling a deposited document
5-15
p
Depending on the type of poll you should:
Choice
Procedure
Immediate poll
Press
Delayed poll
Press OK
.
Next to the current time, enter the time you wish to poll the
document and press
.
LOCKS
There are restrictions to the use of your fax:
• To lock the printing of received documents (refer to paragraph Fax answering machine,
page 3-5),
• locking the keyboard,
• locking the numbers.
Entering the locking code
The operator access parameters are confidential; they are protected by a four-digit interlock code that
the authorised operators must know.
To access the locking code:
M 811 OK - ADVANCED FCT / LOCK / LOCKING CODE
Enter your four-digit interlock code on the keypad.
Confirm by pressing OK.
Confirm the interlock code by entering the code one more time.
Press OK to confirm.
Remark:
When a code is already registered, the machine asks you to give the former code before allowing you to modify it.
Locking the keyboard
This function allows you to prevent access to non-authorised persons. An access code must be entered
each time a person wants to use the machine.
To access the keypad unlocking menu:
M 812 OK - ADVANCED FCT / LOCK / LOCK KEYBD.
Enter the four-digit interlock code.
Press key OK to confirm.
With keys
or
of the navigator, select the option WITH.
5-16
Contents
p
Press key OK to confirm.
After each operation, the machine interlocks automatically.
Locking the numbers
This function locks dialling and the numerical keypad is disabled. Transmissions are only
possible from numbers included in the directory.
You can still send mails by typing in the addressee’s address (if this has no numbers in it).
Installation
Remark:
To access the number interlocking option:
of the navigator, select the option DIRECT ONLY.
Press key OK to confirm.
DEPARTMENT CODE
Use of the machine can be limited to authorized personnel within each department by setting up
a master department code and individual department codes. You can assign one master code and
up to 98 department codes. The FAX 4640 can then monitor the usage for each department. The
master department code is used to setup and modify the department code information.
During the setup procedure, you are prompted to enter a 4-digit master department code. This
code is required to perform any modifications; it is used as a supervisory master key. The master
code department number is preset to 00 by the FAX 4640.
The individual department codes are used to access and operate the FAX 4640. During the setup
procedure, you can assign department numbers from 1-98. You are also prompted to enter a
4-digit department code for each department. As each department enters their assigned
department code to access and operate the FAX 4640, the usage for each department is recorded
on the department code report.
FUNCTION
MANAGEMENT BY THE ADMINISTRATOR
By default, the "Department Code" function is deactivated when the machine is first put into
service.
Activating the department code
Setting your
or
Directory
With keys
Operation
Press key OK to confirm.
Maintenance
Enter the four-digit interlock code with the keypad.
Getting started
M 813 OK - ADVANCED FCT / LOCK / LOCK NUMBER
M 881 OK - ADVANCED FCT / DEPT. CODES / ACTIVATION
or
keys, select WITH.
Press OK to confirm; the function is activated.
5-17
Safety
Using the browser’s
p
Deactivating the department code
M 881 OK - ADVANCED FCT / DEPT. CODES / ACTIVATION
Using the browser’s
or
keys, select WITHOUT.
Press OK to confirm; the function is deactivated.
Setting the department codes
The administrator must enter the department number to be created, between 01 and 98; the number 00
is reserved for the administrator to enter his or her own department code and department name before
being able to record other codes for different users.
• Entering the master1 code.
M 882 OK - ADVANCED FCT / DEPT. CODES / NEW DEPT.
The screen displays:
NEW DEPT..
00> FREE
Using the browser’s
key, select 00.
Confirm by pressing OK.
The screen displays:
8821>DEPT. CODE
8822 DEPT. NAME
Press OK to confirm the line 8821>DEPT. CODE.
The screen displays MASTERCODE and ****.
Using the
key, go to the **** line and enter your 4-digit department code (remember this
code).
Confirm the code by pressing OK.
Using the browser’s
key, select 8822 DEPT. NAME and press OK.
Using the alphabetical keypad, enter the name you want to give to your department (maximum
20 characters).
Confirm your department name by pressing OK.
1.
Code only attributed to the administrator.
5-18
Contents
p
Creating a department code
Only the administrator, using the Mastercode is able to attribute other department codes.
M 882 OK - ADVANCED FCT / DEPT. CODES / NEW DEPT.
Enter a number between 01 and 98 or select a free number using the
or
keys, as
shown on the machine’s display.
Confirm your selection by pressing OK.
Installation
Enter your mastercode and confirm by OK.
8821>DEPT. CODE
8822 DEPT. NAME
Press OK; the screen displays:
DEPT. CODE
Getting started
The screen displays:
machine displays "CODE ALREADY USED". In this case, enter another code.
Confirm your selection by pressing OK.
The machine also asks you if you want to be able to modify the department name. Press OK then
the
key to return to the main menu.
Deleting a department code
The administrator can also delete a department code to prevent the department associated with it
having any access to the machine functions.
Directory
Enter a 4-digit code (remember it); if this code is already used by another service, the
Setting your
****
Enter your administrator mastercode.
Enter the number of the department code you want to delete or search for it using the
or
keys.
Confirm by pressing OK. A confirmation screen is displayed. Press OK again to confirm
Operation
M 883 OK - ADVANCED FCT / DEPT. CODES / DELETE
Safety
Caution - If the administrator deletes his or her own department code all the other department
codes will also be deleted.
Maintenance
the deletion. Once confirmed, the department code number becomes free again and the
counters also associated with this number will be erased.
5-19
p
Printing a department code
The administrator may print reports for each department entered. These reports show the department
number (between 01 and 98), its name, the associated access code and the number of pages transmitted
and copied by this department.
M 884 OK - ADVANCED FCT / DEPT. CODES / PRINT
Enter the number of the department you want to print and confirm by pressing OK.
The machine begins printing the report, as shown in the illustration below.
** DEPARTMENT
SID : Smith
CODES **
Number : 0987654321
Date : 12-12-04 14:20
Department
01
Departement Name
FAX LASER
Departement Code
3178
Pages sent
1589
Pages copied
2890
Printing the department report
The administrator may print reports for all the departments created. To do so:
M 884 OK - ADVANCED FCT / DEPT. CODES / PRINT
Enter the administrator department number 00 and confirm by pressing OK. The machine prints
the report, as shown in the illustration below.
** DEPARTMENT CODES
SID : Smith
Dept.
**
Number: 0885654321
Department name
Date : 12-12-04 14:20
Dept. Code
Pages sent
Pages copied
00
Master
1234
1258
3698
001
Office 44
6589
2596
1589
002
Office 85
2574
3561
4587
003
Office 47
1593
1897
5984
5-20
THU 20 FEB 10:15
ENTER DEPT. CODE
Press on the numerical keypad only (pressing any other keys will sound beeps).
The screen displays:
ENTER DEPT. CODE
****
Enter your department’s access code (as provied by the administrator). If this code is
correct, the machine will grant you access to all the functionalities available, except for
menu 88 as this is reserved for the administrator. If the access code does not correspond to
any services, the machine displays "WRONG CODE".
Printing a user department code
Each department may print the data of its own department code.
Installation
To access the different machine functions, each department must enter its own access code as
delivered by the administrator. When the "DEPARTMENT CODE" function is activated, the
screen displays:
Getting started
OF THE DEPARTMENT CODES BY A DEPARTMENT
Setting your
USE
Contents
p
If the "Department Code" function is activated, enter your 4-digit numerical access code
M 59 OK - PRINT / DEPT. CODE
The machine prints the data for your own department’s department code.
Maintenance
Operation
If the mastercode is enter the machine prints the summary of the accounts.
Safety
Remark:
Directory
and confirm by pressing OK.
5-21
p
CHARGE CODE
ENTERING
THE CHARGE CODE
The charge code is a number that is sent on-line after your correspondent’s fax machine number. To
add a charge code after entering your correspondent’s number you must press the
key. This inserts
the "+" symbol after the number and you may then type your charge code.
Example:
TO:
9738088444+****
The charge code will always be hidden.
The maximum length that can be entered is 30 characters. When dialing, only the digits are sent on the
line. The "+" symbol inserted is not sent. In the example above, the number 97380884440123 is dialed.
If your equipment is connected to a private exchange (PABX), enter the prefix (number used by your
PABX to access the telephone network, for example 0), followed by a "/" (or pause).
When a charge code is used, the transmission reports and the machine log printout contains the
correspondent’s number followed by the charge code’s "+" symbol.
MAIL BOX (MBX FAX)
There are 32 mailboxes (MBX), enabling you to transmit documents in complete confidence using an
access code (named code MBX), to all subscribers equipped with a fax compatible to yours.
MBX 00 is public. It is handled directly by the terminal to record the messages of the fax TAD as soon
as this is put into service.
MBX’s 01 to 31 are private. Each is password-protected. They can be used to receive documents
confidentially.
The use and access to MBX 01 - 31 are conditioned by the initialisation, defined by a MBX code (if
needed) and a mnenonic (its S.I.D.).
5-22
• print the contents of an MBX, only possible if the MBX contains one or more documents
(with a star "*" next to the MBX). When the contents of an MBX have been printed it
becomes empty,
• delete an MBX, only if the MBX is initialised and empty,
• print the the list of your fax machine’s MBX’s.
You may receive and send through an MBX in complete confidentiality.
The deposit a document into your MBX, the access code is not needed. All documents deposited
in a MBX are added to the ones already present.
In polling, the MBX are only accessible with an MBX code.
You may perform MBX deposits or polls by:
• depositing a document in a fax MBX,
• transmit to deposit a document in a remote fax MBX,
• perform document poll from a remote fax.
MBX
MANAGEMENT
Creating an MBX
Getting started
• modify the features of an MBX,
Setting your
Later you may:
Installation
Contents
p
Select a free MBX out of the 31 MBX or directly enter the number of a free MBX and
confirm with OK.
Select option MAILBOX CODE and press OK.
Directory
M 71 OK - MAILBOXES / CREATE MBX
Value 0000 is always displayed.
Select option MAILBOX NAME and press OK.
Enter this MBX ’s S.I.D. (20 characters max.) and press OK.
The MBX is initialised. If you wish to initialise another, press C and repeat the same procedure.
.
Modifying the features of a MBX
M 71 OK - MAILBOXES / CREATE MBX
Select a free MBX out of the 31 MBX, or enter the number of a free MBX directly (1-31)
Maintenance
To exit the MBX, press
Operation
Enter the code of your choice, if needed, and press OK.
and confirm with OK.
Safety
Enter the code of this MBX, if there is one, and confirm with OK.
5-23
p
Select the menu MAILBOX CODE or MAILBOX NAME, then confirm your choice with OK.
Perform data modification of the menu and confirm with OK.
If needed, repeat the last two steps for the other menu.
Printing the contents of a MBX
M 73 OK - MAILBOXES / PRINT MBX
Select a free MBX out of the 31 MBX, or enter the number of a free MBX directly (1-31) and
confirm with OK.
Enter the code of the MBX, if there is one, and confirm with OK.
All documents found in the MBX are printed and the MBX is emptied.
Deleting a MBX
Before deleting an MBX, you need to make sure it is empty, by printing its content.
M 74 OK - MAILBOXES / DELETE MBX
Select a free MBX out of the 31 MBX, or enter the number of a free MBX directly (1-31) and
confirm with OK.
Enter the code of the MBX, if there is one, and confirm with OK.
Press
to confirm MBX deletion.
The MBX is deleted and will appear as a free MBX in the list.
Printing the MBX list
M 75 OK - MAILBOXES / PRT MBX LIST
The list gives the status of each MBX.
MBX deposit in your fax
Insert the document in the fax machine’s feeder.
Select M 72 OK - MAILBOXES / DEPOSIT MBX and confirm with OK.
Select a free MBX out of the 31 MBX, or enter the number of a free MBX directly (1-31) and
confirm with OK.
The document is placed in the feeder and saved in the selected MBX.
MBX deposit in a remote fax
Insert the document in the fax machine’s feeder.
Select M 35 OK - FAX / MBX SENDING and confirm with OK.
5-24
Enter your subscriber’s number for MBX deposit or choose your dialing mode (refer to
paragraph Dialling, page 5-2) and validate with OK.
Contents
p
If you wish to delay transmission, enter the new transmission time next to the current time
and press OK.
If you wish to modify the document feed type, select one of the options
FEEDER or
MEMORY, and press OK.
Installation
Enter the subscriber’s MBX number and confirm with OK.
If you wish, you may enter the number of pages of your document before transmitting and
Confirm the transmission request to a remote MBX fax by pressing key
.
In the case of an immediate transmission, the document is sent immediately.
If the document is set for a postponed transmission the document will be stored in the memory
and sent at the requested time.
Getting started
confirm with OK.
M 36 OK - FAX / MBX POLLING
Enter your subscriber’s number for MBX deposit or choose your dialing mode (refer to
paragraph Dialling, page 5-2) and validate with OK.
Setting your
MBX polling from a remote fax
Enter the subscriber MBX number and press OK.
If you wish to delay the poll time, enter the departure time next to the current time.
Confirm the MBX poll request by pressing key
.
As soon as the remote fax is subscribed, either immediately or later, the document(s) in the remote
fax MBX are receveid in your fax.
Maintenance
Operation
Please check for remote fax compatibility.
Safety
Remark:
Directory
Enter this MBX access code and press OK.
5-25
p
5-26
MAINTENANCE
GENERAL
Directory
Setting your
machine
Getting started
Installation
6 MAINTENANCE
Contents
Maintenance
To ensure the best operating conditions for your fax, it is recommended that you regularly clean
the inside.
• Never leave the cover open unless required.
• Do not attempt to oil the machine.
• Always gently close the cover and avoid vibrations.
Operation
For normal usage, please respect the following rules:
• Do not open the cover while printing.
• Do not use paper that has stayed in the paper tray for a long time.
Safety
Look at the safety rules in the Safety and Environment chapter at the end of this booklet.
Maintenance
• Never try to dismantle the machine.
6-1
Date en cours : 12 June 2006
\\osn01001\be31-doc\DOC 31 - En cours\Travaux en cours\URD31\Fax\MFL V3\LUs MFLV3 MF4640\LU 252 551 036A MFL_V3 FAX 4640
GB\Maintenance Gb.fm
Maintenance
REPLACING
THE CONSUMABLES
(TONER
AND DRUM)
To check the remaining capacities of the consumables:
M 85 OK - ADVANCED FCT / CONSUMABLES
The toner cartridge and the drum cartridge come with a chip card.
After replacing a consumable item in the printer, you need to inform the machine about its features.
Replacing cartridges
Replacing the toner cartridge
To replace the toner cartridge, proceed as shown below.
When the display shows:
CHANGE TONER
<OK> TO CONFIRM
1 - Open the printer cover.
6-2
Date en cours : 12 June 2006
\\osn01001\be31-doc\DOC 31 - En cours\Travaux en cours\URD31\Fax\MFL V3\LUs MFLV3 MF4640\LU 252 551 036A MFL_V3 FAX 4640
GB\Maintenance Gb.fm
Caution - The fusing unit located inside the printer may become very hot during operation.
2 - Remove the drum/toner cartridge assembly. In order to protect the environment, do
Safety
Maintenance
Operation
Directory
not throw away the used toner cartridge. Used cartridges should be disposed of in
accordance with local regulations concerning waste materials.
Setting your
machine
Getting started
Installation
To avoid injury - do not touch.
Contents
Maintenance
6-3
Date en cours : 12 June 2006
\\osn01001\be31-doc\DOC 31 - En cours\Travaux en cours\URD31\Fax\MFL V3\LUs MFLV3 MF4640\LU 252 551 036A MFL_V3 FAX 4640
GB\Maintenance Gb.fm
Maintenance
3 - Unlock the toner cartridge by turning the blue locking clip in the direction shown in the
illustration below.
4 - Separate the drum cartridge from the toner cartridge.
Drum cartridge
Toner cartridge
5 - Remove the new toner cartridge from its box, holding it firmly in both hands.
6-4
Date en cours : 12 June 2006
\\osn01001\be31-doc\DOC 31 - En cours\Travaux en cours\URD31\Fax\MFL V3\LUs MFLV3 MF4640\LU 252 551 036A MFL_V3 FAX 4640
GB\Maintenance Gb.fm
6 - Shake the toner cartridges alternately in the directions shown by the arrows in the
Safety
Maintenance
Operation
Directory
Setting your
machine
7 - Remove the protective plastic strip from the cartridge.
Getting started
Installation
illustration below.
Contents
Maintenance
6-5
Date en cours : 12 June 2006
\\osn01001\be31-doc\DOC 31 - En cours\Travaux en cours\URD31\Fax\MFL V3\LUs MFLV3 MF4640\LU 252 551 036A MFL_V3 FAX 4640
GB\Maintenance Gb.fm
Maintenance
8 - Insert the new toner cartridge in the drum cartridge until locked in place.
Caution - Make sure not to touch the green coloured drum roller located under the fold away flap of
the drum cartridge, which could cause deterioration to the print quality of your faxes and your local
photocopies.
Caution - Do not touch the metal parts located on the side of the toner/drum cartridge set as shown
below, to prevent causing damage due to possible static electricity discharges.
Drum roller
Caution - Make sure not to touch the black coloured development roller located in front of the toner
cartridge, which would cause downgrading to the print quality of your faxes and your local
photocopies.
Development roller
6-6
Date en cours : 12 June 2006
\\osn01001\be31-doc\DOC 31 - En cours\Travaux en cours\URD31\Fax\MFL V3\LUs MFLV3 MF4640\LU 252 551 036A MFL_V3 FAX 4640
GB\Maintenance Gb.fm
Getting started
Installation
9 - Insert the toner/drum cartridge in the printer as shown below.
Contents
Maintenance
Press OK on the scanner control panel. The display shows:
TUE 02 APR 13:39
Maintenance
Operation
Directory
Setting your
machine
10 - Close the printer cover pressing it carefully but firmly until it clicks into position.
Safety
INSERT GAUGE CARD
6-7
Date en cours : 12 June 2006
\\osn01001\be31-doc\DOC 31 - En cours\Travaux en cours\URD31\Fax\MFL V3\LUs MFLV3 MF4640\LU 252 551 036A MFL_V3 FAX 4640
GB\Maintenance Gb.fm
Maintenance
Insert chip card (supplied with the toner cartridge) into the card reader ensuring that the chip is
entered as shown in the illustration below.
The following is displayed on the scanner control panel screen:
CHANGE TONER?
YES = OK - NO = C
Press OK.
Once the chip card has been read, the display shows:
TONER OK
REMOVE CARD
Remove the card.
Caution - If the following is displayed, check that you have inserted the chip card the right way up.
CANNOT READ CARD
REMOVE CARD
6-8
Date en cours : 12 June 2006
\\osn01001\be31-doc\DOC 31 - En cours\Travaux en cours\URD31\Fax\MFL V3\LUs MFLV3 MF4640\LU 252 551 036A MFL_V3 FAX 4640
GB\Maintenance Gb.fm
Replacing the drum cartridge
To replace the drum cartridge, proceed as shown below.
Contents
Maintenance
When the display shows:
Installation
CHANGE DRUM
<OK> TO CONFIRM
Safety
Maintenance
Operation
Directory
Setting your
machine
Getting started
1 - Open the printer cover.
6-9
Date en cours : 12 June 2006
\\osn01001\be31-doc\DOC 31 - En cours\Travaux en cours\URD31\Fax\MFL V3\LUs MFLV3 MF4640\LU 252 551 036A MFL_V3 FAX 4640
GB\Maintenance Gb.fm
Maintenance
2 - Remove the drum/toner cartridge assembly. In order to protect the environment, do not
throw away the used drum cartridge. Used cartridges should be disposed of in accordance
with local regulations concerning waste materials.
Caution - The fusing unit located inside and at the bottom of the printer may become very hot
during operation. To avoid injury - do not touch.
3 - Unlock the toner cartridge by turning the blue locking clip in the direction shown in the
illustration below.
6-10
Date en cours : 12 June 2006
\\osn01001\be31-doc\DOC 31 - En cours\Travaux en cours\URD31\Fax\MFL V3\LUs MFLV3 MF4640\LU 252 551 036A MFL_V3 FAX 4640
GB\Maintenance Gb.fm
Caution - Make sure not to touch the green coloured drum roller located under the fold away
flap of the drum cartridge, which could cause deterioration to the print quality of your faxes and
your local photocopies.
Caution - Do not touch the metal parts located on the side of the toner/drum cartridge set as
Directory
shown below, to prevent causing damage due to possible static electricity discharges.
Setting your
machine
Getting started
Installation
4 - Separate the drum cartridge from the toner cartridge.
Contents
Maintenance
toner cartridge, which would cause downgrading to the print quality of your faxes and your local
photocopies.
Safety
Development roller
Maintenance
Caution - Make sure not to touch the black colored development roller located in front of the
Operation
Drum roller
6-11
Date en cours : 12 June 2006
\\osn01001\be31-doc\DOC 31 - En cours\Travaux en cours\URD31\Fax\MFL V3\LUs MFLV3 MF4640\LU 252 551 036A MFL_V3 FAX 4640
GB\Maintenance Gb.fm
Maintenance
5 - Insert the new toner cartridge in the drum cartridge until locked in place.
6 - Insert the toner/drum cartridge in the printer as shown below.
6-12
Date en cours : 12 June 2006
\\osn01001\be31-doc\DOC 31 - En cours\Travaux en cours\URD31\Fax\MFL V3\LUs MFLV3 MF4640\LU 252 551 036A MFL_V3 FAX 4640
GB\Maintenance Gb.fm
Press OK on the scanner control panel. The display shows:
Directory
Setting your
machine
Getting started
Installation
7 - Close the printer cover pressing it carefully but firmly until it clicks into position.
Contents
Maintenance
TUE 02 APR 13:39
Safety
Maintenance
Operation
INSERT GAUGE CARD
6-13
Date en cours : 12 June 2006
\\osn01001\be31-doc\DOC 31 - En cours\Travaux en cours\URD31\Fax\MFL V3\LUs MFLV3 MF4640\LU 252 551 036A MFL_V3 FAX 4640
GB\Maintenance Gb.fm
Maintenance
Insert chip card (supplied with the drum cartridge) into the card reader ensuring that the chip is
entered as shown in the illustration below.
Flèche verte
The following is displayed on the scanner control panel screen:
CHANGE DRUM?
YES = OK - NO = C
Press OK.
Once the chip card has been read, the display shows:
DRUM OK
REMOVE CARD
Remove the card.
Caution - If the following is displayed, check that you have inserted the chip card the right way up.
CANNOT READ CARD
REMOVE CARD
6-14
Date en cours : 12 June 2006
\\osn01001\be31-doc\DOC 31 - En cours\Travaux en cours\URD31\Fax\MFL V3\LUs MFLV3 MF4640\LU 252 551 036A MFL_V3 FAX 4640
GB\Maintenance Gb.fm
Dust, dirt and paper debris on the outer surfaces and inside the printer can interfere with printer
performance. Clean the printer regularly.
Caution - Use a soft cloth to clean the printer. Never use abrasive or corrosive detergents.
The fusing unit can become very hot during operation. To avoid injury - do not touch.
Wait for at least 10 minutes after the printer has been turned off and make sure that the fusing unit
has cooled before cleaning the interior of the printer.
Cleaning the outside of the printer
Safety
Maintenance
Operation
Directory
Setting your
machine
Clean the outside of the printer with a smooth duster.
Installation
Cleaning the printer
Getting started
CLEANING
Contents
Maintenance
6-15
Date en cours : 12 June 2006
\\osn01001\be31-doc\DOC 31 - En cours\Travaux en cours\URD31\Fax\MFL V3\LUs MFLV3 MF4640\LU 252 551 036A MFL_V3 FAX 4640
GB\Maintenance Gb.fm
Maintenance
Cleaning the paper feed roller
1 - Turn off the printer and unplug the power cord.
2 - Remove the drum/toner cartridge set from the machine.
3 - Use a soft cloth to clean the paper feed roller located under the fusing unit.
4 - Put the drum/toner cartridge set back in place (refer to paragraph Replacing cartridges,
page 6-2).
5 - Close the printer cover, connect the power lead and power the machine using the switch
located on the front left hand side.
Caution - The fusing unit located inside the printer above the paper supply roller may become
burning hot during machine operation. Avoid touching it ; you could hurt yourself.
6-16
Date en cours : 12 June 2006
\\osn01001\be31-doc\DOC 31 - En cours\Travaux en cours\URD31\Fax\MFL V3\LUs MFLV3 MF4640\LU 252 551 036A MFL_V3 FAX 4640
GB\Maintenance Gb.fm
SERVICING
For guaranteed performance of your terminal, some maintenance work (replacing the fusing unit
and the transfer roll) has to be done on the printer approximatly every 50,000 printed pages.
Please contact your supplier for this operation.
CALIBRATION
You can perform this operation when the quality of photocopied documents is no longer
satisfactory.
M 80 OK - ADVANCED FCT / CALIBRATION
Setting your
machine
Confirm your choice by pressing the OK key.
Getting started
SCANNER
Installation
Contents
Maintenance
INCIDENTS
ERRORS
Directory
COMMUNICATION
If the communication fails, the fax advises you of an automatic retry later.
Current time - - - - - - - - - - - - - - - - - - - - - - - - - - - - - - - - - FRI 11 DEC 20:13
Time of next try - - - - - - - - - - - - - - - - - - - - - - - - - - - - - - - 0142685014 20:18
Transmission from the feeder
Operation
Example of what is displayed:
You have the choice between:
• restarting the transmission immediately by pressing
. To eject the document, press
again.
Safety
• abandoning transmission by pressing
,
Maintenance
• waiting until the transmission takes place at the given time,
6-17
Date en cours : 12 June 2006
\\osn01001\be31-doc\DOC 31 - En cours\Travaux en cours\URD31\Fax\MFL V3\LUs MFLV3 MF4640\LU 252 551 036A MFL_V3 FAX 4640
GB\Maintenance Gb.fm
Maintenance
Transmission from memory
You have the choice between:
• waiting until the transmission takes place at the given time,
• restarting the transmission using the transmission queue (refer to paragraph Immediately perform transmission from the waiting queue, page 5-7). In this case, for a document composed of
several pages, the transmission will take place from the page where the error occurred,
• abandoning the transmission by deleting the corresponding command in the transmission queue
(refer to paragraph Deleting a transmission on hold, page 5-8).
The fax machine makes at most 5 automatic redials. The non-transmitted document is automatically
deleted from the memory and a transmission report is then printed together with an error code and the
cause for transmission failure (see the communication error codes).
Communication error codes
The communication error codes appear in the logs and transmission reports.
General codes
Code 01 - Busy or no fax answer
This code appears after 6 unsatisfactory attempts. Call later.
Code 03 - User break
A communication has been stopped by the user pressing the
key.
Code 04 - Non programmed number
A number saved as a one-touch key or abbreviated number is not valid, check it (example: a delayed
transmission was programmed with a one-touch key and this key has been deleted in the meantime).
Code 05 - Scanning default
An incident occurred with the scanner, for example, the sheet is jammed.
Code 06 - Printer default
An incident occurred in the printer: no paper, paper jam, opened cover... In the reception mode, this
incident appears only if the reception parameter is switched to WITHOUT PAPER (refer to paragraph
Reception without paper, page 3-6).
Code 07 - Disconnected
The link has been cut (bad line). Check the number and try again.
Code 08 - Quality
The document you sent was not well received. Contact your subscriber to see if you need to send again.
Code 0A - No document to be polled
You tried to poll a document from a subscriber who had not prepared his document (no deposit) or the
password entered was incorrect.
6-18
Date en cours : 12 June 2006
\\osn01001\be31-doc\DOC 31 - En cours\Travaux en cours\URD31\Fax\MFL V3\LUs MFLV3 MF4640\LU 252 551 036A MFL_V3 FAX 4640
GB\Maintenance Gb.fm
Code 0B - Wrong number of pages
There is a difference between the number of pages indicated during preparation for the
transmission and the number of pages sent, check the number of pages in the document.
Contents
Maintenance
Ask the subscriber who called you to check the length of his document (it may be too long to be
completely received).
Code 0D - Transmission failed
Ask the sender to resend the document.
Installation
Code 0C - Received document error
Your fax can no longer receive since its memory is full. There are too many received unprinted
documents or too many documents in the transmission queue.
Print the received documents and delete or transmit immediately the documents in the
transmission queue.
Code 14 - Memory full
Received document memory full.
Getting started
Code 13 - Memory full
You wish to deposit a document in a subscriber’s mailbox. The mailbox number does not exist.
Code 16 - No Relay Bcst list Nr x
You requested a document relay from a remote fax but the fax has not programmed the list of
subscribers requested.
Setting your
machine
Code 15 - Unknown mailbox number
Code 17 - Unknown mailbox number
Code 18 - Relay Bcst impossible
You have requested a document relay from a remote fax which does not have the relay broadcast
function.
Directory
You wish to recover a document from a subscriber’s mailbox. The mailbox number does not
exist.
The communication has been stopped by your subscriber (example: a fax wanted to poll your fax
but there is no document deposited).
Code 1A - Disconnected
The transmission has not started. The telephone line is busy.
Code 1B - Transmission failed
Operation
Code 19 - Subscriber has stopped
Safety
Maintenance
During transmission: start again.
During reception: ask your subscriber to resend the document.
6-19
Date en cours : 12 June 2006
\\osn01001\be31-doc\DOC 31 - En cours\Travaux en cours\URD31\Fax\MFL V3\LUs MFLV3 MF4640\LU 252 551 036A MFL_V3 FAX 4640
GB\Maintenance Gb.fm
Maintenance
PRINTER
ERRORS
Error messages
If the printer has one of the problems described below, the corresponding message is displayed on the
screen.
Message
Action
CHANGE TONER
<OK> TO CONFIRM
Replace the toner cartridge.
CHANGE DRUM
<OK> TO CONFIRM
Replace the drum cartridge.
Proceed as indicated in paragraph Replacing the toner cartridge,
page 6-2.
Proceed as indicated in paragraph Replacing the drum cartridge,
page 6-9.
CLOSE COVER
PRINTER
Close the front cover of the printer.
CLOSE UPPER COVER
PRINTER
Close the rear upper cover of the printer.
DRUM NEAR END
The drum cartridge is nearly worn out (10% use left).
TONER NEAR END
The toner cartridge is nearly worn out (10% capacity left).
PAPER EMPTY
Install the paper tray.
Fill the tray with paper in the required size.
PAPER JAM INSIDE
Open the tray.
Remove the jammed sheet.
PAPER JAM EXTERNAL
TRAY
Open the cover.
Remove the jammed sheet from the print outlet.
PAPER JAM INTERNAL
TRAY
Open the cover.
Remove the jammed sheet from between the tray and the fusing unit.
PRINTER ERROR XX
Disconnect and reconnect the terminal.
If the problem persists, contact your supplier.
PAPER SIZE ERROR
Check paper size (A4 / LETTER / ...)
6-20
Date en cours : 12 June 2006
\\osn01001\be31-doc\DOC 31 - En cours\Travaux en cours\URD31\Fax\MFL V3\LUs MFLV3 MF4640\LU 252 551 036A MFL_V3 FAX 4640
GB\Maintenance Gb.fm
Contents
Maintenance
Printer paper jam
avoid injury - do not touch.
Open the front cover of the printer.
Remove the toner/drum cartridge set from inside the printer.
Open the rear cover of the printer.
Maintenance
Operation
Remove any jammed sheets.
Directory
Setting your
machine
Remove any jammed sheets.
Getting started
Use the following procedure to remove any sheets of paper jammed inside the printer.
Caution - The fusing unit inside the printer can become very hot during operation. To
Installation
Inside the printer
Reinstall the drum/toner cartridge set (refer to paragraph Replacing cartridges, page 6-2).
Safety
Correctly close the front and rear covers of the printer.
6-21
Date en cours : 12 June 2006
\\osn01001\be31-doc\DOC 31 - En cours\Travaux en cours\URD31\Fax\MFL V3\LUs MFLV3 MF4640\LU 252 551 036A MFL_V3 FAX 4640
GB\Maintenance Gb.fm
Maintenance
Paper jam at the feeders and trays
The figures below show different type of paper jam you might experience when using your machine.
Remove any stuck sheets as shown by the arrow depending on where the paper jam occurs
At the printer output stacker
6-22
Date en cours : 12 June 2006
\\osn01001\be31-doc\DOC 31 - En cours\Travaux en cours\URD31\Fax\MFL V3\LUs MFLV3 MF4640\LU 252 551 036A MFL_V3 FAX 4640
GB\Maintenance Gb.fm
At the manual feed tray
Second cassette unit and paper tray (option)
2
2
Directory
Setting your
machine
1
Getting started
Installation
At the paper tray
Contents
Maintenance
Safety
Maintenance
Operation
1
6-23
Date en cours : 12 June 2006
\\osn01001\be31-doc\DOC 31 - En cours\Travaux en cours\URD31\Fax\MFL V3\LUs MFLV3 MF4640\LU 252 551 036A MFL_V3 FAX 4640
GB\Maintenance Gb.fm
Maintenance
SCANNER
INCIDENTS
Scanner paper jam
When a paper jam occurs, the message REMOVE DOCUMENT appears on the control panel screen.
If jams often occur in a specific part of the unit, the latter needs to be checked, cleaned or repaired.
Open the scanner cover by pressing key (A).
A
Remove the jammed paper (B) without tearing it.
B
Then, close the scanner cover.
6-24
Date en cours : 12 June 2006
\\osn01001\be31-doc\DOC 31 - En cours\Travaux en cours\URD31\Fax\MFL V3\LUs MFLV3 MF4640\LU 252 551 036A MFL_V3 FAX 4640
GB\Maintenance Gb.fm
MISCELLANEOUS
INCIDENTS
Contents
Maintenance
Check that the mains cable is plugged in, and check the mains plug if necessary.
The fax does not detect the presence of your inserted document. The message READY does
not appear on the screen
At the start and during scanning, REMOVE DOCUMENT appears on the screen
Installation
At switch-on nothing appears on screen
Help the sheets along.
The fax machine does not receive any faxes
Check that the telephone line cable is correctly plugged in and that there is a tone signal on the
key.
telephone line by means of the
You receive a blank page
Make a photocopy of a document; if it is correct then your fax is functioning normally. Call back
the subscriber and have him resend the document. It was probably sent with the sheet inserted
backwards.
You cannot send a fax
Setting your
machine
Iron out the sheets if needed.
Getting started
key.
Remove the document or press the
Check the thickness of the document (30 sheets of paper of 80 g/m2).
Check that the telephone line cable is correctly plugged in.
MACHINE
PACKING AND TRANSPORTATION
Always use the original package when transporting the machine. Failure to do so could void the
warranty.
1 - Disconnect the machine from the telephone network and the AC power socket.
2 - Open the front cover.
Directory
key.
Check the prefix is correctly programmed and used.
Operation
Check the tone by pressing the
holder and the document stacker. Put them in the original package.
4 - Put the machine in the plastic bag and then in the original package, with all the original
packing material.
Safety
5 - Close the shipping box with adhesive tape.
Maintenance
3 - Close the front cover. Unplug the phone line cord and the AC power cord, the document
6-25
Date en cours : 12 June 2006
\\osn01001\be31-doc\DOC 31 - En cours\Travaux en cours\URD31\Fax\MFL V3\LUs MFLV3 MF4640\LU 252 551 036A MFL_V3 FAX 4640
GB\Maintenance Gb.fm
Maintenance
CHARACTERISTICS
Device type: Office fax machine, fast, operation with all Group 3 devices according to ITU-T
recommendations.
UNIT
Dimensions:
Weight:
Electric power supply:
Power consumption (max. values):
Operating temperature:
Operating humidity:
Original document size:
Document feeder:
CHARACTERISTICS
Width: 430 mm
Depth: 460 mm
Height: 420 mm (not including stacker)
14 kg
220-240 V - 50/60 Hz - 4 A
- standby mode: less than 15 W
- wait mode: less than 75 W
- operation: 580 W during copy (850 W peak)
- operation: +10°C to 35°C (50 to 95°F) with a maximum difference of
10°C per hour
- storage: 0°C to 40°C (32 to 104°F) with a maximum difference of
10°C per hour
Operation or storage: 20% to 80% RH (without condensation) with a
maximum difference of 20% per hour
Width: 216 mm max.
Height: 297 mm
Thickness: 0.05 to 0.15 mm
Reception size (A4 size):
Max capacity: a normal capacity of 35 pages (80 g/m2)
Width: 210 mm
Length: 297 mm
Reception paper:
Plain paper (copier type (80 g/m2))
Paper tray capacity:
250 pages max. (80 g/m2)
Second paper tray (option):
Second paper tray: 500 pages (80 g/m2)
In accordance with UIT-T recommendations for group 3 copiers
To all public switched telephone networks (or equivalent)
Scanner: 600 dpi
CIS optronics reading
Laser printing process
600 x 600 dpi
For group 3: 33600/14400/12000/9600/7200/4800/2400 bps
Transmission procedures:
Possible phone line connections:
Scanned image resolution:
Reading system:
Print type:
Printer resolution:
Communication rate:
The effective transmission time for an A4 page ranges between a few seconds to approximately one minute (depending
on line quality, modem bit rate, the amount of information on the original document and the resolution) (*).
(*) Not taking into account the exchange initialisation procedure.
Encoding type:
MH (Modified Huffman)
MR (Modified Read)
MMR (Modified Modified Read)
6-26
Date en cours : 12 June 2006
\\osn01001\be31-doc\DOC 31 - En cours\Travaux en cours\URD31\Fax\MFL V3\LUs MFLV3 MF4640\LU 252 551 036A MFL_V3 FAX 4640
GB\Maintenance Gb.fm
File format:
V90 modem (up to 56 kbps)
TCP/IP/PPP protocols
SMTP/POP3/MIME protocols for E-mails
- Image: TIFF-F for black/white documents and JPEG for color
documents
Safety
Maintenance
Operation
Directory
Setting your
machine
Getting started
- PDF: monochrome and color
Specifications may change for improvement without prior notice.
Installation
Internet (general specifications):
Contents
Maintenance
6-27
Date en cours : 12 June 2006
\\osn01001\be31-doc\DOC 31 - En cours\Travaux en cours\URD31\Fax\MFL V3\LUs MFLV3 MF4640\LU 252 551 036A MFL_V3 FAX 4640
GB\Maintenance Gb.fm
Maintenance
6-28
Date en cours : 12 June 2006
\\osn01001\be31-doc\DOC 31 - En cours\Travaux en cours\URD31\Fax\MFL V3\LUs MFLV3 MF4640\LU 252 551 036A MFL_V3 FAX 4640
GB\Maintenance Gb.fm
Safety and Environment
7 SAFETY AND
ENVIRONMENT
SAFETY
SAFETY WARNING
!
Before powering on your unit, make sure the mains outlet it is connected to meets the requirements printed on the warning label on your unit, or on the separate power supply (depending
on the model). This unit must not be installed on the floor.
If your unit works with a separate Power Supply, use only the one delivered with your unit;
never use another power supply.
If your unit works with a battery, replace it only with the same type of battery or an equivalent
type recommended by the manufacturer.
Warning:
incorrect replacement of the battery may cause an explosion. Replace only with
the same or equivalent type recommended by the manufacturer. Dispose of
used batteries according to the manufacturer’s instructions.
Used batteries must be disposed of following the manufacturer’s instructions.
Depending on the model, the unit’s mains plug may be the only way to disconnect the unit
from the power network. Therefore you must respect the following:
•
Your unit must be connected to a mains outlet located nearby.
•
The mains outlet must remain easily accessible.
Your unit is delivered with a power cord including a plug which, depending on the model, may
be:
•
•
without earth (the
symbol on the warning label).
with earth (no symbol on the warning label). It is imperative that a power plug with an
earth be connected to a wall outlet with an earth.
!
APPAREIL A RAYONNEMENT LASER
DE CLASSE 1
CLASS 1 LASER PRODUCT
LASER KLASSE 1
APPARECCHIO LASER DI CLASSE 1
PRODUCTO LASER DE CLASE 1
APARELHO A LASER DE CLASSE 1
If the machine is powered when you remove the upper cover, be careful with the two following dangers:
• Laser beam interception by human eye can produce irremediable injuries.
• Human contact with parts electrically powered can produce a
very dangerous electric shock.
7-1
Date en cours : 12 juin 2006
Safety and Environment
ENVIRONMENT
The preservation of the environment is of importance to the manufacturer. The manufacturer wishes to
service the installations with respect to the environment and has chosen to integrate the environmental
performance in the whole lifecycle of its products, throughout manufacturing, release use and disposal.
THE
PACKAGING
The (green point) logo indicates that a contribution is given to an approved national
organization to improve the packaging salvage and recycling infrastructures.
To make recycling easier, follow local rules and regulations concerning sorting and
disposal of such waste.
BATTERIES
AND RECHARGEABLE BATTERIES
If your product contains batteries or rechargeable batteries, these shall be disposed of at
the designated collecting centers.
THE
PRODUCT
The crossed bin symbol on the product indicates that it belongs to the electric and
electronic equipment family.The crossed bin symbol on the product indicates that it
belongs to the electric and electronic equipment family.
Therefore, according to European regulations you are requested to dispose of it at the
selected collection areas:
- to distribution centers in case of equivalent equipment purchase,
- to the available local collecting centers (dump, selective collection, etc.).
Thus, you participate in the "Waste of Electric and Electronic Equipment reuse and
development" which can have potential effects on the environment and human health.
ENERGY STAR
The purpose of the International ENERGY STAR® Program is to promote the
development and popularization of energy-efficient office equipment.
As an ENERGY STAR® Partner, Sagem Communication has determined that this
product meets the ENERGY STAR® guidelines for energy efficiency.
7-2
Date en cours : 12 juin 2006
CONSUMABLES REFERENCES
Toner cartridge TNR 370:
251 471 044
Drum cartridge DRM 370:
251 471 057
CONSUMABLES CHARACTERISTICS
Toner cartridge:
The standard toner cartridge can produce up to
6,000 pages (when printing on A4 paper with a 5%
max. black and white ratio) or 10,000 pages ITU No. 1
in normal mode.
The initial toner cartridge can produce up to
2,000 pages (when printing on A4 paper with a 5%
max. black-and-white ratio).
The service life of the toner cartridge mainly depends
on the type of printed document and the average
number of pages per print operation).
Drum cartridge:
The standard drum cartridge can produce up to
20,000 pages.
The initial drum cartridge that comes with the printer
can produce up to 4,000 pages.
Various factors may influence the effective service life
of the drum cartridge, namely the environment
(temperature, humidity), the average number of pages
per print operation, the type of paper used, etc.
The declaration of compliance can be consulted on the site www.sagem.com
category "Support", or can be requested at the following address:
SAGEM Communication - Customer relations department
4 rue du petit Albi - 95800 Cergy Saint-Christophe - FRANCE
Data subject to change without notice
*252551036A*
Sagem Communication
Société anonyme au capital de 300 272 000 € - 480 108 158 RCS PARIS
27, rue Leblanc - 75512 PARIS CEDEX 15 - FRANCE
www.sagem.com
Date en cours : 12 June 2006
\\osn01001\be31-doc\DOC 31 - En cours\Travaux en cours\URD31\Fax\MFL V3\LUs MFLV3 MF4640\LU 252 551 036A MFL_V3 FAX 4640
GB\4 COV Gb.fm