1
Setup step-by-step sequence
1. Adjusting the mechanics
Mount the camera on the tray and balance the gimbal in all three axes. Stabilization quality is hardly
connected to the balance quality. To check your balance, pick your turned off gimbal in hands. Make
fast motions along all axes, trying to catch resonance point and swing the gimbal. If it is hard to do gimbal is balanced correctly.
NOTE : With good balance and low friction, It's possible to scale down power consumption and
keep good quality of stabilization
If you rewound motors by yourself, it's recommended to check winding. Remove motors from gimbal,
connect them to controller and set parameters P=0, I=0.1, D=0 for each axis and set enough POWER.
Connect main power supply. Motors should spin smoothly, while rolling the sensor. Little jitter is normal
due to magnetic force between rotor and stator (“cogging” effect).
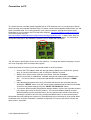
Pay great attention to sensor installation. Its axes must be parallel with motor axes. Pay attention to
mechanical links. They must be a VERY RIGID and backlash-free. Sensor provides feedback data for
stabilization, and even any little freedom or flexibility will cause delays and low-frequency resonances.
This can result in difficult PID setting, and unstable work in real conditions ( frame vibrations, wind, etc)
2. Calibrating the sensor
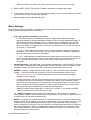
Gyro is calibrated every time you turn controller on, and lasts about 4 seconds. Try to immobilize sensor
(camera) as hard as you can in first seconds after powering on, while signal LED is blinking. After
powering on you have 3 seconds to freeze gimbal before calibration starts.
If you activated option “Skip gyro calibration at startup”, gyro is not calibrated every time and controller
start working immediately after powering up. Be careful and recalibrate gyro manually, if you will notice
something wrong with IMU angles.
Calibrating Accelerometer
You must perform ACC calibration only once, but it's recommended to recalibrate it from time to time or
when the temperature significantly changes.
•
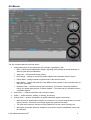
Simple calibration mode: set sensor horizontally, and press CALIB.ACC in the GUI (or menu
button, if it's assigned). LED will blink for 3 seconds. Try not to move sensor during calibration.
At this step no matter how camera is leveled. You are calibrating the sensor, not the camera!
•
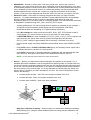
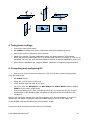
Advanced mode (recommended): perform calibration in simple mode as above. Then turn
sensor in order that each side of sensor looks up (6 positions at all, including base one). Fix the
sensor in each position, press CALIB.ACC button in the GUI, and wait about 3-4 seconds, while
LED if flashing. The order does not matter, but the base position always goes first (because the
simple calibration cancels a result of advanced calibration). You have not to press WRITE
button, calibration data is written automatically after each step.
NOTE: Precise accelerometer calibration is a very important for horizon holding during
dynamic flying or YAW rotation.
© 2013 Basecamelectronics®
11