1
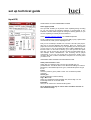
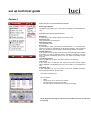
Table of Contents
introduction Luci® Edit........................................................................................................................3
system requirements.............................................................................................................................4
quick installation guide.........................................................................................................................5
Software installation........................................................................................................................5
License installation..........................................................................................................................5
user guide / workflow...........................................................................................................................6
Project..............................................................................................................................................6
Recorder...........................................................................................................................................7
Clip editor........................................................................................................................................8
user guide / workflow...........................................................................................................................9
Editor + extra features.....................................................................................................................9
Non-destructive editing..................................................................................................................10
Copying recordings........................................................................................................................10
Cutting recordings..........................................................................................................................11
Publish...........................................................................................................................................14
Publish by FTP..........................................................................................................................15
Publish by Email.......................................................................................................................15
Publish with images and video's....................................................................................................16
set up technical guide.........................................................................................................................17
Register..........................................................................................................................................17
New Project....................................................................................................................................18
FTP.................................................................................................................................................19
Email..............................................................................................................................................20
Publish...........................................................................................................................................21
Input EQ.........................................................................................................................................22
Audio.............................................................................................................................................23
PDAudio........................................................................................................................................24
Options 1........................................................................................................................................25
Options 2........................................................................................................................................26
N>Trans.........................................................................................................................................27
technical specifications / extra features..............................................................................................28
Broadcast wave file chunks...........................................................................................................28
Importing external files..................................................................................................................29
introduction Luci® Edit
FAST REPORTING ON RADIO OR WEBSITE
WITH EXTENDED NON-DESTRUCTIVE EDITING FEATURES
Congratulations with your choice of Luci® Edit! Luci® Edit is a fantastic product that a reporter can use throughout the
day while on the road without having to constantly return to the studio to get their items on the radio quickly. With Luci, a
professional quality interview can be sent to the studio immediately after recording. Simply connect to the Internet,
upload with the relevant data included for the editor and then carry on. Now that’s fast reporting! This is all made possible
by the rapid advances in PDA’s and wireless communication. With Luci® Edit you also have extra real non-destructive
editing features. You can edit much more exactly due to the 4-fold increase in resolution in time compared to the other
Luci applications. You also have more possibilities for importing external files.
The main features of Luci® Edit are listed below
o
o
o
o
o
o
o
o
o
o
More accurate editing possibilities due to the 4-fold increase in resolution of time
Extra features to enable non-destructive editing
More possibilities for Importing external files or files recorded with other recording equipment
Big buttons on screen
No technical knowledge demanded for using Luci® Edit
Excellent recording quality
More than 17 hours recording possible at 128 kbps, with a 1GB memory-card
Possibility to record real-time in Mpeg compression: small storage-space needed and quick transmission
Import of external files recorded with other recording equipment
Free helpdesk via email at [email protected]
This manual consist of 5 main chapters
SYSTEM REQUIREMENTS
The kind of devices needed, software compatibility, audio cards, plugs etc. for both users, reporters and program makers
/ technicians or web (radio) masters
QUICK INSTALLATION GUIDE
Both software installation and license or registration process is explained in detail for both users, reporters and program
makers
USER GUIDE / WORKFLOW
For users i.e. reporters who are using a PocketPC equipped with Luci® Edit
SETUP TECHNICAL GUIDE
LuciSetup allows program makers / technicians or web (radio) masters to define the technical setup and the general
behaviour of the software
TECHNICAL SPECIFICATIONS / EXTRA FEATURES
For both users, reporters and program makers / technicians or web (radio) masters. It explaines the technical
specifications like what external files can be imported, what file headers are written, etc.
system requirements
Luci® Software can be installed on your PocketPC, personal computer or laptop. In order to install and have optimum
use of all Luci® software on your device, you must have one of the following:
For PocketPC:
o Microsoft Windows Mobile 5 and higher
o PPC 2003 SE.
o PPC 2003
To see what version you have, go to the Start / Settings / About screen of your PocketPC. Luci for Windows Mobile 5 is
recommended if you have Windows Mobile 5.
For PC:
o Microsoft XP and higher
o Microsoft Windows 2000
o Microsoft Windows NT
Minimal technical requirements of a PocketPC:
o Processor of 200 Mhz
o 5 Mbyte of free program-memory . Look at Start / Settings / Memory
Preferred minimal requirements of a PocketPC for ultimate reliability :
o Processor of 400 Mhz
o Flash-card with SLC technology. Like Transcend 1GB 80X type or Sandisk Premier Micro SD-card.
Preferred requirements of a PocketPC with ease of use in mind:
o Headset input with 2.5 or 3.5 mm jack input. For reliable connection of external microphones
o Non-square screen
Preferred requirements of a PocketPC for maximum connectivity:
o GSM
o Wifi
o HSDPA
o Bluetooth stereo
o USB host capability
quick installation guide
Software installation
There are 2 ways to install Luci:
o
o
Download the 'PC-install' program directly from www.luci.eu/downloads.html This enables you to install the software
with your PC through your ActiveSync connection.
Download the 'cab’-file directly from www.luci.eu/downloads.html with your PDA and start the installation directly on
your PDA.
License installation
START SETUP IN YOUR PROGRAMS FOLDER
You will now enter the page Register
If you have purchased Luci online via www.luci.eu/purchase.html , your
Keycode request ID will be issued in your order confirmation e-mail. If
you have purchased Luci any other way you will also receive an e-mail
with these important numbers. Be sure to save these numbers in case
you need to re-install your Luci® Software.
Registration is the process of unlocking your software for one particular
PDA. To unlock, you request a unique 'key-code' that belongs to the
particular PDA you use to register and want to use Luci on.
When you buy 1 or more licenses for Luci, you receive only 1 Key-code
request ID from us that enables you to request the purchased number
of different key-codes from our license server. For each PDA that you
register, fill in the key-code request ID and press ‘Request key-code’.
First, a message appears to confirm that you have an internetconnection:
•
If you have an internet-connection and answer OK you will
receive the key-code after a few seconds.
•
If you do not have an internet connection and still answer OK
a license-file called ‘Key-code request ID’.lrg (ie
1234567890.lrg in the example on your left) is copied to the
‘My documents’-folder. Send this file to [email protected] and we
will email you the keycode back.If you use a PC , this file is
located int eh installation folder of Luci, usually “Program files\
Technica Del Arte\Luci Edit\”.
•
When you do have an internet-connection but something
goes wrong you can also email this file to [email protected].
After you have pressed 'Request key-code' and you received the Keycode it is automatically filled into the field called 'Key-code' and a
message appears to indicate how many licenses you have left if you
purchased more than one.
Go to adjust the next page or choose menu “File/Save and exit” to
save and leave Setup
user guide / workflow
Project
STEP 1
Start up Luci in your Programs Folder
If not registered yet you will see a warning that the software will
operate in demo-mode. The demo-mode will interrupt recordings and
published files every 10 seconds. This enables you to try Luci before
purchasing the full program with its complete features.
You will now enter the ‘record’window where you can make recordings.
It is best to make a new project before starting the first recording.
Choose menu File → New Project
Luci will then ask your:
Name
Folder
Type
Location
Type your projects name
Select folder in which all project files should be saved
There is only one type of project to select at this moment
Decice if you want to save the project files in the Main
Memory or storage card for example. The storage card is
recommended
If you have set up everything, select OK to confirm the settings and
continue, or Cancel to return.
user guide / workflow
Recorder
STEP 2
After making a new project you will now see the Record Window again.
The recording window is the most important. It has large buttons so that
everything can be operated easily. We are assuming that you have
worked with recording equipment before so the controls should be selfexplanatory.
Things you should be aware of are:
o Each time a recording is started a new file with a new name is
written. The names are selected as follows: If, for example, you have
made an mp2 project ‘test’, the first file that is recorded will be
‘test00.mp2’. After stopping and then re-starting a recording, the file
‘test01.mp2’ will be recorded, etc. This doesn’t have the
disadvantages of ONE large, difficult to manage, file and it is also
more reliable and will result in less damage if a mistake is made by
accident.
o If your PocketPC has its own record button, you can also use that
one to start and stop recording in Luci. To enable this, please make
sure you have this record-button pointing to Luci in your PDA's
settings\buttons screen.
o If you press the record-button during recording, a marker is written at
that specific point in the recording. You can write as many markers as
you like.
user guide / workflow
Clip editor
STEP 3
You have made a number of recordings in the project ‘test’ and it is
guaranteed that there will be some rubbish at the beginning and the end
that you do not want to use and perhaps some recordings that you will
want to discard altogether. Both the clip editor and editor now come to
good use.
Choose menu Tools → Clip Editor
All the recorded files are presented neatly in chronological order.
Here you can listen to all the recordings and change the playing order,
remove them and add old recordings. Also the total length of all the
recordings of the complete clip-list is mentioned at the bottom.
Insert
Remove
adds a file before the cursor
removes the file that is under the cursor from the clip list
Moves the clip up in the list
moves the clip down in the list
You now see 3 recorded clips for example, quickly listen and if you decide
to remove number 1 for example you just place the cursor on the file and
press remove.
To change the name of a recorded clip in the list, press on its name and
type in the new name.
To edit a recorded clip go to STEP 4, the editor feature.
user guide / workflow
Editor + extra features
STEP 4
In the Clipeditor you have listened to all recorded files and noticed that
Test03.mp2 has a very long introductory pause, that is not needed to
publish.
Position the cursor over Test 03. mp2 and choose menu Tools → Editor
You can now mark the beginning and end of this file.
You now see the Test03.mp2 recording in the Edit window. Here you can
both play and record. As well as this, you also have the option of viewing
the recording’s volume trace. When using this function it is easy to visually
establish where the beginning and end markers should be placed
approximately. As well as this, you can use the fast-forward and rewind
buttons to move quickly through the recording while hearing fragments of
it. This gives the possibility of aurally assessing where the important parts
of the recording are located.
o
o
o
Choose Edit → Crop Begin or Edit → Crop End. You define the
absolute begin and end of the recording. The actual recording before
the begin or after the end is not gone, only the begin and end
positions are marked and used in the clip-editor or during publishing.
Notice that 2 counters are presented in the screen , the left one is the
current position of the cursor, the right one is the total length of the
clip-list which is updated each time you make any changes to the clip
you're editing.
If you have set markers during the recording, they are shown at their
position in the upper part of the volume trace. You can also define
new markers with the menu item Edit/Mark.
o
o
o
To remove markers set the cursor on the marker and press the
red arrow . You can also undo or redo this.
o
The
and
buttons are used to jump to markers in one go. If, for
example, you are at the beginning of the file and you have set
markers at 1/4 and then 3/4 of the recording, then the
key will
bring you immediately to 1/4, then to 3/4 and then to the end of the
recording. If you then press that key again you will jump to the
beginning of the following clip in the clip-list, etc.
If, after playing, you press Stop and then for a second time press Stop
again, the cursor will jump back to where you started playing before.
If you want to use or save a piece of the recording to a new file you can
also choose Edit → Crop Begin and Edit → Crop End to select the range
you want to copy. Choose File → Save selection and that part is now
saved to a file ready to be added to any Clip-list. If you open Clip Editor
and choose insert file you can add the piece of recording in to the list.
user guide / workflow
Non-destructive editing
Luci Edit has the following extra menu-items for non-destructive editing:
Choose Edit → Copy to Clip-editor...
Copy this recording to the clip-list, a copy of this recording is inserted into
the clip-list before the present recording. The present Crop Begin and
Crop End points are copied also and you can give this copy a new name.
This copy-feature is non-destructive, no new file will be created, only the
information about the Crop Begin and Crop End points is copied and a
new clip in the clip-list will be created with the new name you provide. This
new item in the clip-list will also still refer to the same recording.
More about this below.
Choose Edit → Cut Begin
Start defining a Cut with the beginning at the cursor's present location or
define a new cut-begin for the cut you are editing.
More about this below.
Choose Edit → Cut End
Start defining a Cut with the end at the cursor's present location or define
a new cut-end for the cut you are editing.
More about this below.
Choose Edit → Mark
Define a marker at the cursor's present location.
Copying recordings
Below an example of how to copy a piece of a recording to the clip-list.
First, define the starting-point of the new piece by setting the cursor on the
starting-point and choose Edit → Crop begin, a screen like the example on
the left will appear.
A dashed line is painted through the cursor and 2 buttons appear:
Allows you to push the ‘Crop Begin’ backwards slightly.
Allows you to push the ‘Crop Begin’ forward slightly.
Just listen and adjust until you think it's ok.
Do the same with the ‘Crop End’.
When ready, choose Edit → Copy to Clip-editor… a window will appear
that enables you to enter a new name for this copy if you like:
A new name will be generated automatically: the old name with a
preceding number that represents the number of copies made of the
original recording.
You can also type in your own name if you like. For the purpose of this
example we type: "my new name". And press Ok.
If you then choose Tools → Clip-editor the new name will appear in the list.
user guide / workflow
Notice that the new copy is inserted before the original recording and at
this moment has the same length as the original recording because the
Crop Begin and Crop End positions are the same.
You can now go back to Tools → Editor and choose other Crop Begin and
Crop End positions for the original recording and/or make other copies if
you like.
If you later on want to change the new clip ‘my new name’ you can always
do that by selecting it and in the editor change the Crop Begin and Crop
End positions. You can even make a copy of a copy.
Cutting recordings
Cutting recordings is like copying, a non-destructive process, no changes
are made to the file, no new files have to be written. Only information
about which parts of a recording are skipped (cut) is saved.
Below an example of how to cut out an unwanted piece of a recording.
This is the recording, we want to cut out the circled part:
First start defining the begin of the cut, place the cursor on approximately
the begin and choose Edit → Cut Begin.
Then place the cursor near the end of the cut you want to make. You will
see the next screen in the editor:
user guide / workflow
The black line indicates the beginning of this new ‘Cut in the waiting-room’.
It is in the waiting-room because the Cut End is not defined yet. To define
the Cut End, place the cursor near the end, play and listen, if it is ok, press
The following screen now appears:
The red line in the graph now marks the piece of audio that is cut-out from
the recording and indicates that you are editing this cut (otherwise it is
green).
If you press the play-button now, playing begins automatically 1 second
before the cut start. This enables you to quickly listen to the cut and see if
it is ok. In general, when the cursor is somewhere inside the region of a
cut that is being edited, playing begins with this so-called pre-roll.
If the end is not ok you can immediately continue changing the end of the
cut. Use the
and
to push the end of this cut backwards or forward.
Just like with defining the Crop Begin or Crop End.
Or, you can reposition the cursor somewhere else: if the cursor is not
exactly on the beginning or end of the cut the following buttons appear that
enable you to set the Cut Begin or Cut End at the cursor-position:
to define the new Cut Begin or
to define the new Cut End.
To remove a cut, set the cursor on the begin or end of the cut and press
the red arrow . You can also undo
or redo
this.
The red line indicates that you are editing this cut.
If you are ready, you can stop editing this cut by placing the cursor
somewhere outside the cut-out region and press Play. The red line
changes into a green line, now you can continue to play and find the next
region you want to cut.
user guide / workflow
You can have more than 1 cut in a recording.
Important notice: to be able to define a new cut you have to leave the
editing mode of the present cut. You do that, as mentioned above, by
playing from somewhere outside the currently edited cut or jumping to a
marker, Crop End or Crop Begin.
To start editing an already defined cut you jump with the
buttons to the cut you want to change.
and
user guide / workflow
Publish
STEP 5
If you wish to write accompanying text for the editor
choose menu Tools → Edit Text
The text will be sent later with the interviews.
If you wish to send the complete clip list pasted together as 1 large file:
choose menu Publish → Clip List
If you only wish to send the clip the cursor in the clip editor is pointing at:
choose menu Publish → Clip
Luci will use the ‘Broadcast Wave Format (BWF)’ which can easily be
processed by any professional newsroom system. To see a list of BWF
chunks that Luci writes consult the Technical Specifications Manual.
Publish by FTP
If Luci was setup to use FTP for publishing, a progress-window will immediately appear indicating the progress of the FTP upload.
Luci will then immediately send:
o one file containing the sound-data and the first 256 characters of the
accompanying text you typed
o one text-file (with extension .txt) or XML-file (with extension .xml)
containing ALL accompanying text. The choice of whether to write a
txt or XML file is dependent on the template-text you choose in
LuciSetup
Press cancel to stop the upload, sometimes this might take a little while.
Publish by Email
If Luci was setup to use Email for publishing, Luci will compose an email
that is copied to the outbox of your PDA, ready to be sent, or send the
email directly. The email will have the Project-name as the subject, the
body of the email will contain ALL the text you typed in while the sound
data is attached to your email, with the same naming-convention as via
FTP.
Before composing the email, the ‘Publish through email’ form will appear
that enables you to fill in some parts of the email and to check the size of
the email, if the email is too big it may not be wise to send it via email. Use
FTP instead.
You can now type in an email-address or choose one of the 5 last used
email-addresses. You can also change the subject if you like.
user guide / workflow
Publish with images and video's
STEP 6
Besides publishing sound and text only, Luci can also publish images and video's with or without the sound and text-files.
To be able to publish images and video's you must check the ‘Enable images’ check-box in the Set up Publish-page.
Publish Images together with the sound-file
Besides publishing sound and text only, you have the ability to add images
and video's to the files you are sending. Then, if you choose ‘Publish’,
new windows will appear that enables you to choose 1 or more files.
EXPLANATORY FIELDS AND BUTTONS
All windows contain the extra fields and buttons you see on the left:
Choose Image or Video
Select an image or video to be included in the send-list. The send-list
containing all extra files to send will appear
Clear List
Clears the send-list.
Remove Selected
Remove the file that the cursor is on.
Naming convention:
The names of the files will be substituted by the project-name appended
with an image or video nr, the extension will however remain the same as
the original. For example if you send waterfall.jpg and test.avi in a project
named test, the following files will be sent: test00.jpg and test01.avi.
Publish Images only
You also have the ability to only publish images and video's with the extra
menu-item ‘Publish Image’. Choose this and the window on the left
appears
EXPLANATORY FIELDS AND BUTTONS
Add
Select an image or video to be included in the send-list. The send-list
containing all files to send will appear
Remove
Remove the file that the cursor is on.
Clear List
Clears the send-list.
Keep names
If you don't want to use the naming convention mentioned below, but want
to keep the original names: mark this.
Naming convention:
The names of the files will be substituted by the project-name appended
with an image or video nr, the extension will however remain the same as
the original. For example if you send waterfall.jpg and test.avi in a project
named test, the following files will be sent: test00.jpg and test01.avi.
set up technical guide
Register
START SETUP IN YOUR PROGRAMS FOLDER
You will now enter the page Register
If you have purchased Luci online via www.luci.eu/purchase.html , your
Keycode request ID will be issued in your order confirmation e-mail. If
you have purchased Luci any other way you will also receive an e-mail
with these important numbers. Be sure to save these numbers in case
you need to re-install your Luci® Software.
Registration is the process of unlocking your software for one particular
PDA. To unlock, you request a unique 'key-code' that belongs to the
particular PDA you use to register and want to use Luci on.
When you buy 1 or more licenses for Luci, you receive only 1 Key-code
request ID from us that enables you to request the purchased number
of different key-codes from our license server. For each PDA that you
register, fill in the key-code request ID and press ‘Request key-code’.
First, a message appears to confirm that you have an internetconnection:
o If you have an internet-connection and answer OK you will receive
the key-code after a few seconds.
o If you do not have an internet connection and still answer OK a
license-file called ‘Key-code request ID’.lrg (ie 1234567890.lrg in
the example on your left) is copied to the ‘My documents’-folder.
Send this file to [email protected] and we will email you the keycode
back.If you use a PC , this file is located in the installation folder of
Luci, usually “Program files\Technica Del Arte\Luci Edit\”.
o When you do have an internet-connection but something goes
wrong you can also email this file to [email protected].
After you have pressed 'Request key-code' and you received the Keycode it is automatically filled into the field called 'Key-code' and a
message appears to indicate how many licenses you have left if you
purchased more than one.
Go to adjust the next page or choose menu “File/Save and exit” to
save and leave Setup
You will now have full access to the Luci® Software with all features
included in the application of your choice without any interruption.
set up technical guide
New Project
START SETUP IN YOUR PROGRAMS FOLDER
Select page New Project
EXPLANATORY FIELDS AND BUTTONS
Select folder+name
Enables you to select the default folder and name of a new project as well
as the default project name that Luci starts with.
Select template text
You can choose a default text-file that Luci reads to pre-fill the text-editor
with when you create a new project. You can choose a text-file or XMLfile. If you choose an XML-file, Luci will publish an XML-file instead of a
txt-file.
Record Format
wav or mp2
You can choose to record in Windows WAV-format or compressed mp2,
the bit rate for which you can set next to it. If you select wav, then an mp2
file will actually be published to the ftp server in accordance with the bit
rate that has been set by you. However, the recording on the PocketPC
will be saved in uncompressed wav-format.
Stereo
If you want to record stereo, check this.
Bitrate (Kbps)
The mp2-bitrate is adjustable. The sample frequency is ALWAYS 48 kHz,
even if a PocketPC can only record with 44.1 kHz maximum. Luci
contains sample rate converters that are automatically activated when
necessary during recording and playback without you having to do
anything. Possible bit rates are: 32, 48, 56, 64, 80, 96, 112, 128, 160, 192,
224 and 256 kbit per second .
Go to adjust the next page or choose menu “File/Save and
exit” to save and leave Setup
set up technical guide
FTP
START SETUP IN YOUR PROGRAMS FOLDER
Select page FTP
FTP or file transfer protocol is used to transfer files across the internet.
Publishing via FTP is the preferred way to send your reported items.
Start Setup in your Programs Folder
Select page FTP
EXPLANATORY FIELDS AND BUTTONS
Allow profile selection in Luci
If you have more than one FTP-server (profiles) you regularly use to
publish to in Luci, you can allow the user to choose the appropriate server
each time at the time of 'Publish'. Mark the box to allow this.
Profile
You can store up to 5 profiles for the FTP server. Select the profile you
wish to use. If you then ‘Publish’ with Luci you can choose 1 out of these 5
profiles. Each profile can have different values for the following fields:
FTP server
Fill in the name of your server you use to upload all your items. For
instance 'ftp.test.com'. To change the port-number from the default (21) to
a different one, type in ' :port-number'. For instance: 'ftp.lucinl.com:23'
User
Fill in the user-name you use to login at your server.
Dest.Dir
Fill in the destiny folder you want to use on your ftp-server .
Password
Fill in the password belonging to your user name.
Passive
Checked means ’Passive’ mode. Otherwise it will be ‘Active’ mode. These
are 2 modes for contacting your ftp-server. Contact your network-manager
to decide which mode to use.
Test
You can test your ftp-settings with this button.
Resume transfer silently
If your connection gets lost during a transfer via FTP, Luci can keep trying
to send indefinitely without asking. Normally Luci will ask you if you want
to resume sending a broken transfer. If your FTP server allows it, Luci will
only send the part that has not been sent yet.
Go to adjust the next page or choose menu “File/Save and
exit” to save and leave Setup
set up technical guide
Email
START SETUP IN YOUR PROGRAMS FOLDER
Select page Email
If you want to publish (send) your reported items via email, there are two
ways: via the standard way via the Outbox or the direct way in which Luci
acts as a mail-client and sends the published email immediately when you
press 'Publish'. The direct way saves memory and time because no
separate email has to be composed and saved in the Outbox. Use of the
Outbox however enables you to store emails when at the time you have
no internet-connection. In both cases you must remember that with email
you have to send 33% more data compared to when you use FTP.
EXPLANATORY FIELDS AND BUTTONS
Profile
You can define up to 5 profiles for the SMTP server. Select the profile you
wish to use. If you then ‘Publish’ with Luci you can choose 1 out of these 5
profiles.
SMTP server
Fill in the name of your server you use to send emails direct. For instance
‘mail.test.com’.
Server needs authentication
When you are on the road you can log-in to any internet provider you
encounter. But most email servers will not allow you to send an email via
them when you are connected through another provider (you get the
message 'relaying denied'). But when you can login to your SMTP-server
you often ARE allowed to do that (relaying possible). This way you can
keep the email-settings the same, regardless of how you are connected to
the internet.
User
Fill in the user name you use to login at your SMTP-server.
Password
Fill in the password belonging to your user name.
Test
Press this to check if your server-settings are correct.
Account
Set the email account you want to use when you use the Outbox.
Go to adjust the next page or choose menu “File/Save and
exit” to save and leave Setup
set up technical guide
Publish
START SETUP IN YOUR PROGRAMS FOLDER
Select page Publish
Now you choose the way you are sending out your recordings according
to your FTP or Email settings.
EXPLANATORY FIELDS AND BUTTONS
bwf header
If you switch this Off, no bwf-header is written in the published file. This is
useful for publishing to systems that do not understand bwf-headers, like
blogging sites.
bwf UMID
Country
Type in your country-code (according to ISO 3166-1).
Org.
Type in your Organization-code issued by the SMPTE.
User
Type in your user-code within the Organization.
file extension
Type in the extension you want to use in the name for your published
Broadcast Wafe (BWF) files. Normally 'wav ', 'bwf' or 'mp2'. It depends on
your newsroom-system you use what is best. For instance if you have a
project called 'test', and you set the extension to 'wav', Luci will publish a
file called 'test.wav', but it will always contain mp2-compressed sounddata.
Enable to file
Besides publishing through the internet you can also publish to a file on
your PDA To enable this, you mark this box. You then get 2 extra menuitems in the main Luci program called ‘Publish → clip to file’ and ‘Publish
→ cliplist to file’. This is useful for exporting an edited file or cliplist to 1
file, ready to be played Live via Luci Live 2.
Enable images
When marked, this will enable you to choose an image or video to transfer
as well, when you choose 'Publish' in Luci.
Auto-connect
When marked, Luci will try to establish a GPRS or 3G/UMTS connection
when no wifi is available. But only when you start Publishing.
Send through
Choose how you want to publish files with Luci: via FTP, Email-Outbox or
Email-direct (see Setup FTP and Setup Email).
Go to adjust the next page or choose menu “File/Save and
exit” to save and leave Setup
set up technical guide
Input EQ
START SETUP IN YOUR PROGRAMS FOLDER
Select page Input EQ
The 'Input EQ' enables you to perform some equalizing during recording
so you can improve the frequency-response or sound-quality of any
PocketPC. We also added support for saving and loading presets, so you
can use equalizing for already known PocketPC's.
Check www.luci.eu/downloads.html for available EQpresets.
To set or adjust the EQ yourself you have the ability to play a prerecorded
un-EQ'd wav-file, while you are adjusting the EQ:
First you use LuciSetup to enable Luci to record a wav-file ('new project'tab) and no Input EQ (deselect 'EQ Enable'). Start Luci, create a new
project and record a test-file while you are speaking into the microphone
you are going to use, the recorded file will be called 'default00.wav' for
instance. Quit Luci and start LuciSetup, go to the Input EQ and press
'Play file', you can choose any wav-file you have recorded earlier, but for
this example choose 'default00.wav'. The recording will be played
continuously, so you can now set the EQ to improve the quality of the
recording. Be sure to select 'EQ Enable' and press 'On' for every band
you want to use.
ADDITIONAL EXPLANATORY FIELDS AND BUTTONS
Allow profile selection in Luci
Switch this on to allow the user to choose an Input EQ type you
predefined here. This allows them to use different EQ settings for internal
Microphone, external Microphone of type A, external Microphone of type
B , etc.
Profile
Choose a profile or give a profile a name. You can define 5 profiles
maximum.
Overall gain
Set the overall gain of this EQ setting.
High – Mid - Low
There are 3 parametric bands available: low, mid and high. You can
individually switch On or Off each band.
EQ Enable
Here you can switch On or Off the EQ all together.
Go to adjust the next page or choose menu “File/Save and exit” to
save and leave Setup
set up technical guide
Audio
START SETUP IN YOUR PROGRAMS FOLDER
Select page Audio
EXPLANATORY FIELDS AND BUTTONS
Digital gain control in Luci
If you check this you can add some extra gain from within Luci. Keep in
mind that this gain is applied in software, so after the analog to digital
conversion. In the Luci 'Record'-tool the following button appears: Use the
up/down buttons of your PDA to change the gain, or tap on the knob with
your stylus and drag it up and down.
Sample-rate accuracy
Many PDA's have a sample-rate that is not as accurate as one likes it to
be. With this option you have the ability to measure the exact sample-rate
of your PDA and let Luci compensate for this inaccuracy. To measure,
press the button ‘Measure sample-rate’ and wait until the counter is 0. You
will see the real sample-rate of your PDA appearing to the right of the
button. 44100 is the value it is supposed to be. Some PDA's have a
sample-rate that is even as high as 44300 .
Mark the box ‘Compensate in codecs’ to let Luci compensate for any
inaccuracy encountered in the above step.
HTC gain control
This appears only when you have a PDA of one of these types:
QTEK9090, O2 XDA IIs, O2 Germany XDA III,T-Mobile MDA III, QTEK
9090, iMate PDA2K, Orange SPV, M2000, Siemens SX66, Vodafone VPx,
Vodafone V1620, Vodafone Germany VPA III, ePlus PDA III, Audiovox
XV6600, NZ Telcom Harrier, QTEK 2020i, O2 XDAIIi, Orange SPV
M2500, I-mate PDA2, DOPOD 699.
You can then change the -analog- input-gain:
Normally, as a user, you can not change the Input-gain, but we did found
a way to change the gain for these types of PDA. If Luci detects it is
running on such a type of PDA, this extra field appears which is called
‘HTC gain control’.
Overall enable
With this switch you enable or disable this feature of Luci all together.
You can change the AGC, like in Settings/Microphone AGC of your PDA.
Input sens.
Change the Input-gain. The manufacturer hides this feature from the
common user. You set the gain in dBuFS, which is the maximum inputlevel you can use without distortion.
These figures are for an external Microphone with our MCA1-cable.
Without MCA1-cable, add 7 dB to these numbers.
If you have changed the gain and press OK, you will see the screen
flashing once: Luci now writes the new gain to the QTEK electronics. If
you press OK again Luci setup stores the gain. Luci will then constantly
check if the gain has changed (due to a video-recording for instance) and
make sure the gain remains the same as the Setup gain when recording.
set up technical guide
PDAudio
START SETUP IN YOUR PROGRAMS FOLDER
Select page PDAudio
With this Tab you can activate the PDAudio-card of Core-sound.
With PDAudio, Luci records always mono, the left-channel. Luci Edit can
record mono or stereo. Supported sample-rates are 44.1 , 48, 88.2 and 96
kHz.
EXPLANATORY FIELDS AND BUTTONS
PDAudio digital input
Choose to use the optical or coaxial input or none at all (Off) in which
case you use the normal PDA's mic-input.
If you insert the PDAudio-card and you get a message 'unrecognized
card', you can tap 'Install driver' which installs the necessary driver on
your PocketPC. Re-insert the card, no error-message should appear, so
you are ready to start recording digital audio.
Go to adjust the next page or choose menu “File/Save and exit” to
save and leave Setup
set up technical guide
Options 1
START SETUP IN YOUR PROGRAMS FOLDER
Select page Options1
The Options tab enables you to switch On the display of several features of
Luci.
EXPLANATORY FIELDS AND BUTTONS
Record tool
In this group you can change options for the Record-tool :
Show max. time
View the Maximum recording time.
Show battery-state
View the battery-state.
Screen flip
If you mark this - when your screen is in portrait-mode - Luci will switch the
Record tool screen to upside-down mode during recording. This is practical
when you use the internal microphone situated on the bottom of the PDA.
Disable Activesync
If you mark this, Luci will shut-down Activesync automatically before making
a recording so it will not interfere with the recording. ActiveSync can slow
down your PDA considerably which in turn can cause a recording to have
drop-outs.
Luci start-up project
When Luci starts up a project, you have 4 options to choose from.
Layout: Lite
If you check this, Luci will start with only the record-tool and the publish
feature available. This enables you to let Luci be used by an unexperienced
user.
Clip-editor view *
In the 'Clip-editor'-tool you can choose to see more detailed information
about each clip in the list. Shown below.
•
Clip-editor in detailed view
You can see the:
o Name
o Length of the clip in minutes and seconds
o Time and date of the original recording
o Storage location and file-name of the original recording
Go to adjust the next page or choose menu “File/Save and exit” to save and
leave Setup
set up technical guide
Options 2
START SETUP IN YOUR PROGRAMS FOLDER
Select page Options2
EXPLANATORY FIELDS AND BUTTONS
Exit on Close
Normally, on a PDA, if you click on the X in the upper-right corner of a
window the window will not close but go into the background. If you want
Luci to really exit and free up precious memory then, mark his box and
Luci will exit when you press the X.
Low memory warning (MB):
Free working-memory (not storage memory) can be monitored in Luci.
You can define a low memory point with this option. When Luci detects no
more free memory available then this, a warning appears which also
allows you to soft-reset the device then (after saving project). When
memory is running low, the whole PDA can slow-down considerably.
What is low? Look at the free memory in settings/memory/main/program.
Luci needs 4MB, so if you don not plan to use many other applications
together with Luci, subtract an additional 4MB for other programs and try
that.
So, if you have 25 MB free, set the low memory-point at 25-4-4=17
MByte. This will make sure that no other applications are eating up too
much memory (4MByte max in this example). You might think that 17
Mbyte is a bit too much, but it is better to be safe than sorry when you
make that precious recording.
Go to adjust the next page or press OK to save and leave Setup.
set up technical guide
N>Trans
START SETUP IN YOUR PROGRAMS FOLDER
Select page N>Trans
This tab will appear when Luci detects the N>Trans.
EXPLANATORY FIELDS AND BUTTONS
Input jack
Choose the input you will use.
Mic Bias
Switch on the Mic Bias here.
AGC
Set the Automatic gain control.
Input sensitivity
Mic +20dB: Microphone-input with 20dB extra gain
Mic: for Microphone-input
Line: for Line level input
Limiter On
This is an analog limiter for the microphone-signal, that can be used to
prevent nasty digital overloading.
The gain-level and headphone-output-level can be controllled from within
Luci.
Go to adjust the next page or press OK to save and leave Setup.
technical specifications / extra features
Broadcast wave file chunks
When Luci publishes a file it will write extra information, so -called “chunks” into the published file. This is a list of
information Luci will write into the file:
BEXT
FMT
FACT
DATA
LEVL
QLTY
•
•
•
chunk with extended SMPTE UMID*
chunk
chunk
chunk with the mp2-data
chunk, containing the envelope-data of Luci
chunk, contaning:
Maximum peak
All markers.
If you publish a clip-list all transition-points between clips are saved as a marker here also.
*) SMPTE UMID:
•
Universal label
•
Material number generation method: SMPTE
•
Instance number creation method: Copy number and 16-bit PRS
•
Instance number
•
Material number
Extended SMPTE UMID:
•
Spatial co-ordinates (GPS)
•
Country
•
Org
•
User
technical specifications / extra features
Importing external files
Luci Edit enables you to import external files from other recording devices. Nobody says that you have to record your
sound-bits with Luci or a PDA. If you already have recording-equipment that records audio to flash you can do the
recording with that and have the PDA as your phone, audio-editor and wireless sending equipment.
To import a file you simply ‘Insert’ the file into the clip-editor. Luci will then calculate a new volume-trace ( this can take a
short while for long files) and inserts it into the current project.
Wav -project
A wav-project can import any wav-file, you can even mix sampling-rates, 16/24-bit files and mono/stereo files.
Luci Edit can import the following wav-files:
•
Supported sample-rates: 44.1 , 48, 88.2 and 96 Khz.
•
Supported bit-depths: 16 and 24 bit.
•
Supported number of channels : 1 and 2
•
Supported headers: plain wav and BWF
MP2-project
An mp2-project can import only mp2-files with the same bitrate and number of channels as the project you import them
into.
Luci Edit can import the following mp2-files:
•
Supported sample-rates: 48 Khz.
•
Supported bit-depths: 16 bit.
•
Supported number of channels : 1 and 2
•
Supported headers: plain mp2 and BWF