1
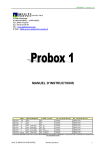
W-DMX G4 MK I and MK II BlackBox and WhiteBox F-1 BlackBox and WhiteBox R-512 BlackBox and WhiteBox F-2 Micro F-1 Lite Micro R-512 Lite ProBox F-2500 User Manual W-DMX G4(S) User Manual Issue date: 2013-10 Edition: 2 Subject to modifications. All trademarks referenced are trademarks or registered trademarks of their respective owners, whose protected rights are acknowledged. Copyright Wireless Solution Sweden Sales AB Contact us: Wireless Solution Sweden Sales AB Stureparksvägen 7 451 55 Uddevalla Sweden Tel.: +46 522 511 511 Fax: +46 522 440 885 E-Mail: [email protected] Web: www.wirelessdmx.com Contents Contents 1 Your Wireless DMX G4 system (W-DMX G4S) ................................................... 7 2 The W-DMX technology ....................................................................................... 8 3 About this document ......................................................................................... 10 4 3.1 Target group of this document ................................................................ 10 3.2 Signs and symbols in this document ....................................................... 10 BlackBox and WhiteBox F-1 ............................................................................. 11 4.1 4.2 4.1.1 BlackBox F-1 .............................................................................. 11 4.1.2 WhiteBox F-1 .............................................................................. 11 Connectors and ports .............................................................................. 12 4.2.1 BlackBox F-1 .............................................................................. 12 4.2.2 WhiteBox F-1 MK I ..................................................................... 13 4.2.3 WhiteBox F-1 MK II .................................................................... 14 4.3 LEDs ....................................................................................................... 15 4.4 Installing the unit ..................................................................................... 16 4.4.1 BlackBox F-1 .............................................................................. 16 4.4.2 WhiteBox F-1 .............................................................................. 17 4.5 Switching FLEX modes ........................................................................... 19 4.6 Operation as a transmitter ....................................................................... 20 4.7 4.8 5 Scope of delivery ..................................................................................... 11 4.6.1 Prerequisites for successful linking with receivers ...................... 20 4.6.2 Linking receivers......................................................................... 21 4.6.3 Unlinking all receivers ................................................................. 22 Operation as a receiver ........................................................................... 22 4.7.1 Linking with transmitters ............................................................. 22 4.7.2 Unlinking from transmitters ......................................................... 23 Switching CTRL modes ........................................................................... 23 BlackBox and WhiteBox R-512 ......................................................................... 25 5.1 5.2 Scope of delivery ..................................................................................... 25 5.1.1 BlackBox R-512 .......................................................................... 25 5.1.2 WhiteBox R-512 ......................................................................... 25 Connectors and ports .............................................................................. 25 5.2.1 2013-10 BlackBox R-512 .......................................................................... 25 W-DMX G4(S) User Manual, edition 2 3 Contents 5.2.2 6 5.3 LEDs ....................................................................................................... 26 5.4 Installing the unit ..................................................................................... 26 5.5 Operation as a receiver ........................................................................... 26 BlackBox and WhiteBox F-2 ............................................................................. 27 6.1 6.2 7 Scope of delivery ..................................................................................... 27 6.1.1 BlackBox F-2 .............................................................................. 27 6.1.2 WhiteBox F-2 .............................................................................. 27 Connectors and ports .............................................................................. 27 6.2.1 BlackBox F-2 .............................................................................. 27 6.2.2 WhiteBox F-2 MK I ..................................................................... 29 6.2.3 WhiteBox F-2 MK II .................................................................... 30 6.3 LEDs ....................................................................................................... 31 6.4 Installing the unit ..................................................................................... 32 6.5 Switching FLEX modes ........................................................................... 32 6.6 Operation as a transmitter ....................................................................... 33 6.7 Operation as a receiver ........................................................................... 33 6.8 Operation as a repeater .......................................................................... 33 6.9 Switching CTRL modes ........................................................................... 34 Micro units .......................................................................................................... 35 7.1 7.2 4 WhiteBox R-512 ......................................................................... 26 Micro F-1 Lite .......................................................................................... 35 7.1.1 Scope of delivery ........................................................................ 35 7.1.2 Connectors and ports ................................................................. 35 7.1.3 LEDs ........................................................................................... 35 7.1.4 Installing the unit......................................................................... 36 7.1.5 Switching FLEX modes .............................................................. 36 7.1.6 Operation as a transmitter .......................................................... 36 7.1.7 Operation as a receiver .............................................................. 36 7.1.8 Switching CTRL modes .............................................................. 36 7.1.9 Battery option ............................................................................. 37 Micro R-512 Lite ...................................................................................... 38 7.2.1 Scope of delivery ........................................................................ 38 7.2.2 Connectors and ports ................................................................. 38 7.2.3 LEDs ........................................................................................... 39 W-DMX G4(S) User Manual, edition 2 2013-10 Contents 8 9 7.2.4 Installing the unit......................................................................... 39 7.2.5 Operation as a receiver .............................................................. 39 ProBox F-2500 .................................................................................................... 40 8.1 Scope of delivery ..................................................................................... 40 8.2 Connectors and ports .............................................................................. 40 8.3 LEDs ....................................................................................................... 41 8.4 Installing the unit ..................................................................................... 41 8.5 Switching FLEX modes ........................................................................... 41 8.6 Operation as a transmitter ....................................................................... 41 8.7 Operation as a receiver ........................................................................... 42 8.8 Operation as a repeater .......................................................................... 42 8.9 Switching CTRL modes ........................................................................... 42 Technical data .................................................................................................... 43 9.1 BlackBoxes (BB) and WhiteBoxes (WB) F-1, R-512 and F-2 .................. 43 9.2 MicroBox F-1 Lite and MicroBox R-512 Lite ............................................ 45 9.3 ProBox F-2500 ........................................................................................ 47 10 FAQ – Frequently asked questions .................................................................. 49 11 Appendix:Certificates ........................................................................................ 52 11.1 E1551 RFC ............................................................................................. 52 11.2 ETSI Test Report .................................................................................... 53 11.3 GRANT OF EQUIPMENT AUTHORIZATION ......................................... 55 2013-10 W-DMX G4(S) User Manual, edition 2 5 1 Your Wireless DMX G4 system (W-DMX G4S) 1 Your Wireless DMX G4 system (W-DMX G4S) Thank you for purchasing the Wireless DMX G4 system (W-DMX G4), the industry’s leading system for transmitting and receiving DMX signals reliably. There are one or two operating modes for W-DMX G4 units, depending on which unit you have purchased: • W-DMX G4 Receivers to receive W-DMX signals (denoted with an R in their product model name) • W-DMX G4 Transceiver to receive, transmit or repeat W-DMX signals (denoted with an F in their product model name) W-DMX G4 Transceivers (or ‘Flex’ model units) can be changed between Transmit Mode and Receive Mode with the procedure described in chapter 4.5 Switching FLEX modes", page 19. W-DMX units are available in four different series: • BlackBox MK I / MK II • WhiteBox MK I / MK II • MicroBox • ProBox The unit you have purchased is marked on the outside of the unit's packaging. 2013-10 W-DMX G4(S) User Manual, edition 2 7 2 The W-DMX technology 2 The W-DMX technology W-DMX technology is the core of all our products. W-DMX is specifically engineered by Wireless Solution Sweden AB to provide the same quality, reliability and performance as in any hardwired DMX data link. W-DMX gives you even greater freedom to create reliable point-to-point, pointto-multipoint and even multipoint-to-multipoint installations over large distances and in any environment. Fig. 1: Point-to-point operation versus multipoint-to-multipoint operation W-DMX is unique in its use of advanced radio technologies that are also used in mobile phones and military communication. Rather than using fixed frequency channels, W-DMX uses Adaptive Frequency Hopping technology to continually check the radio channels for interferences and to rapidly move operation to clear radio channels. The checks are carried out in combination with another advanced technology: time division multiple access. This technology makes the most efficient use of every visited frequency channel. 8 W-DMX G4(S) User Manual, edition 2 2013-10 2 The W-DMX technology W-DMX has the following advantages: • Consistent and wide-ranging control of lighting systems over long distances. • The complex communication protocols are fully automated and concealed from view - you just plug-and-play, the W-DMX G4 units do all the hard work. • From the DMX connector of one W-DMX G4S unit to the DMX connector of another, the W-DMX system is totally transparent. The W-DMX G4 system includes additional features that help to enhance reliability: both in its installation in any type of environment as well as in its stable operation. W-DMX meets the USITT DMX512 and DMX512-A standards. Furthermore, W-DMX G4 units support Art-Net (I/II/III), Streaming ACN and RDM protocols (Ethernet and RDM functionality depends on model used). For this reason, the W-DMX G4 units continually are awarded the first prize for distance covered, resilience against interference and easy installation. For additional information about our technology, please visit our website at www.wirelessdmx.com. 2013-10 W-DMX G4(S) User Manual, edition 2 9 3 About this document 3 3.1 About this document Target group of this document This document is designed for lighting designers, lighting operations managers and lighting engineers. W-DMX is an easy-to-use plug-and-play system. Basic knowledge of lighting technologies is an advantage. Every user has to be familiar with local regulations regarding frequencies and their usage. For advanced settings and projects, contact your distributor. 3.2 Signs and symbols in this document Sign / symbol 10 Description Danger Indicates notes that, if not observed, will inevitably lead to severe injuries or death. Warning Indicates notes that, if not observed, can lead to severe injuries or death. Caution Indicates notes that, if not observed, can lead to light injuries. Caution Indicates notes that, if not observed, can lead to damages to property. Hint Indicates useful information designed to make working with the unit easier. Indicates a requirement that must be met before you can complete the corresponding tasks. 1. 2. Indicates tasks you have to complete. The tasks must be completed in the specified order. Indicates the result of a task or a series of tasks. W-DMX G4(S) User Manual, edition 2 2013-10 4 BlackBox and WhiteBox F-1 4 BlackBox and WhiteBox F-1 BlackBox and WhiteBox are functionally identical. The BlackBox is intended for indoor usage, the WhiteBox for outdoor usage. 4.1 4.1.1 4.1.2 2013-10 Scope of delivery BlackBox F-1 • 1 x BlackBox F-1 device • 1 x user manual • 1 x antenna adapter • 1 x antenna indoor (2 dBi) • 2 x mounting bracket • 1 x Phoenix gold connector • 1 x power cable without plug (MK I) WhiteBox F-1 • 1 x WhiteBox F-1 device • 1 x user manual • 1 x outdoor antenna (2 dBi) • 1 x Phoenix gold connector W-DMX G4(S) User Manual, edition 2 11 4 BlackBox and WhiteBox F-1 4.2 4.2.1 Connectors and ports BlackBox F-1 Caution Damage to the unit! Connecting more than one DMX Universe at a time damages the unit. • Connect only one DMX Universe input at a time. Fig. 2: Connectors and ports of F-1 No. Port Description 1 AC power input UAC = 90–250 V / 50–440 Hz MK I: IEC 2.5A connector MK II: PowerCon 20A connector 2 Reserved – 3 Ethernet (optional) RJ 45 port (MK II: EtherCon RJ 45 port) 4 DMX OUT bypass XLR female 5 pin Universe 1 5 DMX IN XLR male 5 pin Universe 1 6 Reserved – 7 DMX IN / OUT RJ 45 port (not BlackBox MK II): 12 1: Universe 1+ 5: – 2: Universe 1- 6: – 3: – 7: Universe 1 GND 4: – 8: – W-DMX G4(S) User Manual, edition 2 2013-10 4 BlackBox and WhiteBox F-1 No. Port Description 8 DC power input Input for Phoenix gold connector: • Left: Ground • Right: UDC = +12 V 9 DMX OUT bypass XLR female 3 pin (BlackBox MK II only) 10 DMX IN for Universe 1 4.2.2 XLR male 3 pin output for Universe 1 (BlackBox MK II only) WhiteBox F-1 MK I Fig. 3: Connectors and ports of the WhiteBox F-1 MK I To ensure safe transmission of signals for outdoor use, the WhiteBox does not have XLR connectors. For this reason the connection of DMX signal cables differs slightly from the BlackBox models, which are for indoor use only. To install the unit it is necessary to open the housing. See chapter "4.4.2 WhiteBox F-1", page 17. No. Port Description 1 Cord Strip For AC power input (2) 2 AC power input UAC = 90–250 V / 50–440 Hz: • Left: Outer conductor (L) • Middle: Ground (GND) • Right: Neutral conductor (N) 3 Cord Strip For DC power input (4) 2013-10 W-DMX G4(S) User Manual, edition 2 13 4 BlackBox and WhiteBox F-1 No. Port Description 4 DC power input Phoenix gold connector 12 V DC: • Left: Ground • Right: +12 V DC 5 Cord Strip For signal cable (DMX or Ethernet) 6 DMX IN / OUT RJ 45 port: 1: Universe 1+ 5: – 2: Universe 1– 6: – 3: – 7: Universe 1 GND 4: – 8: – 7 Ethernet (optional) RJ 45 port 8 DMX IN for Universe 1 (depeding on production date) 4.2.3 • • • Left: GND Middle: DMX Data – (for Universe 1) Right: DMX Data + (for Universe 1) WhiteBox F-1 MK II Fig. 4: Connectors and ports of the WhiteBox F-1 MK II To ensure safe transmission of signals for outdoor use, the WhiteBox does not have XLR connectors. For this reason the connection of DMX signal cables differs slightly from the BlackBox models, which are for indoor use only. To install the unit it is necessary to open the housing. See chapter "4.4.2 WhiteBox F-1", page 17. 14 W-DMX G4(S) User Manual, edition 2 2013-10 4 BlackBox and WhiteBox F-1 No. Port Description 1 AC power input UAC = 90–250 V / 50–440 Hz: • Left: Outer conductor (L) • Middle: Ground (GND) • Right: Neutral conductor (N) 2 DC power input Phoenix gold connector UDC = 12 V: • Left: Ground • Right: UDC = +12 V 3 DMX OUT for Universe 1 • • • Left: GND Middle: DMX Data – (Universe 1 OUT) Right: DMX Data + (Universe 1 OUT) 4 DMX IN for Universe 1 • • • Left: GND Middle: DMX Data – (Universe 1 IN) Right: DMX Data + (Universe 1 IN) 5 Antenna ports Connector for antennas 6 Cord Strip For signal cable (DMX or Ethernet) 7 Cord Strip For DC power input (2) 8 Cord Strip For AC power input (1) 4.3 LEDs Fig. 5: LEDs of F-1 Name Signal bar LED signal – Description RX (receiver) mode: Currently received signal strength TX (transmitter) mode: Yellow and green LEDs indicate output power TX • • LINK TX mode: • On: Normal operation • Flashing: Receivers are being unlinked • Rapid flashing: Receivers are being linked 2013-10 On: Unit in TX mode Flashing: Transmitter in repeater mode W-DMX G4(S) User Manual, edition 2 15 4 BlackBox and WhiteBox F-1 Name LED signal Description RX mode: • Off: Unit is not linked to any transmitter. • On: Unit is linked to transmitter. • Rapid Flashing: Transmitters are being searched or linked transmitter is lost. • • G4 • Off: Unit is in G3 mode. On: Unit is in G4 or G4S 2.4 GHz mode. G4/G4S is indicated by red SIGNAL LED on the unit. Flashing: Unit in G4S 5.8 GHz mode1 SIGNAL TX mode: • Off: Unit is in G4S mode. • On: Unit is in G4 mode. RX mode: Part of signal strength PWR Power on / off RX • • DATA Data is available at the input / output. RDM WhiteBox: included, BlackBox: optional • Off: No RDM data is available on output. • On: RDM data is available on output (RDM Downstream activated). CTRL • • 4.4 4.4.1 On: Unit is in RX (receiver) mode. Flashing: Receiver is in repeater mode. Off: Normal operation. On: Switch between normal operation (CTRL LED off) and CTRL mode (flashing). • Flashing: CTRL mode is active To set the frequency band, see chapter "4.8 Switching CTRL modes", page 23. 1 5.8GHz is not available in all countries. For more info please contact Wireless Solution (see page 2). Installing the unit BlackBox F-1 1. Choose one of the following options to make the DMX connection: – Connect the DMX source to the XLR 5 pin DMX IN port, XLR 3 pin DMX IN port (BlackBox MK II only) or to the RJ 45 DMX IN port (BlackBox MK I only). – Connect the DMX fixture to the XLR 5 pin DMX OUT port, XLR 3 pin OUT port (BlackBox MK II only) or the RJ 45 DMX OUT port (BlackBox MK I only). 16 W-DMX G4(S) User Manual, edition 2 2013-10 4 BlackBox and WhiteBox F-1 – Unit with optional Ethernet lighting protocol support: Connect the Ethernet lighting source or output to the Ethernet in port. 2. Attach the supplied standard antenna(s) and standard adapter(s) or other suitable antenna(s) / adapter(s) available from Wireless Solution to the matching connector(s). Warning Risk of death by electrocution! AC power connection must be carried out correctly. • • Make sure that only a qualified and trained electrician carries out AC power connection. Make sure the correct Schuko connector or other connector suitable for your country is used. 3. Choose one of the following options to connect the power to the unit: – Attach a suitable mains plug to the supplied power cord and connect the power supply to the AC power input. – Connect the power supply to the DC power input. 4. If required, attach the unit to the supplied mounting brackets or other mounting hardware available from Wireless Solution. 4.4.2 WhiteBox F-1 1 2 3 4 Fig. 6: Housing of the WhiteBox models 2013-10 W-DMX G4(S) User Manual, edition 2 17 4 BlackBox and WhiteBox F-1 When connecting a WhiteBox model it is necessary to open the housing. Warning Risk of death by electrocution! AC power connection must be carried out correctly. • • Make sure that only a qualified, trained electrician carries out AC power connection. Make sure the correct Schuko connector or other connector suitable for your country is used. 1. Remove the 4 screws (1) by turning them couterclockwise. 2. Open the housing. Caution Damage to the unit! • • Make sure no contact voltage is transferred when touching the connection cables. All non used Cable Glands need to be sealed to achieve IP65 rating. 3. Loosen the cord strips (3) by turning the screws counter-clockwise. 4. Put the cables through the cord strips (3). 5. When using AC, put the AC power cables into the socket (see chapter "4.2.2 WhiteBox F-1 MK I", page 13 or "4.2.3 WhiteBox F-1 MK II", page 14) and tighten the bolts of the socket. 6. Couple the connectors to the cables: – When using 12 V DC power, couple the 12 V DC power cable to the Phoenix gold connector – Couple RJ 45 connector: MK I: to DMX signal cable (or Ethernet cable if option is installed and should be used). MK II: to the socket (see chapter "4.2.3 WhiteBox F-1 MK II", page 14) 7. Fit the connectors within the sockets (see chapter "4.2.2 WhiteBox F-1 MK I", page 13 or "4.2.3 WhiteBox F-1 MK II, page 14). 8. Fit the cord strips by turning them clockwise. 9. If the FFC cable to the overlay is loose: – rotate the lid by 180°, – insert the FFC cable, – secure the FFC cable in the connector – rotate back the lid before you close the housing. 18 W-DMX G4(S) User Manual, edition 2 2013-10 4 BlackBox and WhiteBox F-1 10. Close the housing. 11. Tighten the 4 screws (1) by turning them clockwise. 4.5 Switching FLEX modes The FLEX mode determines if the unit is used in Transmit Mode (TX) or Receive Mode (RX). To switch the FLEX mode, proceed as follows: 1. Disconnect the power cable. 2. Press and hold the red function button (1) on the front panel. 3. Reconnect the power cable. 4. Release the red function button (1). The mode is switched. The LEDs indicate the current mode: either TX (1) or RX (2): 2013-10 W-DMX G4(S) User Manual, edition 2 19 4 BlackBox and WhiteBox F-1 4.6 Operation as a transmitter The unit is in Transmit Mode (TX) working as a transmitter. 4.6.1 Prerequisites for successful linking with receivers Hint The figures are maximum figures and depend on output level and environment. Local settings may be required. 1. For advanced settings and projects, contact your distributor. Max. distance to transmitter (air): – 200 m (Micro units) – 500 m (BlackBox, WhiteBox and ProBox in ETSI mode) – 750 m (BlackBox, WhiteBox and ProBox in FCC mode) Distance to transmitter (glass): up to 500 m Distance to transmitter (wall, except concrete): up to 350 m Distance to transmitter (concrete): up to 150 m 20 W-DMX G4(S) User Manual, edition 2 2013-10 4 BlackBox and WhiteBox F-1 Position above crowds: min. 1 m Position above trees: min. 1 m 4.6.2 Linking receivers Hints You can link receivers at any time, also during operation. During the linking procedure the DMX transmission is interrupted. Linking a transmitter to a receiver means that any DMX data put into the transmitter is output at the receiver. 1. Power on the receivers you want to link. 2. Ensure that the receiver is not connected to any other transmitter, i.e., the LINK LED on the receiver is off: If required, see chapter "4.7.2 Unlinking from transmitters", page 23. 3. Press the red function button of the transmitter momentarily (1 second). The transmitter scans for all unlinked receivers for a period of about 5 seconds. The LINK LED flashes rapidly: If the connection is successful, the LINK LED on the receiver goes on. If DMX input is available, the DATA LED goes on as well: If the connection fails, check the position of the receiver, see chapter "4.6.1 Prerequisites for successful linking", page 20. The signal bar on the receiver indicates the received signal strength. 2013-10 W-DMX G4(S) User Manual, edition 2 21 4 BlackBox and WhiteBox F-1 4.6.3 Unlinking all receivers Use this procedure to unlink all receivers connected with the unit. 1. Press the red function button on the transmitter for 3 seconds, until the LINK LED flashes slowly. The LINK LED on the transmitter flashes slowly: The signal bar of the receivers fall back to zero. LINK LED on receivers goes off. All connected receivers are unlinked. Hint To unlink one specific receiver, press and hold the red function button on the specific receiver for 3 seconds, until the LINK LED is off. 4.7 Operation as a receiver The unit is in Receive Mode (RX), working as a receiver. 4.7.1 Linking with transmitters Hint You can link receivers at any time, also during operation. During the linking procedure the DMX transmission is interrupted. 1. Power on the receiver. 2. Ensure that the receiver is not connected to any other transmitter, i.e., the LINK LED on the receiver is off: If required, see chapter "4.7.2 Unlinking from transmitters", page 23. 3. Press the red function button of the transmitter momentarily (1 second). The transmitter scans for all unlinked receivers for a period of about 5 seconds. The LINK LED flashes rapidly: 22 W-DMX G4(S) User Manual, edition 2 2013-10 4 BlackBox and WhiteBox F-1 If the connection is successful, the LINK LED on the receiver goes on. If DMX input is available, the DATA LED goes on as well: If the connection fails, check the position of the receiver, see chapter "4.6.1 Prerequisites for successful linking", page 20. The signal bar on the receiver indicates the received signal strength. 4.7.2 Unlinking from transmitters 1. Press the red function button on the receiver until the LINK LED goes off: The receiver is unlinked and now can be linked, see chapter "4.6.2 Linking receivers" on page 21. 4.8 Switching CTRL modes The CTRL mode determines which frequency band is used and if Legacy G2 and G3 units can be used in the wireless environment. Wireless DMX G4 units in Transmit Mode (TX) can switch the CTRL mode of the entire system: • G3 2.4 GHz mode (Legacy G2 and G3 units) • G4 2.4 GHz mode • G4S 2.4 GHz mode • G4S 5.8 GHz mode Hint • • • 2013-10 G4S 5.8 GHz mode depends on local regulations. Unlink receivers before switching CTRL mode. The G4 receivers will automatically detect the mode the transmitters are in and adapt to it during linking. G4S 2.4 GHz Repeater mode and G4S 5.8 GHz Repeater mode can only be set with dongle or RDM command. W-DMX G4(S) User Manual, edition 2 23 4 BlackBox and WhiteBox F-1 To change the CTRL mode, proceed as follows: The unit is in Transmit Mode (TX), working as a transmitter. 1. Press and hold the red function button (1) on the front panel for at least 10 seconds. The CTRL LED (2) is on. TX, RX, DATA and LINK LEDs are rotating. Hints • • • • Do NOT release the red function button (1) until TX, RX, DATA and LINK start rotating and CTRL is on. Keep holding the red function button (1) even if the LINK LED starts blinking. This allows you to go through the unlink mode without unlinking. Old G4 software indicate CTRL mode with CTRL and TX on, RX, DATA and LINK off. Therefore, to exit control mode with Old G4 software, unplug power. Old G4 software is compatible only in G3 and G4 mode. G3 units are compatible only in G3 mode. 2. Release the red function (1) button. 3. Press the red function button (1) repeatedly until the desired mode is displayed via the status of the following LEDs: G4 LED RED SIGNAL LED G3 2.4 GHz mode G4 2.4 GHz mode G4S 2.4 GHz mode (on transmitter) G4S 5.8 GHz mode (on transmitter) The desired mode is set. 4. Press and hold the red function button (1) for 3 seconds. The unit exits CTRL mode (configuration) and CTRL LED turns off. Normal operation restarts. 24 W-DMX G4(S) User Manual, edition 2 2013-10 5 BlackBox and WhiteBox R-512 5 BlackBox and WhiteBox R-512 BlackBox and WhiteBox are functionally identical. The BlackBox is intended for indoor usage, the WhiteBox for outdoor usage. 5.1 5.1.1 5.1.2 5.2 5.2.1 Scope of delivery BlackBox R-512 • 1 x BlackBox R-512 device • 1 x user manual • 1 x antenna adapter • 1 x antenna indoor (2 dBi) • 2 x mounting bracket • 1 x Phoenix gold connector • 1 x power cable without plug (MK I only) WhiteBox R-512 • 1 x WhiteBox R-512 device • 1 x user manual • 1 x outdoor antenna (2 dBi) • 1 x Phoenix gold connector Connectors and ports BlackBox R-512 Fig. 7: Connectors and ports of BlackBox R-512 2013-10 W-DMX G4(S) User Manual, edition 2 25 5 BlackBox and WhiteBox R-512 No. Port Description 1 AC power input UAC = 90–250 V / 50–440 Hz MK I: IEC 2.5A connector MK II: PowerCon 20A connector 2 DMX OUT • • 3 DMX OUT XLR female 5 pin 4 DMX OUT RJ 45 port: 5 5.2.2 DC power input MK I: XLR female 5 pin MK II: XLR female 3 pin 1: Universe 1+ 5: – 2: Universe 1– 6: – 3: – 7: Universe 1 GND 4: – 8: – Input for Phoenix gold connector: • Left: Ground • Right: +12 V DC WhiteBox R-512 Connectors and ports of the WhiteBox R-512 are identical to the WhiteBox F-1: 5.3 • MK I: See chapter "4.2.2 WhiteBox F-1 MK I", page 13. • MK II: See chapter "4.2.3 WhiteBox F-1 MK II", page 14. LEDs LED signals are identical to F-1, see chapter 4.3 LEDs", page 15. Hint • • 5.4 The R-512 does not have transmission functionality. The R-512 does not provide CTRL mode, because the receiver detects the right mode automatically. Installing the unit Installation is identical to: 5.5 • BlackBox F-1: See chapter "4.4.1 BlackBox F-1", page 16. • WhiteBox F-1: See chapter "4.4.2 WhiteBox F-1", page 17. Operation as a receiver Operation as a receiver is identical to the BlackBox and WhiteBox F-1, see chapter "4.7 Operation as a receiver", page 22. 26 W-DMX G4(S) User Manual, edition 2 2013-10 6 BlackBox and WhiteBox F-2 6 BlackBox and WhiteBox F-2 BlackBox and WhiteBox are functionally identical. The BlackBox is intended for indoor usage, the WhiteBox for outdoor usage. 6.1 6.1.1 6.1.2 6.2 6.2.1 Scope of delivery BlackBox F-2 • 1 x BlackBox F-2 device • 1 x user manual • 2 x antenna adapter • 2 x antennas indoor (2 dBi) • 2 x mounting bracket • 1 x Phoenix gold connector • 1 x power cable without plug (MK I only) • 1 x Powercon connector (MK II only) WhiteBox F-2 • 1 x WhiteBox F-2 device • 1 x user manual • 2 x outdoor antennas (2 dBi) • 1 x Phoenix gold connector Connectors and ports BlackBox F-2 Caution Damage to the unit! Connecting more than one DMX Universe to each pair of Universe connectors (XLR / RJ 45) at a time damages the unit. • Connect only one DMX Universe input to each pair of Universe connectors (XLR / RJ 45) at a time. 2013-10 W-DMX G4(S) User Manual, edition 2 27 6 BlackBox and WhiteBox F-2 Fig. 8: Connectors and ports of the BlackBox F-2 Hint On BlackBox F-2 MK I, the Universe 2 output is only available via RJ 45 ports. No. Port Description 1 AC power input UAC = 90–250 V / 50–440 Hz MK I: IEC 2.5A connector MK II: PowerCon 20A connector 2 Reserved – 3 Ethernet RJ 45 port (MK II: EtherCon RJ 45 port) 4 DMX OUT / bypass XLR female 5 pin output for Universe 1 5 DMX IN XLR male 5 pin input for Universe 1 6 DMX IN / OUT standard for Universe 2 RJ 45 port: 7 28 DMX IN / OUT standard for Universe 1 1: Universe 2+ 5: – 2: Universe 2– 6: Universe 1– 3: Universe 1+ 7: Universe 2 GND 4: – 8: Universe 1 GND RJ 45 port: 1: Universe 1+ 5: – 2: Universe 1– 6: Universe 2– 3: Universe 2+ 7: Universe 1 GND 4: – 8: Universe 2 GND W-DMX G4(S) User Manual, edition 2 2013-10 6 BlackBox and WhiteBox F-2 No. Port Description 8 DC power input Input for Phoenix gold connector: • Left: Ground • Right: +12 V DC 9 DMX OUT / bypass XLR female 5 pin output for Universe 2 10 DMX IN XLR male 5 pin input for Universe 2 6.2.2 WhiteBox F-2 MK I Fig. 9: Connectors and ports of the WhiteBox F-2 MK I To ensure safe transmission of signals for outdoor use, the WhiteBox does not have XLR connectors. For this reason the connection to DMX signal cables differs slightly to the BlackBox models, which are for indoor use only. No. Port Description 1 Cord Strip For AC power input (2) 2 AC power input UAC = 90–250 V / 50–440 Hz • Left: Outer conductor (L) • Middle: Ground (GND) • Right: Neutral conductor (N) 3 Cord Strip For DC power input (4) 4 DC power input Phoenix gold connector 12 V DC • Left: Ground • Right: +12 V DC 5 Cord Strip For signal cable (DMX or Ethernet) 2013-10 W-DMX G4(S) User Manual, edition 2 29 6 BlackBox and WhiteBox F-2 No. Port Description 6 DMX IN/OUT standard for Universe 1 RJ 45 port: 7 DMX IN/OUT standard for Universe 2 1: Universe 1+ 5: – 2: Universe 1– 6: Universe 2– 3: Universe 2+ 7: Universe 1 GND 4: – 8: Universe 2 GND RJ 45 port: 1: Universe 2+ 5: – 2: Universe 2– 6: Universe 1– 3: Universe 1+ 7: Universe 2 GND 4: – 8: Universe 1 GND 8 Ethernet (optional) RJ 45 port 9 DMX Universe 1 (depending on production date) • • • 6.2.3 Left: GND Middle: DMX Data – (for Universe 1) Right: DMX Data + (for Universe 1) WhiteBox F-2 MK II Fig. 10: Connectors and ports of the WhiteBox F-2 MK II 30 W-DMX G4(S) User Manual, edition 2 2013-10 6 BlackBox and WhiteBox F-2 No. Port Description 1 AC power input UAC = 90–250 V / 50–440 Hz • Left: Outer conductor (L) • Middle: Ground (GND) • Right: Neutral conductor (N) 2 DC power input Phoenix gold connector 12 V DC • Left: Ground • Right: +12 V DC 3 DMX IN/OUT for Universe 2 • • • Left: GND Middle: DMX Data – (Universe 2) Right: DMX Data + (Universe 2) 4 DMX OUT for Universe 1 • • • Left: GND Middle: DMX Data – (Universe 1 OUT) Right: DMX Data + (Universe 1 OUT) 5 DMX IN for Universe 1 • • • Left: GND Middle: DMX Data – (Universe 1 IN) Right: DMX Data + (Universe 1 IN) 6 Antenna port Connector for antenna of Universe 1 7 Cord Strip For signal cable (DMX or Ethernet) 8 Cord Strip For DC power input (2) 9 Cord Strip For AC power input (1) 10 Antenna port Connector for antenna of Universe 2 6.3 LEDs The F-2 units are equipped with two identical sets of LEDs and red function buttons: • Left: Universe 1 • Right: Universe 2 Fig. 11: LEDs of F-2 For the description of the LED meanings, see chapter "4.3 LEDs", page 15. 2013-10 W-DMX G4(S) User Manual, edition 2 31 6 BlackBox and WhiteBox F-2 6.4 Installing the unit Installation is identical to: • BlackBox F-1: see chapter "4.4.1 BlackBox F-1", page 16. • WhiteBox F-1: see chapter "4.4.2 WhiteBox F-1", page 17. Hint • • 6.5 You have to install two antennas. On BlackBox MK I and WhiteBox MK I, Universe 2 is only available via RJ 45 port. Switching FLEX modes The FLEX mode determines if the unit is used in Transmit Mode (TX), Repeater Mode (TX flashing) or Receive Mode (RX). To switch the FLEX mode, proced as follows: 1. Disconnect the power cable. 2. Press and hold the left red function button (1) on the front panel (Universe 1). 3. Reconnect the power cable. 4. Release the red function button (1). The FLEX mode is switched. The LEDs indicate the current mode: either TX (2) or RX (3). 5. If necessary, repeat the procedure for Universe 2 on the right side of the front panel. Functional elements are identical to the left side (Universe 1). 32 W-DMX G4(S) User Manual, edition 2 2013-10 6 BlackBox and WhiteBox F-2 6.6 Operation as a transmitter The operation as a transmitter is identical to the BlackBox and WhiteBox F-1, see chapter "4.6 Operation as a transmitter", page 20. Carry out the procedures for each Universe individually. Hints When you link the receivers for Universe 1, power-on only the respective receivers for Universe 1. Once the receivers for Universe 1 are connected, you can power-on the receivers for Universe 2 and link them. Universe 2 will have a delayed start after Universe 1 is in operation. When linking Universe 1, Universe 2 will stop transmitting. When linking Universe 2, Universe 1 will stop transmitting. Operating an F-2 as a single universe transmitter, put Universe 2 into RX mode and keep the Universe 2 unlinked to avoid interference. 6.7 Operation as a receiver The operation as a receiver is identical to the BlackBox and WhiteBox F-1, see chapter "4.7 Operation as a receiver", page 22. Carry out the procedures for each Universe individually. 6.8 Operation as a repeater Since the F-2 unit provides 2 Universes, it is possible to use the unit as a repeater. W-DMX Co-Existence dongle or RDM command is available. Hints If Universe 1 loses link in active repeater mode: • • • LINK LED of Universe 1 will flash rapidly. Universe 2 will stop sending radio. Receivers linked to the repeater also will lose link. RDM is not available when running G4S in repeater mode. You have only access to master transmitter. 2013-10 W-DMX G4(S) User Manual, edition 2 33 6 BlackBox and WhiteBox F-2 Hints Master transmitter is the initial transmitter that receive DMX input on cable. Universe 2 will have a delayed start some seconds after Universe 1 has received LINK. • If required to operate with G3 receivers or old G4 receivers, repeater can work in G3 mode as well. This function requires G4S software on the repeater. 1. Set Universe 1 and Universe 2 into transmitter mode, see chapter "6.5 Switching FLEX modes", page 32. 2. Use the W-DMX Co-Existens dongle or a RDM command: – To set the master transmitter into "G4S repeater mode". – To set the Universe 2 of the F-2 unit into "G4S repeater mode". 3. Set Universe 1 into receiver mode, see chapter "6.5 Switching FLEX modes", page 32. 4. Link Universe 1 to the master transmitter. 5. Link the receivers to Universe 2 of the F-2 unit. 6.9 Switching CTRL modes The CTRL mode determines which frequency band is used in G4 mode and if Legacy G2/G3 units can be used in the wireless environment. Switching CTRL mode is identical to the BlackBox and WhiteBox F-1, see chapter "4.8 Switching CTRL modes", page 23. Hint The F-2 unit provides 2 Universes. • • • 34 Carry out the procedures for each Universe individually. Keep the 2 Universes in the same mode to avoid interference. Power cycle the box after changing CTRL mode, to let Universe 2 receive a complete configuration. W-DMX G4(S) User Manual, edition 2 2013-10 7 Micro units 7 Micro units 7.1 Micro F-1 Lite 7.1.1 Scope of delivery 7.1.2 • 1 x Micro F-1 Lite device • 1 x user manual • 1 x external power supply unit • adapters for several electrical outlets • 1 x hook-and-loop belt Connectors and ports Fig. 12: Micro F-1 Lite, side view No. Port Description 1 DMX IN XLR male 5 pin. If you want to use the unit as a receiver, you can buy an optional XLR 5-pin female-to-female adapter. 2 DC power input RJ 45 port: +12 V DC (Connector for EMS120050-P19-SZ) 3 Power Switch Turn on / off the unit. 7.1.3 LEDs Fig. 13: LEDs of Micro F-1 Lite 2013-10 W-DMX G4(S) User Manual, edition 2 35 7 Micro units SIGNAL/BATT: – SIGNAL identifies if the signal strength or battery power is displayed on the LED bar. – BATT is a coming feature. Other LED signals are identical to F-1, see chapter 4.3 LEDs", page 15. Hint Micro F-1 Lite does not have the G4S 5.8 GHz mode. 7.1.4 Installing the unit 1. Choose one of the following options to make the DMX connection: – Connect the DMX source to the DMX IN / OUT port. – Connect the DMX fixture to the DMX IN / OUT port. 2. Connect the power supply to the DC power input. 7.1.5 Switching FLEX modes The FLEX mode determines if the unit is used in Transmit Mode (TX) or Receive Mode (RX). Switching the FLEX mode is identical to the BlackBox F-1, see "4.5 Switching FLEX modes", page 19. 7.1.6 Operation as a transmitter The operation as a transmitter is identical to the BlackBox and WhiteBox F-1, see chapter "4.6 Operation as a transmitter", page 20. 7.1.7 Operation as a receiver The operation as a receiver is identical to the BlackBox and WhiteBox F-1, see chapter "4.7 Operation as a receiver", page 22. 7.1.8 Switching CTRL modes The CTRL mode determines which frequency band is used and if Legacy G2/G3 units can be used in the wireless environment. Switching CTRL modes is identical to the BlackBox and WhiteBox F-1, see chapter "4.8 Switching CTRL modes", page 23. Hint This unit does not support the G4S 5.8 GHz mode. 36 W-DMX G4(S) User Manual, edition 2 2013-10 7 Micro units 7.1.9 Battery option The W-DMX G4 Micro units are equipped with a holder for 6 AAA batteries. If batteries are installed in the unit and 12 V DC power is disconnected, the unit runs on battery power. Indication of battery status is a coming feature. The BATT and SIGNAL LED light up alternately every 5 seconds: • When the BATT LED is on, the signal bars indicate battery status. • When the SIGNAL LED is on, the signal bars indicate signal strength. On average, the W-DMX receiver can receive for approximately from 4 to 8 hours in battery mode. The exact battery life depends on the brand of batteries and mode of the W-DMX unit. Hint We recommend testing the discharge time of your selected batteries before using them in a show environment. The W-DMX G4 Micro units are compatible with rechargeable batteries (down to UDC = 1.2 V per cell). Hint Batteries cannot be charged with the Micro units. Please use an appropriate battery charger. 2013-10 W-DMX G4(S) User Manual, edition 2 37 7 Micro units 7.2 Micro R-512 Lite The unit is provided with a battery option, see chapter "7.1.9 Battery option", page 37. 7.2.1 7.2.2 Scope of delivery • 1 x Micro R-512 Lite device • 1 x user manual • 1 x external power supply unit • adapters for several electrical outlets • 1 x hook-and-loop belt Connectors and ports Fig. 14: Micro R-512 Lite, side view No. Port Description 1 DMX OUT XLR female 5 pin 2 DC power input RJ 45 port: +12 V DC (Connector EMS120050-P19-SZ) 3 Power Switch Turn on / off the unit. 38 W-DMX G4(S) User Manual, edition 2 2013-10 7 Micro units 7.2.3 LEDs Fig. 15: LEDs of Micro R-512 Lite SIGNAL/BATT: Identifies if the signal strength or battery power is displayed on the LED bar. BATT is a coming feature. Other LED signals are identical to F-1, see chapter "4.3 LEDs", page 15. Hint • • • 7.2.4 Micro R-512 Lite does not have the G4S 5.8 GHz mode. Micro R-512 Lite does not have a transmission function, LED "TX" is never used. Micro R-512 Lite does not have RDM support. Installing the unit Installation is identical to the Micro F-1 Lite, see chapter "7.1.4 Installing the unit", page 36. 7.2.5 Operation as a receiver The operation as a receiver is identical to the BlackBox and WhiteBox F-1, see chapter "4.7 Operation as a receiver", page 22. 2013-10 W-DMX G4(S) User Manual, edition 2 39 8 ProBox F-2500 8 ProBox F-2500 8.1 Scope of delivery 8.2 • 1 x ProBox F-2500 device • 1 x user manual • 2 x antenna adapter • 2 x antennas indoor (2 dBi) • 1 x Phoenix gold connector Connectors and ports Fig. 16: Connectors and ports of ProBox F-2500 (Upper picture: front panel; lower picture: connector rear) No. Port Description 1 Antenna Ports Connector for antennas Universe 1: left, Universe 2: right 2 Display & Buttons See chapter "4.3 LEDs", page 15 3 DMX IN for Universe 1 • • Front: XLR male 3 pin Back: XLR male 5 pin 4 DMX IN for Universe 2 • • Front: XLR male 3 pin Back: XLR male 5 pin 5 DMX OUT for Universe 1 XLR female 5 pin 6 DMX OUT for Universe 2 XLR female 5 pin 7 DC power input 40 Input for Phoenix gold connector: • Left: Ground • Right: +12 V DC W-DMX G4(S) User Manual, edition 2 2013-10 8 ProBox F-2500 No. Port Description 8 AC power input UAC = 90–250 V / 50–440 Hz PowerCon 20A connector 9 Ethernet EtherCon RJ 45 port Supports Power over Ethernet 802.3af Includes an embedded BlueBox 8.3 LEDs The ProBox F-2500 is equipped with two identical sets of LEDs and red function buttons: • Left: Universe 1 • Right: Universe 2 Fig. 17: LEDs of ProBox F-2500 For the description of the LED meanings, see chapter "4.3 LEDs", page 15. 8.4 Installing the unit Installation is identical to the BlackBox F-1, see chapter "4.4.1 BlackBox F-1", page 16. 8.5 Switching FLEX modes The FLEX mode determines if the unit is used in Transmit Mode (TX) or Receive Mode (RX). Switching FLEX mode is identical to the BlackBox and WhiteBox F-2, see chapter "6.5 Switching FLEX modes", page 32. 8.6 Operation as a transmitter The operation as a transmitter is identical to the BlackBox and WhiteBox F-1, see chapter "4.6 Operation as a transmitter", page 20. Carry out the procedures for each Universe individually. 2013-10 W-DMX G4(S) User Manual, edition 2 41 8 ProBox F-2500 Hint When you link the receivers for Universe 1, power on only the respective receivers for Universe 1. Once the receivers for Universe 1 are connected, you can power on the receivers for Universe 2 and link them. 8.7 Operation as a receiver The operation as a receiver is identical to the BlackBox and WhiteBox F-1, see chapter "4.7 Operation as a receiver", page 22. 8.8 Operation as a repeater Since the ProBox F-2500 provides 2 Universes, it is possible to use the unit as a repeater. The operation is identical to BlackBox and WhiteBox F-2, see chapter "6.8 Operation as a repeater", page 33. 8.9 Switching CTRL modes The CTRL mode determines which frequency band is used in G4 mode and if Legacy G2/G3 units can be used in the wireless environment. Switching CTRL mode is identical to the BlackBox and WhiteBox F-1, see chapter "4.8 Switching CTRL modes", page 23. Hint The ProBox F-2500 provides 2 Universes. • • 42 Carry out the procedures for each Universe individually. Keep the two universes in the same mode to avoid interference. W-DMX G4(S) User Manual, edition 2 2013-10 9 Technical data 9 9.1 Technical data BlackBoxes (BB) and WhiteBoxes (WB) F-1, R-512 and F-2 BlackBox (in mm): WhiteBox (in mm): BB F-1 WB F-1 BB R-512 WB R-512 BB F-2 WB F-2 Electrical data Regulations complied with Certified Worldwide (FCC, ETL, ETSI, CE, Japan, Russia) High voltage input UAC = 90–250 V / 50–440 Hz Low voltage input UDC = 12 V Average current (TX mode) 450 – 700 mA / 12 VDC Average current (RX mode) 200 mA / 12 VDC DC power supply Phoenix gold connector Dimensions Width x height x depth Weight 2013-10 MK I 219 x 131 x 50 mm 250 x 180 x 67.5 mm 219 x 131 x 50 mm 250 x 180 x 67.5 mm 219 x 131 x 50 mm 250 x 180 x 67.5 mm MK II 234 x 150 x 60 mm – 234 x 150 x 60 mm – 234 x 150 x 60 mm – 1005 g 1200 g 1005 g 1200 g 1005 g 1200 g W-DMX G4(S) User Manual, edition 2 43 9 Technical data BB F-1 WB F-1 BB R-512 WB R-512 BB F-2 WB F-2 Environmental conditions Ambient temperature range (standard) 0 °C to 45 °C Ambient Temperature range (12 VDC) 0 °C to 40 °C 0 °C to 55 °C Humidity 90 % Input protocols DMX512 Yes RDM (1) Yes Optional Yes Ethernet Optional No Optional Streaming ACN Optional No Optional Art-Net 1 / Art-Net 2 / Art-Net 3 Optional No Optional Radio performance Loss of date behavior As wire Output protocols DMX512 RDM (1) Yes Yes Optional Yes Streaming ACN Optional No Optional Art-Net 2 Optional No Optional Radio technologies G3/G4/G4S 2.4 GHz Yes Yes – depending of local regulations, not in EU G4S 5.8 GHz Adaptive Frequency Hopping Yes W-DMX G3 compatibility Yes License free Yes W-DMX Datasafe Redundancy Yes External antenna Yes Standard range Up to 750 m (standard antenna) Expandable range Unlimited (optional antennas) Latency < 5 ms –97 dBm Sensitivity (0.1% PER) Modulation method GFSK Max. power 2.4 GHz EIRP (2) 400 mW Max. power 5.8 GHz EIRP (2) 400 mW DMX capabilities Max. number of Universes Input / output Opto Isolation 32 Yes 64 No Fully compliant USITT DMX512A Yes W-DMX Invisi-wire Yes Yes Product functionality Front panel control Yes W-DMX Uglybox compatible Yes W-DMX Dongle compatible Yes Free software updates Yes Update over Dongle Yes PC configurable Configurable over RDM 44 Yes Yes Optional W-DMX G4(S) User Manual, edition 2 Yes 2013-10 9 Technical data 9.2 MicroBox F-1 Lite and MicroBox R-512 Lite MicroBox F-1 Lite MicroBox R-512 Lite Electrical data Regulations complied with Certified Worldwide (FCC, ETL, ETSI, CE, Japan, Russia) High voltage input UAC = 90 - 250 V (external power supply) Low voltage input UDC = 12–24 V Average current (TX mode) 450 to 700 mA / 12 V Average current (RX mode) 200 mA / 12 V DC power supply Connector EMS120050-P19-SZ Dimensions Width x height x depth 122 x 69 x 43 mm Weight (without battery) 130 g Environmental conditions Ambient temperature range (standard) 0 °C to 55 °C Ambient temperature range (12 VDC) 0 °C to 55 °C Humidity 90 % Input protocols DMX512 RDM (1) Yes Yes Ethernet No No Loss of date behavior As wire Output protocols DMX512 RDM (1) Yes Yes No Radio technologies 2.4 GHz Yes 5.8 GHz No DMX capabilities Adaptive Frequency Hopping Yes W-DMX G3 compatibility Yes License free Yes W-DMX Datasafe Redundancy Yes 2013-10 W-DMX G4(S) User Manual, edition 2 45 9 Technical data MicroBox F-1 Lite MicroBox R-512 Lite Radio performance External antenna No Standard range Up to 200 m Latency < 5 ms –97 dBm Sensitivity (0.1% PER) Modulation method GFSK Max. power 2.4 GHz EIRP (2) Max. number of Universes 250 mW 4 4 Input / output Opto Isolation No Fully compliant USITT DMX512A Yes W-DMX Invisi-wire Yes Product functionality Front panel control Yes W-DMX Uglybox compatible Yes W-DMX Dongle compatible Yes Free software updates Yes Update over Dongle Yes PC configurable Configurable over RDM 46 Yes Yes W-DMX G4(S) User Manual, edition 2 No 2013-10 9 Technical data 9.3 ProBox F-2500 ProBox F-2500 Electrical data Regulations complied with High voltage input Low voltage input Average current (TX mode) Average current (RX mode) DC power supply Certified Worldwide (FCC, ETL, ETSI, CE, Japan, China , Russia) UAC = 90–250 V / 50–440 Hz UDC = 12–24 V 450 to 700 mA / 12 V 200 mA / 12 V Phoenix gold connector Dimensions Format 19" rack format. Height: 1 U, depth: 120 mm Weight 800 g Environmental conditions Ambient temperature range (standard) 0 °C to 45 °C Ambient temperature range (12 VDC) 0 °C to 55 °C Humidity 90 % Input protocols DMX512 Yes RDM (1) Yes Ethernet / PoE Yes Streaming ACN (incl. ETCNet3) Yes Art-Net 1 / Art-Net 2 / Art-Net 3 Yes Loss of date behavior As wire Output protocols DMX512 Yes RDM (1) Yes Streaming ACN (incl. ETCNet3) Yes Art-Net 2 Yes Radio technologies 2.4 GHz Yes 5.8 GHz Yes – depending on local regulations, not in EU Adaptive Frequency Hopping Yes W-DMX G3 compatibility Yes License free Yes W-DMX Datasafe Redundancy Yes Radio performance External antenna Standard range Expandable range Latency Sensitivity (0.1% PER) Modulation method Yes Up to 750 m Unlimited < 5 ms –97 dBm GFSK Max. power 2.4 GHz EIRP (2) 400 mW Max. power 5.8 GHz EIRP (2) 400 mW 2013-10 W-DMX G4(S) User Manual, edition 2 47 9 Technical data ProBox F-2500 DMX capabilities Max. number of Universes 64 Input / output Opto Isolation Yes Fully compliant USITT DMX512A Yes W-DMX Invisi-wire Yes Product functionality Front panel control Yes W-DMX Uglybox compatible Yes W-DMX Dongle compatible Yes Free software updates Yes Update over Dongle Yes PC configurable Yes Configurable over RDM Yes (1) RDM only available in G4S radio modes, except for configuration of transmitter. RDM needs to be activated, "Enable RDM Downstream" at both transmitter and receiver, can be performed with Co-Existence dongle or RDM command. 48 W-DMX G4(S) User Manual, edition 2 2013-10 10 FAQ – Frequently asked questions 10 FAQ – Frequently asked questions Is W-DMX compatible with other systems on the market? Today there is no standard for wireless transmission of DMX signals and there is no possibility of mixing different brands of wireless DMX solutions in a system. For example, you cannot use a Martin® Wireless DMX-512 - Pro Diversity® with Interactive Technologies® CueLink® even though they use a similar type of physical radio transmission standard. Because of this, no wireless-DMX brand today is compatible with another. Is W-DMX built on Bluetooth®? No. It is built on standard radio components with a GSM influenced radio system protocol. Bluetooth® lacks the range needed. Is W-DMX plug and play? Yes. W-DMX doesn’t need any configuration for IP address and net mask like WLAN. W-DMX is “plug and play”. Is it made for use outdoors? Yes. Receivers, transceivers, repeaters and boosters are all available in outdoor versions, all with an IP65 rating. What are the differences between the indoor and outdoor models? The outdoor units would use a different antenna. And, of course, the outdoor units are rated IP65 weatherproof. What is IP65? IP65 is a rating of how weather resistant an item is. IP65 means that the device is totally protected against dust and protected against low pressure jets of water from all directions. On the Outdoor models, WhiteBox, the end user open the box during the installation, care need to be taken to ensure that cable glands and lid is properly sealed to ensure that the installed unit is IP65 rated. What is the difference between the standard and the pro models? The pro model W-DMX have a built support for S-ACN and Art-Net, and a build in RDM controller in the embedded BlueBox module, it has also a built in Power over Ethernet module Do the transmitters and receivers have built-in power supplies? All units have built-in universal power supplies that can operate from a supply range of UAC = 90–250 V, 50–440 Hz (except the MicroBox, F-1 Lite and R-512 Lite which requires a 12–24 VDC external supply). The BlackBox, WhiteBox can run on UDC = 12 V input and the ProBox can run on UDC = 12–24 V as well. Will the signal go through solid objects? Yes, the W-DMX signal will penetrate walls, glass, metal and most objects. One thing that will interrupt the signal is people. Antennas should be above 2013-10 W-DMX G4(S) User Manual, edition 2 49 10 FAQ – Frequently asked questions audiences to ensure reliable operation. Care need to be taken to ensure proper functionality. Will other electronics and other W-LAN users interfere with it? No, it is not affected by cell phones. Heavily loaded W-LAN can be a problem, care need to be taken when you can expect a high use of several W-LAN’s. How many channels of DMX does it control? Each transmitter can control 512 channels (1 universe) of DMX, unlike some wireless systems which only have “half universe” or 256 channels. The F-2 and the ProBox can additionally control a second DMX universe. What antenna should I use? For most indoor applications the 2 dBi antennas work fine. Longer distances, outdoors or unique applications most likely will require different antennas. Please contact us with your intended application questions. Warranty is voided if using other antennas than W-DMX branded. What is the transmission range? With standard antennas the, maximum distance is 700 m/2300 feet (FCC version). As an option it’s possible to connect other antenna models to achieve longer distances or where there is a specific need for higher gain. (Distances valid at 300 mW FCC) Antenna Transmitter Antenna Receiver Maximum Distance 2 dBi 2 dBi 750 m 5 dBi 2 dBi 1000 m 7 dBi 5 dBi 1450 m 9 dBi 8 dBi 2300 m How many receivers can be assigned per universe to the W-DMX in a DMX512, DMX512A, or RDM installation? DMX Receivers is only limited to the 512 channels per universe. If RDM is activated, you are limited to 34 RDM devices, where each W-DMX device is counted as one RDM device. Can multiple transmitters run side by side (to support more than one universe)? Yes, up to 8.192 receivers can be controlled from one system, and the standard configuration is with 512 DMX Channels and can easily be updated with 8.192 DMX channels (16 DMX-512 Universes). Is it FCC approved? Yes. Please see chapter "Technical data", page 43, 45 and 47. 50 W-DMX G4(S) User Manual, edition 2 2013-10 10 FAQ – Frequently asked questions Are these products UL listed? UL pending. What is the typical power consumption? 450 mA average, 700 mA maximum. Please see chapter "Technical data", page 43, 45 and 47. Is there a warranty? All BlackBox products are covered by a standard 12 month full warranty. Can the antenna be mounted away from the transmitter or receiver? Yes, there are indoor and outdoor cables available in lengths from 0,5 m to 30 m (1.6 to 98 feet). Will the receivers stay logged on to the transmitter if the DMX signal is lost? Yes, even if the DMX signal is interrupted the receiver(s) will remain logged in. Will the units stay logged in to each other if power is cut? The log-in information is stored in an EEPROM and will not be erased. No battery backup is needed. In theory, the units stay logged in forever. In an operational system, can I log on an additional receiver without disrupting DMX transmission to other receivers? This is not possible with the BlackBox unit. Logging on an additional receiver will make the logged-in units revert to idle mode for 10 seconds; once the new units are logged-in they will all start again together with the new unit. What is the difference between Multicast and Point to Point? Multi-cast: transmitting to multiple receivers simultaneously. Point to Point: data is a single path of data transmission. What is FHSS? Short for Frequency Hopping Spread Spectrum – Frequency hopping techniques, in which the transmitter jumps from sub-channel to sub-channel at rapid pace, were first used by the U.S. Military. Such techniques were developed precisely because they are difficult to disrupt and, unless you know the frequency hopping sequence, practically impossible to intercept. Spread spectrum techniques have two main advantages: Firstly, they are more resistant to interference than conventional systems. Secondly, they can be used to provide multiple access functionality. Does W-DMX support on-site service with technical documentation after visit? Wireless Solution and/or its distributors offer Cell Planning Service for larger projects. Please contact your local distributor for a quote. This is highly recommended for all larger projects to save time and money. 2013-10 W-DMX G4(S) User Manual, edition 2 51 11 Appendix:Certificates 11 11.1 52 Appendix:Certificates E1551 RFC W-DMX G4(S) User Manual, edition 2 2013-10 11 Appendix:Certificates 11.2 2013-10 ETSI Test Report W-DMX G4(S) User Manual, edition 2 53 11 Appendix:Certificates 54 W-DMX G4(S) User Manual, edition 2 2013-10 11 Appendix:Certificates 11.3 GRANT OF EQUIPMENT AUTHORIZATION TCB TCB GRANT OF EQUIPMENT AUTHORIZATION Certif ication Issued Under the Authority of the Federal Communications Commission By : Intertek Testing Serv ices NA, Inc. 70 Codman Hill Road Boxborough, MA 01719 Date of Grant: 09/04/2012 Application Dated: 08/17/2012 Interlite AB Interlite AB Stureparksv ägen 7 Uddev alla, 451 55 Sweden Attention: Niclas Arv idsson , CEO NOT TRANSFERABLE EQUIPMENT AUTHORIZATION is hereby issued to the named GRANTEE, and is VALID ONLY f or the equipmen t identif ied hereon f or use under the Commission's Rules and Regulations listed below. Grant Notes FCC IDENTIFIER:NY2-WDMXTRX Name of Grantee: Interlite AB Equipment Class:Part 15 Spread Spectrum Transmitter Notes:FHSS radio transcei v er f or DMX communication in lighting industry Modular Ty pe:Single Modular Frequency Output Frequency FCC Rule Parts Range (MHZ) Watts Tolerance 15C2402.0 - 2459.0 0.0851 Emission Designator Modular approv al. Output power isconducted. The antenna(s) used f or this transmitter must be installed to prov ide a paration se distance of atleast 20 cm f rom all persons and must not be co-located or operating in conjunction with any other antenna or transmitter. Users and insta llers must be prov ided with antenna installation instructions and transmitter operating conditions f or satisf y ing RF exposure compliance. 2013-10 W-DMX G4(S) User Manual, edition 2 55 Wireless Solution Sweden Sales AB Stureparksvägen 7 451 55 Uddevalla Sweden Tel.: +46 522 511 511 Fax: +46 522 440 885 E-Mail: [email protected] Web: www.wirelessdmx.com