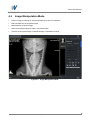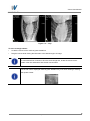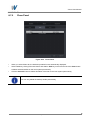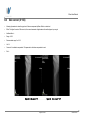
1
VXvue User Manual (For Veterinary Use) VXvue User Manual Revision History Version Date 1.0 2012-06-15 Description Initial Release 2012-08-11 Modified VXvue log-in UI User interface layout screen Image reject Reject study Image Convert / Export Viewer setting panel UI Procedure panel Queue panel UI MWL panel UI MPPS panel UI / contents 1.1 Added ER(Emergency) Mode Worklist panel UI / contents Exposure Mode panel UI / contents Image Processing Mode UI / contents Storage panel Storage Commitment panel UI / contents Reject Rejected List panel UI / contents Reason panel UI / contents 2012-10-22 Added Appendix A Appendix B Appendix C Page 2 of 181 RA20-129-035 VXvue User Manual Contents Safety and Regulatory ....................................................................................................... 8 Safety Notice ............................................................................................................................................. 8 1. Introduction ................................................................................................................. 9 1.1 Getting Started .......................................................................................................................... 9 1.2 How to use Mouse .................................................................................................................. 10 2. User Interface Layout ................................................................................................ 11 3. Work Mode ................................................................................................................. 12 3.1 Worklist Panel ......................................................................................................................... 12 3.1.1 Search Conditions............................................................................................................. 13 3.1.2 Search ............................................................................................................................... 14 3.1.3 Clear Search Conditions ................................................................................................... 14 3.1.4 Save to Local .................................................................................................................... 14 3.1.5 Start Study ........................................................................................................................ 14 3.1.6 Register Emergency Study ............................................................................................... 15 3.1.7 Search Results List ........................................................................................................... 15 3.2 New Study Panel ..................................................................................................................... 19 3.2.1 3.3 Register Study .................................................................................................................. 20 Local Panel .............................................................................................................................. 22 3.3.1 Search Conditions............................................................................................................. 22 3.3.2 Search ............................................................................................................................... 23 3.3.3 Clear Search Conditions ................................................................................................... 23 3.3.4 Start Study ........................................................................................................................ 24 3.3.5 Register Emergency Study ............................................................................................... 24 3.3.6 Modify Order Information .................................................................................................. 24 3.3.7 Deleting Order Information ............................................................................................... 25 3.3.8 Search Results List ........................................................................................................... 25 4. Exposure Mode .......................................................................................................... 26 4.1 Exposure ................................................................................................................................. 26 4.1.1 Study Tab .......................................................................................................................... 27 4.1.2 Detector and Detector Status Information ........................................................................ 27 4.1.3 Step Registration Window ................................................................................................ 28 4.1.4 Patient Size Slide .............................................................................................................. 29 4.1.5 Thumbnail and Step .......................................................................................................... 30 Page 3 of 181 RA20-129-035 VXvue User Manual 4.1.6 Image Manipulation Mode Button ..................................................................................... 31 4.1.7 Image Manipulation Tools ................................................................................................. 31 4.1.8 Exposure View .................................................................................................................. 31 4.2 Image Manipulation Mode...................................................................................................... 32 4.2.1 Button for Switching to Exposure Mode............................................................................ 33 4.2.2 Process Panel ................................................................................................................... 33 4.2.3 Tools Panel ....................................................................................................................... 35 4.2.4 Label Panel ....................................................................................................................... 70 5. Database Mode .......................................................................................................... 74 5.1 Search Condition .................................................................................................................... 75 5.2 Search Menu ........................................................................................................................... 76 5.2.1 Search ............................................................................................................................... 76 5.2.2 Clear Search Conditions ................................................................................................... 76 5.2.3 New Study ......................................................................................................................... 76 5.2.4 Insert ................................................................................................................................. 77 5.2.5 Move Image ...................................................................................................................... 77 5.2.6 Modify Study Information .................................................................................................. 78 5.3 Database Menu ....................................................................................................................... 79 5.3.1 Open ................................................................................................................................. 79 5.3.2 Reject Study...................................................................................................................... 80 5.3.3 Export ................................................................................................................................ 81 5.3.4 Stitch ................................................................................................................................. 83 5.3.5 Send .................................................................................................................................. 84 5.3.6 Print ................................................................................................................................... 84 5.4 Searched Study List ............................................................................................................... 85 5.5 Thumbnail................................................................................................................................ 86 6. Viewer Mode............................................................................................................... 88 Page 4 of 181 RA20-129-035 VXvue User Manual 7. Print Mode .................................................................................................................. 89 7.1 Printer and Page Setup .......................................................................................................... 90 7.2 Image Manipulation Buttons ................................................................................................. 91 7.2.1 Select ................................................................................................................................ 91 7.2.2 Zoom ................................................................................................................................. 91 7.2.3 Panning ............................................................................................................................. 92 7.2.4 Window/Level .................................................................................................................... 92 7.2.5 Pick W/L (Window Level) .................................................................................................. 92 7.2.6 Magic Glass ...................................................................................................................... 92 7.2.7 Crop .................................................................................................................................. 92 7.2.8 Invert ................................................................................................................................. 92 7.2.9 Clockwise Rotation ........................................................................................................... 93 7.2.10 Counterclockwise Rotation ............................................................................................... 93 7.2.11 Flip .................................................................................................................................... 93 7.2.12 Mirror ................................................................................................................................. 93 7.2.13 Fit to Screen...................................................................................................................... 93 7.2.14 Delete Image..................................................................................................................... 94 7.2.15 Delete All ........................................................................................................................... 94 7.2.16 Image Swap ...................................................................................................................... 94 7.2.17 Print ................................................................................................................................... 94 7.2.18 Distance ............................................................................................................................ 95 7.2.19 Angle ................................................................................................................................. 95 7.2.20 Arrow ................................................................................................................................. 95 7.2.21 Rectangle .......................................................................................................................... 95 7.2.22 Ellipse ............................................................................................................................... 95 7.2.23 Displaying ROI Information ............................................................................................... 95 7.2.24 Text Note ........................................................................................................................... 96 7.2.25 Delete Annotations ............................................................................................................ 96 8. Setting Mode .............................................................................................................. 97 8.1 System Settings ...................................................................................................................... 97 8.1.1 System Panel .................................................................................................................... 97 8.1.2 Account Panel ................................................................................................................. 100 8.1.3 Miscellaneous Panel ....................................................................................................... 101 8.1.4 Log Panel ........................................................................................................................ 104 Page 5 of 181 RA20-129-035 VXvue User Manual 8.2 Work Settings........................................................................................................................ 105 8.2.1 New Study ....................................................................................................................... 105 8.2.2 Unit .................................................................................................................................. 106 8.2.3 Default Tab ...................................................................................................................... 106 8.3 Exposure Settings ................................................................................................................ 107 8.3.1 Category ......................................................................................................................... 107 8.3.2 Shortcut ........................................................................................................................... 108 8.4 Viewer Settings ..................................................................................................................... 109 8.4.1 Image Overlay.................................................................................................................. 110 8.4.2 Monitor LUT ..................................................................................................................... 111 8.4.3 Interpolation Mode ........................................................................................................... 111 8.4.4 Window Level Option ....................................................................................................... 111 8.4.5 Crop Option ...................................................................................................................... 111 8.5 LUT Settings........................................................................................................................... 112 8.6 Procedure Settings ................................................................................................................ 113 8.6.1 Procedure Panel .............................................................................................................. 113 8.6.2 Step Panel ....................................................................................................................... 114 8.6.3 Body Part/Projection Panel ............................................................................................. 129 8.6.4 Species Code.................................................................................................................. 130 8.6.5 Breed Code ..................................................................................................................... 131 8.6.6 Breed Registration Code ................................................................................................ 132 8.7 Backup Settings ................................................................................................................... 133 8.7.1 Backup Panel .................................................................................................................. 133 8.7.2 Clean Panel .................................................................................................................... 135 8.7.3 Restore Panel ................................................................................................................. 136 8.8 DICOM Settings .................................................................................................................... 137 8.8.1 Queue Panel ................................................................................................................... 137 8.8.2 MWL Panel...................................................................................................................... 138 8.8.3 MPPS Panel.................................................................................................................... 141 8.8.4 Storage Panel ................................................................................................................. 143 8.8.5 Storage Commitment Panel ............................................................................................ 146 8.8.6 Print Panel ...................................................................................................................... 148 8.9 Setting Reject ........................................................................................................................ 152 8.9.1 Rejected List Panel ......................................................................................................... 152 8.9.2 Reason Panel ................................................................................................................. 153 Page 6 of 181 RA20-129-035 VXvue User Manual Appendix A. Cursor and Icon List............................................................................. 154 A.1 Tool Cursors.......................................................................................................................... 154 A.2 Annotation Cursors .............................................................................................................. 154 A.3 Status Bar Icons ................................................................................................................... 155 A.4 Listed Icons in Database Mode ........................................................................................... 155 A.5 Thumbnail Status Icons ....................................................................................................... 156 A.6 Detector information Icons .................................................................................................. 157 A.7 Detector Status Icons........................................................................................................... 158 Appendix B. Image Process Guide (HS2) ................................................................. 159 B.1 HS2 Basic .............................................................................................................................. 160 B.2 Contrast slope (0~50) ........................................................................................................... 161 B.3 Contrast point (0~100).......................................................................................................... 162 B.4 Mean Point (1~100) ............................................................................................................... 163 B.5 Skin correct (0~100) ............................................................................................................. 164 B.6 OPPoint (1000~100): TBD .................................................................................................... 165 B.7 Compensation ....................................................................................................................... 166 B.8 Compression ......................................................................................................................... 167 B.9 Denoise .................................................................................................................................. 168 B.10 Gamma................................................................................................................................... 169 B.11 Fine Edge............................................................................................................................... 171 B.12 Middle Edge........................................................................................................................... 172 B.13 Large Edge ............................................................................................................................ 173 B.14 Huge Edge ............................................................................................................................. 174 Appendix C. Exposure Index ..................................................................................... 175 C.1 Flowchart (Exposure Index Setting) ................................................................................... 175 C.2 Exposure Index (E.I) and Deviation Index (D.I) Display .................................................... 176 C.3 Set Target Exposure Index ( EI t ) in Step Panel ................................................................ 177 C.4 Exposure Index Formula...................................................................................................... 178 C.4.1 Definition ......................................................................................................................... 178 C.4.2 Range ............................................................................................................................. 178 C.5 C.6 Deviation Index (Relative Index) Formula .......................................................................... 179 C.5.1 Definition ......................................................................................................................... 179 C.5.2 Range ............................................................................................................................. 179 The Recommended Target Exposure Index ( EI t ) ............................................................ 180 Page 7 of 181 RA20-129-035 VXvue User Manual Safety and Regulatory Safety Notice The following safety notices are used to emphasize certain safety instructions. Follow the safety instructions in this manual along with warnings and cautions symbols. Ignoring such warnings or cautions while handling the product may results in serious injury or accident. It is important for you to read and understand the contents of this manual before attempting to use the product. Symbols Descriptions Indicates a potentially hazardous situation which may cause minor personal injury or property damage if the instructions are ignored. Provides additional information that is helpful to you. It may emphasize certain information regarding special tools or items to check before operating the product. Page 8 of 181 RA20-129-035 VXvue User Manual 1. Introduction 1.1 Getting Started The following login dialog will be displayed when you run VXvue.exe. To log in to VXvue, you need to enter registered ID and password. Figure 1.1 VXvue login dialog When you sign in using your ID and password with the Remember ID checkbox checked, the login ID will be remembered so that you can sign in without entering the ID. User permissions for software features vary depending on the group of user accounts. For more information about user rights for each user group, refer to chapter 8.1.2 "Account Panel”. When you click the ER button, you can directly access to the ER mode without entering your ID and password. In the ER mode, you can use the Work and Exposure modes only. The following buttons will be disabled in the ER mode. - Patient Edit and Delete buttons in the Local panel of the Work mode. - Image Process, Send and Print buttons in the Exposure mode. Page 9 of 181 RA20-129-035 VXvue User Manual 1.2 How to use Mouse Mouse is a device to move cursor to choose an object on the screen. Followings are the instruction for using Mouse. Left button click: Choose an image, menu or button to activate certain feature. Right button click: Display option menus for the selected menu. Ctrl key+ left button click: Choose multiple objects. Left button double click: Execute special functions on each menu. Scroll: Roll the mouse wheel (if applicable) up and down to switch between images when multiple images are selected. Drag: Drag with the left mouse button pressed for adjusting parameters, changing object’s size or moving an object. Drag with the right mouse button pressed for adjusting Window Level on the main image window. Up Left Right Down Drag the mouse with pressing right button can be used with other features simultaneously. When it is active, the mouse cursor will be changed to Increasing and decreasing of Window Level can be mapped as four directions (Left/Right/Up/Down) when moving a mouse. Cursor speed also can be set. For more information, refer to chapter 8.4 “Viewer Settings”. The basic and configurable action Window Level are as follows; - W1/W2 (basic action): W1/W2 is start/end value of Window to be displayed. - Contrast - Brightness Page 10 of 181 RA20-129-035 VXvue User Manual 2. User Interface Layout 2 1 Figure 2.1 VXvue User Interface Layout 1. Mode Tab: You can change the mode by clicking on each tab. 2. Status Bar: Display currently logged in account, free space of hard drive, data transfer status to DICOM Storage or DICOM Print server, current time and date. Status of hard drive capacity Transmit status to DICOM Storage server. (success / total / fail) Transmit status to DICOM Print server. (success / total / fail) Refer to Appendix A for information of “Cursor and Icon List”. Refer to the descriptions of each mode for the rest of layout. Click the transmit status icon of DICOM Storage or DICOM Print server to move to Queue panel (also available Setting > DICOM > Queue) where you can check the queues to DICOM Storage and DICOM Print server. Page 11 of 181 RA20-129-035 VXvue User Manual 3. Work Mode 3.1 Worklist Panel Figure 3.1 Worklist Panel To use DICOM Worklist server, you must register the server (SCP) on “MWL Panel” described in chapter 8.8.2. Page 12 of 181 RA20-129-035 VXvue User Manual 3.1.1 Search Conditions You can search the scheduled orders from DICOM Worklist server configured and selected in MWL panel with the following conditions. Patient ID: Input a patient ID to search. Patient Name: Input a patient name to search. Accession Number: Input accession number of study to search. Station Name: Input a station name to search. Modality: Select a modality to search. Scheduled Date Range: Select a specific period of time to search. Select the checkbox on the left side of Station Name to use it. The default value for Station Name can be modified on “System Panel” described in chapter 8.1.1. Modifying in Worklist Panel will affect only the current field but not change the default value. The special characters available to enter patient ID, name, accession number and station name are limited to ‘-, _, =, +, (,)’. Select the checkbox on the left side of Modality to use it. The selectable modalities are CR, DX and DR. 3.1.1.1 Period Search Button Today Search scheduled orders on today with entered search conditions immediately. Week Search the latest scheduled orders within a week with entered search conditions immediately. Month Search the latest scheduled orders within a month with entered search conditions immediately. Page 13 of 181 RA20-129-035 VXvue User Manual 3.1.2 Search Execute a search for scheduled order with entered search conditions. Search results from the selected sever are displayed among configured DICOM Worklist servers. For more information about DICOM Worklist server setting, refer to chapter 8.8.2 “MWL Panel”. 3.1.3 Clear Search Conditions Clear all search conditions entered previously. To search without search conditions, click the Search button after clicking the Clear Search Conditions button. 3.1.4 Save to Local Register the selected order to local database. You can check the saved orders in the local panel. 3.1.5 Start Study Initiate study with the selected order. You can register both selected order and its related orders when patient ID and name are same. Page 14 of 181 RA20-129-035 VXvue User Manual 3.1.6 Register Emergency Study Register emergency study using patient information automatic created. Emergency study’s patient ID will be entered in the form of EM-YYMMDD-HHMMSS based on the current date and time. The emergency study’s patient name is entered as ‘Urgent Patient’. 3.1.7 Search Results List Search results will be displayed on the list. 3.1.7.1 Sort You can sort by clicking on the header of each column. Figure 3.2 Sort Page 15 of 181 RA20-129-035 VXvue User Manual 3.1.7.2 Modifying Column You can modify which fields to be displayed on the search results by clicking the right mouse button, and then the More… button. Figure 3.3 Modifying Search Result Field (continuous) Figure 3.4 Modifying Search Result Field Check Box: Indicate whether to display the field on the list of search results. Move Up: Move the selected field upward in the list. Move Down: Move the selected field downward in the list. Show: Display the selected field on the list of search results. Hide: Do not display the selected field on the list of search results. Width: Adjust the size of selected column to be displayed on the search results. Check Box and Show/Hide buttons have same function. Page 16 of 181 RA20-129-035 VXvue User Manual If there is no result value on DICOM Worklist server, the fields’ result is not displayed even the relevant fields are showed on the list. You can edit the following fields. Scheduled Date/Time Acc. No. Patient ID Patient Name Sex Age Birth Date Modality Requested Procedure ID Scheduled Procedure Step Desc. Patient Comments Study Description Referring Physician Species Description Species Code Sequence Breed Description Breed Code Sequence Breed Registration Number Breed Registration Code Sequence Responsible Person Responsible Person Role Responsible Organization Sex Neutered Scheduled Station AE Title Requested Contrast Agent Scheduled Performing Physician’s Name Scheduled Station Name Scheduled Procedure Step ID Requested Procedure Description Requested Procedure Code Sequence Study Instance ID Study Date/Time Requested Procedure priority Patient Transport Arrangements Page 17 of 181 RA20-129-035 VXvue User Manual Requested Procedure Location Requesting Service Visit Status ID Patient Institution Residence Current Patient Location Admitting Diagnosis Description Other Patient IDs Other Patient Names Patient Birth Time Patient Size Patient Weight Ethnic Group Occupation Patient Address Patient Telephone Numbers Confidentiality Constraint on Patient Additional Patient History Patient State Pregnancy Status Medical Alerts Allergies Special Needs Page 18 of 181 RA20-129-035 VXvue User Manual 3.2 New Study Panel Figure 3.5 New Study Panel You can enter patient information manually and then start study. For more information about how to configure mandatory and optional registration fields, refer to chapter 8.2 “Work Settings”. The optional fields are displayed in white while required fields are displayed in green. Page 19 of 181 RA20-129-035 VXvue User Manual 3.2.1 Register Study Input the following information to register studies. Scheduled Date Time Acc.No Patient ID Patient Name Birth Date Age / Sex Size / Weight Procedure: Bundle of steps Referring Physician: Physician name who requested the study Species Description Species Code Sequence Breed Description Breed Code Sequence Breed Registration Number Breed Registration Code Sequence Responsible Person Responsible Person Role Responsible Organization Sex Neutered Patient Comments Study Description When you move to the other field after entering patient ID, the patient’s information is entered automatically if there is a patient registered with that patient ID. The related field to the information is patient name, birth date, sex and patient’s comments. You cannot register a study if you change the automatically entered patient information (name, birth date and sex) in the previous registered study. The patient’s age is calculated automatically using the birth date and current date. Age is classified into Y (year), M (month) and D (day) and Sex is classified into M (male), F (female) and O (Other: unsettled or unidentified). The units of size / weight are Metric (kg / cm) and English (lb / ft). Refer to chapter 8.2 “Work Settings” for detailed information. Page 20 of 181 RA20-129-035 VXvue User Manual For more information about how to configure Procedure, refer to chapter 8.6 “Procedure Settings”. The special characters available for Patient ID, Patient Name, Accession Number and Referring Physician are limited to ‘-, _, =, +, (,)’. 3.2.1.1 Register Emergency Study Register Emergency Study using patient information automatic created. Emergency patient’s ID will be entered in the form of EM-YYMMDD-HHMMSS based on the current date and time. The emergency patient’s name is entered as ‘Urgent Patient’, whereas the currently inputted information will not be saved. 3.2.1.2 Add to Local Register the entered order information to local database. 3.2.1.3 Start Study Initiate study with entered order information. When the study starts, the panel moves to the Exposure mode automatically. Page 21 of 181 RA20-129-035 VXvue User Manual 3.3 Local Panel Figure 3.6 Local Panel 3.3.1 Search Conditions You can search a previously registered order entered in the local panel using the options below. Patient ID: Input a patient ID of order to search. Patient Name: Input a patient name of order to search. Accession Number: Input accession number of order to search. Patient Age: Input patient’s age of order to search. (Y: year, M: month, D: day) Input infant age on month or day unit. (younger than 1 year) Patient Sex: Input a patient’s gender of order to search. (F: Female, M: Male, O: Other (unsettled or unidentified)) Scheduled Date Range: Input a specific period of time of order to search. Page 22 of 181 RA20-129-035 VXvue User Manual 3.3.1.1 Today Search the local order entered and registered today with the input search conditions immediately. 3.3.1.2 Week Search the latest local order entered and registered within a week with the input search conditions immediately. 3.3.1.3 Month Search the latest local order entered and registered within a month with the input search conditions immediately. 3.3.2 Search Execute a search on local database with entered search conditions. Search results will be retrieved from local database. 3.3.3 Clear Search Conditions Clear all search conditions entered previously. To search without search conditions, click the Search button after clicking this button. Page 23 of 181 RA20-129-035 VXvue User Manual 3.3.4 Start Study Initiate study with the selected order. 3.3.5 Register Emergency Study Register the study of emergency study using patient information automatic created. The patient ID of emergency study will be entered in the form of EM-YYMMDD-HHMMSS based on the current date and time. The patient name of emergency study is entered as ‘Urgent Patient’. 3.3.6 Modify Order Information Modify order information registered on local database. Changing order information on local database will not change previously performed study information. Page 24 of 181 RA20-129-035 VXvue User Manual 3.3.7 Deleting Order Information Delete order information saved on local database. Deleting order information on local database will not delete previously performed study information. 3.3.8 Search Results List When you select multiple items from the searched result list, the Patient Edit button will be disabled. For more information, refer to chapter 3.1.7 “Search Results List”. Page 25 of 181 RA20-129-035 VXvue User Manual 4. Exposure Mode Exposure Mode allows you to acquire and process images for the registered study. 4.1 Exposure You can acquire an image for registered study. You can quickly switch to Exposure Mode by double clicking the acquired image in the Image Processing Mode. Refer to chapter 4.2 “Image Manipulation Mode” for more information. Study Tab Image Manipulation Tools Image Manipulation Mode Button Patient Size Slide Detector and Detector Status Information Thumbnail and Step Exposure View Step Registration Window Figure 4.1 Exposure Mode Page 26 of 181 RA20-129-035 VXvue User Manual 4.1.1 Study Tab Swap between studies. Close selected study. Patient Name, Patient ID, Accession Number and Study Description are marked in the study tab. 4.1.2 Detector and Detector Status Information The yellow selective frame is applied when a detector for exposure is selected. Status information of detector is displayed on its button. Right click the detector mode button or press and hold the left button for 1.5 seconds to display detailed status information of the detector. Figure 4.2 Detector Status Information The type and status information of detector are as follows. Detectors - 1717 wired detector (static) - 1417 wired detector (portable) - 1417 wireless detector (portable) - 1417 wireless detector connected with tether interface (portable) Page 27 of 181 RA20-129-035 VXvue User Manual Status - Detector connected - Detector disconnected - Detector selected (yellow selective frame applied) - Detector in sleep mode (1417 portable wireless detector) - Images are not transmitted to the detector. (1417 potable wireless detector) - Updated information in the detector You can check the following information on the detector Info dialog. - Detector connection status - Detector temperature status - Battery information (1417 portable wireless detector) - Wireless signal strength (1417 portable wireless detector) Refer to Appendix A “Cursor and Icon List” for icons of each status. 4.1.3 Step Registration Window Register steps for scheduled study. Shape provides two types of shortcut. Body Part Shortcut: When you click the Body Part shortcut, the Projection buttons appear on each side of Step Registration window. To register the step as a scheduled study, click the Projection button again. Step Shortcut: When you click the Step shortcut, the step will be registered as a scheduled study immediately. Step is a combination of Body part and its projection. Refer to chapter 8.6.2 “Step Panel” for setting it. For more information about registering the shortcut, refer to the chapter 8.3 “Exposure Settings” For more information about registering Projection, refer to the chapter 8.6.2 “Step Panel”. Page 28 of 181 RA20-129-035 VXvue User Manual Category: You can change the category of study. 1. Click the left mouse button on the category area. 2. Choose a category option you want on the pop-up window. Refer to chapter 8.3.1 “Category” for registering category. 4.1.4 Patient Size Slide Select the size of patient with thickness. The setting value of image processing for each patient size is applied. The image processing can be applied for each combination of Body part, Projection and Size. Refer to chapter 8.6.2 “Step Panel” for setting image processing. Page 29 of 181 RA20-129-035 VXvue User Manual 4.1.5 Thumbnail and Step Display the images of current study and the registered step for acquiring images. Select a step to be exposed among the registered steps. Figure 4.3 Thumbnail and Step The yellow framed item is the selected image that displayed on the thumbnail. The step of item marked with is applied after acquiring images. The status information of images displayed on thumbnail is as follows; - Backed up - Cleaned - Sent to the DICOM Print server. - Sent to the DICOM Storage server. - Rejected Refer to Appendix A “Cursor and Icon List” for icons of each status. Page 30 of 181 RA20-129-035 VXvue User Manual 4.1.6 Image Manipulation Mode Button View the images of current study in the image processing mode. 4.1.7 Image Manipulation Tools You can control the image by clicking the image control button. The tools are synchronized to the image manipulation buttons of Process panel. The buttons added on “Tools Panel” in chapter 4.2.3 can be deleted, except the default buttons. Choose Remove from Image Process Tab message by clicking the right mouse button on added buttons you want to delete. The default buttons cannot be deleted. Select, Zoom, Pan, Magic Glass, Crop For more information about each button’s function, add and setting, refer to the chapter 4.2.3 “Tools Panel”. 4.1.8 Exposure View Verify the acquired images. Display information of images. Adjust Window Level by dragging the mouse while pressing and holding the right mouse button. Page 31 of 181 RA20-129-035 VXvue User Manual 4.2 Image Manipulation Mode Perform image processing for acquired images using various parameters. Add annotations to the acquired images. Manipulate the acquired images. Stitch the acquired images to make a composed image. Transfer the acquired images to DICOM Storage or DICOM Print server. Figure 4.4 Image Manipulation Mode Page 32 of 181 RA20-129-035 VXvue User Manual 4.2.1 Button for Switching to Exposure Mode Exit from the image Manipulation mode and switch back to the previous exposure mode. 4.2.2 Process Panel Image Processing Parameter Image Manipulation buttons Parameter History Figure 4.5 Process Panel Page 33 of 181 RA20-129-035 VXvue User Manual Image Reprocessing Perform various image reprocessing for acquired images by selecting HS1 or HS2 algorithm. Click the Change Step button to modify Step of the image. Then image will be reprocessed with image processing parameters which are associated with the selected step. Click the Enhance Image button to reprocess the image with the image processing parameters which are associated with the selected step. Click the Reset button to reprocess the image with the image processing parameters which are associated with the current image’s step. Modify the parameter values in the Simple Image Processing Panel and click the Process button to reprocess the image. When the image is reprocessed by changing parameter values, the values are added to the parameter history. Double click the left mouse button on the list of the parameter history to reprocess the image with previously applied parameters. Image Manipulation Button You can manipulate images by clicking image manipulation buttons. The tools are synchronized to the image manipulation buttons of Process panel. The buttons added on “Tools Panel” in chapter 4.2.3 can be deleted except the default buttons. Choose Remove from Image Process Tab message by clicking the right mouse button on buttons you want to delete. The default buttons cannot be deleted. Select, Zoom, Pan, Magic glass, Crop. For more information about each button’s function, add and setting, refer to the chapter 4.2.3 “Tools Panel”. Page 34 of 181 RA20-129-035 VXvue User Manual The following buttons become deactivated when selecting backed up images. - Change Step, Enhance Image, Reset, Process 4.2.3 Tools Panel Tools panel are organized with buttons of image manipulation, screen layout, annotations and specialized functions. Image Manipulation tools Screen Layout tools Annotations Specialized functions Figure 4.6 Tools Panel You can add / delete buttons of Tools panel to Image manipulation tools in the Exposure mode in chapter 4.1 and to Process panel of the Image manipulation mode in chapter 4.2.2. Page 35 of 181 RA20-129-035 VXvue User Manual Choose Add from Image Process Tab message to add buttons by clicking the right mouse button on them. The previously added buttons can be deleted by selecting Remove from Image Process Tab message by clicking right mouse button on the added buttons. The default buttons of Image manipulation tools in the Exposure mode in chapter 4.1 and Process panel of the Image manipulation mode in chapter 4.2.2 cannot be added. - Default Button: Select, Zoom, Pan, Magic glass, Crop. The screen layout buttons cannot be added. A yellow frame is not displayed on the following buttons as their functions are applied immediately. Previously selected buttons is not deactivated by clicking these buttons. - Inv., CW, CCW, flip, mirror, fit, 1:1, R Label, L Label, image process, convert raw, send to the DICOM Storage, send to the DICOM Print server, stitch, reject image, close study, close all study, edit patient. If you choose the following buttons, the shape of cursor is changed. - Select, zoom, magic glass, pan, W/L, crop, distance, angle, arrow, rectangle, ellipse, Rect ROI, Text. Refer to Appendix A “Cursor and Icon List” for cursor shape of each button. The following buttons become disabled when selecting backed up images. - Inv., Arrow, Rectangle, Ellipse, Rect ROI, Text, Image process, Stitch, Convert raw, reject Image. Page 36 of 181 RA20-129-035 VXvue User Manual 4.2.3.1 Select This is the default mouse cursor state. Click the Select button to choose other images in the current study or annotations in the selected image. The selected image in main image window and thumbnail images are synchronized and yellow frames are applied. Figure 4.7 Selected Study Image If you click the Select button on the Tools panel, the functions of previously selected buttons are deactivated. Page 37 of 181 RA20-129-035 VXvue User Manual 4.2.3.2 Select All Select all images in the current study. Figure 4.8 Selected All Images You can apply the following image manipulation functions to all selected images at once. Inv., CW, CCW, flip vertical, flip horizontal, fit, 1:1, R label, L label, image process, send, print, stitch, convert raw image, reject image. The other functions (annotations, etc.) are applied to selected images after clicking relevant buttons. At this time, the multi selecting is deactivated and a yellow frame is displayed on the relevant image only. The 1:1 can be applied only to the images displayed on the current screen. Page 38 of 181 RA20-129-035 VXvue User Manual 4.2.3.3 Zoom Enable interactive zooming by dragging the mouse with clicking the left mouse button. To zoom in and zoom out, Click the Zoom button on the Tools Panel. Move the mouse cursor to the main image window then the cursor will be changed to magic glass shape. Drag the mouse with clicking left mouse button on the image to control zooming. Zoom in – Drag the mouse upward on the image. Zoom out – Drag the mouse downward on the image. Release the mouse button to finish zooming. The maximum zoom ratio is 3200% and the minimum is 5%. An annotation added on the image is enlarged and reduced when you zoom in / out the image. 4.2.3.4 Panning Perform panning the image. To perform panning, Click the Pan button on the Tools Panel. Move the mouse cursor to the main image window then the cursor will be changed to hand shape. Drag the mouse with clicking left mouse button while panning the image to the desired position. Page 39 of 181 RA20-129-035 VXvue User Manual 4.2.3.5 Window / Level Change the window level – brightness and contrast of an image. The changed window level values are marked in Histogram information on the image display window. Set Histogram in Image Overlay to display Histogram information on the main image window. Refer to chapter 8.4 “Viewer Settings” for more information. To adjust the window level of an image, Click the W/L button on the Tools Panel. Move the mouse cursor into the image area then the cursor will be changed. Drag the mouse while clicking the left button to the desired Window/Level. Refer to chapter 1.2 “How to Use Mouse” for adjusting the window level by mouse dragging. It is the same drag function with a right mouse button. 4.2.3.6 Pick W/L (Window / Level) Change the window level - brightness and contrast of the image based on the selected region of interest. The changed window level values are marked in Histogram information on the image display window. Set Histogram in Image Overlay to display Histogram information on the image display window. Refer to chapter 8.4 “Viewer Settings” for more information. Page 40 of 181 RA20-129-035 VXvue User Manual 4.2.3.7 Magic Glass Magnify a specific region of interest. An annotation added on the image is enlarged and reduced when you zoom in / out the image. To magnify a local region of interest Click the Magic Glass button on the Tools Panel. Move the mouse cursor into the image area then the cursor will be changed to a magic glass shape. Drag the mouse with clicking left button while dragging it to specific region of interest in the image that you want to magnify. The image in rectangle area around the position of the mouse cursor appears enlarged by 2 times to the current image scale. Figure 4.9 Magic Glass Page 41 of 181 RA20-129-035 VXvue User Manual 4.2.3.8 Crop Crop an image. To crop an image Click the Crop button, then the rectangle shutter will be displayed in green dotted line. The previously cropped image is displayed on the main image window same as the original image size, and the image out of a rectangle shutter frame becomes slightly darker. Figure 4.10 Crop Locate the mouse cursor on the dotted lines or edges of square. Drag the mouse with clicking left mouse button on the dotted line or edge to adjust shutter size. Click the Select button to finish cropping of the image. The cropped image is displayed as enlarged or reduced automatically as fitting it to the main image window. Page 42 of 181 RA20-129-035 VXvue User Manual Figure 4.11 Crop To move rectangle shutter Locate the mouse cursor inside of green dotted line. Drag the mouse while clicking the left button to the desired region of image. To make dotted line of shutter to fit to the entire image size, locate the mouse cursor inside of the line and double-click the left mouse button. The shutter size is displayed inside of green dotted line by inch when resizing or moving the square shutter. Page 43 of 181 RA20-129-035 VXvue User Manual 4.2.3.9 Invert Invert black and white of an image. To invert an image Click the Invert icon on the Tools Panel. Figure 4.12 Invert 4.2.3.10 Clockwise Rotation Rotate an image by 90˚ clockwise. Figure 4.13 Clockwise Rotation Page 44 of 181 RA20-129-035 VXvue User Manual 4.2.3.11 Counterclockwise Rotation Rotate an image by 90˚ counterclockwise. Figure 4.14 Counterclockwise Rotation 4.2.3.12 Flip Flip an image vertically. Figure 4.15 Flip Page 45 of 181 RA20-129-035 VXvue User Manual 4.2.3.13 Mirror Flip an image horizontally. Figure 4.16 Mirror 4.2.3.14 Fit to Screen Fit an image to the main image window size. If the image is cropped, the cropped area of the image will be fit to the window. Page 46 of 181 RA20-129-035 VXvue User Manual 4.2.3.15 1:1 (Actual Size View) Display an image in its actual size. Figure 4.17 Actual Size View You must configure the pixel size of the monitor as described in chapter 8.1.3 “Miscellaneous Panel”. This function may malfunction if the pixel size of the monitor is configured incorrectly or not configured. 4.2.3.16 R/L Mark Add the green R (right) / L (left) label to the left and right top of the image. Figure 4.18 Add R/L Mark Page 47 of 181 RA20-129-035 VXvue User Manual To add R / L label Click the R (Right) / L (Left) Label button. To move R / L label Click the Select button. Drag the mouse with clicking left mouse button on the label while moving it to the area you want. To delete R / L label Click the Select button Click the Delete button after choosing the label to be deleted. When you click the R / L label button, R / L label is displayed on the left / right top’s appointed position at the main image window. If R / L label already exists on the image, it is changed with a new one on the appointed area ignoring its moving and changes. To set color, font and size of R / L label, refer to ‘Annotation Font & Color’ in chapter 8.4 “Viewer Settings”. 4.2.3.17 1×1 Layout Display one image on the main image window. Figure 4.19 1×1 Layout Page 48 of 181 RA20-129-035 VXvue User Manual 4.2.3.18 2×2 Layout Display four images on the main image window. Figure 4.20 2×2 Layout 4.2.3.19 3×3 Layout Display nine images on the main image window. Figure 4.21 3×3 Layout Page 49 of 181 RA20-129-035 VXvue User Manual 4.2.3.20 User Defined Layout Allow to customize the image layout within 4x4 layout (maximum) displayed on the main image window. Ex) 4x1, 1x2.. To customize image layout Click the User Defined Layout button on the Tools Panel then the following dialog box will appear. Figure 4.22 Dialog of User Defined Layout Select the image layout by dragging the mouse over the grid until the right numbers of rows and columns are highlighted. Click the OK button. Then the layout will be changed. Page 50 of 181 RA20-129-035 VXvue User Manual 4.2.3.21 Distance Measure distances between two points on the image. You must configure Pixel Spacing option for each detector exactly through VXSetup. Otherwise, discrepancies may occur between the measured distance and the actual distance. To draw a line and measure distance Click the Distance button on the Tools Panel. Move the mouse cursor to the main image window, then the cursor will be changed to the ruler shape. Drag the mouse with clicking left button while moving it from starting point (A) you want to measure distance to another B point to draw a line. The distance between two points (A and B) will be calculated and displayed automatically. To modify and move measurements Click the Select button and select the distance annotation. Click the measured line (AB), select the point of line (A or B), and then drag the mouse with clicking left button while moving it to the position you want to re-measure, then the value of angle will be calculated and displayed automatically. Move the mouse into a red frame and drag it with clicking left mouse button to move the measured value mark. Drag the mouse with clicking left button on the line (AB) to move the distance annotation. Figure 4.23 Distance Page 51 of 181 RA20-129-035 VXvue User Manual To delete a line, Click the Select icon. Choose the distance annotation and press the Delete key. 4.2.3.22 Angle Measure the angle between three points over an image. When you complete drawing an angle, the value of the angle will be computed and displayed automatically. To draw an angle Click the Angle button on the Tools Panel. Move the mouse cursor to the main image window then the cursor will be changed. Drag the mouse with clicking left button while moving it from A point you want to measure angle to another B point to draw a line Then a virtual line from A to C point is drawn when clicking C point with the left mouse button, and the measured angle will be calculated and displayed automatically on the initial point (A) where line (AB) and line (AC) are met. To modify and move an angle Click the Select button and select the distance annotation. Choose a point to be re-measured among 3 points. (A, B, C) Drag the mouse with clicking left button while moving it to the other point, then the value of angle will be calculated and displayed automatically. Drag the mouse with clicking left button while moving it into the red frame to move the measured value mark. Drag the mouse with clicking left button on the line (AB or AC) to move the angle annotation. Figure 4.24 Angle Page 52 of 181 RA20-129-035 VXvue User Manual To delete an angle annotation Click the Select icon. Select the angle annotation and press the Delete key. 4.2.3.23 Arrow Draw an arrow on the image. To draw an arrow Click the Arrow button on the Tools Panel. Move the mouse cursor to the main image window and then the cursor will be changed to arrow shape. Drag the mouse with clicking left button while moving mouse from one point to another to draw an arrow. To move an arrow annotation Click the Select button, move the mouse cursor on the arrow and then drag the mouse with clicking left button. Figure 4.25 Arrow To resize an arrow annotation Click the Select button and select the arrow annotation. Drag the mouse with clicking left button on one end of the arrow and drag it to the desired size. To delete an arrow annotation Click the Select button. Select the arrow annotation and then press the Delete key. Page 53 of 181 RA20-129-035 VXvue User Manual 4.2.3.24 Rectangle Draw a rectangle over an image to indicate a region of interest. To draw a rectangle Click the Rect icon on the Tools Panel. Move the mouse cursor to the main image window, and then the cursor will be changed to rectangle shape. Drag the mouse with clicking left button from one point to draw rectangle to other point of diagonal direction. To move the rectangle annotation Click the Select button and select the rectangle annotation. Locate the mouse cursor on the one line of the rectangle, and then drag the mouse with clicking left button to move rectangle annotation. Figure 4.26 Rectangle To resize the rectangle annotation Click the Select button and select the rectangle annotation. Locate the mouse cursor on the corner of the rectangle and then drag the mouse with clicking left button to the desired size. To delete the rectangle Click the Select icon. Select the rectangle annotation, and then press the Delete key. Page 54 of 181 RA20-129-035 VXvue User Manual 4.2.3.25 Ellipse Draw an ellipse (including circle) over an image for indicating a region of interest. To draw an ellipse Click the Ellipse icon on the Tools Panel. Move the mouse cursor to the main image window, and then the mouse pointer will be changed to an ellipse shape. Drag the mouse with clicking left button from one point to draw ellipse to other point of diagonal direction To move the ellipse Click the Select button and select the annotation of ellipse. Move the mouse cursor around the rectangle line of ellipse, and then drag the mouse with clicking left button to move ellipse annotation. To resize the ellipse Click the Select button and select the annotation of ellipse. Drag the mouse with clicking left button on one corner of the rectangle around the ellipse to the desired size. Figure 4.27 Ellipse To delete the ellipse Click the Select icon. Select the ellipse annotation and then press the Delete key. Page 55 of 181 RA20-129-035 VXvue User Manual 4.2.3.26 Displaying ROI Information (Rect. ROI) Draw a rectangle on the image and Insert information of ROI (Rectangular Region of Interest) in it. The displayed information in the rectangle is minimum value, maximum value, average value and standard deviation. Figure 4.28 Displaying ROI Information To move a rectangle Click the Select button and move the mouse cursor to the line of rectangle, then drag the mouse with clicking left button. To resize the rectangle Click the Select button and select the Rect. ROI annotation. Locate the mouse cursor on the corner of the rectangle and then drag the mouse with clicking left button to the desired size. To delete the rectangle Click the Select button and select the rectangle Press the Delete key. Page 56 of 181 RA20-129-035 VXvue User Manual 4.2.3.27 Text Annotation Attach text annotation to the image. To add a text annotation Click the Text button on the Tools Panel. Move the mouse cursor to the main image window, and then the cursor will be changed to T shape. Drag the mouse with clicking left button to the desired rectangular box size where you want to add a text annotation. Click in the text box and type text annotation. If the entered text is longer than the length of text box, it moves to the next line automatically. Press the Enter key if you want to move to the next line. To finish typing, move the mouse cursor out of the text box. To move the text annotation Click the Select button and move the mouse cursor in the text box, then drag the mouse with clicking left button. Figure 4.29 Text Annotation To resize the text box Click the Select button and locate mouse cursor on each corner of the text box, then drag the mouse with clicking left button to the desired size. To delete the text annotation Click the Select button and select text annotation. Press the Delete key. Page 57 of 181 RA20-129-035 VXvue User Manual To modify the text annotation Click the Select button and select text annotation. Double click the left mouse button in the selected text box to change with text input status. Change or add text annotation. To finish typing, move the mouse cursor out of the text box. 4.2.3.28 Show/Hide Annotations (Hide Ann.) Show or hide all annotations on the image. To show/hide annotations Click the Hide Ann button on the Tools Panel. If the Hide Ann button is deactivated, the annotations will be displayed on the image. If the Hide Ann button is activated, the annotation will be hidden. Figure 4.30 Show/Hide Ann If you add an annotation when the Hide Ann button is activated, the Hide Ann button will be automatically deactivated. Page 58 of 181 RA20-129-035 VXvue User Manual 4.2.3.29 Delete Annotations (Delete Ann.) Delete the selected annotations. To delete annotations Click the Select button, select an annotation and then click the Delete Ann. button. To delete multiple annotations, click the Select button. Multi-select annotations with the Ctrl key and then click the Delete key or the Delete Ann. button. If you drag the mouse while clicking the left button on the point where there is no annotation and draw boxes, all annotations in the box are selected when the Select button is activated. Figure 4.31 Delete Annotations Page 59 of 181 RA20-129-035 VXvue User Manual 4.2.3.30 Image Process Change image process parameters and apply them to the currently selected image. To process images Click the Select button and select an image to reprocess. Click the Image Process button and then the image process pop-up widow is displayed. The previously step applied on the selected image has been added to Selected Step List, and the relevant parameter is displayed. If you want to reprocess the image with other step, select a step in the Step list to apply it on the current selected image. Then the step will be added to Selected Step List. Change the image process parameter and click the Process button to reprocess with these parameters. Click the Update button to save the changed parameter to apply it on the selected step. Click the Reset button to change with default parameter as a latest saved one. Figure 4.32 Image Process Parameters Page 60 of 181 RA20-129-035 VXvue User Manual For more information, refer to chapter 8.6.2 “Step Panel”. Drag the mouse with clicking left button on a title bar in the image process pop-up window to other desired location. 4.2.3.31 Transfer Transfer images to DICOM Storage server. The image will be transferred to all servers which are registered on DICOM Storage configuration. You can select All image or Selected in the selected study when sending images to DICOM Storage server. Page 61 of 181 RA20-129-035 VXvue User Manual 4.2.3.32 Print Select the image to print and click the Print button to add images to Print Mode. The mode is switched to “Print Mode” described in chapter 7 automatically. You can select All image or Selected in the selected study which sends images to DICOM print server. Click the Print button in Print Mode to print images by DICOM print server after manipulating image and adjusting layout. Page 62 of 181 RA20-129-035 VXvue User Manual 4.2.3.33 Stitch Figure 4.33 Image stitching To combine images Select images in the same study. Click the Stitch button, and then the Image Stitching dialog will appear. Adjust the border. Align orders of image by moving images. Move and align the area of images to be stitched. Adjust brightness of each image and click the Blend button to blend brightness of the images you want to stitch if needed. Check the adjustment and result of combined images with Zoom View, Pan, W/L, Crop and Reset button. Click the OK button. Assign step, then new study will be created with stitched image in database. The maximum numbers of images to be stitched are six. You cannot stitch the previous stitched image to another image. Only the raw images with same size can be stitched. Page 63 of 181 RA20-129-035 VXvue User Manual Make enough caution when taking images to stitch correctly. Overlapped region between images should be longer than 10 cm. Prevent or minimize the movement of patient during the whole process of taking images for stitch. The proper shift of detector or tube is necessary during the whole process of taking images for stitch. Border Adjust Menu Crop unnecessary area from the image. After adjusting, click the Border Confirm button to apply adjusted border. To adjust border Click the Border Adjust button. Click the image and drag the green dotted line to crop. Click the Border Confirm button. Sort Image Menu Set the position of the images. To sort images Click the image. Click ▲ to move image upward or click ▼ to move image downward. Page 64 of 181 RA20-129-035 VXvue User Manual Auto Stitch Menu Click the Auto Stitch button, align images to the matched region by matching the same image pattern automatically and adjust brightness. Click the Setting button to change parameters for Auto Stitch. Figure 4.34 Auto Stitch Menu Maximum search rate of height: Set the maximum height rate to search same patterns in each image for stitching. (Recommended rate: 25~35%) Height rate of overlapped region: Set the height rate of overlapped region between images to be stitched. (Recommended rate: 5~10%) Width rate of overlapped region: Set the width rate of overlapped region between images to be stitched. (Recommended rate: 80%) Resample strength: Set re-sampling strength of the stitched area. (Recommended value: 5~20 pixels) Scan level: Set the pixel block unit to be scanned to search the stitched area. (Recommended value: 10~30 pixels) When you use the Auto Stitch function, we recommend checking the alignment of images. You have to align images and adjust brightness manually for fine alignment. Page 65 of 181 RA20-129-035 VXvue User Manual Position Menu Align images by moving images manually. To align images Click the image. Set speed of moving the image. Put image to front or back. Click ▲ to move image upward. Click ▼ to move image downward. Click ◀ to move image right. Click ▶ to move image left. Brightness Menu Adjust offset of brightness for the image to match brightness of images. Click the image. Set speed of brightness adjustment. Click + or - button to adjust. +: Increase brightness offset. -: Decrease brightness offset. Blend Blend the brightness of each border to eliminate the difference in brightness. Reset Reset all adjustments and manipulation of images to initial state. The stitched image will be added to the study which original images belong to. Image information such as patient, study and series information will be inherited from the original images Page 66 of 181 RA20-129-035 VXvue User Manual 4.2.3.34 Convert to Raw Image Restore the processed images to raw images. 4.2.3.35 Image Reject Reject selected images. To reject images Select images to be rejected. Click the Reject button. Enter password of the current login account In the Reason options, select the preset reason or enter your own reason. Page 67 of 181 RA20-129-035 VXvue User Manual The Reason input item is displayed only when setting Reason function to use. The user input reason is registered automatically and displayed in the list when you reject images next time. The rejected image can be restored. Refer to chapter 8.9 “Setting Reject” for restoration process and reason configuration. 4.2.3.36 Close Study Close the current study. 4.2.3.37 Close All Study Close all open studies. Page 68 of 181 RA20-129-035 VXvue User Manual 4.2.3.38 Modifying Study Information Modify patient and study information on the current study. To modify study information Click the Edit Patient button, then the Edit Patient dialog will appear to modify study information. Figure 4.35 Modifying Study Information Modify study information and click the Edit button. You should input value in the green fields. If one of these fields is blank, you cannot modify the study information. For more information about configuring mandatory and optional fields, refer to chapter 8.2 “Work Settings”. Page 69 of 181 RA20-129-035 VXvue User Manual 4.2.4 Label Panel Figure 4.36 Label Panel All buttons of the Label panel are deactivated and and cannot be used if the selected image is backed up. Page 70 of 181 RA20-129-035 VXvue User Manual 4.2.4.1 R/L Label Put green R (right) / L (left) Label on the image. Figure 4.37 R/L Label To put R/L label Choose the position to put R/L label from the Insert Position dropdown list. Click the Right or Left button. To move the label Click the Select button on the Tools panel. Drag the mouse while clicking the left button on the label and move it to the desired position. To remove the label Click the Select button on the Tools panel. Select the label and press the Delete key. When you click the R/L label button, R/L label is displayed on the selected position among left top, right top, left bottom and right bottom at the main image window. If R/L label already exists on the image, it is changed with a new one on the appointed area ignoring its moving and changes. To set color, font and size of R/L label, refer to ‘Annotation Font & Color’ in chapter 8.4 “Viewer Settings”. Page 71 of 181 RA20-129-035 VXvue User Manual R/L label has the same function of “R/L Mark”, described in chapter 4.2.3.16 4.2.4.2 Image Laterality Set body parts of the image as unity, right / left or both (defined by DICOM). To input unity, right / left or both labels of the body part Click the U, L, R, or B button to select unity, left, right and both of body part in the image. Click the Set button to apply. Figure 4.38 Image Laterality To display Laterality, refer to ‘Image Overlay’ in chapter 8.4 “Viewer Settings”. Page 72 of 181 RA20-129-035 VXvue User Manual 4.2.4.3 Patient Orientation Set the patient orientation To input patient orientation Click the Orientation button. Input patient orientation on the top and left area of the exposed image. (Defined by DICOM) Click the Set button for configuring patient orientation. The patient orientations configured on each top / bottom / left / right of the image are displayed with “[ ]” labels and the bottom and right orientations are displayed as symmetric directions automatically. Figure 4.39 Patient Orientation Page 73 of 181 RA20-129-035 VXvue User Manual 5. Database Mode Database Mode allows you to review past studies. Figure 5.1 Database Mode Page 74 of 181 RA20-129-035 VXvue User Manual 5.1 Search Condition You can search the past studies using the following conditions on database. Figure 5.2 Database Search Patient ID: Input a patient ID of study to search. Patient Name: Input a patient name of study to search. Accession Number: Input a patient’s accession number of study to search. Body Part: Input a body part of study to search. Patient Age: Input a patient’s age of study as year, month and day form. (Y, M, D) Patient Sex: Input a patient sex of study to search. (F, M. O) Study Date: Choose the date of study to search. To search with search conditions Enter the search conditions such as patient ID, name, accession number, Body Part, sex, age, etc, and then click the Search button in the search menu. To search with date range Input a specific period of time to search and click the Search button in the search menu. Period search buttons Today: Search the study examined today with the entered condition immediately. Week: Search the study examined within a week with the entered condition immediately. Month: Search the study examined within a month with the entered condition immediately. Page 75 of 181 RA20-129-035 VXvue User Manual 5.2 5.2.1 Search Menu Search Execute a search in the local database using search conditions. Check search result on the local database. 5.2.2 Clear Search Conditions Clear all search conditions entered previously. To search all without search conditions, click the Search button after clicking the Clear Search Conditions button. 5.2.3 New Study Register a new study in the Exposure mode using the patient information of previous studies. To create new study Select a study in the searched study list. Click the New Study button and then the screen is changed to “Exposure Mode” described in chapter 4. A new study created by patient information of the selected study is registered and ready to be acquired. A new image is acquired in the Exposure mode. Close the study by closing the Study tab in the Exposure mode or pressing the Close study button. Page 76 of 181 RA20-129-035 VXvue User Manual 5.2.4 Insert Register a previous study in the Exposure mode to acquire additional images. To insert images into the study Select a study that needs additional exposure in the searched study list. Click the Insert button and then the screen is changed to “Exposure Mode” described in chapter 4. The selected study is open and ready to be acquired in Exposure Mode. A new image is acquired in the Exposure mode. Close the study by closing the Study tab in the Exposure mode or pressing the Close study button. This button becomes disabled when selecting backup study or studies displaying on other modes. 5.2.5 Move Image Move partial or total images of the selected study in searched studies to other studies. To move images Select a study in the searched study list to move images. Select multiple images in the thumbnail to move partial images of the selected study. Click the Move Image button. Select All Image or Selected on the pop-up message. Page 77 of 181 RA20-129-035 VXvue User Manual Select a target study in the pop-up searched study list and click the OK button. The source study including images to move will not be displayed on the target study list. Figure 5.3 Searched Study List A target study is automatically selected in the searched study list after completing moving images. Check the moved image from thumbnail or open the target study to check its result. A study without images can be rejected as they are moved to other studies. The Move Image button becomes disabled when selecting backup study or studies displaying on other modes. 5.2.6 Modify Study Information Modify study information of the selected previous study. The information of the previous study with same patient ID is modified if you change the patent information. This button becomes disabled when selecting backup study or studies displaying on other modes. Page 78 of 181 RA20-129-035 VXvue User Manual 5.3 Database Menu Figure 5.4 Database Menu 5.3.1 Open Open the selected study. To open a study Select a study from the searched study list. Click the Open button. The screen is changed to Viewer Mode and the selected study is opened. The first image of the selected study is displayed on the main image window. Double click the mouse on the searched result list to open the selected study. Double click the mouse on the image displayed on the thumbnail to open the selected study and to display the selected image on the main image window. Page 79 of 181 RA20-129-035 VXvue User Manual 5.3.2 Reject Study Reject the selected study. To reject a study Select a study from the searched results. Click the Reject button. Enter password of the current login account. Select the preset reason in Reason, or input your own reason. The Reason input item is displayed only when setting Reason function to use. The user input reason is registered automatically and displayed in the list when rejecting images next time. Refer to chapter 8.9 “Setting Reject” for restoration process and Reason configuration. Page 80 of 181 RA20-129-035 VXvue User Manual 5.3.3 Export Convert images to various formats from selected studies and save/export them to the local storage, external storage device (USB stick, HDD) or optical media. (CD/DVD) Figure 5.5 Converting/Exporting Image Page 81 of 181 RA20-129-035 VXvue User Manual Patient ID: Display the patient ID of study to export. If you select multiple studies, some IDs are displayed as ‘….’ Name: Display the patient name of study to export. If you select multiple studies, some names are displayed as ‘….’ Target Image: Select an image to be exported. All Image: Export all images in the selected studies. Selected Image: Export selected images in the selected study. The option is disabled when more than two studies are selected. Processing Raw: Export with unprocessed images. Processed: Export with processed images. Image Format Selection: Select a file format to save the image Select the image compression type when exporting to DICOM or Compression: DICOMDIR. Compression ratio: Select compression ratio when choosing image compression type as ‘JEPG2000 lossy’ only. The ratio is highest when choosing 99, but the image quality is not good. Burned in Annotation: The image is exported with burning annotations on it when choosing YES. Burned in information: The image is exported with burning information on it when choosing YES. Software Collimation: Select option to apply on the image when exports it. NONE: The original size image without applying Crop is exported. CUT: Images with cutting CROP area as much as possible are exported. FILL: Images filled the outside of Crop area with black color are exported. Target Directory: Select the location to export images. Select User Directory to save the image in the local database. Select the available optical drive list to save the image to ODD. User Directory: The selected path is displayed after selecting the local path to export the image. Language: Select Encoding to be applied to the DICOM or DICOMDIR type. The changeable image formats are as follows; BMP, JPEG, TIF-8Bit, TIF-16Bit, Raw, DICOM, DICOMDIR. Each image format can be selected multiply, but TIF format has only 8Bit or 16Bit options. You can select “Include DICOMDIR Viewer” only when selecting DICOMDIR format. The available compression types are as follows; - No Compression, JPEG2000 lossless, JPEG2000 lossy. Page 82 of 181 RA20-129-035 VXvue User Manual The available language encodings are as follows; 5.3.4 Stitch Stitch the images from the selected study. To stitch images Select two or more images from the selected study. Click the Stitch button. Stitch images. For more information, refer to chapter 4.2.3.33 “Stitch”. Page 83 of 181 RA20-129-035 VXvue User Manual 5.3.5 Send Send selected images to the DICOM Storage server. Refer to chapter 4.2.3.31 “Transfer” for detailed information of sending images. You can send more than two images together. 5.3.6 Print Click the print button and select images to print, then selected study images are added to Print Mode described in chapter 7 and switched to the Print mode automatically. Refer to chapter 4.2.3.32 “Print” for detailed information of sending images. You can add more than two studies to Print Mode. Page 84 of 181 RA20-129-035 VXvue User Manual 5.4 Searched Study List The searched study list with selected or entered conditions is displayed The following buttons are disabled when selecting more than two studies. - Insert, Move Image, Modify study information, Stitch. Double click the mouse on the searched result list to open the selected study. Double click the mouse on the image displayed on the thumbnail to open the selected study and to display selected images on the main image window. Page 85 of 181 RA20-129-035 VXvue User Manual 5.5 Thumbnail Display the selected images of study and steps. Figure 5.6 Thumbnail Double click the mouse on the image displayed on the thumbnail to open the selected study and to display selected images on the main image window. Page 86 of 181 RA20-129-035 VXvue User Manual You can preview each page of images displayed on thumbnail using a mouse wheel and thumbnail move buttons (up/down) quickly. The status information displayed on thumbnail is as follows; - Backup, Deleted, Printed with the DICOM Print server, Sent to the DICOM Storage server, Rejected. Refer to Appendix A ‘Cursor and Icon List’ for icons of each status. Page 87 of 181 RA20-129-035 VXvue User Manual 6. Viewer Mode Viewer Mode allows you to open the study selected on Database Mode and display it on the main image window. Figure 6.1 Viewer Mode For more information about Viewer Mode, refer to chapter 4.2 “Image Processing”. Page 88 of 181 RA20-129-035 VXvue User Manual 7. Print Mode Print Mode allows you to print images added from Exposure, Database and Viewer modes using DICOM Print server. Figure 7.1 Print Mode Page 89 of 181 RA20-129-035 VXvue User Manual 7.1 Printer and Page Setup Figure 7.2 Printer and Page Setup Printer Name: Name of DICOM Print server to be used for printing FilmSize: Size of printed materials Number of Copies: Number of copies to print Image Layout: Type of image layout Orientation: Type of image orientation Values displayed in red color are different from the values configured on “Print Panel” described in chapter 8.8.6. These modifications are not saved. For more information about configuring DICOM print server, refer to chapter 8.8.6 “Print Panel”. Page 90 of 181 RA20-129-035 VXvue User Manual 7.2 Image Manipulation Buttons Figure 7.3 Image Manipulation Buttons Refer to chapter 4.2.3 “Tools Panel” for more information of image control buttons. 7.2.1 Select This is the default mouse cursor state. Clicking the Select button on the Tools Panel will deactivate the currently activated functions. 7.2.2 Zoom Enable interactive zooming by dragging the mouse with clicking left button. Page 91 of 181 RA20-129-035 VXvue User Manual 7.2.3 Panning Perform panning the image. 7.2.4 Window/Level Adjust the window level – brightness and contrast of an image. 7.2.5 Pick W/L (Window Level) Adjust the window level - brightness and contrast of the image based on the selected region of interest. 7.2.6 Magic Glass Magnify a selected region of interest more than twice than the current image ratio. 7.2.7 Crop Crop an image. 7.2.8 Invert Invert black and white of an image. Page 92 of 181 RA20-129-035 VXvue User Manual 7.2.9 Clockwise Rotation Rotate an image by 90˚ clockwise. 7.2.10 Counterclockwise Rotation Rotate an image by 90˚ counterclockwise. 7.2.11 Flip Flip an image vertically. 7.2.12 Mirror Flip an image horizontally. 7.2.13 Fit to Screen Fit an image to the main image window size. If the image is cropped, the cropped area of the image will be fit to the window. Page 93 of 181 RA20-129-035 VXvue User Manual 7.2.14 Delete Image Delete selected images from the printing list. 7.2.15 Delete All Delete all images from the printing list. 7.2.16 Image Swap Swap the position of selected two images. 7.2.17 Print Print images according to configured options. Page 94 of 181 RA20-129-035 VXvue User Manual 7.2.18 Distance Measure distances between two points on the image. 7.2.19 Angle Measure the angle between three points over an image. When you complete drawing an angle, the value of the angle will be computed and displayed automatically. 7.2.20 Arrow Draw an arrow on the image. 7.2.21 Rectangle Draw a rectangle over an image to indicate a region of interest. 7.2.22 Ellipse Draw an ellipse over an image for indicating a region of interest. 7.2.23 Displaying ROI Information Draw information of rectangular region of interest. Page 95 of 181 RA20-129-035 VXvue User Manual 7.2.24 Text Note Attach text notes to the image. 7.2.25 Delete Annotations Delete the selected annotations. Page 96 of 181 RA20-129-035 VXvue User Manual 8. Setting Mode Setting Mode allows you to configure options for the device and Viewer. To access Setting Mode, you must be logged on as a member of the Admin or Service group. To apply the setting options, you should click the Update button Some options are applied by restarting the program. 8.1 8.1.1 System Settings System Panel Figure 8.1 System Panel You can configure the system properties on System Panel. Page 97 of 181 RA20-129-035 VXvue User Manual Make sure to enter the information configured in System since it is included as DICOM information. 8.1.1.1 Institution Institution Name: Input the hospital name. Institution Address: Input the hospital address. Institution Department Name: Input the Institution Department Name. 8.1.1.2 Equipment Manufacturer: Input the equipment manufacturer’s name Manufacturer Model Name: Input a model name of the product. Software Version: Display the software version. (only display is available) Serial Number: Input serial numbers of the product. 8.1.1.3 System Station Name Station AE Title Language: Change a language used on the software. Station Name inputted on System Panel will be used for searching studies described in chapter 3.1 “Worklist Panel”. Station AE Title inputted on System Panel will be used for querying Worklist, sending or printing images. Changed language is applied after restarting the program. Page 98 of 181 RA20-129-035 VXvue User Manual 1. If you want to add other languages to default set languages, please open Language.txt with only Excel software to support Unicode text from a language folder in database folder (D:\Database or user defined folder) which is made during the program installation. 2. Add a language title and translated words or sentences at the next column, then you can select the title added on this panel. 3. If you want to change the language of existing words or sentences, change them in column of the language title in the same way. 4. Save the changed language.txt on the language folder with Unicode txt format as below. Page 99 of 181 RA20-129-035 VXvue User Manual 8.1.2 Account Panel Figure 8.2 Account Panel You can manage login accounts on Account Panel. More permission is granted User, Admin and Service group in order. You cannot create an account which has more permissions than the currently logged in account. Currently logged in account cannot be removed. You must have an account of Admin and Service group each. You can access to the following panels from Setting Mode if you log in with the user account. - Account panel configured in System. - Log panel configured in System. - Procedure panel configured in Procedure settings. (the Delete button is hidden) - Queue panel configured in DICOM setting. Page 100 of 181 RA20-129-035 VXvue User Manual 8.1.3 Miscellaneous Panel Figure 8.3 Miscellaneous Panel 8.1.3.1 Storage Free Space Alarm Set alarm threshold for free space on hard disk. When the space is down to Warning level, the following window is displayed. Page 101 of 181 RA20-129-035 VXvue User Manual When the space is down to Critical level, the following window is displayed and you can end the study immediately. To perform the study continuously, the hard disk space should be enough as the images are stored in it. Make the alarm check the storage capacity for warning/ critical messages automatically before studying. If free space on hard disk falls less than critical level, you cannot acquire images. 8.1.3.2 Custom Setting Send to storage servers when closing studies: All images in the study are sent to the registered DICOM Storage servers automatically when closing the study in Exposure Mode. Allow multi-studies: You can register a number of studies in Exposure Mode at the same time to perform multiple studies. 8.1.3.3 Monitor Pixel Pitch Set the pixel size of the monitor. Measure the diagonal line on the screen with a ruler and enter the value in millimeters. If the pixel size of the monitor is configured incorrectly or not configured, the Actual Size View may malfunction described in chapter 4.2.3.15 “1:1 (Actual Size View)”. You also have to configure the pixel size again when you change the monitor. Page 102 of 181 RA20-129-035 VXvue User Manual 8.1.3.4 Export/Import You can export or import setting values in Setting Mode. Click the Export button to save settings as ‘xlm’ format file to the local system. Click the Import button to load settings from ‘xlm’ format file in the local system. The exportable or importable settings are as follows. Modifiable values on “System Panel” All settings on “Miscellaneous Panel” All settings on “Work Settings” “Exposure Settings” “Viewer Settings” “LUT Settings” All settings on “Procedure Panel” All settings on “Step Panel” All settings on “Body Part/Projection Panel” All settings on “MWL Panel” “Storage Panel” “Print Panel” Header settings on “Worklist Panel” Header settings on “Local Panel” Header settings on “Database Mode” Account information cannot be exported or imported. Page 103 of 181 RA20-129-035 VXvue User Manual 8.1.4 Log Panel Figure 8.4 Log Panel You can check the status of the system on Log Panel. VXvue can display up to 300 logs on Log Panel. To delete the currently displayed logs, click the Clear button. The displayed contents on Log Panel are saved to a log folder in the database folder (D:\Database or user defined folder) which is made during program installation. Page 104 of 181 RA20-129-035 VXvue User Manual 8.2 Work Settings Figure 8.5 Work Settings 8.2.1 New Study New Study allows to configuring items to use for registering studies manually. Items on the right side are added to the left side by clicking the triangle button (◀). Selected Items on the left side are removed by clicking the triangle button (▶). Fields added / listed on the left side will be displayed on “New Study Panel” described in chapter 3.2. Checked items on the list indicate the mandatory items for registering studies manually. Blue items cannot be removed. Click the Up or Down button to change the order of the displayed items. Page 105 of 181 RA20-129-035 VXvue User Manual You can add or remove the following fields on the list at the left side. Acc. No Birth Date Age / Sex Size / Weight Procedure Referring Physician Species Description Species Code Sequence Breed Description Breed Code Sequence Breed Registration Number Breed Registration Code Sequence Responsible Person Responsible Person Role Responsible Organization Sex Neutered Patient Comments Study Description 8.2.2 Unit You can specify the unit of height or weight to be used when registering study manually. 8.2.3 Default Tab You can select a default tab to be displayed on the Work Mode among Worklist tab, New Study tab and Local tab. Page 106 of 181 RA20-129-035 VXvue User Manual 8.3 Exposure Settings Figure 8.6 Exposure Settings 8.3.1 Category Insert categories that allow registering shortcuts described in chapter 4.1.3 “Step Registration Window”. Click the Add button and register the name, background image file and description of category in the following window. You can select background image files from a BodypartCategory folder in the database folder (D:\Database or user defined folder) which is made during program installation. Default image files are Bird, Cat, Dog and Exotics. If you want to add or change other background image files to use images in the category, please copy BMP format image (346X463 size) to the BodypartCategory folder in the database folder. Page 107 of 181 RA20-129-035 VXvue User Manual 8.3.2 Shortcut You can register shortcuts described in chapter 4.1.3 “Step Registration window”. Shortcut has the following two types. Body Part: Register body parts shortcut to use when you registers steps for study. Step: Register step (combination of body part and its projection) shortcuts to use when you register steps for study. ◀, ▶ button: Items are added on the left list from the right list by clicking the triangle button (◀). Items on the left list are removed by clicking the triangle button (▶). For more information about each shortcut, refer to chapter 4.1.3 “Step Registration window”. Page 108 of 181 RA20-129-035 VXvue User Manual 8.4 Viewer Settings Figure 8.7 Viewer Settings Page 109 of 181 RA20-129-035 VXvue User Manual 8.4.1 Image Overlay Configure the list of information to overlay on displayed images at the main image window ◀, ▶ button Items are added on the left list from the right list by clicking the triangle button (◀). Items on the left list are removed by clicking the triangle button (▶). The following information can be configured to display on the left/right top and left/right bottom of the image display window. Patient ID, Patient Name, Birthdate, Sex/Age, Height, Weight Bodypart, Projection, Laterality Performing Physician, Referring Physician Study Date, Study Time, Accession number Series Number, Instance Number, Exposure Time Dose kVp, Dose mA, Dose ms, Dose mAs, DAP Exposure Index, Deviation Index, Target Exposure Index Pixel Value, Histogram, Zoom Ratio Institutional Name, Institutional Address, Institutional Department Name Manufacturer, Manufacturer Model Name, Station Name, Modality. Image Overlay Font & Color Configure color, size and font of the overlay information to be displayed at the main image window on the image viewer. - When you select the Absolute Font Size checkbox, fonts always appear to be the same size regardless of main image window’s layout. - When you deselect the Absolute Font Size checkbox, the font size will be automatically adjusted according to the main image window’s layout. Also, the font size will be adjusted by referring the inputted font size. Annotation Font & Color Configure color, size and font of annotation. - Annotation Size: Configure annotation size. - Label Size: Configure R/L label’s size. Page 110 of 181 RA20-129-035 VXvue User Manual 8.4.2 Monitor LUT Configure LUT to correct monitor’s gamma for displaying images consistently regardless of a monitor to be used. Refer to chapter 8.5 “LUT Settings” for more information about LUT setting. 8.4.3 Interpolation Mode Configure interpolation types to be use when image is displayed on monitor. The interpolation types are as follows; - Nearest Neighbor, Bilinear, High Quality Bilinear, Bicubic, High Quality Bicubic, GDI. 8.4.4 Window Level Option Speed: Configure the speed of actions. The default value is 10. Left: Select the changed way of W/L basic configured actions when moving a mouse to the left. The default value is W1 decrease. Up: Select the changed way of W/L basic configured actions when moving a mouse to up. The default value is W2 increase. Right: The changed way of W/L action that configured automatically in the opposite way of Left when moving a mouse to the right. Down: The changed way of W/L action that configured automatically in the opposite way of Up when moving a mouse to the bottom. The basic and configurable action of Window Level are as follows; - W1/W2 (basic action): W1/W2 is start/end value of Window to be displayed. - Contrast - Brightness 8.4.5 Crop Option It is recommended to register Crop size preset when clicking the right mouse button on the main image window. Page 111 of 181 RA20-129-035 VXvue User Manual 8.5 LUT Settings Figure 8.8 LUT Settings Look Up Table (LUT) is used to apply gamma values to images while displaying, processing or sending the images to DICOM Storage server and DICOM Print server. You can register LUT to be applied to the settings described in following chapters. 8.4 “Viewer Settings” 8.6.2 “Step Panel” 8.8.4 “Storage Panel” 8.8.6 “Print Panel” Page 112 of 181 RA20-129-035 VXvue User Manual 8.6 Procedure Settings 8.6.1 Procedure Panel Figure 8.9 Procedure Panel Add / Delete button: Manage procedures which are multiple steps to be exposed in the registered study. You can import a CSV format files made with the following way when clicking the Import button. Name1, Code1, Description1 Name 2, Code2, Description2 … If you register multiple steps to the procedure, these steps will be automatically registered to that study when you register patients. Click the Up or Down button to change the order of steps in the procedure. Input codes of the procedure should be matched to the tag value described in chapter 8.8.2.5 “Procedure Tag Selection” Code’ means a study code in the DICOM worklist server. (or hospital information system) You can input Name and Description to apart from code without restriction. Page 113 of 181 RA20-129-035 VXvue User Manual When the studies register with information from DICOM Worklist server described in chapter 3.1 “Worklist Panel”, the procedure matched with the code from DICOM worklist server is searched and steps assigned to the procedure are added automatically without selecting step. The procedures registered on the Procedure panel will be displayed in the “New Study Panel” in chapter 3.2. Contents of Description are added to Study Description when selecting procedures manually in the New study tab. 8.6.2 Step Panel Figure 8.10 Step Panel Page 114 of 181 RA20-129-035 VXvue User Manual Register steps. Adjust image processing parameters. Configure label, rotation, shutter and auto crop to be applied for exposure. You can hide or show each item with the Hide / Show buttons. Hide Show ex) 8.6.2.1 Select Image Process Algorithm You can select HS1 by applying HS1 Basic, Boost, Pre Filter, MLDC Range and Pre LUT or HS2 applied only to HS2 Basic. Page 115 of 181 RA20-129-035 VXvue User Manual 8.6.2.2 Step List Figure 8.11 Step List Show All: Step List is a list of image process parameter combined Body Part and Projection. 8.6.2.3 Display all configurable body parts. If it is not checked, only configured steps are displayed. Selected Step List Figure 8.12 Selected Step List Shows the list of steps selected from Step List. Insert: Add a new step. Delete: Delete a selected step. Page 116 of 181 RA20-129-035 VXvue User Manual 8.6.2.4 Copy Figure 8.13 Copy From DB: Copy the image process parameter of other steps from the database. From File: Copy the image process parameter of other steps from the exported XLM file. XML files used in ‘From File’ option are exported from “Export/Import” described in chapter 8.1.3.4. 8.6.2.5 Command Figure 8.14 Command Reset: Reset the last saved image process parameter. Process: Apply the image process parameter to images for checking image processing result. Update: Save the changed parameters. When you change the parameter value, it is displayed in red color before clicking the Update button to save the value. The changed value in red color is restored with the previously saved value by clicking the Reset button. Page 117 of 181 RA20-129-035 VXvue User Manual 8.6.2.6 HS1 Basic Figure 8.15 HS1 Basic Set basic parameters for HS1 image processing algorithm. Sharpness Enhance the edge of the image. The bigger the value is, the more enhanced the edge is. Contrast Enhance the contrast of the image. The bigger the value is, the more enhanced the contrast is. Denoise Remove noise of the image. The bigger the value is, the stronger the noise removal is. The image will become soft if this value is set to high. Freq Layer Convert the image to domain areas and divide each area into 10 frequency layers for image processing. This parameter is used to determine the number of frequency layers to be used for image processing. The bigger the value is, the wider the image processing is performed, even to the extent of low frequency level. LUT Select lookup table that is used to invert black and white or to expand histogram of the image. Page 118 of 181 RA20-129-035 VXvue User Manual 8.6.2.7 Boost Figure 8.16 Boost Set basic boost for HS1 image processing algorithm. Sharpness The sharpness value set in HS1 basic will be applied to all frequency layers equally. These parameters are to adjust sharpness of each frequency layer additionally. L1 ~ L10 stands for each frequency layer of the image. The number followed by ‘L’ is frequency layer index. High frequency layer index means low frequency layer of the image. Default value is 100. The range of value is 0 to 1000. 100 mean no additional sharpness adjustment. At the value lower than 100, sharpness enhancement is stronger. At the value higher than 100, sharpness enhancement is weaker. Page 119 of 181 RA20-129-035 VXvue User Manual (Sharpness) Slope Adjust the sharpness enhancement strength of all frequency layers to the sharpness value set in HS1 Basic. Default value is 100. The range of value is 0 to 1000. 100 mean no additional sharpness adjustment. At the value lower than 100, sharpness enhancement on high frequency layer of the image is stronger than that on low frequency layer of the image. At the value higher than 100, sharpness enhancement on low frequency layer of the image is stronger than that on high frequency layer of the image. Contrast The contrast value set in HS1 Basic will be applied to all frequency layers equally. These parameters are to adjust contrast of each frequency layer additionally. L1 to L10 stands for each frequency layer of the image. The number followed by ‘L’ is frequency layer index. High frequency layer index means low frequency layer of the image. Default value is 100. The range of value is 0 to 1000. 100 mean no additional contrast adjustment. At the value lower than 100, contrast enhancement is weaker. At the value higher than 100, contrast enhancement is stronger. (Contrast) Slope This parameter is used to adjust contrast of all frequency layers to the contrast value set in HS1 Basic. Default value is 0. The range of value is 0 to 1000. 0 means no additional contrast adjustment. At the value higher than 0, contrast enhancement on low frequency layer of the image is stronger than that on high frequency layer of the image. Page 120 of 181 RA20-129-035 VXvue User Manual 8.6.2.8 Pre Filter Figure 8.17 Pre Filter Apply following filters before doing Multi-Layer Dynamic Range Compression (MLDC) for HS1 image processing algorithm. None No filter applied. High Pass Apply high pass filter to improve clarity of the image. The range of value is 0 to 1000. Higher value makes image sharper. Low Pass Apply low pass filter to make image smoother. The range of value is 0 to 1000. - 0: No filter applied. - 1 – 9: value × value Average Filter applied. - 10 – 1000: Higher value makes image smoother. Page 121 of 181 RA20-129-035 VXvue User Manual 8.6.2.9 MLDC Range Figure 8.18 MLDC Range Configure a range of image input and out applied MLDC. In Input range of the image data. The range of image data is 0 to 16383. Out Output range of the image data. The range of image data is 0 to 16383. 8.6.2.10 Pre LUT Figure 8.19 Pre LUT Apply Pre Lookup table before doing MLDC for HS1 image processing algorithm. Page 122 of 181 RA20-129-035 VXvue User Manual 8.6.2.11 HS2 Basic Figure 8.20 HS2 Basic Set basic parameter for HS2 image processing algorithm. Contrast Slope Set the overall contrast of the image. The default value is 0. (Use calculated value automatically) The range of value is 0 to 50. Contrast Point Set the point to apply Contrast Slope. Default value is 0. (Use calculated value automatically) The range of value is 0 to 100. Mean Point Set the intermediate point for image processing. Default value is 1. The range of value is 1 to 100 Skin Correct Correct skin of the image. Default value is 1. The range of value is 0 to 100. OPPoint (TBD) Compensation Compensate the strengthened background area by Compression. Default value is 100. The range of value is 0 to 100. Compression Control dynamic range of image. The bigger the value is, the more enhanced the edge of skin and bones. Default value is 5. The range of value is 0 to 20. Denoise Reduce noise of the image. The bigger the value is, the stronger the noise reduction is and the image becomes soft. Default value is 5. The range of value is 0 to 14 Page 123 of 181 RA20-129-035 VXvue User Manual Gamma Set gamma curve level. The bigger the value is, the overall image becomes darker. Default value is 2. The range of value is 0 to 9. Fine Edge Enhance the fine edge contrast of the image. The bigger the value is, the more enhanced the fine edge contrast is. Default value is 3. The range of value is 0 to 20. Middle Edge Enhance the middle edge contrast of the image. The bigger the value is, the more enhanced the middle edge contrast is. Default value is 3. The range of value is 0 to 20. Large Edge Enhance the large edge contrast of the image. The bigger the value is, the more enhanced the large edge contrast is. Default value is 0. The range of value is 0 to 20. Huge Edge Enhance the huge edge contrast of the image. The bigger the value is, the more enhanced the huge edge contrast is. Default value is 0. The range of value is 0 to 20. Refer to Appendix B “Image Process Guide (HS2)” for image processing and its result using HS2. Page 124 of 181 RA20-129-035 VXvue User Manual 8.6.2.12 Post LUT Figure 8.21 Post LUT Apply Post Lookup table after doing MLDC. Apply Range The data range set in this field will be used for post-lookup conversion. - Manual Set range manually by entering low / high value. The range of value is 0~16383. - Min/Max Set range automatically using default algorithm. The low/high offset adjustment will be applied. - Auto Set range automatically using auto algorithm. The low/high offset adjustment will be applied. - Low Offset Adjust the lowest value of the automatic calculated range as much as entered percentage (%) additionally. The range of value is -100~100. - High Offset - Adjust the highest value of the automatic calculated range as much as entered percentage (%) additionally. The range of value is -100~100. LUT Type Select LUT to be applied to Post LUT. For more information about how to register LUT available from LUT Type, refer to chapter 8.5 “LUT Settings”. Page 125 of 181 RA20-129-035 VXvue User Manual 8.6.2.13 Display ROI Figure 8.22 Display ROI Set data range of image that is to be displayed on the monitor by default. Manual Set range manually by entering low / high value. The range of value is 0~16383. Min/Max Set range automatically using default algorithm. The low/high offset adjustment will be applied. Auto Set range automatically using auto algorithm. The low/high offset adjustment will be applied. Low Offset Adjust the lowest value of the automatic calculated range as much as entered percentage (%) additionally. The range of value is -100~100. High Offset Adjust the highest value of the automatic calculated range as much as entered percentage (%) additionally. The range of value is -100~100. Page 126 of 181 RA20-129-035 VXvue User Manual 8.6.2.14 Label Figure 8.23 Label Auto Label: Set Label that is to be displayed on the acquired image automatically. L/R Label Set text of L/R label. Position Set position of L/R label. Available positions are TopLeft, TopRight, BottomLeft, and BottomRight. Rotation: Set the direction to be applied when acquiring image Flip Flip an image vertically. Mirror Flip an image horizontally. Rotation Rotate the image in the following options. None, CCW90, CCW 180, CCW270, CW90, CW 180 and CW270 Shutter Set width and height of shutter size. Set the length by selecting the value from 8~17 inch. Auto Crop Set the offset of Auto Crop applied to the image automatically. It will crop the image as much as the offset value (unit: pixel), more inward than the calculated crop region. The range of value is 0~500. You cannot set both Shutter and Auto Crop functions at the same time. Page 127 of 181 RA20-129-035 VXvue User Manual 8.6.2.15 E.I (Exposure Index) Figure 8.24 E.I E.I (Exposure Index) is a setting that check whether the proper x-ray exposure is made or not by comparing the target E.I ( EI t ) and the calculated E.I. Target Set the target E.I ( EI t ) of the selected Step. The range of value is 100 to 5000. Area Set the area to calculate E.I. The range of value is 10 to 50. Page 128 of 181 RA20-129-035 VXvue User Manual 8.6.3 Body Part/Projection Panel Figure 8.25 Body Part/Projection Panel You can manage Body parts and projections to use for registering study on Exposure mode. Click the Add Button of Body part category for registering new Body Part to use. Click the Hide Button of Body part category for hiding Body part not in use. Click the Add Button of Projection category for registering new Projection to use. Click the Hide Button of Projection category for hiding Projection not in use. Both Body Part and Projection panels support Show/Hide function, not the delete function. You cannot combine Steps by hidden Body Part or Projection. The registered item cannot be deleted. You can see the hidden items by checking the Show All checkbox. You can use Alias field name instead of Meaning field name by modifying Alias field. The name of designator is “99VW” for the items you add. Value (code) made with U and 4digit numbers are increasing like as U-0001, and U-0002. You can freely modify the added items. You cannot modify the default item of SRT designator. You can only modify the Alias field. You can register steps by combining registered Body Part and Projection on “Step Panel” described in chapter 8.6.2. Page 129 of 181 RA20-129-035 VXvue User Manual 8.6.4 Species Code Figure 8.26 Species Code Panel You can manage species codes to use for registering study on Exposure mode Click the Add Button for registering new species codes to use. Click the Hide Button for hiding species codes not in use. Species Code panel supports Show/Hide function, not the delete function. The registered item cannot be deleted. You can see the hidden items by checking the Show All checkbox. The name of designator is “99VW” for the items you add. Value (code) made with U and 4digit numbers are increasing like as U-0001, and U-0002. You can freely modify the added items. You cannot modify the default item of SRT designator. You can only modify the Alias field. You can use species code on “New Study Panel” described in chapter 3.2. Page 130 of 181 RA20-129-035 VXvue User Manual 8.6.5 Breed Code Figure 8.27 Breed Code Panel User can manage breed codes to use for registering study on Exposure mode Click the Add Button for registering new breed codes to use. Click the Hide Button for hiding breed codes not in use. Breed Code panel supports Show/Hide function, not the delete function. The registered item cannot be deleted. You can see the hidden items by checking the Show All checkbox. The name of designator is “99VW” for the items you add. Value (code) made with U and 4digit numbers are increasing like as U-0001, and U-0002. You can freely modify the added items. You cannot modify the default item of SRT designator. You can only modify the Alias field. You can use breed code on “New Study Panel” described in chapter 3.2. Page 131 of 181 RA20-129-035 VXvue User Manual 8.6.6 Breed Registration Code Figure 8.28 Breed Reg. Code Panel You can manage breed reg. codes to use for registering study on Exposure mode. Click the Add Button for registering new breed reg. codes to use. Click the Hide Button for hiding breed reg. codes to not in use. Breed reg. Code support Show/Hide function, not the delete function. The registered item cannot be deleted. You can see the hidden items by checking the Show All checkbox. The name of designator is “99VW” for the items you add. Value (code) made with U and 4digit numbers are increasing like as U-0001, and U-0002. You can freely modify the added items. You cannot modify the default item of DCM designator. You can only modify the Alias field. You can use Breed Reg code on “New Study Panel” described in chapter 3.2. Page 132 of 181 RA20-129-035 VXvue User Manual 8.7 8.7.1 Backup Settings Backup Panel Figure 8.29 Backup Panel Insert writable optical storage media (CD/DVD) to the optical drive or connect external storage device (USB stick, HDD) to the local system to make it accessible. Select the corresponding drive to use from the Location dropdown list. Click the Refresh button to search studies to back up in order of the oldest studies. System will automatically select studies to be backed up depending on the selected drive capacity and display them on the list. Click the Archive button. Backup will be preceded and the progress window will appear. When the backup is complete, a notification window will be displayed with a name (label) provided to the backed up media as shown below. Page 133 of 181 RA20-129-035 VXvue User Manual As instructed, it is recommended to keep the backed up media by writing a label on it. To open the backed up study, insert optical storage media (CD/DVD) to the optical drive or connect external storage device (USB stick, HDD) to the local system to make it accessible. VXvue recognizes backed up optical storage media (CD/DVD) or external storage device (USB stick, HDD) with its label and serial number. If you copy this media to another device manually, VXvue cannot recognize them because they have the same label but have different serial numbers. Medical recode is very important. You should keep these backed up optical storage media (CD/DVD) or external storage device (USB stick, HDD) safely not to lose images. For keeping the media safely, we recommend to use optical storage media (CD/DVD) or external storage device. (USB stick, HDD) You cannot backup the previous backed up study again. Only the restored study after deleting from the local system can be backed up again. When the backup is completed to the optical storage media (CD/DVD), you cannot use the media for backup again even if there is free space. You can backup studies to other media if there is no free space in the external storage device. (USB stick, HDD) Page 134 of 181 RA20-129-035 VXvue User Manual 8.7.2 Clean Panel Figure 8.30 Clean Panel When you select Clean tab, the backed up studies list are automatically displayed. Select studies by clicking left mouse button with Ctrl or Shift key on the lists and click the Clean button to delete selected studies on the local system permanently. Click the Clean All button to delete all studies of the lists on the local system permanently. You can only delete the backup studies permanently. Page 135 of 181 RA20-129-035 VXvue User Manual 8.7.3 Restore Panel Figure 8.31 Restore Panel The cleaned studies are displayed on the list automatically by clicking the Restore tab. Select studies by clicking left mouse button with Ctrl or Shift key and click the Restore button to restore studies on the list. Click the Restore All button to restore all studies in the list. To restore the permanently deleted study from the local system, Insert the backed up optical storage media to the optical drive (CD/DVD) or connect the external storage device (USB stick, HDD) to the local system to make it accessible. The studies revert to the status before backup by copying them from the backed up optical storage media and external storage device to the local system. Restore function can restore all studies from all accessible optical storage media and external storage devices at a time. You can back up the restored studies to the optical storage media and external storage device. Page 136 of 181 RA20-129-035 VXvue User Manual 8.8 8.8.1 DICOM Settings Queue Panel Figure 8.32 Queue Panel Check the queue list of image transfer to the server and transfer status when sending images to DICOM Storage server or DICOM Print server. The transfer status are as follows; Pending: Standby Failed: Transfer failed. Sending: Transferring Stopped: Transfer stopped. Done: Transfer is done. Select the failed transfer items by clicking left mouse button with Ctrl or Shift key and Click the Retry button to resend the items altogether. Click the Delete button to remove Pending, Done and Failed transfer items altogether after clicking left mouse button with Ctrl or Shift key. Page 137 of 181 RA20-129-035 VXvue User Manual 8.8.2 MWL Panel Figure 8.33 MWL Panel Configure SCP (DICOM Worklist server) to get study information. Click the Add button to add New DICOM Worklist server and then input the information on the Basic Information. Specify the DICOM tags of information to be searched from SCP. Select the Procedure tag (including code) to be used on “Procedure Panel” described in chapter 8.6.1. Click the Update button to save the changed information Click the Echo button to verify the communication with a selected server. 8.8.2.1 SCP List: The registered SCP is listed and you can select a SCP to use. Add Add new SCP Delete Delete the selected SCP. Check Select a SCP to use with a checked mark on the use field. Page 138 of 181 RA20-129-035 VXvue User Manual 8.8.2.2 Verification: Display the results after verifying communication with the selected SCP Echo: 8.8.2.3 Verify the communication with the selected SCP. Basic Information Configure properties of SCP when the registered SCP is selected on the SCP List. Name: Set the SCP name. AE Title: Set the AE title of the SCP. IP Address: Set IP address of the SCP. Port: Set port number of the SCP. Max PDU: Set Max PDU size to use while communicating with the selected SCP. If Max PDU size is not checked, the communication is made by using the setting value from SCP. The speed of communication can be too low if Max PDU is not configured. In this case, change MAX PDU with various values and enter one of the values that communicated successfully. 8.8.2.4 Tag Selection Specify the DICOM tags having information to be retrieved from SCP. If you encounter a problem searching on SCP (DICOM Worklist server) due to unsupported tags from the SCP, deselect them to solve the problem and refer to DICOM Conformance Statement of that SCP. 8.8.2.5 Procedure Tag Selection Select the Procedure tag (including code) to be used on “Procedure Panel” described in chapter 8.6.1. Select a tag which has codes that classifying studies from the DICOM Worklist panel and use it as procedure codes value. Page 139 of 181 RA20-129-035 VXvue User Manual The available DICOM tags are as follows; - Requested Procedure ID - Requested Procedure Description - Requested Procedure Code Sequence - Scheduled Procedure Step Description - Scheduled Procedure Step ID Refer to chapter 8.6.1 “Procedure Panel” for more information about procedure. Page 140 of 181 RA20-129-035 VXvue User Manual 8.8.3 MPPS Panel Figure 8.34 MPPS Panel Configure the SCP. (DICOM Modality Performed Procedure Step server) Click the Echo button to verify the communication with selected SCP. When the study starts or finishes, the procedure information performed in that study is sent to the SCP. 8.8.3.1 SCP List You can select a SCP to use when the registered SCP is listed. Add Add new SCP Delete Delete the selected SCP. 8.8.3.2 Verification Display results after verifying communication with the selected SCP. Echo: Verify the communication with the selected SCP. Page 141 of 181 RA20-129-035 VXvue User Manual 8.8.3.3 Basic Information Configure properties of SCP when the registered SCP is selected on the SCP List Name: Set the SCP name. AE Title: Set the AE title of the SCP. IP Address: Set IP address of the SCP. Port: Set port number of the SCP. Max PDU: Set Max PDU to use while communicating with the selected SCP. If Max PDU size is not checked, the communication is made by using the setting value from SCP. The speed of communication can be too low if Max PDU is not configured. In this case, change MAX PDU with various values and enter one of the values that communicated successfully. 8.8.3.4 Options Language: Select an encoding of language applied when transferring procedure performed information. Page 142 of 181 RA20-129-035 VXvue User Manual 8.8.4 Storage Panel Figure 8.35 Storage Panel Configure the SCP. (DICOM Storage server) Click the Echo button to verify the communication with the selected SCP. Configure various options to be used for sending the images to the selected SCP. Make sure to enter the Station AE Title. The image transfer can be failed if Station AE Tilte entered in “System Panel” described in chapter 8.1.1 is different with “Calling AE Title” on the specific SCP because some SCP rejects to receive images from unregistered SCU. (Client) 8.8.4.1 SCP List You can select a SCP to use when the registered SCP is listed. Add Add new SCP Delete Delete the selected SCP. 8.8.4.2 Verification Display the results after verifying communication with the selected SCP Echo: Verify the communication with the selected SCP. Page 143 of 181 RA20-129-035 VXvue User Manual 8.8.4.3 Basic Information Configure properties of SCP. When the registered SCP is selected on the SCP List, the properties of SCP are displayed and can be configured. Name: Set the SCP name. AE Title: Set the AE title of the SCP. IP Address: Set IP address of the SCP. Port: Set port number of the server. Max PDU: Set Max PDU to use while communicating with the selected SCP. Timeout: Set the waiting time to receive response from the selected SCP when the system tries to communicate with the selected SCP (Unit: second). If no response is received during that time, it is treated with communication failure. If Max PDU size is not checked, the communication is made by using the setting value from SCP. The speed of communication can be too low if Max PDU is not configured. In this case, change MAX PDU with various values and enter one of the values that communicated successfully. Page 144 of 181 RA20-129-035 VXvue User Manual 8.8.4.4 Options Configure LUT, Modality, image compression and other options to be used for sending images. LUT: Choose LUT applied when sending the images to the selected SCP. Modality: Choose the Modality value applied when sending the images to the selected SCP. The Modality value recorded when exposing images is applied if choosing the current modality. Software Collimation: Select option to apply on the image when image is sent. NONE: Images as its original size without applying Crop are sent. CUT: Images cut as much as CROP area are sent. FILL: Images filled the outside of Crop area with black color are sent. Burned in Annotation: The annotation is exported by recording in the image when choose YES. Burned in Information: Patient information is exported by recording in the image when choose YES Transfer Syntax: Select communication protocol when sending images to the selected SCP. Language: Select an encoding of language applied when sending images to the selected SCP. Compression: Select the compression protocol. If it is selected, the image compressed with the selected compression protocol is sent to the selected SCP. If you select JPEG2000 lossless or JPEG2000 lossy as a compression protocol, image transfer may fail due to unsupported protocol from the selected SCP. (DICOM Storage server) Select No compression to send images if that SCP doesn’t support any compression protocol. Page 145 of 181 RA20-129-035 VXvue User Manual 8.8.5 Storage Commitment Panel Figure 8.36 Storage Commitment Panel Configure the SCP. (DICOM Storage Commitment server) Click the Echo button to verify the communication with the selected SCP. When the image transfer is finished to DICOM Storage server, the transfer information is sent to the registered SCP. 8.8.5.1 SCP List You can select a SCP to use when the registered SCP is listed. Add Add new SCP Delete Delete the selected SCP. 8.8.5.2 Verification Display the results after verifying communication with the selected SCP Echo: Verify the communication with the selected SCP. Page 146 of 181 RA20-129-035 VXvue User Manual 8.8.5.3 Basic Information Verification Configure properties of SCP. When the registered SCP is selected on SCP List, the properties of SCP are displayed and can be configured. Name: Set the SCP name. AE Title: Set the AE title of server. IP Address: Set IP address of server. Port: Set port number of server. Max PDU: Set Max PDU to use while communicating with the selected SCP. If Max PDU size is not checked, the communication is made by using the setting value from SCP. The speed of communication can be too low if Max PDU is not configured. In this case, change MAX PDU with various values and enter one of the values that communicated successfully. Page 147 of 181 RA20-129-035 VXvue User Manual 8.8.6 Print Panel Figure 8.37 Print Panel Configure the SCP. (DICOM Print server) Click the Echo button to verify the communication with the selected SCP. Specify information to be printed on the film. Make sure to enter the Station AE Title. The image transfer can be failed if Station AE Tilte entered in “System Panel” of chapter 8.1.1 is different with “Calling AE Title” on the specific SCP because some SCP rejects to receive images from unregistered SCU. (Client) Page 148 of 181 RA20-129-035 VXvue User Manual 8.8.6.1 SCP List The registered SCP is listed and User can select a SCP to use. Add Add new SCP Delete Delete the selected SCP. 8.8.6.2 Verification Display of the results after verifying communication with the selected SCP Echo: 8.8.6.3 Verify the communication with the selected SCP. Basic Information Verification Configure properties of SCP. When the registered SCP is selected on SCP List, the properties of SCP are displayed and can be configurable. Name: Set the SCP name. AE Title: Set the AE title of server. IP Address: Set IP address of server. Port: Set port number of sever. Max PDU: Set Max PDU size to use while communicating with the selected SCP. Timeout: Set the waiting time to receive response from the selected SCP.when tried to communicate with the select SCP. (Unit: second) If no response is received during that time, it is treated with communication failure. LUT: Choose LUT applied when sending the images to the selected SCP. If Max PDU size is not checked, the communication is made by using the setting value from SCP. The speed of communication can be too low if Max PDU is not configured. In this case, change MAX PDU with various values and enter one of the values that communicated successfully. Page 149 of 181 RA20-129-035 VXvue User Manual 8.8.6.4 Printer Format Configure properties of DICOM Print server. Size: Select the film size. Orientation: Configure the printed direction. (Portrait / Landscape) Format: Configure the layout of images printed on film. Medium Type: Configure the medium type of print. (Clear film, Blue film, ect.) Film Destination: Configure the film destination of print. (Magazine / Processor / BIN_1~BIN_9) Priority: Configure the priority of printing. Trim: Configure the use of Trim. (Yes / No) Min Density: Configure minimum density of print. Max Density: Configure maximum density of print. Magnification Type: Configure the image interpolation method printed on a film. (Replicate/Bilinear/Cubic) Request Resolution: Configure the requested resolution of print. (Standard /High) Num of Copy: Configure number of copy. Uncheck the unsupported tags if SCP (DICOM Print server) fails to operate due to those tags. Refer to DICOM Conformance Statement of that SCP for more information. 8.8.6.5 Layout Items Header font & color: Configure color, font and its size for texts to be displayed on the header. Color: Configure color of the text displayed on the header. Font: Configure font of the text displayed on the header. Size: Configure size of the text displayed on the header. Position: Set the position of header. Layout: Set the layout of items displayed on the header. Image overlay font & color: Configure color, font and its size for texts to be displayed on the image. Color: Configure color of the text displayed on the image. Font: Configure font of the text displayed on the image. Size: Configure size of the text displayed on the image. Absolute Font Size: - When you select the Absolute Font Size checkbox, font always display to be the same size regardless of image layout on the film. - When you deselect the Absolute Font Size checkbox, the font size will be automatically adjusted according to image layout on the film. Also, the font size will be adjusted by referring the inputted font size. Page 150 of 181 RA20-129-035 VXvue User Manual Annotation font & color: Configure color, font and its size for texts of annotation to be displayed on the image. Color: Configure color of the text displayed on the image Font: Configure font of the text displayed on the image. Size: Configure size of the text displayed on the image. Header: Specify the items to be displayed on the header. ▲, ▼ button: add/delete the items to be displayed on the header from item category. Top Left, Bottom Left, Top Right, and Bottom Right: Specify the items to be displayed on each position of the image. ▶, ◀ button: add/delete the items to be displayed on the each position from item category. Item: The list of information that can be displayed on the header or the image. The list of information displayed on the header or the image is as follows. Patient ID, Patient Name, Birthdate, Sex/Age, Height, Weight Bodypart, Projection, Laterality Performing Physician, Referring Physician Study Date, Study Time, Accession number Series Number, Instance Number, Exposure Time Dose kVp, Dose mA, Dose ms, Dose mAs, DAP Exposure Index, Deviation Index, Target Exposure Index Pixel Value, Histogram, Zoom Ratio Institutional Name, Institutional Address, Institutional Department Name Manufacturer, Manufacturer Model Name, Station Name, Modality Page 151 of 181 RA20-129-035 VXvue User Manual 8.9 8.9.1 Setting Reject Rejected List Panel Figure 8.38 Rejected List Panel Search the rejected study or images. Click Restore to restore selected study or image. Click Delete to remove selected study or image. Page 152 of 181 RA20-129-035 VXvue User Manual 8.9.2 Reason Panel Figure 8.39 Reason Panel Register reasons to be used when reject study or image. Use rejection reason: Check to enter ‘reject reason’ when rejecting study or images. Always display image: Check to display the rejected study or image with other study/image. Page 153 of 181 RA20-129-035 VXvue User Manual Appendix A. A.1 Cursor and Icon List Tool Cursors Crop Zoom Magic Glass Window Level Pan Move A.2 Annotation Cursors Angle Arrow Distance Window Level Ellipse Rectangle Text Page 154 of 181 RA20-129-035 VXvue User Manual A.3 Status Bar Icons More than local HDD Under the configured warning space of local HDD Under 33% compared to the total capacity of local HDD Under 66% compared to the total capacity of local HDD Under 100% compared to the total capacity of local HDD In DICOM Storage status In DICOM Print status A.4 Listed Icons in Database Mode Backed up Deleted Sent to the DICOM Print server Sent to the DICOM Storage server Page 155 of 181 RA20-129-035 VXvue User Manual A.5 Thumbnail Status Icons Backed up Deleted Sent to the DICOM Print server Sent to the DICOM Storage server Rejected image Currently selected step Page 156 of 181 RA20-129-035 VXvue User Manual A.6 Detector information Icons The battery capacity is under 100% The battery capacity is under 75% The battery capacity is under 50% The battery capacity is under 25% Need battery charge Errors in detector connection Detector connected Detector disconnected Temperature error in the detector Low temperature in the detector High temperature in the detector The Wi-Fi signal strength is under 100% The Wi-Fi signal strength is under 75% The Wi-Fi signal strength is under 50% The Wi-Fi signal strength is under 25% Wi-Fi error Page 157 of 181 RA20-129-035 VXvue User Manual A.7 Detector Status Icons Disconnected Some images on the detector are not transferred Changed information of detector status Sleep Mode FXRD-1717SA/SB detector FXRD-1417SA/SB detector FXRD-1417WA/WB detector is connected to Wi-Fi FXRD-1417WA/WB detector is connected to tether. Page 158 of 181 RA20-129-035 VXvue User Manual Appendix B. Contrast Slope Image Process Guide (HS2) Min. Max. Recommendation * Class Unit Comment 0 50 5~30 Contrast - 0 : Auto ↑ : Less Contrast Point 0 100 0 or 20~100 Contrast % 0 : Auto ↑ : Less + : Contrast Slope Mean Point 1 100 1 Contrast % ↑ : Less Skin Correct 0 100 0 or 5~20 Contrast % ↑ : Less + : Compensation OPPoint Compensation 100 1000 1000 0 100 100 or - ↑ : More Contrast % ↑ : More Contrast - ↑ : More Edge - ↑ : More 100↓: air region Compression ** 0 20 5~10 : extremity 0 : Body Denoise ** 0 14 5 : extremity 10↑ : Body Gamma ** 0 9 2 Brightness - ↑ : Less Fine Edge ** 0 20 3 Edge - ↑ : More Middle Edge ** 0 20 3 Edge - ↑ : More Large Edge 0 20 0 Edge - ↑ : More Huge Edge 0 20 0 Edge - ↑ : More Post LUT 0 16383 Auto - or Manual : Pixel Value % Auto : % Brightness (Low: 0,High: 0) LUT Type Display ROI Linear Curve 0 16383 Auto (Low: -10,High: 10) Brightness Brightness - or Manual : Pixel Value % Auto : % Note) * These values in ‘Recommendation’ column are just for the reference purposes, as they might need to be adjusted depending on anatomic regions, projection, patient size, dose conditions, environmental conditions, etc. * You need to make your own image processing parameters for each anatomic region and projection by referring to the values in ‘Recommendation’ column and sample parameters. ** These five (5) kinds of image processing parameters can be easily adjusted by a user at process panel located at the right of the GUI of the software when the image is being displayed. (Exposure mode or Viewer mode) Page 159 of 181 RA20-129-035 VXvue User Manual B.1 HS2 Basic Figure B.40 Page 160 of 181 HS2 Basic RA20-129-035 VXvue User Manual B.2 Contrast slope (0~50) Meaning: A slope which can determine the contrast of a whole image (data). Effect: The lower the value of Contrast slope is, the more enhanced contrast you can get. Additional effect: - Range: 0~50 Recommended range: 5~30 Unit: - Comment: “0” means that Contrast slope is automatically determined. Risk: “1~4” is not recommended for use, as those values are not good for a proper image processing. Figure B.2 Contrast slope = 5 Figure B.3 Page 161 of 181 Contrast slope = 50 RA20-129-035 VXvue User Manual B.3 Contrast point (0~100) Meaning: A point of gray value where Contrast slope is applied Effect: To enhance the contrast at a wanted gray level. For instance, if you use the contrast slope at the lower gray level, you can get more contrast at such low gray level. (e.g. Bone-low, Abdomen-middle, background-High) Additional effect: - Range: 0~100 Recommended range: 0 or 20~100 Unit: % Comment: “0” means that Contrast point is automatically determined. Risk: “1~19” is not recommended for use, as those values are not good for a proper image processing. Figure B.4 Contrast Point = “20" Figure B.5 Page 162 of 181 Contrast Point = “100" RA20-129-035 VXvue User Manual B.4 Mean Point (1~100) Meaning: Mean point (in log scale) of gray value of the image for image processing. Effect: To enhance clarity at a wanted gray level. Caution: The higher the value of Mean Point is, the low level is compressed. (e.g. skin) Range: 1~100 Recommended range: 1 Unit: % Comment: Risk: “31~100” is not recommended for use, as those values are not good for a proper image processing. Figure B.6 Mean Point = “1" Figure B.7 Mean Point = “50" Page 163 of 181 RA20-129-035 VXvue User Manual B.5 Skin correct (0~100) Meaning: A parameter to restore the gray level of the area compressed by Mean Point to a certain level. Effect: The higher the value of Skin correct is, the more enhancement of edge between skin and background you can get. Additional effect: - Range: 0~100 Recommended range: 0 or 5~20 Unit: % Comment: It is related to compensation. This parameter is valid when compensation is used. Risk: - Figure B.8 Skin correct = “0" Figure B.9 Page 164 of 181 Skin correct = “100" RA20-129-035 VXvue User Manual B.6 OPPoint (1000~100): TBD Meaning: - Effect: - Additional effect: - Range: 100~1000 Recommended range: 1000 Unit: Comment: - Risk: - Figure B.10 OPPoint = “100" Figure B.11 OPPoint = “1000" Page 165 of 181 RA20-129-035 VXvue User Manual B.7 Compensation Meaning: A parameter to determine a level of compensation for the area enhanced by Compression. (See ‘B.8. Compression’) Effect: The higher the value of Compensation is, the more compensation you can get at the area untended to be enhanced by Compression. This parameter can be used for compensating the ‘background area’. Additional effect: - Range: 0~100 Recommended range: 100 for almost all anatomic regions. Less than 100 for specific anatomic regions full of air. (e.g. lung) Unit: % Comment: It is related to Compression. Risk: - Figure B.12 Compensation = “0" Figure B.13 Compensation = “100" Page 166 of 181 RA20-129-035 VXvue User Manual B.8 Compression Meaning: A parameter to determine dynamic range of the image. Effect: The higher the value of Compression is, the more enhanced contrast between skin and bone you can get. Caution: The background area becomes brighter. In this case, you need to compensate the area by Compensation. Range: 0~20 Recommended range: 5~10 for body except for extremities, 3~5 for extremities Unit: - Comment: This parameter can be easily adjusted by a user at the image processing panel. Risk: - Figure B.14 Compression = “0" Figure B.15 Compression = “20" Page 167 of 181 RA20-129-035 VXvue User Manual B.9 Denoise Meaning: A parameter to determine the strength of noise reduction. Effect: The higher the value of Denoise is, the more noise reduction you can get. Caution: The higher level of noise reduction could make the image smoother. Range: 0~14 Recommended range: More than 10 for body except for extremities, 5 for extremities Unit: - Comment: This parameter can be easily adjusted by a user at the image processing panel. Risk: Details in the image could be sacrificed a bit. Figure B.16 Denoise = “0" Figure B.17 Denoise = “14" Page 168 of 181 RA20-129-035 VXvue User Manual B.10 Gamma Figure B.18 Gamma Curve Meaning: A parameter to determine the level of gamma curve after an image processing. Effect: The lower level of Gamma could make the image brighter. Additional effect: The lower value of Gamma is, the more details you can get at the lower level. Range: 0~9 Recommended range: 2 Unit: - Comment: This parameter can be easily adjusted by a user at the image processing panel. Risk: - Page 169 of 181 RA20-129-035 VXvue User Manual Figure B.19 Gamma = “0" Figure B.20 Gamma = “9" Page 170 of 181 RA20-129-035 VXvue User Manual B.11 Fine Edge Meaning: A parameter to determine the level of edge enhancement for the edge in the fine size. Effect: Fine edge is sharpened. Caution: It could also enhance the noise. Range: 0~20 Recommended range: 3 Unit: - Comment: This parameter can be easily adjusted by a user at the image processing panel. Risk: - Figure B.21 Fine edge = “0" Figure B.22 Fine edge = “20" Page 171 of 181 RA20-129-035 VXvue User Manual B.12 Middle Edge Meaning: A parameter to determine the level of edge enhancement for the edge in the middle size. Effect: Middle edge is more sharpened. Caution: It could also enhance the noise. Range : 0~20 Recommended range : 3 Unit : - Comment: This parameter can be easily adjusted by a user at the image processing panel. Risk: Smaller edge than this could be weakened. Figure B.23 Middle edge = “0" Figure B.24 Page 172 of 181 Middle edge = “20" RA20-129-035 VXvue User Manual B.13 Large Edge Meaning: A parameter to determine the level of edge enhancement for the edge in the large size. Effect: Large edge is sharpened. Caution: It could also enhance the noise. Range : 0~20 Recommended range: 0 Unit: - Comment: Risk: Smaller edge than this could be weakened. It is not recommended to use the value higher than 15, as it is not good for a proper image processing. Figure B.25 Large edge = “0" Figure B.26 Large edge = “20" Page 173 of 181 RA20-129-035 VXvue User Manual B.14 Huge Edge Meaning: A parameter to determine the level of edge enhancement for the edge in the huge size. Effect: Huge edge is sharpened. Caution: It could also enhance the noise. Range: 0~20 Recommended range: 0 Unit: - Comment: Risk: Smaller edge than this could be weakened. It is not recommended to use the value higher than 5, as it is not good for a proper image processing. Figure B.27 Huge edge = “0" Figure B.28 Page 174 of 181 Huge edge = “20" RA20-129-035 VXvue User Manual Appendix C. C.1 Exposure Index Flowchart (Exposure Index Setting) Figure C.1 Flowchart Page 175 of 181 RA20-129-035 VXvue User Manual C.2 Exposure Index (E.I) and Deviation Index (D.I) Display If you set to use Exposure Index, you will see EI and DI in “Image Overlay” area after exposure automatically. (Refer to 8.4.1 “Image Overlay”) You have to set the area to be calculated exposure index and proper target value ( EI t ) per “Step (anatomic region and projection)” on Step panel. (Refer to 8.6.2.15 “E.I (Exposure Index)”) Exposure Index Display Figure C.2 Exposure Index Display You Can display the value of E.I. / D.I. / Target E.I according to “Viewer Settings” D.I.’s Background’s Color Green : Adequate Exposure Orange : a little over/under adequate Exposure Red : Over/Under Exposure Page 176 of 181 RA20-129-035 VXvue User Manual C.3 Set Target Exposure Index ( EI t ) in Step Panel Exposure Index Figure C.3 Step Panel Enter the target exposure index ( EI t ) in the “Target” box and the area to calculate exposure index in the “Area” box. Page 177 of 181 RA20-129-035 VXvue User Manual C.4 Exposure Index Formula C.4.1 Definition EI = c0 * g (v) = c0 * K cal c0 ----- Constant, 100 μGy.-1 K cal ----- Air kerma that the image receptor received under calibrated conditions (Standard beam RQA5 with 21mm aluminum filtration), unit is μGy. v ----- Set ROI in Gain, dark, distortion corrected raw image, remove the background and get a Mean, Mode, or Median value of gray level. g (v) ---- Inverse calibration function which is same with “linearity relationship” we said, determined from the relationship between the image receptor air kerma ( K cal ) and the value of interest ( v ). C.4.2 Range 0~10000 (It depends on individual detector, for example CsI-DR and GOS-DR have different maximum EI values). Page 178 of 181 RA20-129-035 VXvue User Manual C.5 Deviation Index (Relative Index) Formula C.5.1 Definition Deviation is a number quantifying the deviation of the actual Exposure index from the Target (Proper) Exposure Index. DI = 10 * log10 EI EI T EI --- Actual Exposure Index EI t --- Expected value of the exposure index. It may depend on the type of detector, on the type of examination, on the diagnostic question and on other parameters. EI t = c0 * g (vT ) C.5.2 Range -9.9~9.9 If EI <0.1* EI t DI =-9.9; If EI >10* EI t DI =9.9; Page 179 of 181 RA20-129-035 VXvue User Manual C.6 The Recommended Target Exposure Index ( EI t ) Bodypart Projection Target Exposure Index Default Default 1300 Ankle AP/PA 1460 LAT 2210 Axial 2310 LAT 2250 AP/PA 1280 LAT 1120 LAT 980 AP/PA 1430 AP/PA 1660 LAT 860 AP 2120 LAT 2040 AP/PA 1940 LAT 2370 AP/PA 2440 LAT 2530 AP/PA 1880 OBL 2140 AP/PA 2270 LAT 2430 AP/PA 2400 LAT 2670 OBL 2540 AP/PA 1760 LAT 2580 AP/PA 1760 LAT 1970 AP/PA 1750 LAT 1930 AP/PA 1310 LAT 1300 Calcareous C-SPINE Chest Clavicle Elbow Femur Finger Foot Forearm Hand Hip Knee Tibia L-SPINE Page 180 of 181 RA20-129-035 VXvue User Manual Vieworks Co., Ltd. #107-108, 601-610, Suntechcity 2, 52, Sagimakgol-ro (307-2, Sangdaewon-dong), Jungwon-gu, Seongnam-si, Gyeonggi-do, 462-736, South Korea Telephone: +82-70-7011-6161 FAX: +82-31-737-4954 Website: http://www.vieworks.com European representative: DONGBANG ACUPRIME 1 Forrest Units, Hennock Road East, Marsh Barton, Exeter EX2 8RU, UK Telephone: +44(0)-1392-829500 Site: http://www.acuprime.com Page 181 of 181 RA20-129-035