1
Red Hat JBoss Web Framework
Kit 2.1
TorqueBox Quickstart Guide
for use with JBoss Enterprise Application Platform
Edition 2.1.0
Red Hat Content Services
Red Hat JBoss Web Framework Kit 2.1 TorqueBox Quickstart Guide
for use with JBoss Enterprise Application Platform
Edition 2.1.0
Red Hat Co ntent Services
Legal Notice
Copyright © 2012 Red Hat.
T his document is licensed by Red Hat under the Creative Commons Attribution-ShareAlike 3.0 Unported
License. If you distribute this document, or a modified version of it, you must provide attribution to Red
Hat, Inc. and provide a link to the original. If the document is modified, all Red Hat trademarks must be
removed.
Red Hat, as the licensor of this document, waives the right to enforce, and agrees not to assert, Section
4d of CC-BY-SA to the fullest extent permitted by applicable law.
Red Hat, Red Hat Enterprise Linux, the Shadowman logo, JBoss, MetaMatrix, Fedora, the Infinity Logo,
and RHCE are trademarks of Red Hat, Inc., registered in the United States and other countries.
Linux ® is the registered trademark of Linus T orvalds in the United States and other countries.
Java ® is a registered trademark of Oracle and/or its affiliates.
XFS ® is a trademark of Silicon Graphics International Corp. or its subsidiaries in the United States
and/or other countries.
MySQL ® is a registered trademark of MySQL AB in the United States, the European Union and other
countries.
Node.js ® is an official trademark of Joyent. Red Hat Software Collections is not formally related to or
endorsed by the official Joyent Node.js open source or commercial project.
T he OpenStack ® Word Mark and OpenStack Logo are either registered trademarks/service marks or
trademarks/service marks of the OpenStack Foundation, in the United States and other countries and
are used with the OpenStack Foundation's permission. We are not affiliated with, endorsed or
sponsored by the OpenStack Foundation, or the OpenStack community.
All other trademarks are the property of their respective owners.
Abstract
T orqueBox provides an enterprise-grade environment that not only provides complete Ruby-on-Rails
and Rack compatibility, but also goes beyond the functionality offered in traditional Rails/Rack
environments.
Table of Contents
Table of Contents
.Preface
. . . . . . . . . . . . . . . . . . . . . . . . . . . . . . . . . . . . . . . . . . . . . . . . . . . . . . . . . . . . . . . . . . . . . . . . . . . . . . . . . . . . . . . . . . .3. . . . . . . . . .
1. Document Conventions
3
1.1. T ypographic Conventions
3
1.2. Pull-quote Conventions
4
1.3. Notes and Warnings
5
2. Getting Help and Giving Feedback
5
2.1. Do You Need Help?
5
2.2. Give us Feedback
6
.Chapter
. . . . . . . . 1.
. . .First
. . . . . Steps
. . . . . . . . . . . . . . . . . . . . . . . . . . . . . . . . . . . . . . . . . . . . . . . . . . . . . . . . . . . . . . . . . . . . . . . . . . .7. . . . . . . . . .
1.1. First Steps on Mac / Linux
7
1.1.1. Your First Rails Application
7
1.1.2. Subsequent Applications
8
1.2. First Steps on Windows
9
1.2.1. Your First Rails Application
9
1.2.2. Subsequent Applications
11
1.3. First Steps with RVM
12
1.3.1. Your First Rails Application
12
1.3.2. Subsequent Applications
14
.Chapter
. . . . . . . . 2.
. . .Adding
. . . . . . . .T.orqueBox
. . . . . . . . . . .Features
. . . . . . . . . . . . . . . . . . . . . . . . . . . . . . . . . . . . . . . . . . . . . . . . . . . . . . . . . . 17
............
2.1. T orqueBox Rails T emplate
17
2.2. Running T asks in the Background
17
2.3. Scheduled Jobs
18
2.4. Long-Running Services
19
2.5. Message Processors
20
. . . . . . . . . .History
Revision
. . . . . . . . . . . . . . . . . . . . . . . . . . . . . . . . . . . . . . . . . . . . . . . . . . . . . . . . . . . . . . . . . . . . . . . . . . . . . . . . 22
............
.Index
. . . . . . . . . . . . . . . . . . . . . . . . . . . . . . . . . . . . . . . . . . . . . . . . . . . . . . . . . . . . . . . . . . . . . . . . . . . . . . . . . . . . . . . . . 22
............
F
22
H
22
1
Red Hat JBoss Web Framework Kit 2.1 TorqueBox Quickstart Guide
2
Preface
Preface
1. Document Conventions
T his manual uses several conventions to highlight certain words and phrases and draw attention to
specific pieces of information.
In PDF and paper editions, this manual uses typefaces drawn from the Liberation Fonts set. T he
Liberation Fonts set is also used in HT ML editions if the set is installed on your system. If not, alternative
but equivalent typefaces are displayed. Note: Red Hat Enterprise Linux 5 and later include the Liberation
Fonts set by default.
1.1. Typographic Conventions
Four typographic conventions are used to call attention to specific words and phrases. T hese
conventions, and the circumstances they apply to, are as follows.
Mono-spaced Bold
Used to highlight system input, including shell commands, file names and paths. Also used to highlight
keys and key combinations. For example:
T o see the contents of the file m y_next_bestselling_novel in your current working
directory, enter the cat m y_next_bestselling_novel command at the shell prompt
and press Enter to execute the command.
T he above includes a file name, a shell command and a key, all presented in mono-spaced bold and all
distinguishable thanks to context.
Key combinations can be distinguished from an individual key by the plus sign that connects each part of
a key combination. For example:
Press Enter to execute the command.
Press Ctrl+Alt+F2 to switch to a virtual terminal.
T he first example highlights a particular key to press. T he second example highlights a key combination:
a set of three keys pressed simultaneously.
If source code is discussed, class names, methods, functions, variable names and returned values
mentioned within a paragraph will be presented as above, in m ono-spaced bold. For example:
File-related classes include filesystem for file systems, file for files, and dir for
directories. Each class has its own associated set of permissions.
Proportional Bold
T his denotes words or phrases encountered on a system, including application names; dialog-box text;
labeled buttons; check-box and radio-button labels; menu titles and submenu titles. For example:
Choose System → Preferences → Mouse from the main menu bar to launch Mouse
Preferences. In the Buttons tab, select the Left-handed m ouse check box and click
Close to switch the primary mouse button from the left to the right (making the mouse
suitable for use in the left hand).
T o insert a special character into a gedit file, choose Applications → Accessories →
3
Red Hat JBoss Web Framework Kit 2.1 TorqueBox Quickstart Guide
Character Map from the main menu bar. Next, choose Search → Find… from the
Character Map menu bar, type the name of the character in the Search field and click
Next. T he character you sought will be highlighted in the Character T able. Double-click
this highlighted character to place it in the T ext to copy field and then click the Copy
button. Now switch back to your document and choose Edit → Paste from the gedit menu
bar.
T he above text includes application names; system-wide menu names and items; application-specific
menu names; and buttons and text found within a GUI interface, all presented in proportional bold and all
distinguishable by context.
Mono-spaced Bold Italic or Proportional Bold Italic
Whether mono-spaced bold or proportional bold, the addition of italics indicates replaceable or variable
text. Italics denotes text you do not input literally or displayed text that changes depending on
circumstance. For example:
T o connect to a remote machine using ssh, type ssh username@ domain.name at a shell
prompt. If the remote machine is exam ple.com and your username on that machine is
john, type ssh john@ exam ple.com .
T he m ount -o rem ount file-system command remounts the named file system. For
example, to remount the /hom e file system, the command is m ount -o rem ount /hom e.
T o see the version of a currently installed package, use the rpm -q package command. It
will return a result as follows: package-version-release.
Note the words in bold italics above: username, domain.name, file-system, package, version and release.
Each word is a placeholder, either for text you enter when issuing a command or for text displayed by
the system.
Aside from standard usage for presenting the title of a work, italics denotes the first use of a new and
important term. For example:
Publican is a DocBook publishing system.
1.2. Pull-quote Conventions
T erminal output and source code listings are set off visually from the surrounding text.
Output sent to a terminal is set in m ono-spaced rom an and presented thus:
books
books_tests
Desktop
Desktop1
documentation
downloads
drafts
images
mss
notes
photos
scripts
stuff
svgs
svn
Source-code listings are also set in m ono-spaced rom an but add syntax highlighting as follows:
4
Preface
package org.jboss.book.jca.ex1;
import javax.naming.InitialContext;
public class ExClient
{
public static void main(String args[])
throws Exception
{
InitialContext iniCtx = new InitialContext();
Object
ref
= iniCtx.lookup("EchoBean");
EchoHome
home
= (EchoHome) ref;
Echo
echo
= home.create();
System.out.println("Created Echo");
System.out.println("Echo.echo('Hello') = " + echo.echo("Hello"));
}
}
1.3. Notes and Warnings
Finally, we use three visual styles to draw attention to information that might otherwise be overlooked.
Note
Notes are tips, shortcuts or alternative approaches to the task at hand. Ignoring a note should
have no negative consequences, but you might miss out on a trick that makes your life easier.
Important
Important boxes detail things that are easily missed: configuration changes that only apply to the
current session, or services that need restarting before an update will apply. Ignoring a box
labeled “Important” will not cause data loss but may cause irritation and frustration.
Warning
Warnings should not be ignored. Ignoring warnings will most likely cause data loss.
2. Getting Help and Giving Feedback
2.1. Do You Need Help?
If you experience difficulty with a procedure described in this documentation, visit the Red Hat Customer
Portal at http://access.redhat.com. T hrough the customer portal, you can:
search or browse through a knowledgebase of technical support articles about Red Hat products.
submit a support case to Red Hat Global Support Services (GSS).
access other product documentation.
5
Red Hat JBoss Web Framework Kit 2.1 TorqueBox Quickstart Guide
Red Hat also hosts a large number of electronic mailing lists for discussion of Red Hat software and
technology. You can find a list of publicly available mailing lists at https://www.redhat.com/mailman/listinfo.
Click on the name of any mailing list to subscribe to that list or to access the list archives.
2.2. Give us Feedback
If you find a typographical error, or know how this guide can be improved, we would love to hear from
you. Submit a report in Bugzilla against the product JBoss Enterprise WFK Platform and the
component doc-T orqueBox_Quickstart_Guide. T he following link will take you to a pre-filled bug
report for this product: Bugzilla_URL.
Fill out the following template in Bugzilla's Description field. Be as specific as possible when
describing the issue; this will help ensure that we can fix it quickly.
Document URL:
Section Number and Name:
Describe the issue:
Suggestions for improvement:
Additional information:
Be sure to give us your name so that you can receive full credit for reporting the issue.
6
Chapter 1. First Steps
Chapter 1. First Steps
Choose the section below to follow based on your development environment - Windows users should
follow Section 1.2, “First Steps on Windows”, RVM users should follow Section 1.3, “First Steps with
RVM”, and regular Mac or Linux users should follow Section 1.1, “First Steps on Mac / Linux”.
1.1. First Steps on Mac / Linux
If you use Ruby Version Manager (RVM), be sure to follow the Section 1.3, “First Steps with RVM”
instructions and not the generic Mac / Linux instructions.
1.1.1. Your First Rails Application
Ensure you have Java 6 or above installed then download and extract the T orqueBox binary distribution
and set a few environment variables.
$ wget http://torquebox.org/release/org/torquebox/torqueboxdist/${project.version}/torquebox-dist-${project.version}-bin.zip
...
2012-09-13 09:35:56 (1.61 MB/s) - `torquebox-dist-${project.version}-bin.zip'
saved [152039457/152039457]
$ unzip torquebox-dist-${project.version}-bin.zip -d ~
...
inflating: torquebox-2.1.1/Rakefile
$ export TORQUEBOX_HOME=~/torquebox-${project.version}
$ export JBOSS_HOME=$TORQUEBOX_HOME/jboss
$ export JRUBY_HOME=$TORQUEBOX_HOME/jruby
$ export PATH=$JRUBY_HOME/bin:$PATH
You'll likely want to place the exports somewhere that gets loaded automatically - ~/.bashrc,
~/.bash_profile, or wherever your operating system suggests placing user-specific environment
variables.
Install Rails and create a new Rails example application.
$ mkdir -p ~/torquebox_examples/rails_example
$ cd ~/torquebox_examples/rails_example
$ gem install rails
...
Successfully installed rails-3.2.8
27 gems installed
$ rails new .
...
Using rails (3.2.8)
Installing sass (3.2.1)
Installing sass-rails (3.2.5)
Installing therubyrhino_jar (1.7.4)
Installing therubyrhino (2.0.1)
Installing uglifier (1.3.0)
Your bundle is complete! Use `bundle show [gemname]` to see where a bundled gem
is installed.
7
Red Hat JBoss Web Framework Kit 2.1 TorqueBox Quickstart Guide
Bundler and jruby-openssl
Some versions of JRuby, Bundler, and jruby-openssl don't play well together so if you get an error
when Rails tries to run bundle install regarding jruby-openssl, edit the Gem file to change
the source line from https to http and manually run bundle install afterwards.
Add a simple scaffolded resource, deploy it to T orqueBox, and run T orqueBox.
$ rails g scaffold post title body:text
...
create
app/assets/stylesheets/posts.css.scss
invoke scss
create
app/assets/stylesheets/scaffolds.css.scss
$ rake db:migrate
== CreatePosts: migrating ====================================================
-- create_table(:posts)
-> 0.0060s
-> 0 rows
== CreatePosts: migrated (0.0080s) ===========================================
$ torquebox deploy
Deployed: rails_example-knob.yml
into: /Users/someone/torquebox-${project.version}/jboss/standalone/deployments
$ torquebox run
...
15:59:28,053 INFO [org.jboss.as.server] (DeploymentScanner-threads - 2)
JBAS018559: Deployed "rails_example-knob.yml"
Open http://localhost:8080 in your browser and you'll be greeted with the Rails "Welcome aboard" page.
Navigate to http://localhost:8080/posts/ to see your scaffolded resource.
Now edit ~/torquebox_exam ples/rails_exam ple/app/views/posts/index.htm l.erb then
refresh the posts page in your browser and see your changes. Changes to your Rails application show
up immediately in the browser, as expected. When you're done, press CT RL+C in the terminal to stop
T orqueBox before continuing with the next steps.
1.1.2. Subsequent Applications
Deploying multiple applications to T orqueBox is straightforward, but let's walk through the required
steps. We'll create a Rack application to go with our Rails example application created earlier. If
T orqueBox is still running stop it with CT RL+C in its terminal window before following the steps below.
$ mkdir -p ~/torquebox_examples/rack_example
$ cd ~/torquebox_examples/rack_example
$ gem install rack
Fetching: rack-1.4.1.gem (100%)
Successfully installed rack-1.4.1
1 gem installed
Now create a config.ru for our example rack application.
8
Chapter 1. First Steps
Example 1.1. ~/torquebox_exam ples/rack_exam ple/config.ru
app = lambda { |env|
[200, { 'Content-Type' => 'text/html' }, "Hello from Rack\n" ]
}
run app
Deploy the Rack application at a context-path of "/rack" since we already have the Rails application
deployed at the root context.
$ torquebox deploy --context-path=/rack
Deployed: rack_example-knob.yml
into: /Users/someone/torquebox-${project.version}/jboss/standalone/deployments
Now you should be able to run T orqueBox and see both applications deployed.
$ torquebox run
...
19:25:38,049 INFO [org.jboss.as.server] (DeploymentScanner-threads - 1)
JBAS018559: Deployed "rails_example-knob.yml"
19:25:38,050 INFO [org.jboss.as.server] (DeploymentScanner-threads - 1)
JBAS018559: Deployed "rack_example-knob.yml"
Visit http://localhost:8080 and http://localhost:8080/rack/ to see that both your Rails and Rack
applications are deployed and working.
Congratulations! You now know all the basics to proceed with the rest of this getting started guide when
using a Mac or Linux.
Continue to Chapter 2, Adding TorqueBox Features.
1.2. First Steps on Windows
1.2.1. Your First Rails Application
Ensure you have Java 6 or above installed then download T orqueBox using your web browser from
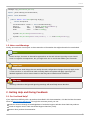
http://torquebox.org/release/org/torquebox/torquebox-dist/${project.version}/torquebox-dist${project.version}-bin.zip. Right-click the downloaded zip in Windows Explorer and select Extract All.
When prompted for a folder to extract the files to, choose your user's home directory (ie
C:\Users\som eone\).
After T orqueBox is extracted, we need to set a few environment variables. Find the Advanced System
Settings dialog (in Windows 7 this is Control Panel -> System and Security -> System -> Advanced
System Settings) and click the Environment Variables button. We want to add three new user
environment variables. Add T ORQUEBOX_HOME with a value of %HOME%\torquebox${project.version}. Add JBOSS_HOME with a value of %HOME%\torquebox${project.version}\jboss. Add JRUBY_HOME with a value of %HOME%\torquebox${project.version}\jruby. Also modify the Path environment variable by prepending
%JRUBY_HOME%\bin; to the front of the current value. Click the OK button to save and close the
Environment Variables dialog.
Now let's open up a Command Prompt to install Rails and create a new Rails example application. You
can open a Command Prompt by clicking the Windows button in the bottom left and typing cm d in the
9
Red Hat JBoss Web Framework Kit 2.1 TorqueBox Quickstart Guide
search box.
> mkdir %HOME%\torquebox_examples\rails_example
> cd %HOME%\torquebox_examples\rails_example
> gem install rails
...
Successfully installed rails-3.2.8
27 gems installed
> rails new .
...
Using rails (3.2.8)
Installing sass (3.2.1)
Installing sass-rails (3.2.5)
Installing therubyrhino_jar (1.7.4)
Installing therubyrhino (2.0.1)
Installing uglifier (1.3.0)
Your bundle is complete! Use `bundle show [gemname]` to see where a bundled gem
is installed.
Bundler and jruby-openssl
Some versions of JRuby, Bundler, and jruby-openssl don't play well together so if you get an error
when Rails tries to run bundle install regarding jruby-openssl, edit the Gem file to change
the source line from https to http and manually run bundle install afterwards.
Add a simple scaffolded resource, deploy it to T orqueBox, and run T orqueBox.
> rails g scaffold post title body:text
...
create
app/assets/stylesheets/posts.css.scss
invoke scss
create
app/assets/stylesheets/scaffolds.css.scss
> rake db:migrate
== CreatePosts: migrating ====================================================
-- create_table(:posts)
-> 0.0060s
-> 0 rows
== CreatePosts: migrated (0.0080s) ===========================================
> torquebox deploy
Deployed: rails_example-knob.yml
into: C:\Users\someone\torquebox${project.version}\jboss\standalone\deployments
> echo Y | jruby -S torquebox run
...
15:59:28,053 INFO [org.jboss.as.server] (DeploymentScanner-threads - 2)
JBAS018559:
Deployed
"rails_example-knob.yml"
Why echo
Y and
jruby -S?
When stopping T orqueBox via CT RL+C, the Windows Command Prompt will ask you if you want
to "T erminate batch job (Y/N)?". Piping echo Y into the command just prevents you from having
to answer this prompt. We prefix the command with jruby -S because if we just used echo Y
| torquebox run there's currently a bug where T orqueBox would get stuck in an infinite
restart loop upon stopping.
10
Chapter 1. First Steps
Open http://localhost:8080 in your browser and you'll be greeted with the Rails "Welcome aboard" page.
Navigate to http://localhost:8080/posts/ to see your scaffolded resource.
Now edit
%HOME%\torquebox_exam ples\rails_exam ple\app\views\posts\index.htm l.erb then
refresh the posts page in your browser and see your changes. Changes to your Rails application show
up immediately in the browser, as expected. When you're done, press CT RL+C in the terminal to stop
T orqueBox before continuing with the next steps.
1.2.2. Subsequent Applications
Deploying multiple applications to T orqueBox is straightforward, but let's walk through the required
steps. We'll create a Rack application to go with our Rails example application created earlier. If
T orqueBox is still running stop it with CT RL+C in its terminal window before following the steps below.
> mkdir %HOME%\torquebox_examples\rack_example
> cd %HOME%\torquebox_examples\rack_example
> gem install rack
Fetching: rack-1.4.1.gem (100%)
Successfully installed rack-1.4.1
1 gem installed
Now create a config.ru for our example rack application.
Example 1.2. %HOME%\torquebox_exam ples\rack_exam ple\config.ru
app = lambda { |env|
[200, { 'Content-Type' => 'text/html' }, "Hello from Rack\n" ]
}
run app
Deploy the Rack application at a context-path of "/rack" since we already have the Rails application
deployed at the root context.
> torquebox deploy --context-path=/rack
Deployed: rack_example-knob.yml
into: C:\Users\someone\torquebox${project.version}\jboss\standalone\deployments
Now you should be able to run T orqueBox and see both applications deployed.
> echo Y | jruby -S torquebox run
...
19:25:38,049 INFO [org.jboss.as.server] (DeploymentScanner-threads - 1)
JBAS018559: Deployed "rails_example-knob.yml"
19:25:38,050 INFO [org.jboss.as.server] (DeploymentScanner-threads - 1)
JBAS018559: Deployed "rack_example-knob.yml"
Visit http://localhost:8080 and http://localhost:8080/rack/ to see that both your Rails and Rack
applications are deployed and working.
Congratulations! You now know all the basics to proceed with the rest of this getting started guide when
using Windows. T he filesystem paths and command prompts shown in future chapters won't be
Windows-specific, so be sure to translate any paths to the appropriate format before executing the
example commands.
11
Red Hat JBoss Web Framework Kit 2.1 TorqueBox Quickstart Guide
Continue to Chapter 2, Adding TorqueBox Features.
1.3. First Steps with RVM
1.3.1. Your First Rails Application
Ensure you have a recent JRuby installed then install the torquebox-server gem into the global
gemset.
$ rvm install jruby-${version.jruby}
$ rvm use jruby-${version.jruby}@global
$ gem install torquebox-server
Create a directory and project-specific gemset for our example application.
$ mkdir -p ~/torquebox_examples/rails_example
$ cd ~/torquebox_examples/rails_example
$ rvm --rvmrc --create jruby-${version.jruby}@tb_rails_example
Change to the Rails example directory, trust the generated .rvmrc file when prompted, and install Rails.
$ cd ~/torquebox_examples/rails_example
===============================================================================
=====
= NOTICE
=
===============================================================================
=====
= RVM has encountered a new or modified .rvmrc file in the current directory
=
= This is a shell script and therefore may contain any shell commands.
=
=
=
= Examine the contents of this file carefully to be sure the contents are
=
= safe before trusting it! ( Choose v[iew] below to view the contents )
=
===============================================================================
=====
Do you wish to trust this .rvmrc file?
(/Users/someone/torquebox_examples/rails_example/.rvmrc)
y[es], n[o], v[iew], c[ancel]> y
$ rvm gemset list
gemsets for jruby-${version.jruby} (found in /Users/someone/.rvm/gems/jruby${version.jruby})
global
=> tb_rails_example
$ gem install rails
...
Successfully installed rails-3.2.8
27 gems installed
Create a new Rails application, add a simple scaffolded resource, deploy it to T orqueBox, and run
12
Chapter 1. First Steps
T orqueBox.
$ rails new .
...
Using rails (3.2.8)
Installing sass (3.2.1)
Installing sass-rails (3.2.5)
Installing therubyrhino_jar (1.7.4)
Installing therubyrhino (2.0.1)
Installing uglifier (1.3.0)
Your bundle is complete! Use `bundle show [gemname]` to see where a bundled gem
is installed.
$ rails g scaffold post title body:text
...
create
app/assets/stylesheets/posts.css.scss
invoke scss
create
app/assets/stylesheets/scaffolds.css.scss
$ rake db:migrate
== CreatePosts: migrating ====================================================
-- create_table(:posts)
-> 0.0060s
-> 0 rows
== CreatePosts: migrated (0.0080s) ===========================================
$ torquebox deploy
Deployed: rails_example-knob.yml
into: /Users/someone/.rvm/gems/jruby-${version.jruby}@global/gems/torqueboxserver-${project.version}-java/jboss/standalone/deployments
$ torquebox run
...
15:59:28,053 INFO [org.jboss.as.server] (DeploymentScanner-threads - 2)
JBAS018559: Deployed "rails_example-knob.yml"
Open http://localhost:8080 in your browser and you'll be greeted with the Rails "Welcome aboard" page.
Navigate to http://localhost:8080/posts/ to see your scaffolded resource.
Now edit ~/torquebox_exam ples/rails_exam ple/app/views/posts/index.htm l.erb then
refresh the posts page in your browser and see your changes. Changes to your Rails application show
up immediately in the browser, as expected. When you're done, press CT RL+C in the terminal to stop
T orqueBox before continuing with the next steps.
When you want to take advantage of T orqueBox-specific features, like we'll do in subsequent chapters,
you'll need the torquebox gem in your application's Gemfile. However, since we're using torqueboxserver under RVM to install T orqueBox, you'll want to ensure this gem is in the Gemfile for every
application as well. If it's not you'll receive errors trying to use the torquebox because bundler will be
unable to find the torquebox-server gem.
13
Red Hat JBoss Web Framework Kit 2.1 TorqueBox Quickstart Guide
Example 1.3. ~/torquebox_exam ples/rails_exam ple/Gem file
source 'https://rubygems.org'
gem 'rails', '3.2.8'
gem 'activerecord-jdbcsqlite3-adapter'
gem 'jruby-openssl'
gem 'json'
group
gem
gem
gem
gem
end
:assets do
'sass-rails',
'~> 3.2.3'
'coffee-rails', '~> 3.2.1'
'therubyrhino'
'uglifier', '>= 1.0.3'
gem 'jquery-rails'
gem 'torquebox', '~> ${project.version}'
gem 'torquebox-server', '~> ${project.version}'
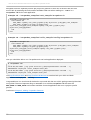
1.3.2. Subsequent Applications
Deploying multiple applications to T orqueBox when using RVM and project-specific gemsets requires a
small amount of extra work. T o walk through the required steps, let's create a second Rack application
to go with our Rails example application created earlier. If T orqueBox is still running stop it with CT RL+C
in its terminal window before following the steps below.
14
Chapter 1. First Steps
$ mkdir -p ~/torquebox_examples/rack_example
$ cd ~/torquebox_examples/rack_example
$ rvm --rvmrc --create jruby-${version.jruby}@tb_rack_example
$ cd ~/torquebox_examples/rack_example
===============================================================================
=====
= NOTICE
=
===============================================================================
=====
= RVM has encountered a new or modified .rvmrc file in the current directory
=
= This is a shell script and therefore may contain any shell commands.
=
=
=
= Examine the contents of this file carefully to be sure the contents are
=
= safe before trusting it! ( Choose v[iew] below to view the contents )
=
===============================================================================
=====
Do you wish to trust this .rvmrc file?
(/Users/someone/torquebox_examples/rack_example/.rvmrc)
y[es], n[o], v[iew], c[ancel]> y
$ rvm gemset list
gemsets for jruby-${version.jruby} (found in /Users/someone/.rvm/gems/jruby${version.jruby})
global
=> tb_rack_example
tb_rails_example
$ gem install rack
Fetching: rack-1.4.1.gem (100%)
Successfully installed rack-1.4.1
1 gem installed
Now create a config.ru for our example rack application.
Example 1.4 . ~/torquebox_exam ples/rack_exam ple/config.ru
app = lambda { |env|
[200, { 'Content-Type' => 'text/html' }, "Hello from Rack\n" ]
}
run app
Deploy the Rack application at a context-path of "/rack" since we already have the Rails application
deployed at the root context.
$ torquebox deploy --context-path=/rack
Deployed: rack_example-knob.yml
into: /Users/someone/.rvm/gems/jruby-${version.jruby}@global/gems/torqueboxserver-${project.version}-java/jboss/standalone/deployments
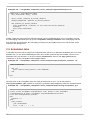
Now that two applications are deployed to T orqueBox, each with separate RVM gemsets, we hit an issue
that trips up most users of RVM and T orqueBox. T orqueBox runs as a single process but RVM is really
15
Red Hat JBoss Web Framework Kit 2.1 TorqueBox Quickstart Guide
designed to have a separate process per project for gemsets to work out of the box. We can work
around this by emulating the environment variables RVM sets when reading our .rvm rc in a
torquebox.rb file for each application.
Example 1.5. ~/torquebox_exam ples/rack_exam ple/torquebox.rb
TorqueBox.configure do
environment do
GEM_HOME "#{ENV['rvm_path']}/gems/jruby-${version.jruby}@tb_rack_example"
GEM_PATH "#{ENV['rvm_path']}/gems/jruby${version.jruby}@tb_rack_example:#{ENV['rvm_path']}/gems/jruby${version.jruby}@global"
end
end
Example 1.6. ~/torquebox_exam ples/rails_exam ple/config/torquebox.rb
TorqueBox.configure do
environment do
GEM_HOME "#{ENV['rvm_path']}/gems/jruby-${version.jruby}@tb_rails_example"
GEM_PATH "#{ENV['rvm_path']}/gems/jruby${version.jruby}@tb_rails_example:#{ENV['rvm_path']}/gems/jruby${version.jruby}@global"
end
end
Now you should be able to run T orqueBox and see both applications deployed.
$ torquebox run
...
19:25:38,049 INFO [org.jboss.as.server] (DeploymentScanner-threads - 1)
JBAS018559: Deployed "rails_example-knob.yml"
19:25:38,050 INFO [org.jboss.as.server] (DeploymentScanner-threads - 1)
JBAS018559: Deployed "rack_example-knob.yml"
Visit http://localhost:8080 and http://localhost:8080/rack/ to see that both your Rails and Rack
applications are deployed and working.
Congratulations! You now know all the basics to proceed with the rest of this getting started guide when
using RVM. T he most important thing to remember is to add the torquebox.rb that sets the
GEM_HOME and GEM_PAT H environment variables for each application that uses a project-specific
gemset.
Continue to Chapter 2, Adding TorqueBox Features.
16
Chapter 2. Adding TorqueBox Features
Chapter 2. Adding TorqueBox Features
T his chapter builds upon the simple Rails application we created in Chapter 1, First Steps by modifying it
to take advantage of T orqueBox features.
2.1. TorqueBox Rails Template
T orqueBox ships with a Rails template that we can use to automatically add torquebox to the Gemfile,
convert the session store to the optional T orqueBox clustered session storage, setup all ActiveRecord
objects to have T orqueBox::Backgroundable methods available, and add some T orqueBoxspecific Rake tasks.
$ cd ~/torquebox_examples/rails_example
$ torquebox rails
apply /Users/someone/torquebox-${project.version}/share/rails/template.rb
gemfile
torquebox (${project.version})
remove
config/initializers/session_store.rb
initializer
session_store.rb
initializer
active_record_backgroundable.rb
rakefile
torquebox.rake
2.2. Running Tasks in the Background
T o illustrate how T orqueBox makes it effortless to run long-running tasks in the background, let's first
add a long-running task to our Post model. After each Post is created, lets publish a message to our
favorite social network linking to that post. For simplicitly we'll just log a message and sleep for a few
seconds to simulate the publish.
Example 2.1. ~/torquebox_exam ples/rails_exam ple/app/m odels/post.rb
class Post < ActiveRecord::Base
attr_accessible :body, :title
after_create :publish_to_social_network
def publish_to_social_network
puts "Publishing '#{title}' to our favorite social network"
sleep(5)
puts "Post published"
end
end
Start T orqueBox if it isn't already running via torquebox run (Windows users remember to use echo
Y | jruby -S torquebox run), navigate to http://localhost:8080/posts/, create a new post, and
observe the output from the T orqueBox console.
09:11:19,746 INFO [stdout] (http-localhost/127.0.0.1:8080-1) Publishing 'Chunky
Bacon Fever' to our favorite social network
09:11:24,747 INFO [stdout] (http-localhost/127.0.0.1:8080-1) Post published
As you can see, it took 5 seconds to publish the post and during that five seconds the browser was
waiting on a response from the server. T here's no reason the browser needs to wait until the post is
published, so let's see how easy it is to convert the publish_to_social_network method to run in the
background.
17
Red Hat JBoss Web Framework Kit 2.1 TorqueBox Quickstart Guide
Example 2.2. ~/torquebox_exam ples/rails_exam ple/app/m odels/post.rb
class Post < ActiveRecord::Base
attr_accessible :body, :title
after_create :publish_to_social_network
always_background :publish_to_social_network
def publish_to_social_network
puts "Publishing '#{title}' to our favorite social network"
sleep(5)
puts "Post published"
end
end
Create a new post and you'll see that the browser returns immediately and in the T orqueBox console
the messaging runtime will spin up (since T orqueBox::Backgroundable uses messaging and the
first message we send starts the messaging runtime pool) and publish the post to our favorite social
network in the background.
2.3. Scheduled Jobs
T orqueBox also has built-in support for scheduled jobs (like Cron or Windows Scheduler) but in a crossplatform way. T o see how scheduled jobs work, let's create a job that logs the number of posts in our
database every 10 seconds. T o do this create a PostCounter class in the app/jobs directory
created for us by the T orqueBox Rails template earlier.
Example 2.3. ~/torquebox_exam ples/rails_exam ple/app/jobs/post_counter.rb
class PostCounter
def run
puts "#{Post.count} posts in the database"
end
end
We also have to tell T orqueBox about this new job and when to run it. T o do that, edit the
config/torquebox.ym l created for us by the T orqueBox Rails template to have the contents below.
Example 2.4 . ~/torquebox_exam ples/rails_exam ple/app/config/torquebox.ym l
--# This is the TorqueBox configuration file. Refer to the TorqueBox
# documentation at http://torquebox.org/documentation/current/
# for all configuration options.
web:
context: "/"
jobs:
post_counter:
job: PostCounter
cron: "*/10 * * * * ?"
18
Chapter 2. Adding TorqueBox Features
Since we had to make a change to config/torquebox.ym l, we need to restart T orqueBox for the job
to start running. After restarting T orqueBox you should see output like below every 10 seconds.
09:45:30,029 INFO
in the database
[stdout] (JobScheduler$rails_example-knob.yml_Worker-2) 2 posts
2.4. Long-Running Services
T orqueBox supports the notion of long-running services that get started when the application is
deployed and stopped when the application is undeployed. T his could be useful to connect a client to a
streaming API service (like that provided by some social networks), monitor a resource for changes and
take some action, or many other things. As an example, we'll create a service that pretends to connect to
a social network and submit post ideas to a queue for later processing.
Example 2.5. ~/torquebox_exam ples/rails_exam ple/app/services/post_idea_grabb
er.rb
class PostIdeaGrabber
def initialize(options)
@queue = TorqueBox::Messaging::Queue.new(options['queue_name'])
end
def start
puts "******** Starting PostIdeaGrabber ********"
Thread.new do
until @done
@queue.publish("Random idea #{rand(100)}")
sleep 2
end
end
end
def stop
@done = true
end
end
Just like with our scheduled job, we need to tell T orqueBox about this new service and the message
queue it uses.
19
Red Hat JBoss Web Framework Kit 2.1 TorqueBox Quickstart Guide
Example 2.6. ~/torquebox_exam ples/rails_exam ple/app/config/torquebox.ym l
--# This is the TorqueBox configuration file. Refer to the TorqueBox
# documentation at http://torquebox.org/documentation/current/
# for all configuration options.
web:
context: "/"
jobs:
post_counter:
job: PostCounter
cron: "*/10 * * * * ?"
services:
post_idea_grabber:
service: PostIdeaGrabber
config:
queue_name: "/queue/post_ideas"
queues:
/queue/post_ideas:
durable: false
Restart T orqueBox and you should see the service starting in the logs.
10:43:56,316 INFO [org.torquebox.core.runtime] (MSC service thread 1-7) Created
ruby runtime (ruby_version: RUBY1_8, compile_mode: JIT, app: rails_example,
context: services) in 17.73s
10:43:56,325 INFO [stdout] (MSC service thread 1-5) ******** Starting
PostIdeaGrabber ********
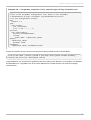
2.5. Message Processors
We have a long-running service placing messages on a queue but now we need something to consume
those messages and do something with them. T orqueBox has a feature designed specifically for this
purpose - message processors. We'll create a message processor to randomly choose some of the
ideas and create new posts from them.
Example 2.7. ~/torquebox_exam ples/rails_exam ple/app/processors/post_idea_pro
cessor.rb
class PostIdeaProcessor < TorqueBox::Messaging::MessageProcessor
def on_message(message)
if (rand(10) > 8)
puts "Creating new post from idea #{message}"
Post.create(:title => message, :body => "Random post created from an
idea")
end
end
end
As usual we need to edit config/torquebox.ym l so T orqueBox knows how to wire up this new
message processor.
20
Chapter 2. Adding TorqueBox Features
Example 2.8. ~/torquebox_exam ples/rails_exam ple/app/config/torquebox.ym l
--# This is the TorqueBox configuration file. Refer to the TorqueBox
# documentation at http://torquebox.org/documentation/current/
# for all configuration options.
web:
context: "/"
jobs:
post_counter:
job: PostCounter
cron: "*/10 * * * * ?"
services:
post_idea_grabber:
service: PostIdeaGrabber
config:
queue_name: "/queue/post_ideas"
queues:
/queue/post_ideas:
durable: false
messaging:
/queue/post_ideas: PostIdeaProcessor
Restart T orqueBox and you should see new posts being created from the random ideas.
11:10:31,891 INFO [stdout] (Thread-2 (HornetQ-client-global-threads-9512807))
Creating new post from idea Random idea 66
Congratulations! You now have an application that uses many of the features of T orqueBox. For detailed
documentation on T orqueBox, look for the User Manual in the same location you found this Getting
Started Guide.
21
Red Hat JBoss Web Framework Kit 2.1 TorqueBox Quickstart Guide
Revision History
Revision 1-1.4 05
Rebuild with Publican 4.0.0
T ue Dec 17 2013
Rüdiger Landmann
Revision 1-1
Initial creation of book
Fri Sep 28 2012
Isaac Rooskov
Index
F
feedback
- contact information for this manual, Give us Feedback
H
help
- getting help, Do You Need Help?
22


![[1]Oracle® DIVAdirector](http://vs1.manualzilla.com/store/data/005731358_1-211e3778ae12716a403cbbeaab90ad2a-150x150.png)