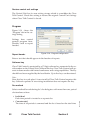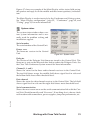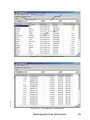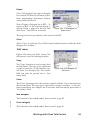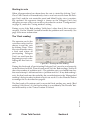
1
Close Talk Control User Manual Part number: 11-531-01 Revision: 1.06 Author: Göran Ekström The contents of this document is subject to change without prior notice and does not represent any commitment on the part of Close Talk Marketing. No part of this document may be copied without the prior consent of Close Talk Marketing. Rev. 1.06 Copyright 1999-2005 Close Talk Marketing AB Revision History: Rev. 1.01 First public release. Rev. 1.02 Minor language corrections and clarifications. Expanded description of ‘Privileged units’. Rev. 1.03 Applies to version 2.2.0.23 or later. Minor language corrections and clarifications. New configuration settings. Expanded voting functionality. Delegate Unit test. Rev. 1.04 Support Generation 2 conference system. Rev. 1.05 Language and document error corrections. Rev. 1.06 Rev. 1.06 Updated for software version 2.4.0.3. Table Of Contents Section 1 Introduction . . . . . . . . . . . . . . . . . . . . . . . . 1 Welcome! . . . . . . . . . . . . . . . . . . . . . . . . . . 3 About Close Talk Marketing . . . . . . . . . . . . . . . . 3 About this manual . . . . . . . . . . . . . . . . . . . . . 4 Support . . . . . . . . . . . . . . . . . . . . . . . . . . . 4 Section 2 Installation . . . . . . . . . . . . . . . . . . . . . . . . . 5 Preparations. . . . . . . . . . . . . . . . . . . . . . . . . 7 Software installation and operating requirements . . . . . . . . . . . . . . 7 Optional equipment . . . . . . . . . . . . . . . . . . . . . . . . . . . . . . 7 Installing the software . . . . . . . . . . . . . . . . . . . 8 Installation media . . . . . . . . . . . . . . . . . . . . . . . . . . . . . . . 8 Performing the installation . . . . . . . . . . . . . . . . . . . . . . . . . . 8 Starting . . . . . . . . . . . . . . . . . . . . . . . . . . . . . . . . . . . 8 If the installer prompts for an uninstall . . . . . . . . . . . . . . . . . . . 8 Installing . . . . . . . . . . . . . . . . . . . . . . . . . . . . . . . . . . 9 Ready to install . . . . . . . . . . . . . . . . . . . . . . . . . . . . . . 10 Connecting the Central Unit . . . . . . . . . . . . . . . 11 Choose serial port . . . . . . . . . . . . . . . . . . . . . . . . . . . . . . 11 Section 3 Configuration . . . . . . . . . . . . . . . . . . . . . . . 13 The key to a working system . . . . . . . . . . . . . . . 15 Starting Close Talk Control for the first time . . . . . . . 15 No contact... . . . . . . . . . . . . . . . . . . . . . . . . . . . . . . . . . 15 Invalid serial port... . . . . . . . . . . . . . . . . . . . . . . . . . . . . . 16 Rev. 1.06 The Settings dialog . . . . . . . . . . . . . . . . . . . . 16 Conference . . . . . Chairman unit . . . Priority unit . . . . Chairman channel . . . . . . . . . . . . . . . . . . . . . . . . . . . . . . . . . . . . . . . . . . . . . . . . . . . . . . . . . . . . . . . . . . . . . . . . . . . . . . . . . . . . . . . . . . . . . . . . . . . . . . . . . . . . . . . . 16 16 16 17 i Number of speakers. . . . . . . . . . Show reply list. . . . . . . . . . . . . Speaker list size. . . . . . . . . . . . Speaker list control . . . . . . . . . . Privi. automatic . . . . . . . . . . . . Reply function. . . . . . . . . . . . . Reply list size . . . . . . . . . . . . . Warn at time left . . . . . . . . . . . . Interrupt speaker . . . . . . . . . . . Limit reply time . . . . . . . . . . . . Warning sound . . . . . . . . . . . . Use warning sound . . . . . . . . . . Voting . . . . . . . . . . . . . . . . . . Voting method . . . . . . . . . . . . Voting type . . . . . . . . . . . . . . Voting time . . . . . . . . . . . . . . No casted vote means absent . . . . . Voting view delay . . . . . . . . . . . Emphasize manual vote results . . . . Hardware . . . . . . . . . . . . . . . . Communication . . . . . . . . . . . . Turn delegate unit off . . . . . . . . . Disable power off in delegate unit . . . Restore central unit settings. . . . . . Program . . . . . . . . . . . . . . . . . Report header. . . . . . . . . . . . . Software key . . . . . . . . . . . . . Fee method . . . . . . . . . . . . . . Show names with free arrival . . . . . Only show Main Display during voting. Show Matter Order on Main Display. . Security . . . . . . . . . . . . . . . . . Password . . . . . . . . . . . . . . . Confirm password. . . . . . . . . . . One password is enough . . . . . . . Protect . . . . . . . . . . . . . . . . . . . . . . . . . . . . . . . . . . . . . . . . . . . . . . . . . . . . . . . . . . . . . . . . . . . . . . . . . . . . . . . . . . . . . . . . . . . . . . . . . . . . . . . . . . . . . . . . . . . . . . . . . . . . . . . . . . . . . . . . . . . . . . . . . . . . . . . . . . . . . . . . . . . . . . . . . . . . . . . . . . . . . . . . . . . . . . . . . . . . . . . . . . . . . . . . . . . . . . . . . . . . . . . . . . . . . . . . . . . . . . . . . . . . . . . . . . . . . . . . . . . . . . . . . . . . . . . . . . . . . . . . . . . . . . . . . . . . . . . . . . . . . . . . . . . . . . . . . . . . . . . . . . . . . . . . . . . . . . . . . . . . . . . . . . . . . . . . . . . . . . . . . . . . . . . . . . . . . . . . . . . . . . . . . . . . . . . . . . . . . . . . . . . . . . . . . . . . . . . . . . . . . . . . . . . . . . . . . . . . . . . . . . . . . . . . . . . . . . . . . . . . . . . . . . . . . . . . . . . . . . . . . . . . . . . . . . . . . . . . . . . . . . . . . . . . . . . . . . . . . . . . . . . . . . . . . . . . . . . . . . . . . . . . . . . . . . . . . . . . . . . . . . . . . . . . . . . . . . . . . . . . . . . . . . . . . . . . . . . . . . . . . . . . . . . . . . . . . . . . . . . . . . . . . . . . . . . . . . . . . . . . . . . . . . . . . . . . . . . . . . . . . . . . 17 17 17 17 18 18 18 18 18 18 19 19 19 19 20 20 20 20 21 21 21 21 21 22 22 22 22 22 23 23 23 23 23 23 24 24 Section 4 Working with Close Talk Control. . . . . . . . . . . . . 25 The toolbar . . . . . . . . ‘File’ menu . . . . . . . . . Settings . . . . . . . . . Configure Main Display... Test delegate units... . . Manage databases... . . Edit delegate list.... . . . Edit seating list... . . . . Printer settings... . . . . Exit . . . . . . . . . . . ‘View’ menu . . . . . . . . Main display. . . . . . . System status . . . . . . Central unit . . . . . . . Delegate unit . . . . . . Battery level. . . . . . . ‘Control’ menu . . . . . . . Conference . . . . . . . ii . . . . . . . . . . . . . . . . . . . . . . . . . . . . . . . . . . . . Close Talk Control: . . . . . . . . . . . . . . . . . . . . . . . . . . . . . . . . . . . . . . . . . . . . . . . . . . . . . . . . . . . . . . . . . . . . . . . . . . . . . . . . . . . . . . . . . . . . . . . . . . . . . . . . . . . . . . . . . . . . . . . . . . . . . . . . . . . . . . . . . . . . . . . . . . . . . . . . . . . . . . . . . . . . . . . . . . . . . . . . . . . . . . . . . . . . . . . . . . . . . . . . . . . . . . . . . . . . . . . . . . . . . . . . . . . . . . . . . . . . . . . . . . . . . . . . . . . . . . . . . . . . . . . . . . . . . . . . . . . . . . . . . . . . . . . . . . . . . . . . . . . . . . . . . . . . . . . . . . . . . . . . . . . . . . . . . . . . . . . . . . . . . . Table Of Contents . . . . . . . . . . . . . . . . . . . . . . . . . . . . . . . . . . . . . . . . . . . . . . . . . . . . . . . . . . . . . . . . . . . . . . . . 28 28 28 28 28 29 29 29 29 29 30 30 31 32 32 33 33 33 Rev. 1.06 Program overview . . . . . . . . . . . . . . . . . . . . . 27 Roll call . . . . . . . . . . . . . . . . . . . . . . . . . . . . . . . . . . 33 Voting . . . . . . . . . . . . . . . . . . . . . . . . . . . . . . . . . . . 34 ‘Help’ menu . . . . . . . . . . . . . . . . . . . . . . . . . . . . . . . . . 34 Roll call . . . . . . . . . . . . . . . . . . . . . . . . . . . 34 Connect unit ID . . . . . . . . . . . . . . . . . . . . . . . . . . . . . . . 35 Traditional . . . . . . . . . . . . . . . . . . . . . . . . . . . . . . . . . . 36 Free arrival . . . . . . . . . . . . . . . . . . . . . . . . . . . . . . . . . 36 Database management . . . . . . . . . . . . . . . . . . 36 Create new Copy . . . . Delete . . . Backup. . . Restore . . Rename . . . . . . . . . . . . . . . . . . . . . . . . . . . . . . . . . . . . . . . . . . . . . . . . . . . . . . . . . . . . . . . . . . . . . . . . . . . . . . . . . . . . . . . . . . . . . . . . . . . . . . . . . . . . . . . . . . . . . . . . . . . . . . . . . . . . . . . . . . . . . . . . . . . . . . . . . . . . . . . . . . . . . . . . . . . . . . . . . . . . . . . . . . . . . . . . . . . . . . . . 37 37 37 37 38 38 Delegate list . . . . . . . . . . . . . . . . . . . . . . . . 38 Introduction . . . . . Overview. . . . . . . Delegate list fields . . Database editing. . . Tables. . . . . . . Table modes . . . Changing a field . . Undo changes . . Save changes. . . Erase record . . . Insert record . . . Appearance . . . . ‘File’ menu . . . . . . Print . . . . . . . . Export . . . . . . . Close . . . . . . . ‘Edit’ menu. . . . . . Copy . . . . . . . Paste . . . . . . . New delegate . . . Erase delegate . . ‘Search’ menu . . . . ‘Sort’ menu . . . . . Sort list . . . . . . Sorting alternatives Table filtering . . . . Data pre-defines . . . Organisation . . . Function. . . . . . Speaker time . . . Region . . . . . . Fee . . . . . . . . . . . . . . . . . . . . . . . . . . . . . . . . . . . . . . . . . . . . . . . . . . . . . . . . . . . . . . . . . . . . . . . . . . . . . . . . . . . . . . . . . . . . . . . . . . . . . . . . . . . . . . . . . . . . . . . . . . . . . . . . . . . . . . . . . . . . . . . . . . . . . . . . . . . . . . . . . . . . . . . . . . . . . . . . . . . . . . . . . . . . . . . . . . . . . . . . . . . . . . . . . . . . . . . . . . . . . . . . . . . . . . . . . . . . . . . . . . . . . . . . . . . . . . . . . . . . . . . . . . . . . . . . . . . . . . . . . . . . . . . . . . . . . . . . . . . . . . . . . . . . . . . . . . . . . . . . . . . . . . . . . . . . . . . . . . . . . . . . . . . . . . . . . . . . . . . . . . . . . . . . . . . . . . . . . . . . . . . . . . . . . . . . . . . . . . . . . . . . . . . . . . . . . . . . . . . . . . . . . . . . . . . . . . . . . . . . . . . . . . . . . . . . . . . . . . . . . . . . . . . . . . . . . . . . . . . . . . . . . . . . . . . . . . . . . . . . . . . . . . . . . . . . . . . . . . . . . . . . . . . . . . . . . . . . . . . . . . . . . . . . . . . . . . . . . . . . . . . . . . . . . . . . . . . . . . . . . . . . . . . . . . . . . . . . . . . . . . . . . . . . . . . . . . . . . . . . . . . . . . . . . . . . . . . . . . . . . . . . . . . . . . . . . . . . . . . . . . . . . . . . . . . . . . . . . . . . . . . . . . . . . . . . . . . . . . . . . . . . . . . . . . . . . . . . . . . . . . . . . . . . . . . . . . . . . . . . . . . . . . . . . . . . . . . . . . . . . . . . . . . . . . . . . . . . . . . . . . . . . . . . . . . . . . . . . . . . . . . . . . . . . . . . . . . . . . . . . . . . . . . . . . . . . . . . . . . . . . . . . . . . . . . . . . . . . . . . . . . . . . . . . . . . . . . . . . . . . . . . . . . . . . . . . . . . . . . . . . . . 38 38 40 41 41 41 41 41 42 42 42 42 42 42 43 43 43 43 43 43 43 44 44 44 44 44 45 45 46 46 46 46 Rev. 1.06 Seating list . . . . . . . . . . . . . . . . . . . . . . . . . 47 Overview. . . . . Seating list fields. ‘File’ menu . . . . Print . . . . . . Export . . . . . . . . . . . . . . . . . . . . . . . . . . . . . . . . . . . . . . . . . . . . . . . . . . . . . . . . . . . . . . . . . . . . . . . . . . . . . . . . . . . . . . . . . . . . . . . . . . . . . . . . . . . . . . . . . . . . . . . . . . . . . . . . . . . . . . . . . . . . . . . . . . . . . . . . . . . 47 48 49 49 49 iii Close . . . . . . . . . ‘Edit’ menu. . . . . . . . Select delegate . . . . Replace delegate . . . Delegate not present . Ordinary delegate . . . No delegate . . . . . . All delegates ordinary . All delegates vote . . . New seat . . . . . . . Erase seat . . . . . . ‘Search’ menu . . . . . . ‘Show’ menu . . . . . . . . . . . . . . . . . . . . . . . . . . . . . . . . . . . . . . . . . . . . . . . . . . . . . . . . . . . . . . . . . . . . . . . . . . . . . . . . . . . . . . . . . . . . . . . . . . . . . . . . . . . . . . . . . . . . . . . . . . . . . . . . . . . . . . . . . . . . . . . . . . . . . . . . . . . . . . . . . . . . . . . . . . . . . . . . . . . . . . . . . . . . . . . . . . . . . . . . . . . . . . . . . . . . . . . . . . . . . . . . . . . . . . . . . . . . . . . . . . . . . . . . . . . . . . . . . . . . . . . . . . . . . . . . . . . . . . . . . . . . . . . . . . . . . . . . . . . . . . . . . . . . . . . . . . . . . . . . . . . . . . . . . . . . . . . . . . . . . . . . . 50 50 50 50 50 50 51 51 51 51 51 51 52 Main Display configuration . . . . . . . . . . . . . . . . 52 Common components . Speaker lists . . . . . . Header . . . . . . . Footer . . . . . . . . List . . . . . . . . . List, fixed . . . . . . Voting, header . . . . . Header . . . . . . . Table . . . . . . . . Bar graph . . . . . . Seating . . . . . . . Voting, time . . . . . . Welcome. . . . . . . . Voting, summary. . . . . . . . . . . . . . . . . . . . . . . . . . . . . . . . . . . . . . . . . . . . . . . . . . . . . . . . . . . . . . . . . . . . . . . . . . . . . . . . . . . . . . . . . . . . . . . . . . . . . . . . . . . . . . . . . . . . . . . . . . . . . . . . . . . . . . . . . . . . . . . . . . . . . . . . . . . . . . . . . . . . . . . . . . . . . . . . . . . . . . . . . . . . . . . . . . . . . . . . . . . . . . . . . . . . . . . . . . . . . . . . . . . . . . . . . . . . . . . . . . . . . . . . . . . . . . . . . . . . . . . . . . . . . . . . . . . . . . . . . . . . . . . . . . . . . . . . . . . . . . . . . . . . . . . . . . . . . . . . . . . . . . . . . . . . . . . . . . . . . . . . . . . . . . . . . . . . . . . . . . . . . . . . . . . . . . . . . . . . . . 52 52 53 53 53 53 53 53 54 54 54 55 55 56 Managing Seating View’s . . . . . . . . . . . . . . . . . 56 The Seating View editor . Basics . . . . . . . . . . The tools. . . . . . . . . Background image . . Seat . . . . . . . . . . View. . . . . . . . . . Object . . . . . . . . . Properties . . . . . . . Save/Close . . . . . . . . . . . . . . . . . . . . . . . . . . . . . . . . . . . . . . . . . . . . . . . . . . . . . . . . . . . . . . . . . . . . . . . . . . . . . . . . . . . . . . . . . . . . . . . . . . . . . . . . . . . . . . . . . . . . . . . . . . . . . . . . . . . . . . . . . . . . . . . . . . . . . . . . . . . . . . . . . . . . . . . . . . . . . . . . . . . . . . . . . . . . . . . . . . . . . . . . . . . . . . . . . . . . . . . . . . . . . . . . . . . . . . . . . . . . . . . . 57 58 59 59 59 61 62 62 63 Test delegate units . . . . . . . . . . . . . . . . . . . . 64 Section 5 Conference . . . . . . . . . . . . . . . . . . . . . . . . 69 Introduction . . . . . . . . . . . . . . . . . . . . . . . . 71 Preparing the list’s . . . . . . . The delegate list. . . . . . . The seating list . . . . . . . The conference controller . . . Starting a conference - Start. Next . . . . . . . . . . . . . Stop . . . . . . . . . . . . . iv Close Talk Control: . . . . . . . . . . . . . . . . . . . . . . . . . . . . . . . . . . . . . . . . . . . . . . . . . . . . . . . . . . . . . . . . . . . . . . . . . . . . . . . . . . . . . . . . . . . . . . . . . . . . . . . . . . . . . . . . . . . . . . . . . . . . . . . . . . . . . Table Of Contents . . . . . . . . . . . . . . . . . . . . . . . . . . . . 71 71 71 72 72 72 72 Rev. 1.06 Before the conference. . . . . . . . . . . . . . . . . . . 71 Print . . . . . . . . . . . . . Export . . . . . . . . . . . . Order and Matter . . . . . . Edit . . . . . . . . . . . . . Close . . . . . . . . . . . . Agenda’s. . . . . . . . . . . . Creating and using agendas . . . . . . . . . . . . . . . . . . . . . . . . . . . . . . . . . . . . . . . . . . . . . . . . . . . . . . . . . . . . . . . . . . . . . . . . . . . . . . . . . . . . . . . . . . . . . . . . . . . . . . . . . . . . . . . . . . . . . . . . . . . . . . . . . . . . . . . . . . . . . . . . . . . . . . . . . . . . . . . . . 72 72 73 73 73 73 73 During a conference . . . . . . . . . . . . . . . . . . . . 74 Controlling the speaker and reply list. . . . . . . . . . . . Allowing a delegate to speak . . . . . . . . . . . . . . Removing a speaker . . . . . . . . . . . . . . . . . . Re-arranging . . . . . . . . . . . . . . . . . . . . . . Locking/un-locking lists . . . . . . . . . . . . . . . . . Controlling the audio channels . . . . . . . . . . . . . . Interrupting a speaker . . . . . . . . . . . . . . . . . . Updating attendance . . . . . . . . . . . . . . . . . . . Delegate is arriving (seat is empty) . . . . . . . . . . . Delegate is leaving (seat becomes empty) . . . . . . . Delegate is substituted (one departed and one arrived) . Delegate did not arrive . . . . . . . . . . . . . . . . . Another delegate arrived . . . . . . . . . . . . . . . . Agenda’s. . . . . . . . . . . . . . . . . . . . . . . . . . Privileged units . . . . . . . . . . . . . . . . . . . . . . . . . . . . . . . . . . . . . . . . . . . . . . . . . . . . . . . . . . . . . . . . . . . . . . . . . . . . . . . . . . . . . . . . . . . . . . . . . . . . . . . . . . . . . . . . . . . . . . . . . . . . . . . . . . . . . . . . . . . . . . . . . . . . . . . . . . . . . 74 74 75 75 75 75 76 76 76 76 76 77 77 77 77 After the conference. . . . . . . . . . . . . . . . . . . . 78 The conference controller Stopping a conference Printing and exporting . . Attendance . . . . . . Fee . . . . . . . . . . . . . . . . . . . . . . . . . . . . . . . . . . . . . . . . . . . . . . . . . . . . . . . . . . . . . . . . . . . . . . . . . . . . . . . . . . . . . . . . . . . . . . . . . . . . . . . . . . . . . . . . . . . . . . . . . . . . . . . . . . . . . . . . . . . . 78 78 78 78 78 The Main Display . . . . . . . . . . . . . . . . . . . . . 79 Section 6 Voting . . . . . . . . . . . . . . . . . . . . . . . . . . . 81 Introduction . . . . . . . . . . . . . . . . . . . . . . . . 83 How it works . . . . . . . . . . . . . . . . . . . . . . . . . . . . . . . . . 83 Preparing for a vote . . . . . . . . . . . . . . . . . . . . 83 Performing a vote . . . . . . . . . . . . . . . . . . . . . 83 Rev. 1.06 Starting a vote session Starting to vote . . . . The ‘Final reading’ . . . Vote done . . . . . . . Handle bad reading’s . . . . . . . . . . . . . . . . . . . . . . . . . . . . . . . . . . . . . . . . . . . . . . . . . . . . . . . . . . . . . . . . . . . . . . . . . . . . . . . . . . . . . . . . . . . . . . . . . . . . . . . . . . . . . . . . . . . . . . . . . . . . . . . . . . . . . . . . 83 86 86 87 88 The Main Display . . . . . . . . . . . . . . . . . . . . . 89 v Appendix A Null modem cable . . . . . . . . . . . . . . . . . . . . 93 Rev. 1.06 Custom designed null-modem cable . . . . . . . . . . . 95 vi Close Talk Control: Table Of Contents Section 1 Rev. 1.06 Introduction Introduction 1 Rev. 1.06 Blank page 2 Close Talk Control: Section 1 Welcome! Thank you for purchasing the Close Talk Conference System. The design philosophy was to make a revolutionary product in both design and productivity. A Close Talk Conference System installation in combination with the Close Talk Control PC software will make it a powerful conference tool including: • • • • • • • • • • Speaker list management including reply function Voting Attendance time management Attendance fee management Roll call Agenda management Delegate database Seating database Print and export attendance, fee, vote results, agenda... And more... We hope it will provide a long time of good use. About Close Talk Marketing Close Talk Marketing AB is a Swedish company responsible for the development and manufacturing of the Close Talk Conference System product range. Close Talk Marketing ships its products using a world wide network of distributors. Check the web site at www.closetalk.se to find a local distributor. Rev. 1.06 We value your input! Please send comments by e-mail to ‘[email protected]’. You may not get a personal response but we can assure you that all input is read. We will use this feedback to improve our products even further. Welcome! 3 About this manual The manual is divided into several sections, each focusing on a specific topic: • • • • • • • Introduction This section Installation Software installation process and serial port connection Configuration Close Talk Control configuration. A correctly configured software is the key for a properly working system. Most of the following sections refer to settings described in this section so read it carefully Working with Close Talk Control Describes the basic functionality of Close Talk Control including software interface, database creation and management, etc. Conference Conference system functionality Voting Voting system functionality Null modem cable Custom designed null-modem cable for connecting the Central Unit to a PC. Not required reading, for special use only Support Sales questions and support issues should be directed to your local dealer. Rev. 1.06 If you have a specific problem, please check at www.closetalk.se for software updates before contacting support. Updates are available for download free of charge. 4 Close Talk Control: Section 1 Section 2 Rev. 1.06 Installation Installation 5 Rev. 1.06 Blank page 6 Close Talk Control: Section 2 Preparations Software installation and operating requirements The following computer specs. is required run Close Talk Control: • • • • • • • • • • Pentium 133MHz CPU or better (>=500Mhz recommended) Any of the following Microsoft operating systems: Windows 95 Windows 98 Windows 98 Second Edition Windows 98 Millennium Edition Windows NT4 Service Pack 3 or greater Windows XP or 2000 Professional (recommended) Memory requirements vary with operating systems. Below follow some minimum recommendations: Windows 95 - 32 MB Windows 98 - 64 MB Windows 98 Second Edition - 64 MB Windows 98 Millennium Edition - 64 MB Windows NT4 Service Pack 3 or greater - 64 MB Windows XP/2000 Professional - 128 MB (256MB recommended) Minimum of 15MB free hard drive space for installation. A general recommendation is to always have at least 300MB free hard drive space Mouse pointing device Display resolution of 800x600 or better at 65536 colors (1024x768 recommended) One free RS-232 serial port. For systems without built-in serial port, an USB-To-Serial adapter will also work. Contact your local computer parts retailer 9-pin to 9/25-pin null-modem cable 3.5” floppy disk station or a CD-ROM reader. See installation description later in this chapter Software key. See the Configuration section Optional equipment Rev. 1.06 The following is not required but will enhance the functionality of Close Talk Control: • • • Second computer display adapter/output (recommended) Printer Computer sound card Preparations 7 Installing the software Installation media The Close Talk Control software may be delivered using various media’s, on diskettes, on CD-ROM or as downloaded from the www.closetalk.se web site. For a new installation, it is recommended to download the installation software from the www.closetalk.se web site. If in doubt, contact your local dealer. Important! Always use the latest version available, even after installation. Check the www.closetalk.se web site at regular intervals to find out if there is a later version available. Performing the installation Locate the installation software. If you have diskettes, insert disk number one and run SETUP.EXE. If it was downloaded from the web or on a CD, either run the CTSF_xxxxxxx.EXE file or unpack the installation files to a suitable location and run Setup.EXE. Starting The software installer checks the version of the operating systems ‘Windows Installer’ functionality and may prompt for a re-boot. After restarting the computer, the installation continues automatically. Very important! If the computer already contains an installation of Close Talk Software Family with a version number less than 2.2.0.20 (start Close Talk Control and select ‘Help’->’About’ to verify version), DO NOT uninstall this version of Close Talk Software Family or all settings such as sound levels will be lost. Refer to application note ‘Upgrading Close Talk Software Family’ for more information. If the installer prompts for an uninstall Click ‘OK’ to exit the installer and start ‘Add/Remove program’ in the Control Panel. If the program list only contains one entry of ‘Close Talk Software Family’, select it and start the uninstaller. Verify that the first prompt header reads ‘Windows Installer’ as shown in figure 2.1. If not, the installed version is probably older than 2.2.0.20. Click ‘No’ and continue with the instructions in the next paragraph. Otherwise, click ‘Yes’ and finish the uninstallation. 8 Close Talk Control: Section 2 Rev. 1.06 If the system already contains an installation of version 2.2.0.20 or higher, the installer may prompt for an uninstall before continuing. Restart the software installer. If two ‘Close Talk Software Family’ entries exist in the ‘Add/remove program’ dialog, proceed as described in application note ‘Upgrading Close Talk Software Family’, uninstalling both entries in the Add/remove program list. Figure 2.1 - ‘Safe’ uninstall Installing After starting the installation software, the picture in figure 2.2 is shown (figure may look different depending on installer version). Click Next to continue. Figure 2.2 - Install welcome The EULA (End User License Agreement) is shown. Read the ‘Terms and Conditions’ and click the appropriate choice below. Click Next to continue. Rev. 1.06 Figure 2.3 - Read the EULA Installation 9 Enter name and company (if applicable). On a multi-user operating system such as Windows 2000 and XP, select if the program should be installed for all users or for a specific user of the computer. Click Next. Figure 2.5 - Ready to start Ready to install The installer now has all the information needed. Click Install to start the installation Figure 2.4 - Ready to start Rev. 1.06 The installer will start to copy files and update the system. Figure 2.6 - Installing 10 Close Talk Control: Section 2 When the installation is complete, click Finish. Close Talk Software Family is now installed on the computer. To start the programs, use the ‘Start’ menu. Figure 2.10 - Install done Connecting the Central Unit Before starting Close Talk Control, the Central Unit needs to be connected to the computer with a null-modem cable which should have been delivered with the system. Choose serial port Locate a free serial port on the computer. Serial ports come in two variants, with 25 pins, figure 2.7, and with 9 pins, figure 2.8. The Windows operating system names serial ports as ‘COMx’ where ‘x’ is a number from 1-8. This name is used to tell Close Talk Control which serial port to use (see section “Configuration”, page 13). Figure 2.7 25 pin serial port Figure 2.8 9 pin serial port Rev. 1.06 Connect the null-modem cable connector to the computer serial port. Connect the other end of the null-modem cable to the Central Unit serial port. Figure 2.9 - Central Unit, 19” rear panel Installation 11 Rev. 1.06 Blank page 12 Close Talk Control: Section 2 Section 3 Rev. 1.06 Configuration Configuration 13 Rev. 1.06 Blank page 14 Close Talk Control: Section 3 The key to a working system Understanding the configuration of Close Talk Control is necessary to make it work the desired way. The configuration is divided into five categories: • • • • • Conference Settings for the conference capabilities such as list control, chairman methods, etc. Voting Settings for the voting capabilities such as voting method and time Hardware Settings for serial ports, power off conditions, etc. Program Settings for various program functionality such as report headers, software key, etc. Security Settings for program security Starting Close Talk Control for the first time When Close Talk Control is started it tries to establish contact with the Central Unit via the serial port. The default serial port is COM1 which may or may not be the right port. During start, a splash screen is shown as in figure 3.1. If contact has been established with the Central Unit, the main program window will be shown (see “Working with Close Talk Control”, page 25) after a few seconds. Figure 3.1 - Program start Rev. 1.06 No contact... If the dialog in figure 3.2 is shown, Close Talk Control has not been able to establish contact with the Central Unit. Click OK. If the main program Figure 3.2 - No contact window is shown within a few seconds, this is an indication that the serial port is free to use but that no contact was made. Exit Close Talk Control and check that the Central Unit is turned on and that the null-modem cable is connected properly. If no problem can be found, try to connect the null-modem cable to another serial port on the computer. Start Close Talk Control again to see if the problem remains. The key to a working system 15 Invalid serial port... If the dialog in figure 3.3 is shown it means that the selected serial port is already used by another software in Windows. Click OK and the ‘Settings’ dialog will be shown. Refer to page 21 for more information about selecting serial port. Figure 3.3 - Can’t use serial port The Settings dialog Conference Figure 3.4 shows the ‘Conference’ tab in the settings dialog. Settings here control the conference system parts of Close Talk Control. See “Conference”, page 69, for more information. Figure 3.4 - Conference configuration Chairman unit The Delegate Unit for the chairman have special functionality (see “Conference”, page 69) and Close Talk Control needs to know which Delegate Unit that is the chairman unit. Turn the chairmans Delegate Unit upside-down and enter the unit serial number in the ‘Chairman unit’ field. If no chairman unit will be used, 0 should be entered. Priority unit Rev. 1.06 Similar to the ‘Chairman unit’, a so called ‘Priority Unit’ can be used with special functionality (see “Conference”, page 69). Close Talk Control needs to know which Delegate Unit that is the priority unit, if any. Turn the priority unit upside-down and enter the unit serial number in the ‘Priority unit’ field. If no priority unit will be used, 0 should be entered. 16 Close Talk Control: Section 3 Chairman channel Close Talk Conference System has three audio channels and the chairman can be guaranteed access to a channel. This guarantee is implemented using three methods: • • • Steal channel If no audio channels are free for use, the chairman will steal the channel from the speaker that has spoken the longest time. The original speaker will have to re-enter the speaking list Borrow channel If no audio channels are free for use, the chairman will borrow the channel from the speaker that has spoken the longest time. The channel will be returned to the original speaker as soon as the chairman releases it Own channel The chairman has a private audio channel. This leaves a maximum of two audio channels for other speakers Number of speakers Close Talk Conference System has a maximum of three audio channels for simultaneous use. This setting can be used to control the number of available channels to either ‘One’, ‘Two’ or ‘Three’. Note: If ‘Chairman channel’ is set to ‘Own channel’, settings ‘Two’ and ‘Three’ is only available, since channel ‘One’ is implied to be owned by the chairman. Show reply list If ‘Reply function’ is set to ‘On’, this check box selects whether to show the reply list or not in the ‘Main Display’ (see “Working with Close Talk Control”, page 25). Speaker list size Selects how many delegates that can enter the speaker list at one time. The maximum speaker list size is 512. Rev. 1.06 Speaker list control The speaker list can be controlled either automatically or manually. In ‘Automatic’ mode the speaker list is emptied on a first-in first-out basis. Chairman and Priority units bypass the list. In ‘Manual’ mode it is up to the operator to manage the list (see “Conference”, page 69, and the ‘Privi. Automatic’ setting). Configuration 17 Privi. automatic If ‘Speaker list control’ is set to ‘Manual’, this check box selects whether privileged units (the ‘Chairman unit’ and ‘Priority unit’ settings) are handled automatically or not. If un-checked, it is up to the operator to give privileged units a channel. Reply function Turns the reply function ‘On’ or ‘Off’. The reply list is similar to the ordinary speaking list with these exceptions: • • The list is always in ‘Manual’ mode Privileged units are handled manually Reply list size Selects how many delegates that can enter the reply list at one time. The maximum reply list size is 64. Warn at time left Speaking and reply time can be limited for each delegate (see “Working with Close Talk Control”, page 25, and “Conference”, page 69). This settings specifies at how much time left a warning should be emitted (see the ‘Warning sound’, ‘Use warning sound’ and ‘Limit reply time’ settings). Enter in the ‘hH:mM:sS’ format, e.g. ‘0:0:20’ which translates to 0 hours, 0 minutes and 20 seconds. Interrupt speaker When a delegates speaking or reply time has run out, this check box selects whether his or her’s audio channel should be turned off automatically. Note: Close Talk Conference System only supports this function for speakers on regular Delegate Unit audio channels and not for platforms. Limit reply time Rev. 1.06 Selects whether reply speakers should be time limited similar to regular speakers. 18 Close Talk Control: Section 3 Warning sound If the computer is equipped with a sound card, a sound can be played when the specified speaking time warning (see the ‘Warn at time left’ setting) is active. Click the ellipsis button to open a standard file selection dialog and choose the desired sound file. The sound file must be in the WAV-format. Use warning sound Selects if a warning sound should be played when the specified speaking time warning (see the ‘Warn at time left’ setting) is active. If the computer has a sound card, a valid sound file must be selected in the ‘Warning sound’ setting. If no sound card is available, a beep is played on the computer speaker. Voting Figure 3.7 shows the ‘Voting’ tab in the settings dialog. Settings here control the voting system parts of Close Talk Control. See “Voting”, page 81, for more information. Figure 3.7 - Voting configuration Voting method Selects the vote result entry method on the Delegate Unit. The Delegate Unit has three LED’s to indicate a vote result, red for No, yellow for Abstain and green for ‘Yes’. Rev. 1.06 Figure 3.5 - No, Abstain and Yes-LED’s are blinking ‘Simple’ method: At the start of a voting session (see “Voting”, page 81, for more information), all three LED’s blink as figure 3.5 shows. By pressing the left Delegate Unit button, the desired vote result can be selected directly. Each LED is selected in a round-robin style by pressing the left button repeatedly and will stay flashing. Figure 3.6 - Toggle result selection with left button Configuration 19 Figure 3.8 - A yes-vote has been selected ‘Extra’ method: At the start of a voting session (see “Voting”, page 81, for more information), all three LED’s blink as figure 3.5 shows. By pressing the left Delegate Unit button, each LED is selected in a round-robin style and will stay flashing. Acknowledge the vote result by pressing the right button once. The LED will go to a steady glow. To re-select the vote result, simply press the left button again. Voting type Selects the default vote type, ‘Open’ where individual vote results are reported and ‘Closed’ where they are hidden. This setting can also be controlled from the voting controller dialog described in section “Voting”, page 81. Voting time Specifies the default maximum time for a vote session. Enter in the ‘hH:mM:sS’ format, e.g. ‘0:2:30’ which translates to 0 hours, 2 minutes and 30 seconds. This setting can also be controlled from the voting controller dialog described in section “Voting”, page 81. Note: A vote session can be canceled or stopped at any time, see “Voting”, page 81, for more information. No casted vote means absent Affects vote result report generation. Specifies whether delegates marked as present that does not vote (no vote result selected) should be counted as ‘Did not vote’ or as ‘Absent’. Sets the delay time in seconds before switching vote result views (see figure 6.2 on page 84). During voting, the view selection in ‘View’ is used in the Main Display and after a successful final read, the Main Display switches to the selection in ‘View after’. This parameter specifies the delay for switching to the ‘View after’ selection. 20 Close Talk Control: Section 3 Rev. 1.06 Voting view delay Emphasize manual vote results If a problem occurs when reading vote result’s from a Delegate Unit, the vote result for the problem unit can be entered manually. By checking this setting, manually entered results shown on the main display and in reports will be printed ALL CAPS. Hardware Figure 3.9 shows the ‘Hardware’ tab in the settings dialog. Settings here control communication and other hardware related settings. Communication Figure 3.9 - Hardware configuration Selects which serial port Close Talk Control should use to communicate with the Central Unit. Valid choices are ‘COM1-8’. Turn delegate unit off Specifies if and how the Delegate Unit’s should be turned off when Close Talk Control is closed where: • • • Always The units are always turned off by Close Talk Control Never The units are never turned off by Close Talk Control Ask Close Talk Control asks if the units should be turned off Disable power off in delegate unit Rev. 1.06 If checked, the power-off function in the Delegate Unit right key is turned off as long as Close Talk Control is running. Note: The delegate units will not power off automatically as long as Close Talk Control is running unless the battery level goes low. Configuration 21 Restore central unit settings The Central Unit has its own setting storage which is overridden by Close Talk Control. Check this setting to restore the original Central Unit settings when Close Talk Control is closed. Program Figure 3.10 shows the ‘Program’ tab in the settings dialog. Settings here control general program functionality such as report headers. Report header Figure 3.10 - Program configuration Enter a text that should appear in the headers of reports. Software key Close Talk Control is protected by a 17 digit software key connected to the serial number on the Central Unit. Without this key Close Talk Control will operate in demo mode with limited conference and voting capabilities. The key should have been supplied by the local dealer. Up to five keys can be entered. Note: Store this key in a safe place! A new install of Close Talk Control requires this key. Software updates of an existing installation does not require the key. Fee method • • 22 Individual Each time period is treated as a separate fee Concatenated The time of all periods is summed and the fee is based on the total time Close Talk Control: Section 3 Rev. 1.06 Selects method for calculating fee’s for delegates with more than one period of attendance where: Show names with free arrival If checked, the name of each delegate is shown on the ‘Main Display’ during roll call type “Free arrival” (page 34). Unchecking this setting will increase roll call speed. Only show Main Display during voting If checked, the ‘Main Display’ is only shown during voting, i.e. the speaker list’s cannot be shown. Show Matter Order on Main Display By checking this setting, the Matter Order from the Agenda will be shown together with the matter on the Main Display. Security Figure 3.11 shows the ‘Security’ tab in the settings dialog. Settings here control program security. Password Figure 3.11 - Security configuration If the Close Talk Control functionality is protected by a password, the password is shown hidden. If not, this field is empty. To enable password protection or change password: Enter a password in the ‘Password’ field. Enter the same password again in the ‘Confirm password’ field for confirmation. Click OK. Close Talk Control is now password protected. Rev. 1.06 To disable password protection: Simply clear the ‘Password’ field. Leave the ‘Confirm password’ field blank. Click OK. Close Talk Control is now without password protection. Confirm password See the ‘Password’ setting description. Configuration 23 One password is enough If this setting is checked, Close Talk Control will only prompt for a password once as long as Close Talk Control is running. Note: If this setting is checked, once a valid password has been entered, Close Talk Control will remain un-protected until restarted. Protect Selects which parts of Close Talk Control that should be protected. The ‘Settings’ dialog is always protected if password protection is enabled. The various parts that can be protected are: • • • • • • Settings for delegate units Delegate Unit settings such as speaker and headphone levels Settings for central unit Central Unit settings such as system sound levels Unit-ID connecting roll call A Unit-ID connecting roll call is usually only done at system installation Delegate database The delegate database contains information about conference attendees Seating list The seating list is where attendees for a conference is registered and managed Database management Database management is used to create and delete databases Rev. 1.06 All these parts are described in detail in section “Working with Close Talk Control”, page 25. 24 Close Talk Control: Section 3 Section 4 Rev. 1.06 Working with Close Talk Control Working with Close Talk Control 25 Rev. 1.06 Blank page 26 Close Talk Control: Section 4 Program overview 1 2 3 6 7 4 8 5 Figure 4.1 - The main program window Figure 4.1 shows the Close Talk Control main program window. The components are: • • • • Rev. 1.06 • 1 The main menu. Provides access to the main functions in Close Talk Control 2 The toolbar. The most important functions in Close Talk Control can be reached directly using the toolbar 3 The audio channel status area. Close Talk Control has three built-in audio channels, numbered 1-3, and supports the use of a platform, the platform icon. The adjacent fields shows current speaker for that channel or that the channel is free for use 4 The speaker list area. This area shows the current speaker list contents. See section “Conference”, page 69, for more information 5 The program status bar. Contains five fields that show, from left to right, the speaker list handling mode, the chairman audio channel mode, the number of entries in the speaker list, the database name and the conference mode. Program overview 27 • • • 6 The speaker list toolbar. Used to control the speaker list. See section “Conference”, page 69, for more information 7 The reply list area. This area shows the current reply list contents and is only shown if the reply function is enabled. See Configuration, page 13, and section “Conference”, page 69, for more information. 8 The reply list toolbar. Used to control the reply list and is only shown if the reply function is enabled. See Configuration, page 13, and section “Conference”, page 69, for more information Most Close Talk Control windows will retain their old position and size when the program is re-started. This makes it possible to arrange the different windows on the desktop after taste and to maximize the use of the desktop. The toolbar The toolbar provides quick access to some of the functions on the main menu. Main menu functions with a toolbar direct access will have it’s corresponding toolbar icon included in the following description of the main menu. ‘File’ menu Settings Opens the configuration dialog described in section “Configuration”, page 13. Configure Main Display... Used to configure the Main Display appearance such as fonts, colors and vote result seating views. See page 52. Figure 4.2 - The File menu Tools for making connectivity and endurance test’s for Delegate Unit’s. Should normally only be used by support personnel. See page 64 for more information. 28 Close Talk Control: Section 4 Rev. 1.06 Test delegate units... Manage databases... The database manager is used to create, delete, copy, rename and backup databases and is described in detail on page 36. Edit delegate list... The delegate list editor is used to manage personal information about conference attendees and is described in detail on page 38. Edit seating list... The seating list is where most job is done during an active meeting. It connects actual delegates to a seat number which in turn is connected to a specific Delegate Unit ID. It is described in detail on page 47. Printer settings... Opens a standard printer settings dialog as shown in figure 4.4. These printer settings are used for all print functions in Close Talk Control. Figure 4.4 - Printer settings Exit Rev. 1.06 Closes Close Talk Control. An active conference must be stopped before closing the program or the dialog in figure 4.3 will be shown. Figure 4.3 - Stop conference before closing A confirmation prompt is shown to prevent closing accidentally as in figure 4.5. Figure 4.5 - Close confirmation prompt Working with Close Talk Control 29 If configured to do so (see “Configuration”, page 13) , a question about turning the Delegate Unit power off is shown. Figure 4.8 - Power off prompt ‘View’ menu Main display The ‘Main Display’ is a window intended for use on a separate display, for projection, taping or broadcasting on an organizations internal TV network. Rev. 1.06 Although the main display can be Figure 4.6 - The View menu shown on the main Window’s desktop (primary display), it’s best use is with a second display output. Dual graphic adapter/output is supported by Windows 98, Windows 98SE, Windows 98ME, Windows 2000 and Windows XP. At this manuals writing, Close Talk Control with Windows 2000/XP more or less requires two physical graphic adapters since the Windows 2000/XP support of dual-output adapter technology such as the Matrox Dual-Head technology has serious limitations. Figure 4.7 - The Main Display 30 Close Talk Control: Section 4 Figure 4.7 shows an example of the Main Display with a status field on top, the speaker and reply list in the middle and the current speaker(s) in the bottom. The Main Display is used extensively by the Conference and Voting system. See “Main Display configuration”, page 52, “Conference”, page 69, and “Voting”, page 81, for more information. System status The system status window shows various system information and is normally used for problem solving and installation support. Serial number The serial number of the Central Unit. Firmw. vers. The firmware version in the Central Unit. Figure 4.9 - System status Delegate The version of the Delegate Unit firmware stored in the Central Unit. This firmware is sent on the infra-red data link to update the Delegate Units. See the Close Talk Conference System manual for more information. Channel 1, 2 and 3 Shows the status for the three audio channel receivers in the Central Unit. The top field shows usage, the middle field shows signal level in volts and the bottom field shows mute threshold level. Data channel Shows the status for data channel receiver in the Central Unit. The left field shows signal level in volts and the right field shows mute threshold level. Rev. 1.06 Serial communication Shows the most recent error on the serial communication link with the Central Unit. Should normally read ‘No errors’. If anything else is shown, check null-modem cable connections, power supplies, computer performance, etc. Working with Close Talk Control 31 Central unit Figure 4.10 shows the Central Unit control panel. This panel is used to control system audio levels. See the Close Talk Conference System manual for a description of the audio system. Figure 4.10 - Central Unit control Drag the sliders using the mouse or highlight a slider and use the arrow keys to change settings. The ‘Line In’, ‘Tele In’, ‘Line->Line’ and ‘Line->Tele’ inputs can be muted without changing the pre-set levels by un-checking the check box above the slider. The ‘Restore’ button can be used to abandon all changes done as long as the panel remained open. Once the panel is closed all settings are stored permanently. The ‘CU’ button reads the panel settings from the Central Unit. This makes it possible to make an installation and tune the audio levels without using Close Talk Control. The levels are all stored in the Central Unit and can later be read by Close Talk Control using this button. Delegate unit Figure 4.11 shows the Delegate Unit control panel. This panel is used to control the Delegate Unit. See the Close Talk Conference System manual for a description of the audio system. Drag the sliders using the mouse or highlight a slider and use the arrow keys to change settings. Figure 4.11 - Delegate Unit control The ‘CU’ button reads the panel settings from the Central Unit. This makes it possible to make an installation and tune the audio levels without Close Talk Control. The levels are all stored in the Central Unit and can later be read by Close Talk Control using this button. 32 Close Talk Control: Section 4 Rev. 1.06 The ‘Restore’ button can be used to abandon all changes done as long as the panel remained open. Once the panel is closed all settings are stored permanently. Battery level Figure 4.12 shows the Delegate Unit battery level window. Every time a Delegate Unit request to speak, it’s battery level is sent with the request and is checked and displayed in this window. Figure 4.12 - Delegate Unit battery levels The name, if available otherwise the serial number, is shown together with seat number, level status and time of report. Battery voltage levels are not an exact way to determine expected remaining operating time because of several different factors such as age of battery, temperature, usage intensity, etc. If ‘Level’ is reported as ‘Bad’, less than an hour of operating time can be expected, possibly as listen-only. This situation should be avoided so always keep the Delegate Unit batteries fully charged before each conference start. Note: Close Talk Control does not actively ask Delegate Unit’s about their battery levels. The ‘Time’ indicator in the window was the last time of report. ‘Control’ menu Conference Conference start and stop is controlled using the Conference Controller panel. This panel also includes creating and using agendas. See section “Conference”, page 69, for more information. Figure 4.13 - The Control menu Roll call Rev. 1.06 Several types of roll calls can be performed using the Roll Call panel which is only available before a conference is started. See Roll call on page 34 for more information. Working with Close Talk Control 33 Voting The Close Talk Control voting function is only available when a conference is started. See section “Voting”, page 81, for a detailed description. ‘Help’ menu The help menu shows various program information such as software version number. Figure 4.15 - The Help menu Roll call Close Talk Control has three methods to make roll calls. They are ‘Connect unit ID’, ‘Traditional’ and ‘Free arrival’. The roll call function interacts directly with the ‘Seating list’, page 47, so an understanding of the seating list functionality is helpful. Figure 4.16 - The Roll call panel After selecting the ‘Roll call’ function, the panel in figure 4.16 is shown. ‘Roll call method’ selects the desired function. ‘Start’/’Done’ starts and stops a roll call. The roll call function starts with the first seat number in the seating list which is shown in the seat information row at the bottom. ‘Done’ finishes the roll call. It does not check whether all seats have been called for. After ‘Done’ is clicked, the changes to the seating list are made permanent. 34 Close Talk Control: Section 4 Rev. 1.06 Figure 4.14 - A roll call is started After starting a roll call, seats in the list can be selected at will using the database navigation buttons, ‘First’, ‘Previous’, ‘Next’ and ‘Last’. The ‘Absent’ and ‘Present’ buttons can be used to override or replace a delegates response. ‘Close’ will close the roll call panel. If a roll call is active, the ‘Done’ button will be clicked automatically before closing. ‘Cancel’ can be used to abandon a started roll call. No changes to the seating list are made. ‘Present’ shows the current number of present delegates. Figure 4.17 - The Main Display during a roll call The Main Display will show the name of the person currently being called for. Connect unit ID Rev. 1.06 A ‘Connect unit ID’ roll call is usually used during a system installation or with mobile conference system installations. Its main function is to establish the ‘seat number-delegate unit ID’ connection. It should be used with caution since a carefully updated seating lists unit-ID’s may be ruined with a few mouse clicks. When being called for, delegates respond by pressing the left button once on their units. The yellow LED will blink for a short while and then be turned off. The roll call function updates the panel with the unit ID and the seat will be marked as present. The operator then uses the navigation buttons to select next seat and the next delegate responds a.s.o. After all seats have been called for the navigation right arrow buttons will be greyed. The roll call is done. Working with Close Talk Control 35 Traditional ‘Traditional’ does a standard roll call. When being called for, delegates respond by pressing the left button once on their units. The yellow LED will blink for a short while and then be turned off. The response is checked to see that the correct Delegate Unit responded and that the unit has not responded before. If no errors where encountered, the roll call function will update the panel and the seat will be marked as ‘Present’. The operator then uses the navigation buttons to select next seat and the next delegate responds a.s.o. After all seats have been called for the navigation right arrow buttons will be greyed. The roll call is done. Free arrival ‘Free arrival’ more or less takes care of itself. As delegates arrive at their seats, they press the left Delegate Unit button once. The seating list is checked for that unit ID and if in list, it is marked as ‘Present’ and the Main Display will show a message, acknowledging them as present automatically for a few seconds. Multiple arrivals will be queued and handled on a first-in first-out basis. The operator can at any time check and update the attendance in the seating table using the navigator, ‘Absent’ and ‘Present’ buttons. Database management Database management is used to create, copy, delete, rename and backup the Close Talk Control databases. In a multiuser environment (Windows NT 4, Windows 2000, Windows XP and Windows 9x with multiuser option installed), databases are private, i.e. different users will not have access to each others databases. All other installations use global database management. An unlimited (limited by hard disk space only) number of databases can be created. The selected (highlighted) database when ‘Close’ is clicked will be used by Close Talk Control. Figure 4.18 - The database manager The field under the database list shows if, and if so, when a backup was last made. 36 Close Talk Control: Section 4 Rev. 1.06 Figure 4.18 shows the database manager window. The currently selected database has it’s name followed by (*). Create new ‘Create new’ creates a new, empty database. Enter a descriptive name for the new database and click ‘OK’. After a short while the new database will be shown in the database list. Figure 4.19 - Database name prompt Copy ‘Copy’ creates a new database based on an existing one. Select the database to copy in the list and click ‘Copy’. Enter a descriptive name for the new database and click ‘OK’. After a short while the new database will be shown in the database list. Delete ‘Delete’ deletes a database. Select the database to delete in the list and click ‘Delete’. A warning prompt is shown. Clicking ‘Yes’ will delete the database permanently from the hard drive and cannot be undone. Figure 4.20 - Delete warning Backup ‘Backup’ makes a safety copy of the selected database. A safety copy does not show up in the database list and can only be retrieved using the ‘Restore’ command. The time and date of the last backup is shown below the database list. Only one backup per database can exist so an old, if any, backup will be overwritten by the new. Rev. 1.06 Note: This function is not intended to replace any system backups. It is supposed to be used as a normal work safety backup, similar to the ‘undo’ function in many Window’s software’s. Use a professional backup solution to protect the complete Window’s system. Working with Close Talk Control 37 Restore ‘Restore’ restores a database from the safety copy. Select the database to be restored and click ‘Restore’. A dialog is shown, warning that the original database will be overwritten. Clicking ‘Yes’ will start the restore process. Figure 4.21 - Restore warning Rename ‘Rename’ changes the name of an existing database. Select the database to be renamed, click ‘Rename’ and enter the new name in the dialog. Click ‘OK’. Delegate list Introduction The delegate list holds personal information about conference attendees. This information is used in speaker lists, status fields, reports, etc. It includes powerful edit, search, sort and filter functions for easy maintenance. Many data types can be pre-defined for easy selection and for maintaining organization policies. The seating list (see page 47) derives much of its information from the delegate list. Overview • • • • 38 1 The main menu. All delegate list commands are reached from the main menu. In the delegate list, several commands can also be reached by right-clicking 2 The filter bar. Used to filter the delegate list 3 The tab selector. Used to switch between the delegate list view and the data pre-defines view 4 The delegate list table. Figure 4.22 shows the first half and figure 4.23 shows the second half Close Talk Control: Section 4 Rev. 1.06 Figure 4.22 shows the main delegate list window. The components are: 1 2 3 4 Rev. 1.06 Figure 4.22 - The main delegate list window Figure 4.23 - The delegate list, second half Working with Close Talk Control 39 Delegate list fields The delegate list consist of 11 fields. The following list is a description of each field with its corresponding edit methods. Some fields are required (cannot be left empty). These fields are marked ‘Required’. Most fields are directly editable, i.e. just select the field and start typing. These fields are marked ‘Editable’. Many fields have predefines that can be selected on a drop-down list. These fields are marked ‘Pre-defines’. A few fields can only be used with pre-defines. These fields are marked ‘Only pre-defines‘. • • • • • • • • • 40 Last name, Required, Editable The delegates last name First name, Required, Editable The delegates first name Organisation name, Editable, Pre-defines The name of the delegates organization. Can be company names, political parties, etc. Function name, Editable, Pre-defines The delegates function, e.g. ‘Chairman’, ‘Shareholder’, etc. Order number, Editable Mainly used for delegate list sorting purposes, e.g. to create a sorting order for delegate substitutes. See the description of the ‘Sort’ menu on page 44 Region, Editable, Pre-defines For grouping delegates by a geographical definition. Used with filtering and sorting functions in the delegate list Social security number, Editable The delegates social security number Vote weight, Editable The delegates vote weight, i.e. how many votes a person has. The vote weight can contain fractions, e.g. 1,34 votes. In parliamentary elections, a citizen has vote weight 1 while a shareholder may have any vote weight. A vote weight of 0 means that the delegate does not participate in voting Fee type, Only pre-defines The data pre-defines tab contains a ‘Fee type’ section where fee categories are created (see description on page 46). A fee category contains a list of fee time periods Close Talk Control: Section 4 Rev. 1.06 The delegate list fields are: • • Speak time, Editable, Pre-defines A delegates speaking time can be limited by specifying a duration in this field. Select a pre-defined duration or enter a duration as ‘hh:mm:ss’ Reply time, Editable, Pre-defines A delegates reply time can be limited by specifying a duration in this field. Select a pre-defined duration or enter a duration as ‘hh:mm:ss’ Regardless of the field types, all fields can use the basic edit commands described in ‘Edit menu’, page 43. Database editing Tables A database consists of several tables, each consisting of records (lines) which contains fields (columns). A table is displayed as a grid as the delegate list example shows in figure 4.22. Table modes A table can have different modes. The main modes are browse and edit. Figure 4.22 shows a table in browse mode, indicated by the small solid arrow shown in the leftmost column next to the highlighted field ‘Johnsson’. Changing a field To change a fields contents, the table must enter edit mode. There are two ways to enter edit mode • • Highlight a field and start typing (all ‘Editable’ fields) Highlight a field and select an item from the drop-down list (some ‘Editable’ and all ‘Pre-defines’ fields) The solid arrow in the leftmost column changes to a caret to indicate edit mode. Undo changes To undo changes in a field, press the ‘Esc’ key once. The original contents is returned but the table is still in edit mode. Rev. 1.06 To exit edit mode, press the ‘Esc’ key until the leftmost column indicator changes back to a solid arrow. Working with Close Talk Control 41 Save changes As long as the table is in edit mode, nothing has been changed in the actual database. The easiest way to save changes is simply to move with the arrow keys to an adjacent record. The mode indicator changes to a solid arrow. The tables on the data pre-defines tab can also save changes by pressing enter. Erase record A record can be erased by selecting any field in the record and then pressing ‘Ctrl-Del’. A confirmation dialog appears to prevent accidental erasing. Right-clicking any field in a table and selecting ‘Erase delegate’ can also be used. Insert record By pressing the ‘Insert’ key, a new record can be created. A new record is indicated with an asterix in the leftmost column and is automatically in edit mode. Edit and save the new record as previously described. A new record can also be created by moving below the last record in the table with the down-arrow key. A third way is to right-click any field in a table and select ‘New delegate’. Appearance The column widths can be changed by placing the mouse cursor over a field boundary in the header row and dragging the boundary to a new position. ‘File’ menu The file menu is used for printing and exporting the delegate list and for closing the ‘Edit delegate list’ window. Select ‘Print->Delegate list’ to print the current delegate list. The list is printed with the selected sorting order and filter. If a filter is active, a warning prompt is displayed. 42 Close Talk Control: Figure 4.24 - Edit delegate list File menu Section 4 Rev. 1.06 Print Export Close Talk Control Can export delegate lists in the RTF (Rich Text Format, a platform independent document format) and as Microsoft Excel. Select ‘Export->Delegate list as RTF...’ to export to RTF. A file selection dialog is shown. Enter a name for the file and click ‘Save’. The RTF file is created. Figure 4.25 - Edit delegate list Export menu The export to Excel procedure is the same as for RTF. Close Select ‘Close’ or click the Close Talk Control toolbar button to hide the ‘Edit delegate list’ window. ‘Edit’ menu Figure 4.26 shows the ‘Edit’ menu. The edit menu is used for editing in tables. Copy The ‘Copy’ function is used to copy data in table fields. The copy-paste operation is context sensitive, i.e. the contents copied from, for example, the ‘Last name’ field can only be pasted into a ‘Last name’ field. Figure 4.26 - Edit delegate list Edit menu Paste The ‘Paste’ function pastes the contents copied with the ‘Copy’ function into the selected field. The copy-paste operation is context sensitive, i.e. the contents copied from, for example, the ‘Last name’ field can only be pasted into a ‘Last name’ field. New delegate Rev. 1.06 This function is described under ‘Insert record’, page 42. Erase delegate This function is described under ‘Erase record’, page 42. Working with Close Talk Control 43 ‘Search’ menu The ‘Search->In column’ is a free-text search function. Select a column (field type) to search in and select ‘Search->In column’. A standard search dialog as in figure 4.28 is shown. Figure 4.27 - Edit delegate list Search menu Enter a text to search for, the search direction and click ‘Find next’. If the text is found, it is highlighted in the table. The search dialog can remain open while editing the table and is then ready to search again. Figure 4.28 - Edit delegate list Search prompt If the specified text cannot be found, a ‘Search done’ prompt is shown. ‘Sort’ menu The ‘Sort’ menu is used to sort the contents of the delegate list. Sort list Turns sorting on or off. A check mark indicates that the list is sorted. Sorting alternatives Figure 4.29 - Edit delegate list Sort menu Seven different sorting alternatives are available as figure 4.29 shows. Table filtering Rev. 1.06 Figure 4.30 shows a filtered delegate list. Figure 4.30 - A filtered delegate list 44 Close Talk Control: Section 4 The filter function is used to show records of a particular interest. Using filtering together with sorting makes it very easy to find delegates in the list. The filter works on three field types, ‘Organisation’, ‘Function’ and ‘Region’. To use the filter, turn it on by checking the ‘Use filter’ check box. Select the filtering criteria with the three drop-down lists. These drop-down lists contains the data from the ‘Organisation’, ‘Function’ and ‘Region’ tables, on the ‘Data pre-defines’ tab. To disable the filtering for a particular field type, select the blank line in the drop-down list. Data pre-defines Figure 4.31 shows the delegate data pre-defines tab. Figure 4.31 - The delegate data pre-defines tab These tables are used to create pre-defined entries for the delegate list to maintain a consistent appearance and to create filtering criteria. The description of database editing on page 41 applies to these tables as well. Rev. 1.06 Organisation Holds organization names. Working with Close Talk Control 45 Function Holds an organizations function titles or the ‘roles’ of delegates. Speaker time Holds speaking time categories used by the ‘Speak time’ and ‘Reply time’ fields in the delegate list. Enter as ‘hh:mm:ss’. Region Holds an organizations delegate regions. Fee The fee database consists of two tables, the ‘Fee type’ table and the ‘Fee’ table. The ‘Fee type’ table holds fee categories. Each fee category has one or more entries in the ‘Fee’ table. Create a new fee category by inserting a new record in the ‘Fee type’ table and entering the category name and specifying the ‘Method’, ‘Hour’ or ‘Period’. Save the new category by pressing enter. A new ‘Fee’ table is created. The ‘Fee’ table holds fees for one or more time periods. The ‘Fee’ field holds the fee amount in local currency and the ‘Time’ field holds the time periods equal-to-or-greater-than duration. Using the data in figure 4.31 as an example, the ‘Normal’ fee category contains three time periods, 1 hour, 4 hours and 8 hours. With ‘Fee Method’ set to ‘Hour’, the example reads: • • • • A delegate present shorter than 1 hour will not receive any fee A delegate present more than 1 hour but less than 4 hours will receive a $30/hour fee A delegate present more than 4 hours but less than 8 hours will receive a $40/hour fee A delegate present more than 8 hours will receive a $50/hour fee Had ‘Method’ been set to ‘Period’, the fee would have been the single fixed fee amount, not the per-hour fee. 46 Close Talk Control: Section 4 Rev. 1.06 The ‘Hour’ fee method is calculated on minute basis, e.g. a fee of $240 per hour is recalculated to $4 per minute and is then multiplied with the attendance time The maximum normal time period that can be used in the ‘Fee’ table is ‘23:59:58’. The ‘23:59:59’ time period has special meaning. It means ‘the whole meeting’, i.e. delegates present the whole meeting (from conference start to stop, see section Conference, page 69) will receive the fee associated with the ‘23:59:59’ time period, regardless of the actual conference duration. Seating list The seating list is a database describing the actual conference system setup in a room. It is based on a list of numbered seats and links each seat to its respective Delegate Unit ID through the ‘Unit-ID’ field. It also describes the ordinary seat holder, the seats current occupant, attendance status and voting participation. It is in this list that delegates arrivals, departures and replacements are updated. The accuracy of this updating directly affects the attendance time and fee reports. The ‘Connect unit ID’ roll call function described on page 34 can be used to make the seat-unit ID connection in a more automatic fashion. The other alternative is to manually enter each Delegates Unit ID number for each seat. The same basic database editing functionality described on page 41 also applies to the seating list. Working with the delegate and seating list is also described in section “Conference”, page 69. Overview Figure 4.32 shows the main seating list window: 1 Rev. 1.06 2 Figure 4.32 - The seating list main window Working with Close Talk Control 47 The main components are: • • 1 The main menu. All seating list commands are reached from the main menu. Several commands can also be reached by right-clicking in the seating list 2 The seating list table Seating list fields The seating list consist of 9 fields. The following list is a description of each field with its corresponding edit methods. Fields marked ‘Required’ must have a value (cannot be left empty). Fields marked ‘Delegate list link‘ is edited using the delegate list. Fields marked ‘Informational’ are for information only and cannot be edited. Fields marked ‘Editable’ are directly editable, select the field and start typing. Fields marked ‘Yes/No’ is changed by double-clicking. • • • • • • • • • 48 Seat, Required, Editable The number of the seat. The seating list is sorted in seat number order. Numbering doesn’t have to be sequential. Ordinary, Delegate list link The name of the ordinary seat holder Organisation, Delegate list link, Informational The organization of the ordinary seat holder Delegate, Delegate list link The current seat holder Organisation, Delegate list link, Informational The organization of the current seat holder Function, Delegate list link, Informational The function of the current seat holder Present, Yes/No Marks if the current seat holder is present or not Votes, Yes/No Selects whether the current seat holder participates in voting or not. If the current seat holder has vote weight 0 (see page 38), this field has no effect Unit ID, Editable Holds the ID number for the seats Delegate Unit Close Talk Control: Section 4 Rev. 1.06 The seating list fields are: A new seat must be saved before editing. Create a seating list by adding all required seats first, entering a value in the ‘Seat’ field only, leaving the rest of the fields as default, and then edit the rest of the fields. The seating list has two seat holders, the ‘Ordinary’ and the ‘Delegate’ fields. The ‘Ordinary’ field is meant to be used in, for example, parliamentary situations where the seat holder is ruled by elections. This makes preparations for each conference much easier, the ‘Ordinary’ fields can be copied to the ‘Delegate’ fields in one operation. Then, with seats where the ordinary delegate cannot attend, a replacement is easily inserted in the ‘Delegate’ field. In situations where the attendees change for each conference, the ‘Ordinary’ field can be left unused (blank). The ‘Unit ID’ field crucial for the correct operation of Close Talk Control. It links a physical Delegate Unit to a seat number and delegate name. If this ID number is wrong, either by faulty input in the seating list or that the Delegate Units have been mixed, speaking lists will show the wrong name and more important, voting will be faulty, registering vote results for wrong persons. ‘File’ menu The file menu is used for printing and exporting the seating list and for closing the ‘Edit seating list’ window. Print Select ‘Print->Participants in seat order...’ to print the current seating list in seat number orFigure 4.34 - Edit seating list der. File menu Select ‘Print->Participants in name order...’ to print the current seating list in delegate name order. Export Rev. 1.06 Close Talk Control can export seating lists in the RTF (Rich Text Format, a platform independent document format). Select ‘Export->Participants in seat order as RTF...’ or ‘Ex- Figure 4.33 - Edit seating list Export menu port->Participants in name order as RTF...’ to export to RTF. A file selection dialog is shown. Enter a name for the file and click ‘Save’. The RTF file is created. Working with Close Talk Control 49 Close Select ‘Close’ or click the Close Talk Control toolbar button to hide the ‘Edit seating list’ window. ‘Edit’ menu Figure 4.36 shows the ‘Edit’ menu. The edit menu is used for editing in the seating list. Many commands are depending on the conference mode. Select delegate Before conference start, inserts the delegate selected in the delegate list at the selected seat, in field ‘Ordinary’ or ‘Delegate’. Figure 4.36 - Edit seating list Edit menu before conference start After conference start, if field ‘Present’ is set to ‘Yes’, the command will mark the previous delegate as ‘departed’ in the time log and the new delegate as ‘arrived’ in one operation. If field ‘Present’ is set to ‘No’, the command works as before conference start. Replace delegate ‘Replace delegate’ only works with a started conference. Inserts the, in the delegate list, selected delegate into the ‘Delegate’ field. The new delegate will take over the previous delegates time log if field ‘Present’ is set to ‘Yes’. Figure 4.35 - Edit seating list Edit menu after conference start Delegate not present ‘Delegate not present’ only works with a started conference. Removes the current delegate from the attendance time log and marks the seat as vacant by setting the ‘Present’ field to ‘No’. Before conference start, copies the delegate in the ‘Ordinary’ field to the ‘Delegate’ field. After conference start, copies the delegate in the ‘Ordinary’ field to the ‘Delegate’ field and updates the time log as described in the ‘Select delegate’ command. 50 Close Talk Control: Section 4 Rev. 1.06 Ordinary delegate No delegate Only works before a conference start. Removes the delegate from the selected field. All delegates ordinary Only works before a conference start. Copies all the delegates in the ‘Ordinary’ fields to the ‘Delegate’ fields. All delegates vote Sets the ‘Votes’ field to ‘Yes’ for all delegates. New seat This function is described under ‘Insert record’, page 42. Enter a seat number and save the new seat before continuing. Erase seat This function is described under ‘Erase record’, page 42. ‘Search’ menu The ‘Search->Name’ is a free-text function. It searches the ‘Ordinary’ and ‘Delegate’ columns. The ‘Ordinary’ column is only searched if it is visible (see ‘Show’ command). A standard search dialog as in figure 4.38 is shown. Figure 4.37 - Edit seating list Search menu Enter a text to search for and click ‘Find next’. Rev. 1.06 Figure 4.38 - Edit seating list Search prompt If the text is found, it is highlighted in the table. The search dialog can remain open while editing the table and is then ready to search again. If the specified text cannot be found, a ‘Search done’ prompt is shown. Working with Close Talk Control 51 ‘Show’ menu Figure 4.39 shows the ‘Show’ menu. It is used for showing/hiding the ‘Ordinary delegate’ and ‘Unit-ID’ columns in the seating table. Since the ‘Ordinary’ and ‘Unit-ID’ columns are more configuration related, hiding these columns will both save desktop space and increase safety. Figure 4.39 - Edit seating list Show menu Main Display configuration The Main Display is intended to show conference information to the delegates and is normally used with video projectors, broadcasting and VCR’s. The appearance of the Main Display can be customized to fit existing environments, including background and foreground colors, font type and attributes. When starting the Main Display configuration utility, the Main Display is shown (if not already visible) with dummy data. A configuration dialog (see figure 4.40) is shown which is used to change all various attributes of the Main Display. Selecting different tab’s in the dialog updates the Main Display to the corresponding page with dummy data inserted. Figure 4.40 - Speaker list configuration Common components Many tab’s share the same editing methods. All color selections uses a standard Window’s color selection dialog. The font type can be changed with a drop-down list. A font can be bold or normal. This tab is used to change the appearance of the speaker list view. Refer to figure 5.7 on page 79 in the following description. 52 Close Talk Control: Section 4 Rev. 1.06 Speaker lists Header Configures the speaker list ‘Header’ area. Color selects the background color. Font color selects the font color. Use the drop-down list to select a font type. Checking Bold will make the font bold Footer Configures the speaker list ‘Footer’ area. Color selects the background color. Font color selects the font color. Use the drop-down list to select a font type. Checking Bold will make the font bold. List Configures the speaker and reply list main area’s. Color selects the background color. Font color selects the font color. Use the drop-down list to select a font type. Checking Bold will make the font bold. List, fixed Configures the speaker and reply list’s column header’s and row number. Color selects the background color. Font color selects the font color. Use the drop-down list to select a font type. Checking Bold will make the font bold. Voting, header Used to configure the vote result displays that use a common header as shown in figures 6.7, 6.8, 6.11, found in section 6. Header Rev. 1.06 The three vote result displays shown in figures 6.7, 6.8, 6.11 share a common header area which is divided into two subareas, Over which shows ‘Matter’ and time, and Under which shows result summaries. Color selects the background color. Font color selects the font Figure 4.41 - Vote result header color. Use the drop-down list to select a font type. Checking Bold will make the font bold. Yes color, No color and Abstain color sets the color for all objects in the Main Display that show color coded results, e.g. the Yes indicator in the header area and the bar-graph colors. Working with Close Talk Control 53 Table Configures the table vote result view shown in figure 6.7 where List is the main table area and List,fixed is the table area column headers and line numbers. Color selects the background color. Font color selects the font color. Use the drop-down list to select a font type. Checking Bold will make the font bold. Figure 4.44 - Vote result, table view Bar graph Configures the bar graph vote result view shown in figure 6.8 where Bar background is the background of a bar and Vote weight is the rest of the bar graph area including the vote weight text at the bottom. Yes, No and Abstain selects the background color of the bar graphs. Color selects the background color for the rest of the Figure 4.42 - Vote result, bar graph view area. Font color selects the font color. Use the drop-down list to select a font type. Checking Bold will make the font bold. Seating Seating view selects which seating view to use when selecting ‘Seating’ in the ‘View’ and ‘View after’ groups (see figure 6.2) during voting. Seating view’s are managed by clicking ‘Edit’. If the seating view option should not be available during voting, select ‘--Disable--’ in the ‘Seating view’ box. Figure 4.43 - Vote result, seating view 54 Close Talk Control: Rev. 1.06 See page 56 for more information about creating Seating View’s. Section 4 Voting, time Configures the time vote result view shown in figure 6.9. Color selects the background color. Font color selects the font color. Use the drop-down list to select a font type. Checking Bold will make the font bold. Figure 4.46 - Vote result, time view Welcome The ‘Welcome’ tab configures the Main Display appearance before and after a conference. Before a conference, the Main Display is divided into two halves, the upper and the lower. The upper area is used to show a Welcome image and a Goodbye image. The Welcome image is shown before a conference is started. The Goodbye image is Figure 4.45 - Roll call and greetings shown when a conference is stopped as long as the Conference manager (see page 72) dialog remains open. The images is in the standard windows bitmap format and is specified by clicking the ellipsis button (...) next to the image name field. A standard file selector is opened. Select the image to use and click OK. The image name appears in the name field. The image is centered in the upper area. Use the X button to remove the image file selection. By checking Transparent, a transparent color is used. A transparent color is a specific color that is not drawn when the image is drawn, leaving the background intact, thus creating the appearance of transparency. The transparent color is derived from the first pixel in the image, usually the left-bottom pixel. Rev. 1.06 The ‘Image’ box has two settings, ‘Welcome’ and ‘Goodbye’ that provides an easy way to enable/disable the respective image once the images has been specified. Working with Close Talk Control 55 Voting, summary Configures the summary vote result view shown in figure 6.10. Color selects the background color. Font color selects the font color. Use the drop-down list to select a font type. Checking Bold will make the font bold. Managing Seating View’s A Seating View is a very powerful way to present vote result’s in real time. Figure 4.47 shows an example of a Seating View: 3 1 2 Figure 4.47 - Seating View example The main area below is the actual Seating View, in the example it depicts a small conference room with ten seats and a table in the middle. ‘1’ is the background area, a solid fill color. ‘2’ is the seating view image that shows the carpet, the chairs and the table. ‘3’ is the actual vote result indicators, in the example four for each seat placed in a vertical arrangement. These indicators 56 Close Talk Control: Section 4 Rev. 1.06 There are several components in this view. At the top there is the standard double row vote result header with matter, vote time and result counters. This header is shared with two other vote result views, the Table view and the Bar Graph view. will change colors depending on how the voting process progresses. The Seating View arrangement is fully editable. The background color can be specified freely. The image is a standard Windows bitmap that can be created by: • • • Creating a simple (or complex) drawing of the room in an illustration software such as Corel Draw and exporting the drawing as a Windows BMP (bitmap) Taking a photograph of the room using a digital camera Scanning a photograph, a drawing, etc. After creating the BMP file, simply tell Close Talk Control where to find it using the Seating View editor. The shape, on-color, off-color, position and inter-arrangement of the vote result indicators can be specified. The Seating View editor Rev. 1.06 Click the ‘Edit’ button shown in figure 4.43 to start the editor. Two new windows are shown, the work area and the tool-bar: Figure 4.48 - The Seating View work area Working with Close Talk Control 57 The tool-bar contains all the necessary tools for creating and maintaining seating views. The work area only serves as a display, showing the editing as it progresses. The Seating View editor is a true ‘What-YouSee-Is-What-You-Get tool. After creating the view and saving it, that is how it will look during voting (adding the vote result header of course). Basics Figure 4.49 - The Seating View tool-bar • • • • • • • • • • • • 58 The view bottom area must have a fill color There can be an image layered on top of the bottom area An image must be in Windows bitmap (BMP) or Windows Meta File (WMF) format. The image can be any color depth but 16 bit (65536) or 24 bit (16 million) colors is preferred An image is shown in 1:1 format An image is centered on the bottom area. Re-sizing the Main Display will also re-center (not re-size) the image The voting progress is displayed using so called indicators There are two types of indicators, ‘Present’ and ‘Vote result’. The ‘Present’ indicator shows if the particular seat is participating in the vote session and the ‘Vote result’ indicators show the actual vote result An indicator has several properties, ‘Shape’, ‘On-outline’ pen width and color, ‘On’ state fill color, ‘Off-outline’ pen width and color, ‘Off’ state fill color, ‘Angle’, ‘Position’ and ‘Size’ The use of any indicator is optional, e.g. only a ‘Yes’ result indicator can be shown for a seat A ‘Seat’ is a set of up to four indicators There is a direct connection between the Seating List seats and the ‘Seats’ in a Seating View using the seat number Any number of seats can be added. Seat numbers not present in the Seating List will still be drawn as designed but will not be used by the voting functionality Close Talk Control: Section 4 Rev. 1.06 Following are the basic facts about a Seating View, possibilities and limitations helpful to remember during editing: • • • • All ‘Seats’ make a complete seat group. The seat group is drawn centered in the work area using the top-leftmost and bottom-rightmost seat indicator as area delimiters A Seating View is always drawn in 1:1 scale. Seating View’s should be designed against a specific display resolution, e.g. two views may need to be created, one for screen resolution 800x600 and one for 1024x768 Seating View’s can be copied, deleted, renamed and re-sized There is a simple one-level undo function implemented via the ‘Save’ button The tools The following parts explains each of the tool groups on the tool-bar shown in figure 4.49. Background image Used to specify work area color and an optional image. To specify the background color, click the right-most ellipsis button. A standard Windows color picker dialog is shown. Select the preferred color and click OK. To specify a background image, click the ellipsis button next to the file name area. A standard Windows file selector dialog opens. Browse to the required image and select it, then click OK. The image is shown centered in the work area. To remove the image, click the X-button. Seat The Seat tool group is used to browse, add, remove, copy, property-copy and verify seats in a seat group. It is also used to set the indicator states during editing which is a visual aid for designing indicator sets. Rev. 1.06 To add a seat, click the ‘Add new seat’ button. A prompt is shown. Enter a number and click OK. The seat is added to the group. All seats must have an exclusive seat number. The ‘Remove seat’ button is used to deFigure 4.50 - Add a seat lete a seat from the seat group. Select the seat to be deleted using the ‘Number’ spinner and click the minus-sign button. A confirmation prompt is shown. Click ‘Yes’ and the seat is deleted. Working with Close Talk Control 59 To copy a seat, select the seat to be copied using the ‘Number’ spinner. Use the arrow and page-up/down keys for greater speed with a large number of seats. Click the ‘Copy seat’ button and the prompt in figure 4.50 is shown. Enter a unique seat number and click ‘OK’. A seat’s indicator properties can be copied to one or more seats using the ‘Copy properties to all seats’ button. Select the seat to copy from using the ‘Number’ spinner. Click the ‘Copy properties to all seats’ button. The dialog in figure 4.51 is shown. In the ‘Object’ Figure 4.51 - Copy properties group, select from which indicators to copy. In the ‘Property’ group, select which properties to copy. If ‘Prompted’ is checked, every seat is prompted before copying, making it possible to skip certain seats. If ‘Prompted’ is not checked, all seats are copied to. Click ‘OK’ to start copying. The ‘Verify with seating list’ button is used to verify the current Seating View’s seat group to the Seating List. Click the button and the verification is started. If a seat in the Seating List does not exist in the seat group, an option to add this seat to the group is presented. This is also an easy way to add all seats present in the Seating List to the seat group. If a seat in the seat group is not present in the Seating List, a prompt shown in figure 4.52 is shown. Click ‘Yes’ to delete the seat from the seat group. Important! ‘Ghost’ seats may be present to aid in positioning the seat group visually. Be certain that the seat is not needed before deleting it. Figure 4.52 - Seat verify The ‘State’ combo box is used to select the state of the indicators for the currently select the seat (seat number shown in the ‘Number’ spinner). Select ‘Off’ to draw the indicators in their off state, select ‘On’ to draw the indicators in their on state. Select ‘Blink’ to draw the indicators blinking, switching between the off and on state. 60 Close Talk Control: Section 4 Rev. 1.06 The ‘Default’ setting can be used to establish a template seat for creating new seats. Select the seat to use as a template using the ‘Number’ spinner and then check the ‘Default’ setting. The template seat number is now shown in parentheses. The ‘Show’ combo box is used for showing the indicators for all seats or only the current seat in the work area. View The ‘View’ group is used to select, create, delete, copy, rename, center and re-size Seating View’s. Use the drop-down list to select the Seating View to edit. To add a new, blank Seating View, click the ‘New’ button. A prompt for a name for the new Seating View is shown. Enter a name and click ‘OK’. The new, empty Seating View is created and made active for editing. Figure 4.54 - Seating View delete prompt To delete a Seating Figure 4.53 - Name prompt View, select the view for new Seating View using the drop-down list and click ‘Delete’. A prompt is shown, confirming the delete. Click ‘Yes’ to delete the Seating View. Deleting a Seating View is permanent and cannot be undone. To copy a Seating View, select the view to copy using the drop-down list and click ‘Copy’. A name prompt appears. Enter a name for the new view and click ‘OK’. The Seating View copy is created and made active for editing. To rename a Seating View, select the view to rename using the drop-down list and click ‘Rename’. A prompt for a name is shown. Enter the new name and click ‘OK’. Rev. 1.06 When new indicators are added, the seat group (all visible indicators) is not automatically re-centered. Use the ‘Center’ button to center the seat group in the work area. If centering the indicators over an image is problematic, create ‘Ghost’ seats (seat numbers that does not exist in the Seating List) with size 1, at the top left corner and bottom right corner as centering guides. When making several versions of the same Seating View, e.g. to create versions for different display resolutions, the ‘Resize’ button can be used to stretch or shrink a Seating View. Click the ‘Resize’ button and enter a re-size percentage in the interval 20% to 200% and click ‘OK’. The current seating View is re-sized. Figure 4.53 - Prompt for Seating View re-size Working with Close Talk Control 61 The ‘View size:’ indicator shows the current size in pixels of the work area. Object The ‘Object’ group is used to select which of the four indicator types, ‘Present’, ‘Yes’, ‘No’ and ‘Abstain’, to edit. Properties The ‘Properties’ group is where the actual indicator editing is done. First select the desired indicator using the ‘Object’ group. The ’Shape’ drop-down list is used to select the shape of an indicator. There are four choices available: • • • • Not used The indicator is not used and will not be drawn Square The indicator is drawn as a filled square and is rotatable Rectangle The indicator is drawn as a filled rectangle and is rotatable Circle The indicator is drawn as a filled circle ‘As yes’ is used to make the Yes-indicator be shared for all three vote results, Yes, No, and Abstain. To use this functionality, create the ‘Yes’ indicator first, including size, position and colors. Then create the ‘No’ and ‘Abstain’ indicators, where only the On and Off colors are important, and check ‘As yes’. Now position, size and angle is inherited from the ‘Yes’ indicator. ‘On-Outline’ width and color is the indicator outline pen width (in pixels) and color for the ON state, i.e. when the indicator is ‘lit’. ‘On’ color is the indicator fill color for the ON state, i.e. when the indicator is ‘lit’. ‘Off-Outline’ width and color is the indicator outline pen width (in pixels) and color for the OFF state, i.e. when the indicator is ‘dark’. ‘Angle’ is the indicator rotation angle in degrees. To change the setting, use the spinner buttons, the arrow-up/down / Page-Up/Down buttons or enter a degree manually. 62 Close Talk Control: Section 4 Rev. 1.06 ‘Off’ color is the indicator fill color for the OFF state, i.e. when the indicator is ‘dark’. ‘Position’ is used to move the indicator. Click the arrow buttons to move indicator to the desired position in 1 pixel steps. Press ‘Shift’ and click the arrow buttons to move in 10 pixel steps. Keep arrow button clicked for auto-repeat moving. ‘Move object’ and ‘Move group’ is used to select what to move, either the single currently selected indicator or all the indicators for that seat. ‘Size’ is used to change the indicator size. Click the arrow buttons to change indicator size in the desired direction in 1 pixel steps. Press ‘Shift’ and click the arrow buttons to change size in 10 pixel steps. Keep arrow button clicked for auto-repeat sizing. The current indicator size is shown below the ‘Size’ button group. The ‘running man’ icon between the ‘Position’ and ‘Size’ button group is a speed-edit function. Click once on the icon. Now the following keyboard commands are available: • • • • • Arrow keys Up/Down/Left/Right controls indicator position in 1 pixel steps. Use Shift-Arrow to move in 10 pixel steps Control-Arrow Up/Down/Left/Right controls the indicator size in 1 pixel steps. Use Shift-Control-Arrow to re-size in 10 pixel steps Alt-Arrow Left/Right controls the indicator angle Control-Alt-Arrow Up/Down selects the current seat number. Use Shift to increase stepping P-key selects the ‘Present’ indicator. ‘Y’-key selects the ‘Yes’ indicator. ‘N’-key selects the ‘No’ indicator. ‘A’-key selects the ‘Abstain’ indicator Save/Close The ‘Save’ button works as a one-level undo function. The currently edited Seating View is stored internally until the ‘Save’ button is clicked when it is saved to the database. Rev. 1.06 ‘Close’ closes the Seating View editor windows. Working with Close Talk Control 63 Test delegate units The ‘Test delegate units’ tool can be used as an installation aid, for maintenance, checking that all Delegate Units are turned on and working before a conference or for checking battery levels in the Delegate Units. Figure 4.57 shows the main window: Figure 4.57 - Test Delegate Units The ‘Settings’ tab is used to prepare for a test: Figure 4.56 - Test Delegate Units The ‘How’ group is used to select the test type. Selecting ‘Contact’ will make a shorter run, testing that all units can be contacted. This is the preferred test method for checking that all units are turned on or to check battery voltage levels. Select ‘Durability’ to make a running time test. The test will continue 64 Close Talk Control: Section 4 Rev. 1.06 In the ‘What’ group, selecting ‘All seats’ will test all the seats in the Seating List with a valid Delegate Unit ID. Selecting ‘Only present’ will only test the seats in the Seating List marked as ‘Present’. until all units have been turned off due to low battery. Use this test to determine Delegate Unit battery quality. The ‘Retry’ setting is used to specify how many contact attempts that should be made before a Delegate Unit is considered ‘turned off’. ‘Timeout’ specifies how long the time-out for a contact attempt should be in seconds. Specifying a short time can make the test faster but also susceptible to false ‘contact lost’ results. Selecting a longer time reduces false ‘contact lost’ situations but may increase test time. A time-out between 4 and 8 seconds is a good compromise. ‘Test time’ is the actual test time in the ‘HH:MM:SS’ format. When making selections in the ‘What’, ‘How’ and ‘Retry’ settings, a suggested test time is updated in this field. Accept the suggested test time or enter another time manually. When the preparations are ready, switch to the ‘Control’ tab and click the ‘Start’ button. Figure 4.58 - Test started Rev. 1.06 ‘Units’ shows the total number of Delegate Unit’s included in the test. ‘Failed’ shows the total number of units that contact has been lost with. Status’ shows the test state and ‘Time’ counts down the test time. Use the ‘Done’ button to end a test prematurely. Working with Close Talk Control 65 When the test starts, the unit table begins to update with test results. The table contains the following information: • • • • • • • Seat The seat number Unit-ID The Delegate Unit ID for that seat Status During a test, shows the current state. After a test, shows the ‘final verdict’ Time For an active unit, shows the current test time. For a unit that is considered off-line, shows the test time before contact was lost Battery Shows the battery level in volts at the last successful contact attempt Contact Shows the total number of successful contact attempts No contact Shows the total number of failed contact attempts When the test is done, a summary dialog is shown such as in figure 4.59 where a short conclusion is drawn about the test outcome. Rev. 1.06 Figure 4.59 - Test done Figure 4.58 - Test done 66 Close Talk Control: Section 4 A test report table report table can be printed and/or exported as RTF (Rich Text Format) or ‘Excel’. Note! This test function is to be considered as an aid, not a definitive test to be used to determine the working/not working status of a conference system. There are more things to consider than the few parameters presented in the test report. Do not be alarmed if some Delegate Units experience occasional ‘No contact’ situations. Only when a unit... • • • Regularly fails a contact test In a duration test, shows an unusually short operation time In a duration test, the total time differs greatly from the other units Rev. 1.06 ... is there a cause for concern. If so, contact your local dealer/support organisation for advice. Working with Close Talk Control 67 Rev. 1.06 Blank page 68 Close Talk Control: Section 4 Section 5 Rev. 1.06 Conference Conference 69 Rev. 1.06 Blank page 70 Close Talk Control: Section 5 Introduction The preparation, execution and conclusion of a conference involves such things as: • • • • • • • • Creating and maintaining delegate lists Creating and maintaining seating lists Creating and maintaining agendas Placing the Delegate Units at the seats Charging the Delegate Units Maintaining speaker and reply lists Updating attendance Voting with result processing Careful planning will make Close Talk Conference System and Close Talk Control work much smoother. Before the conference Preparing the list’s Preparing the delegate and seating list is half the work. Updating all this basic information during a busy conference is stressful and error prone. Take time to learn the behavior of the delegate and seating list before the conference is started. The delegate list Working with the delegate list is described in section “Working with Close Talk Control”, page 25. Make sure the information is accurate and that all delegates attending is included in the list. Pre-set a suitable delegate sorting order and place the delegate list window in a suitable position on the desktop. The seating list Rev. 1.06 Update the seating list ‘Ordinary’ (if used) and ‘Delegate’ settings according to the expected attendees. As delegates arrive, update the ‘Present’ setting for each delegate so that the list is ready for conference start. Make absolutely sure that the ‘Unit ID’ is correct for each seat. Having mixed ID’s, no ID’s, missing ID’s and wrong ID’s results in confusing problems and what looks like complete system malfunction. Introduction 71 The conference controller Figure 5.3 shows the conference controller. It is used for starting a conference, maintaining and using agenda’s, stopping a conference and post-processing attendance and fee results. Figure 5.3 - The conference controller Starting a conference - Start To start a conference, click ‘Start’. A start time dialog is shown. Select ‘Current’ to use the current computer time or select ‘Custom’ and enter a time and click ‘OK’. Figure 5.1 - Start prompt The ‘Started’ field shows the start time. As long as a conference is not started, the speaker and reply lists are closed and no votes can be made. As soon as a conference is started, all delegates marked as ‘Present = Yes’ will enter an attendance time log. The seating table is now ‘live’ and updates in the seating table such as delegate changes and the ‘Present’ field affects the time log. The Main Display will change to the speaking list view. Next ‘Next’ moves to the next matter on the Agenda. The ‘Order’ and ‘Matter’ fields show the current matter. Stop ‘Stop’ stops a conference. Enter a stop time and click ‘OK’ or just click ‘OK’ to use the current time. Print The ‘Print’ menu is used to print attendance and fee reports. It is only available after a conference has been stopped. The ‘Export’ menu is used to export attendance and fee reports as RTF (Rich Text Format, a plat- Figure 5.2 - Export menu form independent document format) or as Microsoft Excel. It is only available after a conference has been stopped. 72 Close Talk Control: Section 5 Rev. 1.06 Export Order and Matter The ‘Order’ and ‘Matter’ fields show the currently selected matter on the Agenda. The matter description is shown on the Main Display and on vote result reports. A new matter can be manually entered in the ‘Matter’ field. When ‘Close’ is clicked, the new text is shown on the Main Display and used in reports. Edit Opens the Agenda editor. See description later in this section. Close Closes the conference controller. Save/export attendance and fee reports before closing if the conference was stopped. Agenda’s Figure 5.4 - The agenda editor Creating and using agendas The agenda editor is used to create a conference agenda. It provides basic database editing functionality as described on page 41. Matters are sorted by the ‘Order’ field. Rev. 1.06 Selecting matters from the agenda is done with the ‘Next’ button on the conference controller window or by opening the agenda editor a selecting a new matter. If the conference is started, a confirmation dialog is shown, asking if the new matter should be made active. Conference 73 During a conference Controlling the speaker and reply list Audio channel status area Reply list Speaker list List toolbar Figure 5.5 - Controlling speaker lists When a conference is started, speak requests from Delegate Unit’s are placed in a list, waiting to be processed. List entries shows up on the ‘Speaker’ and ‘Reply list’ as shown above. Depending on the configuration, the speaker list can be handled automatically or manually. In automatic mode, the speaker list is emptied on a first-in first-out basis, picking off the list as soon as audio channels are available. The operator can re-arrange and delete entries as long as they are in the list. In manual mode, all requests are placed in the list and it is up to the operator to assign speakers an audio channel using the list toolbars. Allowing a delegate to speak If any audio channel is available, an delegate in the speaker or reply list can nel. Otherwise, a image will be shown next to the name in the audio channel status area. It is then up to the operator to free the audio channel (see ‘Interrupting a speaker’ later in this section). 74 Close Talk Control: Section 5 Rev. 1.06 be given a channel by selecting it in the list and then clicking on it’s list toolbar. The delegate will be given the first available audio channel and show up on the audio channel status area as soon as it has acquired the channel. If the delegate has a maximum speaking time (see page 38), a timer will be started. If Close Talk Control is configured to do so, when the speaking time runs out it will interrupt the speaker automatically, freeing the audio chan- The delegate can also be given right to speak on a platform by clicking the button. Since Close Talk Conference System does not have control over the platform or it’s audio channel, just the name of the speaker will be shown in the platform field on the audio channel status area and the speak request on the delegates Delegate Unit will be canceled. It is up to the operator to update the name of the current platform speaker. As long as all available audio channels are busy, clicking the button will have no effect and as long as the platform is busy (a name is presented in the audio channel status area), clicking the button will have no effect. Removing a speaker To remove one or more speakers from a list, select the speaker in the list and click . The selection will be removed and the request on the Delegate Unit will be canceled. To select a range in the list, select the top-most entry, hold down the shift-key and select the bottom entry. To make a non-contiguous multiple selection, select both the ‘Name’ and ‘Organisation’ field by dragging from ‘Name’ to ‘Organisation’. Hold down the Ctrl-key and make as many more ‘Name’+’Organisation’ selections as needed. Re-arranging Select speakers in the list as described in ‘Removing a speaker’. Click to move the selection to the top, to to move the selection one step up, move the selection one step down and tom of the list. to move the selection to the bot- Locking/un-locking lists The speaking and reply list can be locked to prevent more entries in the lists. Click the button. The button changes to , indicating that the list is now locked. Click the button again to un-lock the list. Rev. 1.06 Controlling the audio channels The audio channel status area shows the current use of the system speaker audio channels. Up to three audio channels can be active simultaneously. The fourth pseudo-channel is a platform, enabling the speaker list functionality to be used. If a channel is free, ‘Available’ will be shown in the channels status field, otherwise the name of the current speaker is shown. Conference 75 Interrupting a speaker A channel can be freed (except the platform) by clicking the button next to the status field. As soon as the Delegate Unit frees the audio channel, ‘Available’ will be shown in the channel status field. Updating attendance As soon as a conference is started, all delegate arrivals and departures in the seating list is logged. This information is later used to produce attendance and fee reports. Updating arrivals and departures is done using the delegate and seating list. Delegate is arriving (seat is empty) All delegates marked as ‘Present = Yes’ in the seating table are considered ‘arrived’ when the conference is started. If a delegate arrives at his or her’s empty seat, check that the correct name is associated with the seat and then double-click the ‘Present’ field in the seating table for that seat to change it to ‘Yes’. The delegate is now present. If the wrong name is presented in the seating list ‘Delegate’ field, correct this before changing the ‘Present’ field to ‘Yes’ by: • • • • Find the correct person in the delegate list and select him/her Switch to the seating list Select the ‘Delegate’ field for the correct seat Select ‘Select delegate’ on the ‘Edit’ menu Delegate is leaving (seat becomes empty) To mark a delegate as departed: • Double-click the ‘Present’ field in the seating table for that seat to change it to ‘No’ The seat is now empty and the delegate is logged as ‘departed’. Delegate is substituted (one departed and one arrived) • • • 76 Find the new delegate in the delegate list and select him/her Switch to the seating list Select the ‘Delegate’ field for the correct seat Close Talk Control: Section 5 Rev. 1.06 To switch seat occupant: • Select ‘Select delegate’ on the seating list ‘Edit’ menu The previous delegate is now marked as ‘departed’ and the new delegate as ‘arrived’. Delegate did not arrive If a conference is started with the assumption that someone ‘will show up’ (his/her’s time is logged) but doesn’t do so, the seat can be marked as empty without the assumed delegate being included on attendance and fee reports by: • • Select the ‘Delegate’ field for the correct seat Select ‘Delegate not present’ on the seating table ‘Edit’ menu The seat is now marked empty and no time was logged for that delegate. Another delegate arrived If a conference is started with the assumption that someone will show up (his/her’s time is logged) but another person shows up for that seat, the time log can be transferred to the new person by: • • • • Find the new delegate in the delegate list and select him/her Switch to the seating list Select the ‘Delegate’ field for the correct seat Select ‘Replace delegate’ on the seating list ‘Edit’ menu The new person has now taken over the time log that was started for the person that did not show up. Agenda’s During a started conference, selecting matters from the agenda is done with the ‘Next’ button on the conference controller window or by opening the agenda editor a selecting a new matter row. A confirmation dialog is shown, asking if the new matter should be made active. Rev. 1.06 A new matter can also be entered manually in the matter field on the conference controller panel. It will be in effect until ‘Next’ is clicked again or a new matter is selected in the Agenda editor. Privileged units Privileged units are handled different than regular units. There can be two privileged units in Close Talk Conference System, a chairman unit and a priority unit. Conference 77 The chairman unit can be guaranteed an audio channel in several ways (see section “Configuration”, page 13) and does not have a limited speaking time. The Priority unit can be guaranteed an audio channel using the ‘Steal’ method described in section “Configuration”, page 13, and does not have a limited speaking time. After the conference The conference controller The conference controller panel is used to stop a conference. When a conference is stopped, all delegate time log’s are marked as ‘departed’. The Main Display shows a ‘Good-bye’-image if configured to do so (see Configuration, page 13). Stopping a conference ‘Stop’ stops a conference. Enter a stop time and click ‘OK’ or just click ‘OK’ to use the current time. The ‘Stopped’ field shows the stop Figure 5.6 - Stop prompt time. The speaker and reply lists are now closed and no votes can be made. As soon as a conference is stopped, all delegates marked as ‘Present = Yes’ will have their time log closed. The seating table is now back to normal mode and will not affect the time log. Printing and exporting Attendance and fee reports must be handled while the conference control panel is still open. After closing the conference control panel, the attendance and fee information will be lost. Attendance Attendance is reported for all delegates that has attended the conference, full or part time. All time periods (arrival-departure pairs) are reported for each delegate on multiple lines. Fee’s are minute-based and rounded to the base currency, e.g. a fee total of $102,34 is rounded to $102. For delegates with more than one time period of attendance, Close Talk Control can be configured to either calculate a fee for each time period or for the total sum of time. 78 Close Talk Control: Section 5 Rev. 1.06 Fee The Main Display Header Reply list Speaker list Footer Figure 5.7 - The Main Display with a started conference The Main Display is used by various parts of the program to show information to the auditorium. In conference mode, the main components are: • • • Rev. 1.06 • Header Shows the current matter, number of entries in the speaker and reply list Speaker list Shows the current contents of the speaker list Reply list Shows the current contents of the reply list. This list can be hidden on the ‘Settings’ dialog, see page 13 Footer Shows the current speakers on the audio channels and platform Conference 79 Rev. 1.06 Blank page 80 Close Talk Control: Section 5 Section 6 Rev. 1.06 Voting Voting 81 Rev. 1.06 Blank page 82 Close Talk Control: Section 6 Introduction The Close Talk Control vote function expands the functionality of Close Talk Conference System by using the Delegate Unit’s as entry units for voting. How it works The system communicates with the Delegate Unit’s via Infra Red light. During a vote session, Close Talk Control continuously asks each participating Delegate Unit about their vote result in a round-robin fashion. It is necessary that every participating Delegate Unit can be contacted without problems or the vote will fail. Make sure all Delegate Units are fully charged before conference start, that they are turned on and that all delegates have been made aware not to block the free sight to and from a Delegate Unit and the Transceiver’s. Placing even the smallest object on top of the Delegate Unit can cause the vote session to fail. It is recommended to configure Close Talk Control to disable the power-off function in the Delegate Unit during a conference (see section “Configuration”, page 13) to prevent delegates from accidentally turning off the unit. Preparing for a vote Having accurate delegate and seating list’s is the first step towards a successful vote session. Make sure all voting delegates have the correct vote weight in the delegate list. Make sure the seating list is accurate, especially the ‘Delegate’ and ‘Votes’ fields. Performing a vote Starting a vote session Rev. 1.06 When the ‘Vote’ function is started, Close Talk Control assembles a list of Delegate Unit’s participating in the session by examining the seat and delegate lists. When this list is Figure 6.1 - Starting a vote session ready, it sets the selected Delegate Unit’s into vote mode which respond by blinking the red, yellow and green LED’s. A vote result cannot be selected yet. Delegate Unit’s that does not participate in voting will be disabled during the vote session. Introduction 83 • • • • • • • • 84 Status Shows the current status of the vote controller Time Can be used to limit voting time automatically. Regardless of the time left to vote, a vote can be ended by clicking ‘Done’, or canceled by clicking ‘Cancel’ at any time. Enter time as ‘hH:mM:sS’, e.g. ‘0:2:30’ which translates to 0 hours, 2 minutes and 30 seconds. Click ‘Apply’ to set the new time Yes-vote means and No-vote means Can be used to describe the meaning of a Yes and No-vote. It will be shown on the Main Display and be included in vote result reports. Click ‘Apply’ to show any changes Type Selects if the vote should be ‘Open’, where individual vote results are shown and reported, or ‘Closed’ where only a result summary is shown and reported Apply Used to show the changes in the ‘Matter’, ‘Time’, ‘Yes-vote means’ and ‘No-vote means’ fields View Selects the vote result view on the Main Display during voting. See the description of the Main Display later in this section View after Selects the vote result view on the Main Display after a successful vote session. See the description of the Main Display later in this section Voters Shows the number of delegates participating in a vote Close Talk Control: Section 6 Rev. 1.06 As soon as all Delegate Unit’s have been set into vote mode, the vote controller panel is shown as in figure 6.2. The top section is an agenda controller similar to the functionality described on page 73. The matter field will be shown on the Main Display and be included in vote result reports. Select a matter from the agenda or edit Figure 6.2 - Preparing to vote the matter directly in the ‘Matter’ field. Click ‘Apply’ to show the new matter on the Main Display. The main components of the vote controller page are: • • • • • • • • • • • • • Rev. 1.06 • Time to vote Show the time left of a vote Votes Shows how many delegates that have made a result selection during a vote Yes, No and Abstain Shows the number of (not accumulated vote weight) the respective vote results that have been selected Absent Shows the number of absent voters Final reading During the ‘final read’ (see later), this counter will show the number of Delegate Unit’s left ro read Bad readings If Close Talk Control fails to read the result selection from a Delegate Unit, this field shows the number of failed unit’s. If any unit’s fails vote result reading, the ‘Handle’ button is made active, enabling manual handling of the problem unit Handle Used to manage problem unit’s during a vote. See page 88 for more information Vote Start’s a vote Done Concludes a vote and starts the ‘final reading’ (see later) Cancel Cancel’s a vote Print Used to print vote result reports after a successful vote Export Used to export vote result reports after a successful vote Reset After a successful vote, the vote controller remains on hold so the operator can post-process vote results. As soon as this is ready, ‘Reset’ is clicked and all vote results are erased. Another vote can now be done Exit Used to exit the vote session. The vote controller is closed and all Delegate Unit’s are returned to the conference mode Voting 85 Starting to vote When all preparations have been done, the vote is started by clicking ‘Vote’. Close Talk Control will immediately start to read vote results from the Delegate Unit’s and the vote controller panel and Main Display view is continually updated. No apparent change is shown on the Delegate Unit’s but delegates can now select vote results as described in section “Configuration” on page 13, under the ‘Voting method’ setting. During a vote, if the ‘Bad readings’ field show’s other than 0, this is not catastrophic. Use the ‘Handle’ button to handle the problem unit’s manually. See page 88 for more information. The ‘Final reading’ The operator can let the vote time-out by itself or choose to end the vote by clicking ‘Done’. Then the vote controller starts a final read where all participating Delegate Unit’s are read from the beginning to end, establishing the final vote result. Figure 6.3 - Starting the final reading During this final read, all participating Delegate Unit’s must be read correctly or the final read will fail. If one or more units fail, the ‘Bad readings’ field will show the number of problem unit’s. The problem unit is excluded from further read attempt’s and entered into a ‘problem unit list’. If any bad reading’s exist, the final read must be ended by the override button in the ‘Manage bad readings’ dialog in order to obtain a final vote result. Use the ‘Handle’ button to manage this as described on page 88 Rev. 1.06 The final read will continue until a successful final reading was made (’Bad readings’ field show’s 0), the final reading is overridden by the ‘Handle’ button functionality or the ‘Cancel’ button is clicked. 86 Close Talk Control: Section 6 Vote done After a successful vote, the pre-set vote view change delay (see section “Configuration”, page 13) will be executed and then the Main Display will switch to the result view selected in the ‘View after’ setting. The ‘Status’ field will show ‘Vote done’. The vote results can Figure 6.4 - Vote done, Print menu now be printed and/or exported in the RTF (Rich Text Format, a platform independent document format) format. Two report styles are available, the ‘Short result’ and the Full result’. ‘Short result’ is a compacted report format with a summary first followed by the names of Yes and No-voters. This report may accommodate the result of up to 150 voters on a single, A4-size page. ‘Full result’ is a report in tabular format, presenting a summary first followed by each voter on it’s own line with seat number and other personal information. The ‘Export’ function exports the above mentioned report formats as RTF-files. A file selection dialog is show. Enter a file name and click ‘Save’. Rev. 1.06 All successful votes are numbered by a running counter which is included in reports. The running counter is reset to 1 each time Close Talk Control is started. Both the printing and exporting of vote results can be automated by checking the ‘Print short result automatically’, ‘Print full result automatically’, ‘Export short result automatically’ and ‘Export full result automatically’ respectively. After a successful vote, printing will be done automatically on the default printer selected under ‘Printer settings...’ on the main menu. Exporting automatically will export using the ‘Matter’ field contents followed by the vote number running counter as file name. For example, if the matter field reads as in figure 6.4 and the running counter is 6, the file name will be ‘Proposal 1.9a_6.RTF’. The location of exported files is remembered and used by all export functions in Close Talk Control. For example, using the export function in the delegate list will remember the location exported to and Close Talk Control will use Voting 87 that as a default location for all other export functions. Select a new location in, for example, the vote controller export function and that location will be the default for Close Talk Control a.s.o. Note: Turning on these automatic functions will only be active as long as Close Talk Control remains started. Re-starting Close Talk Control will turn them off to prevent un-intentional printing and saving. After handling the vote results, click ‘Reset’ to prepare for another vote or ‘Exit’ to close the vote controller panel. If the vote results had not been handled, a warning that the vote results will be lost is shown. Handle bad reading’s If reading the vote result from a delegate unit fails, it is entered into a ‘Bad Readings’ list. By entering this list, the faulty delegate unit is excluded from the vote result reading loop and the result for that unit must be managed manually by clicking the ‘Handle’ button shown in figure 6.3. Figure 6.5 - Manage bad reading’s If there are bad reading’s present when the Final Reading is started by clicking the ‘Done’ button in figure 6.3, the final read loop will continue to run until the ‘Vote done’ button is clicked in the ‘Manage bad readings’ dialog as shown in figure 6.6. This button can be seen as an override button, Figure 6.6 - Manage bad reading’s a way to tell the system ‘I know we during final reading have bad readings, end the final read anyway’. Make sure that all bad reading unit’s in the list are handled properly before clicking ‘Vote done’. 88 Close Talk Control: Section 6 Rev. 1.06 A dialog is shown as in figure 6.5. There are five ways to manage a faulty unit, either give it one of the four vote results ‘Yes’, ‘No’, ‘Abstain’ or ‘No vote result’ by clicking the corresponding button in the ‘Handle’ group or correct the problem (e.g. removing an obstruction of the infra red light path) and click ‘Try again’. By clicking ‘Try again’, the unit is restored into the vote result reading loop and an attempt to read the vote result is made again. If the vote result reading fails again, the unit will be returned to the ‘Bad readings’ list for manual management. The Main Display The Main Display have five ways of presenting vote results during a vote session. These are: • • • • Rev. 1.06 • Table The vote result is shown in summary and as individual results in tabular form. See figure 6.7 Bar graph The vote results are shown in summary and as a bar graph. See figure 6.8 Time The voting time left is shown. No results are presented. See figure 6.9 Summary A result summary is shown as in figure 6.10 Seating Vote results are shown graphically. See figure 6.11. Seating views can be created as described on page 52. Voting 89 Figure 6.8 - Main Display, ‘Bar graph’ view 90 Close Talk Control: Section 6 Rev. 1.06 Figure 6.7 - Main Display, ‘Table’ view Rev. 1.06 Figure 6.9 - Main Display, ‘Time’ view Figure 6.10 - Main Display, ‘Summary’ view Voting 91 Rev. 1.06 Figure 6.11 - Main Display, ‘Seating’ view 92 Close Talk Control: Section 6 Appendix A Rev. 1.06 Null modem cable Null modem cable 93 Rev. 1.06 Blank page 94 Close Talk Control: Appendix A Custom designed null-modem cable It is generally recommended to use a purchased null-modem cable. In the event that a longer cable length is needed or if the installation requires it, a custom built cable can be used and should be connected according to the drawings in figure A.1 and A.2. • • • Only use high quality foil shielded cables recommended for data communication Use high quality connectors with, preferably, shielded connector housings Do not exceed the RS-232 specification of a maximum of 15 meters (45 feet) cable length CU Computer Shield Shield Figure A.1 - 9 to 25 pin null modem cable CU Computer Shield Rev. 1.06 Shield Figure A.2 - 9 to 9 pin null modem cable Null modem cable 95 Rev. 1.06 Blank page 96 Close Talk Control: Appendix A Index A About . . . . . . . . . . . . . . . . . . . . . . . . . . . . . . . . . . . . . 3, 4 agenda . . . . . . . . . . . . . . . . . . . . . . . . . . . . . . . 71, 73, 77, 84 Apply . . . . . . . . . . . . . . . . . . . . . . . . . . . . . . . . . . . . . . 84 arriving . . . . . . . . . . . . . . . . . . . . . . . . . . . . . . . . . . . . 76 attendance . . . . . . . . . . . . . . . . . . . . . . . . . . . . . . . . . 76, 78 audio channel . . . . . . . . . . . . . . . . . . . . . . . . . 27, 31, 74, 75, 79 B Background image . backup . . . . . . Bad reading . . . . Bar graph . . . . . Basics . . . . . . . Battery . . . . . . . . . . . . . . . . . . . . . . . . . . . . . . . . . . . . . . . . . . . . . . . . . . . . . . . . . . . . . . . . . . . . . . . . . . . . . . . . . . . . . . . . . . . . . . . . . . . . . . . . . . . . . . . . . . . . . . . . . . . . . . . . . . . . . . . . . . . . . . . . . . . . . . . . . . . . . . . . . . . . . . . 59 29, 36, 37 . . . . 85 . . 54, 89 . . . . 58 . . . . 33 Cancel . . . . . . . . . . Central Unit . . . . . . . Chairman channel . . . . Chairman unit . . . . . . Close. . . . . . . . . . . communication. . . . . . conference controller . . Configuration. . . . . . . Conference . . . . Hardware . . . . . Program . . . . . . Voting . . . . . . . Configure Main Display... Confirm password . . . . Connect unit ID . . . . . copy . . . . . . . . . . . create . . . . . . . . . . . . . . . . . . . . . . . . . . . . . . . . . . . . . . . . . . . . . . . . . . . . . . . . . . . . . . . . . . . . . . . . . . . . . . . . . . . . . . . . . . . . . . . . . . . . . . . . . . . . . . . . . . . . . . . . . . . . . . . . . . . . . . . . . . . . . . . . . . . . . . . . . . . . . . . . . . . . . . . . . . . . . . . . . . . . . . . . . . . . . . . . . . . . . . . . . . . . . . . . . . . . . . . . . . . . . . . . . . . . . . . . . . . . . . . . . . . . . . . . . . . . . . . . . . . . . . . . . . . . . . . . . . . . . . . . . . . . . . . . . . . . . . . . . . . . . . . . . . . . . . . . . . . . . . . . . . . . . . . . . . . . . . . . . . . . . 85 11, 15, 22, 31, 32 . . . . . . . . 17 . . . . 16, 18, 77 . . . . 43, 50, 73 . . . . . . 21, 31 . . . . . . 72, 78 . . . . . . . . 15 . . . . . . . . 16 . . . . . . . . 21 . . . . . . . . 22 . . . . . . . . 19 . . . . . . . . 28 . . . . . . . . 23 . . . . . . . . 35 . . 29, 36, 37, 43 . . . . 29, 36, 37 C Rev. 1.06 D Database management . . . . . . . . . . . . . . . . . . . . . . . . . . . . 36 delegate . . . . . . . . . . . . . . . . . . . . . . . . . . 31, 50, 51, 74, 76, 77 delegate list . . . . . . . . . . . . . . . . . . . . . . . . . . 29, 38, 40, 50, 71 Delegate Unit . . . . . . . . . 19, 21, 29, 30, 32, 33, 47, 71, 74, 75, 83, 85, 86 delete . . . . . . . . . . . . . . . . . . . . . . . . . . . . . . . . . 29, 36, 37 desktop . . . . . . . . . . . . . . . . . . . . . . . . . . . . . . . . . . . . 28 Disable power off in delegate unit . . . . . . . . . . . . . . . . . . . . . . . 21 i Done . . . . . . . . . . . . . . . . . . . . . . . . . . . . . . . . . . . . . . 85 E Edit. . . . . . . . . . . . . . . Emphasize manual vote results Erase . . . . . . . . . . . . . Exit . . . . . . . . . . . . . . . Export . . . . . . . . . . . . . . . . . . . . . . . . . . . . . . . . . . . . . . . . . . . . . . . . . . . . . . . . . . . . . . . . . . . . . . . . . . . . . . . . . . . . . . . . . . . . . . . . . . . 50, 73 . . . . . . . . 21 . . . . . . 42, 43 . . . . . . 29, 85 43, 49, 72, 78, 85 . . . . . . . . . . . . . . . . . . . . . . . . . . . . . . . . . . . . . . . . . . . . . . . . . . . . . . . . . . . . . . . . . . . . . . . . . . . . . . . . . . . . . . . . . . . . . . . . . . . . . . . . . . . . . . . . . . . . . . . . . . . . . . . . . . . . . . . . . . . . . . . . . . . . . . . . . . . . . . . . . . . . . . . . . . F Fee. . . . . . Fee method . field . . . . . File . . . . . . filtering . . . . Final reading . Firmw. vers. . Footer . . . . Free arrival. . Function . . . . . . . . . . . . . . . . . . . . . . . . . . . . . . . . . . . . . . . . . . . . . . . . . . . . . . . . . . . . . . . . . . . . . . . . . . . . . . . . . . . . . . . . . . . . . . . . . . . . . . . . . . . . . . . . . . . . . . . . . . . . . . . . . . . . . . . . . . . . . . . 46, 78 . . 22 41, 48 . . 42 44, 45 85, 86 . . 31 . . 53 . . 36 . . 46 H Handle . . . . . . . . . . . . . . . . . . . . . . . . . . . . . . . . . . . 85, 88 Header . . . . . . . . . . . . . . . . . . . . . . . . . . . . . . . . . . . . . 53 Help . . . . . . . . . . . . . . . . . . . . . . . . . . . . . . . . . . . . . . 34 I Insert . . . . . . . . . . . . . . . . . . . . . . . . . . . . . . . . . . . . . 42 installation . . . . . . . . . . . . . . . . . . . . . . . . . . . . . . . . . . . 7 media . . . . . . . . . . . . . . . . . . . . . . . . . . . . . . . . . . . 8 Performing . . . . . . . . . . . . . . . . . . . . . . . . . . . . . . . . 8 Interrupt speaker. . . . . . . . . . . . . . . . . . . . . . . . . . . . . . . . 18 L leaving . . . . . Limit reply time. List . . . . . . . Locking. . . . . . . . . . . . . . . . . . . . . . . . . . . . . . . . . . . . . . . . . . . . . . . . . . . . . . . . . . . . . . . . . . . . . . . . . . . . . . . . . . . . . . . . . . . . . . . . . . . . . . . . . . . . . . . . . . . . . . . . . . . . . . . . . . . . . 76 18 53 75 Main Display . . . . . . . . Main Display configuration. main menu . . . . . . . . . Manage databases . . . . . . . . . . . . . . . . . . . . . . . . . . . . . . . . . . . . . . . . . . . . . . . . . . . . . . . . . . . . . . . . . . . . 23, 30, 52, 79, 86, 89 . . . . . . . . . . 52 . . . . . . . . . . 27 . . . . . . . . . . 29 ii Close Talk Control: Rev. 1.06 M Matter . . . . . . . . . . . . . . . . . . . . . . . . . . . . . . . . . . . 73, 84 modes . . . . . . . . . . . . . . . . . . . . . . . . . . . . . . . . . . . . . 41 N New . . . . . . . . . . . . . . . . . . . . . . . . . . . . . . . . . . . . . . 43 Next . . . . . . . . . . . . . . . . . . . . . . . . . . . . . . . . . . . . . . 72 No casted vote means absent . . . . . . . . . . . . . . . . . . . . . . . . . 20 No contact . . . . . . . . . . . . . . . . . . . . . . . . . . . . . . . . . . . 15 No-vote . . . . . . . . . . . . . . . . . . . . . . . . . . . . . . . . . . . . 84 null-modem cable . . . . . . . . . . . . . . . . . . . . . . . . . . . . . . . 95 connecting. . . . . . . . . . . . . . . . . . . . . . . . . . . . . . . . 11 custom built . . . . . . . . . . . . . . . . . . . . . . . . . . . . . . . 95 requirements . . . . . . . . . . . . . . . . . . . . . . . . . . . . . . . 7 Number of speakers . . . . . . . . . . . . . . . . . . . . . . . . . . . . . . 17 O Object . . . . . . . . . . . . . . . . . . . . . . . . . . . . . . . . . . . . . 62 One password is enough . . . . . . . . . . . . . . . . . . . . . . . . . . . 24 Only show Main Display during voting . . . . . . . . . . . . . . . . . . . . . 23 Optional equipment . . . . . . . . . . . . . . . . . . . . . . . . . . . . . . . 7 Order . . . . . . . . . . . . . . . . . . . . . . . . . . . . . . . . . . . . . 73 Organisation . . . . . . . . . . . . . . . . . . . . . . . . . . . . . . . . . . 45 P Password . . . disable . enable . . Paste. . . . . . platform . . . . pre-defines . . . Print . . . . . . Printer settings . Priority unit . . . Privi. automatic Priviliged units . Properties . . . Protect . . . . . . . . . . . . . . . . . . . . . . . . . . . . . . . . . . . . . . . . . . . . . . . . . . . . . . . . . . . . . . . . . . . . . . . . . . . . . . . . . . . . . . . . . . . . . . . . . . . . . . . . . . . . . . . . . . . . . . . . . . . . . . . . . . . . . . . . . . . . . . . . . . . . . . . . . . . . . . . . . . . . . . . . . . . . . . . . . . . . . . . . . . . . . . . . . . . . . . . . . . . . . . . . . . . . . . . . . . . . . . . . . . . . . . . . . . . . . . . . . . . . . . . . . . . . . . . . . . . . . . . . . . . . . . . . . . . . . . . . . . . . . . . . . . . . . . . . . . . . . . . . . . . . . . . . . . . . . . . . . . . . . 23 . . . . . . . . 23 . . . . . . . . 23 . . . . . . . . 43 . . . . . . . . 75 . . . . . . . . 45 42, 49, 72, 78, 85 . . . . . . . . 29 . . . . 16, 18, 77 . . . . . . . . 18 . . . . . . . . 77 . . . . . . . . 62 . . . . . . . . 24 . . . . . . . . . . . . . . . . . . . . . . . . . . . . . . . . . . . . . . . . . . . . . . . . . . . . . . . . . . . . . . . . . . . . . . . . . . . . . . . . . . . . . . . . . . . . . . . . . . . . . . . . . . . . . . . . . . . . . . . . . . . . . . . . . . . . . . . . . . . . . . . . . . . . . . . . . . . . . . . . . . . . . . . . . . . . . . . . . . . . . . . . . . . . . . . . . . . . . . . . Rev. 1.06 R Region . . . . rename . . . Reply function reply list . . . Reply list size Report header Reset. . . . . Restore . . . . . . . . . . . . . . . . . . . . . . . . . . . . . . . . . . . . . . . 46 29, 36, 38 . . . . 18 . . 28, 79 . . . . 18 . . . . 22 . . 85, 88 . . . . 38 iii Restore central unit settings . Rich Text Format . . . . . . Roll call . . . . . . . . . . . running counter . . . . . . . . . . . . . . . . . . . . . . . . . . . . . . . . . . . . . . . . . . . . . . . . . . . . . . . . . . . . . . . . . . . . . . . . . . . . . . . . . . . . . . . . . 22 43, 49, 72, 87 . . . . 33, 34 . . . . . . 87 S Save . . . . . . . . . . . . . . . . . . . . . . . . . . . . . . . . . . . . . . 42 Search . . . . . . . . . . . . . . . . . . . . . . . . . . . . . . . . . . . 44, 51 seat . . . . . . . . . . . . . . . . . . . . . . . . . . . . . . . . . . . . 51, 77 Seat . . . . . . . . . . . . . . . . . . . . . . . . . . . . . . . . . . . . . . 59 Seating. . . . . . . . . . . . . . . . . . . . . . . . . . . . . . . . . . . 54, 89 seating list . . . . . . . . . . . . . . . . . . . . . . . . . . . . . . . 29, 47, 71 Seating View . . . . . . . . . . . . . . . . . . . . . . . . . . . . . . . . . . 56 Seating View editor . . . . . . . . . . . . . . . . . . . . . . . . . . . . . . 57 Serial number . . . . . . . . . . . . . . . . . . . . . . . . . . . . . . . . . 31 Settings . . . . . . . . . . . . . . . . . . . . . . . . . . . . . . . . . . . . 28 Show . . . . . . . . . . . . . . . . . . . . . . . . . . . . . . . . . . . . . . 52 Show Matter Order on Main Display . . . . . . . . . . . . . . . . . . . . . . 23 Show names with free arrival . . . . . . . . . . . . . . . . . . . . . . . . . 23 Show reply list . . . . . . . . . . . . . . . . . . . . . . . . . . . . . . . . . 17 Software key . . . . . . . . . . . . . . . . . . . . . . . . . . . . . . . . . . 22 Sort . . . . . . . . . . . . . . . . . . . . . . . . . . . . . . . . . . . . . . 44 speak . . . . . . . . . . . . . . . . . . . . . . . . . . . . . . . . . . . . . 74 speaker . . . . . . . . . . . . . . . . . . . . . . . . . . . . . . . . . . 75, 76 speaker list. . . . . . . . . . . . . . . . . . . . . . . . . . . . . . . . . 27, 79 Speaker list control . . . . . . . . . . . . . . . . . . . . . . . . . . . . . . 17 Speaker time. . . . . . . . . . . . . . . . . . . . . . . . . . . . . . . . . . 46 speaking . . . . . . . . . . . . . . . . . . . . . . . . . . . . . . . . . . . . 75 speaking time . . . . . . . . . . . . . . . . . . . . . . . . . . . . . . . . . 74 Start . . . . . . . . . . . . . . . . . . . . . . . . . . . . . . . . . . . . . . 72 Starting . . . . . . . . . . . . . . . . . . . . . . . . . . . . . . . . . . . . 15 Status . . . . . . . . . . . . . . . . . . . . . . . . . . . . . . . . . . . . . 84 status bar . . . . . . . . . . . . . . . . . . . . . . . . . . . . . . . . . . . 27 Stop . . . . . . . . . . . . . . . . . . . . . . . . . . . . . . . . . . . . . . 72 substituted . . . . . . . . . . . . . . . . . . . . . . . . . . . . . . . . . . . 76 Summary. . . . . . . . . . . . . . . . . . . . . . . . . . . . . . . . . . . . 89 Support . . . . . . . . . . . . . . . . . . . . . . . . . . . . . . . . . . . . . 4 System status . . . . . . . . . . . . . . . . . . . . . . . . . . . . . . . . . 31 Table . . . . . . . . . Tables . . . . . . . . test . . . . . . . . . . Test delegate units. . Time . . . . . . . . . Time to vote . . . . . toolbar . . . . . . . . tools . . . . . . . . . Traditional . . . . . . Turn delegate unit off Type . . . . . . . . . iv . . . . . . . . . . . . . . . . . . . . . . . . . . . . . . . . . . . . . . . . . . . . . . . . . . . . . . . . . . . . . . . . . . . . . . . . . . . . . . . . . . . . . . . . Close Talk Control: . . . . . . . . . . . . . . . . . . . . . . . . . . . . . . . . . . . . . . . . . . . . . . . . . . . . . . . . . . . . . . . . . . . . . . . . . . . . . . . . . . . . . . . . . . . . . . . . . . . . . . . . . . . . . . . . . . . . . . . . . . . . . . . . . . . . . . . . . . . . . . . . . . . . . . . . . . . . . . . . . . . . . . . . . . . . . . . . . . . . . . . . . . . . . . . . . . . . . . . . . . . . . . . . . 54, 89 . . 41 . . 28 . . 28 84, 89 . . 85 27, 28 . . 59 . . 36 . . 21 . . 84 Rev. 1.06 T U Undo . . . . . . . . . . . . . . . . . . . . . . . . . . . . . . . . . . . . . 41 uninstall . . . . . . . . . . . . . . . . . . . . . . . . . . . . . . . . . . . . . 8 Use warning sound . . . . . . . . . . . . . . . . . . . . . . . . . . . . 18, 19 W Warn at time left . . . . . . . . . . . . . . . . . . . . . . . . . . . . . . 18, 19 Warning sound. . . . . . . . . . . . . . . . . . . . . . . . . . . . . . . 18, 19 Welcome . . . . . . . . . . . . . . . . . . . . . . . . . . . . . . . . . . 3, 55 V View . . . . . . . View after . . . . vote . . . . . . . vote controller . . Voters . . . . . . Votes. . . . . . . Voting . . . . . . Voting method . . Voting time . . . . Voting type . . . . Voting view delay Voting, summary . . . . . . . . . . . . . . . . . . . . . . . . . . . . . . . . . . . . . . . . . . . . . . . . . . . . . . . . . . . . . . . . . . . . . . . . . . . . . . . . . . . . . . . . . . . . . . . . . . . . . . . . . . . . . . . . . . . . . . . . . . . . . . . . . . . . . . . . . . . . . . . . . . . . . . . . . . . . . . . . . . . . . . . . . . . . . . . . . . . . . . . . . . . . . . . . . . . . . . . . . . . . . . . . . . . . . . . . . . . . . . . . . . . . . . . . . . . . . . . . . . . . . . . . . . . . . . . . . . . . . . . . . . . . . . . . . . . . . . . . . . . . . . . . . . . . . . . . . . . . . . . . . . . . . . . . . . . . . . . . . . . . . 30, 61, 84 . . . . 84 83, 85, 86 . . . . 88 . . . . 84 . . . . 85 . . 34, 71 . . . . 19 . . . . 20 . . . . 20 . . . . 20 . . . . 56 Y Rev. 1.06 Yes-vote . . . . . . . . . . . . . . . . . . . . . . . . . . . . . . . . . . . . 84 v Rev. 1.06 Blank page vi Close Talk Control: