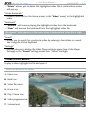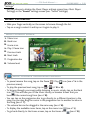
1
ENGLISH | 32 internet tablet ENGLISH USER MANUAL Please visit www.archos.com/manuals to download the latest version of this manual. Dear Customer, Thank you for choosing this ARCHOS product. We hope that you will enjoy using it and that it will give you satisfaction for many years to come. This truly miniature multimedia computer running Android™ allows you to FQYPNQCFCOWNVKVWFGQHCRRNKECVKQPUTGCF[QWTTGIWNCTQHÒEGFQEWOGPVUCPF 2&(ÒNGUCPFIGVVJGOQUVHTQOVJG+PVGTPGV UWTHGOCKNYKFIGVUGVELWUV like you do with your desktop computer. And like your desktop computer, using one of our accessories, you can con nect a keyboard and mouse. And of course take advantage of the ARCHOS GZRGTKGPEGYJGPRNC[KPIDCEMOWUKEQTXKFGQÒNGU Wishing you the best experience, The ARCHOS Team. All the information contained in this manual was correct at the time of publication. However, as we are often updating and improving our products, your device’s software may have a slightly different appearance or PRGL¿HGIXQFWLRQDOLW\WKDQSUHVHQWHGLQWKLVPDQXDO Entertainment way | 32 Internet Tablet --- FCC Draft Manual --- TABLE OF CONTENTS > P. 2 TABLE OF CONTENTS INTRODUCTION...................................................................................................... 4 ARCHOS DESCRIPTION . . . . . . . . . . . . . . . . . . . . . . . . . . . . . . . . . . . . . . . . . . . . FIRST TIME USAGE . . . . . . . . . . . . . . . . . . . . . . . . . . . . . . . . . . . . . . . . . . . . . . . THE POWER BUTTON. . . . . . . . . . . . . . . . . . . . . . . . . . . . . . . . . . . . . . . . . . . . . . THE INSTALLATION WIZARD . . . . . . . . . . . . . . . . . . . . . . . . . . . . . . . . . . . . . . . . USING THE ARCHOS INTERFACE . . . . . . . . . . . . . . . . . . . . . . . . . . . . . . . . . . . . . PRODUCT CARE . . . . . . . . . . . . . . . . . . . . . . . . . . . . . . . . . . . . . . . . . . . . . . . . . . 4 5 6 6 6 9 USING THE FILE BROWSER............................................................................10 NAVIGATION . . . . . . . . . . . . . . . . . . . . . . . . . . . . . . . . . . . . . . . . . . . . . . . . . . . 10 USING THE VIRTUAL KEYBOARD . . . . . . . . . . . . . . . . . . . . . . . . . . . . . . . . . . . . 12 MAKING A WIFI CONNECTION .......................................................................13 HOW TO IMPROVE WIFI RECEPTION . . . . . . . . . . . . . . . . . . . . . . . . . . . . . . . . . ENABLING WIFI . . . . . . . . . . . . . . . . . . . . . . . . . . . . . . . . . . . . . . . . . . . . . . . . . THE LIST OF AVAILABLE NETWORKS . . . . . . . . . . . . . . . . . . . . . . . . . . . . . . . . ADVANCED CONNECTION . . . . . . . . . . . . . . . . . . . . . . . . . . . . . . . . . . . . . . . . . 13 13 14 14 INTERNET & WIFI FEATURES .......................................................................15 BROWSING THE WEB . . . . . . . . . . . . . . . . . . . . . . . . . . . . . . . . . . . . . . . . . . . . 15 PLAYING YOUR PC’S SHARED MEDIA FILES (UPNP) . . . . . . . . . . . . . . . . . . . . 16 THE MEDIA CLUB . . . . . . . . . . . . . . . . . . . . . . . . . . . . . . . . . . . . . . . . . . . . . . . 19 PLAYING VIDEO ....................................................................................................21 PLAYING MUSIC ..................................................................................................27 VIEWING PHOTOS ............................................................................................. 37 TRANSFERRING FILES .................................................................................... 42 MAIN SETTINGS................................................................................................. 44 “WIRELESS CONTROLS” . . . . . . . . . . . . . . . . . . . . . . . . . . . . . . . . . . . . . . . . . . “SOUND & DISPLAY” . . . . . . . . . . . . . . . . . . . . . . . . . . . . . . . . . . . . . . . . . . . . “TV OUT”. . . . . . . . . . . . . . . . . . . . . . . . . . . . . . . . . . . . . . . . . . . . . . . . . . . . . . “SECURITY & LOCATION” . . . . . . . . . . . . . . . . . . . . . . . . . . . . . . . . . . . . . . . . . “APPLICATIONS”. . . . . . . . . . . . . . . . . . . . . . . . . . . . . . . . . . . . . . . . . . . . . . . . “DEVICE STORAGE” . . . . . . . . . . . . . . . . . . . . . . . . . . . . . . . . . . . . . . . . . . . . . “DATE & TIME” . . . . . . . . . . . . . . . . . . . . . . . . . . . . . . . . . . . . . . . . . . . . . . . . . “LANGUAGE & TEXT” . . . . . . . . . . . . . . . . . . . . . . . . . . . . . . . . . . . . . . . . . . . . “ABOUT DEVICE” . . . . . . . . . . . . . . . . . . . . . . . . . . . . . . . . . . . . . . . . . . . . . . . UPDATING THE FIRMWARE . . . . . . . . . . . . . . . . . . . . . . . . . . . . . . . . . . . . . . . . TABLE OF CONTENTS CONTINUED ON NEXT PAGE... 44 45 46 47 47 47 48 48 49 49 | 32 Internet Tablet --- FCC Draft Manual --- TABLE OF CONTENTS > P. 3 ARCHOS PLUG-INS AND ADD-ONS ............................................................51 DVR STATION . . . . . . . . . . . . . . . . . . . . . . . . . . . . . . . . . . . . . . . . . . . . . . . . . . DVR SNAP-ON . . . . . . . . . . . . . . . . . . . . . . . . . . . . . . . . . . . . . . . . . . . . . . . . . . MINI DOCK . . . . . . . . . . . . . . . . . . . . . . . . . . . . . . . . . . . . . . . . . . . . . . . . . . . . BATTERY DOCK . . . . . . . . . . . . . . . . . . . . . . . . . . . . . . . . . . . . . . . . . . . . . . . . . TV SNAP-ON . . . . . . . . . . . . . . . . . . . . . . . . . . . . . . . . . . . . . . . . . . . . . . . . . . . CAR MOUNT . . . . . . . . . . . . . . . . . . . . . . . . . . . . . . . . . . . . . . . . . . . . . . . . . . . 51 51 51 52 52 52 TROUBLESHOOTING .........................................................................................53 RESETTING YOUR ARCHOS . . . . . . . . . . . . . . . . . . . . . . . . . . . . . . . . . . . . . . . . 53 SYSTEM RECOVERY . . . . . . . . . . . . . . . . . . . . . . . . . . . . . . . . . . . . . . . . . . . . . 53 TOUCHSCREEN PROBLEMS. . . . . . . . . . . . . . . . . . . . . . . . . . . . . . . . . . . . . . . . 54 TECHNICAL SUPPORT INFORMATION..............................................................................................55 | 32 Internet Tablet --- FCC Draft Manual --- INTRODUCTION > P. 4 INTRODUCTION ARCHOS DESCRIPTION MAIN BUTTONS • Press and hold to turn your ARCHOS on/off*. • The green LED indicator lights up when the device is on. When the device turns on, wait for the ARCHOS and Android™ logos to appear. * When your device is on, you can press the Power button once to put it in standby. To turn the screen back on, press the Power button once, and press it again to unlock the screen. If you do not plan on using the ARCHOS for an extended period of time, keep the Power button held down until you see a window appear with a list of options. Tap on “Power Off”. The device will shut down completely, and there will be absolutely no battery usage. VOL Volume buttons: to increase/decrease volume. LED INDICATORS Battery charge indicator (on the left side of the device): • light on: the battery is charging • blinking: the battery is fully charged CONNECTORS On the left side of the device: • On/off button and Volume up/down Underneath the device: • *GCFRJQPGLCEMOKETQRJQPG1PUVCVWUNCOR/KETQ USB port: to connect your ARCHOS to your computer, WUKPIVJGUWRRNKGF75$ECDNG VQVTCPUHGTÒNGUCPF EJCTIGVJGDCVVGT[See Connecting the ARCHOS to a Computer. • • | 32 Internet Tablet --- FCC Draft Manual --- INTRODUCTION > P. 5 BUILT-IN LOUDSPEAKER The ARCHOS is equipped with a single speaker, located on the left side of the device. MICROPHONE The microphone is located underneath the device, on the right side. ACCELEROMETER The ARCHOS is equipped with an accelerometer which allows the screen to automati cally switch its orientation when you rotate the device. To see how to set up the ac EGNGTQOGVGT ECNKDTCVKQPQTKGPVCVKQPUGG“Sound & Display”. BUILT-IN GPS RECEIVER ;QWTRTQFWEVHGCVWTGUCDWKNVKP)25TGEGKXGT8KUKVYYYCTEJQUEQOVQRWTEJCUGC)25 NKEGPUGCPFCEVKXCVGVJG)25QP[QWTRTQFWEV6JGUWRRNKGF)25OCRUUQHVYCTG&8& YKNNCNNQY[QWVQKPUVCNNVJG)25UQHVYCTGCPFOCRUQH[QWTEJQKEGQP[QWTRTQFWEV BLUETOOTH Your ARCHOS integrates the Bluetooth technology, which allows you to connect with other types of Bluetooth devices. The ARCHOS is compatible with various Bluetooth devices such as A2DP stereo Bluetooth headphones. Note that not all types of Bluetooth devices are compatible with VJG#4%*156QNGCTPJQYVQEQPÒIWTGVJG$NWGVQQVJQP[QWTFGXKEGUGG“Wireless controls”. LEG STAND • Your ARCHOS is equipped with a leg stand, located on the back of the device. • 2WNNKVQWVCPFKVYKNNCNNQY[QWT#4%*15VQUVCPFD[KVUGNHQPCÓCVUVCDNGUWTHCEG FIRST TIME USAGE CHARGING THE BATTERY $GHQTGWUKPI[QWT#4%*15HQTVJGÒTUVVKOGcompletely charge its battery: • Connect the supplied USB cable to the ARCHOS and to a running computer. • The ARCHOS will turn on and start charging: - 6JG%JCTIKPI.'&KPFKECVQTKUQPYJKNGVJGDCVVGT[KUEJCTIKPI+VYKNNDNKPM when the battery is fully charged. - A lightning bolt symbol will appear on the battery icon in the upper right cor | 32 Internet Tablet --- FCC Draft Manual --- INTRODUCTION > P. 6 ner of the screen while the battery is charging. You can also charge your ARCHOS device without a computer, and more rapidly, via the optional DVR Station, Mini Dock or Battery Dock (available at www. archos.com or from the Media Club). See ARCHOS Plug-ins and Add-ons. THE POWER BUTTON • Press and hold the Description. button to turn your ARCHOS on/off. See ARCHOS • The green LED indicator lights up when the device is on. When the device turns on, wait for the ARCHOS and Android™ logos to appear. • While the ARCHOS is on, holding down on the Power button will display a win dow with a list of options: - airplane mode: cuts the WiFi and Bluetooth connections. - buttons mode: buttons will appear on the right side of the screen. This can be useful in certain applications that require the use of buttons. - full shut down: to shut down your device completely. THE INSTALLATION WIZARD 6JGÒTUVVKOG[QWVWTPQPVJG#4%*15VJGKPUVCNNCVKQPYK\CTFYKNNJGNR[QWEQPÒIWTG the main functions of your ARCHOS: language, country, time, etc. USING THE ARCHOS INTERFACE INTERFACE DESCRIPTION Top bar of the Interface (varies according to the screen you are in) ź ź 1. Return to the Home screen 2. 1RWL¿FDWLRQKEQPUFTCIVJGVQRDCTFQYPYCTFUVQTGXGCNVJGPQVKÒECVKQPOGU UCIGU KHCP[ 3. StatusKEQPU 9K(KCPF$NWGVQQVJEQPPGEVKQPUVCVWUDCVVGT[NGXGNGVE | 32 Internet Tablet --- FCC Draft Manual --- INTRODUCTION > P. 7 4. Return to the previous screen 5. Menu: gives menu options according to the current screen. Home Screen 1. 6JGUGCTGVJGFGHCWNV#PFTQKFsUJQTVEWVU Web “Browser”, “EMail”, “&RQWDFWVnGVE6CRQPCP icon to open the corresponding application. You can EWUVQOK\GVJG*QOGUETGGPD[CFFKPITGOQXKPI shortcuts and widgets, changing the wallpaper, etc. 2. $SSOLFDWLRQV7DE: Tap on this icon to reveal all the Android™ applications in UVCNNGFQP[QWT#4%*15 ICOGUXCTKQWUVQQNUGVE;QWECPEQR[VJGOQPVQVJG Home screen by pressing and holding on their icons. You can get more Android™ CRRNKECVKQPUHTQOVJG+PVGTPGV 3. 0XOWLPHGLDLFRQV6CRQPQPGQHVJGUGKEQPU GZmVideonVJGPUGNGEVVJGFGUKTGF submenu function. These 5 items cannot be separated from each other, and can only be placed at the bottom of the screen. The extended Home screen 5NKFG[QWTHKPIGTJQTK\QPVCNN[QPVJGUETGGPVQIQVQVJGNGHVQTTKIJVRCPGNQHVJGGZ tended Home screen. Customizing the Home screen items • 6QCFFC*QOGUETGGPKVGO UJQTVEWVUYKFIGVUGVEJQNF[QWTHKPIGTQPVJG screen at an empty location, then choose from the list. You can also tap on the Menu icon and select “Add” , at the bottom of the screen. • To move a Home screen item, hold your finger onto it until it enlarges, then drag it to the desired location, and release it. • To remove a Home screen item, hold your finger onto it, drag it onto the recycle DKP YJKNG[QWlTGJQNFKPICPKVGOVJG$SSOLFDWLRQV tab, on the right side of the | 32 Internet Tablet --- FCC Draft Manual --- screen, turns into a recycle bin INTRODUCTION > P. 8 CPFVJGPTGNGCUGKV Changing the wallpaper From the Home screen, tap on the Menu icon. A list of options appears at the bottom of the screen. Tap on “Wallpaper” then choose from the list. Changing the Settings From the Home screen, tap on the Menu icon , tap on “Settings” and choose a category: “Wireless Controls”, “Sound & Display”, “'DWH7LPH”, etc. For more information on the different settings, see: Main Settings. USING THE TOUCHSCREEN Your ARCHOS is equipped with a touchscreen. Below is a description of the main tactile screen areas and a few tips on how to use the touchscreen. Main Touchscreen Actions • +PVJGFKHHGTGPVCRRNKECVKQPU[QWECPIQDCEMQPGNGXGNKPVJGKPVGTHCEGD[VCRRKPI KPVJGVQRTKIJVEQTPGTQHVJGUETGGP on the Back icon • Wherever you are in the interface, you can go back directly to the Home screen by tapping on the Home icon KPVJGVQRNGHVEQTPGTQHVJGUETGGP • While playing a video or song, you can pause/resume it by tapping on the Pause / Play icon. Other Touchscreen Actions • When watching a video or listening to music, you can tap on the progres sion bar to go directly to a different location in the video or song. You can CNUQWUG[QWTÒPIGTVQFTCIVJGEWTUQTKPVJGRTQITGUUKQPDCTVQCPQVJGT location in the video or song. • +PVJGUETGGPUYJGTGKVCRRGCTUVJGXQNWOGDCTECPDGFTCIIGFKPVJGUCOGYC[ • +PVJGFKHHGTGPVDTQYUGTU (KNG/WUKE8KFGQ2JQVQGVE[QWECPFTCIVJG UETQNNDCTWRCPFFQYPVQUETQNNVJGÒNGNKUVWRCPFFQYP;QWECPCNUQUETQNN faster by tapping above or below the cursor in the scroll bar. • +PVJG9GDDTQYUGT[QWECPUETQNNWRCPFFQYPD[VCRRKPIQPVJGRCIGCPF FTCIIKPIKVWRQTFQYP DGECTGHWNJQYGXGTPQVVQVCRQPCNKPMÑ | 32 Internet Tablet --- FCC Draft Manual --- INTRODUCTION > P. 9 PRODUCT CARE Your ARCHOS is an electronic product that needs to be treated with care: • • • • • Do not subject it to shock or vibration. &QPQVUWDLGEVKVVQJGCVMGGRKVXGPVKNCVGF GURGEKCNN[YJGPEQPPGEVGFVQCEQORWVGT Keep it away from water and excessively humid areas. -GGRKVCYC[HTQOJKIJGNGEVTQOCIPGVKEÒGNFU &QPQVQRGPKVWR6JGTGCTGPQWUGTUGTXKEGCDNGRCTVUKPUKFG1RGPKPIYKNNXQKF your warranty. | 32 Internet Tablet --- FCC Draft Manual --- USING THE FILE BROWSER > P. 10 USING THE FILE BROWSER 6JG#4%*15(KNG$TQYUGTIKXGU[QWVJGRQUUKDKNKV[VQPCXKICVGVJGÒNG U[UVGOQH[QWT#4%*15KPVGTPCNOGOQT[+PVJG*QOGUETGGPVCRQP the applications tab, on the right side of the screen, and tap on “File manager” to enter the File Browser. You will see two panels: • The one on the left is the panel that you usually use to navigate through [QWTFGXKEGlUKPVGTPCNOGOQT[ • The panel on the right is the one you will use when you want to EQR[QTOQXGÒNGUCPFHQNFGTU UGGCopying and Moving Files and Folders About your ARCHOS internal memory: DO NOT delete or rename the original folders: Music, Pictures, Video, Playlists, etc. In the Home screen, several icons “Video”, “Music”, “Photo”...) lead directly to these folders and they will no longer work if the folders are deleted or renamed. NAVIGATION TOUCHSCREEN CONTROLS • ;QWECPFTCIVJGUETQNNDCTWRCPFFQYPVQUETQNNVJGÒNGNKUVWRCPFFQYP;QW can also scroll faster by tapping above or below the cursor in the scroll bar. • 6QQRGPCÒNGQTHQNFGTVCRQPKVVQJKIJNKIJVKVVJGPVCRQPKVCICKP • To jump between the left and right panels, tap directly on the panel that you want to highlight. • To display the available menu items, tap on the menu icon . • You can go back one level in the interface by tapping on the Back icon . Wherever you are in the interface, you can go back directly to the Home screen by tapping on the Home icon . | 32 Internet Tablet --- FCC Draft Manual --- USING THE FILE BROWSER > P. 11 FILE BROWSER MENU ITEMS Note that some of the above menu items may not appear if they are not availDEOHIRUWKHKLJKOLJKWHG¿OHRUIROGHU m+PHQn - FKURNC[UCOGUUCIGDQZYKVJKPHQTOCVKQPCDQWVVJGJKIJNKIJVGFÒNG “Select mode” - CEVKXCVGUVJGUGNGEVKQPOQFGYJKEJCNNQYU[QWVQUGNGEVVJGHQNFGTUCPFÒNGU[QW YCPVVQEQR[OQXGQTFGNGVGD[LWUVEJGEMKPIVJGKTEQTTGURQPFKPIDQZGU YJKEJ CRRGCTQPVJGNGHVQHVJGHQNFGTUÒNGU5GNGEVmNavigation mode” to disable the UGNGEVKQPOQFGCPFIQDCEMVQVJGTGIWNCTÒNGDTQYUGT “Create folder” - creates a folder at the current location. - [QWYKNNJCXGVQGPVGTVJGHQNFGTlUPCOGYKVJVJGXKTVWCNMG[DQCTF UGGUsing the Virtual Keyboard “File Management” - “RenamenCNNQYU[QWVQEJCPIGVJGPCOGQHVJGJKIJNKIJVGFÒNGQTHQNFGTWUKPI the virtual keyboard. See: Using the Virtual Keyboard. - “DeletenCNNQYU[QWVQFGNGVGVJGJKIJNKIJVGFÒNGQTHQNFGT CPFCNNKVUEQPVGPVU #EQPÒTOCVKQPUETGGPYKNNRQRWR “Copy” - “CopynCNNQYU[QWVQEQR[VJGJKIJNKIJVGFÒNGQTHQNFGTVQVJGNQECVKQPFGÒPGFKP the other browser panel. - “&RS\DOO¿OHVnCNNQYU[QWVQEQR[CNNVJGÒNGUQHVJGEWTTGPVHQNFGTVQVJGNQEC VKQPFGÒPGFKPVJGQVJGTDTQYUGTRCPGN - “MovenCNNQYU[QWVQOQXGVJGJKIJNKIJVGFÒNGQTHQNFGTVQVJGNQECVKQPFGÒPGF in the other browser panel. COPYING AND MOVING FILES AND FOLDERS • +PVJGNGHVRCPGNJKIJNKIJVVJGÒNGHQNFGTVJCV[QWYCPVVQEQR[QTOQXG • +PVJGTKIJVRCPGNPCXKICVGVQVJGNQECVKQPYJGTG[QWYKUJVQEQR[VJGÒNGHQNFGTVQ • )QDCEMVQVJGNGHVRCPGNUGNGEVVJGmCopy” menu item and then choose “Copy”, “&RS\DOO¿OHV” or “Move”, depending on the action that you want to carry out. You can also use the “Select Mode” menu item, which allows you to select the IROGHUVDQG¿OHV\RXZDQWWRFRS\PRYHRUGHOHWHE\MXVWFKHFNLQJWKHLUFRUUHVSRQGLQJER[HVZKLFKDSSHDURQWKHOHIWRIWKHIROGHUV¿OHV | 32 Internet Tablet --- FCC Draft Manual --- USING THE FILE BROWSER > P. 12 USING THE VIRTUAL KEYBOARD The virtual keyboard is an interface that allows you to type in text, for instance to rename CÒNGQTHQNFGTQTYJGP[QWYCPVVQIKXGCVKVNGVQCRNC[NKUVVJCV[QWJCXGLWUVETGCVGF 1. Home icon 2. Back icon 3. current name of the ÒNGHQNFGT 4. delete character be fore cursor 5. Tab key 6. Shift key 7. green Alt key: enable/ FKUCDNGVJGMG[UlITGGP secondary functions. 8. blue Alt key: enable/ FKUCDNGVJGMG[UlDNWG • the virtual keyboard might vary according to where you are secondary functions. in the interface. • if a key is transparent, it means that it is disabled. 9. move cursor one character to the left 10. move cursor one character to the right KEYBOARD TOUCHSCREEN CONTROLS • To enter a character, tap on the corresponding key. • To exit the keyboard without saving, tap on the Back icon UGGP2 • 9JGP[QWCTGUCVKUÒGFYKVJVJGPCOGVCRQPVJGOk key to save it and exit the MG[DQCTF#EQPÒTOCVKQPUETGGPYKNNRQRWR | 32 Internet Tablet --- FCC Draft Manual ---MAKING A WIFI CONNECTION > P. 13 MAKING A WIFI CONNECTION When you do not need the WiFi or Bluetooth connections, remember to deactivate them in order to save battery power. First of all, you need to configure a WiFi network. For this procedure to work, you need VQDGKPC9K(K\QPGVJCVYKNNCNNQY[QWVQEQPPGEVVQKV'XGT[VKOGVJG#4%*15KUKP range of a network that you have already configured once, it will attempt to make a connection. HOW TO IMPROVE WIFI RECEPTION +PQTFGTVQKORTQXG[QWTFGXKEGlU9K(KTGEGRVKQP CXQKFRNCEKPI[QWTÒPIGTUKPHTQPVQHVJG9K(KCP VGPPCCTGC \QPGKPTGFQPVJGHQNNQYKPIKOCIG ENABLING WIFI $GHQTGNCWPEJKPICP+PVGTPGVCRRNKECVKQPUWEJCUVJGYGDDTQYUGTQTYGD68[QWÒTUV PGGFVQCEVKXCVGVJG9K(KCPFEQPÒIWTGC9K(KPGVYQTM 1. )QQPVJG*QOGUETGGPVCRQPVJG/GPWKEQP , then select “Settings” . 2. +PVJGmSettings” screen, select “:LUHOHVVFRQWUROV”. 3. +HVJG9K(KKUQHHVCRQPVJGmWi-Fi” line to turn it on. Then select “Wi-Fi settings”. The ARCHOS will scan automatically for available WiFi networks and display them at the bottom of the screen. | 32 Internet Tablet --- FCC Draft Manual ---MAKING A WIFI CONNECTION > P. 14 • When the WiFi is enabled, the ARCHOS will EQPPGEVCWVQOCVKECNN[VQ[QWTEQPÒIWTGF networks when they are in range. • +HVJG#4%*15ÒPFUCPGVYQTMVJCVJCU PGXGTDGGPEQPÒIWTGFKVYKNNFKURNC[CPQ VKÒECVKQPKEQP in the top left corner of the interface. Drag the top bar downwards VQTGXGCNVJGPQVKÒECVKQPOGUUCIGCPFVCR on it to view available WiFi networks. THE LIST OF AVAILABLE NETWORKS • The list of available networks shows all the wireless networks in range of your device. • The list is constantly refreshed automatically. • Tap on the network you want to connect to, enter the required network informa tion* and then tap on “&RQQHFW”. Your ARCHOS will now attempt to establish a connection to that WiFi hot spot with the network parameters you entered. * For free access WiFi points, there is no need to enter any special information. For secured networks, you will need either a key (a series of numbers and/or letters) of the type WEP, WPA, or WPA2, or you will need to have a WiFi access point that uses the WiFi protection standard WPS (WiFi Protected Setup). Check with the person who manages the WiFi network to obtain the exact connection parameters required. ADVANCED CONNECTION • To manually scan for available WiFi networks, on the “Wi-Fi settings” screen, tap on the Menu icon , then tap on “6FDQ”. • +HVJG9K(KPGVYQTM[QWYCPVVQEQPPGEVVQFQGUPQVCRRGCTKPVJGNKUVUETQNN down the screen, then tap on “Add a Wi-Fi network”. Enter the required settings, then tap on “Save”. • 6QCEEGUUVJGCFXCPEGFPGVYQTMRCTCOGVGTU mRegulatory domain”, “IP address”, GVEVCRQPVJG/GPWKEQP , then tap on “$GYDQFHG”. Other parameters will appear: the required information can be obtained from the person who manages the network. | 32 Internet Tablet --- FCC Draft Manual --- THE INTERNET FEATURES > P. 15 INTERNET & WIFI FEATURES $GHQTGNCWPEJKPICP+PVGTPGVCRRNKECVKQPOCMGUWTGVJCVVJG9K(KKUCEVKXCVGFQP[QWT device and that you are connected to a WiFi network. 7R¿QGPRUHLQIRUPDWLRQDERXWKRZWRFRQQHFWWRWKH,QWHUQHWVHHMaking a :L)L&RQQHFWLRn. BROWSING THE WEB LAUNCHING THE WEB BROWSER From the Home screen, tap on the “Browser” icon. You can also access the web brows er by tapping on the applications tab, on the right side of the screen. • +H[QWCTGCNTGCF[EQPPGEVGFVQCPGVYQTMVJG9GDDTQYUGTYKNNUKORN[QRGPCPF you can start browsing the Web. • 2NGCUGPQVGPQVCNNYKTGNGUUPGVYQTMUQHHGTCEEGUUVQVJG+PVGTPGV5QOG9K(KPGV YQTMUQPN[NKPMUGXGTCNEQORWVGTUVQIGVJGTYKVJQWVCP[+PVGTPGVEQPPGEVKQP If the time and date are not correctly set, you might not be able to access certain web pages (See: ³'DWH7LPH”). USING THE WEB BROWSER • ;QWECPWUG[QWTÒPIGTVQUETQNNVJGEWTTGPVYGDRCIGJQTK\QPVCNN[QTXGTVKECNN[6Q open a link, simply tap on it. • You can open several web pages at a time, view them all at once on the screen, then tap on one of them to view it in full screen. • To go back to the previous page that you browsed, tap on the Back icon . • To display the available menu items, tap on the Menu icon . • To go back directly to the Home screen, tap on the Home icon . • Depending on where you are in the web browser, holding down on an item will give you access to more options. • 6QÒNNKPCVGZVÒGNFVCRKPVJGÒGNFVJGPWUGVJGXKTVWCNMG[DQCTFVQV[RGVJG required information | 32 Internet Tablet --- FCC Draft Manual --- THE INTERNET FEATURES > P. 16 WEB BROWSER MENU ITEMS m)Qn - CNNQYU[QWVQGPVGTVJGCFFTGUUQHC9GDUKVG[QWlFNKMGVQXKUKV'PVGTVJGCFFTGUU with the virtual keyboard. Select “Go” to open the website in the current window. “Bookmarks” - will open the “Bookmarks” manager. You will see three tabs: “Bookmarks”, “Most visited”, and “History”. - “Bookmarks”: Here you can see your list of bookmarks. Just tap on one of them to open it in the current window. Holding down on a bookmark will give you ac EGUUVQUGXGTCNQRVKQPU [QWYKNNDGCDNGVQGFKVKVTGPCOGKVFGNGVGKVGVE6Q add a new bookmark, you can either tap on “Add bookmark“ and select the name and address of your bookmark, or you can also use the Menu icon , YJKEJYKNNCNNQY[QWVQDQQMOCTMVJGNCUVXKGYGFRCIG - The two other tabs allow you to access your “Most visited” sites and your “Historyn+PVJGmHistory” tab, the Menu icon allows you to clear the history. “New window”/”Windows” - Allows you to open new windows. When you have several windows currently opened, tap on ”Windows” to display them all at once on the screen. Just tap on one of the small windows to view it in full screen. “Refresh” / “Stop” - will stop loading the web page, if it is currently loading. - will refresh the current web page, if it has stopped loading. “Forward” - will go to the next page that you browsed. “More” - YKNNIKXG[QWCEEGUUVQQVJGTQRVKQPU mFind on page”, “6HOHFWWH[W”, “Page info”, “Downloads”, “Settingsn Please note that some Web features requiring special plug-in software or Active X controls may not work in this special version of the Web Browser. PLAYING YOUR PC’S SHARED MEDIA FILES (UPNP) • When connected to your home WiFi network, your ARCHOS gives you the possi DKNKV[VQYCVEJFKTGEVN[QP[QWTFGXKEGUJCTGFOGFKCÒNGU XKFGQUOWUKEQTRJQ VQUUVQTGFKP[QWT2%lU9KPFQYU/GFKC.KDTCT[ | 32 Internet Tablet --- FCC Draft Manual --- THE INTERNET FEATURES > P. 17 • (QTVJKUVQYQTM[QWYKNNPGGFC9K(KEQPPGEVKQPCPF9KPFQYU/GFKC2NC[GT or higher installed on your PC*. • This is especially useful when you have a large library of music and video and you ECPPQVÒVKVCNNQPVQVJGKPVGTPCNOGOQT[QHVJG#4%*15 • 6JG#4%*15WUGUVJG72P2 7PKXGTUCN2NWICPFRNC[UVCPFCTFVQUVTGCOUJCTGF OGFKCÒNGUHTQO[QWT2%lU9KPFQYU/GFKC.KDTCT[ 5VTGCOKPIQPGQH[QWT2%lUUJCTGFXKFGQUCPFFKURNC[KPIKVQP[QWT68 * If you cannot install Windows Media® Player 11 or higher, it is possible to acFHVVDQGVWUHDP\RXU3&¶V¿OHVIURPWKH$5&+26)LOH%URZVHU6HHBrowsing Other Computers on the Network. SETTING WINDOWS MEDIA® PLAYER’S SHARING OPTIONS 1. %QPPGEVVJG#4%*15VQ[QWT9K(KPGVYQTM UGG Making a WiFi Connection 2. Connect your PC to the same WiFi network and UVCTV9KPFQYU/GFKC2NC[GTXGTUKQPQTJKIJGT 3. Click on the Library tab, and select Media sharing... | 32 Internet Tablet --- FCC Draft Manual --- THE INTERNET FEATURES > P. 18 4. Check the box Share my media to, and click on OK. The ARCHOS icon should appear in the win dow, with a warning symbol next to it*. $77(17,21WKH¿UVWWLPH\RXVHW\RXUVKDUing options, it might take a couple of minutes for your PC to display the ARCHOS icon. 5. Select the ARCHOS icon and click on the Allow button. 6. To modify your sharing settings, click on Settings. You can, for example, enter a PCOGHQT[QWTUJCTGFOGFKCÒNGU;QWYKNNVJGPUGGVJKUPCOGQP[QWT#4%*15 Click on OKVQUCXGVJGOQFKÒECVKQPU 7. Click on OK to close the Media Sharing window. 8. ;QWECPPQYENQUG9KPFQYU/GFKC2NC[GTCPFUVCTVXKGYKPI[QWT2%lUUJCTGF OGFKCÒNGUFKTGEVN[QP[QWT#4%*15 UGGPGZVUGEVKQP PLAYING YOUR SHARED MEDIA FILES ON THE ARCHOS Your PC needs to be connected to the same WiFi network as the one the ARCHOS will EQPPGEVVQ;QWCNUQPGGFVQJCXGEQPÒIWTGF9KPFQYU/GFKC2NC[GTlUUJCTKPIQR VKQPU UGGVJGRTGXKQWUUGEVKQP 1. On the ARCHOS home screen, tap on the “Video”, “0XVLF” or “Photo” icons, and choose “Network”. 2. Tap on “Network ‘UPnP’” to start scanning for devices and computers sharing VJGKTOGFKCÒNGUQPVJG9K(KPGVYQTM 3. +H[QWGPVGTGFCPCOGHQT[QWTUJCTGFOGFKCÒNGUKP9KPFQYU/GFKC2NC[GTKV should appear. Open it, and you will see all your shared videos, songs or photos. • +H[QWCTGKPVJG8KFGQOQFG[QWYKNNVJGPJCXGCEEGUUVQCNNVJGXKFGQUUVQTGFKP [QWT2%lU9KPFQYU/GFKC.KDTCT[ • +PVJGUCOGYC[VJG/WUKECPF2JQVQOQFGUYKNNCNNQY[QWVQCEEGUUCNNVJGOW UKERJQVQUUVQTGFKP[QWT2%lU9KPFQYU/GFKC.KDTCT[ 1RWH<RXPD\KDYHVRPHYLGHR¿OHVRIYHU\KLJKTXDOLW\DQGWKHVHUHTXLUH that the WiFi connection transfers data at a high speed. If your ARCHOS is far away from your WiFi box, it may happen that the connection speed is reduced WKXVQRWDOORZLQJVRPHYLGHR¿OHVWRVWUHDPIURP\RXU3&WRWKH$5&+26DQG the television. | 32 Internet Tablet --- FCC Draft Manual --- THE INTERNET FEATURES > P. 19 BROWSING OTHER COMPUTERS ON THE NETWORK • When you are connected to a Windows network, you can browse* the shared folders of other computers in the network, using the ARCHOS File Browser. • %QPPGEVVJG#4%*15VQ[QWT9K(KPGVYQTM UGGMaking a WiFi Connection • +PVJG*QOGUETGGPVCRQPVJGCRRNKECVKQPUVCDQPVJGTKIJVUKFGQHVJGUETGGP and tap on “File ManagernVQGPVGTVJG(KNG$TQYUGT+PVJGNGHVRCPGNQHVJG DTQYUGTUGNGEVVJGÒTUVNKPGKPVJGNKUV mNetworkn+H[QWTFGXKEGKUEQPPGEVGFVQ [QWT9K(KCEEGUURQKPVKVYKNNUGCTEJHQTQVJGTEQORWVGTUKPVJG9KPFQYUPGV work. You can then choose a computer and start browsing its shared folders. * If the computer with the shared folders normally has a Windows® username and password, you will be asked to enter these before you can access the folder contents. 7UKPIVJG#4%*15FQWDNGDTQYUGT[QWYKNNDGCDNGVQRNC[OGFKCÒNGUQTVTCPUHGTCP[ ÒNGHTQOCPGVYQTMGFEQORWVGTQPVQ[QWTFGXKEG;QWECPCNUQVTCPUHGTÒNGUHTQO[QWT FGXKEGQPVQCEQORWVGTlUYTKVGGPCDNGFUJCTGFHQNFGT UGGCopying and Moving Files and Folders If the WiFi is not enabled or if you are not connected to a network, the device will scan for available networks and connect to a known network or display the list of available networks so that you can connect to one of them. THE MEDIA CLUB The Media Club gives you access to movies, videos, and music directly from your ARCHOS device without having to use your computer. Better yet, connect your ARCHOS to the optional DVR Station and then purchase or rent video and music con tent on your television from the comfort of your living room. 1. +PQTFGTVQCEVKXCVGVJG/GFKC%NWD[QWYKNNPGGFVQTGIKUVGT[QWTRTQFWEVQPNKPG directly on your ARCHOS via the WiFi. You can also register on the ARCHOS web UKVG YYYCTEJQUEQOTGIKUVGT 2. /CMGUWTG[QWJCXGEQPÒIWTGF[QWT#4%*15VQEQPPGEVVQC9K(KPGVYQTM UGG Making a WiFi Connection 3. On the Home screen, select the “Media Club” and choose a category. Depending on your connection speed, you will have the possibility to start playing the video/song you purchased or rented while it’s being downloaded. The videos/songs you get from the Media Club are saved in the “Video”/“Music” folders. Look for your partner folder (AMC, Fnac, Cinema Now, etc.) | 32 Internet Tablet --- FCC Draft Manual --- THE INTERNET FEATURES > P. 20 WATCHING WEB TV ,QRUGHUWREHDEOHWRZDWFKQXPHURXV,QWHUQHW79FKDQQHOVGLUHFWO\RQ\RXU $5&+26\RXZLOOQHHGWRUHJLVWHU\RXUGHYLFH 1. First connect to a WiFi network*. 2. From the Home Screen, tap on “Media Club”, then choose “:HE79”. 3. The “:HE79nKPVGTHCEGKUQTICPK\GFD[ECVGIQT[UWEJCUm/RFDWLRQ”, “Genre”, “FavoritesnGVE$TQYUGVJGECVGIQTKGUVQÒPFVJGEJCPPGN[QWYCPVVQYCVEJ 7R¿QGPRUHLQIRUPDWLRQDERXWKRZWRFRQQHFWWRWKH,QWHUQHWVHHMaking a :L)L&RQQHFWLRn. 4. The TV channel you select will open in the video player. Selecting the menu icon will display several options: - “Info”: to view the information concerning the TV channel. - “Add to favorites” / “Remove favorite”: adds the current Web TV station as CHCXQTKVG QTTGOQXGUKVHTQOVJGHCXQTKVGU#NN[QWTHCXQTKVGYGD68UVCVKQPU will be accessible directly from “Media Club” > “:HE79” > “Favorites”. - “Format”: allows you to change the way the image is displayed - “Sound”: displays the “SoundnUGVVKPIUUETGGP UGG“Sound” Settings LISTENING TO WEB RADIO STATIONS In order to be able to listen to thousands of different Web radio stations and YDULRXVSRGFDVWVZRUOGZLGH\RXUGHYLFHZLOOQHHGWREHUHJLVWHUHG 1. First connect to a WiFi network*. 2. From the Home Screen, tap on “Media Club”, then choose “Web Radio”. 3. The “Web RadionKPVGTHCEGKUQTICPK\GFD[ECVGIQT[UWEJCUm/RFDWLRQ”, “Genre”, “Most Popular StationsnGVE$TQYUGVJGECVGIQTKGUVQÒPFVJGTCFKQUVCVKQPRQF cast you want to listen to. 7R¿QGPRUHLQIRUPDWLRQDERXWKRZWRFRQQHFWWRWKH,QWHUQHWVHHMaking a :L)L&RQQHFWLRn. 4. The radio station/podcast you select will open in the music player. Selecting the will display several options: menu icon - “Info”: to view the information concerning the radio station/podcast. - “Add to favorites” / “Remove favorite”: adds the current Web radio station as CHCXQTKVG QTTGOQXGUKVHTQOVJGHCXQTKVGU#NN[QWTHCXQTKVGYGDTCFKQUVCVKQPU will be accessible directly from “Media Club” > “Web Radio” > “Favorites”. - “Sound”: displays the “SoundnUGVVKPIUUETGGP UGG“Sound” Settings | 32 Internet Tablet --- FCC Draft Manual --- PLAYING VIDEO > P. 21 PLAYING VIDEO From the Home screen, tap on the “Video” icon, then select “Internal StoragenVQFKURNC[CNNVJGXKFGQUCPFHQNFGTUUVQTGFKP[QWTFGXKEGlU Video folder. <RXFDQUHVXPHWKHODVWSOD\HGYLGHR¿OHLILWZDVLQWHUUXSWHGEHIRUHWKHHQG BROWSING THROUGH YOUR VIDEOS • The “Video” browser allows you to navigate through the Video folder of the ARCHOS internal memory. • You can go back one level in the interface by tapping on the Back icon . Wherever you are in the interface, you can go back directly to the Home screen by tapping on the Home icon . THE VIDEO BROWSER • 6JGÒTUVUETGGPQHVJG8KFGQOQFG shows you all the videos and sub folders located in the Video folder. • 5NKFG[QWTÒPIGTXGTVKECNN[QPVJG screen to browse through the list. • Tap on a video to select it and tap on it again to play it. • +HCXKFGQKUKPCUWDHQNFGTQHVJG Video folder, open the subfolder, and you will see it. ,QWKH³9LGHR´EURZVHUHDFKYLGHR¿OHDSSHDUVZLWKDWKXPEQDLOGLVSOD\HGRQ WKHOHIWRIWKH¿OH¶VQDPH VIDEO BROWSER MENU ITEMS m+PHQn - FKURNC[UCOGUUCIGDQZYKVJKPHQTOCVKQPCDQWVVJGJKIJNKIJVGFXKFGQÒNG “File Management” - “RenamenCNNQYU[QWVQEJCPIGVJGPCOGQHVJGJKIJNKIJVGFXKFGQÒNGWUKPIVJG virtual keyboard. See: Using the Virtual Keyboard. | 32 Internet Tablet --- FCC Draft Manual --- PLAYING VIDEO > P. 22 - “DeletenCNNQYU[QWVQFGNGVGVJGJKIJNKIJVGFXKFGQÒNG#EQPÒTOCVKQPUETGGP will pop up. “Create Bookmark” - ETGCVGUCUJQTVEWV QPVJG*QOGUETGGPKPVJGmVideonOGPWVQVJGJKIJNKIJVGF video. “Bookmark” - “Resume”: will resume playing the highlighted video from the bookmark. - “ClearnYKNNTGOQXGVJGDQQMOCTMHTQOVJGJKIJNKIJVGFXKFGQÒNG ³%RRNPDUN´RQO\DSSHDUVLQWKHPHQXZKHQDERRNPDUNHGYLGHR¿OHLVKLJKlighted. “Search” - Allows you to search for a particular video by entering a few letters or a word. See: Using the Virtual Keyboard. “Settings” - [QWECPEJQQUGVQFKURNC[VJG8KFGQ2NC[GTUGVVKPIUUETGGP UGGVideo Player SettingsQTVJGmSoundnUGVVKPIUUETGGP UGG“Sound” Settings VIDEO PLAYBACK 6QRNC[CXKFGQJKIJNKIJVVJGÒNGCPFQRGPKV VIDEO PLAYBACK SCREEN 1. Menu icon 2. Back icon 3. 8KFGQÒNGPCOG 4. Home icon 5. Play / Pause icon 6. Video progression bar 7. Volume level | 32 Internet Tablet --- FCC Draft Manual --- PLAYING VIDEO > P. 23 VIDEO PLAYBACK TOUCHSCREEN CONTROLS • To pause/resume the video, tap on the Pause RTGXKQWUUETGGP / Play KEQP UGGP5 in the • To display the menu overlay, tap once anywhere on the screen. To make it disap pear, tap again. • You can tap on the progression bar to go directly to a different location in the XKFGQ;QWECPCNUQWUG[QWTÒPIGTVQFTCIVJGEWTUQTKPVJGRTQITGUUKQPDCTVQ CPQVJGTNQECVKQPKPVJGXKFGQ UGGP6 • 6JGXQNWOGDCTECPDGFTCIIGFKPVJGUCOGYC[ UGGP7 • To display the available menu items, tap on the menu icon UGGP1 • To stop the video and go back to the “Video” browser, tap on the Back icon UGGP2To exit the Video mode and go back directly to the Home screen, tap on the Home icon UGGP4 VIDEO PLAYBACK MENU ITEMS m+PHQn - FKURNC[UCOGUUCIGDQZYKVJKPHQTOCVKQPCDQWVVJGEWTTGPVXKFGQÒNG “Soundtrack” and/or “Subtitles” - allows you to select a different audio track*. - allows you to choose subtitles**. 2QO\LIWKHYLGHR¿OHFRQWDLQVVHYHUDODXGLRWUDFNV ** Only if subtitles are available. “Format” - allows you to change the way the image is displayed. - “AutonCFLWUVUVJGXKFGQUK\GVQDGUVCFCRVVQVJGDWKNVKPUETGGP QT68YKVJVJGQR tional DVR Station, Mini Dock or Battery Dock: see #4%*152NWIKPUCPF#FFQPs - “)XOO6FUHHQnGPNCTIGUVJGRKEVWTGVQÒNNVJGUETGGP+PQTFGTVQÒVVJG#4%*15 screen, your device might need to cut small parts of the image, most likely at the top and bottom. - “0D[LPL]HGnGPNCTIGUVJGRKEVWTGVQÒNNVJGUETGGPCUUWOKPIVJGKOCIGJCUCP aspect ratio of 2.35 with black bands at the top and bottom. - “Original”: displays the entire picture in its original format. “Speed” - will play the current video in slow motion or high speed. - while paused in slow motion, you can advance frame by frame, using the right arrow. | 32 Internet Tablet --- FCC Draft Manual --- PLAYING VIDEO > P. 24 “Set” - “Bookmark”: sets a bookmark at the current spot in the video. Only one book OCTMRGTÒNGKUCNNQYGF - to resume playing a video from a bookmark, go to the Home screen, in the “Video” menu, and you will see your bookmarked video. You can also go to the “Video” DTQYUGTCPFJKIJNKIJVVJGDQQMOCTMGFXKFGQÒNG5GNGEVVJGmBookmark” menu item, then choose “Resumen mClearnYKNNTGOQXGVJGDQQMOCTMHTQOVJGXKFGQ - “7KXPEQDLO”: saves the current image as a new thumbnail image in the “Video” browser. - “WallpapernVJGEWTTGPVKOCIGYKNNDGFGÒPGFCU[QWTFGXKEGlUDCEMITQWPFKOCIG “Switch to TV out” - +H[QWJCXGEQPPGEVGFVJG#4%*15VQ[QWT68XKCCPQRVKQPCN&845VCVKQP/KPK Dock or Battery Dock, use this option to switch the display from the ARCHOS DWKNVKP.%&VQVJGUETGGPQH[QWT68 “Settings” - [QWECPEJQQUGVQFKURNC[VJG8KFGQ2NC[GTUGVVKPIUUETGGP UGGVideo Player SettingsQTVJGmSoundnUGVVKPIUUETGGP UGG“Sound” Settings VIDEO PLAYER SETTINGS • +PVJG8KFGQOQFG[QWECPCEEGUUVJG8KFGQ2NC[GTUGVVKPIUUETGGPD[WUKPIVJG “Settings” menu item. • Use the left/right arrows to select a different setting for a parameter. m2NC[/QFGnm4GRGCV5JWHÓGn - the following table explains how the video player will work according to the set tings you chose in “PlayMode” AND “5HSHDW6KXIÀH”. | 32 Internet Tablet --- FCC Draft Manual --- PLAYING VIDEO > P. 25 “PlayMode” “Repeat & 6KXIÀH´ “Single” “Normal” - RNC[UVJGEWTTGPVXKFGQÒNGCPFVJGPUVQRU “Repeat” - RNC[UVJGEWTTGPVXKFGQÒNGTGRGCVGFN[ “Normal” - RNC[UCNNVJGXKFGQÒNGUQHVJGEWTTGPVHQNFGT one after the other, and then stops. “Repeat” - RNC[UCNNVJGXKFGQÒNGUQHVJGEWTTGPVHQNFGT one after the other. This will be repeated in FGÒPKVGN[ “Folder” “6KXIÀH” What the video player does... - plays all the videos of the current folder ran domly. “UPnP Thumbnails” - allows you to enable/disable the video thumbnails while browsing through your 2%lUUJCTGFXKFGQU5GG2NC[KPI[QWT2%lU5JCTGF/GFKC(KNGU 72P2+H[QWEJQQUG “Disabledn[QWYKNNDGCDNGVQDTQYUGVJTQWIJ[QWT2%lUUJCTGFXKFGQUHCUVGT “Brightness” - adjusts the level of brightness of the screen. PUTTING VIDEOS ONTO YOUR ARCHOS The Media Club gives you the choice to purchase or rent videos directly from your ARCHOS, without using a computer. See: 7KH0HGLD&OXb. There are two main methods to transfer the videos stored on your computer onto the ARCHOS: 1. 9KPFQYU/GFKC2NC[GT: copy your videos using Windows Media Player 11 or higher: Use Windows Media2NC[GTQTJKIJGT 6\QFVCDVQU[PEJTQPK\G[QWT EQORWVGTlUXKFGQÒNGUVQVJG#4%*155GGPutting Files onto the ARCHOS for more details. 2. 9KPFQYUExplorer%QR[CPFRCUVG[QWTXKFGQÒNGUHTQO[QWTEQORWVGTKPVQVJG Video folder of your ARCHOS. ! ʆ $77(17,21)RUERWKPHWKRGVRIWUDQVIHUULQJ¿OHVIURP\RXU3&WR your ARCHOS, you MUST have Windows Media Player® 11 or higher installed on your computer. | 32 Internet Tablet --- FCC Draft Manual --- PLAYING VIDEO > P. 26 To learn how to connect/disconnect the ARCHOS from your computer, see the Transferring Files section. CREATING COMPATIBLE VIDEO FILES WITH YOUR COMPUTER +HUQOGQH[QWTXKFGQUFQPlVRNC[QP[QWT#4%*15[QWOC[PGGFVQEQPXGTVVJGOVQ a compatible format: • 6JGGCUKGUVYC[VQFQVJKUKUD[WUKPI9KPFQYU/GFKC2NC[GTQTJKIJGTVQ VTCPUHGTXKFGQUVQ[QWT#4%*159KPFQYU/GFKC2NC[GTYKNNCWVQOCVKECNN[EQP vert most formats to the WMV format that your device can play. See your Windows Media Player help instructions for more information. • +H[QWFQPlVYCPVVQWUG9KPFQYU/GFKC2NC[GTCUGCTEJQPVJG+PVGTPGVUJQWNF CNNQY[QWVQÒPFQVJGTUWKVCDNGWVKNKV[RTQITCOU PLAYING YOUR PC’S SHARED VIDEOS (UPNP) • When connected to your home WiFi network, your ARCHOS gives you the possibility to watch, directly on your device, shared videos UVQTGFKP[QWT2%lU9KPFQYU/GFKC.KDTCT[ • (QTVJKUVQYQTM[QWYKNNPGGFC9K(KEQPPGEVKQPCPF9KPFQYU/GFKC2NC[GT or higher* installed on your PC. * There are other products (software) on the market that also can share media ¿OHVXVLQJWKH83Q3VWDQGDUG • 6JG#4%*15WUGUVJG72P2 7PKXGTUCN2NWICPFRNC[UVCPFCTFVQUVTGCOUJCTGF XKFGQUHTQO[QWT2%lU9KPFQYU/GFKC.KDTCT[ • See: 2NC[KPI[QWT2%lU5JCTGF/GFKC(KNGU 72P2. If you cannot install Windows Media® Player 11 or higher, it is possible to acFHVVDQGVWUHDP\RXU3&¶V¿OHVIURPWKH$5&+26)LOH%URZVHU6HHBrowsing Other Computers on the Network. | 32 Internet Tablet --- FCC Draft Manual --- PLAYING MUSIC > P. 27 PLAYING MUSIC From the Home screen, tap on the “0XVLF” icon, then select “Internal StoragenVQFKURNC[CNNVJGUQPIUCPFHQNFGTUUVQTGFKP[QWTFGXKEGlU 0XVLF folder. <RXFDQUHVXPHWKHODVWSOD\HGPXVLF¿OHLILWZDVLQWHUUXSWHGEHIRUHWKHHQG BROWSING THROUGH YOUR MUSIC FILES • There are two types of views for you to browse through your songs: the Music Library and the Music Browser. • +PDQVJXKGYU[QWECPIQDCEMQPGNGXGNKPVJGKPVGTHCEGD[VCRRKPIQPVJG$CEM icon . Wherever you are in the interface, you can go back directly to the Home screen by tapping on the Home icon . When you leave the music playback screen while a song is still playing, it will keep playing in the background. This allows you to browse your internal memory, view your photos or surf the Web while listening to music. You will be able WRDFFHVVWKHPXVLFSOD\EDFNVFUHHQGLUHFWO\IURPWKHQRWL¿FDWLRQDUHD7RVWRS the song, tap on pause in the music playback screen and then tap on Home. THE MUSIC LIBRARY • 6JG/WUKE.KDTCT[ FGHCWNVXKGY shows your music sorted by cat GIQTKGU %QXGT#TVKUV#NDWO)GPTG GVEKH[QWTOWUKEÒNGUEQPVCKP these song information tags. • When new music is copied to the ARCHOS, the Music Library will be updated automatically. • +HUQOGQH[QWTOWUKEÒNGUFQPQV contain information tags, they will DGENCUUKÒGFCU(Unknown) in the Music Library. | 32 Internet Tablet --- FCC Draft Manual --- PLAYING MUSIC > P. 28 THE MUSIC BROWSER • The music browser allows you to navigate through the 0XVLF folder QH[QWTFGXKEGlUKPVGTPCNOGOQT[ • To use it, select “Internal Memory” in the initial Music Library view. MUSIC LIBRARY AND MUSIC BROWSER MENU ITEMS* * The available menu items will vary depending on the mode you chose (Music Library or Music Browser). m+PHQn - FKURNC[UCOGUUCIGDQZYKVJKPHQTOCVKQPCDQWVVJGJKIJNKIJVGFOWUKEÒNG “Show playlist” - QRGPUCRNC[NKUVGFKVKQPYKPFQYQPVJGTKIJV UGGPlaylists “File Management” - “RenamenCNNQYU[QWVQEJCPIGVJGPCOGQHVJGJKIJNKIJVGFOWUKEÒNGWUKPIVJG virtual keyboard. See: Using the Virtual Keyboard. - “DeletenCNNQYU[QWVQFGNGVGVJGJKIJNKIJVGFOWUKEÒNG#EQPÒTOCVKQPUETGGP will pop up. “Create Bookmark” - ETGCVGUCUJQTVEWV QPVJG*QOGUETGGPKPVJGm0XVLFnOGPWVQVJGJKIJNKIJVGF song, artist, album, folder, etc. “Bookmark” - “Resume”: will resume playing the highlighted song from the bookmark. - “ClearnYKNNTGOQXGVJGDQQMOCTMHTQOVJGJKIJNKIJVGFOWUKEÒNG ³%RRNPDUN´RQO\DSSHDUVZKHQDERRNPDUNHGPXVLF¿OHLVKLJKOLJKWHG “Search” - #NNQYU[QWVQUGCTEJHQTCURGEKÒEUQPID[GPVGTKPICHGYNGVVGTUQTCYQTF5GG Using the Virtual Keyboard. | 32 Internet Tablet --- FCC Draft Manual --- PLAYING MUSIC > P. 29 “Settings” - [QWECPEJQQUGVQFKURNC[VJG/WUKE2NC[GTUGVVKPIUUETGGP UGGMusic Player SettingsQTVJGmSoundnUGVVKPIUUETGGP UGG“Sound” Settings MUSIC PLAYBACK • 5NKFG[QWTÒPIGTXGTVKECNN[QPVJGUETGGPVQDTQYUGVJTQWIJVJGNKUV • Tap on a song to select it and tap on it again to play it. MUSIC PLAYBACK SCREEN 1. Menu icon 2. Back icon 3. Home icon 4. Play / Pause icon 5. Previous track 6. Next track 7. Progression bar 8. Volume level MUSIC PLAYBACK TOUCHSCREEN CONTROLS / Play KEQP UGGP4 in the • To pause/resume the song, tap on the Pause RTGXKQWUUETGGP / P5 or 6 • To play the previous/next song, tap on • To browse through your songs while listening to music, simply tap on the Back icon . This will take you to the Music Library or browser screen that you NCWPEJGFVJGEWTTGPVUQPIHTQO UGGP2 • You can tap on the progression bar to go directly to a different location in the song. You can also drag the cursor in the progression bar to another location in VJGUQPI UGGP7 • 6JGXQNWOGDCTECPDGFTCIIGFKPVJGUCOGYC[ UGGP8 • To display the available menu items, tap on the menu icon UGGP1 • To go back directly to the Home screen, tap on the Home icon UGGP3. | 32 Internet Tablet --- FCC Draft Manual --- PLAYING MUSIC > P. 30 When you leave the music playback screen while a song is still playing, it will keep playing in the background. This allows you to browse your internal memory, view your photos or surf the Web while listening to music. You will be able WRDFFHVVWKHPXVLFSOD\EDFNVFUHHQGLUHFWO\IURPWKHQRWL¿FDWLRQDUHD7RVWRS the song, tap on pause in the music playback screen and then tap on Home. MUSIC PLAYBACK MENU ITEMS m+PHQn - FKURNC[UCOGUUCIGDQZYKVJKPHQTOCVKQPCDQWVVJGEWTTGPVOWUKEÒNG “Set bookmark” - UGVUCDQQMOCTMCVVJGEWTTGPVURQVKPVJGUQPI1PN[QPGDQQMOCTMRGTÒNGKUCN lowed. - to resume playing a song from a bookmark, go to the Home screen, in the “0XVLF” menu, and you will see your bookmarked song. You can also go to the Music Library or the Music Browser, and highlight the song. Select the “Bookmark” menu item, then choose “Resumen mClearnYKNNTGOQXGVJGDQQMOCTMHTQOVJGUQPI “Set rating” - CNNQYU[QWVQIKXGCTCVKPIVQVJGEWTTGPVUQPI QTVQTGOQXGVJGTCVKPI PQPG “Switch to TV out” - +H[QWJCXGEQPPGEVGFVJG#4%*15VQ[QWT68XKCCPQRVKQPCN&845VCVKQP/KPK Dock or Battery Dock, use this option to switch the display from the ARCHOS DWKNVKP.%&VQVJGUETGGPQH[QWT68 “Settings” - [QWECPEJQQUGVQFKURNC[VJG/WUKE2NC[GTUGVVKPIUUETGGP UGGPGZVUGEVKQPQT the “SoundnUGVVKPIUUETGGP UGG“Sound” Settings MUSIC PLAYER SETTINGS • +PVJG/WUKEOQFG[QWECPCEEGUUVJG/WUKE2NC[GTUGVVKPIUUETGGPD[WUKPIVJG “Settings” menu item. • Use the left/right arrows to select a different setting for a parameter. | 32 Internet Tablet --- FCC Draft Manual --- PLAYING MUSIC > P. 31 m2NC[/QFGnm4GRGCV5JWHÓGn - the following table explains how the audio player will work according to the set tings you chose in “PlayMode” AND “5HSHDW6KXIÀH”. - An icon shows the current modes in the Music playback screen. “PlayMode” “Repeat & 6KXIÀH´ “Single” “Normal” - plays the current song and then stops. “Repeat” - plays the current song repeatedly. “Normal” - plays all the songs of the current folder one after the other, and then stops. “Repeat” - plays all the songs of the current folder one CHVGTVJGQVJGT6JKUYKNNDGTGRGCVGFKPFGÒ nitely. “6KXIÀH” - plays the songs of the current folder ran domly. “Normal” - plays all the songs of your ARCHOS one after the other, and then stops. “Repeat” - plays all the songs of your ARCHOS one CHVGTVJGQVJGT6JKUYKNNDGTGRGCVGFKPFGÒ nitely. “6KXIÀH” - plays all the songs of your ARCHOS ran domly. “Folder” “All” What the audio player does... | 32 Internet Tablet “Queue” “Intro” --- FCC Draft Manual --- PLAYING MUSIC > P. 32 - allows you to select a track to be played after the current one KUÒPKUJGF - while a track is playing, switch to the browser window, select a track to highlight it, then open it. This is your queued track, which will be played after the current track. - you can only queue one track at a time. - RNC[UVJGÒTUVHGYUGEQPFUQHGCEJVTCEM;QWECPFGÒPGVJG length to play in “Intro duration”. m+PVTQFWTCVKQPn - FGÒPGUHQTJQYNQPIGCEJVTCEMYKNNDGRNC[GFYJGPmPlayMode” is set to “Intro”. “SOUND” SETTINGS This screen allows you to adjust the sound settings of your ARCHOS to your personal taste. “Preset”* - CNNQYU[QWVQSWKEMN[UGNGEVCUQWPFRTQÒNG m5GV'SWCNK\GTn - CNNQYU[QWVQWUGCEWUVQOUQWPFRTQÒNG5GNGEVVJKUQRVKQPVQGPVGTVJGGSWCNK\GT UETGGP UGGPGZVUGEVKQP * These two parameters are grayed out when the sound is coming from the device’s built-in speaker. “Balance” - allows you to balance the sound between the left and right stereo channels. “Reset” - resets the sound parameters to the default values. “EQUALIZER” SCREEN • ;QWT#4%*15HGCVWTGUCDCPFGSWCNK\GT • 5GNGEVCDCPF $CUU/KFDCUU/KFTCPIG/KFVTGDNGQT6TGDNGVJGPWUGVJGWR down arrows to change the gain level for these frequency ranges. It is advised that you change these settings while listening to music, in order to be able to appreciate the sound changes. | 32 Internet Tablet --- FCC Draft Manual --- PLAYING MUSIC > P. 33 PLAYLISTS • A playlist is a list of audio tracks that the music player will automatically play one after the other. • On your ARCHOS, you can play, create and edit as many playlists as you want. Note: when you delete a playlist, you are only deleting the list and not the music itself. PLAYING A PLAYLIST • +PVJG/WUKE.KDTCT[JKIJNKIJVVJG “Playlist” line and open it. • Highlight a playlist and open it. A panel showing the contents of the playlist will open on the right. • 1RGPVJGÒTUVKVGOKPVJGRNC[NKUVVQ UVCTVRNC[KPIHTQOVJGÒTUVVTCEM PLAYLIST MENU ITEMS 6JGUGOGPWKVGOUCRRGCTYJGPCOWUKEÒNGKUJKIJNKIJVGFQPVJGNGHVRCPGN “Add to playlist” - “6HOHFWHG¿OH”: will add the highlighted track at the end of the current playlist. - “$OO¿OHVnYKNNCFFCNNVJGVTCEMU HTQOVJGNGHVRCPGNCVVJGGPFQHVJGEWTTGPVRNC[NKUV m+PUGTVKPRNC[NKUVn - “6HOHFWHG¿OH”: will insert the highlighted track before the selected item in the current playlist. - “$OO¿OHVnYKNNCFFCNNVJGVTCEMU HTQOVJGNGHVRCPGNDGHQTGVJGUGNGEVGFKVGOVJG current playlist. “Hide playlist” - closes the playlist editor. 6JGUGOGPWKVGOUCRRGCTYJGPVJGHQEWUKUQPVJGTKIJVRCPGN RNC[NKUVGFKVQT “Track” - “5HPRYHWUDFN”: deletes the highlighted track from the playlist. | 32 Internet Tablet --- FCC Draft Manual --- PLAYING MUSIC > P. 34 - “Move”: allows you to change the position of the highlighted track within the playlist. Highlight the track you want to move, select the “7UDFN” menu item, then choose “Move”. Now highlight the position to which you want to move the track and validate. “Playlist” - “Clear”: clears the current playlist. - “6KXIÀHnTCPFQON[UJWHÓGUVJGQTFGTQHVJGUQPIUKPVJGEWTTGPVRNC[NKUV “Save playlist” - “Save”: saves the current playlist to the Playlists folder. - “Save As”: same as “SavenDWVKVCNUQCNNQYU[QWVQIKXGCRGTUQPCNK\GFPCOGVQ the playlist. See: Using the Virtual Keyboard. “Hide playlist” - closes the playlist editor. CREATING A NEW PLAYLIST 1. While you are in the Music browser, select the “Show playlist” menu item. A playlist panel will open on the right. By default, the new playlist contains the same songs as the last opened playlist. These can be cleared with the menu item “Playlist” > “Clear”. You can now start modifying the playlist. 2. +PVJGNGHVRCPGNNQECVGVJGUQPIU[QWYQWNFNKMGVQCFFVQ[QWTRNC[NKUV*KIJNKIJV a song and open it to add it to the playlist. Repeat this operation with all the tracks you want. To add all the songs of a folder to a playlist: open the folder in the left panel DQGKLJKOLJKWWKH¿UVWVRQJ7KHQXVHWKH³$GGWRSOD\OLVW´RU³,QVHUWLQSOD\OLVW´PHQXLWHPDQGFKRRVH³$OO¿OHV´ 3. 9JGP[QWCTGUCVKUÒGFYKVJ[QWTPGYRNC[NKUVUGNGEVVJGmSave playlist” menu item, and then choose “Save as”. 4. 'PVGTVJGPCOGQH[QWTPGYRNC[NKUVYKVJVJGXKTVWCNMG[DQCTF UGGUsing the Virtual KeyboardCPFUGNGEVmOK”. 8VHWKHWDEVWRMXPSEDFNDQGIRUWKEHWZHHQWKHOHIWDQGULJKWSDQHOV EDITING A PLAYLIST To edit an existing playlist: 1. +PVJG/WUKE.KDTCT[JKIJNKIJVVJGmPlaylist” line and open it. | 32 Internet Tablet --- FCC Draft Manual --- PLAYING MUSIC > P. 35 2. Highlight the playlist you want to modify and open it. A panel showing the con tents of the playlist will open on the right. 3. ;QWECPPQYCFFUJWHÓGOQXGQTTGOQXGVTCEMUYKVJKPVJGRNC[NKUVWUKPIVJG appropriate menu items. The available menu items will vary according to which RCPGN[QWUGNGEVGF UGG2NC[NKUV/GPW+VGOs 4. After you have made the changes you want, select the “Save playlist” menu item and choose “SavenVQUCXGVJGRNC[NKUV+H[QWYKUJVQIKXGKVCFKHHGTGPVPCOG choose “Save As”. PUTTING MUSIC ONTO YOUR ARCHOS There are two main methods to transfer the music stored on your computer onto the ARCHOS: 1. 9KPFQYU/GFKC2NC[GT: copy your music using Windows Media Player 11 or higher: Use Windows Media2NC[GTQTJKIJGT 6\QFVCDVQU[PEJTQPK\G[QWT EQORWVGTlUOWUKEÒNGUVQVJG#4%*155GGPutting Files onto the ARCHOS for more details. 2. 9KPFQYUExplorer%QR[CPFRCUVG[QWTOWUKEÒNGUHTQO[QWTEQORWVGTKPVQVJG 0XVLF folder of your ARCHOS. ! ʆ $77(17,21)RUERWKPHWKRGVRIWUDQVIHUULQJ¿OHVIURP\RXU3&WR your ARCHOS, you MUST have Windows Media Player® 11 or higher installed on your computer. To learn how to connect/disconnect the ARCHOS from your computer, see the Transferring Files section. TRANSFERRING YOUR CD COLLECTION TO YOUR ARCHOS ;QWECPGCUKN[ETGCVGOWUKEÒNGUYKVJ[QWTEQORWVGTD[WUKPI9KPFQYU/GFKC2NC[GT 11 or higher to convert your CDs to a playable format for your ARCHOS: 1. 2NCEGCOWUKE%&KP[QWTEQORWVGTCPF9KPFQYUYKNNCUM[QWYJCVCEVKQP[QW would like to perform. 2. Choose 5LSPXVLFIURP&'CPF9KPFQYU/GFKC2NC[GTYKNNUVCTVTKRRKPIVJG CD. The songs will be automatically extracted from the CD and encoded into the /2QT9/#HQTOCVCEEQTFKPIVQYJCV[QWEJQUGKP9KPFQYU/GFKC2NC[GTlU ripping options. The default format is WMA. | 32 Internet Tablet --- FCC Draft Manual --- PLAYING MUSIC > P. 36 3. Once this is done, the album will become part of your Music Library. 4. See Transferring Files to learn how to transfer the TKRRGFOWUKEÒNGUQPVQVJG#4%*15. 5GG[QWT9KPFQYU/GFKC2NC[GTJGNRKPUVTWEVKQPUHQTOQTG information. • Check the laws and regulations in your country RUMXULVGLFWLRQWRNQRZLISULYDWHFRS\LQJRI\RXU CDs for your own use is authorized. • Some music CDs have a special copy protection system that will not allow Windows Media® Player WRPDNHPXVLF¿OHVIURPWKHP PLAYING YOUR PC’S SHARED MUSIC (UPNP) • When connected to your home WiFi network, your ARCHOS gives you the possibility to play, directly on your device, shared music stored in [QWT2%lU9KPFQYU/GFKC.KDTCT[ • (QTVJKUVQYQTM[QWYKNNPGGFC9K(KEQPPGEVKQPCPF9KPFQYU/GFKC2NC[GT or higher* installed on your PC. * There are other products (software) on the market that also can share media ¿OHVXVLQJWKH83Q3VWDQGDUG • 6JG#4%*15WUGUVJG72P2 7PKXGTUCN2NWICPFRNC[UVCPFCTFVQUVTGCOUJCTGF OWUKEHTQO[QWT2%lU9KPFQYU/GFKC.KDTCT[ • See: 2NC[KPI[QWT2%lU5JCTGF/GFKC(KNGU 72P2. If you cannot install Windows Media® Player 11 or higher, it is possible to acFHVVDQGVWUHDP\RXU3&¶V¿OHVIURPWKH$5&+26)LOH%URZVHU6HHBrowsing Other Computers on the Network. | 32 Internet Tablet --- FCC Draft Manual --- VIEWING PHOTOS > P. 37 VIEWING PHOTOS From the Home screen, tap on the “Photo” icon, then select “Internal StoragenVQFKURNC[CNNVJGRJQVQUCPFHQNFGTUUVQTGFKP[QWTFGXKEGlU 3LFWXUHV folder. You can resume the last-viewed photo or slideshow. BROWSING THROUGH YOUR PHOTOS • The “Photo” browser allows you to navigate through the 3LFWXUHV folder of the ARCHOS internal memory. • You can go back one level in the interface by tapping on the Back icon . Wherever you are in the interface, you can go back directly to the Home screen by tapping on the Home icon . THE PHOTO BROWSER • 6JGÒTUVUETGGPQHVJG2JQVQOQFG shows all the photos and subfolders located in the 3LFWXUHV folder. • To view a photo, highlight its VJWODPCKNVJGPQRGPKV+HCRJQVQKU in a subfolder of the 3LFWXUHV folder, open the subfolder, and you will see your photo. • The Photo Browser also allows you to view your pictures, sorted by date. In the “Photo” browser each photo is displayed with a thumbnail. PHOTO BROWSER MENU ITEMS* m+PHQn - displays a message box with information about the highlighted picture. “File Management” - “DeletenCNNQYU[QWVQFGNGVGVJGJKIJNKIJVGFRJQVQ#EQPÒTOCVKQPUETGGPYKNN pop up. | 32 Internet Tablet --- FCC Draft Manual --- VIEWING PHOTOS > P. 38 “Start slideshow” - starts a slideshow from the highlighted image. “Create Bookmark” - creates a shortcut to this picture on the Home screen, in the “Photo” menu. “Settings” - YKNNFKURNC[VJG2JQVQXKGYGTUGVVKPIUUETGGP UGGPhoto Viewer Settings * The available menu items will vary depending on where you are in the “Photo” Browser. PHOTO VIEWER To view a picture, highlight the corresponding thumbnail and open it. PHOTO VIEWER SCREEN PHOTO VIEWER TOUCHSCREEN CONTROLS / Pause icon. • To start/pause a slideshow, tap on the Play • To display the menu overlay, tap once anywhere on the screen. To make it disap pear again, tap again. • 6QFKURNC[VJGPGZVRKEVWTGFTCI[QWTÒPIGTHTQONGHVVQTKIJV&TCIHTQOTKIJVVQ left to go back one picture. • 6QTQVCVGVJGRKEVWTGEQWPVGTENQEMYKUGFTCI[QWTÒPIGTHTQODQVVQOVQVQR 6QTQVCVGVJGRKEVWTGENQEMYKUGFTCIHTQOVQRVQDQVVQO • To magnify the current picture, hold down anywhere on the screen until you are UCVKUÒGFYKVJVJG\QQONGXGN;QWECPVJGPFTCI[QWTÒPIGTVQOQXGVJGRKEVWTG6Q FKURNC[VJGKOCIGKPKVUQTKIKPCNHQTOCVVCRVYKEG TCRKFN[CP[YJGTGQPVJGUETGGP | 32 Internet Tablet --- FCC Draft Manual --- VIEWING PHOTOS > P. 39 • You can use the progression bar to go directly to another photo of the current folder. • To display the available menu items, tap on the menu icon . • To close the photo and go back to the “Photo” browser, tap on the Back icon . To exit the Photo mode and go back directly to the Home screen, tap on the Home icon . PHOTO VIEWER MENU ITEMS m+PHQn - displays a message box with information about the current picture. “Zoom” - use the slider to magnify/demagnify the current picture. “Rotate” - choose “LeftnVQTQVCVGVJGRKEVWTGEQWPVGTENQEMYKUG - choose “RightnVQTQVCVGVJGRKEVWTGENQEMYKUG “Start slideshow” - starts a slideshow from the current image. - the “Pause slideshow” menu item will appear, allowing you to pause the slide show. “Set as wallpaper” - FGÒPGUVJGEWTTGPVRKEVWTGCU[QWT#4%*15DCEMITQWPFKOCIG “Switch to TV out” - +H[QWJCXGEQPPGEVGFVJG#4%*15VQ[QWT68XKCCPQRVKQPCN&845VCVKQP/KPK Dock or Battery Dock, use this option to switch the display from the ARCHOS DWKNVKP.%&VQVJGUETGGPQH[QWT68 “Settings” - YKNNFKURNC[VJG2JQVQXKGYGTUGVVKPIUUETGGP UGGPGZVUGEVKQP | 32 Internet Tablet --- FCC Draft Manual --- VIEWING PHOTOS > P. 40 PHOTO VIEWER SETTINGS • +PVJG2JQVQOQFG[QWECPCEEGUU the Photo viewer settings screen via the “Settings” menu item. • Use the left/right arrows to select a different setting for a parameter. “Picture Pause” - FGÒPGUVJGVKOGVJCVGCEJRKEVWTGYKNNDGFKURNC[GFFWTKPICUNKFGUJQY “Transition” - FGÒPGUVJGVTCPUKVKQPGHHGEVVQDGWUGFDGVYGGPVYQRKEVWTGU6JGTGCTGUGXGTCN cool effects that you can choose from. “Sequence” - CNNQYU[QWVQGPCDNGFKUCDNGVJGUJWHÓGOQFG+HVJKURCTCOGVGTKUUGVVQ “6KXIÀHn[QWTRKEVWTGUYKNNDGFKURNC[GFTCPFQON[6QFKUCDNGVJGUJWHÓGOQFG select “Normal”. “Format” - allows you to change the way the picture is displayed. - “Original”: displays the entire picture in its original format. - “)XOO6FUHHQnGPNCTIGUVJGRKEVWTGVQÒNNVJGUETGGP+PQTFGTVQÒVVJG#4%*15 screen, your device might need to cut small parts of the image, most likely at the top and bottom. - “Fit to widthnGPNCTIGUVJGRKEVWTGVQÒNNVJGUETGGPlUYKFVJ PLAYING A SLIDESHOW • 6QXKGYCUNKFGUJQYJKIJNKIJVCRKEVWTGÒNGKPVJGmPhoto” browser or while viewing icon. a photo, and choose the “Start slideshow” menu item, or tap on the Play • While a slideshow is playing, you can pause it at any time by selecting the “Pause icon. slideshow” menu item or by tapping on the Pause • ;QWECPFGÒPGVJGVKOGVJCVGCEJRKEVWTGKUFKURNC[GFCPFVJGVTCPUKVKQPGHHGEVUKP the “PhotonUGVVKPIU UGGPhoto Viewer Settings | 32 Internet Tablet --- FCC Draft Manual --- VIEWING PHOTOS > P. 41 PUTTING PHOTOS ONTO YOUR ARCHOS There are two main methods to transfer the pictures stored on your computer onto the ARCHOS: 1. 9KPFQYU/GFKC2NC[GT: copy your pictures using Windows Media Player 11 or higher: Use Windows Media2NC[GTQTJKIJGT 6\QFVCDVQU[PEJTQPK\G[QWT EQORWVGTlURKEVWTGUVQVJG#4%*155GGPutting Files onto the ARCHOS for more details. 2. 9KPFQYUExplorer: Copy and paste your pictures from your computer into the 3LFWXUHV folder of your ARCHOS. ! ʆ $77(17,21)RUERWKPHWKRGVRIWUDQVIHUULQJ¿OHVIURP\RXU3&WR your ARCHOS, you MUST have Windows Media Player® 11 or higher installed on your computer. To learn how to connect/disconnect the ARCHOS from your computer, see the Transferring Files section. PLAYING YOUR PC’S SHARED PHOTOS (UPNP) • When connected to your home WiFi network, your ARCHOS gives you the possibility to view, directly on your device, shared photos UVQTGFKP[QWT2%lU9KPFQYU/GFKC.KDTCT[ • (QTVJKUVQYQTM[QWYKNNPGGFC9K(KEQPPGEVKQPCPF9KPFQYU/GFKC2NC[GT or higher* installed on your PC. * There are other products (software) on the market that also can share media ¿OHVXVLQJWKH83Q3VWDQGDUG • 6JG#4%*15WUGUVJG72P2 7PKXGTUCN2NWICPFRNC[UVCPFCTFVQUVTGCOUJCTGF RJQVQUHTQO[QWT2%lU9KPFQYU/GFKC.KDTCT[ • See: 2NC[KPI[QWT2%lU5JCTGF/GFKC(KNGU 72P2. If you cannot install Windows Media® Player 11 or higher, it is possible to acFHVVDQGVWUHDP\RXU3&¶V¿OHVIURPWKH$5&+26)LOH%URZVHU6HHBrowsing Other Computers on the Network. | 32 Internet Tablet --- FCC Draft Manual --- TRANSFERRING FILES > P. 42 TRANSFERRING FILES ʆ ! ATTENTION: To connect your ARCHOS to your PC, you MUST have Windows Media Player® 11 or higher installed on your computer. CONNECTING THE ARCHOS TO A COMPUTER 1. Connect the supplied USB cable to the ARCHOS. 2. Plug the USB end of the cable into your computer. 3. The ARCHOS will turn on and ask you if you want to connect it or not. Choose to EQPPGEVKV+H[QWEJQQUGVQECPEGNVJGEQP nection, you can always drag the top bar FQYPYCTFUVQTGXGCNVJG75$PQVKÒECVKQP message and choose to connect. 4. The ARCHOS icon will appear on your computer. The ARCHOS starts charging CPF[QWECPUVCTVVTCPUHGTTKPIÒNGUVQKV | 32 Internet Tablet --- FCC Draft Manual --- TRANSFERRING FILES > P. 43 PUTTING FILES ONTO THE ARCHOS 6JGTGCTGVYQOCKPOGVJQFUVQVTCPUHGT[QWTÒNGUQPVQVJG#4%*15 1. %QR[[QWTOGFKCÒNGU XKFGQUOWUKERJQVQUYKVJ9KPFQYU/GFKC2NC[GT or higher: 6JG5[PEJTQPK\GDWVVQPKP9KPFQYU/GFKC2NC[GTKUCQPGYC[kU[PElDWVVQP+VYKNNCFF XKFGQOWUKECPFRJQVQÒNGUVQ[QWT#4%*15+VYKNNIKXG[QWVJGRQUUKDKNKV[VQJCXGVJGUCOG FKIKVCNOGFKCQP[QWT#4%*15CU[QWJCXGKP[QWT9KPFQYU/GFKC2NC[GTOGFKCNKDTCT[ 1. Connect your ARCHOS to the computer. See Connecting the ARCHOS to a Computer. 2. On your computer, start Windows Media2NC[GT QTJKIJGT 3. Select the 6\QF tab. 4. %JQQUGVJGOGFKCÒNGU[QWYCPVVQVTCPUHGT&TCIVJGÒNGUQTCNDWOU you want to transfer into the right panel. 5. Click on the 6WDUW6\QF button. 6. The selected videos, songs or photos will be copied directly into the corresponding Video, 0XVLFor 3LFWXUHV folder of the ARCHOS. See your Windows Media Player help instructions for more information. 2. The second method is to use 9KPFQYU'ZRNQTGTVQEQR[CPFRCUVG[QWTÒNGU from your computer to the Video, 0XVLFor 3LFWXUHV folder of your ARCHOS. DISCONNECTING • Verify that no data are being transferred between your ARCHOS and your computer. • Now unplug the USB cable from your ARCHOS and/or computer. • When you disconnect the ARCHOS from a computer, your device automatically WRFCVGUVJGOWNVKOGFKCNKDTCT[UQVJCVVJGOGFKCÒNGU[QWLWUVEQRKGFCRRGCTKP the Music and Photo Libraries. • +PECUGUQOGQH[QWTUQPIUQTRJQVQUFQPQVCRRGCTKPVJGOWUKEQTRJQVQNKDTCT[ select “Settings” > “'HYLFH6WRUDJH” > “Multimedia library update” to do a full multimedia library update. About your ARCHOS internal memory: DO NOT delete or rename the original folders: Music, Pictures, Video, Playlists, etc. In the Home screen, several icons “Video”, “Music”, “Photo”...) lead directly to these folders and they will no longer work if the folders are deleted or renamed. | 32 Internet Tablet --- FCC Draft Manual --- MAIN SETTINGS > P. 44 MAIN SETTINGS From the Home screen, tap on the Menu icon, tap on “Settings” and choose a category: “Wireless Controls”, “Sound & Display”, “'DWH7LPH”, etc. USING THE TOUCHSCREEN • When a down arrow appears on the right of a parameter, this means that this setting includes UWDRCTCOGVGTU6CRQPKVVQTGXGCNVJGNKUVQH UWDRCTCOGVGTU • When a check box appears on the right of a pa rameter, tap on it to enable or disable this option. • 9JGPKVKURQUUKDNG[QWECPWUG[QWTÒPIGTVQUETQNNVJGUETGGPWRCPFFQYPVQ TGXGCNUGVVKPIUVJCV[QWFQPlVKPKVKCNN[UGG • 9JGP[QWJCXGÒPKUJGFCFLWUVKPI[QWTUGVVKPIUVCRQPVJG$CEMKEQP to go back to the list of settings, or tap on the Home icon to go directly to the Home screen. Your settings are saved instantly. to access more options. • When it is possible, you can use the Menu icon “WIRELESS CONTROLS” This menu allows you to manage your WiFi and Bluetooth connections as well as set up the Airplane mode. When you do not need the WiFi or Bluetooth connections, remember to deactivate them in order to save battery power. m9K(Kn - tap on this line to enable or disable the WiFi connection. m9K(KUGVVKPIUn - allows you to set up and manage your WiFi networks. See: Making a WiFi Connection. | 32 Internet Tablet --- FCC Draft Manual --- MAIN SETTINGS > P. 45 “Bluetooth” - tap on this line to enable or disable the Bluetooth connection. “Bluetooth settings” - CNNQYU[QWVQUGVWR[QWTFGXKEGlUPCOG VJGPCOGVJCVYKNNCRRGCTQP[QWTFKH HGTGPV$NWGVQQVJFGXKEGUOCMGKVFKUEQXGTCDNGQTJKFFGPUECPHQT$NWGVQQVJFG vices in range, etc. - The list of Bluetooth devices in range will appear at the bottom of the “Bluetooth settings” screen, so that you can pair and connect them to the ARCHOS. - Tap on the Bluetooth device you want to connect to, and follow the instructions on the screen. Read the documentation that came with your Bluetooth device for more details. The ARCHOS is compatible with various Bluetooth devices such as A2DP stereo Bluetooth headphones. Note that not all types of Bluetooth devices are compatible with the ARCHOS. “Airplane mode” - When you activate the “Airplane mode”, this cuts the WiFi and Bluetooth con nections. This is typically required when onboard airplanes in order not to inter HGTGYKVJVJGCKTETCHVlUUGPUKVKXGKPUVTWOGPVU “SOUND & DISPLAY” “Sound settings” “Media volume” - Sets the volume for music and videos. You can also adjust the sound by using the Volume buttons, on the top of the device. “Audible selection” - enables/disables the touchscreen click sound. m'SWCNK\GTn - ;QWT#4%*15HGCVWTGUCDCPFGSWCNK\GT - &TCICDCPF $CUU/KFDCUU/KFTCPIG/KFVTGDNGQT6TGDNGVQVJGNGHVQTTKIJV to change the gain level for these frequency ranges. It is advised that you change these settings while listening to music, in order to be able to appreciate the sound changes. - This screen also allows you to balance the sound between the left and right ste reo channels. | 32 Internet Tablet --- FCC Draft Manual --- MAIN SETTINGS > P. 46 “Display settings” m6QWEJ5ETGGP%CNKDTCVKQPn - +HVJGVQWEJUETGGPKUPQVTGURQPFKPIRTQRGTN[WUGVJKUDWVVQPCPFHQNNQYVJGKP structions on the screen. If this does not work or if you cannot access the touchscreen settings, you can force the touchscreen calibration (see: 6\VWHP5HFRYHUy). “Accelerometer calibration” - +HVJGCEEGNGTQOGVGTKUPQVTGURQPFKPIRTQRGTN[ KPQVJGTYQTFUKHVJGCWVQOCVKE UETGGPTQVCVKQPFQGUPQVHWPEVKQPEQTTGEVN[WUGVJKUDWVVQPCPFHQNNQYVJGKP structions on the screen. “Orientation” - CNNQYU[QWVQGPCDNGFKUCDNGVJGCWVQOCVKEUYKVEJKPIQHVJGUETGGPlUQTKGPVCVKQP when rotating the device “Animation” - enables/disables the display of animations when opening and closing applications. “Archos theme color” - CNNQYU[QWVQEJCPIGVJGVJGOGEQNQT JWGUCVWTCVKQPCPFDTKIJVPGUUQHCNNVJG #4%*15OWNVKOGFKCCRRNKECVKQPU mVideo”, “0XVLF”, “PhotonGVE “Brightness” - allows you to adjust the brightness of the screen. “Screen timeout” - allows you to adjust the delay before the screen automatically turns off and locks itself. - to turn the screen back on, press the Power button once, and press it again to unlock the screen. “TV OUT” These settings are useful when the ARCHOS is connected to the DVR Station, Mini Dock or Battery Dock. “TV Connection” - YJGP[QWT#4%*15KUEQPPGEVGFVQVJGQRVKQPCN&845VCVKQP CXCKNCDNGCV YYYCTEJQUEQOQTHTQOVJG/GFKC%NWDUGNGEVVJGV[RGQHXKFGQQWVRWV mComposite”, “S-Video”, “RGB”, “Component” or “HDMInDCUGFQPJQY[QW have connected the DVR Station to your TV. | 32 Internet Tablet --- FCC Draft Manual --- MAIN SETTINGS > P. 47 “TV Format” - choose between the “176&86$” and “PAL (Europe)nU[UVGOU UGNGEVVJGQPG VJCVKUEQORCVKDNGYKVJ[QWTEQWPVT[lUVGNGXKUKQPU[UVGO - choose between “4/3”, “16/9” or “:LGHVFUHHQnVJGHQTOCVWUGFD[[QWTVGNGXK sion set to display images. - if you choose the “HDMI” TV connection mode, the following parameters will appear: “9*$[+]”, “S[+]”, “S [+]” or “S[+]”. Select the resolution that best adapts to your TV. “Audio Output” - FGÒPGUYJGVJGTVJGCWFKQUKIPCNKUUGPVQWVXKCVJGmAnalog Line-Out”, “HDMI” or “SPDIF” interface depending on how you have connected the ARCHOS to your TV. “SECURITY & LOCATION” This screen gives you the possibility to allow certain Android™ applications to deter OKPG[QWTEWTTGPVNQECVKQPXKCVJG9K(KQTVJG)25;QWECPCNUQFGÒPGCUETGGPWPNQEM pattern and other security parameters. “APPLICATIONS” This screen allows you to manage your Android™ applications. You can view informa tion about all the applications installed on your device. “DEVICE STORAGE” “Internal storage” “Total space” - displays the amount of total space on the internal memory. “Available space” - displays the amount of free space available on the internal memory. Note: reported number of megabytes is binary-based counting (1KB=1024 bytes). Thus each reported Mb represents approximately 1.07 megabytes (decimal). Formatting also takes up space. “Multimedia library update” - +PECUGUQOGQH[QWTUQPIUQTRJQVQUFQPQVCRRGCTKPVJGOWUKEQTRJQVQNKDTCT[ select this option to do a full multimedia library update. | 32 Internet Tablet --- FCC Draft Manual --- MAIN SETTINGS > P. 48 “Format internal storage” - HQTOCVUVJGKPVGTPCNOGOQT[ GTCUGCNNFCVCOGFKCÒNGUCPFNKEGPUGU “System storage” “Available space” - FKURNC[UVJGCOQWPVQHHTGGURCEGCXCKNCDNGQPVJGU[UVGOOGOQT[ VJGOGOQT[ WUGFVQUVQTGVJG#PFTQKFsCRRNKECVKQPU “Factory data reset” - GTCUGUCNNFCVCQPVJGFGXKEG;QWTFGXKEGYKNNDGTGUGVVQKVUHCEVQT[EQPÒIWTCVKQP “DATE & TIME” If you use the optional DVR Station to schedule video recordings on your TV system, make sure that the time and date are set correctly! “Automatic” - enable this option if you want to set the clock automatically when your ARCHOS is connected to a WiFi network. - FKUCDNGVJKUQRVKQPVQUGVVJGEWTTGPVFCVGVKOGOCPWCNN[6JGHQNNQYKPIRCTCO eters will appear: “Set date”, “6HOHFWWLPH]RQH”, “Set timen m5GVFCVGnm5GNGEVVKOG\QPGnm5GVVKOGn - VJGUGRCTCOGVGTUCNNQY[QWVQUGVVJGEWTTGPVVKOGFCVGCPFVKOG\QPGOCPWCNN[ ATTENTION: If the time & date are not correctly set, you might not be able to access certain web pages. m7UGJQWTHQTOCVn - choose between 12h or 24h mode. “Select date format” - choose one of the available date format options “LANGUAGE & TEXT” 5GV [QWT RTGHGTTGF NCPIWCIG CPF TGIKQP CPF EQPÒIWTG VGZV UGVVKPIU HQT HCUVGT CPF more accurate text input. | 32 Internet Tablet --- FCC Draft Manual --- MAIN SETTINGS > P. 49 “ABOUT DEVICE” “Status” - select this option to see the battery level and status, the WiFi Mac address, the Bluetooth address, etc. “Online registration” - UGNGEVVJKUQRVKQPVQTGIKUVGT[QWTFGXKEGQPNKPG 9K(KEQPPGEVKQPTGSWKTGFKVYKNN CNNQY[QWVQIGVCEEGUUVQQWTVGEJPKECNUWRRQTVCUYGNNCU(4''RNWIKPU GZ9GD 684CFKQCPFRWTEJCUCDNGQHHGTUHTQOQWTYGDUKVG6JKUYKNNCNUQIKXG[QWCE cess to the Media Club, which allows you to choose, directly on your device, from a list of purchasable, rental and free multimedia contents. - [QWECPCNUQTGIKUVGT[QWTRTQFWEVWUKPICEQORWVGT YYYCTEJQUEQOTGIKUVGT “Legal information” - allows you to view the open source licenses. “Model number” - This is the model number of your ARCHOS device. “Product Key” - each ARCHOS has a unique number. - +H[QWTGIKUVGT[QWTRTQFWEVQPNKPGWUKPICEQORWVGT YYYCTEJQUEQOTGIKUVGT this number will be needed. m2NWIKPUn - FKURNC[UVJGEWTTGPVRNWIKPUKPUVCNNGFQP[QWTFGXKEG “Firmware version” - FKURNC[UVJGEWTTGPVXGTUKQPQHVJGÒTOYCTGCPF&KIKVCN4KIJVU/CPCIGOGPV &4/U[UVGOCUYGNNCUVJGEWTTGPVXGTUKQPQH#PFTQKFs “Firmware update” - WUGVJKUDWVVQPVQUGCTEJHQTCPQPNKPGWRFCVGXKCC9K(KPGVYQTM+HVJGTGKUQPG available, it will be installed automatically. See Updating the Firmware to learn more. UPDATING THE FIRMWARE 6JGÒTOYCTGKUVJGQRGTCVKPIU[UVGO 15QH[QWT#4%*15+VKURGTKQFKECNN[WRFCVGF VQDTKPIPGYHGCVWTGUKORTQXGOGPVUCPFDWIÒZGU6JGTGCTGVYQOCKPYC[UVQWR FCVG[QWTRTQFWEVlUÒTOYCTG • Directly on your ARCHOS if your device can connect to a WiFi network. • With a computer connected to the internet | 32 Internet Tablet --- FCC Draft Manual --- MAIN SETTINGS > P. 50 UPDATE DIRECTLY ON THE ARCHOS (WIFI CONNECTION NEEDED) 6JKUKUVJGGCUKGUVYC[VQWRFCVGVJGÒTOYCTG(QTVJKUVQYQTM[QWQPN[PGGFCEQP nection to a WiFi network. See Making a WiFi Connection. 1. From to the Home screen, tap on the Menu icon , select “Settings”, and choose “$ERXWGHYLFH”. 2. Tap on the “Firmware update” button. 3. 6JG#4%*15YKNNUGCTEJQPNKPGHQTCPGYÒTOYCTG+HVJGTGKUQPGCXCKNCDNG KVYKNNUVCTVFQYPNQCFKPICPFKVYKNNDGKPUVCNNGFCWVQOCVKECNN[(QNNQYVJGQP screen instructions. UPDATE USING A COMPUTER (INTERNET CONNECTION NEEDED) ;QWECPCNUQWRFCVGVJGÒTOYCTGWUKPICEQORWVGTEQPPGEVGFVQVJGKPVGTPGV 1. 1P[QWT2%IQVQYYYCTEJQUEQOÒTOYCTG 2. 5GCTEJHQTVJGNCVGUVÒTOYCTGCXCKNCDNGHQT[QWT#4%*15 3. %QORCTGVJGNCVGUVQPNKPGXGTUKQPYKVJVJGQPGKPUVCNNGFQP[QWT#4%*15[QWT #4%*15ÒTOYCTGXGTUKQPPWODGTCRRGCTUKPVJGm$ERXWGHYLFH” settings screen UGG“About device” 4. +HVJGQPNKPGXGTUKQPKUOQTGTGEGPVVJCP[QWTUHQNNQYVJGKPUVTWEVKQPUVQFQYP load it and copy it to your ARCHOS. <RXU,QWHUQHWEURZVHUPD\ZDUQ\RXWKDWWKHFRQWHQWVRIWKH¿UPZDUH¿OH could harm your computer. ARCHOS has taken precautions to insure that this ¿OHZLOOQRWKDUP\RXUFRPSXWHU | 32 Internet Tablet --- FCC Draft ManualARCHOS --PLUG-INS AND ADD-ONS > P. 51 ARCHOS PLUG-INS AND ADD-ONS You can purchase the following accessories to add more functions to your ARCHOS device. They are available online at the ARCHOS website ZZZDUFKRVFRP, or directly on your product in the Media Club. A list of FREE GZ9GD684CFKQCPFRWTEJCUCDNGRNWIKPUKUCNUQCXCKNCDNGHTQO the ARCHOS website. DVR STATION When connected to your ARCHOS and to your home enter tainment system, the DVR Station will allow you to: • UEJGFWNG68TGEQTFKPIUGCUKN[XKCVJG#4%*15682TQITCO)WKFG '2) CXCKNCDNG HQTOQUVEQWPVTKGU • record video directly to your ARCHOS, from your cable box, satellite receiver, digi tal tuner, or most any standard video source • EQPPGEVVQ[QWT#4%*15CEQORCVKDNG75$FGXKEG /CUU5VQTCIGQT262GZVGT nal hard drive, digital camera, etc. • play video back to your TV • charge your ARCHOS DVR SNAP-ON 9JGPEQPPGEVGFVQ[QWT#4%*15VJG&845PCRQPYKNNCNNQY you to: • record audio/video, directly on your ARCHOS, from most any standard audio/video source. MINI DOCK When connected to your ARCHOS, the Mini Dock will allow you to: • FKURNC[VJGKOCIGQHVJG#4%*15QP[QWT68 58KFGQCPF EQORQUKVGQWVRWVU • EQPPGEVVQ[QWT#4%*15CEQORCVKDNG75$FGXKEG /CUU 5VQTCIGQT262GZVGTPCNJCTFFTKXGFKIKVCNECOGTCGVE • charge your ARCHOS. | 32 Internet Tablet --- FCC Draft ManualARCHOS --PLUG-INS AND ADD-ONS > P. 52 BATTERY DOCK The battery dock is like the Mini Dock but also includes a battery to give your ARCHOS extra play time. TV SNAP-ON Digital TV receiver which allows you to watch and record digital TV &8$6FKTGEVN[QP[QWT#4%*15 CAR MOUNT Allows you to mount your ARCHOS on your windshield in order to WUGKVCUCECT)25;QWTRTQFWEVHGCVWTGUCDWKNVKP)25TGEGKXGT8KUKV ZZZDUFKRVFRPVQRWTEJCUGC)25NKEGPUGCPFCEVKXCVGVJG)25QP your product. | 32 Internet Tablet --- FCC Draft Manual --- TROUBLESHOOTING > P. 53 TROUBLESHOOTING RESETTING YOUR ARCHOS • +PVJGGXGPVVJCV[QWT#4%*15HTGG\GUQRGTCVKQP you can force the device to shut down by holding the Power button for 15 seconds. • Only if the Power button does not reset your device, then should you use the “pinhole reset” button, locat ed on the back the device, next to the USB port, or at VJGDQVVQOQHVJGRTQFWEVQPVJGNGHVUKFG FGRGPFKPI QPYJKEJOQFGN[QWJCXG Note: Resetting your ARCHOS will not erase any data from your device. However some settings will be reset to their factory defaults. SYSTEM RECOVERY +H[QWT#4%*15FQGUPQVTGURQPFEQTTGEVN[QTFQGUPQVUJQYEGTVCKPUQPIUQTXKFGQU VJCV[QWJCXGEQRKGFVQKV[QWECPVT[CU[UVGOTGEQXGT[+VCNNQYU[QWVQTGRCKTVJG internal memory, format it, etc. 1. Press and hold the button to turn on your device. 2. When the screen turns on, immediately press and hold the Volume + button until VJG4GEQXGT[OQFGUVCTVU YJKVGUETGGP Since the system recovery mode is activated, the touchscreen is currently disabled. To move from an option to another, use the volume buttons. To validate an option, press the ON/OFF button. The system recovery mode gives you several options: “No” - cancels the system recovery. “Repair Disk” - CVVGORVUVQTGRCKTVJGÒNGUVTWEVWTGQPVJGKPVGTPCNOGOQT[ - does not erase any data. | 32 Internet Tablet --- FCC Draft Manual --- TROUBLESHOOTING > P. 54 “Format Disk” - formats the internal memory. - CNNFCVC OWUKERJQVQUXKFGQUGVENKEGPUGUCPFUGVVKPIUCTGGTCUGF “Check Disk” - EJGEMUVJGKPVGTPCNOGOQT[CPFCVVGORVUVQÒZGTTQTUKHCP[ - does not erase any data. “Force Touchscreen Calibration” - use this option if the touchscreen does not respond correctly and if you cannot CEEGUUVJGVQWEJUETGGPUGVVKPIU UGGTouchscreen Problems - follow the instructions on the screen. TOUCHSCREEN PROBLEMS • +HVJGVQWEJUETGGPKUPQVTGURQPFKPIRTQRGTN[VT[VQIQVQVJGmSound & display” UGVVKPIUUETGGP /GPWKEQP > “Settings” > “Sound & displayn • Then use the “7RXFK6FUHHQ&DOLEUDWLRQ” button, and follow the instructions on the screen. If this does not work or if you cannot access the touchscreen settings, you can force the touchscreen calibration (see: 6\VWHP5HFRYHUy). | 32 Internet Tablet --- FCC Draft Manual --TECHNICAL SUPPORT INFORMATION > P. 55 TECHNICAL SUPPORT INFORMATION 0GGF*GNR!;QWECPÒPFVJGKPHQTOCVKQP[QWPGGF • On our Website: see the frequently asked questions section on www.archos.com/faq • $[CUMKPIQWTVGEJPKECNUWRRQTVVGCOXKUKVYYYCTEJQUEQOUWRRQTVHQTGOCKN support. • 75%CPCFC%CNN VQNNHTGG All brands and product names are registered trademarks and the property of their respec tive owners. Windows Media and Windows are trademarks or registered trademarks QH/KETQUQHV%QTRQTCVKQPKPVJG7PKVGF5VCVGUCPFQTQVJGTEQWPVTKGU5RGEKÒECVKQPU CTGUWDLGEVVQEJCPIGYKVJQWVPQVKEG'TTQTUQTQOKUUKQPUGZEGRVGF+OCIGUCPFKNNWU trations may not always match contents. All the information contained in this manual was correct at the time of publication. %12;4+)*6#4%*15~#NNTKIJVUTGUGTXGF