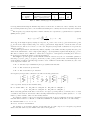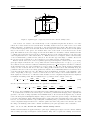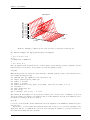
1
Vulture FDTD Code User Manual Vulture Version 0.6.3 Mesh Version 1.0.0 (3/9/2014) Physical Layer Research Group Department of Electronics University of York Heslington York YO10 5DD Dr I D Flintoft Tel: +44 (0) 1904 322391 Email: [email protected] http://www.emc.york.ac.uk Fax: +44 (0) 1904 323224 c 2013 Ian Flintoft. Permission is granted to copy, distribute and/or modify this Copyright document under the terms of the GNU Free Documentation License, Version 1.3 or any later version published by the Free Software Foundation; with no Invariant Sections, no Front-Cover Texts, and no Back-Cover Texts. A copy of the license is included in the section entitled “GNU Free Documentation License”. Acknowledgements • The input mesh format for Vulture is an evolution of the format used by the University of York “Hawk” Transmission Line Matrix and “Falcon” Finite-Difference Time-Domain solvers by Dr Stuart Porter and Dr John Dawson [1, 2]. The binary output format and the associated post-processing tools were also originally developed by Dr Stuart Porter and Dr John Dawson for these two codes [3]. History Contents Acronyms and Abbreviations 1 Introduction 1.1 Overview . . . . . 1.2 Solver features . . 1.3 Running the solver 1.4 The mesh file . . . 1.5 The log file . . . . 5 . . . . . . . . . . . . . . . . . . . . . . . . . . . . . . . . . . . . . . . . . . . . . . . . . . . . . . . . . . . . . . . . . . . . . . . . . . . . . . . . . . . . . . . . . . . . . . . . . . . . . . . . . . . . . . . . . . . . . . . . . . . . . . . . . . . . . . . . . . . . . . . . . . . . . . . . . . . . . . . . 6 6 6 7 8 8 computational mesh Mesh version and title: VM, CE, GS . . . Mesh lines and cells: DM, MS, XL, YL, ZL Bounding boxes . . . . . . . . . . . . . Simulation time-step control: NT, CN . . . . . . . . . . . . . . . . . . . . . . . . . . . . . . . . . . . . . . . . . . . . . . . . . . . . . . . . . . . . . . . . . . . . . . . . . . . . . . . . . . . . . . . . . . . . . . . . . . . . . . . . . . . . . . . . . . . . . . . . . . . . . 11 11 11 13 14 3 Physical models 3.1 Physical models and bounding boxes as selectors 3.2 Volumetric materials: MT, MB . . . . . . . . . . . 3.2.1 SIMPLE non-dispersive material type . . . 3.2.2 FREE SPACE material type . . . . . . . . . 3.2.3 PEC material type . . . . . . . . . . . . . . 3.2.4 DEBYE electrically dispersive material type 3.3 Internal and external surface materials, BT, TB . . 3.3.1 External surfaces . . . . . . . . . . . . . . 3.3.2 PEC boundary type . . . . . . . . . . . . . 3.3.3 PMC boundary type . . . . . . . . . . . . . 3.3.4 PERIODIC boundary type . . . . . . . . . 3.3.5 FREE SPACE boundary type . . . . . . . . 3.3.6 MUR boundary type . . . . . . . . . . . . . 3.3.7 PML boundary type . . . . . . . . . . . . . 3.3.8 SIBC boundary type . . . . . . . . . . . . 3.4 Linear wire materials: WT, TW . . . . . . . . . . . 3.4.1 PEC wire type . . . . . . . . . . . . . . . . 3.4.2 THIN WIRE wire type . . . . . . . . . . . . . . . . . . . . . . . . . . . . . . . . . . . . . . . . . . . . . . . . . . . . . . . . . . . . . . . . . . . . . . . . . . . . . . . . . . . . . . . . . . . . . . . . . . . . . . . . . . . . . . . . . . . . . . . . . . . . . . . . . . . . . . . . . . . . . . . . . . . . . . . . . . . . . . . . . . . . . . . . . . . . . . . . . . . . . . . . . . . . . . . . . . . . . . . . . . . . . . . . . . . . . . . . . . . . . . . . . . . . . . . . . . . . . . . . . . . . . . . . . . . . . . . . . . . . . . . . . . . . . . . . . . . . . . . . . . . . . . . . . . . . . . . . . . . . . . . . . . . . . . . . . . . . . . . . . . . . . . . . . . . . . . . . . . . . . . . . . . . . . . . . . . . . . . . . . . . . . . . . . . . . . . . . . . . . . . . . . . . . . . . . . . . . . . . . . . . . . . . . . . . . . . . . . . . . . . . . . . . . . . . . . . . . . . . . . . . . . . . . . . . . . . . . . . . . . . 14 14 15 16 16 16 17 17 18 19 19 20 20 20 20 21 24 25 25 . . . . . . 25 25 26 29 29 29 30 . . . . . . . . . 31 32 32 32 32 33 34 34 34 . . . . 34 34 34 34 2 The 2.1 2.2 2.3 2.4 . . . . . . . . . . . . . . . . . . . . . . . . . . . . . . . . . . . . . . . . . . . . . . . . . . 4 Waveforms and sources 4.1 Waveforms: WF . . . . . . . . . . . . . . . . . . . . . . . . . . . . . . . . . . . . . . . . . . . 4.1.1 Built-in waveform types . . . . . . . . . . . . . . . . . . . . . . . . . . . . . . . . . . 4.1.2 EXTERNAL waveform type . . . . . . . . . . . . . . . . . . . . . . . . . . . . . . . . . 4.2 Current and field sources: EX . . . . . . . . . . . . . . . . . . . . . . . . . . . . . . . . . . . 4.3 Distributed “soft“ current source types . . . . . . . . . . . . . . . . . . . . . . . . . . . . . . 4.3.1 JX, JY, JZ, JMX, JMY and JMZ volume current density sources . . . . . . . . . . . . . . 4.3.2 JSXY, JSXZ, JSYX, JSYZ, JSZX, JSZY, JMSXY, JMSXZ, JMSYX, JMSYZ, JMSZX, JMSZY surface current density sources . . . . . . . . . . . . . . . . . . . . . . . . . . . . . . . . . . . 4.3.3 IX, IY, IZ, IMX, IMY and IMZ line current sources . . . . . . . . . . . . . . . . . . . . 4.3.4 IDX, IDY, IDZ, IMDX, IMDY and IMDZ current moment sources . . . . . . . . . . . . . 4.3.5 EX, EY, EZ, HX, HY and HZ soft “field” sources . . . . . . . . . . . . . . . . . . . . . . 4.3.6 VX, VY and VZ soft “voltage” sources . . . . . . . . . . . . . . . . . . . . . . . . . . . 4.4 Distributed “hard“ field source types . . . . . . . . . . . . . . . . . . . . . . . . . . . . . . . 4.4.1 =EX, =EY, =EZ, =HX, =HY and =HZ hard field sources . . . . . . . . . . . . . . . . . . . 4.4.2 =VX, =VY and =VZ hard voltage sources . . . . . . . . . . . . . . . . . . . . . . . . . . 4.4.3 =JX, =JY, =JZ, =JMX, =JMY and =JMZ hard current density sources . . . . . . . . . . . 4.4.4 =JSXY, =JSXZ, =JSYX, =JSYZ, =JSZX, =JSZY, =JMSXY, =JMSXZ, =JMSYX, =JMSYZ, =JMSZX, =JMSZY hard surface current density sources . . . . . . . . . . . . . . . . . . . . . . . 4.4.5 =IX, =IY, =IZ, =IMX, =IMY and =IMZ hard current sources . . . . . . . . . . . . . . . 4.4.6 =IDX, =IDY, =IDZ, =IMDX, =IMDY and =IMDZ hard current moment sources . . . . . . 4.5 Other source types . . . . . . . . . . . . . . . . . . . . . . . . . . . . . . . . . . . . . . . . . 3 4.6 4.5.1 VRX, VRY, VRZ, IRX, IRY and IRZ finite impedance lumped sources . . . . . . . . . . . . 34 4.5.2 VDX, VDY and VDZ delta-gap thin wire voltage sources . . . . . . . . . . . . . . . . . . . 35 Plane-wave sources: PW . . . . . . . . . . . . . . . . . . . . . . . . . . . . . . . . . . . . . . . . 35 5 Observers 5.1 Simulation output control: OT, OF . . . . . . . . . . 5.2 Implicit waveform observers . . . . . . . . . . . . . 5.3 Near-field observers: OP . . . . . . . . . . . . . . . 5.3.1 TDOM BINARY type observers . . . . . . . . . 5.3.2 TDOM ASCII and FDOM ASCII type observers 5.3.3 HDF5 type observers . . . . . . . . . . . . . 5.4 Far-field observers: FF . . . . . . . . . . . . . . . . . . . . . . . . . . . . . . . . . . . . . . . . . . . . . . . . . . . . . . . . . . . . . . . . . . . . . . . . . . . . . . . . . . . . . . . . . . . . . . . . . . . . . . . . . . . . . . . . . . . . . . . . . . . . . . . . . . . . . . . . . . . . . . . . . . . . . . . . . . . . . . . . . . . . . . . . . . . . . . . . . . . . . . . . 37 37 37 37 38 38 39 39 6 Viewing the mesh 40 6.1 gvulture . . . . . . . . . . . . . . . . . . . . . . . . . . . . . . . . . . . . . . . . . . . . . . . 40 6.2 Gnuplot . . . . . . . . . . . . . . . . . . . . . . . . . . . . . . . . . . . . . . . . . . . . . . . . 41 6.3 Gmsh . . . . . . . . . . . . . . . . . . . . . . . . . . . . . . . . . . . . . . . . . . . . . . . . . 41 7 Post-processing tools 7.1 TDOM ASCII and FDOM ASCII type outputs . . . . . . . . . . . . . . . . 7.2 TDOM BINARY type outputs . . . . . . . . . . . . . . . . . . . . . . . . . 7.2.1 Overview . . . . . . . . . . . . . . . . . . . . . . . . . . . . . . 7.2.2 Calculation of frequency spectra: xtransall . . . . . . . . . . 7.2.3 Data extraction at a point or along a line: xtime, xfreq . . . . 7.2.4 Data extraction along a line or across plane: xplane, xfplane 7.2.5 Animated plots: mxplane, mxfplane . . . . . . . . . . . . . . . 7.2.6 Interleaving of multiple TDOM BINARY observer data . . . . . . . 7.3 HDF5 format output . . . . . . . . . . . . . . . . . . . . . . . . . . . . . . . . . . . . . . . . . . . . . . . . . . . . . . . . . . . . . . . . . . . . . . . . . . . . . . . . . . . . . . . . . . . . . . . . . . . . . . . . . . . . . . . . . . . . . . . . . . . . . . . . . . . . . . . . . . . . . . . . . . 42 42 42 42 43 43 43 44 44 44 8 Tutorial 8.1 Example 1: Free-space . . . . . . . . . . . . . . . . . . . . . . . . . . 8.1.1 Creating and viewing the mesh . . . . . . . . . . . . . . . . . 8.1.2 Running the solver . . . . . . . . . . . . . . . . . . . . . . . . 8.1.3 Viewing ASCII data . . . . . . . . . . . . . . . . . . . . . . . 8.1.4 Post-processing binary data in the time-domain . . . . . . . . 8.1.5 Post-processing binary data in the frequency-domain . . . . . 8.2 Example 2: An infinite parallel plate transmission line . . . . . . . . 8.3 Example 3: An accurate plane-wave in free-space . . . . . . . . . . . 8.4 Example 4: Transmission and reflection from a dielectric slab . . . . 8.5 Example 5: Transmission and reflection from a thin boundary . . . . 8.6 Example 6: Radiation from an infinitesimal Hertzian dipole . . . . . 8.7 Example 7: Radiation from a half-wave dipole . . . . . . . . . . . . . 8.8 Example 8: Plane-wave penetration through an aperture . . . . . . . 8.9 Example 9: Shielding effectiveness of an enclosure with an aperture . 8.10 Example 10: Stripline and microstrip line parameters . . . . . . . . . . . . . . . . . . . . . . . . . . . . . . . . . . . . . . . . . . . . . . . . . . . . . . . . . . . . . . . . . . . . . . . . . . . . . . . . . . . . . . . . . . . . . . . . . . . . . . . . . . . . . . . . . . . . . . . . . . . . . . . . . . . . . . . . . . . . . . . . . . . . . . . . . . . . . . . . . . . . . . . . . . . . . . . . . . . . . . . . . . . . . . . . . . . . . . . . . . . . 44 44 45 45 45 46 48 48 51 52 58 58 58 58 63 66 A GNU Free Documentation License . . . . . . . . . . . . . . . 68 4 Vulture: User Manual 5 Acronyms and abbreviations ABC ASCII CFL CFLN DC DFT EM FDTD FFT PEC PMC PML SIBC TEM TFSF UPML I. D. Flintoft Absorbing Boundary Condition American Standard Code for Information Interchange Courant-Fredrichs-Lewy Courant-Fredrichs-Lewy Number Direct Current Discrete Fourier Transform ElectroMagnetic Finite-Difference Time-Domain Fast Fourier Transform Perfect Electric Conductor Perfect Magnetic Conductor Perfectly Matched Layer Surface Impedance Boundary Condition Transverse ElectroMagnetic Total-Field Scattered-Field Uniaxial Perfectly Matched Layer University of York Vulture: User Manual 1 6 Introduction 1.1 Overview This user guide provides both a user manual and tutorial introduction for the Vulture finite-difference time-domain (FDTD) code. Details about the theory and implementation of the code can be found in the Vulture Code Implementation Manual [4]. This user guide assumes that the Vulture software has already been installed according to the instructions in the binary or source distribution package as appropriate. Please also refer to the ReadMe.txt and Bugs.txt files in the distribution package for details of any known bugs or issues with the particular version of Vulture you have installed. 1.2 Solver features Vulture is a non-uniform structured mesh FDTD code which has the following features: • Non-uniform mesh allowing for uniform cubic and uniform cuboid special cases; • External mesh surfaces that can independently be perfect electric conductor (PEC), perfect magnetic conductor (PMC), perfectly match layer (PML), analytic Mur absorbing boundary condition (ABC) or periodic boundary conditions; • A uniaxial perfectly matched layer (UPML) implementation that can terminate arbitrary inhomogeneous media; • Gaussian pulse, compact pulse, ramped sinusoid, differentiated pulse and user defined waveforms; • Distributed hard and soft electric and magnetic field, current density, current and ideal voltage sources; • Lumped resistive voltage and current sources; • Internal PEC surfaces; • Simple isotropic media with frequency independent permittivity, conductivity and (real) permeability. • Arbitrary electrically dispersive media using a generalised multi-pole Debye dispersion relationship. • A total-field-scattered-field (TFSF) plane-wave source, also known as a Huygen’s surface source, for multiple plane-wave excitation. The implementation supports partial Huygen’s surfaces and has grid dispersion optimisations for uniform cubic meshes. • Binary and ASCII format field observers. Additional optional features that can be enabled at compile time are: • (WITH SIBC=ON/OFF): Enables/disables frequency dependent surface impedance boundary condition (SIBC) surface material types. • (USE AVERAGED MEDIA=ON/OFF): Enables/disables volumetric material averaging. When enabled this providies second-order accurate treatment of boundaries between different media (incompatible with USE INDEXED MEDIA=ON, EXPERIMENTAL). • (WITH OPENMP=ON/OFF): Enables/disables multi-threaded parallelisation of the core update algorithms for increased performance on shared memory multi-core computers. • (USE INDEXED MEDIA=ON/OFF): Enables/disables the use of indexed media. Indexed media can considerably reduced memory consumption, with a small penalty in run-time performance, providing the number of media is not very large (incompatible with USE AVERAGED MEDIA=ON and USE SCALED FIELDS=ON. • (USE SCALED FIELDS=ON/OFF): Enables/disables the use of scaled fields on the computational grid. Scaled field give a small improvement in performance by reducing the operataion count in the discete curl operator (incompatible with USE INDEXED MEDIA=ON). I. D. Flintoft University of York Vulture: User Manual 1.3 7 Running the solver Vulture is a command-line program that runs from the Linux/Unix shell or Windows command prompt. For example, under Linux the program can be run using $ vulture -h Usage: vulture -h | --help vulture -V | --version vulture [ option ] <meshFile> Valid options are: -m, --readmesh -n <int>, --numproc <int> -p, --preprocess -v, --verbose Read the mesh only and stop Set number of threads Preprocess the mesh only and stop Produce verbose logging information where the -h option is used to provide basic usage information. The settings of the compilation options used to compile the executable can be checked using the -V option: $ vulture -V Vulture (version 0.6.3) Copyright (C) 2011-2013 Ian David Flintoft Vulture comes with ABSOLUTELY NO WARRANTY; for details type ‘vulture --licence’. This is free software, and you are welcome to redistribute it under certain conditions; type ‘vulture --licence’ for details. Supported mesh versions 1.0.0 - 1.0.0 Using un-scaled fields. Field arrays are 4-bytes. Using indexed media. Medium index is 4-bytes. Using un-averaged media. The program expects an input mesh file in the current directory which is in the format given in Section 1.4. The program’s outputs are written into files in the same directory, hence each simulation requires its own working directory in order to avoid confusion and overwriting of output data. A typical command line for running Vulture is $ vulture -v antenna.mesh where antenna.mesh is the name of the input mesh file and the -v option requests more verbose information in the log file. The output files created by the solver include: • vulture.log: An ASCII log file containing information on the mesh and simulation. • xlines.dat, ylines.dat and zlines.dat: ASCII files containing lists of the x, y and z mesh line coordinates. • impulse.dat: A binary format file containing time-domain field outputs. • excite.dat: An ASCII file containing the excitation waveform time series. • process.dat: A template ASCII file for controlling other post-processing tools. • wf <t: name> td.asc: ASCII data files containing waveform time series. • eh <t: name> td.asc: ASCII data files containing field time series. I. D. Flintoft University of York Vulture: User Manual 8 • wf <t: name> fd.asc: ASCII data files containing waveform frequency spectra. • eh <t: name> fd.asc: ASCII data files containing field frequency spectra. If the solver has been compiled with OpenMP parallelisation support the number of threads used can be set wtih the command line flag -n. For example, to use two threads start the solver with $ vulture -n 2 antenna.mesh If the number of threads is not specified using the option argument then the value of the environment variable OMP NUM THREADS is used. On Linux/Unix system using Bourne/bash shells this can be set with $ export OMP_NUM_THREADS=2 If neither the option argument or environment variable are set then a single thread is used. 1.4 The mesh file The simulation is defined in an ASCII mesh file with the format shown in Table 1, in which each line performs a specific function. The first two characters of each line constitute a two letter code or directive that specifies the nature of the information on the rest of the line. The # character can be used to insert comments anywhere in the mesh file, either full lines or at the end of a line. In the table it has been used to insert comments identifying the different logical parts of the mesh file. Empty lines can also be placed anywhere in the file. Each directive must appear on a single line in the file. In this manual some directives with long lines have been wrapped onto a second line denoted by the back-slash at the end of the first line. In the real input file the directives must be place on a single line. Optional elements in the directives are enclosed in square brackets []. The VM directive must be the first directive in the mesh file. It specifies the version of the mesh format and is used by Vulture to determine how to parse the file. The other directives can occur in any order within their respective mesh sections. The mesh sections must be in the order shown in Table 1. The number of times each directive can be used (its multiplicity) and other constraints are listed in Table 2. Some directives are optional (multiplicity 0,1), with default values being assigned in their absence, while others must occur once and only once (multiplicity 1). Sections 1 and 3 of the mesh file define the computational grid while section 2 defines the objects on the grid. The elements following the two-letter directive code are user defined values of the following types: • <i: var>: An integer. • <r: var>: A real number. • <s: var>: A general character string up to 1023 characters long. The string must be enclosed in double quotation marks, for example "waveform.asc". • <t: var>: A “tag”, which is defined as a character string consisting of the letters “a-z”, “A-Z”, numbers “0-9” and underscore “ ” with length up to 31 characters. The string must not be enclosed in quotation marks and should not start with an underscore character. These tags are used to name and reference entities in the mesh and must be defined before they are used. The detailed meanings of all the mesh directives are given in Sections 2 to 5 below. 1.5 The log file Vulture creates a detailed log file called vulture.log in the current directory. This file contains: • Information about the parsing of the mesh file. • A report on the input mesh characteristics. • Initialisation information for all the grid objects. • A report on the computational grid characteristics. • A breakdown of the memory usage. • A periodically updated estimate of the completion time of the simulation. I. D. Flintoft University of York Vulture: User Manual 9 VM <i: majorVersion>.<i: minorVersion>.<i: patchVersion> # # Section 1 # CE <s: comment> DM <i: nx> <i: ny> <i: nz> GS # # Section 2 # MT <t: name> <t: type> <param1> ... <paramN> BT <t: name> <t: type> <param1> ... <paramN> WT <t: name> <t: type> <param1> ... <paramN> MB <i: ilo> <i: ihi> <i: jlo> <i: jhi> <i: klo> <i: khi> <t: name> [ <t: mask> ] TB <i: ilo> <i: ihi> <i: jlo> <i: jhi> <i: klo> <i: khi> <t: name> [ <i: orient> [ <r: angle> ] ] TW <i: ilo> <i: ihi> <i: jlo> <i: jhi> <i: klo> <i: khi> <t: name> [ <t: end1Type>] [ <t: end2Type> ] WF <t: name> <t: type> [ <r: size> [ <r: delay> [ <r: width> [ <r:freq> ] ] ] ] WF <t: name> EXTERNAL <s: fileName> [ <r: size> [ <r: delay> ] ] EX <i: ilo> <i: ihi> <i: jlo> <i: jhi> <i: klo> <i: khi> <t: name> <t: type> <t: wfName> \ [ <r: size> [ <r: delay> ] ] EX <i: ilo> <i: ihi> <i: jlo> <i: jhi> <i: klo> <i: khi> <t: name> <t: type> <t: wfName> \ <r: imped> [ <r: size> [ <r: delay> ] ] PW <i: ilo> <i: ihi> <i: jlo> <i: jhi> <i: klo> <i: khi> <t: name> <t: wfName> \ <r: theta> <r: phi> <r: psi> [ <i:mask> [<r: size> [ <r: delay> ] ] ] OP <i: ilo> <i: ihi> <i: jlo> <i: jhi> <i: klo> <i: khi> <t: name> <t: type> [<t: wfName>] OP <i: ilo> <i: ihi> <i: jlo> <i: jhi> <i: klo> <i: khi> <t: name> <t: type> [ <t: wfName> \ [ <i: xstep> <i: ystep> <i: zstep> ] ] FF <i: ilo> <i: ihi> <i: jlo> <i: jhi> <i: klo> <i: khi> <t: name> <t: wfName> \ <r: theta1> <r: theta2> <i: num_theta> <r: phi1> <r: phi2> <i: num_phi> [ <t: mask> ] GE # # Section 3 # NT <i: numSteps> CN <r: courantNumber> OT <i: tstart> <i: tstop> OF <r: fstart> <r: fstop> <i: numFreq> MS <r: delx> [ <r: dely> <r: delz> ] ] XL <r: x[0]> ..... <r: x[nx]> YL <r: y[0]> ..... <r: y[ny]> ZL <r: z[0]> ..... <r: z[nz]> EN Table 1: Input mesh file format. Note that some directives with long lines have been wrapped onto a second line denoted by the back-slash (\) at the end of the first line. In the real input file the directives must be place on a single line. Optional elements are enclosed in square brackets []. • A final summary of the run-time and the overall average seconds per iterations (spi) per cell. If called with the -v option Vulture will add more detailed information to the log file that is useful for debugging the solver and identifying problems with the mesh. An example of the grid report from the log file is: Grid characteristics: Grid is CUBIC Number of lines x: 41 y: 6 z: 6 Mesh BBOX=[0,40,0,5,0,5] I. D. Flintoft University of York Vulture: User Manual Directive VM CE DM GS MT BT WT MB TB TW WF EX PW OP FF GE NT CN OT OF MS XL YL ZL EN Section 0 1 1 1 2 2 2 2 2 2 2 2 2 2 2 2 3 3 3 3 3 3 3 3 3 10 Multiplicity 1 0,1 1 1 0,1,... 0,1,... 0,1,... 0,1,... 0,1,... 0,1,... 0∗ ,1,... 0∗ ,1,... 0,1,... 0∗ ,1,... 0,1,... 1 1 0,1 0,1 0,1 0,1 0,1 0,1 0,1 1 Table 2: Directive properties. simulation! ∗ Mnemonic Vulture Mesh CommEnt DiMensions Geometry Start Medium Type Boundary Type Wire Type Material Block Thin Boundary Thin Wire WaveForm EXcitation PlaneWave OutPut Far Field Geometry End Number of Time-steps Courant Number Output Time-steps Output Frequencies Mesh Size X-Lines Y-Lines Z-Lines ENd Class Syntax Syntax Mesh Syntax Physical model Physical model Physical model Selector (Volume) Selector (Surface) Selector (Line) Source Source Source Observer Observer Syntax Simulation Simulation Simulation Simulation Mesh Mesh Mesh Mesh Syntax Constraints/Notes Mesh version Mesh title Number of cells Marks end of section 1 Marks end of section 2 Not valid if MS present Not valid if MS present Not valid if MS present Marks end of section 3 indicates a multiplicity that while syntactically valid will lead to a useless Grid dimensions [cells]: 58 x 7 x 7 Grid size: 1400 cells Inner grid: BBOX=[9,49,1,6,1,6] Outer grid: BBOX=[1,57,1,6,1,6] Ghost grid: BBOX=[0,58,0,7,0,7] Minimum edge lengths: DXMIN = 9.999983e-04, DYMIN = 9.999999e-04, DZMIN = 9.999999e-04 Maximum edge lengths: DXMAX = 1.000002e-03, DYMAX = 1.000000e-03, DZMAX = 1.000000e-03 Time step [s]: 1.667820e-12 PML XLO Region: BBOX=[1,8,1,5,1,5] PML XHI Region: BBOX=[49,56,1,5,1,5] PML YLO Region: BBOX=[9,48,1,0,1,5] PML YHI Region: BBOX=[9,48,6,5,1,5] PML ZLO Region: BBOX=[9,48,1,5,1,0] PML ZHI Region: BBOX=[9,48,1,5,6,5] Total array allocation 258.5 kiB This part of the log file contains the time-step and total array allocation. An example of the detailed memory usage report which follows the grid characteristics is: Memory usage: Grid auxiliary arrays: Grid E/H field arrays: Grid update coefficient arrays: PML field arrays: PML coefficients arrays: Waveforms: Sources: I. D. Flintoft 1.33203 kiB 0.0862885 MiB 0.0862885 MiB 0.0241089 MiB 2.8125 kiB 0 kiB 0 kiB University of York Vulture: User Manual Observers: Boundaries: Surfaces: Media: Blocks: Wires: Lines: 2 2.1 11 27.4453 kiB 0 kiB 0 kiB 0.015625 kiB 0 kiB 0 kiB 0 kiB The computational mesh Mesh version and title: VM, CE, GS The version of the mesh format must be specified by the first directive in the mesh file using the VM directive: VM <i: majorVersion>.<i: minorVersion>.<i: patchVersion> Here the three integers define the major version number, minor version number and patch level of the mesh format. For mesh files conforming to the format specified by this manual the version numbers should match those on the front title page. An optional single line description or title for the mesh can be defined after the VM directive using the CE directive: CE <s: comment> Section 1 of the mesh file is then closed using a GS directive: GS 2.2 Mesh lines and cells: DM, MS, XL, YL, ZL 2 Figure 1: Mesh lines and cells in the x and y directions. I. D. Flintoft University of York Vulture: User Manual 12 The structured mesh used by Vulture is defined by a set of mesh lines xi , yj and zk in the x, y and z directions {xi ; i = 0 . . . Nx − 1} {yj ; j = 0 . . . Ny − 1} (2.1) {zk ; k = 0 . . . Nz − 1}, where Nx , Ny and Nz are the number of mesh lines in each direction (see Figure 1). The mesh lines are labelled by the indices i, j and k. The intersection points of the mesh lines define a set of nodes labelled by the indices of the intersecting mesh lines, (i, j, k), and the lines (edges) between the nodes partition the volume of the mesh into (Nx − 1) × (Ny − 1) × (Nz − 1) ≡ nx × ny × nz cuboid cells. These cell form the primary grid or lattice. The cells are labelled by the indices of the mesh lines on the low coordinate side of the cell, so we have cells number indices 0, . . . , nx − 1 etc. The cell sizes are given by {∆xi = xi+1 − xi ; i = 0 . . . nx − 1} {∆yj = yj+1 − yj ; j = 0 . . . ny − 1}. (2.2) {∆zk = zk+1 − zk ; k = 0 . . . nz − 1} The electric field is sampled at the centres of the primary grid edges at times t = n∆t (n = 0, . . . , Ns − 1): Exn (i + 12 , j, k), Eyn (i, j + 12 , k) and Ezn (i, j, k + 21 ). The cell centres are at the coordinates { xi+ 12 = xi + ∆xi /2; i = 0 . . . Nx − 2} { yj+ 21 = yj + ∆yj /2; j = 0 . . . Ny − 2} { zk+ 12 = zk + ∆zk /2; k = 0 . . . Nz − 2}. (2.3) The dual or secondary lattice is then defined to be the grid whose vertices are the primary lattice centres, { xi+ 21 ; i = 0 . . . Nx − 2} { yj+ 21 ; j = 0 . . . Ny − 2} { zk+ 21 ; k = 0 . . . Nz − 2}, (2.4) and the edge lengths of the dual lattice are { ˜ i = xi+ 1 − xi− 1 = (∆xi + ∆xi−1 )/2; ∆x 2 2 i = 1 . . . Nx − 2} { ˜ j = yj+ 1 − yj− 1 = (∆yj + ∆yj−1 )/2; ∆y 2 2 j = 1 . . . Ny − 2} { ˜ k = zk+ 1 − zk− 1 = (∆zk + ∆zk−1 )/2; k = 1 . . . Nz − 2}. ∆z 2 2 (2.5) The magnetic field is sampled at the centres of the secondary grid edges at times t = (n + 12 )∆t (n = n+ 1 n+ 1 n+ 1 0, . . . , Ns − 1): Hx 2 (i, j + 21 , k + 12 ), Hy 2 (i + 12 , j, k + 12 ) and Hz 2 (i + 21 , j + 12 , k). The locations of the electric and magnetic fields in the primary are is shown in Figure 2. In the mesh file the overall mesh extents are specified in Section 1 using the numbers of cells (nx , ny , nz ) with the DM directive: DM <i: nx> <i: ny> <i: nz> The mesh sizes are defined in Section 3 of the mesh file. Uniform meshes are defined using an MS directive to specify the constant edge lengths <r: delx> (∆x), <r: dely> (∆y) and <r: delz> (∆z) in the three coordinate directions: MS <r: delx> [ <r: dely> <r: delz> ] ] The edge lengths are specified in metres. If <r: dely> and/or <r: delz> are missing the edge length from the previous coordinate direction is used. A uniform cubic mesh can therefore be defined using MS <r: del> in which case ∆xi = ∆yj = ∆zk = ∆ (∀i, j, k). The physical coordinates of the mesh lines are defined automatically for a uniform mesh starting at x0 = y0 = z0 = 0 m. For non-uniform meshes the MS directive is replaced by XL, YL and ZL directives which explicitly give the physical coordinates of all the mesh lines in metres: I. D. Flintoft University of York Vulture: User Manual 13 Figure 2: Location of the field sampling points in the primary FDTD grid. XL <r: x[0]> ..... <r: x[nx]> YL <r: y[0]> ..... <r: y[ny]> ZL <r: z[0]> ..... <r: z[nz]> 2.3 Bounding boxes Objects on the mesh are specified by a bounding box selector which references a physical model or other entity such as a source or observer. An inclusive bounding box consists of a set of six integer mesh line indices [ilo , ihi , jlo , jhi , klo , khi ] that selects all the compatible mesh elements within and on its surface: [ilo , ihi , jlo , jhi , klo , khi ] = {i : ilo ≤ i ≤ ihi , j : jlo ≤ j ≤ jhi , k : klo ≤ k ≤ khi }. I. D. Flintoft University of York Vulture: User Manual 14 Such bounding boxes are able to select single nodes, edges, faces, surfaces and volumes on the mesh. Bounding boxes are required to be normal in the sense defined by ilo ≤ ihi jlo ≤ jhi klo ≤ khi , (2.6) and use the mesh line numbers from (0, 0, 0) to (nx , ny , nz ). Some examples are: 2 2 2 2 2 2 2 2 2 2 2 2 3 4 2.4 3 3 3 1 1 3 3 3 3 3 2 5 4 5 4 4 4 1 1 4 4 4 5 7 2 5 5 6 # # # # # # # A node at (2,3,4). A z-directed edge. A z-directed line 3 edges long. An x-normal face. An x-normal 4x4 face surface. A single cell. A 2x2x2 cell volume. Simulation time-step control: NT, CN The number of time-step iterations to be performed, Ns , is specified by the <i: numSteps> parameter in the NT directive: NT <i: numSteps> The FDTD simulation will run for Ns iterations n = 0, . . . , Ns − 1 corresponding to times t = 0, . . . , (Ns − 1)∆t. The time-step is determined automatically from the mesh-lines using 1 ∆t = CN c0 r 1 ∆xmin 2 + 1 ∆ymin 2 + 1 ∆zmin (2.7) 2 ˜ i ] etc. are the edge lengths of the smallest cell in the mesh. Thus the cell where ∆xmin = mini [∆xi , ∆x with the largest value of 1/(∆xmin )2 + 1/(∆ymin )2 + 1/(∆zmin )2 in the mesh determines the time-step. Here the Courant-Fredrichs-Lewy Number (CFLN), √CN , must be in the range zero to one, 0 < CN ≤ 1, for the simulation to be stable. By default CN = 3/2, in which case on a cubic mesh of edge length ∆ the time-step becomes ∆t = ∆ 2c0 (2.8) and wavefronts propagating in free-space normal to mesh faces advance by one cell in two time-steps. The CFLN number can changed using the CN directive: CN <r: courantNumber> Dispersion in the FDTD grid becomes greater as the CFLN is reduced. However, as the CFLN approaches unity the algorithm has more chance of becoming unstable, depending on which features of the code are being used. 3 3.1 Physical models Physical models and bounding boxes as selectors Physical models for volumetric, surface and line type materials are defined separately using MT, BT and WT directives respectively: MT <t: name> <t: type> <param1> ... <paramN> BT <t: name> <t: type> <param1> ... <paramN> WT <t: name> <t: type> <param1> ... <paramN> The parameters for these directives are generally independent of the mesh and specific to the physical model. The name-spaces of the tags for the voulme, surface and wire material types are distinct. Three corresponding types of selector are defined for physical models on the mesh using MB, TB and TW directives: I. D. Flintoft University of York Vulture: User Manual 15 MB <i: ilo> <i: ihi> <i: jlo> <i: jhi> <i: klo> <i: khi> <t: name> [<param1> ... <paramN>] TB <i: ilo> <i: ihi> <i: jlo> <i: jhi> <i: klo> <i: khi> <t: name> [<param1> ... <paramN>] TW <i: ilo> <i: ihi> <i: jlo> <i: jhi> <i: klo> <i: khi> <t: name> [<param1> ... <paramN>] These select volumes (blocks), surfaces (boundaries) and lines (wires) respectively. These selectors are used to define the mesh elements on which the physical models referenced by their tags are to be applied. The parameters are used to define how the model is applied within the bounding box. Irrespective of the order in which the physical model directives are declared in Section 2 of the mesh file they are applied to the computational grid in the following order: 1. All MBs in the order found in the mesh. 2. All TBs in the order found in the mesh. 3. All TWs in the order found in the mesh. 4. All EXs in the order found in the mesh. 5. All PWs in the order found in the mesh. As will be detailed below MB, TB and TW objects of type PEC, FREE SPACE and SIMPLE will over-write each other without side effects. Other types (e.g SIBCs and dispersive materials) will not overwrite and will probably generate indeterminate results. 3.2 Volumetric materials: MT, MB Volumetric material model types are defined using the MT directive which has the general form: MT <t: name> <t: type> <param1> ... <paramN> Here <t: name> is the name tag for the material type being defined and must be unique amongst all other MT directives. The valid material types, <t: type>, and their parameters are: MT MT MT MT <t: name> SIMPLE [ <r: eps_r> [ <r: sigma> [ <r: mu_r> ] ] ] <t: name> FREE_SPACE <t: name> PEC <t: name> DEBYE <r: eps_Inf> <r: sigma> <r: mu_r> <r: res_1> <r: pole_1> \ [ <r: res_2> <r: pole_2> [ <r: res_3> <r: pole_3> ] ] MT <t: name> DEBYE <s: fileName> The material type tags PEC and FREE SPACE are predefined for PEC and FREE SPACE materials respectively and cannot be overridden, i.e. the directives MT PEC PEC MT FREE_SPACE FREE_SPACE have effectively already been applied internally by the solver. A material type identified by tag <t: name> is applied to a volume on the mesh using the MB directive: MB <i: ilo> <i: ihi> <i: jlo> <i: jhi> <i: klo> <i: khi> <t: name> [ <t: mask> ] The bounding box must define a volume (not a surface, line, edge or node). Volumetric materials are the first physical models applied to computational grid with each MB directive applied in the order it appears in the mesh file. Materials of type SIMPLE, FREE SPACE and PEC will overwrite each other without adverse side effects. Other materials types should not be applied “on top of each other”. If compilation option USE AVERAGED MEDIA=OFF (see below) then the optional parameter <t: mask> can be used to determine if each external surface of the block is included in the material. The parameter is a string of six binary digits 0/1 with no spaces between them indicating whether (1) or not (0) the surfaces XLO, XHI, YLO, YHI, ZLO, ZHI respectively of the block are within the material. The default is to include all surfaces, i.e. 111111. The string 111011 would indicate that all surfaces except YHI should be included. Depending on the value of the compilation option USE AVERAGED MEDIA, volumetric materials are applied to the grid in one of two ways: I. D. Flintoft University of York Vulture: User Manual 16 • USE AVERAGED MEDIA=OFF: The simple material parameters are applied directly to all the edges encompassed by the bounding box. This method does not accurately represent the location of interfaces between different media. SIMPLE material types will overwrite when the bounding boxes overlap. Overlapping of DEBYE material types is ill-defined and the <t: mask> option of the MB directive should be used to align such material boundaries precisely without overlap. • USE AVERAGED MEDIA=ON: The material parameters are first associated with the entire volume of each cell in the bounding box, ignoring any <t: mask> parameters in MB directives. After all the MB directives have been processed the parameters are then averaged across the boundaries of different materials to give a more accurate model for material interfaces at the location of the mesh faces (i.e the actual location of the bounding box surfaces). This option does not yet correctly support averaging of DEBYE type media. For Debye media the high frequency permittivity and (ionic) conductivity terms are averaged, however, the polarisation currents due to the relaxtion terms are not. The polarisation currents are applied directly, as for the case USE AVERAGED MEDIA=OFF, respecting any <t: mask> parameters. Depending on the material parameters and simulation geometry this may or may not produce an accurrate model. 3.2.1 SIMPLE non-dispersive material type MT <t: name> SIMPLE [ <r: eps_r> [ <r: sigma> [ <r: mu_r> ] ] ] Parameter <r: eps r> <r: sigma <r: mu r> Quantity Relative permittivity Electrical conductivity Relative permeability Symbol r σ µr Units S/m - Default 1.0 0.0 1.0 Table 3: SIMPLE material model parameters. The simple material model type, SIMPLE, defines frequency independent isotropic media that are characterised by a relative permittivity, r , electrical conductivity, σ, and a relative permeability, µr . The parameters for this type are defined in Table 3. An example of a simple material model type and its application on a mesh is: MT copper SIMPLE 1.0 3.7e7 1.0 MB 10 20 10 20 10 20 copper This would set the volume enclosed by the bounding box [10, 20, 10, 20, 10, 20] to have the simple material parameters of copper: r = 1, σ = 37 MS/m and µr = 1. 3.2.2 FREE SPACE material type MT <t: name> FREE_SPACE The free-space material type, FREE SPACE, is a pseudonym for SIMPLE 1.0 0.0 1.0 so the above is equivalent to MT <t: name> SIMPLE 1.0 0.0 1.0 3.2.3 PEC material type MT <t: name> PEC The PEC material type, PEC, simulates a perfect electric conductor in volumes to which it is applied by setting the FDTD update coefficients to α = −1.0 and β = 0.0 (see the Code Implementation Manual for details [4]). This method is more robust than using a high conductivity to represent a PEC material as in MT POORPEC SIMPLE 1.0 1e5 but it behaves in the same way with regard to overwriting of overlapping bounding boxes and the averaging of neighbouring materials discussed above. I. D. Flintoft University of York Vulture: User Manual 3.2.4 17 DEBYE electrically dispersive material type MT <t: name> DEBYE <r: eps_Inf> <r: sigma> <r: mu_r> <r: res_1> <r: pole_1> \ [ <r: res_2> <r: pole_2> [ <r: res_3> <r: pole_3> ] ] MT <t: name> DEBYE <s: fileName> The DEBYE material type defines a frequency dependent electrically dispersive material characterised by a multi-pole generalised Debye dispersion relationship. The dispersion relationship for an Nm -pole relaxation is given by N ˆr (ω) = ∞ − m X σ + ω0 k=1 rk rk∗ + ω − pk ω − p∗k , (3.1) where ∞ is the relative permittivity in the high frequency limit, σ is an ionic conductivity term, rk is the residue of the k-th pole and pk is the k-th pole. Using this formulation the poles are enforced to occur in complex conjugate pairs. Such parameterisations can, for example, be obtained using a vector fitting algorithm [5]. A standard Debye relaxation is a special case with a real residue and pole given by pk = rk = rk rk∗ + ω − pk ω − p∗k → 1 τk ∆k 2τk ∆k , 1 + ωτk − (3.2) (3.3) (3.4) where ∆k = static;k − ∞;k is the decrement caused by the k-th pole and τk is the relaxtion time of the pole. Here s;k is the static, low frequency permittivity associated with the k-th relaxation. A second-order Lorentz dispersion is given by q pk = −δk − ωk2 − δk2 (3.5) rk rk rk∗ + ω − pk ω − p∗k = ∆ ω 2 p k k 2 ωk2 − δk2 (3.6) → ∆k ωk2 . ωk2 + 2ωδk − ω 2 (3.7) The parameters are summarised in Table 4, where the poles and residues are taken to be real. For a stable causal model it is required that ∞ ≥ 1 and Re(pk ) ≤ 0. For up to three real poles the Debye parameters can be specified directly in the mesh file. For complex poles and higher orders the parameters must be specified in an external ASCII file, referenced by the file name parameter <s: fileName>, that has the format given in Table 5. Note that only one residue/pole of each complex conjugate pair should be entered - the other is included implicitly! Parameter <r: eps Inf> <r: sigma> <r: res k> <r: pole k> Quantity High frequency relative permittivity (Ionic) electrical conductivity Residue Pole Symbol ∞ σ rk pk Units S/m rad s−1 rad s−1 Default 1.0 0.0 none none Table 4: DEBYE material model parameters. 3.3 Internal and external surface materials, BT, TB Surface material model types - called boundary types - are defined using the BT directive which has the general form: BT <t: name> <t: type> <param1> ... <paramN> Here <t: name> is the name tag for the boundary type being defined and must be unique amongst all other BT directives. The valid boundary types, <t: type>, and their parameters are: I. D. Flintoft University of York Vulture: User Manual 18 <i: N_m> <r: eps_inf> <r: sigma> <r: mu_r> Re[<r: res_1>] Im[<r: res_1>] Re[<r: pole_1>] ... ... ... Re[<r: res_N>] Im[<r: res_N>] Re[<r: pole_N>] Im[<r: pole_1>] ... Im[<r: pole_N>] Table 5: External file format for the DEBYE material type. Comment and blank lines are not allowed. BT BT BT BT BT BT BT <t: <t: <t: <t: <t: <t: <t: name> name> name> name> name> name> name> FREE_SPACE PEC PMC PERIODIC MUR PML <i: nlayer> <i: order> <rl: n_eff> <rl: refcoeff> <rl: kmax> SIBC <r: S11_TM> <r: S12_TM> <r: S21_TM> <r: S22_TM> \ [ <r: S11_TE> <r: S12_TE> <r: S21_TE> <r: S22_TE> ] BT <t: name> SIBC <s: fileName> The boundary type tags PEC, PMC and FREE SPACE are predefined for PEC, PMC and FREE SPACE boundary types respectively and cannot be overridden, i.e. the directives BT PEC PEC BT PMC PMC BT FREE_SPACE FREE_SPACE are effectively applied internally by the solver. The valid usage of the different boundary types on internal and external surfaces of the mesh is summarised in Table 6. Boundary type FREE SPACE PEC PMC PERIODIC MUR PML SIBC Internal surface Yes Yes No No No No Yes External surface No Yes Yes Yes Yes Yes No Over-write Yes Yes No n/a n/a n/a Limited Table 6: Valid usage of different boundary types. A boundary type identified by tag <t: name> is applied to a surface on the mesh using the TB directive: TB <i: ilo> <i: ihi> <i: jlo> <i: jhi> <i: klo> <i: khi> <t: name> \ [ <i: orient> [ <r: angle> ] ] The bounding box must define a surface (not a volume, line, edge or node). The parameters <i: orient> and <r: angle> are used to orientate and align asymmetric and anisotropic boundary type materials on the computational grid as discussed below. Boundary type materials are the second type of physical model applied to computational grid, after the volumetric materials, with each TB directive applied in the order it appears in the mesh file. Boundaries of type FREE SPACE and PEC will overwrite each other without adverse side effects. SIBC boundaries can be applied (once) on top of PEC boundaries. Other boundary types should not be applied “on top of each other”. 3.3.1 External surfaces Boundary type tags for the boundaries forming each external face of the mesh are predefined by the solver and associated with those surfaces. This is equivalent to the directives I. D. Flintoft University of York Vulture: User Manual TB 0 0 0 ny 0 TB nx nx 0 0 0 TB 0 nx 0 0 0 TB 0 ny ny ny 0 TB 0 nx 0 ny 0 TB 0 nx 0 ny nz nz nz nz nz 0 nz 19 XLO XHI YLO YHI ZLO ZHI having been applied, where nx, ny, nz are the mesh extents. So, for example, XLO is a tag for the boundary type of the x-normal external face of the mesh on the lower x side of the mesh. These tags can used to define the boundary types on the external mesh surfaces using BT directives, somewhat in reverse to the way they are used for all other internal surfaces. By default all the external surfaces are PML absorbing boundary types with default parameters, i.e. the directives TB TB TB TB TB TB XLO XHI YLO YHI ZLO ZHI PML PML PML PML PML PML are applied by default. Only boundary types PEC, PMC, PERIODIC, MUR and PML are valid on external surfaces. 3.3.2 PEC boundary type BT <t: name> PEC The PEC boundary type enforces zero tangential electric field on a surface by setting the FDTD update coefficients to α = −1.0 and β = 0.0 (see the Code Implementation Manual for details [4]). The following example defines a closed PEC box: BT TB TB TB TB TB TB walls 10 10 20 20 10 20 10 20 10 20 10 20 3.3.3 PEC 10 20 10 20 10 20 10 20 10 10 20 20 10 10 10 20 10 10 20 20 10 20 20 20 walls walls walls walls walls walls PMC boundary type BT <t: name> PMC The PMC boundary type enforces a PMC boundary condition on an external surface using a field mirroring algorithm with ghost fields “outside” the computational grid. In this way the PMC is located on the primary grid faces, the same as PEC boundary types on external surfaces. For example an infinite parallel plate waveguide with metal plates on the lower and upper z-normal external surfaces can be defined using: BT BT BT BT BT BT XLO XHI YLO YHI ZLO ZHI PMC PMC PEC PEC PML PML PMC boundary types can also be used to create symmetry planes, for example: BT BT BT BT BT BT XLO XHI YLO YHI ZLO ZHI PML PML PMC PML PML PML would create a symmetry plane in the YLO mesh surface. I. D. Flintoft University of York Vulture: User Manual 3.3.4 20 PERIODIC boundary type BT <t: name> PERIODIC The PERIODIC boundary type enforces a periodic boundary condition between pairs of external surfaces XLO/XHI, YLO/YHI and ZLO/ZHI, using a field copying algorithm with ghost fields “outside” the computational grid. The boundary condition is located on the primary grid faces, the same as other boundary types on external surfaces. Opposite pairs of external faces must both be defined with the PERIODIC boundary type. For example an infinite parallel plate waveguide with metal plates on the lower and upper z-normal external surfaces can be defined using: BT BT BT BT BT BT XLO XHI YLO YHI ZLO ZHI 3.3.5 PERIODIC PERIODIC PEC PEC PML PML FREE SPACE boundary type BT <t: name> FREE_SPACE The FREE SPACE boundary type imposes free-space material parameters on a surface. The main use of this boundary type is to “punch” holes through internal PEC type surfaces to create apertures. For example: BT walls PEC BT aperture FREE_SPACE # First make a closed metal box. TB 10 10 10 20 10 20 walls TB 20 20 10 20 10 20 walls TB 10 20 10 20 10 10 walls TB 10 20 10 20 20 20 walls TB 10 20 10 10 10 20 walls TB 10 20 20 20 10 20 walls # Then punch hole in face. TB 10 10 12 18 12 18 aperture Note that this does not work for SIBC types surfaces! 3.3.6 MUR boundary type BT <t: name> MUR The MUR boundary type specifies a first order Mur analytic ABC for external surfaces. It is compatible with PEC and PMC boundary types on neighbouring surfaces. It gives a normal incidence free-space reflection coefficient of approximately -20 dB providing sufficient space is left between it and scattering objects on the grid (about half a wavelength). 3.3.7 PML boundary type BT <t: name> PML <i: nlayer> <i: order> <r: n_eff> <r: refcoeff> <r: kmax> The PML boundary type specifies a perfectly matched layer (PML) ABC for external surfaces. This is a more advanced ABC than the Mur with much better performance, albeit at a significantly higher computational cost. The PML boundary type adds a number of layers, nlayer , of fictitious matched absorbing material to the external face of the mesh. Adding more layers improves the performance, i.e. reduces the reflections from the face, but increases the memory requirements and run-time of the simulation. Vulture implements a Uniaxial PML (UPML) with complex stretching factor [4] s(x) = κ(x) + I. D. Flintoft σ(x) iω0 (3.8) University of York Vulture: User Manual 21 and polynomial grading profiles σ(x) κ(x) = = σ max x m (3.9) d 1 + (κmax − 1) x m d . (3.10) Here x is the perpendicular distance into the PML and d is the total thickness of the PML. The maximum PML conductivity, σ max , is related to the magnitude of the theoretical (continuous space) reflection coefficient, |R(0)| by σ max = − m+1 ln |R(0)| . 2ηd (3.11) This has an empirically determined optimum value of σ opt = 4 m+1 4neff m + 1 = , η∆ 5 η0 ∆l 5 (3.12) where ∆ is the mesh size of the PML cells in the direction perpendicular to the surface and neff is the effective refractive index of the dominant mode(s) incident on the PML. The PML parameters and their default values are defined in Table 7. Parameter <i: nlayer> <i: order> <r: n eff> <r: refcoeff> <r: kmax> Quantity Number of layers Profile order Effective refractive index Reflection coefficient Maximum PML permittivity Table 7: PML boundary type model parameters. ∗ Symbol nlayer m neff |R(0)| κmax Units - Default 6 4 1.0 -1∗ 1.0 indicates optimal value should be chosen automatically While the PML has substantially improved performance relative to the Mur ABC it has limitiations: • The reflection coefficient begins to increase at grazing angles of incidence which can be a problem on high apsect ratio meshes. • The PMLs performance at transparently terminating evanescent waves is limited. The PML permittivity parameter κ is useful for improving the performance in this respect. Typically values of κ from 5 to 80 have been found to be useful. The Vulture PML implementation allows inhomogeneous simple materials to be place in contact with PML boundaries and PEC type internal boundaries normal to the PML surface can also be placed in contact with the PML. This effectively simulates the medium touching the PML being extended in the normal direction to infinity. The PML is also consistent with PEC, PMC and PERIODIC boundary types on neighbouring external surfaces. Support for electrically dispersive materials is currently only partially implemented. For example, a 10 layer PML with a cubic polynomial profile can de defined using: BT ZLO PML 10 3 3.3.8 SIBC boundary type BT <t: name> SIBC <s: fileName> BT <t: name> SIBC <r: Saa_TM> <r: Sab_TM> <r: Sba_TM> <r: Sbb_TM> \ [ <r: Saa_TE> <r: Sab_TE> <r: Sba_TE> <r: Sbb_TE> ] TB <i: ilo> <i: ihi> <i: jlo> <i: jhi> <i: klo> <i: khi> <t: name> \ [ <i: orient> [ <r: angle> ] ] Note that the SIBC boundary type is a compile time option that is enabled by setting the compilation option WITH SIBC=ON and may not be available in a particular solver executable. SIBC boundary types are arbitrary frequency dependent reflection and transmission boundaries. In general the tangential fields on each side of an anisotropic boundary representing a thin material can be I. D. Flintoft University of York Vulture: User Manual 22 x PA ^ n plane of incidence y PA side b E TM side a H TM E TE H TE Figure 3: Definition of SIBC impedance matrix (left) and alignment SIBCs on the mesh for a z-normal surface(right). The conventions for x- and y-normal surface are given by cyclic permutation. resolved into transverse electric (TE) and transverse magnetic (TM) waves (see Figure 3). The SIBC model relates these tangential electric and magnetic fields using a surface impedance matrix. A natural convention for defining the surface impedance matrix is with the TM and TE ports blocked together on either side of the boundary. In the principal axis system of the material the impedance matrix is block diagonal and the SIBC can be written TM TM TM HaTM (ω) HaTM (ω) Zaa (ω) Zab (ω) 0 0 Ea (ω) TM −H TM (ω) E TM (ω) Z TM (ω) Z TM (ω) 0 0 b (ω) (3.13) b bb ≡ Z (ω) −HTE ba bTE TE TE TE Ea (ω) = Ha (ω) Ha (ω) 0 0 Zab (ω) Zaa (ω) TE TE TE TE −HbTE (ω) −Hb (ω) 0 0 Zba (ω) Zbb (ω) Eb (ω) with two 2-by-2 sub-matrices for the TM and TE polarisations. Here “a” and “b” denote the two sides of the boundary. For a reciprocal material Zij (ω) = Zji (ω), (3.14) TM TE Zij (ω) = Zij (ω) ≡ Zij (ω). (3.15) while if the material is isotropic The TM and TE polarisations are defined with reference to a local reference system on the surface of the material. Aligning this with the global coordinate system of a computational grid requires two parameters to be specified for each surface on which the SIBC is applied: • <i: orient> (ξ): A binary orientation flag that indicates which side of the material is on which side of the surface. ξ = +1 indicates the “a” side of the material is on the lower perpendicular coordinate side of the surface while ξ = −1 indicates the converse. • <r: angle> (α): The angle between the x/y/z coordinate axis on the mesh and the xpa reference axes on the material for z/x/y-normal surfaces respectively. The conventions are shown in Figure 3 and the SIBC parameters and their default values are summarised in Table 8. SIBC boundary types can only be used on internal surfaces. The impedance matrix is related to the scattering matrix of the surface by −1 S = (Z − Z0 ) (Z + Z0 ) , (3.16) where a b a b Z0 = diag ηTM , ηTE , ηTE , ηTE I. D. Flintoft (3.17) University of York Vulture: User Manual 23 Parameter <s: filename> <i: orient> <r: angle> Quantity File name Orientation of sides (±1) Angle of principal axes Symbol n/a ξ α Units degrees Default 6 +1 0.0 Table 8: SIBC boundary type model parameters. is a diagonal matrix holding the intrinsic impedances of the media on either side of the boundary. Note that the scattering matrix is specific to the medium surrounding the boundary whereas the impedance matrix is not. The frequency dependent impedance matrix elements are represented by partial fraction expansions (PFEs) in the s-plane ∞ Zij (s = ω) = Zij + Nij X k rij k=1 s − pkij (i, j = 1, . . . , M ) (3.18) ∞ k where Zij is the high frequency asymptotic response, Nij is the order of the (i, j)-th element and rij and k pij are the k-th complex residues and poles of the (i, j)-th element. Typically the order is the same for each element, however, this does not need to be the case. Frequency independent boundaries are a special case with Nij = 0 (∀i, j). The PFE representation automatically ensures causality of the SIBC. Stability requires that the poles all lie in the left-hand side of the complex plane (Re[pkij ] < 0) and passivity requires that Re[Zij (ω)] ≥ 0 ∀ω. The latter condition can be difficult to ensure since it applies to all frequencies, including those far above the frequency at which the mesh becomes under-sampled. The PFEs are specified in an external ASCII format file referenced by the <s: filename> parameter. k Denoting rij by r(i,j,k), pkij by p(i,j,k) and Nij by N(i,j) the general format of this PFE input file is given in Table 9. Vulture currently supports three cases of SIBC in external files determined by the order of the impedance matrix, M : • M = 1: One-sided (no transmission) isotropic symmetrical material. • M = 2: Two-sided isotropic material. • M = 4: Two-sided anisotropic material. For frequency independent boundaries real valued scattering parameters TM+ TM− TM TM Ea Ea Saa Sab 0 0 TM+ E TM− S TM S TM 0 0 bb EbTE+ ≡ S bTE− = ba TE TE 0 Ea 0 Sab Saa Ea TE TE 0 0 Sba Sbb EbTE+ EbTE− EaTM+ EbTM+ EaTE+ EbTE+ (3.19) can be specified directly in the mesh file using BT <t: name> SIBC <r: Saa_TM> <r: Sab_TM> <r: Sba_TM> <r: Sbb_TM> \ [ <r: Saa_TE> <r: Sab_TE> <r: Sba_TE> <r: Sbb_TE> ] These scattering parameters should be referenced to free-space port impedances, even if they are to be used on surfaces embedded in other media. The scattering matrix must represent a passive system, i.e. I − S † S must be positive definite, where I is the identity matrix. For example, a surface composed of a frequency independent, isotropic, symmetric and reciprocal surface material with a reflection coefficient of -6 dB and transmission coefficient -20 dB can be modelled using BT absorber SIBC 0.5 0.1 0.1 0.5 TB 10 10 12 18 12 18 absorber An example of an enclosure with five metal walls and one wall composed of a frequency dependent surface material defined by the PFE in a file called "cfc2.prm" is: I. D. Flintoft University of York Vulture: User Manual M N N(1,1) Zinf(1,1) Re[r(1,1,1)] ... Re[r(1,1,N(1,1))] N(1,2) Zinf(1,2) Re[r(1,2,1)] ... Re[r(1,2,N(1,2))] ... N(i,j) Zinf(i,j) Re[r(i,j,1)] ... Re[r(i,j,N(i,j))] ... N(M,N) Zinf(M,N) Re[r(M,N,1)] ... Re[r(M,N,N(M,N))] 24 Im[r(1,1,1)] Re[p(1,1,1)] Im[r(1,1,1)] Im[r(1,1,N(1,1))] Re[p(1,1,N(1,1))] Im[r(1,1,N(1,1))] Im[r(1,2,1)] Re[p(1,2,1)] Im[r(1,2,1)] Im[r(1,2,N(1,2))] Re[p(1,2,N(1,2))] Im[r(1,2,N(1,2))] Im[r(i,j,1)] Re[p(i,j,1)] Im[r(i,j,1)] Im[r(i,j,N(i,j))] Re[p(i,j,N(i,j))] Im[r(i,j,N(i,j))] Im[r(M,N,1)] Re[p(M,N,1)] Im[r(M,N,1)] Im[r(M,N,N(M,N))] Re[p(M,N,N(M,N))] Im[r(M,N,N(M,N))] Table 9: PFE ASCII file format for SIBC boundary types. For Vulture SIBC boundaries only M = N = 1, 2 or 4 are valid. BT BT TB TB TB TB TB TB TB cfc2 SIBC "cfc.prm" walls PEC 10 10 10 20 10 20 walls 20 20 10 20 10 20 walls 10 20 10 20 10 10 walls 10 20 10 20 20 20 walls 10 20 10 10 10 20 walls 10 20 20 20 10 20 walls 10 10 12 18 12 18 cfc2 3.4 Linear wire materials: WT, TW Wire material types are defined using the WT directive which has the general form: WT <t: name> <t: type> <param1> ... <paramN> Here <t: name> is the name for the wire type being defined and must be unique amongst all other WT directives. The valid wire types and their parameters are: WT <t: name> PEC WT <t: name> THIN_WIRE <r: radius> The wire type tag PEC is predefined for PEC wire types and cannot be overridden, i.e. the directive WT PEC PEC has effectively already been applied internally by the solver. A wire type identified by tag <t: name> is applied to a line on the mesh using the TW directive: TW <i: ilo> <i: ihi> <i: jlo> <i: jhi> <i: klo> <i: khi> <t: name> \ [ <t: end1Type>] [ <t: end2Type> ] The bounding box must define a line (not a volume, surface, or node). The parameters <t: endType1> and <t: endType2> are used to set the end types for the low and high ends of wire on the computational grid as discussed below. Wire type materials are the third type of physical model applied to computational grid, after the volumetric and surface materials, with each TW directive applied in the order it appears in the mesh file. Wire types should not be applied “on top of each other”. Wires can be applied within SIMPLE volumetric materials and across PEC type surfaces. I. D. Flintoft University of York Vulture: User Manual 3.4.1 25 PEC wire type WT <t: name> PEC The PEC wire types enforces zero electric field on a line by setting the FDTD update coefficients to α = −1.0 and β = 0.0 (see the Code Implementation Manual for details [4]). This method is more robust than using a high conductivity to represent a PEC material. This produces a model of a wire with crosssectional area of roughly 3 % of the the area of the secondary grid face normal to the wire’s edge. Example: BT cable PEC TB 10 10 10 20 10 10 cable THIN WIRE wire type 3.4.2 The THIN WIRE type is currently not implemented! WT <t: name> THIN_WIRE <r: radius> TW <i: ilo> <i: ihi> <i: jlo> <i: jhi> <i: klo> <i: khi> <t: name> \ [ <t: end1Type>] [ <t: end2Type> ] The THIN WIRE type is a thin wire sub-cell model in which the wire radius, <r: radius>, must be much less than the cell size. The radius is specified in metres. The parameters <t: endType1> and <t: endType2> are used to set the end types for the low and high coordinate ends of the wire. The valid values are THRU (default), END and CORNER. An example for a wire going around a corner is: WT cable THIN_WIRE 1e-3 TW 10 10 10 20 10 10 cable END CORNER TW 10 10 20 20 10 20 cable CORNER END 4 Waveforms and sources 4.1 Waveforms: WF Waveform types are used to define a nominally dimensionless time-series of values that can be used by different physical sources in a simulation. They are defined by the WF directive which has two slightly different forms depending on the waveform type: WF <t: name> <t: type> [ <r: size> [ <r: delay> [ <r: width> [ <r:freq> ] ] ] ] WF <t: name> EXTERNAL <s: fileName> [ <r: size> [ <r: delay> ] ] Here <t: name> is the name tag for the waveform type being defined and must be unique amongst all other WT directives. The valid waveform types and their parameters are WF WF WF WF WF WF WF WF WF WF <t: <t: <t: <t: <t: <t: <t: <t: <t: <t: name> name> name> name> name> name> name> name> name> name> GAUSSIAN_PULSE [ <r: size> [ <r: delay> [ <r: width> [ <r:freq> ] ] ] ] NARROW_GAUSSIAN_PULSE [ <r: size> [ <r: delay> [ <r: width> [ <r:freq> ] ] ] ] DIFF_GAUSSIAN_PULSE [ <r: size> [ <r: delay> [ <r: width> [ <r:freq> ] ] ] ] RICKER_WAVELET [ <r: size> [ <r: delay> [ <r: width> [ <r:freq> ] ] ] ] COMPACT_PULSE [ <r: size> [ <r: delay> [ <r: width> [ <r:freq> ] ] ] ] DIFF_COMPACT_PULSE [ <r: size> [ <r: delay> [ <r: width> [ <r:freq> ] ] ] ] RAMPED_SINSOID [ <r: size> [ <r: delay> [ <r: width> [ <r:freq> ] ] ] ] MOD_GAUSSIAN_PULSE [ <r: size> [ <r: delay> [ <r: width> [ <r:freq> ] ] ] ] MOD_COMPACT_PULSE [ <r: size> [ <r: delay> [ <r: width> [ <r:freq> ] ] ] ] EXTERNAL <s: fileName> [ <r: size> [ <r: delay> ] ] The common waveform type parameters are defined in Table 10. I. D. Flintoft University of York Vulture: User Manual 26 Parameter <r: size> <r: delay> <r: width> <r: freq> Quantity Magnitude Delay Pulse width Modulation frequency Symbol A td σ fm Table 10: Waveform type common parameters. 4.1.1 Units s s Hz ∗ Default 1.0 0.0 ∗ ∗ depends on type. Built-in waveform types The built-in waveform types are defined and their default parameters given in Table 11. The equations for the waveforms are: Gaussian pulse: ψGP (t) = Ae−(t−td ) 2 /2σ 2 (4.1) Differentiated Gaussian pulse: 2 2 dψGP = −A(t − td )e−(t−td ) /2σ dt Ricker wavelet (double-differentiated Gaussian pulse): 2 ! 2 2 2 dψDGP t − td 2 d ψGP ψRW (t) = σ =σ = −A 1 − e−(t−td ) /2σ , 2 2 dt dt σ ψDGP (t) = σ Compact pulse (Blackman-Harris pulse): A 32 (10 − 15 cos(ω0 t) + 6 cos(2ω0 t) − cos(3ω0 t)) 0 ≤ t ≤ 2σ ψCP (t) = 0 t > 2σ P3 m=0 am cos(mω0 t) 0 ≤ t ≤ 2σ = 0 t > 2σ π with ω0 = , a0 = 10/32, a1 = −15/32, a2 = 6/32, a3 = −1/32 σ Differentiated compact pulse: π dψCP −A 32 (15 sin(ω0 t) + 12 sin(2ω0 t) + 3 sin(3ω0 t)) 0 ≤ t ≤ 2σ = ψDCP (t) = σ 0 t > 2σ dt (4.2) (4.3) (4.4) (4.5) (4.6) (4.7) Ramped sinusoid: ψRS (t) = P3 A m=0 am cos(mω0 t) sin(2πfm t) 0 ≤ t ≤ σ A sin(2πfm t) t>σ (4.8) Modulated Gaussian pulse: ψMGP (t) = Ae−(t−td ) 2 /2σ 2 sin(2πfm t) (4.9) Modulated compact pulse: ψMCP (t) = A 0 P3 m=0 am cos(mω0 t) sin(2πfm t) 0 ≤ t ≤ 2σCP t > 2σCP (4.10) When choosing a waveform the following issues should be considered: • Broad pulses generally have more energy at high frequencies and therefore exhibit more artefacts due to under-sampling. The default parameters limit this effect while still giving sufficient energy at frequencies up to where cell size is λ/5 to avoid dynamic range issues. The NARROW GAUSSIAN PULSE is an except to this - it has significant energy beyond the Nyquist spatial sampling frequency. • Differentiated pulses have no DC response. The low frequency response may be inaccurate. • The modulated Gaussian and compact pulse have a band-pass response, hence the results are only meaningful over a limited frequencies range and may be unreliable at low and high frequencies. The default pulses and differentiated pulses and their spectra are shown in Figures 4 and 5. The modulated pulses and their spectra are shown in Figure 6 and Figure 7. I. D. Flintoft University of York Vulture: User Manual 27 1 Amplitude (-) 0.5 0 -0.5 -1 0 20 40 60 80 100 Time step (-) Gaussian pulse Differentiated Gaussian pulse Ricker wavelet Compact pulse Differentiated compact pulse Figure 4: Default pulse waveforms and their derivatives. 0 -20 Normalised amplitude (dB) -40 -60 -80 -100 -120 -140 -160 -180 -200 0 0.05 0.1 0.15 0.2 0.25 0.3 Frequency (1/∆t) Gaussian pulse Differentiated Gaussian pulse Ricker wavelet 0.35 0.4 0.45 0.5 Compact pulse Differentiated compact pulse Figure 5: Spectra of the pulse waveforms and their derivatives. I. D. Flintoft University of York Vulture: User Manual 28 1 Amplitude (-) 0.5 0 -0.5 -1 0 50 100 Time step (-) Modulated Gaussian pulse Modulated compact pulse 150 200 Ramped sinusoid Figure 6: Default modulated waveforms. 0 -20 Normalised amplitude (dB) -40 -60 -80 -100 -120 -140 -160 -180 0 0.05 0.1 0.15 0.2 0.25 0.3 Frequency (1/∆t) Modulated Gaussian pulse Modulated compact pulse 0.35 0.4 0.45 0.5 Ramped sinusoid Figure 7: Spectra of the default modulated waveforms. I. D. Flintoft University of York Vulture: User Manual 29 Waveform type Definition GAUSSIAN PULSE NARROW GAUSSIAN PULSE DIFF GAUSSIAN PULSE RICKER WAVELET COMPACT PULSE DIFF COMPACT PULSE RAMPED SINUSOID MOD GAUSSIAN PULSE MOD COMPACT PULSE ψGP (t) ψGP (t) ψDGP (t) ψRW (t) ψCP (t) ψDCP (t) ψRS (t) ψMGP (t) ψMCP (t) Size, A (-) 1.0 1.0 1.0 1.0 1.0 1.0 1.0 1.0 1.0 Delay, td (s) 40∆t 12∆t 40∆t 40∆t n/a n/a n/a 120∆t n/a Width, σ √(s) 5 2∆t 2∆t √ 5√2∆t 5 2∆t 20∆t 20∆t 20∆t √ 20 2∆t 80∆t Frequency, fm (Hz) n/a n/a n/a n/a n/a n/a 1 20∆t 1 20∆t 1 20∆t Table 11: Waveform types and default parameters. 4.1.2 EXTERNAL waveform type A user defined waveform can be provided as a time-series in an external ASCII file using the EXTERNAL waveform type: WF <t: name> EXTERNAL <s: fileName> [ <r: size> [ <r: delay> ] ] <s: fileName> is the path to an ASCII file containing two columns with monotonically increasing time (seconds) and waveform values (-). The file format does not support any comment lines or blank lines! The waveform is assumed zero outside the range of times in the file and is interpolated using cubic splines for values in between those given in the file. The waveform is scaled by <r: size> and delayed by <r: delay> seconds. 4.2 Current and field sources: EX Current and field sources are applied to the grid using the EX directive, which has two forms: EX <i: <t: EX <i: <t: ilo> <i: ihi> <i: jlo> <i: jhi> <i: klo> <i: khi> <t: name> <t: type> \ wfName> [ <r: size> [ <r: delay> ] ] ilo> <i: ihi> <i: jlo> <i: jhi> <i: klo> <i: khi> <t: name> <t: type> \ wfName> <r: param> [ <r: size> [ <r: delay> ] ] The first form is valid for all the distributed field and current sources while the second form is used for lumped sources with finite internal impedance. Field and current sources are applied to the grid in the order they are defined in the mesh file before any plane-wave sources. The common source parameters are defined in Table 12. The waveform to be used for the source, <t: wfName>, must have been previously defined in a WF directive. The delay of the source relative to its waveform, <r: delay>, is in addition to any delay specified in the WF directive. Parameter <t: name> <t: type> <t: wfName> <r: size> <r: delay> Quantity Source name Source type Waveform name Magnitude Delay Symbol n/a n/a n/a A td Table 12: Source type common parameters. 4.3 Units n/a n/a n/a Default none none ∗ 1.0 0.0 s ∗ ∗ depends on type. Distributed “soft“ current source types EX <i: ilo> <i: ihi> <i: jlo> <i: jhi> <i: klo> <i: khi> <t: name> <t: wfName> [ <r: size> [ <r: delay> ] ] I. D. Flintoft <t: type> \ University of York Vulture: User Manual 30 Figure 8: Spatial region occupied by a soft electric current density source. “Soft sources” are added to the fields already on the computational grid and as such do not cause reflections of waves scattered back towards them. Formally all such sources are ideal current sources with infinite impedance, presenting an open-circuit to any waves incident upon them. The field at the source location is the superposition of the incident field from the impressed current and the scattered field (which may be the reaction of the grid to the incident field of the source itself or from another source in the grid). The distributed soft sources supported are shown in Table 13. For surface current densities the first coordinate direction in the tag denotes the polarisation direction of the current and the second denotes the other tangential direction of the current sheet. So JMSYZ would denote a magnetic surface current density on an x-normal surface polarised in the y-direction. For all other types the single coordinate direction in the tag denotes the polarisation, so JY would denote a y-polarised electric current density. Electric current sources are excited on primary grid edges and magnetic current sources on secondary grid edges. Figure 8 shows the case of a z-polarised electric current density source on edge [i, i, j, j, k, k + 1]. Note that the electric current is evaluated at half-intergral times (n + 12 )∆t; magnetic currents are evaluated at integral times n∆t. For sources distributed over more than one edge the current density is distributed evenly over the cross-sectional area of the source using parallel current sources and uniformly along the polarisation direction of the source using equal series current sources. Essentially all the soft current sources excite the grid in the same way - the only difference is the normalisation, and units, of the amplitude of the source. Depending on the type of source been modelled one choice may be more natural than the other. If all outputs are referenced to a calibration value measured on the computational grid then the amplitude normalisation is unimportant. The normalisations for z-polarised electric current sources are n+ 12 Jz (i, j, k + 12 ) = JZ = JSZY IZ IDZ EZ JSZX VZ = = = =− = . ˜ j ˜ i ˜ i ∆y ˜ j ˜ i ∆y ˜ j ∆zk η0 c0 ∆t η0 c0 ∆t∆zk ∆y ∆x ∆x ∆x (4.11) For an x-polarised magnetic current source the equivalent normalisation is n+ 1 JMx 2 (i, j + 12 , k + 12 ) = JMX = JMSXY JMSXZ IMX IMDX η0 HX = = = =− . ˜ i ∆yj ∆zk ∆zk ∆yj ∆yj ∆zk c0 ∆t ∆x (4.12) In the above, the normalisations for the fields and voltage assume that the source is imposed in free-space. Note that isolated current sources in free-space often lead to permanent DC charging of the computational grid due to the lack of charge dynamics in the FDTD method. As a waveform is impressed by a current source the divergent fields implicitly displace charge between cells in the grid according to the Gauss’ Laws for electric and magnetic fields. This charging will be temporary if the waveform has no DC component, however, for waveforms with DC components (like a Gaussian pulse) a permanent static field will be left on the comptutational grid. If there is a conductive path between the end-points of the current source then the charge can discharge with a time constant determined by the grid capacitance and conductance. 4.3.1 JX, JY, JZ, JMX, JMY and JMZ volume current density sources Volume current densities are applied directly to grid edges - primary grid edges for electric current densities and secondary grid edges for magnetic current densities. They can be regarded as existing across an area I. D. Flintoft University of York Vulture: User Manual 31 Source type JX, JY, JZ JMX, JMY, JMZ JSXY, JSXZ, JSYZ, JSYX, JSZX, JSZY JMSXY, JMSXZ, JMSYZ, JMSYX, JMSZX, JMSZY IX, IY, IZ IMX, IMY, IMZ IDX, IDY, IDZ IMDX, IMDY, IMDZ VX, VY, VZ EX, EY, EZ HX, HY, HZ Description Electric (volume) current density Magnetic (volume) current density Electric surface current density Magnetic surface current density Electric (line) current Magnetic (line) current Electric current moment Magnetic current moment Voltage Electric field Magnetic field Units A m−2 V m−2 A m−1 V m−1 A V Am Vm V V m−1 A m−1 Table 13: Distributed “soft” current source types. 1 Wb = 1 V s. normal to their polarisation ditrection given by the area of the dual grid faces associated with the edges excited. For example, # A soft electric current density source EX 16 17 16 17 16 17 current_density JY 1.0 would correspond to a y-polarised electric current density of 1 A m−2 impressed on four primary grid edges in the volume bounded by [15.5,17.5,15.5,17.5,16,17]. 4.3.2 JSXY, JSXZ, JSYX, JSYZ, JSZX, JSZY, JMSXY, JMSXZ, JMSYX, JMSYZ, JMSZX, JMSZY surface current density sources Surface current density sources are useful for impressing “current sheet” sources across surfaces of the grid. According to Love’s Surface Equivalence Principle the sources within a surface S can be replaced by the equivalent surface currents J Ms Js = − n̂ × E|S = n̂ × H|S (4.13) (4.14) on the surface, leaving a null field inside the surface and the original field outside the surface. An aperture in a PEC surface for example can be modelled using a magnetic surface current density J Ms = − n̂ × E|S radiating on a PEC surface with the aperture closed (the electric current density is shorted out in this case). The known electric field in an aperture can be impressed using # An equivalent # aperture with TB 0 10 10 10 EX 5 6 10 10 magnetic current density source for an an electric field of 1 V/m. 0 10 PEC 5 6 aperture_efield JMSZY 1.0 Note that this will radiate into both the j < 10 and j > 10 half-spaces which is probably not what is intended. A volumetic PEC backing needs to be used on the non-radiating side, say the j < 10 half-space: # An equivalent # aperture with MB 0 10 0 10 EX 5 6 10 10 magnetic current density source for an a uniform electric field of 1 V/m. 0 10 PEC 5 6 aperture_efield JMSZY 1.0 Another example is # A soft electric surface current density source EX 15 20 15 20 10 10 current_sheet JSXY 1.0 which corresponds to an x-polarised electric surface current density of 1 A m−1 impressed on 36 primary grid edges on the z-normal surface bounded by [15,20,14.5,20.5,9.5,10.5]. The equivalent volume current density is determined by dividing surface current density by the dual grid edge length normal to the surface, ˜ 10 . in this case ∆z I. D. Flintoft University of York Vulture: User Manual 32 For infinitesimal sources that are not aligned with the grid it may be better to distributed the source over two edges for each polarisation so that each polarisation has the same √ centre √ [6]. For example an √ phase electric dipole moment with amplitude 1 A m, aligned along unit vector (1 3, 1 3, 1 3) can be implemented using # Non-aligned source EX 10 11 10 10 10 10 EX 10 10 10 11 10 10 EX 10 10 10 10 10 11 4.3.3 with same phase centre for each polarisation. current_sheet IDX 0.5773 current_sheet IDY 0.5773 current_sheet IDZ 0.5773 IX, IY, IZ, IMX, IMY and IMZ line current sources Line current sources are related to current densities using the area of the dual grid face normal to and centred on the excited edge. For example, # A soft electric current source EX 15 15 15 15 14 16 line_current IZ 1.0 impresses a z-directed current of 1 A flowing in the volume [14.5,15.5,14.5,15.5,14,16]. The current ˜ 15 ∆y ˜ 15 ) A m−2 . Current sources can be specified on volumetric bounding density is determined as 1/(∆x boxes as well. So, # A soft volumetric electric current source EX 15 16 15 16 14 16 line_current IZ 1.0 ˜ 15 + ∆x ˜ 16 ) × (∆y ˜ 15 + ∆y ˜ 16 ) normal to the current would distribute the 1 A current across the area (∆x direction. 4.3.4 IDX, IDY, IDZ, IMDX, IMDY and IMDZ current moment sources Current moments impress the specified current moment on a volume, surface or edge. The current is determined by dividing the moment by the total length of the bounding box in the polarisation direction and then the current density is found by dividing by the area of the normal dual grid faces. For example, # A soft volumetric electric current moment source EX 15 16 15 16 14 16 current_moment IDZ 1.0 ˜ 15 + ∆x ˜ 16 ) × (∆y ˜ 15 + ∆y ˜ 16 ) normal to the would distribute the 1 A m current moment across the area (∆x current direction and length ∆z14 + ∆x15 . 4.3.5 EX, EY, EZ, HX, HY and HZ soft “field” sources Soft “field” sources are added directly to the fields already on the grid, however, as noted above they are formally current sources with respect to their physical behaviour. The field they impress on the grid is dependent on the time-step (and hence CFLN). In general this means they are difficult to use on a nonuniform mesh. In√Vulture the soft electric field source is normalised such that on a uniform grid with the default CFLN of 3/2 an infinite plane of colinearly polarised edges would launch a plane wave with the specified electric/magnetic field amplitude in to the grid. Explicitly, # A soft electric ‘‘field’’ source EX 1 10 1 10 5 5 eplane EZ 1.0 would launch a “plane-wave” of amplitude 1 V/m in both the positve and negative z-directions on a uniform mesh with the default CFLN. Note that in practice the source plane is usually not infinite and therefore this give a poor representation of a plane-wave: There will be always be diffraction from the edges of the source plane. However, within an infinite parallel-plate waveguide, simulated using PEC and PMC external boundaries, the source plane is effectively infinite and in this case a well defined TEM wave is launched (in both directions). The PEC external boundaries also effectively remove any displaced charge from the grid and prevent DC charging of the grid for this case too. 4.3.6 VX, VY and VZ soft “voltage” sources Soft voltage sources are just soft field sources normalised by the total edge length of the bounding box in the direction of polarisation, so all the comments above for field sources apply equally here. I. D. Flintoft University of York Vulture: User Manual 4.4 33 Distributed “hard“ field source types EX <i: ilo> <i: ihi> <i: jlo> <i: jhi> <i: klo> <i: khi> <t: name> <t: wfName> [ <r: size> [ <r: delay> ] ] <t: type> \ Figure 9: Spatial region occupied by a hard electric field source. “Hard sources” replace the fields already on the computational grid and as such cause reflections of waves scattered back towards them. Formally such sources are ideal voltage sources with zero impedance, presenting a short-circuit to any waves incident upon them. For sources distributed over more than one edge the voltage is distributed uniformly over the cross-sectional area of the source using equal parallel voltage sources and evenly along the polarisation direction of the source using series voltage sources. The edges on which hard sources are impressed appear as PEC or PMC materials as far as waves scattering from them are concerned. Indeed, one practical use of a hard source is to impress the equivalent surface currents of an aperture field onto a PEC surface, however, it must always be bourne in mind that any waves reflected back towards such a source may suffer unphysical reflections. This is discussed futher below. The distributed hard sources supported are shown in Table 13. Electric sources are excited on primary grid edges (centres of secondary grid faces) and magnetic sources at the centres of primary grid faces (on secondary grid edges). Figure 9 shows the case of a z-polarised hard electric field source on edge [i, i, j, j, k, k + 1]. Note that electric field sources are evaluated at intergral times n∆t; magnetic field sources are evaluated at half-integral times (n + 12 )∆t. Essentially all the hard field sources excite the grid in the same way - the only difference is the normalisation, and units, of the amplitude of the source. Depending on the type of source been modelled one choice may be more natural than the other. If all outputs are referenced to a calibration value measure on the computational grid then the amplitude normalisation is unimportant. The normalisations for a z-polarised hard electric field source are n+ 21 Ez (i, j, k + 12 ) = = JSZX VZ JSZY = −η0 c0 ∆tJZ = −η0 c0 ∆t = −η0 c0 ∆t ˜ j ˜ i ∆zk ∆y ∆x IDZ IZ = −η0 c0 ∆t −η0 c0 ∆t ˜ i ∆y ˜ j ˜ i ∆y ˜ j ∆zk ∆x ∆x EZ = − (4.15) For an x-polarisaed hard magnetic field source the equivalent normalisation is n+ 21 Hx (i, j + 12 , k + 12 ) = = c0 ∆t c0 ∆t JMSXY c0 ∆t JMSXZ JMX = − =− η0 η0 ∆zk η0 ∆yj c0 ∆t IMX c0 ∆t IMDX − =− . ˜ i ∆yj ∆zk η0 ∆yj ∆zk η0 ∆x HX = − (4.16) The above the normalisations for the fields and voltage assume that the source is imposed in free-space. Note that the fields induced on the grid for all the current related hard sources depend on the time-step (and CFLN). I. D. Flintoft University of York Vulture: User Manual 34 Source type =EX, =EY, =EZ =HX, =HY, =HZ =VX, =VY, =VZ =JX, =JY, =JZ =JMX, =JMY, =JMZ =JSXY, =JSXZ, =JSYZ, =JSYX, =JSZX, =JSZY =JMSXY, =JMSXZ, =JMSYZ, =JMSYX, =JMSZX, =JMSZY =IX, =IY, =IZ =IMX, =IMY, =IMZ =IDX, =IDY, =IDZ =IMDX, =IMDY, =IMDZ Description Electric field Magnetic field Voltage Electric (volume) current density Magnetic (volume) current density Electric surface current density Magnetic surface current density Electric (line) current Magnetic (line) current Electric current moment Magnetic current moment Units V m−1 A m−1 V A m−2 V m−2 A m−1 V m−1 A V Am Vm Table 14: Distributed “hard” field source types. 4.4.1 =EX, =EY, =EZ, =HX, =HY and =HZ hard field sources Hard field source can be used to impress known field distributions on surfaces, similar to the use of current sheets in Section 4.3.2 above. With a hard source an aperture field can be imposed directly on a PEC surface, for example: # Direct Dirchlet boundary condition for # aperture with a uniform electric field of 1 V/m. MB 0 10 0 10 0 10 PEC EX 5 6 10 10 5 6 aperture_efield =EZ 1.0 4.4.2 =VX, =VY and =VZ hard voltage sources Hard voltage sources are just hard field sources normalised by the total edge length of the bounding box in the direction of polarisation. They can be used in cases where an ideal voltage source excitation is required. 4.4.3 =JX, =JY, =JZ, =JMX, =JMY and =JMZ hard current density sources These source types are provided for completeness but may not be practically useful. 4.4.4 =JSXY, =JSXZ, =JSYX, =JSYZ, =JSZX, =JSZY, =JMSXY, =JMSXZ, =JMSYX, =JMSYZ, =JMSZX, =JMSZY hard surface current density sources These source types can be used to impose current sheets, however, the field induced on the mesh is dependent on the time-step and will only have the correct normalisation on uniform cubic grids with the default CFLN. It is usually better to imposed field values directly using =EX etc. 4.4.5 =IX, =IY, =IZ, =IMX, =IMY and =IMZ hard current sources These source types are provided for completeness but may not be practically useful. 4.4.6 =IDX, =IDY, =IDZ, =IMDX, =IMDY and =IMDZ hard current moment sources These source types are provided for completeness but may not be practically useful. 4.5 4.5.1 Other source types VRX, VRY, VRZ, IRX, IRY and IRZ finite impedance lumped sources EX <i: ilo> <i: ihi> <i: jlo> <i: jhi> <i: klo> <i: khi> <t: name> VRX|VRY|VRZ|IRX|IRY|IRZ \ <t: wfName> <r: resist> [ <r: size> [ <r: delay> ] ] This form of the EX directive is used to introduce lumped Thévenin voltage and Norton current sources with finite internal impedance. For Thévenin voltage sources the amplitude <r: size> is the open circuit voltage of the source in volts and <r: resist> is the internal resistance in ohms. For Norton current sources I. D. Flintoft University of York Vulture: User Manual 35 Figure 10: Schematic illustration of lumped Thévenin voltage source (left) and Norton current source (right) on a z-polarised edge. the amplitude <r: size> is the short circuit current of the source in amps and <r: resist> is the internal resistance in ohms. Both sources are implement as soft current sources on the corresponding electric field edge, together with an appropriate conductive loading of the edge to account for the source resistance, as shown in Figure 10. Currently the bounding box must be a single edge! Examples: # A soft z-polarised lumped voltage source of ampltiude 1 V # and internal resistance 50 ohms applied on the grid edge # from (16,16,16) to (16,16,17). EX 16 16 16 16 16 17 feed VRZ 50.0 1.0 4.5.2 VDX, VDY and VDZ delta-gap thin wire voltage sources Delta-gap sources are currently not implemented! 4.6 Plane-wave sources: PW Plane-waves can be launched into the computational grid using the PW directive: PW <i: ilo> <i: ihi> <i: jlo> <i: jhi> <i: klo> <i: khi> <t: name> <t: wfName> \ <r: theta> <r: phi> <r: psi> [ <s: mask> [<r: size> [ <r: delay> ] ] ] Plane-wave sources partition the grid into two regions: • A total field region inside of the bounding box. • A scattered field region outside of the bounding box. Such source are also known as Huygen’s sources or total-field scattered-field (TFSF) sources or boundaries. The bounding box must define a volume and must not cut across any objects on the mesh; it can however butt-up against an internal PEC surface or external PEC, PMC or PERIODIC surface in certain cases (see <t: mask> below). Plane-wave sources are applied in the order they are given in the mesh file after all other types of sources. Parameter <t: name> <t: wfName> <r: theta> <r: phi> <r: psi> <t: mask> <r: size> <r: delay> Quantity Plane-wave name Waveform name Polar angle Azimuthal angle Polarisation angle Face activity mask Magnitude Delay Symbol n/a n/a θ φ ψ n/a E0 td Units n/a n/a degrees degrees degrees n/a V/m s Default none none none none none 111111 1.0 0.0 Table 15: Plane-wave source type parameters. The plane-wave source type parameters are: I. D. Flintoft University of York Vulture: User Manual 36 • <t: name>: The unique name of the plane-wave. • <t: wfName>: The name of the waveform to use for the source. This must have been defined already in a WF directive. • <r: theta>: The polar angle, 0 ≤ θ ≤ 180, of the wave vector in degrees. • <r: phi>: The azimuthal angle, 0 ≤ φ < 360, of the wave vector in degrees. • <r: psi>: The polarisation angle, 0 ≤ ψ ≤ 360, of the electric field vector relative to k̂inc ×ẑ in degrees. • <s: mask>: A bit mask of six binary digits indicating which faces (XLO XHI YLO YHI ZLO ZHI) of the plane-wave bounding box are active. e.g 111111 indicates all faces are active while 011111 indicates that the XLO face is inactive. This can be used to terminate one face (the inactive one) of the TFSF surface with a PEC plate to construct a semi-infinite space. The reflected wave must be included using a second PW directive with opposite wave-vector and polarisation in this case to obtain accurate results - see the examples later. • <r: size>: The source amplitude, E0 , in V/m. The default value is 1.0 V/m. • <r: delay>: The delay of the source relative to the waveform in seconds. This delay is in addition to any delay specified in the WF directive. These parameters are summarised in Table 15 and Figure 11 shows how the angles are defined. The incident wave-vector, electric field vector and magnetic field vector are given by sin(θ) cos(φ) k̂inc = r̂ = sin(θ) sin(φ) (4.17) cos(θ) cos(ψ) sin(φ) − sin(ψ) cos(θ) cos(φ) = E0 − cos(ψ) cos(φ) − sin(ψ) cos(θ) sin(φ) sin(ψ) sin(θ) (4.18) sin(ψ) sin(φ) + cos(ψ) cos(θ) cos(φ) E0 − sin(ψ) cos(φ) + cos(ψ) cos(θ) sin(φ) . = η0 − cos(ψ) sin(θ) (4.19) Einc Hinc The angles for common directions and polarisations are given in Table 16. Figure 11: Definition of the angles of the wave-vector and electric field vector for the plane-wave source. On a cubic mesh an auxiliary 1D grid is used to accurately account for dispersion across the total field region. On non-cubic uniform meshes and non-uniform meshes a basic analytic incident field is used: This has low accuracy on electrically large meshes. In any case it is advisable to make the plane-wave bounding box as small as possible to minimise any dispersion errors. I. D. Flintoft University of York Vulture: User Manual 37 k̂inc kx x̂ kx x̂ ky ŷ ky ŷ kz ẑ kz ẑ −kx x̂ −kx x̂ −ky ŷ −ky ŷ −kz ẑ −kz ẑ Êinc Ey ŷ Ez ẑ Ex x̂ Ez ẑ Ex x̂ Ey ŷ −Ey ŷ −Ez ẑ −Ex x̂ −Ez ẑ −Ex x̂ −Ey ŷ Ĥinc Hz ẑ Hy ŷ Hz ẑ Hx x̂ Hy ŷ Hx x̂ Hz ẑ −Hy ŷ −Hz ẑ Hx x̂ Hy ŷ −Hx x̂ θ (◦ ) 90 90 90 90 0 0 90 90 90 90 180 180 φ (◦ ) 0 0 90 90 0 0 180 180 270 270 0 0 ψ (◦ ) 180 90 0 90 270 180 180 270 0 270 270 0 Table 16: Angles for common directions of propagation and polarisation. 5 Observers The observer directive format and assocaited output file formats are under review and may change in a future version of Vulture. 5.1 Simulation output control: OT, OF The OT directive determines for which time-steps data are output by the time-domain observers: OT <i: tstart> <i: tstop> The data for all time-steps between and including <i: tstart> and <i: tstop> will be written out. By default the data for all time-steps is output if no OT directive is given. For frequency domain observers, including waveforms and far-fields calculations, the frequencies to be output are determined by the OF directive: OF <r: fstart> <r: fstop> <i: numFreq> By default, if no OF directive is given, the frequencies fk = k Ns k = 0, . . . , Ns ∆t 10 (5.1) are output, where Ns is the number of time-steps and ∆t is the time-step. The DFTs are computed using the time-series within the bounds specified by any OT directive or the full time series if there is no OT directive. 5.2 Implicit waveform observers For every waveform directive found in the mesh file two implicit “‘waveform observers” are automatically created which monitor the waveform’s time-series and frequency spectrum. Waveform time-series are output into ASCII files called wf <t: name> td.asc, where <t: name> is the name of the waveform in the meshfile. The associated frequency spectra are similarly stored in ASCII files called wf <t: name> fd.asc. The output format are given in Tabe 17. 5.3 Near-field observers: OP Near-field output requests are made using OP directives which have two forms depending on the type: OP <i: ilo> <i: ihi> <i: jlo> <i: jhi> <i: klo> <i: khi> <t: name> <t: type> \ [ <t: wfName> ] OP <i: ilo> <i: ihi> <i: jlo> <i: jhi> <i: klo> <i: khi> <t: name> <t: type> \ [ <i: xstep> <i: ystep> <i: zstep> ] ] These directives place observers on the computational grid that output the fields on and within the specified bounding box. I. D. Flintoft University of York Vulture: User Manual # Waveform# 0 # ts (-) t (s) 0 0.00000000e+00 . .............. # Waveform# 0 # f (Hz) 0.00000000e+00 .............. 38 wf (-) 0.00000000e+00 .............. Re(wf) (-) 0.00000000e+00 .............. Im(wf) (-) 0.00000000e+00 .............. Table 17: Output formats for implicit waveform obserbvers: Time series (top) and frequency spectra (bottom). 5.3.1 TDOM BINARY type observers OP <i: ilo> <i: ihi> <i: jlo> <i: jhi> <i: klo> <i: khi> <t:name> TDOM_BINARY \ [ <i: xstep> <i: ystep> <i: zstep> ] The TDOM BINARY type requests time-domain field outputs over a volumetric region in the University of York finite methods binary output format [3]. The electric and magnetic field components in each cell enclosed by the bounding box are output with a cell index stride length in each coordinate direction given by <i: xstep>, <i: ystep> and <i: zstep>. The default stride lengths are one in all directions. The time-series of the first waveform defined in the mesh file will be stored in the excite.dat to be used as a reference in frequency domain calculations. The observer outputs are indexed by cell numbers but are sampled at their respective positions and times in the Yee cell shown in Figure 2. For example Ex[i][j][k] is sampled at position (xi + dx2 i , yj , zk ) dy and Hx[i][j][k] is sampled at position (xi , yj + 2j , zk + dz2k ). Time domain fields are output with electric field times. The magnetic fields are half a time step later than the time specified. Frequency domain outputs are divided by the spectrum of the (complex) reference waveform, defined by the <t: wfName> parameter, to give the frequency response of the observerable relative to the source waveform. Any amplitude factor in the waveform directive is therefore divided out, however, amplitude factors in excitation directives are retained. The default reference waveform is the first one found in mesh. Magnetic field spectra have a phase shift (advance) corresponding to half a time step. The results are stored in a binary output file called impulse.dat. Results from multiple TDOM BINARY types observers are stored in the same impulse.dat file. Two other files are also created when TDOM BINARY type observers are present: • excite.dat: An ASCII file containing the reference excitation waveform time series. • process.dat: A template ASCII file for controlling other post processing tools. See Section 7.2 for information on using the binary output data. Note that the name tag is currently not propagated in to the output data files. For example the directive OP 4 10 14 20 10 10 output1 TDOM_BINARY 2 2 1 will output electric and magnetic fields on a 2D grid of cells with • x indices 4, 6, 8 and 10. • y indices 14, 16, 18 and 20. • z index 10. 5.3.2 TDOM ASCII and FDOM ASCII type observers OP <i: ilo> <i: ihi> <i: jlo> <i: jhi> <i: klo> <i: khi> <t: name> TDOM_ASCII OP <i: ilo> <i: ihi> <i: jlo> <i: jhi> <i: klo> <i: khi> <t: name> FDOM_ASCII [ <t: wfName> ] The TDOM ASCII and FDOM ASCII observer types requests time-domain and frequency-domain ASCII format field outputs respectively in a single mesh cell. As such the bounding box must be a single cell. I. D. Flintoft University of York Vulture: User Manual 39 Time-domain outputs for each observer of type TDOM ASCII are written to separate files with names eh <t: name> td.asc. The file format is given in Table 18. The outputs are sampled at their respective positions and times in the Yee cell shown in Figure 2. For example Ex[i][j][k] is sampled at position dy (xi + dx2 i , yj , zk ) and Hx[i][j][k] is sampled at position (xi , yj + 2j , zk + dz2k ). Time domain fields are output with electric field times. The magnetic fields are half a time step later than the time specified. Frequency-domain outputs for each observer of type FDOM ASCII are written to separate files with names eh <t: name> fd,asc. The file format is given in Table 19. Frequency domain outputs are divided by the spectrum of the (complex) reference waveform, defined by the <t: wfName> parameter, to give the frequency response of the observerable relative to the source waveform. Any amplitude factor in the waveform directive is therefore divided out, however, amplitude factors in excitation directives are retained. If no reference waveform is given the first one found in the mesh file is used. Magnetic field spectra have a phase shift corresponding to half a time step. # [<i: ilo>,<i: jlo>,<i: klo>] -> (x_ilo,y_jlo,z_klo) # ts (-) t (s) Ex (V/m) Ey (V/m) 0 0.00000000e+00 0.00000000e+00 0.00000000e+00 . .............. .............. .............. Ez (V/m) 0.00000000e+00 .............. Hx (A/m) ... 0.00000000e+00 ... .............. ... Table 18: Output format of the TDOM ASCII observer types. # [<i: ilo>,<i: jlo>,<i: klo>] -> (x_ilo,y_jlo,z_klo) # f (Hz) Re(Ex) (V/m) Im(Ex) (V/m) Re(Ey) (V/m) 0.00000000e+00 0.00000000e+00 0.00000000e+00 0.00000000e+00 .............. .............. .............. .............. Im(Ey) (V/m) 0.00000000e+00 .............. ... ... ... Table 19: Output format of the FDOM ASCII observer types. 5.3.3 HDF5 type observers HDF5 observers are currently not implemented! OP <i: ilo> <i: ihi> <i: jlo> <i: jhi> <i: klo> <i: khi> <t: name> TDOM_HDF5 [<t: wfName>] These will have the following characteristics: • Nodal observers. • All outputs to one file called output.h5. • Maybe AMELET format. • Optional compilation using USE HDF5=ON/OFF. 5.4 Far-field observers: FF Far-field observers are currently not implemented! The FF directive requests a near-field to far-field transformation of the fields over the bounding box: FF <i: ilo> <i: ihi> <i: jlo> <i: jhi> <i: klo> <i: khi> <t: name> <t: wfName> \ <r: theta1> <r: theta2> <i: num_theta> <r: phi1> <r: phi2> <i: num_phi> [ <t: mask> ] These will have the following characteristics: • Calculate the frequency domain far-field from the near-field sampled on the bounding box. • Calculate the total radiated power in far field by integrating the pattern. I. D. Flintoft University of York Vulture: User Manual 40 • Calculate the frequency domain power flowing out of the bounding box by integrating the Poynting flux. • Check the power balance between the previous two powers. • Use a running DFT via “internal” surface observers. • Use frequencies from the OF card or those automatically determined. • The bounding box must be a volume. • <r: theta1>: Start polar angle in degrees [0,180). • <r: theta2>: Stop polar angle in degrees (0,180), >= r: theta1 • <i: num theta>: Number of polar angles, >= 0. • <r: phi1>: Start azimuthal angle in degrees [0,360). • <r: phi2>: Stop azimuthal angle in degrees (0,360], >= r: phi1. • <i: num phi>: Number of azimuthal angles, >= 0. • <t: mask> is a bitmap that defines which faces (XLO XHI YLO YHI ZLO ZHI) are included e.g 111111, 011111. • Origin is the centre of bounding box - may need to make it a parameter? • Phase reference - is the waveform? Distance for phase calculation? • Output is θ, φ, Eθ , Eφ , power gain/RCS in files called rcs <i: freqNum>.asc where <i: freqNum> is the frequency number. 6 6.1 Viewing the mesh gvulture The program gvulture converts a Vulture mesh into a set of files suitable for 3D viewing of the mesh using Gnuplot [7] or Gmsh [8]. The gvulture program takes a Vulture mesh file as input and writes out a number of files to the current directory. A typical command line for running gvulture is $ gvulture -p antenna.mesh where antenna.mesh is the name of the input mesh file and the -p option requests the output to be in physical mesh units rather than the default which uses the mesh line indices as coordinates. The default output format is for Gnuplot. To generate Gmsh output format add the -m flag: $ gvulture -p -m antenna.mesh gvulture also creates a log file called gvulture.log. To suppress the inclusion of representations of the external mesh surfaces in the output files use the -e options: $ gvulture -p -m -e antenna.mesh Further specific details on the two output format are given in the following sub-sections. I. D. Flintoft University of York Vulture: User Manual 6.2 41 Gnuplot Gnuplot is public domain graph plotting program that will run on most display devices [7]. It can also produce (Encapsulated) Postscript, Latex picture environment and various bitmap image format outputs. When used in the default mode to generate Gnuplot output gvulture generates a number of files: • mesh.gnp: An ASCII Gnuplot script that must be executed in either batch or interactive mode to create the image of the mesh. • gnuplot-lines.dat: An ASCII data file containing a Gnuplot compatible description of the mesh lines. • gnuplot-external.dat: An ASCII data file containing a Gnuplot compatible description of the external surfaces of the mesh. The edges of the cuboid forming the simulation space are shown. • gnuplot-surface.dat: An ASCII data file containing a Gnuplot compatible description of the internal surfaces in the mesh. The outer perimeter of the surfaces are shown. • gnuplot-blocks.dat: An ASCII data file containing a Gnuplot compatible description of the materials blocks in the mesh. The outer surface of the volume of the material block are shown. • gnuplot-sources.dat: An ASCII data file containing a Gnuplot compatible description of the sources in the mesh. These are shown as the bounding box of the sources with an arrow indicating the direction of the electric field polarisation. • gnuplot-planewaves.dat: An ASCII data file containing a Gnuplot compatible description of the plane-waves in the mesh. These are shown as the bounding boxes of the active faces of the plane-wave excitation surface. An orthogonal set of arrows are added to the corner of the plane-wave surface where the wavefront first enters the mesh. The direction of propagation is denoted by an open arrow, the electric field direction by a closed arrow and the magnetic field direction by a double closed arrow. • gnuplot-observers.dat: An ASCII data file containing a Gnuplot compatible description of the observers in the mesh. These are rendered as points at the nodes where outputs are generated. An image of the mesh from the default viewing direction can created in batch mode from the command line using $ gnuplot mesh.gnp resulting in an Encapsulated Postscript file mesh.eps. To view the mesh interactively start gnuplot in interactive mode and use the load command to load the mesh.gnp file: $ gnuplot gnuplot> load ’mesh.gnp’ The viewing direction can then be changed using the mouse or by issuing commands to the Gnuplot interpreter [9]. 6.3 Gmsh When used with the -m option to generate Gmsh format output gvulture generates a single output Gmsh ASCII format file called mesh.msh. This can be loaded into Gmsh using $ gmsh mesh.msh Details on using the gmsh program can be found in its manual [10]. The most useful actions for viewing Vulture meshes include: • Rotating and scaling the view using the mouse. • Selecting the physical groups in the mesh that are visible. • Altering the appearance of the mesh items that are rendered. • Saving the current view as an image file. I. D. Flintoft University of York Vulture: User Manual 7 42 Post-processing tools 7.1 TDOM ASCII and FDOM ASCII type outputs These observer type have outputs that are flat ASCII files which can easily be plotted using Gnuplot or GNU Octave or imported into spreadsheets etc. 7.2 7.2.1 TDOM BINARY type outputs Overview A suite of programs is available for post-processing the time response stored in the impulse.dat file created by TDOM BINARY type observers. The processing can be done in either the time-domain or, via a Fast Fourier Transform (FFT), in the frequency-domain. Full details can be found in the Processing Tools Manual [3]. These programs require the files impulse.dat, process.dat and excite.dat which are generated by Vulture for TDOM BINARY types observers. The files impulse.dat and excite.dat should be not be modified; only the file process.dat require alterations to control the output programs described below. The format of process.dat is shown in Table 20. <i: nobs> <i: ilo> <i:ihi> <i:istep> <i:jlo> <i:jhi> <i:jstep> <i:klo> <i:khi> <i:kstep> ................. <i: ilo> <i:ihi> <i:istep> <i:jlo> <i:jhi> <i:jstep> <i:klo> <i:khi> <i:kstep> <i: n1> <i: n2> <i: nstep> <r: f1> <r: f2> <r: fstep> <r: meshsize> <i: ilo> <i: ihi> <i: jlo> <i: jhi> <i: klo> <i: khi> <i: field> Table 20: Format of the process.dat file. The parameters in the file have the following interpretations: • <i: nobs>: is the number of TDOM BINARY type observers. Do not modify. • The following <i: nobs> lines are the bounding boxes [<i: ilo>,<i: ihi>,<i: jlo>,<i: jhi>, <i: klo>,<i: khi>] and stride lengths [<i: istep>,<i: ijstep>,<i: kstep>] of these TDOM BINARY observers in the order given in the mesh file. Do not modify. • <i: n1>, <i: n2> and <i: nstep> give the start time-step, stop time-step and number of time timesteps respectively, initially as defined in the OT and NT directives. These can be modified to the time or frequency iterations for which data should be output. • <r: f1>, <r: f2> and <f: fstep> are the first frequency, last frequency and frequency step, initially as defined in the OF directive (or determined automatically by the solver). Do not modify. • <r: meshsize> is the mesh size. For non-cubic meshes this value is not meaningful - the processing tools do not fully support non-uniform meshes and only work with mesh line indices. Do not modify. • The last can be modified to give the bounding box [<i: ilo>,<i: ihi>,<i: jlo>,<i: jhi>,<i: klo>,<i: khi>] and the field component <i: field> of the outputs to be extracted as described in the following. The meaning of the <i: field> parameter is defnied in Table 21. <i: field> 1 2 3 4 5 6 Field component Ex Ey Ez Hx Hy Hz Table 21: Definition of the <i: field> parameter in the process.dat file. I. D. Flintoft University of York Vulture: User Manual 7.2.2 43 Calculation of frequency spectra: xtransall If the frequency spectra of points in the TDOM BINARY observer are required, an FFT can be applied to all the time series in impulse.dat and the resulting spectra stored in another binary file called frequency.dat. This is accomplished using the program xtransall, which reads in impulse.dat, the output point information stored in process.dat and the excitation waveform information in excite.dat and then transforms all of the output points: $ xtransall By default only magnitude data is computed. If phase information is also required then $ xtransall phase should be used. The frequency spectra are written to frequency.dat are truncated at a maximum frequency. This maximum frequency is the smallest value of: • The frequency which corresponds to a mesh size of λ/5. • Half of the points in the frequency response computed by the FFT. 7.2.3 Data extraction at a point or along a line: xtime, xfreq The programs xtime and xfreq allow the extraction of time series and frequency spectra of a field component, either at a point or along a line, from the impulse.dat and frequency.dat files respectively. In the process.dat file the parameters n1 and n2 should be set to specify the start and stop time-step or frequency numbers to be extracted. The parameters ilo, ihi, jlo, jhi, klo and khi should be set to the required position(s) and ifield to the required field component as described in Table 21. The data is then extracting using $ xtime or $ xfreq phase if phase information is required. The output ASCII file written is one of either tdex.dat, tdey.dat or tdez.dat for the time series data or either fdex.dat, fdey.dat or fdez.dat for the frequency spectra. A comment is inserted at the start of the data file showing the indices of the cell(s) of the point(s) chosen. The format of the output file is either time (ns) and field (V/m) for the time series, or frequency (MHz), logarithmic field (dB V/m or dB A/m), and field (V/m or A/m) for the frequency spectra. If phase information is requested another column is written with the phase in degrees. If more than one point is specified, an extra carriage return is inserted after each point, thus allowing a mesh plot of the field along a line against the position along the line and either time or frequency. 7.2.4 Data extraction along a line or across plane: xplane, xfplane The programs xplane and xfplane allow the extraction of the time series and frequency spectra of a field component, either along a line or across a plane, from the impulse.dat and frequency.dat files respectively. In the process.dat file the parameters n1 and n2 should both be set to the time-step or frequency number to be extracted, i.e. both numbers must be the same. The parameters ilo, ihi, jlo, jhi, klo and khi should be set to the required position(s) and ifield to the required field component as described in Table 21. The data is then extracting using $ xplane or $ xfplane phase I. D. Flintoft University of York Vulture: User Manual 44 where the phase is needed if phase information is required. The output ASCII file written is one of either tdex.dat, tdey.dat or tdez.dat for the time series data or either fdex.dat, fdey.dat or fdez.dat for the frequency spectra. A comment is inserted at the start of the data file showing the value of the time (s) or frequency (Hz) chosen. The data is then written in the format of i-index, j-index, k-index and field (V/m or A/m) for both the time series and the frequency spectra. If phase information is requested another column is written with the phase in degrees. If only one coordinate varies, the data will just be along a line. 7.2.5 Animated plots: mxplane, mxfplane The programs mxplane and mxfplane allow the extraction of multiple time series and frequency spectra of a field component, either along a line or across a plane, from the impulse.dat and frequency.dat files respectively. In the process.dat file the parameters n1 and n2 should be set to specify the start and stop time-step or frequency numbers to be extracted. The parameters ilo, ihi, jlo, jhi, klo and khi should be set to the required position(s) and ifield to the required field component as described in Table 21. The data is then extracting using $ mxplane or $ mxfplane phase if phase information is required. Each plane of data is written to a separate ASCII file, suitable for plotting as a mesh plot in Gnuplot. The files written are called tds1.dat, tds2.dat, etc, for the time domain data or fds1.dat, fds2.dat, etc, for the frequency domain data. A comment is inserted at the start of each file showing the value of the time (s) or frequency (Hz) chosen. The data is written in the format of the two changing coordinates and the field (V/m or A/m) for both the time series and the frequency spectrum. If only one iteration is specified, that and the next iteration will be output. If only one coordinate varies, the data will just be along a line and will not be suitable for plotting in an animated sequence. The programs also create a file called plot that contains a Gnuplot script to animate the sequence of data files. This can be loaded into Gnuplot using gnuplot> load ’plot’ to view the animation sequence. 7.2.6 Interleaving of multiple TDOM BINARY observer data The tools in the processing toolbox work simultaneously on all the outputs points in the impulse.dat file, regardless of whether they “belong” to different OP directives. Thus, if multiple OP directives of type TDOM BINARY are used in the same simulation and the sets of output cells in the different directives are not disjoint any shared point will be output multiple times. If this is not accounted for then spurious lines can appear in graphs generated from the data. One way to mitigate this problem for lines plots is to sort the data according to position before plotting it. 7.3 HDF5 format output Python and Octave scripts are currently not implemented! 8 Tutorial The mesh files and processing scripts for these examples are included in the Vulture software distribution in the examples directory. 8.1 Example 1: Free-space This first example is worked through in detail. I. D. Flintoft University of York Vulture: User Manual 8.1.1 45 Creating and viewing the mesh The simplest example of a FDTD simulation is an empty volume of space. Create an ASCII text file called free space.mesh with the following contents using a text editor: VM 1.0.0 CE Vulture example: An empty space with absorbing boundaries. # The mesh extents are 20x40x20 cells. DM 20 40 20 GS # Define all external surfaces to be Mur ABCs. BT XLO MUR BT XHI MUR BT YLO MUR BT YHI MUR BT ZLO MUR BT ZHI MUR # The waveform is a Gaussian pulse with default paramters. WF wf1 GAUSSIAN_PULSE # The source is a surface of z-polarised soft electric fields. EX 0 20 10 10 0 20 source EZ wf1 1.0 # Observe the fields on a plane, every second cell. OP 0 20 0 40 10 10 plane TDOM_BINARY 2 2 2 # Observe the fields at the centre of the mesh. OP 10 10 20 20 10 10 centre1 TDOM_ASCII OP 10 10 20 20 10 10 centre2 FDOM_ASCII GE # Run for 400 time-steps. NT 400 # The mesh size is 1 m. MS 1.0 EN Now run gvulture $ gvulture -p free_space.mesh to create Gnuplot format output files and then create an image of the mesh using $ gnuplot mesh.gnp The resulting image in the file mesh.eps is shown in Figure 12. The mesh shows the source plane and observer output points. Note the direction arrow on the source plane indicating the direction of polarisation of the electric field. 8.1.2 Running the solver Now run the solver with the command $ vulture -v free_space.mesh The progress of the simulation can be checked in the log file vulture.log, though this example should run in only a few seconds. 8.1.3 Viewing ASCII data The time response at the centre of the mesh from the ASCII observer will be stored in the file eh centre1 td.dat. This can be plotted with Gnuplot using set terminal post eps enhanced color ’Helvetica’ 18 set output ’free_space_td.eps’ set xlabel ’Time (ns)’ set ylabel ’Electric field, E_z(10,20,10) (V/m)’ plot ’eh_centre1_td.asc’ us ($2/1e-9):5 ti ’’ w l ls 1 I. D. Flintoft University of York Vulture: User Manual 46 Vulture example: An empty space with absorbing boundaries. External surfaces Sources Observers 25 20 z [m] 15 10 5 00 5 10 x [m] 15 20 25 0 5 10 15 20 25 30 35 40 45 y [m] Figure 12: Example 1 - Mesh geometry created by gvulture and gnuplot. creating the image file free space td.eps shown in Figure 13. The response exhibits two interesting effects: • There is a non-physical DC response due to the charging of the grid capacitance associated with the discretised space. FDTD does not include explicit charge dynamics - charges only appear implicitly in the field distributions as determined by Gauss’s Law. Hence, since the Gaussian waveform has a DC component it displaces charge across the source plane leaving a net static field on the grid. • “Spurious” reflections from the edge of the mesh can be seen due to the truncation of the source plane. The source plane only has a finite size and hence the edge launches waves into the mesh. The frequency spectrum at the centre of the mesh from the ASCII observer will be stored in the file eh centre2 fd.dat. This can be plotted with Gnuplot using set terminal post eps enhanced color ’Helvetica’ 18 set output ’free_space_fd.eps’ se xlabel ’Frequency (MHz)’ se ylabel ’Electric field, |E_z|(10,20,10) (dB V/m)’ plot ’eh_centre2_fd.asc’ us ($1/1e6):(db20ri($6,$7)) ti ’’ w l lw 2 creating the image file free space fd.eps shown in Figure 14. The spurious DC response is now isolated from the physical response. The ripples in the spectrum are again a manifestation of the finite size of the source plane. In order to increase the resolution of the spectrum the simulation needs to be run for more time-steps. 8.1.4 Post-processing binary data in the time-domain Edit the last line of the process.dat file created by the solver so that the file contains CE Vulture example: An empty space with absorbing boundaries. 1 0 20 2 0 40 2 10 10 2 1 400 0 5.99585e+08 1.49896e+06 I. D. Flintoft University of York Vulture: User Manual 47 1 Electric field, Ez(10,20,10) (V/m) 0.9 0.8 0.7 0.6 0.5 0.4 0.3 0.2 0.1 0 0 100 200 300 400 Time (ns) 500 600 700 Figure 13: Example 1 - Time response for Ez at the centre of the mesh. Electric field, |Ez|(10,20,10) (dB V/m) 60 50 40 30 20 10 0 -10 0 10 20 30 Frequency (MHz) 40 50 60 Figure 14: Example 1 - Frequency response for Ez at the centre of the mesh. 1 10 10 20 20 10 10 3 and then extract the time data at the centre of the mesh using $ xtime which should create the output ASCII file tdez.dat. This can be plotted with the previous ASCII data using the Gnuplot script set terminal post eps enhanced color ’Helvetica’ 18 set output ’free_space_td2.eps’ set xlabel ’Time (ns)’ set ylabel ’Electric field, E_z(10,20,10) (V/m)’ plot ’eh_centre1_td.asc’ us ($2/1e-9):5 ti ’ASCII’ w l ls 1 , \ I. D. Flintoft University of York Vulture: User Manual ’tdez.dat’ 48 us 1:2 ti ’Binary’ w l lw 2 and should give identical results. 8.1.5 Post-processing binary data in the frequency-domain The frequency response of all the data in the binary impulse.dat file can be calculated using the command $ xtransall phase where the phase argument requests that phase information is included - by default xtransall only generates magnitude information. Using the same process.dat as in the previous section the command $ xfreq phase will then extract the frequency response at the centre of the mesh into the ASCII file fdez.dat. This can be plotted with se xla ’Frequency (MHz)’ se yla ’Electric field, |E_z|(10,20,10) (dB V/m)’ plot ’fdez.dat’ us 1:2 ti ’’ w l lw 2 se term post eps enhanced color ’Helvetica’ 18 se ou ’um_eg1_plotfd.eps’ replot and again should be identical to the output from the ASCII observer. 8.2 Example 2: An infinite parallel plate transmission line Another simple example is a parallel plate transmission line of “infinite” width. The top and bottom plates are represented using PEC boundaries on the external surfaces of the mesh, while the infinite width of the waveguide can by modelled by using PMC boundary conditions on the “sides” of the mesh. Compared to Example 1 we only need to changed the boundary conditions on the external surfaces. The complete mesh file is VM 1.0.0 CE Vulture example: An empty parallel-plate waveguide. # The mesh extents are 20x40x20 cells. DM 20 40 20 GS # Side walls are PMC. BT XLO PMC BT XHI PMC # End walls are absorbing ABC. BT YLO PML BT YHI PML # Top wals are PEC. BT ZLO PEC BT ZHI PEC # The waveform is a Gaussian pulse with default paramters. WF wf1 GAUSSIAN_PULSE # The source is a surface of z-polarised soft electric fields. EX 0 20 10 10 0 20 source EZ wf1 1.0 # Observe the fields on a plane, every second cell. OP 0 20 0 40 10 10 plane TDOM_BINARY 2 2 2 # Observe the fields at the centre of the mesh. OP 10 10 20 20 10 10 centre1 TDOM_ASCII OP 10 10 20 20 10 10 centre2 FDOM_ASCII GE # Run for 400 time-steps. NT 400 # The mesh size is 1 m. MS 1.0 EN I. D. Flintoft University of York Vulture: User Manual 49 and the output from gvulture looks exactly like the free-space example is Figure 12. We have also chosen to use PML absorbing boundaries on the open ends of the waveguide rather than the Mur ABCs used in Example 1. 1.2 Electric field, Ez(10,20,10) (V/m) 1 0.8 0.6 0.4 0.2 0 -0.2 0 100 200 300 400 Time (ns) 500 600 700 Figure 15: Example 2 - Time response for Ez at the centre of the mesh. 2 Electric field, |Ez|(10,20,10) (dB V/m) 1.8 1.6 1.4 1.2 1 0.8 0.6 0.4 0.2 0 -0.2 0 10 20 30 Frequency (MHz) 40 50 60 Figure 16: Example 2 - Frequency response for Ez at the centre of the mesh. The processing steps are exactly the same as for Example 1. The time response at the centre of the mesh is shown in Figure 15 and the frequency spectrum at the smae point in Figure 15. The “spurious” reflections from the edge of the mesh in the previous example have now disappeared since the source plane is now consistent with the boundary conditions on the external surfaces of the mesh. The DC response has also disappeared since the charge on the source plane edges can discharge into the PEC plates. A soft electric field source can therefore excite an accutate TEM wave in a parallel-plate waveguide structure, however, it launches a wave in both directions! The time response of the electric field can be extract from the binary observer over a whole plane. To accomplish this for time-step number 60 modify the process.dat file to contain I. D. Flintoft University of York Vulture: User Manual 50 Electric field, Ez(i,j,10) (V/m) Time-step: 60 1 0.9 0.8 0.7 0.6 0.5 0.4 0.3 0.2 0.1 00 20 15 5 10 15 j (cells) 10 20 25 30 5 35 i (cells) 40 0 Figure 17: Example 2 - Time response of Ez across the k = 10 plane at time-step 60. CE Vulture example: An empty parallel-plate waveguide. 1 0 20 2 0 40 2 10 10 2 60 60 0 5.99585e+08 1.49896e+06 1 0 20 0 40 10 10 3 Here the parameters n1 and n2 are used to set the required output time-step and the bounding box in the last line ranges over the whole observer plane. Now run the xplane program $ xplane This should generate an output file called tdez.dat containing mesh plot data for the field that can be plotted using the Gnuplot script set terminal post eps enhanced color ’Helvetica’ 18 set output ’parallel_plate_tds60.eps’ set xlabel ’i (cells)’ set ylabel ’j (cells)’ set zlabel ’Electric field, E_z(i,j,10) (V/m)’ rotate by 90 offset -1.5,1.5 set ticslevel 0 set title "Time-step: 60" set view 120,60 splot ’tdez.dat’ us 1:2:4 ti ’’ w l ls 1 The result is shown in Figure 17. Note how the soft field source excites a wave of amplitude one in both directions normal to the surface over which it is imposed. The amplitude depends on the CFLN as can be investigated by adding a CN directive, such as CN 0.99 to section 3 of the mesh file. As the CFLN is increased the amplitude of the TEM wave launched is reduce and visa-vera. The presence of both forward and backwards waves may or may not be a problem depending on the application. The use of a PML in the open ends of the waveguide is advisable to provide low reflection of the backward travelling wave into the mesh. I. D. Flintoft University of York Vulture: User Manual 8.3 51 Example 3: An accurate plane-wave in free-space To launch an accurate plane-wave in free-space a total-field scattered-field plane-wave source can be used. Starting from the mesh of Example 1 again we replace the distributed electric field source with a plane-wave source and also change the external surfaces to be PMLs rather than Mur ABCs. The complete mesh is now VM 1.0.0 CE Vulture example: Plane wave in free-space. # The mesh extents are 20x40x20 cells. DM 20 40 20 GS # Define all external surfaces to be PML. BT XLO PML BT XHI PML BT YLO PML BT YHI PML BT ZLO PML BT ZHI PML # The waveform is a Gaussian pulse with default paramters. WF wf1 GAUSSIAN_PULSE # Plane-wave in +ve y direction, Ez polarisation. PW 3 17 3 17 3 17 pw1 wf1 90 90 90 111111 1.0 0.0 # Observe the fields on a plane, every second cell. OP 0 20 0 40 10 10 plane TDOM_BINARY 1 1 1 # Observe the fields at the centre of the mesh. OP 10 10 20 20 10 10 centre1 TDOM_ASCII OP 10 10 20 20 10 10 centre2 FDOM_ASCII GE # Run for 400 time-steps. NT 400 # The mesh size is 1 m. MS 1.0 EN The mesh now looks like Figure 18. The TFSF surface is shown as a box on the mesh with arrows at the corner where the plane-wave first enters the total-field zone depicting the direction of propagation (open arrow), polarisation direction the electric field (closed arrow) and polarisation direction of the magnetic field (double open arrow). A higher density of observation points have been requested by changing the stride lengths in the binary observer to one cell. Proceeding with the same proccessing steps as before we obtain the time response and frequency spectrum at the centre of the mesh shown in Figures 19 and 20 respectively. Compared to Example 1 we observe that a substantially improved plane-wave is excited within the total-field zone in the mesh. Up to a frequency corresponding to a mesh-size of one-tenth of a wavelength the amplitude of the wave remains within 0.1 dB of the ideal value. Surface plots of the electric field over the plane of the binary observer can be obtained as before. For example to get the response at time-step 60 modify the process.dat file to be CE Vulture example: Plane wave in free-space. 1 0 20 1 0 40 1 10 10 1 60 60 0 5.99585e+08 1.49896e+06 1 0 20 0 40 10 10 3 and run $ xplane I. D. Flintoft University of York Vulture: User Manual 52 Vulture example: Plane wave in free-space. External surfaces Plane waves Observers 25 20 z [m] 15 10 5 00 5 10 x [m] 15 20 25 0 5 10 15 20 25 30 35 40 45 y [m] Figure 18: Example 3 - Mesh geometry created by gvulture and gnuplot. Figure 21 shows surface plots for time-steps 60 and 100. Notice how there is no field in the scattered field zone since there are no scattering objects inside the TFSF surface. The plane-wave is completely “reabsorbed” by the TFSF surface at j = 37. An animation of the whole time response in the plane can be created by changing the time-step intervals in the process.dat file to cover the whole time range: CE Vulture example: Plane wave in free-space. 1 0 20 1 0 40 1 10 10 1 1 400 0 5.99585e+08 1.49896e+06 1 0 20 0 40 10 10 3 Using the command $ mxplane a series of 400 data files with names tds<nnn>.dat are created that can be viewed in sequence to create an animation. $ gnuplot gnuplot> load ’plot’ 8.4 Example 4: Transmission and reflection from a dielectric slab This example calculates the reflection and transmission coefficient of an infinite dielectric slab to a normally incident TEM wave. To simulate the infinite extent of the slab it is placed in the cross-section of a parallelplate waveguide as was used in Example 2. Since the problem is invariant along the directions parallel to the plane of the slab only one cell needs to be used in those directions. The effectively one-dimensional mesh is given by VM 1.0.0 CE Vulture example: Parallel plate waveguide with dielectric slab DM 200 1 1 GS # Parallel-plate waveguide boundary conditions. I. D. Flintoft University of York Vulture: User Manual 53 1 Electric field, Ez(10,20,10) (V/m) 0.8 0.6 0.4 0.2 0 -0.2 0 100 200 300 400 Time (ns) 500 600 700 Figure 19: Example 3 - Time response for Ez at the centre of the mesh. Electric field, |Ez|(10,20,10) (dB V/m) 1 0.5 0 -0.5 -1 -1.5 0 10 20 30 Frequency (MHz) 40 50 60 Figure 20: Example 3 - Frequency response for Ez at the centre of the mesh. BT XLO PML BT XHI PML BT YLO PEC BT YHI PEC BT ZLO PMC BT ZHI PMC # Simple dielectric medium. MT dielectric SIMPLE 2.0 0.01 1.0 MB 50 150 0 1 0 1 dielectric # Gaussian source. WF wf1 GAUSSIAN_PULSE # Partial TF/SF. PW 30 170 0 1 0 1 pw1 wf1 90 0 180 110000 1.0 0.0 I. D. Flintoft University of York Vulture: User Manual 54 1 0.9 0.8 0.7 0.6 0.5 0.4 0.3 0.2 0.1 0 -0.1 0 Time-step: 100 Electric field, Ez(i,j,10) (V/m) Electric field, Ez(i,j,10) (V/m) Time-step: 60 20 15 5 10 15 j (cells) 10 20 25 30 5 35 1 0.9 0.8 0.7 0.6 0.5 0.4 0.3 0.2 0.1 0 -0.1 0 i (cells) 20 15 5 10 15 10 20 j (cells) 40 0 25 30 5 35 i (cells) 40 0 Figure 21: Example 3 - Time responses of Ez across the k = 10 plane at time-steps 60 and 100. Vulture example: Parallel plate waveguide with dielectric slab External surfaces Blocks Plane waves Observers 0.012 0.01 0.008 z [m] 0.006 0.004 0.002 0.012 0.01 0.008 0.006 0.004 y [m] 0.002 0 -0.002 0 0.5 1 x [m] 1.5 2 0 -0.002 2.5 Figure 22: Example 4 - Mesh geometry created by gvulture and gnuplot. # Observe field reflected field if SF zone. OP 20 20 0 0 0 0 ref1 TDOM_ASCII OP 20 20 0 0 0 0 ref2 FDOM_ASCII # Observe transmitted field in TF zone. OP 160 160 0 0 0 0 trans1 TDOM_ASCII OP 160 160 0 0 0 0 trans2 FDOM_ASCII # Observe field along waveguide. OP 0 200 0 0 0 0 line TDOM_BINARY 1 1 1 GE NT 5000 MS 0.01 EN The lossy dielectric has a relative permittivity of 2 and a conductivity of 10 mS/m. These parameters are defined by the MT directive. The material parameters are applied to the mesh between i = 50 and i = 150 by the MB directive. A TEM wave could be excited using a plane of soft electric field sources as was done in Example 2. However, in this case we use a partial TFSF plane-wave source, which has the advantage of allowing the reflected wave to be observed directly in the scattered field zone. I. D. Flintoft University of York Vulture: User Manual 55 The mesh geometry is shown in Figure 22. Only the XLO and XHI surfaces of the TFSF are active, as set by the mask 110000 in the PW directive. The wave is excited at i = 30 and the upper surface of the TF-SF boundary is at i = 170. Therefore the transmitted wave can be observed at the point i = 160 in the total field zone and the reflected wave at i = 20 in the scattered field zone. time-step: 100 0.5 0.5 150 200 0 50 100 time-step: 150 0.5 0.5 SF SF Dielectric TF SF SF -1 Dielectric 0 -0.5 TF Free-space Dielectric Dielectric TF Free-space 0 Free-space Ey (V/m) 1 SF 200 time-step: 200 1 -0.5 150 x (cells) TF 100 Free-space 50 x (cells) -1 150 200 0 50 100 time-step: 250 0.5 0.5 TF SF SF -1 Dielectric 0 -0.5 TF Free-space Dielectric Dielectric TF Free-space 0 Free-space Ey (V/m) 1 SF 200 time-step: 350 1 -0.5 150 x (cells) SF 100 x (cells) TF 50 Free-space 0 Dielectric Ey (V/m) TF -1 0 Ey (V/m) Free-space Dielectric TF SF SF -1 Dielectric 0 -0.5 TF Free-space Dielectric TF SF -0.5 Dielectric 0 Free-space Ey (V/m) 1 Free-space Ey (V/m) time-step: 50 1 -1 0 50 100 150 200 0 50 x (cells) 100 150 200 x (cells) Figure 23: Example 4 - Time response at time-steps 50, 100, 150 and 350. The solver is run in the usual way and the response along the length of the waveguide from the binary observer is extracted at all time steps by editing the process.dat to read CE Vulture example: Parallel plate waveguide with dielectric slab 1 0 200 1 0 0 1 0 0 1 1 1000 0 5.99585e+10 1.19917e+07 0.01 0 200 0 0 0 0 2 I. D. Flintoft University of York Vulture: User Manual 56 Magnitude of scattering parameters, |Sij| (dB) 0 S11 Analytic S11 FDTD S21 Analytic S21 FDTD -5 -10 -15 -20 0 0.5 1 1.5 2 2.5 3 Frequency (GHz) Phase of scattering parameters, /_Sij| (degrees) 300 S11 Analytic S11 FDTD S21 Analytic S21 FDTD 200 100 0 -100 -200 -300 0 0.5 1 1.5 2 Frequency (GHz) Figure 24: Example 4 - Scattering parameters of the dielctric slab: Magntitude (top) and phase (bottom). The phase reponse is only shown to 2 GHz for clarity. and then running $ mxplane to obtain data files tds<nnn>.dat for the response along a line at each time-step. These can be plotted using, for example, the Gnuplot script set set set set set set set set terminal post eps enhanced color ’Helvetica’ 16 output ’frame100.eps’ style data lines xrange [0:200] yrange [-1:1] xlabel ’x (cells)’ ylabel ’E_y (V/m)’ title ’time-step: 100’ I. D. Flintoft University of York Vulture: User Manual 57 set arrow 1 from 30,-1 to 30,1 nohead lt 0 set arrow 2 from 170,-1 to 170,1 nohead lt 0 set label 1 ’SF’ at 26,-0.9 left rotate by 90 set label 2 ’TF’ at 34,-0.9 left rotate by 90 set label 3 ’TF’ at 166,-0.9 left rotate by 90 set label 4 ’SF’ at 174,-0.9 left rotate by 90 set arrow 3 from 50,-1 to 50,1 nohead lt 0 set arrow 4 from 150,-1 to 150,1 nohead lt 0 set label 5 ’Free-space’ at 46,-0.9 left rotate set label 6 ’Dielectric’ at 54,-0.9 left rotate set label 7 ’Dielectric’ at 146,-0.9 left rotate set label 8 ’Free-space’ at 154,-0.9 left rotate plot ’tds100.dat’ us 1:2 ti ’’ by by by by 90 90 90 90 Figure 23 shows the spatial variation of the field at a series of time-steps. At time-step 50 the pulse is emerging from the lower TFSF boundary and is approaching the dielectric’s surface. By time-step 100 the pulse is approximately centred on the lower dielectric interface and the reflected pulse is just becoming visible. At time-step 150 the reflected pulse has propagated away into the lower scattered-field zone and the transmitted pulse has cleared the dielectric interface and propagates into the medium. The attenuation of the pulse due to the dielectric loss can be observed at time-steps 200 and 250. At time-step 350 the incident field has entered the upper scattered-field zone. Note, if there were no dielectric present this field would be cancelled by the field which propagates through the total-field zone, giving zero scattered field. However, the dielectric slab attenuates and delays the wave in the total-field zone and so a non-zero scattered field is manifested in the upper scattered-field zone. The scattering parameters of the slab with reference to its surfaces are: S11 = S21 = Ez− (50) Ez+ (50) Ez+ (150) . Ez+ (50) (8.1) (8.2) The can be calculated analytically [11]. The fields at the slab surfaces are related to those at the observation and excitation points by Ez+ (160) Ez+ (150) Ez+ (50) Ez+ (29) Ez− (20) Ez− (50) = e−ω·10∆t/c0 (8.3) = e−ω·21∆t/c0 (8.4) = e−ω·30∆t/c0 (8.5) Note that in terms of the phase reference the plane-wave is effectively launched from one cell inside the scattered field zone, hence the field Ez+ (29) is used as the reference for the FDTD spectra. It is usually more reliable to calibrate the incident field at the location of the front face of the dielectric by running a reference simulation with the dielectric slab removed and an observation point at i = 50 rather than relying on knowledge on the internal implementation of the code. Using the above we find that S11 = S21 = Er− (20) Ez+ (29) E + (160) eω·31∆t/c0 z+ . Ez (29) eω·51∆t/c0 (8.6) (8.7) Figure 24 shows the scattering parmeters of the dielectric slab compared with the analytical solution. It can be seen that the lower frequencies give accurate results whereas the higher frequency results are not so reliable. For high accuracy simulations the standard λ/10 rule of thumb is not sufficient and a maximum mesh edge length of λ/20 should not be exceeded at the highest frequency of interest. In the analytic result a slab thickness of 101 cells was used - one more than the thickness of the FDTD bounding box. This is because the simulation was run using an executable without the averaged media support enabled and hence the dielectric material parameters are applied “in-full” on both the front and back (XLO and XHI) surfaces of the slab. Applied in this way the material parameters are effective to about half a cell from these surfaces leading to an overall effective thickness one cell greater than the bounding box thickness. I. D. Flintoft University of York Vulture: User Manual 58 8.5 Example 5: Transmission and reflection from a thin boundary 8.6 Example 6: Radiation from an infinitesimal Hertzian dipole 8.7 Example 7: Radiation from a half-wave dipole 8.8 Example 8: Plane-wave penetration through an aperture This examples looks the transmission through a small square aperture in an infinite PEC plate using a truncated plane-wave excitation. The mesh for the problem is: VM 1.0.0 CE Vulture example: Aperture in infinite plane DM 60 40 40 GS # Free-space boundaries. BT XLO PML BT XHI PML BT YLO PML BT YHI PML BT ZLO PML BT ZHI PML # Solid PEC sheet #TB 30 30 0 40 0 40 PEC # PEC sheet with 2x2 cell square aperure. # TB 30 30 0 40 0 19 PEC # TB 30 30 0 40 21 40 PEC # TB 30 30 0 19 19 21 PEC # TB 30 30 21 40 19 21 PEC # Differentiated Gaussian pulse waveform WF wf1 DIFF_GAUSSIAN_PULSE 1.0 # Full plane-wave for empty mesh case. PW 5 55 5 35 5 35 pw1 wf1 90.0 0.0 90.0 111111 1.0 0.0 # Truncated incident wave. PW 5 30 5 35 5 35 pw1 wf1 90.0 0.0 90.0 101111 1.0 0.0 # Add reflected wave using second plane-wave, delay by flight time along bbox. # PW 5 30 5 35 5 35 pw2 wf1 90.0 180.0 270.0 101111 1.0 8.339e-11 # Magnetic moment source using differential waveform # dt = 1.667818e-12 # dl = 1e-3 # a = 2 * dl # alpha = 4 * a^3 / 3 / pi^1.5 # Hsc = 2 / eta0 # m = -alpha * Hsc # sigma = 5 * sqrt(2) * dt # Imdl = mu0 * m * 1 / sigma * d/dt WF # delay = ( 25 + 0.5 ) * dl / c0 # WF wf2 RICKER_WAVELET 1.0 # EX 30 31 19 19 19 21 dipmom IMDY wf2 1.0836e-06 8.5059e-11 # Observe incident field point. OP 29 29 20 20 20 20 inc1 TDOM_ASCII OP 29 29 20 20 20 20 inc2 FDOM_ASCII # Observe transmitted field on axis of aperture. OP 50 50 20 20 20 20 trans1 TDOM_ASCII OP 50 50 20 20 20 20 trans2 FDOM_ASCII # Observe fields in plane through aperture. OP 0 60 0 40 20 20 plane TDOM_BINARY 1 1 1 GE NT 200 MS 0.001 I. D. Flintoft University of York Vulture: User Manual 59 EN Some parts of the mesh are commented out and will be used later. The active parts currently simulate a plane-wave in free space to use as a reference case. The simulation is run and the data post-processed using the same steps as in the previous examples. The tangential magnetic field spectrum at mesh point (29, 20, 20) is shown in Figure 26 and as expected it has a uniform magnitude of 1/η0 A/m. Vulture example: Aperture in infinite plane External surfaces Internal surfaces Plane waves Observers 0.045 0.04 0.035 0.03 z [m] 0.025 0.02 0.015 0.01 0.005 0 -0.005 0 0.01 0.02 0.03 x [m] 0.04 0.05 0.06 0.045 0.04 0.035 0.03 0.025 0.02 0.015 y [m] 0.01 0.005 0 -0.005 0.07 Figure 25: Example 8 - Geometry of the aperture transmission problem, showing the TFSF bounding box, aperture and observation points either side of the aperture plane. The plane observer points are not shown for clarity. Now the problem space is cut by introducing a solid PEC surface in the i = 30 plane # Solid PEC sheet TB 30 30 0 40 0 40 PEC ... and replacing the full TFSF surface by a partial surface ... # Truncated incident wave. PW 5 30 5 35 5 35 pw1 wf1 90.0 ... 0.0 90.0 101111 1.0 0.0 which only extends as far as the PEC plate and where the XHI surface has been deactivated using the mask 101111. The wave at time-step 120, after the wave has reflected from the PEC surface, is shown in the top-left of Figure 26. It can be seen that it is quite distorted compared to the expected superposition of incident and reflected plane-waves. This is because the TFSF surface only injects the incident field into the total field region and the reflected field “spills out” into the scattered field region. The effect can also be seen in the amplitude spectrum of the tangential magnetic field at the PEC surface, which exhibits some ripples compared to the expected flat value of 2/η0 . This can be thought of as arising from secondary Huygen’s sources located along the edges where the TFSF and PEC plate intersect; on these edge the field injected by the TFSF surface does not satisfy the PEC boundary conditions. To remedy this the reflected wave can be included in the field injected by the TFSF surface. In Vulture this can be accomplished by adding a second PW directive with a wave travelling in the opposite direction, with the opposite polarisation: ... # Add reflected wave using second plane-wave, delay by flight time along bbox. I. D. Flintoft University of York Vulture: User Manual 60 time-step: 120 time-step: 120 Ez (V/m) 1 Ez (V/m) 1 0.5 0.5 0 0 -0.5 -0.5 -1 0 10 20 30 x (cells) 40 50 60 0 5 10 15 20 25 30 35 -1 0 y (cells) 10 20 x (cells) -10 Magnetic field, Hy(29,20,20) (dB A/m) 40 30 40 50 60 0 5 10 15 20 25 30 35 40 y (cells) Free-space Solid plate, inc. wave only Solid plate, inc. + ref. waves Plate with aperture, inc. + ref. waves -20 -30 -40 -50 -60 0 10 20 30 40 50 60 Frequency (GHz) Figure 26: Example 8 - Spatial response of electric across a plane for a plane-wave incident on a solid PEC plate at time step 120 without (top left) and with (top right) the reflected wave included in the TF-SF exciation. The frequency reponse of the tangential magnetic field directly next to the PEC plane is shown below. PW 5 30 ... 5 35 5 35 pw2 wf1 90.0 180.0 270.0 101111 1.0 8.339e-11 The wave is also delayed by a time of (30 − 5)∆/c0 = 8.339 ps, corresponding to the propagation time along the partial Huygen’s surface, so the reflected wave begins as the incident wave strikes the PEC plate. The wave at time-step 120 with this reflected wave included is shown in the top-right of Figure 26. This shows a substantial improvement in the wave shape. There is still some distortion due to the fact that the incident wave undergoes dispersion as it propagates towards the PEC plate that is not accounted for by the injected reflected wave. In a “real” simulation the length of the TFSF box would be reduced to one or two cells as in ... # Add reflected wave PW 28 30 5 35 5 35 # Truncated incident PW 28 30 5 35 5 35 ... I. D. Flintoft using second plane-wave, delay by flight time along bbox. pw2 wf1 90.0 180.0 270.0 101111 1.0 8.339e-11 wave. pw1 wf1 90.0 0.0 90.0 101111 1.0 0.0 University of York Vulture: User Manual 61 in order to mitigate these dispersion effect. Here, for the sake of presentation, the TFSF has been made sufficiently long to allow the incident and reflected waves to be seen clearly. Now that we have an accurate incident field, a small square aperture of side length a = 2∆l is cut in the PEC plate by replacing the solid plate TB directive with ... # PEC TB 30 TB 30 TB 30 TB 30 ... sheet 30 0 30 0 30 0 30 21 with 2x2 40 0 19 40 21 40 19 19 21 40 19 21 cell square aperure. PEC PEC PEC PEC The mesh for this case is shown in Figure 25. The transmitted wave is shown in the top-left of Figure 27 at time-step 130. A “spherical” wave can be seen radiating from the aperture. The transmitted electric field is observed at mesh cell (50, 20, 20) and its time series is shown in the graph in the lower part of Figure 27. time-step: 130 time-step: 130 0.01 E z (V/m) 0.01 E z (V/m) 0.005 0.005 0 0 -0.005 -0.0130 35 40 45 x (cells) 4 55 60 0 5 10 15 20 35 -0.005 40 -0.0130 y (cells) 35 40 45 x (cells) 50 55 60 0 5 10 15 20 25 30 35 40 y (cells) Physical aperture model Equiv. dipole model, a = 2 ∆l Equiv. dipole model, a = 1.49 ∆l, 7 ps delay 3 Electric field, Ez(50,20,20) (mV/m) 50 25 30 2 1 0 -1 -2 -3 -4 0 50 100 150 200 250 300 350 Time (ps) Figure 27: Example 8 - Spatial response of the electric field transmitted by the aperture across a plane at time-step 130 for the physical aperture (top left) and equivlanet dipole (top right). The time reponse of the electric field at a point on the axis of the aperture is shown below. The field radiated by a small aperture can be approximated by the field from a set of equivalent dipole moments [12]. For a normally incident plane-wave only the magnetic dipole moment polarised in the I. D. Flintoft University of York Vulture: User Manual 62 direction of the magnetic field is excited and this is given by my = αM;yy HySC = 2αM;yy Hyinc , (8.8) where αM;yy is the magnetic polarisability of the aperture and HySC is the short-circuited magnetic field on the incident field side, equal to twice the incident magnetic field Hyinc [13]. The polarisability of the aperture is approximately 4a3 αM;yy = √ 3 , 3 π (8.9) where a is the side length. The current moment of the equivalent infinitesimal magnetic dipole is given by IM;y (t) dy = µ0 dmy dt (8.10) and from the above we can write this IM;y (t) dy = 8a3 dHyinc µ0 √ 3 . dt 3 π (8.11) In the “real” aperture similation the incident waveform was a differentiated Gaussian pulse, ψDGP (t), so accounting for the delay between the waveform and the location of the equivalent dipole moment of the aperture is µ0 8a3 dψDGP . (8.12) IM;y (t) dy = √ η0 3 π 3 dt t−25.5∆t The derivative of the differentiated Gaussian pulse waveform is just a scaled version of the Ricker Wavelet waveform so finally IM;y (t) dy = µ0 8a3 1 ψRW (t − 25.5∆t). √ η0 3 π 3 σGP (8.13) This can be implemented in the simulation by removing the plane-wave source, closing the aperture in the PEC plate and then introducing the magnetic moment source ... # WF wf2 RICKER_WAVELET 1.0 EX 30 31 19 19 19 21 dipmom IMDY wf2 1.0836e-06 8.5059e-11 ... The top-right part of Figure 27 shows the wave radiated by this equivalent dipole moment source. While it is similar to that of the aperture it is not the same. Looking at the wave at (50, 20, 20) is can be seen that the wave from the equivalent dipole moment is larger and slightly ahead of that of the physical aperture simulation. The reasons for this are: • The effective size of the aperture on the discretised FDTD grid is smaller than a = 2∆l. The PEC conditions are enforced on the aperture edges, but have an effective “range of influnence” of the order of ∆l/2. The effective size of the aperture is there somewhat smaller than 2∆l. • The grid dispersion of the incident wave in the physical aperture simulation is not accounted for in the equivalent dipole simulation. • The physical aperture may have some dispersion (delay) associated with its finite size. Good agreement between the physical aperture simulation and equivalent dipole simulation can be obtained using an effective aperture size of a = 1.49∆l and adding an excess delay of 7 ps, as shown in Figure 27. By varying the number of cells in the aperture while keeping the physical aperture size fixed it can be shown that at least 8 cells per side are required to obtain an accuracy of 12 % or better. I. D. Flintoft University of York Vulture: User Manual 63 Figure 28: Example 9 - Mesh geometry created by gvulture and gmsh. 8.9 Example 9: Shielding effectiveness of an enclosure with an aperture This example consists of a metal sided enclosure of dimensions 300 × 120 × 300 mm with a 200 × 30 mm slot in the centre of one side. The enclosure is illuminated by a plane-wave which is normally incident on the slot. The input mesh file is: VM 1.0.0 CE Vulture example: Enclosure with slot. DM 80 100 44 GS # Front face of enlcosure with slot.. TB 10 70 30 30 10 19 PEC TB 10 70 30 30 25 34 PEC TB 10 20 30 30 19 25 PEC TB 60 70 30 30 19 25 PEC # Back face. TB 10 70 90 90 10 34 PEC # Top face. TB 10 70 30 90 34 34 PEC # Bottom face. TB 10 70 30 90 10 10 PEC # Left face. TB 10 10 30 90 10 34 PEC # Right face. TB 70 70 30 90 10 34 PEC # Gaussian waveform. WF wf1 GAUSSIAN_PULSE # Incident plane-wave. PW 15 65 10 30 14 30 pwinc wf1 90.0 90.0 90.0 111011 1.0 0.0 # Reflected plane-wave. PW 15 65 10 30 14 30 pwref wf1 90.0 270.0 270.0 111011 1.0 3.3356e-10 # Observers at centre of top face. OP 40 40 60 60 22 22 centre1 TDOM_ASCII OP 40 40 60 60 22 22 centre2 FDOM_ASCII # Observer for field in the slot. OP 40 40 29 29 22 22 slot1 TDOM_ASCII OP 40 40 29 29 22 22 slot2 FDOM_ASCII GE NT 80000 I. D. Flintoft University of York Vulture: User Manual 64 MS 5e-3 EN The enclosure is constructed from PEC surface materials. A partial TFSF is again used to introduce the plane-wave excitation of the slot and the reflected wave and we observe the fields in the slot and at the centre of the enclosure. The geometry as viewed in Gmsh is shown in Figure 28. The Gmsh input file can be created using $ gvulture -e -p -m enclsoure_se.mesh and then viewed in Gsmh with $ gmsh mesh.msh The time response of the observation point at the centre of the enclosure is shown in Figure 29. The attenuation of the signal is entirely due to re-radiation of energy back through the slot since there are no other loss mechanisms inside the enclosure. The shielding effectiveness of the enclosure can be defined as the amount by which the incident field is attenuated by the enclosure’s presence. If the incident plane-wave field amplitude is |E inc | and the internal field amplitude is |E int | then we can define SE = |E inc | . |E int | (8.14) In order to obtain an accurate frequency spectrum from a time response a rule-of-thumb is that the time response should have decayed by 60 dB from its maximum value. The response in Figure 29 has only decayed by about 35 dB so a spectrum obtained from it should be treated with caution. Clearly the field inside the enclosure is highly non-uniform so the shielding effectiveness depends on the position within the enclosure. Figure 30 shows the shielding effectiveness at the centre of the cavity, which since the incident field amplitude is unity is just the reciprocal of |Ez (40, 60, 22)|, compared to the prediction of a simple analytical model [14]. The two results agree well up to just over 1 GHz. Beyond this frequency the analytic model becomes invalid due to the excitation of higher order modes. Once a cavity is loaded by contents the response will change. To respresent this effect we introduce a 100 mm sided cube of radio absorbing material into the enclsoure. The material is a commercially available absorber, Eccosorb LS22 [15]. The material’s complex permittivity, obtained from the manufacturer’s datasheet, is shown in figure 31 together the result of applying a genetic algorithm to fit the complex permittivity to a third order Debye dispersion relationship. The Debye parameters obtained are given in Table 22. k (-) 1 2 3 ∆k (-) 0.00109 6.632 3.27 τk 0.1 s 0.1062 ns 15.781 ps rk (rad s−1 ) 5.45118e-03 3.12249e+10 1.03602e+11 pk (rad s−1 ) -1.00000e+01 -9.41658e+09 -6.33664e+10 Table 22: Example 9 - Debye model for LS22 RAM: ∞ = 1, σ = 0.344191. The absorber is introduced to the mesh by adding the following two directives MT ls22 DEBYE "LS22-3pole.prm" MB 30 50 60 80 12 32 ls22 The Debye parameters are then entered into an ASCII file called LS22-3pole.prm which should contain: 3 1.00000e+00 3.44191e-01 1.00000e+00 1.03602e+11 0.00000e+00 -6.33664e+10 0.00000e+00 5.45118e-03 0.00000e+00 -1.00000e+01 0.00000e+00 3.12249e+10 0.00000e+00 -9.41658e+09 0.00000e+00 Running the simulation again we obtain the results denoted by “Loaded” in Figures 29 and 30. The time response now decays much more quickly than that of the empty enclosure and the shielding effectiveness at the centre of the enclosure is generally increased by 20 dB. The resonant features are smeared out and damped by the absorber, though some sharp features remain and there are frequencies at which the shielding has decreased. TBC: I. D. Flintoft University of York Vulture: User Manual 65 0 Empty Loaded Electric field, |Ez(40,60,33)| (dB V/m) -10 -20 -30 -40 -50 -60 -70 -80 0 100 200 300 400 Time (ns) 500 600 700 Figure 29: Example 9 - Time response at centre of enclosure. The amplitude of the electric field is plotted in decibels, showing the long exponential decay of the field inside the unloaded enclosure compared to the rapid decay when the enclosure is loaded with an LS22 block. Shielding effectiveness at (40,60,33) (dB) 60 Analytic, empty FDTD, empty FDTD, loaded 50 40 30 20 10 0 -10 -20 0 1000 2000 3000 4000 Frequency (MHz) 5000 6000 Figure 30: Example 9 - Shielding effectiveness at centre of enclosure with and without loading. The analytic model is only valid up to the first resonance of the enclosure. • Decay time calculation and graph annotation. • Required energy decay for reliable DFT. • Partial Q-factor and decay rate of aperture. • Partial Q-factor and decay rate of LS22. I. D. Flintoft University of York Vulture: User Manual 66 15 Re(εr) Manufacturer Data Im(εr) Manufacturer Data Re(εr) Fit Im(εr) Fit Relative Permittivity 10 5 0 -5 -10 -15 0 2 4 6 8 10 Frequency (GHz) Figure 31: Example 9 - Complex permittivity of LS22 RAM comparing manufacturer’s data to a third order Debye model obtained using a genetic algorithm. y ha h w ε r =2.2 x s Figure 32: Cross-section of the shielded microstrip line. 8.10 Example 10: Stripline and microstrip line parameters This example considers a shielded microstrip structure, as used by Gedney [16], and shown in Figure 32. The dimension of the structure are w = 0.254 mm, h = 0.254 mm, ha = 0.762 mm, s = 2.11 mm and the permittivity is r = 2.2. The structure is modelled on a grid with ∆l = 0.042333 mm giving an overall grid of dimensions 50 × 24 × 400 and time step of ∆t = 70.5555 fs. The line was excited using a plane of y-polarised electric field points underneath the track at the centre of the mesh in the z direction. A broad Gaussian pulse was used, with a bandwidth of 450 GHz. PML boundaries were used to terminate the problem space at the lower and upper z boundaries. This structure therefore allows the near normal incidence reflection the inhomogeneous PML to be studied. Replacing the PECs on the sides of the mesh with PML we obtain the open microstrip structure shown in Figure 33. [TBD: Determination of voltage, current, characterstic impedance, propagation constant and effective permittivity.] References [1] J. F. Dawson and S. J. Porter, A user’s guide to the Hawk Transmission Line Matrix package. Department of Electronics, York, UK, 1.3 ed., September 1999. [2] S. J. Porter, A user’s guide to the Falcon Time-Domain Finite-Difference package. University of York, Department of Electronics, York, UK, 1.3 ed., November 2000. I. D. Flintoft University of York Vulture: User Manual 67 y y ∆T ∆T h=6 w=6 ∆T ∆L ∆L Ey ε r = 9.8 ∆T x z Figure 33: Cross-section of the microstrip line. [3] S. J. Porter, A user’s guide to the finite methods post-processing routines. Department of Electronics, York, UK, 3.4 ed., February 1975. [4] I. D. Flintoft, “Vulture FDTD code: Code implementation,” tech. rep., University of York, Department of Electronics, York, UK, January 2013. [5] B. Gustavsen and A. Semlyen, “Rational approximation of frequency domain responses by vector fitting,” Power Delivery, IEEE Transactions on, vol. 14, pp. 1052 –1061, July 1999. [6] G. Noetscher, Y. Xu, and S. Makarov, “Accuracy of point source models with coincident phase centers in a cubic fdtd grid for arbitrary source orientation,” in Antennas and Propagation Society International Symposium (APSURSI), 2012 IEEE, pp. 1–2, 2012. [7] “Gnuplot web site.” http://www.gnuplot.info. [8] “Gmsh web site.” http://geuz.org/gmsh. [9] T. Williams and C. Kelley, Gnuplot: An interactive plotting program, 4.6 ed., 2012. [10] C. Geuzaine and J.-F. Remacle, Gmsh Reference Manual, 2.7 ed., March 2013. [11] S. J. Orfanidis, Electromagnetic Waves and Antennas. ECE Department, Rutgers University, 94 Brett Road, Piscataway, NJ 08854-8058: Rutgers University, online ed., 2010. [12] K. C. Chen and C. E. Baum, “On EM excitations of cavities with small openings,” Interaction Note, 2 January 1974. [13] N. McDonald, “Polynomial approximations for the transverse magnetic polarizabilities of some small apertures,” Microwave Theory and Techniques, IEEE Transactions on, vol. 35, no. 1, pp. 20–23, 1987. [14] M. Robinson, T. Benson, C. Christopoulos, J. Dawson, M. D. Ganley, A. Marvin, S. Porter, and D. W. P. Thomas, “Analytical formulation for the shielding effectiveness of enclosures with apertures,” Electromagnetic Compatibility, IEEE Transactions on, vol. 40, no. 3, pp. 240–248, 1998. [15] Emerson and Cuming, “ECCOSORB LS material data sheet.” http://www.eccosorb.com. [16] S. D. Gedney, “An anisotropic perfectly matched layer-absorbing medium for the truncation of FDTD lattices,” IEEE Trans. Antennas Propagat., vol. 44, pp. 1630–1639, Dec. 1996. I. D. Flintoft University of York Vulture: User Manual A 68 GNU Free Documentation License Version 1.3, 3 November 2008 c 2000, 2001, 2002, 2007, 2008 Free Software Foundation, Inc. Copyright <http://fsf.org/> Everyone is permitted to copy and distribute verbatim copies of this license document, but changing it is not allowed. Preamble The purpose of this License is to make a manual, textbook, or other functional and useful document “free” in the sense of freedom: to assure everyone the effective freedom to copy and redistribute it, with or without modifying it, either commercially or noncommercially. Secondarily, this License preserves for the author and publisher a way to get credit for their work, while not being considered responsible for modifications made by others. This License is a kind of “copyleft”, which means that derivative works of the document must themselves be free in the same sense. It complements the GNU General Public License, which is a copyleft license designed for free software. We have designed this License in order to use it for manuals for free software, because free software needs free documentation: a free program should come with manuals providing the same freedoms that the software does. But this License is not limited to software manuals; it can be used for any textual work, regardless of subject matter or whether it is published as a printed book. We recommend this License principally for works whose purpose is instruction or reference. 1. APPLICABILITY AND DEFINITIONS This License applies to any manual or other work, in any medium, that contains a notice placed by the copyright holder saying it can be distributed under the terms of this License. Such a notice grants a world-wide, royalty-free license, unlimited in duration, to use that work under the conditions stated herein. The “Document”, below, refers to any such manual or work. Any member of the public is a licensee, and is addressed as “you”. You accept the license if you copy, modify or distribute the work in a way requiring permission under copyright law. A “Modified Version” of the Document means any work containing the Document or a portion of it, either copied verbatim, or with modifications and/or translated into another language. A “Secondary Section” is a named appendix or a front-matter section of the Document that deals exclusively with the relationship of the publishers or authors of the Document to the Document’s overall subject (or to related matters) and contains nothing that could fall directly within that overall subject. (Thus, if the Document is in part a textbook of mathematics, a Secondary Section may not explain any mathematics.) The relationship could be a matter of historical connection with the subject or with related matters, or of legal, commercial, philosophical, ethical or political position regarding them. The “Invariant Sections” are certain Secondary Sections whose titles are designated, as being those of Invariant Sections, in the notice that says that the Document is released under this License. If a section does not fit the above definition of Secondary then it is not allowed to be designated as Invariant. The Document may contain zero Invariant Sections. If the Document does not identify any Invariant Sections then there are none. The “Cover Texts” are certain short passages of text that are listed, as Front-Cover Texts or BackCover Texts, in the notice that says that the Document is released under this License. A Front-Cover Text may be at most 5 words, and a Back-Cover Text may be at most 25 words. A “Transparent” copy of the Document means a machine-readable copy, represented in a format whose specification is available to the general public, that is suitable for revising the document straightforwardly with generic text editors or (for images composed of pixels) generic paint programs or (for drawings) some widely available drawing editor, and that is suitable for input to text formatters or for automatic translation to a variety of formats suitable for input to text formatters. A copy made in an otherwise Transparent file format whose markup, or absence of markup, has been arranged to thwart or discourage subsequent modification by readers is not Transparent. An image format is not Transparent if used for any substantial amount of text. A copy that is not “Transparent” is called “Opaque”. I. D. Flintoft University of York Vulture: User Manual 69 Examples of suitable formats for Transparent copies include plain ASCII without markup, Texinfo input format, LaTeX input format, SGML or XML using a publicly available DTD, and standard-conforming simple HTML, PostScript or PDF designed for human modification. Examples of transparent image formats include PNG, XCF and JPG. Opaque formats include proprietary formats that can be read and edited only by proprietary word processors, SGML or XML for which the DTD and/or processing tools are not generally available, and the machine-generated HTML, PostScript or PDF produced by some word processors for output purposes only. The “Title Page” means, for a printed book, the title page itself, plus such following pages as are needed to hold, legibly, the material this License requires to appear in the title page. For works in formats which do not have any title page as such, “Title Page” means the text near the most prominent appearance of the work’s title, preceding the beginning of the body of the text. The “publisher” means any person or entity that distributes copies of the Document to the public. A section “Entitled XYZ” means a named subunit of the Document whose title either is precisely XYZ or contains XYZ in parentheses following text that translates XYZ in another language. (Here XYZ stands for a specific section name mentioned below, such as “Acknowledgements”, “Dedications”, “Endorsements”, or “History”.) To “Preserve the Title” of such a section when you modify the Document means that it remains a section “Entitled XYZ” according to this definition. The Document may include Warranty Disclaimers next to the notice which states that this License applies to the Document. These Warranty Disclaimers are considered to be included by reference in this License, but only as regards disclaiming warranties: any other implication that these Warranty Disclaimers may have is void and has no effect on the meaning of this License. 2. VERBATIM COPYING You may copy and distribute the Document in any medium, either commercially or noncommercially, provided that this License, the copyright notices, and the license notice saying this License applies to the Document are reproduced in all copies, and that you add no other conditions whatsoever to those of this License. You may not use technical measures to obstruct or control the reading or further copying of the copies you make or distribute. However, you may accept compensation in exchange for copies. If you distribute a large enough number of copies you must also follow the conditions in section 3. You may also lend copies, under the same conditions stated above, and you may publicly display copies. 3. COPYING IN QUANTITY If you publish printed copies (or copies in media that commonly have printed covers) of the Document, numbering more than 100, and the Document’s license notice requires Cover Texts, you must enclose the copies in covers that carry, clearly and legibly, all these Cover Texts: Front-Cover Texts on the front cover, and Back-Cover Texts on the back cover. Both covers must also clearly and legibly identify you as the publisher of these copies. The front cover must present the full title with all words of the title equally prominent and visible. You may add other material on the covers in addition. Copying with changes limited to the covers, as long as they preserve the title of the Document and satisfy these conditions, can be treated as verbatim copying in other respects. If the required texts for either cover are too voluminous to fit legibly, you should put the first ones listed (as many as fit reasonably) on the actual cover, and continue the rest onto adjacent pages. If you publish or distribute Opaque copies of the Document numbering more than 100, you must either include a machine-readable Transparent copy along with each Opaque copy, or state in or with each Opaque copy a computer-network location from which the general network-using public has access to download using public-standard network protocols a complete Transparent copy of the Document, free of added material. If you use the latter option, you must take reasonably prudent steps, when you begin distribution of Opaque copies in quantity, to ensure that this Transparent copy will remain thus accessible at the stated location until at least one year after the last time you distribute an Opaque copy (directly or through your agents or retailers) of that edition to the public. It is requested, but not required, that you contact the authors of the Document well before redistributing any large number of copies, to give them a chance to provide you with an updated version of the Document. 4. MODIFICATIONS I. D. Flintoft University of York Vulture: User Manual 70 You may copy and distribute a Modified Version of the Document under the conditions of sections 2 and 3 above, provided that you release the Modified Version under precisely this License, with the Modified Version filling the role of the Document, thus licensing distribution and modification of the Modified Version to whoever possesses a copy of it. In addition, you must do these things in the Modified Version: A. Use in the Title Page (and on the covers, if any) a title distinct from that of the Document, and from those of previous versions (which should, if there were any, be listed in the History section of the Document). You may use the same title as a previous version if the original publisher of that version gives permission. B. List on the Title Page, as authors, one or more persons or entities responsible for authorship of the modifications in the Modified Version, together with at least five of the principal authors of the Document (all of its principal authors, if it has fewer than five), unless they release you from this requirement. C. State on the Title page the name of the publisher of the Modified Version, as the publisher. D. Preserve all the copyright notices of the Document. E. Add an appropriate copyright notice for your modifications adjacent to the other copyright notices. F. Include, immediately after the copyright notices, a license notice giving the public permission to use the Modified Version under the terms of this License, in the form shown in the Addendum below. G. Preserve in that license notice the full lists of Invariant Sections and required Cover Texts given in the Document’s license notice. H. Include an unaltered copy of this License. I. Preserve the section Entitled “History”, Preserve its Title, and add to it an item stating at least the title, year, new authors, and publisher of the Modified Version as given on the Title Page. If there is no section Entitled “History” in the Document, create one stating the title, year, authors, and publisher of the Document as given on its Title Page, then add an item describing the Modified Version as stated in the previous sentence. J. Preserve the network location, if any, given in the Document for public access to a Transparent copy of the Document, and likewise the network locations given in the Document for previous versions it was based on. These may be placed in the “History” section. You may omit a network location for a work that was published at least four years before the Document itself, or if the original publisher of the version it refers to gives permission. K. For any section Entitled “Acknowledgements” or “Dedications”, Preserve the Title of the section, and preserve in the section all the substance and tone of each of the contributor acknowledgements and/or dedications given therein. L. Preserve all the Invariant Sections of the Document, unaltered in their text and in their titles. Section numbers or the equivalent are not considered part of the section titles. M. Delete any section Entitled “Endorsements”. Such a section may not be included in the Modified Version. N. Do not retitle any existing section to be Entitled “Endorsements” or to conflict in title with any Invariant Section. O. Preserve any Warranty Disclaimers. If the Modified Version includes new front-matter sections or appendices that qualify as Secondary Sections and contain no material copied from the Document, you may at your option designate some or all of these sections as invariant. To do this, add their titles to the list of Invariant Sections in the Modified Version’s license notice. These titles must be distinct from any other section titles. You may add a section Entitled “Endorsements”, provided it contains nothing but endorsements of your Modified Version by various parties—for example, statements of peer review or that the text has been approved by an organization as the authoritative definition of a standard. I. D. Flintoft University of York Vulture: User Manual 71 You may add a passage of up to five words as a Front-Cover Text, and a passage of up to 25 words as a Back-Cover Text, to the end of the list of Cover Texts in the Modified Version. Only one passage of Front-Cover Text and one of Back-Cover Text may be added by (or through arrangements made by) any one entity. If the Document already includes a cover text for the same cover, previously added by you or by arrangement made by the same entity you are acting on behalf of, you may not add another; but you may replace the old one, on explicit permission from the previous publisher that added the old one. The author(s) and publisher(s) of the Document do not by this License give permission to use their names for publicity for or to assert or imply endorsement of any Modified Version. 5. COMBINING DOCUMENTS You may combine the Document with other documents released under this License, under the terms defined in section 4 above for modified versions, provided that you include in the combination all of the Invariant Sections of all of the original documents, unmodified, and list them all as Invariant Sections of your combined work in its license notice, and that you preserve all their Warranty Disclaimers. The combined work need only contain one copy of this License, and multiple identical Invariant Sections may be replaced with a single copy. If there are multiple Invariant Sections with the same name but different contents, make the title of each such section unique by adding at the end of it, in parentheses, the name of the original author or publisher of that section if known, or else a unique number. Make the same adjustment to the section titles in the list of Invariant Sections in the license notice of the combined work. In the combination, you must combine any sections Entitled “History” in the various original documents, forming one section Entitled “History”; likewise combine any sections Entitled “Acknowledgements”, and any sections Entitled “Dedications”. You must delete all sections Entitled “Endorsements”. 6. COLLECTIONS OF DOCUMENTS You may make a collection consisting of the Document and other documents released under this License, and replace the individual copies of this License in the various documents with a single copy that is included in the collection, provided that you follow the rules of this License for verbatim copying of each of the documents in all other respects. You may extract a single document from such a collection, and distribute it individually under this License, provided you insert a copy of this License into the extracted document, and follow this License in all other respects regarding verbatim copying of that document. 7. AGGREGATION WITH INDEPENDENT WORKS A compilation of the Document or its derivatives with other separate and independent documents or works, in or on a volume of a storage or distribution medium, is called an “aggregate” if the copyright resulting from the compilation is not used to limit the legal rights of the compilation’s users beyond what the individual works permit. When the Document is included in an aggregate, this License does not apply to the other works in the aggregate which are not themselves derivative works of the Document. If the Cover Text requirement of section 3 is applicable to these copies of the Document, then if the Document is less than one half of the entire aggregate, the Document’s Cover Texts may be placed on covers that bracket the Document within the aggregate, or the electronic equivalent of covers if the Document is in electronic form. Otherwise they must appear on printed covers that bracket the whole aggregate. 8. TRANSLATION Translation is considered a kind of modification, so you may distribute translations of the Document under the terms of section 4. Replacing Invariant Sections with translations requires special permission from their copyright holders, but you may include translations of some or all Invariant Sections in addition to the original versions of these Invariant Sections. You may include a translation of this License, and all the license notices in the Document, and any Warranty Disclaimers, provided that you also include the original English version of this License and the original versions of those notices and disclaimers. In case of a disagreement between the translation and the original version of this License or a notice or disclaimer, the original version will prevail. If a section in the Document is Entitled “Acknowledgements”, “Dedications”, or “History”, the requirement (section 4) to Preserve its Title (section 1) will typically require changing the actual title. I. D. Flintoft University of York Vulture: User Manual 72 9. TERMINATION You may not copy, modify, sublicense, or distribute the Document except as expressly provided under this License. Any attempt otherwise to copy, modify, sublicense, or distribute it is void, and will automatically terminate your rights under this License. However, if you cease all violation of this License, then your license from a particular copyright holder is reinstated (a) provisionally, unless and until the copyright holder explicitly and finally terminates your license, and (b) permanently, if the copyright holder fails to notify you of the violation by some reasonable means prior to 60 days after the cessation. Moreover, your license from a particular copyright holder is reinstated permanently if the copyright holder notifies you of the violation by some reasonable means, this is the first time you have received notice of violation of this License (for any work) from that copyright holder, and you cure the violation prior to 30 days after your receipt of the notice. Termination of your rights under this section does not terminate the licenses of parties who have received copies or rights from you under this License. If your rights have been terminated and not permanently reinstated, receipt of a copy of some or all of the same material does not give you any rights to use it. 10. FUTURE REVISIONS OF THIS LICENSE The Free Software Foundation may publish new, revised versions of the GNU Free Documentation License from time to time. Such new versions will be similar in spirit to the present version, but may differ in detail to address new problems or concerns. See http://www.gnu.org/copyleft/. Each version of the License is given a distinguishing version number. If the Document specifies that a particular numbered version of this License “or any later version” applies to it, you have the option of following the terms and conditions either of that specified version or of any later version that has been published (not as a draft) by the Free Software Foundation. If the Document does not specify a version number of this License, you may choose any version ever published (not as a draft) by the Free Software Foundation. If the Document specifies that a proxy can decide which future versions of this License can be used, that proxy’s public statement of acceptance of a version permanently authorizes you to choose that version for the Document. 11. RELICENSING “Massive Multiauthor Collaboration Site” (or “MMC Site”) means any World Wide Web server that publishes copyrightable works and also provides prominent facilities for anybody to edit those works. A public wiki that anybody can edit is an example of such a server. A “Massive Multiauthor Collaboration” (or “MMC”) contained in the site means any set of copyrightable works thus published on the MMC site. “CC-BY-SA” means the Creative Commons Attribution-Share Alike 3.0 license published by Creative Commons Corporation, a not-for-profit corporation with a principal place of business in San Francisco, California, as well as future copyleft versions of that license published by that same organization. “Incorporate” means to publish or republish a Document, in whole or in part, as part of another Document. An MMC is “eligible for relicensing” if it is licensed under this License, and if all works that were first published under this License somewhere other than this MMC, and subsequently incorporated in whole or in part into the MMC, (1) had no cover texts or invariant sections, and (2) were thus incorporated prior to November 1, 2008. The operator of an MMC Site may republish an MMC contained in the site under CC-BY-SA on the same site at any time before August 1, 2009, provided the MMC is eligible for relicensing. I. D. Flintoft University of York