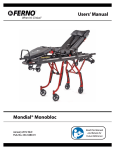
Download USINg THE CoT
Transcript
FERNO
When It’s Critical ®
User’s Manual
Model 5126-EL and 5226-EL
Easy Loading Multi-Level Cots
August 2008 INT
Pub. No. 234-3415-00
Read this Manual
and Retain for
Future Reference
Model 5026-EL Series Cot
Disclaimer
Proprietary Notice
This manual contains general instructions for the use,
operation and care of this product. The instructions are not
all-inclusive. Safe and proper use of this product is solely at
the discretion of the user. Safety information is included as
a service to the user. All other safety measures taken by the
user should be within and under consideration of applicable
regulations. It is recommended that training on the proper
use of this product be provided before using this product in
an actual situation.
The information disclosed in this manual is the property of
Ferno-Washington, Inc., Wilmington, Ohio, USA. FernoWashington, Inc. reserves all patent rights, proprietary design
rights, manufacturing rights, reproduction use rights, and
sales use rights thereto, and to any article disclosed therein
except to the extent those rights are expressly granted to
others or where no applicable to vendor proprietary parts.
Retain this manual for future reference. Include it with the
product in the event of transfer to new users. Additional free
copies are available upon request from Customer Relations.
The products sold by Ferno are covered by a limited
warranty, which is printed on the invoice you received when
you purchased the product. Please refer to the warranty
terms as printed on your invoice. The complete terms and
conditions of the limited warranty, and the limitations of
liability and disclaimers, are also available upon request by
calling Ferno at 1.800.733.3766 or 1.937.382.1451.
Limited Warranty Statement
Ferno Customer Relations
Customer service are product support are important aspects
of each Ferno product. For assistance or information, contact
your Ferno distributor or Ferno Customer Relations.
Please have the serial number available when calling
Ferno Customer Relations, and include it in all written
communications.
Ferno-Washington, Inc.
70 Weil Way
Wilmington, Ohio 45177-9371, U.S.A.
Telephone (U.S.A. and Canada)...................1.877.733.0911
Telephone (Worldwide).............................. +1.937.382.1451
Fax (U.S.A. and Canada)..............................1.888.388.1349
Fax (Worldwide)........................................ +1.937.382.6569
Internet......................................................... www.ferno.com
European Representative
Ferno (UK) Limited
Stubs Beck Lane, Cleckheaton
West Yorkshire BD19-4TZ, United Kingdom
Telephone........................ +44 (1274) 851999
Fax...................................+44 (1274) 851111
Internet................................www.ferno.co.uk
Serial Number _________________________
Location: Crosstube Under Shock Frame.
Users’ manual
To request additional free users’ manuals,
contact Ferno Customer Relations, your
Ferno distributor, or visit www.ferno.com.
© Copyright Ferno-Washington, Inc. All Rights Reserved.
2
© Ferno-Washington, Inc 234-3415-00 August 2008
Model 5026-EL Series Cot
Table of Contents
Section
Page
1 - Safety Information........................................................4
1.1 Warning..................................................................4
1.2 Important................................................................4
1.3 Bloodborne Disease Notice....................................4
1.4 Cot and Fastener Compatibility.............................4
1.5. Compliance with Current Safety Regulations........4
1.6 Safety labels...........................................................5
1.7 Symbol Glossary....................................................5
2 - Operator Skills and Training.......................................6
2.1 Skills......................................................................6
2.2 Training..................................................................6
2.3 Height and Strength Considerations......................6
3 - About the Cot................................................................7
3.1 Description.............................................................7
3.2 Components...........................................................7
3.3 General Specifications...........................................8
3.4 Cot Positions..........................................................8
4 - Setup/Installation..........................................................9
4.1 Loading Surface Specifications ............................9
4.2 Restraints, Mattress and Accessories...................10
5 - Using the Features...................................................... 11
5.1 Easy Loading System...........................................11
5.3 Leg Control Handles............................................13
5.4 Sidearms...............................................................14
5.5 Shock Frame........................................................14
5.6 Backrest................................................................15
5.7 Wheel Locks........................................................15
© Ferno-Washington, Inc 234-3415-00 August 2008
Section
Page
6 - Using the Cot...............................................................16
6.1 Before Placing the Cot in Service........................16
6.2 General Guidelines for Use..................................16
6.3 Changing Cot Positions.......................................17
6.4 Transferring the Patient to the Cot.......................18
6.5 Rolling the Cot.....................................................19
6.6 Loading the Cot....................................................20
6.7 Unloading the Cot................................................21
6.8 Using Additional Help.........................................22
8 - Maintenance................................................................23
8.1 Maintenance Schedule.........................................23
8.2 Disinfecting and Cleaning the Restraints.............23
8.3 Disinfecting the Cot.............................................23
8.4 Cleaning the Cot..................................................23
8.5 Waxing the Cot....................................................23
8.6 Inspecting the Cot................................................24
8.7 Lubricating the Cot..............................................25
9 - Parts and Service........................................................26
9.1 Worldwide............................................................26
10 - Accessories . ..............................................................26
Training Record...............................................................27
Maintenance Record........................................................27
3
Safety Information
Model 5026-EL Series Cot
1 - Safety Information
1.1 Warning
1.3Bloodborne Disease Notice
Warning notices indicate a potentially hazardous situation
which, if not avoided, could result in injury or death.
To reduce the risk of exposure to bloodborne diseases
such as HIV-1 and hepatitis when using the cot, follow the
disinfecting and cleaning instructions in this manual.
Warning
Untrained operators can cause injury or be injured. Permit
only trained personnel to operate the cot.
Improper use of the cot can cause injury. Use the cot only
for the purpose described in this manual.
Attaching improper items to the cot can cause injury. Use
only Ferno-approved items on the cot.
Improper operation can cause injury. Operate the cot only
as described in this manual.
An unattended patient can be injured. Stay with the
patient at all times.
An unrestrained patient can fall off the cot and be injured.
Use restraints to secure the patient on the cot.
Helpers can cause injury or be injured. Maintain control
of the cot, operate the CONTROLS, and direct all helpers.
Improper maintenance can cause injury. Maintain the cot
only as described in this manual.
Improper parts and service can cause injury. Use only
Ferno parts and Ferno-approved service on the cot.
Modifying the cot can cause injury and damage. Use the
cot only as designed by Ferno.
1.2 Important
Important notices emphasize important usage or maintenance
information.
Important
1.4 Cot and Fastener Compatibility
For the purpose of this notice, this cot and all Ferno
transporters are included under the generic term, “cot.”
Combining different manufacturers’ products into a “mixedcomponent” cot/cot fastener system can increase the user’s
risk of injury and damage.
Ferno-Washington, Inc. strongly recommends that only
Ferno-manufactured cots be used in Ferno-manufactured cot
fasteners, and that only Ferno-manufactured cot fasteners be
used for securing Ferno-manufactured cots in ambulances.
ANY COMBINATION OF A FERNO COT OR COT
FASTENER WITH A NON-FERNO COT OR COT
FASTENER IS MISUSE OF THE FERNO PRODUCT.
Responsibility for the outcome of know, intentional misuse
rests squarely on the misuser.
1.5.Compliance with Current Safety Regulations
The multi-level self-loading cots Model 5126-EL and
5226-EL are designed and built by Ferno Washington Inc.
in compliance with the safety requirements called for by
directive 93/42/EEC dated 06/14/93 (class I) concerning
medical devices.
All the materials used are designed to work properly within
the load limits indicated in the technical specifications and
are flame resistant, do not release any toxic or polluting
substances, and are protected to provide a high level
of resistance to wear and tear and corrosion. In making
the self-loading cot, corners and sharp edges that could
cause accidental harm to the personnel using the cot were
avoided.
4
© Ferno-Washington, Inc 234-3415-00 August 2008
Model 5026-EL Series Cot
Safety Information
1.6 Safety Labels
Safety labels link important information between the manual and the cot.
Read and follow the instructions, and immediately replace any worn or damaged labels. For replacement labels, see Parts and
Service, page 26.
The labels below are placed on the cot.
1.7 Symbol Glossary
The symbols defined below are used on the cot and in this users’ manual. Ferno uses symbols recognized by the International
Standards Organization (ISO), American National Standards Institute (ANSI) and the emergency medical services industry.
2
181 kg
400 lb
General Warning of
Potential Injury
Keep Clear of
This Area
Pinch Point
Load Limit
Pinch Point
© Ferno-Washington, Inc 234-3415-00 August 2008
Read the Users’
Manual
Do Not
Lubricate
Cot Operation Requires
Two Trained Operators
Lubricate
Product meets European
Union Standards
5
Operator Skills and Training
Model 5026-EL Series Cot
2 - Operator Skills and Training
2.1 Skills
2.2 Training
Operators using the cot need:
Trainees need to:
●
a working knowledge of emergency patient-handling
procedures.
●
the ability to assist the patient.
●
read and understand this manual.
●
be trained and tested on the use of the cot.
●
practice with the cot before using it with a patient.
●
record their training information. A sample training
record sheet is provided on page 27.
Warning
Untrained operators can cause injury or be injured.
Permit only trained personnel to operate the cot.
2.3 Height and Strength Considerations
When unloading the cot, the foot-end operator must lift
and hold the weight of the cot, patient and equipment high
enough for the wheels to remain off the ground until the
undercarriage legs completely unfold and lock into place.
Be aware that if the ambulance is parked on an uneven
surface, the foot-end operator (and any helpers) may need
to lift the cot higher than usual to allow the legs to unfold
completely and lock.
Supporting this weight requires greater strength from short
operators than from tall operators because short operators
must raise their arms higher in relation to their shoulders.
Note: Use additional help as needed to lift the weight of
the cot, patient and equipment (see Using Additional Help,
page22).
6
© Ferno-Washington, Inc 234-3415-00 August 2008
Model 5026-EL Series Cot
About the Cot
3 - About the Cot
3.1 Description
The Model 5026-EL Series includes the Model 5126-EL cot
and the Model 5226-EL cot. Both are referred to as “the cot”
in this manual.
Warning
Improper use of the cot can cause injury. Use the cot
only for the purpose described in this manual.
The cot is an emergency patient-handling device. It is for
professional use by a minimum of two trained operators.
A set of patient restraints and a mattress are also required
and are purchased separately.
The 5126-EL and 5226-EL cots are identical except that the
5226-EL is higher than the 5126-EL. Illustrations throughout
the manual represent both cot models and text differs only
where cot dimensions are specified.
Compatible fastener
The cot is designed for use with a Ferno SLAM 5026EFX
cot fastener (not included).
AMBULANCE REQUIREMENTS
The compartment in the ambulance must have sufficient
space to accommodate the folded cot and must have the cot
fastener installed.
The loading surface must have minimum internal dimensions
of 190 x 58 cm and a height from the ground of between 64
and 66 cm for the Model 5126-EL and between 70 and 72
cm for the Model 5226-EL.
Cot features
●
Easy Loading System
●
7 height positions
●
Adjustable backrest
●
Swing-down sidearms
●
Pull handle
●
Two swivel wheels with locks (operator end of cot).
Wheels swivel with cot in positions 4, 5, and 6.
●
Shock frame
●
Automatic release of front legs when loading into an
ambulance.
●
Safety stop
●
Rigid panels
3.2 Components
Shock Frame
Head End
Adjustable
Backrest
Front Leg
Control Handle
Pull Handle
Loading Wheels
Rear Leg
Control Handle
Front Leg
Release Assembly
Swivel Wheels
With Wheel Locks
(2)
Foot End
© Ferno-Washington, Inc 234-3415-00 August 2008
Rear Legs
Front Legs
7
About the Cot
Model 5026-EL Series Cot
3.3General Specifications
3.4 Cot Positions
Reference
Height1
5126-EL 5226-EL
Bed Position 7 (loaded)
Bed position 6
Loading Height
Bed Position 5
Bed Position 4
Bed Position 3
Bed Position 2
Bed Position 1 (folded)
Length
Width
Weight2
Load Limit
28 cm
89 cm
64 cm
85 cm
80 cm
68 cm
50 cm
25 cm
197 cm
55 cm
43 kg
181 kg
28 cm
96 cm
71 cm
90 cm
83 cm
71 cm
53 cm
27 cm
197 cm
55 cm
44 kg
181 kg
Position 7 - Loaded
Position 6 - Transport and Loading
Metric specifications are rounded to the nearest whole number. For more information, contact Ferno Customer Relations.
Bed Position height is measured from the ground to the top of
the upper frame (tube diameter 28 mm) the surface on which the
patient rests. Loading height is measured from the ground to the
bottom of the loading wheels.
1
2
Position 5 - Transport
Weight is without mattress, restraints and optional features.
Ferno reserves the right to change specifications without notice.
Position 4 - Transport and Patient Transfer
181 kg
400 lb
LOAD LIMIT
Inspect the cot if the load limit of
181 kg has been exceeded (see
section “Cot Inspection”).
Position 3 - Patient Transfer
Position 2 - Patient Transfer
Position 1 - Patient Transfer
8
© Ferno-Washington, Inc 234-3415-00 August 2008
Model 5026-EL Series Cot
Setup/Installation
4 - Setup/Installation
4.1 Loading Surface Specifications
For optimum operation of the cot during the loading and
unloading phases, the following dimensions for the loading
surface and the corresponding position of the SLAM
5026EFX cot fastener are suggested (Figure 1).
Important
Loose items and debris on the patient compartment
floor can interfere with the operation of the cot with
the fastener. Keep the patient compartment floor
clear.
SLAM Box
Figure 1 - Suggested Mounting Dimensions
(Dimensions Shown in Millimeters)
Safety lock device
When the cot is unloaded from the ambulance properly, the front legs unfold completely (Figure 2).
If the cot is improperly unloaded from the ambulance and the front legs do not unfold completely, the safety lock device stop
bar on the cot will contact the SLAM box (Figure 3) to stop the cot’s movement and prevent it from being pulled from the
ambulance before the front legs have completely unfolded. (Figure 3).
For proper operation of the Safety Lock Device: Position the SLAM box at the point where, when the front legs of the cot
unfold completely during unloading, the safety lock device stop bar is raised before it reaches the SLAM box.
Figure 2 - Unloading the Cot
© Ferno-Washington, Inc 234-3415-00 August 2008
Figure 3 - Stop Bar Catching Fastener
9
Setup/Installation
4.2 Restraints, Mattress and
Accessories
Before placing the cot in service, assign appropriate
personnel to install the restraints and mattress (purchased
separately from the cot) and any accessories shipped with
the cot.
Restraints are required for patient safety. Ferno recommends
using the Model 417-1 torso restraint (a four-point harness)
plus two Model 430 two-piece restraints for the hips and
legs (see Accessories, page 26 for ordering information).
See Figure 4.
Install restraints and accessories according to the users’
manuals supplied with them. Keep restraint and accessory
manuals with this manual for future reference. For additional,
free manuals, contact Ferno Customer Relations (page 2).
Model 5026-EL Series Cot
Warning
Attaching improper items to the cot can cause
injury. Use only Ferno-approved items on the cot.
Model 417-1
Torso Restraint
Model 430 Two-Piece Restraints
Figure 4 - Ferno Restraints Recommended for Use with
Model 5126-EL and 5226-EL Cots
10
© Ferno-Washington, Inc 234-3415-00 August 2008
Model 5026-EL Series Cot
Using the Features
5 - Using The Features
5.1 Easy Loading System
The EL (Easy Loading) system consists of an automatic
release mechanism for the front legs of the cot (Figure 5)
plus total and independent closing of the front legs during
the first part of loading (see Figure 6).
The automatic release mechanism is made of a system of
levers and is actuated by contact between the runner and the
ambulance floor.
This system allows the cot to be loaded into an ambulance
without the operator needing to activate the release handle
until the rear legs contact the ambulance.
Runner
Figure 5 - Easy-Loading Mechanism
Figure 6- Loading the Cot
© Ferno-Washington, Inc 234-3415-00 August 2008
11
Using the Features
Model 5026-EL Series Cot
5.2 Safety Mechanisms
Safety lock device
The safety lock device prevents the cot from being unloaded
from the vehicle before the front legs have completely
unfolded to the normal transport position.
During normal unloading, when the legs lock into place, the
stop bar allows the cot to be removed from the ambulance
(Figure 7).
If the front legs have not unfolded completely, the safety
lock stop bar will contact the SLAM box to stop the cot from
being pulled any further out of the ambulance (Figure 8).
If this should occur, the operators must follow the recovery
procedure below:
1. Control Operator: Lift the foot end of the cot high
enough to allow both sets of legs to unfold completely
and lock in position.
Figure 7 - Stop Bar Lifted During Proper Unloading
2. Both Operators: Confirm that both legs are locked in
the normal transport position, then resume unloading
the cot. For complete unloading instructions, see Unloading the Cot, page 21.
Ratchet- bar safety catch
The ratchet-bar safety catch offers two additional lock points
for the head-end legs at intermediate levels.
If the cot is removed from the patient compartment
without the front legs completely unfolded, a plunger in
the undercarriage assembly catches the ratchet bar notches
to hold the cot at an intermediate level, preventing it from
lowering to the ground.
Figure 8 - Stop Bar Lowered During Improper Unloading
If the ratchet-bar safety catch system is activated, operators
must follow the recovery procedure below:
1. Assisting Operator: Immediately move to the head end
of the cot and lift the head end high enough to allow
the front legs to unfold completely and lock into place
(Figure 9).
2. Both Operators: Stand at opposite ends of the cot,
grasp the main frame, and lift the cot off its transport
wheels to confirm that the legs have locked into position. When you are certain both sets of legs are locked,
set the cot on the ground. For complete unloading instructions, see Unloading the Cot, page 21.
3. Both Operators: Roll the cot away from the ambulance.
Figure 9 - Cot Stopped at an Intermediate Level by the
Ratchet-Bar Safety Catch System
12
© Ferno-Washington, Inc 234-3415-00 August 2008
Model 5026-EL Series Cot
Using the Features
5.3 Leg Control Handles
Feature: A leg control handle is located at each end of the
cot, accessible to each operator’s right hand.
Purpose: The leg control handles release the undercarriage
lock to allow the legs to fold so the cot can be raised or
lowered to a new position, loaded into an ambulance, or
unloaded from an ambulance.
Foot-end control handle
●
The foot-end control (Figure 10) handle unlocks the
rear legs.
●
Use the foot-end control handle when lowering and
loading the cot.
Head-end control handle
●
The head-end control handle (Figure 11) unlocks the
front legs.
●
Use the head-end control handle only when raising or
lowering the cot.
Figure 10 - Foot-End Control Handle
Use: Always assume the weight of the cot before squeezing
a control handle.
The operators assume the weight of the cot, patient, and
equipment, then squeeze both leg control handles to change
the cot’s position. See Using the Cot, pages 16-22 for
complete instructions.
Figure 11 - Head-End Control Handle
Important
Operators should expect and be prepared to control
the normal downward movement of the cot which occurs when a control handle is squeezed.
© Ferno-Washington, Inc 234-3415-00 August 2008
13
Using the Features
Model 5026-EL Series Cot
5.4 Sidearms
Feature: A sidearm is located on each side of the cot.
Purpose: The swing-down sidearms provide comfort and
safety to the patient. Keep the sidearms raised except when
transferring the patient to and from the cot.
Use: To lower a sidearm, pull the lock pin knob and swing
the sidearm down (Figure 12).
To raise a sidearm, simply swing it up until it locks.
Important
Do not use the sidearms to lift the cot. Sidearms are
not designed for lifting. Lift the cot only by grasping
the main frame, or main frame and side lift handles.
Figure 12 -Lowering a Sidearm
5.5 Shock Frame
Feature: The shock frame is located at the foot end of the
cot.
Purpose: Use the shock frame to raise the patient’s legs for
patient comfort or when medically advisable.
Use:
●
Grasp the shock frame with the palms facing upward
and maintain this grip both when raising and when
lowering the frame.
●
Always raise the shock frame from the foot end (Figure 13), never from the side.
Raising the shock frame:
1. Unfasten or loosen the leg and hip restraints.
2. Lift the shock frame until it locks into position.
3. Fasten and adjust the restraints.
Lowering the shock frame:
Figure 13 -Lowering the Shock Frame
1. Grasp the corners of the shock frame near the support bars (Figure 13) and lift to release, then lower the
shock frame.
2. Fasten and adjust the leg and hip restraints.
14
© Ferno-Washington, Inc 234-3415-00 August 2008
Model 5026-EL Series Cot
Using the Features
5.6Backrest
Feature: The backrest is adjustable to 8 positions.
Purpose: The backrest can be raised for patient comfort or
when medically advisable.
Use: To make the adjustments:
1. Unfasten or loosen the restraints.
2. Support the backrest while squeezing the release lever
(Figure 14).
3. Continue supporting the backrest while raising or lowering it to the desired position.
Figure 14 -Raising or Lowering Backrest
4. When the backrest is near the desired position, release
the lever and raise or lower the backrest slightly until
it locks into the new position.
5. Fasten and adjust the restraints.
5.7 Wheel Locks
Feature: The foot-end swivel casters are fitted with wheel
locks.
Purpose: When engaged, the wheel locks help keep the
cot from rolling during patient transfer, certain medical
procedures, and when the cot is stopped on a level or
inclined surface.
Use: To engage the wheel lock, press the end of the lock
lever down with your toe. To disengage the lock, use your
toe to lift the lever (Figure 15).
●
Stay with the cot and maintain control of it at all
times.
●
Do not use the wheel locks as a substitute for operator
control.
●
Do not use the wheel locks as brakes.
© Ferno-Washington, Inc 234-3415-00 August 2008
Figure 15 -Using the Wheel Lock
15
Using the Cot
Model 5026-EL Series Cot
6 - Using The Cot
6.1Before Placing the Cot in Service
●
Personnel who will work with the cot need to read this manual and the manual
for the SLAM 5026EFX cot fastener.
●
Attach the patient restraints and mattress (see page 10 for restraint information.)
●
Confirm that the cot operates properly. See Inspecting the Cot, page 24.
●
The vehicle must have a Ferno cot fastener system installed.
Warning
Improper operation can cause
injury. Operate the cot only as
described in this manual.
Warning
An unattended patient can be
injured. Stay with the patient
at all times.
6.2General Guidelines for Use
●
Medical advice is beyond the parameters of this manual.
●
It is the users’ responsibility to ensure safe practices for the patient and themselves.
●
A minimum of two trained operators is required.
●
Operators work together and maintain control of the cot at all times.
●
Operators communicate with one another and use coordinated movements to
operate the cot.
●
Follow standard emergency patient-handling procedures when operating the
cot.
●
Lift only the weight you can safely handle. Use additional help when working
with heavy loads (patient and equipment). For placement of help, see Using
Additional Help, page 22.
●
Stay with the patient at all times.
●
Always use patient restraints to secure the patient on the cot.
16
Warning
An unrestrained patient can
fall off the cot and be injured.
Use restraints to secure the
patient on the cot.
© Ferno-Washington, Inc 234-3415-00 August 2008
Model 5026-EL Series Cot
6.3 Changing Cot Positions
Changing cot positions with a patient on the cot requires
a minimum of two trained operators working together and
maintaining control of the cot at all times.
Preparing to raise or lower the cot
●
Using the Cot
Important
Operators should expect and be prepared to control
the normal downward movement of the cot which occurs when a control handle is squeezed.
Maintain a firm grasp on the cot main frame at all
times and be prepared to control the normal downward movement of the cot when a control handle is
squeezed.
Lowering the cot
1. Both Operators: Stand at opposite ends of the cot and
grasp the main frame with both hands. Position your
right hand to squeeze the leg control handles (Figure
16).
2. Both Operators: While supporting the weight of the
cot, squeeze the leg control handles and lower the cot
to the desired height (Figure 17).
3. Both Operators: When the cot locks into the new position, release the control handles but continue to support the cot.
4. Both Operators: Together, lift the cot until all four
transport wheels are off the ground. This ensures that
both sets of legs lock into position if they have not
already done so.
Figure 16 - Raising and Lowering the Cot
Foot-End Control Handle
Head-End Control Handle
5. Both Operators: Set the cot on the ground and release
your grasp when you are sure the legs have locked into
the new position.
Raising the cot
When raising the cot, only the head-end operator squeezes
the control handle.
Figure 17 - Lowering the Cot: Use Both Control Handles
1. Both Operators: Stand at opposite ends of the cot,
grasp the main frame with both hands, and support the
cot.
2. Both Operators: While the head-end operator squeezes
the front-leg control handle (Figure 18) both operators raise the cot to the desired height in a coordinated
movement.
3. Both Operators: When the cot reaches the desired
height, the head-end operator releases the control handle. Both operators continue to support the cot.
Figure 18 - Raising the Cot: Use Only the Head-End
Control Handle
4. Both Operators: Together, lift the cot until all four
transport wheels are off the ground. This ensures that
both sets of legs lock into position if they have not
already done so.
5. Both Operators: Set the cot on the ground and release
your grasp when you are sure the legs have locked into
the new position.
© Ferno-Washington, Inc 234-3415-00 August 2008
17
Using the Cot
Model 5026-EL Series Cot
6.4 Transferring the Patient to the Cot
To transfer a patient onto the cot:
1. Unfasten the restraints and arrange the straps so they
will not interfere with transferring the patient onto the
cot.
2. Place the cot beside the patient and adjust it to the patient’s level.
3. Engage the wheel locks.
4. Lower the cot sidearms.
5. Transfer the patient onto the cot using approved medical emergency procedures.
6. Raise the sidearms. Adjust the backrest and shock
frame as needed.
7. Fasten and adjust the patient restraints.
8. Adjust the cot to a rolling position.
18
© Ferno-Washington, Inc 234-3415-00 August 2008
Model 5026-EL Series Cot
6.5 Rolling the Cot
General guidelines
●
Rolling the cot requires a minimum of two trained operators working together and maintaining control of
the cot at all times.
●
Use transport position 4, 5, or 6 to roll the cot (see Cot
Positions, page 8).
●
Roll the cot on smooth, unobstructed surfaces whenever possible.
●
To cross a low obstacle such as a door threshold, lift
the cot slightly to take the weight off the wheels so the
wheels roll smoothly over the obstacle.
●
Avoid high obstacles such as curbs whenever possible.
When a high obstacle cannot be avoided, lift and carry
the cot over the obstacle.
●
When rolling the cot over rough terrain, the operators
(and helpers) should grasp the cot with both hands.
●
Use additional help as needed to safely control the cot
when it is heavily loaded (see Using Additional Help,
page 22).
Using the Cot
Important
Roll the cot downhill foot-end first. If it is not medically
appropriate to do this, roll the cot head-end first, but
do the following:
To maintain cot balance while rolling it downhill headend first, the assisting operator must exert upward
force on the main frame.
Rolling the cot
1. Securely fasten the restraints around the patient.
2. Release the wheel locks.
3. Both Operators: Place the cot in transport position 4,
5, or 6 (see Cot Positions, page 8).
4. Control Operator: Position yourself at the foot end
of the cot, grasp the pull handle and pull the cot forward.
If rolling the cot on an uneven or rough surface,
grasp the main frame with both hands and roll the cot
forward.
5. Assisting Operator: Position yourself at either the
head-end of the cot or at the side of the cot near the patient’s torso and grasp the main frame with both hands.
Attend the patient and assist in rolling and steering the
cot.
© Ferno-Washington, Inc 234-3415-00 August 2008
19
Using the Cot
Model 5026-EL Series Cot
6.6 Loading the Cot
Loading the cot into a vehicle requires a minimum of two
trained operators working together and maintaining control
of the cot at all times.
1. Assisting Operator: If the ambulance has a folding
bumper, raise the bumper.
2. Both Operators: Place the cot in the loading position
(see Cot Positions, page 8).
3. Both Operators: Roll the cot to the open patient compartment.
4. Control Operator: Push the cot forward until the loading wheels are on the floor of the ambulance and the
front legs contact the bumper.
Figure 19 - Loading the Cot
During this phase of the loading, the front legs will
automatically fold (Figure 19) as the Easy Loading
device contacts the ambulance floor (see Easy Loading
System, page 11).
5. Both Operators: Be prepared to support the weight of
the cot, patient, and any equipment on the cot.
6. Control Operator: Squeeze and hold the rear-leg control handle (Figure 20) and push the cot forward until
it is completely inside the ambulance.
7. Control Operator: Release the rear leg control handle.
Figure 20 - Rear-Leg Control
Handle
8. Control Operator: Lock the cot in the fastener.
20
© Ferno-Washington, Inc 234-3415-00 August 2008
Model 5026-EL Series Cot
Using the Cot
6.7 Unloading the Cot
Unloading the cot requires a minimum of two trained
operators working together and maintaining control of the
cot.
1. Raise the folding bumper, if present.
2. Assisting Operator: Position yourself next to the cot to
assist the control operator.
3. Control Operator: Release the cot from the cot fastener.
Figure 21 - Unloading the Cot
4. Using both hands, grasp the main frame at the foot end
of the cot and begin pulling the cot out of the ambulance.
Important
Keep the loading wheels on the patient compartment
floor and hold the cot high enough to allow both pairs
of legs to unfold completely and lock into the normal
transport position (Figure 21).
If the ambulance is parked on an uneven surface, the
operators (and any helpers) may need to lift the cot
higher than normal to allow the undercarriage to lock.
The front and rear legs will unfold automatically as
the cot is pulled from the ambulance. Do not squeeze
the control handle. Squeezing the control handle will
prevent the legs from locking.
5. Control Operator: While keeping the loading wheels
on the patient compartment floor, lift the cot until all
four transport wheels are off the ground to make sure
the legs have unfolded and locked. Then set the cot on
the ground and roll it away from the ambulance.
Figure 22 - Stop Bar Lowered
Recovering from unloading errors
Safety Lock Stop Bar: If the front legs do not unfold and
lock into the normal transport position while unloading the
cot, the stop bar will catch on the fastener slam lock and
prevent the cot from being removed from the ambulance
(Figure 22). To recover from this situation, see Safety Lock
Device, page 12.
Ratchet Safety Bar Catch: If the cot is removed from the
ambulance and the front legs have not completely unfolded,
the ratchet safety bar system will be activated and the front
legs will lock in an intermediate position (Figure 23). To
recover from this situation, see Ratchet-Bar Safety Catch,
page 12.
© Ferno-Washington, Inc 234-3415-00 August 2008
Figure 23 - Cot With Legs Locked in
Intermediate Position
21
Using the Cot
Model 5026-EL Series Cot
6.8 Using Additional Help
Operating the cot requires a minimum of two trained
operators working together. They may need additional help
when working with heavy loads (patient plus equipment).
The chart below shows suggested placement for operators
and helpers.
Note: Side helpers may need to walk sideways under some
circumstances. Follow your local protocols.
Changing Levels
●
Position themselves at the head and foot ends of the
cot.
●
Maintain control of the cot at all times.
●
Operate the controls.
●
Direct all helpers.
Rolling
Loading/Unloading
Two Operators and
Four Helpers
Two Operators and
Two Helpers
Helpers
Operators should do the following:
Key: O = Operator
H = Helper
P = Patient
Warning
Helpers can cause injury. Maintain control of the
cot, operate the controls, and direct all helpers.
181 kg
400 lb
LOAD LIMIT
Inspect the cot if the load limit of
181 kg has been exceeded (see
Inspecting the Cot, page 24).
Warning
Helpers can be injured. Show helpers where to grasp
the cot to avoid pinch points.
22
© Ferno-Washington, Inc 234-3415-00 August 2008
Model 5026-EL Series Cot
Maintenance
8 - Maintenance
8.1 Maintenance Schedule
Warning
Improper maintenance can cause injury. Maintain
the cot only as described in this manual.
Minimum
Maintenance Intervals
8.2 Disinfecting and Cleaning
the Restraints
Disinfecting (this page)
Remove the restraints from the cot. Disinfect and clean only
as directed in the restraint users’ manuals provided with the
restraints.
Waxing (this page)
8.3 Disinfecting the Cot
Apply disinfectant to all surfaces of the cot. Follow the
disinfectant manufacturer’s instructions for application
method and contact time.
Ferno recommends you inspect the cot for damage as you
disinfect it.
8.4 Cleaning the Cot
1. Remove the restraints, mattress and any accessories.
2. Hand clean all surfaces of the cot with warm water and
a mild detergent.
Cleaning (this page)
Inspecting (page 24)
Lubricating (page 25)
•
As Needed
When using maintenance products, follow the manufacturers’
directions and read the manufacturers’ material safety data
sheets.
Each Use
Keep maintenance records. A sample maintenance record
sheet is provided on page 27.
•
•
•
•
Each Month
The cot requires regular maintenance. Set up and follow a
maintenance schedule. The table at right represents minimum
intervals for maintenance.
•
Important
Disinfectants and cleaners containing bleach, phenolics,
or iodines can cause damage. Disinfect and clean only
with products that do not contain these chemicals.
Important
Water under high pressure, or steam, can penetrate
joints, flush away lubricant, and cause corrosion. Use
caution when cleaning moving parts such as joints and
hinges.
3. Use a brush to remove stains. Do not use a metal wire
brush.
4. Rinse with warm, clear water. Dry the cot with a towel
or allow it to air-dry.
8.5 Waxing the Cot
Important
Using abrasive cleaning compounds or applicators on
the cot can cause damage. Do not use abrasive materials to clean the cot.
While it is not necessary to wax this cot, waxing it will not
damage it, and will help maintain the cot’s appearance.
Disinfect and clean the cot before applying wax. Use an
automotive wax as directed by the wax manufacturer.
© Ferno-Washington, Inc 234-3415-00 August 2008
23
Maintenance
Model 5026-EL Series Cot
8.6 Inspecting the Cot
Have your service’s equipment maintenance personnel
inspect the cot regularly. Follow the checklist at right and
operate the cot through all its functions as described in this
manual.
If inspection shows damage or excessive wear, remove the
cot from service until repair is made.
24
Inspection checklist
●
Are all components present?
●
Is the cot free of excessive wear?
●
Are all screws, nuts, bolts, rivets, and roll pins
securely in place?
●
Do all moving parts operate smoothly and properly?
●
Does the cot lock properly into each position?
●
Does the cot load and unload properly?
●
Does the cot roll smoothly?
●
Are the restraints properly installed?
●
Is restraint webbing in good condition with no cuts
or frayed edges?
●
Are restraint buckles free of visible damage and do
they operate properly?
●
Do installed accessories operate properly without
interfering with cot operation?
●
Is the ambulance properly prepared for the cot with a
Ferno-approved cot fastener installed?
© Ferno-Washington, Inc 234-3415-00 August 2008
Model 5026-EL Series Cot
Maintenance
8.7 Lubricating the Cot
Important
Disinfect and clean the cot before applying lubricant. Use
the lubricants designated below to lubricate the cot. Do not
lubricate points marked with the “do not lubricate” symbol.
Do Not Lubricate
Lubricating parts that should not be lubricated allows
dirt and foreign particles to collect on those parts, resulting in damage. Lubricate only the numbered reference points shown.
Lubricate
Upper-frame Lubrication points
Undercarriage Lubrication points
Use a small amount of lubricant. Lubricate identical
points on each side of the cot.
Use a small amount of lubricant. Lubricate identical
points on each side of the cot.
1
2
3
Backrest Hinge................................. WRL-191S or E-Z-1 (1-2 drops)
Backrest Lock Pin............................ WRL-191S or E-Z-1 (1-2 drops)
Sidearm Lock Pin............................. WRL-191S or E-Z-1 (1-2 drops)
Backrest Bar................................................................Do not lubricate
Sidearm Casting..........................................................Do not lubricate
1
2
3
Main Frame I-Beam............................................ WRL-191S or E-Z-1
Release Bar Pivot Points.................. WRL-191S or E-Z-1 (1-2 drops)
Foot-End Leg Joint Pivot................. WRL-191S or E-Z-1 (1-2 drops)
All Wheels..................................................................Do not lubricate
Legs (except for Foot-End Leg Joint Pivot)...............Do not lubricate
Lubrication-free items
Lubrication-free items
1
2
2
2
2
1
3
1
3
© Ferno-Washington, Inc 234-3415-00 August 2008
25
Parts and Service, Accessories
Model 5026-EL Series Cot
9 - Parts And Service
9.1 Worldwide
To order Ferno parts, and for professional cot repair, contact
your Ferno distributor. Your distributor is the only agent
authorized by Ferno to manage, service, and repair Ferno
products.
Warning
Modifying the cot can cause injury and damage. Use
the cot only as designed by Ferno.
Warning
Improper parts and service can cause injury. Use
only Ferno parts and Ferno-approved service on
the cot.
10 - Accessories
model
SLAM 5026EFX Cot Fastener
359-21
417-1
430
513-13
514
26
description
Cot fastening system (to be installed in ambulance)
Mattress
Patient restraint (torso harness with shoulder and hip straps)
Patient restraint (two-piece)
IV Pole
Oxy Clip (oxygen tank holder)
© Ferno-Washington, Inc 234-3415-00 August 2008
Model 5026-EL Series Cot
Training Record
Date
Name
Training Method
Maintenance Record
Date
Maintenance Performed
© Ferno-Washington, Inc 234-3415-00 August 2008
By
27


