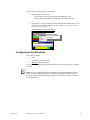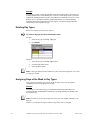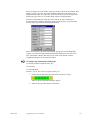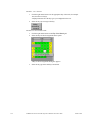
1
GE Fanuc Automation
CIMPLICITY® Monitoring and Control Products
CIMPLICITY
Action Calendar
Operation Manual
GFK-1548A
December 2000
GFL-005
Following is a list of documentation icons:
Warning notices are used in this publication to emphasize that hazardous voltages,
currents, temperatures, or other conditions that could cause personal injury exist in the
equipment or may be associated with its use.
In situations where inattention could cause either personal injury or damage to
equipment, a Warning notice is used.
Caution provides information when careful attention must be taken in order to avoid
damaging results.
Important flags important information.
To do calls attention to a procedure.
Note calls attention to information that is especially significant to understanding and
operating the equipment.
Tip provides a suggestion.
Guide provides additional directions for selected topics.
This document is based on information available at the time of publication. While efforts have been made to be
accurate, the information contained herein does not purport to cover all details or variations in hardware or software,
nor to provide for every possible contingency in connection with installation, operation, or maintenance. Features
may be described herein which are not present in all hardware and software systems. GE Fanuc Automation
assumes no obligation of notice to holders of this document with respect to changes subsequently made.
GE Fanuc Automation makes no representation of warranty, expressed, implied, or statutory with respect to, and
assumes no responsibility for the accuracy, completeness, sufficiency, or usefulness of the information contained
herein. No warranties of merchantability or fitness for purpose shall apply.
CIMPLICITY is a registered trademark of GE Fanuc Automation North America, Inc.
Windows NT, Windows 2000 and Windows 98 are registered trademarks of Microsoft Corporation
This manual was produced using Doc-To-Help®, by WexTech Systems, Inc.
Copyright 2000 GE Fanuc Automation North America, Inc.
Preface
Contents of this Manual
Chapter 1. Introduction: Provides a brief introduction to the Action Calendar.
Chapter 2. Operational Overview: Provides an overview of how the Action
Calendar works and offers suggestions to plan for configuration.
Chapter 3. Configuring the Action Calendar: Provides an in depth
description on how to enter information when configuring the Action Calendar.
Related Publications
For more information, refer to these publications:
CIMPLICITY HMI Base System User's Manual (GFK-1180)
Contents
Introducing Action Calendar
1-1
Welcome to the Action Calendar ........................................................................................... 1-1
Planning for the Action Calendar
2-1
What the Action Calendar Does............................................................................................. 2-1
Action Calendar Interface Overview...................................................................................... 2-3
About the Action Calendar Scheduler.................................................................................... 2-5
Action Calendar Planning Configuration ............................................................................... 2-6
Setting Up Areas...................................................................................................... 2-7
Setting up Day Types with Assigned Days.............................................................. 2-8
Configuring Actual Schedules ................................................................................. 2-9
Making One Time Adjustments to Schedules........................................................ 2-10
Expediting Schedule Adjustment Through Offset Events ..................................... 2-11
Production Shifts and Days .................................................................................................. 2-12
Changing Production Shift Parameters .................................................................. 2-12
Modifying Production Days................................................................................... 2-12
Configuration Changes Incorporated into the System.......................................................... 2-13
Sample Factory Configuration Example .............................................................................. 2-13
Configuring the Action Calendar
3-1
Action Calendar at a Glance................................................................................................... 3-1
Action Calendar Data Entry Overview................................................................................... 3-4
Area Configuration................................................................................................................. 3-6
Adding New Areas................................................................................................... 3-6
Editing Areas ........................................................................................................... 3-7
Deleting Areas ......................................................................................................... 3-7
Day Type Legend................................................................................................................... 3-8
Creating New Day Types......................................................................................... 3-8
Editing Day Types ................................................................................................. 3-10
Copying Day Types ............................................................................................... 3-11
Deleting Day Types ............................................................................................... 3-12
Assigning Days of the Week to Day Types ........................................................... 3-12
Event Configuration ............................................................................................................. 3-15
Creating New Events ............................................................................................. 3-15
Modifying Existing Events .................................................................................... 3-17
Viewing Events...................................................................................................... 3-18
Configuring Offset Events ..................................................................................... 3-20
Creating Offset Events........................................................................................... 3-22
Schedules ............................................................................................................................. 3-23
Adjusting the Schedule View................................................................................. 3-23
Adding a Scheduled Event to a Day Type ............................................................. 3-25
Modifying a Scheduled Event for a Day Type....................................................... 3-26
Deleting a Scheduled Event from a Day Type....................................................... 3-27
GFK-154A
Contents-i
Configuring Schedule Overrides............................................................................ 3-27
Security ................................................................................................................................ 3-36
Role Base Privileges .............................................................................................. 3-36
Day Start .............................................................................................................................. 3-37
Command Line Parameters .................................................................................................. 3-38
Index
Contents-ii
i
CIMPLICITY Action Calendar Operation Manual–April 2000
GFK-1548A
Introducing Action Calendar
Welcome to the Action Calendar
Action Calendar is a feature added to CIMPLICITY HMI, which allows you to
dynamically create, maintain, and execute a calendar schedule of manufacturing events
and associated actions. Turn on lights, heat, and equipment based on a schedule, which
you configure and maintain through simple point and click actions.
This Application
Action Calendar
Module is fully
integrated with
CIMPLICITY HMI
software’s Base System
functionality to enhance
its already powerful
monitoring capability in
a full range of computer
integrated manufacturing
environments. Designed
from the ground up as a
true client / server
architecture,
CIMPLICITY HMI has
always provided more
than simple monitoring
and control.
CIMPLICITY HMI
software’s flexible system architecture and modular design also allows for easy add-on of
functionality. When you take on the challenge of an enterprise wide system, you face
challenges which simple MMI systems just cannot handle. With the CIMPLICITY HMI
Action Calendar you can coordinate plant operations on a timed basis.
GFK-1548A
1-1
The Action Calendar Application Module, which interfaces with the Base System Point
Management facility and User Interface, allows you to easily schedule the execution
events in your system through a simple calendar based user interface. Configured events
can drive real world I/O through CIMPLICITY HMI and turn equipment/utilities on and
off based on production schedules. In addition internal events can be activated to trigger:
•
Data collection
•
Data logging
•
Report generation
•
Execution of scripts or programs.
Managing events and activities associated with your production schedule are made easy
with the CIMPLICITY Action Calendar.
1-2
CIMPLICITY Action Calendar Operation Manual–December 2000
GFK-1548A
Planning for the Action Calendar
What the Action Calendar Does
The Action Calendar option gives you, the system administrator, the ability to build a set
of automated events that can be applied in one area of or throughout your plant. You can
invoke events with associated actions at specific times of a day and during day types (for
example, weekdays) that you define.
An action can be any action supported by the Event Editor. For example an action can set
a point, generate an alarm, download a recipe or even run a user written Basic Script. See
the CIMPLICITY HMI Basic Control Engine Event Editor Operation Manual (GFK1282) and Basic Control Engine Language Reference Manual (GFK-1283) for more
information.
Note: The Action Calendar schedules events with associated actions. It is not designed
for Production scheduling.
The Action Calendar has two major components. The:
1.
Graphical User Interface (GUI) allows users to interactively configure and view
schedule information.
2.
Scheduler is responsible for ensuring that your operations are initiated at the
appropriate times.
Action Calendar's Graphical User Interface
. The Graphical User Interface, which has a familiar electronic day planner appearance:
GFK-1548A
Provides the screens needed for you to configure all Calendar data, including
areas, event actions, and schedules.
Lets you project what events are scheduled either today or for any date in the
future, based on existing Action Calendar configuration data.
Lets you specify exceptions to these standard schedules, as needed, to meet
production needs for a specific date. These schedule overrides can be used to
completely alter a day’s schedule (for example, to accommodate holidays), or to
modify, add, or skip a single event on a specified date.
2-1
Action Calendar's Scheduler
The Action Calendar's Scheduler is a CIMPLICITY HMI resident process that:
Determines the daily production schedules by:
1.
Combining all standard events for the current date.
2.
Applying all overrides associated with that date, until the total plant wide
schedule has been calculated.
Initiates events based on these schedules.
Performs periodic cleanup of the Action Calendar configuration data so that
outdated information (in particular, overrides that correspond to dates in the
past) is automatically purged from the system.
When to Use Other CIMPLICITY HMI Tools
Although the Action Calendar will normally provide for all of your event scheduling
needs, there are two instances where you should use other CIMPLICITY HMI tools:
2-2
1.
If you want to schedule an event to execute every minute, use the
CIMPLICITY HMI Event Editor. The Event Editor provides an easier way
than the Action Calendar to schedule these types of repetitive events.
2.
If you want to schedule an event in less than one-second real time intervals,
use a PLC or a CIMPLICITY PC control to perform the real time control. In
the Action Calendar, events can be scheduled to the second. On a normally
loaded system, your event will execute within +1 second of the target time.
CIMPLICITY Action Calendar Operation Manual–December 2000
GFK-1548A
Action Calendar Interface Overview
It is through the Action Calendar interface that you:
Create and define Areas with scheduled events
Project Schedules for each Area
Action Calendar Areas in a Facility
The Action Calendar lets you divide your facility into any number of areas, each with its
own unique set of events and schedules.
An Area defines specific locations, stations, or work units with which schedule
information may be associated. Examples of areas are
ASSEMBLY
Inspection
Factory
Each area has its own configuration data. One immediate benefit of this feature is that
users only need to be familiar with their own area, and do not need to understand the
entire plant’s operation in order to create or modify schedules. Of course, you, the system
administrator, may also define plant wide areas, to schedule events for the entire factory.
For example, you may dedicate an area to factory_lights. You can then create a
configuration that will instruct the Action Calendar to turn the lights on and off
throughout the plant, at the times you designate.
The information required for an area includes definitions for:
Events
Day types with associated weekdays
Schedules for the day types
Event Definitions
An Event definition provides a list of actions to perform such as Setpoints, and assigns a
unique event name to the association.
Example
To define the event MAIN_LIGHTS_ON, associate the CIMPLICITY Point ID
MASTER_LIGHTS with a value of one (1).
Day Type Definitions
Day type definitions (or classifications) identify the different types of days are required
to accommodate the various production needs of the plant.
Each day type within an area
GFK-1548A
Has its own unique schedule of events
Includes the days of the week (for example, Tuesday) that you designate
Can not have a day of the week (for example, Wednesday) that is assigned to a
different day type
Planning for the Action Calendar
2-3
Examples of day types with assigned days include
Area A
Weekday—Monday, Tuesday, Wednesday, Thursday, Friday
Weekend—Saturday, Sunday
Area B
Workday—Tuesday
Maintenance—Friday
Schedules
A Schedule definition specifies the sequence and timing of events associated with the
area. All times may be specified to the nearest second on a 24-hour clock.
Example
The schedule for a FACTORY area specifies the event MAIN_LIGHTS_ON to occur at
6:00:00am.
Projected Schedules
Projected schedules display a time ordered list of events that are scheduled to occur on a
selected date.
In addition to building base schedules for each area, the Graphical User Interface
provides you with the mechanism to:
Project what an area’s schedule will look like for today or for any date in the
future.
Override any or all events associated with that date with:
Day type overrides completely replace the set of events associated with oneday type with the base schedule associated with a new day type.
Event overrides affect individual events, letting you dynamically add, skip,
or reschedule events at any time.
2-4
CIMPLICITY Action Calendar Operation Manual–December 2000
GFK-1548A
About the Action Calendar Scheduler
The Action Calendar generates the next day schedule on a nightly basis.
The Action Calendar
1.
Determines the current day of the week.
2.
Determines, for each area, the appropriate configured day type.
This day type will either be the standard day type for the area or, if the day type has
been overridden, the new requested day type.
1.
Reads that day type’s schedule, along with any event overrides specific to
today’s schedule, and merges with all other area schedules for that day.
2.
Begins processing of the events once the complete schedule has been built.
Important: Some important notes about how the Action Calendar Scheduler deals with
events include:
If any events are being scheduled during the time that the Action Calendar is
actually generating the schedule, these events will be initiated, in order,
immediately upon completion of the schedule generation.
There will be no predictable order for events that are scheduled to execute
simultaneously.
If a single event performs more than one action, the sequence of the actions is
guaranteed.
When the Calendar determines that an event needs to be initiated, it sends an event
request to the Event Manager (EM) subsystem. If the event has been configured with
logging enabled, then the success or failure of the actions will be logged. See the Basic
Control Engine Event Editor Operation Manual(GFK-1282) for details about where the data
is logged.
GFK-1548A
Planning for the Action Calendar
2-5
Action Calendar Planning Configuration
A suggested order in planning for your Action Calendar includes setting up:
1.
Areas
2.
Events with associated actions
3.
Day types with assigned days
4.
Actual Schedules
Once you have completed the overall plan, you can then:
1.
Make one-time adjustments to any of the schedules
2.
Expedite schedule adjustment through Offset Events
Simple Planning for an Area Called Fanuc CNC Lathe
Procedure
1
2
3
5
6
List Events
Determine
Day Types
Create
Schedule
Day Type Mode
Override Schedules
Calendar Mode
Define
Area
4
Assign Days
of Week
Example
Fanuc CNC
Lathe Area
Holidays
Lathe
On
Lathe
Off
Week Days
M T W Th Fr
Lights
On
Lights
Off
2-6
Weekend
Week Day
Schedule
6:00A Lights On
7:00A Lathe On
10:00A Lathe Off
1:00P Lathe On
3:00P Lathe Off
5-31-99 (Mon.)
Override
No Events
Scheduled
Holiday
Day Type
8:00 P Lathe On
10:00P Lathe Off
11:00P Lights Off
Weekend
Day Type
5-30-99 (Sun.)
Override
8:00A Lights Off
11:00A Lights Off
11:00P Lights On
Skip Lights On
Reschedule
Sa Su
CIMPLICITY Action Calendar Operation Manual–December 2000
Skip
GFK-1548A
Setting Up Areas
When setting up your configuration you need to decide what are the:
Areas into which you will group events
Events you will schedule in each area
You may want to begin planning by defining what appear to be obvious areas. As you
continue planning your configuration, you may see different relationships that prompt
you to redefine your original areas.
The key to defining areas is to identify one or more:
Physically independent areas that have their own repetitive actions in
machinery or peripheral equipment, for example, a raw material cutting area that
has its own light source.
Logical areas, each with its scheduling needs, for example, reporting that is due
every Friday.
Note: The Action Calendar lets you handle your entire facility through a single area. In
fact, Action Calendar provides a pre-configured area, Plant, that you can use as a starting
point.
A plant wide area may be appropriate for company wide actions. However, most likely
you will also need to define more specific areas.
Once you have your initially defined areas, review each area to determine the types of
operations that occur in that area. There may be one or more events associated with each
operation and one or more actions associated with each event.
Each operation typically corresponds to something that is controllable through a
CIMPLICITY HMI point.
In most cases, there will be a set of two or more events (or ultimately, event point values)
that correspond with the operation point referenced in your configuration.
Events can be:
Actions which enable and disable a digital point
A series of actions, each of which sets analog or text points to one of multiple
values
Scripts
Alarms
Recipes
Note: The Action Calendar lets you configure events for points which have been defined
but which have not been incorporated into the runtime system via a Configuration Update
operation.
This enables you to set up a system for a future point configuration modification that will
make these events valid at a future date. Until that time, these events will be ignored by
the Calendar, and messages will be logged whenever an attempt is made to incorporate
these events into a day’s schedule.
GFK-1548A
Planning for the Action Calendar
2-7
Example
A machine requires a light to be on for part of the day and to be off for the remainder.
1.
Create an operation point for the light, called Machine_Light.
2.
Configure two events to control Machine_Light. Call the events
unit_on
unit_off .
The Action Calendar will turn the machine light on and off, based on the times for which
you schedule unit_on and unit_off.
You may also have a series of actions that involve turning off the machine light, which
you can call up through the use of a script.
Setting up Day Types with Assigned Days
Having determined at least the initial set of events that will be required within an area,
you can begin to determine when these events may be invoked. As you review the day
types, you may need to redefine some areas.
The Action Calendar carries out events that you schedule for day types.
You may:
Require multiple standard day types to handle the scheduling requirements such
as weekdays, weekends and holidays.
Configure additional reserved day types for a specific area because your plant
has other conditions, which you must accommodate (for example, extended
production days or shutdown).
Configure a day type that has no events. Any days of the week assigned to that
day type will have no events scheduled for that area.
However, within one area, you can only assign a specific day of the week, for example,
Friday, to one day type.
Example
In one area you:
1.
Define Weekdays as a day type to which you assign Monday through Friday
2.
Decide that the area has additional events on Friday and, therefore, define Friday
as a day type. You assign Friday to it, thereby removing Friday from Weekdays
3.
Do define Saturday and Sunday as None. "None" has no schedule.
The Action Calendar will display
2-8
Weekdays as Monday through Thursday
Friday as Friday
Saturday and Sunday are None.
CIMPLICITY Action Calendar Operation Manual–December 2000
GFK-1548A
At this stage of your planning, you may decide to:
Create another area where you:
Create Friday as a day type and schedule the additional events,
Keep the day type Weekdays as Monday through Friday in this area.
or
Keep Friday as a day type in this area with a schedule that includes all the events
for Weekdays and Friday's additional events. Action See "Configuring the Action
Calendar – Copying Day Types"
Days Assigned to Day Types Example
Weekends=None
Mon-Thur=WeekDay
Fri=Friday
Configuring Actual Schedules
Once you have defined:
Areas
Events that occur in each area
Day types with assigned days
you are ready to schedule the time during the day types, that the Events will occur within
each Area.
Note: Since the configuration screens are intended to accommodate standard, repetitive
events, exception conditions should not be included in the initial schedules. Instead,
these can be more appropriately handled through event or day type overrides, discussed
in more detail below.
GFK-1548A
Planning for the Action Calendar
2-9
Making One Time Adjustments to Schedules
Once you have designed and configured standard configuration data, you can analyze
your system’s needs for any date specific overrides. Overrides supported by the Action
Calendar can be divided into two distinct categories:
Day type overrides
Event overrides
Day Type Overrides
Day type overrides replace an entire day’s schedule for the designated area.
This is particularly useful in the case of holidays or special events that fall on a day in
which production would normally run.
Example
If July 4 falls on a Monday, which is configured as a Weekday in the base configuration,
you use a day type override to define July 4 as a Holiday.
Another example is a case where, due to increased production demands, the plant decides
to run extra hours to meet these demands. If an alternate schedule and day type have been
configured to meet these additional production hours, you can use the alternate day type
to override the standard day type.
Event Overrides
Event overrides are specific to a single event.
The three supported event overrides are:
1.
Adding an unscheduled event to the schedule.
This type of override is useful in situations when an operation is required on a
given date where it normally would not be part of that day’s schedule.
2.
Rescheduling a specific event to a new time.
This override can be used to alter the time at which a scheduled event is
initiated.
3.
Skipping an event, which would otherwise be initiated.
This override is useful in situations where a standard event is not desired on a
particular date.
There are a number of rules associated with overrides, which are important to understand.
2-10
Any override, which is scheduled for the current day, will be incorporated into
the current schedule immediately upon being requested by the user.
If a day type override is configured, all existing event overrides for that same
date and area will be immediately deleted, so that an override is not
inadvertently applied to an event for which it was not intended.
Initiate all day type and event overrides after you project a schedule for the date
in question. These overrides will be automatically reflected in the projected
schedule being presented to the user.
CIMPLICITY Action Calendar Operation Manual–December 2000
GFK-1548A
Expediting Schedule Adjustment Through Offset Events
As you define an area's events and their scheduling requirements, including needs for
overrides, you may discover groups of events that are logically related and are, therefore,
always processed as a set.
You can expedite scheduling the group at any time, by establishing an Initial/Offset Event
relationship among these events.
An Initial Event is one that, whenever scheduled, has one or more offset events
scheduled relative to it at fixed time intervals.
An offset event occurs relative to when the initial event occurs. For example, it may
occur one minute before the initial event, or three hours after.
Establishing an initial/offset event relationship has the following impact on a schedule,
no matter whether you are adding it to the base schedule or as an event type override.
Adding an unscheduled initial event to a schedule causes all the initial event’s
offset events to be scheduled automatically.
Rescheduling an initial event to a new time causes all the initial event’s offset
events to be rescheduled automatically, so that the fixed time intervals between
all the events in the set are preserved.
Skipping or deleting an initial event, which would otherwise be initiated, causes
all the initial event’s offset events to be skipped or deleted automatically.
Changing the interval of the offset events causes all instances of the scheduled
event/offsets to change automatically.
You uniquely define Initial/offset event relationships for each area. Within an area, the
relationships you define apply across schedules for all day types.
GFK-1548A
Planning for the Action Calendar
2-11
Production Shifts and Days
If your plant has multiple shifts and 24 hour or nonstandard productions days, you may
have to customize the Action Calendar definitions of production shifts and days.
Changing Production Shift Parameters
If your production facility operates in a multiple shift environment, it may be desirable
from an operational or maintenance viewpoint to configure your system so that each shift
maintains its own schedule of operations. Since an Action Calendar area may only be
associated with a single day type at any given time, you can define Pseudo-Areas within
an Action Calendar.
A pseudo-area maintains its own event, day type, schedule, and day of the week
definitions, while still merging the individual schedules at runtime into a single plant
wide schedule for any given day.
Within a given area, each Pseudo-Area will really represent the same set of devices,
locations, points, etc., but will only schedule events against these points during the
respective timeframe of each shift.
Example
Pseudo-Areas could be “Assembly_Shift1” and “Assembly_Shift2”, each with their own
respective schedules.
Modifying Production Days
By default, Action Calendar is set up to display a production day as midnight this
morning through midnight tonight.
However, if your production facility has production days that run 24 hours, with one
production shift running through midnight, you may want to set up different parameters
for your production day.
If you prefer, you can configure the Action Calendar to adjust the 24-hour-production
period to a period more desirable for your production facility.
2-12
CIMPLICITY Action Calendar Operation Manual–December 2000
GFK-1548A
Configuration Changes Incorporated into the System
As you configure schedules through the Action Calendar User Interface, the data is sent
to the Action Calendar, which stores it in a set of Action Calendar configuration files.
The data is immediately incorporated into the runtime system. This means that if you
modify a day type schedule that is in effect for the day, your modifications will be
applied immediately to the currently running schedule.
When you have to add an event to the current day’s schedule you may add it to the
schedule using an Add Event override.
Sample Factory Configuration Example
Assume we have a factory that:
1.
Runs the same schedule five days a week.
2.
Does not run manufacturing on the weekends.
3.
Has maintenance crews that work seven days a week.
Production Day Schedule
The schedule for a production day looks like:
Activity
Factory Lights On
Kilns Turned On
Kilns Warmed Up
Kilns On Full
Assembly Conveyors On
Morning Break Starts
Morning Break Ends
Lunch Starts
Lunch Ends
Afternoon Break Starts
Afternoon Break Ends
First Shift Ends
Assembly Conveyors Off
Assembly Conveyors On
Second Shift Starts
Dinner Starts
Dinner Ends
Evening Break Starts
Evening Break Ends
Assembly Conveyors Off
Kilns Cooled Off
Kilns Turned Off
Factory Lights Off
GFK-1548A
Planning for the Action Calendar
Time
5:30 AM
5:30 AM
5:45 AM
6:00 AM
6:00 AM
10:30 AM
10:45 AM
12:00 PM
12:45 PM
2:15 PM
2:30 PM
3:45 PM
3:45 PM
4:00 PM
4:00 PM
5:30 PM
6:15 PM
8:00 PM
8:15 PM
11:00 PM
11:00 PM
11:15 PM
11:30 PM
Area of Plant Affected
ALL
Kilns Only
Kilns Only
Kilns Only
Assembly Only
ALL
ALL
ALL
ALL
ALL
ALL
ALL
Assembly Only
Assembly Only
ALL
ALL
ALL
ALL
ALL
Assembly Only
Kilns Only
Kilns Only
ALL
2-13
Point Configuration
In order to control production activities, a set of CIMPLICITY HMI Point IDs is needed
as follows:
Point ID
Point Type
Function
MAIN_LIGHTS
KILN_ENABLED
KILN_TEMP
ASSY_CONVEY
BREAK_LIGHT
DIGITAL
DIGITAL
ANALOG
DIGITAL
DIGITAL
Used to control factory lights
Used to enable/disable kilns
Used to control kiln temperature
Used to enable/disable conveyors
Used to turn on/off light to signal
breaks
Note: This example assumes that these points are already configured.
Area Configuration
While all of the plant's required events could be controlled under a single area, it makes
sense from a maintenance and ease of use perspective to define the three following areas:
1.
PLANTWIDE
2.
KILN_AREA
3.
ASSEMBLY
Event Configuration
Having defined three areas, we can now split the list of events (as indicated above) into
area specific events, and begin to configure each area.
PLANTWIDE Events
Beginning with the PLANTWIDE area, we can define the following events:
2-14
Event ID
Point ID
Point Value
LIGHTS_ON_EV
LIGHTS_OFF_EV
START_BREAK_EV
END_BREAK_EV
START_LUNCH_EV
END_LUNCH_EV
MAIN_LIGHTS
MAIN_LIGHTS
BREAK_LIGHT
BREAK_LIGHT
BREAK_LIGHT
BREAK_LIGHT
1
0
1
0
1
0
CIMPLICITY Action Calendar Operation Manual–December 2000
GFK-1548A
KILN_ONLY Events
The events associated with the KILN_ONLY area are:
Event ID
Point ID
Point Value
KILN_ON_EV
KILN_OFF_EV
KILN_WARM_EV
KILN_FULL_EV
KILN_COOL_EV
KILN_ENABLED
KILN_ENABLED
KILN_TEMP
KILN_TEMP
KILN_TEMP
1
0
250
500
100
Assembly Event Configuration
Finally, the events associated with the ASSEMBLY area are:
Event ID
Point ID
CONVEYOR_ON_EV ASSY_CONVEY
CONVEYOR_OFF_EV ASSY_CONVEY
Point Value
1
0
Offset Event Configuration
Having defined events for each area, we can now create sets of events that are done in a
group. Creating events offset from a base event by a relative time does this.
PLANTWIDE Offset Events
Beginning with the PLANTWIDE area, we can define the following offset events:
Base Event
Offset Event
START_BREAK_EV
START_LUNCH_EV
END_BREAK_EV 00:15
END_LUNCH_EV 00:45
Offset Time
KILN_ONLY Offset Events
The offset events associated with the KILN_ONLY area are:
GFK-1548A
Base Event
Offset Event
KILN_ON_EV
KILN_ON_EV
KILN_OFF_EV
KILN_WARM_EV 00:15
KILN_FULL_EV
00:30
KILN_COOL_EV -00:15
Planning for the Action Calendar
Offset Time
2-15
Day Type Configuration
There is one set of day types for the PLANTWIDE Area and one for the KILN_ONLY
and ASSEMBLY areas.
PLANTWIDE Area Day Type
The day types associated with the PLANTWIDE area are:
Day Type ID
Purpose
PRODUCTION_DAY
MAINT_ONLY_DAY
Used for days in which production is run
Used for days when only maintenance
crew
KILN_ONLY and ASSEMBLY Area Day Type
The day types associated with both the KILN_ONLY and ASSEMBLY areas is:
Day Type ID
Purpose
PRODUCTION_DAY
Used for days in which production is run
Schedule Configuration
There are different base schedules for each area.
PLANTWIDE Area Base Schedule
The base schedule associated with the PLANTWIDE area is:
2-16
Day Type ID
Event ID
PRODUCTION_DAY
PRODUCTION_DAY
PRODUCTION_DAY
PRODUCTION_DAY
PRODUCTION_DAY
PRODUCTION_DAY
PRODUCTION_DAY
PRODUCTION_DAY
PRODUCTION_DAY
PRODUCTION_DAY
PRODUCTION_DAY
PRODUCTION_DAY
MAINT_ONLY_DAY
MAINT_ONLY_DAY
LIGHTS_ON_EV
START_BREAK_EV
END_BREAK_EV
START_LUNCH_EV
END_LUNCH_EV
START_BREAK_EV
END_BREAK_EV
START_LUNCH_EV
END_LUNCH_EV
START_BREAK_EV
END_BREAK_EV
LIGHTS_OFF_EV
LIGHTS_ON_EV
LIGHTS_OFF_EV
Time
5:30
10:30
10:45
12:00
12:45
14:15
14:30
17:30
18:15
20:00
20:15
23:30
5:30
23:30
CIMPLICITY Action Calendar Operation Manual–December 2000
Offset Flag
0
0
0
0
0
GFK-1548A
KILN_ONLY Area Base Schedule
The base schedule associated with the KILN_ONLY area is:
Day Type ID
Event ID
Time
PRODUCTION_DAY
PRODUCTION_DAY
PRODUCTION_DAY
PRODUCTION_DAY
PRODUCTION_DAY
KILN_ON_EV
KILN_WARM_EV
KILN_FULL_EV
KILN_COOL_EV
KILN_OFF_EV
05:30
05:45
06:00
23:00
23:15
Offset
Flag
0
0
0
ASSEMBLY Area Base Schedule
The base schedule associated with the ASSEMBLY area would be:
Day Type ID
Event ID
Time
PRODUCTION_DAY
PRODUCTION_DAY
PRODUCTION_DAY
PRODUCTION_DAY
CONVEYOR_ON_EV
CONVEYOR_OFF_EV
CONVEYOR_ON_EV
CONVEYOR_OFF_EV
06:00
15:45
16:00
23:00
Offset
Flag
Day of the Week Assignments
Finally, the days of the week are assigned to day types for each area as follows:
GFK-1548A
Area
Day of Week
Day Type ID
PLANTWIDE
PLANTWIDE
PLANTWIDE
PLANTWIDE
PLANTWIDE
PLANTWIDE
PLANTWIDE
KILN_ONLY
KILN_ONLY
KILN_ONLY
KILN_ONLY
KILN_ONLY
ASSEMBLY
ASSEMBLY
ASSEMBLY
ASSEMBLY
ASSEMBLY
SUNDAY
MONDAY
TUESDAY
WEDNESDAY
THURSDAY
FRIDAY
SATURDAY
MONDAY
TUESDAY
WEDNESDAY
THURSDAY
FRIDAY
MONDAY
TUESDAY
WEDNESDAY
THURSDAY
FRIDAY
MAINT_ONLY_DAY
PRODUCTION_DAY
PRODUCTION_DAY
PRODUCTION_DAY
PRODUCTION_DAY
PRODUCTION_DAY
MAINT_ONLY_DAY
PRODUCTION_DAY
PRODUCTION_DAY
PRODUCTION_DAY
PRODUCTION_DAY
PRODUCTION_DAY
PRODUCTION_DAY
PRODUCTION_DAY
PRODUCTION_DAY
PRODUCTION_DAY
PRODUCTION_DAY
Planning for the Action Calendar
2-17
Configuring the Action Calendar
Action Calendar at a Glance
The Action Calendar gives you the capability to:
Define and automatically execute events in your plant, based on a standard
schedule.
Project a schedule of automated events for any day in the future
Add, delete or reschedule events for a specific day.
Once you have planned your areas and events, entering information into the Action
Calendar is very straightforward. See "Operational Overview" in this manual for more
information about planning.
To open the Action Calendar:
Double click
in the right pane of the CIMPLICITY HMI Workbench.
If the icon does not appear in the, you may need to add the Action Calendar option to
your project.
When you open the Action Calendar, you see the Action Calendar window that is divided
into four parts:
GFK-1548A
Area
Schedule Type
Day Type Legend
Weekday Schedule
3-1
Action Calendar Overview
Area
Day Type or Date
Day Type mode
Day Type mode
Schedule
Type
Hour tags for when
events are scheduled
Weekday schedule
Day Type Legend
Calendar mode
Following is a brief description of each part in the Action Calendar window.
Area
The Area box displays the current area being viewed, for example an area called Plant.
Selecting the new menu option accessed by clicking the right mouse button over the
control or selecting the menu button can configure new areas– .
Schedule Type
The Schedule Type group contains radio buttons for
Day Type— to configure and view the events for a type of day
Calendar— to view and override the schedule for a particular date.
Weekday Schedule
The Weekday Schedule section
Allows the configuration and viewing of the events configured for a day type or
a projected calendar schedule. You can add or remove events from the schedule.
Tags the hour intervals for which events are scheduled. These tags remain
stationary even when you scroll the schedule up and down.
When you view:
3-2
Day Type schedules and select a day type in the Day Type Legend you will see
the day type's associated schedule in the schedule area.
Calendar schedules you will see the schedule for the date that is selected on the
calendar.
CIMPLICITY Action Calendar Operation Manual–December 2000
GFK-1548A
Day Type Legend
The Day Type Legend grid provides configuration and selection of the day type being
viewed. Each day type is assigned a color. Each day of the week (for example, Tuesday)
displays the color of the day type to which it is assigned.
When your Schedule Type is in Day Type mode, the Day Type Legend displays the:
Color and Day Type grid
Days—Mon through Sat
When your Schedule Type is in Calendar mode, the Day Type Legend displays the:
GFK-1548A
Color and Day Type grid
Year
Month
Days—Mon through Sat
Days of the month—from 1 – 31 depending on how many days are in the
displayed month.
Configuring the Action Calendar
3-3
Action Calendar Data Entry Overview
When you have completed planning each area's events, day types and schedules and are
ready to enter data into the Action Calendar, it is recommended that you enter information
in the following order.
Configure areas
Create day types
Assign days of the week to day types
Create events before or while scheduling
Create a schedule using Day Type mode
Override schedules in Calendar mode
Factory Action Calendar Schedule Example
Area
Day of Week
Day Type ID
PLANTWIDE
PLANTWIDE
PLANTWIDE
PLANTWIDE
PLANTWIDE
PLANTWIDE
PLANTWIDE
KILN_ONLY
KILN_ONLY
KILN_ONLY
KILN_ONLY
KILN_ONLY
ASSEMBLY
ASSEMBLY
ASSEMBLY
ASSEMBLY
ASSEMBLY
SUNDAY
MONDAY
TUESDAY
WEDNESDAY
THURSDAY
FRIDAY
SATURDAY
MONDAY
TUESDAY
WEDNESDAY
THURSDAY
FRIDAY
MONDAY
TUESDAY
WEDNESDAY
THURSDAY
FRIDAY
MAINT_ONLY_DAY
PRODUCTION_DAY
PRODUCTION_DAY
PRODUCTION_DAY
PRODUCTION_DAY
PRODUCTION_DAY
MAINT_ONLY_DAY
PRODUCTION_DAY
PRODUCTION_DAY
PRODUCTION_DAY
PRODUCTION_DAY
PRODUCTION_DAY
PRODUCTION_DAY
PRODUCTION_DAY
PRODUCTION_DAY
PRODUCTION_DAY
PRODUCTION_DAY
See the next page for a sample data entry process.
3-4
CIMPLICITY Action Calendar Operation Manual–December 2000
GFK-1548A
Simple Configuration of an Area Called Fanuc CNC Lathe
Simple Data Entry for an Area Called Fanuc CNC Lathe
Procedure
1
2
Create Day
Types
Define
Area
3
Assign
Days of Week
5
6
Create Schedule
Day Type Mode
Override Schedules
Calendar Mode
4
Create Events
before or while
scheduling
Example
Week Day
Schedule
6:00A Lights On
7:00A Lathe On
10:00A Lathe Off
Fanuc CNC
Lathe Area
Holidays
Week Days
M T W Th Fr
Weekend
Sa Su
Lathe
On
Lathe
Off
Lights
On
Lights
Off
GFK-1548A
Configuring the Action Calendar
5-31-99 (Mon.)
Override
No Events
Scheduled
Holiday
Day Type
1:00P Lathe On
3:00P Lathe Off
8:00 P Lathe On
10:00P Lathe Off
Weekend
11:00P
Lights Off
Day Type
8:00A Lights Off
5-30-99 (Sun.)
Override
11:00A Lights Off
11:00P Lights On
Skip Lights On
Reschedule
Skip
3-5
Area Configuration
You will do all of your scheduling in one or more areas.
Areas can be physically independent or logical. See "Operational Overview" in this manual.
Adding New Areas
You use the Area Properties dialog box to add new areas. There are two methods to open
the Area Properties dialog box.
To Open the Area Properties dialog box:
Method 1:
1.
Click File on the Action Calendar's menu bar.
2.
Select New.
3.
Select Area.
Method 2:
1.
Click the Popup menu button– –to the right of the Area dialog box.
2.
Select New.
Enter the following information in the Area Properties dialog box:
3-6
Area Id
The name of the area, 15 mixed case characters or
less.
Description
A 40 character or less description used by you to
provide more information about the area.
Resource ID
The Resource ID to use for the area. Resources can
be used to implement access control for the user
interface. If you don’t know yet what sort of security
you will implement, select the $SYSTEM resource.
The configuration can always be changed later. See
the section "Security" in this chapter for more
information.
CIMPLICITY Action Calendar Operation Manual–December 2000
GFK-1548A
Editing Areas
After you create an area, you can easily edit its properties..
To edit the an area's properties:
1.
Select the area you want to edit in the Area field.
2.
Click the Popup menu button
3.
Select Edit.
to the right of the Area field.
The Area Properties dialog box appears.
3.
Change the Description or the Resource ID.
Deleting Areas
When you no longer need an existing area, delete it.
To delete an area:
1.
Select the area in the Area field.
2.
Click the Popup menu button
3.
Select Delete from the menu.
.
The area is deleted.
Important: When an area is deleted, all of its day types, events and scheduling
information are also deleted.
GFK-1548A
Configuring the Action Calendar
3-7
Day Type Legend
Before you begin to schedule events, you need to define day types and assign days of the
week to the day types, for each area in your plant.
You can create day types that you:
Use immediately and to which you assign one or more days of the week (for
example, Friday).
Reserve for future use, by creating it but not assigning any days of the week to it.
These reserved day types can then have days of the week assigned to them
whenever their schedules are needed. This feature is particularly useful when one
schedule replaces another for extended periods of time.
Note: If you only need to change the schedule for a few Thursdays, you can override
each Thursday that requires the long production run. You do this when the selected
Schedule Type is in Calendar mode. See "Overriding Day Types" in this chapter.
Example
A cutting machine, in the Cutting Area, normally runs from 1:00pm through 4:00pm
every Monday through Friday.
You schedule the Action Calendar to turn the machine on and off.
The Cutting Area has already been defined.
Now you will create a day type in the Cutting Area called Weekdays and assign
Monday through Friday to that day type.
The plant manager tells you that every Thursday the cutting machine will have to run
from Noon through 6:00pm.
You create a day type called Long Run and assign Thursday to that day type. Every
Thursday the Action Calendar will run the Long Run Schedule. You do this when the
Action Calendar is in Day Type mode.
Creating New Day Types
To create a new day type, you fill information in the Day Type Properties dialog box.
Open a new Day Type Properties dialog box using any one of three methods.
To open a new Day Type Properties dialog box:
Method 1
3-8
1.
Click File on the Action Calendar menu bar.
2.
Select New.
3.
Select Day Type.
CIMPLICITY Action Calendar Operation Manual–December 2000
GFK-1548A
Method 2
Double Click on an empty row in the Day Type grid.
Method 3
1.
Click the right mouse button on the Day Type grid.
2.
Select New.
The Day Type Properties dialog box appears.
3.
GFK-1548A
Enter the following information in the Day Type Properties dialog box:
Name
The 16 character mixed case name for the
day type.
Description
A 40 character or less description used by
you to provide more information about the
day type.
Color
A color used to represent the day type
graphically in the week and month
calendars. Black is an invalid color, it is
used to represent unassigned days.
Configuring the Action Calendar
3-9
Editing Day Types
Change the color that represents a day type
Edit the properties of a day type
You can change the color that represents a Day Type in the Day Type Legend grid or in
the Day Type Properties dialog box.
To change the color of an existing Day Type in the Day Type Legend grid:
1.
Click the color directly in the DayType grid.
A menu arrow appears.
2.
Click the down arrow
.
A Color palette appears.
Click a
standard color
once to select
Click one to open
the (custom)
Color dialog box
3.
3-10
Either:
Click the standard color you want once. It will appear both in the grid and,
for the corresponding days, on the Weekday Title bar.
Click a custom color or custom color square. The Color dialog box appears
in which you can create a custom color. See the CIMPLICITY HMI CimEdit
Operation Manual(GFK-1396) for a detailed description of how to create a
custom color.
CIMPLICITY Action Calendar Operation Manual–December 2000
GFK-1548A
To edit the properties of an existing day type:
Method 1:
Double click the entry in the Day Type grid.
Method 2:
1.
Click the right mouse button menu on the item
A menu appears.
2.
Select Edit.
Result: Using either method, the Day Type Properties dialog box appears for the Day
Type that you want to edit.
Copying Day Types
You can copy an existing day type to a new day type within an area. To get the greatest
benefit from this feature, use it after you have created the original day type's entire
schedule. When you do, you will copy the entire schedule for the original day type to the
new day type.
This feature is particularly useful when you want to create a new day type that contains a
slightly modified schedule from the original. You can then easily edit the new day type
and assign days of the week to it whenever the modified schedule is required.
To copy a day type:
1.
Select the day type in the Day Type grid that you want to copy.
2.
Click the right mouse button.
3.
Select Copy from the menu that appears.
A Copy Day Type dialog box appears.
4.
Type the name of the new day type in the New Day Type field.
5.
Click OK.
The Action Calendar creates a new day type with the name you specified and copies the
original day type's weekday schedule to the new day type.
GFK-1548A
Configuring the Action Calendar
3-11
Example
For example, you have a Weekday schedule for the spring and summer to start and stop a
molding machine that is in the Molding area . However, in the fall and winter you need to
lengthen the molding machine's run time on Wednesday and Thursday. You create a Long
Run day type by copying the Weekday schedule and editing it to extend the molding
machine's runtime hours. When the fall season begins, you can then assign Wednesday
and Thursday to the Long Run day type.
Deleting Day Types
When you no longer need a day type, delete it.
To delete a day type and all its scheduled events:
Method 1:
1.
Select the day type in the Day Type grid.
2.
Click Delete.
Method 2:
1.
Select the day type in the Day Type legend.
2.
Click the right mouse button.
3.
Select the delete option.
Note: A day type cannot be deleted when it has a day of the week assigned to it or is used
as a day type override.
Assigning Days of the Week to Day Types
Once you have created day types you can assign each day of the week that requires
scheduling in an area to its appropriate day type.
Example
For example, if you created a day type called Weekend and your plant adheres to a
weekend schedule on both Saturday and Sunday, you assign Saturday and Sunday to the
Weekend day type.
Note: In each area, you can only assign a day of the week (for example, Monday) to one
day type.
However, you can have day types to which no days of the week are assigned
3-12
CIMPLICITY Action Calendar Operation Manual–December 2000
GFK-1548A
When you assign a day of the week to a day type, the day of the week (for example, Wed)
displays in its day type color. The Action Calendar displays days that you have not yet
assigned in black. Once you assign a day of the week to a day type you can assign it to a
different day type. However, you cannot change it back to being unassigned.
There are several methods to assign days of the week to day types. Following is a
description of three methods to assign days of the week to day types. You perform the
first two in Day Type mode, the third in Calendar mode
When you select Day Type mode in the Schedule Type group (above the Day Type
Legend) you will see the days Sun through Sat underneath the grid. (You will not see
days of the month.). While in this mode you can either call up the Day of Week
Assignments dialog box or use a shortcut method..
To assign a day of the week to a Day Type:
Use the Day of Week Assignment dialog box
Use a shortcut
Use Calendar Mode
Method 1: Use the Day of Week Assignment dialog box
1.
Double click the appropriate day of the week from the row of days.
A Day of Week Assignments dialog box appears.
2.
GFK-1548A
Select the day type from each day's menu field.
Configuring the Action Calendar
3-13
Method 2: Use a shortcut
1.
Click the right mouse button over the appropriate day of the week (for example
Tue) from the row of days.
A Popup menu lists all of the day types you configured for the area.
2.
Select the day type to assign to the day.
Method 3:Use the Calendar mode
1.
Click the right mouse button on the Day of the Month grid.
2.
Select the Day Of Week Assignments menu option.
A Day of Week Assignments dialog box appears.
3.
3-14
Select the day type from each day's menu field.
CIMPLICITY Action Calendar Operation Manual–December 2000
GFK-1548A
Event Configuration
In addition to creating day types for each area, you need to create the events that may be
scheduled during one or more day types in that area.
You can create new events either before or during scheduling.
Working with events includes:
Creating a new event, which can include a series of one or more actions that
make up the event. Actions include:
Setpoints
Alarm generation
Scripts
Recipes.
For more information on the type of actions available please consult the
CIMPLICITY HMI Event Editor Manual (GFK-1282).
Modifying an existing event
Scheduling the event to occur at specific times in your schedule
When necessary, changing the event. All of your changes affect all instances of
the event in the schedule.
Creating offset events to expedite scheduling
Creating New Events
You can create a new event:
Before you begin scheduling, when the Schedule Type is in Day Type mode.
While you are entering schedules and the Schedule Type is in Calendar mode.
The Action Calendar provides three methods to open the new Event properties dialog
box.. The first two methods are available in both Day Type and Calendar mode; the third
in Calendar mode only.
To open the New Event Properties dialog box:
Method 1: In Day Type Mode or Calendar Mode
1.
Select File from the Action Calendar's menu bar.
2.
Select New.
3.
Select Event.
Method 2: In Day Type or Calendar Mode
1.
Select Edit from the Action Calendar's menu bar.
2.
Select Events.
An Events dialog box displays. See "Viewing Events" in this chapter.
GFK-1548A
3.
Right click on any event in the Event dialog box tree.
4.
Select New.
Configuring the Action Calendar
3-15
Method 3: In Calendar Mode
1.
Select the day type for which you are creating a schedule.
2.
Select the time that the event will occur.
3.
Click the right mouse button.
4.
Select New from the popup menu.
5.
Click the Menu button
6.
Select New.
to the right of the Event dialog box.
When you complete any method, the General tab of the New Event Properties dialog box
displays.
New Event Properties Dialog Box Example
Dialog box when first opened
Dialog box the first time New is pressed.
Use the side buttons on the General tab of the New Events Properties dialog box as
follows:
New
Add new actions.
Delete
Delete an existing action.
Move Up / Move Down
Position an Action item in the desired order of
execution.
The fields you fill in on the bottom of the General tab of the New Events Properties
dialog box depend on what action you select in the Action type field.
Action type
The default action is Setpoint(,). This action appears
in the Actions box the first time you click New. You
can configure that action or select another from the
Action type. menu field. If you select another action
the fields will change to reflect your choice.
See the CIMPLICITY HMI Basic Control Engine Event Editor Operation Manual (GFK1282) and Basic Control Engine Language Reference Manual (GFK-1283) for more
information.
3-16
CIMPLICITY Action Calendar Operation Manual–December 2000
GFK-1548A
Modifying Existing Events
When you modify an existing event, the Action Calendar applies your changes to that
event wherever it is scheduled in its area.
To modify an existing event:
1.
Click Edit on the Action Calendar menu bar.
The Events dialog box appears.
2.
Select the event you want to modify.
3.
Right click the event.
4.
Select Edit.
The General tab of the Event Properties dialog box appears, displaying the event you
want to modify.
Use the buttons in the General tab of the Event Properties dialog box as follows:
New
Add a new action to the list.
Delete
Delete an action from the list.
The fields you fill in on the bottom of the Event Properties dialog box depend on what
action you select in the Action type field.
GFK-1548A
Configuring the Action Calendar
3-17
Action type
If you did not select an action when you created the
event, the default action, Setpoint(,), appears in the
Actions box the first time you click New.You can
configure that action or select another from the
Action type menu field. If you select another action
the fields will change to reflect your choice.
See the CIMPLICITY HMI Basic Control Engine Event Editor Operation Manual (GFK1282) and Basic Control Engine Language Reference Manual (GFK-1283) for more
information.
Viewing Events
You can view all configured events in an area along with scheduling information for each
event through the Events dialog box
To view all configured events in an area:
1.
Click Edit on the Action Calendar's menu bar.
2.
Select Events.
The Events dialog box displays:
When you are in the Events dialog box:
3-18
At first, you will see a tree of the events along with scheduling information for
each event..
As you navigate through the tree, the hour Schedule part of the Action dialog
box will update and position the corresponding event.
CIMPLICITY Action Calendar Operation Manual–December 2000
GFK-1548A
Schedule Section of the Action Calendar
Day Type mode
Calendar mode
Hour tags for when
events are scheduled
Events can be:
Deleted
Added
Edited
Scheduled
Unscheduled
Note: Events can only be deleted when they are not scheduled.
GFK-1548A
Configuring the Action Calendar
3-19
Configuring Offset Events
Offset Events allow you to specify a sequence of events that always occur in a certain
order and at a certain time.
Offset Events provide you with a way to expedite any rescheduling that occurs for the
sequenced events by reducing the number of calendar entries you have to make for each
time the sequence is scheduled to one (1). Needless to say this also minimizes the
possibility for error.
Important: Offset events only support one level of offset. You cannot create an offset of
an offset.
In the next example, the Kiln_Start event, which is an offset of Kiln_On cannot have an
event that is scheduled relative to when it occurs. For example, Kiln_Preheat has to occur
relative to Kiln_On (20 minutes prior). It can not be configured to occur 10 minutes after
Kiln_Start.
Simply said, if you are a programmer—offsets cannot be nested.
Example
For the sake of the example, say your factory has a Kiln. To start this Kiln, you must
perform the following events in the following order:
1.
Kiln_Start - Turn on Kiln
2.
Kiln_Preheat - Preheat Kiln (10 minutes later)
3.
Kiln_On_Full - Kiln on Full (20 minutes later)
There are at least three methods to configure your schedule. However, the first is
inefficient; the second is problematic; the third is the best choice.
Important: Events with offset that wrap around the end of the day are not supported.
Example
You schedule an event for 11:59 PM on March 1 and an offset event of two minutes. The
offset event will be scheduled for 12:01 AM on March 1, NOT 12:01 AM on March 2.
Method 1. (Inefficient)
You could easily configure three scheduled events to occur.
1.
7:00 – Kiln_Start
2.
7:10 – Kiln_Preheat
3.
7:30 – Kiln_On_Full
However, if you decide to start the Kiln 30 minutes earlier tomorrow, you need to
reschedule three events. Or if you decide that the preheat cycle can be decreased to 10
minutes, you need to move all Kiln_On_Full events back 10 minutes in all of our
schedules.
Method 2. (Problematic)
One possible offset configuration is, in the Offset tab of the Event Properties dialog box,
to configure the event:
1.
3-20
Kiln_Start
CIMPLICITY Action Calendar Operation Manual–December 2000
GFK-1548A
2,
Kiln_Preheat to happen 10 minutes later
3.
Kiln_On_Full to be 30 minutes after Kiln_Start
This way when you schedule Kiln_Start the other two events are automatically scheduled.
The problem with this strategy is that you need the Kilns to be on at 7:30. If the preheat
cycle is decreased by 10 minutes you still need to change your schedules to move
Kiln_Start forward .
Method 3. (Best method)
The correct solution is illustrated below. In the Offset tab of the Event Properties dialog
box, configure the event:
1.
Kiln_On that has no actions.
2.
Kiln_Start to occur 30 minutes prior to KILN_ON
3.
Kiln_Preheat to occur 20 minutes prior to KILN_ON
4.
Kiln_On_Full to happen at the same time as KILN_ON.
Now if you need the kilns to be ready at 7:30 you simply place the Kiln_On event at 7:30.
GFK-1548A
Configuring the Action Calendar
3-21
Creating Offset Events
You create offset events in the Offset tab of the New Event Properties dialog box.
To create an offset event:
1.
Open the Events dialog box.
2.
Select the event that will have offset events.
3.
Either:
A. Select Edit on the event's popup menu.
B. Select New to create a new event and associated offset events.
The Event Properties dialog box opens.
4.
Select the Offset tab.
The Offset tab of the Event Properties dialog box appears.
Use the buttons in the Offset tab of the Event Properties dialog box as follows:
New
Add a new offset event to the list.
Delete
Delete an offset event from the list
Enter the following information in the Offset tab of the Event Properties dialog box fields:
3-22
Event
Name of an offset event.
Offset
Time that should pass between the initial event and
the offset event. If the offset event occurs before the
initial event, make a negative entry; after, make a
positive entry in an HH:MM:SS format.
CIMPLICITY Action Calendar Operation Manual–December 2000
GFK-1548A
Schedules
When you have defined a plant's areas and configured each area's day types, you are ready
to configure schedules.
Schedule
A schedule defines the series of activities that should occur on the days of the week that
are assigned to a day type.
If you created the area's events, you now only need to schedule them. If you did not create
the events, you can create them during scheduling. See "Configuring Events" in this
chapter.
First, when your Schedule Type is in Day Type mode, you configure the basic
day type schedules for each area.
You configure a schedule of events for each day type. As a result, the Action
Calendar will apply a day type's schedule of events to each day of the week
assigned to it
Later, you can switch your Schedule Type to Calendar mode and override any
specific days or events, where necessary.
Example
You assign Monday, Wednesday and Friday to a day type called Weekday. The Action
Calendar will carry out whatever schedule you create for the day type Weekday on
Monday, Wednesday and Friday.
Before you get started, you may want to take a look at how you can adjust the Schedule
View.
Adjusting the Schedule View
There are several options available to you when viewing the schedule. The options can
be found on the applications view menu, or by using the right mouse button on the
schedule.
Time Interval
Time Interval allows you to specify the time interval to use in the day view. Valid
intervals are 10, 15, 30 and 60 minutes.
Time Bar
Time Bar toggles the time bar on the left of the schedule. The time bar allows you to
rapidly find events.
GFK-1548A
Configuring the Action Calendar
3-23
24 Hour Clock
24 Hour Clock enables you to switch back and forth between a 24 hour clock and a 12
hour AM/PM clock.
Show Offset Events
Show Offset Events lets you decide if offset events are viewed in the schedule. See the
section on offset events for more information.
Day Schedule
Day Schedule lets you toggle back and forth between a day view and a list to display the
scheduled events. If you find the day view becoming cluttered due to many events
scheduled in the same time slot, try the list view.
Action Calendar Day Schedule Toggled On and Off
Day Schedule checked
3-24
Day Schedule not checked
CIMPLICITY Action Calendar Operation Manual–December 2000
GFK-1548A
Adding a Scheduled Event to a Day Type
To add a new event to the schedule, simply double click on the time slot where you want
to place the event. The Scheduled Event (Time) dialog box will display:
To schedule an event:
If the event all ready exists:
1.
Fill in the time for the event to occur.
2.
Click the Browse button
3,
Select the appropriate event to schedule.
to the right of the Event field.
If the event does not exist:
1.
Click the Popup menu button
2.
Select New from the popup menu.
3.
Follow the procedure outlined in "Configuring Events" in this chapter.
to the right of the Browse button .
New Scheduled Event Dialog Example
GFK-1548A
Configuring the Action Calendar
3-25
Modifying a Scheduled Event for a Day Type
To modify an existing scheduled event:
1.
Make sure the Action Calendar is in Day Type mode.
2.
Double click on a scheduled event in an hour row of the Action Calendar
Schedule part.
The Scheduled Event dialog box opens.
3.
Do one of the following:
Change the time of the event.
Change the event.
Select Edit from the Event field popup menu to open the Event Properties
dialog box.
Edit Scheduled Event for the Day Dialog Example
3-26
CIMPLICITY Action Calendar Operation Manual–December 2000
GFK-1548A
Deleting a Scheduled Event from a Day Type
You can delete any scheduled event from a day type at any time.
To delete an existing scheduled event:
1.
Select the scheduled event in the hour Schedule part of the Action Dialog box.
2.
Press the Delete key.
Configuring Schedule Overrides
When you have completed configuring an area's basic schedule, you may have specific
days or events that will need to be changed during a specified calendar day.
You can make these changes through:
Day type overrides
Event overrides
Day Type Overrides
Day Type Overrides allow you to change the day type for a specified calendar day. You
might need to make the change for a variety of reasons including holidays, long
weekends, plant shutdowns or to accommodate a longer production schedule.
Example
You normally run your cutting machine, in the Cutting Area, from 1:00pm through
4:00pm every Monday through Friday. You schedule the Action Calendar to turn the
machine on and off. You have all ready defined the Cutting Area. Now you will create a
day type in the Cutting Area called Weekdays and assign Monday through Friday to that
day type.
The plant manager tells you that beginning three weeks from the current week, the
cutting machine will have to run from noon through 6:00pm for four Thursdays in a row.
Anticipating these long runs you have created a day type called Long Run that turns the
machine on at noon and off at 6:00pm. You can immediately select the four involved
Thursdays and override the Weekdays day type with Long Run. On those four Thursdays
the Action Calendar will follow the Long Run schedule.
Note: Switch the Schedule Type to Calendar mode to assign Day Type Overrides.
GFK-1548A
Add
Remove
View
Edit
Delete
Configuring the Action Calendar
3-27
To add a day type override:
Double click on a day in the Month calendar.
The Day Type Override dialog box appears.
The Day Type Override dialog box tells you (read only) the:
3-28
Area you are in
Date you selected
Currently assigned day type
CIMPLICITY Action Calendar Operation Manual–December 2000
GFK-1548A
Enter the following information in the Day Type Override dialog box to override the day
type.
Override Day Type
Select to override the currently assigned day type
New Day Type
The day type to use instead of the currently assigned
day type
To Remove a Day Type Override
To remove a day type override, double click on the day and uncheck the Override Day
Type check box in the Day Type Override dialog box.
Select a Day Type
override to delete
To View all Day Type Overrides:
To view a list of all day type overrides for the active area:
1.
Select the application's Edit menu.
2.
Select Day Type Overrides.
The box appears.
GFK-1548A
Configuring the Action Calendar
3-29
To edit a Day Type Override in the Day Type Override dialog box:
Double click on the entry.
The Day Type Override dialog box appears.
To delete a day type override in the Day Type Override dialog box:
1.
Select the entry to be deleted.
2.
Press Delete on the keyboard.
A message appears to confirm deletion.
3.
Click OK.
Select a Day Type
override to delete
3-30
CIMPLICITY Action Calendar Operation Manual–December 2000
GFK-1548A
Event Overrides
Event Overrides allow you to change an event n a schedule during a specific calendar
day.
For example, you want to start production an hour early tomorrow or extend lunch by an
hour. You use an event override to make the change.
There are three types of event overrides.
New Scheduled Event Override
Rescheduled Event
Skip a Scheduled Event
View Event overrides for a specific date
View all Event overrides
Edit
Delete
Note: All event overrides are performed when the Action Calendar is in Calendar mode.
New Scheduled Event Override
To add a scheduled event override:
GFK-1548A
1.
Delete the event you want to replace.
2.
Add an event that exists or a new event to the same time.
Configuring the Action Calendar
3-31
Rescheduled Event Override
To reschedule or skip an event:
Double click the event to be modified.
The Scheduled Event dialog box displays:
The Scheduled Event dialog box tells you (read only) the:
Time the event is currently scheduled
Event that is currently scheduled
Enter the following in information to skip or reschedule an event in the Scheduled Event
dialog box:
Skip Event
Select to skip the event on the selected calendar day.
Reschedule Event
Select to reschedule the event on the selected
calendar day.
Reschedule Time
Enter the time the event should occur on the selected
calendar day. The event and all of its offsets, if any,
will be rescheduled.
Note: When a day has event overrides, an asterisk is displayed next to the day in the
month calendar.
3-32
CIMPLICITY Action Calendar Operation Manual–December 2000
GFK-1548A
To remove a Skip or Reschedule Override:
To remove the event override:
1.
Double click on the override event.
2.
Uncheck the Skip Event or Reschedule Event check box
.
To view the event overrides for a specific date:
Select the date in the Day Type Legend calendar.
An displays in the Schedule part of the Action Dialog box on the Events that are
overridden.
Event override
GFK-1548A
Configuring the Action Calendar
3-33
To view all event overrides:
1.
Select the application's Edit menu.
2.
Select Event Overrides.
The Event Overrides dialog box appears.
To edit an event override in the Event Override dialog box:
1.
Double click on the entry.
The Scheduled Event dialog box associated with that event override appears.
2.
3-34
Make the required changes.
CIMPLICITY Action Calendar Operation Manual–December 2000
GFK-1548A
To delete an event override in the Event Overrides dialog box:
1.
Select the entry to be deleted.
2.
Press Delete on the keyboard.
Select a Day Type
override to delete
GFK-1548A
Configuring the Action Calendar
3-35
Security
The Action Calendar provides access control to CIMPLICITY HMI users logged into the
system.
Security is provided and can be enforced only when the project is running.
When the project is not running, any user may perform configuration from the
configuration cabinet.
Role Base Privileges
You, the system administrator, have assigned each CIMPLICITY HMI user a role. Each
role has a set of privileges associated with it. When the Action Calendar is part of the
project, the Calendar tab of the Role Properties dialog box is displayed:
Choices for the Calendar tab of the Role Properties dialog box are:
Area Based Security
When resource based security is:
Enabled, a user will only be able to see areas whose
Resource ID is assigned to the user
Disabled, a user will be able to see all areas.
For example, if you have schedules across several
parts of your plant, you may wish to restrict the paint
booth operator from modifying the assembly
schedule. Resource based security is the way to do
this.
Configuration
When configuration is:
Checked, the users will be able to configure a
schedule for any areas they can see.
Unchecked, users will be able to view schedules but
no configuration is possible.
3-36
CIMPLICITY Action Calendar Operation Manual–December 2000
GFK-1548A
Day Start
To accommodate plant production days, the start of day can be changed from the Action
Calendar default of midnight.
To set the day start time:
1.
Select Tools on the Action Calendar's menu bar.
2.
Select Setup.
The Setup dialog box displays.
Enter the following information in the Setup dialog box.
Day Start
Enter a number from 01 to 12
AM/PM
Choose AM or PM from the Menu field.
Important: Day Start cannot be changed when the project is running.
Changing the Day Start requires that the application be exited.
GFK-1548A
Configuring the Action Calendar
3-37
Command Line Parameters
The CalCfg.exe program takes command line options. These can be useful if you want to
launch CalCfg from a CimView screen.
3-38
/AREA areaId
Specifies the default area to select.
/AREALOCK
Lock the current area, user cannot switch areas.
/ONLINEONLY
Application can only run when CIMPLICITY project
is active. This is useful if you want to require
operators to be logged in and subject to role
privileges.
/PROJECT path
Specifies the path to the project's file (e.g.
c:\cimplicity\hmi\projects\cimpdemo\cimpdemo.gef)
to use.
/READONLY
Do not allow any configuration to be performed while
the project is or is not running regardless of Role
configuration.
/TODAY
Default to viewing the schedule for the current day.
CIMPLICITY Action Calendar Operation Manual–December 2000
GFK-1548A
B
Index
A
Action Calendar
Definition 2-1
Action Type
Event 3-18
For event 3-16
Actions
As events 2-7
Add
Day type override 3-28
New day type 3-8
Offset event 3-22
Scheduled event to day type 3-25
Add Event
Override 2-13
Area Configuration 2-14
Area ID 3-6
Area Properties
Dialog box 3-6
Areas
Configuration 3-6
Day types configured for 2-5
Defining 2-7
definition 2-3
Definition 2-3, 3-2
Definition example 2-3
Deleting 3-7
Examples 2-3
Information required for 2-3
Logical 2-7
Logical for configuration 2-7
Overview 2-3
Physically independent 2-7
Assign
Day of week to day type 3-13
GFK-1548A
Begin
Schedule day type 3-8
C
Clock
12 hour 3-24
24 hour 3-24
Color
Day type 3-9
Command Line Parameters
/AREA areaId 3-38
/AREALOCK 3-38
/ONLINEONLY 3-38
/PROJECT path 3-38
/READONLY 3-38
/TODAY 3-38
Components
Action Calendar 2-1
Configuration
Action Calendar 2-6
Areas 3-6
Day start 3-37
Designing 2-6
Events 3-15
Events dialog box 3-18
GUI 2-1
Incorporating changes into the runtime system 2-13
Offset events 3-20
Sample Factory See Sample Factory Configuration
Schedule of events 3-23
Schedule overrides 3-27
Schedules 2-9
User security 3-36
Copy
Day type 3-11
Create
Event 3-15
New day type 3-8
New modified day type schedule 3-11
Offset event 3-22
D
Data Entry
Overview 3-4
Day
Changing length of 2-12
Day of the Week Configuration 2-17
Day of Week
Assign to day type 3-13
Assigned to day types 2-8
Day Schedule
Index-i
View options 3-24
Day Start
Change 3-37
Day Type
Add scheduled event 3-25
Assign day of week 3-13
Components 2-3
Configured for each area 2-5
Copy 3-11
Create 3-8
Definition 2-3
Definition example 2-4
Delete 3-12
Delete scheduled event 3-27
Description 3-9
Edit 3-10, 3-11
For different uses 2-8
Modify scheduled event 3-26
Name 3-9
Next day schedule 2-5
Overrides 3-27
Schedule events 3-25
Use for 3-8
Day Type Configuration 2-16
Day Type definition 2-3
Day Type Legend
Definition 3-3
Display 3-3
Day Type Overrides
Add 3-28
Definition 3-27
Definition 2-4, 2-10
Delete 3-30
Edit 3-30
Remove 3-29
View 3-29
Day View
Time interval 3-23
Days
Production 2-12
Days of Month
Display 3-3
Days of Week
Assigning to day types 2-8
Display 3-3
Generated with next day schedule 2-5
Defining
Areas 2-7
Definition
Action Calendar 2-1
Delete
Areas 3-7
Day type 3-12
Day type override 3-30
Event action 3-16, 3-17
Event overrides 3-35
Index-ii
Initial event 2-11
Offset event action 3-22
Scheduled event 3-27
Delete an Event Override 3-35
Description
Area 3-6
Events dialog box 3-18
Dialog Box
Area properties 3-6
Don't Use
Action Calendar for… 2-2
E
Edit
Area 3-7
Day type 3-10
Day type color 3-10
Day type overrides 3-30
Day type properties 3-11
Event override 3-34
Event: 3-17
Scheduled event 3-26
Entering Data
Action Calendar 3-4
Event
Remove reschedule override 3-33
Schedule in day type 3-25
Skip reschedule override 3-33
Event Manager
Event request 2-5
Event Overrides 3-31
Definition 3-31
Definition 2-4
Delete 3-35
Edit 3-34
Supported types 2-10
Event Request 2-5
Events
Action type 3-18
Adding unscheduled 2-10
Configuration 2-14
Configure 3-15
Create 3-15
Creating for schedules 3-23
Definition 2-3
Definition example 2-3
Delete action 3-17
Example of 2-7
Executed less than one second apart 2-2
Execution order when simultaneous 2-5
Initial 2-11
Initial/offset relationship 2-11
Modify 3-17
New action 3-17
Next day schedule 2-5
CIMPLICITY Action Calendar Operation Manual–April 2000
GFK-1548A
Offset 2-11
Order initiated 2-5
Reschedule 3-32
Rescheduling 2-10
Schedule in day types 3-25
Scheduled every minute 2-2
Setting up in areas 2-7
Skip 3-32
Viewing 3-18
What can be 2-7
Work with 3-15
Example
Assigning days of week to day types 2-8
Copy day type 3-12
Day of week assignment 3-12
Day type override 3-27
Day Type Uses 3-8
Event 2-7
Offset events 3-20
Sample factory configuration 2-13
F
Field
Area id 3-6
Configuration for security 3-36
Day type color 3-9
Day type description 3-9
Day type name 3-9
Delete event action 3-16, 3-17
Delete offset event action 3-22
Description of area 3-6
Event action type 3-16, 3-18
New event action 3-16, 3-17
New offset event 3-22
Offset 3-22
Offset event 3-22
Reschedule event 3-32
Reschedule time for event 3-32
Resource based security 3-36
Resource id 3-6
Skip Event 3-32
G
Graphical User Interface
Overview 2-3
Projected schedules 2-4
What it does 2-1
GUI
And areas 2-3
And day type overrides 2-4
And day types 2-3
And event overrides 2-4
And events 2-3
And projected schedules 2-4
GFK-1548A
Index
And schedules 2-4
Area 3-2
Day type legend 3-3
Overview 2-3
Projected schedules 2-4
Schedule Type 3-2
Weekday schedule 3-2
What it does 2-1
I
Important Notes About
Scheduler 2-5
Independent
Areas 2-7
Information Required
For areas 2-3
Initial events 2-11
Skip 2-11
Initial Events
Definition 2-11
Delete 2-11
Offset relationship 2-11
Reschedule 2-11
Interval
Change for offset events 2-11
L
Logical
Areas 2-7
M
Methods
Add day type 3-8
Assign days of week to day types 3-13
Change day type color 3-10
Copy a day type 3-11
Create an event 3-15
Create offset events 3-22
Delete areas 3-7
Delete day type 3-12
Delete scheduled event 3-27
Edit areas 3-7
Edit day type properties 3-11
Modify scheduled event 3-26
Opening Area Properties dialog box 3-6
Schedule an event 3-25
Modify
Area 3-7
Day type 3-10
Event 3-17
Scheduled event 3-26
Index-iii
N
P
New
day type 3-8
Event 3-15
Event action 3-16, 3-17
Offset event 3-22
Offset event field 3-22
Next Day Schedule
Days of week 2-5
Events 2-5
Scheduler 2-5
Parameters
Command line 3-38
Parts Of
Action Calendar 3-1
Planning
Sequence 2-6
Point Configuration 2-14
Privileges
Role base 3-36
Production
Changing day length 2-12
Changing shift parameters 2-12
Shifts and days 2-12
Production Days 2-12
Projected Schedules
Definition 2-4
Pseudo-Area
Definition 2-12
O
Offset events 2-11
Offset Events
Change interval 2-11
Configuration 2-15
Configure 3-20
Definition 2-11, 3-20
Delete action 3-22
Example 3-20
Offset time field 3-22
Relationship with initial events 2-11
Show 3-24
One time adjustments
Event overrides 2-10
One<#106>time adjustments 2-10
One–time adjustments
Day type overrides 2-10
Open
Area properties dialog box 3-6
Order
Of data entry 3-4
Of events 2-5
Other CIMPLICITY Tools
When to use 2-2
Overrides
Add day type 3-28
Add event 2-13
Day type 3-27
Delete day type 3-30
Delete event 3-35
Edit day type 3-30
Edit events 3-34
Event 2-4
Events 3-31
Remove day type 3-29
Rules 2-10
Schedule 3-27
View day type 3-29
Óverrides
Day type 2-4
Overview
Action Calendar 2-1, 3-1
Index-iv
R
Remove
Day type override 3-29
Reschedule override 3-33
Remove a skip or reschedule override 3-33
Reschedule
Event 2-10
Event field 3-32
Event time 3-32
Events 3-32
Initial event 2-11
Reserve
Day type 3-8
Resource Based Security 3-36
Role Base
Privileges 3-36
Rules
Overrides 2-10
S
Sample Factory
Configuration Activities 2-13
Sample Factory Configuration
Area Configuration 2-14
Day of Week
Configuration 2-17
Day Type Configuration 2-16
Event Configuration 2-14
Offset Event Configuration 2-15
Point configuration 2-14
Schedule Configuration 2-16
Schedule
Event 3-25
CIMPLICITY Action Calendar Operation Manual–April 2000
GFK-1548A
Schedule Configuration 2-16
Schedule definition 2-4
Schedule Overrides
Configuring 3-27
Schedule Type
Calendar mode 3-23
Day type mode 3-23
Definition 3-2
Mode 3-2
Scheduled Event
Add 3-25
Delete 3-27
Modify 3-26
Scheduler 2-1
Action Calendar's 2-2
Important notes about 2-5
Overview 2-2, 2-5
Schedules
Offset events adjustments 2-11
Adjusting the view 3-23
Configuring 2-9
Configuring day type's basic schedule 3-23
Creating events for 3-23
Definition 2-4, 3-23
Definition example 2-4
In areas 3-6
One time adjustments
Event overrides 2-10
One<#106>time adjustments 2-10
One–time adjustments
Day type overrides 2-10
Overview 3-23
Projected definition 2-4
When take effect 2-13
Security
Access 3-36
Resource based 3-36
Sequence
Of data entry 3-4
Scheduler 2-5
Setpoint Calendar
Design Configuration 2-6
Overview 2-1
Shift
Production 2-12
Simultaneous Events 2-5
Skip
Event field 3-32
Events 3-32
Initial event 2-11
Reschedule override 3-33
Bar 3-23
Change day start 3-37
Interval 3-23
Offset lapse 3-22
Toggle 3-23
To Do
Add a scheduled event override 3-31
Add day type override 3-28
Assign day to day type 3-13
Change day type color 3-10
Copy day type 3-11
Create new event 3-15
Create offset event 3-22
Delete an area 3-7
Delete day type 3-12
Delete day type override 3-30
Delete event 3-27
Edit an area's properties 3-7
Edit an event override 3-34
Edit day type override 3-30
Modify existing event 3-17
Open area properties dialog box 3-6
Open Day Type Properties dialog box 3-8
Remove day type override 3-29
Reschedule or skip an event 3-32
Schedule event 3-25
Set the day start time 3-37
View all event overrides 3-34
View an event override 3-33
View day type overrides 3-29
View events in area 3-18
Tree
Events dialog box 3-18
T
Weekday Schedule
Definition 3-2
Work With
Events 3-15
Time
Adjusting the clock 3-24
GFK-1548A
Index
U
Unscheduled Event
Adding to a day's schedule 2-10
User
Access 3-36
Privileges 3-36
Security configuration 3-36
V
View
Day schedule options 3-24
Day type overrides 3-29
Events 3-18
Offset events 3-24
W
Index-v