1
User’s Manual
Contents
Introduction ....................................................................................................................................................... 2
Installation ..................................................................................................................................................... 2
Errors ............................................................................................................................................................. 2
Security .............................................................................................................................................................. 3
TIMETABLE
Test Data ............................................................................................................................................................ 3
Menu > File ........................................................................................................................................................ 3
Menu > Tools ..................................................................................................................................................... 4
Structure ............................................................................................................................................................ 4
Resources ........................................................................................................................................................... 4
Overrides ........................................................................................................................................................... 5
Subject Weighting .............................................................................................................................................. 5
Split Organiser.................................................................................................................................................... 6
Split Allocation ................................................................................................................................................... 7
Subject Allocation .............................................................................................................................................. 7
Work Load .......................................................................................................................................................... 8
Timetable ........................................................................................................................................................... 8
Copy and Paste or SWAP Class/Teachers Periods ........................................................................................ 9
Learner Timetable ............................................................................................................................................ 10
Relief Table ...................................................................................................................................................... 10
Same School Different Periods......................................................................................................................... 11
Rules for Same School Different Periods ........................................................................................................... 11
How Will Your Timetable Look Like? ............................................................................................................... 11
When do I use this? ......................................................................................................................................... 12
MARKS MANAGEMENT
Tools ................................................................................................................................................................. 13
Pass Marks ....................................................................................................................................................... 14
Pass Marks ............................................................................................................................................... 14
Results Comments ................................................................................................................................... 15
Promotional Comments .......................................................................................................................... 15
Settings ............................................................................................................................................................ 15
School ............................................................................................................................................................... 15
Structure .......................................................................................................................................................... 15
Teacher ............................................................................................................................................................ 16
Learners ........................................................................................................................................................... 16
Support Staff .................................................................................................................................................... 17
Absenteeism .................................................................................................................................................... 17
Marks ............................................................................................................................................................... 18
Schedule ........................................................................................................................................................... 20
Report Cards .................................................................................................................................................... 21
Promote ........................................................................................................................................................... 22
www.scheduler.co.za
Page 1
Introduction
This application is designed to draw timetable for any kind of school, college or university. It can handle
different school complexities with ease. It is a product of a long research into different schools requirement
and conditions.
Computers are still fairly new to most people. This is a very user friendly application in which you just key in
your obvious school information and leave the rest to the application to compute for you.
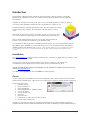
Timetable information is organized and treated as a cube. The cube elements are Learners,
Teachers, Rooms, Days and Time. The combination of all cube elements is always
unique.
Menu items are organized into sequence of workflow to guide you in every step of the
way. You only need to save where typing is involved otherwise the system auto-saves.
Click on the help button and move the mouse over any item on the application for
assistance. Every item has been explained to avoid unwanted results.
Every timetable you draw is guaranteed to be different from the previous ones. You can backup and produce as
many different types of timetable as you want and choose any one. You can produce more than 8085 different
timetables from the same allocation setup. (Every time you draw a timetable Subjects are sort in 1 of 11 different ways, Classes
in 1 of 7, Periods in 1 of 5, Days in 1 of 3 and 7 other internal sorting. This makes it almost impossible to draw similar tables at any
given time)
Installation
Go to www.scheduler.co.za and click on button ‘Download Now’ or Insert the CD supplied into your CD Drive. Click
on Setup.exe and follow the wizard.
You may need to install the .Net Framework first if you don’t have it already on your computer. The
.Net Framework is also available from our web site and on the CD as dotNetFx40_Full_setup.
All other files that might be needed to run Scheduler on your computer are available on the CD and on our
website www.scheduler.co.za.
Go to Start – select Programs and click on Scheduler to run this application.
Errors
The most common error after installation will contain something like ‘File is used by another user’ OR ‘Could not
lock the file’ OR ‘updatable query’. OR You get an error when trying to Upgrade by running SchedulerUpgrade.exe.
Steps to resolve these errors.
1. Open My Computer
2. Open ‘Local Disk (C:)’
3. Open ‘Program Files’
4. Select and Right click on ‘Scheduler’ Folder
5. Click on ‘Properties’
6. Click on ‘Security’ tab
7. Click ‘Edit’
8. Select the ‘Users’
9. Check the box on ‘Full Control’ or at least on ‘Write’
10. Click on ‘Apply’ and then ‘OK’
Any other error will mention the file or the program that is needed. All files or programs needed by Scheduler are
supplied with the CD and also available for download from our website. For Printing errors please install Reportviewer.
www.scheduler.co.za
Page 2
Security
Press Alt+P anywhere to set the password and control the access to the application. You must know the Admin or
the Master Password to change the security.
TIMETABLE
Test Data
There are 4 demo data marked as Test Data available from www.scheduler.co.za . Go to File > Restore menu
to copy the data across. Play around and generate timetables to get the real feel of this application.
To clear the demo data, restore the file called Schooltable Empty or click File > Initialise > All
Information.
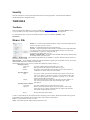
Menu > File
Backup – To save the current timetable information. Today’s date will be added to the file
name. You can give any name you want.
Restore – To upload the file that was previously backed up.
Network – To link to the database on the network or at another location (Schooltable.mdb).
Any changes you do will be stored in the selected database. Restore will overwrite the
selected database. Copy the file ‘Schooltable.mdb’ to
the network drive and link other users to it.
Initialise > Timetable Only – To erase the current timetable allocation only. When clicking
the timetable button it will show blank.
Initialise > All Information – This will delete all information of your timetable i.e. Teachers, Resources and allocations. You
will need to start from scratch.
Import/Upgrade – To copy timetable information from other databases or upgrade your old Scheduler versions. You can also
import from Dr. Samuelson’s timetable and from SAMS.
When importing from csv files, you have to indicate the columns from which to import. E.g.
Importing Learners;
Learner ID:
Type in the column position of Learner ID in your csv file.
Name:
Type in position of the column that contain names in your csv
Surname
The position of the column that contain surnames. If names and surnames are
combined in one column, then leave surname blank.
Importing Subjects;
Code:
Type in the column from which to find code of the subject. If you want the
code of your subjects to be the first 3 letters of you long subject name, then
type in the column position and 3 separated by a comma. i.e. 5,3 will mean
column 5 and take the first three letters.
Subject:
If the subject and code name are the same, then type in the same number as in
code. If you want the N letters of the subject name then type a comma
followed by N.
Importing Learners Subjects;
Learner ID:
Type in the column position of Learner ID in your csv file.
Sbj From:
The first column that contains subjects. If you need the first 3 letters of the
subject, they type in ‘column,3’. Make sure that your subject code will be the
same as that of ‘Importing Subjects’ above.
Sbj To:
The last column that contain subjects.
You have to import the learners and subjects first before importing Learners subjects. Duplicates and blanks will be ignored.
Your timetable will be updated by the new imported data. All the old data will be replaced.
Export – To export the data to Excel or csv files.
About – Information about the Authors of this program and version.
www.scheduler.co.za
Page 3
Menu > Tools
Overrides – see ‘Overrides’ below
Split Organiser –see ‘Split Organiser’ below
Subject Weighting – see ‘Subject Weighting’ below
Structure
Just type in your preferred names of your school structure.
Days – In the order of appearance, type in the names of days per cycle. The order in which
you type the days is the order in which they will appear in your timetable. Any number of
days per cycle is fully catered for. The days entered should be unique to each other.
Periods – Type in the names of your periods in the order you would like them to appear on
the timetable. Indicate which of those periods are breaks by simply
clicking the check box next to them. You can call them Period 1, Period 2…. or simply 01, 02, 03 ….
Time – Give time indications for your periods, e.g. time like 8:00, 8:30… or 8:00-8:45, 8:45-9:15 etc.
Minutes – If the Timebase box is checked. Type the minutes allocated to a period.
For an advance complex situation read ‘Same School Different Periods’ at the end of this manual.
Grades – Type in the list of grades at your school and indicate the number of classes each grade has. The grades
should have unique names and abbreviations. When a ‘Save All’ button is pressed, the system will generate the
number of classes for each grade and list them below grades.
Classes – The list of classes is generated by the system using the information provided under Grades. The Class names
will be derived from the Grade names above. The class abbreviation will be derived from the abbreviation of the grades
above. To change class names and their abbreviations use the corresponding Alias fields.
If you want to add or remove classes, simply change the number of classes in the grade and save. If you reduce the number, the
extra classes will be deleted and all subject allocations to the deleted classes will be lost.
Deleting a record- Click the left most gray column to highlight the record and press Delete button on your
keyboard.
Resources
Type in the list of all your resources here. They might share the same names but they should have unique codes.
Please give teachers and subjects codes that make sense not mere numbers.
Teachers – Type in the list of all your teachers at school. Give each a unique
code. It could be their initials or abbreviated surnames. Do not use ‘0’ (Zero)
as a code. FLEXI is a reserved code for floating teacher that could fill in for
free periods.
Subjects – Type in all the subjects you do at your school. Make sure they
have unique codes (Abbr.). Splits – This is the names given to your split
combinations where learners of the same class split to attend different
subjects, e.g. home languages as VERNAC. Leave it blank if you do not
have any splits at your school. ‘LINK’ is given to the subject/split that
will be done at the same time by all classes that it is assigned to regardless
of grade (see LINK under ‘When Do I Use This’).
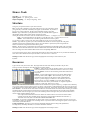
Rooms – This is the list of resourced classrooms that learners should share for specific subjects e.g. Computer room, Laboratory,
etc. To assign general classes to teachers you have to click on ‘Class Teachers’ at the bottom left of the screen. You can turn On
or Off the use of rooms without deleting them by checking the ‘Rooms Off’. Room names and Teacher classes should be unique.
Class Teachers – To allocate the list of classrooms to teachers in class-based-teachers environment where learners go to teachers
for different periods. Simply add the classroom name next to the teacher. Room names and Class Teacher classes should be
unique. When all classes are assigned, you can leave the remaining teachers unassigned. The system will allocate them in to
classes of others teachers when they are free.
Your composite timetable will show the class names next to their teachers. The classes for teachers with no
assigned classes will show with their subjects and classes to teach inside the timetable cells enclosed in {}.
To turn this On or Off, check or uncheck the ‘Learners to Teachers’ box.
Use Colours – If you want a colourful display of subjects when viewing your timetable. This makes it easier for you to locate
occurrences of a subject in a timetable. You can change colours as you wish. Colours will not appear on print or excel export. To
cancel colours just uncheck the box.
Teacher Information – This allows you to add more information about the teachers. Things like Qualifications,
Teaching History, Workshops attended, Level, Position and teachers workload.
Deleting a record- Click the left most gray column to highlight the record and press Delete.
www.scheduler.co.za
Page 4
Overrides
From Tool menu. This allows you to dedicate certain periods to particular activities at
the school. You can indicate specific periods for SPORT or other activities for a class,
grade or entire school. This is where you can also indicate if a subject or teacher will be
available or not on a specific period.
Override Type – Select the type of override you want to use.
Teacher – To restrict the allocation of a teacher to selected periods.
Subject - To restrict the allocation of a subject to selected periods.
Split - To restrict the allocation of a split to selected periods.
Activity – To reserve specific periods for a specific school activity.
Step 1 – Select the grade in which the override will apply. Select ‘<All>’ if all grades will be affected.
Step 2 – Select the class in which the override will apply. Select ‘<All>’ to affect all classes.
Step 3 – Select the starting day for overriding.
Step 4 – Select the last day for overriding.
Step 5 – Select the starting period for overriding.
Step 6 – Select the ending period for overriding.
Step 7 – Indicate whether you want the selected item to be scheduled or not.
Show Split Subjects – To list the subjects and teachers that are linked to the selected split combination.
If scheduled box is checked it means the teacher or subject will only be made available during the specified periods. If it is
unchecked, it means that the teacher or subject will be scheduled except on the specified periods. If scheduled box is unchecked
for Activity, that activity will be ignored.
If a Fix box is checked on a subject or a split, it means that a subject or a split will be done at that specific period no matter what,
the rest of the same subject will be allocated anywhere else. E.g. if you want three or four periods in a sequence on a specific day,
use this feature to indicate the periods and days you want them. You can only fix a subject or a split.
Add - To add the override.
Update - To change the override with the new values on the text boxes.
Remove - To delete the override.
Update All – After renaming or altering your Days or Periods you should press on this button to update their sequence and
numbering because the Override uses numbers to refer to days and periods not names. These numbers are stored in sequence
and might have been altered during the renaming.
If you override a teacher and allocate that teacher to a split, that split will be affected.
The timetable preview above will help you to understand the impact of your override. The periods that will be available for
allocations will be highlighted in green and the blank ones will be blocked. Move to the override record to see its impact.
NB: The more overrides you make the more restrictions you put to your timetable. This will make the drawing of your
timetable to take longer or infeasible to draw.
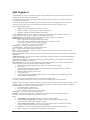
Subject Weighting
From Tool Menu. This is to help and guide you through with the subject and split allocation. This is where you set the
default number of subjects to be allocated per cycle. If you have the subjects and splits already allocated and want to
change the allocations, you can do it here instead of changing it class by class. You can jump this step if you want to. It
has no effect on your timetable.
Step 1- Select the Subject to allocate the weighting for.
Step 2- Select the Grade where this weighting will have effect. If you select
<All>, then all grades doing this subject will be affected.
Step 3- Indicate the number of periods/minutes to be allocated to the subject or
split.
Step 4- Click the Submit button. The default is set.
If the allocation of subject has already been done, then changes to the
selected subject will be made to all corresponding allocations.
The right side of the screen will indicate the subject already allocated to the selected grades.
www.scheduler.co.za
Page 5
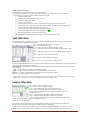
Split Organiser
From Tools Menu. If you have a lot of different groups of learners doing different sets of subjects in the same grade, this
could help you group them into split combinations.
All you need to do is type in the learners Names and IDs and allocate the set of subjects for each. Each learner will be
saved under the selected Grade.
You can also group your learners according to the set of subjects they take. Instead of typing in the individual learners,
you can type in the group name and give it an ID. Indicate the number of learners in the group under ‘Units’.
Subjects will be listed on the right.
Weight - the number of periods that a subject has per circle.
Group – the number of groups you want to divide the learners in to.
Learners – the number of learners registered for the subject.
Use the ‘Add subject’ button to allocate a subject to a learner/group. The number of subjects allocated will show on
learner’s subjects. To remove a subject, simply select the records and press delete.
Maximum Learners – The maximum number of learners to be allocated to a subject in a combination.
Subjects Per Split - The number of subjects per combination.
Step 1 – Select the Learner/Group from the list on your right.
Step 2 – Select the subject the Learner/Group take and press ‘Add Subject>>’. Step 3
– Repeat step 3 for all other subject for the Learner/Group.
Step 4 – Repeat step 1 – 3 for all other Learners/Groups.
Add Subject >> - To add the selected subject to the learner.
<< Remove Subject – To delete the selected subject from the learner.
Copy – Copy the subjects allocation of the selected learner.
Paste - To paste the copied subject to the to all or selected learner(s). To select learners, press control and click on the
left most column of the record.
Organize Combinations – When all learners have been allocated with subjects, press here to organize them in to different split
combinations.
Auto Rearrange Groups – To organize split subjects into the number of groups specified for each subject and distribute the
subjects evenly into other Splits.
Filter Learners Per Subject – To list learners that only do or have been allocated to a selected subject. Click on different
subjects to list corresponding learners/group.
Split Combinations - To view the results of combinations. Click on the learner/group to see their allocated combinations.
You can also move learners from one Split subject to another to group them.
1. DoubleClick on the Subject whose learners you want to move. The source will be sky blue.
2. Click on Copy.
3. DoubleClick on the same subject on another/same split column where you want to move the learners, and then
right click. The target will be lime in colour.
4. Indicate the number of learners you want moved.
5. Click on Paste to move.
6. Or select Distribute to simply distribute to others of its kind. i.e. if you double click on, say Maths, the system will
distribute Maths into other Maths splits.
To create a new Subject in a Split column, just paste it on any subject in that column.
To separate an existing subject into two groups, copy it and paste it on another subject in the same column.
Groups – This appears on the top right corner indicating the number of groups the selected subject has been setup to have. Click
on this to view the list of subjects that do not comply with their group settings. Click on the subject on the list to highlight it.
Allocate Teachers – To switch to a teacher allocation screen.
1. Click on the teacher you want to allocate.
2. Click on the Subject to allocate the teacher to.
3. Click on ‘Link To’ or double-click the subject to allocate.
Clear Teacher – To remove the teacher from the selected subject.
Load Split - You can then load the generated combinations to your Splits. This will overwrite the previous split
allocations. To load the selected grade only, uncheck the ‘Load All’.
Print
Combinations List – Will print the tabulated list as shown for the current grade.
Learners Subject List (With Splits) – prints the list of learners and their subjects according to their
allocated splits. Only subject allocated to splits will show.
Learners Subject List (No Splits) – prints the list of learners and their subjects. Only learners with subjects
that are not allocated to splits will show. Excel will list them all.
Learners in – Prints the list of learners that are allocated to the selected Split, Subject and Teacher.
Excel – Produce an excel spreadsheet of current learners and their subjects.
www.scheduler.co.za
Page 6
Adding Learners Afterwards.
You can add new/late comers after you have organized your splits.
The simplest way of doing this, is to copy subjects from one of the learners doing similar subjects as a new/late
comer, and paste it to the new/late learner. Alternatively do the following;
1. Select the Grade to update.
2. Add the learner’s name at the bottom of the list. Save.
3. Allocate the subjects to the learner.
4. Click on Split Combination
5. Click on Unallocated Learners to list the new added learners that do not have split allocations.
6. Click on Show Learner Subjects to list the subject allocation of the selected learner. The selected subject
will be written in blue in the Combination grid to guide you.
7. Click on the drop list to allocate the Split to the selected subject.
8. The newly allocated/moved subjects will be highlighted in green.
9. After all subjects have been allocated to splits then Save.
Click on Reconcile to allocate and update the number of learners per subjects in a group.
Split Allocation
This is where you specify the teachers and subjects involved in each split per grade. Make sure that all the split names
are added in the Resources before allocating splits.
Step 1 – Select the grade that the split should apply to.
Step 2 – Select the name of the split.
Step 3 – Click on the subject you want to assign to the split.
Step 4 – Click on the teacher who will be teaching the selected subject in the
split.
Step 5 – (Optional) select the specific room at which this subject should be
done.
Step 6 – Click Add to assign the split to the grade.
Repeat step 3 to 6 for other members of the split.
NB You can have the same split name for different grades.
The list of all allocated splits will show at the right top corner to keep you informed of the grades and splits assigned to them. To
move to an existing split allocation, just click on it.
Show Allocated – To display the list of subjects already allocated to the selected teacher, OR the list of classes allocated to a
selected subject.
<<Add – To add a subject and a teacher to a current grade and split.
Update – To change the selected allocation to a newly selected subject and/or a teacher.
Remove>> - To remove a split member record, select the records and click Remove button.
Print – Will print the breakdown of the split allocation.
Tip: If you have two or more groups of classes doing the same split in the same grade but at different times, you must give
different names for the splits, i.e. VERN1 and VERN2 and treat them as different splits.
Subject Allocation
This is where you allocate subjects to a class.
Step 1 – Select the class to assign the subjects to.
Step 2 – Select a subject/split to allocate by clicking the record.
Step 3 – If a subject is selected then select the teacher for the subject.
Step 4 – Indicate the number of times the subject/split should be done or the
total minutes per cycle.
Step 5 – (Optional) Indicate the number of doubles you would like.
Step 6 – (Optional) Indicate the number of triples you would like.
Step 7 – (Optional) select the specific room at which this subject should be done.
Step 8 – Click the Add button to assign the subject/split to a class.
Repeat step 2 to 8 for other subjects.
Splits are those subjects marked with a tick on their Split column. When a split is selected, the list of subjects and
teachers for the selected split will be listed on the right corner for your information.
If you want to allocate one Teacher to different classes, check the box of Classes to Teacher. This will list the Classes
instead of Teachers and list teachers in the dropdown box. You will be assigning subjects and classes to a teacher.
www.scheduler.co.za
Page 7
Note that the allocated number of periods/minutes and doubles changes according to your previous allocations or your
Subject Weighting settings.
To make corrections on the assigned subject, select the subject allocated by clicking on it. Make your desired changes
by clicking on the new teacher or subject and then click Update. To remove the assigned subject just select the
subject allocated and click Remove.
You can Copy the allocation of one class and paste it on another class to avoid repeating the same steps for every class
in the same grade. Use the Update button to edit teacher allocations.
The top right corner contains the total number of Periods already allocated and the Residual that is still to be allocated.
The periods are correctly allocated when the Residual is 0 (zero). You can press the Auto Allocate FLEXI button that
will allocate unsupervised flexi or free periods to all the residual periods. This is ideal for colleges and universities
where there are self-study periods for students.
Click the View Allocation button to display the allocation of the selected teacher, class, subject or room.
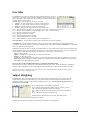
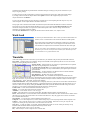
Work Load
To check if your allocation balances. This is where you will be notified if there are
teachers, classes or rooms that have more allocations than the available periods.
The override settings are included in the calculations of work load. To check the
subject allocation for a teacher, class or room simply click on the teacher, class or
room and the list of subjects and classes/teachers allocated will show on the right.
There are lots of other checks-and-balances that are performed by the system when
this button is pressed. You will only be allowed to draw your timetable after these
check-and-balances are performed and are OK.
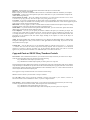
Timetable
After all the settings and Work Load checked, you can then draw your timetable. The previously drawn timetable will show.
Draw Table – Click this to draw a new timetable. The previous timetable will be replaced by the new one. You can first do a
Backup by selecting Backup from the File menu.
Separate Doubles – Where periods are very long and you prefer doubles to be separated
rather than one long double period, check this box.
No Triples rather separate dbles – If you prefer separate double periods instead of triple
or three periods of the subject in a day. If unchecked the system prefers triples instead of
separate doubles.
Auto Shadowing – To allow Scheduler to use Shadow Teachers when the timetable
become infeasible. See Shadow Teachers below.
Draw Minimized – The table draw will run at the background.
Shuffle This Timetable – This will shuffle the already drawn timetable. This will
rearrange the timetable without redrawing it. This helps the system to comply as much as possible with your user period settings.
Type - For some reason, if you want to draw splits only timetable and maybe continue to add other subjects at the later stage,
select ‘Splits Only’. Select ‘After Split’ to finilise your timetable.
Undesirable Allocation– After your timetable has been completely drawn, the system will run an auto-check of the allocations
and list all periods that were undesirably allocated, i.e. unwanted triple periods, separated periods of the same subject etc. You
will have a chance to rectify this by clicking the ‘Fix This’ button. The system will shuffle the timetable and get rid of those
allocations. You can check for undesirable allocated periods anytime by pressing Alt+R.
Teacher Table – List the selected individual teacher table for the cycle.
Subjects - To view the subject allocation of the selected class.
UnShadow – (check Shadow Teacher on the last page).
Teacher – Select the teacher to view his/her teacher table. Remember Shadow Teachers are marked with =S’
Room – When Maximize is set to Room Table or Room Table button clicked under Print. This will list the Room Tables. Rooms
that ends with * are those that are allocated to class teachers under Resources. They only appear when ‘Learners to Teachers’
box is checked under Resources.
Class/Teacher – To view the class or teacher timetable for the whole cycle.
Composite – To view the composite class, room or teacher table per day. You can only Swap teachers under Composite view.
Compact – View, print and export to Excel a compact version of timetable. Instead of two lines per entry this will
compact it to one line per entry where teacher, class ad room are all in one cell.
Swap View – To alter the display of your table. When unchecked the Periods are on left vertical pale and days on top
horizontal. When checked the Periods are top horizontal and days are left vertical.
Class – Select the specific class to view its class table.
Day – Select the day to view the composite class or teacher table.
www.scheduler.co.za
Page 8
Maximize – Select the table you want maximized. Room table could only be viewed from here.
Print – Print your selection of Timetable
Excel – Export your selection of Timetable to Microsoft Excel. You should have MS Excel installed in your computer.
Expand Splits – Export to Excel and expand all split entries. Where there is a split, list underneath all subjects and
teachers that belong to that split.
Classes/Teachers for Grade – This is only available when Maximize is set to Class/Teacher Timetable. To view classes
or teachers of a specific grade only. This will also affect your printing and Excel export.
Use Colours – If you want a colourful display of subjects when viewing your timetable. This makes it easier for you to locate
occurrences of a subject in a timetable. You can change colours as you wish under Resources. Colours will not appear on print or
excel export. To cancel colours just uncheck the box.
Hide FLEXI – This only applies if you have a FLEXI teacher and want to hide/show the unsupervised periods. Hiding
FLEXI from display will suppress FLEXI from printing or exporting to Excel.
Include Relief – If you have allocated relief periods under Relief Table, you can activate those periods and include
them for print. All relief periods will be displayed in Red.
User Compliance – As a user, you will specify the number of doubles and triples you would like per subject. The
system may only comply with few subjects and not all. You may push the system to compliance by pressing Alt+C
or clicking the button ‘User Compliance’. The more you click, the more compliance the allocation becomes. The
percentage level of compliance will show under comply heading on the subjects list. Click on the subject to
highlight the occurrence.
NOTE : During the timetable draw, Windows might show as if it is hanging (Not Responding) while it is running in the
background. This happens also when you move focus to other applications or mouse clicking. If you leave it for some
time it will show activity again.
Columns Size – You can adjust the size of your timetable columns by clicking on the i ncrease ‘<>’ or decrease
‘><’ buttons. This will resize all columns except those manually adjusted. You can adjust the size of individual
columns by increasing or decrease its header size. All the manually adjusted column sizes will be saved and
applied every time you load the timetable. Press ‘Reset col sizes’ to clear and reset the sizes.
Copy and Paste or SWAP Class/Teachers Periods
Class Periods - After a timetable has been drawn, you can still move the subject around. If you want to move a subject
from one period to another, under Class Teacher View do the following;
Step 1 DoubleClick on the subject you want to copy.
Step 2 DoubleClick on another subject/period you want to paste on or swap with.
The targeted periods will be marked in sky blue for your notification. If the swap would not affect other classes, then the
swap will take place. Should there be any other classes that will be affected by the copy/paste, then those classes will be
listed with their subjects and teachers. Split combinations will be marked by teacher “0”. Click on the listed records to
see the subjects that will be affected by the paste.
The copy/paste or swap will not be allowed if it will violate Override settings.
NB: Press Alt+R to check is your allocation is still up to standard.
The ‘Fix This’ button will be grayed-out (disabled) if changes were made to your structure, resources or
allocations after the current timetable was drawn, or you have swapped teachers.
Swap Teachers - After a timetable has been drawn, you can still move the Teacher subject around. If you want to swap
a teacher subject from one teacher to another, under Composite View do the following;
Step 1 DoubleClick on the teacher period you want to copy.
Step 2 DoubleClick on another teacher subject of the same period you want to paste on or swap with.
www.scheduler.co.za
Page 9
Learner Timetable
This is the timetable that will be specific to a learner especially those taking split combinations. You may import the
list of learners from a csv text file. You can also group your learners according to the set of subjects they take or
according to streams. Instead of typing in the individual learners, you can type in the group/stream name.
Using Group/Stream names.
Step 1 - Select ‘Allocations’ from the top left box.
Step 2 - Select Grades to list the grades only.
Step 3 – Click on Group names.
Step 4 – Select the grade and add the group/stream names and give them unique IDs. E.g. Grade 11 IDs could be 111,
112, 113 or 11A, 11B, 11C etc. where the first two digits indicate a grade.
Step 5 – Save the names.
These names will be auto-added to a class with no learners or groups/streams assigned.
Adding individual Learners or Groups.
Step 1- Select ‘Allocations’ from the top left box.
Step 2- Select a class or a grade to add learners or group to.
Step3 - Add the list of learners or a group of learners taking similar subjects in a grade. Indicate the number of learners in
the group under ‘Units’.
Step 4 – Click on ‘Save’ button. The non-split subject will be auto-added to every learner/group if the selected class has
a split allocation.
Step 5 – Select a Split subject (teacher is ‘0’) to list all the subjects under it.
Step 6- Select a subject under split subject.
Step 7 – Click on Add/Upgrade to add or change the Learner Subject.
Select the next learner/group and repeats the steps above.
You may only add the selective subjects i.e. those subjects that are done in split combinations.
When you click on the learner/group the timetable will display the specific subjects instead of split names.
Update Table – To update the database of the learner timetable and make it ready to print.
Count Allocations - To count and allocate the number of learners taking the subject.
Show Learners – To list only learners/groups that are allocated to the selected subject and teacher.
List All Classes/Grades – By default, the system will only list classes/grades that have split combinations in them. When
this is checked then all classes/grades will list.
Grades – List learners by grades.
Excel – Export and list the current learners/groups with their subjects.
Print (gray) – Print the list the current learners/groups with their subjects.
Print (green) – Print the timetable for the current learners/groups.
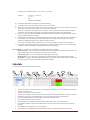
Relief Table
The list of teachers that are available as substitutes for those who are absent. You first have to select the absent teachers
by clicking on the names from the list of teachers. The teachers most suitable to relief will be marked with “”. The
teachers with “” are those teachers who are teaching the same subject as that which is sought to be relieved in the
underlying teacher table. Click the teacher from the list to see his/her workload list. Click on ‘>’ to hide and ‘<’ to show.
To Allocate a Relief to a teacher.
Step 1 - Click the teachers that are absent from the list of teachers. As you click the teacher is added to the absent list.
Step 2 - Select the teacher from the absent list to check his/her possible substitutes. The corresponding day timetable of
the selected teacher will be shown at the bottom.
Step 3 – Double click or click on Relief button to allocate a teacher to corresponding subject below.
Select another day and repeats the steps above.
Select another absent teacher and do the steps above.
The teachers who are allocated to the current absent teacher will be written in red. Those allocated to relief other teachers
will be in blue. The unallocated will be in black. To view the allocation of the teacher in Blue or Red, just click on the
name to reveal the details.
Show Workload – Will list the teacher workload percentage along the teacher name.
Relief Table – Will list the timetable of the selected absent teacher showing the names of relieving teachers in red.
Where names are not shown it means that no relief teacher has been allocated as yet and these will not print.
Print Relief – Will print the relief timetable of the selected absent teacher. Only the relieved periods will be printed.
Free Teachers - If you want to check the list of teachers that are free at any given period. This will list all the teachers not
teaching at a given period excluding those appearing on the absent list and those assigned to relieve during the period.
Excel - Click on Excel button to export the list of all free teacher, excluding those who are absents, to Excel spreadsheet.
www.scheduler.co.za
Page 10
Same School Different Periods
For more complex situations, you can allocate different periods to different classes or days by allocating different period
structures. You can also allocate different breaks to free your resources and make them available while other classes are
on break.
You can also allocate the amount of time (minutes) per periods. With this you will be required to allocate time (minutes) to
subjects. The drawing of a Time Based timetable might take a little longer that the non-time based.
Under Structure, click the check box ‘Different Classes’ or ‘Different Days’. Select the specific class/grade or the day to
which the new set of periods will apply. You can paste the general periods and change the periods, or you can type in the
new periods.
This setting will produce a timetable with different period structure for specified classes or days as per your choice. You
can Copy a set of periods from one Class/Day and Paste it to another.
To disable all specific periods, simply uncheck the ‘Different Classes’ and/or ‘Different Days’ then save. If the boxes are
unchecked, the specific periods will be ignored. You do not have to delete all specific periods.
All the specified periods per class and/or day will be displayed on the top right corner. Just click on the specific set of
periods you want to access.
Rules for Same School Different Periods
1.
2.
3.
4.
Durations of vertical period sets should be the same for all classes per day.
Period durations can be different from each other and be different day by day.
Where classes have different breaks, then the break duration should be the same as other vertical periods.
You cannot have, for instead, one period at 60 minutes for one class and the same period at 30 minutes for
another on the same day.
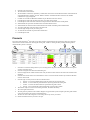
How Will Your Timetable Look Like?
Please note that School Scheduler handles Subjects and Periods in the following order.
1. Subjects and splits are allocated at one occurrence a day and spread to other days to ensure continuity.
2. Only where doubles are specified will consecutive double periods be allocated for a subject, except where the
subject requires more doubles than the number of days, then consecutive triples will be allocated. These are
also spread to other days to ensure minimum doubles per day per class.
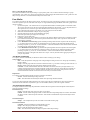
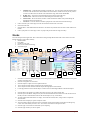
3. Only if there is no space for a consecutive double or a single period elsewhere, then a subjects will be
allocated in a non-consecutive/separate periods as illustrated below.
ENG
HIST
Break LO
GEO
MATH
MATH
4. At other circumstances, the system might resort on making a consecutive triple period rather than nonconsecutive double period for the same subjects in a day. You will be given an option to ‘Fix This’.
5. If you do not want triple periods, then indicate that you rather have separate/non-consecutive doubles than
triples by checking ‘No Triples rather Separate Dbles’.
6. It is only after trying everything that a subject will be left in a non-consecutive periods.
7. However, if ‘Separate Doubles’ is checked, then the opposite of all points except for 1 above will happen
(Replace consecutive with non-consecutive and visa versa).
8. The Study/Free periods or subjects that are taught by a FLEXI teacher are always spread in a non- consecutive
manner to avoid longer unsupervised periods.
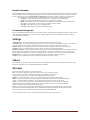
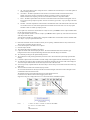
Below is an illustration of your timetable cell content.
Teacher Table
Subject
Subject
Class
Class/Learner Table
Subject
Split
Teacher
www.scheduler.co.za
Subject
Class-{Room}
Grade(Split)
Subject
Grade-{Room}(Split)
Subject
Teacher-{Room}
Page 11
When do I use this?
FLEXI
This is a reserved name for a floating teacher that;
1. Could be allocated regardless of clashes. Overloading will be disregarded for this teacher.
2. Will not be listed in the Teacher timetable printout.
3. Is used mainly for unsupervised or Free periods.
4. It is generally a non-existing/imaginary teacher.
This is teacher that can fill in on every period. Suppose you want to allocate free periods to a class(s) then add a subject called
‘Free’ or ‘Study’ and allocate it to teacher FLEXI.
If during your allocation, you are still left with residuals that you want to convert to ‘Free’ or ‘Study’ periods, just click the ‘Auto
Allocate FLEXI’.
LINK
Suppose you have a subject that you want done at the same period by different classes which may be from different grades.
In your Resources, go to the subject concern and change the label of SUBJECT or SPLIT to ‘LINK’, i.e. leave the CODE as it
is and change the description on the corresponding column to LINK.
All classes that have been allocated with this subject or split will do it at the same time regardless of grade. E.g. religious, prayer
or physical exercises.
TWIN SUBJECTS
Twin subjects are those subjects that belong together but allocated as different, e.g. Physics and Chemistry, Algebra and Calculus,
Paper 1 subject, Paper 2 and Paper 3 etc. If you want Scheduler to treat them as one such that they do not end up being done all in
one day on different separate times, then mark them with the same subject name. Give then their different Codes but the same
Subject Name. There is no limit on the number of twins each twin subject can contain.
SHADOW TEACHER
A shadow teacher is the teacher that gets assigned to periods that are coursing clashes that could lead to infeasible timetable
settings and delaying the finalization of timetable. When School Scheduler reaches the point of infeasible timetable, it first
disregard the room assigned to the teacher to ease constrains. If the problem persists, it then adds a Shadow Teacher
corresponding to the teacher with more workload, or the teacher mingled in splits. Scheduler will then allocate some periods of
the shadowed teacher to its shadow to complete the timetable. The shadow teacher is the teacher whose code ends with ‘=S’, e.g.
the shadow for FKZ will be FKZ=S, for 18 will be 18=S and so on.
After the timetable is successfully drawn,
1. From the teacher timetable, select the Shadow Teacher from the dropdown list of teachers.
2. Click the periods allocated to the Shadow Teacher. The list of all available teachers (Free) during that period
will be displayed.
3. Choose a teacher that could substitute or takeover in that period. All periods of the same subject and
class for which the selected teacher could substitute in, will be highlighted in gray and others (same
subject and class) in yellow.
4. Double-click on each period or click on Substitute to allocate the selected teacher. Or click on ‘Substitute’
with ‘All’ checked to allocate the selected teacher to all the gray highlighted period.
Click on UnShadowed to list the periods of the main teacher that belong the same class/group of learners. You do this if you
want to rather reallocate the whole class/group to another teacher than separating the one subject to different teachers. The
periods written in red belong to the original teacher (Unshadowed Teacher).
www.scheduler.co.za
Page 12
MARKS MANAGEMENT
Tools
TASKS
To setup the list of Tasks or Assessments that will be taken during the course the terms. The Tasks/Assessments are organized
and grouped by year and term. Select the Grade, Subject and Term to setup its Task. A Task can apply to all Terms, Grades or
Subjects unless specified.
To create a Task, you must enter its;
1.
2.
3.
Type- and abbreviation which should always be unique per given set of entries. This is the name of the Task by which it
will be referred to when entering marks against it.
Exam – to indicate whether this task will be an exam or just mere assessment. Exam entries are treated differently when a
term formula is used.
Sum Of Same – Available only for 4th Term. This indicate that the previous terms entries bearing the same Type name
should be added to this. All totals and marks scored from the previous similar types will be accumulated into the 4th Term.
All the allocated Tasks will be listed on the right which could easily be accessed by clicking on the desired set. You can filter the
list of allocated tasks by selected the Grade, Subject and/or Term for the Year.
Marks Formula
To setup the formula for calculating your assessment and exam marks towards your final term results. Each term will be
calculated using its term’s formula.
Grade – Select the grade that this formula will be used for. If a specific grade is selected, then the formula will only be used in
that specific grade only. Grades that do not have a formula specified, will use the formula under <All>.
Subject Group – Select <All> if the formula will apply to all subjects otherwise select a group of subjects that the formula will
be applied in. A subject that is not in a specified group will use the formula under <All>. Select “- Add New -“ to add a group.
‘-Add New –‘ Select this to add a new subject group for the selected Grade. Type in the name of the group under Groups. Select
the subjects from your left list and click ‘Add Subject’ to add them to the group.
You can specify how each term should be calculated by indicating the percentage of previous term, Assessment and Exam that
should add up to a Total of 100%.
Assessment – Type in the percentage of Assessment that all your assessment will be calculated against. If 75% is entered, this
will mean that all assessments of a subject for the term will be added up to 75%. You may have as many assessments as you
want per subject.
Exam - Type in the percentage of Exam that you want as part of the final term mark. If 25% is entered, this will mean that all
exam marks of a subject for the term will be added up to make 25% of the final Term marks. You may have as many exams per
subject as you want, i.e. Paper 1, Paper 2 etc.
4th Term and Year Mark – The Year Mark is determined in the 4th term by indicating how the previous term marks are
accumulated. You can combine 1st, 2nd, 3rd and 4th term marks to make up your Year Mark. Or you can indicate different
percentages per term that you want to make up your Year Mark.
1st, 2nd, 3rd Term – If you want to pull part of the past terms as part of the current term’s marks, you indicate here otherwise
leave it as zero. If you want to give your own calculated Year Mark then indicate 4 th Assessment as 100%.
4th Term – Before the final exam, there is a term in which the Assessments are done. Indicate how you would like those last
assessments to be handled together with the past terms. You can include the 4th Term Assessment or treat them separately. This
will then form the Year Assessment Mark (The assessment for the whole year).
Final – How would you like the final mark to be calculated? Indicate the percentage of Year Mark and of final Exam that will
make up the learner final mark.
www.scheduler.co.za
Page 13
How a system will apply the formula.
The system with check first if the subject belongs to a group in this grade. If not, it will then check if it belongs to a group
specified under <All> grades. If it is still not specified, then the system will apply the default formula of <All> grades and <All>
Subject-Group, otherwise it will indicate that the Subject has no Pass mark.
Pass Marks
To set up the pass marks for all subjects done at school. You first have to group your subjects according to your requirements. If
a learner is required to pass two of the three main subjects i.e. English, Home Language and Maths, then create a group for these
subjects as follows;
1. Opt stand for Option – This indicates the set of requirement that should be evaluated together to ascertain the results.
The 0 (zero) is the main set for the pass requirement which should always be indicated. 1, 2, 3,etc may then follow as
other options for Pass, Condone or Age Cohort should the learner not meet Opt 0 requirements.
2. Type in the name of the group for your subjects. Give it any name, the shorter the better.
3. Indicate the minimum number of subjects to pass in the group.
4. Select the subjects from the left list and add them to the group.
5. Indicate the pass mark in percentages for each subject.
6. Repeat step 1 to 4 for each group.
7. Condoned - Indicates the set of conditions for a learner to be condoned. Should a learner fails in meeting the required
pass conditions mentioned above, but scores the specified minimum of subjects with % specified or more, then the
learner will be ‘Condoned’.
8. Under ‘Minimum Percent in Group’ type the minimum percentages that need to be acquired in the selected group
e.g. if a learner need to get two subjects at a minimum of 40% to pass then type 40. Indicate the number of those
percentages required. e.g. if ‘Perc %’ =40 and ‘Minimum’ =2 this will mean that the learner should obtain a minimum
of 2 subjects in this group with 40% or above to pass.
9. Under ‘Minimum Percent in Grade’, type the minimum percentages that need to be acquired in the selected grade
e.g. if a learner need to get four subjects at a minimum of 40% to pass then type 40. Indicate the number of those
percentages required, e.g. if ‘Perc %’ =40 and ‘Minimum’ =4, this will mean that the learner should obtain a
minimum of 4 subjects in this grade with 40% or above to pass. You may also indicate the aggregate percentage for
your pass requirement.
Auto Results Commenting
To set up the comments such that they are allocated to learner results according to your settings.
Group Comment
Rate – Enter the importance of the group with 1 being the highest 2 being next and so on. The groups are ranked by
Passed or Failed.
Group – Enter the group name that is relevant to the kind of results, e.g. ‘Excellent’ referring to results with 50% x 5.
Passed – Indicate if this will apply to the learners that have passed or failed.
Comment – List the comment numbers that will be attached to the learners who meet your requirements. Use a
comma to separate more than one comment Comments will be joined as sentences. If more than one comments are
enclosed in brackets then only one comment randomly selected by the system will be used per learner. This will
ensure that different comments are used for learners even if they scored same outcome.
Requirements
To set up the requirements that should be met for the comments to be attached.
Percent – Enter the minimum percentage to be met.
Units – Enter the number of times/subjects that the above percentage should be obtained.
You can leave the requirements unallocated for the last of each group of Passed or Failed learners. This will mean that if a
learner has not met all the above requirement to get a relevant comment, then the system will assign this comment.
Auto Promotional Comments
To setup the conditions for allocating the promotional Comments that are assigned to learners that passed certain subjects at
particular minimum percentage.
Promotional Group
Group – Enter the name of the group. Any name of your choice.
Exclude – Indicate whether this group include or exclude the listed corresponding subject. If exclude is clicked then
all subjects will be evaluated except the listed ones. If the exclude is left blank then only the listed subjects will be
evaluated.
Promotional Subjects
Subject – List all subject that you want to exclude ot not exclude from the group.
Promotional Comments
Comment – Enter the Promotional Comment number you want.
Group – Select the group to which this comment will apply.
Perc% - Enter the minimum percentage required.
Units – Enter the minimum number of subjects required to obtain the percentage.
www.scheduler.co.za
Page 14
Results Comments
The list of predefined comments that you could select from to paste to a learner’s Report Card. You can refer to these comments
by their ID number. They can also be grouped per grade. List all the school’s standard comments that you would like to attach to
learners’ Progress Reports. Use the Auto Results Commenting under Pass Mark to setup the conditions for each comment.
There are words and phrases that will be replaced by relevant words to make the comment more personal;
<Surname> will be replaced by the surname of the learner. For uppercase use <SURNAME>
<Name> will be replaced by the Name of the learner. For uppercase use <NAME>
He/She will be replace by He for the male learner or by She for the female learner. It will be left unchanged
where gender is not specified. The same will apply for his/hers, him/her, his/her.
<Top Sbj> will be replaced by the top scored subject name.
<Low Sbj> will be replaced by the lowest scored subject name.
Promotional Comments
The list of comments that indicate the level of results achieved. These comments will be displayed in the leaner’s report to reflect
if the results achieved could lead to University, College or Higher education study. Set the conditions for these comments in
Auto Promotional Commenting.
Settings
Archive Reasons – The list of predefined reasons to terminate or archive the learner from school.
Assessment Type – The list of assessment types that you do at school, e.g. Class Test, Assignment, Project etc. These types can
be grouped by grades and by subjects such that only the grade or subject specific Assessment Types will show.
Fail/Pass Term – Give your preferred terms to use instead of Pass, Fail or Condoned. This can be specific to grades.
Languages – The list of national languages and their code as provided by the Education Department.
Report Cards Notices – The notices that print on the Report Card. They may include things like the pass conditions, message to
parents and school reopening dates. These can also be grade specific. There are two kinds of notices, one for all terms and
another for final term. There is also an option of setting up frames for your Report Card to give it a personal touch and design.
Report Header – To specify you logo and the address or text that you want printed on all your printouts.
Symbols – The list of Symbols or Levels to indicate the performance of learner per subject.
School
Enter the details of your school. Most of this information is for updating the government LURITS. Maintain the details of your
School Governing Body and your School Management Team members.
Structure
Just type in your preferred names of your school structure.
Days – In the order of appearance, type in the names of days per cycle. The order in which
you type the days is the order in which they will appear in your timetable. Any number of
days per cycle is fully catered for. The days entered should be unique to each other.
Subjects – Type in all the subjects you do at your school. Make sure they have unique codes (Abbr.).
Splits – This is the names given to your split combinations where learners of the same class split to attend different
subjects, e.g. home languages as VERNAC. Leave it blank if you do not have any splits at your school.
Grades – Type in the list of grades at your school and indicate the number of classes each grade has. The grades
should have unique names and abbreviations. When a ‘Save All’ button is pressed, the system will generate the
number of classes for each grade and list them below grades.
Classes – The list of classes is generated by the system using the information provided under Grades. The Class names
will be derived from the Grade names above. The class abbreviation will be derived from the abbreviation of the grades
above. To change class names and their abbreviations use the corresponding Alias fields.
If you want to add or remove classes, simply change the number of classes in the grade and save.
www.scheduler.co.za
Page 15
Teacher
Capture the details of all your teaching staff. The unique field in this is the teacher code which is also used by the timetable to
uniquely identify the teacher. When a teacher is archived or terminated, this code will be made available for reuse. The system
will mark the Teacher code by attaching a date of termination to it.
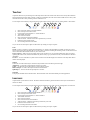
You can capture new teachers by using the Record navigator found at the top of the screen by clicking button 7 shown below.
1
1.
2.
3.
4.
5.
6.
7.
8.
9.
2
3
4
5
6
7
8
9
Move to the first teacher record in the database.
Move to the previous teacher record..
Record position in the database. i.e. teacher number 2.
Total number of teachers.
Move to the next teacher.
Move to the last teacher in the database.
Add new teacher. A blank records will be presented for you to add.
Delete the current teacher record.
Save all changes that have been made.
Or you can also use the Express Capture to add teachers by clicking on ‘Express Capture’.
Tools
Search - Use this to search for a teacher from the database. Use Teacher Code and Employee Number to search for an exact
match. Use the Name like or Surname like to search for name or surname containing the searching words. On the latter the ssem
will list all teachers that match the search for you to choose from.
Express Capture – When you want to speedily capture a list of teachers so as to get started without delay. Here you will be
capturing the Teacher Code, surname and Names only which are key o get you started. You may come back later to add other
information.
List View – To view all teachers in system all at once instead of a form that displays one teacher at a time. Key fields about a
teacher will be displayed.
Subjects
To allocate or list the teacher subjects. Select the subject and the class from the drop list on the right.
Add Subject - To allocate a selected subject and class to a teacher.
Update – To change the current allocation to a selected subject and class.
Remove Subject - To remove the subject from the teacher allocation.
Split Subject – To list or allocate the split subjects to a teacher.
Timetable
To display the timetable of the selected teacher. This information comes from the timetable part of this application.
Learners
Capture details of your learners at school. The learner admission number is generated from the current year and increment as
learners are added.
You can capture new learners by using the Record navigator found at the top of the screen by clicking button 7 shown below.
1
1.
2.
3.
4.
5.
6.
7.
8.
9.
2
3
4
5
6
7
8
9
Move to the first learner record in the database.
Move to the previous learner record..
Record position in the database. i.e. learner number 2.
Total number of learners.
Move to the next learner.
Move to the last learner in the database.
Add new learner. A blank records will be presented for you to add.
Delete the current learner record.
Save all changes that have been made.
Or you can also use the Express Capture to add learners by clicking on ‘Express Capture’.
www.scheduler.co.za
Page 16
Tools
Search - Use this to search for a learner in the database. Use learner ID (admission number) to search for an exact match. Use
the Name like or Surname like to search for names or surnames containing the searching words. On the latter the system will list
all learners that match the search for you to choose from.
Filter – Select parameters by specifying the filters for the list of learners you want. Click on ‘Filter’ to display only those
learners you want to work with. The red word Filtered will display on the left bottom corner to remind you that you are working
with the filtered records. You Search will only be limited to the filtered records.
Clear Filter – To remove the filter and display all other records except those that are archived.
List View - To view all learners in system at once instead of a form that displays one learner at a time. Key fields about a learner
will be displayed. Select the learner from the list and click on ‘Form View’ to work with that learner records and access other
information. You can make and save changes here. You can select the previous years to list learners who attended then.
AutoGenerate LearnerID – This will allow you to provide your own or current learner admission number. You can leaving
checked to allow the system to generate its own.
Subjects
To allocate or list the subjects registered to the learner. Select the subject and the teacher from the drop list on the right.
Add Subject - To allocate a selected subject and teacher to a learner.
Update – To change the current allocation to a selected subject and teacher.
Remove Subject - To remove the subject from the learner allocation.
Timetable
To display the timetable of the selected learner or for the class of the selected learner. This information comes from the timetable
part of this application.
Assessments
Display the marks of all assessment, exams and schedule marks of the learner as per your selection on the right box. You can
change the display by changing the selection on the right box.
Progress Report
To display the accumulated term marks for the learner. These are the final term marks as they will appear on the report card /
progress report of the learner. You can choose the year and term to display. Double click on the marks to print.
Progression
To display the list of results for all terms since the learner has joined the school. You can add or edit the list by typing the new
information. Note that you cannot edit or delete the information that was added by the system but only the old information that
was manually added.
Support Staff
Capture details of your supporting staff at school. The unique staff user code is generated from the current year and increment as
more staff is added. This user code will be the staff members logging name.
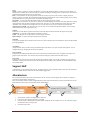
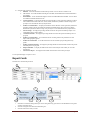
Absenteeism
This is to keep and maintain the records of absenteeism at school. You only record the people who are absent as everybody is
assumed to be present during schooling days.
Select to work with Learners, Teachers or Support Staff by clicking on the relevant button. You must provide the list of reasons
for absenteeism to choose from. You enter these reasons under Settings.
5
1
8
3
2
6
7
4
1.
2.
3.
4.
Select Learners, Teachers or Support staff to work with.
For Learners, select the grade and class to work with.
Select the reason of absenteeism to add when double clicking the date on Calendar View. Or select the date to register
for absenteeism when viewing by date.
Select he desired results ;
www.scheduler.co.za
Page 17
Calendar View – all absenteeism presented on Calendar view. You can register absent by double clicking
on the date. The selected reason will be added to the selected learner, teacher or staff. If you only want to
view the list of those who were absent on the selected date range, then unclick the List All.
b. By Date View – To list and to record absenteeism for the specific selected date only.
c. Absentees List – The list of all who were absent during the selected date range.
d. Absent Totals – The list of Learners, teachers or staff with the total number of days absent during the
selected term and to total for the year.
e. View Stats - to view the statistic or number of people who were absent in the selected date range.
Click to select the year to date range. This will select all absent records from 1 Jan to date.
Select to the date from.
Select the date to. If the different between the dates is less than 25 days then the stats will show in dates otherwise in
months.
Click to jump to the <Prv date range or Next> to jump to the previous/next date range of 24 days.
a.
5.
6.
7.
8.
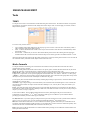
Marks
This is the main part of this application. This is where all the setting and input that has been made come to effect. This is the
kitchen where they all get cooked. Namely;
Marks Formula
Pass Marks
Symbol or Level setup
Pass, Fail or Condone terminology
14
Assessment Types
2
4
3
6
5
13
12
8
15
1
16
9
11
17
10
31
30
29
28
21
18
19
1.
2.
3.
4.
5.
6.
7.
8.
9.
10.
11.
12.
13.
14.
22
24
25
26
27
20
23
Select this to switch from listing learners per class to listing learners by grade. If this is checked then the list of grades
will show in the drop down.
Select the class/grade to list its learners.
Select the subject to capture or list the captured marks for.
To list only those learners that are registered for the selected subject.
To list only those learners marks for selected subject and taught by the selected teacher.
List the top performers for the selected subject. Learners whore scored the highest Marks in the selected subject.
Select the date for the marks to be captured. The marks are going to be stored using this date.
Select the year for the Marks. If the previous years has been selected then learners who were in the selected class for
the that year will be listed and their marks for the selected subject, if any, will be shown.
To mark all the learner Marks that are on display. You marks all to Delete, Move, Assign teacher or Adjust the
selected marks.
Select the Term to display or capture its subjects’ marks.
To list the marks of the previous dates. The list of all marks for the selected subject will be shown on the right top
corner. Click on the marks you want to view. You can also select the list for the previous terms.
Select the type of Assessment or Exam marks you are capturing.
Select the type of marks you want to capture.
www.scheduler.co.za
Page 18
a)
b)
c)
d)
All – This will list all the Tasks as setup in the Tools > TASKS for the selected subject. You can then capture all
marks according to the Task.
Assessment – The marks captured here will be treated as assessments and the assessment formula will be
applied. You can have as many assessments per subject as possible. You have to select the type of
Task/Assessment before capturing. The list is derived from the Tasks the is setup under TASKS.
Exam – The marks captured here will be treated as exam marks and the exam formula will be applied. You can
have as many exams per subject as possible. You have to select the type of exam, as per your setup in the Tools
> TASKS..
Schedule – The marks captured here will be treated as schedule/Final marks. The marks formula will not be used
for calculation in this case as the marks captured here are deemed to be the end results. You can only capture
Schedule or other set of marks per subject per term.
If you capture All, Assessment or Exam marks for a subject in a term, you will not be able to capture Schedule marks
for the same subject in the same term.
If you capture Schedule marks in a term for a subject, you will not be able to capture any Assessment or Exam for the
same subject in the same term.
You must choose whether you capture Tasks as setup under TASKS which will accumulate towards a Schedule mark
for a subject, or you just capture Schedule mark.
15. Indicate the total marks for the Assessment or Exam you are capturing. Scheduled marks are always totaled to 100.
This will not be available if the All is selected.
16. Provide the description of the marks. This is optional.
17. Select the subject teacher.
18. This indicate the teacher responsible for the subject.
19. Capture the marks of the selected subject per learner. The old and submitted marks will be marked by gray
background. If the marks are adjusted the background turns white until the changes are submitted.
20. The calculated percentage of the captured marks per learner.
21. The symbol/level for the percentage obtained by the learner. This is derived from the symbol setup specified under
Settings.
22. Commit the captured marks to the database. All other settings will be applied and final calculation done per learner.
23. To capture the new marks. If there are marks for the selected date and subject, the previous marks will be displayed.
You cannot capture different marks for the same subject and Tasks in the same term.
24. To list the previously captured marks for the selected subject. The list of all previous marks will be listed on the top
right corner.
25. To list the final term marks of the selected subject per learner.
All Assessment and Exams for the subjects that have been taken during this term will be listed on the right as items
accumulated towards the final term mark.
The formula used to get at the final mark will be shown at the bottom on the list.
Click on the Prv% column to list the marks from the previous terms.
Suppose the setup was as displayed below for 4th Term and the learner is Khumbane Siphiwe;
4th Term TASK and EXAM
Previous Terms
4th Term Formula
Prv%
=
www.scheduler.co.za
1st Term + 2nd Term + 3rd Term + 4th Term / 4 term Marks
45 + 42 + 53 + 70 / 400 X 100%
52
Which forms YM
Page 19
According to the formula Final Mark = 25% of YM + 75% of Exam
Overall% =
25% of 52 + 75% of 70
13 + 52
65
Which is our Final Mark
26. To delete the marks that have already been processed (old marks).
27. To change the currently assigned subject teacher to the newly selected one.
28. Should you wrongly submit subject marks to an incorrect term or subject, maybe you forgot to change the Term or the
subject name, you can move subject marks from one term/subject to another.
When ‘All’ is selected this same button becomes ‘Resubmit’. You can resubmit all the marks of different Tasks for
recalculation. This is usually done when there were changes made in the Pass marks or Pass Requirements.
29. Should you change settings in the Pass Marks after the marks and other calculations are captured and done, click this
to update results to apply the new settings.
30. To adjust the marks of learners by a specific percentage to change the results. The system will add an item marked as
‘Adjust Marks’ to the list of marks. This should always be the last marks captured for the term. If new marks are
captured or resubmitted for the subject, the adjustment marks will be lost.
You can also round-up the marks to a particular score, like round-up all marks to 30 that are between 26 and 30.
31. If you fiddle or keep changing Tasks names or Subject names the system might go out of synch. To maintain system
and keep it in synch you must keep on Updating Records by clicking this button.
View Dropdown – You can select to view additional information about learners and Marks.
All Learner Marks – This will list all the marks that have been captured for the selected learner. Double click on the
subject to make it the current selected subject and list all its marks per learner.
Learner Progression – To view and edit the list of learner progression per year.
Marks Analysis – To view the analysis of performance for all listed learners on the selected subject and marks.
Spreadsheet – To produce an excel spreadsheet that could be used to capture marks for the listed learners and for the
selected subject. This spreadsheet could then be imported into Scheduler.
Schedule
To list the statistical analytical report on the term results.
1
2
3
1.
2.
3.
4.
5.
6.
7.
8.
9.
4
5
6
7
8
10
9
Select this to switch from listing learners per class to listing learners by grade. If this is checked then the list of grades
will show in the drop down.
Select the class/grade to list its statistic report.
Select the year to display its results. The system will list the learners who attended during the specified year and their
performance. Only learners who obtained marks on at least one subject for the term will be displayed.
To list the Top/Bottom number of learners based on the overall Total marks Scored
Select the term for which to analyse its results.
To include other learner information like Date of Birth, Age, Gender etc. that is required by district.
If clicked the full names of subjects and not abbreviations will be used. Good when exporting to excel for district
reporting.
To include the Levels/Symbols for every marks obtained.
To list the learners who obtained the selected Results only. Maybe you want to lists the learners who Failed.
www.scheduler.co.za
Page 20
10. Select the type of analyses you want.
a. Schedule – To list the schedule of all final marks per learner. You can choose to include Levels.
b. YM Schedule - To list the Schedules indicating the Year Mark, Exam Mark and the Promotion Mark all in
one schedule.
c. SBA Schedule – To list schedule indicating the Current Term SBA Mark and Exam Mark. You can choose
to include the Promotion Mark and Levels.
d. Level Performance – To display the number of learners that have scored a particular symbol/level. The list
will include the total learners who wrote, Passed, Failed, obtained the symbol/level and the average score
per subject. You can break this down by subject teacher.
e. Gender Level Performance - To display the number of learners that have scored a particular symbol/level
grouped by Gender. The list will include the total male and female learners who wrote, Passed, Failed,
obtained the symbol/level and the average score per subject. You can break this down by subject teacher.
f.
Pass Percentage - To display the percentage number of learners who passed and failed per subject. You
can break this down by subject teacher.
g.
Overall Performance - To display the percentage number of learners who passed and failed per class or
per grade.
h. Gender Level Performance - To lists the total learners according to their level performance on each
subject taken grouped by gender.
i.
Gender Pass Performance – To list the total learners who wrote and the pass percentage thereof by
gender..
j.
Gender Overall Performance - To display the percentage number of male and female learners who passed
and failed per class or per grade.
k. Subject Marksheet – To display the marks sheets for the selected subject for the whole year or for the
selected term.
l.
Learners Per Subject – To display the total number of learners that wrote exams per subject.
You can print the display or export it to excel.
Report Cards
The final term’s results listed per learner.
2
3
4
1
5
<
6
8
15
7
14
9
11
10
1.
2.
3.
12
13
Select this to switch from listing learners per class to listing learners by grade. If this is checked then the list of grades
will show in the drop down.
Select the class/grade to list the learners that belong to it.
Select the term for the results you want.
www.scheduler.co.za
Page 21
4.
5.
6.
7.
8.
9.
10.
11.
12.
13.
14.
15.
Select the year for the results.
The name of the selected learner.
The ID numbers of comments, separated by a comma, that will be or that are attached to the leaner results from the list
of predefined Results Comments. Click on ‘Submit Comments’ to attach the Results Comments. The attached
comments have a gray background.
Click this to reveal the Pass Mark and conditions for pass that have been met or not met.
Print the Report Card for the selected Learner only. One report will be printed.
Print the Report Cards of the whole selected class. Report Cards of the listed learners will be printed.
When checked, the report cards of failed learners will contain the fail reasons.
When checked, the comments will be omitted and lines for manual commenting will be added instead.
To use the grade name or the class name in the report card.
Select the type of Report Card you want to print.
To reallocate the comments as per allocated comment ID’s.
Print the Report Cards.
Promote
This is done at the end of the 4th Term (end of year) where learners are promoted from one grade to the other. The system will
list the learners with the ‘Grade From’ showing the current grade, ‘Grade To’ showing the next possible promotion grade for
learners that have passed or condoned.
5
2
3
6
4
1
7
8
9
10
1.
Select this to switch from listing learners by class to listing learners by grade. If this is checked then the list of grades
will show in the drop down.
2. Select the class/grade to list the learners that belong to it.
3. Select to display learners with the selected results. Only the learners whose results are the same as the selected will be
displayed.
4. Select the Term for the results. This is defaulted to 4th Term. You will not be able to effect any action here other than
on the 4th Term results.
5. Select the type of action you want to effect on selected learners.
a. Promote – To move the marked learners from one grade to the next selected grade.
b. Demote – To reverse/undo the promoted learners by moving then back to lower grade.
c. Archive – To archive the learners that have passed their last grade at school.
d. Salvage - To reverse/undo the archived learners that were archived by mistake.
6. This button is only active on the 4th term during November, December and January.
7. The current grade of the learner.
8. The next grade for promotion. This could be changed to any grade but the system will pick up the next grade from the
current one and only for the passed or condoned learners.
9. The first next class in the next grade. You can change this to any class at your school.
10. Mark or unmark the learners you want to act upon.
www.scheduler.co.za
Page 22