1
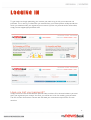
WELCOME TO MYNEWSDESK!
We want to make you an expert user of Mynewsdesk in the shortest possible time,
and make it easy for you to see the positive results you can achieve from effective and
well thought out communication work.
Our goal is that your efforts will generate good publicity and that your message directly reaches
decision makers, influencers, customers and opinion leaders who are involved in shaping the
success of your business and your organization.
In this user manual we provide an overview of how our services work, and how you quickly and
easily can start publishing your press content.
If you need further help or are
unsure about how to use these
features, feel free to contact our
Customer Service Department.
We are available to help you
weekdays from 9 am to 5 pm CET.
Contact Information:
Telephone: +46 (0)8 644 89 50
Email: [email protected]
Twitter: @mynewsdesk
Facebook: www.facebook.com/mynewsdesk
Via chat on mynewsdesk.com
Revised December 2011
2
TABLE OF CONTENTS
WELCOME TO MYNEWSDESK! ..................................................................................................................... 2 GETTING STARTED – 10 STEPS TO FASTER PUBLISHING ..................................................................... 4 LOGGING IN ...................................................................................................................................................... 5 Have you lost your password? ........................................................................................................................................ 5 SETTINGS .......................................................................................................................................................... 8 Newsroom ............................................................................................................................................................................... 8 Links ................................................................................................................................................................................ 8 Comments ..................................................................................................................................................................... 8 License ............................................................................................................................................................................ 8 Blogstream .................................................................................................................................................................... 8 Categorization ............................................................................................................................................................. 9 External sources ......................................................................................................................................................... 9 External links ............................................................................................................................................................... 9 Channels ................................................................................................................................................................................. 10 Comments .............................................................................................................................................................................. 11 Newsroom on Facebook .................................................................................................................................................. 11 Hosted Newsroom .............................................................................................................................................................. 11 NETWORK ...................................................................................................................................................... 12 Distribution lists ................................................................................................................................................................. 12 Followers ............................................................................................................................................................................... 13 Send message ................................................................................................. Fel! Bokmärket är inte definierat. PUBLISH .......................................................................................................................................................... 14 Press releases ...................................................................................................................................................................... 14 1. Basic information ............................................................................................................................................... 14 2. Related material. ................................................................................................................................................ 16 3. Categorization ..................................................................................................................................................... 16 4. Distribution ........................................................................................................................................................... 17 Publish news ......................................................................................................................................................................... 18 Publish a blog post ............................................................................................................................................................ 18 Publish an event ................................................................................................................................................................. 18 Publish an image ................................................................................................................................................................ 19 Publish a video .................................................................................................................................................................... 19 Publish a document ........................................................................................................................................................... 20 Add a contact person ........................................................................................................................................................ 20 EXPLORE ......................................................................................................................................................... 21 To add an alert .................................................................................................................................................................... 21 Read content, reconnect and add contacts ............................................................................................................. 22 ANALYZE ......................................................................................................................................................... 24 Newsroom ............................................................................................................................................................................. 24 Detailed statistics ............................................................................................................................................................... 25 Web analytics ...................................................................................................................................................................... 25 Statistical report via email ............................................................................................................................................ 25 3
GETTING STARTED – 10 STEPS
TO FASTER PUBLISHING
1.
2.
3.
4.
5.
6.
7.
8.
9.
Log in with your user name and password. If you don't know or don't have your log in
information, please contact [email protected]
After you have logged in, allow yourself a few minutes to click around to familiarize yourself
with the different features.
Under the tab Settings → Newsroom, which you will find in the right hand corner, you can
build the foundation for your newsroom. Here you can add your logo, company description
and address, links and other important information. To see how your newsroom looks, save
the information and then click on Newsroom higher up on the page. When you are in your
newsroom, you can return to this page by clicking on Settings.
To enhance your newsroom, make sure to connect to social media. Your YouTube videos,
Flickr photos, Twitter tweets and RSS feed can all be integrated into one Social Media
Newsroom. Via Settings, add the social media feeds you want displayed in your newsroom.
Select the preset categories for your pressroom under Settings. These categories are how
Mynewsdesk users set up their alerts to follow your content. If your company is regionspecific, you may wish to choose a region. When you publish content you may wish to
change categories depending on the nature of the press content.
Settings is also where you select whether or not you would like to use our Blogstream. If
someone with a blog links to your content on Mynewsdesk, a link to the blog will be seen
next to your content. You can also choose the settings for comments on your published
content, as well as choose which Creative Commons license you want to use for your
photos, videos and documents. This means that you add a note on how others may use
your content.
Add a press contact to your newsroom. Under Publish → Contact persons you can publish
information about your contact person(s). Enter the contact information and then click
Show as press contact in the newsroom. The contact person will then be visible on the left
hand side in your newsroom. Remember to add a photo to personalize your newsroom.
Under Settings → Channels you can activate both your social media channels and other
channels for direct publishing on external websites.
If you want your press releases to reach specific contacts, you can add those contacts by
creating a new list – just click on Distribution Lists, which is located under the Network tab.
You can create as many lists as you want. When you publish a press release, you can
select one or more lists based on how relevant they are for that particular content.
to your newsroom by clicking on Newsroom in the upper right hand corner to check
10. Go
that you've added everything you think is important. You’re ready to go, so start publishing!
Good luck!
4
LOGGING IN
To get started and begin publishing your content you need to log in with your username and
password. This is the log in information you received from your contact person at Mynewsdesk or
which you selected when you registered your account. If you’ve not yet received this information,
simply contact [email protected].
Have you lost your password?
Simply click on the link underneath the password box, and then fill in the email address you used
when you registered your account. Via email, you will be sent a link for resetting your password.
The link will work for one hour. Please note that both your username and password are case
sensitive.
5
DASHBOARD
If you have Newsrooms in several countries, you will choose from a menu which countryʼs
newsroom to work on. You will also see a graph of the viewings in each respective country from
the past month, alongside a map of the locations of the most recent visitors.
Once you have chosen which newsroom to work on, or simply logged in to an account with one
single newsroom, you will get to Mynewsdeskʼs Dashboard. At the top of the list you will find the
seven navigation tabs for your account: Dashboard, Publish, Network, Explore, Analyze,
Inställningar and Newsroom.
In the top left of the overview you will find two boxes
with numbers in them. These boxes display the
number of viewings in the newsroom, weekly on the
left and monthly on the right. Below them you will find
your three most recently published press releases as
well as the number of hits each has had since
publication.
Slightly below these three press releases you will find
the header Publish >> Draft. This is where you find
recently saved drafts that have not yet been published.
If you donʼt have any drafts, quick links to Press
Releases, News, Blog posts, Events, Images, Videos,
Documents and Contact persons will display instead.
Below these again is the Network >> Lates followers
header, where the three newest followers of your
newsroom will show. This information displays for
users with Pro, Plus and Premium accounts.
6
At the top in the centre of the Dashboard is a map with
orange-coloured dots. These dots show the locations of
your most recent visitors at the time of their visits to your
newsroom. This functionality is only available in Plus and
Premium accounts.
Below the map is a box with the headline Explore. At the
top of this box, the most influential people who have
mentioned your business or some of your keywords will
display. Further down you can see the most recent hits for
some of your keywords in Explore. This functionality is
only available to users with Plus or Premium accounts.
In the top right is the heading Newsroom. Below the
header is a bar that shows, in percent, to what degree
your newsroom is complete. Below the chart are
examples of things you have not yet added to your
newsroom, each with a value in percent of how much
more complete your newsroom would be if you added the
suggested information. This could for example be a
business description, with your newsroom being 8% more
complete once added. At the bottom of this box youʼll find
tips on how to better utilize Mynewsdesk and reach a
greater number of people
Below the Newsroom header is the three most recent posts
from our Mynewsdesk Blog. There you can find, among other
things, tips on best practice for using Mynewsdesk and ways of
improving your digital PR work. This is also where we
communicate news and changes to the site.
In the bottom right is a speech bubble with messages from us
here at Mynewsdesk. This could be about challenges, tips,
tricks or information that may be important to you as a
Mynewsdesk user.
7
SETTINGS
Newsroom
When your newsroom needs updating, you can do so
under Settings → Newsroom.
Here you can add or change:
•
•
•
•
•
•
•
•
Name
Headline
Company description
Company description as a boiler plate text, i.e. the text
visible directly underneath your press releases
Your newsroom URL (should not be edited or
changed once you’ve published any content in your
newsroom)
Contact information for your company
Logo
Links and streams
Links
Under Settings you can add the links that you want displayed in your newsroom. You do this in the
right hand column. Link text are the words that are linked with the URL that you enter. You can
add multiple links. The links appear in the newsroom in the right hand column.
Comments
In the right hand column you can set whether to
allow comments on the content you publish, and if
the comments will be moderated before they appear
in the newsroom.
License
In the right hand column, you can also set the
Creative Commons license you wish to use as the
default setting for images and videos. With a
Creative Commons license, you keep your copyright
but allow people to copy and distribute your work
provided they recognize you as the author. You may
also select whether or not to authorize the creation
of derivative works of your content. Click the
question marks to see an explanation of the
different license types.
Blogstream
This is where you choose to have the blogstream activated or not. A blogstream creates links when
someone uses your press content in their blog. The links will appear on the right hand side of your
published content.
8
Categorization
Here is where you categorize your content and select the region that will be displayed by default
when you publish content. Remember that the regions are used only when you write something
that is directed at or about a specific location. With each publication, you can remove or add more
categories.
Categories are one of the ways that journalists and other influencers subscribe to press contents
from companies that publish on Mynewsdesk.
External sources
You can add social media feeds to your newsroom. You can add your own or another relevant feed
from Facebook, Twitter, Flickr, YouTube or an RSS feed. Click Settings in the upper right hand
corner and then click on the Newsroom tab. Add the social media feeds in the section External
Sources.
You fill in what you want the flow to be called and add in either the URL or the username
depending on which flow it is. There are more detailed instructions in conjunction with the different
flows.
External links
Here is where you can add links to your company’s own file banks if they contain content that you
do not publish on Mynewsdesk. External links are shown together with the content in your
newsroom, so a link to an image bank, for instance, can be seen together with the images in your
newsroom.
REMEMBER TO CLICK ON SAVE CHANGES WHEN YOU ARE
DONE UPDATING!
9
Channels
In addition to our distribution to journalists,
bloggers and other influencers, content is also
distributed to several other editorial channels all to increase your exposure. Our channels
display your press release to relevant sites
such as industry portals, search engines,
company databases and social media
channels.
Click on the Settings tab, and then on Channels, to select the settings for your channels. This is
where you fill in your user details for Facebook, Flickr, Slideshare, Twitter, Wordpress, and
YouTube to automatically publish your content there as well. A prerequisite for using these
channels is that you already have accounts on these social media services. If you do not have
accounts already set up, you can easily register at each site.
Facebook and Twitter channels will publish the title of the content along with a link to the press
content in your newsroom. Publishing an image on Flickr, a document on Slideshare or a video on
YouTube will work in the same way, if you publish in these channels.
If you wish to have an even wider distribution of
your news and direct publication to various
media, you can choose from our pay channels
for direct publicity in the media. Next to each
channel, you will see the price per news release.
Activate those that are relevant to you by filling
in your billing information. Then select the ones
you wish to use when you publish your press
content. We recommend that you not set
channels that involve a cost as default.
If you have newsrooms in more than one
country, you can have different channel settings
for each country’s newsroom.
For up-to-date information on which channels
are available, and which are relevant to you,
contact your Mynewsdesk representative or our
Customer Service Department.
Al l social m edi a chan nels a re added in a sim ilar m a nner. To a dd, fo r ex a m ple, Twitter as a ch annel :
1. Once logged in to Mynewsdesk, click the Settings tab and then Channels. You will see a list of different channels.
Click Activate next to the selected channel, in this case Twitter.
2. Choose if you want to set the channel as default or not. If you do not check the default box, you must actively
select the Twitter channel every time you publish content.
3. Log in to Twitter. Accept Mynewsdesk as a service.
10
Comments
Comments can be found under Settings → Comments. If you have chosen to allow comments
(under Settings → Newsroom), they will appear here. If you have chosen to moderate comments
before they appear in your newsroom, you will receive all comments in a list (under Pending
approval) where you can either accept or reject them. Under the tab Rejected you can view
comments you have refused publication, and under Spam you’ll find spam comments that have
been removed by the spam filter.
Newsroom on Facebook
To create a newsroom on your company's Facebook page, click on the tab labeled Newsroom on
Facebook under Settings and simply follow the instructions. There is a also video tutorial available
in Mynewsdesk’s own newsroom. The newsroom will be added as an application in the left hand
column on the company's Facebook page.
The person who activates the Facebook newsroom must be an administrator for the company's
Facebook page. As an administrator, you’ll log into Facebook (via Mynewsdesk) with your personal
Facebook profile.
Hosted Newsroom
A Hosted Newsroom is included in the Premium account, but if you have a Plus account, you can
purchase this feature as an add on. A Hosted Newsroom works as a mirroring function, so it is
sufficient that you publish your content to Mynewsdesk. When you publish, the information is
added automatically to your company’s website. Hence, the information is always up to date while
making your daily PR work more effective.
If you do not have knowledge of HTML coding, it’s likely you’ll need the help of your web
technician or the company that hosts your website. For a web expert, it is easy to set up a Hosted
Newsroom.
Customize the appearance of your Hosted
Newsroom by selecting your settings under the tab
Settings → Hosted Newsroom → Design.
To add your newsroom to your own domain, follow
these steps:
• Point a domain or a subdomain to
www.mynewsdesk.com using a CNAME. A
CNAME can usually be created by a webmaster
or the person responsible for the maintenance
of your website.
• Specify your new domain under the tab Settings
→ Hosted Newsroom → Custom Domain.
• Now your newsroom will appear on the new
domain.
To embed the newsroom on your site, you need to upload a
file on your web server. If you need help with this process,
contact the webmaster or a web technician at your company.
• Click on Settings →Hosted Newsroom →Embed with
iframe.
• Download the HTML file.
• Upload the HTML file to your web server.
• Enter the adress to the HTML file where it is on your
webserver.
• Paste in the code on the page of your website where
you wish to display your newsroom.
Please note that your site must be at least 940 pixels wide
for the newsroom to fit.
For more advanced graphics you can use your own CSS
code. To do this you must be knowledgeable in CSS.
For more information, contact your Mynewsdesk
representative or our Customer Service Department.
11
NETWORK
Distribution lists
Under the Network tab you’ll find all your contacts – both those added by you and those following
your newsroom, in other words those who are interested specifically in the material you are
distributing. When you publish material to Mynewsdesk you can easily send it straight to your
contacts. You can also send unpublished press material exclusively to a selected group of
journalists. There is also the possibility of sending messages from Network to your contacts with or
without material attached.
Before sending out press material you must have saved your contacts in lists. The number of lists
you can have is infinite. If the same email address is included in two lists, both of which are sent
the same mail-out, the duplicate will automatically be removed. The reply address for the lists can
be set under Settings -> Newsroom.
Add contacts by going to the Network tab and clicking Add more contacts. You can either import
contacts straight from an Excel spreadsheet or type in the email addresses manually, one on each
row without punctuation marks. If you want, you can offer your new contacts to follow your
Mynewsdesk news feed by ticking the box for that option below the address field. To simplify your
work, add your contacts to lists. Choose an existing list or create a new one by giving it the
appropriate name and click Add new list. To complete the importing of new contacts, just click Add
Contacts.
When you publish press releases or other types of material you can choose to use one or more of
your distribution lists. Simply tick the boxes for the required distribution lists before saving and
publishing.
12
Lists
To view the contacts in the different lists, click the name of the list in the
column on the left. Here you can see which list a given contact is included
in. By clicking the person’s email address, you can view his or her user
profile, if one exists. This often consists of a profile imported from LinkedIn,
containing the person’s interests and employment history.
If you want to make changes to the lists you can select email addresses by
ticking the boxes next to them. You will then be able to add them to
another list, create a new list for them, remove them from the list, or delete
them completely. You can also choose to send a message to the selected
email addresses by clicking Send message. To return to the main list, just
click Clear selection.
Top tip! Send
m a teria l
ex clusively to a
selected group of
journal ists.
Mention in the
message that they are
receiving the material
before everyone else.
If you want to remove a list you can click Edit lists at the bottom of the column on the left. By
clicking the x beside the list, you will remove the list but keep the contacts. The contacts will still be
available under All contacts.
To print a list from your Mynewsdesk account, go to the tab Settings -> Network, choose a list and
then Download contacts. The list will be saved as an Excel spreadsheet.
Send a message
You can send direct messages to up to 100 contacts from your network. This functionality was
created to enable you to communicate with your contacts and to send material exclusively before it
is published. Simply click the list you want to send something to or mark individual contacts by
ticking the box next to their email address. Once you have chosen your contacts, there will be a
window where you can click Send message. Now type in your subject and write your message for
the recipients. If you want, you can attach material available as a published post or saved as a draft
for publication at a later date. Do this by clicking Attach material and click Select beside the
material you wish to attach.
The reply address will be the same as that set for the distribution lists. You’ll find this under the tab
Settings -> Network.
13
PUBLISH
The Publish tab is where you can publish press releases, news, blog posts, events, images, videos,
documents and add contact persons.
Press releases
All publishing forms are created in basically the same way in order to simplify
your work. Go into Publish and then click on Press Releases. You will see a list
of content that has already been published. If you wish to edit any of this
content, simply click on Edit next to the press release. To delete previously
published content click on Edit, then scroll down and click on Remove. You will
also find, under Press releases, a list of the drafts you are working on.
Tip ! Click on Save
as draft at the very
bottom of the form
as soon you start to
create your press
release. That way,
your content will be
automatically saved
every two minutes.
Publish a press release by clicking on the green Publish new button. This will take you to the press
release form. The form is divided into sections to simplify publication. Mandatory sections are
marked with an asterisk, all other sections are optional. When the press release is ready to be
published, click on Save and publish at the bottom of the form.
Basic information
Here is where you enter the heading, summary and body text. Choose a suitable heading that
ideally includes both your company name and relevant keywords to increase your search engine
optimization.
The summary is the text that is shown when your press release appears in a search result, in a
subscribers email and in your newsroom. Note that the summary is not visible when the full press
release is displayed. If you want to include the summary in the press release itself, you have to add
it in the body text section. Body text is the main content of the press release.
In the box for the body there is a toolbar with basic editing options such as bold, italics,
underscore and strikethrough. You can also create hyperlinks, remove hyperlinks, add
embedded media (such as YouTube videos or videos you have published on
Mynewsdesk), and clean up or edit HTML code.
Tip! If you have you added a
company description as a
boilerplate under Settings in
your newsroom, it is included by
default in press release form.
14
Web images
You can add web images to make your press release
more interesting. Click on Choose image and choose a
previously uploaded image or upload one from your hard
drive. Click on the name of the image to add it. Then you
will return to the press release form. Web images are
displayed in low resolution between the heading and the
summary. Publication date
To publish immediately is the default setting. To backdate a press release or publish at a later date check the
Publish on… box and choose a date and time.
Attachments
You may attach a copy of the press release in PDF or
Word format if you have a press release with a special
graphic design, an invitation, a table etc.
Resource links
This is where you choose a title for links you add as well
as the URL of the link. Use this area to add links to
potential partners, addresses, directions and more.
Comments
For each press release you can choose whether or not
to have the comments feature activated or not.
Ti p! Make sure your content is
search engine optimized,
regardless of it it’s in the form of
text, images or documents! Use
the most important keywords in
the text as tags. The better you
are at using keywords that are
repeated in the text as tags, the
higher you will rank in search
engines.
15
Related material
Under Related material you can link material like images, videos, documents or contacts to your
press release. It can be something that already exists in your newsroom or completely new
information that you want to add.
If you want to use material that has not yet been added to your newsroom, click the blue Create
new button. Choose in the list which type of material you would like to add: Events, Images, Videos,
Documents or Contact persons. Material created this way will be published when you publish the
press release.
You can also link to previously published material. If for example you click Images, a list of already
published images will appear. You just click add beside the material you would like to add. If you
have newsrooms in more than one country you can easily link to information from these as well by
choosing the relevant country’s newsroom in the menu next to the material type. When you link
between newsrooms in different countries, the link only appears at the linking end, along with the
press release you are linking from. If you want the link to appear at the other end too, where the
related material is, you have to go to the form in that country’s newsroom and relate back.
Categorization
To ensure the best results for your press release in search engines, be sure to categorize it with
Subject and Region. There are more than 25 main categories with various sub-categories to
choose from. Make sure to save each category you wish to utilize by clicking on Add chosen. Also
be sure to use categories specific to that press release as they may be different than your default
settings.
The regions are divided into geographic regions, and each region has sub-categories. If you
choose a local categorization when publishing a press release, it will still show up in a search for
the entire country.
Select Subject and Region so
distribution is not limited to region only,
but instead reaches all who have
subscribed to the chosen topic in
addition to the region. By adding subcategories you can reach the people
who have subscribed to more specific
16
topics in addition to the main category. Be selective when choosing regions, as journalists covering
them just want to have news about that particular region. The most common method is not
selecting a region. The press release is then distributed to the whole country according to the
categories of substance journalists and opinion makers have chosen as well as to those users
who only pay attention to their specific region.
Tags
Tags are a way to add specific keywords to your press release. The tags will aid search engine
optimization of your content as well as help organize your pressroom. We recommend that you add,
at most, eight tags. Otherwise search engines may perceive posts as spam and not index them as
valid material. The tags link to the information associated with them in your newsroom. Start by
writing a word to see if it is similar to other sources (which is desirable), then click Add tag(s). The
tags you use most frequently show up below the text box so you can simply click those that are
appropriate.
Distribution
Distribution lists
Choose if you would like your press release sent to one or more distribution lists. If you wish to use
a list that you have not previously added, you will need to add it under Distribution lists, which can
be found under the Network tab, before you publish the press release. Remember to save your
press release as a draft before clicking on Network. If not, what you're working on will be lost.
Channels
This is where you determine which channels you want to publish your content in. The various
channels can be activated under Settings → Channels through, for example, filling in your billing
information. Remember to save your press release as a draft before you go to the Channels page.
You choose a channel by clicking in the box next to it.
Preview, Save as draft or Save and publish
Choose Preview to see how your press release will look when it’s published. Keep in mind that
links and related content will not be clickable in the preview version. Click on Save as draft if you
would like to save it without publishing, or Save and publish to publish during the timeframe you
have chosen: now, in the future, or back-dated.
17
Publish news
It’s up to you how you decide whether the information you publish should be classified as a press
release or news, but a good rule of thumb for determining which is which is that a press release is
more formal and comprehensive, while news tend to be in the form of short announcements.
Publish a news item by clicking Publish → News and then clicking on Publish new. You will see a
form that is divided into sections to simplify the publishing process. Mandatory sections are marked
with an asterisk, and all other information is optional. When your news is ready to publish, click on
Save and publish at the bottom of the page. This form works in the same way as when you publish
a press release.
Publish a blog post
Blog posts are generally more subjective than news, but again - it is up to you how to choose to
classify your content.
Publish a blog post by clicking Publish → Blog post and then clicking on Publish new. You will see
a form that is divided into sections to simplify the publishing process. Mandatory sections are
marked with an asterisk, and all other information is optional. When your blog post is ready to
publish, click on Save and publish at the bottom of the page. This form works the same way as
when you publish a press release.
If you have a Wordpress blog you can also publish your blog post there via your Mynewsdesk
account. To connect your newsroom blog to Wordpress, go to Settings → Channels and fill in the
required information.
Publish an event
Publish an event by clicking Publish → Events and clicking on
Publish new. You will see a form that is divided into sections to
make publishing easier. Mandatory sections are marked with an
asterisk, all other information is optional.
For events, make sure you enter the start and end time as well as the
location. You can add a URL to another site where you can collect
RSVP’s. When your event is ready to publish, click on Save and
publish at the bottom of the page. This form works the same way
as when you publish a press release.
When you publish an event it will be displayed in our event calendar. It may be helpful to keep in
mind that some subscribers only monitor press releases and therefore a greater impact can come
from your event going out as a press invitation instead of just being listed as an event.
18
Publish an image
Under Publish → Images you can publish high-resolution images
which can be downloaded from your newsroom. To publish a new
image, click on the green tab marked Publish new. You will see a
form which works the same way as when publishing a press
release. Upload your image by clicking on Select picture and then
Upload a new file. Once you’ve uploaded the image, it will be
placed in the list of images. Double-click on the title of the image
you want to publish. This will take you back to the publishing form.
Fill in the Headline, Summary and Photographer/source.
Remember to choose a clear and effective headline and summary.
If you wish to change the license restrictions on a specific image you can change your Creative
Commons settings for that individual image by clicking on Edit, which you will find in the right hand
column under License. With a Creative Commons license, you keep your copyright but allow
people to copy and distribute your work provided they recognize you as the author. Next to each
type of license you can click the question mark to learn more. Remember that the license only
serves as a guideline; the images on Mynewsdesk are always possible to download.
Tags for images work both as SEO keywords and as "folders" for images in your newsroom. The
ten most frequently used tags are used to divide the images into different groups that are visible to
the visitors in your newsroom.
Via Channels you can choose to publish your image on your Flickr, Facebook or Twitter account.
Activate the channels by going to Settings → Channels.
Publish a video
Publish a video under the Publish → Videos tab by clicking on Publish new. You will see a form
which works the same way as when publishing an image. Mynewsdesk supports most video
formats, but a video should not exceed 100 megabytes in size.
In addition to posting a video as standalone content, you can use video to enhance a press release,
just like a web image. You do this by clicking on the film icon in the body text field in the press
release form, then enter the embed code which you will find next to the published video in your
newsroom.
Your videos can be published on your different channels: Facebook, Twitter and YouTube.
19
Publish a document
If you have information you wish to distribute that is not a press release, you can publish it as a
document. Publish a document by clicking on Publish → Documents and then clicking on Publish
new. You will see a form which works the same way as when publishing an image.
Your documents can be published on the Facebook, Twitter and Slideshare channels. Slideshare
lets you create an account to share PowerPoint presentations and other similar documents.
Add a contact person
It is important for both the media and other influencers to be able to reach your contact persons.
Under Publish → Contact persons you can add information about the contact persons that should
be visible in the left hand column of your newsroom. Once you’ve added a contact person, you can
attach that contact person to every kind of content you publish through Related Material.
Remember to check the box Show as press contact in the newsroom if you want your contact
person's information to be visible in the left hand column of your newsroom.
20
EXPLORE
Thanks to Explore you can set up alerts for material published on the web, such as articles, blog
posts, tweets, public Facebook updates, YouTube footage, and forum posts. A Plus account allows
you to create up to three different alerts, while the number is infinite in a Premium account.
To add an alert
You create an alert by clicking Add a profile. Add a plus (+) in front of every word you want to
include in each search. To exclude words from your search, add a minus (-) instead. If, for example,
you choose to monitor your business name and another word as one alert, it means that you will
receive material containing your company name and the specified word.
You also choose in which language or languages to get alerts. When it
comes to Twitter there is no language setting, since tweets are written
with so many abbreviations that the system cannot identify languages.
Please note that the monitoring begins the moment you create your alert,
so it will not include material published in the past.
Top tip!
An example of what the
three alerts might be:
your own brand, your
industry, and your
competitors.
21
Read content, reconnect and add contacts
When you have created one or more profiles, all material will be gathered in an overview that
displays when you click on a profile’s name. If you want to edit the profile, click Edit profile. Hits will
be saved for 30 days unless you mark them with a star, in which case they remain until you choose
to remove them. When you want to view starred material, just click Favorites in the column on the
left below your other profiles.
Overview
Most influential
You can choose whether to view material from today, the past week, or the past 30 days in the
blue field at the top. Below this field you will also see lists of the people who are the most
influential in social media of those who have mentioned your company name or one of your
keywords. The ratings of who is the most influential are based on a so-called PeerIndex. PeerIndex
measures the size of people’s social networks, how active they are in social media, and how other
people interact with updates they post.
If you click on any of the names in the list of the most influential, a window showing that person’s
PeerIndex in yellow will appear. The bar graph shows their activity, readership and authority based
on PeerIndex data in percent. The chart below shows what subjects they write about the most. For
more detailed information, click the yellow symbol in the top right and you will get to that person’s
page on PeerIndex.
By clicking the Follow symbol you can start following a person on Twitter. You can also invite them
to your network on Mynewsdesk through Twitter.
By clicking Show hits in the top right you can view the posts a person has created where he or she
mentions your company name or one of your keywords.
22
Most mentions
In the Most mentions column you can see the people who have mentioned you or your keywords
most frequently on Twitter. If you click on a name a window will appear, allowing you to follow the
person on Twitter or invite them to your network on Mynewsdesk through Twitter. By clicking Show
hits you can see the posts the person has created where they mention your company or some of
your keywords.
Most Coverage
Here you will find the newspapers/media sites that have
mentioned your company name or other keywords in articles. To
view more specific information, click Show hits. You will then be
able to view the articles containing your keywords that have been
created by this sender. If you hover over an article headline, you get
the option to view the whole article by selecting Show hit.
On the left in the list of articles you will see email addresses
published alongside the article. If the email addresses are relevant
to your business you can click them to either invite the person to
your network on Mynewsdesk or add the address to one of your
distribution lists.
If you hover over the article headline you will be able to email it to
someone, share it on Twitter, see how many people have already
tweeted it, or like it on Facebook.
Social media mentions
In the chart for social media mentions you will find the statistics for
the past ten days. With social media, always remember that only
public updates will be included. To view statistics for different
sources, click Facebook, YouTube or Twitter below the chart. If a
word is in bold it means that the statistics you see are from that
source. Hover over the peaks in the chart to see more detailed
information.
Mentions in editorial media
In the chart for mentions in editorial media you can see in how many forums, blogs and articles
your keywords have been featuring. To view the statistics for different sources, click Forums, Blogs
or Articles. If a word is in bold it means that the statistics you see are from that source. Hover over
the peaks in the chart to see more detailed information.
Hits
If you click on hits, a list of all types of hits will appear, containing articles, blogs, Twitter, Facebook,
YouTube and forums. If you wish for one of the sources not to display in your list, just untick the
box next to that source at the top of the blue list.
Hovering over the field with an article’s headline will allow you to email it to someone, share it on
Twitter, see how many people have already tweeted it, or like it on Facebook. When it comes to
mentions on Twitter, you can not only share the tweet by email, but also reply to it via your own
Twitter account, retweet it, or start following the sender. You can share or comment on Facebook
updates by clicking Show on Facebook.
23
ANALYZE
Newsroom
Under the Analyze tab you will find statistics for your newsroom, both in total and for each
individual content. You’ll also find Web analytics and the possibility to subscribe to your statistics
via email.
The first thing you will see when you click on the Newsroom tab is a graph of the views of your
newsroom over the past 30 days. To change the time span for the stats, you can click the date
fields, change the start and end date and click on Change date. The number of views refers to any
click on your published objects. Click throughs in order to to read the company presentation on the
front page of your newsroom is not included in the statistics.
You will then see a bar graph of the number of readers per month, a diagram of the content most
viewed, and a pie chart of distribution of the viewings which shows what kind of content your
readers have chosen to click on in your newsroom.
You can share the statistics by clicking Send report or Print at the top of the page.
24
Detailed statistics
Click on Detailed statistics to produce reports on each single content item. Each type of content
has a tab that lists what’s been published for that type of content.
After you click on Show report for the content you want to view, you will see how many times the
press content has been read and to how many people the content was sent. You can also see how
many people you sent the content to via your distribution lists. Remember that those who receive
the content through the distribution list are not included in the statistics for the newsroom – they
receive it as an email and therefore they won’t visit your newsroom.
Underneath the summary you will see a graph of how many views your content has received during
a specific period. You can change the timeframe of the graph.
Under Alerts and subscriptions of editorial desks you can see to which editorial desks your press
release was sent. Here you will also see who the journalists that received your content are and
which media they represent.
At the bottom of the page you can see through what channels, and to which distribution lists you
have sent your content.
Web analytics
Via the Analyze tab you'll find Web analytics where
you can see the number of visitors who found your
newsroom via searches and referring websites.
You can see which links they came in through and
what words they searched. To obtain more detailed
information about where the searches come from,
you can click on the keywords.
The words that visitors used to search to get into
your newsroom should be added as tags when you
post content, where it feels appropriate.
Statistical report via email
If you wish to subscribe to statistics, either all information from your newsroom on an on-going
basis or from your latest press release, go into Analyze → Statistical report via email. Adding your
colleagues to this list might be a good idea!
25