1
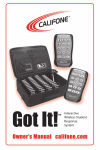
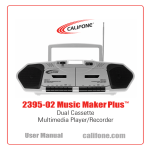
Are you ready to Go! with Got It!™ ?
This Go! Guide will help you use Got It!™ right away! For
more complete information, please refer to the User Manual
located on the installation CD.
Thank you for choosing the Got It!™ Wireless Student
Response System. We encourage you to visit our website
(www.califone.com) to register your product for its warranty
and learn more about the complete line of Califone portable
audio equipment, headphones, computer peripheral and
language learning materials.
Warranty Registration
Please visit www.califone.com to register your Got It!™ for
warranty coverage. It is built to the same standards as the
rest of our products which teachers rely on day in and day
out. Califone warrants this Student Response System to be
free from defective material and workmanship for one year
from the purchase date. Our “Project Intercept” Customer
Satisfaction program will replace defective parts and repair
malfunctioning products under this warranty when the defect
occurs under normal installation and use, provided the unit is
returned to our factory via prepaid transportation only after
the factory issues an RA (Return Authorization) number
which must be clearly written on the outside of the box.
Go! Guide
Quick Start Set-Up Manual
www.califone.com
visit us online at califone.com
2
Table of Contents
Got It!™ Features and Applications
Got It!™ Features and Applications
4
System Set Up
6
Starting Out
9
Got It!™ Interactive Wireless Student Response System is
the most comprehensive educational technology for the
classroom environment. Got It!™ provides a rich user
interface, with an enhanced activity mode, as well as
expanded support for multimedia teaching materials. In
addition, it includes a range of reporting statistics to make it
even easier to track learning patterns and student progress.
Creating an Activity
10
•
How to Use Got It!
12
•
Generating Reports
15
If you are using Windows Vista™
16
•
•
•
•
•
Use with prepared lesson plans, or ask spontaneous
questions at any time
Evaluate progress for individual students and whole
classes
Performance ratings
Classroom surveys
Question/Answer sessions
Polling
Group contests
What Got It!™ Can Do
Interactive Activity Modes:
• Standard mode: Got It!™ provides a wide range of
interactive modes, including Evaluation, Competition
Quiz, Buzz-in Quiz, Prompt QA, Knock Out Game, as
well as Presentation, Grading, Survey, Pick Out
(individuals and groups), Asking Questions, PowerClick
mode, and Self-Paced modes.
• On the fly activity mode: Enables the instructor to insert
questions spontaneously within a lesson, making it easy
to adapt to current learning situations.
Statistic Reports:
visit us online at califone.com
visit us online at califone.com
3
4
•
Comparison Report and Semester Report modes make it
even easier to track individual student and whole-class
learning history.
Teaching Materials Preparation:
• High-efficiency EAS files: The new EAS teaching
materials file format speeds up information access. An
EAS file is exclusively used in Got It!™ for storing
question sets – the questions, answers, and the multimedia attachments.
• Rich Text format: Supports Microsoft’s® Rich Text File
(RTF) format, making it easy to import and export
Microsoft®Word™ and other documents.
• Multiple display templates: Got It!™ offers a variety of
display templates covering a wide range of categories
and graphic styles.
• Multiple testing formats: With Got It!™, testing materials
can be presented in a wide range of formats, including
single choice, multiple choice, true/false, Q&A,
presentation, buzz-in quiz, competition quiz and more.
Multimedia Support:
• Multiple format support: Got It!™ supports most common
media formats, including WAV, MID, MP3, JPEG, BMP,
GIF, Flash, WMV, HTML, hyperlink, etc.
• MS® Excel™ equation editor support: Support for
Microsoft® Excel’s™ equation editor enables instructors
to integrate graphing, mathematical formulas and more
into teaching materials.
Multiple Controller Support:
• Got It!™ supports simultaneous multiple controllers,
including IR remotes, standard mouse, electronic
whiteboard, touch display, remote pen pal, and remote
pointer.
visit us online at califone.com
System Set Up
Package Contents
When you receive the Got It!™ package, the following items
should be included. If you are missing any item(s), contact
Califone® immediately by phone (818-407-2400 or 800- 7020500) or email ([email protected]).
Got It!™ Classroom
System package
Infrared Receiver
with Bracket and Cable
Got It! ™ System
Software CD
+ Electronic Manual
Teacher’s and Students’
Remote Controls
Software Installation
NOTE: Do not connect the infrared receiver until you
have installed the Got It!™ software from the included
CD-ROM.
Insert the Got It!™ CD into your computer’s CD-ROM drive,
the menu will start automatically. If it does not, check your
local disk drive. After the autorun menu appears, click the
Install Got It!™ button. Follow the InstallShield Wizard
instructions. When the Complete dialog box appears, click
Finish.
visit us online at califone.com
5
6
connected, position the receiver in a suitable location
where it is in direct line of sight for all class members,
and not blocked by desks, walls or other objects. Screw
receiver into the magnetic bracket provided. The
magnetic bracket can be used to attach to most
white/black boards. Also, holes are provided in the
bracket for attachment to walls. For best results, aim the
IR remote control directly at the receiver while pressing
any key. If the receiver does not respond, adjust the
angle of the receiver.
After the Got It!™ software is installed, the Got It!™ menu
will appear under Start > Programs > Got It!™, displaying
the shortcuts to its applications:
•
•
•
•
•
Activity: Launches standard Got It!™ activity modes,
including Quiz, Competition Quiz, Buzz-In Quiz, Knock
Out Game, Prompt QA, and Pick Out.
Editor: This is the teaching materials editing application,
used to edit text and insert multimedia files including
images, animations, videos, sounds, webpages, etc.
Manager: Maintain results and statistics needed to track,
organize and categorize class and student data.
Report: Used to generate Got It!™’s range of statistics
and activity reports.
ClickDaemon: This is the setup application for
communication between the remote control and the
Got It!™ system software.
Receiver Setup
• Once you have installed the
Got It!™ software, connect
the IR receiver to the
computer’s USB port:
•
Once the receiver is properly
visit us online at califone.com
visit us online at califone.com
7
8
Starting Out
Creating an Activity
Before using Got It!™ for the first time, the teacher, class
and student profiles setup must first be completed for each
individual. The IT Installer application can be found by
opening the Editor program found on the desktop and
clicking on Tools > IT Installer.
Got It!™ offers a wide range of interactive instructional
activities, through six main interactive modes. Each time an
activity is run, the system will enter the response
records into the Got It!™ database automatically.
•
Teacher Profile Setup
In the IT Installer window, select the New Teacher button.
• In the New Teacher dialog box, insert teacher
information, and then select OK.
•
Class Profile Setup
In the IT Installer window, select the New Class button.
• In the New Class dialog box, enter the year, grade, class
name, and number of students into the fields provided.
Then, click the OK button.
• To setup a new class, select it from the Class List. Click
the Name field in the Student List and enter the
student’s information in the available fields.
Group organization
• In the IT Installer window, select the Grouping button. In
the Grouping dialog box, click the New Group button.
In the New Group dialog box, input the group name, and
then click OK.
• The new group name will appear in the left column. Click
and drag each student’s name from the list on the right to
the group name on the left. Repeat the process for
setting up additional groups. Note that each student may
only be assigned to one group.
•
•
•
•
visit us online at califone.com
Ordinary Quiz: Got It!™ presents prepared teaching
materials in various question formats. Student responses
and class statistics can be compiled for assessment
purposes.
Competition Quiz: Got It!™ presents test questions in a
competition style presentation, with students or groups of
students attempting to be the first to answer each
question.
Buzz-in Quiz: Similar to the competition quiz, however,
only the first student to buzz in will be called upon to
answer the question.
Knock out Game: Students who answer incorrectly are
disqualified from answering further questions, ultimately
resulting in a single “winner.”
Prompt QA: This is a pure vote-tallying mode, with the
instructor dictating the question for immediate response.
Pick out: This is used to pick out a student at random to
answer a question. It is useful for individual or group
surveying.
visit us online at califone.com
9
10
To generate a new EAS Activity file
• Double-click the activity icon on the desktop. Click New
on the File menu, or the New File icon. In the New
Lesson File dialog box, select or enter Course, Author
and Title, and then click OK. Select the Activity Mode
(Ordinary Quiz, Pick Out, etc.) and Question Format
(Multiple Choice, True/False, etc.) using the drop-down
list.
• To add new questions, click the New Item button or
select New Item from the Edit menu. In the Editor
window, type in the question, enter a selection of
response options in the answer fields, and click the check
box next to the correct answer. Also select the number of
points given for each question, time provided to complete
each question and the level of difficulty for each question.
• On the top Font tool bar, you may select the font and
other options as well. To preview an individual question
during editing, click the Preview button on the tool bar.
How to Use Got It!™
Using an Activity
• Double click the Activity Icon on your desktop. In the
Select Class window, select the desired class. In the
Select Activity window, select the desired activity
function.
• When the Select Material window appears, click on the
Up or Down arrow to browse available subjects; the Left
and Right arrows for the types of material provided under
the chosen subject.
• When the Ready window appears, students are
instructed to get their remote controls ready. The teacher
introduces the activity, then presses
or
button to begin.
• When the main activity window appears, the students
press the number buttons on the remote control to
answer the question. The activity name, timer and title of
EAS file are displayed at the top of the window, the
Answer Status Area is at the bottom, and the tool bar is
on the right.
visit us online at califone.com
visit us online at califone.com
11
12
Self-Paced Mode
The Self-Paced activity mode may be called the electronic
version of the traditional paper question and answer
assignment. The teacher prepares an EAS file with
questions and multiple choice answers using Got It!™. This
is then printed out and a copy is given to each student. The
students work through the assignment at their own speed,
recording the answers with their remotes as they are ready.
When the test is completed, the instructor can review the
students’ answers using the Report program.
To print test or questionnaire:
• Open an EAS file from the Editor window, then click
Print on the File menu.
• When the Print dialog box appears, select the printer you
want to use, then select to print.
To operate the Self-Paced mode:
• Launch the Activity program, then select a class from
the Select Class window. In the Select Activity window,
select Self-Paced. In the Select Materials window,
select the desired EAS file, then press or click the button.
• When the Ready window appears, the instructor can
or
introduce the activity process, then presses
button to begin the Self-Paced activity.
PowerClick Mode
The PowerClick activity mode enables Got It!™ to be
integrated with Power Point® files with only minimal effort in
preparation. In Got It!™ PowerClick mode, each
PowerPoint® slide corresponds to a question. When the
desired slide appears, the students can answer the
corresponding question with a click of the remote. The slide
number is on the top left corner.
visit us online at califone.com
visit us online at califone.com
13
14
Generating Reports
If you are using Windows Vista™
Got It!™ provides six different types of reports to analyze
students’ responses and progress. To access the Report
function, double click the Editor icon on your desktop, then
Run(R) > History.
In Windows Vista™, there is a “User Account Control (UAC)”
which may block communication with the receiver. Before
installing Got It!™, turn off the “User Account Control”. Login
as administrator in Windows Vista™.
Got It!™ provides six different types of reports to analyze
students’ responses and progress.
To turn off the “User Account Control” –
•
•
•
•
•
•
The Summary Report displays the overall answering
times and detailed response data for each student.
The Grade Report is a report card that provides parents
with information regarding students’ learning results.
The Activity Detail Report will display the class’ number
of correct responses, the rate of correct responses and
the contents of each question.
The Historical Report is useful for tracking learning
curves of individuals and classes.
The Comparison Report displays a comparison of
students’ grades for a particular subject or lesson.
The Semester Report compiles and prints mid- or finalterm results for all activities.
1.
2.
3.
4.
Click Start, and then click Control Panel.
In Control Panel, click User Accounts.
In the User Accounts window, click User Accounts.
In the User Accounts tasks window, click Turn User
Account Control on or off.
5. When the User Account Control message appears.
Click Continue.
6. Uncheck the Use User Account Control (UAC) to help
protect your computer check box, and then click OK.
To Delete Records: Select the records from the Records
List, and then click on the Delete Reports button to delete.
7. Click Restart Now to apply the change.
visit us online at califone.com
visit us online at califone.com
15
16