1
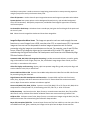
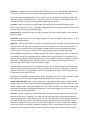
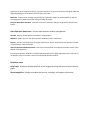
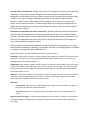
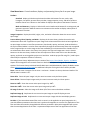
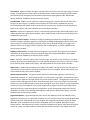
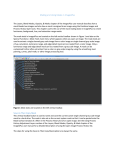
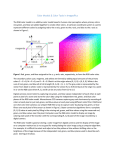
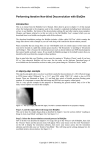
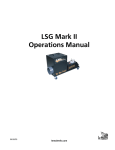
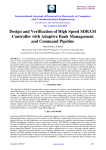
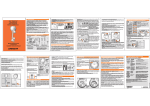
ImagesPlus 6.5 Menu and Toolbar Reference Summary
ImagesPlus has two different main menus. The initial state menu is shown in Figure 1 and is visible if no
images are open in ImagesPlus.
Initial state main menu consists of File, Image Set Operations, Open Operators, and Help
when no images open and displayed.
Figure 1. The initial state main menu is displayed when there are no images open and displayed in
ImagesPlus.
The menu items of the initial state main menu are File, Image Set Operations, Open Operators, and
Help.
File Menu Items
New Creates a new color or monochrome image with a constant color or grayscale. The new image
can be used in many different ways. For example, a constant gray scale monochrome image can be
painted on with the Local Mouse tool from the vertical toolbar to create a custom mask. A Gaussian
shaped star can be created by placing a single white pixel on a constant black image then blurring the
image using Gaussian option of the Smooth Sharpen | Smoothing & Noise Reduction tool.
Open Used to open one or more BMP, JPG, TIFF, FITS, or DSLR raw file such as Canon CR2 or Nikon NEF.
Use the tools on the main Image Set Operations menu to convert and process sets of light, flat, dark,
and bias frames.
Load Project ImagesPlus track all image enhancement tools and mask in the order that they are applied
to an open image. The Process History tool on the horizontal toolbar display the tools and mask applied
to an open image and also saves the processing history in a project file with a file extension of .ipj. The
Load Project menu item is used to restore an image being processed to its exact processing sequence
using the project file save by the Process History tool.
Close All Operators Used to close all open image enhancement and image set operation tool windows.
System Options Sets system options such as background thread priority, main window background
color, GPU acceleration, JPEG quality compression, and default new image file type when created by
main menu options.
Arc Second Per Pixel Setup Calculates the arc seconds per pixel given the focal length of the optics and
the size of a pixel.
Exit Closes the main ImagesPlus window and shuts down ImagesPlus.
Image Set Operation Menu Items The image set operation tools are used to apply the same
functions to a set of images from a DSLR, one shot color CCD, or monochrome CCD. A processed
image set from one tool can be passed to another image set operation tool for further
processing using the image set control buttons on the tool. For example, a set of raw CR2 files
from a Canon 6D of a deep sky object can be converted to 16 bit color FITS, aligned, and
stacked using the Digital Camera Raw File Development and Conversion tool followed by Align
TSR then Combine Files tool.
Automatic DSLR, OSC CCD, CCD Image Set Processing Provides automated calibrate, normalize, grade,
align, and combine of a set of light, dark, bias, flat, and flat dark image images from a DSLR, one shot
color CCD, or monochrome CCD camera.
Video File Display and Processing Display, split into separate image files, grade, multi-point align, and
stack a video file in AVI, SID, or SER format.Convert MOV and AVI to SER Converts Canon MOV and problem AVI video files into SER video format
for processing using the video tool.
Digital Camera Raw File Development and Conversion Converts DSLR raw files such from Canon,
Nikon, Sony, Olympus, and other cameras to16 bit FITS or TIF format. Raw files can be converted to
color or Bayer format with or without color balance applied.
Convert JPG, BMP, FITS, SBIG, TIF Files Converts a set of JPG, BMP, FITS or TIF files to JPG, BMP, 16 bit
compressed or uncompressed FITS, 32 bit floating point FITS, 8 bit TIF, or 16 bit TIF format.
Calibration Setup Used to select color, Bayer format, or monochrome master dark, bias, flat, and flat
dark files for use by Calibrate Files. Master calibration frames are constructed using Combine Files.
Calibrate Files Calibrates a set of color, Bayer format, or monochrome images using the dark, bias, flat,
and flat dark master files selected using the Calibration Setup window.
Bayer CFA Interpolate/Split Files Converts Bayer format raw files from a DSLR or one shot color CCD to
color RGB format. Red, green, and blue pixel images can be split from the Bayer format raw files.
Resize Files Changes the pixel width and height of each image in a set to the largest or smallest image
in the set. A size factor or specific width and height can also be used to resize the image set.
The monochrome Bayer to RGB option can be used to crop a set of Bayer format images to match the
width and height of color RGB images. This option is useful when processing a set of light frames from a
monochrome DSLR so that the luminance frames match the color frames.
Crop Files Crops a set of files to a specific width and height about a fixed point defined using the
mouse. Crops a set of solar, lunar, or planetary images about the center of the object disk. All files in the
set must have the same pixel width and height.
Normalize Files Adjust each image in the set so that they all have the same brightness and contrast or
luminance range.
Grade Files Grades each file in a set by edge sharpness or star size and shape. Grades of A, B, C, D, and
F can be assigned manually.
Align Files The Align Files menu item contains two alignment options. The Auto Planet Align menu item
is used to center and align a set of images that contain the complete lunar, solar, or planetary disk. All
images in the set should be similar. For example, all images contain the same disk phase and do not
contain a region of interest only. All files in the set must have the same pixel width and height.
The second Align Files menu item is called Translate, Scale, Rotate or Align TSR for short. The Auto Star,
On Reference, and On Each alignment options of Align TSR are used primarily for star alignment. The
Auto Star option automatically finds alignment stars. The On Reference and On Each options are used to
select from 1 to 10 alignment stars manually. If four or more stars are used for alignment then it is
possible to warp each image to match the reference image.
The On Reference option is used if the image set was captured with good tracking so that there is little
shift in position of stars between frames. Stars are selected only on the reference frame. The On Each
options is used if there is a large amount of shift or rotation between images in the set. The same stars
are selected on each image in the set.
The Auto Star and On Reference options both require all images in the set to have the same pixel width
and height. The On Each option can align images with different pixel width or height.
Combine Files/HDR Add Stacks a set of images into a single image using average, min/max excluded
average, sigma clip average, manual graded average, edge graded average, minimum, maximum, or 16
bit add. A high dynamic range (HDR) add option is also available. Combine Files is used to create master
calibration frames and stack aligned sets of deep sky or solar system images. All files in the set must
have the same pixel width and height.
Filter Files Applies a sequence of enhancement filters each with their own blend mode, opacity, and
optional mask to a set of image files. The sequence of enhancement filters is generated by applying
stretch, smoothing, sharpening, deconvolution, star size, color adjustment, and multi-point flatten tools
to an open image. The Process History window tracks the sequence of filters and is used to save the
sequence in a project file. Filter Files can use the sequence applied to an open image or the sequence
saved in a project file. So to apply a sequence of filters to a set of similar images first open one of the
images then apply a sequence of filters. Next use Filter Files to apply the same set of filters that were
applied to the open image from the set. In general all files in the set must have the same pixel width and
height depending on the sequence of filters and masks used.
Blink Files Displays a set of images sequentially for inspection. Images can be excluded from the set.
The images do not need to have the same pixel width or height.
Compute Read Noise and Gain Calculates a camera’s read noise and gain using two flat and two bias
frames.
Open Operators Menu Items Perform open operator window management.
Cascade Overlay all open operator windows in a step pattern.
Minimize Reduce the size of all open operator windows to their smallest size.
Restore Sets the size and position of all open operators to the size and position each operator window
occupied before it was minimized.
Reset All Operator Window Positions Sets the size and position of all operator windows to their initial
default size and position.
A list of open operator windows is maintained at the bottom of the Open Operators menu. Left-click on
an operator in the list to make it the current displayed operator window.
Help Menu Items
Help Topics Displays a window with links to the image processing and camera control tutorial
pages.
About ImagesPlus Displays a window with version, copyright, and support information.
The second main menu is shown in Figure 2 and is visible when at least one image is open and displayed
in ImagesPlus.
Main menu consists of File, Image Set Operations, Special Functions, View, Geometric,
Stretch, Smooth Sharpen, Color, Modeling, Open Images, Open Operators, and Help
when at least one image is open and displayed.
Status bar statistic are displayed for the current active open image.
Image width x height Display %
Image statics under the mouse
(x, y) Luminance
(R,G,B)
Figure 2. The open image main menu is displayed when at least one image is open and displayed.
File Menu Items
New Same function as described in the File section of the initial state menu.
Open Same function as described in the File section of the initial state menu.
Load Same function as described in the File section of the initial state menu.
Lock Close lock prevents an image from being closed. Close unlock resets the close lock switch and
allows an image to be closed.
Close Closes the current active image, all open images, or all operator windows.
Save Save and replace the current active open image.
Save Copy As Saves the current active image with optional name change. The image format can be
changed to BMP, JPG, FITS, or TIF. The folder where the image is saved can be changed.
Save All Save and replace all open images.
Save Copy With History As Saves the current active image with optional name change. The image
format can be changed to BMP, JPG, FITS, or TIF. A text version of the processing applied to the image is
also saved. Use the Save As button on the Process History window to save the sequence of operations
with their parameters for future reprocessing of the image.
Print Prints the current open image. The size of the printed image can be adjusted.
System Options Same function as described in the File section of the initial state menu.
Arc Second Per Pixel Setup Same function as described in the File section of the initial state menu.
Exit Same function as described in the File section of the initial state menu.
Image Set Operations Menu Items Contains the same items as the Image Set Operations menu of
the initial state menu that is displayed when there are no open images.
Special Functions Menu Items
Mask Tools
Save As Then Copy Mask Save and rename a single channel gray scale mask to a hard drive and
also make it the current ImagesPlus system mask. The current system mask can be assigned to a
filter that is applied to an image that is the same width and height as the mask. Use the Mask
button on the Process History window to assign a mask to a filter that is applied to an image.
Luminance Mask Creates a HSL luminance mask from a color image.
Lab Luminance Mask Creates a Lab luminance mask from a color image.
Red Channel Mask Creates a gray scale mask from the red channel of a color image.
Green Channel Mask Creates a gray scale mask from the green channel of a color image.
Blue Channel Mask Creates a gray scale mask from the blue channel of a color image.
Custom Luminance Mask Creates a 3 channel gray scale image by mixing variable amounts of
red, green, and blue. A min max luminance range with feathered end points can be used to
select only dark, midtone, or bright areas of the image. A smoothing parameter is used to blur
the gray scale image when it is to be used as a mask. Use the Special Functions | Save As Then
Copy Mask option or the Save As – Copy Mask button on the tool to convert the 3 channel gray
scale custom luminance image to a single channel gray scale mask for use with filters.
Selective Color Luminance Mask Creates a 3 channel gray scale image by selecting a region of a
color image with specific hue, saturation, and luminance range. A hue range can be selected
from an image using the mouse or from a list of colors. A min max saturation range with
feathered end points can be used to select only low, medium, or high saturation areas of the
specified hue range. A min max luminance range with feathered end points can be used to
select only dark, midtone, or bright areas of the specified hue range. A smoothing parameter is
used to blur the gray scale image when it is to be used as a mask. Use the Special Functions |
Save As Then Copy Mask option or the Save As – Copy Mask button on the tool to convert the 3
channel gray scale custom luminance image to a single channel gray scale mask for use with
filters.
Negative Creates the negative of a color or monochrome image.
Area Mask Creates a single channel gray scale mask with smoothing applied so that detail is
removed and smooth large areas remain.
Edge Mask Creates a single channel gray scale mask that contains variable width edge detail
from an image. The mask is often used to sharpen or increase contrast.
Feature Mask Splits an image into a star only image and another image without stars. The two
images can be used to make masks or processed. The processed images can be merged using
the Special Functions | Combine Images tool by using the star only image as the top layer with
merge split blend mode.
High Pass Filter Creates an image that contains the high frequency or detail of an image. Most
often used to sharpen or increase contrast by setting blend mode on the Process History
window of the high pass filter to soft light. Process History window blend mode, opacity, and
mask enabled.
Threshold Creates a black and white image by setting all pixels greater or less than the
threshold value to white and black, respectively.
Multi Scale Decomposition Decomposes an image into two or more images each with its own detail
range from very fine high frequency detail to low frequency large scale structure. The very fine high
frequency detail images are called detail level images and the image with low frequency large scale
structure is called the residual image. The blur function type, blur window size, and number of detail
levels determines the resolution of the detail levels and also the residual image. Detail levels can be
consolidated into one detail level image along with its associated residual level image. The initial image
can be rebuilt from its decomposition by using the residual image as the bottom layer with normal blend
mode and all of the detail images as additional layers each with merge split blend mode. The most
common use of the detail and residual level images include multi-resolution smoothing, sharpening,
contrast enhancement.
Combine All Open Images Using General layering tool where each image layer can have its own blend
mode, opacity, and mask. Common uses include LRGB layering, blend H-alpha or OIII with a color image,
merging split star and background images to name a few. All open images are included in the layer stack
from bottom up in the order in which they were opened. The layer order can be modified.
Manual Combine Image Setup Same as Combine All Open Images Using except the user selects the
images to be layered and their layer order.
Multi Point Flatten Background Select one or more background points to remove gradients from an
image after flat frame correction has been applied. Blend mode, opacity, and mask enabled on the
Process History window.
Background Compensation Generates a Gaussian or planar gradient that can be used as a mask or
subtracted from an image. A control point mask created using the Mask Surface window from the
Process History window will generate similar to Gaussian gradients and also many more. The planar
gradient option has been replaced 100% by the Multi Point Flatten tool. Blend mode, opacity, and mask
enabled on the Process History window.
Star Size, Shape, Halo Reduction Reduces the size of stars. Red, green, and blue can be adjusted
separately or by the same amount. Elongated stars caused by poor tracking where the
elongation is uniform and in the same direction across the entire image can be reduced. Often
it is best to first split the image into background and star only images using the Special
Functions | Mask Tools | Feature Mask tool then apply star size reduction to the star only
image. Use the Special Functions | Combine Images layer tool to merge the background and
reduce star size image using merge split blend mode. Blend mode, opacity, and mask enabled on
the Process History window.
Distortion Correction (Radial, Chromatic, Perspective) Removes radial pin, barrel, and chromatic
distortion. Chromatic aberration is performed by adjusting red, green, and blue by different
amounts. The most common use of radial distortion correction is to correct trailed stars in the
corners of an image where the trails in each corner all point to the center of the image and
stars in the center of the image are round.
Corrects vertical, horizontal, and rotational perspective distortion which appears in an image
when parallel lines appear to converge. For example, the sides of a building appear to converge
to a point in an image taken with a wide field lens.
Blend mode, opacity, and mask enabled on the Process History window.
Pixel Math Add, subtract, multiply, or divide each pixel of an image by a constant. The constant can be
applied to a min max luminance range with feathered boundaries. Blend mode, opacity, and mask
enabled on the Process History window.
Images Math Add, subtract, multiply, divide, maximum, or minimum source image 2 by source image 1
pixel by pixel. Divide can be used to flat frame source image 2 by source image 1. The output image is
always a three channel RGB image even though the input images can be single channel monochrome,
three channel RGB, or a mix.
Add Noise Add impulse, additive, or multiplicative noise to an image. One use is to and a little noise to
an image or synthetic mask that looks too uniform or unnatural after applying filters. Blend mode,
opacity, and mask enabled on the Process History window.
Edit Pixels
Intensity Grid Right click on an image to display a 9 x 9 grid of 16 bit luminance, red, green, or
blue pixel intensity values. Modify the values.
Color Grid Right click on an image to display a zoomed in portion of the image. Modify the
values.
Copy a Portion of an Image On off switch the enables the local crop tool. If enabled or on left click on
an image and drag a rectangle to define a region of interest to crop out of the image and display as a
new image.
View Menu Items Controls toolbars, display, and processing history list of an open image.
ToolBars
Standard Display or hide the top horizontal toolbar with buttons for save, undo, redo,
histogram, line profile, process history window, image properties, zoom, and other functions.
Hold the mouse over a button on the toolbar to display a description of the button’s function.
Mask and Geometry Display or hide the left vertical toolbar with buttons for creating mask and
geometric operation. Hold the mouse over a button on the toolbar to display a description of
the button’s function.
Images Properties Display the width, height, color, and other information about the current active
open image.
Process History, Blend, Opacity, and Mask Displays the Process History window that tracks each
enhancement filter that is applied to an open image. Each enhancement filter that has been applied to
an open image can have its own filter parameters, blend mode, opacity, and mask. Undo and Redo on
the top horizontal toolbar is used to move sequentially through the enhancement filters that are applied
to the image and also to set the image to the state created by the enhancement filter. Double click on
an enhancement filter name in the history list to jump to the filter and image state. Use the Save As
button on the Process History window to save the sequence of filters each with its own blend mode,
opacity, and mask as an ImagesPlus project on a hard drive. Load the project file using File | Load Project
and modify the sequence of filters as necessary.
The Using Process History Adjustment Layers section of the Layers, Blend Modes, Opacity, and Masks
chapter of the ImagesPlus user manual contains a detailed description of using the Process History
window. The Process History Unlimited Undo & Redo Layers with Blend Modes, Opacity, & Masks section
of the image processing tutorial page has additional examples of using the Process History window.
Zoom Sets the zoom increment for the zoom + and zoom – buttons on the top horizontal toolbar. The
default zoom increment is 5%.
Zoom All In Zooms all open images in by the zoom increment set by the Zoom option.
Zoom All Out Zooms all open images out by the zoom increment set by the Zoom option.
Zoom In +100% Zoom the current active open image in by 100%.
Zoom Out -100% Zoom the current active open image out by 100%.
Fit Image To Screen Scales the image to fit about 2/3 of the screen and without scrollbars.
Duplicate Image @ Duplicates the current active open image to a specific display percent.
Duplicate Image to Scale Duplicates the current active open image with the same display percent.
Set View If the same enhancement filter such as curves is to be applied to an open image twice in a
row with different parameters then Set View is used to tell ImagesPlus to save the first application of the
filter and allow the second to be applied with different parameters. Otherwise ImagesPlus will assume
that the second application of the filter is a parameter adjustment of the first application of the filter.
Geometric Menu Items Perform geometric transforms of an open image.
Mirror Image Vertical Flip the current active open image top to bottom.
Mirror Image Horizontal Flip the current active open image left to right.
Rotate Image CW Rotate the current active open image 90° clockwise.
Rotate Image CCW Rotate the current active open image 90° counter clockwise.
Mirror All Images Flip all open images vertical or horizontal.
Rotate All Images Rotate all open images clockwise or counter closkwise.
Center Image Centers the current open image by placing its center of mass at the center of the image.
Does not perform a sub pixel or fractional shift of the center of mass.
Center All Images Centers all open images.
Auto Align
All Planetary Images Shifts the center of mass of each open image to the center of the image.
Performs a sub pixel shift of the center of mass.
Transform
Translate Shifts an image by fractional pixel values. The translation vector can be defined using
the mouse or direction buttons. A common use is to shift the red or blue ring on the limb of a
planet towards the center of the planet’s disk to improve color.
Scale Changes the width and height of the current open image by a scale factor or to specific
values. Bilinear or bicubic interpolation is used to resample the image and a small amount of
smooth occurs with either option. A common use is to reduce the size of an image for display on
the internet.
Rotate Rotate the current active open image about a point in the image. The center of rotation
and rotation amount can be selected from the image using the mouse. A border can be added to
the image so that rotation does not clip the corners of the image.
Bin Image Applies an add, average, or median 2x2, 3x3, 4x4, or 5x5 bin operation to an open image.
Image Size Add or remove rows and columns from the edge of an open image. Frequently used to
remove black edges from a stacked image captured with imperfect polar alignment.
Stretch Menu Items The tools on the Stretch menu are used in general to adjust the
brightness and contrast of a color or monochrome image.
Auto Stretch Applies a uniform histogram contrast stretch to the current active open image or all open
images. To modify the auto stretch open the Process History window from the top horizontal toolbar
then double click on Histogram Contrast Stretch and move the top brightness slider. Blend mode,
opacity, and mask enabled on the Process History window.
Auto Min Max Applies a linear minimum to maximum brightness stretch to the current active open
image or all open images. To modify the stretch open the Process History window from the top
horizontal toolbar then double click on General Stretch Functions the modify the stretch parameters.
Blend mode, opacity, and mask enabled on the Process History window.
Negative Displays the negative of a color or monochrome grayscale image. Blend mode, opacity, and
mask enabled on the Process History window. Can be used to create an inverse luminance mask from a
standard luminance mask.
Histogram Contrast Stretch Stretches an image by modifying the shape of its histogram using a
uniform, Rayleigh, hyperbolic, logarithmic, exponential, or Background/Highlight hybrid function. The
uniform option is an excellent general purpose stretch and can be used to apply a very aggressive
equalize stretch to an image for defect inspection. Blend mode, opacity, and mask enabled on the
Process History window.
Brightness and Contrast Increase or decrease brightness and contrast. The brightness and contrast
adjustment can be applied to a min max luminance range with feathered boundaries. Blend mode,
opacity, and mask enabled on the Process History window.
Levels Sets black, mid-tone, white points of a color image. The stretch is linear if mid-tone, mid-tone
intensity, black gamma, and white gamma are not adjusted otherwise the stretch is nonlinear as shown
by the function graph. Blend mode, opacity, and mask enabled on the Process History window.
Micro Curves Standard curves adjustment in LRGB or Lab mode. The tool has a min and max apply to
sliders that are used to define a luminance range where the curve is applied. Blend mode, opacity, and
mask enabled on the Process History window.
General Stretch Functions The general stretch functions include linear, logarithmic nth Root X^n,
exponential nth Power X^n, and a hybrid ArcSinH. Pre-stretch linear, logarithmic, and exponential scale
functions can be applied to increase control of the main stretch function. The logarithmic stretch or prestretch increases the brightness of darker areas faster than lighter areas of an image. The exponential
stretch or pre-stretch decrease darker areas faster than lighter areas of an image. Try using a logarithmic
stretch to increase the brightness of the overall image with an exponential pre-stretch to darken the
darker areas that are made too bright by the logarithmic stretch. Background weight and minimum
parameters are used to control background brightness and contrast. Blend mode, opacity, and mask
enabled on the Process History window.
Digital Development Digital development main stretch with additional control provided by linear,
logarithmic nth Root X^n, or exponential nth Power X^n pre-stretch function. Start by adjusting the DDP
stretch Break-Point slider towards the left to brighten the image then adjust the background weight
(BkGd.Wt.) slider towards the left so that the background level is not clipped. Next select the prestretch function. The logarithmic pre-stretch increases the brightness of darker areas faster than lighter
areas of an image. The exponential pre-stretch decrease darker areas faster than lighter areas of an
image. So you can over stretch with the DDP stretch then darken the brighter background using an
exponential nth Power X^n pre-stretch or use the DDP stretch to get the brighter areas stretched
correctly then increase the brightness of the dark background using the logarithmic nth Root X^n prestretch.
Digital development has color decompression control to maintain good color and prevent color
compression caused by the aggressive stretch provided by digital development. A sharpening option is
also included with digital development.
Blend mode, opacity, and mask enabled on the Process History window.
ArcSinH The ArcSinH main stretch function is more aggressive and produces much smaller stars than
digital development. Start by adjusting the ArcSinH stretch Power slider towards the left to brighten the
image then adjust the background weight (BkGd.Wt.) slider towards the left so that the background
level is not clipped. Next select the pre-stretch function. The logarithmic pre-stretch increases the
brightness of darker areas faster than lighter areas of an image. The exponential pre-stretch decrease
darker areas faster than lighter areas of an image. So you can over stretch with the ArcSinH stretch then
darken the brighter background using an exponential nth Power X^n pre-stretch or use the ArcSinH
stretch to get the brighter areas stretched correctly then increase the brightness of the dark background
using the logarithmic nth Root X^n pre-stretch.
ArcSinH has color decompression control to maintain good color and prevent color compression caused
by the very aggressive stretch provided by ArcSinH.
Blend mode, opacity, and mask enabled on the Process History window.
Smooth Sharpen Menu Items Performs smoothing and sharpening operations on an open
image.
Standard Smoothing and Noise Reduction Standard non-adaptive smoothing filters include Gaussian,
box, binomial, and median filters. Adaptive detail preserving smoothing filters include selected
neighborhood, absolute difference, quantile, and adaptive median. For any of the smoothing functions
increase the blur window size to increase the amount of smoothing. Smoothing can be applied to a min
max luminance range with feathered boundaries.
For a fixed blur window size the amount of smoothing increases in the order of binomial, Gaussian, box,
and median. The selected neighborhood smoothing function with 3x3 blur window is an excellent detail
preserving filter that removes hot pixels.
Blend mode, opacity, and mask enabled on the Process History window.
Multiresolution Smooth/Sharpen Wavelet based multi scale function that allows each detail level to
be independently smoothed or sharpened. Smoothing and sharpening can be applied to a min max
luminance range with feathered boundaries.
Blend mode, opacity, and mask enabled on the Process History window.
Reduce High, Low, Bloom Pixel Reduces high pixels, low pixels, and bloom from bright stars.
Blend mode, opacity, and mask enabled on the Process History window.
Background/Highlight Smoothing Iterative wavelet based multi scale smoothing function. Smooth
preset background, highlight, or user defined luminance range with feathered boundaries. Select and
modify a luminance range to smooth from the image using the mouse. Overall smoothing strength
control.
Blend mode, opacity, and mask enabled on the Process History window.
Star Size Reduction/Smoothing Iterative brightness reduction of smaller stars with effecting nebula or
galaxy detail. Not as aggressive as the Special Functions | Star Size, Halo, and Shape filter which effects
all stars. Iterative erosion and dilation
Blend mode, opacity, and mask enabled on the Process History window.
Local Smooth, Sharpen, Clone, Column Fix, Paint Use the mouse to smooth, sharpen, clone, or paint
along a path in the image. Use Undo and Redo toolbar buttons to undo or redo a path. Left-click on a
problem column to fix it.
Blend mode, opacity, and mask enabled on the Process History window.
Sharpening and Texture Enhancement General sharpening and smoothing tool.
Adaptive Contrast Increase or decrease local contrast to sharpen or smooth an image,
respectively.
Statistical Difference Increase the Standard Deviation parameter to sharpen and decrease it to
smooth an image. Excellent sharpening filter especially when applied to lunar, solar, or planet
images.
Unsharp Mask Classic non-adaptive sharpening tool. Increase the Background Weight Factor
slider and Window Size to increase detail in an image.
Adaptive Unsharp Mask Similar in operation to the non-adaptive unsharp mask. The adaptive
unsharp mask provides greater control with less noise amplification as compared to a nonadaptive unsharp mask.
Range Provides min max luminance range control with feathered boundaries for the adaptive
contrast, statistical difference, unsharp mask, and adaptive unsharp mask options.
Blend mode, opacity, and mask enabled on the Process History window.
Van Cittert, One-Step Gradient, R-L Restoration Classic iterative deconvolution methods for restoring
an image. The Van Cittert method is very good at restoring high signal-to-noise ratio images. Images of
the sun, moon, planets, and daytime terrestrial scenes would all be appropriate candidates for a Van
Cittert restoration. The one-step gradient method is similar to the Van Cittert algorithm but produces a
smoother restored image. The Richardson-Lucy (R-L) method has been widely used for restoring HST
images. The classical Richardson-Lucy algorithm produces restored images with several desirable
properties:
1) The Richardson-Lucy iteration converges to the maximum likelihood image based on Poisson
statistics. This is appropriate for optical images and noise from counting.
2) The restored image is not affected by small errors in the point-spread function.
3) The algorithm can be implemented efficiently on a computer.
The strength of each of the three restoration methods can be increased by using a larger point spread
function (PSF) window size, increased relaxation parameter, or using a larger number of iterations.
Restoration can be applied to a min max luminance range with feathered boundaries that is selected
from the image or user defined. The reduce artifacts parameter will soften restoration for a given
number of iterations, point spread function, and relaxation value with reduced haloes around bright
objects such as stars. A star can be used as a custom PSF or a user defined PSF can be used.
Blend mode, opacity, and mask enabled on the Process History window.
Adaptive Richardson-Lucy Restoration The adaptive Richardson-Lucy iterative restoration method is
used to control noise amplification in the restored image. The characteristic speckled appearance in
restored images produced by the classical non-adaptive Richardson-Lucy algorithm can be greatly
reduced or eliminated by using this adaptive method. By adjusting the noise threshold value and point
spread function (PSF) size 40 to 100 iterations of this method can be applied without noticeable noise
amplification.
The restoration strength can be increased by using a larger point spread function (PSF) window size or
using a larger number of iterations. Restoration can be applied to a min max luminance range with
feathered boundaries that is selected from the image or user defined. The reduce artifacts parameter
will soften restoration for a given number of iterations, point spread function, and noise threshold with
reduced haloes around bright objects such as stars. A star can be used as a custom PSF or a user defined
PSF can be used.
Blend mode, opacity, and mask enabled on the Process History window.
Custom Restoration Point Spread Function Defines a 3x3, …, 13x13 custom point spread function for
use with Van Cittert, One Step Gradient, R-L Restoration, or Adaptive Richardson-Lucy Restoration
deconvolution tools. To define a custom point spread function enter values or check the Select From
Image box on the tool then right-click on a small isolated star in the image. To apply the custom point
spread function press the Set Filter button then select Custom as the PSF type on the restoration tool
window.
Edge Extraction Generates an edge map of an image which can be used as a mask to smooth, sharpen,
or increase contrast in an image. Variable width edge control is available with the Deriche and contraharmonic edge options.
Blend mode, opacity, and mask enabled on the Process History window.
Custom Filter Creates a user defined 3x3, 5x5, 7x7, or 9x9 non-adaptive filter kernel for smoothing,
sharpening, edge extraction, or other function.
Blend mode, opacity, and mask enabled on the Process History window.
Line Enhancement and Suppression Enhance lines in Jupiter’s belts or Saturn’s rings. Suppress fine
horizontal and vertical line noise when applied to the background image created by the Feature Mask
tool.
Blend mode, opacity, and mask enabled on the Process History window.
Band Suppression Suppress larger horizontal and vertical band noise when applied to the background
image created by the Feature Mask tool.
Blend mode, opacity, and mask enabled on the Process History window.
Frequency Filter Applies a Fourier transform to an image to compute the frequency spectrum of the
image. Low pass, high pass, band pass, and band stop frequency selection is used to select a frequency
range from the spectrum to smooth, sharpen, or select a detail range from an image.
Blend mode, opacity, and mask enabled on the Process History window.
Split Frequency Spectrum Displays the frequency spectrum of a color or monochrome image. The local
mouse painting tool ca be used to blacken areas of the spectrum to eliminated complex fixed pattern
noise from an image.
Combine Frequency Spectrum Applies an inverse Fourier transform to the frequency spectrum of an
image to rebuild the original image.
Color Menu Items The tools on the Color menu contains tool for adjusting the hue, saturation,
and luminance of a color image. Adjustments can be made in HSL and Lab mode. A blend mode,
opacity, and mask can be assigned to each color adjustment. A color image can be split into or
built from LRGB, LCMY, HSL, or Lab components. A Bayer format image can be split into or built
from R, G, and B components. Color adjustment tools have parameters that specify the hue,
saturation, and luminance range where color adjustment is applied. The Special Functions |
Mask Tools | Custom Luminance Mask and Selective Color Mask tools can be used to generate
a smoothed hue, saturation, and luminance range mask that further extends the selection
capability of the color adjustment tools. The Color Models & Color Tools chapter of the
ImagesPlus user manual contains a detailed descriptions of Bayer format, HSL, Lab color
models, and the tools on the Color menu.
Bayer CFA Interpolation Converts an open image in Bayer format from a one shot color CCD or DLRS
raw file to a color image. DSLR raw files are converted to Bayer format using File |Open, Image Set
Operations | Digital Camera Raw File Development & Conversion, or Image Set Operations | Auto Image
Set Processing tools.
Combine LRGB, LCMY, HSL, Lab Build a color image from LRGB, LCMY, HSL, and Lab monochrome
component images. The components can be captured using a camera or created by splitting a color
image using the Color | Split LRGB, LCMY, HSL, Lab tool. Narrow band images can be used as the input L,
R, G, and B components.
Combine Bayer CFA Combine red, green, and blue images split from a Bayer format monochrome
image using Color | Split Bayer CFA or the Bayer component options of Image Set Operations | Bayer
CFA Interpolate/Split Files into a monochrome Bayer format image. The monochrome Bayer format
image can be converted to a RGB color image using Color | Bayer CFA Interpolation
Mix LRGB and Hue Combines a variable percent of one or more monochrome L, R, G, B, and narrow
band images into a single color RGB image. The L, R, G, and B channels from a color image can be used
as input. The input L, R, G, and B components can be assigned to any hue or to Lab luminance.
Split LRGB, LCMY, HSL, Lab Splits a color RGB image into it component LRGB, LCMY, HSL, or Lab
component images. Use Color |Combine LRGB, LCMY, HSL, Lab to build a color RGB image from the split
LRGB, LCMY, HSL, and Lab components.
Split Bayer CFA Splits a monochrome Bayer format image into it component red, green, and blue pixel
images. Use Color |Combine Bayer CFA to rebuild the monochrome Bayer format image from the split
red, green, and blue components.
Split Luminance Creates a single channel monochrome luminance image from a color image using the
HSL color model. The monochrome luminance image can be used as a mask.
Split Lab Luminance Creates a single channel monochrome luminance image from a color image using
the Lab color model. The monochrome luminance image can be used as a mask.
Interpret – Mix Colors Specify how a single channel monochrome gray scale image is to be interpreted
by the Special Functions | Combine Images layer tool. For example, a single channel gray scale image
could be used as red, green, blue, or luminance data. Swap or mix red, green, or blue channels of color
image.
Color Balance Sets the white, mid-tone, and background color balance. Check the Neutralize
Background box then left-click on a background area in an image that has no object to set the
background color to dark gray. Blend mode, opacity, and mask enabled on the Process History window.
Additive Color Balance Add or subtract red, yellow, green, cyan, blue, or magenta to a color image. The
Lab mode option independent adjustment of luminance, green-red, and yellow-blue. A min max
luminance range with feathered end points can be used to select only dark, mid-tone, or bright areas of
the image for adjustment. A selective color mask, created by Special Functions | Mask Tools | Selective
Color Luminance Mask, is often used to limit the effect of Additive Color Balance to a specific smoothed
hue, saturation, and luminance range. Blend mode, opacity, and mask enabled on the Process History
window.
Selective HSL Color Balance Scales red, yellow, green, cyan, blue, or magenta of a color image. The tool
has hue, saturation, and luminance range selection control to limit the area where the tool is applied to
a color image. A selective color mask, created by Special Functions | Mask Tools | Selective Color
Luminance Mask, is often used to limit the effect of Selective HSL Color Balance to a specific smoothed
hue, saturation, and luminance range. Blend mode, opacity, and mask enabled on the Process History
window.
Hue Saturation Luminance Performs hue rotation, saturation, and luminance adjustment in HSL or Lab
mode of a specific hue range. A selective color mask, created by Special Functions | Mask Tools |
Selective Color Luminance Mask, is often used to limit the effect of Hue Saturation Luminance to a
specific smoothed hue, saturation, and luminance range. Blend mode, opacity, and mask enabled on the
Process History window.
HSL Micro Curves Select a hue, saturation, and luminance range then use luminance and saturation
curves to adjust the color image. A selective color mask, created by Special Functions | Mask Tools |
Selective Color Luminance Mask, is often used to limit the effect of HSL Micro Curves to a specific
smoothed hue, saturation, and luminance range. Blend mode, opacity, and mask enabled on the Process
History window.
Reduce RGB Reduces red, green, or blue in a color image with little effect to the other colors. Most
often used to remove a green bias to an image with little effect to red or blue. Blend mode, opacity, and
mask enabled on the Process History window.
Modeling Menu Items Perform statistical measurements of an open image.
Histogram Displays the histogram or pixel value frequency distribution of the current active open
image in 8, 10, 12, 14, and 16 bit precision. The 8 bit histogram of a 16 bit integer or 32 bit floating point
image can give the appearance of clipped black and white data on the far left and right sides,
respectively, since pixel values are compressed to 8 bit values for display by the histogram. Use the 16
bit histogram display option and check the black and white ends to get a more accurate view of clipping.
The histogram display in ImagesPlus is linear in the pixel value x-axis and logarithmic in the pixel
frequency or y-axis so that very large and very small frequency values can be displayed in the limited
amount of space of the histogram window.
Cross-hair Analysis Display global and local statistics of the current active open image. Global statistics
include image size, zoom percent, minimum, maximum, average, median, standard deviation, entropy,
and symmetry. Local statistics under the mouse for a user selected neighborhood size include centroid,
neighborhood size, minimum, maximum, average, median, standard deviation, entropy, and symmetry.
Hold the Ctrl key down then left click or right click on the image to increase or decrease the
neighborhood size. Global and local statistic can displayed for luminance, red, green, or blue channels.
For a color image both 8 and 16 bit HSL luminance, hue, and saturation are display for a given pixel
under the mouse. Lab color values are also shown.
Line Profile The mouse is used to draw a line across an image and the pixel values along the line are
displayed in a graph called a line profile. Three operation modes can be used to draw the line on the
image. First check the Select Profile box. If the operation mode is set to Line Segment Profile then left
click on the image and drag a line segment to be used for the line profile. If the operation mode is set to
Horizontal Line Segment or Vertical Line Segment the just left click on the image to create the line
profile. The line profile can be displayed for luminance, red, green, or blue channels.
A common use is to verify that the diagonal line profile from top left to lower right of a flat frame is
similar in shape to the same line profile of a light frame to be calibrated using the flat frame. Gradient
detection of a flat calibrated light frame is another common use.
Star Shape Calculates the size and shape in the form of eccentricity of stars in the current active open
image. The size and shape of a star under the mouse can be displayed or the average star shape in
different regions of the image. Star shape is calculated for luminance, red, green, or blue channels.
Time Sequence /Blink Blinks open images. The Image Set Operations | Blink Files tool has more control
options and can be used with the image set processing tools.
Open Images Menu Items Perform open image window management.
Cascade Overlay all open image windows in a step pattern.
Minimize Reduce the size of all open image windows to their smallest size.
Restore Sets the size and position of all open images to the size and position each operator window
occupied before it was minimized.
Stack Moves the upper left corner of each open image to the same point in the upper left corner of the
main ImagesPlus window and overlays the image windows.
Tile Reduces the size of all open windows so that they can be arranged and displayed in row and
column form.
A list of all open images is maintained at the bottom of the Open Images menu. Left-click on an image in
the list to make it the current displayed operator image.
Open Operators Menu Items Contains the same items as the Open Operators menu of the initial
state menu that is displayed when there are no open images.
Help Menu Items Contains the same items as the Help menu of the initial state menu that is
displayed when there are no open images.