1
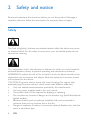
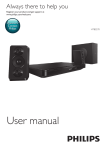
Always there to help you
Register your product and get support at
www.philips.com/welcome
Question?
Contact
Philips
User manual
HMP7100
Contents
1 Trademark notice
4
2 Safety and notice
6
Safety
6
Compliance
7
Copyright
8
Care of the environment
8
Warranty
9
3Basics
10
Connect
10
Switch on or off
10
Auto standby
11
Screen saver
11
Use the remote control
12
Enter text
13
Use the onscreen keyboard
13
Use the alphanumeric buttons
14
4 First-time setup
15
Connect to your home network
15
Connect wirelessly
16
Connect through an Ethernet cable
18
EN
1
5Play
Play from online services
Play from the Smart TV portal
Play from your home network
20
20
20
21
Play media from an iOS device or Philips Android device
22
Play media files from a computer (DLNA)
25
Play from a USB storage device
Select play options
26
27
6Setup
29
Video
29
Audio
29
Network
30
Preference
30
Advanced
31
7EasyLink
32
8 Update the firmware of HMP7100
33
Update the firmware online
33
Update the firmware through a USB storage device
33
9Troubleshooting
35
10Specification
36
2
EN
11Written Offer
37
EN
3
1 Trademark notice
®
The terms HDMI and HDMI High-Definition Multimedia Interface, and the HDMI
Logo are trademarks or registered trademarks of HDMI Licensing LLC in the
United States and other countries.
DivX®, DivX Certified®, DivX Plus® HD and associated logos are trademarks of
Rovi Corporation or its subsidiaries and are used under license.
ABOUT DIVX PLUS® HD: DivX® is a digital video format created by DivX, Inc.
This is an official DivX Certified® device that plays DivX video, including DivX®
Plus HD video (H.264/.MKV) up to 1080p and premium content. Visit www.divx.
com for more information and software tools to convert your files into DivX
video.
ABOUT DIVX VIDEO: DivX® is a digital video format created by DivX, LLC, a
subsidiary of Rovi Corporation. This is an official DivX Certified® device that plays
DivX video. Visit divx.com for more information and software tools to convert
your files into DivX videos.
ABOUT DIVX VIDEO-ON-DEMAND: This DivX Certified® device must be
registered in order to play purchased DivX Video-on-Demand (VOD) movies.
To obtain your registration code, locate the DivX VOD section in your device
setup menu. Go to vod.divx.com for more information on how to complete your
registration.
Manufactured under license from Dolby Laboratories.
Dolby and the double-D symbol are trademarks of Dolby Laboratories.
4
EN
Manufactured under license under U.S. Patent Nos: 5,956,674; 5,974,380; 6,487,535
& other U.S. and worldwide patents issued & pending. DTS, the Symbol, & DTS
and the Symbol together are registered trademarks & DTS 2.0+Digital Out is a
trademark of DTS, Inc. Product includes software. © DTS, Inc. All Rights Reserved.
EN
5
2 Safety and notice
Read and understand all instructions before you use this product. If damage is
caused by failure to follow the instructions, the warranty does not apply.
Safety
This 'bolt of lightning' indicates uninsulated material within the device may cause
an electrical shock. For the safety of everyone in your household, please do not
remove the covering.
The 'exclamation mark' calls attention to features for which you should read the
enclosed literature closely to prevent operating and maintenance problems.
WARNING: To reduce the risk of fire or electric shock, the device should not be
exposed to rain or moisture and objects filled with liquids, such as vases, should
not be placed on the device.
CAUTION: To prevent electric shock, fully insert the plug. (For regions with
polarized plugs: To prevent electric shock, match wide blade to wide slot.)
• Only use attachments/accessories specified by the manufacturer.
• Use only power supplies listed in the user manual.
• The product shall not be exposed to dripping or splashing.
• Do not place any sources of danger on the product (e.g. liquid filled objects,
lighted candles).
• Batteries (battery pack or batteries installed) shall not be exposed to
excessive heat such as sunshine, fire or the like.
• Danger of explosion if battery is incorrectly replaced. Replace only with the
same or equivalent type.
6
EN
Modification of the product could result in hazardous radiation of EMC or
other unsafe operation.
Warning
••
••
••
••
••
••
Never remove the casing of this product.
Never lubricate any part of this product.
Never place this product on other electrical equipment.
Keep this product away from direct sunlight, naked flames or heat.
Ensure that you always have easy access to the power cord, plug or adaptor to disconnect the
product from the power.
Where the mains plug or an appliance coupler is used as the disconnect device, the disconnect
device shall remain readily operable.
Compliance
This product complies with the radio interference requirements of the European
Community.
0700
This product complies with the requirement of the 1999/5/EC directive.
Class II equipment symbol:
CLASS II apparatus with double insulation, and no protective earth provided.
EN
7
Any changes or modifications made to this product that are not expressly
approved by Philips Consumer Lifestyle may void the user’s authority to operate
the equipment.
Note
•• The type plate is located on the bottom of the product.
Copyright
This item incorporates copy protection technology that is protected by U.S.
patents and other intellectual property rights of Rovi Corporation. Reverse
engineering and disassembly are prohibited.
Specifications are subject to change without notice. Trademarks are the property
of Koninklijke Philips Electronics N.V or their respective owners. Philips reserves
the right to change products at any time without being obliged to adjust earlier
supplies accordingly.
Care of the environment
Environmental information
All unnecessary packaging has been omitted. We have tried to make the packaging
easy to separate into three materials: cardboard (box), polystyrene foam (buffer)
and polyethylene (bags, protective foam sheet.)
Your system consists of materials which can be recycled and reused if
disassembled by a specialized company. Please observe the local regulations
regarding the disposal of packaging materials, and old equipment.
8
EN
Your product is designed and manufactured with high quality materials and
components, which can be recycled and reused.
When this crossed-out wheeled bin symbol is attached to a product it means that
the product is covered by the European Directive 2002/96/EC.
Please inform yourself about the local separate collection system for electrical and
electronic products.
Please act according to your local rules and do not dispose of your old products
with your normal household waste. Correct disposal of your old product helps to
prevent potential negative consequences for the environment and human health.
Warranty
•
•
•
•
Never attempt to repair the product, this could lead to the risk of injury,
damage to the product and will void your warranty.
Use the product and accessories only as intended by the manufacturer. The
caution sign printed on the back of the product indicates risk of electric
shock.
Never remove the cover of the product. Always contact Philips Customer
Support for service or repairs.
Any operation expressly prohibited in this manual, or any adjustments and
assembly procedures not recommended or authorized in this manual shall
void the warranty.
EN
9
3Basics
Connect
HDMI
HDMI IN
b
a
a HDMI connector for audio/ video output
• Connects to a high-definition TV (HDTV) through an HDMI cable
b Power connector
• Connects to power supply through the AC power cord
For high quality audio
•
Through OPTICAL, use a fiber optical cable to connect HMP7100 to the
OPTICAL or SPDIF input connector on an audio/video system.
Switch on or off
1
On HMP7100, press
10
EN
on the remote control to switch on.
»» The power indicator lights up white.
2
On the TV, switch to the input source of HMP7100:
• On the remote control of your TV, use the source button to select the
input connector of HMP7100.
AV
HDMI 1
HDMI 2
HDMI 3
Side HDMI
Side AV
3
SOURCE
To switch HMP7100 to standby mode, press
»» The power indicator lights up red.
TV
again on the remote control.
Auto standby
From the Home screen, switch on [Auto standby ]in [Setup] > [Preference ].
If there is no button press or media play on HMP7100 for 30 minutes, HMP7100
switches to standby mode automatically.
Screen saver
From the Home screen, go to [Setup] > [Preference ] to switch on [Screen
saver].
If there is no button press or media play on HMP7100 for 10 minutes, the screen
saver is activated. To exit the screen saver, press any button on the remote control.
EN
11
Use the remote control
Switch HMP7100 on or to standby mode
• Press
Navigate between screens or through options
•
Return to the Home screen
, ,
Navigate through options
,
•
OK
• Confirm the option
• Back one level
View options menu for media play or file navigation
• Press
Connect to online TV services
• Press SMART TV to go to the SMART TV portal
Color buttons (Red, Green,Yellow, Blue)
• Functional buttons in the SMART TV portal
Enter text or numbers
• Press the alphanumeric buttonsrepeatedly to enter numbers or letters
• Alternatively, press the text box to show the onscreen keyboard
Control the play
•
Start or resume the play
•
Pause the play
•
•
/
•
Stop the play
Skip to the previous/ next media file
/
Search backwards or forwards within current file
Press repeatedly to select a search speed
/
• Rotate a photo
INFO
• Display the information about current file during play
SUBTITLE
12
EN
• Access subtitle options
AUDIO
• Access the options of audio languages
• Access the options of audio tracks
Enter text
Use the onscreen keyboard
With the onscreen keyboard, use the remote control to enter text.
www.
.com
.net
SPACE
.org
DONE
.!@
+
ௗၿ
$%& DEF #
Select input modes
• Press / on the remote control.
»» On the onscreen keyboard, current input mode is highlighted.
Enter text
1
2
3
: English input in the upper case
: English input in the lower case
: symbols
On the remote control, press
, , , to move to a key, press OK to select the letter or symbol.
On the onscreen keyboard, select the input options by using the remote
control:
/
: Move the cursor to the left or right.
: Delete the entry before the cursor.
When the text entry is complete, select DONE on the onscreen keyboard
to exit.
EN
13
Tip
•• To use the onscreen keyboard of different languages, go to
[Setup] > [Preference ] >
[Keyboard layout] from the Home screen. You can select a language for the onscreen keyboard.
Use the alphanumeric buttons
•
On the remote control, press the alphanumeric buttons repeatedly to enter
text or numbers.
14
EN
4 First-time setup
The first time you use HMP7100, do the following setup:
• Select the menu language on HMP7100;
• Select your country for the SMART TV portal;
• Connect HMP7100 to your home network through Wi-Fi or an
Ethernet cable.
To change your setup options,
• From the Home screen, go to [Setup].
Connect to your home network
Connect HMP7100 to a router (Access Point) wirelessly or through an Ethernet
cable. You can connect HMP7100 to the network that is built around the router.
To connect to the Internet, make sure that the router connects to the Internet
directly and no dial-up is required on the computer.
Note
•• If MAC address filtering is enabled on your router, add the MAC address of HMP7100 to the list of
allowed devices. To find the MAC address, go to
the Home screen.
> [Advanced ]> [Version information] from
EN
15
Connect wirelessly
WWW
HDMI
The network wizard helps you
to connect the device to the
internet.
Wired (Ethernet)
Please select the type of
Wireless (Wi-Fi)
network setup
EURZVH86%
EURZVH3&
6PDUW79
Cancel
6HWXS
1
2
The first time you connect HMP7100 to power, select [Wireless (Wi-Fi)] on
the first-time setup page.
»» A pop-up screen is displayed for you to select connection options.
On the pop-up screen, select [Scan].
»» You can find a list of networks in range.
•
•
3
4
To refresh the list of networks, select [Rescan].
To manually enter the name and password of the network, select
[Manual entry].
Select your network.
Select your connection option: PIN, PBC, or [Standard].
»» A message is displayed when the connection is complete.
»» Next time you switch on HMP7100, HMP7100 connects to the
previously connected network automatically.
»» When HMP7100 is connected to Wi-Fi,
changes to on the Home screen.
changes to
, and
One-touch Wi-Fi Protected Setup (WPS)
HMP7100 supports Wi-Fi Protected Setup(WPS). You can quickly and securely
connect HMP7100 to a wireless router that also supports the WPS.
You can select one of the two setup methods: PBC (Push Button Configuration),
or PIN (Personal Identification Number).
16
EN
Tip
•• Wi-Fi Protected Setup(WPS) is a standard created by Wi-Fi Alliance for easy establishment of
secure wireless home network.
PBC
HDMI
3,13%&6WDQGDUG
1
2
On the router, add HMP7100:
• Consult the user manual of the router to learn how to add a WPS
device to the router. For example:
press and hold the WPS push button.
»» The router starts to search for HMP7100.
On HMP7100, select PBC.
»» On HMP7100, a message is displayed when the connection is
complete.
PIN
1
2
3
Write down the PIN that is displayed on HMP7100.
On your PC, enter the PIN on the router setup page:
• Consult the user manual of the router to learn how to enter the PIN
of the router.
On HMP7100, select PIN.
Standard connection
1
2
On HMP7100, select [Standard].
On the pop-up screen, enter the password to the network (see 'Enter text'
on page 13).
Use an IP address that the router assigns automatically
EN
17
•
Select [Auto (recommended)].
»» HMP7100 starts to acquire an IP address.
»» A message is displayed when the connection is complete.
Tip
•• If the DHCP (Dynamic Host Configuration Protocol) is unavailable or disabled on the router,
manually enter the IP address of the player.
Enter the IP address manually
1
2
Get the IP address of the router.
• Consult the user manual of the router; or
• To check for the settings of the router, enter the IP address (for
example, 192.168.1.1) in the web browser (for example, Internet
Explorer) of the computer. Get the information in the setup page.
On HMP7100, select [Manual (advanced)], and assign the IP address
manually:
• On the player, enter an IP address that allows the player to be in the
same subnet as the router.
For example, if the router has
IP address: 192.168.1.1, Subnet mask: 255.255.255.000;
Then, enter the following on the player:
IP address: 192.168.1.XX (where XX denotes a number), Subnet mask:
255.255.255.000.
• On the remote control, press
to select the entry location; Press
repeatedly to enter digits.
Connect through an Ethernet cable
1
Use an Ethernet cable to connect HMP7100 to the router.
18
EN
2
3
The first time you connect HMP7100 to power, select [Wired (Ethernet)]
on the first-time setup page.
»» A pop-up screen is displayed for you to select connection options.
Select [Auto (recommended)] or [Manual (advanced)] to use auto IP or
enter the IP address manually.
• Refer to the standard wireless connection (see 'Standard connection'
on page 17).
EN
19
5Play
On the HDTV, enjoy media play from
• the online services (through the SMART TV portal),
• a DLNA-compliant device on your home network, or
• a USB mass storage device.
Play from online services
Connect HMP7100 to the Internet. You can enjoy online services on the HDTV.
Note
•• Koninklijke Philips Electronics N.V. bears no responsibility for content provided by online service
providers.
Play from the Smart TV portal
From the SMART TV portal, you can do the following:
• Access online services;
• Download apps from App Gallery;
• Browse Web pages through the web browser.
1
20
From the Home screen, go to .
»» The SMART TV portal is displayed.
EN
86%
+RPHQHWZRUN
6PDUW79
6HWXS
SmartTV
29 Jan
App Gallery
2
3
Online TV
15:01
Internet
To navigate on the portal,
• press , , , and OK to select options;
• press to go back one level;
• press to go to the Home screen.
To remove, move or lock apps on the portal,
• use the color buttons on the remote control as instructed at the base
of the screen.
Set parental control to apps
In the SMART TV portal, you can do the following to lock apps:
• use the color buttons on the remote control as instructed at the base
of the screen;
• The first time you launch the SMART TV portal, follow the onscreen
instructions to set password to the apps with the rating of 18+.
Play from your home network
Connect HMP7100 to your home network through Wi-Fi or an Ethernet cable
(see 'First-time setup' on page 15).
EN
21
With HMP7100, you can play media from a DLNA-compliant device on the same
network. In this way, you can enjoy the media play through the HDTV that you
connect to HMP7100.
The DLNA-compliant device can be:
• an iOS device or Philips Android device that runs MyRemote, such as
iPhone, iPod touch, iPad, and Philips Android tablet;
• a computer or device that runs the software of DLNA media server,
such as Windows Media Player 11 or later.
Play media from an iOS device or Philips Android device
HDMI
SimplyShare
SimplyShare
1
2
3
22
Make sure that you have connected your iOS device or Philips Android
device tothe same Wi-Fi network as HMP7100.
On your iOS device or Philips Android device, download
from App Store or Google Play.
In
EN
MyRemote, tap to select SimplyShare.
MyRemote
4
Select the source of media:
• Select a connected device on your home network.
»» You can find the music, photos, and videos that you store under the
following folders on your Philips Android device: Music, Pictures, and
Videos.
»» You can also find the photos and videos that you take or record on the
device.
EN
23
5
Select a media file to start play.
Use the iOS or Android device as remote control
With your iOS or Android device, you can control the media play on HMP7100.
1
In
MyRemote, select Control.
»» The remote control buttons are displayed
2
Swipe left/ right to move to other pages of buttons.
24
EN
Play media files from a computer (DLNA)
1
2
Make sure that you have connected HMP7100 and the PC to the same
network.
• Make sure that the UPnP (Universal Play and Plug) function is enabled
on the router.
On the PC, launch the software of DLNA media server. Enable the media
sharing function.
For example, in Windows Media Player 11, do the following:
a Select Library > Media Sharing ...
EN
25
b Select the check box next to Share my media to:
»» If HMP7100 is detected, you can find the name of HMP7100 in the
device list.
c If necessary, select the playerandclick Allow.
3
4
On the Home screen of HMP7100 , select
• Find media files on the servers.
.
Use the remote control to search for and play media files on HMP7100.
Play from a USB storage device
Through the HDTV, play media from a USB mass storage device that you connect
to HMP7100.
86%
+RPHQHWZRUN
6PDUW79
HDMI
6HWXS
1
2
3
Connect your USB mass storage device to
on HMP7100.
»» When the USB device is recognized by HMP7100, changes to
the Home screen.
Select .
»» Media files are sorted as follows:
: Display all the file folders.
: Display music files
: Display video files
: Display photo files
•
Select a file to start play.
To play DivX videos on this player, rent or purchase the DivX videos
by using the DivX® registration code of this player. Go to [Setup] >
[Advanced ] > [DivX® VOD Code]to get the code.
To use a separate subtitle file for DivX video play, do the following:
26
EN
•
on
a Name the subtitle file in the same way as you do with the DivX video
file, with file extension names unchanged.
b Save the subtitle file under the same directory as the DivX video file
on the mass storage device.
Select play options
1
2
During play, press
OPTIONS on the remote control.
Press
to select an option. Press OK to confirm.
For videos,
[Info]: Display file information.
[Audio language]: Select an audio language.
[Subtitle language]: Select a subtitle language.
[Auto subtitle shift]: Allow to relocate the subtitles on TVs that support the
function.
[Titles]: Search within the video by title.
[Chapters]: Search within the video by chapter.
[Time search]: Search within the video by elapsed time.
[Zoom]: Zoom in the scene. Press , to select your zoom options. To pan
through the enlarged scene, press
, , , .
[Repeat] > [File]: Repeat current file.
[Repeat] > [Folder]: Repeat all the files in current folder.
[Repeat] > [Off]: Switch off the repeat mode.
[Repeat A-B]: Repeat the selected section. During video play, select [Repeat A-B]
at the start point A, and then, select [Repeat A-B] again at the end point B. The
selected section start to play repeatedly.
[Picture settings]: Select color settings for the video display.
For photo slideshow,
[Info]: Display file information.
[Rotate +90]: Rotate the photo clockwise by 90 degrees.
[Rotate -90]: Rotate the photo counter-clockwise by 90 degrees.
[Zoom]: Zoom in the scene. Press , to select your zoom options. To pan
through the enlarged scene, press
, , , .
[Duration per slide]: Select the play speed of photo slideshow.
[Slide animation]: Select the transition effects between photos.
EN
27
[Picture settings]: Select color settings for the images.
[Repeat] > [Off]: Switch off the repeat mode.
[Repeat] > [Folder]: Repeat all the files in current folder.
For music,
During music play, press
OPTIONS repeatedly to select play options:
: Repeat current file.
: Repeat all the flies in current folder.
: Play all the files in random order.
28
EN
6Setup
You can change the setup options of HMP7100.
1
2
On the Home screen, select [Setup].
• If necessary, press on the remote control to go to the Home screen.
»» The setup menu is displayed.
Press , , , to select an option. Press OK to confirm the option.
• Press to return to the upper-level menu.
Video
[TV display]: Select display aspect ratio
*[HDMI video]: Select the video resolution that your TV supports. See your
TV manual for details.
[HDMI Deep Color]: Display colors with more shades and hues when the
video content is recorded in Deep Color mode and the TV supports this
feature.
[Picture settings]: Select color settings for the video display.
[Watch 3D video]: Set the HDMI video output to 3D or 2D.
Note
•• *If the video resolution is incompatible with your TV, you can see a blank screen. To recover the
display, wait for 10 seconds.
Audio
[Night mode]: Equalize loud and soft sounds to play media at night (for
Dolby Digital-encoded files).
[HDMI audio]: Select audio output for the HDMI connector.
[Digital audio]: Select audio output for the OPTICAL connector.
EN
29
[PCM downsampling]: Set the sampling rate of the PCM audio from the
OPTICAL connector.
Network
•
•
•
•
•
In [Network installation], connect HMP7100 to your home network.
[Wired (Ethernet)]: Connect to the network through an Ethernet cable.
[Wireless (Wi-Fi)]: Connect to a Wi-Fi network.
In [View network settings], find the information about current network ,
such as the MAC address, and current IP address and subnet mask.
In [View wireless settings], find the status of current Wi-Fi network.
In [Clear Smart TV memory], clear the temporary files from the web
browser of SMART TV.
In [Name your Product: ], edit how HMP7100 isdiscovered by name in your
home network.
Preference
[Menu language]: Select the language for onscreen menus.
[Keyboard layout]: Select the standard keyboard for the language that you
use to enter text.
[Audio]: Select the audio language for videos.
[Subtitle]: Select the language for video subtitles.
[Screen saver]: Enable the screen saver when HMP7100 is in the idle mode
for 10 minutes, for example, in pause or stop mode. To exit the screen saver
mode, press any key.
[Auto subtitle shift]: Allow to relocate the subtitles on TVs that support the
function.
[Auto standby ]: Switch HMP7100 to standby mode when there is no
button press or media play on HMP7100 for 30 minutes.
[Fast wake up]: Start up HMP7100 after a short time duration.
30
EN
Advanced
[Downmix mode]: Select options for the two-channel audio output.
[DivX® VOD Code]: Find the DivX® Video-on-Demand code of HMP7100
to register with DivX®.
[Netflix ESN]: Find the Electronic Serial Number (ESN) of HMP7100 to
register with Netflix.
[Deactivation]: Deactivate online services.
[Version information]: Find the information about the product, such as
product name, software version, MAC address, SimplyShare activation code,
and support site.
[Restore default settings]: Restore factory settings.
EN
31
7EasyLink
HMP7100 supports Philips EasyLink which uses the HDMI CEC (Consumer
Electronics Control) protocol. You can use a single remote control to control
EasyLink compliant devices that are connected through HDMI.
1
2
3
4
Through HDMI, connect HMP7100 to a TV compliant with the HDMI CEC
protocol.
On the TV, switch on the functions to allow HDMI CEC operations (Consult
the user manual of the TV).
On HMP7100, switch on [EasyLink].
• On the Home screen, select [Setup] > [EasyLink]. Select [On].
In [EasyLink], you can select the following options:
[One Touch Play]
When you start play on HMP7100, the TV switches to the HDMI input channel
automatically.
[One Touch Standby]
When you switch the TV to the standby mode, HMP7100 switches to the
standby mode automatically.
Note
•• Philips does not guarantee 100% interoperability with all HDMI CEC devices.
32
EN
8 Update the firmware of
HMP7100
From the Home screen, go to . In the SMART TV portal, you can register with
Club Philips. By doing so, you can get information about the product and software
updates.
Before you update the firmware, check current the firmware version of HMP7100.
Go to [Setup] > [Advanced ] > [Version information].
Update the firmware online
1
2
3
Connect HMP7100 to the Internet.
On the Home screen of HMP7100, go to > [Advanced ]. Select
[Software update] > [Network].
»» If a firmware update is detected, you are prompted to start the update.
Follow onscreen instructions to complete the update.
»» When the update is complete, HMP7100 switches off automatically, and
then switches on again.
Note
•• Keep HMP7100 powered on before the firmware update is complete.
Update the firmware through a USB storage device
1
On your computer, do the following:
a Go to www.philips.com/support to find the latest firmware.
b Search for your model and click on "Software and drivers".
EN
33
c Download the firmware update and save the file to the root
directory of a USB storage device.
2
On HMP7100, do the following:
a Connect the USB storage device.
b On the Home screen, go to > [Advanced ]. Select [Software
update]> [USB].
»» If a firmware update is detected, you are prompted to start the
update.
3
Follow onscreen instructions to complete the update.
»» When the update is complete, HMP7100 switches off automatically, and
then switches on again.
Caution
•• Keep HMP7100 powered on and the storage device mounted before the firmware update is
complete.
34
EN
9Troubleshooting
If you contact Philips, you will be asked for the model and serial number of this
player. The model number and serial number are at the bottom of this player.
Write the numbers here:
Model No. __________________________
Serial No. ___________________________
No picture.
• Refer to the TV user manual for how to select the correct video input
channel
The contents of the USB storage device cannot be read.
• The format of this USB storage device is not supported.
• The supported memory size is 1TB maximum.
• Make sure that this player supports these files. (Refer to "Specifications" >
"Playable media") .
Subtitles are not displayed or not properly displayed.
• Make sure that the player supports the formats of the subtitles. (Refer to
"Specifications" > "Subtitle support")
• To use a separate subtitle file for DivX video play, do the following:
a Name the subtitle file in the same way as you do with the DivX video
file, with file extension names unchanged.
b Save the subtitle file under the same directory as the DivX video file
on the mass storage device.
c Through the player, play the DivX video from a mass storage device.
•
If you stream DivX video files through DLNA, the separate subtitle files are
not supported.
EN
35
10 Specification
Note
•• Specification and design are subject to change without notice.
AC Power
• Input: 230 V~50 Hz, 10 W
• Power consumption: < 10 W
• Power consumption in standby mode: < 0.5 W
USB connector
• Output: DC 5 V, 500 mA
Supported formats:
• Video: MPEG 1/2/4(MPEG 4 Part 2), H.264, VC-1, WMV9, Divx HD,
Divx Plus HD, Xvid, MKV, MPG, AVCHD, AVI, TS, M2TS, TP, VOB, DAT,
MP4, MPEG, MOV (MPEG 4, H.264), ASF, FLV(640 x 480)
• Audio: Dolby digital, DTS, MPEG Audio, AAC, RA, OGG, MKA, ADPCM,
AC3, WMA (V9), MP3, PCM, LPCM
• Picture: .JPEG, JPG, PNG, GIF (unanimated GIF),JPEG in HD resolution
HDD & USB support
• Compatibility: Hi-Speed USB (2.0)
• NTFS, FAT32, FAT, EXT-3
• USB MTP support, USB PTP support, USB MSC support
Subtitle support
• .srt, .sub, .smi, .ssa, .idx+.sub, ANSI
Video
• HDMI output: 480i, 480p, 576i, 576p, 720p, 1080i, 1080p/24 Hz,
1080p/50 Hz, 1080p/60 Hz
Audio
• HDMI output
• Optical output
Main Unit
• Dimensions (L x W x H): 178 x 57.5 x 91 mm
• Net Weight: 0.34 Kg
36
EN
11 Written Offer
Philips Electronics Hong Kong Ltd. hereby offers to deliver, upon request, a copy
of the complete corresponding source code for the copyrighted open source
software packages used in this product for which such offer is requested by the
respective licenses.
This offer is valid up to three years after product purchase to anyone in receipt of
this information. To obtain source code, please contact [email protected].
If you prefer not to use email or if you do not receive confirmation receipt within
a week after mailing to this email address, please write to "Open Source Team,
Philips Intellectual Property & Standards, P.O. Box 220, 5600 AE Eindhoven, The
Netherlands." If you do not receive timely confirmation of your letter, please email
to the email address above.
EN
37
Specifications are subject to change without notice
© 2013 Koninklijke Philips Electronics N.V.
All rights reserved.
HMP7100_12_UM_V1.0
WK1312.5