1
FedCure FOIA Litigation
2005-03326
Cover Sheet
This Section Contains:
C. Information related to the training methods
used for operators
Location: IC Co -\e),,,inacO
Name and phone number of person conducting search:
6-LICAV- eu(kn
Prerequisites:
Operator Course
Maintenance Course
Administration functions may be assigned to Operator, Maintenance, or other
personnel. This module is separate so that it may be used for any of these
situations.
Course Objective: At the completion of this course the student will be able to
assign user log-in codes and provide advanced menu and administrative level
support.
Logging on: Demonstrate Logging on as an administrator
Menus: Demonstrate the menus and functions needed for an administrator.
Describe the following parts of the Menu Screen:
Edit Functions: Options, Configuration, Substances, & Users
View Functions: Advanced Menu, History
Action Functions: Change Mode
Advanced Menu Functions:
Adjust Time and Date
Upgrade Software
Saving Alarms
Course Overview
GE Ion Track
• Logging On
• Menu Screens
» Edit Functions
• Options
• Configuration
• Users
» View Functions
• Advanced Menu Functions
• History
» Action Functions
• Change Mode
• Summary
TM001018 rev:)
2
GE Ion Track
Logging On
User Log On...
• The Administrator will need a log in
PIN that has Advanced Menu
Functions.
Enter PIN and press <Log On>
*410e1
PN.TM001018 rev:3
The Advanced Menu Function PIN [Personal Identification Number (Password)] for
your system is Menu Screen
The menu sections outlined in olive green were covered in the Maintenance Course
and are not covered here.
The six (6) menu sections outlined in red are covered in this course.
Menu Screen
GE loft Track
Edit Functions: Options
Most changes to the options screen should be performed under the direction of your
service support agent.
Menu Screen
GE Ion Track
Options: Dryers
o_ o.
,Pmesopows,siss
Rakoirsows
Any changes to this section
of the options screen should
be performed under the
direction of your service
support agent.
•The Itemiser3 has a regenerative dryer containing two chambers.
'While one chamber is being used, the other is being heated to remove moisture and
contaminants.
-The Itemiser3 switches between the two chambers at the specified interval.
-4 hours is the recommended switch time and is the system default value. This
allows for the best results in keeping moisture out of the system.
a
Menu Screen
GE Ion Track
Options: Warn or Require Calibration
P
-
DitrA,„ m
r
iss
iths
zj
41H4'ea*
Int(
elattSeen
Any changes to this section
of the options screen should
be performed under the
direction of your service
support agent.
P
P
Far
Ptspop Owl, Nn w1ci m 4
DN4f
PH
001018 rera
•A timed calibration warning may be set in this box. The Default setting is 8 hours.
•An audible alarm may be set to occur when a substance is detected by checking the
box.
tre
GE too Track
Menu Screen
Options: Screen Saver
P
r
'PAN; EALLINU
Any changes to this section
of the options screen. should
be performed under the
direction of your service
support agent.
RALIPSOrfflti
tswicILDipLELvtfr 14 0
PPP TP1001018 rev.3
Allows the screen saver to be enabled. Enabling the screen saver allows for the
option of "sleeping" the sample pump while the screen saver is active.
CE ion Trac k
Menu Screen
Options: Display Options 1
Pwo.oeciPtat.6.. r-ont4
r
001"15.0500
54ieniiet
r-Dito
Lstvi !Me 0
isbe
XAms Daplayb
r WI
belletedur*
Any changes to this section
of the options screen should
be performed under the
direction of your service
support agent.
PH: TM0010 IS rev:3
Display Options:
Processed Data:
The single plasmagram results from a sampling analysis.
Processed PlasmaGram:
There are 70 processed plasmagrams during a 7 second sampling analysis (10
plasmagrams/second). This option allows you to view each plasmagram separately
by moving a scroll bar on the right side of the screen.
Raw PlasmaGram:
This is the "raw" plasmagram data before it is transformed into processed
plasmagram data
Substances:
Displays and/or labels peaks for selected substances, if selected
Report Level:
Sets the percentage of programmed alarm level required before a substance is
identified and reported
Display Alarm Strength in Select Scan:
GE Ion Track
Menu Screen
Options: Display Options 2
options
I 'Poa4,.dIJM P P*sØj
h'ettedbg°
P Di
nrn.
e
St
Any changes to this section
of the options screen should
be performed under the
direction of your service
support agent.
awe Co0s0
tenSAvo
DIS led
rva
TN: TM001018 rev:3
Display Options:
Peaks List:
Describes the left side of the screen in Plasmagram view. Only one of three options
can be selected, "Processed Data", "Processed Plasmagram" or "Raw
PlasmaGram". Changing this setting uses more space (memory) but does not
improve performance.
X Axis Display Units:
Specifies the units used for X axis in Plasmagram view, "Time (ms)" or "Calibrated
Units". Only one can be selected. Calibrated units should be selected since the
system adjusts automatically for changes in pressure and moisture.
4 el
Menu Screen
GE Ian Track
Options: Save & Print
Pit:oesiedftssmeGroin
r
, FleViNsitarmetn P Divier
11000zi
"
The operator will need the
optional keyboard installed if
either
• Prompt for Name
-or• Prompt for Notes
are checked.
PN: TM001018 rev:3
Auto Save:
-Specifies the type of automatic saving of data to be used, "Never", "Every Alarm"
or "Every Sample". Only one of three can be selected.
•Also includes two boxes that let the user specify if the system should "Prompt for
Name" and "Prompt for Notes" when automatically saving data in the "Every
Alarm" and "Every Sample" options.
Auto Print:
-Specifies how the automatic printing of data should be employed, "Never", "Every
Alarm" or "Every Sample". Only one can be selected.
•If the "Session Log" option is selected, a session log is automatically printed at
logoff. The Session Log lists calibration occurrences, saved files, warning, mode
changes, and number of samples introduced.
44
Menu Screen
Options: Battery
"laDItW
tthel
"10
Chair I Chagtl
'r¼,aeloe,etl HattSaebchmflI421.5
-bnitch.ths. Ev my ,L71liar. SeItheeTh
Executes a 14-hour trickle charge on the back-up battery when connected to an AC
source.
12
a
LT Ion Track
Menu Screen
Options: Set Defaults
PooesvedP14,rerkiem r otsdo
Own*
Subtance
W4AI.rfr
Pul o 1 NSS8cII 014
StrpolvDtfor Pep 14 0
3J cw.d
4115elatt0:
PO4:111001018 rev:3
Resets Options Screen settings back to the factory default settings.
13
Menu Screen
Edit Functions: Substances
7.836
6.350
7.990
7.070
1.532
1.120
6.437 -00404.0 040
1000.5
7.166 -0.0401-0.010
1.519 .0.090+0.040
1500.0
1500.0
7.919 7.551 0114040.040
7.936 0.044 -0.04040.040
8.877 9.942 -0.04040.040
8 757 BS 6 -0.040+9.040
5.757 5.631 -0.010+0.010
504.0
6.375
6.162 0 019.40.0.10
500.0
1000.0
10440.0
7.936 9.014 .0.00-10080
CAUTION: GE Ion Track recommends that these levels be used initially while
gaining experience with the system.
Substances can be selected or deselected from the list of detected substances.
14
Menu Screen
Edit Functions: Users
Users:
An Administrator can Add, Modify, or Delete users and assign PINs to all levels.
Each user is assigned one of 3 security levels. The Supervisor level is available for
those systems that previously used the supervisor level.
While there can be any number of user log in accounts, there can be only 3 security
levels. User permissions are controlled by group and cannot be modified
individually.
This example shows adding a new user with the name "My User" as an Operator.
There is a Super User level, but level can only be created by a Super User. It is
explained and in the Troubleshooting and Repair Course and available to designated
users who've had the proper training.
Menu Screen
View Functions: Advanced Menu
Advanced Menu:
Allows the user to change the following features and settings.
'Calibrate Touch Screen
-Adjust Date & Time
-Upgrade Software
"Create Software Install Disk
'Show Network Name and IF
-Remote Connect
'Open Command Prompt
'Open Alarms Folder
IC
Advanced Menu:
Allows the user to change many system features and settings.
Calibrate Touch Screen - Follow on-screen instructions to calibrate touch screen.
Adjust Date & Time - Sets the system date and time. Note: System displays a
warning that prompts the user to exit the software to make this change. The dialog
box also warns user not to adjust the Time Zone or Daylight Savings Time settings
because they will not be saved.
a
Menu Screen
GE Iva Track
Advanced Menu: Buttons (cont'd)
Upgrade Software — Upgrades Itemiser3 software with latest version from a
diskette inserted into floppy drive on rear of unit.
1)
Log on to the ITMS software with the Administrator PIN.
2)
Press <Menu>, then <Advanced Menu>.
On the Advanced Menu Dialog, press <Upgrade Software> and
3)
follow the instructions on-screen to complete the upgrade.
4)
After you upgrade the Itemiser3 software, be sure to fully charge the
backup battery: Press <Menu>, then <Options> and press <Charge>.
Create Software Install Disk - Creates a software install disk, which can be used
for upgrading other systems or opening saved alarms on a desktop computer.
Show Network Name and IP — Displays a dialog box with the Host Name and the
Itemiser3 IP address
I CI
Menu Screen
GE ion Track
Advanced Menu: Buttons (cont'd)
Remote Connect - Connect to a remote device through the IR port.
Open Command Prompt - Opens a command prompt window for advanced
features, such as copying alarms over a network to a server.
GE Ion Track
Menu Screen
Advanced Menu: Open Alarms Folder
• Open Alarms Folder - For copying and
or deleting alarm files.
Pe "Edit 'Ow 60 Woke,
lairrazt
tipi;:tait
IEEE
conam,
Da
Dl
MV
DOCUrnenti
NETwORr IROgra
File5
conool
Saving Alarm Files to Diskette
1. The Alarm Files folder can be quickly accessed at any time by pressing the
Advanced menu, Open Alarms folder. From this Explorer window, select the
desired files then choose <Edit>, then <Copy>.
2. To copy to a floppy press the yellow up folder button three times to get to "My
Computer".
3. Insert a floppy disk, double click on the icon that says 'refresh', and a folder
called "Floppy" will appear. Double click on the "Floppy" folder Choose
<File>, then <Paste> to paste the alarms to the floppy.
20
GE Ion Track
Menu Screen
View Functions: History
4
System°.
4/27/2004 10 322AM IAA Lin
427/101410 4 29AM Lop Off
4127121144 10 34 33AM Log Do
4/27120D1 034 NAM Log 011
127/2004 10 4 42 AM Lim On
4/27/2034 10 6 18AM Log 03
4/(7/2004 10 3S 21 AM Lop Cm
4/7/11440 36330M Leg 011
4/271200110 36 38AM Log 00
4,27/2nDo 1038 07 al Loa ON
4/27/2004 10 08 11 AM 100 On
417 o D4 1038 113AM Lop 03
4/272004 10 3E 18/311 System OH
4/27/2004 11 0224 AN Smlem Or
4/27/2034 110- _5 42 Log Go
4/77/2004 II 02 27 40.1 LoA CM
4/27/2034 II 02-39Am Log Cm
4/27/2004 II 0216AM Log 00
4/27/2004 11 0121AM
oa on
t
ShOW S.M.M
Iop 4/
PH:
1
MOO
' ODayl I 02
bDa94oj 0001
r
/200
001018 rev:'
The Itemiser3 System automatically records session information in a History file. This history file
lists all mode changes, files saved, warnings issued, log on/off information, alarm occurrences, and
manual and automatic calibrations performed. These history files can be accessed and copied to a
diskette for further analysis.
The buttons, explained below, only work on the part of the history file covered by the
From/Through Dates.
Print Statistics:
Prints the statistics displayed in the lower right window of the screen.
Print History:
Prints the history (shown in left side window) using the From/Through dates.
Export History:
Export History allows export of the history files to a PDA or laptop computer with Infrared Port
capabilities or to a Network or File location. The file is exported as serial#.csv (the comma
separated values format) which can be opened by any application that reads .csv files, such as Excel.
The files also can be exported to a floppy drive, automatically at a specified time of day.
Note: The file time information will be saved as Pacific Time Zone but the data within the file will
have the correct time information. This is a function of Windows CE.
If your laptop computer or PDA is equipped with an Infrared Port, you can export the .csv file.
Purge History:
Clears the History record.
Add Maintenance log:
Allows the user to add maintenance notes to the history log.
Menu Screen
GE lisa Track
Action Functions: Change Mode
Allows user to choose between
Explosives, Narcotics, or Dual mode.
PN TMD01018 rev:3
Optimizes the temperatures and substance library for increased sensitivity for target
substances.
Dual mode selects intermediate temperatures to allow for detection of all selected
substances.
22
GE ton Track
• Logging On
• Menu Screens
» Edit Functions
• Options
• Configuration
• Users
»View Functions
• Advanced Menu Functions
• History
» Action Functions
• Change Mode
23
Prerequisites:
Operator Course
Maintenance Course
Administration functions may be assigned to Operator, Maintenance, or other
personnel. This module is separate so that it may be used for any of these
situations.
Course Objective: At the completion of this course the student will be able to
assign user log-in codes and provide advanced menu and administrative level
support.
Logging on: Demonstrate Logging on as an administrator
Menus: Demonstrate the menus and functions needed for an administrator.
Describe the following parts of the Menu Screen:
Edit Functions: Options, Configuration, Substances, & Users
View Functions: Advanced Menu, History
Action Functions: Change Mode
Advanced Menu Functions:
Adjust Time and Date
Upgrade Software
Saving Alarms
Course Overview
GE Ion Track
• Logging On
• Menu Screens
» Edit Functions
• Options
• Configuration
• Users
» View Functions
• Advanced Menu Functions
• History
» Action Functions
• Change Mode
• Summary
PN: TM001018 rev:3
GE Ion Track
• The Administrator will need a log in
PIN that has Advanced Menu
Functions.
• Enter PIN and press <Log On>
The Advanced Menu Function PIN [Personal Identification Number (Password)] for
your system is The menu sections outlined in olive green were covered in the Maintenance Course
and are not covered here.
The six (6) menu sections outlined in red are covered in this course.
Most changes to the options screen should be performed under the direction of your
service support agent.
Menu Screen
GE Ian Track
Options: Dryers
Any changes to this section
of the options screen should
be performed under the
direction of your service
support agent.
•The Itemiser3 has a regenerative dryer containing two chambers.
• While one chamber is being used, the other is being heated to remove moisture and
contaminants.
•The Itemiser3 switches between the two chambers at the specified interval.
•4 hours is the recommended switch time and is the system default value. This
allows for the best results in keeping moisture out of the system.
et
Menu Screen
GE Ian Track
Options: Warn or Require Calibration
Any changes to this section
of the options screen should
be performed under the
direction of your service
support agent.
PN: TMOOlOI8 rev:3
•A timed calibration warning may be set in this box. The Default setting is 8 hours.
• An audible alarm may be set to occur when a substance is detected by checking the
box.
Menu Screen
GE Ion Track
Options: Screen Saver
Any changes to this section
of the options screen should
be performed under the
direction of your service
support agent.
PN: TM001018 rev:3
Allows the screen saver to be enabled. Enabling the screen saver allows for the
option of "sleeping" the sample pump while the screen saver is active.
Menu Screen
GE Ion Track
Options: Display Options 1
Any changes to this section
of the options screen should
be performed under the
direction of your service
support agent.
Display Options:
Processed Data:
The single plasmagram results from a sampling analysis.
Processed PlasmaGram:
There are 70 processed plasmagrams during a 7 second sampling analysis (10
plasmagrams/second). This option allows you to view each plasmagram separately
by moving a scroll bar on the right side of the screen.
Raw PlasmaGram:
This is the "raw" plasmagram data before it is transformed into processed
plasmagram data
Substances:
Displays and/or labels peaks for selected substances, if selected
Report Level:
Sets the percentage of programmed alarm level required before a substance is
identified and reported
Display Alarm Strength in Select Scan:
Menu Screen
GE Ion Track
Options: Display Options 2
Any changes to this section
of the options screen should
be performed under the
direction of your service
support agent.
PN: T74001018 rev:3
Display Options:
Peaks List:
Describes the left side of the screen in Plasmagram view. Only one of three options
can be selected, "Processed Data", "Processed Plasmagram" or "Raw
PlasmaGram". Changing this setting uses more space (memory) but does not
improve performance.
X Axis Display Units:
Specifies the units used for X axis in Plasmagram view, "Time (ms)" or "Calibrated
Units". Only one can be selected. Calibrated units should be selected since the
system adjusts automatically for changes in pressure and moisture.
• ON
Menu Screen
GE Ion Track
Options: Save & Print
The operator will need the
optional keyboard installed if
either
• Prompt for Name
-or• Prompt for Notes
are checked.
Auto Save:
• Specifies the type of automatic saving of data to be used, "Never", "Every Alarm"
or "Every Sample". Only one of three can be selected.
• Also includes two boxes that let the user specify if the system should "Prompt for
Name" and "Prompt for Notes" when automatically saving data in the "Every
Alarm" and "Every Sample" options.
Auto Print:
• Specifies how the automatic printing of data should be employed, "Never", "Every
Alarm" or "Every Sample". Only one can be selected.
• If the "Session Log" option is selected, a session log is automatically printed at
logoff. The Session Log lists calibration occurrences, saved files, warning, mode
changes, and number of samples introduced.
Menu Screen
Options: Battery
Executes a 14-hour trickle charge on the back-up battery when connected to an AC
source.
Resets Options Screen settings back to the factory default settings.
et
GE Ion Track
Menu Screen
Edit Functions: Substances
ncSoIN noon
ON
142
,
000IrE
OM
1 0AM
nO
150.0
1500.0
15W.0
7.990 0.299 -0.040+0.040
7,070 7.166 -0.040+11040
4,002 4.591 -0.040+0.040
1.120 4.176 -0.040+0.040
•
.
,
7.9360 .044,0,04240.040
8.822 0.942 ,0.04046.040
8.757
5.753
5.661 5.741 -0.040+0.010
6.375
6.275 6.361 -0.040+0.040
7.506
yeS
yes
no
no
no
ORPO4
yes
Ins
04. 0k6.070no
no
7.936
CAL
ce
750.0
1000 0
0297.0
0099.0
424:17,4001018 re,3
CAUTION: GE Ion Track recommends that these levels be used initially while
gaining experience with the system.
Substances can be selected or deselected from the list of detected substances.
14
Menu Screen
Edit Functions: Users
"Ob
Users:
An Administrator can Add, Modify, or Delete users and assign PINs to all levels.
Each user is assigned one of 3 security levels. The Supervisor level is available for
those systems that previously used the supervisor level.
While there can be any number of user log in accounts, there can be only 3 security
levels. User permissions are controlled by group and cannot be modified
individually.
This example shows adding a new user with the name "My User" as an Operator.
There is a Super User level, but level can only be created by a Super User. It is
explained and in the Troubleshooting and Repair Course and available to designated
users who've had the proper training.
Menu Screen
View Functions: Advanced Menu
Advanced Menu:
Allows the user to change the following features and settings.
•Calibrate Touch Screen
•Adjust Date & Time
•Upgrade Software
• Create Software Install Disk
•Show Network Name and IP
•Remote Connect
• Open Command Prompt
•Open Alarms Folder
0.0
Menu Screen
Advanced Menu: Buttons
Advanced Menu:
Allows the user to change many system features and settings.
Calibrate Touch Screen - Follow on-screen instructions to calibrate touch screen.
Adjust Date & Time - Sets the system date and time. Note: System displays a
warning that prompts the user to exit the software to make this change. The dialog
box also warns user not to adjust the Time Zone or Daylight Savings Time settings
because they will not be saved.
Menu Screen
GE Ian Track
Advanced Menu: Buttons (cont'd)
PM Th1001018 rev:3
Upgrade Software — Upgrades Itemiser3 software with latest version from a
diskette inserted into floppy drive on rear of unit.
Log on to the ITMS software with the Administrator PIN.
1)
2)
Press <Menu>, then <Advanced Menu>.
On the Advanced Menu Dialog, press <Upgrade Software> and
3)
follow the instructions on-screen to complete the upgrade
After you upgrade the Itemiser3 software, be sure to fully charge the
4)
backup battery: Press <Menu>, then <Options> and press <Charge>.
Create Software Install Disk - Creates a software install disk, which can be used
for upgrading other systems or opening saved alarms on a desktop computer.
Show Network Name and IP — Displays a dialog box with the Host Name and the
Itemiser3 IP address.
A
Menu Screen
Advanced Menu: Buttons (cont'd)
Ad
r
Remote Connect - Connect to a remote device through the IR port.
Open Command Prompt - Opens a command prompt window for advanced
features, such as copying alarms over a network to a server.
41'
Menu Screen
GE Ion Track
Advanced Menu: Open Alarms Folder
• Open Alarms Folder - For copying and
or deleting alarm files.
Ill
MV
Document
NETWORK Proga
Files
Saving Alarm Files to Diskette
1. The Alarm Files folder can be quickly accessed at any time by pressing the
Advanced menu, Open Alarms folder. From this Explorer window, select the
desired files then choose <Edit>, then <Copy>.
2. To copy to a floppy press the yellow up folder button three times to get to "My
Computer".
3. Insert a floppy disk, double click on the icon that says 'refresh', and a folder
called "Floppy" will appear. Double click on the "Floppy" folder. Choose
<File>, then <Paste> to paste the alarms to the floppy.
20
GE Ian Track
Menu Screen
View Functions: History
4.127/20134 10 33004
4/27/2004 10 33 20 AM
4/27,2001 10,4 29 AM
—2 4,27/200410 34 3340
4,27/2004 10 34 34 PM
4,2722004 10-34 42AM
4/27/2304 10 36 10 A14
4/27,2004 10 3421 AM
4/27/2604 1036 33 AM
4717/20714 123630 AM
12772004 1031 07AM
/27/2004 10 3E111 AM
/27a024 10 3810 AM
4/2712004 10 38 18 AM
4/271340410 02 24AM
7 4/27/2004 11 02 25AM
/27/2004 11 0227/114
/27/2004 11'0239AM
4/27/2024000 16/34
4/27/2016 110121 AM
sm
Log on
000 00
Log On
Log 01
Log On
Log 011
Log On
Log 00
Log 0,1
Log 01
Lo On
Log 011
System OH
System On
Log On
Log CM
Log On
011
on On
g
PN TM001018 rov.3
The Itetniser3 System automatically records session information in a History file. This history file
lists all mode changes, files saved, warnings issued, log on/off information, alarm occurrences, and
manual and automatic calibrations performed. These history files can be accessed and copied to a
diskette for further analysis.
The buttons, explained below, only work on the part of the history file covered by the
From/Through Dates.
Print Statistics:
Prints the statistics displayed in the lower right window of the screen.
Print History:
Prints the history (shown in left side window) using the From/Through dates.
Export History:
Export History allows export of the history files to a PDA or laptop computer with Infrared Port
capabilities or to a Network or File location. The file is exported as serialitcsv (the comma
separated values format) which can be opened by any application that reads .csv files, such as Excel.
The files also can be exported to a floppy drive, automatically at a specified time of day.
Note: The file time information will be saved as Pacific Time Zone but the data within the file will
have the correct time information. This is a function of Windows CE.
If your laptop computer or PDA is equipped with an Infrared Port, you can export the .csv file.
Purge History:
Clears the History record.
Add Maintenance log:
Allows the user to add maintenance notes to the history log.
a
Menu Screen
GE Ion Track
Action Functions: Change Mode
Allows user to choose between
Explosives, Narcotics, or Dual mode.
PN' T4001018 rcr.3
Optimizes the temperatures and substance library for increased sensitivity for target
substances.
Dual mode selects intermediate temperatures to allow for detection of all selected
substances.
22
Summary
GE Ion Track
• Logging On
• Menu Screens
» Edit Functions
• Options
• Configuration
• Users
» View Functions
• Advanced Menu Functions
• History
» Action Functions
• Change Mode
PN
TM001018 re,3
23
FedCure FOIA Litigation
2005-03326
Cover Sheet
This Section Contains:
C. Information related to the training methods
used for operators
Location: C
SAek mac°
Name and phone number of person conducting search:
eurkon
/
L€1
L4
SG001018 Rev. 2
we*
rob
ara
0-•
SG001018 Rev. 2
iv
Itemiser'
Admirustmtm Student CuldP
Preface Conventions used in this document
Safety terms and symbols vii
viii
ix
Warnings and cautions Rear panel symbols Chapter 1. Menu Functions xi
1
Administrator Menu 2
Substances 2
Change mode 4
Users 5
Advanced menu 6
Calibrate touchscreen 7
Adjust date & time 7
Upgrade software 8
Create software install disk 9
Show network name & IP 10
Remote connect 10
Open command prompt 10
Open alarms folder 10
vi
Iterniser7
Ad r rrHst r utor Student Guide
ea)
Preface
Chapter?. Contact Information and Notes13 Contact Information 14
Notes 16
#0.
Ira
ra
I
This is the GE Itemiser .' Administrator Student
Guide. This document includes an overview of
the product and detailed instructions explaining
how to utilize Itemiser3 Administrator
menu functions.
There is also information describing how to
contact technical support if you have questions
or concerns.
To use this document effectively, you should
have the following minimum qualifications:
Completed the Itemiser Operator +
Maintenance courses.
• a basic knowledge of explosive and
narcotic trace detection and
a basic knowledge of your organization's
alarm resolution protocols.
Read these instructions and all ancillary
documentation entirely before installing or
viii
Itemiser Admirnstr Mot- Student Guide
operating this product. The most current versions
of this and related documentation are available
through GE Security Customer Service.
so"
0090 Safety terms and symbols
Or. These terms may appear in this manual:
Ore
General Warning: User should use care to avoid possible
damage to equipment. This warning is accompanied by
additional text information indicating the details of the warning.
Conventions used in this document
The following conventions are used in this
document:
Bald
Menu items and buttons
Italic
Emphasis of on instruction or point; special
terms.
A
High Voltage Warning: User should use appropriate electrical
A safety precautions.
File names, path names, windows, panes, tabs,
fields, variables, and other GUI elements
Titles of books and documents.
Blue italic
(Electronic version.) Hyperlinks to crossreferences, related topics, and URL addresses.
Monospace
Text that displays on the screen.
Hot Surface Warning: User should use core when working near
the I beled item.
Radiation Warning: Indicates the presence of a radioactive
A source
Programming or coding sequences.
#046
014
OP.
00.41
40041
X
Itemiser
Ariminiqtrotor Student Guile
Warnings and cautions
A,
ai
solo. Rear panel symbols
System Off
Indicates the system is off.
The Itemiser Detector contains a radioactive nickel 63 source of
10 millicuries(370 M Bq) strength. The source is fully enclosed in
the detector of the instrument that stops all primary radiation.
The detector has been designed in compliance with USNRC
guidelines for safety. If a problem is suspected with the detector,
DO NOT open the detector—call GE Security's Technical Service
Department. Then, if instructed, return the instrument to GE for
service. Note that in some countries, notification of receipt and
registration of the source may be required by the national
government body responsible for control of radioactive sources.
System On,
Indicates the systern 'son
Note: Annual Radiation wipe test is NOT required for this
instrument.
CON Port
The detector must be disposed of properly in accordance with
local, state, and federal (or National) regulations. Please contact
your local hazardous waste disposal facility or GE Homeland
Protection for proper disposal methods.
Network
\ CAUTION:
A
CAUTION:
Do not position the unit so that it is difficult to
operate the disconnecting device.
Keyboard
MOO
lithe equipment is used in a manner not
specified by the manufacturer, the protection
provided by the equipment may be impaired.
xiiIterniseN
Administrator Student Guide
Alternating Current 1ACY
ess Indicates alternating current. Direct Current 100 Symbol
roe Chapter 1 Menu
.00
000
egra
.0010
ea.
efige
Fuse
SOO
WOO
4001.
Or.
SOP.
.0.11
Or.
ere
OP.
ere
Monitor
Os]
Functions
This chapter instructs the Administrator
user on the various menu functions:
Administrator Menu Substance y
Change mode Advanced menu Calibrate touchscreen Adjust date & time Upgrade software Create software install disk
Show network name & IP Remote connect Open command prompt Open alarms 'Older 2
2
4
6
7
7
8
9
10
10
10
10
2
Chapter
Menu Function
Itemiser
Administratei Student (Jude
Administrator Menu
Figure 1. Administrator menu view
Press the checkbox in the lower left
corner of the screen to select or deselect
the substance
Administrators do not have access to
adding, modifying or deleting
substances. These functions are available
to superuser's only and should only be
changed under the advisement of a GE
Homeland Protection Applications
Engineer.
Figure 2. Substances
Substances
Displays the list of selected substances and their
configuration.
•
Select or deselect any substance by
highlighting the name on the list.
4-120 4 476 A/ 040.40 Olo
• 440
500
040+0.040
7+09 7 551 .4004•0004
0143
7.900 tOn 0 040+0 1110
0-022 0000.704200.0w
Soil
0fl40o0.O40
6075 0.IO2401000.542
4205 8361 -004000005
7000 7747 -0.040+0.040
ON -0 0.0+0 OW
5 043
00
0 00
0.00
0.00
00
0+0
000
000
000
034
0 00
047
0.40
0255
000
0.00
0 00
0 co
1910
0500
Woo 0
41 AS
rtemiseri
Administrator Student Guide
Change mode
•
•
Allows you to change detection modes
(Dual, Explosives or Narcotics mode)
depending on system configuration.
Changing modes requires a stabilization
period.
Chopter 1
Menu Functions
01.
Effie
Itemiser sets the detector temperature at
198°C and only the narcotics substances
are selected for analysis. You will see the
split window, but all narcotics will
appear in the positive ion window.
re
OPle
Dual Temperature gl Library
When selecting the dual-mode detection
option, the Itemiser sets the detector
temperature at 183°C and both the
explosives and narcotics substances are
selected for analysis. For optimized
detection of narcotics or explosives, it is
recommended that the Itemiser be
operated in explosives or narcotics
single mode.
Explosives Temperature & Library
When selecting the explosives-only,
single-mode detection option, the
Itemiser sets the detector temperature at
I62°C and only the explosive substances
are selected for analysis. You will see the
split window in Plasmagram view
because some substances, such as
TATP1, TATP2, and Smokeless Powder
will appear in the positive ion window
even though they are explosives.
OP.
4004
Ore
Narcotics Temperature & Library
When selecting the narcotics-only,
single-mode detection option, the
Or.
OSA
VIa
Users
Allows you to add, modify and delete
users at the Administrator level and
below.
4
6
en%
Ova
40000
fete
Itemiser'
Actminist rotor Student Guide
Advanced menu
Ltiopte
Menu sunctic
Calibrate touchscreen
1. Press Calibrate touchscreen.
Figure 3. Administrator advanced menu view
011.41
0/01.
0....1
1
3. Press and hold for a few seconds on
each +.
IS
E.,...L...,
0
OlastameineaDY
,,
,
,
I
I:
I '
•001° I
2. Follow on-screen instructions to
calibrate touchscreen.
,,,,
L
190114
OEM
4. Press OK to accept calibration.
,T11-0
•
•
•
Calibrate touchscreen
Adjust date & time
Upgrade software
•
Create software install disk
•
•
•
•
Show network name and IP
Remote connect
Open command prompt
Open alarms folder
40,041
fro*
eel
Or.
0011.
0010.
4P+4
Igoe!.
Adjust date & time
Sets the system date and time.
1. Press Menu/Advanced Menu/Adjust
date and time.
2. System will exit the ITMS software to
the desktop
3. Set local system date and time.
4. Press OK to accept changes.
nermsert
Administrator Student Cu r&
Note: System displays a warning that prompts the
user to exit the software to make this change.
The dialog box also warns user not to adjust the
Time Zone or Daylight Savings Time settings
because they will not be saved.
rat
Ore
ese
10.4.
Figure 4. Adjusting the date & time
000
Oa*
C lu p Ler tt
Menu FUrictions
1. Press Menu/Advanced Menu.
2. Insert a floppy disk into the floppy drive.
3. On the Advanced Menu Dialog, press
Upgrade Software and follow the
instructions on-screen to complete the
upgrade.
Note:
This process will exit you to the command
prompt, please wait until the process is
complete.
Create software install disk
2•'
00.1.
001.
Creates a software install disk, which can be used
for upgrading other systems or opening saved
alarms on a desktop computer.
1. Press Menu/Advanced Menu
Upgrade software
Upgrades the system software with the latest
version from a diskette inserted into floppy drive
on rear of instrument
SOO
1104.
0401.
oda
fosse
7.etaaarer"7"
2. On the Advanced menu dialog, press
Create Software Install Disk and
follow the instructions on-screen to
complete the process.
j 10
C l uipter 1
Meet I r ICA/0115
itemiser'
Administrator Student Guide
Show network name & II'
Figure 5. Opening alarm files folder
oukittaiXIcrl OW
I r- tar
Displays a dialog box with the Host Name and
system IP address.
Remote connect
Connect to a remote device through the IR port.
Open command prompt
I_
•
•
611400534
a 025130535
• 6L590536
• A0420537
A00120530
5111539
500540
1
;
22)6LIfl644
a 6LMJC1545
Opens a command prompt window for advanced
features, such as copying alarms over a network
to a server.
Open alarms folder
For copying and deleting alarm files.
/6.92 KA PIO
73 71 8 (CA Me
739:0 SCA ille
70 1513 (Cl Fa
7400 (CA 3112
73.90 SCA 3.1e
74 WE SCA File
73.340 SCA 3.8
735/0 1/4 /16
74.340 SCA Fa
75.11 (CA Fa
74 0 0 (CA nie
74.32 (CA Fa
76.340 (CA P:6
746/0 SC/ 1116
76 023 (CA File
6/2/06 1(4' 04 AM
512/135 11 5 6 34 AM
a BB (CA File
6/2/06 12707 a PM
622/06 12 09 CC PM
6/2626 12 I I 20 PM
6/2/06 12 12 04 PM
6/2/06 12 13 20 PM
6/2106 12 (532 PM
6/2/06 12 19 36 044
6/2706 12 22 26 PM
6/2/06 12 23 32 PM
6/2/06 12.21 24 PM
6/2/06 12 25 32 PM
5/2/06 12 26•20PM
0/29206 3 24 IC PM
6/28/06 3 25 32 OM
6/22/06 344 34 PM
73512 SCA File
6/20106 3 a 00 PM
11
: 12
Itemisert
Administrator Student Guide
Chapter 2 Contact
Information
and Notes
This chapter provides contact information
and a place to write notes:
Contact Information Notes 14
16
' 14
Chapter ?
Contact Information onci Notes
Itemiser'
Administrator Student Guide
Contact Information
GE Homeland Protection
205 Lowell Street
Wilmington, MA 01887 USA
TEL 800-433-5346
FAX: 866-249-9105
GE Homeland Protection
Granary House, Station Rd.
Great Shelford, Cambridge
C82 5LT United Kingdom
TEL: +4410) 1223 728888
FAX: +44(0) 1223 728889
GE Homeland Protection
Unit 4,9 Eden Park Drive
Sydney Australia
2113 North Raid NSW
AU
[email protected]
TEL: +61298157900
FAX: +61298897511
GE Homeland Protection
Washington DC
1299 Pennsylvania Avenue
Suite 100W
Washington, DC 20004 USA
TEL: 202-637-4000
FAX: 202-637-4232
i
GE Homeland Protection
Customer Service
GE Homeland Protection
Technical Service
USA
TEL: 866-517-5580
from 8:30 a.m. to 5:00 p.m
(ESTI
USA
TEL: 877-877-1008
24 hours a day)
UK
TEL: +441011223 728888
from 9:00 a.m. to 5:00 p.m
iGST)
ustralia
EL: +6129815 7900
rom 9:00 - 5:00 AEST
Service home/ondprotection us@ge corn
U.K.
TEL: +44101 1223 728888
from 9:00 a.m. to 5:00 p.m.,
GST
Service.hornelandprotection [email protected]
Australia
TEL) +61 2 9815 7900
from 9:00 - 5:00 AEST
[email protected]
1
Itemiser'
Ad mEn istrotor Student Guide
1
A
Administrator Menu Advanced Menu 2
6
aContact Information e
Conventions 13, 14
viii
re.
a
a C
a
Preface Maintenance Overview 2
Menu
4
ea
Adjust date & time 7
Calibrate Tonchscreen 7
trida
Create software install disk
9
1.01000
Open alanns Pude,. 10
Open command prompt .. 10
<4.110111
Show nenvork name ct IP...
#0000
10
aSubstances 2
8
Upgrade 84/ware (4041
-
Ara
Notes P
S
16
vii
Safety tenns and symbols.... ix
W
Warnings and Cautions xi
ttttttttl
ttttttttiuttt
i1
FedCure FOIA Litigation
2005-03326
Cover Sheet
This Section Contains:
B. Documents identifying the number of Visitors
turned away because of the scanning method
Location: fC- ccv,i)oocC)
Name and phone number of person conducting search:
or
B
Arn 7 _ C U_Ifl-
Updated: April 11, 2008
HISTORY OF POSITIVE ION TESTS
VISITOR'S
NAME
INMATE'S
NAME
INMATE'S
REG. NO
POSITIVE
DATE
RETURN
DATE
12-08-05
12-15-05
12-10-05
01-14-06
48 hours
30 days
01-05-06
01-07-06
48 hours
03-18-06
03-20-06
48 hours
05-18-07
05-20-07
48 hours
RESTRICTION
LENGTH
(b)(6)
Page 1
VISITOR'S
NAME
INMATE'S
NAME
INMATE'S
REG. NO
POSITIVE
DATE
RETURN
DATE
RESTRICTION
LENGTH
12-15-06
12-18-06
48 hours
05-26-07
05-28-07
48 hours
02-02-08
02-04-08
48 hours
03-21-08
03-23-08
48 hours
03-28-08
03-30-08
48 hours**
(b)(6)
Page 3
VISITOR'S
NAME
INMATE'S
NAME
INMATE'S
REG. NO
POSITIVE
DATE
,RETURN
DATE
RESTRICTION
LENGTH
02-16-07
02-18-07
48 hours
05-19-07
05-21-07
48 hours
01-28-08
01-30-08
48 hours
03-09-08
03-11-08
48 hours**
03-14-08
04-14-08
48 hours**
(b)(6)
Page 5
VISITOR'S
NAME
INMATE'S
NAME
(b)(6)
INMATE'S
REG. NO
POSITIVE
DATE
RETURN
DATE
01-02-06
01-04-06
48 hours
12-11-05
12-13-05
48 hours
06-16-06
06-18-06
48 hours
11-26-06
11-28-06
48 hours
07-21-07
07-23-07
48 hours
01-28-08
01-30-08
48 hours
03-14-08
03-16-08
48 hours
03-29-08
04-28-08
48 hours
04-05-08
04-07-08
48 hours**
RESTRICTION
LENGTH
Page 9
VISITOR'S
NAME
INMATE'S
NAME
(b)(6)
INMATE'S
REG. NO
POSITIVE
DATE
RETURN
DATE
03-09-06
03-11-06
48 hours
12-12-05
12-16-05
12-14-05
01-15-06
48 hours
30 days
03-05-06
03-07-06
48 hours
10-06-06
10-08-06
48 hours
01-28-08
01-30-08
48 hours
03-24-08
03-26-08
48 hours
03-29-08
04-28-08
30 days**
RESTRICTION
LENGTH
Page 11
VISITOR'S
NAME
INMATE'S
NAME
(b)(6)
INMATE'S
REG. NO
POSITIVE
DATE
RETURN
DATE
RESTRICTION
LENGTH
03-13-06
03-15-06
48 hours
02-03-08
02-05-08
48 hours**
02-03-08
02-05-08
48 hours**
02-03-08
02-05-08
48 hours**
Page 14
VISITOR'S
NAME
INMATE'S
NAME
INMATE'S
REG. NO
POSITIVE
DATE
RETURN
DATE
RESTRICTION
LENGTH
11-23-06
11-25-06
48 hours **
(b)(6)
Page 16
VISITOR'S
NAME
INMATE'S
NAME
INMATE'S
REG. NO
POSITIVE
DATE
RETURN
DATE
02-12-06
02-14-06
48 hours
01-06-06
01-13-06
01-08-06
02-12-06
48 hours
30 days
12-11-05
12-13-05
48 hours
11-12-06
11-14-06
48 hours
12-01-06
12-03-06
48 hours
07-13-07
07-15-07
48 hours
03-16-08
03-18-08
48 hours
03-22-08
03-24-08
48 hours**
RESTRICTION
LENGTH
(b)(6)
Page 17
VISITOR'S
NAME
INMATE'S
NAME
INMATE'S
REG. NO
POSITIVE
DATE
RETURN
DATE
03-29-08
03-31-08
48 hours**
03-29-08
03-31-08
48 hours**
RESTRICTION
LENGTH
(b)(6)
Page 20
VISITOR'S
NAME
INMATE'S
NAME
(b)(6)
INMATE'S
REG. NO
POSITIVE
DATE
RETURN
DATE
RESTRICTION
LENGTH
12-12-05
02-19-06
12-14-05
02-21-06
48 hours
48 hours
Page 21
VISITOR'S
NAME
INMATE'S
NAME
(b)(6)
INMATE'S
REG. NO
POSITIVE
DATE
RETURN
DATE
07-22-07
07-24-07
RESTRICTION
LENGTH
48 hours**
_
Page 22
VISITOR'S
NAME
INMATE'S INMATE'S POSITIVE
NAME
REG. NO
DATE
RETURN
DATE
RESTRICTION
LENGTH
09-11-06
48 hours
10-01-06
10-03-06
48 hours
07-21-07
07-23-07
48 hours**
(b)(6)
09-09-06
Page 24
VISITOR'S
NAME
INMATE'S
NAME
(b)(6)
INMATE'S
REG. NO
POSITIVE
DATE
RETURN
DATE
RESTRICTION
LENGTH
01-25-06
01-27-06
48 hours
03-08-08
03-10-08
48 hours
04-07-08
04-09-08
48 hours**
Page 27
VISITOR'S
NAME
INMATE'S
NAME
(b)(6)
INMATE'S
REG. NO
POSITIVE
DATE
RETURN
DATE
05-11-07
05-13-07
RESTRICTION
LENGTH
48 hours**
Page 28
VISITOR'S
NAME
INMATE'S
NAME
(b)(6)
INMATE'S
REG. NO
POSITIVE
DATE
RETURN
DATE
07-04-06
07-06-06
48 hours
07-14-07
07-16-06
48 hours **
RESTRICTION
LENGTH
Page 30
VISITOR'S
NAME
INMATE'S
NAME
INMATE'S
REG. NO
POSITIVE
DATE
RETURN
DATE
RESTRICTION
LENGTH
01-02-06
01-04-06
48 hours
06-18-06
06-20-06
48 hours
(b)(6)
Page 31
VISITOR'S
NAME
INMATE'S
NAME
(b)(6)
INMATE'S
REG. NO
POSITIVE
DATE
RETURN
DATE
03-31-08
04-02-08
RESTRICTION
LENGTH
48 hours"
Page 33
FedCure FOIA Litigation
2005-03326
Cover Sheet
This Section Contains:
B. Documents identifying the number of Visitors
turned away because of the scanning method
Location: tcL
^,i(e).1)roocC)
Name and phone number of person conducting search:
&>(-\"u-‘
c#Ute
ION Spectrometry Device
Daily Testing Log
January
ION SPECTROMETRY DEVICE DAILY TESTING LOG CIHRm
FEDERAL BUREAU OF PRISONS
U.S. DEPARTMENT OF JUSTICE
BP-5730.051
FED 05
Random No. (s)
Date
Serial No.
Ih2V0
Operator Name/Signature
(b)(7)c
NOTE: Positive Alarms Mus
LARM LOG"
Result
Time
5-35
Initials
1-
60 0y
(o rtcp
(b)(6)
±
-I—
&Z ip
(This form may be replicated via WP)
Sensitive - Limited Official Use only when completed
(b)(7)c
GE ltemisert
(
1
GE Seruritg Weekly Maintenance Checklist
To be performed at END of last shift.
Be sure system is powered off and allowed to cool for 10 minutes before starting maintenance.
It is recommended to perform maintenance tasks in the order listed.
Completed
Procedure
Check/Clean fan air filter
"Z.
Check Dopont level 11/8- 13 mm] minimum fluidl
Remove Desorber. Locking Ring. and Nozzle
vs*"....--7
Remove stainless filter
Blow out Sample Air Line
i/Reinstall/Replace stainless filter
..---'"Clean/inspect Membrane
Clean/Reinstall Nozzle and Locking Ring
Turn Unit ON. Allow system (temperature) to stabilize.
Verify approx. 200 cc Sample flow on rear flow meter
.-/Verify approx. 200 cc Detector flow on rear flow meter
L.--".Verify Nozzle flow (approximately 0.2 -0.4 SCF1-11
r...."-.
Clean ond reinstall desorber
in
Check Printer Paper supply
Check Sample Trap supply
t.7.
Check Calibration Trap supply
1-7
Clean Workspace
Clean Touchscreen
fri"
initials:
Date:
1 _ LI - CM'
(b)(7)c
GE Security, 205 Lowell Street, Wilmington, MA 01887 TEL: 978-658-3767 FAX: 978-657-5954
Granery House Station Rd Great She(ford, Cambridge CB2 5LT UK TEL: +4410) 1223 72888 FAX . 44 101 1223 72889
GE Itemiser
("F9
GE Security Weekly Maintenance Checklist
To be performed at END of last shift.
Be sure system is powered off and allowed to cool for 10 minutes before starting maintenance.
It is recommended to perform maintenance tasks in the order listed.
Completed j
Procedure
Check/Clean fan air filter
Check Dopant level (1/8" 13 mm] minimum fluid)
Remove Desorber, Locking Ring. and Nozzle
P7/
Remove stainless filter
Blow out Sample Air Line
ZReinstall/Replace stainless filter
Clean/Inspect Membrane
Ciecm/Reinstoll Nozzle and Locking Ring
4/'
Turn Unit ON. Allow system (temperature) to stabilize.
."7".
Verify approx. 200 cc Sample flow on rear flow meter
Verify approx. 200 cc Detector flow on rear flow meter
/-7,,-Verify Nozzle flow (approximately 0.2 - OA SCFH)
IV
Clean and reinstall desorber
/7Check Printer Paper supply
i,
Check Sample Trap supply
t.
VCheck Calibration Trop supply
Clean Workspace
WV-Clean Touchscreen
/Initials:
Date:
0 6
//
I - Ii -
(b)(7)c
GE Security, 205 Lowell Street, Wilmington, MA 01887 TEL 978-658-3767 FAX: 978-657-5954
Granery House Station Rd Great Shelford, Cambridge CB2 5LT U8 TEL +44 (011223 72888 FM: +44 (011223 72889
----,,,
(CM.9
GE Itemiser
GE Securitg Weekly Maintenance Checklist
•
To be performed at END of last shift.
Be sure system is powered off and allowed to cool for 10 minutes before starting maintenance.
It is recommended to perform maintenance tasks in the order listed.
Completed
Procedure
Check/Clean tan air filter
v".7
Check Dopont leve111/8"13 aim) minimum fluid)
1/17Remove Desorber, Locking Ring, and Nozzle
Remove stainless filter
17;
Blow out Sample Air line
V'
Reinstall/Replace stainless filter
Clean/Inspect Membrane
<,.....Clean/Reinstall Nozzle and Locking Ring
Turn Unit ON. Allow system (temperature) to stabilize.
Verify approx. 200 cc Sample flow on rear flow meter
<.....
Verify approx. 200 cc Detector flow on rear flow meter
//car
Verify Nozzle flow (approximately 0.2 - 04 SUM
...7Clean and reinstall desorber
Check Printer Paper supply
Check Sample Trap supply
Check Calibration Trap supply Clean
Workspace
_V
Clean Touchscreen
z.-7
Initials
Dote:
O nFC
l - 1
(b)(7)c
GE Security. 205 Lowell Street, Wilmington, MA 01887 TEL: 978-658-3767 FAX: 978-657-5954
Granery House Station Rd Great Shefford, Cambridge CB2 5LT UK TEL- +44 COI 1223 72888 FAX: +44(0)1223 72889
•
GE Itemiser
(16
GE Securitg Weekly Maintenance Checklist
To be performed at END of last shift.
Be sure system is powered off and allowed to cool for 10 minutes before starting maintenance.
It is recommended to perform maintenance tasks in the order listed.
Completed
Procedure
Check/Clean fan air filter
V
Check Dopant level 11/8"13 mml minimum fluid]
Remove Desorber, Locking Ring, and Nozzle
Remove stainless filter
..-Blow out Sample Air Line
AV
Reinstall/Replace stainless filter
1 -Clean/Inspect Membrane
Clean/Reinstall Nozzle and Locking Ring
e-.
Turn
Unit ON. Allow system (temperature) to stabilize.
/-.
Verify approx. 200 cc Sample flow on rear flow meter
Verify approx. 200 cc Detector flow on rear flow meter
Verify Nozzle flow (approximately 02- 0.4 SCFHI
Clean
and reinstall desorber
rCheck Printer Paper supply
Check Sample Trap supply
4-Check Calibration Trap supply
Clean Workspace
Clean Touchscreen
Initia
Date:
_ i
(b)(7)c
i---
GE Security, 205 Lowell Street, Wilmington, MA 01887 TEL: 978-658-3767 FAX . 978-657-5954
Granery House Station Rd Great SheHord, Cambridge C62 5LT UK TEL: +441011223 72888 FAX: +44(0)1223 72889
GE Itemiser
2
GE SeCUritij Monthly Maintenance Checklist
- To be performed at END of last shift.
Be sure system is powered off and allowed to cool for 10 minutes before starting maintenance.
It is recommended to perform maintenance tasks in the order listed.
Procedure
Check/Clean fan air filter
Check Dupont level 11/8"13 mm] minimum fluid)
Remove Desorber. Locking Ring, and Nozzle
Completed
Remove stainless filter
V-1.7.
vv.-7
1,
..---l/
Blow out Sample Air Line
Reinstall/Replace stainless filter
Replace Membrane
Clean/Reinstall Nozzle and Locking Ring
Turn Unit ON. Allow system (temperature) to stabilize.
Verify approx 200 cc Sample flow on rear flow meter
Verify approx. 200 cc Detector flow on rear flow meter
Verify Nozzle flow (approximately 0.2 - 0.4 SCH-11
Clean and reinstall Desorber
Check Printer Paper supply
Check Sample Trap supply
Check Calibration Trap supply
Clean Workspace
Clean Touchscreen
Date.
I -
1 —
0
Initials'
(b)(7)c
GE Security, 205 Lowell Street, Wilmington, MA 01887 TEL: 978-658-3767 FAX: 978-657-5954
Granery House Station Rd Great She'ford. Cambridge CB2 5LT UK TEL: +4410) 1223 72888 FAX: +44 (0)1223 72889
ION Spectrometry Device
Daily Testing Log
February
ION SPECTROMETRY DEVICE DAILY TESTING LOG CDPEM
U.S. DEPARTMENT OF JUSTICE
FEDERAL BUREAU OF PRISONS
BP-5730.051
FEB 05
Date
Serial No.
Random No. (s)
2W
Operator Name/Signature
(b)(7)c
NOTE: Positive Alarms Mus
Time
Visitor Name
KInmate Name
Reg. No.
Result
Initials
A/7
Syn
(b)(6)
e.;27)
(This form may be replicated via WP)
Sensitive - Limited Official Use only when completed
47
(b)(7)c
ION SPECTROMETRY DEVICE DAILY TESTING LOG CDFRM
U.S. DEPARTMENT OF JUSTICE
FEDERAL BUREAU OF PRISONS
BP-S730.051
FEB 05
Serial No.
"1 Louk
Random No. (s)
Date
Oc
Operator Name/Signatur
(b)(7)c
NOTE: Positive Alarms M
Time
Visitor Name
G"
Inmate Name
al
1 1A \
Reg. No.
Result
Initials
kea
)2-5g
I
(b)(6)
fg
si...
MegIF
M
E=
4
(This form may be replicated via WP)
Sensitive - Limited Official Use only when completed
an
ION SPECTROMETRY DEVICE DAILY TESTING LOG CDFRM
FEDERAL BUREAU OF PRISONS
U.S. DEPARTMENT OF JUSTICE
BP-S730.051
FEB 05
/Seri
al No. a269 (-1-7
Random No. (s)
67
Date
Operator Name/Signature
NOTE: Posit
y
(b)(7)c
M LOG"
e Alarms Must
Reg. No.
Time
g'046
Result
Initials
(b)(6)
(b)(7)c
litc
(This form may be replicated via WP)
Sensitive - Limited Official Use only when completed
ION SPECTROMETRY DEVICE DAILY TESTING LOG CDFRM
FEDERAL BUREAU OF PRISONS
U.S. DEPARTMENT OF JUSTICE
BP-S730.051
FEB 05
Serial No.
oldcoir
Random No. (s)
Date
Operator Name/Signature
(b)(7)c
NOTE: Positive Alarms Mus
Time
Inmate Name
Visitor Name
Reg. No.
Result
—
5-20
OM
(b)(6)
—
(to/I)
—
fiX)
—
(This form may be replicated via
WP)
Sensitive - Limited Official Use only when completed
(b)(7)c
ION SPECTROMETRY DEVICE DAILY TESTING LOG CDERM
FEDERAL BUREAU OF PRISONS
U.S. DEPARTMENT OF JUSTICE
BP-S730.051
FEB 05
Random No. (a) 8,
Date
I Serial No
c2o7Coq-)
Operator Name/Signature
(b)(7)c
LARM LOG"
NOTE: Positive Alarms M
Time
Visitor Name
Inmate Name
Reg. No.
5997
(b)(6)
(0,0-‘p
Result
-
—
'
as/ t"
This form may be replicated via WP)
Sensitive - Limited Official Use only when completed
(b)(7)c
BP-0730.051
FEB 05
ION SPECTROMETRY DEVICE DAILY TESTING LOG
FEDERAL BUREAU OF PRISONS
U.S. DEPARTMENT OF JUSTICE Random No. Cs)
Date
-erial No. e
CDFRM
0 02 (047
Operator Name/Signature
-
•Pnstive Plarms
Time
(b)(7)c
Must ALSOBe Lb
ed On POSITIVE ALARM LOG"
Inmate Name
Visitor Name
Reg. No.
Result
Initials
Ott)r
104
—
1207
—
(b)(6)
i vil l
—
t
tic
11 07
-1—
03p
±
Ig o
(This form may be replicated via
WP)
Sensitive - Limited Official Use only when completed
(b)(7)c
ION SPECTROMETRY DEVICE DAILY TESTING LOG COMM
U.S. DEPARTMENT OF JUSTICE
FEDERAL BUREAU OF PRISONS
BP-5730.051
FEB 05
(Serial No.
;a
Random No. (s)
Date
'-n
Operator Name/Signature
(b)(7)c
NOTE: Positive Alarms Mus
Time
Visitor Name
Co
c)/
u0
E ALARM LOG"
Inmate Name
Reg.
No.
Result
Initials
•—
I/IS4
Zoci --,
(b)(6)
+-
—
ra'
iit
(This form may be replicated via WP)
Sensitive - Limited Official Use only when completed
(b)(7)c
ION SPECTROMETRY DEVICE DAILY TESTING LOG CDMM
FEDERAL BUREAU OF PRISONS
U.S. DEPARNMENT OF JUSTICE
BP-S730,051
FEB 05
I
Serial No. ad
Random No. (s)
Date
6)
Operator Name/Signature
IC
(b)(7)c
NOTE: Positive Alarms Must
M LOG"
Result
Time
-
4 ?7
(b)(6)
tox?
-
(b)(7)c
.
-711 9
This form may be replicated via WP)
Sensitive - Limited Official Use only when completed
Initials
GE Itemiser.
7----'"
GE
ecunty Weekly Maintenance Checklist
'-' To be performed at END of last Shift.
Be sure system is powered off and allowed to cool for 10 minutes before starting maintenance.
It is recommended to perform ma • ntenance tasks in the order listed.
Completed
Procedure
Check/Clean fan air filter
..-"-‘77
Check Dopant level (1/8"(3 mml minimum fluid)
Remove Desorber, Locking Ring, and Nozzle
Remove stainless filter
Blow out Sample Air Line
Reinstall/Replace stainless filter
Clean/Inspect Membrane
Clean/Reinstall Nozzle and Locking Ring
Turn Unit ON. Allow system (temperature) to stabilize.
Verify approx. 200 cc Sample flow on rear flow meter
V"
Verify approx. 200 cc Detector flow on rear flow meter
Verify Nozzle flow lapproximately 0.2 - 0.4 SCFHI
Clean and reinstall desorber
Check Printer Paper supply
Check Sample Trap supply
I/
Check Calibration Trap supply
Clean Workspace
Clean Touchscreen
Date:
/1) ., k .- 3 -
Initials:
(b)(7)c
GE Security, 205 Lowell Street, Wilmington, MA 01887 TEL: 978-658-3767 FAX: 978-657-5954
Granery House Station Rd Great Shefford, Cambridge C82 5LT UK TEL: -F44(0) 1223 72888 FAX: +4410) 1223 72889
GE itemiser
it6
E Securitg Weekly Maintenance Checklist
To be performed at END of last shift.
Be sure system is powered off and allowed to cool for 10 minutes before starting maintenance.
It is recommended to perform ma i ntenance tasks in the order listed.
Completed
Procedure
Check/Cleon fan air filter
Check
Dopont level ll./ 8"13 mm) minimum fluid!
I/
Remove Desorber, Locking Ring, and Nozzle
v"
Remove stainless filter
ly/
y,
Slow out Sample Air Line
vt
Reinstall/Replace stainless filter
,//'
Clean/Inspect Membrane
P:,/
Clean/Reinstall Nozzle and Locking Ring
VTurn Unit ON. Allow system (temperature! to stabilize.
Verify opprox. 200 cc Sample flow on rear flow meter
•
Verify approx. 200 cc Detector flow on rear flow meter
p-7.---Verify Nozzle flow (approximately 0.2 - 0.4 SCH-11
Clean and reinstall aesorber
Check Printer Paper supply
t.
A/..Check Sample Trap supply
•
Check Calibration Trap supply
s7Clean Workspace
p/V
Clean Touchscreen
V
1 _ ( ,s _ og,
Initials:
Date:
(b)(7)c
GE Security, 205 Lowell Street, Wilmington, MA 01887 TEL 978-658-3767 FAX: 978-657-5954
Granery House station Rd Great Shelford, Cambridge CB2 5LT UK TEL: +44(0) 1223 72888 FAX: +44(0)1223 72889
GE Itemiser
•
-I r
SeCliritg Weekly Maintenance Checklist
To be performed at END of last shift.
Be sure system is powered off and allowed to cool for 10 minutes before starting maintenance.
It is recommended to perform maintenance tasks in the order listed.
Procedure
Completed
v't
Check/Clean fan air filter
Check Dopont level 11/8"13 rnm) minimum fluid)
7
Remove Desorber. Locking Ring, and Nozzle
Remove stainless filter
./7
Blow out Sample Air Line
Reinstall/ Replace stainless filter
.7
.--'
Clean/Inspect Membrane
Clean/Reinstall Nozzle and Locking Ring
7Turn Unit ON. Allow system (temperature) to stabilize.
Verify approx. 200 cc Sample flow on rear flow meter
Verify approx. 200 cc Detector flow on rear flow meter
Verify Nozzle flow lappro>cimately 0.2- 0.4 SCFH)
Clean and reinstall desorber
/7Check Printer Paper supply
s
.
Check Sample Trap supply
Check Calibration Trap supply
Clean Workspace
Clean Touchscreen
.-7Initials:
Date.
.°) — -2:-L — 0 .
_
(b)(7)c
GE Security, 205 Lowell Street. Wilmington, MA 01887 TEL: 978-658-3767 FAX: 978-657-5954
Granery House Station Rd Great She(ford, Cambridge CB2 5LT UK TEL: +44 (0) 1223 72888 FAX: +44(011223 72859
GE Itemiser,
GE SE—Linty Monthly Maintenance Checklist
To be performed at END of last shift.
Be sure system is powered off and allowed to cool for 10 minutes before starting maintenance.
It is recommended to perform maintenance tasks in the order listed.
Completed
Procedure
Check/Clean fan air filter
Check Dopant level (1/8"13 mml minimum fluid/
Remove Desorber, Locking Ring, and Nozzle
Remove stainless filter
Blow out Sample Air Line
Reinstall/Replace stainless liter
Replace Membrane
Clean/Reinstall Nozzle and Locking Ring
Turn Unit ON. Allow system Itemperature) to stabilize.
Verify approx. 200 cc Sample flow on rear flow meter
Verify approx. 200 cc Detector flow on rear flow meter
Verify Nozzle flow iapproximately 0.2 - 0.4 SCF1-11
Clean and reinstall Desorber
Check Printer Paper supply
o-V<7
V . .,
Check Sample Trap supply
Check Calibration Trap supply
Clean Workspace
Clean Touchscreen
Date-
1.1 "
Qq-- oe
initials:
(b)(7)c
GE Security. 205 Lowell Street. Wilmington, MA 01887 TEL: 978-658-3767 FAX: 978-657-5954
Granery House Station Rd Great SheIford, Cambridge C82 5LT UK TEL: ±441011223 72858 FAX: +441011223
72889
ION Spectrometry Device
Daily Testing Log
March
BP-5730.051
FEB 05
ION SPECTROMETRY DEVICE DAILY TESTING LOG
FEDERAL BUREAU OF PRISONS
U. S. DEPARTMENT OF JUSTICE
Random No. s)
Date
Serial No.
CDFRM
3Rci Le 9
22(047
th
Operator Name/Signature
(b)(7)c
.
Positive Alarms Mus
Time
• Visitor Name
NOTE
M LOG"
Inmate Name
Reg. No.
Result
Ini tials
?os
A)Ec---
610?
AA)
(posp
NE&
74
(b)(6)
Ala&
1042
as
k
A/E.L>
,
(This form may be replicated via WP)
Sensitive - Limited Official Use only when completed
(b)(7)c
ION SPECTROMETRY DEVICE DAILY TESTING LOG CDFRM
FEDERAL BUREAU OF PRISONS
U.S. DEPARTMENT OF JUSTICE
BP-5730.051
FEB 05
Random No. (s)
Date
Serial No.
.22es,
Operator Name/Signature
(b)(7)c
NOTE: Positive Alarms Must ALSO Be Logged On 'POSITIVE ALARM LOG"
. Visitor Name
Time
Inmate Name
Reg. No.
Result
iv
e&
ite 6-
A
rs
-e-G-
:
n -e_G
/2 e6.
/2 er—
(b)(6)
n eG
n
--.
r-
r
eu-
46
//
1 i)
11-(
n
p
fy
el,
neof
(This form may be replicated via WP)
Sensitive - Limited Official Use only when completed
(b)(7)c
ION SPECTROMETRY DEVICE DAILY TESTING LOG CDFRM
FEDERAL BUREAU OF PRISONS
U.S. DEPARTMENT OF JUSTICE BR-S730.051
FEB 05
CP;
(
ever1-7 pe(So0
cl
Operator Name/Signature
.
Positive Alarms Mus
Time
- Visitor Name
NOTE
Random No.i..z1
Date
Serial No. „„_
(b)(7)c
ALARM LOG"
Inmate Name
Reg. No.
Result
otise
--
1q1
ctI rft
-I-
11/0
(b)(6)
4-—
IZi e>.-1
Initials
.)-.-4-
Z5 0
1 3or
(This form may be replicated via WP)
Sensitive - Limited Official Use only when completed
(b)(7)c
BB-S'i30.051
FEB 05
ION SPECTROMETRY DEVICE DAILY TESTING LOG
FEDERAL BUREAU OF PRISONS
U.S. DEPARTMENT OF JUSTICE
Serial No.
7,260 g 7
CDFRII
Random No. (s)
Date
6
Operator Name/Signatur
(b)(7)c
I
NOTE: Positive Alarms Must ALSO Be Lo ed On "POSITIVE ALARM LOG"
r
Reg. No.
- Visitor Name
Inmate Name
Time
Result
5707
IM
rffil
EIN
FA
ggi
!MA
PM
MI
.
---,
46,.
+-
(b)(6)
- ,
___
__,
--
'
(This form may be replicated via WP)
Sensitive - Limited Official Use only when completed
(b)(7)c
ION SPECTROMETRY DEVICE DAILY TESTING LOG CDFRM
FEDERAL BUREAU OF PRISONS
U.S. DEPARTMENT OF JUSTICE
BP-5730.05l
FEB 05
I
Serial No. •
Random No. (s)
Date,
--t4
2-1.62117
Operator Name/Signature
NOTE
Time
I
(b)(7)c
Positive Alarms Mu
, Visitor Name
RM L1W"
Inmate Name
\
Reg.\o.
Result
Initials
4/ -
5-3 e,-e
,-
16
(b)(6)
122
o
(This form may be replicated via WP)
Sensitive - Limited Official Use only when completed
(b)(7)c
ION SPECTROMETRY DEVICE DAILY TESTING LOG C0FRM
FEDERAL BUREAU OF PRISONS
U.S. DEPARTMENT OF JUSTICE BP-S730.051
FEB 05
I
Serial
No.
Random No. (s)
Date
17
31(2 (3/O F
00
Operator Name
(b)(7)c
NOTE: Positive
Time
- Visitor Name
Inmate Name
Reg. No.
Result
4%
tO
—,
c9
q
--
1/6,
III
n
in
171
-
(b)(6)
i
---
7-3k
iv
IllgE
ifi
Bl
i
•
(This form may be replicated via WP)
Sensitive - Limited Official Use only
when completed
(b)(7)c
ION SPECTROMETRY DEVICE DAILY TESTING LOG CDFRM
FEDERAL BUREAU OF PRISONS
U.S. DEPARTMENT OF JUSTICE BP-5730.051
FEB 05
I
Random No. (s)
Date
Serial No.
C2C960
s-
1r7
Operator Name/Signatur
(b)(7)c
Positive Alarms Must ALSO Be Logged On "POSITIVE ALARM LOG"
NOTE:
Reg. No.
Inmate Name
• Visitor Name
Time
Result
go'
—
,--
b
f5
00
Initials
—
TO5:4
1
(b)(7)c
(b)(6)
two
—
°
4-
in
izro
-et ----
t Z50
I 9?
__
zoo
---
1.1.111
1.11.1.
(b)(7)c
ill
nIlimmillim
Illftn-
(This form may be replicated via WP)
Sensitive - Limited Official Use only when completed
BP-5730.051
FEB 05
ION SPECTROMETRY DEVICE DAILY TESTING LOG
FEDERAL BUREAU OF PRISONS
U.S. DEPARTMENT OF JUSTICE I
Random No. (s)
Date
Serial
Operator Name/Signatur
Time
6
y0
Nogf
i2 CQ Li-7
NOTE:
CDFRM
(b)(7)c
Positive Alarms Must ALSO Be Logged On "POSITIVE ALARM LOG"
Visitor
,
Name
Inmate Name
Reg. No.
Result
CiC
ft 7
3-49
Initials
-.
—
s ir
(b)(6)
e
—
_.-
Win
ylt
4—
(This form may be replicated via WP)
Sensitive - Limited Official Use only when completed
(b)(7)c
RP-5730.051
FEB 05
ION SPECTROMETRY DEVICE DAILY TESTING LOG
FEDERAL BUREAU OF PRISONS
U.S. DEPARTMENT OF JUSTICE
Serial No.
Random No.
Date
Operator Name/Signature
CDFRM
(b)(7)c
NOTE: Positive Alarms Mu
(5)
1
M LOG"
Time
Result
Va
Initials
—
UK*
ii53/.0,II15)
00/9
(b)(6)
.
(b)(7)c
-1-
(This form may be replicated via WP)
Sensitive - Limited Official Use only when completed
BP-5730.051 ION SPECTROMETRY DEVICE DAILY TESTING LOG CDFRM
FEB 05
FEDERAL BUREAU OF PRISONS
U.S. DEPARTMENT OF IUSTICE
Random No. (s)
Date
Serial No.
07 0 1
7
Operator Name/Signature
(b)(7)c
NOTE: Positive Alarms Mus
Time
- Visitor Name
G"
Inmate Name
Reg. No.
Result
Initials
—
90 OA1 11134
(b)(6)
_II ft
by
(This form may be replicated via wP)
Sensitive - Limited Official Use only when completed
--------
(b)(7)c
BP-S730.051
FEB 05
ION SPECTROMETRY DEVICE DAILY TESTING LOG
FEDERAL BUREAU OF PRISONS
U.S. DEPARTMENT OF JUSTICE
Serial No.
MA-1
Operator Name/Signature
Random No(s)
Date
(b)(7)c
NOTE: Positive Alarms Must
Time
- Visitor Name
CDFM
LARM LOG"
Inmate Name
Reg. No.
STI 517
5-30?
Result
Initials
—
1.-—
s5s72
(b)(6)
&g217
(b)(7)c
°
7ar?
—
1 01_7
-4-
(This form may be replicated via WF)
Sensitive - Limited Official Use only when completed
BP-5730.051
FEB 05
ION SPECTROMETRY DEVICE DAILY TESTING LOG
CDFRM
FEDERAL BUREAU OF PRISONS
U.S. DEPARTMENT OF JUSTICE
RandrbNo.(s)
Serial No.
(CILI(7
Operator Name/Sig
NOTE
Time
(b)(7)c
"
Positive Ala
5+5
4 on
(b)(6)
Result
lite irt
ve
(This form may be replicated via WP)
Sensitive - Limited Official Use only when completed
(b)(7)c
BP-5730.051
ION SPECTROMETRY DEVICE DAILY TESTING LOG
FEB 05
FEDERAL BUREAU OF PRISONS
U.S. DEPARTMENT OF JUSTICE
/u6/2::;__
Dates/
Serial
CDF1111
Random No. (;
"°0207(aq-7
Operator Name/Signature
(b)(7)c
'JUTE: Positive Alarms Mu
M LOG"
Inmate Name
Time
Reg. No.
Result
Initials
---
59A
WA
IzZer
(b)(7)c
(b)(6)
acp
"(301
t
—
—
•
(Thi
s
form may be replicated via WP)
Sensitive - Limited Official Use only when completed
BP-5730.051
FEB 05
ION SPECTROMETRY DEVICE DAILY TESTING LOG
FEDERAL BUREAU OF PRISONS
U.S. DEPARTMENT OF JUSTICE Random No. (s)
Date
Serial No.
CDFRM
rza cog-7
Operator Name/Signature
NOTE:
j
et-
/0 44U it-
(b)(7)c
Positive Alarms Mu
LOG"
Result
Time
Initials
—
9A(b)(6)
1100 F
Tfr
—
1?5-9
-
(This form may be replicated via WP)
Sensitive - Limited Official Use only when completed
(b)(7)c
BP-5730.051
FEB 05
ION SPECTROMETRY DEVICE DAILY TESTING LOG
FEDERAL BUREAU OF PRISONS
U.S. DEPARTMENT OF JUSTICE
Serial
NO
Random No. (s)
Date
(270Weill
Operator Name/Signature
(b)(7)c
NOTE Positive Alarms Mus
Time
=RN
- Visitor Name
ALARM LOG"
Inmate Name
Reg. No.
Result
Initials
—
55p
C0
--
(b)(6)
C3519
CI 5-1
(This form may be replicated via WP)
Sensitive - Limited Official Use only when completed
—
(b)(7)c
GE tenser
;1 GE Security
„.,..,/
Weekly Maintenance Checklist
To be performed at END of last shift.
Be sure system is powered off and allowed to cool for 10 minutes before starting maintenance.
It is recommended to perform maintenance tasks in the order listed.
Procedure
Completed
Check/Clean fan air filter
4/7
Check Dopont level 11/8"13 mmlminimum fluid'
Remove Desorber. Locking Ring. and Nozzle
P7
Remove stainless filter
Blow out Sample Air Line
L/7
Reinstall/Replace stainless filter
IV
Clean/inspect Membrane
1-,
Clean/Reinstall Nozzle and Locking Ring
1<,
Turn Unit ON. Allow system (temperature) to stabilize.
verify
approx. 200 cc Sample flow on rear flow meter
kv.---verify approx. 200 cc Detector flow on rear flow meter
17
Verify Nozzle flow (approximately 0.2 - OA SCFI-11
Clean and reinstall desorber
v".
Check Printer Paper supply
V
Check Sample Trap supply
i z
Check Calibration Trap supply
Clean
Workspace
et
Clean Touchscreen
i7Date:
Initials:
1 — 7 —04Y
(b)(7)c
GE Security. 205 Lowell Street, Wilmington, MA 01887 TEL: 978-658-3767 FAX: 978-657-5954
Granery House Station Rd Great She!lard, Cambridge C82 5LT UK TEL: +4410)1223 72888 FAX: +414101 1223 72889
GE Itemisers
GE Securitg Weekly Maintenance Checklist
To be performed at END of last shift.
Be sure system is powered off and allowed to cool for 10 minutes before starting maintenance.
it is recommended to perform maintenance tasks in the order listed.
Completed
Procedure
1,17;
V
ise
7
7..V
see
V
1-
Check/Clean fan air filter
Check Dopont level 11/8"13 rnm1 minimum fluid)
Remove Desorber, Locking Ring. and Nozzle
Remove stainless filter
Blow out Sample Air Line
Reinstall/Replace stainless filter
Clean/inspect Membrane
Clean/Reinstall Nozzle and Locking Ring
Turn Unit ON. Allow system Itemperature) to stabilize.
Verify approx. 200 cc Sample flow on rear flow meter
Verify approx. 200 cc Detector flow an rear flow meter
Verify Nozzle flow lapproximately 02 - 0.4 SCF1 -11
Clean and reinstall desorber
Check Printer Paper supply
Check Sample Trap supply
Check Calibration Trap supply
V:.,..
Clean Workspace
Clean Touchscreen
Dote:
3 -I L(
- 07
Initials:
(b)(7)c
GE Security, 205 Lowell Street, Wilmington, MA 01887 TEL: 978-658-3767 FAX: 978-657-5954
Granery House Station Rd Great Sheiford, Cambridge CB2 5LT UK TEL: +44 (0) 1223 72588 FAX: +44 (011223 72889
GE Itemiser
GE Security Weekly Maintenance Checklist
To be performed at END of last shift.
Be sure system is powered off and allowed to cool for 10 minutes before starting maintenance.
It is recommended to perform mantenance tasks in the order listed.
Procedure
Completed
Check/Clean fan air filter
Vi.
Check Dopant level (1013 mml minimum fluid)
V
Remove Desorber, Locking Ring, and Nozzle
Remove stainless filter
V.."Blow out Sample Air Line
I./
Reinstall/Replace stainless filter
kV
Clean/Inspect Membrane
Clean/Reinstall Nozzle and Locking Ring
Turn Unit ON. Allow system (temperature) to stabilize.
V
Verify approx. 200 cc Sample flow on rear flow meter
17Verify approx. 200 cc Detector flow on rear flow meter
47.
Verify Nozzle flow (approximately 0.2 - 0,4 SCFHI
t Clean and reinstall de.sorber
f.,"/
Check Printer Paper supply
re"Check Sample Trap supply
I/
Check Calibration Trap supply
t•
Clean
Workspace
1/7
Clean Touchscreen
.-41 _ 0 &--
Date:
initials:
s
(b)(7)c
GE Security, 205 Lowell Street, Wilmington, MA 01887 TEL: 978-658-3767 FAX: 976-657-5954
Granery House Station Rd Great Shelford, Cambridge C82 5LT UK TEL: +4410) 1223 72888 FAX: +44(0)1223 72889 •
GE Itemiser,
)
GE 3ecuritg Monthly Maintenance Checklist
To be performed at END of last shift.
........--
Be sure system is powered off and allowed to cool for 10 minutes before starting maintenance.
It is recommended to perform rncintenance tasks in the order listed.
Completed
Procedure
//
./r
V
Check/Clean fan air filter
Check Dopant level 1/8" 13 mm] minimum fluid)
Remove Desorber, Locking Ring, and Nozzle
Remove stainless filter
Blow out Sample Air Line
Reinstall/Replace stainless filter
Replace Membrane
Clean/Reinstall Nozzle and Locking Ring
Turn Unit ON. Allow system !temperature) to stabilize.
v77
/7v
/V-
Verify approx. 200 cc Sample flow on rear flow meter
Verify approx. 200 cc Detector flow on rear flow meter
Verify Nozzle flow (approximately 0.2 - 0.4 SCFN)
Clean and reinstall Desorber
Check Printer Paper supply
Check Sample Trap supply
Check Calibration Trap supply
Clean Workspace
Clean Touchscreen
Date:
3 - j if 'OS'
Initials.
(b)(7)c
GE Security, 205 Lowell Street, Wilmington, MA 01887 TEL: 978 - 658 - 3767 FAX: 978 - 657 - 5954
Granery House Station Rd Great Shelford, Cambridge CB2 5LT UK TEL +44 (0) 1223 72888 FAX: +441011223 72889
(10/28/2008
(b)(7)c
From:
To:
Date:
Subject:
Re: itemizer
(b)(7)c
7/22/2008 9:35 AM
Re: itemizer
GE Security, shipped the Itemizer on March 31, 2008. It was received at FCI Englewood on April 1, 2008.
(b)(7)c
>» J
7/17/2008 7:27 AM >»
Can you tell me again what date we recieved this equipment back from repair?
Page 11
ION Spectrometry Device
Daily Testing Log
April •
ottspctiticu, irre% tin/1210n, agency topics
_
Page 1 of 1
Display Navigation
IPPA Division, Agency Topics
•
Seib/Dort Hnmeoacta
Use of Ion Spectrometry Equipment Suspended
On April 10, 2008, Assistant Directors Joyce K. Conley, CPD, and Thomas R. Kane, IPPA, issued
a joint memorandum to all BOP CEOs advising that the use of any ion spectrometry drug
detection equipment has been suspended effective immediately Bureau-wide due to problems
with the machines software. The manufacturers have been asked to make all necessary
corrections/modifications. After the problems have been fixed and confirmed by the BOP's Office
of Security Technology, CEOs will be contacted with respect to bringing the equipment back
online. Until further notice, institutions will retain all ion spectrometry drug detection equipment
and all relevant documentation.
In those cases where a visitor's visiting privileges are currently suspended as a result of the use of
ion spectrometry drug detection equipment, the visitor may request the Warden consider
reinstatement of visiting privileges, and/or an inmate can make requests for reinstatement of
visiting privileges for such a visitor directly to unit staff. Inmates are to be informed via normal
staff-to-inmate communications channels (e.g., town hall meetings) that they can make such
requests. Talking points are available for staff use with inmates or visitors and for posting notices
to inmates.
Appropriate staff will review each request from an inmate or a visitor and make a written
recommendation to the Warden as to whether privileges should be reinstated. Visiting privileges
should not be reinstated in those cases where the use of ion spectrometry drug detection
equipment was not the basis for the suspension (e.g., the suspension is based instead on
inappropriate behavior in the visiting room).
Additionally, at this time, ion spectrometry drug detection devices
may not be used to test for the
presence of illegal substances on inmates, on inmates' personal belongings, in housing units, or in
work areas.
Date last updated: 04-14-2008
Americans with Disabilities Act (ADA) Text Links
Herne I Phone Bonk I News I Resources I LinkaI BOP Were I Policy/Forms
ataJTr ira I pedinnal Offices I c_erttreLQfkg I Branches and Quick Links
I Institutions I Other Facilities If
http://sayport.bop.gov/co/ipp/public_affairs/conununications_archives/ion spectrometmi... 4/17/2008
BF-S'730.051
FEB 05
ION SPECTROMETRY DEVICE DAILY TESTING LOG
FEDERAL BUREAU OF PRISONS
U.S. DEPARTMENT OF JUSTICE
Serial No.
Random No.
Date
02, (gt/7
MWRM
(1)
5/zip y 2
Operator Name/Signature
(b)(7)c
VE ALARM LOG"
NOTE: Positive Alarms Mus
Time
Inmate Name
- Visitor Name
Reg. No.
Result
sio
—
57r
4--
Si 0
p
it
(b)(6)
—
—
640r
705:7
I
(This form may be replicated via
WP)
Sensitive - Limited Official Use only when completed
(b)(7)c
BP-s730.051
FEB 05
ION SPECTROMETRY DEVICE DAILY TESTING LOG
FEDERAL BUREAU OF PRISONS
U.S. DEPARTMENT OF JUSTICE
Ranaiom No.(sL
Serial No.
Sk.reg Lb 2-
7-Z611-7
Operator Name/Signatur
(b)(7)c
NOTE: Positive Alarms Must ALSO Be Logged On "POS
• Visitor Name
Time
CDFRM
Inmate Name
M LOG
Reg. No.
Result
7
Initials
/VC&
ql
fso
t
NE&
e
et/ 4-
PI
IM
IM
IIM
IIIN
o
A. e
11M
Frall6
MA
s4I
(b)(6)
ra
AkG
Iti
M
Me
illi
sl
I
23k
-
(This form may be replicated via WP)
Sensitive - Limited Official Use only when completed
(b)(7)c
SP-5730A51
PESOS
ION SPECTROMETRY DEVICE DAILY TESTING LOG
CURIA
FEDERAL BUREAU OF PRISONS
U.S. DEPARTMENT OF JUSTICE
Random Uo. (s)
Serial No.
6 0 iFkops
7710 4/7
Operator Name/Signature
(b)(7)c
NOTE: Pos tive Alarms Mu
M LOG"
Result
Time
initials
44-76
eGf94,
flutt
izeg)
(b)(6)
A,
glib
4A-:‘
we-6
73,5
Na
Ms
(This form may be replicated via WP)
Sensitive - Limited Official Use only when completed
(b)(7)c
ION SPECTROMETRY DEVICE DAILY. TESTING LOG UM
FEDERAL BUREAU OF PRISONS
U.S. DEPARTMENT OF JUSTICE
BP-5730.051
FEB 05
Serial No.
07e2 6
Random No. (s)
Date
q
6k117 5 c4o
Operator Name/Signatur
(b)(7)c
NOTE: Positive Alarms
Time
- Visitor Name
c9-
ARM LOG"
Inmate Name
Reg. No.
Result
Initials
-_,,
r'
PII
—
YO
n
(b)(6)
----
or
-,
(tV
—
(This form may be replicated via WP)
Sensitive - Limited Official Use only when completed
(b)(7)c
ION Spectrometry
evice
Daily Testing Log
May
ION Spectrometry Device
Daily Testing Log
June
ION Spectrometry Device
ally Testing Log
July
ION Spectrometry Device
Daily Testing Log
Au
ust
ION Spectrometry Device
Daily Testing Log
September
ION Spectrometry
evice
Daily Testing Log
October
ION Spectrometry Device
Daily Testing Log
November
BP-5730.051
FEB 05
ION SPECTROMETRY DEVICE DAILY TESTING LOG
FEDERAL BUREAU OF PRISONS
U.S. DEPARTMENT OF JUSTICE lerial No, 214:4)
Operato
i)
Date
Random No. (s)
(b)(7)c
NOTE: Po
Time
CDFRM
gged On 'POSITIVE ALARM LOG
Visitor Name
Inmate Name
Reg. No.
Result
9/2A
tf Eet,
116-A
NE&
7/57 4
ivS
/22/2
(b)(6)
Al f-'
/AZ?
po_s
/0510
AJEG
22,7 p.
N ES
(This form may be replicated via WP)
Sensitive - Limited Official Use only when completed
Initials
(b)(7)c
BP-5730.051
FEB 05
ION SPECTROMETRY DEVICE DAILY TESTING LOG
FEDERAL BUREAU OF PRISONS
U.S. DEPARTMENT OF JUSTICE
3erial
cici
Random No. (s)
Date
Operator Name/Signature
(b)(7)c
NOTE: Pos tave Alarms Mus
Time
Visitor Name
CDFRM
"
Inmate Name
Reg.
No.
Result
4/t e
af
7fi
L
W
(
e
in
g
E
Ig
(b)(6)
Mg
ILlee
-
(This form may be replicated via WP)
Sensitive - Limited Official Use only when completed
(b)(7)c
ION SPECTROMETRY DEVICE DAILY TESTING LOG CDFIRM
FEDERAL BUREAU OF PRISONS
U.S. DEPARTMENT OF JUSTICE
BP-0730.051
FEB 05
3erial No.
Date
Random No.
(sy
Operator Name/Signatu
(b)(7)c
NOTE: Positive Alarms M
Time
Visitor Name
Inmate Name
Reg. No.
Result
a
Initials
,44, OE
/14me
855
lnif
00 I
M
No4(
(b)(6)
/in
rin
ME
a-o/3E
kril-12
gira
eZ
tz33
WI
(This form may be replicated via WP)
Sensitive - Limited Official Use only when completed
(b)(7)c
ION SPECTROMETRY DEVICE DAILY TESTING LOG CMTM
FEDERAL BUREAU OF PRISONS
U.S. DEPARTMENT OF JUSTICE
5P-S730.051
FEB 05
3erial No.
Date
Random No.
Operator Name/Signatu
Cs)
5
(b)(7)c
NOTE: Positive Alarms M
Result
Time
90
deD
0/c5
-7 a ofr
r9
/(/'
(b)(6)
C79
44
iv
all
I
(This form may be replicated via
WP)
Sensitive - Limited Official Use only when completed
(b)(7)c
ION SPECTROMETRY DEVICE DAILY TESTING LOG CDFRM
FEDERAL BUREAU OF PRISONS .
U.S. DEPARTMENT OF JUSTICE
BP-5730.051
FEB 05
Nie20(0\--)
Random No. Cs)
Date
Operator Name/Signature
--1
(b)(7)c
NOTE: Positive Alarms Must
Time
a
Visitor Name
Inmate Name
Reg. No.
itit
Result
n
itr
111
IN
ilt ir
7211
• MIV
NFI
at
r
(b)(6)
'
alleg
iffil
1%21
Mil
40 11
ir
IMIN
g
now
(This form may be replicated via WP)
Sensitive - Limited Official Use only when completed
Initials
(b)(7)c
ION SPECTROMETRY DEVICE DAILY TESTING LOG CDFRM
FEDERAL BUREAU OF PRISONS
U. S. DEPARTMENT OF JUSTICE
BP-5730.051
FEB 05
Date 1‘...117..
ierial No.
0(0
Random No. (s)
Operat
(b)(7)c
NOTE:
d On "POSITIVE ALARM LOG"
o.
Time
Result
Initials
5-
IRE
(b)(6)
WAM4111
-ed
Pn
r
(This form may be replicated via WP)
Sensitive - Limited Official Use only when completed
(b)(7)c
13R-S730 051
ION SPECTROMETRY DEVICE DAILY TESTING LOG
MWRM
FEB 05
FEDERAL BUREAU OF PRISONS
U.S. DEPARTMENT OF JUSTICE ,
ierial No.
Random No. (s)
Date
c:)6( --.7
5C:
Operator Name/Signature
(b)(7)c
NOTE: Positive Alarms Mus
M LOG"
Result
Time
/12e
°La)
7
1127
F ni-e
2-..ea
laP
Initials
.4,
1 ail°
A/25,
(b)(6)
105
AAS_
370
jiVaS
i Her4
, 16135-
4.6 4
IV '
(This form may be replicated via WP)
Sensitive - Limited Official Use only when completed
(b)(7)c
BP-5730.051
ION SPECTROMETRY DEVICE DAILY TESTING LOG
FEB 05
FEDERAL BUREAU OF PRISONS
U.S. DEPARTMENT OF JUSTICE Random No. (s)
Date
3erial No..
CUM
/1-44/4-04.5>
7
Operator Name/Signature
NOTE: Positive Alarms Must ALSO Be o qed On POSITIVE ALARM LOG"
Time
.A*
Visitor Name
Inmate Name
Reg. No.
Result
Initials
de_
0
Web-
dfX,
(b)(6)
I 3 10
1lk )
,44'
41c _-
(This form may be replicated via )0)
Sensitive - Limited Official Use only when completed
(b)(7)c
BB-5730.051
FEB 05
ION SPECTROMETRY DEVICE DAILY TESTING LOG amm
FEDERAL BUREAU OF PRISONS
U.S. DEPARTMENT OF JUSTICE Date
3erial No.
-att
',.../---„Uk.12 Cr\
Operator Name/Signature
Random No.
Ks)
7
(b)(7)c
NOTE: Pos tive Alarms Must ALSO Be Logged On "POSITIVE ALARM LOG"
Time
Visitor Name
Inmate Name
Reg. No.
Result
Initials
V ey:
150
7) 5'
Pei-
0
r
II
(b)(6)
IIMI
MES
1 13
t
al.
(This form may be replicated via WP)
Sensitive - Limited Official Use only when completed
(b)(7)c
GE Itemiser'
GP- Security Weekly Maintenance Checklist
To be performed at END of last shift.
Be sure system is powered off and allowed to cool for 10 minutes before starting maintenance.
It is recommended to perform mcintenance tasks in the order listed.
Procedure
Completed
Check/Clean
fan air filter
fre'::
Check Dopant level 11/8 .' 13 mm) minimum fluid)
V..Remove Desorber, Locking Ring, and Nozzle
t
.
Remove stainless filter
Blow out Sample Air Line
V
Reinstall/Replace stainless filter
Zs'
Clean/Inspect Membrane
V"
Clean/Reinstall Nozzle and Locking Ring
Turn Unit ON. Allow system (temperature) to stabilize.
uf
Verify approx. 200 cc Sample flow on rear flow meter
.407:7
Verify approx. 200 cc Detector flow on rear flow meter
vex'
Verify Nozzle flow lapproximately 02 - 04 SCF1-11
Clean and reinstall desorber
Check Printer Paper supply
.../71
Check Sample Trap supply
sot
Check Calibration Trap supply
rClean Workspace
Clean Touchscreen
Date,
initials:
— ct ._0
(b)(7)c
/
I(
7
GE Security, 205 Lowell Street, Wilmington, MA 01887 TEL: 978-658-3767 FAX: 978-657-5954
Granery House Station Rd Great Shelford, Cambridge CB2 SLT UK TEL: +44 (0) 1223 72888 FAX: +44(0)1223 72889
b
I
,_
_ ur.itL1
-
GE ltemtser
Weekly Maintenance Checklist
To be performed at END of last shift.
Be sure system is powered off and allowed to cool for 10 minutes before starting maintenance.
It is recommended to perform maintenance tasks in the order listed.
Procedure
Completed
Check/Cleon fan air filter
,...
Y:
Check Dopant level 11/8"13 mm1minimum fluidl
Remove Desorber, Locking Ring, and Nozzle
by".
Remove stainless filter
1.,
VBlow out Sample Air Line
Reinstall/Replace stainless filter
4.
Clean/Inspect Membrane
Clean/Reinstall Nozzle and Locking Ring
Turn Unit ON. Allow system (temperature) to stabilize.
Verify approx. 200 cc Sample flow on rear flow meter
i7..
Verify approx. 200 cc Detector flow on rear flow meter
V'
Verify Nozzle flow (approximately 0.2 - 0.4 SCFHI
VClean and reinstall desorber
/7.-Check Printer Paper supply
Check Sample Trap supply
17:,
Check Calibration Trap supply
47Clean Workspace
/-'
Clean Touchscreen
Date. 4?
Intais:
0
i'"
r
(b)(7)c
GE Security, 205 Lowell Street, Wilmington, MA 01887 TEL: 978-658-3767 FAX: 978-657-5954
Granery House Station Rd Great Shelford, Cambridge CB2 5LT UK TEL +441011223 72888 FAX- 441011223 72889
GE Itemiser,
Lr- Security
Weekly Maintenance Checklist
To be performed at END of last shift.
Be sure system is powered off and allowed to cool for 10 minutes before starting maintenance.
It is recommended to perform maintenance tasks in the order listed.
Completed
Procedure
Check/Clean fan air filter
Check Dopant level 11/8"13 mml minimum fluid)
Remove Desorber, Locking Ring, and Nozzle
Remove stainless filter
Blow out Sample Air Line
Reinstall/Replace stainless filter
Clean/Inspect Membrane
Clean/Reinstall Nozzle and Locking Ring
Turn Unit ON. Allow system (temperature) to stabilize.
Verify approx. 200 cc Sample flow on rear flow meter
Verify approx 200 cc Detector flow on rear flow meter
Verify Nozzle flow (approximately 0.2- 0.4 SCFH)
Clean and reinstall desorber
Check Printer Paper supply
Check Sample Trap supply
Check Calibration Trap WM*
Clean Workspace
Clean Touchscreen
Date:
I t — I Le - 0 7
Initials:
(b)(7)c
GE Security, 205 Lowell Street, Wilmington, MA 01887 TEL: 978-658-3767 FAX_ 978-657-5954
Granery House Station Rd Great She!ford, Cambridge CB2 5LT UK TEL: +44 (0) 1223 72888 FAX: +44 (Of 1223 72889
GE Itemiser
fr".
t...
curitg Weekly Maintenance Checklist
To be performed at END of last shift.
Be sure system is powered off and allowed to cool for 10 minutes before starting maintenance.
It is recommended to perform maintenance tasks in the order listed.
Completed
Procedure
Check/Clean
fan air filter
V::
Check Dopant level 11/8"13 mmi minimum fluid)
V
Remove Desorber. Locking Ring, and Nozzle
4,.."
Remove stainless filter
gBlow out Sample Air Line
Reinstoll/Reploce stainless filter
Clean/Inspect Membrane
Cy,
Clean/Reinstall Nozzle and Locking Ring
Turn Unit ON. Allow system (temperature) to stabilize.
Verify approx. 200 cc Sample flow on rear flow meter
it/
verify
Verify approx. 200 cc Detector flow on rear flow meter
Verify Nozzle flow (approximately 0.2 - 0.4 SCFH)
7,......Clean and reinstall desorber
„,
Check Printer Paper supply
V
Check Sample Trap supply
Check Calibration Trap supply
/...,/
Clean Workspace
1,-
/
/
/
1-'
Clean Touchscreen
Date:
/I --c;; 3 — c> 7
Initials:
(b)(7)c
GE Security, 205 Lowell Street, Wilmington, MA 01887 TEL: 978-658-3767 FAX: 978-657-5954
Granery House Station Rd Great Shelford, Cambridge CC? 5LT UK TEL: +4410)1223 72888 FAX: +44 (0) 1223 72889
,
GE Itemiser
) GE S0ruritg
Monthly Maintenance Checklist
To be performed at END of last shift.
Be sure system is powered off and allowed to cool for 10 minutes before starting maintenance.
It is recommended to perform ma ntenance tasks in the order listed.
Procedure
Completed
Check/Clean fan air filter
Check Dopant level (1/8"13 mmi rrunmum fluid)
.7t
Remove Desorber, Locking Ring, and Nozzle
te/Remove stainless filter
Blow out Sample Air Line
Reinstall/Replace stainless filter
lot
Replace Membrane
Vf.
Clean/Reinstall Nozzle and Locking Ring
key
Turn
Unit ON. Allow system Itemperature) to stabilize.
t".."
Verify approx. 200 cc Sample flow on rear flow meter
Pc
Verify approx. 200 cc Detector flow on rear flow meter
Verify Nozzle flow approximately 0.2 - 0.4 SCFH)
17
Clean and reinstall Desorber
Check Printer Paper supply
<,
Check Sample Trap supply
,
Check Calibration Trap supply
Clean Workspace
ve
Clean Touchscreen
initials:
Date.
11 — 30 — 0 7
(b)(7)c
GE Security, 205 Lowell Street. Wilmington, MA 01887 TEL: 978-658-3767 FAX: 978-657-5954
Granery House Station Rd Great Shelford, Cambridge 082 5LT UK TEL: +4410)1223 72888 FAX: +44 (0) 1223 72889
ION Spectrometry Device
aily Testing Log
December
ION SPECTROMETRY DEVICE DAILY TESTING LOG gUFEW,
FEDERAL BUREAU OF PRISONS
U.S. DEPARTMENT OF JUSTICE
BP-S730.051
FEB OS
Date
Serial No. a l(3(c)
Operator Name/Signatur
oc
Random 9(a)
(b)(7)c
NOTE: Positive Alarms Must ALSO Be Logged On"POSITIVE ALARM LOG'
Time
Visitor Name
inmate Name
Reg. No
Result
initials
130
IP
4)
V
1
(b)(6)
ii5-
(This form may be replicated via WP)
Sensitive - Limited Official Use only when completed
Po I
l
ec
-
111,11
(b)(7)c
BP-S730.051 ION SPECTROMETRY
FEB 05
U S DEPARTMENT OF JUSTICE
Serial No. :10647
O
gOTE
DEVICE DAILY TESTING LOG
°DEM
FEDERAL BUREAU OF PRISONS
Date
Random No. (s)
/2-m. -a C.
(b)(7)c
Positive Alarms Must ALSO be Logged On "POSITIVE ALARM LOG"
Time
Visitor Name
Inmate Name
Reg. No.
Initials
AME(5
"-AM
/M14sim
(b)(6)
/ 12pA
(This form
Result
et4CA.
Nes
may be replicated via WP)
Sensitive - Limited Official Use only when completed
(b)(7)c
ION SPECTROMETRY DEVICE DAILY TESTING LOG CDFRK
FEDERAL BUREAU OF PRISONS
U.S. DEPARTMENT OF JUSTICE
BP-S730. 051
FEB 05
Time
E /0
li—/C -06
(20 617
Op
NOTE
Random No. (s)
Date
Serial No.
(b)(7)c
Logged On "POSITIVE ALARM LOG"
Visitor Name
Inmate Name
Reg.
Result
tee
P'
Ale
la 3/
-e
(b)(6)
pee(
) it
mee
• 'l
PO S
(This form may be replicated via WI')
Sensitive - Limited Official Use only when completed
(b)(7)c
-
ION SPECTROMETRY DEVICE DAILY TESTING LOG CDERm
FEDERAL BUREAU OF PRISONS
U.S. DEPARTMENT OF JUSTICE
BP 5730.051
FEB 05
.
Serial No 1 1
10
Le
(1
Date
1
r 0
Operator Name/Signature
NOTE:
_ c)
Random No. (s)
(b)(7)c
Positive Alarms Must ALSO Be Logged On "POS
M'F
_
iGn
Result
Time
P,A),
Initials
/L- 'y
97
7/
vey
a
,
(b)(6)
/5
'2
'aT-7
5
f/'
(b)(7)c
-ec
7-&-.
fi/er,
I44
7
(b)(7)c
‘-..
• ,..
•.
(This form may be replicated via
WP)
Sensitive - Limited Official Use only when completed,
ION SPECTROMETRY DEVICE DAILY TESTING LOG CDFRM
FEDERAL BUREAU OF PRISONS
U.S. DEPARTMENT OF JUSTICE
BP-3730.051
FEB 05
Random No. (s)
Date
Serial No.
2-ototti
Operator Name/Signature
(b)(7)c
NOTE: Positive Alarms Must ALSO B Logged On "POS T E ALAW LOG"
Inmate Name
Visitor Name
Reg. No.
Time
(b)(6)
Result
3 p0504
(This form may be replicated via WP)
Sensitive - Limited Official Use only when completed
Initials
(b)(7)c
ION SPECTROMETRY DEVICE DAILY TESTING LOG COFRM
U.S. DEPARTMENT OF JUSTICE
FEDERAL BUREAU OF PRISONS
BP-8730.051
FEB 05
Serial
No.721n I (27
Date/7(_ O
(b)(7)c
NOTE:
4
Random No. s)
LSO Be Logged On"POSITIVE ALARM LOG
Time
Result
0
VS
k4
(b)(6)
—
(This form may be replicated via WP)
Sensitive - Limited Official Use only when completed
i'
I/
(b)(7)c
/7
BP-5730.051
FEB 05
ION SPECTROMETRY DEVICE DAILY TESTING LOG
U.S. DEPARTMENT
OF
JUSTICE
FEDERAL BUREAU OF PRISONS
Date
3erial No.
CDFRm
Random No. (s)
l
--)
Operator Name/Si
(b)(7)c
NOTE: Positive Al
ALARM LOG
Time
Result
Veoz
(b)(6)
(This form may be replicated via WP)
Sensitive - Limited Official Use only when completed
pki
(b)(7)c
ION SPECTROMETRY DEVICE DAILY TESTING LOG CDFRM
FEDERAL BUREAU OF PRISONS
U.S. DEPARTMENT OF JUSTICE
BP-S730.051
FEB 05
206./7
Op
Random No. (s)
Date
3erial No.
(b)(7)c
NOTE: Positive Alarms Must ALSO Be Logged On "POSITIVE ALARM LOG"
Inmate Name
Time
Reg.
Result
B.2/A
fr es
9.6514
A-if a
A, 4 a
(b)(6)
/1 206
4.) FS
//VA-
bergc
09,0-
(This form may be replicated via WP)
Sensitive - Limited Official Use only when completed
(b)(7)c
ION SPECTROMETRY DEVICE DAILY TESTING LOG CDFRm
FEDERAL BUREAU OF PRISONS
U.S. DEPARTMENT OF JUSTICE
35-5730.051
FEB 05
Serial No.
Operator Name/Signature
NOTE:
c)(4:7
Date z
Random No. (a)
(b)(7)c
Positive Alarms Mu
LOG"
Result
Time
Initials
5V
53C
(b)(6)
(030
ZV
j
/4.1EZ
710
(This form may be replicated via WP)
Sensitive - Limited Official Use only when completed
(b)(7)c
GE Itemiser,
I GE Security Weekly Maintenance Checklist
To be performed at END of last shift.
Be sure system is powered off and allowed to cool for TO minutes before starting maintenance.
It is recommended to perform maintenance tasks in the order listed.
Procedure
Completed
Check/Clean fan air filter
V7.
Check Dopant level (1/8 13 mm1minirrium fluid]
V
Remove Desorber. Locking Ring. and Nozzle
t"
Remove stainless filter.
i,Blow out Sample Air Line
1.7.1
Reinstall/Replace stainless filter
cot
17Clean/Inspect Membrane
clean/Reinstall Nozzle and Locking Ring
tVTurn Unit ON. Allow system (temperature) to stabilize.
.7.
VVerify approx. 200 cc Sample flow on rear flow meter
Verify approx. 200 cc Detector flow on rear flow meter
7.
Verify Nozzle flow (approximately 0.2 - OA SCFHI
te
Clean and reinstall desorber
VCheck
Printer Paper supply
<7.
Check Sample Trap supply
V,.
Check Calibration Trop supply
of
Clean Workspace
Clean Touchscreen
V
Initials.
Dote:
1 1- 7 -0 7
V7
(b)(7)c
GE Security, 205 Lowell Street, Wilmington, MA 01887 TEL: 978-658-3767 FAX: 978-657-5954
Granery House Station Rd Great She!ford, Cambridge CE? 5LT UK TEL: +44 (0) 1223 72888 FAX. +44 (0) 1223 72889
GE ltemiseri
OF
SPrdrittsi Weekly Maintenance Checklist
To be performed at END of last shift.
Be sure system is powered off and allowed to cool for 10 minutes before starting maintenance.
It is recommended to perform mOntenance tasks in the order listed.
Procedure
Completed
Check/Clean fan or filter
Check Dopant level (1/8" l:t mml minimum fluid)
pe":„..
Remove Desorber, Locking Ring, and Nozzle
via
Remove stainless filter
res
Blow out Sample Air Line
Reinstall/Replace stainless filter
t/12,
Clean/Inspect
Membrane
ver
Clean/ Reinstall Nozzle and Locking Ring
tei"
Turn Unit ON. Allow system (temperature) to stabilize.
kteL...
verify approx. 200 cc Sample flow on rear flow meter
rode
Verify approx. 200 cc Detector flow on rear flow meter
Verify Nozzle flow (approximately 02 - 0.4 SCA-)
Clean and reinstall desorber
Elyde
Check Printer Paper supply
Check
Sample Trap supply
t.7„..
Check Calibration Trap supply
LC._
Clean Workspace
a/ .......,
Clean Touchscreen
V
(b)(7)c
Date
ii . 14 _ n 7
Initial
GE Security, 205 Lowell Street, Wilmington, MA 01887 TEL: 978-658-3767 FAX: 978-657-5954
Granery House Station Rd Great Shelford, Cambridge C82 5LT UK TEL: +4410) 1223 72888 FAX: +44 (0) 1223 72889
GE Itemiser
G E Sec urity
Weekly Maintenance Checklist
To be performed at END of last shift.
Be sure system is powered off and allowed to cool for 10 minutes before starting maintenance.
It is recommended to perform maintenance tasks in the order listed.
Completed
Procedure
vs/
Check/Clean fan air filter
Check
Dopant level 11/84'13 mrriJ minimum fluid)
V
Remove Desorber, Locking Ring, and Nozzle
Remove stainless filter
ste"
Blow out Sample Air Line
V.
...„,
Reinstall/Replace stainless filter
er
Clean/Inspect Membrane
V.Clean/Reinstall Nozzle and Locking Ring
Turn Unit ON. Allow system (temperature) to stabilize.
appro. 200 cc Sample flow on rear flow meter
p"
Verify approx 200 cc Detector flow on rear flow meter
li
Verify Nozzle flow (approximately 0.2 - 0.4 SCF1-11
VClean and reinstall desorber
Check Pnnter Paper supply
let"
Check Sample Trap supply
Check
Calibration Trap supply
V
Clean Workspace
1/....„
Clean Touchscreen
(b)(7)c
V
Initi
Date:
V
1 ,2 -
I - 0 7
GE Security, 205 Lowell Street, Wilmington, MA 01887 TEL: 978-658-3767 FAX: 978-657-5954
Granery House Station Rd Great Shelford, Cambridge CB2 SLT UK TEL: +441011223 72888 FAX 441011223 72889
GE Itemiser
--Ij
) GE -cf.:cunt
.... -
....
-
Monthly Maintenance Checklist
To be performed at END of last shift.
Be sure system is powered off and allowed to cool for 10 minutes before starting maintenance.
It is recommended to perform maintenance tasks in the order listed.
Completed
Procedure
VCheck/Clean fan air filter
Check Dopant level I1/8' (3 mm] minimum fluid)
'
Remove Desorber, Locking Ring, and Nozzle
V.-
5-
Remove stainless filter
Blow out Sample Air Line
Reinstall/Replace stainless filter
//"..„..
it
Replace Membrane
VClean/Reinstall Nozzle and Locking Ring
Turn Unit ON. Allow system (temperature) to stabilize.
1-.
17
"....71
AK.
it
V..'
.7V.
Verify approx 200 cc Sample flow on rear flow meter
Verify approx. 200 cc Detector flow on rear flow meter
verify Nozzle flow (approximately 0.2 - 0.4 SCFHI
Clean and reinstall Desorber
Check Printer Paper supply
Check Sample Trap supply
Check Calibration Trap supply
Clean Workspace
Clean Touchscreen
Date:
la'rin-0-7
initials:
(b)(7)c
GE Security, 205 Lowell Street, Wilmington, MA 01887 TEL: 978 - 658 - 3767 FAX: 978 - 657 - 5954
Granery House Station Rd Great Shelford, Cambridge CB2 5LT UK TEL: +44(0) 1223 72888 FAX: +44 (0) 1223 72889
FedCure FOIA Litigation
2005-03326
Cover Sheet
This Section Contains:
C. Information related to the training methods
used for operators
Location: fc ctAeuiôaO
Name and phone number of person conducting search:
eu(kin
-c. LaiL4
Itemiser3
Copyright
Disclaimer
Trademarks
and patents
Software
License
Agreement
Copyright 0 2007, GE Homeland Protection Inc. All
rights reserved.
This document may not be copied or otherwise reproduced. in whole or in port, except as specifically
permitted under US and international copyright law,
without the prior written consent from GE.
Document number: SG001017 ISeptember 20071.
irks
4re
gre
FCC
compliance
spas
THE INFORMATION IN THIS DOCUMENT IS SUBJECT TO
CHANGE WITHOUT NOTICE. GE ASSUMES NO RESPONSIBILITY FOR INACCURACIES OR OMISSIONS AND
SPECIFICALLY DISCLAIMS ANY LIABILITIES, LOSSES, OR
RISKS, PERSONAL OR OTHERWISE, INCURRED AS A
CONSEQUENCE, DIRECTLY OR INDIRECTLY, OF THE USE
OR APPLICATION OF ANY OF THE CONTENTS OF THIS
DOCUMENT. FOR THE LATEST DOCUMENTATION,
CONTACT YOUR LOCAL SUPPLIER OR VISIT US ONLINE
AT WWW.GESECURITY.COM .
This publication may contain examples of screen
captures and reports used in daily operations. Exampies may include fictitious names of individuals and
companies. Any similarity to names and addresses of
actual businesses or persons is entirely coincidental.
GE and the GE monogram are registered trademarks of
General Electric. Itemiser product and logo are registered trademarks of GE Homeland Protection.
Other trade names used in this document may be
trademarks or registered trademarks of the manufacturers or vendors of the respective products.
The product contains a Microsoft Windows CE Operating System. Your use of the Windows CE Operating
system is governed by the terms of the Microsoft End
User Licensing Agreement that is enclosed with the
system.
Intended use Use this product only for the purpose it was designed
for, refer to the data sheet and user documentation.
For the latest product information, contact your local
supplier or visit us online at www .gesecurity. corn.
Regulatory
This equipment has been tested and found to comply
with the limits for o Class A digital device, pursuant to
part 15 of the FCC Rules. These limits are designed to
provide reasonable protection against harmful interference when the equipment is operated in a commercial
environment. This equipment generates, uses, and can
radiate radio frequency energy and, if not installed and
used in accordance with the instruction manual, may
cause harmful interference to radio communications.
You are cautioned that any changes or modifications
not expressly approved by the party responsible for
compliance could void the user's authority to operate
the equipment.
CE
certified
iv
Itemiser,
Maintenance Student Guide
Preface Conventions used in this document Safety terms and symbols 0+4
aWarnings and cautions O
Rear 'panel symbols OM
Chapter 1. Warnings 40411.
Overview Detector Flow Warning tr.
Calibration
Warning 40.4
2
siga
Battery Operation Low Battery OM
Stabilizing Temperature Sample Flow Warning ellirn
Na Desorber OM
Chapter 2. Menu Functions eill.
Menu Functions el.
Chapter 3. Calibration OW.
Reasons for Manual Calibration en.
Manual Calibration re
VIM
___.ligmer
ix
x
xi
xii
xiii
1
2
2
3
3
4
4
5
5
7
8
13
14
14
Overview Weekly Maintenance Check Fan Filter Check Dopants Remove Desorber Remove Stainless Steel Filter Blowout Sample Line Reinstall Stainless Steel Filter Clean Membrane Reinstall Nozzle & Ring Power Up and Check Flows Verify Nozzle Flow Cleaning Desorber Monthly Maintenance Change Membrane Verify Nozzle Flow Burn In Membrane Annual Maintenance Wipe Test Requirements 18
18
19
19
19
20
20
21
22
22
23
23
24
25
25
26
27
27
27
31
;a14
Oa
ara
001.
ea
Ira
ri.
SI
Ira
els.
Oa
114/
Ira
re
Oa.
Ir.
Ira
re
re
•
Fuse replacement Chapter 5. Contact Information & Notes Contact Information Notes 31
33
34
36
Itemiser,
Maintenance Student Guide
Safety terms and symbols
operating this product. The most current versions
of this and related documentation are available
through GE Homeland Protection Customer
Service.
These terms may appear in this manual:
1\
1
PI)
/
Conventions used in this document
The following conventions are used in this
document:
Bold
Menu items and buttons.
Italic
Emphasis of an instruction or point; special
terms.
File names, path names, windows, panes, tabs,
fields, variables, and other GUI elements.
Titles of books and documents.
Blue italic
Monospace
/Electronic version.) Hyperlinks to crossreferences, related topics. and URL addresses.
wa
General Warning: User should use care to avoid possible
damage to equipment. This warning is accompanied by
additional text information indicating the details of the warning.
ea
Hot Surface Warning: User should use core when working near
A or on the labeled item.
egial fr.
ea A
High Voltage Warning: User should use appropriate electrical
safety precautions.
fral fr
ea
oge
fee
Text that displays on the screen.
WM
Programming or coding sequences.
fria
Oa
Oa
ria
ern*
ria
A Radiation Warning: Indicates the presence of a radioactive
source
vvui rungs
ea r panel symbols
ana cautions
The Itemiser Detector contains a radioactive nickel 63 source of
A 10 millicuries (370 MOD) strength. The source is fully enclosed in
the detector of the instrument that stops al/ primary radiation.
The detector has been designed in compliance with TISNRC
guidelines for safety. If a problem is suspected with the detector,
DO NOT open the detector—call GE Homeland Protection's
Technical Service Department. Then, if necessary, return the
instrument to GE for service. Note that in some countries,
notification of receipt and registration of the source may be
required by the national government body responsible for
control of radioactive sources.
Note: Annual Radiation wipe test is NOT required for this
instrument.
The detector must be disposed of properly in accordance with
local, state, and federal or notional) regulations. Please contact
A your local hazardous waste disposal facility or GE for proper
disposal methods.
A\ CAUTION:
Do not position the unit so that it is difficult to
operate the disconnecting device.
A CAUTION:
If the equipment is used in a manner not
specified by the manufacturer, the protection
provided by the equipment may be impaired.
0
System Ord
Indicates the system is on.
4010,
elm
000
• te
e
00110
sow•
400.
try
el,
0°0
ors
System Off:
Indicates the system is off.
CON Port'
[CCD1C)cl
Network
Keyboard
Itemiser
Maintenance Student Guide
/Net
Alternating Current {Ad:
Indicates alternating current.
Direct Current (DC) Symbol
101
ireChapter 1 Warnings
See
r°
ire
See
O
(ON.
#11111.
Fuse
Monitor
Ore
Ore
ore
OS
dee
Or.
le.
Ore
el
etele
ere
Ole*
ele
Wrie
ore
This chapter provides an explanation of the
Itemiser warning messages and procedures
for clearing or correcting them:
Overview Detector Flow Warning Calibration Warning Battery Operation Low Battery Stabilizing Temperature Sample Flow Warning No Desorber 2
2
3
3
4
4
5
5
Iterniser3
Maintenance Student Guide
Overview
1. Double pressing any of the yellow
warning messages in the status bar will
display a description of the warning.
2. Press OK to close the dialog box.
Detector Flow Warning
Figure 1. Detector Flow Warning message
Dual Mode
ern
rib
fee Calibration Warning
fee
Figure 2 Coloration Warning message
Dual Mode Calibration Warning
w
re
ere
rib
4,000 Battery Operation
s For help
The Calibration Warning appears every 8 hours
by default. To resolve the warning, calibrate the
instrument.
Detector Flow Warning
Warnings: Press ror help
The Detector Flow Warning indicates the
detector flow is outside the calibrated range.
Routine maintenance may resolve this warning.
If the warning persists, contact GE Homeland
Protection's Technical Service.
Chapter
Warning
Figure 3. Battery Operation message
Dual Mode
Vega
or.
Battery Operation
Warnings: Press For help
The Battery Operation warning indicates the
system is running on internal battery power. This
feature is useful for transporting the system
without the need to power down. At the
maintenance level, you can analyze samples
while running in battery operation. Please note
that the battery power will greatly be reduced
when analyzing samples.
es*
Ira
Low Battery
Figure 4 Low Battery message
Low Battery
Nal Mode
Warnings: Press for help
The Low Battery message displays if the battery
is low and the system is about to power down.
You will need to switch to AC power or power
down immediately.
Stabilizing Temperature
Figure 5. Stabilizing Temperature message
Stabilizing Temperature...
Duel Mode
Warnings: Press for help
This warning appears as the system is stabilizing
the detector and desorber temperatures, if this
Iii
rem
sem
eisis
edr*
rim
4•00*
rob
•0001
vas
risse
roe
vas
IlOns
warning persists for more than 40 minutes, it
could be an indication of a fault. Contact GE
Homeland Protection's Technical Service.
Sample Flow Warning
Figure 6. Sample Flow Warning message
g
Sample Flow Warning
al Mode
Warnings: Press For halt
The Sample Flow Warning indicates the sample
flow is outside the calibrated range. Routine
maintenance may resolve this warning. If the
warning persists, contact GE Homeland
Protection's Technical Service.
No Desorber
Figure 7 Na Desorber message
Dual Mode
No Desorber
Warnhgs: Press for help
Itemiser'
Maintenance Student Guide
This message displays if the desorber is missing
or not installed correctly.
, 16
*410°
Ore
404
404.
40004
Chap te r 2
Menu
Functions
This chapter instructs the Maintenance
user on the various menu functions:
Menu Function 5
Recall Save Print Options Users Config/Nores
Os.
/OS
004
e"
8
8
9
9
9
9
10
••••••••n••...
•
Chapter 2
Menu Functions
itemiser3
Maintenance Student Guide
Menu Functions
F ure a Miintenance Menu
Tabie 1. Maintenance Menu Functions
ors
0004
00-•
004
OP.
Function
Description
Save
Allows the user to save a signal or
alarm file to the alarms folder. A
keyboard is needed to enter file
names and notes.
Print
Allows the user to print data and
config to the built-in thermal
printer, page feed the printer and
obtain access to a local or
network printer.
Options
Accesses the option menu where
you can choose various display
options for data, set screensaver
time-out, auto save and auto
print functions, set the default
required calibration time, initiate
a charge to the battery back up
and set the time for the
regenerative dryers to switch.
Users
Allows you to add, modify and
delete users at the maintenance
level and below.
4000
Table 1. Maintenance Menu Functions
Function
Recall
Or•
04M
Description
Automatically displays the alarm
file folder where the user can
recall an alarm or other saved
file.
Press Clear to clear a recalled file.
worn
ge
OP.
0141
04.41
10
Itemiserl
Maintenance Student Guide
Table 1. Maintenance Menu Functions
Function
Description
Config/Notes
Displays notes, file name.
software version, time the sample
was taken, last calibration time,
serial number, current detection
mode, sample time, warnings at
last trigger; current user level,
system temperature, substance
configuration.
History
The Itemiser3 system
automatically records session
information in a history file. The
history file lists all mode changes,
files saved, warnings issued, log
on/off information, alarm
occurrences, and manual and
automatic calibrations
performed. These history files
can be accessed and copied to a
floppy disk or to a network
location for further analysis.
tea
Chapter
Menu Functions
4000141
sts"
es"
el"
40041
Table 1 Maintenance Menu Functions
Function
History
49"
40"
4•1"
0011.1"
eAPS
410.
•
•
•
from
4000
40041
Description
Add Maintenance Log to
save a brief note about
maintenance to the history.
Export History allows you to
export the history files to a
floppy disk or to a network
or file location
Purge history allows you to
delete all history data before
the selected From date.
Calibrate
Prompts you to select a mode
(Dual Peak or Single Peak) for
manually calibrating the system.
Burn in Membrane
Heats desorber and detector to
maximum temperatures to
accelerate cleaning of the
membrane.
The default burn in time is four
hour.
12
Itemiser'
Morntenance Student Guide
Table I. Maintenance Menu Functions
Function
Live Mode
Description
The plasmagram screen shows
the real time status of the
detector in red and the processed
data in green.
Press Menu/Live Mode once to
turn on live mode, press Menu/
Live Mode a second time to turn
live mode off.
Jr°
40011
Ira
lea
roe
rob
Ire
101.11
WO°
40111.
rola
401010
40101.
Chapter 3 Calibration
This chapter instructs the Maintenance
user on the calibration procedures:
Reasons for Manual Calibration . 14
Manual Calibration 14
14
Iterniser3
Maintenance Student Guide
Reasons for Manual
Calibration
•
•
•
The auto calibration routine failed
Allows the user the ability to select the
correct peak to calibrate on even if it is
outside the white window or if the peak
height is too low.
If a peak is selected outside of the white
window during manual calibration, you
will need to set the default cal factors to
reset the white window.
Manual Calibration
I. Press Menu/Calibrate.
es.
41.0.
4. Insert the calibration trap into the
desorber.
5. Remove and discard the trap when
directed.
6. Select peak in white window.
rine
VIM
wadi/
Figure 9. Selecting peak in white window
sPln1
01.11
11041
rs.
roe
WO.
7. Select OK.
8. Select Pos-Cal-1 and press OK.
2. Press Dual Peak Calibrate.
3. Select Neg-Cal-1 then press OK.
Ch
Ca II
rt.
9. Select peak in white window.
10. Select OK.
11. Press Yes to accept the calibration.
16
Itemiser3
Maintenance Student Guide
12. Press OK.
13. Press Clear.
Figure 10. Clearing
roe
fern
rye
lee
Ch a pter 4 Preventive
Maintenance
This chapter instructs the Maintenance
user on the preventive maintenance
procedures:
rise
14 When No Alarm-Ready appears, the
system has cleared and is ready for use.
"ale
tr.
re
Overview Weekly Maintenance Monthly Maintenance Annual Maintenance As Needed Maintenance 18
18
25
27
31
. 18
Chapt
Preventive Maintena
Itemiser3
Maintenance Student Guide
Overview
Preventive maintenance is required to keep the
Itemiser system calibrated, clean, and dry.
Check Fan Filter
I. Remove the plastic filter cover
2. Clean the fan filter with canned air.
3. Replace filter if damaged.
Weekly Maintenance
•
•
•
•
•
•
•
•
•
•
•
Check Fan Filter
Check Dopants
Remove Desorber, Ring & Nozzle
Remove Stainless Steel Filter
Blowout Sample Line
Reinstall Stainless Steel Filter
Clean Membrane
Reinstall Nozzle and Ring
Power Up and Check Flows
Verify Nozzle Flow
Clean Desorber
Check Dopants
1. Carefully pull with a twisting motion.
2. The large tube is the Dichloromethane
(negative ion) Dopant, and the three
small tubes are Ammonia (positive ion)
Dopants. Replace any tubes that are
empty,
Remove Desorber
I. Remove the desorber.
2. Unscrew the locking ring.
3. Remove nozzle,
..ensisearesa"--- 20
Chapter 4
Preventive Maintenance
Iterruser,
Maintenance Student Guide
Remove Stainless Steel Filter
Figure 11, Blowout Sample Line
I. While the desorber is removed, unscrew
the filter cover.
2. Check the o-ring on the filter cover for
cracks or damage. Replace if necessary.
3. Using the wooden membrane tool,
remove stainless steel filter.
4. Remove rubber washer from back of
filter housing.
Blowout Sample Line
1. With nozzle removed, blow air through
the sample line entrance to the right of
the membrane (At the 3 O'clock
position).
2. Hold the can upright and blast the air
through the sample line for
approximately 3 seconds.
Reinstall Stainless Steel Filter
1. Clean inside stainless steel filter
housing.
23
22
Itemiser,
Maintenance Student Guide
2. Check the filter. Replace if discolored.
3. Using the wooden membrane tool
reinstall stainless steel filter and rubber
washer.
4. Reinstall the filter cover.
els4
Or.
sire
0104
es.
ore
4400
esios
Clean Membrane
I. Gently clean the membrane with the side
of an alcohol swab.
2. Inspect the membrane for damage.
Replace if necessary.[see monthly
maintenance for replacement procedure.]
Reinstall Nozzle & Ring
I. Clean nozzle using alcohol swab and
reinstall.
ore
ots•
ore
Chapter 4
Preventive Maintenance
Power Up and Check Flows
1. Plug in the power cord.
2. Turn ON the power switch and allow
system to warm up until the
temperatures stabilize.
3. Check Sample flow. Should be at 200 cc/
min. +/- 10%
4. Adjust only when there is a Sample or
Detector Flow warning and the flows are
out of range.
Verify Nozzle Flow
too
el•
000
0000
2. Reinstall locking ring.
.00*
dodo
ram
1. With the desorber removed, attach the
plastic tubing from the flow meter to the
nozzle.
2. Verify the meter reads approximately 0.2
to 0.4 SCFH.
23
Itemiser,
Maintenance Student Guide
tyt
gee
40.1.
Monthly Maintenance
Cleaning Desorber
1. Clean the desorber with the alcohol
swabs and blow out with canned air.
el"
Figure 17 cleaning the Desorber
Chapter
Preventive Maintenant
•
•
•
Change Membrane
Verify Nozzle Flow
Burn In Membrane
6101111.
40111.
Change Membrane
1. The wooden membrane tool helps to
remove pieces of the membrane.
spa
era
ern
2. Reinstall the desorber, ensuring you
have it properly connected to the
interface.
0000
0010.
Ira
2. Install new membrane. Carefully inspect
membrane to ensure no tears occurred
during installation.
CAUTION:
When removing the old membrane from
the Interface housing. you must only use
the wooden membrane tool. Use of a
plastic or metal instrument will damage
the surface of the Interface.
' 26
Chapter a
Preventive Maintenance
ften-userl
Maintenance Student G de
Verify Nozzle Flow
1. Power up the system and allow
temperatures to stabilize. 2. With desorber removed, attach the plastic tubing from the flow meter to the nozzle.
Figure 13. Verify Nozzle Flo w
a
a1. Re-install desorber.
a
a
2. Select Menu/Burn in Membrane.
3. Press Yes to initiate a four hour burn in.
a
a
Annual Maintenance
a
Wipe Test Requirements
a
aNewer models of the Itemiser, system have been
amodified for compliance with NRC safety
4•
guidelines regarding the radioactive nickel 63
metal foil in this instrument. The material is fully
a enclosed in the detector, which stops all primary
aradiation. This part of the Itemiser, is not
accessible to the user. The sample labels below
sia
indicate which instruments still require the user
ato perform the radiation wipe test once per year
04)
3 Verify the meter reads approximately 0.2
to 0.4 5CH-1,
Burn In Membrane
a
a
a
a
a
27
28
Iterniser3
Maintenance Student Guide
vs. instruments that are exempt from annual
testing.
Instruments that are exempt from the Radiation Wipe
Test
If the label looks like the one in the photo below
and contains text about being exempt from any
regulatory requirements, the Itemiser, is not
required to have any annual radiation testing
performed.
*Pee
varre
sOrre
400.
40°.
40•10
eta
elb
eirre
orre
Figure 14. Exempt serial number label
THIS INSTRUMENT CONTAINS RADIOACTIVE MATERIAL MD .0;
grulft"N'IORASP27'71745MEZTEMOut,7-,-,7„,
REWAATORY REQUIREMENTS.
Tattsgtva
Ogre
0.4
400.
Ornne
erse
Ore
Ore
ors.
Ore
Orr.
Ore
Chapter 4
Preventive Maintenance
Instruments that are NOT exempt from the Radiation
Wipe Test
If the label looks like the one in the photo below
and contains text about wipe test the Itemiser , is
required to have annual radiation testing
performed.
Figure 15. Non exempt serial number labels
THIS INSTRUMENT CONTAINS RADIOACTIVE MATERIAL: SEE
OPERATOR'S MANUAL FOR WARNINGS AND WPE TEST
morounoti.
THE RECEPT, POSSESSION, USE AND TRANSFER OF THIS DEVICE.
MODEL ITEVISEIU
SEMI NO. Ofll _ MIX
ARE SUBJECT TO A GENERAL IMNSE OR THE ECIUNELNT
AND THE REOULATIONS OF TIE U.S. MC OR OF A STATE
WITH WHICH THE NRC HAS ENTERED two Ari AGREEMENT
FOR THE EXERCISE OF REGIAATORY AUTHORITY. THIS
LABEL SHALL BE MANTANED N A LEGIBLE CONDRION.
REMOVAL OF TM LABEL IS pRomiento.
NO USER SERVICEABLE PARTS PIECE REFER SERVICING
TO MALEBO SERVICE PERSONNEL
GE ION TRACK
DE LOWELL STREET
WANINGTON MA. 01 MIEN I USA
Radiation Wipe Testing
Once a year, contact your local testing firm
(independent of GE Homeland Protection) to
29
30
Chapter 11
Preventive Maintenance
Itemiser3
Maintenance Student Guide
send you a radiation test kit. These wipe test kits
contain instructions on how to perform a wipe
test along with treated swabs to perform the wipe
test. The swabs used to test for radiation leaks are
mailed back to the testing firm. The diagram
below indicates the area on the Itemiser3 that is to
be tested.
As Needed Maintenance
Fuse replacement
There are two fuses that may need replacement, an
AC fuse located above the AC power connector and a
DC fuse located below the DC IN connector.
AC power connector fuse
Figure 16. Radiation Wipe Test
I. Power down the unit
R•mor•
desorber aul
wipe around the
carte area
2.
Using a screwdriver pry open the fuse cover.
3.
Remove the fuse and replace with a new one.
DC IN connector fuse
Wipe along
seams of the
Instrument,
particularly near
the nozzle
1. Power down the unit.
2.
Using a screwdriver, unscrew the fuse
counterclockwise.
3.
Pull the fuse out and replace with a new one.
4.
When reinstalling fuse push in and turn
clockwise.
31
32
Itemiser'
tduntendnce Student Gutde
ter 5 Contact
Information
and Notes
This chapter provides contact information
and a place to write notes:
Contact Information Notes 34
36
34
Chapter 5
Contact Information and Notes
Itemiser3
Maintenance Student Guide
Contact Information
GE Homeland Protection
205 Lowell Street
Wilmington, MA 01887 USA
TEL 800-433-5346
FAX: 866-249-9105
GE Homeland Protection
Unit 4.9 Eden Park Drive
Sydney Australia
2113 North Raid NSW
AU
Service.harneland@gecom
TEL +61298157900
FAX: +61 2 9889 7511
GE Homeland Protection
Granary House, Station Rd.
Great Shelford, Cambridge
CB2 5LT United Kingdom
TEL: +44 (011223 728888
FAX: +44(011223 728889
GE Homeland Protection,
Washington DC
1299 Pennsylvania Avenue
Suite 100W
Washington, DC 20004 USA
TEL: 202-637-4000
FAX: 202-637-4232
GE Homeland Protection
Customer Service
GE Homeland Protection
Technical Service
USA
USA
TEL: 866-517-5580
TEL: 877-877-1008
from 8:30 a.m. to 5:00 p.m. 124 hours a day)
Service. homelandprotection.usege.corn
(EST)
•
105-n
U.K.
TEL: +44 (011223 728888
from 9:00 am. to 5:00 p.m.,
GST
Australia
TEL: +6129615 7900
from 9:00 - 5:00 AEST
Australia
TEL: +61 2 9815 7900
from 9:00 - 5:00 AEST
UK
TEL: +44(011223 728888
from 9:00 orn. to 5:00 p.m
Service hornelandprotection.uk@ge corn
[email protected]
35
36
Iternrser3
Mcnntenonce Student Guide
Notes
ChapterS
Contact infix-mt.-than and Notes
37
FedCure FOIA Litigation
2005-03326
Cover Sheet
This Section Contains:
C. Information related to the training methods
used for operators
Location: ft- ci
.seSeJoa0
Name and phone number of person conducting search:
ediv,
talcAr
Operator Course
Explosives & Drugs
PN: T11001016 rev:2
Itemiser'
Operator Course
Explosives & Drugs
7M00101fi rev:2
Prerequisites: None
Course Objective: At the completion of this course the student will be able to
properly operate the Itemiser3 without supervision.
Trace
1. State the purpose of trace detection. 2. Identify substances detected. 3. Describe
how trace substances are transferred. 4. Describe the various applications for the
products.
Equipment Overview
1. Describe the purpose and function of each major component. 2. Describe power
up, login, and power down of equipment.
Calibration
1. State the reasons for calibration. 2. Describe calibration procedures. 3.
Demonstrate calibration procedures.
Sampling
1. Describe particle detection. 2. State the sampling fundamentals for particle
sampling. 3. Demonstrate proper sampling techniques.
Analysis
1. Describe proper analysis procedures. 2. Describe alarm response example.
Maintenance
1. State the shift maintenance requirements for the product. 2. Perform the shift
maintenance requirements for the product.
Course Overview
GE Ion Track
• Trace Detection
• Equipment Overview
• Calibration
• Sampling
• Itetniser3 Analysis
• Shift Maintenance
PN' n4001016 rev.2
2
GE Jon Track
Trace Detection
Upon successful completion of this topic the trainee will be able to:
•State the purpose of trace detection.
•Identify substances detected.
•Describe how trace substances are transferred.
•Describe the various applications for the products.
Trace Detection
GE Ion Track
Purpose of Trace Detection
• Traces are microscopic amounts of particles
and vapors.
• Explosive and narcotic substances are organic
substances and constantly give off traces.
• Trace detection involves identifying amounts
that cannot be seen by the human eye.
PN:17v1C01016 rtv.2
Trace detection is a process of sample COLLECTION and ANALYSIS of target
substances, in amounts as small as one billionth of a gram, that are "not visible" by
any other means.
The Itemiser3 will detect these traces down to nanogram levels. A nanogram is
one billionth of a gram.
One Billionth is as small as a one piece of a single grain of salt cut into a thousand
pieces.
One Billionth is as packet of sugar dissolved in the water of ad Olympic sized pool.
Trace Detection
GE Ion Track
Purpose of Trace Detection
An IED (Improvised Explosive Device)
can look like anything limited only
by the imagination and resources
of the bomb-maker
P
00/016 rev:2
Although conventional Improvised Explosive Devices (LEDs) are used in situations
that do not require camouflage, most IEDs today will be disguised to look like other
devices. Constructing and handling this type of device will most likely cause the
explosive traces to contaminate the objects and anyone that has handled them.
GE Ion Track
Trace Detection
Substances Detected
Plastic Explosives:
• PETN
• RDX (C-4)
• SEMTEX (PETN & RDX)
• RMX Cyclotetramethylene
tetranitramine.
Other Explosives:
• TNT - Trinitrotoluene
• Nitro - Nitroglycerine
• AM NO3 - Ammonium nitrate (NH4NO3)
• TATP
• Smokeless Powder
M4001016 rev:2
Plastic Explosives:
-PETN (Deta sheet and detonation cord. Most fuses in smoke and fragmentation
hand grenades.) PETN and RDX are the active explosives that may be combined
with other organic materials to form a moldable high explosive.
-RDX (C-4, Common type of plastic explosive.)
-SEMTEX (A plastic explosive made up of PETN and RDX).
The standard characteristic of plastic explosives is that they can be mokkd or
formed into any shape.
Other Explosives:
'TNT (Baseline for referencing other explosives.)
•DNT (Cousin of TNT.)
•Nitro (Nitroglycerin)
•AM NO3 (Ammonium Nitrate —Found in some fertilizers; used in Oklahoma City
bombing.)
.TATP (Tri Acetone Tri Peroxide)
6
Trace Detection
GE ion Track
Substances Detected
Drugs Detected:
• Cocaine
• Heroin
• THC
• Methamphetamine
• Amphetamine
• PCP
Pri. Th1001016 rev:2
Cocaine: A Stimulant, also called Coke, Crack, Flake, Rocks or Snow
Heroin: A Opiate, also called Horse or Smack
THC: A Hallucinogen [Marijuana, Hash]
Methamphetamine: A stimulant, also called Crank, Glass, Ice or Speed
Amphetamine: A Hallucinogen, also called Ecstasy, STP or XTC
PCP: A Hallucinogen, also called Angel Dust
Note: Drug samples need to be put into the Itemiser 3 within 5 to 10 minutes after sampling.
Trace Detection
GE km Track
How Traces Are Transferred
•Contraband substances
cling to hands.
•Substances transfer
to anything touched.
PN:114001016reri
Contraband traces are transferred to anything they touch (think fingerprints)
•Person to person (Shaking hands, etc.)
•Person to object (Touching the handle of a bag, etc.)
'Object to object (Contaminated bag touching another bag, etc.)
Traces are product of the environment. Think of being in a room with smokers.
The tobacco smell clings to the clothing and hair of people who just pass through.
Trace can be absorbed by the skin and later released (onion and garlic cooking are
example).
Body chemistry and personal hygiene habits affects the life span of trace samples.
8
GE Ian Track
Trace Detection
How Traces Are Transferred
Legitimate Reasons for Explosive Traces:
Medication:
• Nitroglycerin
• RDX
Occupations:
• Military
• Construction/Demolition
• Agriculture
• Landscaping
• Lab Workers
P.
001016 rev.2
If the instrument alarms it does not necessarily mean the person is carrying an
IED
Some common substances and chemicals can have traces similar to explosives. As
an example, some types of sugar have been known to alarm on RDX.
Some items such as soaps, creams, lotions contain fragrances which can cause
unexplained alarms.
RDX & Nitroglycerin are used as a heart medications. For this reason, questions on
medications should be a part of your alarm resolution policy..
Fertilizers contain Nitrates.
Trace Detection
GE Ion Track
Applications
• Cargo, mail, and packages
• Conveyance access - Security
access points, border crossings,
checkpoints
• Baggage
• Vehicles
• Facilities protection - government
buildings, correctional institutions
•The Itemiser3 improves the ability to detect contraband.
• May be used along with X-ray, metal detector, and physical inspection at facilities.
• This unit must be used in accordance with the policies and procedures put into
place by the owner of the system.
10
Trace Detection
GE lop Track
Review Questions
1.
What is the purpose of Trace Detection?
2.
Name some of the substances that can or cannot be identified.
How are traces transferred?
Where can trace detection be used?
3.
4.
5.
Discuss how the following might or might not be detected with the
Itemiser3?
• Firearm
• Laptop or radio lined with plastic explosive
• Heart medication
• Pepper spray
• Stun gun
• Explosive traces on package or suitcase
• Cocaine
PN. TM00101
1.
2.
3.
4.
5.
11
GE Ian Track
Equipment Overview
Upon successful completion of this topic the trainee will be able to:
•List the Consumables and Accessories of the Itemiser3.
•Describe the purpose and function of each major component.
•Power up, log on, log off and power down of the equipment.
12
S
Equipment Overview
Consumables & Accessories
GE Ion Track
1. AC & DC Power Cords
2. Hand Wand Sampler
3. Calibration and Multipurpose
Sample Traps
4. Soft Shipping Case with User's
Manual & Maintenance Log Book
5. Gloves
6. Printer Paper
7. Canned Air
8. Wipes
S.
6.
7.
Check the "Best Used By" date on the bottom of the Calibration and Multipurpose
Sample Traps. [Picture 3]
13
Equipment Overview
GE Ion Track
Major Components
Touchscreen
Desorber
PM: 114001016 rev:2
Touchscreen:
• Allows for navigation through system functions
•Do not use abrasive cleaners
•Use fingers only to touch the screen
Printer:
• Outputs system configuration and alarm data
', Printer uses thermal paper that only prints only one side and will fade over time.
Desorber:
• Insert only GE Ion Track supplied traps
CAUTION!!! This area is a hot surface!
14
Equipment Overview
GE Ion Track
Major Components: Rear Panel
4VDC OUT
SERIAL
MONITOR
DC INPUT
KEYBOARD
DC FUSE
NETWORK
FLOPPY
PN
001016 rev:2
Rear panel components:
• Serial Connector *
• Monitor Connector *
• DC Input *
• Keyboard *
• DC Fuse
• Network Connector *
• AC Fuses
• Floppy Drive — for software upgrades
• On/Off Switch
.4VDC Out *
• Optional functionality
15
WI
Equipment Overview
GE Ion Track
Power Up
1. Power-up the system.
2. Wait approximately 30 minutes for warm up and stabilization.
PN
• Tmoolois rev:2
Note: Once powered up Itemiser3 should be left running continuously, even when
not being used.
16
GE Ion Track
Equipment Overview
Log On
Stabilizing Temperature.
rn. h.,. C., h4;
User Log On...
Log on:
• Operator default
PIN is:
4444e ,3a:P
9
1 234.
tigiEirg
mr
'8
98,H
PN:17401:11016 rev:2
If logging in when initially powering up the Itemiser3, you will see the stabilizing
temperature warning. It usually take at least 30 minutes to warm up the system
from a cold start. It is best to leave the power on continuously, 24 hrs/day.
Enter the appropriate PIN and press <Log On>
GE Ion Track recommends that the passwords be changed once the system is
installed.
At the end of shift, press <Log Off>. It is not necessary nor recommended to power
off the device after logging off.
17
GE Ion Track
Equipment Overview
Log On
Calibration Warning
•
,
o
ji
SE
Ugg'
'94,544
,§?
in*c
7,kke
V;2-"ke
322.14
k
kk;
cer
tsg
ack
tra:
PN: TMC01016 rev:2
At initial power on or after a time predetermined by your administrator within the
system configuration, the Calibration Warning will appear. This informs the
operator that a calibration is required.
Calibration is covered later in the course.
After Log on and calibration, the Select Scan Screen should be selected and show
"No Alarm — Ready"
At the completion of your shift, log off. It is not necessary to power down the
system. The system should be left running to keep it stabilized.
18
Equipment Overview
Questions
GE Ion Track
1 What are the Major components of an Itemiser3?
2 What is your log in PIN?
3. Where is the power switch located?
4. What actions must be done after initial power up
before operation of the system?
5. Should the system be powered off between
shifts?
Pit 714001016 reva
1.
2. My PIN is
3.
4.
5.
19
GE km Track
Calibration
001016 rt-v• 2
Upon successful completion of this topic the trainee will be able to:
'State the reasons for calibration.
'Demonstrate Auto-Calibration procedures.
20
Why Calibrate and what
does calibration do?
•
To insure that the Itemiser' is working properly.
•
Compensate for changes in atmospheric pressure and humidity.
•
Uses a calibration trap, with a known substance, to establish a reference point
for the system library.
•
Calibration involves putting a calibration trap, with a known substance, into the
system and identifying it. This establishes a reference point for the internal
library of the system and allows it to reference all other substances in the
library.
•
During normal operation, conditions such as atmospheric pressure and humidity
can affect the ability of the system to detect contraband. By performing periodic
calibrations, the system compensates for these changes.
21
GE Ion Track
Calibration
Auto Calibration Procedure
1 Press <Menu>
and then press
<Auto Calibrate>
2. When the Status bar asks for the
Calibration trap, insert a Calibration
trap into the Desorber.
3. The Itemiser3 will sample. The Status
bar will prompt for the removal of the
Calibration Trap.
4. Discard the Trap after removal.
5. The unit will go through an analysis
then display calibration results in a
pop-up window:
Press OK to accept the calibration
values shown on the screen.
6. Press <Clear> and let the Itemiser3
clear.
TM001016 rev:2
If Auto Calibration fails to calibrate the system [Step 5.] then:
1. Repeat the Auto Calibration with a new Calibration Trap.
2. Check the "Best Used By" date on the can.
3. Use a fresh [new] can of Calibration Traps.
If the Traps are alright and the system fails to calibrate twice, call the system
administrator, maintenance technician or initiate standard protocol for
troubleshooting.
After Auto-Calibration:
The system will perform multiple cleaning cycles until the system clears.
If the system fails to clear, or takes a long time to clear, it may be necessary to
initiate troubleshooting procedures. Remember that particularly strong "hits"
will take longer to clear.
After clearing, the No Alarm-Ready Screen will appear.
22
Calibration
GE ion Track
Summary
1. Why is calibration necessary?
2. How often do you calibrate?
PN: 7M0011316 rev 2
1.
2.
23
GE Ion Track
Sampling
PN
C01016rev:2
Upon successful completion of this topic the trainee will be able to:
• Describe the material & equipment used for particle detection
•Describe the "Optional" Vacuum sampling unit.
•State the sampling fundamentals for particle sampling
•Demonstrate proper sampling techniques
24
GE Ion Track
Sampling
Equipment & Materials
Calibration and Sample Traps
Handle by the
area outlined
in red
Sample area
outlined in
blue
Calibration Trap
(Marked with a "C")
Do not use as a sample trap!
PM:
Sample Trap
(Marked with a "hole")
Gold Sample Trap
Used with the Hand
Vacuum Option.
001016 rev:2
As a rule of thumb, a trap can be used for five sampling events. An event is
sampling one or more surfaces and then placing the trap into the Desorber for
analysis.
25
Sampling
GE Ion Track
Sampling Techniques: Rand
•Use firm contact.
• Sample in one direction, one time
• Take smart samples.
• Sample most-touched last.
TN: TM001016 rev:2
Supplies and procedures:
•
•
•
Sampling traps
Gloves keep oils off your sample, and can be thrown away if contaminated.
Cotton gloves are preferred since other materials may contain contaminants.
When choosing a table upon which to place items to be sampled, a non-porous
table is recommended. Place only one item at a time on the sample table.
Sampling fundamentals:
•
Sampling one item at a time allows for easy identification of what object caused
the alarm. However, each object might have multiple areas that will need to be
sampled. In a single vehicle many items could be sampled, such as boxes in the
bed of a truck or bags in a trunk, etc.
•
Wipe in one direction with firm pressure. Do not use a back and forth
(polishing) type wipe method!
•
•
Smart sampling: Sample where has the item has most likely been touched.
If taking multiple samples of potentially contaminated areas on a single item or
vehicle, start with the least handled surface and sample to the most touched
surface.
26
47t
Sampling
GE Ion Track
Sampling Techniques: Wand
A.
To take a particle sample with the hand
wand:
1. Press button on backside of Wand and insert tip
of trap into Wand.
2. Let go of button and push wide area of trap
down until pin goes through provided hole in
trap.
3. Handle by wide end of trap only.
4. Perform sampling procedures.
5. Remove trap from the wand.
6. Insert trap into the Desorber.
7. The instrument automatically samples.
8. When prompted, remove sample trap.
9. Note Results.
PN• T MC01016 r ev 2
Supplies and procedures:
•Sampling traps
•Hand Wand
•Follow the same guidelines for sampling as you do when sampling by hand.
27
Sampling
GE Ian Track
Sampling Techniques: Vacuum Wand
• The gold colored sample trap must
be used with the vacuum wand.
• Use the same methods when
sampling with the vacuum wand as
when sampling by hand or hand
wand.
PN7MC01016 rev:2
The vacuum wand is optional.
GE Ion Track
Vehicles:
• Door handle
• Gas cap
• Steering wheel
• Knobs
• Seat Belt
• Luggage
• Wherever there may be a
fingerprint.
PN: 1M001016 rev:2
Proper sampling areas on the outside of a vehicle:
*Door handles
toad
'Latches
'Mirrors
Proper sampling areas on the inside of a vehicle:
'Steering wheel
•
'Knobs and handles, including gear shift
tags and luggage
Other areas that may have fingerprints
Avoid sampling surfaces that may be ccated with cgo2ssive dirt or oil and could
potentially cause instrument contamination
B1111111118
Sampling Techniques: Baggage
Outside of Item:
• Zipper tabs
• Closure flaps
• Latches
• Handles and Straps
Inside of Item:
• Seams and seam closure
points
Commonly Touched Areas
Sampling
Sampling Techniques: Electronic Devices
Electronic Devices:
•Vents
•.Seams
•Battery compartments
•Disk drives
•Edges
•Latches
Avoid Sampling:
•Computer Screens
•Camera lenses
001016rov.^
Avoid sample items such as laptop monitors, camera lenses or other items that may
be susceptible to damage.
Proper sampling technique requires sufficient pressure to obtain a good sample and
may damage sensitive items.
Sampling
GE Ion Track
Renew Questions
1.What are some sampling
fundamentals?
2.What areas do we sample on bags?
3.What areas do we sample on
ea electronic items?
4.What areas do we avoid sampling?
P
0010/6 rev.2
GE ion Track
Analysis
Establishing an alarm response procedure is the responsibility of the organization
that has purchased the equipment. Procedures described in this training material are
for example only.
Upon successful completion of this topic the trainee will be able to:
'Describe proper analysis procedures.
'Describe proper clearing procedures.
Analysis
GE Ion Track
Analysis Procedure
Sampling
Analyzing
1. Place the sample trap into the Desorber.
2. Remove the sample trap when prompted
3. Either
No Alarm Rudy or
Explosives or
Drugs or
Contraband Detected
in the Status Bar.
PN
r4nmn
001016 rev 2
Sample is taken then placed into the Desorber.
-If the Ready screen is displayed after analysis is complete then no contraband
substances were detected.
-If machine alarms the substance detected will be displayed on the SelectScan
screen.
-In dual mode, "Contraband Detected" indicates drugs and explosives are detected
simultaneously.
• The Alarm should be resolved in accordance with current operating procedures.
34
Analysis
Alarm Resolution & Recovery
GE Ion Track
Any alarm should be resolved
in accordance with your
organization's current
operating procedures.
Such procedures should include:
• Clearing the Itemiser3.
• Discarding the sample trap and
gloves.
• Decontamination requirements.
• Obtaining a new sample trap and
gloves.
PN: 111001016 rev :2
• If an alarm is detected then the sample trap and gloves must be discarded.
• If hand wand was used it should be cleaned with a GE Ion Track-supplied
alcohol wipe.
-Clear the Itemiser3 by selecting the Clear tab on the menu bar.
-After the unit returns to the No Alarm Ready screen use a new sample trap and
check hands and table for contamination.
All alarms must be cleared before any more samples can be analyzed.
• Make sure that you use only GE Ion Track alcohol wipes. Other types of wipes
may contain chemicals that might contain contaminates.
3!
Analysis
GE Ion Track
Review Questions:
1. Where is the sample trap placeo
in the Itemiser39
2. When is the trap removed?
3. What is the indication of an
alarm? No alarm?
4. How do you clear the
Itemiser39
5. What happens when the
Itemiser3 is contaminated?
6. When are the sample traps
disposed of?
PN 114001016 rer2
1.
2.
3.
4.
5.
6.
36
Shift Maintenance
GE ion Track
• Calibrate the system
• Check the printer paper
• Clean touchscreen and outside
of unit with GE IonTrack
provided alcohol wipes
• Clean and sample the work
area to make sure it is free of
contamination
PN
001016 rev.2
-Make sure that you use only GE Ion Track alcohol wipes.
• Other types of wipes may contain chemicals that might contain contaminates.
37
Shift Maintenance
GE Ion Track
Changing Printer Paper
15Insert roll with paper rolling off the top. Pull out enough paper to feed
through the print mechanism and through the slot in the door.
2. Open the green lever and feed the paper through the print mechanism.
3. Make sure there is enough paper to feed through the slot in the door.
4. Close lever and then close the printer door.
PN. Th1001016 rev :2
Thermal paper prints on one side only.
Make sure green lever is closed.
38
Course Review
GE Ion Track
• Trace Detection
• Equipment Overview
• Calibration
• Sampling
• Itemiser3 Analysis
• Shift Maintenance
• Questions
PN
001016 rer2
If any warning occurs that has not been covered in this course, follow your local
procedure for getting assistance.
39
FedCure FOIA Litigation
2005-03326
Cover Sheet
This Section Contains:
A. Manufacturing documents or studies stating
the accuracy of the to Ion Spectrometer
Scanning Methods
Location: Fcl. qm4aiwoc9
Name and phone number ?If person conducting search:
/At()/ S liplion
0
Itemiser'
Preventive Maintenance
Course
PN • TM001017
re' : 3
Prerequisites: Operator Course
Course Objective: At the completion of this course the student will be able to
properly operate and perform preventive maintenance of the unit without
supervision.
Consumables & Accessories:
1. Identify and describe items needed for maintenance.
Basic Plasmagram Theory:
1. Describe the detector block diagram.
Menus:
1. Describe the menus and functions available for maintenance procedures.
Calibration:
1. State the reasons for calibration.
2. Describe calibration procedures.
3. Demonstrate calibration procedures
Maintenance:
1. State the advantages of scheduled maintenance.
2. State the minimum scheduled maintenance requirements for the product.
a. Weekly b. Monthly c. Annual
4. Perform the scheduled maintenance requirements for the product.
1
Course Overview
GE Ion Track
• Consumables & Accessories
• Basic Plasmagram Theory
• Maintenance Log On
• Menu
• Calibration
• Preventive Maintenance
P.
001017 rev 3
2
GE Ion Track
Consumables & Accessories
0.
13
12.
S.
I. Dopant Tubes
2. AC & DC Power Cords
3. Hand Wand Sampler
4. Calibration and Multipurpose Sample Traps
5. Soft Shipping Case with User's Manual &
Maintenance Log Book
6. Gloves
7. Spare Membranes & Spare Parts Kit
8. Printer Paper
9. Wooden Membrane Tool
10. Fan Filters & Fan Guard
11.Swabs
12.Canned Air
13. Wipes
These are the consumables and accessories you will need to do maintenance.
If the Dopants [Picture 1] are not immediately used, they should be stored in a
freezer.
Check the "Best used by" date on the bottom of the Calibration and Multipurpose
Sample Traps. [Picture 4]
GE ion Track
Basic Plasmagram Theory
Regenerative Dryers
Sample
Pump
i
Dopant
vrLao FI—
Detector Pump
Sample Filter
Display
Desorber
Signal Processing
\
Semi-permeable (low energy beta) 63N1
membrane
Pre-amplifier
Collector
Detector Schematic
PN
001017 revO
Samples are collected with the sample traps and then vaporized by the Desorber
The vaporized molecules then pass through the semi-permeable membrane and into
the detector
The molecules are ionized so that they can be mobilized through the detector by an
electric field
The length of time it takes a substance to pass through the detector is known as its
"time °Plight"
"time of flight" depends on the mobility of the ion
The peaks in the plasmagram are generated by the ions as they hit the collector.
4
GE to
Maintenance Log On
User Log On...
Tra c
Log on:
• Enter Maintenance PIN:
• Select <Menu>
PN. m1001017 rev3
The Maintenance PIN is determined by the administrator who set up the system.
5
SE Ion Track
Menu
Maintenance Menu:
File Functions:
•
Recall
•
Save
•
Print
Edit Functions:
•
Options
•
Substances
•
Users
View Functions:
•
Configfflotes
•
Status
Action Functions:
•
Change Mode
•
•
Burn in Membrane
Live Mode
Calibration will be covered in the calibration section.
6
•
Menu Screen
GE Ion Track
All maintenance
procedures start at
the Menu Screen.
7
Menu Screen
GE for Track
Edit Functions: Options
FN . TM001017 rev.3
The Maintenance person needs to know how to access the Options screen. This
screen contains information and functions that are used under the direction of the
system administrator or GE IonTrack technicians.
9
Menu Screen
Edit Functions: Users
Users:
A list of users and their access levels can be viewed on this screen. New accounts
are created by the system administrator.
10
Menu Screen
GE Ion Track
View Functions: Status
The Status window displays flow,
temperature, Power and Dryer
information.
trsiWie7,11
W:TMlOI?ttr3
This screen contains information useful when initiating troubleshooting procedures
or contacting GE Ion Track.
Flows & Temperatures:
Aids in trouble shooting the Itemiser3.
Power check boxes indicate External DC (car battery, etc.), Battery Operation. The
Charge checkbox indicates if charging is in progress. Charging cannot be initiated
from the checkbox because it will clear when the screen closes. Battery Status is
also indicated ["Charged" in the example depicted].
Purging Dryer status is indicated along with how much time is left before change
over. The <Switch Now> button can initiate the change over before the scheduled
time.
12
BBC_
Menu Screen
GE ion Track
Action Functions: Burn in Membrane
Increases Desorber and
Detector temperatures to
accelerate cleaning of
the membrane.
The default burn-in
time is four hours.
PN 114031017 rev 3
Saying yes to "Burn in Membrane" results in a four hour period of raised
temperature that burns off any contaminants that may have been introduced with the
installation of a new membrane.
Initiating the burn in membrane cycle logs you off the system. This is provided as a
security feature so that the bum in cycle can be started and the administrator does
not have to wait all four hours to log out.
13
Action Functions: Live Mode
Live mode is a continuous display of what the detector is seeing.
The system will not detect a sample trap if left in live mode.
14
Calibration
GE !on
Track
Reasons for Calibration
Why Calibrate?
• Provides a known substance to be
used as a reference to identify
contraband.
• Compensates for changes in
atmospheric pressure and humidity.
• Verifies proper system operation.
• Auto-Calibration is the preferred method of calibration.
• If Auto-Calibration fails, and there are no other warnings, then it will be necessary to
perform a manual calibration and then reset the calibration defaults.
• Dual Peak is the preferred method for Manual Calibration.
P74:TM001017 revg
A successful manual calibration will not reset the calibration factors and the system
may not Auto Calibrate until someone with Super User access resets the Calibration
Factors. However, a successful Manual Calibration allows the system to be used to
analyze samples.
15
GE Ion Track
Calibration
Auto-Calibration
• Auto-Calibration is the primary
calibration method.
• The procedure is shown here, but is
usually performed by the operator.
1. Press <Auto Calibrate>
2. When the Status bar asks for the
Calibration trap, insert a Calibration
trap into the Desorber.
3. The Itemiser3 will sample then the Status bar will prompt for the removal of the
Calibration Trap.
4. Discard Trap after removal.
5. The unit will go through an analysis then display calibration results in a pop-up
window:
Press OK to accept the calibration values shown on the screen.
6. Press <Clear> and let the Itemiser3 clear.
16
a
Calibration
Track
Manual Calibration (Dual Peak)
tddahrate Ophrunsmolog
P.
001017 rev 3
The manual calibration routine can be accessed via the Menu screen.
"Dual Peak Calibrate" is the preferred manual calibration method.
The system administrator should be notified if a manual calibration is required.
17
GE Ion Track
Calibration
Manual Calibration (Dual Peak)
gine
1. Select Neg-CAL-1 and <OK>.
TNT 1
NITRO 1
NITRO
RD>, 1
PETN 1
PEN 2
104%1
M OO I
SrnkIsPNth 2
67
b5
aFIA
7 9NO
615
7 990
3 830
7 070
4 53,
486
4 136
8 629
60
8 629
4 136
7 635
4094
4 170
2. Insert the calibration trap.
3. Remove and discard the trap
when directed.
4. Select high peak in or near the
white band.
5. Select <OK>.
PH; 1)4001017 rev 3
Touch the top of the highest peak that is close to the "Standard Location" listed for
the substance [Neg-CAL 1]. This should be in or near the white area on the screen.
If it is necessary to do a manual calibration the peak may not be in the white band.
The spot will highlight.
Discard trap when finished.
18
m+a
Calibration
GE lon Track
Manual Calibration (Dual Peak)
6. Select Pos-CAL-1 and <OK>.
07
OCAlNE00056:0
5.746
-FoZ
-1E0i
7. Select high peak in white band.
8. Select <OK>.
PN
00101? rev.3
Touch the top of the highest peak that is close to the "Standard Location" listed for
the substance [Pos-CAL 1]. This should be in or near the white area on the screen.
If it is necessary to do a manual calibration the peak may not be in the white band.
The spot will highlight.
Calibration
GE Ion Track
Manual Calibration (Dual Peak)
9. Press <Yes>
to accept the
calibration
uL,tro= T Stn,th
61220
12221
nr
33'6
4",67
4)20
The user is prompted to verify the peak location. If the calibration is correct, press
<Yes>.
A 'System Calibrated' message will appear. Press <OK>.
20
Clear the System after Calibration.
The system will perform multiple cleaning cycles until the system clears.
If the system fails to clear, or takes a long time to clear, it may be necessary to
initiate troubleshooting procedures. Remember that particularly strong "hits" will
take longer to clear.
21
GE Ion Track
Preventive Maintenance
PN. 714001017 rev:3
Topic Objectives:
•State the advantages of scheduled maintenance.
• State the minimum scheduled maintenance requirements for the Itemiser3
• Perform the scheduled maintenance requirements for the Itemiser3.
•Weekly Maintenance
•Monthly Maintenance
•Annual Maintenance
Preventive Maintenance
GE ion Track
Why Maintenance is Necessary
• Optimize system performance
• Keeps the sample and detector tubing clear of contamination
• Prevents nuisance alarms
• Minimize down time
• Reduce repair costs
P
001017 rev:3
23
Preventive Maintenance
GE ion Track
Weekly Maintenance: Checklist
• Power down the system.
• Wear GE provided white cotton gloves while doing maintenance.
1. Check/Clean the fan filter
2. Check dopant levels
3. Remove Desorber, Locking Ring and Nozzle
4. Remove Stainless Filter
5. Blow out Sample Air Line
6. Reinstall/Replace Stainless Filter
7. Clean/Inspect membrane
8. Clean/Reinstall Nozzle and Locking Ring
9. Turn Unit On (Allow temperature to stabilize)
10. Check Sample Flow (180 to 220 cc/min)
11. Check Detector Flow (180 to 220 cc/min)
12. Check Nozzle Flow (approx. 0.2 to 0.4 SCFH)
13. Clean and Re install Desorber
PN: TM001017 rev:3
The weekly maintenance procedures are listed, in order, in the Maintenance Log
Book. The details of any specific procedure can be found in the User manual. All
procedure should be tracked and recorded in the Maintenance Log Book.
24
Preventive Maintenance
GE Ion Track
Weekly Maintenance: Cheek/Clean Fan Filter
1.a. Remove the plastic filter
cover (snaps on and off).
Lb. Clean the fan filter with
canned air.
1.c. Replace if damaged.
ptr
Hands-on demonstration
25
Preventive Maintenance
GE ion Track
Weakly Maintenance: Check Dopant Levels
2.a. Carefully pull ith a
twisting motion.
2.b. The large tube is the
Dichloromethane (negative ion)
Dopant and the three small tubes
are Ammonia (positive ion)
Dopants. Replace any tubes that
are empty.
PN: TM001017 rev:3
Use only GE Ion Track supplied dopants
26
Preventive Maintenance GE lot? Track
Weekly Maintenance: Remove Desorber, Locking Ring & Nozzle
Caution: Desorber is hot
3.a. Remove Desorber and let cool
3.b. Unscrew locking ring
3.c. Remove nozzle
P
001017 rev:3
27
Weekly Maintenance
GE Ion Track
Weekly Maintenance: Remove Sample Filter
4.a. While the Desorber is out,
unscrew the filter cover.
4.b. Remove filter with wooden
tool.
PN: TI4001017 rev.)
28
Preventive Maintenance
GE Ion Track
Weekly Maintenance: Blow Out Sample Line
5.a. With nozzle removed, blow air through the air
line entrance to the right of the membrane.
5.b. Blast the air for 8 to 10 seconds. (hold can
upright)
MTh/10010/7
r
29
a
Weekly Maintenance
GE ion Track
Weekly Maintenance: Reinstall/Replace Sample Filter
6.a. Check the filter. Replace
if discolored.
6.c. Reinstall the filter cover.
6.b. Reinstall filter.
PN. TMI)01017 tev3
30
Preventive Maintenance
GE Ica Track
Weekly Maintenance: Clean! Inspect Membrane
7.a. Gently clean the membrane with
the side of an alcohol swab.
7.b. Inspect the membrane for damage.
Replace if necessary.
[see monthly maintenance for
replacement procedure.]
PN:11n40/017 rev:3
Do not poke the membrane. Use the flat side of the swab to gently clean the front
of the membrane.
Preventive Maintenance
GE Ion Track
Weekly Maintenance: Clean and Reinstall Nozzle & Locking Ring
8.a. Reinstall Nozzle.
8.b. Reinstall locking ring.
PN: 7110010/ 7 rev 3
32
Preventive Maintenance
GE Ion Track
Weekly Maintenance: Power Up Itemiser3.
Sarg
9. Power up the Itemiser3 and
allow it to warm up until the
temperatures stabilize.
P
001017 rev3
Preventive Maintenance
Track
Weekly Maintenance: Check Sample & Detector Air Flow
Sample Air
Flow Meter
Flow
Adjustment
Screw
10.a. Check Sample flow. Should be
between 180 and 220 cc/min.
Only if adjustment is needed:
10.b. Loosen locking nut on adjusting
screw.
10.c. Turn Screw small amounts [no more
than a quarter turn] to adjust flow.
Allow time for flow to settle before
readjusting. Adjust to between 180
to 220 cc/min.
10.d. Tighten locking nut.
PN: 711001017 rev:3
It is normal to have small changes in the flow gauges. The setting may vary by 10
% (180 to 220).
The flow adjusters have locking nuts. If an adjustment is necessary, loosen the lock
nut, make the adjustment, and tighten lock nut. (do not over-tighten)
34
GE ion Track
Preventive Maintenance
Weekly Maintenance: Check Sample & Detector Air Flow
Detector Air
Row Meter
Flow
Adjustment
Screw
11.a. Check Detector flow. It should be
between 180 and 220 cc/min.
Only if adjustment is needed:
11.b. Loosen locking nut on adjusting
screw.
11.c. Turn Screw small amounts no more
than a quarter turn] to adjust flow.
Allow time for flow to settle before
readjusting. Adjust to between 180
to 220 cc/min.
11.d. Tighten locking nut.
It is normal to have small changes in the flow gauges. The setting may vary by 10
% (180 to 220).
The flow adjusters have locking nuts. If an adjustment is necessary, loosen the lock
nut, make the adjustment, and tighten lock nut. (do not over-tighten)
If, after checking and adjusting Sample and Detector Flows, there is a flow cal
alarm, then you will have to contact the system administrator to <Calibrate Rows>
in the advanced menu.
35
Preventive Maintenance
GE io g Track
Weekly Maintenance: Verify Nozzle Flow
12.a. With Desorber
removed, attach the
plastic hose from the
flow gauge to the
nozzle.
12.b.Malce sure the gauge reads
0.2 to 0.4 SCFH
PN ThiIO7 rev :3
This reading may vary from slightly under 0.2 SCFH to around 0.4 SCFH.
If the flow has changed significantly after a membrane change:
Check the membrane for Damage
-Make sure the nozzle is sealing properly against the membrane
This is a test done in the weekly maintenance after cleaning the membrane. This
test should also be done after changing the membrane in monthly maintenance to
make sure the nozzle is seated around the membrane.
6
Preventive Maintenance
GE Ion Track
Weekly Maintenance: Cleaning Desorber
13. Clean and reinstall the Desorber
Tht001017 rer3
After the Desorber has cooled down, blow out the area where the sample trap enters.
Hold the air hose up to the Desorber and blow out any contaminants. Clean the
outside area where the trap enters with an alcohol swab.
Do not insert the plastic tube into the Desorber. The Desorber may still be hot
enough internally to melt the air hose!
Re-install Desorber unit.
Preventive Maintenance
GE ion Track
Monthly Maintenance: Changing the Membrane
Monthly maintenance is the same as weekly except
that the membrane is changed instead of cleaned.
Wear gloves for this procedure, and do not use
metal tools on membrane!
1. The Wooden Membrane Tool helps when removing
membrane, and pieces of membrane that stick.
Caution: When removing the old
membrane from the Interface housing,
you must only use the wooden
membrane tool. Use of a metal
instrument will damage the surface of
the Interface.
PN TMOOIOI7 rev:3
Depending on your application, the membrane may need to be changed more
frequently due to contamination build up.
Remove the Desorber, locking ring, and nozzle (as when cleaning membrane)
Remove the old membrane, clean the area where the membrane seated with alcohol
swab.
38
Preventive Maintenance
GE Ion Track
Monthly Maintenance: Changing the Membrane
2. Install new membrane as shown.
Carefully inspect membrane to
ensure no tears occurred during
installation.
PN: Th1001017 revr3
While holding the membrane by the thick edges, gently press on the new
membrane.
Preventive Maintenance
Monthly Maintenance: Verify Nozzle Flow
3. With Desorber removed,
attach the plastic hose
from the flow gauge to
the nozzle.
PM
4. Power up the Itemiser3
(warm up for 10 minutes),
and make sure the gauge
reads approx. 0.2 to 0.4
SCFH
001017 rev 3
This reading may vary from slightly under 0.2 SCFH to around 0.4 SCFH.
If the flow has changed significantly after a membrane change:
•Check the membrane for Damage
-Make sure the nozzle is sealing properly against the membrane
This is a test done in the weekly maintenance after cleaning the membrane. This
test should also be done after changing the membrane in monthly maintenance to
make sure the nozzle is seated around the membrane.
40
WY
Preventive Maintenance
GE Ion Trask
Monthly Maintenance: Membrane Burn in
7,me
5. Re-install Desorber,
Select Menu then
Burn in Membrane.
Saying "Yes" results
in a four hour period
of raised
temperature.
PM Th[ClO7
Using "Burn in Membrane" burns off any contaminants that may have been
introduced with the installation of a new membrane.
The system will logout at the start of the burn in cycle.
Preventive Maintenance
CE Ion Track
Annual Maintenance: Radiation Wipe Testing
Radiation Wipe Test Locations
Remove Desorber and wipe around
the nozzle area.
ipe along seams of the instrument,
particularly near the nozzle
PN TM0010.17 rev:3
Once a year, an GE Ion Track authorized testing facility will offer our customers a
radiation test kit. These wipe test kits contain instructions on how to perform a
wipe test along with treated swabs to perform the wipe test.
42
• Consumables & Accessories
• Basic Plasmagram Theory
• Maintenance Log On
• Menu
• Calibration
• Preventive Maintenance
FedCure FOIA Litigation
2005-03326
Cover Sheet
This Section Contains:
C. Information related to the training methods
used for operators
Location: Cn&una0
Name and phone number of person conducting search:
v-- edkor,
/
Le-k-Ic4
United States Government
Memorandum
FCI Englewood
Date: De
(b)(7)c
Reply
Attn of
Subject: ION Spectrometry Device Training
To
(b)(7)c
On Monday, December 17, 2007, at approximately 2:45 p.m., in accordance with
Program Statement 5520.01, page 16, the following staff members received the
required training prior to assuming any visiting posts for the 4 th quarter:
(b)(7)c
United States Government
Memorandum
FCI Englewood
Date: Ma
Reply To
Attn of
(b)(7)c
Subject: ION Spectrometry Device Training
To:
(b)(7)c
On Friday, March 14, 2007, at approximately 3:10 p.m., in accordance with Program
Statement 5520.01, page 16, the following staff members received the required training
prior to assuming any visiting posts for the 1st quarter:
(b)(7)c
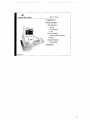
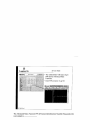
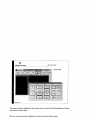
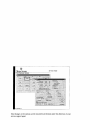
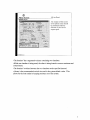
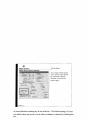
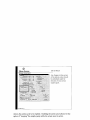
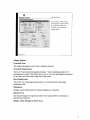
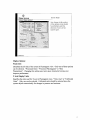
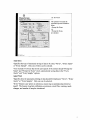
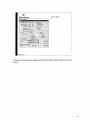
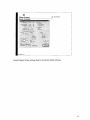

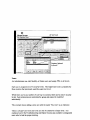
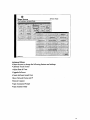
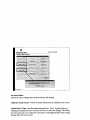
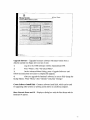
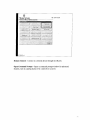
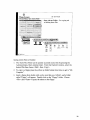
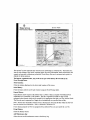
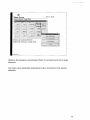
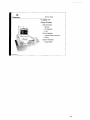

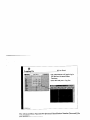
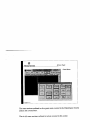

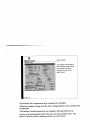
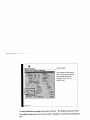

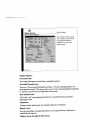
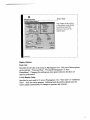
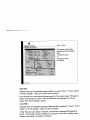
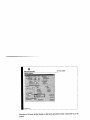
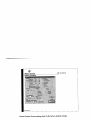
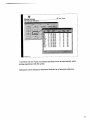
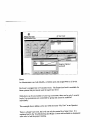
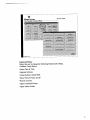
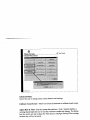
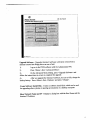
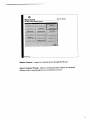
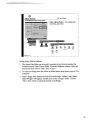
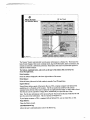
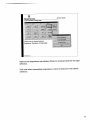
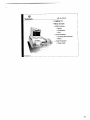
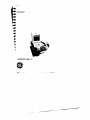
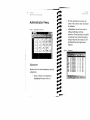
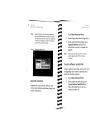


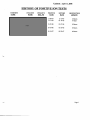
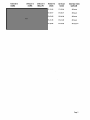

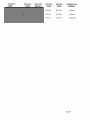
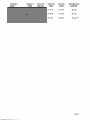

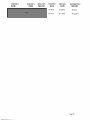


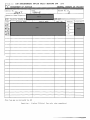
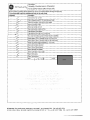
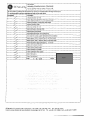

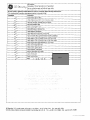
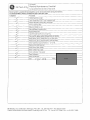
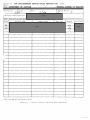
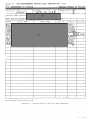
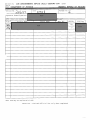
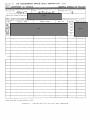
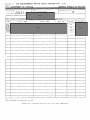
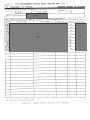
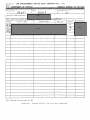
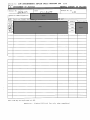
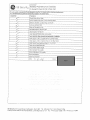
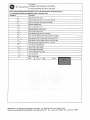

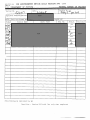

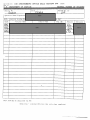
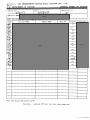
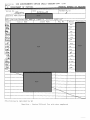
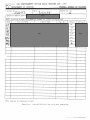

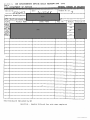
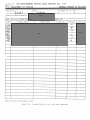
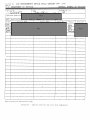
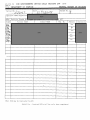
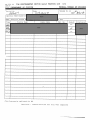
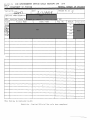
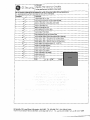

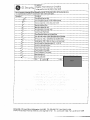
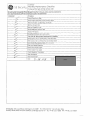


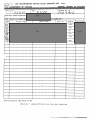
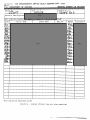
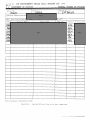
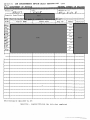


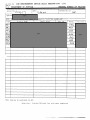
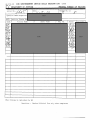
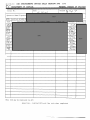
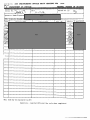
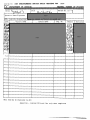
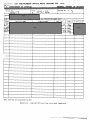
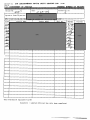
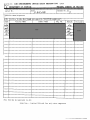
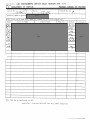
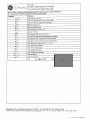
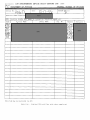
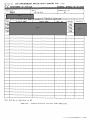
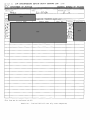
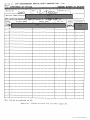
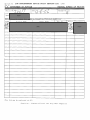
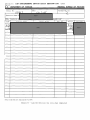
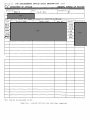
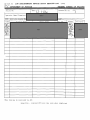
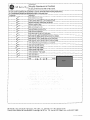


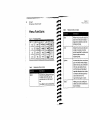
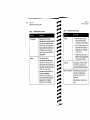
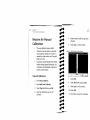
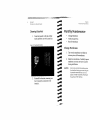
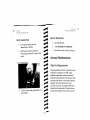
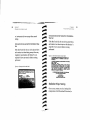
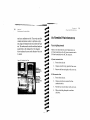

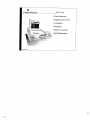

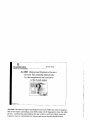
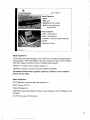
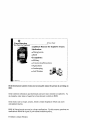
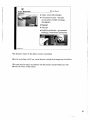
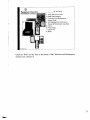
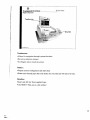
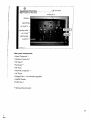
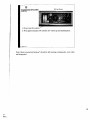
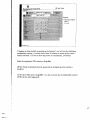
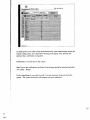
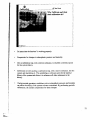

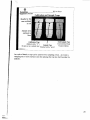
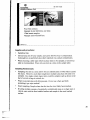
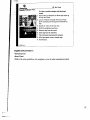
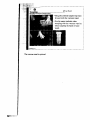
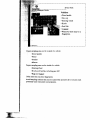
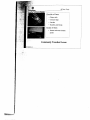

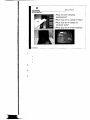
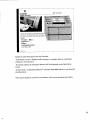

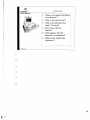
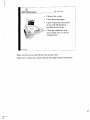

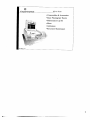
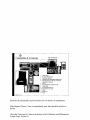
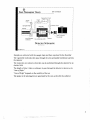
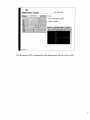
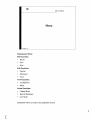
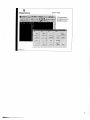
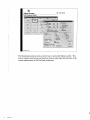
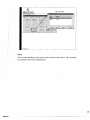
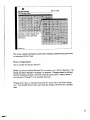
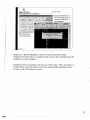
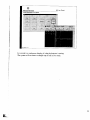
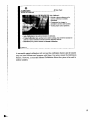
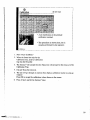
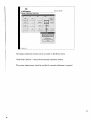
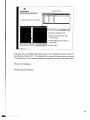
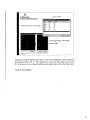
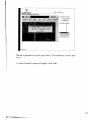
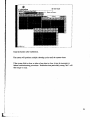
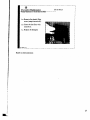
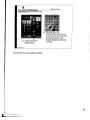
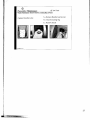
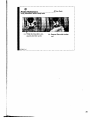
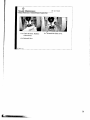
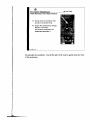
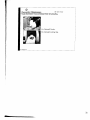
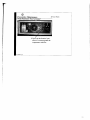
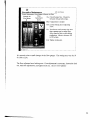
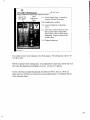
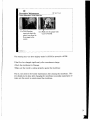
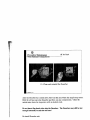
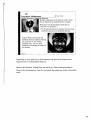
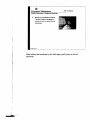
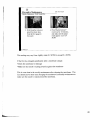
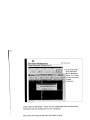
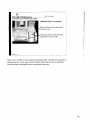
![Rii Mini [Bluetooth]](http://vs1.manualzilla.com/store/data/005730343_1-53cd9486bcc3b780c33a2a4f5175af21-150x150.png)