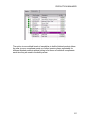
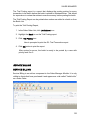
1
BVEssentials
Administrators Guide &
User’s Manual
Version 4.3.5
Table Of Contents
CONTACT ............................................................................................................1
INTRODUCTION ..................................................................................................3
Welcome to BVEssentials .................................................................................3
What is BVEssentials Production Manager?..................................................3
SETUP (ADMINISTRATORS ONLY) ....................................................................5
System Requirements .......................................................................................5
Setting Up BVEssentials (Administrators Only) .................................................5
Installation .....................................................................................................5
User Permissions ..............................................................................................6
Permissions Tab ............................................................................................7
Company Setup...............................................................................................11
BVEssentials Company Setup .....................................................................11
General Ledger ...............................................................................................12
Inventory .........................................................................................................13
Production Orders ...........................................................................................15
Sales Order .....................................................................................................16
Process/Invoicing Tab .................................................................................19
Point of Sale Tab .........................................................................................21
Surcharges Tab ...........................................................................................22
Messages Tab .............................................................................................23
CORE MODULES...............................................................................................25
Core Modules ..................................................................................................25
Master Records ...........................................................................................25
VENDORS ..........................................................................................................27
VENDORS ......................................................................................................27
Creating a New Vendor ...................................................................................27
Creating a New Vendor................................................................................27
Hold .............................................................................................................28
Addresses Tab.............................................................................................28
General Tab.................................................................................................33
Billing Tab ....................................................................................................34
Purchases Tab.............................................................................................35
Communications Tab...................................................................................36
Editing a Vendor Record .................................................................................37
Editing a Vendor Record..............................................................................37
Deleting a Vendor Record ...............................................................................37
INVENTORY .......................................................................................................39
INVENTORY ...................................................................................................39
Creating a New Inventory Item ........................................................................39
Creating a New Inventory Item ....................................................................39
General Tab.................................................................................................41
Pricing and Tax Tab.....................................................................................50
Inventory Adjustments (Impact on Current Costs) ...........................................53
Inventory Adjustments: Impact on Current Costs.........................................53
Adjust Inventory ...........................................................................................54
iii
BVEssentialsAdminGuide
Receive PO..................................................................................................54
Transfer .......................................................................................................55
CUSTOMERS .....................................................................................................57
Customer List ..................................................................................................57
Creating a New Customer ...............................................................................58
Creating a New Customer............................................................................58
Hold .............................................................................................................58
Addresses Tab.............................................................................................59
Billing Tab ....................................................................................................64
More Tab .....................................................................................................68
Sales History Tab ........................................................................................68
Price Matrix Tab...........................................................................................70
Tax Matrix Tab.............................................................................................70
COMMUNICATIONS ..........................................................................................73
COMMUNICATIONS.......................................................................................73
Adding a New Message...................................................................................73
Display Section ............................................................................................74
Deleting a Message.........................................................................................75
Filtering Messages ..........................................................................................75
Subject Contains..........................................................................................76
Hide .............................................................................................................76
Due Date Section.........................................................................................77
Completed Date Section ..............................................................................77
Inventory Filter (Visible only in the Inventory Communications)...................77
PRODUCTION MANAGER.................................................................................79
PRODUCTION MANAGER .............................................................................79
Functions.........................................................................................................79
Creating a Production Order............................................................................80
Creating a Production Order ........................................................................80
Header Tab..................................................................................................81
Components Tab .........................................................................................86
Saving the Bill of Material ................................................................................91
Save the Bill of Material (Recipe).................................................................91
Copying a Bill of Material (Recipe)...............................................................91
THE BUILD PROCESS ...................................................................................92
THE BUILD PROCESS................................................................................92
To Build a Portion of a Production Order .....................................................93
Finished Goods with Serial/Lot Numbers.....................................................95
What Happens after the Build Process is Completed ..................................96
SUB-ASSEMBLIES .........................................................................................96
SUB-ASSEMBLIES .....................................................................................96
Building Production Orders with Sub-Assemblies........................................99
Insufficient Quantities of a Sub-Assembly....................................................99
Multiple Sub-Assemblies ...........................................................................100
SALES MANAGER ...........................................................................................103
Sales Manager ..............................................................................................103
Navigation .....................................................................................................103
iv
Table Of Contents
Sales Order List .........................................................................................103
Note: If the “Use Batching” option has been selected in BVEssentials set up,
then the “Batch” icons will appear next to the “Fill Back Orders” icon. .......104
Creating a New Sales Order..........................................................................106
Creating a New Sales Order ......................................................................106
Main Tab....................................................................................................107
Sales History Tab ......................................................................................116
Communications Tab.................................................................................117
Shipping and Customer Tab ......................................................................117
Saving the Sales Order..............................................................................117
Payment Methods......................................................................................118
Increasing Customers Credit Limit .............................................................120
Quotes...........................................................................................................121
Quotes .......................................................................................................121
Standing Orders ............................................................................................122
Standing Orders.........................................................................................122
Booking Orders .............................................................................................123
Booking Orders..........................................................................................123
POS (POINT OF SALE) ................................................................................124
POS (POINT OF SALE).............................................................................124
POS Setup.................................................................................................125
Accessing POS Screen (with Customer Flag turned on) ...........................125
Increasing the Customers Credit Limit .......................................................129
Switching between POS Screen and Sales Order Entry............................130
Changing back to POS Screen ..................................................................130
Changing Customers in POS.....................................................................130
PRICING .......................................................................................................131
Sage Pricing Overview ..............................................................................131
BVEssentials Pricing..................................................................................135
PROCESSING ORDERS ..............................................................................150
Processing .................................................................................................150
Batches......................................................................................................152
Batch Report..............................................................................................154
Trial Posting Report ...................................................................................154
SERVICE BILLING........................................................................................155
SERVICE BILLING ....................................................................................155
Vehicle Info Tab.........................................................................................156
v
CONTACT
Getting Help
This guide provides complete, detailed information on installing and
setting up the system. However should you find yourself with a
problem that you cannot answer with the provided tools, please contact
your BusinessVision Partner.
When you call your BusinessVision Partner, please be at your
computer and prepared to provide the following information:
•
•
•
•
•
Product name and version number
The exact wording of any messages that appear on your
screen
What you were doing when the problem occurred
How you tried to solve the problem
Does anyone else have the same problem
This document is provided to BVEssentials clients for informational and training
use. They may make printed or electronic copies for the sole purpose of use and
distribution among their own users.
The information and illustrations in this document are private and confidential
information belonging to TriTech Information Systems. Except for the above
provision, no part of this document may be reproduced, transmitted, transcribed
or stored in a retrieval system in any form and any means, electronic, mechanical
or otherwise without the prior written permission of TriTech Information Systems.
The information in this document is provided for informational use only and is
subject to change without notice. Information in the document has been carefully
checked and is believed to be accurate. However, TriTech Information Systems
assumes no responsibility for errors or inaccuracies that may be contained in this
document or in the use to which it may be put.
All third party trademarks, trade names or company names that appear in this
document are used for identification purposes only and are the property of their
respective owners.
1
BVEssentialsAdminGuide
BVEssentials,
A division of
TriTech Information Systems
Suite 4, 5492 Production Blvd.
Surrey, BC V3S 8P5
Toll Free: (888) 534-4790
Tel: (604) 534-4790
2
INTRODUCTION
Welcome to BVEssentials
BVEssentials is comprised of two modules that replace or enhance the
functionality of some BusinessVision modules. The BVEssentials modules are
Sales Manager and Production Manager.
Basically BVEssentials runs beside BusinessVision, using its architecture and
table structure as the foundation to enhance data collection, functionality and
reporting in a user friendly environment.
What is BVEssentials Production Manager?
BVEssentials Production Manager is an application that expands the Bill of
Material module provided within BusinessVision. It requires BusinessVision
Standard or SQL Edition as Bill of Materials is not included within the Small
Business or Limited Editions.
BVEssentials Production Manager increases efficiency and functionality by
pulling data stored in BusinessVision tables and files, displaying it seamlessly in
the relevant BVEssentials windows and adding additional data elements and
work flow options.
BVEssentials Production Manager provides the user with the ability to track raw
material usage and demand before it is required, enabling better control over
scheduling and the production process. At the same time it generates all files
that are consistent with those produced by BusinessVision Bill of Material
module. As a result, once a Production Order is completed and posted/received,
all of the standard reporting and control functions of BusinessVision remain
intact. In fact a better audit trail for the Production Order process is created.
Who Uses It?
The primary purpose is to track Production Order status and raw material
requirements, posting the completed items to the appropriate location and
inventory accounts when they are completed. BVEssentials updates the general
ledger accounts as defined in the Inventory Sales Departments as needed. Once
the Production Order is completed, the raw materials used are removed from
inventory, and the finished product is placed in inventory at the sum cost of the
raw materials used to produce the item.
3
BVEssentialsAdminGuide
The primary users will be the individuals who create Production Orders and need
to follow the status of the order and materials required to complete them.
Typically there is a system administrator that does all of the configuration and
setup, prior to the users doing data entry. They would also be responsible for
defining security and the G/L accounts in BusinessVision, based upon the needs
of their company.
4
SETUP (ADMINISTRATORS ONLY)
System Requirements
Setting Up BVEssentials (Administrators Only)
Installation
Once the minimum system requirements have been met, the Pervasive Engine
and BusinessVision have been installed; you are ready to install BVEssentials.
To Install BVEssentials:
1. Download the installation file from http://updates.tri-tech.com/bvessentials/
and select Run
2. Accept the defaults for the location of the BVEssentials files, or select a
different location using the Browse button.
3. Accept the remaining defaults as prompted
4. Then click Finish
Once the installation has been completed, the next step is to register your
product.
1. Double click the shortcut created on the desktop to BVEssentials
The Company window will open.
2. Click Options
3. Click Add
Browse to the BusinessVision Data folder for the desired company
4. Double click the BVCON.FIL file
Your company name should now appear in the list.
5. Login with your BusinessVision ID and password; you will be prompted to
enter an activation and license key
6. Enter your company name, leave Serial Number blank
7. Click Next
5
BVEssentialsAdminGuide
8. The screen will display a request key and a serial number.
9. Copy and paste both
[email protected]
of
these
numbers
into
an
email
to
A reply will be sent to you with the activation key for your copy of
BVEssentials and license keys for the modules purchased.
1. When the activation and license key is received, launch BVEssentials
2. Log in and when you are prompted for the activation and license keys,
enter the codes sent to you from BVEssentials
3. Select the company and login with your user name and password
User Permissions
A user, typically an Administrator, with BusinessVision Level 9 security is
required to access and complete User Permissions.
To access User Permissions:
1. Select Tools on the menu bar
2. Select Users.
The User List will open.
User List
3. Select the User from the list and double click
Or
6
SETUP (ADMINISTRATORS ONLY)
Select the User in the List and click Edit User Icon
The User Edit window will open.
Permissions Tab
Limit Section
User Edit>Permission Tab Window>Limit Section
Limit Customer By Territory and Territory Code
For the selected user, if the Limit Customer By Territory option is marked, only
the Customers assigned to the specified Territory Code will be displayed in a
Customer List. If the option is unmarked, all Customers will be displayed in a
Customer List..
Limit Customer By Salesperson and Salesperson Code
For the selected user, if the Limit Customer By Salesperson option is marked,
only Customers assigned to the specified Salesman Code will be displayed in a
Customer List. If the option is unmarked, all Customers will be displayed in a
Customer List.
Note: By default all Customers are displayed in a Customer List. The List can be
restricted to display only the Customers that are assigned to a specific
Salesperson in the selected Territory for this user.
Orders Section
7
BVEssentialsAdminGuide
Permissions Tab>Orders Section
Can Only Modify Shipping Fields
When this options is marked, this user is restricted to editing only the shipping
fields on an Order. This setting is useful for a user who only requires to enter the
quantity shipped, shipping method, FOB and reference number fields. If
unmarked, this user can add or edit the other fields on an Order..
Show Backorder Warning
When this user adds an Item to an Order and the quantity ordered exceeds the
quantity available, a dialogue window will be displayed stating that there are
insufficient quantities in inventory and some items are backordered.
Can Process Orders
When the Can Process Orders option is marked, the user has permission to
process Orders. If it is unmarked, the Process icon is disabled and the user is
unable to process Sales Orders.
Lock Processed Orders
There are three options to assign to the User with regards to Locking Processed
Orders
• System Default
• Yes
8
SETUP (ADMINISTRATORS ONLY)
•
No
Can Edit Closed Orders - Invoice
The Can Edit Closed Orders - Invoice option, when marked gives permission to
the User to edit Orders and Invoices after they have been closed. If unmarked,
the User does not have permission to edit closed Orders and Invoices.
Can Override Credit Limit
The User will be able to override the credit limit if this option is marked. If
unmarked, the User will not have permission to override credit limits.
Can Re-Open Closed Orders
The User can re-open closed orders and edit them when this option is marked.
The User will not be able to edit a closed order if this option is not marked.
Can Batch Orders/Invoices
The User can place orders/invoices into Batches when this option is marked. If
the option is unmarked, then the User will not be able to place Orders/Invoices
into a batch.
Can Post Batches
When the Can Post Batches option is marked, the User can post batches. if it is
unmarked, the User is unable to post batches.
Access Section
Permissions Tab>Access Section
Can Change Location
The User will be able to change locations when this option is marked. A Default
Location can be assigned to the user as well. If this option is not marked and a
default location is defined, the User will be restricted to the Default Location
specified.
9
BVEssentialsAdminGuide
Can See Sell Prices
The User will be able to see the selling prices on orders and invoices when this
option is marked. A User whose tasks are that of shipper or receiver does not
need to see the selling price to complete their tasks. In that instance, this option
would be left unmarked for those Users.
Can Modify Sales History
The User will have permission to edit PO Number, Salesperson, Territory, FOB,
Reference Number, Detail Description, Detail Employee, and Detail Memo fields
on a posted Invoice when this option is marked. If unmarked, the User will not
have the ability to edit these fields.
Enforce Report Security
When this option is marked, the Reports Tab in the User Edit becomes active.
From there, the user can be restricted to printing only the selected reports. If
unmarked, the User has unrestricted access to available reports.
Can Add/Edit Mail Merge Template
The User will have permission to add or edit a Mail Merge template when this
option is marked. If unmarked, the user will be restricted from making changes.
Can Print Customer Linked Documents
The User will have permission to print/view documents that are linked to the
Customers they have permission to access, if this option is marked. If unmarked,
the User can be restricted to more specific documents based on the other
permissions that have been set.
Can Print Inventory Linked Documents
The User will have permission to print/view all Inventory documents that are
linked to orders or items they have permission to access, if this option is marked.
If unmarked, the User can be restricted to specific documents based on the there
permissions that have been set.
Can Change Credit Limit
The User will be able to increase or decrease a Customer's credit Limit when this
option is marked. If unmarked the User will be unable to change a Customer's
credit limit, and will require another User with this permission set to change the
credit limit for them.
Inactive Section
User Edit>Permissions Tab>Inactive Section
10
SETUP (ADMINISTRATORS ONLY)
Show Inactive Customers
Inactive Customers will not be displayed in Customer Lists when this option is
marked for this User. If unmarked, all Customers will be displayed.
Show Inactive Inventory
Inactive Inventory Items will not be displayed in Inventory Lists when this option is
marked for this User. If unmarked, all Inventory Items will be displayed.
Company Setup
BVEssentials Company Setup
Before BVEssentials can be used, there is some set up to do that will affect four
areas. These areas are the General Ledger, Inventory, Sales Manager and
Production Manager. A user, typically an Administrator, with BusinessVision
Level 9 security is required to access and complete BVEssentials setup.
.
To access BVEssentials Company Setup:
1. Select Tools on the menu bar
2. Select Company Setup.
The company setup window will open.
11
BVEssentialsAdminGuide
Company Setup> General Ledger Window
General Ledger
General Ledger
The General Ledger tab allows the system administrator to set up location and
profit center segment in the G/L if needed.
Location Section
Some companies will have multiple locations or branches which can be set up as
a segment of the G/L account in order to maintain separate balance sheet and
income statement accounts.
12
SETUP (ADMINISTRATORS ONLY)
This also allows for automatic posting to a pre-determined segment in the G/L. If
the user logs in to a location (segment) then all postings by that user will be made
to the account with that specific location code.
For Example assume the sales account is 40567 and the segment is BC, and the
account 40567-BC exists in the G/L; then the posting will go to account 40567BC. If the account does not exist then the transaction will be posted to the base
sales account (40567).
Profit Center Section
In addition to having multiple branches or locations, some companies will track
profit centers for reporting separately on their income statements. For Example
an automotive repair company may have the following profit centers for parts
revenue:
•
•
•
Parts
Service
Warranty
A segment can be defined to denote these profit centers. Using the previous
multi-location sales account as an Example the automotive repair company could
utilize both the location and profit center segments for easier income statement
reporting. The G/L accounts would look like the following for the BC location
sales account:
•
•
•
40567-BC-PART
40567-BC-SERV
40567-BC-WARR
Note: If the G/L accounts do not exist with either/both the location and profit
centers segment included, then the transactions will be posted to the G/L base
sales account 40567.
Inventory
Inventory Tab
The Inventory tab allows the administrator to set up references for posting a
receiving or transfer to the General Ledger; the default accounts; the method in
which to display the cost margin; and lastly, when the user will be prompted to
enter serial/lot numbers
13
BVEssentialsAdminGuide
Company Setup>Inventory Window
Receiving/Transfers Section
A journal entry will not be posted automatically to the G/L for Receiving and
Transfers unless the “Post to G/L” option is marked.
A default G/L account for inventory receipts needs to be selected from the G/L
account lookup. This account will be the one used when inventory receipts are
created and posted to the General Ledger.
Similarly, a default G/L account for inventory adjustments needs to be selected
from the G/L account lookup. This account will be the one used when any
inventory adjustments are created and posted to the General Ledger.
Note: Default receiving and adjustment accounts must be specified from existing
accounts in the G/L in order for the “Post to G/L” function to work. These settings
can be the same as those already defined in BusinessVision.
A default Transfer Markup Account needs to be selected from the G/L account
lookup. This account will be the one used when a price markup is assigned to an
item when transferred to another warehouse.
A Default Markup Percentage can be assigned to all transfers between locations
or warehouses. The value of this will be entered into the default Transfer Markup
Account mentioned above.
Prompt for Serial/Lot Numbers Section
The prompt for entering serial or lot numbers can be set to either of the following:
14
SETUP (ADMINISTRATORS ONLY)
At Item Selection
The prompt to enter serial/lot numbers appears after the item has been selected.
The number of serial/lot numbers entered will automatically populate the quantity
ordered field.
After Selecting Quantity
The prompt to enter serial/lot numbers appears after the item selection and
quantity has been entered. The number of serial/lot numbers entered/selected
can not be more than the quantity entered.
Enforce Product Codes
The Enforce Product Codes option when marked restricts users to entering or
selecting only the product codes in existence in inventory. When unmarked the
user (if they have permission to create new items) may add an item on the fly
when doing inventory receipts, adjustments or transfers.
Production Orders
Quantities Section
If the items being produced use raw materials and there is left over or scrap
materials at the end of the production process, then this option needs to be
marked to track and allow for scrap and yield.
Please refer to BusinessVision documentation for further information on Scrap
and Yield.
Company Setup>Production Manager Window
15
BVEssentialsAdminGuide
Purchase Orders Section
BVEssentials has the capability of generating a Purchase Order from a
Production Order if the Allow PO Generation from Production Order option is
marked. If unmarked, users will be unable to generate a Purchase Order for
items needed to complete a Production Order. In that case, a Purchase Order
will have to be generated from the Purchase Order Module in BusinessVision.
Sales Order
Sales Orders
The Sales Orders tab contains the setup options for BVEssentials Sales Manager
module. Adding extensive functionality, it replaces the standard Order Entry
module that is contained within BusinessVision. Setup is flexible and can
accommodate most configurations, depending upon the options and functions
selected in Sales Orders in conjunction with those selected in the Inventory and
the General Ledger Tabs.
Orders Tab
16
SETUP (ADMINISTRATORS ONLY)
Company Setup>Sales Orders>Orders Tab Window
Separate Departments Section
Separate Orders by Division – allows a company with multiple divisions or
departments to configure BVEssentials so that each division will only see their
own orders.
Inventory Section
Disable Sales of Items not in Inventory
All users are prevented from entering non–inventory items on an order or invoice
when this option is marked.
17
BVEssentialsAdminGuide
User Selectable Kit Options
Kits are turned into a user definable option package. In other words the items
within the kit can be selectively ‘exploded’ or expanded onto the order rather than
a single line entry for the kit. In this case the master or top assembly item is
never sold.
Match Lowest Price in Price Matrix
Pricing is checked in all places to ensure that a customer gets the lowest possible
price if they are eligible for a special price in more than one instance. If this option
is not marked, then the price matrix price will be used (if one exists) even if it is a
higher price.
Prohibit Over Committing Inventory
Users are restricted from attempting to sell a larger quantity of an item than they
have in inventory.
It will list the quantity available in inventory and flag the remaining quantity as
back-ordered, thus preventing on hand inventory quantities going negative.
Note: If auto-fill in BusinessVision is set, then the order will be filled automatically
if the product is available. However, if Auto-fill is off, over-shipping can occur.
Always Ship (disable order and backorder qty.)
The company has the option to process an order or shipment without having to
track inventory. There are no ordered or back-ordered quantities which will
deplete inventory. It is strictly for shipping an item without it affecting inventory.
Use Customers Default Warehouse
When an order is created, the default inventory warehouse that will be used is the
one defined on the customer record.
Note: If this option is not checked, then the system will assign the logged in
user’s (person creating the order) default warehouse or location automatically.
Use Serial/Lot Number Costing
When this option is marked, the cost assigned to the serial or lot numbered
item when it was received or built, will be used when calculating the profit
margin or selling cost of the item.
Salesperson/Territory Codes Section
Use Salesperson on Orders
Users are required to enter a salesperson on the order before it can be saved.
18
SETUP (ADMINISTRATORS ONLY)
Use Territory on Orders
Users are required to enter a territory code on the order before it can be saved.
Ship Date Section
Days Ahead
A company can predefine the expected time it will take to pull an order together
and have it ready for shipping.
•
For Example a company which has a policy that it most commonly ships in
2 days, would set their option to 2
•
•
•
Orders placed on Monday would be shipped Wednesday,
orders placed on Tuesday would be shipped Thursday,
Wednesday orders on Friday, etc.
This assigns the default ship date but the ship date can still
be changed on the order.
This function does not take weekends into account when
calculating days.
Process/Invoicing Tab
19
BVEssentialsAdminGuide
Company Setup>Sales Orders>Invoicing Tab Window
Order Invoicing Section
User Selectable Invoice Numbers
The user is allowed to override the default invoice number displayed on the
invoice. Typically this is used when a company wishes to generate manual
invoices instead of those that follow the default sequence.
Lock Closed Orders
This option is applicable only when the BVEssentials option to Batch Orders has
been enabled. When both the Batching option and Lock Closed orders are
enabled, only users with the appropriate permissions can access the batch to edit
an order that has not yet been posted. All other users are prevented or locked
out of editing these orders.
All users can edit the payment method and re-print the invoice
Batch Posting
There are three options for Batch Posting.
•
Always batch – All invoices will be kept in BVEssentials until they are
posted in a batch.
•
Always Post – All invoices will be posted directly to the General Ledger
(same manner they are handled in BusinessVision) when the "Invoice"
button is clicked.
•
Ask When Invoicing – The user will be prompted to select to either batch
the invoice or post it to the General Ledger, when the "Invoice" button is
clicked.
Printing Invoices
Different forms are required when printing invoices depending on the batch
posting option being used.
“Always Batch” keeps the invoices in BVEssentials and the invoice report
references the BVEssentials Orders files.
“Always Post” sends the invoice to the general ledger and the invoice report
references the Sales History files.
Customer Credit Section
Require Credit Authorization
20
SETUP (ADMINISTRATORS ONLY)
The user will be prompted for an override password when a customer goes over
their credit limit. Only users with the appropriate permission will be able to
override the credit limit.
Check Credit Limit when Processing Orders
Orders are checked for available credit during the “process” function when this
option is checked. When unchecked, credit is checked during the "invoice"
function.
Disable Credit Over Terms
Orders cannot be processed when the customer is past due on paying their
account even if they are under their credit limit when this option is checked.
Processing Section
Prohibit Processing Orders Twice
The status of an order is checked during the "process" function. If the status is
already marked as "processed", and a user attempts to process it again, a
dialogue window will open stating that the order has already been processed
when this option is checked. Click "okay" and both the dialogue window and the
Sales Order Window will close; and the user returned to the Sales Order List.
Further processing of the order even if the quantities being shipped or on
backorder are adjusted, will not be allowed when this option is marked.
Back Orders Section
Use Suffix on Order Numbers to Manage Back Orders
Users will be able to add a suffix (such as -01, -02, -A, -B, etc.) on Orders that will
be created as back-orders when the original Invoice is posted when this option is
checked.
Create Back Orders While Invoicing
An Order with the Back Ordered Items will be created when the "Invoice" button
is clicked when this option is checked. If it is not checked, the Back Order will be
created when the Invoice is posted.
Point of Sale Tab
The Point of Sale tab needs to be configured only if POS is going to be used.
21
BVEssentialsAdminGuide
BVEssentials Company Setup>Point of Sale Tab
Always Prompt for Customer
•
The user is prompted to select a customer on Point of Sale transactions
when this option is marked.
•
It is automatically assumed the transaction is a Cash Sale if this option is
not marked. The user has the option of selecting a different customer than
the default.
Surcharges Tab
The Surcharges tab contains the option to define surcharges and the taxes that
are applicable to the surcharges (automatic charges) that have been assigned to
product codes.
Note: To edit or assign surcharges to a product code, refer to Core Modules –
Inventory for further details.
Company Setup>Sales Orders>Surcharges Tab
22
SETUP (ADMINISTRATORS ONLY)
Surcharges Section
Apply Tax 1
If Tax 1 in the company setup is applicable to the surcharge placed on the
product code, then this option must be checked.
Apply Tax 2
If Tax 2 in the company setup is applicable to the surcharge placed on the
product code, then this option must be checked.
Min
Specify the minimum amount of the surcharge if applicable.
Max
Specify the maximum amount of the surcharge if applicable.
G/L Account
Specify the General Ledger account to which the surcharge income should be
posted.
G/L Description
The G/L Description field is automatically populated by the system when the G/L
account has been selected. It is not editable.
Alias
Enter the description or name that the surcharge will be called and displayed on
orders. The example above shows “Shop Supplies”.
Messages Tab
A message can be defined to pop up in Sales Order Entry or in Point of Sale.
23
BVEssentialsAdminGuide
Company Setup>Sales Orders>Messages Tab
Price Check Warning Section
Message
A customized message entered here will pop up when a user attempts to sell an
item for less than the margin specified on the Product Code. The message will
include the % of the margin and indicate the margin required. Depending on the
user's permissions, the user can either this price for the item on this Sales Order,
or they can change the price.
Display in POS
The Price Check window will pop up in POS if this option is checked.
Display in Sales Orders
The Price Check window will pop up in Sales Orders if this option is checked.
Warning Messages Section
Display Warning When POS Over Commits inventory
The POS user will be warned if there is insufficient quantity in inventory, when
this option is checked. Otherwise it is possible for inventory to be sold into the
negative quantities.
24
CORE MODULES
Core Modules
Master Records
Within the three core modules, there are Master Records. They are called
Master Records because once created, they are referenced over and over again
without having to be manually re-entered or continually updated. Customer
Details, Inventory Details, Vendor Details are examples of Master Records.
New to BVEssentials?
If you have just purchased BusinessVision and BVEssentials and are installing
them both for the first time, then you will create new master records in
BVEssentials.
If you have already been using BusinessVision and recently upgraded to include
BVEssentials, the master records already exist in your database. It is
recommended that from this point, all master records be maintained in
BVEssentials for simplicity and consistency. There is additional information
stored by BVEssentials that is not available or maintained by BusinessVision.
25
VENDORS
VENDORS
Vendor records need to be present in the database before inventory can be
received and sold. In order to sell an item from inventory, it needs to have been
received.
So the first step to setting up Purchasing and Inventory is to create Vendor
records.
Note: If BVEssentials is an addition to an existing BusinessVision configuration,
the vendor records already exist in the database and will be displayed in
BVEssentials Vendor List. It is recommended that Vendor maintenance now take
place within BVEssentials instead of BusinessVision, as BVEssentials has
access to more information than BusinessVision.
Creating a New Vendor
Creating a New Vendor
The essential data elements required to form a unique Vendor record are the
Vendor Number and the Vendor Name.
Vendor Number and Name
The Vendor Number must be a unique code, with a maximum length of 20 alphanumeric characters. Typically there is a method to the construction of the number
so that it follows the same pattern for each Vendor and is easy to remember.
The Vendor Name is linked to the Vendor Number. Anytime the Vendor Number
is selected in a Sales or Production Order, the Vendor Name will automatically be
populated.
To create a new Vendor
1. Click on New Vendor Record icon in the Vendor List Toolbar
The “Vendor Edit” window opens.
2. Enter Vendor Number (it must be unique)
27
BVEssentialsAdminGuide
3. Enter Vendor Name
4. Click Save to save the record before inputting additional Vendor data
Hold
The hold option when marked will not allow any new Purchase Orders or Invoices
to be generated for this Vendor. However the Vendor will still appear in the
Vendor List as access to the record is still required.
Vendor List>Vendor Edit Window>Addresses Tab
Addresses Tab
Addresses Tab
The Addresses tab contains the basic information about the Vendor.
BVEssentials has the functionality to have multiple address records for the same
Vendor in one Vendor record. Each address record contains the contact
information specific to that address.
Adding a New Address Record
28
VENDORS
To add a new Address Record
1. Click on the “+” button at the bottom right of the Addresses List
The Line directly below the last entry will become active
2. Enter the name or identifier for the new address
3. Enter additional address information as needed
4. Click Save icon to save the record
Note: All that is required for an address record is the Name of the record
Deleting an Address Record
To delete an Address Record
1. Highlight the Address to be deleted in the Addresses List
2. Click on the “-“ button at the bottom right of the Addresses List
The Address will be removed from the list
Note: Once an address has been used it should not be deleted, as it has
historical records attached to it. It is recommended that the address be
placed on hold so that it cannot be used for future orders.
Address Tab
Address Tab
The Address tab is located in the Addresses tab of the Vendor record. Each
Address record contains location and contact information.
29
BVEssentialsAdminGuide
Hold Address
The Hold Address option in the Address Tab allows the user to place a hold on
Purchase Orders or Invoices for this address. This specific location may be
closed for maintenance for a few weeks or they are relocating, etc. Other
addresses can still place and receive Purchase Orders or Invoices, unless the
Vendor record has been placed on hold.
Contact Information Section
Enter Address Information
1.
2.
3.
4.
5.
6.
Address (There are 4 address fields to allow for PO boxes, RR #, etc.)
City
Province/State
Postal Code
Phone Number
Fax Number
The Map Button located to the left of the address information will launch
www.maps.google.com and display the address on a map and satellite image.
Created/Modified Section1
30
VENDORS
Type topic text here.
Contact Section
Contact Tabs have been added to allow for 3 contact persons for each address
record.
In each Contact tab, there are the following fields that are specific to that contact
1.
2.
3.
4.
Contact Name
Phone Number
Fax/Cell number
Email Address
Internet Addresses Section
Enter Internet addresses
1. Email
2. Website
E-Commerce Section
The Upload to Web option when checked, allows the Vendor record to be used
with the E-Commerce module purchased as an add-on module for
BusinessVision.
Vendor Record>Addresses Tab>Address Tab>E-Commerce Section
Order Defaults Tab
Order Defaults Tab
31
BVEssentialsAdminGuide
Vendor Edit>Addresses Tab> Order Defaults Tab
Order Defaults Section
Warehouse (default)
Selecting a default warehouse in a multi-warehouse configuration saves time in
order entry. It can be over-ridden.
Note: If a “Location” setting has been defined in the company setup of
BVEssentials, the default warehouse will be ignored and the User’s default
warehouse (assigned in BusinessVision User Details) will be used instead.
Shipping Method
This value is taken from the Shipping method control file in BusinessVision and is
the default or preferred method for this vendor.
Sales Territory
Sales Territory is a maximum of 10 characters and is validated against a user
defined table.
Salesperson
The Salesperson field is a maximum of 10 alpha-numeric characters and is
validated against a user defined table. Values specified here will be the default in
Sales Order entry but can be over-ridden in the Sales Order.
Expense
The Expense field allows the user to assign a default expense account from the
General Ledger to be used for purchases from this Vendor in this address record
1. Select the appropriate Expense Account from the G/L Account drop down
list.
Pricing and Taxes Tab
32
VENDORS
Sales Taxes Section
The Sales Tax Section defines the taxes that are applicable for the Vendor at this
address. These are the taxes that will be applied on a Purchase Order or
Invoice.
With the Sales Taxes now available for each address record, calculating the
correct taxes is now simplified for companies that have multiple locations within
the same country.
Example
There are typically two applicable taxes, Tax 1 and Tax 2. Some locations will be
exempt from Tax 2 on their purchases. To allow for this, there is another field
called Tax 2 Exemption. Enter the Exempted tax code and this tax will not be
calculated or added to the purchase order.
Note: For those vendors or users that use a combined tax, they will use one
unique tax code that combines the tax value to be applied.
Sell Price Level
The selling price level matches the pricing level established within the Inventory
module. All with the same selling level will be charged the same selling price
during Order Entry or POS.
General Tab
General Tab
33
BVEssentialsAdminGuide
Vendor Edit>General Tab
User Defined Fields Section
Notes
The Note field has a maximum length of 30 alpha-numeric characters. It can be
used for general information about the Vendor.
Buyer
This field would usually contain the name of the representative that is placing the
order.
Purchase Order Defaults
The Payment Terms allow the user to assign payment terms to purchases from
this vendor. These will be the default value for the vendor when a purchase order
is created.
Billing Tab
Billing Tab
34
VENDORS
Vendor Edit>Billing Tab
G/L Accounts Section
Payables
1. Select the appropriate Accounts Payable Account from the G/L Account
drop down list. The description of the account will be automatically
populated beside the payables field.
Note: This is not editable after the first posting to this Vendor.
Account Section
Account Number
1. Enter the unique identifier assigned to your company by the Vendor
Credit limit
2. Enter the credit limit available to your company by the Vendor.
Note: The Currency field will be displayed below the Credit Limit field if the
multi-currency module for BusinessVision has been installed.
3. Select the currency used by the Vendor
Purchases Tab
35
BVEssentialsAdminGuide
Purchases Tab
Vendor Edit>Purchases Tab
Purchases Section
The purchase section displays the year-to-date purchases and for comparison
purposes, the previous fiscal year as well.
Summary Section
The fields in this section are automatically updated after each purchase order is
issued or a payment is made. There is no data entry required; they are for the
convenience of viewing data without the user having to go into BusinessVision
Accounts Payable module to see it.
Communications Tab
Communication Tab
The Communication function is not specific to only Vendors. It is also found in
the Customer and Inventory Master records.
Please refer to the Section “Communication Function” for detailed information on
how to set up and use this feature.
36
VENDORS
Editing a Vendor Record
Editing a Vendor Record
To edit a Vendor record
1. Click on the Vendor List icon
The Vendor List window will open
2. Select the Vendor in the list that is to be edited
3. Click on the Edit Selected Vendor icon
Or
Double click on the selected vendor in the list
The Vendor Edit window will open
4. Edit the appropriate information
5. Click Save to save the changes
Note: Other users will not be able to see the changes made to the Vendor record
until they refresh or re-open the Vendor List.
Deleting a Vendor Record
Deleting a Vendor Record
Vendor records can be deleted under the following circumstances,
1. There are no Purchase Orders or Inventory Receipts/Adjustments
attached to them (this includes open and posted records);
2. The deletion does not have an impact on the General Ledger
3. The user has permission to delete.
BVEssentials honors the rules established in BusinessVision and will disable the
delete function because existing fiscal information is critical. (For Example the
Vendor has an outstanding balance owed to them.)
37
BVEssentialsAdminGuide
Note: It is strongly recommended that the BusinessVision System Administrator
disable the option to delete Vendor, Customer and Inventory records in System
Manager > User Details.
38
INVENTORY
INVENTORY
Inventory items need to be entered into warehouse locations (if the multiple
warehouse option has been marked) before any Sales, Purchasing or Production
Orders can be created. Inventory item records contain information about the
physical attributes of the item, stocking levels, and a pricing matrix.
Existing BusinessVision clients do not have to create new vendors, items or
customers, or receive inventory, the existing data in BusinessVision is read by
BVEssentials.
New to BVEssentials?
New clients installing BusinessVision and BVEssentials for the first time will need
to enter the opening quantities on hand for each inventory item. It is strongly
recommended that all opening inventory balances be received using the
Purchase Order module or receiving function of the Inventory Module in
BVEssentials in order to provide a clear audit trail for inventory balances.
Note: When receiving the opening balance of items into inventory, the General
Ledger Integration must be turned off, so that the receipts will not be reflected in
the General Ledger.
Typically the balance forwards in the General Ledger are created by one large
Journal Entry. Turning the General Ledger Integration on and receiving
beginning inventory could end up in an overstatement of inventory.
Please refer to the BusinessVision documentation for information on turning G/L
integration on/off, entering beginning balances and creating purchase orders.
Creating a New Inventory Item
Creating a New Inventory Item
To create a new Inventory Item record
1. Click Inventory List icon on the BVEssentials navigation bar
Or
Press <ALT> + <I> and select Inventory List from the menu
39
BVEssentialsAdminGuide
Inventory List Window
2. Click Create New Inventory Item icon
The Inventory Edit window will open
Inventory Edit window
Inventory Record Header and Footer
Warehouse, Part Number and Description
In companies with multiple warehouses entered into the system, a
warehouse location will need to be selected for the part.
3. Select the Warehouse location where the part will be stored (only visible
when multiple warehouses are configured) In single warehouse
companies, a warehouse location is not required, and for convenience the
warehouse field has been removed from the form.
If the company expands to more than one location in the future, the multiple
warehouse option can be activated in BusinessVision Company Setup and
the new warehouse added. The warehouse field has a maximum of 6
alpha-numeric characters.
4. Enter a part number in the Part Number field. The Part Number has a
maximum length of 34 alpha-numeric characters and must be unique. It is
linked to the Description field.
5. Enter a brief description of the part in the Description field
40
INVENTORY
NOTE: These are the only fields that require data entry in order to create a new
inventory item.
Inventory Item Footer
At the bottom of the inventory item window there is a footer that contains five
fields with current information about the quantities of the item.
•
On-hand
The quantity of the item that is physically available to be sold
•
Committed
The Committed field contains the quantity of the item on hand that has
been entered into sales orders or consumed in a production order with an
Allocated status. (This value comes from Sales Order entry and
Production Orders.)
•
Backorder
The quantity of the item that has been entered into Sales Orders and
Production Orders, but insufficient stock exists on hand to fulfill the orders
(This value comes from Sales Order entry.)
•
On-order
The quantity that has been ordered through Purchase Order but has not
yet been delivered or received into the system (This value comes from
Purchase Order Entry.)
•
Available Qty
This Available Quantity field is grayed out. It is automatically populated
with the total of the value in the On-hand field less the value in the
Committed field.
General Tab
General Tab
The General tab contains data regarding the physical attributes of the item or
part, an Alternate item to offer if it is out of stock, UPC codes for scanning,
supplier information and reorder levels.
41
BVEssentialsAdminGuide
Inventory Edit>General Tab>General Section
General Section
Inventory Type
The only values available for Inventory type in implementations that are not using
BusinessVision’s Bill of Materials are “Normal” and “Kitted”. Inventory Type is
required when the Bill of Material module is being implemented. It is a field that
comes from BusinessVision. Further details can be found in the Inventory Details
section of BusinessVision documentation.
•
Normal - The inventory item can be sold on its own, used within a kit or
used within a manufactured item.
•
Manufactured - The item can be sold and usually has a Bill of Material that
consists of other items on the inventory file. A manufactured item must be
built before it is available for sale on a Sales Order.
•
Kitted - The item may be sold, and has a bill of material that consists of
other items on the inventory file. When a kitted item is added to a
BVEssentials order, the raw material is committed until posted. When the
order is posted, Inventory is relieved of the raw materials.
Note: The major difference between a kitted and a manufactured item is the
kitted item does not require an additional manufacturing or assembly
process. It is a collection of on hand items that are used together to form a
kit.
•
Raw Material - The item is not typically sold; it is used within a Bill of
Materials as part of a kit or a manufactured item.
Serialized
Sometimes Inventory Items have numbers (other than part numbers) assigned to
them. Electronic items commonly have a serial number assigned while items like
shampoos may have a lot number assigned to them.
•
42
Non Serialized - The item does not need to be tracked other than quantity
and so a serial or lot number is not used. This is the default value for the
serialized drop down list.
INVENTORY
•
Serialized - Identifying an item as serialized will ensure that the user is
prompted for the required number of serial numbers when the item is
being received. In addition, the user will be prompted to choose the serial
number or numbers being assigned to a sales order and consumed or
produced in a Production Order.
•
Lot Numbered - Similar to serialized inventory, the user will be prompted
for the lot number when the item is being received, assigned to a sales
order and consumed or produced in a Production Order.
Note: There can be more than one quantity for each lot number. A lot
number may also have an expiry date.
Non Stocked
An item identified as a non stocked item will not track any quantities. These items
could be service items such as hourly labor, delivery or drop off fees, shipping
and handling, restocking fees, etc. The item needs to exist in inventory, but it is
an intangible and would not be located when a month end inventory count takes
place.
When the Non Stocked item option is selected the four quantity boxes at the
bottom of the Inventory edit window are grayed out.
Product Code
The Product Code allows you to categorize inventory into groups that are
meaningful to your business. There is no limit to the number of product codes
that can be created, however the price matrix will only allow automatic
percentage or monetary discounts for up to 100 product codes. The product code
is composed of up to three alphanumeric characters.
The product code is validated, provided that the Product Code Validation flag is
turned on for the user. Please refer to BusinessVision documentation on setting
user permissions.
For further information, please refer to BusinessVision documentation “Creative
Use of Territory and Product Codes”.
Alternate
43
BVEssentialsAdminGuide
An Alternate is the item number of a part that can be substituted in the event this
item is out of stock. It is recommended that the first part list the second as an
alternate and the second list the first as an alternate.
Example
FX-280 – is an all-in-one printer/copier/scanner that is now out of stock. The
order will display the FX-500 as an alternative. The customer has the option to
accept or reject the alternative. When the FX-500 is shown the user will see the
quantity available.
Conversely, the FX-500 is out of stock. The order will display the FX-280 as an
alternative. The customer has the option to accept or reject the alternative.
Sales Department
The sales department is a 3-digit number and must fall within the range of 0 –
200. It is used to categorize inventory items into different accounts in the
General Ledger.
When an inventory item is sold, the accounts specified in the Sales department
function in BusinessVision are used to generate the appropriate entries in the
General Ledger. Sales departments can be used to departmentalize the revenue
and expense accounts generated by the sale of the item as well as the inventory
asset account, if desired.
If a sales account is not specified, then all revenue, expenses and receipts that
pertain to this item will be posted to the account assigned to the specified sales
department.
Accessory
An Accessory is the part number of another item that is sold together with this
item.
Example
Part Number N142 (package of speaker screws) is always sold with Part Number
SP-250 (speakers). N142 is the accessory Inventory Item for SP-250.
The accessory item (N142) will be added to the order, under the original part
number. If the accessory is a kit, the entire kit will be added.
Price per Each
44
INVENTORY
The Price per Each represents the standard price for the item. It can have a
maximum of 20 different pricing levels. Inventory, customer pricing levels and the
pricing matrix combinations will be covered in a later section.
To enter the price for this item
1. Enter a value into the Price per Each field
The Margin % field will automatically update
Margin
The Margin percentage displayed reflects the margin applied to the cost or the
margin based on the value in the price per each field.
Example
Part No – CD204 has a price per each of $323.700. Based on this price and the
cost of the item, the margin is 51.50%
Change the margin to reflect 45% and the price per each value changes to
$285.455
Now change the price per each to 300.00 and the margin value changes to
47.67%
45
BVEssentialsAdminGuide
Physical Section
Inventory Edit>General Tab>Physical Section
Pack Size
Displays the quantity in a package (Example: 6 pack)
Weight
Displays how much the item weighs
Location
Displays the location in the warehouse where the item is located
Unit of Measure Section
Inventory Edit>General Tab>Unit of Measure Section
The Unit of Measure section contains the units of measure used for purchasing
and selling and the conversion factor if the two are different.
Stock Unit
Displays the unit of measure the item is purchased in
Sell Unit
Displays the unit of measure the item is sold in
Conversion
Displays the factor set to convert the purchase unit of measure into the sales unit
of measure
Example
Part number P1210A is bought by the case which contains 12 tins of resin
speaker paint. The P1210A is sold by the tin. The conversion factor would be 12
46
INVENTORY
Unit of Measure>Conversion Edit
User Defined Section
Notes
The Notes field is user defined and can contain up to 50 alpha-numeric
characters. The numeric field below the Notes field can hold whole numbers or
numbers with decimals. These fields are brought over from BusinessVision.
Refer to BusinessVision documentation "Inventory - User Defined Fields" for
further information.
Display Colors Section
A color combination for the part number can be used to highlight an item. This
could be useful for users to easily recognize items that are discontinued, on sale
or clearance, etc.
•
•
Background Color
Foreground Color (text colour)
Inventory Edit>General Tab>Display Colors Section (default setting)
The item with the custom display colors below will be displayed in the Inventory
List display reflecting those colors. The item with the default color setting is
shown directly above it.
47
BVEssentialsAdminGuide
Inventory Edit>General Tab>Display Colors Section (custom setting)
Inventory List displaying default and custom color settings applied to an inventory
Item
Purchasing Section
Inventory Edit>General Tab>Purchasing Section
Primary Vendor
The Primary Vendor is selected from the Vendor lookup. This is the vendor that
the item is typically ordered from.
Reorder Point
The quantity on hand when more inventory of this item should be ordered
PO No
The last purchase order number for this item,
Note: The number displayed is the last one, even if the stock has already been
received
Due Date
The expected arrival date of the last Purchase Order
Min. Order Qty
The minimum quantity that can be ordered from the Vendor
48
INVENTORY
Extended Description and UPC Numbers Sections
Extended Description
The Extended Description allows for a very detailed description of the item, up to
2000 characters in length.
UPC Numbers
Multiple UPC Numbers can be added for an item. These are bar codes that can
be used for scanning the item into order entry or in receiving inventory.
Alternate or AKA part numbers can also be added here. This is very useful when
a part number has been changed. The new part number is added to inventory
and the old part number is entered into the UPC grid. When the user enters the
old part number, it will display the new part number on the sales order.
49
BVEssentialsAdminGuide
Pricing and Tax Tab
Pricing and Tax Tab
Inventory Edit>Pricing and Tax Tab Window
Selling Price Levels
Each Selling price can be assigned a specific currency, if the Multi-Currency
module has been purchased. This allows the item to be sold in different
currencies, not just the currency it was purchased in. The levels that apply to
other currencies are set up in BusinessVision Multi-Currency Manager.
Note: Each customer can be assigned a selling price or price level on the
customer record. The selling price must be in the same currency that is assigned
to the customer.
The Sell Price field displays the value entered in the field or is dynamically
updated by a change in the Margin field or the cost price. Examples of the effect
of changing values are displayed in the section “Margins”.
Cost Section
This section contains the Average and Current Costs of the item. These fields
are updated when an item is received and inventory adjustments have been
50
INVENTORY
posted. Please refer to the section “The Effect of Inventory Transfers on Cost” for
more information.
Average Cost
Displays the average cost of the item since the Balance on Hand was zero
Current Cost
Displays the most recent cost that the item was received at
Taxes Section
This section displays the applicable taxes and levy code.
Tax 1 (GST in Canada)
Set up in BusinessVision, mark this tax if it applies to this inventory item
Tax 2 (PST in Canada)
Set Up in BusinessVision, mark this tax if it applies to this inventory item
Tax 3 (US or Harmonized Tax in Canada)
Set Up in BusinessVision
Levy Code
Displays a levy or environmental tax to be applied to this inventory item
Example
The environmental fee often charged for paint or car battery purchases would be
applied as a levy.
51
BVEssentialsAdminGuide
Adding a Levy Code to an Item
In the Inventory Edit > Inventory Pricing and Tax tab
1. Click the Levy Code lookup
A BVEssentials window will open that displays existing Levy Codes
2. To add a Levy Code click the New icon
The Levy Edit window will open
Levy Edit Window
3. Enter a unique alphanumeric 3 letter identifier in the Code field
4. Enter a brief description of the Levy in the Description field
5. Mark the check box beside each Tax to be applied to the levy
6. Select the Adjustment Type
a. Amount Adjustment – the levy will be a flat fee, like $3.00
52
INVENTORY
Enter the amount in the Amount field
b. Percentage Adjustment – the levy will be calculated as a percentage
of the selling price
Enter the percentage in the Amount field
7. Select the G/L Account the levy revenue is to be posted to
8. Click Save to save the Levy code
Discountable
Discountable is an optional flag to allow users to discount the selling price of the
inventory item. Once this option is turned on, users will be allowed to discount the
selling price of the item on the sales order.
Inventory Adjustments (Impact on Current Costs)
Inventory Adjustments: Impact on Current Costs
Receiving Inventory
When inventory items are received, the current cost is read from the inventory
record and automatically populates the current cost field on the inventory receipt
record. If the current cost has changed, then the user can edit the current cost
field on the inventory receipt, which will update the current cost on the inventory
record when the receipt is received into inventory.
If the item received has associated landed costs and the user updates these
fields in the inventory receipt record, then the total landed cost of the item will be
used to calculate the new average cost and update the Average Cost field in the
inventory item record as well as FIFO records.
53
BVEssentialsAdminGuide
Inventory Receive Window
Adjust Inventory
An inventory adjustment record typically adjusts the quantities of an inventory
item either because the physical inventory does not match the value in the
inventory record or to write off goods due to damage or exceeded life expectancy.
When an adjustment is made to inventory, the inventory account is reduced or
increased by the Landed Cost; the Average Cost is recalculated and the Average
Cost field on the Inventory item record is updated.
Inventory Adjust Window
Receive PO
When an item is received that is associated with a Purchase Order, the current
cost field on the Inventory receipt is updated with the cost value from the
Purchase Order.
54
INVENTORY
If the item received has associated landed costs and the user updates these
fields in the inventory receipt record, then the total landed cost of the item will be
used to calculate the new average cost and update the Average Cost field in the
inventory item record as well as FIFO records.
Receive PO Window
Transfer
If the company has multiple warehouses, it is common for products to be
transferred from one warehouse to another.
When a transfer is posted, the Average Cost is used to post to the General
Ledger account of the source warehouse inventory. On the destination
warehouse inventory item record, the average cost is recalculated and updated,
as well as the current cost field.
Inventory Transfer Markup
There is also a feature that allows a company with multiple warehouses to assign
a Markup to the cost of the Inventory Item when the item is transferred to a
different warehouse.
Example,
The company has three warehouses located in Ontario, Alberta and British
Columbia. The Ontario warehouse has no widgets in stock; Alberta has 2, and
British Columbia had 57.
Ontario wants 2 dozen, and Alberta wants 1 dozen. Widgets have a cost of $10
each and the transfer markup percentage is 10%. The widgets going to the
warehouses in Ontario and Alberta will be marked up $1/per widget, resulting in
the cost of the widgets received being $11 each while British Columbia widgets
will remain at the original $10 per widget.
55
BVEssentialsAdminGuide
56
CUSTOMERS
Customer List
BVEssentials uses slightly different terms for master records than BusinessVision
uses. For Example in BusinessVision a customer record is found in “Customer
Details”. BVEssentials refers to Master Records in “lists”. Therefore a customer
record is found under “Customer List” in BVEssentials.
These features include
•
•
•
•
The Price Matrix, which can be based on the Customer, Customer Type,
and Territory
The Tax Grid, which is based on the Customer
The Complete History of all invoices associated with the Customer.
The Message Management system (Communications)
BVEssentials Desktop>Customer List Window
Customer List Toolbar
Refresh – Updates the customer list with new customer data
entered on other workstations
Hide Hold - Hides all customers that are on hold from appearing
in the Customer List
Print – Prints customer related reports
New – Create a new customer
Edit – Make changes to an existing customer
Delete – Remove an existing customer from the database (based
on rules of deletion in BusinessVision)
57
BVEssentialsAdminGuide
Copy – Copies an existing customer; user must enter a new
customer number to be able save the record
Merged Documents - opens a window displaying all mail merge
documents
Name Search – Allows user to search for a specific customer
based on their name. The user can search for any word or
portion contained in the customer name. The more characters
typed in, the shorter the list becomes.
Creating a New Customer
Creating a New Customer
The minimum data required to form a new customer record are the Customer
Number and the Customer Name.
Customer Number and Name
The Customer Number must be a unique code, with a maximum length of 10
alpha-numeric characters.
To create a new Customer
1. Click on Create New Customer (ins) icon in the Customer List Toolbar
The “Customer Edit” window opens.
2. Enter Customer Number (it must be unique)
3. Enter Customer Name
4. Click Save to save the record before inputting additional customer data
Hold
The Hold option when marked will not allow any new Sales Orders to be
generated for this Customer. However the Customer will still appear in the
Customer List as access to the record is still required.
58
CUSTOMERS
Customer List>Customer Edit Window>Addresses Tab
Foreground and Background Colors
Each customer record can have its own Background and Foreground (text) colors
so that the record stands out in the Customer List.
Example
All customer records that have been placed on Hold could have a RED
background and BLUE foreground so that they are easily identified in the
customer list.
Addresses Tab
Addresses Tab
The Addresses tab contains the basic information for each customer address
BVEssentials has the functionality to have multiple address records for the same
Customer in one Customer record. Each address record contains the contact
information and default settings specific to that address.
59
BVEssentialsAdminGuide
Adding a New Address Record
By default, a Billing Address record is always created and cannot be removed.
To add a new Address Record
1. Click on the “+” button at the bottom right of the Addresses List
The line directly below the last entry will become active
2. Enter the ID Number for the new address if it is in addition to the Billing
Address
Or
Enter the Name in the Name field to the right of the Addresses List
record
Note: All that is required for an address record is the Name of the
3. Click the Save icon to save the record
Deleting an Address Record
To delete an Address Record
1. Highlight the Address to be deleted in the Addresses List
2. Click on the “-“ button at the bottom right of the Addresses List
The Address will be removed from the list
Note: Once an address has been used it should not be deleted, as it has
historical records attached to it. It is recommended that the address be
placed on hold so that it cannot be used for future orders.
Address Tab
Address Tab
Hold Address
The Hold Address option in the Address Tab allows the user to place a hold on
this address, which would make it unavailable for Sales Orders. This specific
60
CUSTOMERS
location may be closed for maintenance for a few weeks or they are relocating,
etc. Other addresses can still place and receive Sales Orders, unless the
Customer has been placed on hold.
Contact Information Section
Enter Address Information
1.
2.
3.
4.
5.
6.
Address (There are 4 address fields to allow for PO boxes, RR #, etc.)
City
Province/State
Postal or Zip Code
Phone Number
Fax Number
The Map Button located to the left of the address information will launch
www.maps.google.com and display the address on a map and satellite
image.
Contact Section
Contact Tabs have been added to allow for 3 contact persons for each
address record.
In each Contact tab, there are the following fields that are specific to that
contact
7. Contact Name
8. Phone Number
9. Fax/Cell number
10. Email Address
Internet Address Section
Enter Internet addresses
11. Email
12. Website
61
BVEssentialsAdminGuide
Order Defaults Tab
Order Defaults Tab
Customer Edit>Addresses>Order Defaults Tab
Order Defaults Section
Warehouse (default)
Selecting a default warehouse in a multi-warehouse configuration saves time in
order entry. It can be over-ridden.
Shipping Method
This value is taken from the Shipping Method control file in BusinessVision and is
the default for this customer. It can be over-ridden at the time of order entry.
Click on the lookup to select a shipping method from the list.
Sales Territory
Sales Territory is a maximum of 10 characters. Values specified here will be the
default in Sales Order entry but can be over-ridden in the Sales Order. Click on
the lookup to view the list.
Salesperson
The Salesperson field is a maximum of 10 alpha-numeric characters. Values
specified here will be the default in Sales Order entry but can be over-ridden in
the Sales Order.
Revenue Account
The Revenue field allows the user to assign a revenue account from the General
Ledger to be used for sales to this customer in this address record. This will
cause the Sales Account specified in the Inventory Sales Department record to
be ignored during posting. This revenue account will be used instead. Click on
the lookup to display the list of accounts.
62
CUSTOMERS
Pricing and Taxes Tab
Pricing and Taxes Tab
Customer Edit>Addresses>Pricing and Taxes Tab
Sales Taxes Section
The Pricing and Taxes tab defines the taxes that are applicable to the customer
at this address. These are the taxes that will be charged on a Sales Order in
Order Entry and POS.
With the Sales Taxes now available for each address record, calculating the
correct taxes is now simplified for customers that have multiple locations within
the same country.
Example
There are typically two applicable taxes, Tax 1 and Tax 2. Some locations will be
exempt from Tax 2 on their purchases. To allow for this, there is another field
called Tax 2 Exemption. Enter the Tax Exemption Number and this tax will not
be calculated or added to the customers order.
Note: For those customers that use a combined tax, they will use one unique tax
code that combines the tax value to be applied.
Sell Price Level
The Sell Price Level matches the pricing level established within the Inventory
module. All customers with the same selling level will be charged the same
selling price during Order Entry or POS.
63
BVEssentialsAdminGuide
Communication Tab
Communication Tab
The Communication function is available in Customers, Vendors and Inventory
records. Please refer to the section “Communications” for details on how to set it
up and its features.
Billing Tab
Billing Tab
Customer List>Customer Edit>Billing Tab
Credit Limit Section
Balance
The Balance is typically auto-populated by BVEssentials, based on the invoices
that have been posted to the customers account.
Limit
The Limit is the credit value that has been approved for the customer.
Apply Finance Charges
Mark this option if finance charges are to be applied to the statement for the
customer, when the statements are created.
Approved By
The Approved By field contains the initials of the person who approved the credit
limit. It is not editable.
Approved Date
The Approved Date contains the date the credit limit was approved. It is not
editable.
64
CUSTOMERS
Clear Approval
The Clear Approval button will empty the values in the Credit Limit, Approved By
and Approval Date fields.
Pricing Section
Customer List>Customer Edit>Billing Tab>Pricing Section
Price Discount Code
The Price Disc Code refers to the Pricing discount code that is applied to each
customer. There are 26 (A-Z) Price Discount Codes possible to match a Price
Discount to a Product Code.
Example
A product code of ACC for accessories has a 5% discount for Discount Code A.
Customer Joe Shorter Ladders Inc. has been assigned Pricing Discount A. This
means that Joe Shorter Ladders Inc. gets a 5% discount on all inventory items
that have been linked to product code ACC that they purchase.
Discount Percentage
The value in the Discount % field will be applied to the entire Sales Order, before
taxes. This is in addition to any “line discount” that is included in the Sales Order.
When a positive value greater than “0” is entered a discount will be taken. In the
event that a negative value is entered in the Discount Percentage field, a
surcharge would be added and posted to the Sales Order.
Statements and Invoices Section
65
BVEssentialsAdminGuide
Customer Edit>Billing Tab>Statement & Invoices Section
Invoices and Statements can be either printed off in paper format (hard copy) or
they can be emailed to the customer at the email address specified in the Internet
Addresses Section of the Address tab.
1. For Invoices, select Form or Email or Form and Email from the drop down
list.
2. For Statements, select Email or Form or Email and Form or Not Required
from the drop down list.
3. Mark Past Due Notices if past due notices are to be sent to the customer.
(BusinessVision E-Commerce)
4. Mark Monthly Statements if statements are to be sent to client on a
monthly basis. (BusinessVision E-Commerce)
Payments Section
Customer List>Customer Edit>Billing Tab>Payments Section
Receivables
The default Accounts Receivable account is displayed for posting completed
Sales Orders to Accounts Receivable. This cannot be changed after an invoice
has been posted to the account.
Payment Terms
Payment Terms are stored in a BusinessVision control file. The default payment
terms for this customer are displayed when a Sales Order is generated but can
be overwritten on the Sales Order.
Account Information
66
CUSTOMERS
The Account Information displays summary aging of the invoices posted to this
customers account.
PO Number required
This option requires a Purchase Order number be entered into every Sales Order
for this Customer before it can be saved. The user will be prompted in Sales
Order entry or POS to enter the PO number.
Levy and Service Charge Exemptions
Inventory Levy Default Exempt
Marking this option exempts the customer from being charged the levy attached
to an inventory item.
Example
A battery has an environmental levy attached to it when sold in one state, but the
customer purchasing it lives in another state that does not honor the levy. The
out of state customer is exempt from the environmental levy and by marking the
Exemption option, they will not be charged the levy.
Service Charge Default Exempt
Marking this option exempts the customer from being charged the service
charges applied to past due amounts posted to this customers account.
Example
ABC Company has $1000 in invoices that have not been paid within the net 30
day terms. When the statements for the period are generated all customers that
have past due accounts will have a 2% service charge applied to outstanding
amounts. When the Service Charge Default Exempt option is marked in the
customer record, they will not be charged the 2% service charge when the
statements for the period are generated.
67
BVEssentialsAdminGuide
More Tab
More Tab
The More tab contains additional information for the customer, user defined
fields, search key and more.
Customer Edit>More Tab
User Defined Fields Section
Type
The Type field is a user defined code with a maximum length of 10 alpha-numeric
characters; and can be used for reporting control. It is not validated against any
table in BusinessVision. Please refer to “Price Mat rix” for specific use of
Customer Type. See also BusinessVision Documentation on changing the label
for this field.
Note
The Note field has a maximum length of 30 alpha-numeric characters. It can be
used for general information about the customer.
Special Code
The Special Code field is a single alpha-numeric character.
Search Key
The Search Key can be used as an alternate method of locating the Customer.,
such as typing in the Customers phone number (without the area code).
Sales History Tab
68
CUSTOMERS
Sales History Tab
The Sales History tab displays all of the invoices that have been posted to this
customers account.
Any of the columns can be sorted, simply by clicking on the column header. This
makes it very easy to find an invoice by the part number or date depending upon
the display criteria mode selected.
Sales History Tab - Invoices
History Mode
The data displayed can be Invoices or Invoice Details (part numbers). In addition
to the type of data that will be displayed, the user can select a specific invoice
number or range, or a date range to scale down the data presented in the
viewer. If the user selects a preset value (today, current month, current fiscal
year or current calendar year) then only those entries that fell within that date
criteria will be displayed.
Note: Any line item displayed in the Sales History viewer can be expanded to see
the complete details of the invoice.
Invoice Details
Sales history can also be viewed by Invoice Details by selecting that option
instead of Invoice. In this mode all products that the customer has ever
purchased are available for viewing.
69
BVEssentialsAdminGuide
If you sort the view by the part number, this will sort all like part numbers together
and display when that specific item was invoiced.
Adding or Removing Columns Displayed in the Viewer
Columns can be removed from or added to the view by clicking on the down
arrow at the top of the scroll bar to the right of the viewer.
Sales History Tab>Invoices>Column Toggle
By default, all columns are displayed, but a user can remove columns from the
viewer display by un-checking them. Similarly they can be added back by
reversing the process.
click down arrow
Price Matrix Tab
Price Matrix Tab
The Price Matrix tab is only used by the BVEssentials Sales Manager. Please
refer to the “Price Matrix” section in the Sales Manager Module for details on how
to use it.
Tax Matrix Tab
Tax Matrix Tab
70
CUSTOMERS
Customer Edit>Tax Matrix Tab
The Tax Matrix Tab displays a grid of all Inventory Items that have taxes or levies
assigned to them for this customer.
71
COMMUNICATIONS
COMMUNICATIONS
The communication function is available in the Communication tab in the
Customer, Vendor and Inventory Master Records. This function is also available
on Sales Order records. The purpose of the Communication function is to store
messages that are specific to the record.
Example
On the Customer record for ACE Electronics
There is one message in the communication tab
Adding a New Message
1. Click the Add Message button
The Note window will open
Communication Tab>Note Window
73
BVEssentialsAdminGuide
2. Enter a Subject for the note such as “Credit Limit Increase Request”
(Optional)
3. Select Type from the lookup (Optional)
If the note type list is empty, create a new one and save it
Note: Note Type is a field that is used as a filter, and can be
standardized to suit the company needs.
4. Enter the message in the Note area. The note field is limited to a
maximum of 64,000 alpha-numeric characters.
5. Enter the person to whom the note is to be assigned (Optional)
Note: The note can be assigned to another user; all that will be
displayed in the Assigned To field is the 3 digit employee code. This
allows the user to run a report that prints only the messages
assigned to them.
6. Enter Due Date for the note (Optional)
7. The Number field can be any number applicable to the note and can be
used to filter messages displayed and/or printed on communication
reports. (Optional)
8. Enter Completed Date (optional)
This field can be used to store the completed date if there was a
task in the communication record.
Note: The Completed Date is the date the task in the note has been
completed or the note has expired. It can also be used to filter
messages displayed or printed on reports.
Display Section
The display section provides options for where the message is to be printed or
displayed.
Note>Display/Alert Display
74
COMMUNICATIONS
9. Mark Print checkbox to print the message on a specified form
10. Select the Form from the lookup that the message is to be printed on.
Note: A message can not be assigned to more than one form. In order to
display the message in more than one form, the message has to be
recreated for each form.
9. Mark Alert checkbox to have the message pop up when a new Sales
Order or Quote is created.
10. Click Save to save the message.
11. Click Save on the Master record (in the example above, it is the Customer
record) to save the message and have it appear in the future.
Deleting a Message
To delete a message,
1. Select the Message in the Message Grid
2. Click Delete Message
The user will be prompted to confirm they wish to delete the
selected messages.
3. Click Yes to complete the delete process
Or
No to cancel the delete request
4. Click Save on the Master record to update the Master record with the
change
Filtering Messages
The Filter Message function allows the user to filter the messages so that they
can see only those messages that are assigned to them, or are current, or if there
are a lot of messages, to make the display list smaller and more manageable.
75
BVEssentialsAdminGuide
To filter messages in the Communication tab on a Master Record,
1. Click Filter Messages
The Communication Filter window will open. The only active field is
Message Filters.
2. Mark Message Filters to activate the filter options
3. Mark the appropriate filters
Note: The communication filter containing the Part Number lookup only
appears in the Inventory Communications from the Main Menu.
Subject Contains
This field allows the user to search the Subject field for specific characters
or words.
Example
Entering “Credit Limit Increase” into the Subject Contains field will bring
back only the messages that contain those words.
So if there were 50 message records, only those with “Credit Limit
Increase” in the Subject field would be displayed.
Hide
Hide Completed Notes
Marking the Hide Completed Notes option will remove from view all
messages that have a completed date. The messages are not deleted;
they are just not displayed in the message grid.
76
COMMUNICATIONS
Hide Other Users
Marking the Hide Other Users option will remove from view all messages
that have not been assigned to the logged in user.
Message Type
Selecting a Message Type from the lookup will display only messages that
have that message type.
Due Date Section
Entering a range for the Due Date will display only those messages that
have a date between those specified.
Completed Date Section
Entering a range for the Completed Date will display only those messages
that have a date between those specified.
Inventory Filter (Visible only in the Inventory Communications)
Entering a Part Number from the lookup will display only those messages
that contain the selected inventory item part number.
Note: It is important to note that using all of the filters may limit the user’s
ability to locate the message they are looking for.
4. Click the Apply button. Then close the Filter window. The messages that
meet the criteria set will be displayed in the Message grid.
77
PRODUCTION MANAGER
PRODUCTION MANAGER
The Production Manager module has its own unique Toolbar. The Production
Manager Orders List opens when a user accesses BVEssentials if the Production
Manager module has been installed and activated.
Note: If Sales Manager has also been acquired, then the Sales Order List will be
the one visible. The Production Order List is also open but it lies beneath the
Sales Order List.
Click on Window>Production Manager for the List to be accessible, or click on the
Production Manager icon, or close the Sales Order List.
BVEssentials > Production Manager Orders List
Functions
Build
The Build function takes a Production Order that has been created and builds it.
Once it has been built, the raw materials are relieved from inventory and the
finished product is received into inventory and the BusinessVision Accounting
System is updated.
Create PO(s)
Create PO(s) function will look at the Production Order for any raw material or
items that will have insufficient quantities to complete the Production Order and
create a purchase order for each primary supplier that supplies the required item.
79
BVEssentialsAdminGuide
This function makes it faster and more efficient for the user to order sufficient
quantities of the items needed for the order. The user will not have to leave
BVEssentials to manually create Purchase Orders for all materials required for
the Production Order in BusinessVision.
The Purchase Order(s) will be automatically created by BVEssentials and be
available for editing in BusinessVision Purchase Order Module.
Note: BVEssentials does not check if the items have already been ordered before
generating the Purchase Orders for them. If the Create PO(s) function is invoked
more than once, then more than one Purchase Order for the same shortage will
be generated. One for each time the function was invoked.
Copy Order
The Copy Order function will copy the selected Production Order and create a
new Production Order and assign it the next sequential Order number. All of the
other data will remain the same as on the original Production Order, and can be
edited.
Creating a Production Order
Creating a Production Order
To create a Production Order from an existing Bill of Material
1. Click Production Manager icon
The Production Order List will be displayed
2. Click New Order icon
The Production Order window opens
80
PRODUCTION MANAGER
Production Order
Header Tab
Header Tab
Order Information Section
Build No.
Build No is a unique number that is automatically generated by the system each
time a new Production Order is created.
Order Date
Order Date defaults to the current date. It is editable by the user if the current
date is not the date the order was placed by the customer.
Required Date
The Required Date is manually entered by the user. It is used for scheduling the
production of orders and to ensure there is sufficient product available to
complete the build in the specified time. This date is used by many of the reports.
Status
Status indicates the progress made on the build and whether the materials
required have been allocated from inventory.
Unallocated – The manufacturing process has not yet begun and the items
required to build the product have not been committed from inventory.
Allocated – The manufacturing process has not yet begun but the items
required to build the product have been committed from inventory.
81
BVEssentialsAdminGuide
In Progress – The build process has begun and the raw materials have
been committed from inventory. It also adds options for reporting on work
in progress.
Note: The status of a Production Order can be shifted between
Unallocated and Allocated to allow the option of freeing up raw material for
different Production Orders.
Phase
The Phase field allows the user to update and track the progress of the build by
manually changing the phase.
Priority
There are 5 levels of priority - Highest, High, Normal, Low and Lowest. This
allows the user to determine which order(s) receive priority for the materials
required to produce the finished product. This is for reference purposes and is
used by some of the reports.
Creator
Creator is a read only field that displays the user ID of the person that created the
Production Order.
Editor
The Editor is a read only field that displays the user ID of the person that last
modified the Production Order.
Customer Info Section
Customer Information is not required to create, assemble, manufacture or
complete a Production Order but can be used to store the Customer that the
product is being built for.
Sales Order No
The Sales Order lookup allows the user to lookup the sales order where this
manufactured item will be sold. The Sales Order field is not linked to any function
in Production Orders; it is used as a reference.
If a Sales Order Number has been selected from the lookup, the Customer No,
Customer Name and the PO Number will be populated.
Manufactured Item Section
82
PRODUCTION MANAGER
Production Order > Manufactured Item Section
Inventory
The Inventory lookup is used to select the item to be assembled or
manufactured. Once selected the Description, Category and Category
Description are automatically populated.
Required Qty
The Required Quantity is the amount ordered or total amount to be built and
added into inventory.
Example
If 100 Widgets are needed to add to inventory, then the Required Qty is 100.
Received Qty
The Received Quantity is the amount that has been previously been built on the
Production Order. This is automatically populated by the system.
Using the details of the example above,
100 Widgets are on a Production Order. 50 Widgets have already been built.
The Received Quantity will display 50.
The next build is expected to produce another 25. When this build is complete,
the Received Quantity will change to 75.
Still to Build
This field is automatically populated by the system. The calculation for the Still to
Build field is the Required Quantity less the Received Quantity.
Exp Yield %
This field defaults to 100% when the Production Order is created. It can be
modified to use a different yield if scrap and yield has been enabled in
BVEssentials Company Setup.
Example
83
BVEssentialsAdminGuide
Of the 100 widgets that are built only 95 of them will be put into inventory or
used. The other 5 were damaged, sub-standard or broken.
Assemble Qty
The Assemble Qty field is an important one. The value in this field is the quantity
that will be produced or assembled each time the build function is initiated on the
Production Order.
Using the 100 widgets in the above examples
The Required Qty is 100, there is sufficient inventory available to build most of
that, but the customer decided that he wants to receive his order in 3 shipments
of 30, 40 and 30.
The Assemble Qty for the first shipment will be 30; then the order will be built.
The output will be 30 widgets.
The next shipment for this customer is due in two weeks. The next build for this
Production Order will have an Assemble Qty of 40.
The last shipment will have an Assemble Qty value of 30 to complete the entire
order.
Qty Assembled
The Qty Assembled is the quantity assembled to date for this production order. If
the Assemble Qty is the same as the Required Qty, then this field will be empty.
If the Assemble Qty is less than the required Qty, then this field will appear blank
until after the build has been completed. The Qty Assembled field will then be
populated with the total quantity built for the production order.
This allows the user to see at a glance how many have already been built as well
as the quantity remaining to be built.
Example
100 Widgets are required, the yield is 100%. The Assembled Qty defaults to
100.
There will be 3 builds for the order, one for half of the required 100, then 2 builds
of 25 each.
The Assembled Qty is 50 for the first build. The default value of 100 for the build
is incorrect and needs to be changed to 50.
84
PRODUCTION MANAGER
Once the build function has been invoked, and the build process completed, the
Qty Assembled will display 50 and the Received Qty will display 50.
The next build process will produce 25 widgets. Once that build has been invoked
and completed, the Received Qty and Qty Assembled fields will be updated to
75.
Manufacturing Notes
The Manufacturing Notes field can be used to store notes on the manufacturing
or assembly of the finished product for the Production Order in which they were
entered. They are not saved with the Bill of Materials record.
Production Order >Instructions Field
Instructions
The Instructions field can be used to store instructions on how to assemble or
produce the finished product. The contents of the Instructions field are stored
with the Bill of Materials record and are displayed each time a new Production
Order is created for that finished product.
Current Inventory Count Section
The Current Inventory Count section is display only. The fields are populated by
the system, based on the inventory quantities in BusinessVision.
Can Build
85
BVEssentialsAdminGuide
This is the total number of units that can be built for this Production Order based
on the present available quantities of raw materials or components. The Can
Build field gets dynamically updated as inventory changes.
On Hand
The On Hand value is the On Hand balance in inventory for the top assembly
item.
Committed
The Committed value is the total value of the top assembly item that is committed
to Sales Orders and completed Production Order builds.
Back Ordered
The Back Ordered value is the quantity that has been back ordered on Sales
Orders.
On Order
The On Order value is the total value of all Production Orders allocated for the
top assembly item but not yet built or received.
Components Tab
Components Tab
The top section of the Components tab displays the formula or recipe of the
finished product to be built.
The recipe lists all of the components required to make the finished product.
Non-inventoried Stock parts and labor components can also be a part of the
assembly process.
If the BusinessVision Bill of Material module has been implemented and used for
a period of time prior to using Production Orders, it is likely that all of the recipes
have already been created using the Bill of Material module and are displayed in
BVEssentials Production Orders components tab.
When the Production Order is created and the finished item is selected from the
Inventory item lookup, the recipe section of the components tab will be populated
from the data stored in the Bill of Materials record for the finished product.
Note: If a manufactured item has not been produced before or a bill of materials
record has not been saved for it in BusinessVision or BVEssentials, then the
following dialogue window will open when a manufactured item has been
selected.
86
PRODUCTION MANAGER
Adding Components
Components can be added to an existing Bill of Materials record or they can be
added to create a new Bill of Materials record.
Production Order>Components Tab
Component Details Section
In the Component details section
1. Select Inventory from the Inventory Item lookup
2. Click OK
87
BVEssentialsAdminGuide
The item details will be displayed in the component details and a line will
be created for it in the component display grid.
3. Enter Unit Qty.
This is the value that is required to produce 1 assembled product or
manufactured item.
4. Enter Exp Scrap %.
This is the expected percentage of scrap that will be used in addition to the
required amount needed for the assembly.
5. Actual Scrap
This field is auto-populated based on the percentage specified. The user
can also type it in and the Exp Scrap % will change to reflect the actual
scrap.
6. Extended Qty
This field adds the actual scrap to the value in the Unit Qty field. This
calculates the total amount of this item required to produce the finished
product. It is not editable.
7. Inv. Usage
This field is auto-populated and displays the quantity that will be reduced
in inventory. It is not editable.
8. Unit Cost
This field is auto-populated from the inventory item record. It can be edited
and if edited, then the cost will affect the assembled or manufactured item.
9. Extended Cost
The system calculates this value by multiplying the Extended Qty by the
Unit cost. It is not editable.
Note: The values in the Unit Qty, Ext Qty, Unit Cost and Ext Cost in the
component display grid are read from the component details of the
highlighted item.
Current Inventory Counts Section
All of the fields in this area are auto-populated by the system and are not editable
by the user.
88
PRODUCTION MANAGER
On Hand – The quantity that is physically on hand
Committed – The quantity that is committed on other Production Orders, or
on Sales Orders.
Back Ordered – The quantity that is required to fulfill the required amounts
needed on Production and Sales Orders.
On Order – The quantity that has been ordered from a Vendor using the
Purchase Order Module or allocated to be built on another Production
Order.
These fields allow the user to see at a glance the availability of each item
required to complete the Production Order.
Color Coding
In the Component Display Grid, there is a colored ball beside each line item.
This allows the user to see at a glance the stock status of all items required to
produce the finished product.
Green – There is sufficient stock to supply the Production
Order
Red - There is insufficient stock to supply the Production
Order
Yellow – There is physical stock, but it has been allocated
on other
Production Orders or committed on a Sales Order.
Adding Additional Components
89
BVEssentialsAdminGuide
1. Click on the empty space below the bottom line (This inserts a line above
the current line.)
Or
Click Insert Item button at the bottom left of the window
1. Select Inventory item from the inventory item lookup
2. Complete the fields in the Component Details section as detailed in the
previous section.
Components Footer
Sub-Assemblies Button
The Sub-Assemblies button is active when a component is highlighted that is an
assembled item. For more information, refer to the section “Sub-Assemblies”.
Instructions Button
The Instructions button is active when an item in the component grid is
highlighted. Clicking on the Instructions button opens a window where the user
can enter instructions for the component. The notes entered here are stored only
for the specific component for the specific Production Order. Any entries made in
the Component Instruction field will not automatically appear in the Component
Instruction field in future Production Orders that use the component. They will
have to be manually entered each time.
Serial Numbers Button
If an item listed in the component grid is serialized, the quantity used in the
Production Order needs to have the serial numbers used identified so that the
appropriate physical items in inventory can be relieved. This can be done at the
time the Production Order is created or during the build process.
To assign the serialized items when the Production Order is created
1. Highlight the serialized item in the component grid
2. Click Serial Numbers button in the bottom right corner of the window
90
PRODUCTION MANAGER
3. The Serial/Lot Number window will open and display a list of available
serial numbers
4. Click the box to the left of the serial number(s) to be assigned to or
consumed by this Production Order
5. Click OK to close the window
Deleting Components from the Component List
1. Highlight item in the Component Display Grid
2. Click Delete Item button on the bottom left of the window
The item will be removed from the grid.
Saving the Bill of Material
Save the Bill of Material (Recipe)
Once all of the components and their applicable quantities have been added to
the Production Order, the recipe can be saved in a Bill of Material record for
future use.
1. Click Store BOM from the Production Order Toolbar
This updates the Bill of Material record in BusinessVision or creates a new
Bill of Material record for the finished product.
A dialogue window will open asking if the user wishes to update the
subassemblies as well, but only if one or more of the components in the
grid are sub-assemblies. If one or more components used in the
production of the finished product are sub-assemblies, click yes if the subassemblies are to be updated, or click no to leave them unchanged.
Copying a Bill of Material (Recipe)
91
BVEssentialsAdminGuide
Sometimes there are multiple products that have very similar composition. Rather
than creating a new Bill of Material record for each one manually, it is possible to
copy an existing one to a new inventory item.
1. Create a new inventory item record for the finished product that will use
the Bill of Material (recipe) of another product as the base. Type will be
Manufactured
2. Create a Production Order for the item that has the base Bill of Material to
be copied
3. Move off the item field. The components used in the recipe will be
displayed in the components grid.
4. Return to the inventory item field and select or type the new Inventory item
from the inventory lookup that will use the base Bill of Material but is
slightly different.
A dialogue window will open, prompting the user to make a
selection to either keep the existing components or use the
components that are assigned to the new item.
5. Select Keep Existing Components
6. Add components or modify quantities of existing components of the base
Bill of Material record.
7. Click Save to save the changes for the Production Order.
8. Click Update BOM icon to create and save a Bill of Material record for the
finished product.
THE BUILD PROCESS
THE BUILD PROCESS
Creating a Production Order does not create the finished goods. It creates an
order for producing a specified quantity of a manufactured or assembled item.
The next step after creating a Production Order is the build process.
A Production Order that will produce the required quantity in one build process is
simple to achieve. The Required QTY and the Assemble Qty values are the
same on the Production Order. When the build process is invoked, the
Production Order is built and completed in one process.
92
PRODUCTION MANAGER
However, there are times when a customer may order a large quantity of a
manufactured item, but wishes to receive them in partial deliveries. There may
also be other reasons for producing less than the requested amount of items,
such as raw material or component availability.
Example
Joe Boston ordered 10,000 widgets, but wishes to receive them in 4 different
deliveries of 2,500 on each delivery. Instead of producing all 10,000 widgets at
the same time, the Production Order is created for 10,000 and the Assembled
Qty in the manufactured section of the Production Order will be populated with
2,500, the initial quantity to be produced.
To Build a Portion of a Production Order
To build a portion of a Production Order,
1. Open the Production Order
Or
2. Create a New Production Order and save it
Note: See the section on Production Orders for instructions on creating a
new Production Order.
3. Go to the Manufactured Item Section on the Header tab
4. Enter the amount to be produced in the Assembled Qty field for this
instance of the build process.
5. Click Build icon to initiate the build process.
The Build window opens
93
BVEssentialsAdminGuide
6. Enter Build Date
The default displayed is the system date, usually today.
7. Enter Received Qty
This is the quantity of the finished product that will be placed in inventory.
8. Enter Assembled Qty
This is the quantity that was actually assembled, including those that were
damaged or did not pass QA inspection
9. The Unit Cost defaults to the cost from the Production Order
10. The Extended Cost is the calculated extended cost from the Production
Order
11. Click Build to complete the build process
Or
Click Cancel to cancel the build process
Note: If one of the components in the component grid is serialized, and
serial numbers for the item have not already been assigned, then the user
will be prompted to select the serial numbers to be consumed from the
available serial numbers displayed in the Serial/Lot number window before
the build process continues.
94
PRODUCTION MANAGER
If the finished product is serialized, the user will be prompted to enter the
serial numbers to be assigned to the finished items. See section “ Finished
Goods with Serial Lot Numbers” for more information
12. The build process will update inventory with the consumed quantities of
the components used, the Received Qty of the finished products and post
the appropriate entries to the General Ledger.
13. The Build window will close and the Production List window will open.
Note: It is important to keep the integrity of the dates when processing
Production Orders. Entering the correct day in which the build actually took
place will help ensure that the physical inventory will be accurate in real time.
Finished Goods with Serial/Lot Numbers
If the finished goods being produced are serialized or have lot numbers assigned,
the user will be prompted to enter the serial or lot numbers for the item.
In the case of a serialized product, a unique number is assigned to each
completed item.
Example
06-12345
06-12346
For a product that is assigned a lot number, one unique lot number can be
assigned per build process. In other words if one Production Order is built in
multiple build stages, each build can have its own unique lot number for
identification purposes. Subsequent builds of the same Production Order can be
assigned the same lot number.
Example
06-07-01-100
06-07-02-111
06-07-03-245
95
BVEssentialsAdminGuide
The user will be prompted to enter the serial or lot numbers required for the
completed items when the build process is invoked and before the order has
been successfully built and placed into inventory.
The entry of the serial/lot numbers will occur just after Step 11 in the “To Build a
Portion of a Production Order” section above.
What Happens after the Build Process is Completed
BVEssentials creates a closed Purchase Order for the items built. Any references
to P.O. Number refer to Purchase Order Numbers. This Purchase Order enables
the ability to report on historical Production Order builds, just like historical
Purchase Orders.
In addition to the finished goods being assigned to a closed Purchase Order, they
are also assigned a receipt number that tracks their entry into inventory. This
function enables BVEssentials to seamlessly produce the same result that a user
would need to do manually to order a product and receive it into inventory.
With this audit trail, the user can lookup an item and follow its trail back to the
original source easily without having to learn a new process. Serial and lot
numbered items are handled the same way, with the serial numbers available for
display on the serial number tab in the Edit Inventory form.
SUB-ASSEMBLIES
SUB-ASSEMBLIES
Often an item to be produced is composed of two or more raw materials and/or
finished goods. This is probably the most common form of a Production Order
that is used.
In other instances, there could be complex Bill of Materials (recipes) that are
comprised of multiple components that could be composed of multiple
components. An item that can be made up of one or more items that are also
made up of one or more items is called a sub-assembly.
Example
A furniture manufacturer specializes in making office furniture. One item that they
produce is a complete computer desk that consists of the desk, a monitor shelf,
CPU holder and pullout keyboard tray. The inventory items that make up this
finished product are identified as follows:
96
PRODUCTION MANAGER
Item
COMPDESK
DESK
DESKTOP
DESKLEG
DESKHARD
MSHELF
CPUHOLD
KEYBOARD
HARDWARE
PACKAGE
Description
Complete Computer Desk Assembly
Computer Desk
Desktop
Desk legs
Desk Hardware
Monitor Shelf
CPU Holder
Keyboard Pullout
Hardware for Mounting Accessories
Packaging
Type
Manufactured
Manufactured
Normal
Normal
Normal
Normal
Normal
Normal
Normal
Normal
The COMPDESK and the DESK are both finished goods.
The DESK is the basic computer desk made up of the DESKTOP, DESKLEG and
DESKHARD.
It can be sold by itself or it can be one of the components for the COMPDESK.
When used as a component of the COMPDESK, the DESK is a sub-assembly.
The COMPDESK is made up of the following components - DESK, MSHELF,
CPUHOLD, KEYBOARD, HARDWARE and PACKAGE.
Highlight the DESK in the component grid to activate the Sub-Assembly button in
the bottom right corner of the window.
Note: The Sub-Assembly button will only become active when an item is
highlighted that is made up of one or more inventory items or components.
97
BVEssentialsAdminGuide
Clicking on the Sub-Assembly button adds a “+” button to the left of the
component.
Note: When the Sub-Assembly button has not been clicked to expand the DESK
component, it is color coded as RED. This indicates visually to the user that
there are no assembled DESK items in inventory.
When it has been clicked to expand the component it may change to GREEN.
This indicates to the user that there are sufficient quantities of the components
that make up the DESK in inventory to produce the required quantity of DESK.
Clicking on the “+” button expands the highlighted component into all of its
components or parts.
98
PRODUCTION MANAGER
Building Production Orders with Sub-Assemblies
When the user goes to complete the build, the build process will use the subassemblies already in inventory, unless the user “expands” the sub-assembly in
the Production Order.
The sub-assembly will be built as part of the build of the finished product only if
the sub-assembly has been expanded and displays its components. The subassembly components will be removed from inventory to build the sub-assembly
to complete the finished product. The original completed sub-assemblies existing
in inventory will remain in inventory.
When the sub-assembly is not "expanded" there must be sufficient quantity on
hand in order to complete the build.
Insufficient Quantities of a Sub-Assembly
Using the example above, the user will see DESKTOP, DESKLEG and
DESKHARD indented under DESK.
Initially DESK showed RED in the component grid. When the components for
DESK are “exploded” or expanded to be visible in the grid, the user is able to see
if any of the components have insufficient quantities to produce the assembly or if
the assembled product has not been produced.
Even though there are insufficient quantities of the Sub-Assembly DESK
assembled and in inventory, the build of COMPDESK will complete if all of the
components to produce the sub-assembly are available.
99
BVEssentialsAdminGuide
Multiple Sub-Assemblies
BVEssentials can handle many levels of sub-assemblies for a finished top
assembly item. BusinessVision can store up to 9 levels in the Bill of Material
record.
That means that the finished product has a component that is a sub-assembly;
one of the components of the sub-assembly is a sub-assembly, and that subassembly contains a component that is also a sub-assembly, etc. up to 9 levels.
Example
Using the example above, one finished product is DESK. It is comprised of 3
components, none of which are sub-assemblies. If DESKHARD item were
broken down into two components (HARDBOLT and HARDNUTS), then DESK
would have a sub-assembly that would look as follows.
If COMPDESK were the finished product being produced, there would be 2 levels
of sub-assemblies, DESK and within it, DESKHARD.
With both Sub-Assemblies expanded, it would look like the screen shot below.
100
PRODUCTION MANAGER
The option to use multiple levels of assemblies to build a finished product allows
the user to use a component made up of other inventory items repeatedly for
different finished products without having to list them as individual components
each time they are used in the build process.
101
SALES MANAGER
Sales Manager
BVEssentials provides additional functionality to the Sales Order module that is
standard to BusinessVision. The pricing variables and matrix that are available in
BVEssentials ensure that customers are charged the appropriate price for their
items.
In addition to the standard 20 price levels, with multiple currencies (if the module
has been purchased), each inventory item has a selling price and cost, and a
price matrix attached to it. Each customer is assigned a price level, and there is
also the option to enter in pricing for specific customers for a specific period. The
pricing variables and the impact of each will be covered later in a separate
section (Pricing Variables).
Sales Orders are the first step in billing a customer for goods or services
acquired. Depending on the options chosen in BVEssentials set up and user
permissions set, the user can save the order, add it to a batch to be posted, or
generate the invoice and post it to the General Ledger.
Navigation
Sales Order List
The Sales Order List opens by default when a user logs into BVEssentials. In
addition to the BVEssentials Toolbar, the Sales Order Module Toolbar opens
below it.
There are several different functions in the Sales Order Module Toolbar that can
be carried out in the Sales Order list that affect an order, without having to open
the specific order.
BVEssentials>Sales Orders List
103
BVEssentialsAdminGuide
con
Description
Refresh – refreshes the sales order list to update the list to
include any orders anther user has created or updated.
Filters – displays the filter options a user can use to display the
sales order list
New Order – opens the Sales Order Add window
Edit Order – opens the order highlighted in the Sales Order
List for editing
Copy Order – Creates a new order containing the data from
the highlighted order. Only the order number is changed.
Delete – Deletes the highlighted order in the list. There is no
Undo. Permission for a user to delete orders is set up in
BusinessVision User Details.
Print – Print a report from the report selection window that
pertains to an order or list of orders
Hold – Places the order on hold. The order can be read but
not modified until the hold is removed.
Process – Changes the status to process, can verify that the
order does not place the customer beyond their credit limit
and prints the picking or packing slip
Re-Open Order – Allows for an order that has been processed
and closed to be re-opened.
Fill Back Orders – Automatically fills all backorders. This is
done on a first come first, served basis; based on the Order
number
Note: If the “Use Batching” option has been selected in BVEssentials
set up, then the “Batch” icons will appear next to the “Fill Back
Orders” icon.
104
SALES MANAGER
Create Batch – Allows the user to create a new batch with the
selected orders or a date range of orders
Remove from Batch – Allows the user to remove a Sales
Order from a batch without opening the Sales Order
List Batches – Displays the list of batches not yet posted to
BusinessVision
Sales Order Toolbar
The Sales Order Toolbar allows the user to handle orders with ease.
Sales Order Window
Icon
Description
Save – Saves the sales order and leaves it open on the
desktop for further activity
Save Close – Saves the sales order and closes the screen;
the desktop is reset back to the Sales Orders List
Delete – Deletes the sales order, if the user has permission
to do so
Print – Opens a dialogue box with a list of Sales Order
reports
Process – Does three tasks
1. Sets status to "Processed"
2. Prints reports for shipper to pick order
3. Checks the customer credit limit (an optional setting in
105
BVEssentialsAdminGuide
Company Set up)
Invoice – opens up a dialogue asking whether to place on
customers account or edit the payment. Also allows user to
print reports
Store Prices and Taxes – Updates the price matrix and tax
tables with the current prices
Refresh Prices – Recalculates the order with the most
current prices that the customer qualifies for.
Creating a New Sales Order
Creating a New Sales Order
The Sales Order list opens by default when the user logs into BVEssentials. A
few other defaults come with the user login, such as the default location (see
Getting Started, Company Setup, General Ledger, Location segment),
warehouse are loaded.
To create a new sales order
1. Click New Order icon
The Sales Order Entry window will open
106
SALES MANAGER
BVEssentials>Sales Order Entry Window
Main Tab
Main Tab
The Main tab contains the header information such as the Customer, their PO
Number (if provided), Terms, Shipping Method and Date, in addition to the items
or parts ordered.
The only fields required to make a unique new sales order are the Order Number
and the Customer. Once these fields have been populated, the order can be
saved and revisited at a later time.
1. Select the Customer from the Customer lookup
2. Press <Enter> to select the Customer from the list
Or
Any of the following:
107
BVEssentialsAdminGuide
a. Enter a Customer Code
b. Enter a Ship to Code in the Ship To field
c. Enter a Name in the Ship To field
d. Enter a Phone Number with area code in to the Ship To Field
e. Look up a Ship To, and if a Customer is not selected, then all
addresses will be displayed.
3. The Customer Name will be automatically filled in
4. The Note field will be highlighted and automatically filled in with the note
that exists on the customer’s record.
Sales Order>Customer Section
5. Select the Ship To address from the Ship To lookup
The name of the address selected in the Ship To lookup will be displayed
beside it.
Note: This can be done in place of selecting a Customer from the lookup
when the order is created.
6. Enter the PO Number, if applicable
7. The Territory field is automatically populated by the territory specified in
the Customer address record. It can be over-ridden at the time of order
entry.
8. A/R Balance is a dynamic field that is populated by the system and reflects
the value of all unpaid invoices.
9. Credit limit is automatically populated by the Credit limit set in the
Customer record. If the user has been granted permission to do so, they
can over-ride the credit limit to allow an order to be processed.
10. Other Orders is automatically populated by the total of all Orders entered
and saved, that have not yet been posted to the General Ledger
11. Available is automatically populated by the system, displaying the
difference between the Credit Limit and the A/R Balance and the Other
Orders values.
108
SALES MANAGER
If the Available amount is negative, the customer has exceeded their credit
limit and the Available field is highlighted in red.
General Section
The General section of the Main tab contains the Salesperson, FOB, and Ref No
Fields.
1. Select the Salesperson from the Salesperson lookup. It will default to the
salesperson assigned to the Customer Master record, but can be changed
for the Sales Order
2. The Name of the Salesperson will be displayed next to the Salesperson
3. Enter FOB/Ref # with the FOB origin or waybill number or other relevant
reference number
Order Details Section
The Order Status section contains the Status, Order Number, Order Date, Invoice
No, Invoice Date and Ship Date fields on the right side of the Main Tab.
109
BVEssentialsAdminGuide
1. The Status field defaults to “Open” but can be changed
There are 5 different status types for an order. A description of each
status has been detailed in the table below for easy reference.
Status
Open
Hold
Standing
Description
An order that is incomplete, has not yet been
processed, it may be assigned to a batch
awaiting posting; it has not been invoiced.
An order that has been created, either
manually or by the system, but is not available
for editing or processing until the hold flag has
been removed and the order released. It can
be opened in Read-Only mode.
An order that remains in the system as an
order even after invoicing. In essence it is a
recurring order that is required on a regular
basis.
Note: Standing Orders that contain items with
serial or lot numbers will require manual entry
of those numbers. The system does not
automatically list them from those available in
inventory
Booking
A booking is similar to a quote in that the items
are not committed. A booking is unique in that
it can be changed to open and commit the
items in inventory and then be changed back to
booking which will then release the items.
Typically a booking order is one that is placed
for product months in advance of when the
customer wants delivery. An example of that is
a seasonal industry like a nursery. They book
110
SALES MANAGER
all their products in the fall for delivery in the
spring in time for planting season.
Closed
An order is assigned the status of Closed once it
has been invoiced
Note: A sales order placed on hold is different from a customer being
flagged on hold. A sales order on hold can not be processed until its
hold is removed.
A customer cannot place an order until the customer has been
released from being on hold. The customer hold is usually due to nonpayment or over credit limit issues.
2. The Order No is automatically populated by the system based upon the
system setup.
3. The Order Date defaults to today’s date, but can be over ridden at the
time of order entry.
4. Enter the Invoice No
Note: The Invoice No will be automatically populated if the option for
automatic invoice numbering has been selected in BVEssentials setup.
5. The Invoice Date defaults to today’s date, but can be over-ridden at the
time of order entry depending upon the settings in Company Set up
6. Select the Ship Date from the Ship Date lookup
The default is today’s date or the number of days defined in
BVEssentials Sales Order Setup.
Placing an Order on Hold
An order can be placed on hold by changing the status of the order to hold.
1. Go to Status dropdown
2. Select Hold from the list
3. Press <tab> to leave the field.
111
BVEssentialsAdminGuide
The status will still display the status as “open”, though the order has been
placed on hold.
Though the order looks like it is open and available for editing, when you attempt
to edit the order a dialogue window opens advising that the order has been
placed on hold. The user has the option to read the order and not make
changes, or to remove the hold and be able to modify the order.
When the Sales Order list is displayed, any order that had been placed on hold
has its status highlighted in red to make it easy to identify.
Sales Order List – Order on Hold (red)
Item Section
The Item Details section contains all the items for the order and the applicable
pricing, levy, surcharges, taxes etc for each line item.
112
SALES MANAGER
Entering Items into the Items Detail Grid
1. Select the Part No from the Inventory lookup
The Description will automatically be populated.
Or
Type a Part Number into the Part No field
Or
Leave the Part No field blank, press insert to enter a comment line into the
description field
2. Enter Order Qty
If there is insufficient stock on hand, a warning dialogue will open explaining
that there is insufficient stock and that some have been back ordered, if that
option has been selected in Company Set up.
3. The Ship Qty defaults to the Order Qty value.
If the warning dialogue about insufficient stock appears, the available
quantity on hand will populate the Ship Qty field. The shortage will
populate the B/O Qty field.
The Ship Qty can be edited to a lesser number and the B/O Qty field will
dynamically update with the change once the focus has moved from the
Ship Qty field. It is also possible to zero the B/O Qty field indicating that
backorders will never be shipped.
4. Enter Discount if one is applicable.
This is specific to the line item, not the entire order. It will be applied to the
lowest price available for the item to this customer.
113
BVEssentialsAdminGuide
5. The Unit Price will be populated by the best price match found for this
customer. Pricing will be covered in the section on Pricing Variables
6. Current Cost displays the current cost price (last received price) of the
item. Cost can be edited on the order entry screen by a user with
permission, but it is not recommended.
7. Average Cost displays the average cost of the item. The cost of the items
will fluctuate over time and the Average Cost is automatically calculated
for the item from the first receipt to the most recent one. It is not editable.
8. U/M is the unit of measure the item is sold in
9. Conversion Factor is the conversion factor for converting the unit of
measure the item was purchased in to the unit of measure it is sold in.
Example
Speaker wire is purchased by the case. It is sold by the roll. There are 12
rolls in a case. The conversion factor is 12:1.
Taxes and Levy
Tax 1 and Tax 2 are marked by the system, based upon the customer and
inventory settings. They can be changed.
The Levy field will be populated “Yes” if a levy has been assigned to this item.
Levies can be assigned either as a flat fee or a percentage of the extended price,
depending on how the levy was defined.
Example
An environmental levy has been assigned to the speaker paint. It is a flat fee of
2.50 for each tin. One tin is ordered. The Levy field would display “yes”, the Ext
Price would be $10.00, and the Ext Levy would be $2.50. The levy of $2.50 will
be added to the line total.
114
SALES MANAGER
If the same environmental levy was a percentage of 2.5% instead of a flat fee of
$2.50, the same scenario would look like this:
Paint is $10.00 per tin, one tin is sold; Levy displays “yes”. Ext Price is $10.00
and the Ext Levy is $0.25. The levy of $0.25 will be added to the line total.
Margins
The Margin fields display in percentage, not dollars.
The Margin (Cur) field displays the current margin based on the Current Cost and
the Unit Price.
Margin = Selling Price - Current Cost Price/Selling Price x 100
The Margin (Ave) field displays the average margin based on the Average Cost
and the Unit Price.
Margin = Selling Price - Average Cost Price/ Selling Price x 100
Employee
1. Enter the Employee Number to track it on the line item
The Employee Name will be automatically populated
Entering the Employee is valuable when line by line tracking is required,
especially when it is important to track services. The system does not
automatically populate the employee field, it is manually entered for each line
where required.
Creator
The Creator is the user that created the sales order. It is not editable.
Editor
The Editor is the user that last edited the order. It is not editable.
115
BVEssentialsAdminGuide
Item Detail Footer
The item detail footer is located just below the line items. It displays the
Available, On Hand, Committed, and Backorder quantities. In addition it also
displays the quantity On Order and the Expected arrival date. The information is
displayed for each line item, when the line is in focus.
Sales Order Footer
The Sales Order Footer is displayed below the Item Detail Footer and displays an
assortment of information about the order such as Discount on the order, Freight,
Gross Profits (current and average), Taxes and the order Total. It is always
visible, even when the user is in the Shipping, Sales History or Communications
Tabs.
Discount Percentage
The Discount Percentage is the discount percentage to be applied to the subtotal
of the entire order after the line item discount has been applied. If does not
discount the Freight applied to the order. This is editable and typically applied by
the user that has permission to enter discounts.
Freight
The Freight is the cost of shipping the products to the customer. This field is
usually manually entered by the user or calculated by the system as set up in
BusinessVision System setup and Ship VIA Codes.
Gross Profit
The Gross Profit (Cur) and (Ave) Percentages are based on the selling price of
the item, less the current and average costs of the item, less any discounts for
the item. The Freight is not included in the calculation.
Taxes
The Taxes displayed show each tax charged on this order, based on the
customer and inventory tax settings.
Order Total
The Order Total is displayed in very large numbers in the bottom right hand
corner of the Sales Order.
Sales History Tab
Sales History Tab
116
SALES MANAGER
The Sales History tab defaults to the “Invoice” view (unless "Details" was clicked
the last time the screen was displayed). This mode lists all of the invoices that
have been processed for this customer.
The Invoice Details Mode will display a list of all the items this customer has
ordered, grouped together in alphabetical order of the part number as the
default. Other columns can be used to sort the data as well, such as date or
description, simply by clicking on the grey column header to change from the
default.
The “Show Order Items Only” option enables the user to see the sales history for
only the items that are on this order. It is very helpful to be able to see and
compare the past prices for the items being sold on this order.
Communications Tab
Communications Tab
Please refer to the section on the Communications function.
Shipping and Customer Tab
Shipping and Customer Tab
The Shipping and Customer tab contains shipping instructions for the order. In
the event that a customer has a different “bill to” code or location set up in the
customer record, that information is displayed automatically in this section.
The user can manually enter a ship to location.
The contact information is contained in this area for reference. The customer A/R
balances are also displayed in this section.
Saving the Sales Order
Saving the Sales Order
To save the Sales Order
1. Click Save
117
BVEssentialsAdminGuide
The order remains in the window, but all the data up to this point has been
saved on this order.
Or
Click Save Close
The Order will be saved and the data entry form will close, placing the user
back at the Sales Order List.
Payment Methods
Payment Methods
1. Click Invoice icon (or press F5) to complete the transaction
2. Select On Account if the customer has sufficient credit and wishes to put
the order on account.
If the customer has sufficient credit, the order is closed and the user is
prompted to print an invoice.
If the customer does not have sufficient credit to cover the cost of the
order, the Edit Payment window will open.
Note: All Payment Methods that have been set up in BusinessVision are
available in the payment window.
3. Select Edit Payment if the customer does not have sufficient credit to
cover the cost of the order.
The Payment Method window opens
4. The default payment method in the grid is “On Account”. If the customer
wishes to put part of the order on account, enter the amount in the Amount
field.
118
SALES MANAGER
5. Press <Tab> to save the amount and create the next line.
6. Select a credit card from the drop down list, or type the first letter (such as
"V" for Visa)
7. Press <Tab>
8. Enter the Amount in the Amount Field
9. Enter the Card Number in the Card Number field
10. Enter the Expiry Date in the Expiry Field
11. Enter the Authorization number in the Auth Code field.
Repeat steps 20 to 25 if more than one credit card is used.
The balance Owing should now be at zero and the Invoice button
active.
12. Click Invoice
13. A window opens with a list of reports that are available for printing. Select
the desired report (Invoice) and select Print.
14. The sales transaction is now completed and the order window closes.
119
BVEssentialsAdminGuide
Increasing Customers Credit Limit
Increasing the Customers Credit Limit
The customers credit limit can be increased by a supervisor (or user who has
permission set to do this) during the payment method selection.
From the Payment Method Window
1. Click Credit Limit button
The Customer Credit Limit window opens.
2. Enter the new credit limit into the New Limit field
3. Click Save to save the change and update the customer record.
4. Select On Account and enter the amount of the order into the Amount
Field.
5. The balance becomes zero and the Invoice button active.
6. Click Invoice to print an invoice of the transaction.
120
SALES MANAGER
7. The order is complete and the user will be returned to the Sales Order List
Note: If the current user does not have the permissions set to allow them to
increase a credit limit, then a window will open asking for the UserID and
Password of a user that does have the permission to increase credit limits.
Quotes
Quotes
Quotes are different from sales orders in that quotes are an estimate of goods
and services and do not commit the items from inventory.
Quotes can be turned into an order by changing the status, but once changed to
an order, it cannot be returned to quote status.
Creating a Quote
From the Sales Order List desktop,
1. Click New
2. Change Status to Quote
121
BVEssentialsAdminGuide
3. Complete the quote by selecting the customer and entering the
appropriate billing, shipping and item details
4. Finish entering the details of the quote, selecting items, entering prices, in
the same manner as a Sales Order
5. Click Save or Save Close
Changing a Quote to an Order
To change a Quote to an Order from the Sales Order List desktop
1. Double click the appropriate Quote to open it
Or
Highlight the Quote and click Edit
2. Change Status from Quote to Order
3. Click Save or Save Close
Note: Once the quote changes to order status, the items on the order will be
committed in inventory or be back ordered.
Deleting a Quote
To delete a quote from the Sales Order List
1. Highlight the appropriate Quote in the Sales Order List
2. Click Delete from the Sales Orders Toolbar
The record will be deleted.
Standing Orders
Standing Orders
A Standing Order remains in the system as a Standing Order even after the order
has been invoiced. Rather than manually entering the same order on a regular
122
SALES MANAGER
basis, a standing order eliminates the repeated entry of the same order over and
over again. This can be especially useful for Customers that have recurring or
monthly orders.
Creating a Standing Order
From the Sales Order List
1. Click New Order
2. Change Status to Standing
3. Complete the Standing Order by selecting the Customer and entering the
appropriate billing, shipping and item details
4. Click Save or Save Close
The Standing Order will be processed and invoiced in the same manner as a
Sales Order, but it will remain in the Sales Order List even after it has been
posted. Each time the order is posted, the invoice number is cleared from the
Standing Order so that it is ready to be assigned a new invoice number the next
time the order is invoiced.
Booking Orders
Booking Orders
123
BVEssentialsAdminGuide
A Booking order is similar to a Quote in that it does not commit items from
inventory. Primarily a booking order is used to place a tentative order for a date
in the future.
Example
Teddies Wholesale Nursery sells to landscapers, designers and to the public.
During the winter months, there is very little activity for outdoor gardening and
landscaping. The typical operating season for them is late February through the
end of September.
Their customers place booking orders with them in November for seed and soils
to be delivered in February and March. Teddies Wholesale Nursery then places
orders with their suppliers to ensure there is sufficient product on hand at the
beginning of the season to meet the orders placed by their customers.
By doing this, Teddies Wholesale Nursery knows in advance what they will be
receiving and their suppliers can order from their sources or create the product to
meet the booking orders made by their customers.
As the booking orders are placed several months or a season in advance, the
items are not committed from inventory until the booking order has been changed
to an order. This is important as it leaves inventory available to be sold to other
customers in the meantime, rather than being committed and still sitting in the
warehouse for months.
Booking orders can also be partially shipped and will remain as a booking order
until all items have been shipped. Booking orders can also be changed to an
order and if required, back to a booking order without losing any of the data
associated with the record.
POS (POINT OF SALE)
POS (POINT OF SALE)
In addition to the Sales Manager, BVEssentials also contains a component called
Point of Sale or POS for short. Typically POS is used by a company that requires
a simple and fast method of data entry. This is siilar to a cashier and till
situations. POS fully supports Bar Code Scanning.
POS does not eliminate the option of using the Sales Order entry screens to
enter an order if the user wishes to do so. Either way will allow the user to enter
an order and process or pay for it depending on their assigned priority level.
124
SALES MANAGER
POS Setup
POS is configured during the BVEssentials set up. The “Always Show Customer
Dialogue” flag determines whether the user will be doing primarily cash sales or
will need to select a customer from the customer list.
For companies with users that will only be doing cash sales, the Customer
dialogue flag is left unmarked. However it will open the very first time the POS
screen is activated. The user will need to select a defined “CASH” customer and
mark the “default to this customer” flag in the dialogue window. The next time
they go to the POS screen all they will see is the grid to add items purchased, as
the customer is “CASH” by default.
Note: These settings are not global. They are specific to the workstation and the
user signed in to it.
Conversely where the user is not doing cash sales, the Customer dialogue flag
needs to be marked so the user is prompted to select a customer from the
customer list every time the POS screen is activated.
Accessing POS Screen (with Customer Flag turned on)
From the BVEssentials Sales Manager List,
1. Select Sales from the menu
2. Select POS Screen
The POS Customer window will open
125
BVEssentialsAdminGuide
3. Select the Customer from the customer lookup (All of the customer record
data will populate the fields.)
4. Enter the Customer PO (if applicable)
5. Select Territory/Salesperson
Note: This will be bolded if the option to “Validate Salesperson/Territory”
flag has been marked in BVEssentials Set Up. It is bolded to remind the
user that it is a required field and must be populated before they can exit
the window.
6. Mark Default POS Customer (if applicable)
Marking this flag will tag the customer displayed as the default customer
every time the POS Screen opens. This is useful if the customer selected
is CASH and no other information is required.
Note1: If a customer is tagged this way, the Territory/Salesperson field
does not need to be populated and will not be bolded.
Note2: This screen can also be opened by clicking on the Customer icon in
POS or pressing F3.
126
SALES MANAGER
7. Click Okay
8. Scan the item (If using bar codes and scanner)
Note: If using a scanner, repeat this step for all items in the order and
then go to step 15 to complete the transaction.
Or
Click Inventory Lookup icon (F9)
Or
Double click the first row in the part grid
Or
Click Edit Item icon (F4)
9. Select the Item from the inventory List
10. Enter the Quantity (default is 1.00)
11. Enter the Discount (if applicable to the line item)
12. Update the Price (if applicable, otherwise leave the defaulted value, it is
the lowest price for this specific customer)
Note: Step 11 and 12 are not required if using default discounts and
pricing.
13. Click Close
14. Scan another item
Or
Press F4 or F9 to add another item
15. Click Invoice/Tender icon (or F5) to complete the transaction
16. Select On Account if the customer has sufficient credit and wishes to put
the order on account.
If the customer has sufficient credit, the order is processed and the user is
prompted to print an invoice.
127
BVEssentialsAdminGuide
If the customer does not have sufficient credit to cover the cost of the
order, the Edit Payment window will open.
17. Select Edit Payment if the customer does not have sufficient credit to
cover the cost of the order.
The Payment Method window opens
18. The default payment method in the grid is “On Account”. If the customer
wishes to put part of the order on account, enter the amount in the Amount
field.
19. Press <Tab> to save the amount and create the next line.
20. Select an option from the Payment Method drop down list, or type the first
letter
21. Press <Tab>
22. Enter the Amount in the Amount field
23. Enter the Card Number in the Card Number field (if applicable)
24. Enter the Expiry Date in the Expiry field (if applicable)
25. Enter the Authorization Number in the Auth Code field. (if applicable)
128
SALES MANAGER
Repeat steps 20 to 25 if more than one credit card is used. The Balance
Owing should now be at zero and the Invoice button active.
26. Click Invoice
A window opens asking if you wish to post to BusinessVision or save for
batching (this depends on which batching option has been set in
BVEssentials Company Set up). Please refer to the section on Batching
for more information.
27. Select the desired report (Invoice) and select Print.
28. The sales transaction is now complete and the order window closes.
Increasing the Customers Credit Limit
The customers credit limit can be increased by a supervisor (user permission
must be set to allow increasing the credit limits) during the payment method
selection.
In place of selecting a credit card,
1. Click Credit Limit button at the bottom left of the window
The Customer Credit Limit window opens.
129
BVEssentialsAdminGuide
2. Enter the new credit limit into the New Limit field
3. Click Save to save the change and update the customer record.
4. Select On Account and enter the amount of the order into the Amount
field.
5. The balance becomes zero and the Invoice button becomes active.
Switching between POS Screen and Sales Order Entry
The POS screen is a very quick and easy way to scan or manually enter items
into an order if the user does not have to make adjustments to quantities or
pricing.
However, sometimes it is necessary to take an order that has already been
scanned and make an adjustment that is not available on the POS Screen.
This is very easy to do with a simple click of a button.
From the POS Screen
1. Click Order Entry icon or press F6 to display order in the full order entry
screen.
2. Continue entering or modifying the order.
Changing back to POS Screen
To Change back to the POS screen with the changes (if necessary)
1. Click “X” in the top right corner of the title bar to close the full order entry
screen.
2. Continue filling out the order in POS
3. Complete the order as described in the previous section.
Changing Customers in POS
Typically a company will set up a default Cash Account for all customers that do
not have an account or do business with them very often.
130
SALES MANAGER
From the POS Screen
1. A default Customer populates the Customer field
2. Press F3 to open the Customer List.
3. Select the appropriate Customer.
Note: This also works in reverse. A customer has been selected and they do not
want a receipt. Press F3 and find the CASH customer and finish the order.
PRICING
Sage Pricing Overview
Basic Pricing Variables (Overview)
Sage BusinessVision Pricing (Standard)
Some companies do not require complex pricing matrixes. The options provided
within BusinessVision may adequately meet their needs. For convenience,
BusinessVision pricing and BVEssentials will be mentioned in this chapter
The ways in which pricing is handled within BusinessVision are
• Price Discount Codes
• Discount Percentage
• Price Levels
• Customer Specific Pricing (requires Custom Pack)
The Customer Record
The Customer record contains a few fields that provide the option for customer
specific pricing.
131
BVEssentialsAdminGuide
BVEssentials>Customer Edit>Addresses Tab>Pricing and Taxes
Sell Price Levels
This is a pull down field with values from 01 – 20. This is a price level that is
assigned to this customer that corresponds to the same value in the Selling Price
level in Inventory Details in BusinessVision. Further detail about the Selling Price
Level in Inventory is found in the Inventory Record section below.
Price Discount Code and Discount %
Price Discount Code
The Price Discount Code and Discount % fields are located in the middle of the
Billing tab of the Customer record.
132
SALES MANAGER
The Price Discount Code is a pull down field with values of blank, A, B, C and D.
Blank means that regular pricing applies; there is no special pricing discount for
this customer; A, B, C and D assigns a different discount level to the customer for
a product code.
Product codes are assigned to inventory items and price discount codes are
related to Product codes. Both are displayed in the Price Discount Matrix.
Price Discount Codes and Product Codes must be set up in BusinessVision. The
outcome or discounted price is displayed by BVEssentials in the BVEssentials
Sales Order, but are not honored in BVEssentials pricing calculations.
Refer to BusinessVision Documentation on Inventory Details and the Price
Discount Matrix.
Discount Percentage
Discount Percentage is the percentage assigned to a customer and usually only
used if the customer regularly gets a discount on all purchases. It applies to all
items the customer purchases. The value entered on the Customer record in
BVEssentials references the same field in BusinessVision; so a value can be
entered in BVEssentials and is functional with BusinessVision Pricing rules.
The Inventory Record
Selling Price or Price Level
Selling Price is defined on the Inventory Detail record. There can be up to 20
different selling prices for the item and they can be in more than one currency (if
the multi-currency module has been purchased). A customer assigned a selling
price or price level 2 gives them a different price than customers assigned a price
level of 1 would receive.
133
BVEssentialsAdminGuide
Refer to BusinessVision documentation on Inventory Details, Selling price for
more information on setting up Inventory item pricing.
Sage BusinessVision Pricing (Custom Pack)
Customer Specific Pricing
Customer Specific Pricing is only available to customers that have purchased the
BusinessVision Custom Pack.
Please refer to the BusinessVision documentation for Custom Pack, Customer
Specific Pricing for more details.
134
SALES MANAGER
BVEssentials Pricing
BVEssentials Pricing
The Customer Specific Pricing, Price Levels and Price Discount that is available
in BusinessVision are the variables supported by BVEssentials. The Price Levels
and Price Discount options can be configured on the Customer Record in
BVEssentials. BusinessVision Customer Specific Pricing must be set up in
BusinessVision. However, it is recommended that all pricing be set up in
BVEssentials Price Matrix as it is very powerful and allows for greater flexibility.
The Price Discount Code (A, B, C, D) pricing is not supported in BVEssentials.
In its place, BVEssentials does provide a more comprehensive method of pricing
through its Price Matrix linked to Inventory Items and Customers.
Price Matrix Overview
BVEssentials “scores” the different variables available in the Price Matrix. Using
this method it provides the option to find the best price for the customer and item.
The “Match Lowest Price in Price Matrix” option is found in BVEssentials Sales
Order set up. Please refer to Chapter 2 Setting Up BVEssentials for more
information.
The Price Matrix can be accessed from three different locations and viewed in
two different perspectives.
1. Access through the customer record provides a view of all special pricing
for this specific customer.
2. Accessing the price matrix through the inventory item provides a view of all
customers that have special pricing for the item.
3. Accessing the price matrix from the Inventory menu; provides the user with
the option of choosing which records they would like displayed with the
use of the filter.
It is all the same data, each displayed from a different perspective.
135
BVEssentialsAdminGuide
Pricing Variables
Customer Record Basic Pricing Variables
The Customer record has three fields it uses and /or supports for basic pricing on
the Addresses>Pricing and Taxes tab and the Billing tab.
Discount (BusinessVision)
The discount is the flat percentage that is applied to the entire sales order (not
including taxes or freight). It calculates the price by applying the discount to the
Sell price level that is assigned to this customer.
Sell Price Level (BusinessVision)
The Sell Level Price is the price level assigned to this customer overall. Level 01
is the default and is for those customers that do not get discount pricing on their
purchases regularly.
Margin (BVEssentials)
A margin percentage can be assigned to a customer so that their pricing of all
items will be that percentage over the current cost of the item.
Example
Widget100 has a current cost of $8.00 CAD. Its regular sell price is $12.50 CAD.
Customer Joey Baltimore purchases it for 20% margin. In this instance he will
pay $9.60 instead of the sell price of $12.50.
The current cost of the Widget100 increases to $9.00 CAD, but the company has
decided not to raise its selling prices.
However, customer Joe Baltimore will pay more because his pricing changes with
the cost, not the list price. In this instance he will now pay $10.80 for the
Widget100, which still remains less than the list price of $12.50.
Conversely if there is a significant reduction in the cost of an item, it will have an
impact on the price that the item is sold to this customer.
Customer Record Price Matrix
136
SALES MANAGER
The Price Matrix displayed in the Customer Record is shown from the Customer
perspective. When the Price Matrix tab is open, the user has several filters for
displaying the pricing records in the grid that apply to the customer. This can be
very helpful when the customer has a significant number of special pricing
records that apply to them. The user can easily view relevant pricing records
rather than trying to find one specific record in a very long list.
Pricing Matrix Filters
Inventory Filter
The Inventory Filter allows the user to display special prices based on the
1.
2.
3.
4.
Warehouse (multi-warehouse option only),
Part Number
Product Code
Vendor
Any combination of the four selections will display only those pricing records that
match the criteria selected.
Warehouse (multi-warehouse configuration only)
This field only appears as a filter when the multi-warehouse option has been set
up in BusinessVision. It will display all of the special pricing for items that have
been stocked in that warehouse in the grid.
Part No
The Part No filter will display all the special pricing for the part for this customer. It
makes it very easy to see the history of special pricing for this customer.
Product Code
137
BVEssentialsAdminGuide
The Product Code filter will display all the special pricing for the product code
selected for this customer. It makes it very easy to see the history of special
pricing for all items assigned to this product code group for this customer.
Vendor
The Vendor filter will display all the special pricing for items for this customer that
were purchased from the vendor selected.
Pricing Filters
There is only one pricing filter and that is the Price Reason; the reason for the
special pricing. Examples of that could be Case Lots, or an Anniversary Special,
Competitor Pricing, etc.
cial price to a customer record
To add a special price to a customer record
1. Open the customer record
2. Click Add
The Inventory Price Matrix window will open
138
Add
ing
a
spe
SALES MANAGER
3. S
e
l
e
c
t
t
h
e
P
a
r
t
N
o
O
r
S
e
lect the Product Code
4. Enter the Date Range for the special pricing
The Start date is the day the special pricing takes effect. If left
blank, the system goes back to the beginning of time.
The End date is the date the special pricing ends. If left blank, it
goes on to infinity.
Any sales orders that fall within the start and end dates specified
will use the special pricing specified.
Price Break on Quantity
When a customer is required to purchase a minimum quantity before
getting the special pricing
5. Enter Minimum Quantity
139
BVEssentialsAdminGuide
Note: If the purpose of the special pricing are breaks on quantities, then
multiple pricing records will need to be created for each one.
Absolute Price
Absolute price is the price this customer is charged no matter what other
pricing is available throughout the system. When this box is checked, then
the system will not look for the lowest price available.
6. Mark Absolute Pricing
Example
ABC Electronics Company has made an agreement with their
customer, Crazy Al that for the month of September, he pays $50
per Portable DVD player he purchases when he orders more than
10. The regular price for this item is $60.
In the middle of September the selling price of Portable DVD
players has dropped in line with an unexpected decrease in cost.
The regular selling price of a portable DVD is now $47.50.
Crazy Al will still pay $50 when he orders more than 10 on an order
because the Absolute Pricing option is checked.
However if Crazy Al only purchases 5 Portable DVD players, he will
be charged the new lower price of $47.50 because he does not
qualify for the “special price”.
Pricing Methods
7. Select the Pricing method
Price
This is the flat rate the customer will be charged for the item. For
example, the price of a DVD player for this customer is $60.
Discount
The discount specified is applied to the customer’s price level (01 –
20). The discount is a percentage.
140
SALES MANAGER
Example
The regular price (price level 01) of a DVD player is $60. Price
level 02 is $55. Crazy Al is given a discount of 5%. His assigned
price level is 02. His price will be $52.25 (55-5%).
Margin
The Margin is the percentage that will be applied to the current cost
of the item.
Note: This could have a significant impact on sales revenue if the
price drops significantly, or there was a substantial amount of
inventory remaining on hand before the shipment with the reduced
cost was received.
Example
There are 200 Widget100 in stock. Current cost is $5.00 each.
Regular selling price is $10.00 each. Crazy Al has special pricing;
he receives the Widget100 for 50% margin on the current cost on
Tuesday this week ($7.50).
A new shipment of Widget100 has arrived and the current cost of
them with this shipment is $4.00. Crazy Al places another order on
Friday and this time he is charged $6.00.
The widgets do not have a significant cost price but if there was a
large volume sold, like 100, the company could lose a potential
$150 in revenue. The loss could be much greater if the cost of the
item is significant, such as $1000.
Conversely, if it is expected that cost prices will increase, then
using the margin method of pricing is very efficient.
8. Select the Price Reason
fly.
Note: Price Reasons can be selected from the list or added on the
9. Click Save to save the Price record
It will be added to the Price Matrix grid for the customer.
141
BVEssentialsAdminGuide
Inventory Item Price Matrix
In BVEssentials an inventory Item record contains a tab called Price Matrix.
Within that tab there are several filters that can be used to display special price
records for the item.
Accessing the Price Matrix from the Menu
To access the price matrix from the menu bar
1. Go to the Menu bar
2. Click Inventory
Or
<ALT> + I
3. Select Price Matrix
The Price matrix window will open.
The user has the option of selecting Inventory and/or Customer filters to narrow
down their search for special pricing for a Customer or Item.
142
SALES MANAGER
Previously, when adding a special price through the customer record, only the
inventory fields were available for selection. Similarly when adding a special
price from the inventory record, only the customer fields were available. In the
Price Matrix perspective, both inventory and customer fields are available for
selection.
The process for adding a special price records is the same as for adding one to
an inventory or customer record.
Updating Prices in the Price Matrix
Prices can be updated very easily in the Price Matrix. This can be done from any
of the three Price Matrix windows. The process is exactly the same in each
window.
In the Price Matrix window
1. Set the filter to display only the records that require updating
Example,
Select a Vendor and a Product Code. Only the records for the
specified vendor that has the specified product code will be
displayed.
This makes it easier to find records to be updated.
2. Highlight the record(s) to be updated
3. Click Update
The Price Matrix Update window will open
4. Select the Date Range (if applicable)
If a catalogue is being updated, new records can be created here
by inserting a Start date so that they can be entered before they
become effective.
In this instance an End date would also need to be assigned to the
existing price records so that there is no overlap of prices and
dates.
5. Mark the appropriate Adjustment Type
New
Marking New will create a new record based on the item or
customer, depending upon the option selected in the previous
window.
143
BVEssentialsAdminGuide
While creating a new price record, the user needs to specify
whether they will be using Price, Discount or Margin as the type of
price to be assigned.
Amount Adjustment
Marking Amount Adjustment will update all of the records selected
in the previous window. It will update the price currently assigned
to the record and increase or decrease that value by the amount
specified.
Percentage Adjustment
Marking Percentage Adjustment will update all of the records
selected in the previous window. It will update the price currently
assigned to the record and increase or decrease that value by the
percentage specified
6. Enter the Value into the appropriate field.
For convenience, only the value field that applies to the selected
Adjustment type will be active
7. Click Okay to add or update the record(s).
8. Exit the Price Matrix window
Price Matrix Filters
This is very similar to the Price Matrix filters in the Customer record except it uses
different fields for filtering.
1.
2.
3.
4.
144
Customer No
Territory
Customer type
Price Reason (same as in the Customer Record)
SALES MANAGER
Inventory Price Matrix Variables
The Part No and Description are populated and grayed out as the item has
already been defined.
Customer No
A special price can be assigned to a specific customer for this specific
item.
Territory
Territories are assigned to a Customer record. Territories can be based
on salespeople or geographical areas. Using this option for pricing allows
the same price to be applied to all customers in a specified territory very
easily.
Example
A territory called CAD-West is assigned to all Customers who are in
Alberta and BC. In the inventory pricing matrix, the territory selected is
CAD-West. The Inventory item, Widget100, whose regular, non discounted
price is $12.50 CAD; the price will be $10.00 CAD for all customers in the
CAD-West territory.
No other entry is required for these customers to get this special price. It
will be automatically selected unless other variables with a higher “score”
145
BVEssentialsAdminGuide
are used. In which case, the highest scoring variable or combination of
variables with the lowest price will be used.
Customer Type
Customer Type is a user defined field. Depending on the company
business it could contain a value like RETAIL, WHSLE or any other
variation. The field is used to combine common business types together
for common pricing.
Similar to the example above for the Territory, all Customers with the
Customer Type of RETAIL could be assigned the same pricing by using
the Customer Type variable.
Warehouse (Multi-Warehouse configuration only)
BVEssentials provides the option of setting item pricing by warehouse
when there is more than one warehouse location. This provides an easy
way of defining item pricing based on the warehouse, rather than a
customer no, type or territory.
Example
A company has 2 warehouses, one on the East Coast and one on the
West. All inventory items are imported from China and arrive on the West
Coast. There are additional transportation costs to get the items from the
West Coast dock to the East Coast warehouse.
As a result, the company charges 7% more on all items that are sold out of
the East Coast warehouse.
Conversely, BVEssentials allows the price to be set on the part number so
that all warehouses use the same price.
Adding a special price to an inventory record
To add a special price to an inventory record
1. Open the inventory record
2. Click Add
The Inventory Price Matrix window will open
146
SALES MANAGER
3. Select the Customer No
Or
Select Territory
Or
Select Customer Type
4. Enter the Date Range for the special pricing
The Start date is the day the special pricing takes effect. If left
blank, the system goes back to the beginning of time (1800).
The End date is the date the special pricing ends. If left blank, it
goes on to infinity.
Any sales orders that fall within the start and end dates specified
will use the special pricing specified.
Price Break on Quantity
When a customer is required to purchase a minimum quantity before
getting the special pricing
5. Enter Minimum Quantity
Note: If the purpose of the special pricing are breaks on quantities, then
multiple pricing records will need to be created for each one.
Absolute Price
Absolute Price is the price this customer is charged no matter what other
pricing is available throughout the system. When this box is checked, the
system will not look for the lowest price available.
6. Mark Absolute Pricing
Example
ABC Electronics Company has made an agreement with their
customer, Crazy Al that for the month of September, he pays $50
147
BVEssentialsAdminGuide
per Portable DVD player he purchases when he orders more than
10. The regular price for the item is $60.
In the middle of September the selling price of Portable DVD
players has dropped in line with an unexpected decrease in cost.
The regular selling price of a portable DVD is now $47.50.
Crazy Al will still pay $50 when he orders more than 10 on an order
because of the Absolute pricing option being checked.
However if Crazy Al only purchases 5 Portable DVD players, he will
be charged the new lower price of $47.50 because he does not
qualify for the “special price”.
Pricing Methods
7. Select the Pricing method
Price
This is the flat rate the customer will be charged for the item. For
example, the price of a DVD player for this customer is $60.
Discount
The discount specified is applied to the customer’s price level (01 –
20). The discount is a percentage.
Example
The regular price (price level 01) of a DVD player is $60. Price
level 02 is $55. Crazy Al is given a discount of 5%. His assigned
price level is 02. His price will be $52.25 (55-5%).
Margin
The Margin is the percentage that will be applied to the current cost
of the item.
Note: This could have a significant impact on sales revenue if the
price drops significantly, or there was a substantial amount of
inventory remaining on hand before the shipment with the reduced
cost was received.
Example
148
SALES MANAGER
There are 200 Widget100 in stock. Current cost is $5.00 each.
Regular selling price is $10.00 each. Crazy Al has special pricing;
he receives the widget100’s for 50% margin on the current cost on
Tuesday this week ($7.50).
A new shipment of widget100 has arrived and the current cost of
them with this shipment is $4.00. Crazy Al places another order on
Friday and this time he is charged $6.00.
The widgets do not have a significant cost price but if there was a
large volume sold, like 100, the company could lose a potential
$150 in revenue. The loss could be much greater if the cost of the
item is significant, such as $1000.
Conversely, if it is expected that cost prices will increase, then
using the margin method of pricing is very efficient.
8. Select the Price Reason
fly.
Note: Price Reasons can be selected from the list or added on the
9. Click Save to save the Price record
It will be added to the Price Matrix grid for the item.
Note: With the exception of the Customer No, Territory and Customer Type
options, the process is exactly the same as it is when creating a special price for
an item through the customer record.
Deleting a Price Matrix Record
To delete a record in the Price matrix
Note: If no records have been highlighted in the grid, clicking the Delete button
will not activate the delete request.
1. Highlight the record(s)
149
BVEssentialsAdminGuide
2. Click Delete
The User will be prompted if they wish to delete these records
3. Click Delete
The highlighted records will be deleted
Purging a Price Matrix Record
The purpose of purging records is to remove outdated records from cluttering up
the database. Typical criteria used to select the records for purging is a date
range.
1. Click Purge
The Price Matrix Purge window opens and prompts the user to
enter the completion date.
Purging will remove all price records that have an end date up to
and including the date entered into the Completed Date
2. Enter the Completion Date
3. Click Okay
All records that have an end date prior to and including the date
entered will be removed.
4. Exit the Price matrix window
PROCESSING ORDERS
Processing
Processing Orders
The manner in which Sales Orders are processed depends on how the
administrator has set BVEssentials up and the permissions a user has been
given. (Refer to the section on Setting up BVEssentials)
150
SALES MANAGER
In earlier versions, a user that did not have level 8 or 9 priority was unable to
process payments for an order or post the order through to the General Ledger,
even if the permissions in BusinessVision appear to have been set up to allow
the user to post.
Batch or Post
The priority level determines the level of responsibility that a user is permitted in
BVEssentials Sales Order entry.
Any user that has level 7 or lower priority can be given permission to create and
modify an order, and to “process” an order, but will not be able to apply a
payment, charge the order to an account or post the invoice.
They also do not have sufficient permission to create a batch or place orders into
a batch to await posting.
There are three ways to process orders in BVEssentials
1. Always Batch - all orders will be placed in a batch and posted
together
2. Always Post – orders will be posted as the order is completed
the same as it is in BusinessVision
3. Ask When Invoicing - the user will be prompted whether they
want to batch the order or post it
Always Batch
Batching allows an easy method of processing all orders together in one step at
the end of the day. It also allows a user with a higher priority level to check over
the orders prior to being batched and posted. Changes can be made to orders
and then the batch posted with the corrections. It is also possible to “pre-post” a
batch to check for errors.
Always Post
The option to “Always Post” means that the order will be posted when it is
complete. When the Invoice function is invoked and the payment method
selected, the order is closed and posted to BusinessVision. (This is the same
method used in BusinessVision Order Entry.)
Ask When Invoicing
151
BVEssentialsAdminGuide
This option prompts the user each time they process the order whether they wish
to post or place the order in a batch.
Batches
Creating a Batch
The user must have priority level 8 or 9 in order to create and post batches in
BVEssentials. (BusinessVision does not have a batching function.)
1. Click the Sales Orders icon
2. Highlight the Sales Orders in the list that are to be placed in a batch
3. Click Create Batch icon
4. Mark Create New Batch
5. Mark Selected Orders
Or
Mark Closed Orders
152
SALES MANAGER
And enter an Invoice Date
6. Mark Print Batch Report
7. Click Okay
The orders will remain in the Sales Order List, but have now been assigned a
batch number.
Once the batch has been reviewed it is ready to be posted.
Editing an Order in a Batch
Orders can be edited even after they have been closed and placed in a batch
ready for posting by a user with priority level 8 or 9.
1. Click Sales Orders icon to see the order list
2. Select the order to be edited
3. Double click the order to open the record
Or
4. Click Edit to modify the order
5. Click Save Close to save the changes. The status of the order will remain
the same until a user modifies it.
Add an Order to a Batch
To add an Order to an existing batch,
1. Select the Order in the Sales Order List
2. Click Create Batch icon
3. Mark Add to Existing Batch
4. Select the Batch Number from the look up
5. Mark Selected Orders in the Selection Criteria section (default)
153
BVEssentialsAdminGuide
6. Mark Print Batch Report (prints the transactions in the batch.)
7. Click OK button to finish.
Remove an Order from a Batch
To remove an Order from a Batch,
1. Select the order in the Sales Order List
2. Click Remove from Batch icon
The order is removed from the batch
Batch Report
The Batch report can be printed when the batch is being posted or when an order
is added to a batch.
To print the Batch Report when the batch is being posted,
1. From the Batch List, click Post Batch
The Batch will be posted and the user will be prompted to print the
batch report.
2. Click OK to post the batch and print the Batch report.
To Reprint the Batch Report
On the BVEssentials Toolbar,
1. Click the Reports icon
2. Select Batch to display the batch reports
3. Mark Batch Journal Reprint
4. Click Ok to print the report.
Trial Posting Report
154
SALES MANAGER
The Trial Posting report is a report that displays the posting entries for every
transaction in the batch before the batch is posted to BusinessVision. This allows
for supervisors to review the entries to ensure accuracy before posting the batch.
The Trial Posting Report can be printed when orders are added to a batch or from
the Batch List.
To print the Trial Posting Report,
1. In the Sales Order List, click List Batches icon
2. Highlight the Batch to run the Trial Posting report
3. Click Trial Posting icon
User is prompted to print the G/L Trial Transaction report
4. Click OK button to print the report
After review for errors, the batch is ready to be posted by a user with
priority level 8 or 9
SERVICE BILLING
SERVICE BILLING
Service Billing is an add-on component to the Sales Manager Module. It is only
visible to clients that have purchased it and appears as a tab called “Vehicle Info”
on a Sales Order.
155
BVEssentialsAdminGuide
Sales Order Window>Vehicle Info Tab
Vehicle Info Tab
Vehicle Info Tab
The primary function of Service Billing is to store and track information about a
vehicle that has had or is about to have a service performed on it.
Both Inventory and Customers modules will need to be set up prior to using
Service Billing. Inventory should have the parts and services records already
created. The Customer records should also be added to BVEssentials prior to
creating a Sales Order that uses Service Billing.
Vehicle Details Section
The Vehicle Details section contains data fields pertaining to the vehicle itself,
such as the License No, Make, Model, Year and VIN as well as the Customer
record this vehicle record will be related to.
Adding a New Vehicle Record
To add a new vehicle record
1. Click on the License No Lookup
A new BVEssentials window opens
2. Click on the New icon
156
SALES MANAGER
The Vehicle Info window opens to the Details Tab
3. Enter the State/Province (maximum 2 characters) and License Plate
number in the License No fields
4. The Customer No and Customer Name fields will be automatically
populated from the same fields in the Sales Order
5. Enter the Unit No (01, 3, 10, B24, etc.) if applicable
6. Enter the Make of the vehicle (GMC, Chevrolet, BMW, etc.)
7. Enter the Model (Blazer, Envoy, Sonoma, F150, etc.)
8. Enter the Year of the vehicle
9. Enter the VIN of the vehicle
Note: Users can enter up to 3 VIN for those vehicles that have more than
the single one typically found on a passenger car. An ambulance may
have one VIN for the chassis and one for the “box” or body.
157
BVEssentialsAdminGuide
Odometer Section
10. Click Kilometers or Miles as applicable
11. The Reading field will update on this form will update when the Current
Mileage field on the Vehicle Info form has been populated.
Note: For a new Vehicle record, it is read only and will not accept data
input.
Vehicle Notes Section
12. Enter any applicable notes about the vehicle into the Vehicle Notes field.
Notes can be added each time the vehicle comes in for servicing,
providing a running commentary, depending upon if the notes are
manually date/time stamped
Note: Every entry into the Vehicle Note field will be visible on the Vehicle
Info tab and on the Vehicle record. It can also be edited in either location.
Vehicle History Tab or Section
The Vehicle History tab and section contains the Vehicle History grid
which displays all of the sales orders that are related to this specific
vehicle.
Users can see a summary listing of the orders and define the columns they
wish displayed in the grid to suit their requirements.
After entering all the data relevant to this vehicle in the Vehicle Details tab,
the user can
13. Click the Print button to print a hard copy of the vehicle information
Or
Click the Save button to save the record and return to the Vehicle Info
window
Or
158
SALES MANAGER
Click the Cancel button to lose the data entered and return to the Vehicle
Info window.
Once the data has been entered in the Vehicle Info tab, the Sales Order can be
saved and ready for processing. If the user chooses to close the Sales Order
and discard the changes, any changes to the Sales Order including the vehicle
record linked to the Sales Order, will be lost.
Editing Vehicle Information
To edit Vehicle Information
1. Click on the License No or Unit No lookup on the Vehicle Info tab
A window will open displaying a grid of all Vehicles records that are
linked to this Customer.
2. Highlight the appropriate record by clicking on it once
3. Click on the Edit icon in the navigation bar
The Vehicle record opens, available for editing.
4. Edit the required information
Note: It is highly recommended that a chassis or passenger VIN number not be
deleted in order to retain the integrity of the vehicle record. There are some
instances when a vehicle will be assigned a different License No or Unit No, or a
numbered box will be moved from one chassis to another and those fields will
need to be updated to properly correspond with the vehicle being serviced.
159
BVEssentialsAdminGuide
Deleting a Vehicle Record
It is not recommended that a vehicle record be deleted as it could affect the data
available in the Sales Order and remove all history of the vehicle from
BVEssentials.
160