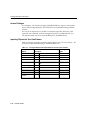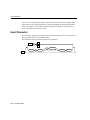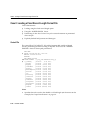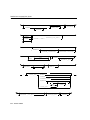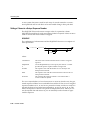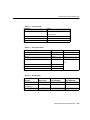
1
Oracle8 Utilities Release 8.0 December 1997 Part No. A58244-01 Oracle8 Utilities Part No. A58244-01 Release 8.0 Copyright © 1990, 1997, Oracle Corporation. All rights reserved. Primary Author: Jason Durbin Contributors: Karleen Aghevli, Allen Brumm, Paul Lane, Visar Nimani, Joan Pearson, Mike Sakayeda, James Stenois, Chao Wang , Gail Ymanaka, Hiro Yoshioka The programs are not intended for use in any nuclear, aviation, mass transit, medical, or other inherently dangerous applications. It shall be licensee's responsibility to take all appropriate failsafe, back up, redundancy and other measures to ensure the safe use of such applications if the Programs are used for such purposes, and Oracle disclaims liability for any damages caused by such use of the Programs. This Program contains proprietary information of Oracle Corporation; it is provided under a license agreement containing restrictions on use and disclosure and is also protected by copyright patent and other intellectual property law. Reverse engineering of the software is prohibited. The information contained in this document is subject to change without notice. If you find any problems in the documentation, please report them to us in writing. Oracle Corporation does not warrant that this document is error free. If this Program is delivered to a U.S. Government Agency of the Department of Defense, then it is delivered with Restricted Rights and the following legend is applicable: Restricted Rights Legend Programs delivered subject to the DOD FAR Supplement are 'commercial computer software' and use, duplication and disclosure of the Programs shall be subject to the licensing restrictions set forth in the applicable Oracle license agreement. Otherwise, Programs delivered subject to the Federal Acquisition Regulations are 'restricted computer software' and use, duplication and disclosure of the Programs shall be subject to the restrictions in FAR 52..227-14, Rights in Data -- General, including Alternate III (June 1987). Oracle Corporation, 500 Oracle Parkway, Redwood City, CA 94065. Oracle, Oracle8, SQL*Forms, Net8, and SQL*Plus are registered trademarks of Oracle Corporation, Redwood Shores, California. Oracle Call Interface, Oracle7, Oracle7 Server, Oracle Forms, PL/SQL, Pro*C, Pro*C/C++, and Enterprise Manager are trademarks of Oracle Corporation, Redwood Shores, California. Contents Preface.......................................................................................................................................................... xxi The Oracle Utilities ............................................................................................................................ Audience............................................................................................................................................... How Oracle8 Utilities Is Organized............................................................................................... Part I: Export/Import.................................................................................................................. Part II: SQL*Loader ..................................................................................................................... Part III: NLS Utilities ................................................................................................................... Part IV: Offline Database Verification Utility.......................................................................... Conventions Used in This Manual ................................................................................................. Text of the Manual........................................................................................................................ We Welcome Your Comments.......................................................................................................... xxii xxii xxiii xxiii xxiii xxiv xxiv xxv xxv xxvi Part I: Export/Import 1 Export What is the Export Utility?................................................................................................................ Reading the Contents of an Export File..................................................................................... Access Privileges........................................................................................................................... Export Modes....................................................................................................................................... Understanding Table-Level and Partition-Level Export ........................................................ Using Export ........................................................................................................................................ Before Using Export ..................................................................................................................... Invoking Export ............................................................................................................................ 1-2 1-3 1-3 1-4 1-6 1-6 1-6 1-7 iii Getting Online Help ..................................................................................................................... The Parameter File...................................................................................................................... Export Parameters ............................................................................................................................. BUFFER ........................................................................................................................................ COMPRESS.................................................................................................................................. CONSISTENT.............................................................................................................................. CONSTRAINTS .......................................................................................................................... DIRECT ........................................................................................................................................ FEEDBACK.................................................................................................................................. FILE............................................................................................................................................... FULL ............................................................................................................................................. GRANTS....................................................................................................................................... HELP............................................................................................................................................. INCTYPE...................................................................................................................................... INDEXES...................................................................................................................................... LOG............................................................................................................................................... OWNER........................................................................................................................................ PARFILE....................................................................................................................................... POINT_IN_TIME_RECOVER................................................................................................... RECORD ...................................................................................................................................... RECORDLENGTH ..................................................................................................................... RECOVERY_TABLESPACES.................................................................................................... ROWS ........................................................................................................................................... STATISTICS ................................................................................................................................. TABLES ........................................................................................................................................ USERID......................................................................................................................................... Parameter Interactions ............................................................................................................... Example Export Sessions ................................................................................................................. Example Export Session in Full Database Mode.................................................................... Example Export Session in User Mode.................................................................................... Example Export Sessions in Table Mode ................................................................................ Example Export Session Using Partition-Level Export......................................................... Using the Interactive Method......................................................................................................... Restrictions................................................................................................................................... iv 1-9 1-10 1-11 1-13 1-13 1-14 1-15 1-15 1-16 1-16 1-16 1-16 1-17 1-17 1-17 1-17 1-17 1-17 1-18 1-18 1-18 1-19 1-19 1-19 1-19 1-21 1-21 1-22 1-22 1-24 1-25 1-27 1-29 1-31 Warning, Error, and Completion Messages ................................................................................. Log File......................................................................................................................................... Warning Messages...................................................................................................................... Fatal Error Messages .................................................................................................................. Completion Messages ................................................................................................................ Direct Path Export............................................................................................................................. Invoking a Direct Path Export .................................................................................................. Character Set Conversion .......................................................................................................... Performance Issues..................................................................................................................... Restrictions .................................................................................................................................. Incremental, Cumulative, and Complete Exports ...................................................................... Restrictions .................................................................................................................................. Base Backups ............................................................................................................................... Incremental Exports ................................................................................................................... Cumulative Exports ................................................................................................................... Complete Exports ....................................................................................................................... Benefits ......................................................................................................................................... A Scenario .................................................................................................................................... Which Data Is Exported? ........................................................................................................... Example Incremental Export Session ...................................................................................... System Tables.............................................................................................................................. Network Considerations ................................................................................................................. Transporting Export Files Across a Network......................................................................... Exporting and Importing with Net8........................................................................................ Character Set and NLS Considerations ........................................................................................ Character Set Conversion .......................................................................................................... NCHAR Conversion During Export and Import .................................................................. Single-Byte Character Sets During Export and Import......................................................... Multi-Byte Character Sets and Export and Import................................................................ Considerations in Exporting Database Objects.......................................................................... Exporting Sequences .................................................................................................................. Exporting LONG Datatypes ..................................................................................................... Exporting Foreign Function Libraries ..................................................................................... Exporting Directory Aliases...................................................................................................... Exporting BFILE Columns and Attributes.............................................................................. 1-32 1-32 1-32 1-33 1-33 1-33 1-34 1-36 1-36 1-37 1-37 1-37 1-37 1-37 1-38 1-39 1-39 1-40 1-41 1-42 1-43 1-44 1-44 1-44 1-45 1-45 1-45 1-46 1-46 1-46 1-46 1-47 1-47 1-47 1-47 v Exporting Array Data................................................................................................................. Exporting Object Type Definitions........................................................................................... Exporting Advanced Queue (AQ) Tables ............................................................................... Exporting Nested Tables............................................................................................................ Using Different Versions of Export ............................................................................................... Using a Previous Version of Export......................................................................................... Using a Higher Version Export................................................................................................. Creating Oracle Release 7 Export Files from an Oracle8 Server .............................................. Excluded Objects......................................................................................................................... Exporting to Version 6 ............................................................................................................... 2 Import What is the Import Utility? ............................................................................................................... Table Objects: Order of Import ................................................................................................... Compatibility................................................................................................................................. Import Modes ...................................................................................................................................... Understanding Table-Level and Partition-Level Import ........................................................ Using Import ........................................................................................................................................ Before Using Import ..................................................................................................................... Invoking Import............................................................................................................................ Getting Online Help ................................................................................................................... The Parameter File...................................................................................................................... Privileges Required to Use Import ................................................................................................ Access Privileges......................................................................................................................... Importing Objects into Your Own Schema ............................................................................. Importing Grants ........................................................................................................................ Importing Objects into Other Schemas.................................................................................... Importing System Objects ......................................................................................................... User Privileges ............................................................................................................................ Importing into Existing Tables....................................................................................................... Manually Creating Tables before Importing Data................................................................. Disabling Referential Constraints............................................................................................. Manually Ordering the Import ................................................................................................. Import Parameters............................................................................................................................. ANALYZE.................................................................................................................................... vi 1-47 1-48 1-49 1-49 1-49 1-49 1-50 1-50 1-51 1-51 2-3 2-4 2-5 2-5 2-6 2-7 2-7 2-7 2-10 2-11 2-11 2-12 2-12 2-13 2-14 2-14 2-14 2-14 2-15 2-15 2-15 2-16 2-19 BUFFER ........................................................................................................................................ CHARSET .................................................................................................................................... COMMIT...................................................................................................................................... DESTROY..................................................................................................................................... FEEDBACK.................................................................................................................................. FILE............................................................................................................................................... FROMUSER ................................................................................................................................. FULL............................................................................................................................................. GRANTS ...................................................................................................................................... HELP ............................................................................................................................................ IGNORE ....................................................................................................................................... INCTYPE...................................................................................................................................... INDEXES...................................................................................................................................... INDEXFILE.................................................................................................................................. LOG .............................................................................................................................................. PARFILE ...................................................................................................................................... POINT_IN_TIME_RECOVER................................................................................................... RECORDLENGTH ..................................................................................................................... ROWS ........................................................................................................................................... SHOW........................................................................................................................................... SKIP_UNUSABLE_INDEXES................................................................................................... TABLES ........................................................................................................................................ TOUSER ....................................................................................................................................... USERID ........................................................................................................................................ Using Table-Level and Partition-Level Export and Import ...................................................... Guidelines for Using Partition-Level Import ......................................................................... Migrating Data Across Partitions and Tables......................................................................... Combining Multiple Partitions into One ................................................................................ Reconfiguring Partitions............................................................................................................ Example Import Sessions ................................................................................................................ Example Import of Selected Tables for a Specific User......................................................... Example Import of Tables Exported by Another User ......................................................... Example Import of Tables from One User to Another.......................................................... Example Import Session Using Partition-Level Import........................................................ 2-19 2-20 2-20 2-21 2-22 2-22 2-22 2-23 2-23 2-23 2-23 2-24 2-25 2-25 2-26 2-26 2-26 2-26 2-27 2-27 2-27 2-27 2-29 2-29 2-30 2-30 2-31 2-31 2-32 2-33 2-33 2-34 2-35 2-35 vii Using the Interactive Method......................................................................................................... Importing Incremental, Cumulative, and Complete Export Files ........................................... Restoring a Set of Objects .......................................................................................................... Importing Object Types and Foreign Function Libraries from an Incremental Export File.................................................................................................................................... Controlling Index Creation and Maintenance ............................................................................ Index Creation and Maintenance Controls ............................................................................. Delaying Index Creation............................................................................................................ Reducing Database Fragmentation ............................................................................................... Warning, Error, and Completion Messages ................................................................................. Error Handling................................................................................................................................... Row Errors ................................................................................................................................... Errors Importing Database Objects .......................................................................................... Fatal Errors................................................................................................................................... Network Considerations.................................................................................................................. Transporting Export Files Across a Network ......................................................................... Exporting and Importing with Net8 ........................................................................................ Import and Snapshots ...................................................................................................................... Master Table ................................................................................................................................ Snapshot Log ............................................................................................................................... Snapshots ..................................................................................................................................... Storage Parameters............................................................................................................................ Read-Only Tablespaces.............................................................................................................. Rollback Segments...................................................................................................................... Dropping a Tablespace..................................................................................................................... Reorganizing Tablespaces ............................................................................................................... Character Set and NLS Considerations ........................................................................................ Character Set Conversion .......................................................................................................... Import and Single-Byte Character Sets.................................................................................... Import and Multi-Byte Character Sets..................................................................................... Considerations for Importing Database Objects........................................................................ Importing Object Identifiers...................................................................................................... Importing Existing Object Tables and Tables That Contain Object Types......................... Importing Nested Tables ........................................................................................................... Importing REF Data ................................................................................................................... Importing Array Data ................................................................................................................ viii 2-41 2-43 2-43 2-44 2-45 2-45 2-46 2-47 2-47 2-48 2-48 2-48 2-49 2-50 2-50 2-50 2-50 2-51 2-51 2-51 2-52 2-53 2-53 2-54 2-54 2-55 2-55 2-55 2-56 2-57 2-57 2-58 2-58 2-59 2-59 Importing BFILE Columns and Directory Aliases................................................................. Importing Foreign Function Libraries ..................................................................................... Importing Stored Procedures, Functions, and Packages ...................................................... Importing Advanced Queue (AQ) Tables............................................................................... Importing LONG Columns ....................................................................................................... Importing Views ......................................................................................................................... Generating Statistics on Imported Data....................................................................................... Using Oracle7 Export Files.............................................................................................................. Check Constraints on DATE Columns.................................................................................... Using Oracle Version 6 Export Files.............................................................................................. CHAR columns ........................................................................................................................... Syntax of Integrity Constraints................................................................................................. Status of Integrity Constraints .................................................................................................. Length of DEFAULT Column Values...................................................................................... Using Oracle Version 5 Export Files.............................................................................................. 2-60 2-60 2-60 2-61 2-61 2-61 2-62 2-62 2-62 2-63 2-63 2-63 2-63 2-63 2-64 Part II: SQL Loader 3 SQL*Loader Concepts SQL*Loader Basics ............................................................................................................................. SQL*Loader Control File................................................................................................................... Control File Contents and Storage ............................................................................................. Data Definition Language (DDL)............................................................................................... Input Data and Datafiles ................................................................................................................... Input Data Formats ...................................................................................................................... Data Conversion and Datatype Specification ............................................................................. Discarded and Rejected Records ................................................................................................... The Bad File ................................................................................................................................. SQL*Loader Discards................................................................................................................. Log File and Logging Information ................................................................................................ Conventional Path Load versus Direct Path Load...................................................................... Partitioned Object Support............................................................................................................. 3-2 3-3 3-4 3-5 3-6 3-6 3-10 3-13 3-13 3-15 3-15 3-16 3-17 ix 4 SQL*Loader Case Studies The Case Studies ................................................................................................................................. Case Study Files .................................................................................................................................. Tables Used in the Case Studies ...................................................................................................... Contents of Table EMP................................................................................................................. Contents of Table DEPT............................................................................................................... References and Notes ......................................................................................................................... Running the Case Study SQL Scripts ............................................................................................. Case 1: Loading Variable-Length Data............................................................................................ Control File .................................................................................................................................... Invoking SQL*Loader .................................................................................................................. Log File ........................................................................................................................................... Case 2: Loading Fixed-Format Fields .............................................................................................. Control File .................................................................................................................................... Datafile ........................................................................................................................................... Invoking SQL*Loader .................................................................................................................. Log File ........................................................................................................................................... Case 3: Loading a Delimited, Free-Format File ........................................................................... Control File .................................................................................................................................. Invoking SQL*Loader ................................................................................................................ Log File ......................................................................................................................................... Case 4: Loading Combined Physical Records ............................................................................. Control File .................................................................................................................................. Data File ....................................................................................................................................... Invoking SQL*Loader ................................................................................................................ Log File ......................................................................................................................................... Bad File ......................................................................................................................................... Case 5: Loading Data into Multiple Tables.................................................................................. Control File .................................................................................................................................. Data File ....................................................................................................................................... Invoking SQL*Loader ................................................................................................................ Log File ......................................................................................................................................... Loaded Tables ............................................................................................................................. x 4-2 4-2 4-3 4-3 4-4 4-4 4-4 4-5 4-5 4-6 4-6 4-8 4-8 4-9 4-9 4-9 4-11 4-11 4-12 4-13 4-14 4-14 4-15 4-16 4-16 4-17 4-18 4-18 4-19 4-19 4-20 4-22 Case 6: Loading Using the Direct Path Load Method................................................................ Control File .................................................................................................................................. Invoking SQL*Loader ................................................................................................................ Log File......................................................................................................................................... Case 7: Extracting Data from a Formatted Report....................................................................... Data File ....................................................................................................................................... Insert Trigger............................................................................................................................... Control File .................................................................................................................................. Invoking SQL*Loader ................................................................................................................ Log File......................................................................................................................................... Dropping the Insert Trigger and the Global-Variable Package ........................................... Case 8: Loading a Fixed Record Length Format File .................................................................. Control File .................................................................................................................................. Table Creation ............................................................................................................................. Input Data File ............................................................................................................................ Invoking SQL*Loader ................................................................................................................ Log File......................................................................................................................................... 5 4-24 4-24 4-25 4-25 4-27 4-27 4-27 4-28 4-30 4-30 4-31 4-32 4-32 4-33 4-34 4-34 4-34 SQL*Loader Control File Reference Overview .............................................................................................................................................. 5-2 Data Definition Language (DDL) Syntax....................................................................................... 5-4 High-Level Syntax Diagrams...................................................................................................... 5-4 Expanded Clauses and Their Functionality................................................................................... 5-7 Position Specification...........................................................................................................5-7 Field Condition ....................................................................................................................5-7 Column Name ....................................................................................................................5-8 Datatype Specification .........................................................................................................5-8 Precision vs. Length...........................................................................................................5-10 Date Mask .................................................................................................................................... 5-10 Delimiter Specification............................................................................................................... 5-10 Comments........................................................................................................................................... 5-11 Specifying Command-Line Parameters in the Control File ..................................................... 5-11 OPTIONS ..................................................................................................................................... 5-11 Specifying RECOVERABLE and UNRECOVERABLE............................................................. 5-12 xi Specifying Filenames and Database Objects .............................................................................. Database Object Names within Double Quotation Marks ................................................... SQL String within Double Quotation Marks .......................................................................... Filenames within Single Quotation Marks.............................................................................. Quotation Marks in Quoted Strings......................................................................................... Backslash Escape Character ...................................................................................................... Using a Backslash in Filenames ................................................................................................ Including Data in the Control File with BEGINDATA ............................................................. Identifying Datafiles ........................................................................................................................ Naming the File........................................................................................................................... Specifying Multiple Datafiles.................................................................................................... Examples of How to Specify a Datafile ................................................................................... Specifying READBUFFERS ............................................................................................................ Specifying Datafile Format and Buffering................................................................................... File Processing Example ............................................................................................................ Specifying the Bad File .................................................................................................................... Examples of How to Specify a Bad File ................................................................................... Rejected Records ............................................................................................................................... Integrity Constraints .................................................................................................................. Specifying the Discard File............................................................................................................. Using a Control-File Definition ................................................................................................ Examples of How to Specify a Discard File ............................................................................ Discarded Records ............................................................................................................................ Limiting the Number of Discards ............................................................................................ Handling Different Character Encoding Schemes ..................................................................... Multi-Byte (Asian) Character Sets ............................................................................................ Input Character Conversion...................................................................................................... Loading into Empty and Non-Empty Tables ............................................................................... How Non-Empty Tables are Affected ..................................................................................... INSERT ......................................................................................................................................... APPEND ...................................................................................................................................... REPLACE ..................................................................................................................................... TRUNCATE................................................................................................................................. Specifying One Method for All Tables .................................................................................... xii 5-12 5-12 5-13 5-13 5-13 5-13 5-14 5-15 5-16 5-16 5-17 5-17 5-18 5-18 5-18 5-19 5-20 5-20 5-21 5-21 5-21 5-22 5-23 5-23 5-24 5-24 5-24 5-25 5-26 5-26 5-26 5-26 5-27 5-27 Continuing an Interrupted Load.................................................................................................... State of Tables and Indexes ....................................................................................................... Using the Log File....................................................................................................................... Dropping Indexes ....................................................................................................................... Continuing Single Table Loads ................................................................................................ Continuing Multiple Table Conventional Loads ................................................................... Continuing Multiple Table Direct Loads ................................................................................ Assembling Logical Records from Physical Records ................................................................ Examples of How to Specify CONTINUEIF........................................................................... Loading Logical Records into Tables ............................................................................................ Specifying Table Names ............................................................................................................ Table-Specific Loading Method................................................................................................ Table-Specific OPTIONS keyword........................................................................................... Choosing which Rows to Load................................................................................................. Specifying Default Data Delimiters ......................................................................................... Handling Short Records with Missing Data........................................................................... Index Options .................................................................................................................................... SORTED INDEXES Option ....................................................................................................... SINGLEROW Option ................................................................................................................. Specifying Field Conditions........................................................................................................... Comparing Fields to BLANKS ................................................................................................. Comparing Fields to Literals .................................................................................................... Specifying Columns and Fields..................................................................................................... Specifying the Datatype of a Data Field.................................................................................. Specifying the Position of a Data Field........................................................................................ Using POSITION with Data Containing TABs ...................................................................... Using POSITION with Multiple Table Loads ........................................................................ Using Multiple INTO TABLE Statements ................................................................................... Extracting Multiple Logical Records ....................................................................................... Distinguishing Different Input Record Formats .................................................................... Loading Data into Multiple Tables .......................................................................................... Summary...................................................................................................................................... Generating Data ................................................................................................................................ Loading Data Without Files ...................................................................................................... Setting a Column to a Constant Value .................................................................................... 5-27 5-27 5-28 5-28 5-28 5-28 5-28 5-29 5-32 5-33 5-33 5-34 5-34 5-34 5-35 5-35 5-36 5-36 5-37 5-37 5-38 5-39 5-39 5-40 5-40 5-41 5-42 5-43 5-43 5-44 5-45 5-45 5-46 5-46 5-46 xiii Setting a Column to the Datafile Record Number ................................................................. Setting a Column to the Current Date ..................................................................................... Setting a Column to a Unique Sequence Number ................................................................. Generating Sequence Numbers for Multiple Tables ............................................................. Specifying Datatypes ....................................................................................................................... Datatype Conversions................................................................................................................ Native Datatypes ........................................................................................................................ Character Datatypes ................................................................................................................... Numeric External Datatypes..................................................................................................... Specifying Delimiters ................................................................................................................. Conflicting Character Datatype Field Lengths....................................................................... Loading Data Across Different Operating Systems................................................................... Determining the Size of the Bind Array....................................................................................... Minimum Requirements............................................................................................................ Performance Implications.......................................................................................................... Specifying Number of Rows vs. Size of Bind Array.............................................................. Calculations ................................................................................................................................. Minimizing Memory Requirements for the Bind Array ....................................................... Multiple INTO TABLE Statements .......................................................................................... Generated Data ........................................................................................................................... Setting a Column to Null or Zero .................................................................................................. DEFAULTIF Clause.................................................................................................................... NULLIF Keyword....................................................................................................................... Null Columns at the End of a Record ...................................................................................... Loading All-Blank Fields ................................................................................................................ Trimming Blanks and Tabs ............................................................................................................. Datatypes ..................................................................................................................................... Field Length Specifications........................................................................................................ Relative Positioning of Fields.................................................................................................... Leading Whitespace ................................................................................................................... Trailing Whitespace.................................................................................................................... Enclosed Fields............................................................................................................................ Trimming Whitespace: Summary ............................................................................................ Preserving Whitespace..................................................................................................................... PRESERVE BLANKS Keyword ................................................................................................ xiv 5-47 5-47 5-48 5-49 5-50 5-50 5-51 5-58 5-60 5-60 5-63 5-65 5-65 5-65 5-66 5-66 5-67 5-70 5-70 5-71 5-71 5-71 5-71 5-72 5-72 5-72 5-73 5-73 5-74 5-75 5-76 5-77 5-77 5-78 5-78 Applying SQL Operators to Fields................................................................................................ Referencing Fields ...................................................................................................................... Referencing Fields That Are SQL*Loader Keywords............................................................ Common Uses ............................................................................................................................. Combinations of Operators....................................................................................................... Use with Date Mask ................................................................................................................... Interpreting Formatted Fields................................................................................................... 6 5-78 5-79 5-80 5-80 5-80 5-80 5-80 SQL*Loader Command-Line Reference SQL*Loader Command Line ............................................................................................................ Using Command-Line Keywords .............................................................................................. Specifying Keywords in the Control File .................................................................................. Command-Line Keywords ................................................................................................................ BAD (bad file)................................................................................................................................ BINDSIZE (maximum size)......................................................................................................... CONTROL (control file) .............................................................................................................. DATA (data file) ........................................................................................................................... DIRECT (data path)...................................................................................................................... DISCARD (discard file) ............................................................................................................... DISCARDMAX (discards to disallow) ...................................................................................... ERRORS (errors to allow)............................................................................................................ FILE (file to load into) .................................................................................................................. LOAD (records to load) ............................................................................................................... LOG (log file)................................................................................................................................. PARFILE (parameter file) ............................................................................................................ PARALLEL (parallel load) .......................................................................................................... ROWS (rows per commit) ........................................................................................................... SILENT (feedback mode) ............................................................................................................ SKIP (records to skip)................................................................................................................... USERID (username/password).................................................................................................. Index Maintenance Options ............................................................................................................. SKIP_UNUSABLE_INDEXES..................................................................................................... SKIP_INDEX_MAINTENANCE ................................................................................................ Exit Codes for Inspection and Display........................................................................................... 6-2 6-3 6-3 6-3 6-3 6-3 6-4 6-4 6-4 6-4 6-5 6-5 6-5 6-5 6-6 6-6 6-6 6-6 6-7 6-8 6-8 6-8 6-8 6-9 6-9 xv 7 SQL*Loader: Log File Reference Header Information ............................................................................................................................ Global Information............................................................................................................................. Table Information ............................................................................................................................... Datafile Information........................................................................................................................... Table Load Information ..................................................................................................................... Summary Statistics ............................................................................................................................. Oracle8 Statistics Reporting to the Log...................................................................................... 8 SQL*Loader: Conventional and Direct Path Loads Data Loading Methods....................................................................................................................... Conventional Path Load .............................................................................................................. Direct Path Load ........................................................................................................................... Using Direct Path Load ...................................................................................................................... Setting Up for Direct Path Loads................................................................................................ Specifying a Direct Path Load..................................................................................................... Building Indexes ........................................................................................................................... Indexes Left in Index Unusable State....................................................................................... Data Saves .................................................................................................................................... Recovery....................................................................................................................................... Loading LONG Data Fields....................................................................................................... Maximizing Performance of Direct Path Loads .......................................................................... Pre-allocating Storage for Faster Loading............................................................................... Pre-sorting Data for Faster Indexing........................................................................................ Infrequent Data Saves ................................................................................................................ Minimizing Use of the Redo Log.............................................................................................. Disable Archiving ....................................................................................................................... Specifying UNRECOVERABLE................................................................................................ NOLOG Attribute....................................................................................................................... Avoiding Index Maintenance ......................................................................................................... Direct Loads, Integrity Constraints, and Triggers ...................................................................... Integrity Constraints .................................................................................................................. Database Insert Triggers ............................................................................................................ Permanently Disabled Triggers & Constraints....................................................................... Alternative: Concurrent Conventional Path Loads ............................................................... xvi 7-2 7-2 7-3 7-4 7-4 7-5 7-6 8-2 8-2 8-4 8-9 8-9 8-9 8-9 8-11 8-12 8-13 8-14 8-15 8-15 8-16 8-18 8-18 8-18 8-18 8-19 8-19 8-20 8-20 8-21 8-24 8-24 Parallel Data Loading Models........................................................................................................ Concurrent Conventional Path Loads ..................................................................................... Inter-Segment Concurrency with Direct Path ........................................................................ Intra-Segment Concurrency with Direct Path ........................................................................ Restrictions on Parallel Direct Path Loads.............................................................................. Initiating Multiple SQL*Loader Sessions................................................................................ Options Keywords for Parallel Direct Path Loads ................................................................ Enabling Constraints After a Parallel Direct Path Load ....................................................... General Performance Improvement Hints .................................................................................. 8-25 8-25 8-25 8-25 8-26 8-26 8-27 8-28 8-28 Part III: NLS Utilities 9 National Language Support Utilities NLS Data Installation Utility ........................................................................................................... Overview........................................................................................................................................ Syntax ............................................................................................................................................. Return Codes................................................................................................................................. Usage .............................................................................................................................................. NLS Data Object Files .................................................................................................................. NLS Configuration Utility............................................................................................................... Overview...................................................................................................................................... Syntax ........................................................................................................................................... Menus ........................................................................................................................................... NLS Calendar Utility ....................................................................................................................... Overview...................................................................................................................................... Syntax ........................................................................................................................................... Usage ............................................................................................................................................ 9-2 9-2 9-2 9-3 9-4 9-4 9-16 9-16 9-16 9-17 9-20 9-20 9-20 9-20 Part IV: Offline Database Verification Utility 10 Offline Database Verification Utility DB_VERIFY ....................................................................................................................................... 10-2 Restrictions .................................................................................................................................. 10-2 Syntax ........................................................................................................................................... 10-2 xvii Enterprise Manager .................................................................................................................... Sample DB_VERIFY Output ..................................................................................................... SQL*Loader Extensions to the DB2 Load Utility.......................................................................... Using the DB2 RESUME Option ..................................................................................................... Inclusions for Compatibility ............................................................................................................ LOG Statement .............................................................................................................................. WORKDDN Statement ................................................................................................................ SORTDEVT and SORTNUM Statements .................................................................................. DISCARD Specification ............................................................................................................... Restrictions........................................................................................................................................... FORMAT Statement ..................................................................................................................... PART Statement ............................................................................................................................ SQL/DS Option ............................................................................................................................ DBCS Graphic Strings .................................................................................................................. SQL*Loader Syntax with DB2-compatible Statements ............................................................... Appendix A SQL*Loader Reserved Words Appendix B DB2/DXT User Notes xviii 10-3 10-4 B-2 B-3 B-3 B-4 B-4 B-4 B-4 B-4 B-5 B-5 B-5 B-5 B-5 Send Us Your Comments Oracle8 Utilities, Release 8.0 Part No. A58244-01 Oracle Corporation welcomes your comments and suggestions on the quality and usefulness of this publication. Your input is an important part of the information used for revision. ■ ■ ■ ■ ■ Did you find any errors? Is the information clearly presented? Do you need more information? If so, where? Are the examples correct? Do you need more examples? What features did you like most about this manual? If you find any errors or have any other suggestions for improvement, please indicate the chapter, section, and page number (if available). You can send comments to us in the following ways: ■ ■ ■ [email protected] FAX - 650.506.7200. Attn: Oracle Utilities postal service: Server Technologies Documentation Manager Oracle Corporation 500 Oracle Parkway Redwood Shores, CA 94065 USA If you would like a reply, please give your name, address, and telephone number below. xix Please provide the following information: Name: Title Company: Department: Electronic Mail Address: Postal Address: Phone Number: Book Title: Version Number: If you like, you can use the following questionnaire to give us feedback. Edit the online release notes file, extract a copy of this questionnaire, and send it to us.Did you find any errors? ■ Is the information clearly presented? ■ Do you need more information? If so, where? ■ Are the examples correct? Do you need more examples? ■ What features did you like most about this manual? If you find any errors or have any other suggestions for improvement, please indicate the chapter, section, and page number (if available). ■ xx Preface This manual describes how to use the Oracle8 Server utilities for data transfer, maintenance, and database administration. Oracle8 Utilities contains information that describes the features and functionality of the Oracle8 and the Oracle8 Enterprise Edition products. Oracle8 and Oracle8 Enterprise Edition have the same basic features. However, several advanced features are available only with the Enterprise Edition, and some of these are optional. For information about the differences between Oracle8 and the Oracle8 Enterprise Edition and the features and options that are available to you, see Getting to Know Oracle8 and the Oracle8 Enterprise Edition. xxi The Oracle Utilities This manual describes the basic concepts behind each utility and provides examples to show how the utilities are used. Some of the information this manual provides must be supplemented for the highsecurity version of the Oracle8 Server, Trusted Oracle. Such information is marked with references to the Trusted Oracle documentation. Audience This manual is for database administrators (DBAs), application programmers, security administrators, system operators, and other Oracle users who perform the following tasks: ■ ■ ■ archive data, back up an Oracle database, or move data between Oracle databases using the Export/Import utilities load data into Oracle tables from operating system files using SQL*Loader create and maintain user-defined character sets (NLS Utilities) and other Oracle NLS data To use this manual, you need a working knowledge of SQL and Oracle8 fundamentals, information that is contained in Oracle8 Concepts. In addition, SQL*Loader requires that you know how to use your operating system’s file management facilities. Note: This manual does not contain instructions for installing the utilities, which is operating system-specific. Installation instructions for the utilities can be found in your operating system-specific Oracle8 documentation. xxii How Oracle8 Utilities Is Organized This manual is divided into four parts: Part I: Export/Import Chapter 1, “Export” This chapter describes how to use Export to write data from an Oracle database into transportable files. It discusses guidelines, export modes, interactive and command-line methods, parameter specifications, and incremental exports. It also provides several examples of Export sessions. Chapter 2, “Import” This chapter shows you how to use Import to read data from Export files into an Oracle database. It discusses guidelines, interactive and command-line methods, parameter specifications, and incremental imports. It also provides several examples of Import sessions. Part II: SQL*Loader Chapter 3, “SQL*Loader Concepts” This chapter introduces SQL*Loader and describes its features. It also introduces data loading concepts. It discusses input to SQL*Loader, database preparation, and output from SQL*Loader. Chapter 4, “SQL*Loader Case Studies” This chapter presents case studies that illustrate some of the features of SQL*Loader. It demonstrates the loading of variable-length data, fixed-format records, a free-format file, multiple physical records as one logical record, multiple tables, and direct file loads. Chapter 5, “SQL*Loader Control File Reference” This chapter describes the data definition language (DDL) used by SQL*Loader to map data to Oracle format. It discusses creating the control file to hold DDL source, using the LOAD DATA statement, specifying data files, specifying tables and columns, and specifying the location of data. Chapter 6, “SQL*Loader Command-Line Reference” This chapter describes the command-line syntax used by SQL*Loader. It discusses the SQLLOAD command, command-line arguments, suppressing SQL*Loader messages, and sizing the bind array. xxiii Chapter 7, “SQL*Loader: Log File Reference” This chapter describes the information contained in the log file. Chapter 8, “SQL*Loader: Conventional and Direct Path Loads” This chapter describes the conventional path load method and the direct path load method— a high performance option that significantly reduces the time required to load large quantities of data. Part III: NLS Utilities Chapter 9, “National Language Support Utilities” Part III explains how to use the NLS utilities: the NLS Data Installation utility, which helps you convert text-format updates to NLS objects; The NLS Configuration utility, which helps you configure your NLS boot files so that only the NLS objects you want will be loaded; the NLS Calendar utility, which allows you to update existing NLS calendar data with additional ruler eras. Part IV: Offline Database Verification Utility Chapter 10, “Offline Database Verification Utility” This chapter describes how to use the offline database verification utility. Appendix A, “SQL*Loader Reserved Words” This appendix lists the words reserved by the Oracle utilities. Appendix B, “DB2/DXT User Notes” This appendix describes differences between the data definition language syntax of SQL*Loader and DB2 Load Utility control files. It discusses SQL*Loader extensions to the DB2 Load Utility, the DB2 RESUME option, options included for compatibility, and SQL*Loader restrictions. xxiv Conventions Used in This Manual This manual follows textual and typographic conventions explained in the following sections. Text of the Manual The following conventions are used in the text of this manual: UPPERCASE Words Uppercase text is used to call attention to command keywords, object names, parameters, filenames, and so on, for example: “If you create a private rollback segment, its name must be included in the ROLLBACK_SEGMENTS parameter in the PARAMETER file.” Italicized Words Italicized words are used at the first occurrence and definition of a term, as in the following example: “A database is a collection of data to be treated as a unit. The general purpose of a database is to store and retrieve related information, as needed.” Italicized words are used also to indicate emphasis, book titles, and to highlight names of performance statistics. PL/SQL, SQL, and SQL*Plus commands and statements are displayed in a fixedwidth font using the following conventions, separated from normal text as in the following example: ALTER TABLESPACE users ADD DATAFILE ’users2.ora’ SIZE 50K; Punctuation: , ’ ” Example statements may include punctuation such as commas or quotation marks. All punctuation given in example statements is required. All statement examples end with a semicolon. Depending on the application in use, a semicolon or other terminator may or may not be required to end a statement. UPPERCASE Words: INSERT, SIZE Uppercase words in example statements indicate the keywords in Oracle SQL. However, when you issue statements, keywords are not case-sensitive. xxv Lowercase Words: emp, users2.ora Lowercase words in example statements indicate words supplied only for the context of the example. For example, lowercase words may indicate the name of a table, column, or file. Some operating systems are case sensitive, so refer to your installation or user’s manual to find whether you must pay attention to case. We Welcome Your Comments We value and appreciate your comments as an Oracle user and reader of our manuals. As we write, revise, and evaluate, your opinions are the most important input we receive. At the back of this manual is a Reader’s Comment Form that we encourage you to use to tell us both what you like and what you dislike about this (or other) Oracle manuals. If the form is missing, or you would like to contact us, please use the following address or fax number: Oracle8 Server Documentation Manager Oracle Corporation 500 Oracle Parkway Redwood City, CA 94065 U.S.A. FAX: 415-506-7200 You can also e-mail your comments to: [email protected] xxvi Part I Export/Import Part I describes the Export and Import utilities. These utilities are complementary. Export writes data from an Oracle database into a transportable operating system file. Import reads data from this file back into an Oracle database. You can use Export and Import to accomplish the following tasks: ■ move data between Oracle databases, even if the databases are on different systems or platforms ■ move data from one tablespace or schema to another ■ repartition data in tables ■ store definitions of database objects (such as tables, clusters, and indexes) with or without the data ■ archive inactive data or store temporary data ■ store Oracle data in operating system files outside a database ■ upgrade to new releases of Oracle ■ ■ back up entire Oracle databases or back up only tables whose data changed since the last export, using an incremental export or a cumulative export selectively back up parts of a database in a way that requires less storage space than a system backup ■ restore a database by importing from incremental or cumulative exports ■ restore tables that were dropped, if they had been exported previously ■ move data between older and newer versions or releases of Oracle save space or reduce fragmentation on the platform used by the Oracle database 1 Export This chapter describes how to use the Export utility to write data from an Oracle database into an operating system file in binary format. This file is stored outside the database, and it can be read into another Oracle database by using the Import utility (described in Chapter 2, “Import”). This chapter covers the following topics: ■ What is the Export Utility? ■ Export Modes ■ Using Export ■ Export Parameters ■ Example Export Sessions ■ Using the Interactive Method ■ Warning, Error, and Completion Messages ■ Direct Path Export ■ Incremental, Cumulative, and Complete Exports ■ Network Considerations ■ Character Set and NLS Considerations ■ Considerations in Exporting Database Objects ■ Using Different Versions of Export ■ Creating Oracle Release 7 Export Files from an Oracle8 Server Export 1-1 What is the Export Utility? What is the Export Utility? Export provides a simple way for you to transfer data objects between Oracle database. Export extracts the object definitions and table data from an Oracle database and stores them in an Oracle binary-format Export dump file located typically on disk or tape. Such files can then be FTPed or physically transported (in the case of tape) to a different site and used, with the Import utility, to transfer data between databases that are on machines not connected via a network or as backups in addition to normal backup procedures. The Export and Import utilities can also facilitate certain aspects of Oracle Advanced Replication functionality like offline instantiation. See Oracle8 Replication for more information. Note that, Export dump files can only be read by the Oracle utility, Import (see Chapter 2, “Import”). If you need to read load data from ASCII fixed-format or delimited files, see Part II, SQL*Loader of this manual. When you run Export against an Oracle database, objects (such as tables) are extracted, followed by their related objects (such as indexes, comments, and grants) if any, and then written to the Export file. See Figure 1–1. Note: If you are working with the Advanced Replication Option, refer to the information about migration and compatibility in Oracle8 Replication. If you are using Trusted Oracle, see the Trusted Oracle documentation for information about using the Export utility in that environment. 1-2 Oracle8 Utilities What is the Export Utility? Figure 1–1 Exporting a Database Database Table 1 Table 3 Export file Table 5 Table 1 Index 1 Index 1 Table 4 Index 5 Table 2 Table 3 Table 2 Index 4 Table 6 Table 4 Index 4 Table 5 Index 5 Table 6 Reading the Contents of an Export File Export files are stored in Oracle-binary format. Export files generated by Oracle8 Export cannot be read by utilities other than Oracle8 Import. Export files created by Oracle8 Export cannot be read by earlier versions of the Import utility. Similarly, Import can read files written by Export, but cannot read files in other formats. To load data from ASCII fixed-format or delimited files, see Part II of this manual for information about SQL*Loader. You can, however, display the contents of an export file by using the Import SHOW parameter. For more information, see “SHOW” on page 2-27. Access Privileges To use Export, you must have the CREATE SESSION privilege on an Oracle database. To export tables owned by another user, you must have the EXP_FULL_DATABASE role enabled. This role is granted to all DBAs. If you do not have the system privileges contained in the EXP_FULL_DATABASE role, you cannot export objects contained in another user’s schema. For example, you cannot export a table in another user’s schema, even if you created a synonym for it. Export 1-3 Export Modes Export Modes The Export utility provides three modes of export. All users can export in table mode and user mode. A user with the EXP_FULL_DATABASE role (a privileged user) can export in table mode, user mode, and full database mode. The database objects that are exported depend on the mode you choose. See “Export Parameters” on page 1-11 for information on specifying each mode. You can use the conventional path Export or direct path Export to export in any of the three modes. The differences between conventional path export and direct path Export are described in “Direct Path Export” on page 1-33. Table 1–1 shows the objects that are exported and imported in each mode. Table 1–1 Objects Exported and Imported in Each Mode Table Mode User Mode Full Database Mode For each table in the TABLES list, users can export and import: For each user in the Owner list, users can export and import: Privileged users can export and import all database objects except those owned by SYS: object type definitions used by table foreign function libraries tablespace definitions table definitions object types profiles pre-table actions database links user definitions table data by partition sequence numbers roles nested table data cluster definitions system privilege grants owner’s table indexes In addition, for each table that the specified user owns, users can export and import: role grants table constraints (primary, unique, check) default roles tablespace quotas owner’s table grants analyze tables object type definitions used by table resource costs column and table comments table definitions rollback segment definitions auditing information pre-table actions database links table referential constraints table data by partition sequence numbers owner’s table triggers nested table data all directory aliases post-table actions owner’s table indexes 1 all foreign function libraries 1-4 Oracle8 Utilities Export Modes Table 1–1 Objects Exported and Imported in Each Mode (Cont.) Table Mode In addition, privileged users can export and import: User Mode table constraints (primary,unique,check) Full Database Mode all object types all cluster definitions owner’s table grants triggers owned by other users indexes owned by other users analyze table password history column and table comments default and system auditing private synonyms user stored procedures, packages, and functions For each table, the privileged user can export and import: auditing information object type definitions used by table user views table definitions analyze cluster pre-table actions referential integrity constraints table data by partition triggers 2 nested table data post-table actions table indexes snapshots table constraints (primary, unique, check) snapshot logs table grants job queues analyze table refresh groups column and table comments auditing information all referential integrity constraints all synonyms all views all stored procedures, packages, and functions all triggers post-table actions analyze cluster all snapshots all snapshot logs all job queues Export 1-5 Using Export Table 1–1 Objects Exported and Imported in Each Mode (Cont.) Table Mode User Mode Full Database Mode all refresh groups and children 1. Non-privileged users can export and import only indexes they own on tables they own. They cannot export indexes they own that are on tables owned by other users, nor can they export indexes owned by other users on their own tables. Privileged users can export and import indexes on the specified users’ tables, even if the indexes are owned by other users. Indexes owned by the specified user on other users’ tables are not included, unless those other users are included in the list of users to export. 2. Non-privileged and privileged users can export and import all triggers owned by the user, even if they are on tables owned by other users. Understanding Table-Level and Partition-Level Export In table-level Export, an entire partitioned or non-partitioned table, along with its indexes and other table-dependent objects, is exported. All the partitions of a partitioned table are exported. (This applies to both direct path Export and conventional path Export.) All Export modes (full, user, table) support table-level Export. In partition-level Export, the user can export one or more specified partitions of a table. Full database and user mode Export do not support partition-level Export; only table mode Export does. Because incremental Exports (incremental, cumulative, and complete) can be done only in full database mode, partition-level Export cannot be specified for incremental exports. In all modes, partitioned data is exported in a format such that partitions can be imported selectively. For information on how to specify a partition-level Export, see “TABLES” on page 1-19. Using Export This section describes how to use the Export utility, including what you need to do before you begin exporting and how to invoke Export. Before Using Export To use Export, you must run the script CATEXP.SQL or CATALOG.SQL (which runs CATEXP.SQL) after the database has been created. 1-6 Oracle8 Utilities Using Export Note: The actual names of the script files depend on your operating system. The script file names and the method for running them are described in your Oracle operating system-specific documentation. CATEXP.SQL or CATALOG.SQL needs to be run only once on a database. You do not need to run it again before you perform the export. The script performs the following tasks to prepare the database for Export: ■ creates the necessary export views ■ assigns all necessary privileges to the EXP_FULL_DATABASE role ■ assigns EXP_FULL_DATABASE to the DBA role Before you run Export, ensure that there is sufficient disk or tape storage space to which to write the export file. If there is not enough space, Export terminates with a write-failure error. You can use table sizes to estimate the maximum space needed. Table sizes can be found in the USER_SEGMENTS view of the Oracle data dictionary. The following query displays disk usage for all tables: select sum(bytes) from user_segments where segment_type=’TABLE’; The result of the query does not include disk space used for data stored in LOB (large object) columns. See the Oracle8 Reference for more information about dictionary views. Invoking Export You can invoke Export in one of the following ways: ■ Enter the following command: exp username/password PARFILE=filename PARFILE is a file containing the export parameters you typically use. If you use different parameters for different databases, you can have multiple parameter files. This is the recommended method. ■ Enter the command exp username/password followed by the parameters you need. Export 1-7 Using Export Note: The number of parameters cannot exceed the maximum length of a command line on the system. Enter only the command exp username/password to begin an interactive session and let Export prompt you for the information it needs. The interactive method provides less functionality than the parameter-driven method. It exists for backward compatibility. You can use a combination of the first and second options. That is, you can list parameters both in the parameters file and on the command line. In fact, you can specify the same parameter in both places. The position of the PARFILE parameter and other parameters on the command line determines what parameters override others. For example, assume the parameters file params.dat contains the parameter INDEXES=Y and Export is invoked with the following line: exp system/manager PARFILE=params.dat INDEXES=N In this case, because INDEXES=N occurs after PARFILE=params.dat, INDEXES=N overrides the value of the INDEXES parameter in the PARFILE. You can specify the username and password in the parameter file, although, for security reasons, this is not recommended. If you omit the username/password combination, Export prompts you for it. See “Export Parameters” on page 1-11 for descriptions of the parameters. To see how to specify an export from a database that is not the default database, refer to “Exporting and Importing with Net8” on page 1-44. Invoking Export as SYSDBA Typically, you should not need to invoke Export as SYSDBA. However, if you are using Tablespace Point-In-Time Recovery (TSPITR) which enables you to quickly recover one or more tablespaces to a point-in-time different from that of the rest of the database, you will need to know how to do so. Attention: It is recommended that you read the information about TSPITR in the Oracle8 Backup and Recovery Guide, “POINT_IN_TIME_RECOVER” on page 2-26, and “RECOVERY_TABLESPACES” on page 1-19 before continuing with this section. To invoke Export as SYSDBA, use the following syntax: exp username/password AS SYSDBA 1-8 Oracle8 Utilities Using Export or, optionally exp username/password@instance AS SYSDBA Note: Since the string “AS SYSDBA” contains a blank, most operating systems require that entire string ‘username/password AS SYSDBA’ be placed in quotes or marked as a literal by some method. Note that some operating systems also require that quotes on the command line be escaped as well. Please see your operating system-specific Oracle documentation for information about special and reserved characters on your system. Note that if either the username or password is omitted, Export will prompt you for it. If you prefer to use the Export interactive mode, please see “Interactively Invoking Export as SYSDBA” on page 1-29 for more information. Getting Online Help Export provides online help. Enter exp help=y on the command line to see a help screen like the one shown below. > exp help=y Export: Release 8.0.4.0.0 - Production on Fri Nov 03 9:26:39 1997 (c) Copyright 1997 Oracle Corporation. All rights reserved. You can let Export prompt you for parameters by entering the EXP command followed by your username/password: Example: EXP SCOTT/TIGER Or, you can control how Export runs by entering the EXP command followed by various arguments. To specify parameters, you use keywords: Format: EXP KEYWORD=value or KEYWORD=(value1,value2,...,valueN) Example: EXP SCOTT/TIGER GRANTS=Y TABLES=(EMP,DEPT,MGR) or TABLES=(T1:P1,T1:P2), if T1 is partitioned table USERID must be the first parameter on the command line. Keyword Description (Default) Keyword Description (Default) -------------------------------------------------------------------------USERID username/password FULL export entire file (N) BUFFER size of data buffer OWNER list of owner usernames Export 1-9 Using Export FILE output file (EXPDAT.DMP) TABLES list of table names COMPRESS import into one extent (Y) RECORDLENGTH length of IO record GRANTS export grants (Y) INCTYPE incremental export type INDEXES export indexes (Y) RECORD track incr. export (Y) ROWS export data rows (Y) PARFILE parameter filename CONSTRAINTS export constraints (Y) CONSISTENT cross-table consistency LOG log file of screen output STATISTICS analyze objects(ESTIMATE) DIRECT direct path (N) FEEDBACK display progress every x rows (0) POINT_IN_TIME_RECOVER Tablespace Point-in-time Recovery (N) RECOVERY_TABLESPACES List of tablespace names to recover VOLSIZE number of bytes to write to each tape volume Export terminated successfully without warnings. The Parameter File The parameter file allows you to specify Export parameters in a file where they can easily be modified or reused. Create the parameter file using any flat file text editor. The command-line option PARFILE=filename tells Export to read the parameters from the specified file rather than from the command line. For example: exp PARFILE=filename exp username/password PARFILE=filename The syntax for parameter file specifications is one of the following: KEYWORD=value KEYWORD=(value) KEYWORD=(value1, value2, ...) The following example shows a partial parameter file listing: FULL=Y FILE=DBA.DMP GRANTS=Y INDEXES=Y CONSISTENT=Y Additional Information: The maximum size of the parameter file may be limited by the operating system. The name of the parameter file is subject to the file naming conventions of the operating system. See your Oracle operating system-specific documentation for more information. You can add comments to the parameter file by preceding them with the pound (#) sign. Export ignores all characters to the right of the pound (#) sign. 1-10 Oracle8 Utilities Export Parameters Export Parameters The following three diagrams show the syntax for the parameters that you can specify in the parameter file or on the command line. The remainder of this section describes each parameter. HELP = Y @ username / connect–string password ExpOpts_1 ExpOpts_2 exp p p Y RECORD INCREMENTAL INCTYPE = = N CUMULATIVE COMPLETE FULL = Y , ( OWNER username ) = username , schema ( TABLES = . : partitionname tablename schema . ) : partitionname tablename , ( POINT_IN_TIME_RECOVER = Y RECOVERY_TABLESPACES tablespacename ) = tablespacename Export 1-11 Export Parameters PARFILE = filename FILE = filename LOG = filename Y COMPRESS = N Y ROWS = N Y DIRECT = N FEEDBACK = integer COMPUTE STATISTICS = ESTIMATE NONE Y INDEXES = N Y CONSTRAINTS = N Y GRANTS = N Y CONSISTENT = N BUFFER = RECORDLENGTH 1-12 Oracle8 Utilities integer = integer Export Parameters BUFFER Default: operating system-dependent. See your Oracle operating system-specific documentation to determine the default value for this parameter. Specifies the size, in bytes, of the buffer used to fetch rows. As a result, this parameter determines the maximum number of rows in an array fetched by Export. Use the following formula to calculate the buffer size: buffer_size = rows_in_array * maximum_row_size If you specify zero, the Export utility fetches only one row at a time. Tables with LONG, LOB, BFILE, REF, ROWID, or type columns are fetched one row at a time. Note: The BUFFER parameter applies only to conventional path Export. It has no effect on a direct path Export. COMPRESS Default: Y Specifies how Export and Import manage the initial extent for table data. The default, COMPRESS=Y, causes Export to flag table data for consolidation into one initial extent upon Import. If extent sizes are large (for example, because of the PCTINCREASE parameter), the allocated space will be larger than the space required to hold the data when you specify COMPRESS=Y. If you specify COMPRESS=N, Export uses the current storage parameters, including the values of initial extent size and next extent size. The values of the parameters may be the values specified in the CREATE TABLE or ALTER TABLE statements or the values modified by the database system. For example, the NEXT extent size value may be modified if the table grows and if the PCTINCREASE parameter is nonzero. Note: Although the actual consolidation is performed upon import, you can specify the COMPRESS parameter only when you export, not when you import. The Export utility, not the Import utility, generates the data definitions, including the storage parameter definitions. Thus, if you specify COMPRESS=Y when you export, you can import the data in consolidated form only. Note: LOB data is not compressed. For LOB data, the original values of initial extent size and next extent size are used. Export 1-13 Export Parameters CONSISTENT Default: N Specifies whether or not Export uses the SET TRANSACTION READ ONLY statement to ensure that the data seen by Export is consistent to a single point in time and does not change during the execution of the export command. You should specify CONSISTENT=Y when you anticipate that other applications will be updating the database after an export has started. If you specify CONSISTENT=N (the default), tables are usually exported in a single transaction. If a table contains nested tables, the outer table and each inner table are exported as separate transactions. If a table is partitioned, each partition is exported as a separate transaction. Therefore, if nested tables and partitioned tables are being updated by other applications, the data that is exported could be inconsistent. To minimize this possibility, export those tables at a time when updates are not being done. The following chart shows a sequence of events by two users: USER1 exports partitions in a table and USER2 updates data in that table. Time Sequence 1 USER1 USER2 Begins export of TAB:P1 2 Updates TAB:P2 Updates TAB:P1 Commit transaction 3 Ends export of TAB:P1 4 Exports TAB:P2 If the export uses CONSISTENT=Y, none of the updates by USER2 are written to the export file. If the export uses CONSISTENT=N, the updates to TAB:P1 are not written to the export file. However, the updates to TAB:P2 are written to the export file because the update transaction is committed before the export of TAB:P2 begins. As a result, USER2’s transaction is only partially recorded in the export file, making it inconsistent. If you use CONSISTENT=Y and the volume of updates is large, the rollback segment will be large. In addition, the export of each table will be slower because the rollback segment must be scanned for uncommitted transactions. 1-14 Oracle8 Utilities Export Parameters Keep in mind the following points about using CONSISTENT=Y: ■ To minimize the time and space required for such exports, you should export tables that need to remain consistent separately from those that do not. For example, export the EMP and DEPT tables together in a consistent export, and then export the remainder of the database in a second pass. ■ To reduce the chances of encountering a “snapshot too old” error, export the minimum number of objects that must be guaranteed consistent. The “snapshot too old” error occurs when rollback space has been used up, and space taken up by committed transactions is reused for new transactions. Reusing space in the rollback segment allows database integrity to be preserved with minimum space requirements, but it imposes a limit on the amount of time that a read-consistent image can be preserved. If a committed transaction has been overwritten and the information is needed for a read-consistent view of the database, a “snapshot too old” error results. To avoid this error, you should minimize the time taken by a read-consistent export. (Do this by restricting the number of objects exported and, if possible, by reducing the database transaction rate.) Also, make the rollback segment as large as possible. Note: You cannot specify CONSISTENT=Y with an incremental export. CONSTRAINTS Default: Y Specifies whether or not the Export utility exports table constraints. DIRECT Default: N Specifies whether you use direct path or conventional path Export. Specifying DIRECT=Y causes Export to extract data by reading the data directly, bypassing the SQL Command Processing layer (evaluating buffer). This method can be much faster than a conventional path export. You can further improve performance by using direct path Export with the database in direct read mode. Contention for resources with other users is eliminated because database blocks are read into the private buffer cache, rather than a public buffer cache. Export 1-15 Export Parameters Direct read mode is enabled if the database compatibility mode is 7.1.5 or higher. For more information about direct read mode, see the Oracle8 Administrator’s Guide. Direct path Export cannot be used to export data from tables that contain column types that were introduced in Oracle8. Those column types are REF, LOB, BFILE, or object type columns (which include VARRAYs and nested tables). If a table contains any of these objects, only the table definition is exported, not the data, and a warning message is given. For more information about direct path Exports, see “Direct Path Export” on page 1-33. FEEDBACK Default: 0 (zero) Specifies that Export should display a progress meter in the form of a dot for n number of rows exported. For example, if you specify FEEDBACK=10, Export displays a dot each time 10 rows are exported. The FEEDBACK value applies to all tables being exported; it cannot be set on a per-table basis. FILE Default: expdat.dmp Specifies the name of the export file. The default extension is .dmp, but you can specify any extension. FULL Default: N Indicates that the Export is a full database mode Export (that is, it exports the entire database.) Specify FULL=Y to export in full database mode. You need the EXP_FULL_DATABASE role to export in this mode. GRANTS Default: Y Specifies whether or not the Export utility exports grants. The grants that are exported depend on whether you use full database or user mode. In full database mode, all grants on a table are exported. In user mode, only those granted by the owner of the table are exported. 1-16 Oracle8 Utilities Export Parameters HELP Default: N Displays a help message with descriptions of the Export parameters. INCTYPE Default: none Specifies the type of incremental Export. The options are COMPLETE, CUMULATIVE, and INCREMENTAL. See “Incremental, Cumulative, and Complete Exports” on page 1-37 for more information. For more information on the system tables that support incremental export and for the definitions of ITIME, EXPID, and CTIME, see “System Tables” on page 1-43. INDEXES Default: Y Specifies whether or not the Export utility exports indexes. LOG Default: none Specifies a file name to receive informational and error messages. For example: exp system/manager LOG=export.log If you specify this parameter, messages are logged in the log file and displayed to the terminal display. OWNER Default: undefined Indicates that the Export is a user-mode Export and lists the users whose objects will be exported. PARFILE Default: undefined Specifies a filename for a file that contains a list of Export parameters. For more information on using a parameter file, see “The Parameter File” on page 1-10. Export 1-17 Export Parameters POINT_IN_TIME_RECOVER Default: N Indicates whether or not the Export utility exports one or more tablespaces in an Oracle database. On Import, you can recover the tablespace to a prior point in time, without affecting the rest of the database. For more information, see the Oracle8 Backup and Recovery Guide. RECORD Default: Y Indicates whether or not to record an incremental or cumulative export in the system tables SYS.INCEXP, SYS.INCFIL, and SYS.INCVID. For information about these tables, see “System Tables” on page 1-43. RECORDLENGTH Default: operating system dependent Specifies the length, in bytes, of the file record. The RECORDLENGTH parameter is necessary when you must transfer the export file to another operating system that uses a different default value. If you do not define this parameter, it defaults to your platform-dependent value for BUFSIZ. For more information about the BUFSIZ default value, see your operating system-specific documentation. You can set RECORDLENGTH to any value equal to or greater than your system’s BUFSIZ. (The highest value is 64KB.) Changing the RECORDLENGTH parameter affects only the size of data that accumulates before writing to the disk. It does not affect the operating system file block size. Note: You can use this parameter to specify the size of the Export I/O buffer. Additional Information: See your Oracle operating system-specific documentation to determine the proper value or to create a file with a different record size. 1-18 Oracle8 Utilities Export Parameters RECOVERY_TABLESPACES Default: undefined Specifies the tablespaces that will be recovered using point-in-time recovery. For more information about point-in-time recovery, see the Oracle8 Backup and Recovery Guide. ROWS Default: Y Specifies whether or not the rows of table data are exported. STATISTICS Default: ESTIMATE Specifies the type of database optimizer statistics to generate when the exported data is imported. Options are ESTIMATE, COMPUTE, and NONE. See the Oracle8 Concepts manual for information about the optimizer. TABLES Default: undefined Specifies that the Export is a table-mode Export and lists the table names and partition names to export. You can specify the following when you specify the name of the table: ■ ■ ■ schema specifies the name of the user’s schema from which to export the table or partition. tablename indicates that the export is a table-level Export. Table-level Export lets you export entire partitioned or non-partitioned tables. If a table in the list is partitioned and you do not specify a partition name, all its partitions are exported. partition name indicates that the export is a partition-level Export. Partitionlevel Export lets you export one or more specified partitions within a table. If you use tablename:partition name, the specified table must be partitioned, and partition-name must be the name of one of its partitions. The following line shows an example of a partition-level Export: exp system/manager FILE = export.dmp TABLES = (scott.b:px, scott.b:py, mary.c, d:qb) Export 1-19 Export Parameters In this example, scott.b must be a partitioned table, and px and py must be two of its partitions. The table denoted by mary.c can be a partitioned or non-partitioned table. Table d, however, must be a partitioned table, and qb must be one of its partitions. If the table-name or partition-name for the same table is used redundantly Export recognizes the duplicate entries and exports the table or partition only once. For example, the following: exp system/manager FILE = export.dmp TABLES = (sc, sc:px, sc) causes one export of table sc. Additional Information: Some operating systems, such as UNIX, require that you use escape characters before special characters, such as a parenthesis, so that the character is not treated as a special character. On UNIX, use a backslash (\) as the escape character, as shown in the following example: TABLES=\(EMP,DEPT\) Table-Name Restrictions Table names specified on the command line cannot include a pound (#) sign, unless the table name is enclosed in quotation marks. Similarly, in the parameter file, if a table name includes a pound (#) sign, the Export utility interprets the rest of the line as a comment, unless the table name is enclosed in quotation marks. For example, if the parameter file contains the following line, Export interprets everything on the line after EMP# as a comment, and therefore does not export the tables DEPT and MYDATA: TABLES=(EMP#, DEPT, MYDATA) However, given the following line, the Export utility exports all three tables: TABLES=("EMP#", DEPT, MYDATA) Attention: When you specify the table name using quotation marks, the name is case sensitive. The name must exactly match the table name stored in the database. By default, table names in a database are stored as uppercase. In the previous example, a table named EMP# is exported, not a table named emp#. Because the tables DEPT and MYDATA are not specified in quotation marks, the names are not case sensitive. 1-20 Oracle8 Utilities Export Parameters Additional Information: Some operating systems require single quotation marks rather than double quotation marks, or vice versa; see your Oracle operating system-specific documentation. Different operating systems also have other restrictions on table naming. For example, the UNIX C shell does not handle a dollar sign ($) or pound sign (#) (or certain other special characters). You must use escape characters to get such characters in the name past the shell and into Export. USERID Default: none Specifies the username/password (and optional connect string) of the user initiating the export. If you omit the password Export will prompt you for it. When using Tablespace Point-in-Time-Recovery USERID can also be: username/password AS SYSDBA or username/password@instance AS SYSDBA See “Invoking Export as SYSDBA” on page 1-8 for more information. Note also that your operating system may require you to treat AS SYSDBA as a special string requiring you to enclose the entire string in quotes as described on 1 - 8. Optionally, you can specify the @connect_string clause for Net8. See the user’s guide for your Net8 protocol for the exact syntax of @connect_string. See also Oracle8 Distributed Database Systems. Parameter Interactions Certain parameters can conflict with each other. For example, because specifying TABLES can conflict with an OWNER specification, the following command causes Export to terminate with an error: exp system/manager OWNER=jones TABLES=scott.emp Similarly, OWNER conflicts with FULL=Y and TABLE conflicts with FULL=Y. Although ROWS=N and INCTYPE=INCREMENTAL can both be used, specifying ROWS=N (no data) defeats the purpose of incremental exports, which is to make a backup copy of tables that have changed. Export 1-21 Example Export Sessions Example Export Sessions The following examples show you how to use the command line and parameter file methods in the full database, user, and table modes. Example Export Session in Full Database Mode Only users with the DBA role or the EXP_FULL_DATABASE role can export in full database mode. In this example, an entire database is exported to the file dba.dmp with all GRANTS and all data. Parameter File Method > exp system/manager parfile=params.dat The params.dat file contains the following information: FILE=dba.dmp GRANTS=y FULL=y ROWS=y Command-Line Method > exp system/manager full=Y file=dba.dmp grants=Y rows=Y Export Messages Export: Release 8.0.4.0.0 - Production on Fri Nov 7 8:23:12 1997 (c) Copyright 1997 Oracle Corporation. All rights reserved. Connected to: Oracle8 Release 8.0.4.0.0 - Production PL/SQL Release 8.0.4.0.0 - Production Export done in US7ASCII character set and WE8DEC NCHAR character set About to export the entire database ... . exporting tablespace definitions . exporting profiles . exporting user definitions . exporting roles . exporting resource costs . exporting rollback segment definitions . exporting database links . exporting sequence numbers . exporting directory aliases . exporting foreign function library names 1-22 Oracle8 Utilities Example Export Sessions . exporting object type definitions . exporting cluster definitions . about to export SYSTEM's tables via Conventional Path ... . . exporting table DEF$_AQCALL 0 . . exporting table DEF$_AQERROR 0 . . exporting table DEF$_CALLDEST 0 . . exporting table DEF$_DEFAULTDEST 0 . . exporting table DEF$_DESTINATION 0 . . exporting table DEF$_ERROR 0 . . exporting table DEF$_LOB 0 . . exporting table DEF$_ORIGIN 0 . . exporting table DEF$_PROPAGATOR 0 . . exporting table DEF$_TEMP$LOB 0 . about to export SCOTT's tables via Conventional Path ... . . exporting table BONUS 0 . . exporting table DEPT 4 . . exporting table EMP 14 . . exporting table SALGRADE 5 . about to export ADAMS's tables via Conventional Path ... . about to export JONES's tables via Conventional Path ... . about to export CLARK's tables via Conventional Path ... . about to export BLAKE's tables via Conventional Path ... . . exporting table DEPT 8 . . exporting table MANAGER 4 . exporting referential integrity constraints . exporting posttables actions . exporting synonyms . exporting views . exporting stored procedures . exporting triggers . exporting snapshots . exporting snapshot logs . exporting job queues . exporting refresh groups and children . exporting user history table . exporting default and system auditing options Export terminated successfully without warnings. rows rows rows rows rows rows rows rows rows rows exported exported exported exported exported exported exported exported exported exported rows rows rows rows exported exported exported exported rows exported rows exported Export 1-23 Example Export Sessions Example Export Session in User Mode Exports in user mode can back up one or more database users. For example, a DBA may want to back up the tables of deleted users for a period of time. User mode is also appropriate for users who want to back up their own data or who want to move objects from one owner to another. In this example, user SCOTT is exporting his own tables. Parameter File Method > exp scott/tiger parfile=params.dat The params.dat file contains the following information: FILE=scott.dmp OWNER=scott GRANTS=y ROWS=y COMPRESS=y Command-Line Method > exp scott/tiger file=scott.dmp owner=scott grants=Y rows=Y compress=y Export Messages Export: Release 8.0.4.0.0 - Production on Fri Nov 7 4:12:14 1997 (c) Copyright 1997 Oracle Corporation. All rights reserved. Connected to: Oracle8 Release 8.0.4.0.0 - Production PL/SQL Release 8.0.4.0.0 - Production Export done in US7ASCII character set and WE8DEC NCHAR character set . exporting foreign function library names for user SCOTT . exporting object type definitions for user SCOTT About to export SCOTT's objects ... . exporting database links . exporting sequence numbers . exporting cluster definitions . about to export SCOTT's tables via Conventional Path ... . . exporting table BONUS 0 rows exported . . exporting table DEPT 4 rows exported . . exporting table EMP 14 rows exported . . exporting table SALGRADE 5 rows exported 1-24 Oracle8 Utilities Example Export Sessions . exporting synonyms . exporting views . exporting stored procedures . exporting referential integrity constraints . exporting triggers . exporting posttables actions . exporting snapshots . exporting snapshot logs . exporting job queues . exporting refresh groups and children Export terminated successfully without warnings. Example Export Sessions in Table Mode In table mode, you can export table data or the table definitions. (If no rows are exported, the CREATE TABLE statement is placed in the export file, with grants and indexes, if they are specified.) A user with the EXP_FULL_DATABASE role can use table mode to export tables from any user’s schema by specifying TABLES=schema.table If schema is not specified, Export defaults to the previous schema from which an object was exported. If there is not a previous object, Export defaults to the exporter’s schema. In the following example, Export defaults to the SYSTEM schema for table a and to SCOTT for table c: > exp system/manager tables=(a, scott.b, c, mary.d) A user without the EXP_FULL_DATABASE role can export only tables that the user owns. A user with the EXP_FULL_DATABASE role can export dependent objects that are owned by other users. A non-privileged user can export only dependent objects that the user owns. Exports in table mode do not include cluster definitions. As a result, the data is imported into unclustered tables. Thus, you can use table mode to uncluster tables. Example 1 In this example, a DBA exports specified tables for two users. Parameter File Method > exp system/manager parfile=params.dat Export 1-25 Example Export Sessions The params.dat file contains the following information: FILE=expdat.dmp TABLES=(scott.emp,blake.dept) GRANTS=y INDEXES=y Command-Line Method > exp system/manager tables=(scott.emp,blake.dept) grants=Y indexes=Y Export Messages Export: Release 8.0.4.0.0 - Production on Fri Nov 7 9:24:34 1997 (c) Copyright 1997 Oracle Corporation. All rights reserved. Connected to: Oracle8 Release 8.0.4.0.0 - Production PL/SQL Release 8.0.4.0.0 - Production Export done in US7ASCII character set and WE8DEC NCHAR character set About to export specified tables via Conventional Path ... Current user changed to SCOTT . . exporting table EMP 14 rows exported Current user changed to BLAKE . . exporting table DEPT 8 rows exported Export terminated successfully without warnings. Example 2 In this example, user BLAKE exports selected tables that he owns. Parameter File Method > exp blake/paper parfile=params.dat The params.dat file contains the following information: FILE=blake.dmp TABLES=(dept,manager) ROWS=Y COMPRESS=Y 1-26 Oracle8 Utilities Example Export Sessions Command-Line Method > exp blake/paper file=blake.dmp tables=(dept, manager) rows=y compress=Y Export Messages Export: Release 8.0.4.0.0 - Production on Fri Nov 5 9:25:33 1997 (c) Copyright 1997 Oracle Corporation. All rights reserved. Connected to: Oracle8 Release 8.0.4.0.0 - Production PL/SQL Release 8.0.4.0.0 - Production Export done in US7ASCII character set and WE8DEC NCHAR character set About to export specified tables via Conventional Path ... . . exporting table DEPT 8 rows exported . . exporting table MANAGER 4 rows exported Export terminated successfully without warnings. Example Export Session Using Partition-Level Export In partition-level export, you can specify the partitions of a table that you want to export. Example 1 Assume EMP is a partitioned table with two partitions M and Z (partitioned on employee name). As this example shows, if you export the table without specifying a partition, all of the partitions are exported. Parameter File Method > exp scott/tiger parfile=params.dat The params.dat file contains the following: TABLES=(emp) ROWS=y Command-Line Method > exp scott/tiger tables=emp rows=Y Export 1-27 Example Export Sessions Export Messages Export: Release 8.0.4.0.0 - Production on Fri Nov7 12:44:14 1997 (c) Copyright 1997 Oracle Corporation. All rights reserved. Connected to: Oracle8 Release 8.0.4.0.0 - Production PL/SQL Release 8.0.4.0.0 - Production Export done in US7ASCII character set and WE8DEC NCHAR character set About to export specified tables via Conventional Path ... . . exporting table EMP . . exporting partition M . . exporting partition Z Export terminated successfully without warnings. 8 rows exported 6 rows exported Example 2 Assume EMP is a partitioned table with two partitions M and Z (partitioned on employee name). As this example shows, if you export the table and specify a partition, only the specified partition is exported. Parameter File Method > exp scott/tiger parfile=params.dat The params.dat file contains the following: TABLES=(emp:m) ROWS=y Command-Line Method > exp scott/tiger tables=emp:m rows=Y Export Messages Export: Release 8.0.4.0.0 - Production on Fri Nov 7 10:32:12 1997 (c) Copyright 1997 Oracle Corporation. All rights reserved. Connected to: Oracle8 Release 8.0.4.0.0 - Production PL/SQL Release 8.0.4.0.0 - Production Export done in US7ASCII character set and WE8DEC NCHAR character set 1-28 Oracle8 Utilities Using the Interactive Method About to export specified tables via Conventional Path ... . .exporting table EMP . . exporting partition M Export terminated successfully without warnings. 8 rows exported Using the Interactive Method Starting Export from the command line with no parameters initiates the interactive method. The interactive method does not provide prompts for all Export functionality. The interactive method is provided only for backward compatibility. If you do not specify a username/password combination on the command line, the Export utility prompts you for this information. Interactively Invoking Export as SYSDBA Typically, you should not need to invoke Export as SYSDBA. However, if you are using Tablespace Point-In-Time Recovery (TSPITR) which enables you to quickly recover one or more tablespaces to a point-in-time different from that of the rest of the database, you will need to know how to do so. Attention: It is recommended that you read the information about TSPITR in the Oracle8 Backup and Recovery Guide, “POINT_IN_TIME_RECOVER” on page 2-26, and “RECOVERY_TABLESPACES” on page 1-19 before continuing with this section. If you use the Export interactive mode, you will not be prompted to specify whether you want to connect as SYSDBA or @instance. You must specify “AS SYSDBA” and/or “@instance” with the username. So the response to the Export interactive username prompt could be for example: username/password@instance as sysdba username/password@instance username/password as sysdba username/password username@instance as sysdba (prompts for password) username@instance (prompts for password) username (prompts for password) username AS sysdba (prompts for password) / as sysdba (no prompt for password, OS authentication is used) / (no prompt for password, OS authentication is used) Export 1-29 Using the Interactive Method /@instance as sysdba /@instance (no is (no is prompt for password, OS authentication used) prompt for password, OS authentication used) Note: if you omit the password and allow Export to prompt you for it, you cannot specify the @instance string as well. You can specify @instance only with username. Then, Export displays the following prompts: Enter array fetch buffer size: 4096 > 30720 Export file: expdat.dmp > (1)E(ntire database), (2)U(sers), or (3)T(ables): (2)U > E Export grants (yes/no): yes > Export table data (yes/no): yes > Compress extents (yes/no): yes > Export done in US7ASCII character set and WE8DEC NCHAR character set About to export the entire database ... . exporting tablespace definitions . exporting profiles . exporting user definitions . exporting roles . exporting resource costs . exporting rollback segment definitions . exporting database links . exporting sequence numbers . exporting directory aliases . exporting foreign function library names . exporting object type definitions . exporting cluster definitions . about to export SYSTEM's tables via Conventional Path ... . about to export SYSTEM's tables via Conventional Path ... . . exporting table DEF$_AQCALL 0 rows exported . . exporting table DEF$_AQERROR 0 rows exported . . exporting table DEF$_CALLDEST 0 rows exported . . exporting table DEF$_DEFAULTDEST 0 rows exported . . exporting table DEF$_DESTINATION 0 rows exported . . exporting table DEF$_ERROR 0 rows exported . . exporting table DEF$_LOB 0 rows exported 1-30 Oracle8 Utilities Using the Interactive Method . . exporting table DEF$_ORIGIN . . exporting table DEF$_PROPAGATOR . . exporting table DEF$_TEMP$LOB . about to export SCOTT's tables via Conventional Path . . exporting table BONUS . . exporting table DEPT . . exporting table EMP . . exporting table SALGRADE . about to export ADAMS's tables via Conventional Path . about to export JONES's tables via Conventional Path . about to export CLARK's tables via Conventional Path . about to export BLAKE's tables via Conventional Path . . exporting table DEPT . . exporting table MANAGER . exporting referential integrity constraints . exporting posttables actions . exporting synonyms . exporting views . exporting stored procedures . exporting triggers . exporting snapshots . exporting snapshot logs . exporting job queues . exporting refresh groups and children . exporting user history table . exporting default and system auditing options Export terminated successfully without warnings. 0 rows exported 0 rows exported 0 rows exported ... 0 4 14 5 rows rows rows rows exported exported exported exported ... ... ... ... 8 rows exported 4 rows exported You may not see all prompts in a given Export session because some prompts depend on your responses to other prompts. Some prompts show a default answer. If the default is acceptable, press [Return]. Restrictions Keep in mind the following points when you use the interactive method: ■ ■ In user mode, Export prompts for all user names to be included in the export before exporting any data. To indicate the end of the user list and begin the current Export session, press [Return]. In table mode, if you do not specify a schema prefix, Export defaults to the exporter’s schema or the schema containing the last table exported in the current session. Export 1-31 Warning, Error, and Completion Messages For example, if BETH is a privileged user exporting in table mode, Export assumes that all tables are in BETH’s schema until another schema is specified. Only a privileged user (someone with the EXP_FULL_DATABASE role) can export tables in another user’s schema. ■ If you specify a null table list to the prompt “Table to be exported,” the Export utility exits. Warning, Error, and Completion Messages The Export utility attempts to save as much of the database as possible, even when part of it has become corrupted, but errors can occur. This section discusses how Export handles those errors. Log File You can capture all Export messages in a log file, either by using the LOG parameter (see “LOG” on page 1-17) or, for those systems that permit it, by redirecting Export’s output to a file. The Export utility writes a log of detailed information about successful unloads and any errors that may occur. Refer to the operating system-specific Oracle documentation for information on redirecting output. Warning Messages Export does not terminate after non-fatal errors. For example, if an error occurs while exporting a table, Export displays (or logs) an error message, skips to the next table, and continues processing. These non-fatal errors are known as warnings. Export issues a warning whenever it encounters an invalid object. For example, if a non-existent table is specified as part of a table-mode export, the Export utility exports all other tables. Then, it issues a warning and terminates successfully, as shown in the following listing: > exp scott/tiger tables=xxx,emp ... About to export specified tables via Conventional Path ... EXP-00011: SCOTT.XXX does not exist . . exporting table EMP 14 rows exported Export terminated successfully with warnings. 1-32 Oracle8 Utilities Direct Path Export Fatal Error Messages Some errors are fatal and terminate the Export session. These errors typically occur because of an internal problem or because a resource, such as memory, is not available or has been exhausted. For example, if the CATEXP.SQL script is not executed, Export issues the following fatal error message: EXP-00024: Export views not installed, please notify your DBA Additional Information: Messages are documented in the Oracle8 Messages manual and in your Oracle operating system-specific documentation. Completion Messages When Export completes without errors, Export displays the message “Export terminated successfully without warnings.” If one or more non-fatal errors occurs but Export is able to continue to completion, Export displays the message “Export terminated successfully with warnings.” If a fatal error occurs, Export terminates immediately with the message “Export terminated unsuccessfully.” Direct Path Export Export provides two methods for exporting table data: ■ conventional path Export ■ direct path Export Conventional path Export uses the SQL SELECT statement to extract data from tables. Data is read from disk into a buffer cache, and rows are transferred to the evaluation buffer. The data, after passing expression evaluation, is transferred to the Export client, which then writes the data into the export file. Direct path Export extracts data much faster than a conventional path export. Direct path Export achieves this performance gain by reading data directly, bypassing the SQL Command Processing layer and saves on data copies whenever possible. For added performance, you can set the database to direct read mode. This eliminates contention with other users for database resources because database blocks are read into the Export session’s private buffer, rather than into a public buffer cache. For more information about direct read mode, see the Oracle8 Administrator’s Guide. Figure 1–2 on page 1 - 35 shows how data extraction differs between conventional path and direct path Export. Export 1-33 Direct Path Export In a direct path Export, data is read from disk into the buffer cache and rows are transferred directly to the Export client. The Evaluating Buffer is bypassed. The data is already in the format that Export expects, thus avoiding unnecessary data conversion. The data is transferred to the Export client, which then writes the data into the export file. Invoking a Direct Path Export To use direct path Export, specify the DIRECT=Y parameter on the command line or in the parameter file. The default is DIRECT=N, which extracts the table data using the conventional path. Note: The Export parameter BUFFER applies only to conventional path exports. For direct path Export, use the parameter RECORDLENGTH to specify the size of the buffer that Export uses for writing to the export file. 1-34 Oracle8 Utilities Direct Path Export Figure 1–2 Database Reads on Conventional Path and Direct Path Conventional Path Dump File Direct Path Generate SQL Commands Dump File Generate SQL Commands Export Export Oracle Server Evaluating Buffer Private Buffer or Buffer Cache Oracle Server SQL Command Processing Buffer Cache Management Evaluating Buffer Private Buffer or Buffer Cache Read Database Blocks Database SQL Command Processing Buffer Cache Management Read Database Blocks Database Export 1-35 Direct Path Export Character Set Conversion Direct path Export exports in the database server character set only. If the character set of the export session is not the same as the database character set when an export is initiated, Export displays a warning and aborts. Specify the session character set to be the same as that of the database before retrying the export. Performance Issues To reduce contention with other users for database resources during a direct path Export, you can use database direct read mode. To enable the database direct read mode, enter the following in the INIT.ORA file: compatible = <db_version_number>, The db_version_number must be 7.1.5 or higher. For more information about direct read mode, see the Oracle8 Administrator’s Guide. You may improve performance by increasing the value of the RECORDLENGTH parameter when you invoke a direct path Export. Your exact performance gain varies depending upon the following factors: ■ DB_BLOCK_SIZE ■ the types of columns in your table ■ your I/O layout (The drive receiving the export file should be separate from the disk drive where the database files reside.) When using direct path Export, set the RECORDLENGTH parameter equal to the DB_BLOCK_SIZE database parameter, so that each table scan returns a full database block worth of data. If the data does not fit in the export I/O buffer, the Export utility performs multiple writes to the disk for each database block. The following values are generally recommended for RECORDLENGTH: ■ multiples of the file system I/O block size ■ multiples of DB_BLOCK_SIZE Note: Other factors also affect the use of direct read mode. See the Oracle8 Administrator’s Guide for more information. 1-36 Oracle8 Utilities Incremental, Cumulative, and Complete Exports Restrictions The following restrictions apply when executing a direct path Export: ■ ■ You cannot use direct path Export to export rows that contain LOB, BFILE, REF, or object type columns, including VARRAY columns and nested tables. Only the data definition to create the table is exported, not the data. You cannot use the interactive method to invoke direct path Export. Incremental, Cumulative, and Complete Exports Incremental, cumulative, and complete Exports provide time- and space-effective backup strategies. This section shows how to set up and use these export strategies. Restrictions You can do incremental, cumulative, and complete Exports only in full database mode (FULL=Y). Only users who have the EXP_FULL_DATABASE role can run incremental, cumulative, and complete Exports. This role contains the privileges needed to modify the system tables that track incremental exports. “System Tables” on page 1-43 describes those tables. You cannot specify incremental Exports as read-consistent. Base Backups If you use cumulative and incremental Exports, you should periodically perform a complete Export to create a base backup. Following the complete Export, perform frequent incremental Exports and occasional cumulative Exports. After a given period of time, you should begin the cycle again with another complete Export. Incremental Exports An incremental Export backs up only tables that have changed since the last incremental, cumulative, or complete Export. An incremental Export exports the table definition and all its data, not just the changed rows. Typically, you perform incremental Exports more often than cumulative or complete Exports. Assume that a complete Export was done at Time 1. Figure 1–3 on page 1 - 38 shows an incremental Export at Time 2, after three tables have been modified. Only the modified tables and associated indexes are exported. Export 1-37 Incremental, Cumulative, and Complete Exports Figure 1–3 Incremental Export at Time 2 Database Table 1 Table 3 Export file Table 5 Table 1 Table 3 Index 1 Table 4 Index 5 Table 2 Index 4 Table 6 Table 6 Index 1 Figure 1–4 shows another incremental Export at Time 3, after two tables have been modified since Time 2. Because Table 3 was modified a second time, it is exported at Time 3 as well as at Time 2. Figure 1–4 Incremental Export at Time 3 Database Table 1 Table 3 Export file Table 5 Table 3 Table 4 Index 1 Table 4 Index 5 Table 2 Index 4 Table 6 Index 4 Cumulative Exports A cumulative Export backs up tables that have changed since the last cumulative or complete Export. A cumulative Export compresses a number of incremental Exports into a single cumulative export file. It is not necessary to save incremental export files taken before a cumulative export because the cumulative export file replaces them. 1-38 Oracle8 Utilities Incremental, Cumulative, and Complete Exports Figure 1–5 shows a cumulative Export at Time 4. Tables 1 and 6 have been modified since Time 3. All tables modified since the complete Export at Time 1 are exported. Figure 1–5 Cumulative Export at Time 4 Database Table 1 Table 3 Export file Table 5 Table 1 Table 3 Index 1 Table 4 Index 5 Table 2 Index 4 Table 6 Table 4 Table 6 Index 1 Index 4 This cumulative export file includes the changes from the incremental Exports from Time 2 and Time 3. Table 3, which was modified at both times, occurs only once in the export file. In this way, cumulative exports save space over multiple incremental Exports. Complete Exports A complete Export establishes a base for incremental and cumulative Exports. It is equivalent to a full database Export, except that it also updates the tables that track incremental and cumulative Exports. Figure 1–6 on page 1 - 40 shows a complete Export at Time 5. With the complete Export, all objects in the database are exported regardless of when (or if) they were modified. Benefits Incremental and cumulative Exports help solve the problems faced by administrators who work in environments where many users create their own tables. For example, administrators can restore tables accidentally dropped by users. Export 1-39 Incremental, Cumulative, and Complete Exports The benefits of incremental and cumulative Exports include: ■ smaller export files ■ less time to export These benefits result because not all tables have changed. As a result, the time and space required for an incremental or cumulative Export is shorter than for a full database Export. Figure 1–6 Complete Export at Time 5 Database Table 1 Table 3 Export file Table 5 Table 1 Table 2 Index 1 Table 4 Index 5 Table 2 Index 4 Table 6 Table 3 Table 4 Table 5 Table 6 Index 1 Index 4 Index 5 A Scenario The scenario described in this section shows how you can use cumulative and incremental Exports. Assume that as manager of a data center, you do the following tasks: 1-40 ■ a complete Export (X) every three weeks ■ a cumulative Export (C) every Sunday ■ an incremental Export (I) every night Oracle8 Utilities Incremental, Cumulative, and Complete Exports Your export schedule follows: DAY: 1 2 3 4 5 6 7 8 9 10 11 12 13 14 15 16 17 18 19 20 21 22 X I I I I I I C I I I I I I C I I I I I I X Sun Sun Sun Sun To restore through day 18, first you import the system information from the incremental Export taken on day 18. Then, you import the data from: 1. the complete Export taken on day 1 2. the cumulative Export taken on day 8 3. the cumulative Export taken on day 15 4. three incremental Exports taken on days 16, 17, and 18 The incremental Exports on days 2 through 7 can be discarded on day 8, after the cumulative Export is done, because the cumulative Export incorporates all the incremental Exports. Similarly, the incremental Exports on days 9 through 14 can be discarded after the cumulative Export on day 15. Note: The section “INCTYPE” on page 1-17 explains the syntax to specify incremental, cumulative, and complete Exports. Which Data Is Exported? The purpose of an incremental or cumulative Export is to identify and export only those database objects (such as clusters, tables, views, and synonyms) that have changed since the last Export. Each table is associated with other objects, such as the data, indexes, grants, audits, triggers, and comments. The entire grant structure for tables or views is exported with the underlying base tables. Indexes are exported with their base table, regardless of who created the index. If the base view is included, “instead of” triggers on views are included. Any modification (UPDATE, INSERT, or DELETE) on a table automatically qualifies that table for incremental Export. When a table is exported, all of its inner nested tables and LOB columns are exported also. Modifying an inner nested table column causes the outer table to be exported. Modifying a LOB column causes the entire table containing the LOB data to be exported. Also, the underlying base tables and data are exported if database structures have changed in the following ways: ■ a table is created ■ a table definition is changed by an ALTER TABLE statement Export 1-41 Incremental, Cumulative, and Complete Exports ■ comments are added or edited ■ auditing options are updated ■ grants (of any level) are altered ■ indexes are added or dropped ■ index storage parameters are changed by an ALTER INDEX statement In addition to the base tables and data, the following data is exported: ■ ■ ■ ■ all system objects (including tablespace definitions, rollback segment definitions, and user privileges, but not including temporary segments) information about dropped objects clusters, tables, views, procedures, functions, and synonyms created since the last export all type definitions Note: Export does not export grants on data dictionary views for security reasons that affect Import. If such grants were exported, access privileges would be changed and the user would not be aware of this. Also, not forcing grants on import allows the user more flexibility to set up appropriate grants on import. Example Incremental Export Session The following example shows an incremental Export session after the tables SCOTT.EMP and SCOTT.DEPT are modified: > exp system/manager full=y inctype=incremental Export: Release 8.0.4.0.0 - Production on Fri Nov 7 10:03:22 1997 (c) Copyright 1997 Oracle Corporation. All rights reserved. Connected to: Oracle8 Release 8.0.4.0.0 - Production PL/SQL Release 8.0.4.0.0 - Production Export done in US7ASCII character set and WE8DEC NCHAR character set About to export the entire database ... . exporting tablespace definitions . exporting profiles . exporting user definitions . exporting roles . exporting resource costs 1-42 Oracle8 Utilities Incremental, Cumulative, and Complete Exports . exporting rollback segment definitions . exporting database links . exporting sequence numbers . exporting directory aliases . exporting foreign function library names . exporting object type definitions . exporting cluster definitions . about to export SYSTEM's tables via Conventional Path ... . about to export SCOTT's tables via Conventional Path ... . . exporting table DEPT 8 rows exported . . exporting table EMP 23 rows exported . about to export ADAMS's tables via Conventional Path ... . about to export JONES's tables via Conventional Path ... . about to export CLARK's tables via Conventional Path ... . about to export BLAKE's tables via Conventional Path ... . exporting referential integrity constraints . exporting posttables actions . exporting synonyms . exporting views . exporting stored procedures . exporting triggers . exporting snapshots . exporting snapshot logs . exporting job queues . exporting refresh groups and children . exporting default and system auditing options . exporting information about dropped objects Export terminated successfully without warnings. System Tables The user SYS owns three tables (INCEXP, INCFIL, and INCVID) that are maintained by Export. These tables are updated when you specify RECORD=Y (the default). You should not alter these tables in any way. SYS.INCEXP The table SYS.INCEXP tracks which objects were exported in specific exports. It contains the following columns: You can use this information in several ways. For example, you could generate a report from SYS.INCEXP after each export to document the export file. You can use the views DBA_EXP_OBJECTS, DBA_EXP_VERSION, and DBA_EXP_FILES to display information about incremental exports. Export 1-43 Network Considerations SYS.INCFIL The table SYS.INCFIL tracks the incremental and cumulative exports and assigns a unique identifier to each. This table contains the following columns: When you export with the parameter INCTYPE = COMPLETE, all the previous entries are removed from SYS.INCFIL and a new row is added specifying an “x” in the column EXPTYPE. SYS.INCVID The table SYS.INCVID contains one column for the EXPID of the last valid export. This information determines the EXPID of the next export. Network Considerations This section describes factors to take into account when you use Export and Import across a network. Transporting Export Files Across a Network Because the export file is in binary format, use a protocol that supports binary transfers to prevent corruption of the file when you transfer it across a network. For example, use FTP or a similar file transfer protocol to transmit the file in binary mode. Transmitting export files in character mode causes errors when the file is imported. Exporting and Importing with Net8 By overcoming the boundaries between different machines and operating systems on a network, Net8 (previous versions are called SQL*Net) provides a distributed processing environment for Oracle8 products. With Net8 (and SQL*Net V2), you can perform exports and imports over a network. For example, if you run Export locally, you can write data from a remote Oracle database into a local export file. If you run Import locally, you can read data into a remote Oracle database. To use Export with Net8, include the @connect_string after the username/ password when you enter the exp command, as shown in the following example: exp scott/tiger@SUN2 FILE=export.dmp FULL=Y For the exact syntax of this clause, see the user’s guide for your Net8 or SQL*Net protocol. For more information on Net8 or Oracle Names, see the Net8 Administrator’s Guide. See also “Invoking Export as SYSDBA” on page 1-8 if you are using Tablespace Point-in-Time Recovery. 1-44 Oracle8 Utilities Character Set and NLS Considerations Character Set and NLS Considerations This section describes the behavior of Export and Import with respect to National Language Support (NLS). Character Set Conversion The Export utility writes to the export file using the character set specified for the user session, such as 7-bit ASCII or IBM Code Page 500 (EBCDIC). If necessary, Import translates the data to the character set of its host system. Import converts character data to the user-session character set if that character set is different from the one in the export file. The export file identifies the character encoding scheme used for the character data in the file. If that character set is any single-byte character set (for example, EBCDIC or USASCII7), and if the character set used by the target database is also a single-byte character set, the data is automatically converted to the character encoding scheme specified for the user session during import, as specified by the NLS_LANG environment variable. After the data is converted to the session character set, it is then converted to the database character set. See also “Single-Byte Character Sets During Export and Import” on page 1-46. During the conversion, any characters in the export file that have no equivalent in the target character set are replaced with a default character. (The default character is defined by the target character set.) To guarantee 100% conversion, the target character set should be a superset or equivalent of the source character set. For multi-byte character sets, conversion is performed only if the length of the character string cannot expand as a result of the conversion. When you use direct path Export, the character set of the user’s session must be the same as the database character set. Caution: When the character set width differs between the export client and the export server, truncation of data can occur if conversion causes expansion of data. If truncation occurs, Export displays a warning message. For more information, refer to the National Language Support section of the Oracle8 Reference. NCHAR Conversion During Export and Import The Export utility always exports NCHAR data in the national character set of the Export server. (You specify the national character set with the NATIONAL character set statement at database creation.) Export 1-45 Considerations in Exporting Database Objects The Import utility does no translation of NCHAR data, but, if needed, OCI automatically converts the data to the national character set of the Import server. Single-Byte Character Sets During Export and Import Some 8-bit characters can be lost (that is, converted to 7-bit equivalents) when you import an 8-bit character set export file. This occurs if the client machine has a native 7-bit character set or if the NLS_LANG operating system environment variable is set to a 7-bit character set. Most often, you notice that accented characters lose their accent mark. This situation occurs because the 8-bit characters in the export file are converted to 7-bit characters through the client application. When sent to the database, the 7-bit characters are converted by the server into 8-bit characters. To avoid this situation, you must turn off one of these conversions. One way to do this is to set NLS_LANG to the character set of the export file data. Multi-Byte Character Sets and Export and Import An export file that is produced with a multi-byte character set (for example, Chinese or Japanese) must be imported on a system that has the same character set or where the ratio of the width of the widest character in the import character set to the width of the smallest character in the export character set is 1. If the ratio is not 1, Import cannot translate the character data to the Import character set. Considerations in Exporting Database Objects The following sections describe points you should take into consideration when you export particular database objects. Exporting Sequences If transactions continue to access sequence numbers during an export, sequence numbers can be skipped. The best way to ensure that sequence numbers are not skipped is to ensure that the sequences are not accessed during the export. Sequence numbers can be skipped only when cached sequence numbers are in use. When a cache of sequence numbers has been allocated, they are available for use in the current database. The exported value is the next sequence number (after the cached values). Sequence numbers that are cached, but unused, are lost when the sequence is imported. 1-46 Oracle8 Utilities Considerations in Exporting Database Objects Exporting LONG Datatypes On export, LONG datatypes can be fetched in sections and do not require contiguous memory. However, enough memory must be available to hold the contents of each row, including the LONG data. LONG columns can be up to 2 gigabytes in length. Note: All data in a LOB column does not need to be held in memory at the same time. LOB data is loaded and unloaded in sections. Exporting Foreign Function Libraries The contents of foreign function libraries are not included in the export file. Instead, only the library specification (name, location) is included in full database and user mode export. The database administrator must move the library and update the library specification if the database is moved to a new location. Exporting Directory Aliases Directory alias definitions are included only in a full database mode Export. To move a database to a new location, the database administrator must update the directory aliases to point to the new location. Directory aliases are not included in user or table mode Export. Therefore, you must ensure that the directory alias has been created on the target system before the directory alias is used. Exporting BFILE Columns and Attributes The export file does not hold the contents of external files referenced by BFILE columns or attributes. Instead, only the names and directory aliases for files are copied on Export and restored on Import. If you move the database to a location where the old directories cannot be used to access the included files, the database administrator must move the directories containing the external files to a location where they can be accessed. Exporting Array Data When the Export utility processes array columns and attributes, it allocates a buffer to accommodate an array using the largest dimensions that could be expected for the column or attribute. If the maximum dimension of the array greatly exceeds the memory used in each instance of the array, the Export may result in memory exhaustion. Export 1-47 Considerations in Exporting Database Objects For example, if an array usually had 10 elements, but was dimensioned for a million elements, the Export utility would size its buffers to accommodate a million element instance. Exporting Object Type Definitions In all Export modes, the Export utility includes information about object type definitions used by the tables being exported. The information, including object name and object identifier, is needed to verify that the object type on the target system is consistent with the object instances contained in the dump file. In full database or user mode, the Export utility writes all object type definitions to the export file before it writes the table definitions. In all modes, the Export utility also writes object type definitions for a table to the export file immediately preceding the table definition. This ensures that the object types needed by a table are created with the same object identifier at import time. If the object types already exist on the importing system, this allows Import to verify that the object identifiers are the same. Note however, that the information preceding the table definition does not always include all the object type definitions needed by the table. Note the following points about the information preceding the table definition: ■ ■ ■ ■ ■ If a column is an object type owned by the owner of the table, its full type definition is included. If the object type definition depends on nested or referenced types, those nested or referenced types are exported iteratively, until Export reaches a type not owned by the table owner. If object types from other schemas are used, Export writes a warning message. If the user is not a privileged user, only object type definitions to which the user has execute access are included. If a column is an object type not owned by the owner of the table, the full object type definition is not written to the export file. Only enough information is written to verify that the type exists, with the same object identifier, on the import target system. The user must ensure that the proper type definitions exist on the target system, either by working with the DBA to create them, or by importing them from full database or user mode exports performed by the DBA. 1-48 Oracle8 Utilities Using Different Versions of Export The user must be cautious when performing table mode Import because the full definitions of object types from other schemas are not included in the information preceding the table. It is important to perform a full database mode Export regularly to preserve all object type definitions. Alternatively, if object type definitions from different schemas are used, the DBA should perform a user mode Export of the proper set of users. For example, if Scott’s table TABLE1 contains a column on Blake’s type Type1, the DBA should perform a user mode Export of both Blake and Scott to preserve the type definitions needed by the table. Exporting Advanced Queue (AQ) Tables Queues are implemented on tables. The export and import of queues constitutes the export and import of the underlying queue tables and related dictionary tables. You can export and import queues only at queue table granularity. When you export a queue table, both the table definition information and the queue data are exported. Because the queue table data is exported as well as the table definition, the user is responsible for maintaining application-level data integrity when queue table data is imported. Exporting Nested Tables Inner nested table data is exported whenever the outer containing table is exported. Although inner nested tables can be named, they cannot be exported individually. Using Different Versions of Export This section describes the general behavior and restrictions of running an Export version that is different from Oracle8. Using a Previous Version of Export In general, you can use the Export utility from any Oracle release 7 to export from an Oracle8 server and create an Oracle release 7 export file. (This procedure is described in “Creating Oracle Release 7 Export Files from an Oracle8 Server” on page 1-50.) Oracle Version 6 (or earlier) Export cannot be used against an Oracle8 database. Export 1-49 Creating Oracle Release 7 Export Files from an Oracle8 Server Whenever a lower version Export utility runs with a higher version of the Oracle Server, categories of database objects that did not exist in the lower version are excluded from the export. (See “Excluded Objects” on page 1-51 for a complete list of Oracle8 objects excluded from an Oracle release 7 Export.) Attention: When backward compatibility is an issue, use the earlier release or version of the Export utility against the Oracle8 database, and use conventional path export. Attention: Export files generated by Oracle8 Export, either direct path or conventional path, are incompatible with earlier releases of Import and can be imported only with Oracle8 Import. Using a Higher Version Export Attempting to use a higher version of Export with an earlier Oracle server often produces the following error: EXP-37: Database export views not compatible with Export utility EXP-0: Export terminated unsuccessfully The error occurs because views that the higher version of Export expects are not present. To avoid this problem, use the version of the Export utility that matches the Oracle server. Creating Oracle Release 7 Export Files from an Oracle8 Server You can create an Oracle release 7 export file from an Oracle8 database by running Oracle release 7 Export against an Oracle8 server. To do so, however, the user SYS must first run the CATEXP7.SQL script, which creates the export views that make the database look, to Export, like an Oracle release 7 database. Note: An Oracle8 Export requires that the CATEXP.SQL script is run against the database before performing the Export. CATEXP.SQL is usually run automatically when the user SYS runs CATALOG.SQL to create the necessary views. CATEXP7.SQL, however, is not run automatically and must be executed manually. CATEXP7.SQL and CATEXP.SQL can be run in any order; after one of these scripts has been run, it need not be run again. 1-50 Oracle8 Utilities Creating Oracle Release 7 Export Files from an Oracle8 Server Excluded Objects The Oracle release 7 Export utility produces an Oracle release 7 export file by issuing queries against the views created by CATEXP7.SQL. These views are fully compatible with Oracle release 7 and consequently do not contain the following Oracle8 objects: ■ directory aliases ■ foreign function libraries ■ object types ■ tables containing objects introduced in Oracle8 (such objects include LOB, REF, and BFILE columns and nested tables) ■ partitioned tables ■ Index Organized Tables (IOT) ■ tables containing more than 254 columns ■ tables containing NCHAR columns ■ tables containing VARCHAR columns longer than 2,000 characters ■ reverse indexes ■ password history Exporting to Version 6 If you need to export data from a Version 6 system, use the Oracle release 7.2 or earlier Export utility. Refer to the Oracle release 7.2 or earler documentation for information about any restrictions. Note that release 7.3 cannot be used. Export 1-51 Creating Oracle Release 7 Export Files from an Oracle8 Server 1-52 Oracle8 Utilities 2 Import This chapter describes how to use the Import utility, which reads an export file into an Oracle database. Import reads only export files created by Export. For information on how to export a database, see Chapter 1, “Export”. To load data from other operating system files, see the discussion of SQL*Loader in Part II of this manual. This chapter discusses the following topics: ■ What is the Import Utility? ■ Import Modes ■ Using Import ■ Privileges Required to Use Import ■ Importing into Existing Tables ■ Import Parameters ■ Using Table-Level and Partition-Level Export and Import ■ Example Import Sessions ■ Using the Interactive Method ■ Importing Incremental, Cumulative, and Complete Export Files ■ Controlling Index Creation and Maintenance ■ Reducing Database Fragmentation ■ Warning, Error, and Completion Messages ■ Error Handling Import 2-1 ■ Network Considerations ■ Import and Snapshots ■ Dropping a Tablespace ■ Reorganizing Tablespaces ■ Character Set and NLS Considerations ■ Considerations for Importing Database Objects ■ Generating Statistics on Imported Data ■ Using Oracle7 Export Files ■ Using Oracle Version 6 Export Files ■ Using Oracle Version 5 Export Files Note: If you are working with the Advanced Replication Option, refer to Oracle8 Replication, Appendix B, “Migration and Compatibility.” If you are using Trusted Oracle, see the Trusted Oracle documentation for information about using the Import utility in that environment. 2-2 Oracle8 Utilities What is the Import Utility? What is the Import Utility? The basic concept behind Import is very simple. Import inserts the data objects extracted from one Oracle database by the Export utility (and stored in an Export dump file) into another Oracle database. Export dump file can only be read by Import. See Chapter 1, “Export” for more information about Oracle’s Export utility. Import reads the object definitions and table data that the Export utility extracted from an Oracle database and stored in an Oracle binary-format Export dump file located typically on disk or tape. Such files are typically FTPed or physically transported (in the case of tape) to a different site and used, with the Import utility, to transfer data between databases that are on machines not connected via a network or as backups in addition to normal backup procedures. The Export and Import utilities can also facilitate certain aspects of Oracle Advanced Replication functionality like offline instantiation. See Oracle8 Replication for more information. Note that, Export dump files can only be read by the Oracle utility Import. If you need to load data from ASCII fixed-format or delimited files, see Part II, SQL*Loader of this manual. Note: If you are working with the Advanced Replication Option, refer to the information about migration and compatibility in Oracle8 Replication. If you are using Trusted Oracle, see the Trusted Oracle documentation for information about using the Export utility in that environment. Figure 2–1 illustrates the process of importing from an Export dump file. Import 2-3 What is the Import Utility? Figure 2–1 Importing an Export File Database Export file Table 1 Table 1 Table 3 Table 5 Index 1 Table 4 Index 5 Table 2 Index 4 Table 6 Table 2 Table 3 Table 4 Table 5 Table 6 Index 1 Index 4 Index 5 Table Objects: Order of Import Table objects are imported as they are read from the export file. The export file contains objects in the following order: 1. table definitions 2. table data 3. table indexes 4. integrity constraints, triggers, and bitmap indexes First, new tables are created. Then, data is imported and indexes are built. Then triggers are imported, integrity constraints are enabled on the new tables, and any bitmap indexes are built. This sequence prevents data from being rejected due to the order in which tables are imported. This sequence also prevents redundant triggers from firing twice on the same data (once when it was originally inserted and again during the import). For example, if the EMP table has a referential integrity constraint on the DEPT table and the EMP table is imported first, all EMP rows that reference departments that have not yet been imported into DEPT would be rejected if the constraints were enabled. 2-4 Oracle8 Utilities Import Modes When data is imported into existing tables however, the order of import can still produce referential integrity failures. In the situation just given, if the EMP table already existed and referential integrity constraints were in force, many rows could be rejected. A similar situation occurs when a referential integrity constraint on a table references itself. For example, if SCOTT’s manager in the EMP table is DRAKE, and DRAKE’s row has not yet been loaded, SCOTT’s row will fail, even though it would be valid at the end of the import. Suggestion: For the reasons mentioned previously, it is a good idea to disable referential constraints when importing into an existing table. You can then reenable the constraints after the import is completed. Compatibility Import can read export files created by Export Version 5.1.22 and later. Import Modes The Import utility provides three modes of import. The objects that are imported depend on the Import mode you choose for the import and the mode that was used during the export. All users have two choices of import mode. A user with the IMP_FULL_DATABASE role (a privileged user) has three choices: Table This mode allows you to import specified tables in your schema, rather than all your tables. A privileged user can qualify the tables by specifying the schema that contains them. The default is to import all tables in the schema of the user doing the import. User This mode allows you to import all objects that belong to you (such as tables, data, grants, and indexes). A privileged user importing in user mode can import all objects in the schemas of a specified set of users. Full Database Only users with the IMP_FULL_DATABASE role can import in this mode which imports a Full Database Export dump file. See “Import Parameters” on page 2-16 for information on specifying each mode. A user with the IMP_FULL_DATABASE role must specify one of these options or specify an incremental import. Otherwise, an error results. If a user without the IMP_FULL_DATABASE role fails to specify one of these options, a user-level import is performed. Import 2-5 Import Modes Table 1–1 on page 1 - 4 shows the objects that are exported and imported in each mode. Understanding Table-Level and Partition-Level Import You can import tables and partitions in the following ways: ■ Table-level Import: imports all data from the specified tables in an Export file. ■ Partition-level Import: imports only data from the specified source partitions. You must set the parameter IGNORE = Y when loading data into an existing table. See “IGNORE” on page 2-23 for information on the parameter IGNORE. Table-Level Import For each specified table, table-level Import imports all of the table’s rows. With table-level Import: ■ ■ All tables exported using any Export mode (Full, User, Table) can be imported. Users can import the entire (partitioned or non-partitioned) table or partitions from a table-level export file into a (partitioned or non-partitioned) target table with the same name. If the table does not exist, and if the exported table was partitioned, table-level Import creates a partitioned table. If the table creation is successful, table-level Import reads all of the source data from the export file into the target table. After Import, the target table contains the partition definitions of all of the partitions associated with the source table in the Export file. This operation ensures that the physical and logical attributes (including partition bounds) of the source partitions are maintained on Import. Partition-Level Import Partition-level Import imports a set of partitions from a source table into a target table. Note the following points: ■ ■ ■ 2-6 Oracle8 Utilities Import always stores the rows according to the partitioning scheme of the target table. Partition-level Import lets you selectively retrieve data from the specified partitions in an export file. Partition-level Import inserts only the row data from the specified source partitions. Using Import ■ ■ If the target table is partitioned, partition-level Import rejects any rows that fall above the highest partition of the target table. Partition-level Import can be specified only in table mode. Partition-level Export and Import provide a way to merge partitions in the same table, even though SQL does not explicitly support merging partitions. A DBA can use partition-level Import to merge a table partition into the next highest partition on the same system. See “Example 2: Merging Partitions of a Table” on page 2-38 for an example of merging partitions. Partition-level Export and Import do not provide for splitting a partition. For information on how to split a partition, refer to the Oracle8 Administrator’s Guide. For information about Import, see “Using Table-Level and Partition-Level Export and Import” on page 2-30. Using Import This section describes what you need to do before you begin importing and how to invoke and use the Import utility. Before Using Import To use Import, you must run either the script CATEXP.SQL or CATALOG.SQL (which runs CATEXP.SQL) after the database has been created. Additional Information: The actual names of the script files depend on your operating system. The script file names and the method for running them are described in your Oracle operating system-specific documentation. CATEXP.SQL or CATALOG.SQL need to be run only once on a database. You do not need to run either script again before performing future import operations. Both scripts performs the following tasks to prepare the database for Import: ■ assign all necessary privileges to the IMP_FULL_DATABASE role ■ assign IMP_FULL_DATABASE to the DBA role ■ create required views of the data dictionary Invoking Import You can invoke Import in three ways: ■ Enter the following command: imp username/password PARFILE=filename Import 2-7 Using Import PARFILE is a file containing the Import parameters you typically use. If you use different parameters for different databases, you can have multiple parameter files. This is the recommended method. See “The Parameter File” on page 2-11 for information on how to use the parameter file. ■ Enter the command imp username/password <parameters> replacing <parameters> with various parameters you intend to use. Note that the number of parameters cannot exceed the maximum length of a command line on your operating system. ■ Enter the command imp username/password to begin an interactive session, and let Import prompt you for the information it needs. Note that the interactive method does not provide as much functionality as the parameter-driven method. It exists for backward compatibility. You can use a combination of the first and second options. That is, you can list parameters both in the parameters file and on the command line. In fact, you can specify the same parameter in both places. The position of the PARFILE parameter and other parameters on the command line determines what parameters override others. For example, assume the parameters file params.dat contains the parameter INDEXES=Y and Import is invoked with the following line: imp system/manager PARFILE=params.dat INDEXES=N In this case, because INDEXES=N occurs after PARFILE=params.dat, INDEXES=N overrides the value of the INDEXES parameter in the PARFILE. You can specify the username and password in the parameter file, although, for security reasons, this is not recommended. If you omit the username and password, Import prompts you for it. See “Import Parameters” on page 2-16 for a description of each parameter. Invoking Import as SYSDBA Typically, you should not need to invoke Import as SYSDBA. However, if you are using Tablespace Point-In-Time Recovery (TSPITR) which enables you to quickly recover one or more tablespaces to a point-in-time different from that of the rest of the database, you will need to know how to do so. 2-8 Oracle8 Utilities Using Import Attention: It is recommended that you read the information about TSPITR in the Oracle8 Backup and Recovery Guide, “POINT_IN_TIME_RECOVER” on page 2-26, and “RECOVERY_TABLESPACES” on page 1-19 before continuing with this section. To invoke Import as SYSDBA, use the following syntax: imp username/password AS SYSDBA or, optionally imp username/password@instance AS SYSDBA Note: Since the string “AS SYSDBA” contains a blank, most operating systems require that entire string ‘username/password AS SYSDBA’ be placed in quotes or marked as a literal by some method. Note that some operating systems also require that quotes on the command line be escaped as well. Please see your operating system-specific Oracle documentation for information about special and reserved characters on your system. Note that if either the username or password is omitted, Import will prompt you for it. If you use the Import interactive mode, you will not be prompted to specify whether you want to connect as SYSDBA or @instance. You must specify “AS SYSDBA” and/or “@instance” with the username. So the response to the Import interactive username prompt could be for example: username/password@instance as sysdba username/password@instance username/password as sysdba username/password username@instance as sysdba (prompts for password) username@instance (prompts for password) username (prompts for password) username as sysdba (prompts for password) / as sysdba (no prompt for password, is used) / (no prompt for password, is used) /@instance as sysdba (no prompt for password, is used) /@instance (no prompt for password, is used) OS authentication OS authentication OS authentication OS authentication Import 2-9 Using Import Note: if you omit the password and allow Import to prompt you for it, you cannot specify the @instance string as well. You can specify @instance only with username. Getting Online Help Import provides online help. Enter imp help=y on the command line to see a help printout like the one shown below. > imp help=y Import: Release 8.0.4.0.0 - Production on Fri Nov 07 12:14:11 1997 (c) Copyright 1997 Oracle Corporation. All rights reserved. You can let Import prompt you for parameters by entering the IMP command followed by your username/password: Example: IMP SCOTT/TIGER Or, you can control how Import runs by entering the IMP command followed by various arguments. To specify parameters, you use keywords: Format: IMP KEYWORD=value or KEYWORD=(value1,value2,...,valueN) Example: IMP SCOTT/TIGER IGNORE=Y TABLES=(EMP,DEPT) FULL=N or TABLES=(T1:P1,T1:P2), if T1 is partitioned table USERID must be the first parameter on the command line. Keyword Description (Default) Keyword Description (Default) -------------------------------------------------------------------------USERID username/password FULL import entire file (N) BUFFER size of data buffer FROMUSER list of owner usernames FILE input file (EXPDAT.DMP) TOUSER list of usernames SHOW just list file contents (N) TABLES list of table names IGNORE ignore create errors (N) RECORDLENGTH length of IO record GRANTS import grants (Y) INCTYPE incremental import type INDEXES import indexes (Y) COMMIT commit array insert (N) ROWS import data rows (Y) PARFILE parameter filename LOG log file of screen output DESTROY overwrite tablespace data file (N) INDEXFILE write table/index info to specified file CHARSET character set of export file (NLS_LANG) 2-10 Oracle8 Utilities Privileges Required to Use Import POINT_IN_TIME_RECOVER Tablespace Point-in-time Recovery (N) SKIP_UNUSABLE_INDEXES skip maintenance of unusable indexes (N) ANALYZE execute ANALYZE statements in dump file (Y) FEEDBACK display progress every x rows(0) VOLSIZE number of bytes in file on each volume of a file on tape Import terminated successfully without warnings. The Parameter File The parameter file allows you to specify Import parameters in a file where they can be easily modified or reused. Create a parameter file using any flat file text editor. The command line option PARFILE=<filename> tells Import to read the parameters from the specified file rather than from the command line. For example: imp parfile=filename or imp username/password parfile=filename The syntax for parameter file specifications is one of the following: KEYWORD=value KEYWORD=(value) KEYWORD=(value1, value2, ...) You can add comments to the parameter file by preceding them with the pound (#) sign. All characters to the right of the pound (#) sign are ignored. The following is an example of a partial parameter file listing: FULL=Y FILE=DBA.DMP GRANTS=Y INDEXES=Y # import all indexes See “Import Parameters” on page 2-16 for a description of each parameter. Privileges Required to Use Import This section describes the privileges you need to use the Import utility and to import objects into your own and others’ schemas. Import 2-11 Privileges Required to Use Import Access Privileges To use Import, you need the privilege CREATE SESSION to log on to the Oracle8 server. This privilege belongs to the CONNECT role established during database creation. You can do an import even if you did not create the export file. However, if the export file was created by someone using the EXP_FULL_DATABASE role, you can import that file only if you have the IMP_FULL_DATABASE role. Importing Objects into Your Own Schema Table 2–1 lists the privileges required to import objects into your own schema. All of these privileges initially belong to the RESOURCE role. Table 2–1 Privileges Required to Import Objects into Your Own Schema Object Privileges clusters CREATE CLUSTER And: database links system tablespace quota, or UNLIMITED TABLESPACE system CREATE DATABASE LINK system CREATE SESSION on remote db system database triggers CREATE TRIGGER system indexes CREATE INDEX system And: integrity constraints 2-12 Privilege Type Oracle8 Utilities tablespace quota, or UNLIMITED TABLESPACE system ALTER TABLE object Privileges Required to Use Import Table 2–1 Privileges Required to Import Objects into Your Own Schema Object Privileges Privilege Type libraries CREATE ANY LIBRARY system packages CREATE PROCEDURE system private synonyms CREATE SYNONYM system sequences CREATE SEQUENCE system snapshots CREATE SNAPSHOT system stored functions CREATE PROCEDURE system stored procedures CREATE PROCEDURE system table data INSERT TABLE object table definitions CREATE TABLE system (including comments And: and audit options) tablespace quota, or UNLIMITED TABLESPACE views And: system CREATE VIEW system SELECT on the base table, or object SELECT ANY TABLE system object types CREATE TYPE system foreign function libraries CREATE LIBRARY system Importing Grants To import the privileges that a user has granted to others, the user initiating the import must either own the objects or have object privileges with the WITH GRANT OPTION. Table 2–2 shows the required conditions for the authorizations to be valid on the target system. Table 2–2 Privileges Required to Import Grants Grant Conditions object privileges Object must exist in the user’s schema, or user must have the object privileges with the WITH GRANT OPTION. system privileges User must have system privileges as well as the WITH ADMIN OPTION. Import 2-13 Importing into Existing Tables Importing Objects into Other Schemas To import objects into another user’s schema, you must have the IMP_FULL_DATABASE role enabled. Importing System Objects To import system objects from a full database export file, the role IMP_FULL_DATABASE must be enabled. The parameter FULL specifies that these system objects are included in the import when the export file is a full export: ■ profiles ■ public database links ■ public synonyms ■ roles ■ rollback segment definitions ■ system audit options ■ system privileges ■ tablespace definitions ■ tablespace quotas ■ user definitions ■ directory aliases User Privileges When user definitions are imported into an Oracle database, they are created with the CREATE USER command. So, when importing from export files created by previous versions of Export, users are not granted CREATE SESSION privileges automatically. Importing into Existing Tables This section describes factors to take into account when you import data into existing tables. 2-14 Oracle8 Utilities Importing into Existing Tables Manually Creating Tables before Importing Data When you choose to create tables manually before importing data into them from an export file, you should use either the same table definition previously used or a compatible format. For example, while you can increase the width of columns and change their order, you cannot do the following: ■ ■ ■ add NOT NULL columns change the datatype of a column to an incompatible datatype (LONG to NUMBER, for example) change the definition of object types used in a table Disabling Referential Constraints In the normal import order, referential constraints are imported only after all tables are imported. This sequence prevents errors that could occur if a referential integrity constraint existed for data that has not yet been imported. These errors can still occur when data is loaded into existing tables, however. For example, if table EMP has a referential integrity constraint on the MGR column that verifies the manager number exists in EMP, a perfectly legitimate employee row might fail the referential integrity constraint if the manager’s row has not yet been imported. When such an error occurs, Import generates an error message, bypasses the failed row, and continues importing other rows in the table. You can disable constraints manually to avoid this. Referential constraints between tables can also cause problems. For example, if the AEMP table appears before the BDEPT table in the export file, but a referential check exists from the AEMP table into the BDEPT table, some of the rows from the AEMP table may not be imported due to a referential constraint violation. To prevent errors like these, you should disable referential integrity constraints when importing data into existing tables. Manually Ordering the Import When the constraints are re-enabled after importing, the entire table is checked, which may take a long time for a large table. If the time required for that check is too long, it may be beneficial to order the import manually. Import 2-15 Import Parameters To do so, do several imports from an export file instead of one. First, import tables that are the targets of referential checks, before importing the tables that reference them. This option works if tables do not reference each other in circular fashion, and if a table does not reference itself. Import Parameters The following diagrams show the syntax for the parameters that you can specify in the parameter file or on the command line: The remainder of this section describes each parameter. Y HELP = N @ username imp 2-16 Oracle8 Utilities / password connect–string ImpOpts_1 ImpOpts_2 Import Parameters SYSTEM INCTYPE = RESTORE TOUSER FULL = = username Y , ( FROMUSER username ) = username TOUSER option TABLES option Y POINT_IN_TIME_RECOVER = N Import 2-17 Import Parameters PARFILE = filename FILE = filename LOG = filename Y ROWS = N Y COMMIT = N FEEDBACK = BUFFER = integer integer RECORDLENGTH = integer Y IGNORE = N Y DESTROY = N Y INDEXES = N INDEXFILE = filename Y SKIP_UNUSABLE_INDEXES = N Y GRANTS = N Y ANALYZE = N CHARSET = charactersetname Y SHOW = N 2-18 Oracle8 Utilities Import Parameters , ( TOUSER username ) = username , : ( TABLES partition tablename = ) : partition tablename The parameters are as follows: ANALYZE Default: Y Specifies whether or not the Import utility executes SQL ANALYZE statements found in the export file. BUFFER Default: operating system-dependent The buffer-size is the size, in bytes, of the buffer through which data rows are transferred. The parameter BUFFER (buffer size) determines the number of rows in the array inserted by Import. The following formula gives an approximation of the buffer size that inserts a given array of rows: buffer_size = rows_in_array * maximum_row_size Import 2-19 Import Parameters For tables containing LONG, LOB, BFILE, REF, ROWID or type columns, rows are inserted individually. The size of the buffer must be large enough to contain the entire row, except for LOB columns. If the buffer cannot hold the longest row in a table, Import attempts to allocate a larger buffer. Additional Information: See your Oracle operating system-specific documentation to determine the default value for this parameter. CHARSET Default: none Note: This parameter applies to Oracle Version 5 and 6 export files only. Oracle Version 5 and 6 export files do not contain the NLS character set identifier. However, a Version 5 or 6 export file does indicate whether the user session character set was ASCII or EBCDIC. Use this parameter to indicate the actual character set used at the time of export. The Import utility will verify whether the specified character set is ASCII or EBCDIC based on the character set in the export file. If you do not specify a value for the CHARSET parameter, Import will verify that the user session character set is ASCII, if the export file is ASCII, or EBCDIC, if the export file is EBCDIC. Use of this parameter is not recommended. It is provided only for compatibility with previous versions. Eventually, it will no longer be supported. If you are using an Oracle7 or Oracle8 Export file, the character set is specified within the export file, and conversion to the current database’s character set is automatic. Specification of this parameter serves only as a check to ensure that the export file’s character set matches the expected value. If not, an error results. COMMIT Default: N Specifies whether Import should commit after each array insert. By default, Import commits after loading each table, and Import performs a rollback when an error occurs, before continuing with the next object. If a table has nested table columns or attributes, the contents of the nested tables are imported as separate tables. Therefore, the contents of the nested tables are always committed in a transaction distinct from the transaction used to commit the outer table. 2-20 Oracle8 Utilities Import Parameters If COMMIT=N and a table is partitioned, each partition in the Export file is imported in a separate transaction. Specifying COMMIT=Y prevents rollback segments from growing inordinately large and improves the performance of large imports. Specifying COMMIT=Y is advisable if the table has a uniqueness constraint. If the import is restarted, any rows that have already been imported are rejected with a non-fatal error. Note that, if a table does not have a uniqueness constraint, and you specify COMMIT=Y, Import could produce duplicate rows when you re-import the data. For tables containing LONG, LOB, BFILE, REF, ROWID or type columns, array inserts are not done. If COMMIT=Y, Import commits these tables after each row. DESTROY Default: N Specifies whether or not the existing data files making up the database should be reused. That is, the DESTROY parameter specifies that Import should include the reuse option in the datafile clause of the CREATE TABLESPACE command. The export file contains the datafile names used in each tablespace. If you attempt to create a second database on the same machine (for testing or other purposes), the Import utility overwrites the original database’s data files when it creates the tablespace. This is undesirable. With this parameter set to N (the default), an error occurs if the data files already exist when the tablespace is created. To eliminate this error when you import into a secondary database, pre-create the tablespace and specify its data files. (Specifying IGNORE=Y suppresses the object creation error that the tablespace already exists.) To bypass the error when you import into the original database, specify IGNORE=Y to add to the existing data files without replacing them. To reuse the original database’s data files after eliminating their contents, specify DESTROY=Y. Note: If you have pre-created your tablespace, you must specify DESTROY=N or your pre-created tablespace will be lost. Warning: If datafiles are stored on a raw device, DESTROY=N does not prevent files from being overwritten. Import 2-21 Import Parameters FEEDBACK Default: 0 (zero) Specifies that Import should display a progress meter in the form of a dot for n number of rows imported. For example, if you specify FEEDBACK=10, Import displays a dot each time 10 rows have been imported. The FEEDBACK value applies to all tables being imported; it cannot be set on a per-table basis. FILE Default: expdat.dmp The name of the export file to import. You do not have to be the Oracle user who exported the file. However, you do need to have current access to the file. The default extension is .dmp, but you can specify any extension. FROMUSER Default: none A list of schemas containing objects to import. The default for users without the IMP_FULL_DATABASE role is a user mode import. That is, all objects for the current user are imported. (If the TABLES parameter is also specified, a table mode import is performed.) When importing in user mode, all other objects in the export file are ignored. The effect is the same as if the export file had been created in user mode (or table mode). See Table 1–1 on page 1 - 4 for the list of objects that are imported in user mode and table mode. For example, the following command treats the export file as though it were simply a user mode export of SCOTT’s objects: imp system/manager FROMUSER=scott If user SCOTT does not exist in the current database, his objects are imported into the importer’s schema — in this case, the system’s. Otherwise, the objects are imported in SCOTT’s schema. If a list of schemas is given, each schema can be specified only once. Duplicate schema names are ignored. The following example shows an import from two schemas: imp system/manager FROMUSER=scott,blake Note: Specifying FROMUSER=SYSTEM does not import system objects. It imports only those objects that belong to user SYSTEM. 2-22 Oracle8 Utilities Import Parameters When FROMUSER is specified and TOUSER is missing, the objects of FROMUSER are imported back to FROMUSER. However, if the schema specified in FROMUSER does not exist in the current database, the objects are imported into the importer’s schema. To import system objects (for example, user definitions and tablespaces), you must import from a full export file specifying FULL=Y. FULL Default: N Specifies whether to import the entire export file. GRANTS Default: Y Specifies whether to import object grants. By default, the Import utility imports any object grants that were exported. If the export was a user-mode Export, the export file contains only first-level object grants (those granted by the owner). If the export was a full database mode Export, the export file contains all object grants, including lower-level grants (those granted by users given a privilege with the WITH GRANT OPTION). If you specify GRANTS=N, the Import utility does not import object grants. (Note that system grants are imported even if GRANTS=N. Note: Export does not export grants on data dictionary views for security reasons that affect Import. If such grants were exported, access privileges would be changed and the user would not be aware of this. Also, not forcing grants on import allows the user more flexibility to set up appropriate grants on import. HELP Default: N Displays a description of the Import parameters. IGNORE Default: N Specifies how object creation errors should be handled. If you specify IGNORE=Y, Import overlooks object creation errors when it attempts to create database objects. If you specify IGNORE=Y, Import continues without reporting the error. Import 2-23 Import Parameters If you accept the default IGNORE=N, Import logs and/or displays the object creation error before continuing. For tables, IGNORE=Y causes rows to be imported into existing tables. No message is given. IGNORE=N causes an error to be reported, and the table is skipped if it already exists. Note that only object creation errors are ignored; other errors, such as operating system, database, and SQL errors, are not ignored and may cause processing to stop. In situations where multiple refreshes from a single export file are done with IGNORE=Y, certain objects can be created multiple times (although they will have unique system-defined names). You can prevent this for certain objects (for example, constraints) by doing an export in table mode with the CONSTRAINTS=N parameter. Note that, if you do a full export with the CONSTRAINTS parameter set to N, no constraints for any tables are exported. If you want to import data into tables that already exist— perhaps because you want to use new storage parameters, or because you have already created the table in a cluster — specify IGNORE=Y. The Import utility imports the rows of data into the existing table. Warning: When you import into existing tables, if no column in the table is uniquely indexed, rows could be duplicated if they were already present in the table. (This warning applies to non-incremental imports only. Incremental imports replace the table from the last complete export and then rebuild it to its last backup state from a series of cumulative and incremental exports.) INCTYPE Default: undefined Specifies the type of incremental import. The options are: 2-24 SYSTEM Imports the most recent version of system objects. You should specify the most recent incremental export file when you use this option. A SYSTEM import imports foreign function libraries and object type definitions, but does not import user data or objects. RESTORE Imports all user database objects and data contained in the export file. Oracle8 Utilities Import Parameters See “Importing Incremental, Cumulative, and Complete Export Files” on page 2-43 for more information about the INCTYPE parameter. INDEXES Default: Y Specifies whether or not to import indexes. System-generated indexes such as LOB indexes, OID indexes, or unique constraint indexes are re-created by Import regardless of the setting of this parameter. If indexes for the target table already exist, Import performs index maintenance when data is inserted into the table. You can postpone all user-generated index creation until after Import completes by specifying INDEXES = N. INDEXFILE Default: none Specifies a file to receive index-creation commands. When this parameter is specified, index-creation commands for the requested mode are extracted and written to the specified file, rather than used to create indexes in the database. Tables and other database objects are not imported. The file can then be edited (for example, to change storage parameters) and used as a SQL script to create the indexes. To make it easier to identify the indexes defined in the file, the export file’s CREATE TABLE statements and CREATE CLUSTER statements are included as comments. Note: Since Release 7.1, the commented CREATE TABLE statement in the indexfile does not include primary/unique key clauses. Perform the following steps to use this feature: 1. Import using the INDEXFILE parameter to create a file of index-creation commands. 2. Edit the file, making certain to add a valid password to the CONNECT string. 3. Rerun Import, specifying INDEXES=N. [This step imports the database objects while preventing Import from using the index definitions stored in the export file.] Import 2-25 Import Parameters 4. Execute the file of index-creation commands as a SQL script to create the index. The INDEXFILE parameter can be used only with the FULL=Y, FROMUSER, TOUSER, or TABLES parameters. LOG Default: none Specifies a file to receive informational and error messages. If you specify a log file, the Import utility writes all information to the log in addition to the terminal display. PARFILE Default: undefined Specifies a filename for a file that contains a list of Import parameters. For more information on using a parameter file, see “The Parameter File” on page 2-11. POINT_IN_TIME_RECOVER Default: N Indicates whether or not Import recovers one or more tablespaces in an Oracle database to a prior point in time, without affecting the rest of the database. For more information, see the Oracle8 Backup and Recovery Guide. RECORDLENGTH Default: operating system-dependent Specifies the length, in bytes, of the file record. The RECORDLENGTH parameter is necessary when you must transfer the export file to another operating system that uses a different default value. If you do not define this parameter, it defaults to your platform-dependent value for BUFSIZ. For more information about the BUFSIZ default value, see your operating system-specific documentation. You can set RECORDLENGTH to any value equal to or greater than your system’s BUFSIZ. (The highest value is 64KB.) Changing the RECORDLENGTH parameter affects only the size of data that accumulates before writing to the disk. It does not affect the operating system file block size. Note: You can use this parameter to specify the size of the Export I/O buffer. 2-26 Oracle8 Utilities Import Parameters Additional Information: See your Oracle operating system-specific documentation to determine the proper value or to create a file with a different record size. ROWS Default: Y Specifies whether or not to import the rows of table data. SHOW Default: N When you specify SHOW, the contents of the export file are listed to the display and not imported. The SQL statements contained in the export are displayed in the order in which Import will execute them. The SHOW parameter can be used only with the FULL=Y, FROMUSER, TOUSER, or TABLES parameters. SKIP_UNUSABLE_INDEXES Default: N Specifies whether or not Import skips building indexes that were set to the Index Unusable state (set by either system or user). Refer to “ALTER SESSION SET SKIP_UNUSABLE_INDEXES=TRUE” in the Oracle8 SQL Reference manual for details. Other indexes (not previously set Index Unusable) continue to be updated as rows are inserted. This parameter allows you to postpone index maintenance on selected index partitions until after row data has been inserted. You then have the responsibility to rebuild the affected index partitions after the Import. You can use the INDEXFILE parameter in conjunction with INDEXES = N to provide the SQL scripts for re-creating the index. Without this parameter, row insertions that attempt to update unusable indexes fail. TABLES Default: none Specifies a list of table names to import. Use an asterisk (*) to indicate all tables. When specified, this parameter initiates a table mode import, which restricts the import to tables and their associated objects, as listed in Table 1–1 on page 1 - 4. The Import 2-27 Import Parameters number of tables that can be specified at the same time is dependent on command line limits. Any table-level Import or partition-level Import attempts to create a partitioned table with the same partition names as the exported partitioned table, including names of the form SYS_Pnnn. If a table with the same name already exists, Import processing depends on the setting of the IGNORE parameter. Unless SKIP_UNUSABLE_INDEXES=Y, inserting the exported data into the target table fails if Import cannot update a non-partitioned index or index partition that is marked Indexes Unusable or otherwise not suitable. Although you can qualify table names with schema names (as in SCOTT.EMP) when exporting, you cannot do so when importing. In the following example, the TABLES parameter is specified incorrectly: imp system/manager TABLES=(jones.accts, scott.emp,scott.dept) The valid specification to import these tables is: imp system/manager FROMUSER=jones TABLES=(accts) imp system/manager FROMUSER=scott TABLES=(emp,dept) If TOUSER is specified, SCOTT’s objects are stored in the schema specified by TOUSER. If user SCOTT does not exist in the current database, his tables are imported into the importer’s schema — system in the previous example. Otherwise, the tables and associated objects are installed in SCOTT’s schema. Additional Information: Some operating systems, such as UNIX, require that you use escape characters before special characters, such as a parenthesis, so that the character is not treated as a special character. On UNIX, use a backslash (\) as the escape character, as shown in the following example: TABLES=\(EMP,DEPT\) Table Name Restrictions Table names specified on the command line or in the parameter file cannot include a pound (#) sign, unless the table name is enclosed in quotation marks. For example, if the parameter file contains the following line, Import interprets everything on the line after EMP# as a comment. As a result, DEPT and MYDATA are not imported. TABLES=(EMP#, DEPT, MYDATA) 2-28 Oracle8 Utilities Import Parameters However, if the parameter file contains the following line, the Import utility imports all three tables: TABLES=(”EMP#”, DEPT, MYDATA) Attention: When you specify the table name in quotation marks, it is case sensitive. The name must exactly match the table name stored in the database. By default, database names are stored as uppercase. Additional Information: Some operating systems require single quotes instead of double quotes. See your Oracle operating system-specific documentation. TOUSER Default: none Specifies a list of usernames whose schemas will be imported. The IMP_FULL_DATABASE role is required to use this parameter. To import to a different schema than the one that originally contained the object, specify TOUSER. For example: imp system/manager FROMUSER=scott TOUSER=joe TABLES=emp If multiple schemas are specified, the schema names are paired. The following example imports SCOTT’s objects into JOE’s schema, and FRED’s objects into TED’s schema: imp system/manager FROMUSER=scott,fred TOUSER=joe,ted Note: If the FROMUSER list is longer than the TOUSER list, you can use the following syntax to ensure that any extra objects go into the TOUSER schema: emp system/manager FROMUSER=scott TOUSER=ted,ted Note that user Ted is listed twice. USERID Default: undefined Specifies the username/password (and optional connect string) of the user performing the import. When using Tablespace Point-in-Time-Recovery USERID can also be: username/password AS SYSDBA Import 2-29 Using Table-Level and Partition-Level Export and Import or username/password@instance AS SYSDBA See “Invoking Import as SYSDBA” on page 2-8 for more information. Note also that your operating system may require you to treat AS SYSDBA as a special string requiring you to enclose the entire string in quotes as described on 2 - 8. Optionally, you can specify the @connect_string clause for Net8. See the user’s guide for your Net8 protocol for the exact syntax of @connect_string. See also Oracle8 Distributed Database Systems. Using Table-Level and Partition-Level Export and Import Both table-level Export and partition-level Export can migrate data across tables and partitions. Guidelines for Using Partition-Level Import This section provides more detailed information about partition-level Import. For general information, see “Understanding Table-Level and Partition-Level Import” on page 2-6. Partition-level Import cannot import a non-partitioned exported table. However, a partitioned table can be imported from a non-partitioned exported table using table-level Import. Partition-level Import is legal only if the source table (that is, the table called tablename at export time) was partitioned and exists in the Export file. ■ ■ If the partition name is not a valid partition in the export file, Import generates a warning. The partition name in the clause refers to only the partition in the Export file, which may not contain all of the data of the entire table on the export source system. If ROWS = Y (default), and the table does not exist in the Import target system, all of the rows for the specified partition in the table are inserted into the same partition in the table in the Import target system. If ROWS = Y (default), but the table already existed before Import, all the rows for the specified partition in the table are inserted into the table. The rows are stored according to the partitioning scheme of the target table. If the target table is partitioned, Import reports any rows that are rejected because they fall above the highest partition of the target table. 2-30 Oracle8 Utilities Using Table-Level and Partition-Level Export and Import If ROWS = N, Import does not insert data into the target table and continues to process other objects associated with the specified table and partition in the file. If the target table is non-partitioned, the partitions are imported into the entire table. Import requires IGNORE = Y to import one or more partitions from the Export file into a non-partitioned table on the import target system. Migrating Data Across Partitions and Tables The presence of a table-name:partition-name with the TABLES parameter results in reading from the Export file only data rows from the specified source partition. If you do not specify the partition name, the entire table is used as source. Import issues a warning if the specified partition is not in the list of partitions in the exported table. Data exported from one or more partitions can be imported into one or more partitions. Import inserts rows into partitions based on the partitioning criteria in the import database. In the following example, the Import utility imports the row data from the source partition py of table scott.b into the py partition of target table scott.b, after the table and its partitions are created: imp system/manager FILE = export.dmp FROMUSER = scott TABLES=b:py The following example causes row data of partitions qc and qd of table scott.e to be imported into the table scott.e: imp scott/tiger FILE = export.dmp TABLES = (e:qc, e:qd) IGNORE=y If table “e” does not exist on the Import target system, it is created and data is inserted into the same partitions. If table “e” existed on the target system before Import, the row data is inserted into the partitions whose range allows insertion. The row data can end up in partitions of names other than qc and qd. Note: With partition-level Import to an existing table, you must set up the target partitions properly and use IGNORE=Y. Combining Multiple Partitions into One Partition merging allows data from multiple partitions to be merged into one partition on the target system. Because partitions are re-created identical to those on the exported table when IGNORE=N, partition merging succeeds only when IGNORE = Y and the partitioned table with the proper partition bounds exists on the Import target system. The following example assumes the presence of the Import 2-31 Using Table-Level and Partition-Level Export and Import Export file (exp.dmp) containing a partitioned table “c” that has partitions qa, qb, and qc. Prior to Import, the target table c is created with partitions, including the qc partition. Partition qd is created with a partition range that can take row data from partitions qa and qb of source table “c”. imp mary/lamb FILE = exp.dmp TABLES = (c:qa, c:qb) IGNORE = Y This command line causes Import to import partitions qa and qb of table mary.c into partition qd of mary.c in the Import target system. See “Example 2: Merging Partitions of a Table” on page 2-38 for an additional example of merging partitions. Reconfiguring Partitions You can use partition-level Export and Import to reconfigure partitions. Perform the following steps: 1. Export the table to save the data. 2. Alter the table with the new partitioning scheme. 3. Import the table data. For example, a user can move data that was previously stored in partitions P1 and P2 in table T into partitions of different ranges of table T on the same system. Assume that the source table T has other partitions besides P1 and P2. Assume that the target partitions are now called P1, P2, P3, and P4. The following steps can be used: 1. Export data from partition P1, P2 of Table T (or export table T). 2. Alter the table by performing the following: Issue the SQL statement ALTER TABLE T DROP PARTITION for P1 and P2. Issue the SQL statement ALTER TABLE T ADD PARTITION for P1, P2, P3, and P4. 3. Import data from exported partitions P1 and P2 (or import table T) with IGNORE = Y. If the target table is partitioned, Import rejects any rows that fall above the highest partition of the target table. If you want to achieve some parallelism, export each partition of the original table at the same time into separate files. After you create the table again, issue multiple import commands to import each of the export files in parallel. 2-32 Oracle8 Utilities Example Import Sessions Example Import Sessions This section gives some examples of import sessions that show you how to use the parameter file and command-line methods. The examples illustrate four scenarios: ■ tables imported by an administrator into the same schema from which they were exported ■ tables imported by a user from another schema into the user’s own schema ■ tables imported into a different schema by an administrator ■ tables imported using partition-level Import Example Import of Selected Tables for a Specific User In this example, using a full database export file, an administrator imports the DEPT and EMP tables into the SCOTT schema. If the SCOTT schema does not exist, the tables are imported into the SYSTEM schema. Parameter File Method > imp system/manager parfile=params.dat The params.dat file contains the following information: FILE=dba.dmp SHOW=n IGNORE=n GRANTS=y FROMUSER=scott TABLES=(dept,emp) Command-Line Method > imp system/manager file=dba.dmp fromuser=scott tables= (dept,emp) Import Messages Import: Release 8.0.4.0.0 - Production on Mon Nov 7 10:22:12 1997 (c) Copyright 1997 Oracle Corporation. All rights reserved. Connected to: Oracle8 Server Release 8.0.4.0.0 - Production PL/SQL Release 8.0.4.0.0 - Production Export file created by EXPORT:V08.00.03 via conventional path Import 2-33 Example Import Sessions . importing SCOTT's objects into SCOTT . . importing table "DEPT" . . importing table "EMP" Import terminated successfully without warnings. 4 rows imported 14 rows imported Example Import of Tables Exported by Another User This example illustrates importing the UNIT and MANAGER tables from a file exported by BLAKE into the SCOTT schema. Parameter File Method > imp scott/tiger parfile=params.dat The params.dat file contains the following information: FILE=blake.dmp SHOW=n IGNORE=n GRANTS=y ROWS=y FROMUSER=blake TOUSER=scott TABLES=(unit,manager) Command-Line Method > imp scott/tiger fromuser=blake touser=scott file=blake.dmp tables=(unit,manager) Import Messages Import: Release 8.0.4.0.0 - Production on Fri Nov 7 14:55:17 1997 (c) Copyright 1997 Oracle Corporation. All rights reserved. Connected to: Oracle8 Server Release 8.0.4.0.0 - Production PL/SQL Release 8.0.4.0.0 - Production Export file created by EXPORT:V08.00.04 via conventional path Warning: the objects were exported by BLAKE, not by you . importing BLAKE's objects into SCOTT . . importing table "UNIT" 4 rows imported . . importing table "MANAGER" 4 rows imported Import terminated successfully without warnings. 2-34 Oracle8 Utilities Example Import Sessions Example Import of Tables from One User to Another In this example, a DBA imports all tables belonging to SCOTT into user BLAKE’s account. Parameter File Method > imp system/manager parfile=params.dat The params.dat file contains the following information: FILE=scott.dmp FROMUSER=scott TOUSER=blake TABLES=(*) Command-Line Method > imp system/manager file=scott.dmp fromuser=scott touser=blake tables=(*) Import Messages Import: Release 8.0.4.0.0 - Production on Fri Nov 7 21.14.1 1997 (c) Copyright 1997 Oracle Corporation. All rights reserved. Connected to: Oracle8 Server Release 8.0.4.0.0 - Production PL/SQL Release 8.0.4.0.0 - Production Export file created by EXPORT:V08.00.04 via conventional path Warning: the objects were exported by SCOTT, not by you . . importing table "BONUS" 0 . . importing table "DEPT" 4 . . importing table "EMP" 14 . . importing table "SALGRADE" 5 Import terminated successfully without warnings. rows rows rows rows imported imported imported imported Example Import Session Using Partition-Level Import This section describes how to use partition-level Import to partition an unpartitioned table, merge partitions of a table, and repartition a table on a different column. Import 2-35 Example Import Sessions The examples in this section assume that the following tablespaces exist: ■ tbs_e1, tbs_e2, tbs_e3 ■ tbs_d1, tbs_d2, tbs_d3 Example 1: Partitioning an Unpartitioned Table Perform the following steps to partition an unpartitioned table: 1. Export the table to save the data. 2. Drop the table from the database. 3. Create the table again with partitions. 4. Import the table data. The following example shows how to partition an unpartitioned table: > exp scott/tiger tables=emp file=empexp.dmp . . . About to export specified tables via Conventional Path ... . . exporting table EMP 14 rows exported Export terminated successfully without warnings. . . . SQL> drop table emp cascade constraints; Table dropped. SQL> create table emp 2 ( 3 empno number(4) not null, 4 ename varchar2(10), 5 job varchar2(9), 6 mgr number(4), 7 hiredate date, 8 sal number(7,2), 9 comm number(7,2), 10 deptno number(2) 11 ) 12 partition by range (empno) 13 ( 14 partition emp_low values less than (7600) 15 tablespace tbs_e1, 16 partition emp_mid values less than (7900) 2-36 Oracle8 Utilities Example Import Sessions 17 tablespace tbs_e2, 18 partition emp_high values less than (8100) 19 tablespace tbs_e3 20 ); Table created. SQL> exit imp scott/tiger tables=emp file=empexp.dmp ignore=y . .. Export file created by EXPORT:V08.00.03 via conventional path . importing SCOTT's objects into SCOTT . . importing table "EMP" 14 rows imported Import terminated successfully without warnings The following SELECT statements show that the data is partitioned on the empno column: SQL> select empno from emp partition (emp_low); EMPNO ---------7369 7499 7521 7566 4 rows selected. SQL> select empno from emp partition (emp_mid); EMPNO ---------7654 7698 7782 7788 7839 7844 7876 7 rows selected. SQL> select empno from emp partition (emp_high); EMPNO ---------7900 7902 7934 3 rows selected. Import 2-37 Example Import Sessions Example 2: Merging Partitions of a Table This example assumes the EMP table has three partitions, based on the EMPNO column, as shown in Example 1. Perform the following steps to merge partitions of a table: 1. Export the partition you want to merge. This saves the data. 2. Alter the table to delete the partition you want to merge. 3. Import the partition to be merged. The following example shows how to merge partitions of a table: exp scott/tiger tables=emp:emp_mid file=empprt.dmp . . . About to export specified tables via Conventional Path ... . . exporting table EMP . . exporting partition EMP_MID 7 rows exported Export terminated successfully without warnings. . . . SQL> alter table emp drop partition emp_mid; Table altered. . . . imp scott/tiger fromuser=scott tables=emp:emp_mid file=empprt.dmp ignore=y . . . Export file created by EXPORT:V08.00.04 via conventional path . importing SCOTT's objects into SCOTT . . importing partition "EMP":"EMP_MID" 7 rows imported Import terminated successfully without warnings. 2-38 Oracle8 Utilities Example Import Sessions The following SELECT statements show the data from the deleted EMP_MID partition now merged in the EMP_HIGH partition: SQL> select empno from emp partition (emp_low); EMPNO ---------7369 7499 7521 7566 4 rows selected. SQL> select empno from emp partition (emp_high); EMPNO ---------7900 7902 7934 7654 7698 7782 7788 7839 7844 7876 10 rows selected. Example 3: Repartitioning a Table on a Different Column This example assumes the EMP table has two partitions, based on the EMPNO column, as shown in Example 2. This example repartitions the EMP table on the DEPTNO coumn. Perform the following steps to repartition a table on a different column: 1. Export the table to save the data. 2. Delete the table from the database. 3. Create the table again with the new partitions. 4. Import the table data. The following example shows how to repartition a table on a different column: exp scott/tiger tables=emp file=empexp.dat . . . Import 2-39 Example Import Sessions About to export specified tables via Conventional Path ... . . exporting table EMP . . exporting partition EMP_LOW . . exporting partition EMP_HIGH Export terminated successfully without warnings. . . . SQL> drop table emp cascade constraints; Table dropped. SQL> SQL> create table emp 2 ( 3 empno number(4) not null, 4 ename varchar2(10), 5 job varchar2(9), 6 mgr number(4), 7 hiredate date, 8 sal number(7,2), 9 comm number(7,2), 10 deptno number(2) 11 ) 12 partition by range (deptno) 13 ( 14 partition dept_low values less than (15) 15 tablespace tbs_d1, 16 partition dept_mid values less than (25) 17 tablespace tbs_d2, 18 partition dept_high values less than (35) 19 tablespace tbs_d3 20 ); Table created. SQL> exit imp scott/tiger tables=emp file=empexp.dat ignore=y . . . Export file created by EXPORT:V08.00.04 via conventional path . importing SCOTT's objects into SCOTT . . importing partition "EMP":"EMP_LOW" 4 rows . . importing partition "EMP":"EMP_HIGH" 10 rows Import terminated successfully without warnings. 2-40 Oracle8 Utilities 4 rows exported 10 rows exported imported imported Using the Interactive Method The following SELECT statements show that the data is partitioned on the DEPTNO column: SQL> select empno, deptno from emp partition (dept_low); EMPNO DEPTNO ---------- ---------7934 10 7782 10 7839 10 3 rows selected. SQL> select empno, deptno from emp partition (dept_mid); EMPNO DEPTNO ---------- ---------7369 20 7566 20 7902 20 7788 20 7876 20 5 rows selected. SQL> select empno, deptno from emp partition (dept_high); EMPNO DEPTNO ---------- ---------7499 30 7521 30 7900 30 7654 30 7698 30 7844 30 6 rows selected. Using the Interactive Method Starting Import from the command line with no parameters initiates the interactive method. The interactive method does not provide prompts for all Import functionality. The interactive method is provided only for backward compatibility. If you do not specify a username/password on the command line, the Import utility prompts you for this information. The following example shows the interactive method: > imp system/manager Import: Release 8.0.4.0.0 - Production on Fri Nov 7 10:11:37 1997 (c) Copyright 1997 Oracle Corporation. All rights reserved. Import 2-41 Using the Interactive Method Connected to: Oracle8 Server Release 8.0.4.0.0 - Production PL/SQL Release 8.0.4.0.0 - Production Import file: expdat.dmp > Enter insert buffer size (minimum is 4096) 30720> Export file created by EXPORT:V08.00.04 via conventional path Warning: the objects were exported by BLAKE, not by you List contents of import file only (yes/no): no > Ignore create error due to object existence (yes/no): no > Import grants (yes/no): yes > Import table data (yes/no): yes > Import entire export file (yes/no): no > y . importing BLAKE's objects into SYSTEM . . importing table "DEPT" 4 rows imported . . importing table "MANAGER" 3 rows imported Import terminated successfully without warnings. You may not see all the prompts in a given Import session because some prompts depend on your responses to other prompts. Some prompts show a default answer; if the default is acceptable, press [RETURN]. Note: If you specify N at the previous prompt, Import prompts you for a schema name and the tables names you want to import for that schema: Enter table(T) or partition(T:P) names. Null list means all tables for user Entering a null table list causes all tables in the schema to be imported. You can only specify one schema at a time when you use the interactive method. Interactively Invoking Import as SYSDBA Typically, you should not need to invoke Import as SYSDBA. However, if you are using Tablespace Point-In-Time Recovery (TSPITR) which enables you to quickly recover one or more tablespaces to a point-in-time different from that of the rest of the database, you will need to know how to do so. Attention: It is recommended that you read the information about TSPITR in the Oracle8 Backup and Recovery Guide, “POINT_IN_TIME_RECOVER” on page 2-26, and “RECOVERY_TABLESPACES” on page 1-19 before continuing with this section. 2-42 Oracle8 Utilities Importing Incremental, Cumulative, and Complete Export Files Importing Incremental, Cumulative, and Complete Export Files Because an incremental export extracts only tables that have changed since the last incremental, cumulative, or complete export, an import from an incremental export file imports the table’s definition and all its data, not just the changed rows. Because imports from incremental export files are dependent on the method used to export the data, you should also read “Incremental, Cumulative, and Complete Exports” on page 1-37. It is important to note that, because importing an incremental export file imports new versions of existing objects, existing objects are dropped before new ones are imported. This behavior differs from a normal import. During a normal import, objects are not dropped and an error is usually generated if the object already exists. Restoring a Set of Objects The order in which incremental, cumulative, and complete exports are done is important. A set of objects cannot be restored until a complete export has been run on a database. Once that has been done, the process of restoring objects follows the steps listed below. Note: To restore a set of objects, you must first import the most recent incremental export file to import the system objects (that is, specify INCTYPE=SYSTEM for the import). Then, you must import the export files in chronological order, based on their export time (that is, specify INCTYPE=RESTORE for the import). 1. Import the most recent incremental export file (specify INCTYPE=SYSTEM for the import) or cumulative export file, if no incremental exports have been taken. 2. Import the most recent complete export file. 3. Import all cumulative export files after the last complete export. 4. Import all incremental export files after the last cumulative export. For example, if you have the following: ■ one complete export called X1 ■ two cumulative exports called C1 and C2 ■ three incremental exports called I1, I2, and I3 then you should import in the following order: imp system/manager INCTYPE=SYSTEM FULL=Y FILE=I3 imp system/manager INCTYPE=RESTORE FULL=Y FILE=X1 Import 2-43 Importing Incremental, Cumulative, and Complete Export Files imp imp imp imp imp system/manager system/manager system/manager system/manager system/manager INCTYPE=RESTORE INCTYPE=RESTORE INCTYPE=RESTORE INCTYPE=RESTORE INCTYPE=RESTORE FULL=Y FULL=Y FULL=Y FULL=Y FULL=Y FILE=C1 FILE=C2 FILE=I1 FILE=I2 FILE=I3 Notes: ■ ■ You import the last incremental export file twice; once at the beginning to import the most recent version of the system objects, and once at the end to apply the most recent changes made to the user data and objects. When restoring tables with this method, you should always start with a clean database (that is, no user tables) before starting the import sequence. Importing Object Types and Foreign Function Libraries from an Incremental Export File For incremental imports only, object types and foreign function libraries are handled as system objects. That is, their definitions are only imported with the other system objects when INCTYPE = SYSTEM. This imports the most recent definition of the object type (including the object identifier) and the most recent definition of the library specification. Then, as tables are imported from earlier incremental export files using INCTYPE=RESTORE, Import verifies that any object types needed by the table exist and have the same object identifier. If the object type does not exist, or if it exists but its object identifier does not match, the table is not imported. This indicates the object type had been dropped or replaced subsequent to the incremental export, requiring that all tables dependent on the object also had been dropped. If a user had execute access to an object type and created a table containing data of that object type, but the execute privilege is later revoked, import of that table will fail. The user must be regranted execute privilege to successfully import the table. 2-44 Oracle8 Utilities Controlling Index Creation and Maintenance Controlling Index Creation and Maintenance This section describes the behavior of Import with respect to index creation and maintenance. Index Creation and Maintenance Controls If SKIP_UNUSABLE_INDEXES=Y, the Import utility postpones maintenance on all indexes that were set to Index Unusable before Import. Other indexes (not previously set Index Unusable) continue to be updated as rows are inserted. This approach saves on index updates during Import and assumes that users can issue the appropriate ALTER INDEX statements for other indexes not covered in the exported list, before Import. Delayed index maintenance may cause a violation of an existing unique integrity constraint supported by the index. The existence of a unique integrity constraint on a table does not prevent existence of duplicate keys in a table that was imported with INDEXES = N. The supporting index will be in UNUSABLE state until the duplicates are removed and the index is rebuilt. Table 2–3 is a summary of results for combinations of IGNORE and INDEXES parameters with partition-level Import. Table 2–3 Partition-Level IGNORE and INDEXES Combinations INDEXES=Y Create indexes Delay index maintenance on Index Unusable Create indexes Delay index maintenance on Index Unusable Existent No No No Yes Non-existent Yes N/A No N/A Existent Error Error No Yes Non-existent Yes N/A No N/A Import IGNORE =Y indexes before Import IGNORE =N indexes before Import INDEXES=N Import 2-45 Controlling Index Creation and Maintenance Delaying Index Creation Import provides you with the capability of delaying index creation and maintenance services until after completion of the import and insertion of exported data. Performing index (re)creation or maintenance after Import completes is generally faster than updating the indexes for each row inserted by Import. Index creation can be time consuming, and therefore can be done more efficiently after the Imports of all other objects have completed. You can postpone creation of global and local indexes until after the Import completes by specifying INDEXES = N (INDEXES = Y is the default) and INDEXFILE = filename. The index-creation commands that would otherwise be issued by Import are instead stored in the specified file. After the Import is complete, you must create the indexes, typically by using the contents of the file (specified with INDEXFILE) as an SQL script. If the total amount of index updates are smaller during data insertion than at index rebuild time after Import, users can choose to update those indexes at table data insertion time by setting INDEXES = Y. Example of Postponing Index Maintenance For example, assume that partitioned table t with partitions p1 and p2 exists on the Import target system. Assume that local indexes p1_ind on partition p1 and p2_ind on partition p2 exist also. Assume that partition p1 contains a much larger amount of data in the existing table t, compared with the amount of data to be inserted by the Export file (expdat.dmp). Assume that the reverse is true for p2. Consequently, performing index updates for p1_ind during table data insertion time is more efficient than at partition index rebuild time. The opposite is true for p2_ind. Users can postpone local index maintenance for p2_ind during Import by using the following steps: 1. Issue the following SQL statement before Import: ALTER TABLE t MODIFY PARTITION p2 UNUSABLE LOCAL INDEXES; 2. Issue the following Import command: imp scott/tiger FILE=export.dmp TABLES = (t:p1, t:p2) IGNORE=Y SKIP_UNUSABLE_INDEXES=Y This example executes the ALTER SESSION SET SKIP_UNUSABLE_INDEXES=Y statement before performing the import. 2-46 Oracle8 Utilities Warning, Error, and Completion Messages 3. Issue the following SQL statement after Import: ALTER TABLE t MODIFY PARTITION p2 REBUILD UNUSABLE LOCAL INDEXES; In this example, local index p1_ind on p1 will be updated when table data is inserted into partition p1 during Import. Local index p2_ind on p2 will be updated at index rebuild time, after Import. Reducing Database Fragmentation A database with many non-contiguous, small blocks of free space is said to be fragmented. A fragmented database should be reorganized to make space available in contiguous, larger blocks. You can reduce fragmentation by performing a full database export and import as follows: 1. Do a full database export (FULL=Y) to back up the entire database. 2. Shut down Oracle after all users are logged off. Use the MONITOR command in SQL*DBA or Server Manager to check for active database users. 3. Delete the database. See your Oracle operating system-specific documentation for information on how to delete a database. 4. Re-create the database using the CREATE DATABASE command. 5. Do a full database import (FULL=Y) to restore the entire database. See the Oracle8 Administrator’s Guide for more information about creating databases. Warning, Error, and Completion Messages By default, Import displays all error messages. If you specify a log file by using the LOG parameter, Import writes the error messages to the log file in addition to displaying them on the terminal. You should always specify a log file when you import. (You can redirect Import’s output to a file on those systems that permit I/O redirection.) Additional Information: For information on the LOG parameter, see “LOG” on page 2-26. Also see your operating system-specific documentation for information on redirecting output. When an import completes without errors, the message “Import terminated successfully without warnings” is issued. If one or more non-fatal errors occurred, and Import was able to continue to completion, the message “Import terminated successfully with warnings” occurs. If a fatal error occurs, Import ends immediately with the message “Import terminated unsuccessfully.” Import 2-47 Error Handling Additional Information: Messages are documented in Oracle8 Messages and your operating system-specific documentation. Error Handling This section describes errors that can occur when you import database objects. Row Errors If a row is rejected due to an integrity constraint violation or invalid data, Import displays a warning message but continues processing the rest of the table. Some errors, such as “tablespace full,” apply to all subsequent rows in the table. These errors cause Import to stop processing the current table and skip to the next table. Failed Integrity Constraints A row error is generated if a row violates one of the integrity constraints in force on your system, including: ■ not null constraints ■ uniqueness constraints ■ primary key (not null and unique) constraints ■ referential integrity constraints ■ check constraints See the Oracle8 Application Developer’s Guide and Oracle8 Concepts for more information on integrity constraints. Invalid Data Row errors can also occur when the column definition for a table in a database is different from the column definition in the export file. The error is caused by data that is too long to fit into a new table’s columns, by invalid data types, and by any other INSERT error. Errors Importing Database Objects Errors can occur for many reasons when you import database objects, as described in this section. When such an error occurs, import of the current database object is discontinued. Import then attempts to continue with the next database object in the export file. 2-48 Oracle8 Utilities Error Handling Object Already Exists If a database object to be imported already exists in the database, an object creation error occurs. What happens next depends on the setting of the IGNORE parameter. If IGNORE=N (the default), the error is reported, and Import continues with the next database object. The current database object is not replaced. For tables, this behavior means that rows contained in the export file are not imported. If IGNORE=Y, object creation errors are not reported. Although the database object is not replaced, if the object is a table, rows are imported into it. Note that only object creation errors are ignored, all other errors (such as operating system, database, and SQL) are reported and processing may stop. Warning: Specifying IGNORE=Y can cause duplicate rows to be entered into a table unless one or more columns of the table are specified with the UNIQUE integrity constraint. This could occur, for example, if Import were run twice. Sequences If sequence numbers need to be reset to the value in an export file as part of an import, you should drop sequences. A sequence that is not dropped before the import is not set to the value captured in the export file, because Import does not drop and re-create a sequence that already exists. If the sequence already exists, the export file’s CREATE SEQUENCE statement fails and the sequence is not imported. Resource Errors Resource limitations can cause objects to be skipped. When you are importing tables, for example, resource errors can occur as a result of internal problems, or when a resource such as memory has been exhausted. If a resource error occurs while you are importing a row, Import stops processing the current table and skips to the next table. If you have specified COMMIT=Y, Import commits the partial import of the current table. If not, a rollback of the current table occurs before Import continues. (See the description of “COMMIT” on page 2-20 for information about the COMMIT parameter.) Fatal Errors When a fatal error occurs, Import terminates. For example, if you enter an invalid username/password combination or attempt to run Export or Import without having prepared the database by running the scripts CATEXP.SQL or CATALOG.SQL, a fatal error occurs and causes Import to terminate. Import 2-49 Network Considerations Network Considerations This section describes factors to take into account when using Export and Import across a network. Transporting Export Files Across a Network When transferring an export file across a network, be sure to transmit the file using a protocol that preserves the integrity of the file. For example, when using FTP or a similar file transfer protocol, transmit the file in binary mode. Transmitting export files in character mode causes errors when the file is imported. Exporting and Importing with Net8 By eliminating the boundaries between different machines and operating systems on a network, Net8 provides a distributed processing environment for Oracle8 products. Net8 lets you export and import over a network. For example, running Export locally, you can write data from a remote Oracle database into a local export file. Running Import locally, you can read data into a remote Oracle database. To use Export or Import with Net8, you must include the connection qualifier string @connect_string when entering the username/password in the exp or imp command. For the exact syntax of this clause, see the user’s guide for your Net8 protocol. For more information on Net8, see the Net8 Administrator’s Guide. See also Oracle8 Distributed Database Systems. See also “Interactively Invoking Import as SYSDBA” on page 2-42 if you are using Tablespace Point-in-Time Recovery. Import and Snapshots The three interrelated objects in a snapshot system are the master table, optional snapshot log, and the snapshot itself. The tables (master table, snapshot log table definition, and snapshot tables) can be exported independently of one another. Snapshot logs can be exported only if you export the associated master table. You can export snapshots using full database or user-mode Export; you cannot use table-mode Export. This section discusses how fast refreshes are affected when these objects are imported. Oracle8 Replication provides more information about snapshots and snapshot logs. 2-50 Oracle8 Utilities Import and Snapshots Master Table The imported data is recorded in the snapshot log if the master table already exists for the database to which you are importing and it has a snapshot log. Snapshot Log When a snapshot log is exported, ROWIDs stored in the snapshot log have no meaning upon import. As a result, each ROWID snapshot’s first attempt to do a fast refresh fails, generating an error indicating that a complete refresh is required. To avoid the refresh error, do a complete refresh after importing a ROWID snapshot log. After you have done a complete refresh, subsequent fast refreshes will work properly. In contrast, when a snapshot log is exported, primary key values do retain their meaning upon Import. Therefore, primary key snapshots can do a fast refresh after the import. See Oracle8 Replication for information about primary key snapshots. Snapshots A snapshot that has been restored from an export file has “gone back in time” to a previous state. On import, the time of the last refresh is imported as part of the snapshot table definition. The function that calculates the next refresh time is also imported. Each refresh leaves a signature. A fast refresh uses the log entries that date from the time of that signature to bring the snapshot up to date. When the fast refresh is complete, the signature is deleted and a new signature is created. Any log entries that are not needed to refresh other snapshots are also deleted (all log entries with times before the earliest remaining signature). Importing a Snapshot When you restore a snapshot from an export file, you may encounter a problem under certain circumstances. Assume that a snapshot is refreshed at time A, exported at time B, and refreshed again at time C. Then, because of corruption or other problems, the snapshot needs to be restored by dropping the snapshot and importing it again. The newly imported version has the last refresh time recorded as time A. However, log entries needed for a fast refresh may no longer exist. If the log entries do exist (because they are needed for another snapshot that has yet to be refreshed), they are used, and the fast refresh completes successfully. Otherwise, the fast refresh fails, generating an error that says a complete refresh is required. Import 2-51 Storage Parameters Importing a Snapshot into a Different Schema Snapshots, snapshot logs, and related items are exported with the schema name explicitly given in the DDL statements, therefore, snapshots and their related items cannot be imported into a different schema. If you attempt to use FROMUSER/TOUSER to import snapshot data, an error will be written to the Import log file and the items will not be imported. Storage Parameters By default, a table is imported into its original tablespace. If the tablespace no longer exists, or the user does not have sufficient quota in the tablespace, the system uses the default tablespace for that user unless the table: ■ is partitioned ■ is a type table ■ contains LOB columns If the user does not have sufficient quota in the default tablespace, the user’s tables are not imported. (See “Reorganizing Tablespaces” on page 2-54 to see how you can use this to your advantage.) The OPTIMAL Parameter The storage parameter OPTIMAL for rollback segments is not preserved during export and import. Storage Parameters for OID INDEXes and LOB Columns Tables are exported with their current storage parameters. For object tables, the OIDINDEX is created with its current storage parameters and name, if given. For tables that contain LOB columns, LOB data and LOB indexes are created with their current storage parameters. If users alter the storage parameters of existing tables prior to export, the tables are exported using those altered storage parameters. The storage parameters for LOB data and LOB indexes cannot be altered. Note that LOB data and LOB indexes might not reside in the same tablespace as the containing table. The tablespace for that data must be read/write at the time of import or the table will not be imported. 2-52 Oracle8 Utilities Storage Parameters If LOB data or LOB indexes reside in a tablespace that does not exist at the time of import or the user does not have the necessary quota in that tablespace, the table will not be imported. Because there can be multiple tablespace clauses, including one for the table, Import cannot determine which tablespace clause caused the error. Overriding Storage Parameters Export files include table storage parameters, so you may want to pre-create large tables with the different storage parameters before importing the data. If so, you must specify the following on the command line or in the parameter file: IGNORE=Y The Export COMPRESS Parameter By default at export time, the storage parameters for large tables are adjusted to consolidate all data for the table into its initial extent. To preserve the original size of an initial extent, you must specify at export time that extents not be consolidated (by setting COMPRESS=N.) See “COMPRESS” on page 1-13 for a description of the COMPRESS parameter. Read-Only Tablespaces Read-only tablespaces can be exported. On import, if the tablespace does not already exist in the target database, the tablespace is created as a read/write tablespace. If you want read-only functionality, you must manually make the tablespace read-only after the import. If the tablespace already exists in the target database and is read-only, you must make it read/write before the import. Rollback Segments When you initialize a database, Oracle creates a single system rollback segment (named SYSTEM). Oracle uses this rollback segment only for transactions that manipulate objects in the SYSTEM tablespace. However, if you want to import into a different tablespace, you must create a new rollback segment. This restriction does not apply if you intend to import only into the SYSTEM tablespace. For details on creating rollback segments, see the Oracle8 Administrator’s Guide. Import 2-53 Dropping a Tablespace Dropping a Tablespace You can drop a tablespace by redefining the objects to use different tablespaces before the import. You can then issue the import command and specify IGNORE=Y. In many cases, you can drop a tablespace by doing a full database export, then creating a zero-block tablespace with the same name (before logging off) as the tablespace you want to drop. During import, with IGNORE=Y, the relevant CREATE TABLESPACE command will fail and prevent the creation of the unwanted tablespace. All objects from that tablespace will be imported into their owner’s default tablespace with the exception of partitioned tables, type tables, and tables that contain LOB columns. Import cannot determine which tablespace caused the error. Instead, the user must create the table and import the table again, specifying IGNORE=Y. Objects are not imported into the default tablespace if the tablespace does not exist or the user does not have the necessary quotas for the default tablespace. Reorganizing Tablespaces If a user’s quotas allow it, the user’s tables are imported into the same tablespace from which they were exported. However, if the tablespace no longer exists or the user does not have the necessary quota, the system uses the default tablespace for that user as long as the table is unpartitioned, contains no LOB columns, and the table is not a type table. If the user is unable to access the default tablespace, the tables cannot be imported. This scenario can be used to move user’s tables from one tablespace to another. For example, you need to move JOE’s tables from tablespace A to tablespace B after a full database export. Follow these steps: 1. If JOE has the UNLIMITED TABLESPACE privilege, revoke it. Set JOE’s quota on tablespace A to zero. Also revoke all roles that might have such privileges or quotas. Note: Role revokes do not cascade. Therefore, users who were granted other roles by JOE will be unaffected. 2-54 2. Export JOE’s tables. 3. Drop JOE’s tables from the tablespace. 4. Give JOE a quota on tablespace B and make it the default tablespace. Oracle8 Utilities Character Set and NLS Considerations 5. Create JOE’s tables into tablespace B. 6. Import JOE’s tables. (By default, Import puts JOE’s tables into tablespace B.) Note: An index on the table is created in the same tablespace as the table itself, unless it already exists. Character Set and NLS Considerations This section describes the behavior of Export and Import with respect to character sets and National Language Support (NLS). Character Set Conversion Export writes export files using the character set specified for the user session, for example, 7-bit ASCII or IBM Code Page 500 (EBCDIC). The import session and the target database character sets can differ from the source database character set. This circumstance requires one or more character set conversion operations. The export file identifies the character encoding scheme used for its character data. If necessary, Import automatically translates the data to the character set of its host system. Import converts character data to the user-session character set if that character set is different from the one in the export file. See also “Character Set Conversion” on page 1-36 and page 1 - 45 for a description of how Export handles character set issues. Import can convert data to the user-session character set only if the ratio of the width of the widest character in the import character set to the width of the smallest character in the export character set is 1. Import and Single-Byte Character Sets If the export file character set is any single-byte character set (for example, EBCDIC or USASCII7), and if the character set used by the target database is also a singlebyte character set, the data is converted automatically during import to the character encoding scheme specified for the user session by the NLS_LANG parameter. After the data is converted to the session character set, it is converted to the database character set. Import 2-55 Character Set and NLS Considerations Some 8-bit characters can be lost (that is, converted to 7-bit equivalents) when importing an 8-bit character set export file. This occurs if the machine on which the import occurs has a native 7-bit character set, or the NLS_LANG operating system environment variable is set to a 7-bit character set. Most often, this is seen when accented characters lose the accent mark. To avoid this unwanted conversion, you can set the NLS_LANG operating system environment variable to be that of the export file character set. When importing an Oracle Version 5 or 6 export file with a character set different from that of the native operating system or the setting for NLS_LANG, you must set the CHARSET import parameter to specify the character set of the export file. Refer to the sections “Character Set Conversion” on page 1-45 and “Single-Byte Character Sets During Export and Import” on page 1-46 for additional information on single-byte character sets. Import and Multi-Byte Character Sets For multi-byte character sets, Import can convert data to the user-session character set only if the ratio of the width of the widest character in the import character set to the width of the smallest character in the export character set is 1. If the ratio is not 1, the user-session character set should be set to match the export character set, so that Import does no conversion. During the conversion, any characters in the export file that have no equivalent in the target character set are replaced with a default character. (The default character is defined by the target character set.) To guarantee 100% conversion, the target character set must be a superset (or equivalent) of the source character set. For more information, refer to the National Language Support section of the Oracle8 Reference. Because character set conversion lengthens the processing time required for import, limit the number of character set conversions to as few as possible. In the ideal scenario, the import session and target database character sets are the same as the source database character set, requiring no conversion. If the import session character set and the target database character set are the same, but differ from the source database character set, one character set conversion is required. 2-56 Oracle8 Utilities Considerations for Importing Database Objects Oracle8 can export and import NCHAR datatypes. Import does no translation of NCHAR data, but, if needed, OCI automatically converts the data to the national character set of the Import server. Considerations for Importing Database Objects This section describes the behavior of various database objects during Import. Importing Object Identifiers The Oracle8 server assigns object identifiers to uniquely identify object types, object tables, and rows in object tables. These object identifiers are preserved by import. For object types, if IGNORE=Y and the object type already exists and the object identifiers match, no error is reported. If the object identifiers do not match, an error is reported and any tables using the object type are not imported. For object types, if IGNORE=N and the object type already exists, an error is reported. If the object identifiers do not match, any tables using the object type are not imported. For object tables, if IGNORE=Y and the table already exists and the object identifiers match, no error is reported. Rows are imported into the object table. If the object identifiers do not match, an error is reported and the table is not imported. For object tables, if IGNORE = N and the table already exists, an error is reported and the table is not imported. For object tables, if IGNORE=Y and if the table already exists and the table’s object identifiers match, import of rows may fail if rows with the same object identifier already exist in the object table. Because Import preserves object identifiers of object types and object tables, note the following considerations when importing objects from one schema into another schema, using the FROMUSER and TOUSER parameters: ■ ■ If the FROMUSER’s object types and object tables already exist on the target system, errors occur because the object identifiers of the TOUSER’s object types and object tables are already in use. The FROMUSER’s object types and object tables must be dropped from the system before the import is started. If an object table was created using the OID AS option to assign it the same object identifier as another table, both tables cannot be imported. One may be imported, but the second receives an error because the object identifier is already in use. Import 2-57 Considerations for Importing Database Objects Importing Existing Object Tables and Tables That Contain Object Types Users frequently pre-create tables before import to reorganize tablespace usage or change a table's storage parameters. The tables must be created with the same definitions as were previously used or a compatible format (except for storage parameters). For object tables and tables that contain columns of object types, format compatibilities are more restrictive. For object tables, the same object type must be specified and that object type must have the same object identifier as the original. The object table's object type and identifier must be the same as the original object table's object type. For tables containing columns of object types, the same object type must be specified and that type must have the same object identifier as the original. Export writes information about object types used by a table in the Export file, including object types from different schemas. Object types from different schemas used as top level columns are verified for matching name and object identifier at import time. Object types from different schemas that are nested within other object types are not verified. If the object type already exists, its object identifier is verified. Import retains information about what object types it has created, so that if an object type is used by multiple tables, it is created only once. In all cases, the object type must be compatible in terms of the internal format used for storage. Import does not verify that the internal format of a type is compatible. If the exported data is not compatible, the results are unpredictable. Importing Nested Tables For nested tables, the storage information for the inner tables is exported with a DDL statement separate from the creation of the outer table. Import handles the multiple statements as one atomic operation. If the creation of the outer table fails, the inner table storage information is not executed. If the creation of the outer table succeeds, but the storage creation for any inner nested table fails, the entire table is dropped and table data is not imported. If the outer table already exists and IGNORE=Y, the inner table storage is not created. Because inner nested tables are imported separately from the outer table, attempts to access data from them while importing may produce unexpected results. For example, if an outer row is accessed before its inner rows are imported, Import returns an incomplete row to the user. 2-58 Oracle8 Utilities Considerations for Importing Database Objects Inner nested tables are exported separately from the outer table. Therefore, situations may arise where data in an inner nested table might not be properly imported: ■ ■ ■ ■ ■ Suppose a table with an inner nested table is exported and then imported without dropping the table or removing rows from the table. If the IGNORE=Y parameter is used, there will be a constraint violation when inserting each row in the outer table. However, data in the inner nested table may be successfully imported, resulting in duplicate rows in the inner table. If fatal errors occur inserting data in outer tables, the rest of the data in the outer table is skipped, but the corresponding inner table rows are not skipped. This may result in inner table rows not being referenced by any row in the outer table. If an insert to an inner table fails after a non-fatal error, its outer table row will already have been inserted in the outer table and data will continue to be inserted in it and any other inner tables of the containing table. This circumstance results in a partial logical row. If fatal errors occur inserting data into an inner table, the import skips the rest of that inner table’s data but does not skip the outer table or other nested tables. You should always carefully examine the logfile for errors in outer tables and inner tables. To be consistent, table data may need to be modified or deleted. Importing REF Data REF columns and attributes may contain a hidden ROWID that points to the referenced type instance. Import does not automatically recompute these ROWIDs for the target database. You should execute the following command to reset the ROWIDs to their proper values: ANALYZE TABLE [schema.]table VALIDATE REF UPDATE See the Oracle8 SQL Reference manual for more information about the ANALYZE TABLE command. Importing Array Data When the Import utility processes array columns or attributes, it allocates buffers to accommodate an array using the largest dimensions that could be expected for the column or attribute. If the maximum dimension of the array greatly exceeds the memory used in each instance of the array, the Import may fail due to memory exhaustion. Import 2-59 Considerations for Importing Database Objects Importing BFILE Columns and Directory Aliases Export and Import do not copy data referenced by BFILE columns and attributes from the source database to the target database. Export and Import only propagate the names of the files and the directory aliases referenced by the BFILE columns. It is the responsibility of the DBA or user to move the actual files referenced through BFILE columns and attributes. When you import table data that contains BFILE columns, the BFILE locator is imported with the directory alias and file name that was present at export time. Import does not verify that the directory alias or file exists. If the directory alias or file does not exist, an error occurs when the user accesses the BFILE data. For operating system directory aliases, if the directory syntax used in the export system is not valid on the import system, no error is reported at import time. Subsequent access to the file data receives an error. It is the responsibility of the DBA or user to ensure the directory alias is valid on the import system. Note: Instances of BFILE columns and attributes contain text strings for the name of the DIRECTORY ALIAS and file name referenced by the instance. Export stores these strings in the character set of the exported database. Import converts the text used to store the directory alias name and the file name of a BFILE column from the character set of the export database to the character set of the import database. Importing Foreign Function Libraries Import does not verify that the location referenced by the foreign function library is correct. If the formats for directory and file names used in the library's specification on the export file are invalid on the import system, no error is reported at import time. Subsequent usage of the callout functions will receive an error. It is the responsibility of the DBA or user to manually move the library and ensure the library's specification is valid on the import system. Importing Stored Procedures, Functions, and Packages When a local stored procedure, function, or package is imported, it retains its original specification timestamp. The procedure, function, or package is recompiled upon import. If the compilation is successful, it can be accessed by remote procedures without error. 2-60 Oracle8 Utilities Considerations for Importing Database Objects Procedures are exported after tables, views, and synonyms, therefore they usually compile successfully since all dependencies will already exist. However, procedures, functions, and packages are not exported in dependency order. If a procedure, function, or package depends on a procedure, function, or package that is stored later in the Export dump file, it will not compile successfully. Later use of the procedure, function, or package will automatically cause a recompile and, if successful, will change the timestamp. This may cause errors in the remote procedures that call it. Importing Advanced Queue (AQ) Tables Importing a queue also imports any underlying queue tables and the related dictionary tables. A queue can be imported only at the granularity level of the queue table. When a queue table is imported, export pre-table and post-table action procedures maintain the queue dictionary. Importing LONG Columns LONG columns can be up to 2 gigabytes in length. In importing and exporting, the LONG columns must fit into memory with the rest of each row’s data. The memory used to store LONG columns, however, does not need to be contiguous because LONG data is loaded in sections. Importing Views Views are exported in dependency order. In some cases, Export must determine the ordering, rather than obtaining the order from the server database. In doing so, Export may not always be able to duplicate the correct ordering, resulting in compilation warnings when a view is imported and the failure to import column comments on such views. In particular, if VIEWA uses the stored procedure PROCB and PROCB uses the view VIEWC, Export cannot determine the proper ordering of VIEWA and VIEWC. If VIEWA is exported before VIEWC and PROCB already exists on the import system, VIEWA receives compilation warnings at import time. Grants on views are imported even if a view has compilation errors. A view could have compilation errors if an object it depends on, such as a table, procedure, or another view, does not exist when the view is created. If a base table does not exist, the server cannot validate that the grantor has the proper privileges on the base table with the GRANT OPTION. Therefore, access violations could occur when the view is used, if the grantor does not have the proper privileges after the missing tables are created. Import 2-61 Generating Statistics on Imported Data Generating Statistics on Imported Data The Export parameter STATISTICS controls the generation of database optimizer statistics during import. When you specify either the COMPUTE or ESTIMATE option of the STATISTICS parameter, all indexes, tables, and clusters that have had ANALYZE applied to them are exported with the commands necessary to generate the appropriate statistics (estimated or computed) on import. You can set the ANALYZE Import parameter to N to prevent Import from generating optimizer statistics. Note: Generation of statistics is limited to those objects that already had them before export. Statistics are not automatically generated for every index, table, and cluster in the database as a result of this option. If your installation generally uses either estimated or computed statistics, it is a good idea to include the STATISTICS parameter whenever you use Export. The cost during Export is negligible — statistics are not recorded in the export file, only a command to generate them. The default is STATISTICS=ESTIMATE. See Oracle8 Concepts for more information about the optimizer. By using the STATISTICS parameter during Export, you ensure that the appropriate statistics are gathered when the data is imported. If your export file was created without this parameter, or if you have changed your method of collecting statistics, use Import’s INDEXFILE parameter to generate a list of imported objects. Then, edit that list to produce a series of ANALYZE commands on them and execute the resulting SQL script. (For more information, see “INDEXFILE” on page 2-25.) Using Oracle7 Export Files This section describes guidelines and restrictions that apply when you import data from an Oracle7 database into an Oracle8 server. Additional information may be found inOracle8 Migration. Check Constraints on DATE Columns In Oracle8, check constraints on DATE columns must use the TO_DATE function to specify the format of the date. Because this function was not required in earlier Oracle versions, data imported from an earlier Oracle database might not have used the TO_DATE function. In such cases, the constraints are imported into the Oracle8 database, but they are flagged in the dictionary as invalid. 2-62 Oracle8 Utilities Using Oracle Version 6 Export Files The catalog views DBA_CONSTRAINTS, USER_CONSTRAINTS, and ALL_CONSTRAINTS can be used to identify such constraints. Import issues a warning message if invalid date constraints are in the database. Using Oracle Version 6 Export Files This section describes guidelines and restrictions that apply when you import data from an Oracle Version 6 database into an Oracle8 server. Additional information may be found in the Oracle8 Migration manual. CHAR columns Oracle Version 6 CHAR columns are automatically converted into the Oracle VARCHAR2 datatype. Syntax of Integrity Constraints Although the SQL syntax for integrity constraints in Oracle Version 6 is different from the Oracle7 and Oracle8 syntax, integrity constraints are correctly imported into Oracle8. Status of Integrity Constraints NOT NULL constraints are imported as ENABLED. All other constraints are imported as DISABLED. Length of DEFAULT Column Values A table with a default column value that is longer than the maximum size of that column generates the following error on import to Oracle8: ORA-1401: inserted value too large for column Oracle Version 6 did not check the columns in a CREATE TABLE statement to be sure they were long enough to hold their DEFAULT values so these tables could be imported into a Version 6 database. The Oracle8 server does make this check, however. As a result, tables that could be imported into a Version 6 database may not import into Oracle8. If the DEFAULT is a value returned by a function, the column must be large enough to hold the maximum value that can be returned by that function. Otherwise, the CREATE TABLE statement recorded in the export file produces an error on import. Import 2-63 Using Oracle Version 5 Export Files Note: The maximum value of the USER function increased in Oracle7, so columns with a default of USER may not be long enough. To determine the maximum size that the USER function returns, execute the following SQL command: DESCRIBE user_sys_privs The length shown for the USERNAME column is the maximum length returned by the USER function. Using Oracle Version 5 Export Files Oracle8 Import reads Export dump files created by Oracle Version 5.1.22 and later. Keep in mind the following: 2-64 ■ CHAR columns are automatically converted to VARCHAR2 ■ NOT NULL constraints are imported as ENABLED ■ Import automatically creates an index on any clusters to be imported Oracle8 Utilities Part II SQL*Loader Part II explains how to use SQL*Loader, a utility for loading data from external files into Oracle database tables. SQL*Loader processes a wide variety of input file formats and gives you control over how records are loaded into Oracle tables. If you have never used a data loading product, begin by reading the introduction in Chapter 3 and then examine the case studies provided in Chapter 4. These two chapters provide a good introduction to data loading concepts. If you are comfortable with data loading concepts, you might start with the examples in Chapter 4 and then consult Chapter 5 and Chapter 6 for more detailed reference information on SQL*Loader. The following topics are covered in this part of this manual: ■ Overview of SQL*Loader Concepts (Chapter 3) ■ SQL*Loader Case Studies in action (Chapter 4) ■ SQL*Loader Control File Reference (Chapter 5) ■ SQL*Loader Command-Line Reference (Chapter 6) ■ SQL*Loader: Log File Reference (Chapter 7) ■ SQL*Loader: Conventional and Direct Path Loads (Chapter 8) 3 SQL*Loader Concepts This chapter explains the basic concepts of loading data into an Oracle database with SQL*Loader. This chapter covers the following topics: ■ SQL*Loader Basics ■ SQL*Loader Control File ■ Input Data and Datafiles ■ Data Conversion and Datatype Specification ■ Discarded and Rejected Records ■ Log File and Logging Information ■ Conventional Path Load versus Direct Path Load ■ Partitioned Object Support Note: If you are using Trusted Oracle, see the Trusted Oracle documentation for information about using the SQL*Loader in that environment. SQL*Loader Concepts 3-1 SQL*Loader Basics SQL*Loader Basics SQL*Loader loads data from external files into tables in an Oracle database. SQL*Loader has many features of the DB2 Load Utility from IBM, as well as several other features that give it additional power and flexibility. SQL*Loader accepts input data in a variety of formats, can perform filtering (selectively loading records based upon their data values), and can load data into multiple Oracle database tables during the same load session. Figure 3–1 shows the basic components of a SQL*Loader session in operation. Figure 3–1 SQL*Loader Overview Bad Input Files Datafiles Log File Database Loader Control File SQL*Loader Bad Bad Files Files Discard Discard Files Files Table Table Indexes Table Table Tables SQL*Loader takes a control file as its input, which describes the load to SQL*Loader. The control file also specifies the input datafile(s). As it executes, SQL*Loader produces a log file where it writes information about the load. If records are rejected (typically because of incorrect data), it produces a bad file containing the rejected records. It also may produce a discard file containing records that did not meet the specified selection criteria. 3-2 Oracle8 Utilities SQL*Loader Control File SQL*Loader can: ■ Load data from multiple input datafiles of different file types ■ Handle fixed-format, delimited-format, and variable-length records ■ ■ Manipulate data fields with SQL functions before inserting the data into database columns Support a wide range of datatypes, including DATE, BINARY, PACKED DECIMAL, and ZONED DECIMAL ■ Load multiple tables during the same run, loading selected rows into each table ■ Combine multiple physical records into a single logical record ■ Handle a single physical record as multiple logical records ■ Generate unique, sequential key values in specified columns ■ Use the operating system’s file or record management system to access datafiles ■ Load data from disk, tape, or named pipes ■ Thoroughly report errors so you can easily adjust and load all records ■ Use high-performance “direct” loads to load data directly into database files without Oracle processing (discussed in Chapter 8, “SQL*Loader: Conventional and Direct Path Loads”) SQL*Loader Control File The control file, written in SQL*Loader data definition language (DDL), specifies how to interpret the data, what tables and columns to insert the data into, and may also include input datafile management information. The data for SQL*Loader to load into an Oracle database must be in files accessible to SQL*Loader (typically a file in a file system, on tape, or a named pipe, depending on the platform). SQL*Loader requires information about the data to be loaded which provides instructions for mapping the input data to columns of a table. These instructions are written in SQL*Loader DDL, typically by the DBA using the system text editor. Following are some of the items that are specified in the SQL*Loader control file: ■ Specifications for loading logical records into tables ■ Field condition specifications ■ Column and field specifications SQL*Loader Concepts 3-3 SQL*Loader Control File ■ Data-field position specifications ■ Datatype specifications ■ Bind array size specifications ■ Specifications for setting columns to null or zero ■ Specifications for loading all-blank fields ■ Specifications for trimming blanks and tabs ■ Specifications to preserve white space ■ Specifications for applying SQL operators to fields SQL*Loader DDL is upwardly compatible with the DB2 Load Utility from IBM. Normally you can use a control file for the DB2 Load Utility as a control file for SQL*Loader. See Appendix B, “DB2/DXT User Notes” for differences in syntax. Control File Contents and Storage Some DDL statements are mandatory. They must define where to find the input data. They must also define the correspondence between the input data and the Oracle database tables or indexes. DDL options are available to describe and manipulate the file data. For example, the instructions can include how to format or filter the data, or how to generate unique ID numbers for a field. A control file can contain the data itself after the DDL statements, as shown in Case 1 on page 4-5, or in separate files, as shown in Case 2 on on page 4-8. Detailed information on creating control files using SQL*Loader DDL is given in “Data Definition Language (DDL) Syntax” on page 5-4. Content Guidelines ■ ■ ■ ■ 3-4 Oracle8 Utilities The control file is written in free format. That is, statements can continue from line to line with new lines beginning at any word. Uppercase or lowercase is not significant except in strings specified within single or double quotation marks. Comments can be included, prefixed by two hyphens (--). A comment can appear anywhere on a line. SQL*Loader ignores everything from the double hyphens to the end of line. SQL*Loader does not recognize comments in a datafile or in the data portion of the control file. It considers a double dash in those areas to be data. SQL*Loader Control File ■ SQL*Loader reserved words (see Appendix A, “SQL*Loader Reserved Words” for a complete list) can serve for database object’s names if they are enclosed in single or double quotation marks. Storage How you store the control file depends on how your operating system organizes data. For example, a UNIX environment stores a control file in a file; in MVS environments, the control file can be stored as a member in a partitioned dataset. The control file must be stored where SQL*Loader can read it. Data Definition Language (DDL) SQL*Loader data definition language (DDL) is used to specify how SQL*Loader should map the input data it is loading to the columns of a table in an Oracle database. Chapter 5, “SQL*Loader Control File Reference” details the syntax and semantics of SQL*Loader DDL. DDL statements serve several purposes. Some statements specify input data location or format. Other DDL statements specify which Oracle table to load, mapping of the columns of a table to fields within an input record (field specifications), and specification of the loader input datatype of a field. A single DDL statement comprises one or more keywords and the arguments and options that modify that keyword’s functionality. The following example from a control file contains several statements specifying how SQL*Loader is to load the data from an input datafile into a table in an Oracle database: LOAD DATA INFILE ’example.dat’ INTO TABLE emp (empno POSITION(01:04) INTEGER EXTERNAL, ename POSITION(06:15) CHAR, job POSITION(17:25) CHAR, mgr POSITION(27:30) INTEGER EXTERNAL, sal POSITION(32:39) DECIMAL EXTERNAL, comm POSITION(41:48) DECIMAL EXTERNAL, ... This example shows the keywords LOAD DATA, INFILE, INTO TABLE, and POSITION. SQL*Loader Concepts 3-5 Input Data and Datafiles Input Data and Datafiles The data for SQL*Loader to load into an Oracle database must be accessible to SQL*Loader, typically in files on disk or tape, or via a named pipe. Input Data Formats SQL*Loader can load data (see “Binary versus Character Data” on page 3-9) that has been stored in data fields (see “Data Fields”) and records of various formats. The record format may be specified in the control file as a file processing option. SQL*Loader recognizes the following three record formats: ■ Stream Record Format (Default Format) ■ Fixed Record Format ■ Variable Record Format Stream Record Format (Default Format) Stream format records are only as long as needed to contain the data. Each physical record ends with a terminating character (or characters on some platforms). The record terminator is typically a newline character (‘\n’), or a carriage return followed by a newline (“\r\n”). The record terminator used is platform dependent. Case 3 on page 4-11 shows delimited fields. Fixed Record Format In fixed format, the data records all have the same fixed-length format. That is, every record is the same fixed length, and the data fields in each record have the same fixed length, type, and position, as shown in Figure 3–2. Figure 3–2 Fixed Format Records Field 2 INTEGER Field 1 CHAR A l f r e d 1 9 2 6 S c o t T o m t 3 0 1 1 9 1 2 3 4 5 6 7 8 9 10 3-6 Oracle8 Utilities Input Data and Datafiles In this figure, each record’s bytes 1 through 6 are specified to contain CHAR data while bytes 7 through 10 are specified to contain INTEGER data. The fields are the same size in each record, regardless of the length of the data; the fields are fixed length rather than variable length. The record size also is fixed, at 10 bytes for each record. Case 2 on page 4-8 shows fixed-length records. Fixed format records make each record exactly the same number of bytes long and each specified field within each record of the specified data type and specified length. The processing option specification in the control file should contain the string “fix n”, where n is the size of the record. Note that if you are loading data that is contained in the control file itself (using INFILE *), you cannot load using fixed length. The following example control file and data will load the included records, which have a fixed length of 11 characters (10 characters of data plus one newline character for ease of editing the data with the system text editor). It is important to note that SQL*Loader does not require a record terminator for fixed length records, but if a record terminator is present, it must be included in the record length. Fixed Format Example Control File and Data load data infile ‘example.dat’ “fix 11” badfile ‘example.bad’ discardfile ‘example.dsc’ discardmax 999 truncate into table example (rown position(1-5), cmnt position(6-10)) example.dat: 00001abcde 00002fghij 00003klmno 00004pqrst 00005uvwxy Variable Record Format Figure 3–3 shows variable length records containing one varying-length character field and one varying-length integer field. In this format, the length of each field and record can vary. For example, in each record the first field may be specified to hold a character string, separated by a space from the next field, which may be specified to hold an integer. SQL*Loader Concepts 3-7 Input Data and Datafiles If the operating system record-terminator character (such as newline) is used to mark where varying-length records end for ease of editing with a text editor, the record size must include the record-terminator. Figure 3–3 Variable Format Records Field 1 CHAR A l f Field 2 INTEGER EXTERNAL r e d S c o t t T o m 1 9 1 9 2 6 3 0 1 Variable Format Example Control File and Data This example uses variable record formats where each record has a variable length n, and n is specified in the first 5 characters of the record. The file processing option should contain the string “var”. The following control and data file will load records with variable length records: load data infile ‘example.dat’ “var” badfile ‘example.bad’ discardfile ‘example.dsc’ discardmax 999 truncate into table example fields terminated by “,” optionally enclosed by ‘”’ (rown, cmnt, len) example.dat: 0001500001,a,00015, 0005000002,abcdefghijklmnopqrstuvwxyzABCDEFGHIJ,00050, 0005900003,abcdefghijklmnopqrstuvwxyzABCDEFGHIJKLMNOPQRS,00059, 0005200004,abcdefghijklmnopqrstuvwxyzABCDEFGHIJKL,00052, 0004800005,abcdefghijklmnopqrstuvwxyzABCDEFGH,00048, Note: For fixed and variable length record formats no assumptions are made about newlines (or other terminator(s)) at the end of each physical record. 3-8 Oracle8 Utilities Input Data and Datafiles Logical versus Physical Records Another distinction is the difference between logical and physical records. A record or line in a file (either of fixed length or terminated) is considered a physical record. An operating system-dependent file/record management system, such as DEC’s Record Management System (RMS) or IBM’s Sequential Access Method (SAM) returns physical records. A logical record, however, comprises one or more physical records. Sometimes the logical and physical records are equivalent. Such is the case when only a few short columns are being loaded. However, sometimes several physical records must be combined to make one logical record. For example, a single logical record containing twenty-four 10-character columns could comprise three 80-character files; thus three physical records would constitute the single logical record. SQL*Loader allows you to compose logical records from multiple physical records by using continuation fields. Physical records are combined into a single logical record when some condition of the continuation field is true. You can specify that a logical record be composed of multiple, physical records in the following ways: ■ ■ ■ A fixed number of physical records are concatenated to form a logical record (no continuation field is used). Physical records are appended if the continuation field contains a specified string (or another test, such as “not equal”, succeeds when applied to the continuation field). Physical records are appended if they contain a specified character as their last non-blank character. Binary versus Character Data Binary is a “native” datatype. Native datatypes may be implemented differently on different operating systems or on different hardware architectures. For more information on native datatypes, see “Native Datatypes” on page 5-51. Character data can be included in any record format. For more information on character datatypes, see “Character Datatypes” on page -58. SQL*Loader can load numeric data in binary or character format. Character format is sometimes referred to as numeric external format. Binary data should not be loaded using stream record format (newline terminated records) as a binary input field may contain a newline character that would incorrectly be considered to be the record delimiter. SQL*Loader Concepts 3-9 Data Conversion and Datatype Specification Data Fields Data (binary or character) in records is broken up into fields. Each field can be specified in terms of a specific position and length, or fields’ positions and lengths can vary, limited by delimiters, in the following example, commas: 1,1,2,3,5,8,13 Enclosed fields are both preceded and followed by enclosure delimiters, such as the quotation marks in the following example: ”BUNKY” Data Conversion and Datatype Specification Figure 3–4 shows the stages in which fields in the datafile are converted into columns in the database during a conventional path load (direct path loads are conceptually similar, but the implementation is different.) The top of the diagram shows a data record containing one or more fields. The bottom shows the destination database column. It is important to understand the intervening steps when using SQL*Loader. Figure 3–4 depicts the “division of labor” between SQL*Loader and the Oracle8 server. The field specifications tell SQL*Loader how to interpret the format of the datafile. The Oracle8 server then converts that data and inserts it into the database columns, using the column datatypes as a guide. Keep in mind the distinction between a field in a datafile and a column in the database. Remember also that the field datatypes defined in a SQL*Loader control file are not the same as the column datatypes. SQL*Loader uses the field specifications in the control file to parse the input data and populate the bind arrays which correspond to a SQL insert statement using that data. The insert statement is then executed by the Oracle8 server to be stored in the table. The Oracle8 server uses the datatype of the column to convert the data into its final, stored form. 3-10 Oracle8 Utilities Data Conversion and Datatype Specification In actuality, there are two conversion steps: 1. SQL*Loader identifies a field in the datafile, interprets the data, and passes it to the Oracle8 server via a bind buffer. 2. The Oracle8 server accepts the data and stores it in the database. Figure 3–4 Translation of Input Data Field to Oracle Database Column DATA FILE Data Field CONTROL FILE SQL LOADER How to interpret the field to recognize data. FIELD SPECIFICATION ROW INSERT DATA TO INSERT DATABASE TABLE SPECIFICATION SERVER How to convert and store the data. COLUMN DATATYPE DATABASE COLUMN STORED DATA SQL*Loader Concepts 3-11 Data Conversion and Datatype Specification In Figure 3–5, two CHAR fields are defined for a data record. The field specifications are contained in the control file. Note that the control file CHAR specification is not the same as the database CHAR specification. A data field defined as CHAR in the control file merely tells SQL*Loader how to create the row insert. The data could then be inserted into a CHAR, VARCHAR2, NCHAR, NVARCHAR, or even a NUMBER column in the database, with the Oracle8 Server handling any necessary conversions. By default, SQL*Loader removes trailing spaces from CHAR data before passing it to the database. So, in Figure 3–5, both field A and field B are passed to the database as three-column fields. When the data is inserted into the table, however, there is a difference. Figure 3–5 Example of Field Conversion Field 2 Field 1 DATA FILE a a a b b b CHAR (5) Control File Specifications CHAR (5) ROW INSERT aaa DATABASE bbb Table Column 1 3-12 Oracle8 Utilities SERVER Column 2 a a a _ _ CHAR (5) SQL LOADER b b b Column Datatypes VARCHAR (5) Discarded and Rejected Records Column A is defined in the database as a fixed-length CHAR column of length 5. So the data (aaa) is left justified in that column, which remains five characters wide. The extra space on the right is padded with blanks. Column B, however, is defined as a varying length field with a maximum length of five characters. The data for that column (bbb) is left-justified as well, but the length remains three characters. The name of the field tells SQL*Loader what column to insert the data into. Because the first data field has been specified with the name “A” in the control file, SQL*Loader knows to insert the data into column A of the target database table. It is useful to keep the following points in mind: ■ ■ ■ ■ The name of the data field corresponds to the name of the table column into which the data is to be loaded. The datatype of the field tells SQL*Loader how to treat the data in the datafile (e.g. bind type). It is not the same as the column datatype. SQL*Loader input datatypes are independent of the column datatype. Data is converted from the datatype specified in the control file to the datatype of the column in the database. The distinction between logical records and physical records. Discarded and Rejected Records Records read from the input file might not be inserted into the database. Figure 3–6 shows the stages at which records may be rejected or discarded. The Bad File The bad file contains records rejected, either by SQL*Loader or by Oracle. Some of the possible reasons for rejection are discussed in the next sections. SQL*Loader Rejects Records are rejected by SQL*Loader when the input format is invalid. For example, if the second enclosure delimiter is missing, or if a delimited field exceeds its maximum length, SQL*Loader rejects the record. Rejected records are placed in the bad file. For details on how to specify the bad file, see “Specifying the Bad File” on page 5-19 SQL*Loader Concepts 3-13 Discarded and Rejected Records Figure 3–6 Record Filtering Record Read in SQL*Loader Field Processing Accepted Rejected SQL*Loader When-clause Evaluation Discard File Discarded Selected RDBMS Inserted Database 3-14 Oracle8 Utilities Bad File Rejected Log File and Logging Information Oracle Rejects After a record is accepted for processing by SQL*Loader, a row is sent to Oracle8 for insertion. If Oracle determines that the row is valid, then the row is inserted into the database. If not, the record is rejected, and SQL*Loader puts it in the bad file. The row may be rejected, for example, because a key is not unique, because a required field is null, or because the field contains invalid data for the Oracle datatype. The bad file is written in the same format as the datafile. So rejected data can be loaded with the existing control file after necessary corrections are made. Case 4 on page 4-14 is an example of the use of a bad file. SQL*Loader Discards As SQL*Loader executes, it may create a file called the discard file. This file is created only when it is needed, and only if you have specified that a discard file should be enabled (see “Specifying the Discard File” on page 5-21). The discard file contains records that were filtered out of the load because they did not match any record-selection criteria specified in the control file. The discard file therefore contains records that were not inserted into any table in the database. You can specify the maximum number of such records that the discard file can accept. Data written to any database table is not written to the discard file. The discard file is written in the same format as the datafile. The discard data can be loaded with the existing control file, after any necessary editing or correcting. Case 4 on page 4-14 shows how the discard file is used. For more details, see “Specifying the Discard File” on page 5-21. Log File and Logging Information When SQL*Loader begins execution, it creates a log file. If it cannot create a log file, execution terminates. The log file contains a detailed summary of the load, including a description of any errors that occurred during the load. For details on the information contained in the log file, see Chapter 7, “SQL*Loader: Log File Reference”. All of the case studies in Chapter 4 also contain sample log files. SQL*Loader Concepts 3-15 Conventional Path Load versus Direct Path Load Conventional Path Load versus Direct Path Load SQL*Loader provides two methods to load data: Conventional Path, which uses a a SQL INSERT statement with a bind array, and Direct Path, which loads data directly into a database. These modes are discussed below and, more thoroughly, in Chapter 8, “SQL*Loader: Conventional and Direct Path Loads”. The tables to be loaded must already exist in the database, SQL*Loader never creates tables, it loads existing tables. Tables may already contain data, or they may be empty. The following privileges are required for a load: ■ ■ You must have INSERT privileges on the table to be loaded. You must have DELETE privilege on the table to be loaded, when using the REPLACE or TRUNCATE option to empty out the table’s old data before loading the new data in its place. In addition to the above privileges, you must have write access to all labels you are loading data into a Trusted Oracle database. See the Trusted Oracle7 Administrator’s Guide. Conventional Path During conventional path loads, the input records are parsed according to the field specifications, and each data field is copied to its corresponding bind array. When the bind array is full (or there is no more data left to read), an array insert is executed. For more information on conventional path loads, see “Data Loading Methods” on page 8-2. For information on the bind array, see “Determining the Size of the Bind Array” on page 5-65. There are no special requirements for tables being loaded via the conventional path. Direct Path A direct path load parses the input records according to the field specifications, converts the input field data to the column datatype and builds a column array. The column array is passed to a block formatter which creates data blocks in Oracle database block format. The newly formatted database blocks are written directly to the database bypassing most RDBMS processing. Direct path load is much faster than conventional path load, but entails several restrictions. For more information on the direct path, see “Data Loading Methods” on page 8-2. 3-16 Oracle8 Utilities Partitioned Object Support Parallel Direct Path A parallel direct path load allows multiple direct path load sessions to concurrently load the same data segments (allows intra-segment parallelism). Parallel Direct Path is more restrictive than Direct Path. For more information on the parallel direct path, see “Data Loading Methods” on page 8-2. Partitioned Object Support The Oracle8 SQL*Loader supports loading partitioned objects in the database. A partitioned object in Oracle8 is a table or index consisting of partitions (pieces) that have been grouped, typically by common logical attributes. For example, sales data for the year 1997 might be partitioned by month. The data for each month is stored in a separate partition of the sales table. Each partition is stored in a separate segment of the database and can have different physical attributes. Oracle8 SQL*Loader Partitioned Object Support enables SQL*Loader to load the following: ■ A single partition of a partitioned table ■ All partitions of a partitioned table ■ Non-partitioned table Oracle8 SQL*Loader supports partitioned objects in all three paths (modes): ■ ■ ■ Conventional Path: changed minimally from Oracle7, as mapping a row to a partition is handled transparently by SQL. Direct Path: changed significantly from Oracle7 to accommodate mapping rows to partitions of tables, to support local indexes, and to support global indexes, which can also be partitioned; direct path bypasses SQL and loads blocks directly into the database. Parallel Direct Path: changed from Oracle7 to include support for concurrent loading of an individual partition and also a partitioned table; allows multiple direct path load sessions to load the same segment or set of segments concurrently. Parallel direct path loads are used for intra-segment parallelism. Note that inter-segment parallelism can be achieved by concurrent single partition direct path loads with each load session loading a different partition of the same table. SQL*Loader Concepts 3-17 Partitioned Object Support 3-18 Oracle8 Utilities 4 SQL*Loader Case Studies The case studies in this chapter illustrate some of the features of SQL*Loader. These case studies start simply and progress in complexity. This chapter contains the following sections: ■ The Case Studies ■ Case Study Files ■ Tables Used in the Case Studies ■ References and Notes ■ Running the Case Study SQL Scripts ■ Case 1: Loading Variable-Length Data ■ Case 2: Loading Fixed-Format Fields ■ Case 3: Loading a Delimited, Free-Format File ■ Case 4: Loading Combined Physical Records ■ Case 5: Loading Data into Multiple Tables ■ Case 6: Loading Using the Direct Path Load Method ■ Case 7: Extracting Data from a Formatted Report ■ Case 8: Loading a Fixed Record Length Format File SQL*Loader Case Studies 4-1 The Case Studies The Case Studies This chapter contains the following case studies: Case 1: Loading Variable-Length Data Loads stream format records in which the fields are delimited by commas and may be enclosed by quotation marks. The data is found at the end of the control file. Case 2: Loading Fixed-Format Fields: Loads a datafile with fixed-length fields, streamformat records, all records the same length. Case 3: Loading a Delimited, Free-Format File Loads data from stream format records with delimited fields and sequence numbers. The data is found at the end of the control file. Case 4: Loading Combined Physical Records Combines multiple physical records into one logical record corresponding to one database row Case 5: Loading Data into Multiple Tables Loads data into multiple tables in one run Case 6: Loading Using the Direct Path Load Method Loads data using the direct path load method Case 7: Extracting Data from a Formatted Report Extracts data from a formatted report Case 8: Loading a Fixed Record Length Format File Loads a datafile using fixed record length and explicitly defined field positions and datatypes. Case Study Files The distribution media for SQL*Loader contains files for each case: ■ control files (for example, ULCASE1.CTL) ■ data files (for example, ULCASE2.DAT) ■ setup files (for example, ULCASE3.SQL) If the sample data for the case study is contained in the control file, then there will be no .DAT file for that case. If there are no special setup steps for a case study, there may be no .SQL file for that case. Starting (setup) and ending (cleanup) scripts are denoted by an S or E after the case number. 4-2 Oracle8 Utilities Tables Used in the Case Studies Table 4–1 lists the files associated with each case: Table 4–1 Case Studies and Their Related Files CASE .CTL 1 x .DAT .SQL 2 x 3 x 4 x x x 5 x x x 6 x x x 7 x x x S, E 8 x x x x x x Additional Information: The actual names of the case study files are operating system-dependent. See your Oracle operating system-specific documentation for the exact names. Tables Used in the Case Studies The case studies are based upon the standard Oracle demonstration database tables EMP and DEPT owned by SCOTT/TIGER. (In some of the case studies, additional columns have been added.) Contents of Table EMP (empno ename job mgr hiredate sal comm deptno NUMBER(4) NOT NULL, VARCHAR2(10), VARCHAR2(9), NUMBER(4), DATE, NUMBER(7,2), NUMBER(7,2), NUMBER(2)) SQL*Loader Case Studies 4-3 References and Notes Contents of Table DEPT (deptno dname loc NUMBER(2) NOT NULL, VARCHAR2(14), VARCHAR2(13)) References and Notes The summary at the beginning of each case study contains page number references, directing you to the sections of this guide that discuss the SQL*Loader feature being demonstrated in more detail. In the control file fragment and log file listing shown for each case study, the numbers that appear to the left are not actually in the file; they are keyed to the numbered notes following the listing. Do not use these numbers when you write your control files. Running the Case Study SQL Scripts You should run the SQL scripts ULCASE1.SQL and ULCASE3.SQL through ULCASE7.SQL to prepare and populate the tables. Note that there is no ULCASE2.SQL as Case 2 is handled by ULCASE1.SQL. 4-4 Oracle8 Utilities Case 1: Loading Variable-Length Data Case 1: Loading Variable-Length Data Case 1 demonstrates ■ ■ ■ A simple control file identifying one table and three columns to be loaded. See “Including Data in the Control File with BEGINDATA” on page 5-15. Including data to be loaded from the control file itself, so there is no separate datafile. See “Including Data in the Control File with BEGINDATA” on page 5-15. Loading data in stream format, with both types of delimited fields — terminated and enclosed. See “Delimited Fields” on page 5-64. Control File The control file is ULCASE1.CTL: 1) 2) 3) 4) 5) 6) LOAD DATA INFILE * INTO TABLE dept FIELDS TERMINATED BY ’,’ OPTIONALLY ENCLOSED BY ’”’ (deptno, dname, loc) BEGINDATA 12,RESEARCH,”SARATOGA” 10,”ACCOUNTING”,CLEVELAND 11,”ART”,SALEM 13,FINANCE,”BOSTON” 21,”SALES”,PHILA. 22,”SALES”,ROCHESTER 42,”INT’L”,”SAN FRAN” Notes: 1. The LOAD DATA statement is required at the beginning of the control file. 2. INFILE * specifies that the data is found in the control file and not in an external file. 3. The INTO TABLE statement is required to identify the table to be loaded (DEPT) into. By default, SQL*Loader requires the table to be empty before it inserts any records. 4. FIELDS TERMINATED BY specifies that the data is terminated by commas, but may also be enclosed by quotation marks. Datatypes for all fields default to CHAR. SQL*Loader Case Studies 4-5 Case 1: Loading Variable-Length Data 5. Specifies that the names of columns to load are enclosed in parentheses. Since no datatype is specified, the default is a character of length 255. 6. BEGINDATA specifies the beginning of the data. Invoking SQL*Loader To run this example, invoke SQL*Loader with the command: sqlldr userid=scott/tiger control=ulcase1.ctl log=ulcase1.log SQL*Loader loads the DEPT table and creates the log file. Additional Information: The command “sqlldr” is a UNIX-specific invocation. To invoke SQL*Loader on your operating system, refer to your Oracle operating system-specific documentation. Log File The following shows a portion of the log file: Control File: ULCASE1.CTL Data File: ULCASE1.DAT Bad File: ULCASE1.BAD Discard File: none specified (Allow all discards) Number to load: ALL Number to skip: 0 Errors allowed: 50 Bind array: 64 rows, maximum of 65336 bytes Continuation: none specified Path used: Conventional Table DEPT, loaded from every logical record. Insert option in effect for this table: INSERT Column Name Position Len Term Encl Datatype --------------- ---------------- --------1) DEPTNO FIRST * , O(”) CHARACTER DNAME NEXT * , O(”) CHARACTER 2) LOC NEXT * WHT O(”) CHARACTER Table DEPT: 7 Rows successfully loaded. 0 Rows not loaded due to data errors. 0 Rows not loaded because all WHEN clauses were failed. 0 Rows not loaded because all fields were null. Space allocated for bind array: 49920 bytes(64 rows) Space allocated for memory besides bind array: 76000 bytes 4-6 Oracle8 Utilities Case 1: Loading Variable-Length Data Total Total Total Total logical logical logical logical records records records records skipped: read: rejected: discarded: 0 7 0 0 Notes: 1. Position and length for each field are determined for each record, based on delimiters in the input file. 2. WHT signifies that field LOC is terminated by WHITESPACE. The notation O(”) signifies optional enclosure by quotation marks. SQL*Loader Case Studies 4-7 Case 2: Loading Fixed-Format Fields Case 2: Loading Fixed-Format Fields Case 2 demonstrates ■ A separate datafile. See “Identifying Datafiles” on page 5-16. ■ Data conversions. See “Datatype Conversions” on page 5-50. In this case, the field positions and datatypes are specified explicitly. Control File The control file is ULCASE2.CTL. 1) 2) 3) 4) LOAD DATA INFILE ’ulcase2.dat’ INTO TABLE emp (empno POSITION(01:04) ename POSITION(06:15) job POSITION(17:25) mgr POSITION(27:30) sal POSITION(32:39) comm POSITION(41:48) 5) deptno POSITION(50:51) INTEGER CHAR, CHAR, INTEGER DECIMAL DECIMAL INTEGER EXTERNAL, EXTERNAL, EXTERNAL, EXTERNAL, EXTERNAL) Notes: 1. The LOAD DATA statement is required at the beginning of the control file. 2. The name of the file containing data follows the keyword INFILE. 3. The INTO TABLE statement is required to identify the table to be loaded into. 4. Lines 4 and 5 identify a column name and the location of the data in the datafile to be loaded into that column. EMPNO, ENAME, JOB, and so on are names of columns in table EMP. The datatypes (INTEGER EXTERNAL, CHAR, DECIMAL EXTERNAL) identify the datatype of data fields in the file, not of corresponding columns in the EMP table. 5. Note that the set of column specifications is enclosed in parentheses. 4-8 Oracle8 Utilities Case 2: Loading Fixed-Format Fields Datafile Below are a few sample data lines from the file ULCASE2.DAT. Blank fields are set to null automatically. 782 CLARK 7839 KING 7934 MILLER 7566 JONES 7499 ALLEN 7654 MARTIN MANAGER PRESIDENT CLERK MANAGER SALESMAN SALESMAN 7839 2572.50 5500.00 7782 920.00 7839 3123.75 7698 1600.00 300.00 7698 1312.50 1400.00 10 10 10 20 30 30 Invoking SQL*Loader Invoke SQL*Loader with a command such as: sqlldr userid=scott/tiger control=ulcase2.ctl log=ulcase2.log EMP records loaded in this example contain department numbers. Unless the DEPT table is loaded first, referential integrity checking rejects these records (if referential integrity constraints are enabled for the EMP table). Additional Information: The command “sqlldr” is a UNIX-specific invocation. To invoke SQL*Loader on your operating system, refer to your Oracle operating system-specific documentation. Log File The following shows a portion of the log file: Control File: ULCASE2.CTL Data File: ULCASE2.DAT Bad File: ULCASE2.BAD Discard File: none specified (Allow all discards) Number to load: ALL Number to skip: 0 Errors allowed: 50 Bind array: 64 rows, maximum of 65336 bytes Continuation: none specified Path used: Conventional SQL*Loader Case Studies 4-9 Case 2: Loading Fixed-Format Fields Table EMP, loaded from every logical record. Insert option in effect for this table: INSERT Column Name Position Len Term Encl Datatype ------------------------------ -------EMPNO 1:4 4 CHARACTER ENAME 6:15 10 CHARACTER JOB 17:25 9 CHARACTER MGR 27:30 4 CHARACTER SAL 32:39 8 CHARACTER COMM 41:48 8 CHARACTER DEPTNO 50:51 2 CHARACTER Table EMP: 7 Rows successfully loaded. 0 Rows not loaded due to data errors. 0 Rows not loaded because all WHEN clauses were failed. 0 Rows not loaded because all fields were null. Space allocated for bind array 4352 bytes(64 rows) Space allocated for memory besides bind array: 37051 bytes Total logical records skipped: 0 Total logical records read: 7 Total logical records rejected: 0 Total logical records discarded: 0 4-10 Oracle8 Utilities Case 3: Loading a Delimited, Free-Format File Case 3: Loading a Delimited, Free-Format File Case 3 demonstrates ■ ■ ■ ■ ■ ■ Loading data (enclosed and terminated) in stream format. See “Delimited Fields” on page 5-64. Loading dates using the datatype DATE. See “DATE” on page 5-58. Using SEQUENCE numbers to generate unique keys for loaded data. See “Setting a Column to a Unique Sequence Number” on page 5-48. Using APPEND to indicate that the table need not be empty before inserting new records. See “Loading into Empty and Non-Empty Tables” on page 5-25. Using Comments in the control file set off by double dashes. See “Comments” on page 5-11. Overriding general specifications with declarations for individual fields. See “Specifying Field Conditions” on page 5-37. Control File This control file loads the same table as in Case 2, but it loads three additional columns (HIREDATE, PROJNO, LOADSEQ). The demonstration table EMP does not have columns PROJNO and LOADSEQ. So if you want to test this control file, add these columns to the EMP table with the command: ALTER TABLE EMP ADD (PROJNO NUMBER, LOADSEQ NUMBER) The data is in a different format than in Case 2. Some data is enclosed in quotation marks, some is set off by commas, and the values for DEPTNO and PROJNO are separated by a colon. 1) 2) 3) 4) 5) 6) 7) 8) -- Variable-length, delimited and enclosed data format LOAD DATA INFILE * APPEND INTO TABLE emp FIELDS TERMINATED BY ”,” OPTIONALLY ENCLOSED BY ’”’ (empno, ename, job, mgr, DATE(20) ”DD-Month-YYYY”, sal, comm, deptno CHAR TERMINATED BY ’:’, projno, loadseq SEQUENCE(MAX,1)) BEGINDATA 7782, ”Clark”, ”Manager”, 7839, 09-June-1981, 2572.50,, 10:101 SQL*Loader Case Studies 4-11 Case 3: Loading a Delimited, Free-Format File 7839, 7934, 7566, 7499, (same 7654, (same 7658, ”King”, ”President”, , 17-November-1981,5500.00,,10:102 ”Miller”, ”Clerk”, 7782, 23-January-1982, 920.00,, 10:102 ”Jones”, ”Manager”, 7839, 02-April-1981, 3123.75,, 20:101 ”Allen”, ”Salesman”, 7698, 20-February-1981, 1600.00, line continued) 300.00, 30:103 ”Martin”, ”Salesman”, 7698, 28-September-1981, 1312.50, line continued) 1400.00, 3:103 ”Chan”, ”Analyst”, 7566, 03-May-1982, 3450,, 20:101 Notes: 1. Comments may appear anywhere in the command lines of the file, but they should not appear in data. They are preceded with a double dash that may appear anywhere on a line. 2. INFILE * specifies that the data is found at the end of the control file. 3. Specifies that the data can be loaded even if the table already contains rows. That is, the table need not be empty. 4. The default terminator for the data fields is a comma, and some fields may be enclosed by double quotation marks (”). 5. The data to be loaded into column HIREDATE appears in the format DDMonth-YYYY. The length of the date field is a maximum of 20. If a length is not specified, the length is a maximum of 20. If a length is not specified, then the length depends on the length of the date mask. 6. The SEQUENCE function generates a unique value in the column LOADSEQ. This function finds the current maximum value in column LOADSEQ and adds the increment (1) to it to obtain the value for LOADSEQ for each row inserted. 7. BEGINDATA specifies the end of the control information and the beginning of the data. 8. Although each physical record equals one logical record, the fields vary in length so that some records are longer than others. Note also that several rows have null values for COMM. Invoking SQL*Loader Invoke SQL*Loader with a command such as: sqlldr userid=scott/tiger control=ulcase3.ctl log=ulcase3.log 4-12 Oracle8 Utilities Case 3: Loading a Delimited, Free-Format File Additional Information: The command “sqlldr” is a UNIX-specific invocation. To invoke SQL*Loader on your operating system, see your Oracle operating systemspecific documentation. Log File The following shows a portion of the log file: Control File: ULCASE3.CTL Data File: ULCASE3.DAT Bad File: ULCASE3.BAD Discard File: none specified (Allow all discards) Number to load: ALL Number to skip: 0 Errors allowed: 50 Bind array: 64 rows, maximum of 65336 bytes Continuation: none specified Path used: Conventional Table EMP, loaded from every logical record. Insert option in effect for this table: APPEND Column Name Position Len Term Encl Datatype ------------- -------- --- ---- ---- ---------EMPNO FIRST * , O(”) CHARACTER ENAME NEXT * , O(”) CHARACTER JOB NEXT * , O(”) CHARACTER MGR NEXT * , O(”) CHARACTER HIREDATE NEXT 20 , O(”) DATE DD-Month-YYYY SAL NEXT * , O(”) CHARACTER COMM NEXT * , O(”) CHARACTER DEPTNO NEXT * : O(”) CHARACTER PROJNO NEXT * , O(”) CHARACTER LOADSEQ SEQUENCE (MAX, 1) Table EMP: 7 Rows successfully loaded. 0 Rows not loaded due to data errors. 0 Rows not loaded because all WHEN clauses were failed. 0 Rows not loaded because all fields were null. Space allocated for bind array: 63810 bytes(30 rows) Space allocated for memory besides bind array: 94391 bytes Total logical records skipped: 0 Total logical records read: 7 Total logical records rejected: 0 Total logical records discarded: 0 SQL*Loader Case Studies 4-13 Case 4: Loading Combined Physical Records Case 4: Loading Combined Physical Records Case 4 demonstrates: ■ ■ ■ ■ ■ ■ Combining multiple physical records to form one logical record with CONTINUEIF; see “Assembling Logical Records from Physical Records” on page 5-29. Inserting negative numbers. Indicating with REPLACE that the table should be emptied before the new data is inserted; see “Loading into Empty and Non-Empty Tables” on page 5-25. Specifying a discard file in the control file using DISCARDFILE; see “Specifying the Discard File” on page 5-21. Specifying a maximum number of discards using DISCARDMAX; see “Specifying the Discard File” on page 5-21. Rejecting records due to duplicate values in a unique index or due to invalid data values; see “Rejected Records” on page 5-20. Control File The control file is ULCASE4.CTL: LOAD DATA INFILE ’ulcase4.dat’ 1) DISCARDFILE ’ulcase4.dsc’ 2) DISCARDMAX 999 3) REPLACE 4) CONTINUEIF THIS (1) = ’*’ INTO TABLE emp (empno POSITION(1:4) ename POSITION(6:15) job POSITION(17:25) mgr POSITION(27:30) sal POSITION(32:39) comm POSITION(41:48) deptno POSITION(50:51) hiredate POSITION(52:60) INTEGER CHAR, CHAR, INTEGER DECIMAL DECIMAL INTEGER INTEGER EXTERNAL, EXTERNAL, EXTERNAL, EXTERNAL, EXTERNAL, EXTERNAL) Notes: 4-14 1. DISCARDFILE specifies a discard file named ULCASE4.DSC. 2. DISCARDMAX specifies a maximum of 999 discards allowed before terminating the run (for all practical purposes, this allows all discards). Oracle8 Utilities Case 4: Loading Combined Physical Records 3. REPLACE specifies that if there is data in the table being loaded, then SQL*Loader should delete that data before loading new data. 4. CONTINUEIF THIS specifies that if an asterisk is found in column 1 of the current record, then the next physical record after that record should be appended to it to from the logical record. Note that column 1 in each physical record should then contain either an asterisk or a non-data value. Data File The datafile for this case, ULCASE4.DAT, is listed below. Note the asterisks in the first position and, though not visible, a new line indicator is in position 20 (following “MA”, “PR”, and so on). Note that CLARK’s commission is -10, and SQL*Loader loads the value converting it to a negative number. *7782 CLARK MANAGER 7839 *7839 KING PRESIDENT *7934 MILLER CLERK 7782 *7566 JONES MANAGER 7839 *7499 ALLEN SALESMAN 7698 *7654 MARTIN SALESMAN 7698 *7658 CHAN ANALYST 7566 * CHEN ANALYST 7566 *7658 CHIN ANALYST 7566 2572.50 -10 2512-NOV-85 5500.00 2505-APR-83 920.00 2508-MAY-80 3123.75 2517-JUL-85 1600.00 300.00 25 3-JUN-84 1312.50 1400.00 2521-DEC-85 3450.00 2516-FEB-84 3450.00 2516-FEB-84 3450.00 2516-FEB-84 Rejected Records The last two records are rejected, given two assumptions. If there is a unique index created on column EMPNO, then the record for CHIN will be rejected because his EMPNO is identical to CHAN’s. If EMPNO is defined as NOT NULL, then CHEN’s record will be rejected because it has no value for EMPNO. SQL*Loader Case Studies 4-15 Case 4: Loading Combined Physical Records Invoking SQL*Loader Invoke SQL*Loader with a command such as: sqlldr userid=scott/tiger control=ulcase4.ctl log=ulcase4.log Additional Information: The command “sqlldr” is a UNIX-specific invocation. To invoke SQL*Loader on your operating system, see your operating Oracle systemspecific documentation. Log File The following is a portion of the log file: Control File: ULCASE4.CTL Data File: ULCASE4.DAT Bad File: ULCASE4.BAD Discard File: ULCASE4.DSC (Allow 999 discards) Number to load: Number to skip: Errors allowed: Bind array: Continuation: Path used: ALL 0 50 64 rows, maximum of 65336 bytes 1:1 = 0X2a(character ’*’), in current physical record Conventional Table EMP, loaded from every logical record. Insert option in effect for this table: REPLACE Column Name Position -------------------EMPNO 1:4 ENAME 6:15 JOB 17:25 MGR 27:30 SAL 32:39 COMM 41:48 DEPTNO 50:51 HIREDATE 52:60 Len --4 10 9 4 8 8 2 9 Term Encl Datatype ---- ----- ---------CHARACTER CHARACTER CHARACTER CHARACTER CHARACTER CHARACTER CHARACTER CHARACTER Record 8: Rejected - Error on table EMP, --EMPNO null ORA-01400: mandatory (NOT NULL) column is missing or NULL during insert Record 9: Rejected - Error on table EMP. --EMPNO not unique 4-16 Oracle8 Utilities Case 4: Loading Combined Physical Records ORA-00001: Table EMP: 7 Rows 2 Rows 0 Rows 0 Rows unique constraint (SCOTT.EMPIX) violated successfully loaded. not loaded due to data errors. not loaded because all WHEN clauses were failed. not loaded because all fields were null. Space allocated for bind array: 5120 bytes(64 rows) Space allocated for memory besides bind array: 40195 bytes Total Total Total Total logical logical logical logical records records records records skipped: read: rejected: discarded: 0 9 2 0 Bad File The bad file, shown below, lists records 8 and 9 for the reasons stated earlier. (The discard file is not created.) * * CHEN 7566 CHIN 7566 ANALYST 3450.00 ANALYST 3450.00 2516-FEB-84 2516-FEB-84 SQL*Loader Case Studies 4-17 Case 5: Loading Data into Multiple Tables Case 5: Loading Data into Multiple Tables Case 5 demonstrates ■ ■ ■ Loading multiple tables. See “Loading Data into Multiple Tables” on page 5-45. Using SQL*Loader to break down repeating groups in a flat file and load the data into normalized tables — one file record may generate multiple database rows Deriving multiple logical records from each physical record. See “Using Multiple INTO TABLE Statements” on page 5-43. ■ Using a WHEN clause. See “Choosing which Rows to Load” on page 5-34. ■ Loading the same field (EMPNO) into multiple tables. Control File The control file is ULCASE5.CTL. 1) 2) 2) 3) 3) 3) 4) 4) -- Loads EMP records from first 23 characters -- Creates and loads PROJ records for each PROJNO -- for each employee LOAD DATA INFILE ’ulcase5.dat’ BADFILE ’ulcase5.bad’ DISCARDFILE ’ulcase5.dsc’ REPLACE INTO TABLE emp (empno POSITION(1:4) INTEGER EXTERNAL, ename POSITION(6:15) CHAR, deptno POSITION(17:18) CHAR, mgr POSITION(20:23) INTEGER EXTERNAL) INTO TABLE proj -- PROJ has two columns, both not null: EMPNO and WHEN projno != ’ ’ (empno POSITION(1:4) INTEGER EXTERNAL, projno POSITION(25:27) INTEGER EXTERNAL) -INTO TABLE proj WHEN projno != ’ ’ (empno POSITION(1:4) INTEGER EXTERNAL, projno POSITION(29:31 INTEGER EXTERNAL) -- 2) INTO TABLE proj 5) WHEN projno != ’ ’ (empno POSITION(1:4) 4-18 Oracle8 Utilities INTEGER EXTERNAL, listed PROJNO 1st proj 2nd proj Case 5: Loading Data into Multiple Tables 5) projno POSITION(33:35) INTEGER EXTERNAL) -- 3rd proj Notes: 1. REPLACE specifies that if there is data in the tables to be loaded (EMP and PROJ), SQL*loader should delete the data before loading new rows. 2. Multiple INTO clauses load two tables, EMP and PROJ. The same set of records is processed three times, using different combinations of columns each time to load table PROJ. 3. WHEN loads only rows with non-blank project numbers. When PROJNO is defined as columns 25...27, rows are inserted into PROJ only if there is a value in those columns. 4. When PROJNO is defined as columns 29...31, rows are inserted into PROJ only if there is a value in those columns. 5. When PROJNO is defined as columns 33...35, rows are inserted into PROJ only if there is a value in those columns. Data File The following is datafile for Case 5: 1234 1234 2664 5321 2134 2414 6542 2849 4532 1244 123 1453 BAKER JOKER YOUNG OTOOLE FARMER LITTLE LEE EDDS PERKINS HUNT DOOLITTLE MACDONALD 10 10 20 10 20 20 10 xx 10 11 12 25 9999 9999 2893 9999 4555 5634 4532 4555 9999 3452 9940 5532 101 777 425 321 236 236 102 102 888 abc 55 456 456 321 294 103 999 102 40 40 14 40 40 665 133 456 132 200 Invoking SQL*Loader Invoke SQL*Loader with a command such as: sqlldr userid=scott/tiger control=ulcase5.ctl log=ulcase5.log SQL*Loader Case Studies 4-19 Case 5: Loading Data into Multiple Tables Additional Information: The command “sqlldr” is a UNIX-specific invocation. To invoke SQL*Loader on your operating system, see your Oracle operating systemspecific documentation. Log File The following is a portion of the log file: Control File: ULCASE5.CTL Data File: ULCASE5.DAT Bad File: ULCASE5.BAD Discard File: ULCASE5.DSC (Allow all discards) Number to load: ALL Number to skip: 0 Errors allowed: 50 Bind array: 64 rows, maximum of 65336 bytes Continuation: none specified Path used: Conventional Table EMP, loaded from every logical record. Insert option in effect for this table: REPLACE Column Name Position Len Term Encl ----------------------------EMPNO 1:4 4 ENAME 6:15 10 DEPTNO 17:18 2 MGR 20:23 4 Table PROJ, loaded when PROJNO != 0x202020(character ’ Insert option in effect for this table: REPLACE Column Name Position Len Term Encl --------------------------EMPNO 1:4 4 PROJNO 25:27 3 Table PROJ, loaded when PROJNO != 0x202020(character ’ Insert option in effect for this table: REPLACE Column Name Position Len Term Encl --------------------------EMPNO 1:4 4 PROJNO 29:31 3 Table PROJ, loaded when PROJNO != 0x202020(character ’ Insert option in effect for this table: REPLACE Column Name Position Len Term Encl ---------------------------EMPNO 1:4 4 PROJNO 33:35 3 4-20 Oracle8 Utilities Datatype ---------CHARACTER CHARACTER CHARACTER CHARACTER ’) Datatype ---------CHARACTER CHARACTER ’) Datatype ---------CHARACTER CHARACTER ’) Datatype ---------CHARACTER CHARACTER Case 5: Loading Data into Multiple Tables 1) 1) 1) 1) 1) 1) 1) Record 2: Rejected - Error on table EMP, column DEPTNO. ORA-00001: unique constraint (SCOTT.EMPIX) violated ORA-01722: invalid number Record 8: Rejected - Error on table EMP, column DEPTNO. ORA-01722: invalid number Record 3: Rejected - Error on table PROJ, column PROJNO. ORA-01722: invalid number Table EMP: 9 Rows successfully loaded. 3 Rows not loaded due to data errors. 0 Rows not loaded because all WHEN clauses were failed. 0 Rows not loaded because all fields were null. Table PROJ: 3) 7 Rows successfully loaded. 3) 2 Rows not loaded due to data errors. 3) 3 Rows not loaded because all WHEN clauses were failed. 3) 0 Rows not loaded because all fields were null. Table PROJ: 4) 7 Rows successfully loaded. 4) 3 Rows not loaded due to data errors. 4) 2 Rows not loaded because all WHEN clauses were failed. 4) 0 Rows not loaded because all fields were null. Table PROJ: 5) 6 Rows successfully loaded. 5) 3 Rows not loaded due to data errors. 5) 3 Rows not loaded because all WHEN clauses were failed. 5) 0 Rows not loaded because all fields were null. Space allocated for bind array: 5120 bytes (64 rows) Space allocated for memory besides bind array: 46763 bytes Total logical records skipped: 0 Total logical records read: 12 Total logical records rejected: 3 Total logical records discarded: 0 2) 2) 2) 2) Notes: 1. Errors are not encountered in the same order as the physical records due to buffering (array batch). The bad file and discard file contain records in the same order as they appear in the log file. 2. Of the 12 logical records for input, three rows were rejected (rows for JOKER, YOUNG, and EDDS). No data was loaded for any of the rejected records. SQL*Loader Case Studies 4-21 Case 5: Loading Data into Multiple Tables 3. Nine records met the WHEN clause criteria, and two (JOKER and YOUNG) were rejected due to data errors. 4. Ten records met the WHEN clause criteria, and three (JOKER, YOUNG, and EDDS) were rejected due to data errors. 5. Nine records met the WHEN clause criteria, and three (JOKER, YOUNG, and EDDS) were rejected due to data errors. Loaded Tables These are results of this execution of SQL*Loader: SQL> SELECT empno, ename, EMPNO ENAME ----------1234 BAKER 5321 OTOOLE 2134 FARMER 2414 LITTLE 6542 LEE 4532 PERKINS 1244 HUNT 123 DOOLITTLE 1453 ALBERT mgr, deptno FROM emp; MGR DEPTNO ----------9999 10 9999 10 4555 20 5634 20 4532 10 9999 10 3452 11 9940 12 5532 25 SQL> SELECT * from PROJ order by EMPNO; EMPNO -----123 1234 1234 1234 1244 1244 1244 1453 2134 2134 2414 2414 2414 4532 5321 5321 4-22 Oracle8 Utilities PROJNO -----132 101 103 102 665 456 133 200 236 456 236 456 40 40 321 40 Case 5: Loading Data into Multiple Tables 5321 6542 6542 6542 55 102 14 321 SQL*Loader Case Studies 4-23 Case 6: Loading Using the Direct Path Load Method Case 6: Loading Using the Direct Path Load Method This case study loads the EMP table using the direct path load method and concurrently builds all indexes. It illustrates the following functions: ■ ■ ■ ■ Use of the direct path load method to load and index data. See Chapter 8, “SQL*Loader: Conventional and Direct Path Loads”. How to specify the indexes for which the data is pre-sorted. See “Pre-sorting Data for Faster Indexing” on page 8-16. Loading all-blank numeric fields as null. See “Loading All-Blank Fields” on page 5-72. The NULLIF clause. See “NULLIF Keyword” on page 5-71. Note: Specify the name of the table into which you want to load data; otherwise, you will see LDR-927. Specifying DIRECT=TRUE as a command-line parameter is not an option when loading into a synonym for a table. In this example, field positions and datatypes are specified explicitly. Control File The control file is ULCASE6.CTL. LOAD DATA INFILE ’ulcase6.dat’ INSERT INTO TABLE emp 1) SORTED INDEXES (empix) 2) (empno POSITION(01:04) INTEGER EXTERNAL NULLIF empno=BLANKS, ename POSITION(06:15) CHAR, job POSITION(17:25) CHAR, mgr POSITION(27:30) INTEGER EXTERNAL NULLIF mgr=BLANKS, sal POSITION(32:39) DECIMAL EXTERNAL NULLIF sal=BLANKS, comm POSITION(41:48) DECIMAL EXTERNAL NULLIF comm=BLANKS, deptno POSITION(50:51) INTEGER EXTERNAL NULLIF deptno=BLANKS) Notes: 1. 4-24 Oracle8 Utilities The SORTED INDEXES clause identifies indexes:presorting data:case studythe indexes on which the data is sorted. This clause indicates that the datafile is sorted on the columns in the EMPIX index. This clause allows SQL*Loader to optimize index creation by eliminating the sort phase for this data when using the direct path load method. Case 6: Loading Using the Direct Path Load Method 2. The NULLIF...BLANKS clause specifies that the column should be loaded as NULL if the field in the datafile consists of all blanks. For more information, refer to “Loading All-Blank Fields” on page 5-72. Invoking SQL*Loader Run the script ULCASE6.SQL as SCOTT/TIGER then enter the following at the command line: sqlldr scott/tiger ulcase6.ctl direct=true log=ulcase6.log Additional Information: The command “sqlldr” is a UNIX-specific invocation. To invoke SQL*Loader on your operating system, see your Oracle operating system-specific documentation. Log File The following is a portion of the log file: Control File: ULCASE6.CTL Data File: ULCASE6.DAT Bad File: ULCASE6.BAD Discard File: none specified (Allow all discards) Number to load: ALL Number to skip: 0 Errors allowed: 50 Continuation: none specified Path used: Direct Table EMP, loaded from every logical record. Insert option in effect for this table: REPLACE Column Name Position Len Term Encl Datatype ------------------------ --------- ----- ---- ---- -------EMPNO 1:4 4 CHARACTER ENAME 6:15 10 CHARACTER JOB 17:25 9 CHARACTER MGR 27:30 4 CHARACTER SAL 32:39 8 CHARACTER COMM 41:48 8 CHARACTER DEPTNO 50:51 2 CHARACTER Column EMPNO is NULL if EMPNO = BLANKS Column MGR is NULL if MGR = BLANKS Column SAL is NULL if SAL = BLANKS SQL*Loader Case Studies 4-25 Case 6: Loading Using the Direct Path Load Method Column COMM is NULL if COMM = BLANKS Column DEPTNO is NULL if DEPTNO = BLANKS The following index(es) on table EMP were processed: Index EMPIX was loaded. Table EMP: 7 Rows successfully loaded. 0 Rows not loaded due to data errors. 0 Rows not loaded because all WHEN clauses were failed. 0 Rows not loaded because all fields were null. Bind array size not used in direct path. Space allocated for memory besides bind array: Total Total Total Total 4-26 Oracle8 Utilities logical logical logical logical records records records records skipped: read: rejected: discarded: 0 7 0 0 164342 bytes Case 7: Extracting Data from a Formatted Report Case 7: Extracting Data from a Formatted Report In this case study, SQL*Loader’s string processing functions extract data from a formatted report. It illustrates the following functions: ■ ■ ■ ■ ■ ■ Using SQL*Loader with an INSERT trigger (see the chapter on database triggers in Oracle8 Application Developer’s Guide Use of the SQL string to manipulate data; see “Applying SQL Operators to Fields” on page 5-78. Different initial and trailing delimiters; see “Specifying Delimiters” on page 5-60. Use of SYSDATE; see “Setting a Column to the Current Date” on page 5-47. Use of the TRAILING NULLCOLS clause; see “TRAILING NULLCOLS” on page 5-36. Ambiguous field length warnings; see “Conflicting Native Datatype Field Lengths” on page 5-57 and “Conflicting Character Datatype Field Lengths” on page 5-63. Note: This example creates a trigger that uses the last value of unspecified fields. Data File The following listing of the report shows the data to be loaded: Today’s Newly Hired Employees Dept Job Manager MgrNo Emp Name ---- -------- -------- ----- -------20 Salesman Blake 7698 Shepard Falstaff Major 30 Clerk Scott 7788 Conrad Ford DeSilva Manager King 7839 Provo EmpNo ----8061 8066 8064 8062 7369 8063 8065 Salary --------$1,600.00 $1,250.00 $1,250.00 $1,100.00 (Comm) -----(3%) (5%) (14%) $800.00 $2,975.00 Insert Trigger In this case, a BEFORE INSERT trigger is required to fill in department number, job name, and manager’s number when these fields are not present on a data line. When values are present, they should be saved in a global variable. When values are not present, the global variables are used. SQL*Loader Case Studies 4-27 Case 7: Extracting Data from a Formatted Report The INSERT trigger and the package defining the global variables is: CREATE OR REPLACE PACKAGE uldemo7 AS -- Global Package Variables last_deptno NUMBER(2); last_job VARCHAR2(9); last_mgr NUMBER(4); END uldemo7; / CREATE OR REPLACE TRIGGER uldemo7_emp_insert BEFORE INSERT ON emp FOR EACH ROW BEGIN IF :new.deptno IS NOT NULL THEN uldemo7.last_deptno := :new.deptno; -- save value for later ELSE :new.deptno := uldemo7.last_deptno; -- use last valid value END IF; IF :new.job IS NOT NULL THEN uldemo7.last_job := :new.job; ELSE :new.job := uldemo7.last_job; END IF; IF :new.mgr IS NOT NULL THEN uldemo7.last_mgr := :new.mgr; ELSE :new.mgr := uldemo7.last_mgr; END IF; END; / Note: The phrase FOR EACH ROW is important. If it was not specified, the INSERT trigger would only fire once for each array of inserts because SQL*Loader uses the array interface. Control File The control file is ULCASE7.CTL. 1) 2) 3) 4) 5) 4-28 Oracle8 Utilities LOAD DATA INFILE ’ULCASE7.DAT’ APPEND INTO TABLE emp WHEN (57) = ’.’ TRAILING NULLCOLS (hiredate SYSDATE, deptno POSITION(1:2) INTEGER EXTERNAL(3) NULLIF deptno=BLANKS, Case 7: Extracting Data from a Formatted Report job POSITION(7:14) CHAR TERMINATED BY WHITESPACE NULLIF job=BLANKS ”UPPER(:job)”, mgr POSITION(28:31) INTEGER EXTERNAL TERMINATED BY WHITESPACE, NULLIF mgr=BLANKS, ename POSITION(34:41) CHAR TERMINATED BY WHITESPACE ”UPPER(:ename)”, empno POSITION(45) INTEGER EXTERNAL TERMINATED BY WHITESPACE, sal POSITION(51) CHAR TERMINATED BY WHITESPACE ”TO_NUMBER(:sal,’$99,999.99’)”, comm INTEGER EXTERNAL ENCLOSED BY ’(’ AND ’%’ ”:comm * 100” 6) 7) 8) 9) ) Notes: 1. The decimal point in column 57 (the salary field) identifies a line with data on it. All other lines in the report are discarded. 2. The TRAILING NULLCOLS clause causes SQL*Loader to treat any fields that are missing at the end of a record as null. Because the commission field is not present for every record, this clause says to load a null commission instead of rejecting the record when only six fields are found instead of the expected seven. 3. Employee’s hire date is filled in using the current system date. 4. This specification generates a warning message because the specified length does not agree with the length determined by the field’s position. The specified length (3) is used. 5. Because the report only shows department number, job, and manager when the value changes, these fields may be blank. This control file causes them to be loaded as null, and an RDBMS insert trigger fills in the last valid value. 6. The SQL string changes the job name to uppercase letters. 7. It is necessary to specify starting position here. If the job field and the manager field were both blank, then the job field’s TERMINATED BY BLANKS clause would cause SQL*Loader to scan forward to the employee name field. Without the POSITION clause, the employee name field would be mistakenly interpreted as the manager field. 8. Here, the SQL string translates the field from a formatted character string into a number. The numeric value takes less space and can be printed with a variety of formatting options. SQL*Loader Case Studies 4-29 Case 7: Extracting Data from a Formatted Report 9. In this case, different initial and trailing delimiters pick the numeric value out of a formatted field. The SQL string then converts the value to its stored form. Invoking SQL*Loader Invoke SQL*Loader with a command such as: sqlldr scott/tiger ulcase7.ctl ulcase7.log Log File The following is a portion of the log file: 1) SQL*Loader-307: Warning: conflicting lengths 2 and 3 specified for column EMP.DEPTNO. Control File: ulcase7.ctl Data File: ulcase7.dat Bad File: ulcase7.bad Discard File: none specified (Allow all discards) Number to load: ALL Number to skip: 0 Errors allowed: 50 Bind array: 64 rows, maximum of 65536 bytes Continuation: none specified Path used: Conventional Table EMP, loaded when 57:57 = 0X2e(character ’.’) Insert option in effect for this table: APPEND TRAILING NULLCOLS option in effect Column Name Position Len Term Encl Datatype ------------------- ---------- ----- ---- ---- ----------DEPTNO 1:2 3 CHARACTER JOB 7:14 8 WHT CHARACTER MGR 28:31 4 WHT CHARACTER ENAME 34:41 8 WHT CHARACTER EMPNO NEXT * WHT CHARACTER SAL 51 * WHT CHARACTER COMM NEXT * ( CHARACTER % HIREDATE SYSDATE Column DEPTNO is NULL if DEPTNO = BLANKS Column JOB is NULL if JOB = BLANKS Column JOB had SQL string ”UPPER(:job)” applied to it. Column MGR is NULL if MGR = BLANKS 4-30 Oracle8 Utilities Case 7: Extracting Data from a Formatted Report Column ENAME had SQL string ”UPPER(:ename)” applied to it. Column SAL had SQL string ”TO_NUMBER(:sal,’$99,999.99’)” applied to it. Column COMM had SQL string ”:comm * 100” applied to it. 2) Record 1: Discarded - failed all WHEN clauses. Record 2: Discarded - failed all WHEN clauses. Record 3: Discarded - failed all WHEN clauses. Record 4: Discarded - failed all WHEN clauses. Record 5: Discarded - failed all WHEN clauses. Record 6: Discarded - failed all WHEN clauses. Record 10: Discarded - failed all WHEN clauses. Table EMP: 6 Rows successfully loaded. 0 Rows not loaded due to data errors. 2) 7 Rows not loaded because all WHEN clauses were failed. 0 Rows not loaded because all fields were null. Space allocated for bind array: 52480 bytes(64 rows) Space allocated for memory besides bind array: 108185 bytes Total logical records skipped: Total logical records read: Total logical records rejected: 2) Total logical records discarded: 0 13 0 7 Notes: 1. A warning is generated by the difference between the specified length and the length derived from the position specification. 2. The 6 header lines at the top of the report are rejected, as is the blank separator line in the middle. Dropping the Insert Trigger and the Global-Variable Package After running the example, use ULCASE7E.SQL to drop the insert trigger and global-variable package. SQL*Loader Case Studies 4-31 Case 8: Loading a Fixed Record Length Format File Case 8: Loading a Fixed Record Length Format File Case 8 demonstrates ■ Loading using the fixed record length option. ■ Using the “SORTED INDEX” clause. ■ ■ Partitioning of data. See Oracle8 Concepts for more information on partitioned data concepts. Explicitly defined field positions and datatypes. Control File The control file is ULCASE8.CTL. It loads the lineitem table with fixed length records, partitioning the data according to shipdate. It also uses the “SORTED INDEXES” clause for direct path performance. LOAD DATA 1) INFILE ‘ulcase8.dat.dat’ “fix 129” BADFILE ‘ulcase8.dat.bad’ TRUNCATE INTO TABLE lineitem 2,3) SORTED INDEXES (l_ship_idx) PARTITION ship_q1 4) (l_orderkey position (1:6) char, l_partkey position (7:11) char, l_suppkey position (12:15) char, l_linenumber position (16:16) char, l_quantity position (17:18) char, l_extendedprice position (19:26) char, l_discount position (27:29) char, l_tax position (30:32) char, l_returnflag position (33:33) char, l_linestatus position (34:34) char, l_shipdate position (35:43) char, l_commitdate position (44:52) char, l_receiptdate position (53:61) char, l_shipinstruct position (62:78) char, l_shipmode position (79:85) char, l_comment position (86:128) char) Notes: 1. 4-32 Oracle8 Utilities Specifies that each record in the datafile is of fixed length (129 characters in this example). See “Input Data Formats” on page 3-6. Case 8: Loading a Fixed Record Length Format File 2. SORTED INDEXES allows SQL*Loader to optimize index creation by eliminating the sort phase for this data when using the direct path load method. See “Index Options” on page 5-36. 3. Use of the PARTITION keyword to specify the loading of a specific partition. In this example, only rows that meet the criteria for a first quarter ship date are loaded with all other rows being rejected. 4. Identifies the column name and location of the data in the datafile to be loaded into each column. Table Creation In order to partition the data the lineitem table is created using four (4) partitions according to the shipment date: create table lineitem (l_orderkey number, l_partkey number, l_suppkey number, l_linenumber number, l_quantity number, l_extendedprice number, l_discount number, l_tax number, l_returnflag char, l_linestatus char, l_shipdate date, l_commitdate date, l_receiptdate date, l_shipinstruct char(17), l_shipmode char(7), l_comment char(43)) partition by range (l_shipdate) ( partition ship_q1 values less than tablespace p01, partition ship_q2 values less than tablespace p02, partition ship_q3 values less than tablespace p03, partition ship_q4 values less than tablespace p04 ) (TO_DATE(‘01-APR-1996’, ‘DD-MON-YYYY’)) (TO_DATE(‘01-JUL-1996’, ‘DD-MON-YYYY’)) (TO_DATE(‘01-OCT-1996’, ‘DD-MON-YYYY’)) (TO_DATE(‘01-JAN-1997’, ‘DD-MON-YYYY’)) SQL*Loader Case Studies 4-33 Case 8: Loading a Fixed Record Length Format File Input Data File The datafile for this case, ULCASE8.DAT, is listed below. Each record is 129 characters in length. Note that five(5) blanks precede each record in the file. 1 151978511724386.60 7.04.0NO09-SEP-6412-FEB-9622-MAR-96DELIVER IN PERSONTRUCK iPBw4mMm7w7kQ zNPL i261OPP 1 2731 73223658958.28.09.06NO12-FEB-9628-FEB-9620-APR-96TAKE BACK RETURN MAIL 5wM04SNyl0AnghCP2nx lAi 1 3370 3713 810210.96 .1.02NO29-MAR-9605-MAR-9631-JAN-96TAKE BACK RETURN REG AIRSQC2C 5PNCy4mM 1 5214 46542831197.88.09.06NO21-APR-9630-MAR-9616-MAY 96NONE AIR Om0L65CSAwSj5k6k 1 6564 6763246897.92.07.02NO30-MAY-9607-FEB-9603-FEB-96DELIVER IN PERSONMAIL CB0SnyOL PQ32B70wB75k 6Aw10m0wh 1 7403 160524 31329.6 .1.04NO30-JUN-9614-MAR-9601 APR-96NONE FOB C2gOQj OB6RLk1BS15 igN 2 8819 82012441659.44 0.08NO05-AUG-9609-FEB-9711-MAR-97COLLECT COD AIR O52M70MRgRNnmm476mNm 3 9451 721230 41113.5.05.01AF05-SEP-9629-DEC-9318-FEB-94TAKE BACK RETURN FOB 6wQnO0Llg6y 3 9717 1834440788.44.07.03RF09-NOV-9623-DEC-9315-FEB-94TAKE BACK RETURN SHIP LhiA7wygz0k4g4zRhMLBAM 3 9844 1955 6 8066.64.04.01RF28-DEC-9615-DEC-9314-FEB-94TAKE BACK RETURN REG AIR6nmBmjQkgiCyzCQBkxPPOx5j4hB 0lRywgniP7 Invoking SQL*Loader Invoke SQL*Loader with a command such as: sqlldr sqlldr/test control=ulcase8.ctl data=ulcase8.dat Additional Information: The command “sqlldr” is a UNIX-specific invocation. To invoke SQL*Loader, see the Oracle operating system-specific documentation. Log File The following shows a portion of the log file: Control File: ULCASE8.CTL Data File: ULCASE8.DAT Bad File: ULCASE8.BAD Discard File: none specified (Allow all discards) Number to load: ALL Number to skip: 0 4-34 Oracle8 Utilities Case 8: Loading a Fixed Record Length Format File Errors allowed: 50 Bind array: Test mode - (O/S dependent) default bindsize Continuation: none specified Path used: Conventional Table LINEITEM, partition ship_q1, loaded from every logical record. Insert option in effect for this table: TRUNCATE Column Name Position Len Term Encl Datatype ------------------------------ ---------- ----- ---- ---- -------------L_ORDERKEY 1:6 6 CHARACTER L_ORDERKEY 1:6 6 CHARACTER L_PARTKEY 7:11 5 CHARACTER L_SUPPKEY 12:15 4 CHARACTER L_LINENUMBER 16:16 1 CHARACTER L_QUANTITY 17:18 2 CHARACTER L_EXTENDEDPRICE 19:26 8 CHARACTER L_DISCOUNT 27:29 3 CHARACTER L_TAX 30:32 3 CHARACTER L_RETURNFLAG 33:33 1 CHARACTER L_LINESTATUS 34:34 1 CHARACTER L_SHIPDATE 35:43 9 CHARACTER L_COMMITDATE 44:52 9 CHARACTER L_RECEIPTDATE 53:61 9 CHARACTER L_SHIPINSTRUCT 62:78 17 CHARACTER L_SHIPMODE 79:85 7 CHARACTER L_COMMENT 86:128 43 CHARACTER Record 4: Rejected - Error on table LINEITEM, partition ship_q1. ORA-14401: inserted partition key is outside specified partition Record 5: Rejected - Error on table LINEITEM, partition ship_q1. ORA-14401: inserted partition key is outside specified partition Record 6: Rejected - Error on table LINEITEM, partition ship_q1. ORA-14401: inserted partition key is outside specified partition Record 7: Rejected - Error on table LINEITEM, partition ship_q1. ORA-14401: inserted partition key is outside specified partition Record 8: Rejected - Error on table LINEITEM, partition ship_q1. ORA-14401: inserted partition key is outside specified partition Record 9: Rejected - Error on table LINEITEM, partition ship_q1. ORA-14401: inserted partition key is outside specified partition SQL*Loader Case Studies 4-35 Case 8: Loading a Fixed Record Length Format File Record 10: Rejected - Error on table LINEITEM, partition ship_q1. ORA-14401: inserted partition key is outside specified partition Table LINEITEM, partition ship_q1: 3 Rows successfully loaded. 7 Rows not loaded due to data errors. 0 Rows not loaded because all WHEN clauses were failed. 0 Rows not loaded because all fields were null. Total Total Total Total 4-36 Oracle8 Utilities logical logical logical logical records records records records skipped: read: rejected: discarded: 0 10 7 0 5 SQL*Loader Control File Reference This chapter describes the SQL*Loader data definition language (DDL) used to map data to Oracle format. If you are using Trusted Oracle, see also the Trusted Oracle documentation for information about using the SQL*Loader in that environment. This chapter contains the following sections: ■ Overview ■ Data Definition Language (DDL) Syntax ■ Expanded Clauses and Their Functionality SQL*Loader Control File Reference 5-1 Overview Overview The information in this chapter falls into the following main categories: ■ General Syntactical Information ■ Managing Files ■ Managing Data The sections that belong to each category follow: General Syntactical Information ■ data definition language syntax ( on page 5-4) ■ adding comments ( on page 5-11) ■ specifying command-line parameters ( on page 5-11) ■ specifying RECOVERABLE and UNRECOVERABLE ( on page 5-12) ■ specifying filenames and database objects ( on page 5-12) Managing Files ■ including data in the control file ( on page 5-15) ■ identifying datafiles ( on page 5-16) ■ Specifying READBUFFERS ( on page 5-18) ■ specifying datafile format and buffering ( on page 5-18) ■ specifying the bad file ( on page 5-19) ■ rejected records ( on page 5-20) ■ specifying the discard file ( on page 5-21) ■ discarded records ( on page 5-23) ■ handling different character encoding schemes ( on page 5-24) ■ loading data for different countries ( on page 5-24) ■ loading into non-empty database tables ( on page 5-25) ■ continuing interrupted loads ( on page 5-27) ■ assembling logical records from physical records ( on page 5-29) 5-2 Oracle8 Utilities Overview Managing Data ■ loading logical records into tables ( on page 5-33) ■ specifying field conditions ( on page 5-37) ■ specifying columns and fields ( on page 5-39) ■ specifying the position of a data field ( on page 5-40) ■ using multiple INTO TABLE clauses ( on page 5-43) ■ generating data ( on page 5-46) ■ loading without files ( on page 5-46) ■ specifying datatypes ( on page 5-50) ■ loading data across different operating systems ( on page 5-65) ■ determining bind array size ( on page 5-65) ■ setting a column to null or zero ( on page 5-71) ■ loading all-blank fields ( on page 5-72) ■ trimming of blanks and tabs ( on page 5-72) ■ preserving whitespace ( on page 5-78) ■ applying SQL operators to fields ( on page 5-78) SQL*Loader Control File Reference 5-3 Data Definition Language (DDL) Syntax Data Definition Language (DDL) Syntax Syntax Notation For details of the notation used in the syntax diagrams in this Reference, see the PL/ SQL User’s Guide and Reference or the preface in the Oracle8 SQL Reference. High-Level Syntax Diagrams The following diagrams of DDL definitions are shown with certain clauses collapsed (e.g. position_spec, into_table clause, etc.). The statements are expanded and explained in more detail in later sections. –– comments OPTIONS (options) UNRECOVERABLE RECOVERABLE LOAD CONTINUE_LOAD DATA CHARACTERSET character_set_name READBUFFERS n infile_clause INSERT APPEND REPLACE TRUNCATE 5-4 Oracle8 Utilities concatenation_clause Data Definition Language (DDL) Syntax into_table_clause PRESERVE BLANKS BEGINDATA INFILE input_filename INDDN * “ OS–dependent file–processing specifications string” BADFILE bad_file_name BDDN DISCARDFILE DISCARDDN discard_file_name DISCARD n DISCARDMAX n CONCATENATE (n) pos_spec operator CONTINUEIF ( THIS NEXT LAST operator ’char_string’ X’hex_byte’ ) ’char_string’ X’hex_byte’ , INTO TABLE table-name PARTITION (partition-name) INSERT REPLACE TRUNCATE APPEND SQL*Loader Control File Reference 5-5 Data Definition Language (DDL) Syntax SINGLEROW ( SORTED ) index_name INDEXES INSERT OPTIONS ( FILE = database_file_name ) APPEND REPLACE TRUNCATE REENABLE DISABLED_CONSTRAINTS WHEN AND field_condition EXCEPTIONS tablename FIELDS delimiter_spec TRAILING SKIP n NULLCOLS , ( column_name RECNUM ) SYSDATE CONSTANT value SEQUENCE ( column_spec POSITION 5-6 Oracle8 Utilities pos_spec n MAX COUNT datatype_spec ) , incr PIECED Expanded Clauses and Their Functionality NULLIF DEFAULTIF field_condition field_condition “ sql_string” Expanded Clauses and Their Functionality Position Specification pos_spec A position specification (pos_spec) gives the starting location for a field and, optionally, the ending location as well. A pos_spec is specified as follows: ( ) start : * +n end – The position must be surrounded by parentheses. The starting location may be specified as a column number, as * (next column), or *+n (next column plus an offset). The start and end locations may be separated with either a colon (:) or a dash (-). Field Condition field_condition A field condition compares a named field or an area of the record to some value. When the condition evaluates to true, the specified function is performed. For example, a true condition might cause the NULLIF function to insert a NULL data value, or cause DEFAULTIF to insert a default value. The field_condition is specified as follows: ( fieldname pos_spec ) operator ’char_string’ X’hex_string’ BLANKS SQL*Loader Control File Reference 5-7 Expanded Clauses and Their Functionality The char_string and hex_string can be enclosed in either single quotation marks or double quotation marks. The hex_string is a string of hexadecimal digits, where each pair of digits corresponds to one byte in the field. The BLANKS keyword allows you to test a field to see if it consists entirely of blanks. It is necessary when you are loading delimited data and you cannot predict the length of the field, or when using a multi-byte character set that has multiple blanks. There must not be any spaces between the operator and the operands on either side of it. Thus, (1)=’x’ is legal, while (1) = ’x’ generates an error. Column Name column_name The column name you specify in a field condition must be one of the columns defined for the input record. It must be specified with double quotation marks if its name is a reserved word. See “Specifying Filenames and Database Objects” on page 5-12 for more details. Datatype Specification datatype_spec The datatype_spec tells SQL*Loader how to interpret the field in the input record. The syntax is as follows: 5-8 Oracle8 Utilities Expanded Clauses and Their Functionality INTEGER FLOAT EXTERNAL (length) ZONED delimiter_spec ) ( precision , scale EXTERNAL (length) DECIMAL delimiter_spec ) ( precision , scale EXTERNAL (length) delimiter_spec DOUBLE SMALLINT BYTEINT RAW (length) GRAPHIC EXTERNAL VARGRAPHIC VARCHAR ( graphic_char_length ) ( maximum_length ) CHAR (length) delimiter_spec DATE (length) ”mask” delimiter_spec SQL*Loader Control File Reference 5-9 Expanded Clauses and Their Functionality Precision vs. Length precision length The precision of a numeric field is the number of digits it contains. The length of a numeric field is the number of byte positions on the record. The byte length of a ZONED decimal field is the same as its precision. However, the byte length of a (packed) DECIMAL field is (p+1)/2, rounded up, where p is the number’s precision, because packed numbers contain two digits (or digit and sign) per byte. Date Mask The date mask specifies the format of the date value. For more information, see the DATE datatype on page 5-58. Delimiter Specification delimiter_spec The delimiter_spec can specify a termination delimiter, enclosure delimiters, or a combination of the two, as shown below: termination_spec enclosure_spec termination_spec enclosure_spec OPTIONALLY termination_spec ::= TERMINATED WHITESPACE ’char’ BY X’hex_char’ enclosure_spec ::= ’char’ ENCLOSED BY X’hex_char’ AND ’char’ X’hex_char’ For more information, see “Specifying Delimiters” on page 5-60. 5-10 Oracle8 Utilities Specifying Command-Line Parameters in the Control File Comments Comments can appear anywhere in the command section of the file, but they should not appear in the data. Precede Comments with a double hyphen, which may appear anywhere on a line. For example, --This is a Comment All text to the right of the double hyphen is ignored, until the end of the line. Case 3 on page 4-11 contains an example in a control file. Specifying Command-Line Parameters in the Control File The OPTIONS statement is useful when you typically invoke a control file with the same set of options, or when the number of arguments makes the command line very long. The OPTION statement precedes the LOAD DATA statement. OPTIONS This keyword allows you to specify runtime arguments in the control file, rather than on the command line. The following arguments can be specified with the OPTIONS keyword. They are described in Chapter 6, “SQL*Loader CommandLine Reference”. SKIP = n LOAD = n ERRORS = ROWS = n BINDSIZE SILENT = DIRECT = PARALLEL n = n {FEEDBACK | ERRORS | DISCARDS | ALL} {TRUE | FALSE} = {TRUE | FALSE} For example: OPTIONS (BINDSIZE=100000, SILENT=(ERRORS, FEEDBACK) ) Values specified on the command line override values specified in the OPTIONS statement of the control file. The OPTIONS keyword file establishes default values that are easily changed from the command line. SQL*Loader Control File Reference 5-11 Specifying RECOVERABLE and UNRECOVERABLE Specifying RECOVERABLE and UNRECOVERABLE The following options apply to direct path loads: RECOVERABLE Loaded data is logged in the redo log. This option is the default for direct path loads. All conventional loads are recoverable. UNRECOVERABLE You can specify this option for a direct path load only. When it is specified, loaded data is not logged which improves performance. (Other changes to the database are still logged.) For other performance improvements, see “Maximizing Performance of Direct Path Loads” on page 8-15. Note that you cannot specify this option for a conventional load. Note also that UNRECOVERABLE is a command level option and is valid only for the command. It must be specified for each command/ operation. It cannot be used with such Oracle8 features as partitioned tables, indexes, etc. Specifying Filenames and Database Objects This section explains how to use quotation marks for specifying database objects and filenames in the load control file. It also shows how the escape character is used in quoted strings. Database Object Names within Double Quotation Marks SQL*Loader follows the SQL standard for specifying object names (for example, table and column names): SQL and SQL*Loader reserved words must be specified within double quotation marks. The reserved words most likely to be column names are: COUNT OPTIONS DATA PART DATE FORMAT POSITION So if you had an inventory system with columns named PART, COUNT, and DATA, you would specify these column names within double quotation marks in your SQL*Loader control file. For example: INTO TABLE inventory (partnum INTEGER, ”PART” CHAR(15), ”COUNT” INTEGER, ”DATA” VARCHAR2(30)) 5-12 Oracle8 Utilities Specifying Filenames and Database Objects See Appendix A, “SQL*Loader Reserved Words”, for a complete list of reserved words. You use double quotation marks if the object name contains special characters other than those recognized by SQL ($, #, _), or if the name is case sensitive. SQL String within Double Quotation Marks You also specify the SQL string within double quotation marks. The SQL string applies SQL operators to data fields. It is described in “Applying SQL Operators to Fields” on page 5-78. Filenames within Single Quotation Marks On many operating systems, attempting to specify a complete file pathname produces an error, due to the use of special characters other than $, #, or _. Usually, putting the pathname within single quotation marks avoids the error. Filenames that use the backslash character, \, may require special treatment, as described in the section, “Using a Backslash in Filenames” on page 5-14. For example: INFILE ’mydata.dat’ BADFILE ’mydata.bad’ Quotation Marks in Quoted Strings SQL*Loader uses strings within double quotation marks and strings within single quotation marks in the control file. Each type of string can appear within the other. Backslash Escape Character In DDL syntax only, you can place a double quotation mark inside a string delimited by double quotation marks by preceding it with the escape character, \, whenever the escape character is allowed in the string. (The following section tells when the escape character is allowed.) The same holds true for putting a single quotation mark into a string delimited by single quotation marks. For example, a double quotation mark is included in the following string which points to the homedir\data”norm\myfile datafile by preceding it with \: INFILE ’homedir\data\”norm\mydata’ To put the escape character itself into a string, enter it twice, like this: \\ SQL*Loader Control File Reference 5-13 Specifying Filenames and Database Objects For example: ”so’\”far” ”’so\\far’” ”so\\\\far” or ’so\’”far’ is parsed as so’”far or ’\’so\\far\’’ is parsed as ’so\far’ or ’so\\\\far’ is parsed as so\\far Note: A double quote in the initial position cannot be escaped, therefore you should avoid creating strings with an initial quote. Using a Backslash in Filenames This section is of interest only to users of PCs and other systems that use backslash characters in file specifications. For all other systems, a backslash is always treated as an escape character, as described in the preceding section. Non-Portable Strings There are two kinds of character strings in a SQL*Loader control file that are not portable between operating systems: filename strings and file processing options strings. When converting to a different operating system, these strings must generally be rewritten. They are the non-portable strings. All other strings in a SQL*Loader control file are portable between operating systems. Escaping the Backslash If your operating system uses the backslash character to separate directories in a pathname and if the version of Oracle running on your operating system implements the backslash escape character for filenames and other non-portable strings, then you need to specify double backslashes in your pathnames and use single quotation marks. Additional Information: To find out if your version of Oracle implements the backslash escape character for filenames, see your Oracle operating system-specific documentation. For example, to load a file named “topdir\mydir\mydata”, you must specify: INFILE ’topdir\\mydir\\mydata’ Escape Character Sometimes Disallowed The version of Oracle running on your operating system may not implement the escape character for non-portable strings. When the escape character is disallowed, a backslash is treated as a normal character, rather than as an escape character (although it is still usable in all other strings). Then pathnames such as: 5-14 Oracle8 Utilities Including Data in the Control File with BEGINDATA INFILE ’topdir\mydir\myfile’ can be specified normally. Double backslashes are not needed. Because the backslash is not recognized as an escape character, strings within single quotation marks cannot be embedded inside another string delimited by single quotation marks. This rule also holds for double quotation marks: A string within double quotation marks cannot be embedded inside another string delimited by double quotation marks. Determining If the Escape Character is Allowed As previously mentioned, you can learn if the backslash is used as an escape character in non-portable strings by checking your operating-system-specific Oracle8 documentation. Another way is to specify “test\me” in the file processing options string. Then check the log file. If the log file shows the file processing options string as ”test\me” then the backslash is not used as an escape character, and double backslashes are not required for file specifications. However, if the log file shows the file processing options string as: ”testme” then the backslash is treated as an escape character, and double backslashes are needed. Including Data in the Control File with BEGINDATA If your data is to be contained in the control file, it is placed at the end of the control specifications. You must place the BEGINDATA keyword before the first data record to separate the data from your data definitions. The syntax is: BEGINDATA This keyword is used with the INFILE keyword, described in the next section. Case 1 on on page 4-5 contains an example. If you omit BEGINDATA, SQL*Loader tries to interpret your data as control information, and you receive an error message. If the data is in a separate file, reaching the end of the control file signals that control information is complete, and BEGINDATA should not be used. SQL*Loader Control File Reference 5-15 Identifying Datafiles There should not be any spaces or other characters on the same line after the BEGINDATA clause. Otherwise, the line containing BEGINDATA is interpreted as the first line of data. Do not put Comments after BEGINDATA—they are also interpreted as data. Identifying Datafiles To specify the datafile fully, use a filename keyword, optionally followed by a fileprocessing options string. You may specify multiple files by using multiple INFILE keywords. You can also specify the datafile from the command line, using the DATA parameter described in “Command-Line Keywords” on page 6-3. Naming the File To specify the file containing the data to be loaded, use the INFILE or INDDN keyword, followed by the filename and optional processing options string. A filename specified on the command line overrides the first INFILE or INDDN keyword in the control file. If no filename is specified, the filename defaults to the control filename with an extension or file type of DAT. If the control file also contains the data to be loaded, specify a filename of “*”. This specification works with the BEGINDATA keyword, described on on page 5-15. INFILE filename INDDN * processing_options where: INFILE or INDDN (Use INDDN when DB2 compatibility is required.) This keyword specifies that a datafile specification follows. filename Name of the file containing the data. Any spaces or punctuation marks in the filename must be enclosed in single quotation marks. See “Specifying Filenames and Database Objects” on page 5-12. 5-16 * If your data is in the control file itself, use an asterisk instead of the filename. If you have data in the control file as well as datafiles, you must specify the asterisk first in order for the data to be read. processing_options This is the file-processing options string. It specifies the datafile format. It also optimizes datafile reads. See “Specifying Datafile Format and Buffering” on page 5-18. Oracle8 Utilities Identifying Datafiles Specifying Multiple Datafiles To load data from multiple datafiles in one run of SQL*Loader, use an INFILE statement for each datafile. Datafiles do not need the same file format, although the layout of the records must be identical. For example, two files could be specified with completely different file processing options strings, and a third could consist of data in the control file. For each datafile, you can also specify a discard file and a bad file. These files should be declared after each datafile name. The following portion of a control file specifies four files: INFILE INFILE INFILE INFILE mydat1.dat BADFILE mydat1.bad DISCARDFILE mydat1.dis mydat2.dat mydat3.dat DISCARDFILE mydat3.dis mydat4.dat DISCARDMAX 10 0 For the first datafile (MYDAT1.DAT), both a bad file and discard file are explicitly named. So both files are created, if needed. For the second datafile (MYDAT2.DAT), neither a bad file nor a discard file is specified. So only the bad file is created, if it is needed. If created, the bad file has a default filename and extension. The discard file is not created, even if rows are discarded. For the third file (MYDAT3.DAT), the default bad file is created, if needed. A discard file with the given name is also created, if it is needed. For the fourth file (MYDAT4.DAT), the default bad file is created, if needed. Because the DISCARDMAX option is used, SQL*Loader assumes that a discard file is wanted and creates it with the default name (MYDAT4.DSC), if it is needed. Note: Physical records from separate datafiles cannot be joined into one logical record. Examples of How to Specify a Datafile In the first example, you specify that the data is contained in the control file itself: INFILE * In the next example, you specify that the data is contained in a file named WHIRL with the default file extension or file type of DAT: INFILE WHIRL SQL*Loader Control File Reference 5-17 Specifying READBUFFERS The following example specifies the full path to a file: INFILE ’c:/topdir/subdir/datafile.dat’ Note: Filenames that include spaces or punctuation marks should be enclosed in single quotation marks. For more details on filename specification, see “Specifying Filenames and Database Objects” on page 5-12. Specifying READBUFFERS The READBUFFERS keyword control memory usage. This clause can be specified for direct path loads only. For more information, “Maximizing Performance of Direct Path Loads” on page 8-15. Specifying Datafile Format and Buffering You specify an operating-system-dependent file processing options string to control file processing. You use this string to specify file format and buffering. Additional Information: For details on the syntax of the file processing options string, see your Oracle operating system-specific documentation. File Processing Example For example, suppose that your operating system has the following option-string grammar: RESIZE n BUFFERS n where RECSIZE is the size of a fixed-length record, and BUFFERS is the number of buffers to use for asynchronous I/O. Note: This example is operating system-specific and may not work on your operating system. For details on the syntax of the file processing options string on your system, see your Oracle operating system-specific documentation. To declare a file named MYDATA.DAT as a file that contains 80-byte records and tell SQL*Loader to use eight I/O buffers with this syntax, you would use the following clause: INFILE ’mydata.dat’ ”RECSIZE 80 BUFFERS 8” 5-18 Oracle8 Utilities Specifying the Bad File Note: This example uses the recommended convention of single quotation marks for filenames and double quotation marks for everything else. See “Specifying Filenames and Database Objects” on page 5-12 for more details. Specifying the Bad File When SQL*Loader executes, it may create a file called a bad file or reject file where it places records that were rejected because of formatting errors or because they caused Oracle errors. The bad file is created according to the following rules: ■ ■ ■ ■ A bad file is created only if one or more records are rejected. If no records are rejected, then a bad file is not created. Note that in this case you must also reinititialize the bad file. If the bad file is created, it overwrites an existing file with the same name. If a bad file is not created, then an existing file with the same name remains intact. Suggestion: If a file exists with the same name as the bad file that SQL*Loader may create, delete or rename it before running SQL*Loader. Additional Information: On some systems a new version of the file is created if a file with the same name already exists. See your Oracle operating system-specific documentation to find out if this is the case on your system. To specify the name of this file, use the BADFILE or BADDN keyword, followed by the filename. If you do not specify a name for the bad file, the name defaults to the name of the datafile with an extension or file type of BAD. You can also specify the bad file from the command line with the BAD parameter described in “CommandLine Keywords” on page 6-3. A filename specified on the command line is associated with the first INFILE or INDDN clause in the control file, overriding any bad file that may have been specified as part of that clause. The bad file is created in the same record and file format as the datafile so that the data can be reloaded after corrections. The syntax is BADFILE bad_file_name BADDN SQL*Loader Control File Reference 5-19 Rejected Records where: BADFILE or BADDN (Use BADDN when DB2 compatibility is required.) This keyword specifies that a filename for the badfile follows. bad_filename Any valid filename specification for your platform. Any spaces or punctuation marks in the filename must be enclosed in single quotation marks. See “Specifying Filenames and Database Objects” on page 5-12. Examples of How to Specify a Bad File In the following example, you specify a bad file with filename UGH and default file extension or file type of BAD: BADFILE UGH In the next examples, you specify a bad file with filename BAD0001 and file extension or file type of REJ: BADFILE BAD0001.REJ BADFILE ’/REJECT_DIR/BAD0001.REJ’ Rejected Records A record is rejected if it meets either of the following conditions: ■ ■ Upon insertion the record causes an Oracle error (such as invalid data for a given datatype). SQL*Loader cannot determine if the data is acceptable. That is, it cannot determine if the record meets WHEN-clause criteria, as in the case of a field that is missing its final delimiter. If the data can be evaluated according to the WHEN-clause criteria (even with unbalanced delimiters) then it is either inserted or rejected. If a record is rejected on insert, then no part of that record is inserted into any table. For example, if data in a record is to be inserted into multiple tables, and most of the inserts succeed, but one insert fails; then all the inserts from that record are rolled back. The record is then written to the bad file, where it can be corrected and reloaded. Previous inserts from records without errors are not affected. The log file indicates the Oracle error for each rejected record. Case 4 on on page 4-14 has an example of rejected records. 5-20 Oracle8 Utilities Specifying the Discard File Integrity Constraints All integrity constraints are honored for conventional path loads. On the direct path, some constraints are unenforceable. See Chapter 8, “SQL*Loader: Conventional and Direct Path Loads”, for more details. Specifying the Discard File As SQL*Loader executes, it may create a discard file for records that do not meet any of the loading criteria. The records contained in this file are called discarded records. Discarded records do not satisfy any of the WHEN clauses specified in the control file. These records are different from rejected records. Discarded records do not necessarily have any bad data. No insert is attempted on a discarded record. The discard file is created according to the following rules: ■ ■ A discard file is only created if a discard filename is specified and when one or more records fail to satisfy all of the WHEN clauses specified in the control file. (Note that, if the discard file is created, it overwrites any existing file with the same name.) If no records are discarded, then a discard file is not created. Suggestion: If a file exists with the same name as the discard file that SQL*Loader may create, delete or rename it before running SQL*Loader. To create a discard file, use any of the following options: In a Control File On the Command Line DISCARDFILE filename DISCARD DISCARDDN filename DISCARDMAX DISCARDS DISCARDMAX Note that you can request the discard file directly with a parameter specifying its name, or indirectly by specifying the maximum number of discards. Using a Control-File Definition To specify the name of the file, use the DISCARDFILE or DISCARDDN (for DB2-compatibility) keyword, followed by the filename. SQL*Loader Control File Reference 5-21 Specifying the Discard File DISCARDFILE discard_file_name DISCARDDN DISCARDS DISCARDMAX n where: DISCARDFILE or DISCARDDN (Use DISCARDDN when DB2 compatibility is required.) This keyword specifies that a discard filename follows. discard_filename Any valid filename specification for you platform. Any spaces or punctuation marks in the filename must be enclosed in single quotation marks. See “Specifying Filenames and Database Objects” on page 5-12. The default filename is the name of the datafile, and the default file extension or file type is DSC. A discard filename specified on the command line overrides one specified in the control file. If a discard file with that name already exists, it is either overwritten or a new version is created, depending on your operating system. The discard file is created with the same record and file format as the datafile. So it can easily be used for subsequent loads with the existing control file, after changing the WHEN clauses or editing the data. Examples of How to Specify a Discard File In the first example, you specify a discard file with filename CIRCULAR and default file extension or file type of DSC: DISCARDFILE CIRCULAR In this example, you specify a file extension or file type of MAY: DISCARDFILE NOTAPPL.MAY In the next example, you specify a full path to filename FORGET.ME: DISCARDFILE ’/DISCARD_DIR/FORGET.ME’ 5-22 Oracle8 Utilities Discarded Records Discarded Records If there is no INTO TABLE keyword specified for a record, the record is discarded. This situation occurs when every INTO TABLE keyword in the SQL*Loader control file has a WHEN clause; and either the record fails to match any of them or all fields are null. No records are discarded if an INTO TABLE keyword is specified without a WHEN clause. An attempt is made to insert every record into such a table. So records may be rejected, but none are discarded. “Case 4: Loading Combined Physical Records” on page 4-14 provides an example of using a discard file. Limiting the Number of Discards You may limit the number of records to be discarded for each datafile with the clause: DISCARD n DISCARDMAX where n must be an integer. When the discard limit is reached, processing of that datafile terminates and continues with the next datafile, if one exists. You can specify a different number of discards for each datafile. Alternatively, if the number of discards is only specified once, then the maximum number of discards is the same for all files. If you specify a maximum number of discards, but no discard filename; SQL*Loader creates a discard file with the default filename and file extension or file type. “Case 4: Loading Combined Physical Records” on page 4-14 provides an example. Using a Command-Line Parameter You can specify the discard file from the command line, with the parameter DISCARDFILE described in “Command-Line Keywords” on page 6-3. A filename specified on the command line goes with the first INFILE or INDDN (DB2) clause in the control file, overriding any bad file that may have been specified as part of that clause. SQL*Loader Control File Reference 5-23 Handling Different Character Encoding Schemes Handling Different Character Encoding Schemes This section describes the features that allow SQL*Loader to operate with different character encoding schemes (called character sets, or code pages). SQL*Loader uses Oracle’s NLS (National Language Support) features to handle the different singlebyte and multi-byte character encoding schemes used on different computers and in different countries. Multi-Byte (Asian) Character Sets Multi-byte character sets support Asian languages. Data can be loaded in multibyte format, and database objects (fields, tables, and so on) can be specified with multi-byte characters. In the control file, Comments and object names may also use multi-byte characters. Input Character Conversion SQL*Loader also has the capacity to convert data from the datafile character set to the database character set, when they are different. When using the conventional path, data is converted into the session character set specified by the NLS_LANG parameter for that session. Then the data is loaded using SQL INSERT statements. The session character set is the character set supported by your terminal. During a direct path load, data converts directly into the database character set. As a consequence, the direct path load method allows data in a character set that is not supported by your terminal to be loaded. When data conversion occurs, it is essential that the target character set contains a representation of all characters that exist in the data. Otherwise, characters that have no equivalent in the target character set are converted to a default character, with consequent loss of data. When using the direct path, load method the database character set should be a superset of, or equivalent to, the datafile character sets. Similarly, when using the conventional path, the session character set should be a superset of, or equivalent to, the datafile character sets. The character set used in each input file is specified with the CHARACTERSET keyword. CHARACTERSET Keyword The CHARACTERSET definition tells SQL*Loader what character set is used in each datafile. Different datafiles can be specified with different character sets. Only one character set can be specified for each datafile. 5-24 Oracle8 Utilities Loading into Empty and Non-Empty Tables Using the CHARACTERSET keyword causes character data to be automatically converted when it is loaded into Oracle. Only CHAR, DATE, and numeric EXTERNAL fields are affected. If the CHARACTERSET keyword is not specified, then no conversion occurs. The syntax for this option is: CHARACTERSET character_set_spec where character_set_spec is the acronym used by Oracle to refer to your particular encoding scheme. Additional Information: For more information on supported character sets, code pages, and the NLS_LANG parameter, see the National Language Support section of the Oracle8 Reference. Control File Characterset The SQL*Loader control file itself is assumed to be in the character set specified for your session by the NLS_LANG parameter. However, delimiters and comparison clause values must be specified to match the character set in use in the datafile. To ensure that the specifications are correct, it may be preferable to specify hexadecimal strings, rather than character string values. Any data included after the BEGINDATA statement is also assumed to be in the character set specified for your session by the NLS_LANG parameter. Data that uses a different character set must be in a separate file. Loading into Empty and Non-Empty Tables You can specify one of the following methods for loading tables: INSERT APPEND REPLACE TRUNCATE This section describes those methods. SQL*Loader Control File Reference 5-25 Loading into Empty and Non-Empty Tables How Non-Empty Tables are Affected This section corresponds to the DB2 keyword RESUME; users of DB2 should also refer to the description of RESUME in Appendix B, “DB2/DXT User Notes”. If the tables you are loading already contain data, you have four choices for how SQL*Loader proceeds: Warning: When the REPLACE or TRUNCATE keyword is specified, the entire table is replaced, not individual rows. After the rows are successfully deleted, a commit is issued. You cannot recover the data that was in the table before the load, unless it was saved with Export or a comparable utility. The remainder of this section provides additional detail on these options. INSERT This is the default method. It requires the table to be empty before loading. SQL*Loader terminates with an error if the table contains rows. “Case 1: Loading Variable-Length Data” on page 4-5 provides an example. APPEND If data already exists in the table, SQL*Loader appends the new rows to it. If data doesn’t already exist, the new rows are simply loaded. “Case 3: Loading a Delimited, Free-Format File” on page 4-11 provides an example. REPLACE All rows in the table are deleted and the new data is loaded. The table must be in your schema, or you must have DELETE privilege on the table. “Case 4: Loading Combined Physical Records” on page 4-14 provides an example. The row deletes cause any delete triggers defined on the table to fire. If DELETE CASCADE has been specified for the table, then the cascaded deletes are carried out, as well. For more information on cascaded deletes, see the “Data Integrity” chapter of Oracle8 Concepts. Updating Existing Rows The REPLACE method is a table replacement, not a replacement of individual rows. SQL*Loader does not update existing records, even if they have null columns. To update existing rows, use the following procedure: 5-26 1. Load your data into a temporary table. 2. Use the SQL language UPDATE statement with correlated subqueries. Oracle8 Utilities Continuing an Interrupted Load 3. Drop the temporary table. For more information, see the “UPDATE” statement in Oracle8 SQL Reference. TRUNCATE With this method, SQL*Loader uses the SQL TRUNCATE command to achieve the best possible performance. For the TRUNCATE command to operate, the table’s referential integrity constraints must first be disabled. If they have not been disabled, SQL*Loader returns an error. Once the integrity constraints have been disabled, DELETE CASCADE is no longer defined for the table. If the DELETE CASCADE functionality is needed, then the contents of the table must be manually deleted before the load begins. The table must be in your schema, or you must have the DELETE ANY TABLE privilege. Specifying One Method for All Tables You specify one table-loading method that applies to all tables by placing the keyword before any INTO TABLE clauses. This choice applies to any table that does not have its own method. You can specify a table-loading method for a single table by including the keyword in the INTO TABLE clause, as described in “Loading Logical Records into Tables” on page 5-33. Continuing an Interrupted Load If SQL*Loader runs out of space for data rows or index entries, the load is discontinued. (For example, the table might reach its maximum number of extents.) Discontinued loads can be continued after more space is made available. State of Tables and Indexes When a load is discontinued, any data already loaded remains in the tables, and the tables are left in a valid state. If the conventional path is used, all indexes are left in a valid state. If the direct path load method is used, any indexes that run out of space are left in direct load state. They must be dropped before the load can continue. Other indexes are valid provided no other errors occurred. (See “Indexes Left in Index Unusable State” on page 8-11 for other reasons why an index might be left in direct load state.) SQL*Loader Control File Reference 5-27 Continuing an Interrupted Load Using the Log File SQL*Loader’s log file tells you the state of the tables and indexes and the number of logical records already read from the input datafile. Use this information to resume the load where it left off. Dropping Indexes Before continuing a direct path load, inspect the SQL*Loader log file to make sure that no indexes are in direct load state. Any indexes that are left in direct load state must be dropped before continuing the load. The indexes can then be re-created either before continuing or after the load completes. Continuing Single Table Loads To continue a discontinued direct or conventional path load involving only one table, specify the number of logical records to skip with the command-line parameter SKIP. If the SQL*Loader log file says that 345 records were previously read, then the command to continue would look like this: SQLLDR USERID=scott/tiger CONTROL=FAST1.CTL DIRECT=TRUE SKIP=345 Continuing Multiple Table Conventional Loads It is not possible for multiple tables in a conventional path load to become unsynchronized. So a multiple table conventional path load can also be continued with the command-line parameter SKIP. Use the same procedure that you would use for single-table loads, as described in the preceding paragraph. Continuing Multiple Table Direct Loads If SQL*Loader cannot finish a multiple-table direct path load, the number of logical records processed could be different for each table. If so, the tables are not synchronized and continuing the load is slightly more complex. To continue a discontinued direct path load involving multiple tables, inspect the SQL*Loader log file to find out how many records were loaded into each table. If the numbers are the same, you can use the previously described simple continuation. CONTINUE_LOAD If the numbers are different, use the CONTINUE_LOAD keyword and specify SKIP at the table level, instead of at the load level. These statements exist to handle unsynchronized interrupted loads. 5-28 Oracle8 Utilities Assembling Logical Records from Physical Records Instead of specifying: LOAD DATA... at the start of the control file, specify: CONTINUE_LOAD DATA SKIP Then, for each INTO TABLE clause, specify the number of logical records to skip for that table using the SKIP keyword: ... INTO SKIP ... INTO SKIP ... TABLE emp 2345 TABLE dept 514 Combining SKIP and CONTINUE_LOAD The CONTINUE_LOAD keyword is only needed after a direct load failure because multiple table loads cannot become unsynchronized when using the conventional path. If you specify CONTINUE_LOAD, you cannot use the command-line parameter SKIP. You must use the table-level SKIP clause. If you specify LOAD, you can optionally use the command-line parameter SKIP, but you cannot use the tablelevel SKIP clause. Assembling Logical Records from Physical Records You can create one logical record from multiple physical records using one of the following two clauses, depending on your data: CONCATENATE CONTINUEIF CONCATENATE is appropriate in the simplest case, when SQL*Loader should always add the same number of physical records to form one logical record. SQL*Loader Control File Reference 5-29 Assembling Logical Records from Physical Records The syntax is: CONCATENATE n where n indicates the number of physical records to combine. If the number of physical records to be continued varies, then CONTINUEIF must be used. The keyword CONTINUEIF is followed by a condition that is evaluated for each physical record, as it is read. For example, two records might be combined if there were a pound sign (#) in character position 80 of the first record. If any other character were there, the second record would not be added to the first. The full syntax for CONTINUEIF adds even more flexibility: pos_spec_operator CONTINUEIF THIS ( 'char_string' X'hex_string' ) NEXT LAST operator 'char_string' X'hex_string' where: THIS If the condition is true in the current record, then the next physical record is read and concatenated to the current physical record, continuing until the condition is false. If the condition is false, then the current physical record becomes the last physical record of the current logical record. THIS is the default. NEXT If the condition is true in the next record, then the current physical record is concatenated to the current record, continuing until the condition is false. pos_spec Specifies the starting and ending column numbers in the physical record. Column numbers start with 1. Either a hyphen or a colon is acceptable (start-end or start:end). If you omit end, the length of the continuation field is the length of the byte string or character string. If you use end, and the length of the resulting continuation field is not the same as that of the byte string or the character string, the shorter one is padded. Character strings are padded with blanks, hexadecimal strings with zeroes. 5-30 Oracle8 Utilities Assembling Logical Records from Physical Records LAST This test is similar to THIS but the test is always against the last non-blank character. If the last non-blank character in the current physical record meets the test, then the next physical record is read and concatenated to the current physical record, continuing until the condition is false. If the condition is false in the current record, then the current physical record is the last physical record of the current logical record. operator The supported operators are equal and not equal. For the equal operator, the field and comparison string must match exactly for the condition to be true. For the not equal operator, they may differ in any character. char_string A string of characters to be compared to the continuation field defined by start and end, according to the operator. The string must be enclosed in double or single quotation marks. The comparison is made character by character, blank padding on the right if necessary. X’hex-string’ A string of bytes in hexadecimal format used in the same way as the character string described above. X’1FB033 would represent the three bytes with values 1F, b), and 33 (hex). Note: The positions in the CONTINUEIF clause refer to positions in each physical record. This is the only time you refer to character positions in physical records. All other references are to logical records. For CONTINUEIF THIS and CONTINUEIF NEXT, the continuation field is removed from all physical records before the logical record is assembled. This allows data values to span the records with no extra characters (continuation characters) in the middle. Two examples showing CONTINUEIF THIS and CONTINUEIF NEXT follow: CONTINUEIF THIS CONTINUEIF NEXT (1:2) = ’%%’ (1:2) =’%%’ Assume physical data records 12 characters long and that a period means a space: %%aaaaaaaa......aaaaaaaa.... %%bbbbbbbb....%%bbbbbbbb.... ..cccccccc....%%cccccccc.... %%dddddddddd....dddddddddd.. %%eeeeeeeeee..%%eeeeeeeeee.. ..ffffffffff..%%ffffffffff.. SQL*Loader Control File Reference 5-31 Assembling Logical Records from Physical Records The logical records would be the same in each case: aaaaaaaa....bbbbbbbb....cccccccc.... dddddddddd..eeeeeeeeee..ffffffffff.. Notes: ■ ■ CONTINUEIF LAST differs from CONTINUEIF THIS and CONTINUEIF NEXT. With CONTINUEIF LAST the continuation character is not removed from the physical record. Instead, this character is included when the logical record is assembled. Trailing blanks in the physical records are part of the logical records. Examples of How to Specify CONTINUEIF In the first example, you specify that if the current physical record (record1) has an asterisk in column 1. Then the next physical record (record2) should be appended to it. If record2 also has an asterisk in column 1, then record3 is appended also. If record2 does not have an asterisk in column 1, then it is still appended to record1, but record3 begins a new logical record. CONTINUEIF THIS (1) = ”*” In the next example, you specify that if the current physical record (record1) has a comma in the last non-blank data column. Then the next physical record (record2) should be appended to it. If a record does not have a comma in the last column, it is the last physical record of the current logical record. CONTINUEIF LAST = ”,” In the last example, you specify that if the next physical record (record2) has a “10” in columns 7 and 8. Then it should be appended to the preceding physical record (record1). If a record does not have a “10” in columns 7 and 8, then it begins a new logical record. CONTINUEIF NEXT (7:8) = ’10’ “Case 4: Loading Combined Physical Records” on page 4-14 provides an example of the CONTINUEIF clause. 5-32 Oracle8 Utilities Loading Logical Records into Tables Loading Logical Records into Tables This section describes the way in which you specify: ■ which tables you want to load ■ which records you want to load into them ■ default characteristics for the columns in those records Specifying Table Names The INTO TABLE keyword of the LOAD DATA statement allows you to identify tables, fields, and datatypes. It defines the relationship between records in the datafile and tables in the database. The specification of fields and datatypes is described in later sections. INTO TABLE Among its many functions, the INTO TABLE keyword allows you to specify the table into which you load data. To load multiple tables, you include one INTO TABLE clause for each table you wish to load. To begin an INTO TABLE clause, use the keywords INTO TABLE, followed by the name of the Oracle table that is to receive the data. INTO TABLE tablename INSERT OPTIONS (...) APPEND REPLACE TRUNCATE The table must already exist. The table name should be enclosed in double quotation marks if it is the same as any SQL or SQL*Loader keyword, if it contains any special characters, or if it is case sensitive. INTO TABLE SCOTT.”COMMENT” INTO TABLE SCOTT.”Comment” INTO TABLE SCOTT.”-COMMENT” The user running SQL*Loader should have INSERT privileges on the table. Otherwise, the table name should be prefixed by the username of the owner as follows: INTO TABLE SOPHIA.EMP SQL*Loader Control File Reference 5-33 Loading Logical Records into Tables Table-Specific Loading Method The INTO TABLE clause may include a table-specific loading method (INSERT, APPEND, REPLACE, or TRUNCATE) that applies only to that table. Specifying one of these methods within the INTO TABLE clause overrides the global tableloading method. The global table-loading method is INSERT, by default, unless a different method was specified before any INTO TABLE clauses. For more information on these options, see “Loading into Empty and Non-Empty Tables” on page 5-25. Table-Specific OPTIONS keyword The OPTIONS keyword can be specified for individual tables in a parallel load. (It is only valid for a parallel load.) For more information, see “Parallel Data Loading Models” on page 8-25. Choosing which Rows to Load You can choose to load or discard a logical record by using the WHEN clause to test a condition in the record. The WHEN clause appears after the table name and is followed by one or more field conditions. AND field_condition WHEN field_condition ( ::= columnname pos_spec ) operator ’char_string’ X’hex_string’ BLANKS For example, the following clause indicates that any record with the value “q” in the fifth column position should be loaded: WHEN (5) = ’q’ A WHEN clause can contain several comparisons provided each is preceded by AND. Parentheses are optional, but should be used for clarity with multiple comparisons joined by AND. For example WHEN (DEPTNO = ’10’) AND (JOB = ’SALES’) 5-34 Oracle8 Utilities Loading Logical Records into Tables To evaluate the WHEN clause, SQL*Loader first determines the values of all the fields in the record. Then the WHEN clause is evaluated. A row is inserted into the table only if the WHEN clause is true. Field conditions are discussed in detail in “Specifying Field Conditions” on page 5-37. “Case 5: Loading Data into Multiple Tables” on page 4-18 provides an example of the WHEN clause. Specifying Default Data Delimiters If all data fields are terminated similarly in the datafile, you can use the FIELDS clause to indicate the default delimiters. The syntax is: FIELDS termination_spec enclosure_spec termination_spec enclosure_spec OPTIONALLY termination_spec ::= TERMINATED BY WHITESPACE ’char’ X’hex_char’ enclosure_spec ::= ’char’ ENCLOSED BY X’hex_char’ AND ’char’ X’hex_char’ You can override the delimiter for any given column by specifying it after the column name. “Case 3: Loading a Delimited, Free-Format File” on page 4-11 provides an example. See “Specifying Delimiters” on page 5-60 for more information on delimiter specification. Handling Short Records with Missing Data When the control file definition specifies more fields for a record than are present in the record, SQL*Loader must determine whether the remaining (specified) columns should be considered null or whether an error should be generated. SQL*Loader Control File Reference 5-35 Index Options If the control file definition explicitly states that a field’s starting position is beyond the end of the logical record, then SQL*Loader always defines the field as null. If a field is defined with a relative position (such as DNAME and LOC in the example below), and the record ends before the field is found; then SQL*Loader could either treat the field as null or generate an error. SQL*Loader uses the presence or absence of the TRAILING NULLCOLS clause to determine the course of action. TRAILING NULLCOLS TRAILING NULLCOLS tells SQL*Loader to treat any relatively positioned columns that are not present in the record as null columns. For example, if the following data 10 Accounting is read with the following control file INTO TABLE dept TRAILING NULLCOLS ( deptno CHAR TERMINATED BY ” ”, dname CHAR TERMINATED BY WHITESPACE, loc CHAR TERMINATED BY WHITESPACE ) and the record ends after DNAME. The remaining LOC field is set to null. Without the TRAILING NULLCOLS clause, an error would be generated due to missing data. “Case 7: Extracting Data from a Formatted Report” on page 4-27 provides an example of TRAILING NULLCOLS. Index Options This section describes the SQL*Loader options that control how index entries are created. SORTED INDEXES Option The SORTED INDEXES option applies to direct path loads. It tells SQL*Loader that the incoming data has already been sorted on the specified indexes, allowing SQL*Loader to optimize performance. Syntax for this feature is given in “HighLevel Syntax Diagrams” on page 5-4. Further details are in “SORTED INDEXES Statement” on page 8-16. 5-36 Oracle8 Utilities Specifying Field Conditions SINGLEROW Option The SINGLEROW option is intended for use during a direct path load with APPEND on systems with limited memory, or when loading a small number of rows into a large table. This option inserts each index entry directly into the index, one row at a time. By default, SQL*Loader does not use SINGLEROW when APPENDing rows to a table. Instead, index entries are put into a separate, temporary storage area and merged with the original index at the end of the load. This method achieves better performance and produces an optimal index, but it requires extra storage space. During the merge, the original index, the new index, and the space for new entries all simultaneously occupy storage space. With the SINGLEROW option, storage space is not required for new index entries or for a new index. The resulting index may not be as optimal as a freshly sorted one, but it takes less space to produce. It also takes more time, since additional UNDO information is generated for each index insert. This option is suggested for use when: ■ ■ available storage is limited, or the number of rows to be loaded is small compared to the size of the table (a ratio of 1:20, or less, is recommended). Specifying Field Conditions A field condition is a statement about a field in a logical record that evaluates as true or false. It is used in the NULLIF and DEFAULTIF clauses, as well as in the WHEN clause. A field condition is similar to the condition in the CONTINUEIF clause, with two important differences. First, positions in the field condition refer to the logical record, not to the physical record. Second, you may specify either a position in the logical record or the name of a field that is being loaded. ( columnname pos_spec ’char_string’ X’hex_string’ BLANKS ) SQL*Loader Control File Reference 5-37 Specifying Field Conditions pos_spec ::= ( start ) : end – where: start Specifies the starting position of the comparison field in the logical record. end Specifies the ending position of the comparison field in the logical record. Either start-end or start:end is acceptable, If you omit end the length of the field is determined by the length of the comparison string. If the lengths are different, the shorter field is padded. Character strings are padded with blanks, hexadecimal strings with zeroes. column_name The name of a column in the database. If column_name is used instead of start:end, the specification for that column defines the comparison field. column_name must match exactly the name of the column in the table’s database definition. Use quotes around the column name if the name matches a SQL or SQL*Loader keyword, contains special characters, or is of mixed case. See “Specifying Filenames and Database Objects” on page 5-12. operator A comparison operator for either equal or not equal. char_string A string of characters enclosed in single or double quotes that is compared to the comparison field. If the comparison is true, the current row is inserted into the table. X’hex_string’ A byte string in hexadecimal format that is used in the same way as char_string, described above. BLANKS A keyword denoting an arbitrary number of blanks. See below. Comparing Fields to BLANKS The BLANKS keyword makes it possible to determine easily if a field of unknown length is blank. For example, use the following clause to load a blank field as null: column_name ... NULLIF column_name=BLANKS 5-38 Oracle8 Utilities Specifying Columns and Fields The BLANKS keyword only recognizes blanks, not tabs. It can be used in place of a literal string in any field comparison. The condition is TRUE whenever the column is entirely blank. The BLANKS keyword also works for fixed-length fields. Using it is the same as specifying an appropriately-sized literal string of blanks. For example, the following specifications are equivalent: fixed_field CHAR(2) NULLIF (fixed_field)=BLANKS fixed_field CHAR(2) NULLIF (fixed_field)=” ” Note: There can be more than one “blank” in a multi-byte character set. It is a good idea to use the BLANKS keyword with these character sets instead of specifying a string of blank characters. The character string will match only a specific sequence of blank characters, while the BLANKS keyword will match combinations of different blank characters. For more information on multi-byte character sets, see “MultiByte (Asian) Character Sets” on page 5-24. Comparing Fields to Literals When a data field is compared to a shorter literal string, the string is padded for the comparison; character strings are padded with blanks; for example: NULLIF (1:4)=”_” compares the data in position 1:4 with 4 blanks. If position 1:4 contains 4 blanks, then the clause evaluates as true. Hexadecimal strings are padded with hexadecimal zeroes. The clause NULLIF (1:4)=X’FF’ compares position 1:4 to hex ’FF000000’. Specifying Columns and Fields You may load any number of a table’s columns. Columns defined in the database, but not specified in the control file, are assigned null values (this is the proper way to insert null values). A column specification is the name of the column, followed by a specification for the value to be put in that column. The list of columns is enclosed by parentheses and separated with commas as follows: ( columnspec, columnspec, ... ) SQL*Loader Control File Reference 5-39 Specifying the Position of a Data Field Each column name must correspond to a column of the table named in the INTO TABLE clause. A column name must be enclosed in quotation marks if it is a SQL or SQL*Loader reserved word, contains special characters, or is case sensitive. If the value is to be generated by SQL*Loader, the specification includes the keyword RECNUM, the SEQUENCE function, or the keyword CONSTANT. See “Generating Data” on page 5-46. If the column’s value is read from the datafile, the data field that contains the column’s value is specified. In this case, the column specification includes a column name that identifies a column in the database table, and a field specification that describes a field in a data record. The field specification includes position, datatype, null restrictions, and defaults. Specifying the Datatype of a Data Field A field’s datatype specification tells SQL*Loader how to interpret the data in the field. For example, a datatype of INTEGER specifies binary data, while INTEGER EXTERNAL specifies character data that represents a number. A CHAR field, however, can contain any character data. You may specify one datatype for each field; if unspecified, CHAR is assumed. “Specifying Datatypes” on page 5-50 describes how SQL*Loader datatypes are converted into Oracle datatypes and gives detailed information on each SQL*Loader’s datatype. Before the datatype is specified, the field’s position must be specified. Specifying the Position of a Data Field To load data from the datafile SQL*Loader must know a field’s location and its length. To specify a field’s position in the logical record, use the POSITION keyword in the column specification. The position may either be stated explicitly or relative to the preceding field. Arguments to POSITION must be enclosed in parentheses, as follows: POSITION ( ) start : – * +n 5-40 Oracle8 Utilities end Specifying the Position of a Data Field where: start The starting column of the data field in the logical record. The first character position in a logical record is 1. end The ending position of the data field in the logical record. Either start-end or start:end is acceptable. If you omit end, the length of the field is derived from the datatype in the datafile. Note that CHAR data specified without start or end is assumed to be length 1. If it is impossible to derive a length from the datatype, an error message is issued. * Specifies that the data field follows immediately after the previous field. If you use * for the first data field in the control file, that field is assumed to be at the beginning of the logical record. When you use * to specify position, the length of the field is derived from the datatype. +n You can use an on offset, specified as +n, to offset the current field from the previous field. A number of characters as specified by n are skipped before reading the value for the current field. You may omit POSITION entirely. If you do, the position specification for the data field is the same as if POSITION(*) had been used. For example ENAME POSITION (1:20) CHAR EMPNO POSITION (22-26) INTEGER EXTERNAL ALLOW POSITION (*+2) INTEGER EXTERNAL TERMINATED BY ”/” Column ENAME is character data in positions 1 through 20, followed by column EMPNO, which is presumably numeric data in columns 22 through 27. Column ALLOW is offset from the end of EMPNO by +2. So it starts in column 29 and continues until a slash is encountered. Using POSITION with Data Containing TABs When you are determining field positions, be alert for TABs in the datafile. The following situation is highly likely when using SQL*Loader’s advanced SQL string capabilities to load data from a formatted report: ■ ■ You look at a printed copy of the report, carefully measuring all of the character positions, and create your control file. The load then fails with multiple “invalid number” and “missing field” errors. SQL*Loader Control File Reference 5-41 Specifying the Position of a Data Field These kinds of errors occur when the data contains TABs. When printed, each TAB expands to consume several columns on the paper. In the datafile, however, each TAB is still only one character. As a result, when SQL*Loader reads the datafile, the POSITION specifications are wrong. To fix the problem, inspect the datafile for tabs and adjust the POSITION specifications, or else use delimited fields. The use of delimiters to specify relative positioning of fields is discussed in detail in “Specifying Delimiters” on page 5-60. Especially note how the delimiter WHITESPACE can be used. Using POSITION with Multiple Table Loads In a multiple table load, you specify multiple INTO TABLE clauses. When you specify POSITION(*) for the first column of the first table, the position is calculated relative to the beginning of the logical record. When you specify POSITION(*) for the first column of subsequent tables, the position is calculated relative to the last column of the last table loaded. Thus, when a subsequent INTO TABLE clause begins, the position is not set to the beginning of the logical record automatically. This allows multiple INTO TABLE clauses to process different parts of the same physical record. For an example, see the second example in “Extracting Multiple Logical Records” on page 5-43. A logical record may contain data for one of two tables, but not both. In this case, you would reset POSITION. Instead of omitting the position specification or using POSITION(*+n) for the first field in the INTO TABLE clause, use POSITION(1) or POSITION(n). Some examples follow: SITEID POSITION (*) SMALLINT SITELOC POSITION (*) INTEGER If these were the first two column specifications, SITEID would begin in column1, and SITELOC would begin in the column immediately following. ENAME POSITION (1:20) CHAR EMPNO POSITION (22-26) INTEGER EXTERNAL ALLOW POSITION (*+2) INTEGER EXTERNAL TERMINATED BY ”/” Column ENAME is character data in positions 1 through 20, followed by column EMPNO which is presumably numeric data in columns 22 through 26. Column ALLOW is offset from the end of EMPNO by +2, so it starts in column 28 and continues until a slash is encountered. 5-42 Oracle8 Utilities Using Multiple INTO TABLE Statements Using Multiple INTO TABLE Statements Multiple INTO TABLE statements allow you to: ■ load data into different tables ■ extract multiple logical records from a single input record ■ distinguish different input record formats In the first case, it is common for the INTO TABLE statements to refer to the same table. This section illustrates the different ways to use multiple INTO TABLE statements and shows you how to use the POSITION keyword. Note: A key point when using multiple INTO TABLE statements is that field scanning continues from where it left off when a new INTO TABLE statement is processed. The remainder of this section details important ways to make use of that behavior. It also describes alternative ways using fixed field locations or the POSITION keyword. Extracting Multiple Logical Records Some data storage and transfer media have fixed-length physical records. When the data records are short, more than one can be stored in a single, physical record to use the storage space efficiently. In this example, SQL*Loader treats a single physical record in the input file as two logical records and uses two INTO TABLE clauses to load the data into the EMP table. For example, if the data looks like 1119 Smith 1121 Albert 1120 Yvonne 1130 Thomas then the following control file extracts the logical records: INTO TABLE emp (empno POSITION(1:4) INTEGER EXTERNAL, ename POSITION(6:15) CHAR) INTO TABLE emp (empno POSITION(17:20) INTEGER EXTERNAL, ename POSITION(21:30) CHAR) SQL*Loader Control File Reference 5-43 Using Multiple INTO TABLE Statements Relative Positioning The same record could be loaded with a different specification. The following control file uses relative positioning instead of fixed positioning. It specifies that each field is delimited by a single blank (“ ”), or with an undetermined number of blanks and tabs (WHITESPACE): INTO TABLE emp (empno INTEGER EXTERNAL TERMINATED BY ” ”, ename CHAR TERMINATED BY WHITESPACE) INTO TABLE emp (empno INTEGER EXTERNAL TERMINATED BY ” ”, ename CHAR) TERMINATED BY WHITESPACE) The important point in this example is that the second EMPNO field is found immediately after the first ENAME, although it is in a separate INTO TABLE clause. Field scanning does not start over from the beginning of the record for a new INTO TABLE clause. Instead, scanning continues where it left off. To force record scanning to start in a specific location, you use the POSITION keyword. That mechanism is described next. Distinguishing Different Input Record Formats A single datafile might contain records in a variety of formats. Consider the following data, in which EMP and DEPT records are intermixed: 1 2 2 1 2 50 1119 1120 60 1121 Manufacturing Smith 50 Snyder 50 Shipping Stevens 60 — DEPT record — EMP record A record ID field distinguishes between the two formats. Department records have a “1” in the first column, while employee records have a “2”. The following control file uses exact positioning to load this data: INTO TABLE dept WHEN recid = 1 (recid POSITION(1:1) deptno POSITION(3:4) ename POSITION(8:21) INTO TABLE emp WHEN recid <> 1 (recid POSITION(1:1) empno POSITION(3:6) 5-44 Oracle8 Utilities INTEGER EXTERNAL, INTEGER EXTERNAL, CHAR) INTEGER EXTERNAL, INTEGER EXTERNAL, Using Multiple INTO TABLE Statements ename POSITION(8:17) CHAR, deptno POSITION(19:20) INTEGER EXTERNAL) Relative Positioning Again, the records in the previous example could also be loaded as delimited data. In this case, however, it is necessary to use the POSITION keyword. The following control file could be used: INTO TABLE dept WHEN recid = 1 (recid INTEGER EXTERNAL TERMINATED BY WHITESPACE, deptno INTEGER EXTERNAL TERMINATED BY WHITESPACE, dname CHAR TERMINATED BY WHITESPACE) INTO TABLE emp WHEN recid <> 1 (recid POSITION(1) INTEGER EXTERNAL TERMINATED BY ’ ’, empno INTEGER EXTERNAL TERMINATED BY ’ ’ ename CHAR TERMINATED BY WHITESPACE, deptno INTEGER EXTERNAL TERMINATED BY ’ ’) The POSITION keyword in the second INTO TABLE clause is necessary to load this data correctly. This keyword causes field scanning to start over at column 1 when checking for data that matches the second format. Without it, SQL*Loader would look for the RECID field after DNAME. Loading Data into Multiple Tables By using the POSITION clause with multiple INTO TABLE clauses, data from a single record can be loaded into multiple normalized tables. “Case 5: Loading Data into Multiple Tables” on page 4-18 provides an example. Summary Multiple INTO TABLE clauses allow you to extract multiple logical records from a single input record and recognize different record formats in the same file. For delimited data, proper use of the POSITION keyword is essential for achieving the expected results. When the POSITION keyword is not used, multiple INTO TABLE clauses process different parts of the same (delimited data) input record, allowing multiple tables to be loaded from one record. When the POSITION keyword is used, multiple INTO TABLE clauses can process the same record in different ways, allowing multiple formats to be recognized in one input file. SQL*Loader Control File Reference 5-45 Generating Data Generating Data The functions described in this section provide the means for SQL*Loader to generate the data stored in the database row, rather than reading it from a datafile. The following functions are described: ■ CONSTANT ■ RECNUM ■ SYSDATE ■ SEQUENCE Loading Data Without Files It is possible to use SQL*Loader to generate data by specifying only sequences, record numbers, system dates, and constants as field specifications. SQL*Loader inserts as many rows as are specified by the LOAD keyword. The LOAD keyword is required in this situation. The SKIP keyword is not permitted. SQL*Loader is optimized for this case. Whenever SQL*Loader detects that only generated specifications are used, it ignores any specified datafile — no read I/O is performed. In addition, no memory is required for a bind array. If there are any WHEN clauses in the control file, SQL*Loader assumes that data evaluation is necessary, and input records are read. Setting a Column to a Constant Value This is the simplest form of generated data. It does not vary during the load, and it does not vary between loads. CONSTANT To set a column to a constant value, use the keyword CONSTANT followed by a value: CONSTANT value CONSTANT data is interpreted by SQL*Loader as character input. It is converted, as necessary, to the database column type. 5-46 Oracle8 Utilities Generating Data You may enclose the value within quotation marks, and must do so if it contains white space or reserved words. Be sure to specify a legal value for the target column. If the value is bad, every row is rejected. Numeric values larger than 2**32 - 1 (4,294,967,295) must be enclosed in quotes. Note: Do not use the CONSTANT keyword to set a column to null. To set a column to null, do not specify that column at all. Oracle automatically sets that column to null when loading the row. The combination of CONSTANT and a value is a complete column specification. Setting a Column to the Datafile Record Number Use the RECNUM keyword after a column name to set that column to the number of the logical record from which that row was loaded. Records are counted sequentially from the beginning of the first datafile, starting with record 1. RECNUM is incremented as each logical record is assembled. Thus it increments for records that are discarded, skipped, rejected, or loaded. If you use the option SKIP=10, the first record loaded has a RECNUM of 11. RECNUM The combination of column name and the RECNUM keyword is a complete column specification. column_name RECNUM Setting a Column to the Current Date A column specified with SYSDATE gets the current system date, as defined by the SQL language SYSDATE function. See the section “DATE Datatype” in Oracle8 SQL Reference. SYSDATE The combination of column name and the SYSDATE keyword is a complete column specification. column_name SYSDATE The database column must be of type CHAR or DATE. If the column is of type CHAR, then the date is loaded in the form ’dd-mon-yy.’ After the load, it can be accessed only in that form. If the system date is loaded into a DATE column, then it can be accessed in a variety of forms that include the time and the date. SQL*Loader Control File Reference 5-47 Generating Data A new system date/time is used for each array of records inserted in a conventional path load and for each block of records loaded during a direct path load. Setting a Column to a Unique Sequence Number The SEQUENCE keyword ensures a unique value for a particular column. SEQUENCE increments for each record that is loaded or rejected. It does not increment for records that are discarded or skipped. SEQUENCE The combination of column name and the SEQUENCE function is a complete column specification. columnname SEQUENCE ( n MAX COUNT ) , increment where: columnname The name of the column in the database to which to assign the sequence. SEQUENCE Use the SEQUENCE keyword to specify the value for a column. n Specifies the specific sequence number to begin with COUNT The sequence starts with the number of rows already in the table plus the increment. MAX The sequence starts with the current maximum value for the column plus the increment. increment The value that the sequence number is to increment after a record is loaded or rejected If a row is rejected (that is, it has a format error or causes an Oracle error), the generated sequence numbers are not reshuffled to mask this. If four rows are assigned sequence numbers 10, 12, 14, and 16 in a particular column, and the row with 12 is rejected; the three rows inserted are numbered 10, 14, and 16, not 10, 12, 14. This allows the sequence of inserts to be preserved despite data errors. When you correct the rejected data and reinsert it, you can manually set the columns to agree with the sequence. 5-48 Oracle8 Utilities Generating Data “Case 3: Loading a Delimited, Free-Format File” on page 4-11 provides an example the SEQUENCE function. Generating Sequence Numbers for Multiple Tables Because a unique sequence number is generated for each logical input record, rather than for each table insert, the same sequence number can be used when inserting data into multiple tables. This is frequently useful behavior. Sometimes, you might want to generate different sequence numbers for each INTO TABLE clause. For example, your data format might define three logical records in every input record. In that case, you can use three INTO TABLE clauses, each of which inserts a different part of the record into the same table. Note that, when you use SEQUENCE(MAX), SQL*Loader will use the maximum from each table which can lead to inconsistencies in sequence numbers. To generate sequence numbers for these records, you must generate unique numbers for each of the three inserts. There is a simple technique to do so. Use the number of table-inserts per record as the sequence increment and start the sequence numbers for each insert with successive numbers. Example Suppose you want to load the following department names into the DEPT table. Each input record contains three department names, and you want to generate the department numbers automatically. Accounting Shipping ... Personnel Purchasing Manufacturing Maintenance You could use the following control file entries to generate unique department numbers: INTO TABLE dept (deptno sequence(1, 3), dname position(1:14) char) INTO TABLE dept (deptno sequence(2, 3), dname position(16:29) char) INTO TABLE dept (deptno sequence(3, 3), dname position(31:44) char) SQL*Loader Control File Reference 5-49 Specifying Datatypes The first INTO TABLE clause generates department number 1, the second number 2, and the third number 3. They all use 3 as the sequence increment (the number of department names in each record). This control file loads Accounting as department number 1, Personnel as 2, and Manufacturing as 3. The sequence numbers are then incremented for the next record, so Shipping loads as 4, Purchasing as 5, and so on. Specifying Datatypes This section describes SQL*Loader’s datatypes and explains how they are converted to Oracle datatypes. Datatype Conversions The datatype specifications in the control file tell SQL*Loader how to interpret the information in the datafile. The server defines the datatypes for the columns in the database. The link between these two is the column name specified in the control file. SQL*Loader extracts data from a field in the input file, guided by the datatype specification in the control file. SQL*Loader then sends the field to the server to be stored in the appropriate column (as part of an array of row inserts). The server does any necessary data conversion to store the data in the proper internal format. The section “Data Conversion and Datatype Specification” on page 3-10 contains diagrams that illustrate these points. The datatype of the data in the file does not necessarily have to be the same as the datatype of the column in the Oracle table. Oracle automatically performs conversions, but you need to ensure that the conversion makes sense and does not generate errors. For instance, when a datafile field with datatype CHAR is loaded into a database column with datatype NUMBER, you must make sure that the contents of the character field represent a valid number. Note: SQL*Loader does not contain datatype specifications for Oracle internal datatypes such as NUMBER or VARCHAR2. SQL*Loader’s datatypes describe data that can be produced with text editors (character datatypes) and with standard programming languages (native datatypes). However, although SQL*Loader does not recognize datatypes like NUMBER and VARCHAR2, any data that Oracle is capable of converting may be loaded into these or other database columns. 5-50 Oracle8 Utilities Specifying Datatypes Native Datatypes Some datatypes consist entirely of binary data or contain binary data in their implementation. See “Binary versus Character Data” on page 3-9 for a discussion of binary vs. character data. These non-character datatypes are the native datatypes: INTEGER ZONED SMALLINT VARCHAR FLOAT GRAPHIC DOUBLE GRAPHIC EXTERNAL BYTEINT VARGRAPHIC (packed) DECIMAL RAW Since these datatypes contain binary data, most of them do not readily transport across operating systems. (See “Loading Data Across Different Operating Systems” on page 5-65.) RAW data and GRAPHIC data is the exceptions. SQL*Loader does not attempt to interpret these datatypes, but simply stores them “as is”. Additional Information: Native datatypes cannot be specified with delimiters. The size of the native datatypes INTEGER, SMALLINT, FLOAT, and DOUBLE are determined by the host operating system. Their size is fixed — it cannot be overridden in the control file. (Refer to your Oracle operating system-specific documentation for more information.) The sizes of the other native datatypes may be specified in the control file. INTEGER The data is a full-word binary integer (unsigned). If you specify start:end in the POSITION clause, end is ignored. The length of the field is the length of a fullword integer on your system. (Datatype LONG INT in C.) This length cannot be overridden in the control file. INTEGER SMALLINT The data is a half-word binary integer (unsigned). If you specify start:end in the POSITION clause, end is ignored. The length of the field is a half-word integer is on your system. SMALLINT SQL*Loader Control File Reference 5-51 Specifying Datatypes Additional Information: This is the SHORT INT datatype in the C programming language. One way to determine its length is to make a small control file with no data and look at the resulting log file. This length cannot be overridden in the control file. See your Oracle operating system-specific documentation for details. FLOAT The data is a single-precision, floating-point, binary number. If you specify end in the POSITION clause, it is ignored. The length of the field is the length of a singleprecision, floating-point binary number on your system. (Datatype FLOAT in C.) This length cannot be overridden in the control file. DOUBLE The data is a double-precision, floating-point binary number. If you specify end in the POSITION clause, it is ignored. The length of the field is the length of a doubleprecision, floating-point binary number on your system. (Datatype DOUBLE or LONG FLOAT in C.) This length cannot be overridden in the control file. DOUBLE BYTEINT The decimal value of the binary representation of the byte is loaded. For example, the input character x”1C” is loaded as 28. The length of a BYTEINT field is always 1 byte. If POSITION(start:end) is specified, end is ignored. The syntax for this datatype is BYTEINT An example is (column1 position(1) BYTEINT, column2 BYTEINT, ... ) ZONED ZONED data is in zoned decimal format: a string of decimal digits, one per byte, with the sign included in the last byte. (In COBOL, this is a SIGN TRAILING field.) The length of this field is equal to the precision (number of digits) that you specify. The syntax for this datatype is: 5-52 Oracle8 Utilities Specifying Datatypes ) precision ZONED ( , scale where precision is the number of digits in the number, and scale (if given) is the number of digits to the right of the (implied) decimal point. For example: sal POSITION(32) ZONED(8), specifies an 8-digit integer starting at position 32. DECIMAL DECIMAL data is in packed decimal format: two digits per byte, except for the last byte which contains a digit and sign. DECIMAL fields allow the specification of an implied decimal point, so fractional values can be represented. The syntax for the this datatype is: DECIMAL ( ) precision , scale where: precision The number of digits in a value. The character length of the field, as computed from digits, is (digits + 2/2) rounded up. scale The scaling factor, or number of digits to the right of the decimal point. The default is zero (indicating an integer). scale may be greater than the number of digits but cannot be negative. For example, sal DECIMAL (7,2) would load a number equivalent to +12345.67. In the data record, this field would take up 4 bytes. (The byte length of a DECIMAL field is equivalent to (N+1)/2, rounded up, where N is the number of digits in the value, and one is added for the sign.) SQL*Loader Control File Reference 5-53 Specifying Datatypes RAW The data is raw, binary data loaded “as is”. It does not undergo character set conversion. If loaded into a RAW database column, it is not converted by Oracle. If it is loaded into a CHAR column, Oracle converts it to hexadecimal. It cannot be loaded into a DATE or number column. The syntax for this datatype is RAW ( length ) The length of this field is the number of bytes specified in the control file. This length is limited only by the length of the target column in the database and by memory resources. GRAPHIC The data is a string of double-byte characters (DBCS). Oracle does not support DBCS, however SQL*Loader reads DBCS as single bytes. Like RAW data, GRAPHIC fields are stored without modification in whichever column you specify. The syntax for this datatype is: GRAPHIC ( graphic_char_length ) For GRAPHIC and GRAPHIC EXTERNAL, specifying POSITION(start:end) gives the exact location of the field in the logical record. If you specify the length after the GRAPHIC (EXTERNAL) keyword, however, then you give the number of doublebyte graphic characters. That value is multiplied by 2 to find the length of the field in bytes. If the number of graphic characters is specified, then any length derived from POSITION is ignored. GRAPHIC EXTERNAL If the DBCS field is surrounded by shift-in and shift-out characters, use GRAPHIC EXTERNAL. This is identical to GRAPHIC, except that the first and last characters (the shift-in and shift-out) are not loaded. 5-54 Oracle8 Utilities Specifying Datatypes The syntax for this datatype is: GRAPHIC EXTERNAL ( graphic_char_length ) where: GRAPHIC Data is double-byte characters. EXTERNAL First and last characters are ignored. graphic_char_length Length in DBCS (see GRAPHIC above). For example, let [ ] represent shift-in and shift-out characters, and let # represent any double-byte character. To describe ####, use ”POSITION(1:4) GRAPHIC” or ”POSITION(1) GRAPHIC(2)”. To describe [####], use ”POSITION(1:6) GRAPHIC EXTERNAL” or ”POSITION(1) GRAPHIC EXTERNAL(2)”. VARGRAPHIC The data is a varying-length, double-byte character string. It consists of a length subfield followed by a string of double-byte characters (DBCS). Additional Information: The size of the length subfield is the size of the SQL*Loader SMALLINT datatype on your system (C type SHORT INT). See “SMALLINT” on page 5-51 for more information. The length of the current field is given in the first two bytes. This length is a count of graphic (double-byte) characters. So it is multiplied by two to determine the number of bytes to read. The syntax for this datatype is VARGRAPHIC ( maximum_length ) A maximum length specified after the VARGRAPHIC keyword does not include the size of the length subfield. The maximum length specifies the number of graphic (double byte) characters. So it is also multiplied by two to determine the maximum length of the field in bytes. SQL*Loader Control File Reference 5-55 Specifying Datatypes The default maximum field length is 4Kb graphic characters, or 8 Kb (2 * 4Kb). It is a good idea to specify a maximum length for such fields whenever possible, to minimize memory requirements. See “Determining the Size of the Bind Array” on page 5-65 for more details. The POSITION clause, if used, gives the location of the length subfield, not of the first graphic character. If you specify POSITION(start:end), the end location determines a maximum length for the field. Both start and end identify single-character (byte) positions in the file. Start is subtracted from (end + 1) to give the length of the field in bytes. If a maximum length is specified, it overrides any maximum length calculated from POSITION. If a VARGRAPHIC field is truncated by the end of the logical record before its full length is read, a warning is issued. Because a VARCHAR field’s length is embedded in every occurrence of the input data for that field, it is assumed to be accurate. VARGRAPHIC data cannot be delimited. VARCHAR A VARCHAR field is a varying-length character string. It is considered a native datatype, rather than a character datatype because it includes binary data (a length). It consists of a length subfield followed by a character string of the given length. Additional Information: The size of the length subfield is the size of the SQL*Loader SMALLINT datatype on your system (C type SHORT INT). See “SMALLINT” on page 5-51 for more information. The syntax for this datatype is: VARCHAR ( maximum_length ) A maximum length specified in the control file does not include the size of the length subfield. If you specify the optional maximum length after the VARCHAR keyword, then a buffer of that size is allocated for these fields. The default buffer size is 4 Kb. Specifying the smallest maximum length that is needed to load your data can minimize SQL*Loader’s memory requirements, especially if you have many VARCHAR fields. See “Determining the Size of the Bind Array” on page 5-65 for more details. 5-56 Oracle8 Utilities Specifying Datatypes The POSITION clause, if used, gives the location of the length subfield, not of the first text character. If you specify POSITION(start:end), the end location determines a maximum length for the field. Start is subtracted from (end + 1) to give the length of the field in bytes. If a maximum length is specified, it overrides any length calculated from POSITION. If a VARCHAR field is truncated by the end of the logical record before its full length is read, a warning is issued. Because a VARCHAR field’s length is embedded in every occurrence of the input data for that field, it is assumed to be accurate. VARCHAR data cannot be delimited. Conflicting Native Datatype Field Lengths There are several ways to specify a length for a field. If multiple lengths are specified and they conflict, then one of the lengths takes precedence. A warning is issued when a conflict exists. The following rules determine which field length is used: 1. The size of INTEGER, SMALLINT, FLOAT, and DOUBLE data is fixed. It is not possible to specify a length for these datatypes in the control file. If starting and ending positions are specified, the end position is ignored — only the start position is used. 2. If the length specified (or precision) of a DECIMAL, ZONED, GRAPHIC, GRAPHIC EXTERNAL, or RAW field conflicts with the size calculated from a POSITION(start:end) specification, then the specified length (or precision) is used. 3. If the maximum size specified for a VARCHAR or VARGRAPHIC field conflicts with the size calculated from a POSITION(start:end) specification, then the specified maximum is used. For example, if the native datatype INTEGER is 4 bytes long and the following field specification is given: column1 POSITION(1:6) INTEGER then a warning is issued, and the proper length (4) is used. In this case, the log file shows the actual length used under the heading “Len” in the column table: Column Name Position Len Term Encl Datatype ----------------------- --------- ----- ---- ---- --------COLUMN1 1:6 4 INTEGER SQL*Loader Control File Reference 5-57 Specifying Datatypes Character Datatypes The character datatypes are CHAR, DATE, and the numeric EXTERNAL datatypes. These fields can be delimited and can have lengths (or maximum lengths) specified in the control file. CHAR The data field contains character data. The length is optional and is taken from the POSITION specification if it is not present here. If present, this length overrides the length in the POSITION specification. If no length is given, CHAR data is assumed to have a length of 1. The syntax is: CHAR ( length ) delimiter_spec A field of datatype CHAR may also be variable-length delimited or enclosed. See “Specifying Delimiters” on page 5-60. Attention: If the column in the database table is defined as LONG, you must explicitly specify a maximum length (maximum for a LONG is 2 gigabytes) either with a length specifier on the CHAR keyword or with the POSITION keyword. This guarantees that a large enough buffer is allocated for the value and is necessary even if the data is delimited or enclosed. DATE The data field contains character data that should be converted to an Oracle date using the specified date mask. The syntax is: DATE ( length ) ”mask” delimiter_spec For example: LOAD DATA INTO TABLE DATES (COL_A POSITION (1:15) DATE ”DD-Mon-YYYY”) BEGINDATA 1-Jan-1991 1-Apr-1991 28-Feb-1991 5-58 Oracle8 Utilities Specifying Datatypes Attention: Whitespace is ignored and dates are parsed from left to right unless delimiters are present. The length specification is optional, unless a varying-length date mask is specified. In the example above, the date mask specifies a fixed-length date format of 11 characters. SQL*Loader counts 11 characters in the mask, and therefore expects a maximum of 11 characters in the field, so the specification works properly. But, with a specification such as DATE ”Month dd, YYYY” the date mask is 14 characters, while the maximum length of a field such as September 30, 1991 is 18 characters. In this case, a length must be specified. Similarly, a length is required for any Julian dates (date mask “J”)—a field length is required any time the length of the date string could exceed the length of the mask (that is, the count of characters in the mask). If an explicit length is not specified, it can be derived from the POSITION clause. It is a good idea to specify the length whenever you use a mask, unless you are absolutely sure that the length of the data is less than, or equal to, the length of the mask. An explicit length specification, if present, overrides the length in the POSITION clause. Either of these overrides the length derived from the mask. The mask may be any valid Oracle date mask. If you omit the mask, the default Oracle date mask of “dd-mon-yy” is used. The length must be enclosed in parentheses and the mask in quotation marks. “Case 3: Loading a Delimited, Free-Format File” on page 4-11 provides an example of the DATE datatype. A field of datatype DATE may also be specified with delimiters. For more information, see “Specifying Delimiters” on page 5-60. A date field that consists entirely of whitespace produces an error unless NULLIF BLANKS is specified. For more information, see “Loading All-Blank Fields” on page 5-72. MLSLABEL This Trusted Oracle datatype stores the Trusted Oracle’s internal representation of labels generated by multilevel secure operating systems. Trusted Oracle uses labels to control database access. SQL*Loader Control File Reference 5-59 Specifying Datatypes You can define a column using the MLSLABEL datatype in Oracle8 for compatibility with Trusted Oracle applications, but NULL is the only valid value for the column in Oracle8. Numeric External Datatypes The numeric external datatypes are the numeric datatypes (INTEGER, FLOAT, DECIMAL, and ZONED) specified with the EXTERNAL keyword with optional length and delimiter specifications. These datatypes are the human-readable, character form of numeric data. Numeric EXTERNAL may be specified with lengths and delimiters, just like CHAR data. Length is optional, but if specified, overrides POSITION. The syntax for this datatype is: INTEGER FLOAT EXTERNAL ( length ) delimiter_spec DECIMAL ZONED Attention: The data is a number in character form, not binary representation. So these datatypes are identical to CHAR and are treated identically, except for the use of DEFAULTIF. If you want the default to be null, use CHAR; if you want it to be zero, use EXTERNAL. See also “Setting a Column to Null or Zero” on page 5-71 and “DEFAULTIF Clause” on page 5-71. FLOAT EXTERNAL Data Values FLOAT EXTERNAL data can be given in either scientific or regular notation. Both ”5.33” and ”533E-2” are valid representations of the same value. Specifying Delimiters The boundaries of CHAR, DATE, MLSLABEL, or numeric EXTERNAL fields may also be marked by specific delimiter characters contained in the input data record. You indicate how the field is delimited by using a delimiter specification after specifying the datatype. Delimited data can be TERMINATED or ENCLOSED. 5-60 Oracle8 Utilities Specifying Datatypes TERMINATED Fields TERMINATED fields are read from the starting position of the field up to, but not including, the first occurrence of the delimiter character. If the terminator delimiter is found in the first column position, the field is null. TERMINATED BY WHITESPACE If TERMINATED BY WHITESPACE is specified, data is read until the first occurrence of a whitespace character (space, tab, newline). Then the current position is advanced until no more adjacent whitespace characters are found. This allows field values to be delimited by varying amounts of whitespace. Enclosed Fields Enclosed fields are read by skipping whitespace until a non-whitespace character is encountered. If that character is the delimiter, then data is read up to the second delimiter. Any other character causes an error. If two delimiter characters are encountered next to each other, a single occurrence of the delimiter character is used in the data value. For example, ’DON’’T’ is stored as DON’T. However, if the field consists of just two delimiter characters, its value is null. You may specify a TERMINATED BY clause, an ENCLOSED BY clause, or both. If both are used, the TERMINATED BY clause must come first. The syntax for delimiter specifications is: termination_spec enclosure_spec termination_spec enclosure_spec OPTIONALLY TERMINATED WHITESPACE BY ’char’ X’hex_byte’ ‘char‘ ENCLOSED BY X’hex_byte’ AND ’char’ X’hex_byte’ SQL*Loader Control File Reference 5-61 Specifying Datatypes where: TERMINATED Data is read until the first occurrence of a delimiter. BY An optional keyword for readability. WHITESPACE Delimiter is any whitespace character including linefeed, formfeed, or carriage return. (Only used with TERMINATED, not with ENCLOSED.) OPTIONALLY Data can be enclosed by the specified character. If SQL*Loader finds a first occurrence of the character, it reads the data value until if finds the second occurrence. If the data is not enclosed, the data is read as a terminated field. If you specify an optional enclosure, you must specify a TERMINATED BY clause (either locally in the field definition or globally in the FIELDS clause. ENCLOSED The data will be found between two delimiters. char The delimiter is the single character char. X’hex_byte’ The delimiter is the single character that has the value specified by hex_byte in the character encoding scheme such as X’1F’ (equivalent to 31 decimal). “X” must be uppercase. AND This keyword specifies a trailing enclosure delimiter which may be different from the initial enclosure delimiter. If the AND clause is not present, then the initial and trailing delimiters are assumed to be the same. Here are some examples, with samples of the data they describe: TERMINATED BY ’,’ a data string, ENCLOSED BY ’”’”a data string” TERMINATED BY ’,’ ENCLOSED BY ’”’”a data string”, ENCLOSED BY ”(” AND ’)’(a data string) Delimiter Marks in the Data Sometimes the same punctuation mark that is a delimiter also needs to be included in the data. To make that possible, two adjacent delimiter characters are interpreted as a single occurrence of the character, and this character is included in the data. For example, this data: (The delimiters are left parentheses, (, and right parentheses, )).) with this field specification: ENCLOSED BY ”(” AND ”)” puts the following string into the database: 5-62 Oracle8 Utilities Specifying Datatypes The delimiters are left paren’s, (, and right paren’s, ). For this reason, problems can arise when adjacent fields use the same delimiters. For example, the following specification: field1 TERMINATED BY ”/” field2 ENCLOSED by ”/” the following data will be interpreted properly: This is the first string/ /This is the second string/ But if field1 and field2 were adjacent, then the results would be incorrect, because This is the first string//This is the second string/ would be interpreted as a single character string with a ”/” in the middle, and that string would belong to field1. Maximum Length of Delimited Data The default maximum length of delimited data is 255 bytes. So delimited fields can require significant amounts of storage for the bind array. A good policy is to specify the smallest possible maximum value; see “Determining the Size of the Bind Array” on page 5-65. Loading Trailing Blanks with Delimiters Trailing blanks can only be loaded with delimited datatypes. If a data field is nine characters long and contains the value DANIELbbb, where bbb is three blanks, it is loaded into Oracle as “DANIEL” if declared as CHAR(9). If you want the trailing blanks, you could declare it as CHAR(9) TERMINATED BY ‘:’, and add a colon to the datafile so that the field is DANIELbbb:. This field is loaded as “DANIEL ”, with the trailing blanks. For more discussion on whitespace in fields, see “Trimming Blanks and Tabs” on page 5-72. Conflicting Character Datatype Field Lengths A control file can specify multiple lengths for the character-data fields CHAR, DATE, MLSLABEL, and numeric EXTERNAL. If conflicting lengths are specified, one of the lengths takes precedence. A warning is also issued when a conflict exists. This section explains which length is used. SQL*Loader Control File Reference 5-63 Specifying Datatypes Predetermined Size Fields If you specify a starting position and ending position for one of these fields, then the length of the field is determined by these specifications. If you specify a length as part of the datatype and do not give an ending position, the field has the given length. If starting position, ending position, and length are all specified, and the lengths differ; then the length given as part of the datatype specification is used for the length of the field. For example, if position(1:10) char(15) is specified, then the length of the field is 15. Delimited Fields If a delimited field is specified with a length, or if a length can be calculated from the starting and ending position, then that length is the maximum length of the field. The actual length can vary up to that maximum, based on the presence of the delimiter. If a starting and ending position are both specified for the field and if a field length is specified in addition, then the specified length value overrides the length calculated from the starting and ending position. If the expected delimiter is absent and no maximum length has been specified, then the end of record terminates the field. If TRAILING NULLCOLS is specified, remaining fields are null. If either the delimiter or the end of record produce a field that is longer than the specified maximum, SQL*Loader generates an error. Date Field Masks The length of a date field depends on the mask, if a mask is specified. The mask provides a format pattern, telling SQL*Loader how to interpret the data in the record. For example, if the mask is specified as: ”Month dd, yyyy” then “May 3, 1991” would occupy 11 character positions in the record, while “January 31, 1992” would occupy 16. If starting and ending positions are specified, however, then the length calculated from the position specification overrides a length derived from the mask. A specified length such as “DATE (12)” overrides either of those. If the date field is also specified with terminating or enclosing delimiters, then the length specified in the control file is interpreted as a maximum length for the field. 5-64 Oracle8 Utilities Determining the Size of the Bind Array Loading Data Across Different Operating Systems When a datafile is created on one operating system that is to be loaded under a different operating system, the data must be written in a form that the target system can read. For example, if the source system has a native, floating-point representation that uses 16 bytes, and the target system’s floating-point numbers are 12 bytes; then there is no way for the target system to directly read data generated on the source system. One solution is to load data across a Net8 database link, taking advantage of the automatic conversion of datatypes. This is the recommended approach, whenever feasible. In general, the problems of inter-operating system loads occur with the native datatypes. Sometimes, it is possible to get around them by padding a field with zeros to lengthen it, or reading only part of the field to shorten it. (For example, when an 8-byte integer is to be read on a system that uses 6-byte integers, or vice versa.) Frequently, however, problems of incompatible byte-ordering, or incompatible implementations of the datatypes, make even this approach unworkable. Without a Net8 database link, it is a good idea to use only the CHAR, DATE, and NUMERIC EXTERNAL datatypes. Datafiles written in this manner are longer than those written with native datatypes. They take more time to load, but they transport most readily across operating systems. However, where incompatible byteordering is an issue, special filters may still be required to reorder the data. Determining the Size of the Bind Array The determination of bind array size pertains to SQL*Loader’s conventional path option. It does not apply to the direct path load method. Because a direct path load formats database blocks directly, rather than using Oracle’s SQL interface, it does not use a bind array. SQL*Loader uses the SQL array-interface option to transfer data to the database. Multiple rows are read at one time and stored in the bind array. When SQL*Loader sends Oracle an INSERT command, the entire array is inserted at one time. After the rows in the bind array are inserted, a COMMIT is issued. Minimum Requirements The bind array has to be large enough to contain a single row. If the maximum row length exceeds the size of the bind array, as specified by the BINDSIZE parameter, SQL*Loader generates an error. Otherwise, the bind array contains as many rows as can fit within it, up to the limit set by the value of the ROWS parameter. SQL*Loader Control File Reference 5-65 Determining the Size of the Bind Array The BINDSIZE and ROWS parameters are described in “Command-Line Keywords” on page 6-3. Although the entire bind array need not be in contiguous memory, the buffer for each field in the bind array must occupy contiguous memory. If the operating system cannot supply enough contiguous memory to store a field, SQL*Loader generates an error. Performance Implications To minimize the number of calls to Oracle and maximize performance, large bind arrays are preferable. In general, you gain large improvements in performance with each increase in the bind array size up to 100 rows. Increasing the bind array size above 100 rows generally delivers more modest improvements in performance. So the size (in bytes) of 100 rows is typically a good value to use. The remainder of this section details the method for determining that size. In general, any reasonably large size will permit SQL*Loader to operate effectively. It is not usually necessary to perform the detailed calculations described in this section. This section should be read when maximum performance is desired, or when an explanation of memory usage is needed. Specifying Number of Rows vs. Size of Bind Array When you specify a bind array size using the command-line parameter BINDSIZE (see “BINDSIZE (maximum size)” on page 6-3) or the OPTIONS clause in the control file (see “OPTIONS” on page 5-11), you impose an upper limit on the bind array. The bind array never exceeds that maximum. As part of its initialization, SQL*Loader determines the space required to load a single row. If that size is too large to fit within the specified maximum, the load terminates with an error. SQL*Loader then multiplies that size by the number of rows for the load, whether that value was specified with the command-line parameter ROWS (see “ROWS (rows per commit)” on page 6-6) or the OPTIONS clause in the control file (see “OPTIONS” on page 5-11). If that size fits within the bind array maximum, the load continues—SQL*Loader does not try to expand the number of rows to reach the maximum bind array size. If the number of rows and the maximum bind array size are both specified, SQL*Loader always uses the smaller value for the bind array. If the maximum bind array size is too small to accommodate the initial number of rows, SQL*Loader uses a smaller number of rows that fits within the maximum. 5-66 Oracle8 Utilities Determining the Size of the Bind Array Calculations The bind array’s size is equivalent to the number of rows it contains times the maximum length of each row. The maximum length of a row is equal to the sum of the maximum field lengths, plus overhead. bind array size = (number of rows) * (maximum row length) where: (maximum row length) = SUM(fixed field lengths) + SUM(maximum varying field lengths) + SUM(overhead for varying length fields) Many fields do not vary in size. These fixed-length fields are the same for each loaded row. For those fields, the maximum length of the field is the field size, in bytes, as described in “Specifying Datatypes” on page 5-50. There is no overhead for these fields. The fields that can vary in size from row to row are VARCHAR CHAR numeric EXTERNAL VARGRAPHIC DATE The maximum length of these datatypes is described in “Specifying Datatypes” on page 5-50. The maximum lengths describe the number of bytes, or character positions, that the fields can occupy in the input data record. That length also describes the amount of storage that each field occupies in the bind array, but the bind array includes additional overhead for fields that can vary in size. When the character datatypes (CHAR, DATE, and numeric EXTERNAL) are specified with delimiters, any lengths specified for these fields are maximum lengths. When specified without delimiters, the size in the record is fixed, but the size of the inserted field may still vary, due to whitespace trimming. So internally, these datatypes are always treated as varying-length fields—even when they are fixedlength fields. A length indicator is included for each of these fields in the bind array. The space reserved for the field in the bind array is large enough to hold the longest possible value of the field. The length indicator gives the actual length of the field for each row. SQL*Loader Control File Reference 5-67 Determining the Size of the Bind Array In summary: bind array size = (number of rows) * ( SUM(fixed field lengths) + SUM(maximum varying field lengths) + ( (number of varying length fields) * (size of length-indicator) ) ) Determining the Size of the Length Indicator On most systems, the size of the length indicator is two bytes. On a few systems, it is three bytes. To determine its size, use the following control file: OPTIONS (ROWS=1) LOAD DATA INFILE * APPEND INTO TABLE DEPT (deptno POSITION(1:1) CHAR) BEGINDATA a This control file “loads” a one-character field using a one-row bind array. No data is actually loaded, due to the numeric conversion error that occurs when “a” is loaded as a number. The bind array size shown in the log file, minus one (the length of the character field) is the value of the length indicator. Note: A similar technique can determine bind array size without doing any calculations. Run your control file without any data and with ROWS=1 to determine the memory requirements for a single row of data. Multiply by the number of rows you want in the bind array to get the bind array size. Calculating the Size of Field Buffers The following tables summarize the memory requirements for each datatype. “L” is the length specified in the control file. “P” is precision. “S” is the size of the length indicator. For more information on these values, see “Specifying Datatypes” on page 5-50. 5-68 Oracle8 Utilities Determining the Size of the Bind Array Table 5–1 Invariant fields Datatype Size INTEGER OS-dependent SMALLINT FLOAT DOUBLE Table 5–2 Non-graphic fields Datatype Default Size Specified Size (packed) DECIMAL None (P+1)/2, rounded up ZONED None P RAW None L CHAR (no delimiters) 1 L+S DATE (no delimiters) None numeric EXTERNAL (no delimiters) None MLSLABEL None Table 5–3 Graphic fields Datatype Default Size Length Specified with POSITION Length Specified with DATATYPE GRAPHIC None L 2*L GRAPHIC EXTERNAL None L-2 2*(L-2) VARGRAPHIC 4Kb*2 L+S (2*L)+S SQL*Loader Control File Reference 5-69 Determining the Size of the Bind Array Table 5–4 Variable-length fields Datatype Default Size Maximum Length Specified (L) VARCHAR 4Kb L+S CHAR (delimited) DATE (delimited) numeric EXTERNAL (delimited) 255 L+S Minimizing Memory Requirements for the Bind Array Pay particular attention to the default sizes allocated for VARCHAR, VARGRAPHIC, and the delimited forms of CHAR, DATE, and numeric EXTERNAL fields. They can consume enormous amounts of memory—especially when multiplied by the number of rows in the bind array. It is best to specify the smallest possible maximum length for these fields. For example: CHAR(10) TERMINATED BY ”,” uses (10 + 2) * 64 = 768 bytes in the bind array, assuming that the length indicator is two bytes long. However: CHAR TERMINATED BY ”,” uses (255 + 2) * 64 = 16,448 bytes, because the default maximum size for a delimited field is 255. This can make a considerable difference in the number of rows that fit into the bind array. Multiple INTO TABLE Statements When calculating a bind array size for a control file that has multiple INTO TABLE statements, calculate as if the INTO TABLE statements were not present. Imagine all of the fields listed in the control file as one, long data structure — that is, the format of a single row in the bind array. If the same field in the data record is mentioned in multiple INTO TABLE clauses, additional space in the bind array is required each time it is mentioned. So, it is especially important to minimize the buffer allocations for fields like these. 5-70 Oracle8 Utilities Setting a Column to Null or Zero Generated Data Generated data is produced by the SQL*Loader functions CONSTANT, RECNUM, SYSDATE, and SEQUENCE. Such generated data does not require any space in the bind array. Setting a Column to Null or Zero If you want all inserted values for a given column to be null, omit the column’s specifications entirely. To set a column’s values conditionally to null based on a test of some condition in the logical record, use the NULLIF clause; see “NULLIF Keyword” on page 5-71. To set a numeric column to zero instead of NULL, use the DEFAULTIF clause, described next. DEFAULTIF Clause Using DEFAULTIF on numeric data sets the column to zero when the specified field condition is true. Using DEFAULTIF on character(CHAR or DATE) data sets the column to null (compare with “Numeric External Datatypes” on page 5-60). See also “Specifying Field Conditions” on page 5-37 for details on the conditional tests. DEFAULTIF field_condition A column may have both a NULLIF clause and a DEFAULTIF clause, although this often would be redundant. Note: The same effects can be achieved with the SQL string and the DECODE function. See “Applying SQL Operators to Fields” on page 5-78 NULLIF Keyword Use the NULLIF keyword after the datatype and optional delimiter specification, followed by a condition. The condition has the same format as that specified for a WHEN clause. The column’s value is set to null if the condition is true. Otherwise, the value remains unchanged. NULLIF field_condition The NULLIF clause may refer to the column that contains it, as in the following example: COLUMN1 POSITION(11:17) CHAR NULLIF (COLUMN1 = ”unknown”) SQL*Loader Control File Reference 5-71 Loading All-Blank Fields This specification may be useful if you want certain data values to be replaced by nulls. The value for a column is first determined from the datafile. It is then set to null just before the insert takes place. “Case 6: Loading Using the Direct Path Load Method” on page 4-24 provides examples of the NULLIF clause. Note: The same effect can be achieved with the SQL string and the NVL function. See “Applying SQL Operators to Fields” on page 5-78. Null Columns at the End of a Record When the control file specifies more fields for a record than are present in the record, SQL*Loader must determine whether the remaining (specified) columns should be considered null or whether an error should be generated. The TRAILING NULLCOLS clause, described in “TRAILING NULLCOLS” on page 5-36, explains how SQL*Loader proceeds in this case. Loading All-Blank Fields Totally blank fields for numeric or DATE fields cause the record to be rejected. To load one of these fields as null, use the NULLIF clause with the BLANKS keyword, as described in the section “Comparing Fields to BLANKS” on page 5-38. “Case 6: Loading Using the Direct Path Load Method” on page 4-24 provides examples of how to load all-blank fields as null with the NULLIF clause. If an all-blank CHAR field is surrounded by enclosure delimiters, then the blanks within the enclosures are loaded. Otherwise, the field is loaded as null. More details on whitespace trimming in character fields are presented in the following section. Trimming Blanks and Tabs Blanks and tabs constitute whitespace. Depending on how the field is specified, whitespace at the start of a field (leading whitespace) and at the end of a field (trailing whitespace) may, or may not be, included when the field is inserted into the database. This section describes the way character data fields are recognized, and how they are loaded. In particular, it describes the conditions under which whitespace is trimmed from fields. Note: Specifying PRESERVE BLANKS changes this behavior. See “Preserving Whitespace” on page 5-78 for more information. 5-72 Oracle8 Utilities Trimming Blanks and Tabs Datatypes The information in this section applies only to fields specified with one of the character-data datatypes: ■ CHAR datatype ■ DATE datatype ■ numeric EXTERNAL datatypes: – INTEGER EXTERNAL – FLOAT EXTERNAL – (packed) DECIMAL EXTERNAL – ZONED (decimal) EXTERNAL VARCHAR Fields Although VARCHAR fields also contain character data, these fields are never trimmed. A VARCHAR field includes all whitespace that is part of the field in the datafile. Field Length Specifications There are two ways to specify field length. If a field has a constant length that is defined in the control file, then it has a predetermined size. If a field’s length is not known in advance, but depends on indicators in the record, then the field is delimited. Predetermined Size Fields Fields that have a predetermined size are specified with a starting position and ending position, or with a length, as in the following examples: loc POSITION(19:31) loc CHAR(14) In the second case, even though the field’s exact position is not specified, the field’s length is predetermined. SQL*Loader Control File Reference 5-73 Trimming Blanks and Tabs Delimited Fields Delimiters are characters that demarcate field boundaries. Enclosure delimiters surround a field, like the quotes in: ”__aa__” where ”__” represents blanks or tabs. Termination delimiters signal the end of a field, like the comma in: __aa__, Delimiters are specified with the control clauses TERMINATED BY and ENCLOSED BY, as shown in the following examples: loc POSITION(19) TERMINATED BY ”,” loc POSITION(19) ENCLOSED BY ’”’ loc TERMINATED BY ”.” OPTIONALLY ENCLOSED BY ’|’ Combining Delimiters with Predetermined Size If predetermined size is specified for a delimited field, and the delimiter is not found within the boundaries indicated by the size specification; then an error is generated. For example, if you specify: loc POSITION(19:31) CHAR TERMINATED BY ”,” and no comma is found between positions 19 and 31 of the input record, then the record is rejected. If a comma is found, then it delimits the field. Relative Positioning of Fields When a starting position is not specified for a field, it begins immediately after the end of the previous field. Figure 5–1 illustrates this situation when the previous field has a predetermined size. Figure 5–1 Relative Positioning After a Fixed Field Field 1 CHAR(9) a a a a 5-74 Oracle8 Utilities Field 2 TERMINATED BY "," b b b b , Trimming Blanks and Tabs If the previous field is terminated by a delimiter, then the next field begins immediately after the delimiter, as shown in Figure 5–2. Figure 5–2 Relative Positioning After a Delimited Field Field 1 TERMINATED BY "," Field 2 TERMINATED BY "," a a a a , b b b b , When a field is specified both with enclosure delimiters and a termination delimiter, then the next field starts after the termination delimiter, as shown in Figure 5–3. If a non-whitespace character is found after the enclosure delimiter, but before the terminator, then SQL*Loader generates an error. Figure 5–3 Relative Positioning After Enclosure Delimiters Field 1 TERMINATED BY "," ENCLOSED BY ' " ' " a a a a " Field 2 TERMINATED BY "," , b b b b , Leading Whitespace In Figure 5–3, both fields are stored with leading whitespace. Fields do not include leading whitespace in the following cases: ■ ■ when the previous field is terminated by whitespace, and no starting position is specified for the current field when optional enclosure delimiters are specified for the field, and the enclosure delimiters are not present These cases are illustrated in the following sections. Previous Field Terminated by Whitespace If the previous field is TERMINATED BY WHITESPACE, then all the whitespace after the field acts as the delimiter. The next field starts at the next non-whitespace character. Figure 5–4 illustrates this case. SQL*Loader Control File Reference 5-75 Trimming Blanks and Tabs Figure 5–4 Fields Terminated by Whitespace Field 2 TERMINATED BY WHITESPACE Field 1 TERMINATED BY WHITESPACE a a a a b b b b This situation occurs when the previous field is explicitly specified with the TERMINATED BY WHITESPACE clause, as shown in the example. It also occurs when you use the global FIELDS TERMINATED BY WHITESPACE clause. Optional Enclosure Delimiters Leading whitespace is also removed from a field when optional enclosure delimiters are specified but not present. Whenever optional enclosure delimiters are specified, SQL*Loader scans forward, looking for the first delimiter. If none is found, then the first non-whitespace character signals the start of the field. SQL*Loader skips over whitespace, eliminating it from the field. This situation is shown in Figure 5–5. Figure 5–5 Fields Terminated by Optional Enclosing Delimiters Field 1 TERMINATED BY " , " OPTIONALLY ENCLOSED BY, ' " ' " a a a a " , Field 2 TERMINATED BY " , " OPTIONALLY ENCLOSED BY ' " ' b b b b , Unlike the case when the previous field is TERMINATED BY WHITESPACE, this specification removes leading whitespace even when a starting position is specified for the current field. Note: If enclosure delimiters are present, leading whitespace after the initial enclosure delimiter is kept, but whitespace before this delimiter is discarded. See the first quote in FIELD1, Figure 5–5. Trailing Whitespace Trailing whitespace is only trimmed from character-data fields that have a predetermined size. It is always trimmed from those fields. 5-76 Oracle8 Utilities Trimming Blanks and Tabs Enclosed Fields If a field is enclosed, or terminated and enclosed, like the first field shown in Figure 5–5, then any whitespace outside the enclosure delimiters is not part of the field. Any whitespace between the enclosure delimiters belongs to the field, whether it is leading or trailing whitespace. Trimming Whitespace: Summary Table 5–5 summarizes when and how whitespace is removed from input data fields when PRESERVE BLANKS is not specified. See the following section, “Preserving Whitespace” on page 5-78, for details on how to prevent trimming. Table 5–5 Trim Table Specification Data Result Leading Whitespace Present (1) Trailing Whitespace Present (1) Predetermined Size __aa__ __aa Y N Terminated __aa__, __aa__ Y Y (2) Enclosed “__aa__” __aa__ Y Y Terminated and Enclosed “__aa__” , __aa__ Y Y Optional Enclosure (present) “__aa__” , __aa__ Y Y Optional Enclosure (absent) __aa__, aa__ N Y Previous Field Terminated by Whitespace __aa__ aa (3) N (3) (1) When an allow-blank field is trimmed, its value is null. (2) Except for fields that are TERMINATED BY WHITESPACE (3) Presence of trailing whitespace depends on the current field’s specification, as shown by the other entries in the table. SQL*Loader Control File Reference 5-77 Preserving Whitespace Preserving Whitespace To prevent whitespace trimming in all CHAR, DATE, and NUMERIC EXTERNAL fields, you specify PRESERVE BLANKS in the control file. Whitespace trimming is described in the previous section, “Trimming Blanks and Tabs” on page 5-72. PRESERVE BLANKS Keyword PRESERVE BLANKS retains leading whitespace when optional enclosure delimiters are not present. It also leaves trailing whitespace intact when fields are specified with a predetermined size. This keyword preserves tabs and blanks; for example, if the field __aa__, (where underscores represent blanks) is loaded with the following control clause: TERMINATED BY ’,’ OPTIONALLY ENCLOSED BY ’”’ then both the leading whitespace and the trailing whitespace are retained if PRESERVE BLANKS is specified. Otherwise, the leading whitespace is trimmed. Note: The word BLANKS is not optional. Both words must be specified. Terminated by Whitespace When the previous field is terminated by whitespace, then PRESERVE BLANKS does not preserve the space at the beginning of the next field, unless that field is specified with a POSITION clause that includes some of the whitespace. Otherwise, SQL*Loader scans past all whitespace at the end of the previous field until it finds a non-blank, non-tab character. Applying SQL Operators to Fields A wide variety of SQL operators may be applied to field data with the SQL string. This string may contain any combination of SQL expressions that are recognized by Oracle as valid for the VALUES clause of an INSERT statement. In general, any SQL function that returns a single value may be used. See the section “Expressions” in the “Operators, Functions, Expressions, Conditions chapter in the Oracle8 SQL Reference. The column name and the name of the column in the SQL string must match exactly, including the quotation marks, as in this example of specifying the control file: 5-78 Oracle8 Utilities Applying SQL Operators to Fields LOAD DATA INFILE * APPEND INTO TABLE XXX ( "LAST" position(1:7) FIRST position(8:15) ) BEGINDATA Phil Locke Jason Durbin char char "UPPER(:\"LAST\)", "UPPER(:FIRST)" The SQL string must be enclosed in double quotation marks. In the example above, LAST must be in quotation marks because it is a SQL*Loader keyword. FIRST is not a SQL*Loader keyword and therefore does not require quotation marks. To quote the column name in the SQL string, you must escape it. The SQL string appears after any other specifications for a given column. It is evaluated after any NULLIF or DEFAULTIF clauses, but before a DATE mask. It may not be used on RECNUM, SEQUENCE, CONSTANT, or SYSDATE fields. If the RDBMS does not recognize the string, the load terminates in error. If the string is recognized, but causes a database error, the row that caused the error is rejected. Referencing Fields To refer to fields in the record, precede the field name with a colon (:). Field values from the current record are substituted. The following examples illustrate references to the current field: field1 POSITION(1:6) CHAR ”LOWER(:field1)” field1 CHAR TERMINATED BY ’,’ NULLIF ((1) = ’a’) DEFAULTIF ((1)= ’b’) ”RTRIM(:field1)” field1 CHAR(7) ”TRANSLATE(:field1, ’:field1’, ’:1’)” In the last example, only the :field1 that is not in single quotes is interpreted as a column name. For more information on the use of quotes inside quoted strings, see “Specifying Filenames and Database Objects” on page 5-12. field1 POSITION(1:4) INTEGER EXTERNAL ”decode(:field2, ’22’, ’34’, :field1)” SQL*Loader Control File Reference 5-79 Applying SQL Operators to Fields Referencing Fields That Are SQL*Loader Keywords Other fields in the same record can also be referenced, as in this example: field1 POSITION(1:4) INTEGER EXTERNAL "decode(:field2, ’22’, ’34’, :field1)” Common Uses Loading external data with an implied decimal point: field1 POSITION(1:9) DECIMAL EXTERNAL(8) ”:field1/1000” Truncating fields that could be too long: field1 CHAR TERMINATED BY ”,” ”SUBSTR(:field1, 1, 10)” Combinations of Operators Multiple operators can also be combined, as in the following examples: field1 POSITION(*+3) INTEGER EXTERNAL ”TRUNC(RPAD(:field1,6,’0’), -2)” field1 POSITION(1:8) INTEGER EXTERNAL ”TRANSLATE(RTRIM(:field1),’N/A’, ’0’)” field1 CHARACTER(10) ”NVL( LTRIM(RTRIM(:field1)), ’unknown’ )” Use with Date Mask When used with a date mask, the date mask is evaluated after the SQL string. A field specified as: field1 DATE ’dd-mon-yy’ ”RTRIM(:field1)” would be inserted as: TO_DATE(RTRIM(<field1_value>), ’dd-mon-yyyy’) Interpreting Formatted Fields It is possible to use the TO_CHAR operator to store formatted dates and numbers. For example: field1 ... ”TO_CHAR(:field1, ’$09999.99’)” 5-80 Oracle8 Utilities Applying SQL Operators to Fields could store numeric input data in formatted form, where field1 is a character column in the database. This field would be stored with the formatting characters (dollar sign, period, and so on) already in place. You have even more flexibility, however, if you store such values as numeric quantities or dates. You can then apply arithmetic functions to the values in the database, and still select formatted values for your reports. The SQL string is used in “Case 7: Extracting Data from a Formatted Report” on page 4-27 to load data from a formatted report. SQL*Loader Control File Reference 5-81 Applying SQL Operators to Fields 5-82 Oracle8 Utilities 6 SQL*Loader Command-Line Reference This chapter shows you how to run SQL*Loader with command-line keywords. If you need detailed information about the command-line keywords listed here, see Chapter 5, “SQL*Loader Control File Reference”. This chapter covers the following subjects: ■ SQL*Loader Command Line ■ Command-Line Keywords ■ Index Maintenance Options ■ Exit Codes for Inspection and Display SQL*Loader Command-Line Reference 6-1 SQL*Loader Command Line SQL*Loader Command Line You can invoke SQL*Loader from the command line using certain keywords. Additional Information: The command to invoke SQL*Loader is operating system-dependent. The following examples use the UNIX-based name, “sqlldr”. See your Oracle operating system-specific documentation for the correct command for your system. If you invoke SQL*Loader with no keywords, SQL*Loader displays a help screen with the available keywords and default values. The following example shows default values that are the same on all operating systems. sqlldr ... Valid Keywords: userid control log bad data discard discardmax — — — — — — — skip — load errors — rows — bindsize — silent — direct — parfile — parallel file - 6-2 Oracle8 Utilities Oracle username/password Control file name Log file name Bad file name Data file name Discard file name Number of discards to allow (Default all) Number of logical records to skip (Default 0) Number of logical records to load (Default all) Number of errors to allow (Default 50) Number of rows in conventional path bind array or between direct path data saves (Default: Conventional Path 64, Direct path all) Size of conventional path bind array in bytes (System-dependent default) Suppress messages during run (header, feedback, errors, discards, partitions, all) Use direct path (Default FALSE) Parameter file: name of file that contains parameter specifications Perform parallel load (Default FALSE) File to allocate extents from Command-Line Keywords Using Command-Line Keywords Keywords are optionally separated by commas. They are entered in any order. Keywords are followed by valid arguments. For example: SQLLDR CONTROL=foo.ctl, LOG=bar.log, BAD=baz.bad, DATA=etc.dat USERID=scott/tiger, ERRORS=999, LOAD=2000, DISCARD=toss.dis, DISCARDMAX=5 Specifying Keywords in the Control File If the command line’s length exceeds the size of the maximum command line on your system, you can put some of the command-line keywords in the control file, using the control file keyword OPTIONS. See “OPTIONS” on page 5-11. They can also be specified in a separate file specified by the keyword PARFILE (see “PARFILE (parameter file)” on page 6-6). These alternative methods are useful for keyword entries that seldom change. Keywords specified in this manner can still be overridden from the command line. Command-Line Keywords This section describes each available SQL*Loader command-line keyword. BAD (bad file) BAD specifies the name of the bad file created by SQL*Loader to store records that cause errors during insert or that are improperly formatted. If a filename is not specified, the name of the control file is used by default with the .BAD extension. This file has the same format as the input datafile, so it can be loaded by the same control file after updates or corrections are made. A bad file filename specified on the command line becomes the bad file associated with the first INFILE statement in the control file. If the bad file filename was also specified in the control file, the command-line value overrides it. BINDSIZE (maximum size) BINDSIZE specifies the maximum size (bytes) of the bind array. The size of the bind array given by BINDSIZE overrides the default size (which is system dependent) and any size determined by ROWS. The bind array is discussed on “Determining the Size of the Bind Array” on page 5-65. SQL*Loader Command-Line Reference 6-3 Command-Line Keywords CONTROL (control file) CONTROL specifies the name of the control file that describes how to load data. If a file extension or file type is not specified, it defaults to CTL. If omitted, SQL*Loader prompts you for the file name. Note: If your control filename contains special characters, your operating system will require that they be escaped. See your operating system documentation. Note also that if your operating system uses backslashes in its filesystem paths, you need to keep the following in mind: ■ a backslash followed by a non-backslash will be treated normally. ■ Two consecutive backslashes are treated as one backslash. ■ Three consecutive backslashes will be treated as two backslashes. ■ Placing the path in quotes will eliminate the need to escape multiple backslashes. However, note that some operating systems require that quotes themselves be escaped. DATA (data file) DATA specifies the name of the data file containing the data to be loaded. If a filename is not specified, the name of the control file is used by default. If you do not specify a file extension or file type the default is .DAT. DIRECT (data path) DIRECT specifies the data path, that is, the load method to use, either conventional path or direct path. TRUE specifies a direct path load. FALSE specifies a conventional path load. The default is FALSE. Load methods are explained in Chapter 8, “SQL*Loader: Conventional and Direct Path Loads”. DISCARD (discard file) DISCARD specifies a discard file (optional) to be created by SQL*Loader to store records that are neither inserted into a table nor rejected. If a filename is not specified, it defaults to DSC. This file has the same format as the input datafile. So it can be loaded by the same control file after appropriate updates or corrections are made. 6-4 Oracle8 Utilities Command-Line Keywords A discard file filename specified on the command line becomes the discard file associated with the first INFILE statement in the control file. If the discard file filename is specified also in the control file, the command-line value overrides it. DISCARDMAX (discards to disallow) DISCARDMAX specifies the number of discard records that will terminate the load. The default value is all discards are allowed. To stop on the first discarded record, specify one (1). ERRORS (errors to allow) ERRORS specifies the maximum number of insert errors to allow. If the number of errors exceeds the value of ERRORS parameter, SQL*Loader terminates the load. The default is 50. To permit no errors at all, set ERRORS=0. To specify that all errors be allowed, use a very high number. On a single table load, SQL*Loader terminates the load when errors exceed this error limit. Any data inserted up that point, however, is committed. SQL*Loader maintains the consistency of records across all tables. Therefore, multitable loads do not terminate immediately if errors exceed the error limit. When SQL*loader encounters the maximum number of errors for a multi-table load, it continues to load rows to ensure that valid rows previously loaded into tables are loaded into all tables and/or rejected rows filtered out of all tables. In all cases, SQL*Loader writes erroneous records to the bad file. FILE (file to load into) FILE specifies the database file to allocate extents from. It is used only for parallel loads. By varying the value of the FILE parameter for different SQL*Loader processes, data can be loaded onto a system with minimal disk contention. For more information, see “Parallel Data Loading Models” on page 8-25. LOAD (records to load) LOAD specifies the maximum number of logical records to load (after skipping the specified number of records). By default all records are loaded. No error occurs if fewer than the maximum number of records are found. SQL*Loader Command-Line Reference 6-5 Command-Line Keywords LOG (log file) LOG specifies the log file which SQL*Loader will create to store logging information about the loading process. If a filename is not specified, the name of the control file is used by default with the default extension (LOG). PARFILE (parameter file) PARFILE specifies the name of a file that contains commonly-used command-line parameters. For example, the command line could read: SQLLDR PARFILE=example.par and the parameter file could have the following contents: userid=scott/tiger control=example.ctl errors=9999 log=example.log Note: Although it is not usually important, on some systems it may be necessary to have no spaces around the equal sign (“=”) in the parameter specifications. PARALLEL (parallel load) PARALLEL specifies whether direct loads can operate in multiple concurrent sessions to load data into the same table. For more information on PARALLEL loads, see “Parallel Data Loading Models” on page 8-25. ROWS (rows per commit) Conventional path loads only: ROWS specifies the number of rows in the bind array. The default is 64. (The bind array is discussed on “Determining the Size of the Bind Array” on page 5-65.) Direct path, loads only: ROWS identifies the number of rows you want to read from the data file before a data save. The default is to save data once at the end of the load. For more information, see “Data Saves” on page 8-12. Because the direct load is optimized for performance, it uses buffers that are the same size and format as the system’s I/O blocks. Only full buffers are written to the database, so the value of ROWS is approximate. 6-6 Oracle8 Utilities Command-Line Keywords SILENT (feedback mode) When SQL*Loader begins, a header message like the following appears on the screen and is placed in the log file: SQL*Loader: Production on Wed Feb 24 15:07:23... Copyright (c) Oracle Corporation... As SQL*Loader executes, you also see feedback messages on the screen, for example: Commit point reached - logical record count 20 SQL*Loader may also display data error messages like the following: Record 4: Rejected - Error on table EMP ORA-00001: unique constraint <name> violated You can suppress these messages by specifying SILENT with an argument. For example, you can suppress the header and feedback messages that normally appear on the screen with the following command-line argument: SILENT=(HEADER, FEEDBACK) Use the appropriate keyword(s) to suppress one or more of the following: HEADER Suppresses the SQL*Loader header messages that normally appear on the screen. Header messages still appear in the log file. FEEDBACK Suppresses the “commit point reached” feedback messages that normally appear on the screen. ERRORS Suppresses the data error messages in the log file that occur when a record generates an Oracle error that causes it to be written to the bad file. A count of rejected records still appears. DISCARDS Suppresses the messages in the log file for each record written to the discard file. PARTITIONS This new Oracle8 option for a direct load of a partitioned table disables writing the per-partition statistics to the log file ALL Implements all of the keywords. SQL*Loader Command-Line Reference 6-7 Index Maintenance Options SKIP (records to skip) SKIP specifies the number of logical records from the beginning of the file that should not be loaded. By default, no records are skipped. This parameter continues loads that have been interrupted for some reason. It is used for all conventional loads, for single-table direct loads, and for multiple-table direct loads when the same number of records were loaded into each table. It is not used for multiple table direct loads when a different number of records were loaded into each table. See “Continuing Multiple Table Conventional Loads” on page 5-28 for more information. USERID (username/password) USERID is used to provide your Oracle username/password. If omitted, you are prompted for it. If only a slash is used, USERID defaults to your operating system logon. A Net8 database link can be used for a conventional path load into a remote database. For more information about Net8, see the Net8 Administrator’s Guide For more information about database links, see Oracle8 Distributed Database Systems. Index Maintenance Options Two new, Oracle8 index maintenance options are available (default FALSE): ■ SKIP_UNUSABLE_INDEXES={TRUE | FALSE} ■ SKIP_INDEX_MAINTENANCE={TRUE | FALSE} SKIP_UNUSABLE_INDEXES The SKIP_UNUSABLE_INDEXES option applies to both conventional and direct path loads. The SKIP_UNUSABLE_INDEXES=TRUE option allows SQL*Loader to load a table with indexes that are in Index Unusable (IU) state prior to the beginning of the load. Indexes that are not in IU state at load time will be maintained by SQL*Loader. Indexes that are in IU state at load time will not be maintained but will remain in IU state at load completion. However, indexes that are UNIQUE and marked IU are not allowed to skip index maintenance. This rule is enforced by DML operations, and enforced by the direct path load to be consistent with DML. Load behavior with SKIP_UNUSABLE_INDEXES=FALSE differs slightly between conventional path loads and direct path loads: 6-8 Oracle8 Utilities Exit Codes for Inspection and Display ■ ■ On a conventional path load, records that are to be inserted will instead be rejected if their insertions would require updating an index. On a direct path load, the load terminates upon encountering a record that would require index maintenance be done on an index that is in unusable state. SKIP_INDEX_MAINTENANCE SKIP_INDEX_MAINTENANCE={TRUE | FALSE} stops index maintenance for direct path loads but does not apply to conventional path loads. It causes the index partitions that would have had index keys added to them instead to be marked Index Unusable because the index segment is inconsistent with respect to the data it indexes. Index segments that are not affected by the load retain the Index Unusable state they had prior to the load. The SKIP_INDEX_MAINTENANCE option: ■ ■ ■ ■ applies to both local and global indexes. can be used (with the PARALLEL option) to do parallel loads on an object that has indexes. can be used (with the PARTITION keyword on the INTO TABLE clause) to do a single partition load to a table that has global indexes. puts a list (in the SQL*Loader log file) of the indexes and index partitions that the load set into Index Unusable state. Exit Codes for Inspection and Display Oracle8 SQL*Loader provides the results of a SQL*Loader run immediately upon completion. Depending on the platform, as well as recording the results in the log file, the SQL*Loader may report the outcome also in a process exit code. This Oracle8 SQL*Loader functionality allows for checking the outcome of a SQL*Loader invocation from the command line or script. The following load results return the indicated exit codes: Result Exit Code All rows loaded successfully EX_SUCC All/some rows rejected EX_WARN All/some rows discarded EX_WARN Discontinued load EX_WARN Command line/syntax errors EX_FAIL SQL*Loader Command-Line Reference 6-9 Exit Codes for Inspection and Display Result Exit Code Oracle errors fatal to SQL*Loader EX_FAIL OS related errors (like file open/close, malloc, etc.) EX_FTL For UNIX the exit codes are as follows: EX_SUCC0 EX_FAIL1 EX_WARN2 EX_FTL3 You can check the exit code from the shell to determine the outcome of a load. For example, you could place the SQL*Loader command in a script and check the exit code within the script: #!/bin/sh sqlldr scott/tiger control=ulcase1.ctl log=ulcase1.log retcode=`echo $?` case "$retcode" in 0) echo "SQL*Loader execution successful" ;; 1) echo "SQL*Loader execution exited with EX_FAIL, see logfile" ;; 2) echo "SQL*Loader exectuion exited with EX_WARN, see logfile" ;; 3) echo "SQL*Loader execution encountered a fatal error" ;; *) echo "unknown return code";; esac 6-10 Oracle8 Utilities 7 SQL*Loader: Log File Reference When SQL*Loader begins execution, it creates a log file. The log file contains a detailed summary of the load. Most of the log file entries will be records of successful SQL*Loader execution. However, errors can also cause log file entries. For example, errors found during parsing of the control file will appear in the log file. This chapter describes the following log file entries: ■ Header Information ■ Global Information ■ Table Information ■ Datafile Information ■ Table Load Information ■ Summary Statistics SQL*Loader: Log File Reference 7-1 Header Information Header Information The Header Section contains the following entries: ■ date of the run ■ software version number For example: SQL*Loader: Version 8.0.2.0.0 - Production on Mon Nov 26... Copyright (c) Oracle Corporation... Global Information The Global Information Section contains the following entries: ■ names of all input/output files ■ echo of command-line arguments ■ continuation character specification If the data is in the control file, then the data file is shown as “*”. For example: Control File: LOAD.CTL Data File: LOAD.DAT Bad File: LOAD.BAD Discard File: LOAD.DSC (Allow all discards) Number to load: Number to skip: Errors allowed: Bind array: Continuation: Path used: 7-2 Oracle8 Utilities ALL 0 50 64 rows, maximum of 65536 bytes 1:1 = ’*’, in current physical record Conventional Table Information Table Information The Table Information Section provides the following entries for each table loaded: ■ ■ table name load conditions, if any. That is, whether all record were loaded or only those meeting WHEN-clause criteria. ■ INSERT, APPEND, or REPLACE specification ■ the following column information: ■ if found in data file, the position, length, datatype, and delimiter ■ if specified, RECNUM, SEQUENCE, or CONSTANT ■ if specified, DEFAULTIF, or NULLIF For example: Table EMP, loaded from every logical record. Insert option in effect for this table: REPLACE Column Name Position -------------------------------------EMPNO 1:4 ENAME 6:15 JOB 17:25 MGR 27:30 SAL 32:39 COMM 41:48 DEPTNO 50:51 Column Column Column Column Column Len Term Encl Datatype --- ---- ---- --------4 CHARACTER 10 CHARACTER 9 CHARACTER 4 CHARACTER 8 CHARACTER 8 CHARACTER 2 CHARACTER EMPNO is NULL if EMPNO = BLANKS MGR is NULL if MGR = BLANKS SAL is NULL if SAL = BLANKS COMM is NULL if COMM = BLANKS DEPTNO is NULL if DEPTNO = BLANKS SQL*Loader: Log File Reference 7-3 Datafile Information Datafile Information The Datafile Information Section appears only for datafiles with data errors, and provides the following entries: ■ SQL*Loader/Oracle data records errors ■ records discarded For example: Record 2: Rejected - Error on ORA-00001: unique constraint Record 8: Rejected - Error on ORA-01722: invalid number Record 3: Rejected - Error on ORA-01722: invalid number table EMP. <name> violated table EMP, column DEPTNO. table PROJ, column PROJNO. Table Load Information The Table Load Information Section provides the following entries for each table that was loaded: ■ number of rows loaded ■ number of rows that qualified for loading but were rejected due to data errors ■ number of rows that were discarded because they met no WHEN-clause tests ■ number of rows whose relevant fields were all null For example: The following indexes on table EMP were processed: Index EMPIX was left in Direct Load State due to ORA-01452: cannot CREATE UNIQUE INDEX; duplicate keys found Table EMP: 7 Rows successfully loaded. 2 Rows not loaded due to data errors.| 0 Rows not loaded because all WHEN clauses were failed. 0 Rows not loaded because all fields were null. 7-4 Oracle8 Utilities Summary Statistics Summary Statistics The Summary Statistics Section displays the following data: ■ amount of space used: ■ ■ ■ for bind array (what was actually used, based on what was specified by BINDSIZE) for other overhead (always required, independent of BINDSIZE) cumulative load statistics. That is, for all data files, the number of records that were: ■ skipped ■ read ■ rejected ■ discarded ■ beginning/ending time of run ■ total elapsed time ■ total CPU time (includes all file I/O but may not include background Oracle CPU time) For example: Space allocated for bind array: 65336 bytes (64 rows) Space allocated for memory less bind array: 6470 bytes Total Total Total Total logical logical logical logical records records records records skipped: read: rejected: discarded: 0 7 0 0 Run began on Mon Nov 26 10:46:53 1990 Run ended on Mon Nov 26 10:47:17 1990 Elapsed time was: CPU time was: 00:00:15.62 00:00:07.76 SQL*Loader: Log File Reference 7-5 Summary Statistics Oracle8 Statistics Reporting to the Log Oracle8 statistics reporting to the log file differs between different load types: ■ ■ ■ For conventional loads and direct loads of a non-partitioned table, statistics reporting is unchanged from Oracle7. For direct loads of a partitioned table, a per-partition statistics section will be printed after the (Oracle7) table-level statistics section. For a single partition load, the partition name will be included in the table-level statistics section. Statistics for Loading a Single Partition ■ The table column description includes the partition name. ■ Error messages include partition name. ■ Statistics listings include partition name. Statistics for Loading a Table ■ Direct path load of a partitioned table reports per-partition statistics. ■ Conventional path load cannot report per-partition statistics. ■ For loading a non-partitioned table stats are unchanged from Oracle7. For conventional loads and direct loads of a non-partitioned table, statistics reporting is unchanged from Oracle7. If media recovery is not enabled, the load is not logged. That is, media recovery disabled overrides the request for a logged operation. New Command-line Option: silent=partitions|all The command-line option, silent=partitions, disables output of the per-partition statistics section to the log file for direct loads of a partitioned table. In Oracle8, the option silent=all includes the partitions flag and suppresses the per-partition statistics. 7-6 Oracle8 Utilities 8 SQL*Loader: Conventional and Direct Path Loads This chapter describes SQL*Loader’s conventional and direct path load methods. The following topics are covered: ■ Data Loading Methods ■ Using Direct Path Load ■ Maximizing Performance of Direct Path Loads ■ Avoiding Index Maintenance ■ Direct Loads, Integrity Constraints, and Triggers ■ Parallel Data Loading Models ■ General Performance Improvement Hints For an example of loading with using the direct path load method, see “Case 6: Loading Using the Direct Path Load Method” on page 4-24. The other cases use the conventional path load method. Note: If you are using Trusted Oracle, see the Trusted Oracle documentation for information about using SQL*Loader in that environment. SQL*Loader: Conventional and Direct Path Loads 8-1 Data Loading Methods Data Loading Methods SQL*Loader provides two methods for loading data: ■ Conventional Path Load ■ Direct Path Load A conventional path load executes SQL INSERT statement(s) to populate table(s) in an Oracle database. A direct path load eliminates much of the Oracle database overhead by formatting Oracle data blocks and writing the data blocks directly to the database files. A direct load, therefore, does not compete with other users for database resources so it can usually load data at near disk speed. Certain considerations, inherent to this method of access to database files, such as restrictions, security and backup implications, are discussed in this chapter. Conventional Path Load Conventional path load (the default) uses the SQL INSERT statement and a bind array buffer to load data into database tables. This method is used by all Oracle tools and applications. When SQL*Loader performs a conventional path load, it competes equally with all other processes for buffer resources. This can slow the load significantly. Extra overhead is added as SQL commands are generated, passed to Oracle, and executed. Oracle looks for partially filled blocks and attempts to fill them on each insert. Although appropriate during normal use, this can slow bulk loads dramatically. Conventional Path Load of a Single Partition By definition, a conventional path load uses SQL INSERT statements. During a conventional path load of a single partition, SQL*Loader uses of partition-extended syntax of the INSERT statement which has the following form: INSERT INTO TABLE T partition (P) VALUES ... The SQL layer of the ORACLE kernel determines if the row being inserted maps to the specified partition. If the row does not map to the partition, the row is rejected, and the loader log file records an appropriate error message. 8-2 Oracle8 Utilities Data Loading Methods When to Use a Conventional Path Load If load speed is most important to you, you should use direct path load because it is faster than conventional path. However, there are certain restrictions on direct path loads that may require you to use a conventional path load. You should use the conventional path in the following situations: ■ When accessing an indexed table concurrently with the load, or when applying inserts or updates to a non-indexed table concurrently with the load. To use a direct path load (excepting parallel loads), SQL*Loader must have exclusive write access to the table and exclusive read-write access to any indexes. ■ When loading data with SQL*Net across heterogeneous platforms. You cannot load data using a direct path load over Net8 unless both systems belong to the same family of computers, and both are using the same character set. Even then, load performance can be significantly impaired by network overhead. ■ When loading data into a clustered table. A direct path load does not support loading of clustered tables. ■ When loading a relatively small number of rows into a large indexed table. During a direct path load, the existing index is copied when it is merged with the new index keys. If the existing index is very large and the number of new keys is very small, then the index copy time can offset the time saved by a direct path load. ■ When loading a relatively small number of rows into a large table with referential and column-check integrity constraints. Because these constraints cannot be applied to rows loaded on the direct path, they are disabled for the duration of the load. Then they are applied to the whole table when the load completes. The costs could outweigh the savings for a very large table and a small number of new rows. ■ When you want to apply SQL functions to data fields. SQL functions are not available during a direct path load. For more information on the SQL functions, see “Applying SQL Operators to Fields” on page 5-78. SQL*Loader: Conventional and Direct Path Loads 8-3 Data Loading Methods Direct Path Load Instead of filling a bind array buffer and passing it to Oracle with a SQL INSERT command, a direct path load parses the input data according to the description given in the loader control file, converts the data for each input field to its corresponding Oracle column datatype, and builds a column array structure (an array of <length, data> pairs). SQL*Loader then uses the column array structure to format Oracle data blocks and build index keys. The newly formatted database blocks are then written directly to the database (multiple blocks per I/O request using asynchronous writes if the host platform supports asynchronous I/O). Internally, multiple buffers are used for the formatted blocks. While one buffer is being filled, one or more buffers are being written if asynchronous I/O is available on the host platform. Overlapping computation with I/O increases load performance. Figure 8–1 shows how conventional and direct path loads perform database writes. 8-4 Oracle8 Utilities Data Loading Methods Figure 8–1 Database Writes on Direct Path and Conventional Path SQL*Loader SQL*Loader User Processes WriteRecord Database Block Generate SQL Commands Generate SQL Commands Conventional Path Direct Path Oracle Server SQL Command Processing Space Management Get new extents Adjust high water mark Find partial blocks Fill partial blocks Buffer Cache Management - Manage queues - Resolve contention Buffer cache Write Database Blocks Read Database Blocks Database SQL*Loader: Conventional and Direct Path Loads 8-5 Data Loading Methods Direct Path Load of a Partitioned Table When loading a partitioned table, SQL*Loader partitions the rows and maintains indexes (which can also be partitioned). Note that a direct path load of a partitioned table can be quite resource intensive for tables with many partitions. Direct Path Load of a Single Partition When loading a single partition of a partitioned table, SQL*Loader partitions the rows and rejects any rows which do not map to the partition specified in the SQL*Loader control file. Local index partitions which correspond to the data partition being loaded are maintained by SQL*Loader. Global indexes are not maintained on single partition direct path loads. While loading a partition of a partitioned table, DML operations on, and direct path loads of, other partitions in the table are allowed. Although a direct path load minimizes database processing, several calls to the Oracle server are required at the beginning and end of the load to initialize and finish the load, respectively. Also, certain DML locks are required during load initialization, and are released when the load completes. Note also that during the load the following operations occur: index keys are built and put into a sort, space management routines are used to get new extents when needed and to adjust the high-water mark for a data save point. The high-water mark is described in “Data Saves” on page 8-12. Advantages of a Direct Path Load A direct path load is faster than the conventional path for the following reasons: ■ ■ ■ ■ ■ 8-6 Oracle8 Utilities Partial blocks are not used, so no reads are needed to find them and fewer writes are performed. SQL*Loader need not execute any SQL INSERT commands therefore, processing load on the Oracle database is reduced. SQL*Loader does not use the bind-array buffer — formatted database blocks are written directly. A direct path load calls on Oracle to lock tables and indexes at the start of the load and releases them when the load is finished. A conventional path load calls Oracle once for each array of rows to process a SQL INSERT statement. A direct path load uses multi-block asynchronous I/O for writes to the database files. Data Loading Methods ■ ■ ■ ■ During a direct path load, processes perform their own write I/O, instead of using Oracle’s buffer cache minimizing contention with other Oracle users. The sorted indexes option available during direct path loads allows you to presort data using high-performance sort routines that are native to your system or installation. When a table to be loaded is empty, the pre-sorting option eliminates the sort and merge phases of index-building — the index is simply filled in as data arrives. Protection against instance failure does not require redo log file entries during direct path loads. Therefore, no time is required to log the load when: – Oracle is operating in NOARCHIVELOG mode – the UNRECOVERABLE option of the load is set to Y – the object being loaded has the NOLOG attribute set See “Instance Recovery and Direct Path Loads” on page 8-13. When to Use a Direct Path Load If none of the above restrictions apply, you should use a direct path load when: ■ ■ ■ you have a large amount of data to load quickly. A direct path load can quickly load and index large amounts of data. It can also load data into either an empty or non-empty table, you want to load data in PARALLEL for maximum performance. See “Parallel Data Loading Models” on page 8-25. you want to load data in a character set that cannot be supported in your current session, or when the conventional conversion to the database character set would cause errors. Restrictions on Using Direct PATH LOADS In addition to the general load conditions described in “Conventional Path Load versus Direct Path Load” on page 3-16, the following conditions must be satisfied to use the direct path load method: ■ Tables are not clustered. ■ Tables to be loaded do not have any active transactions pending. SQL*Loader: Conventional and Direct Path Loads 8-7 Data Loading Methods To check for this condition, use the Enterprise Manager command MONITOR TABLE to find the object ID for the table(s) you want to load. Then use the command MONITOR LOCK to see if there are any locks on the table. ■ You cannot have SQL strings in the control file. Restrictions on a Direct Path Load of a Single Partition In addition to the above listed restrictions, loading a single partition has the following restrictions: ■ ■ ■ The table which the partition is a member of cannot have any global indexes defined on it. Enabled referential and check constraints on the table which the partition is a member of are not allowed. Enabled triggers are not allowed. Integrity Constraints All integrity constraints are enforced during direct path loads, although not necessarily at the same time. NOT NULL constraints are enforced during the load. Records that fail these constraints are rejected. UNIQUE constraints are enforced both during and after the load. A record which violates a UNIQUE constraint is not rejected (the record is not available in memory when the constraint violation is detected.) Integrity constraints that depend on other rows or tables, such as referential constraints, are disabled before the direct path load and must be re-enabled afterwards. If REENABLE is specified, SQL*Loader can re-enable them automatically at the end of the load. When the constraints are re-enabled, the entire table is checked. Any rows that fail this check are reported in the specified error log. See the section in this chapter called“Direct Loads, Integrity Constraints, and Triggers” on page 8-20 . Field Defaults on the Direct Path DEFAULT column specifications defined in the database are not available when loading on the direct path. Fields for which default values are desired must be specified with the DEFAULTIF clause, described on “DEFAULTIF Clause” on page 5-71. If a DEFAULTIF clause is not specified, and the field is NULL, then a NULL value is inserted into the database. 8-8 Oracle8 Utilities Using Direct Path Load Loading into Synonyms You can load data into a synonym for a table during a the direct path load, but the synonym must point directly to a table. It cannot be a synonym for a view or a synonym for another synonym. Exact Version Requirement You can perform a SQL*Loader direct load only be for databases of the same version. For example, you cannot do a SQL*Loader Version 7.1.2 direct path load to load into a Oracle Version 7.1.3 database. Using Direct Path Load This section explains you how to use SQL*Loader’s direct path load. Setting Up for Direct Path Loads To prepare the database for direct path loads, you must run the setup script, CATLDR.SQL to create the necessary views. You need only run this script once for each database you plan to do direct loads to. This script can be run during database installation if you know then that you will be doing direct loads. Specifying a Direct Path Load To start SQL*Loader in direct load mode, the parameter DIRECT must be set to TRUE on the command line or in the parameter file, if used, in the format: DIRECT=TRUE See “Case 6: Loading Using the Direct Path Load Method” on page 4-24 for an example. Building Indexes During a direct path load, performance is improved by using temporary storage. After each block is formatted, the new index keys are put to a sort (temporary) segment. The old index and the new keys are merged at load finish time to create the new index. The old index, sort (temporary) segment, and new index segment all require storage until the merge is complete. Then the old index and temporary segment are removed. Note that, during a conventional path load, every time a row is inserted the index is updated. This method does not require temporary storage space, but it does add processing time. SQL*Loader: Conventional and Direct Path Loads 8-9 Using Direct Path Load The SINGLEROW Option Performance on systems with limited memory can also be improved by using the SINGLEROW option. For more information see “SINGLEROW Option” on page 5-37. Note: If, during a direct load, you have specified that the data is to be presorted and the existing index is empty, a temporary segment is not required, and no merge occurs—the keys are put directly into the index. See “Maximizing Performance of Direct Path Loads” on page 8-15 for more information. When multiple indexes are built, the temporary segments corresponding to each index exist simultaneously, in addition to the old indexes. The new keys are then merged with the old indexes, one index at a time. As each new index is created, the old index and the corresponding temporary segment are removed. Index Storage Requirements The formula for calculating the amount of space needed for storing the index itself can be found in the chapter(s) that describe managing database files” in the Oracle8 Administrator’s Guide. Remember that two indexes exist until the load is complete: the old index and the new index. Temporary Segment Storage Requirements The amount of temporary segment space needed for storing the new index keys (in bytes) can be estimated using the following formula: 1.3 * key_storage where: key_storage = (number_of_rows) * ( 10 + sum_of_column_sizes + number_of_columns ) The columns included in this formula are the columns in the index. There is one length byte per column, and 10 bytes per row are used for a ROWID and additional overhead. The constant 1.3 reflects the average amount of extra space needed for sorting. This value is appropriate for most randomly ordered data. If the data arrives in exactly opposite order, twice the key-storage space is required for sorting, and the value of this constant would be 2.0. That is the worst case. If the data is fully sorted, only enough space to store the index entries is required, and the value of this constant reduces to 1.0. See “Pre-sorting Data for Faster Indexing” on page 8-16 for more information. 8-10 Oracle8 Utilities Using Direct Path Load Indexes Left in Index Unusable State SQL*Loader will leave indexes in Index Unusable state when the data segment being loaded becomes more up-to-date than the index segments that index it. Any SQL statement that tries to use an index that is in Index Unusable state returns an error. The following conditions cause the direct path option to leave an index or a partition of a partitioned index in Index Unusable state: ■ SQL*Loader runs out of space for the index, and cannot update the index. ■ The data is not in the order specified by the SORTED INDEXES clause. ■ ■ ■ There is an instance failure, or the Oracle shadow process fails while building the index. There are duplicate keys in a unique index. Data save points are being used, and the load fails or is terminated via a keyboard interrupt after a data save point occurred. To determine if an index is in Index Unusable state, you can execute a simple query: SELECT INDEX_NAME, STATUS FROM USER_INDEXES WHERE TABLE_NAME = ’tablename’; To determine if an index partition is in unusable state, SELECT INDEX_NAME, PARTITION_NAME, STATUS FROM USER_IND_PARTITIONS WHERE STATUS != ’VALID’; If you are not the owner of the table, then search ALL_INDEXES or DBA_INDEXES instead of USER_INDEXES. For partitioned indexes, search ALL_IND_PARTITIONS and DBA_IND_PARTITIONS instead of USER_IND_PARTITIONS. SQL*Loader: Conventional and Direct Path Loads 8-11 Using Direct Path Load Data Saves You can use data saves to protect against loss of data due to instance failure. All data loaded up to the last data save is protected against instance failure To continue the load after an instance failure, determine how many rows from the input file were processed before the failure, then use the SKIP option to skip those processed rows. If there were any indexes on the table, drop them before continuing the load, then recreate them after the load. See “Recovery” on page 8-13 for more information on media and instance failure. Note: Indexes are not protected by a data save, because SQL*Loader does not build indexes until after data loading completes. (The only time indexes are built during the load is when pre-sorted data is loaded into an empty table — but these indexes are also unprotected.) Using the ROWS Parameter The parameter ROWS determines when data saves occur during a direct path load. The value you specify for ROWS is the number of rows you want SQL*Loader to read from the input file before saving inserts in the database. The number of rows you specify for a data save is an approximate number. Direct loads always act on full data buffers that match the format of Oracle database blocks. So, the actual number of data rows saved is rounded up to a multiple of the number of rows in a database block. SQL*Loader always reads the number of rows needed to fill a database block. Discarded and rejected records are then removed, and the remaining records are inserted into the database. So the actual number of rows inserted before a save is the value you specify, rounded up to the number of rows in a database block, minus the number of discarded and rejected records. A data save is an expensive operation. The value for ROWS should be set high enough so that a data save occurs once every 15 minutes or longer. The intent is to provide an upper bound on the amount of work which is lost when an instance failure occurs during a long running direct path load. Setting the value of ROWS to a small number will have an adverse affect on performance. Data Save Versus Commit In a conventional load, ROWS is the number of rows to read before a commit. A direct load data save is similar to a conventional load commit, but it is not identical. 8-12 Oracle8 Utilities Using Direct Path Load The similarities are: ■ Data save will make the rows visible to other users ■ Rows cannot be rolled back after a data save The major difference is that the indexes will be unusable (in Index Unusable state) until the load completes. Recovery SQL *Loader provides full support for data recovery when using the direct path option. There are two main types of recovery: Media Recover Recovery from the loss of a database file. You must be operating in ARCHIVELOG mode to recover after you lose a database file. Instance Recovery Recover from a system failure in which in-memory data was changed but lost due to the failure before it was written to disk. Oracle can always recover from instance failures, even when redo logs are not archived. See Oracle8 Administrator’s Guide for more information about recovery. Instance Recovery and Direct Path Loads Because SQL*Loader writes directly to the database files, all rows inserted up to the last data save will automatically be present in the database files if the instance is restarted. Changes do not need to be recorded in the redo log file to make instance recovery possible. If an instance failure occurs, the indexes being built may be left in Index Unusable state. Indexes which are Unusable must be re-built before using the table or partition. See “Indexes Left in Index Unusable State” on page 8-11 for more information on how to determine if an index has been left in Index Unusable state. Media Recovery and Direct Path Loads If redo log file archiving is enabled (you are operating in ARCHIVELOG mode), SQL*Loader logs loaded data when using the direct path, making media recovery possible. If redo log archiving is not enabled (you are operating in NOARCHIVELOG mode), then media recovery is not possible. To recover a database file that was lost while it was being loaded, use the same method that you use to recover data loaded with the conventional path: 1. Restore the most recent backup of the affected database file. SQL*Loader: Conventional and Direct Path Loads 8-13 Using Direct Path Load 2. Recover the tablespace using the RECOVER command. (See Oracle8 Backup and Recovery Guide for more information on the RECOVER command.) Loading LONG Data Fields Data that is longer than SQL*Loader’s maximum buffer size can be loaded on the direct path with either the PIECED option or by specifying the number of READBUFFERS. This section describes those two options. Loading Data as PIECED The data can be loaded in sections with the pieced option if it is the last column of the logical record. The syntax for this specification is given “High-Level Syntax Diagrams” on page 5-4. Declaring a column as PIECED informs the direct path loader that the field may be processed in pieces, one buffer at once. The following restrictions apply when declaring a column as PIECED: ■ This option is only valid on the direct path. ■ Only one field per table may be PIECED. ■ The PIECED field must be the last field in the logical record. ■ ■ ■ ■ The PIECED field may not be used in any WHEN, NULLIF, or DEFAULTIF clauses. The PIECED field’s region in the logical record must not overlap with any other field’s region. The PIECED corresponding database column may not be part of the index. It may not be possible to load a rejected record from the bad file if it contains a PIECED field. For example, a PIECED filed could span 3 records. SQL*Loader loads the piece from the first record and then reuses the buffer for the second buffer. After loading the second piece, the buffer is reused for the third record. If an error is then discovered, only the third record is placed in the bad file because the first two records no longer exist in the buffer. As a result, the record in the bad file would not be valid. 8-14 Oracle8 Utilities Maximizing Performance of Direct Path Loads Using the READBUFFERS Keyword For data that is not divided into separate sections, or not in the last column, READBUFFERS can be specified. With READBUFFERS a buffer transfer area can be allocated that is large enough to hold the entire logical record at one time. READBUFFERS specifies the number of buffers to use during a direct path load. (A LONG can span multiple buffers.) The default value is four buffers. If the number of read buffers is too small, the following error results: ORA-02374 ... No more slots for read buffer queue Note: Do not specify a value for READBUFFERS unless it becomes necessary, as indicated by ORA-2374. Values of READBUFFERS that are larger than necessary do not enhance performance. Instead, higher values unnecessarily increase system overhead. Maximizing Performance of Direct Path Loads You can control the time and temporary storage used during direct path loads. To minimize time: ■ Pre-allocate storage space. ■ Pre-sort the data. ■ Perform infrequent data saves. ■ Disable archiving of redo log files. To minimize space: ■ ■ When sorting data before the load, sort data on the index that requires the most temporary storage space. Avoid index maintenance during the load. Pre-allocating Storage for Faster Loading SQL*Loader automatically adds extents to the table if necessary, but this process takes time. For faster loads into a new table, allocate the required extents when the table is created. To calculate the space required by a table, see the chapter(s) describing managing database files in the Oracle8 Administrator’s Guide. Then use the INITIAL or MINEXTENTS clause in the SQL command CREATE TABLE to allocate the required space. SQL*Loader: Conventional and Direct Path Loads 8-15 Maximizing Performance of Direct Path Loads Another approach is to size extents large enough so that extent allocation is infrequent. Pre-sorting Data for Faster Indexing You can improve the performance of direct path loads by pre-sorting your data on indexed columns. Pre-sorting minimizes temporary storage requirements during the load. Pre-sorting also allows you to take advantage of high-performance sorting routines that are optimized for your operating system or application. If the data is pre-sorted and the existing index is not empty, then pre-sorting minimizes the amount of temporary segment space needed for the new keys. The sort routine appends each new key to the key list. Instead of requiring extra space for sorting, only space for the keys is needed. To calculate the amount of storage needed, use a sort factor of 1.0 instead of 1.3. For more information on estimating storage requirements, see “Temporary Segment Storage Requirements” on page 8-10. If pre-sorting is specified and the existing index is empty, then maximum efficiency is achieved. The sort routines are completely bypassed, with the merge phase of index creation. The new keys are simply inserted into the index. Instead of having a temporary segment and new index existing simultaneously with the empty, old index, only the new index exists. So, temporary storage is not required, and time is saved. SORTED INDEXES Statement The SORTED INDEXES statement identifies the indexes on which the data is presorted. This statement is allowed only for direct path loads. See Chapter 5, “SQL*Loader Control File Reference” for the syntax, and see“Case 6: Loading Using the Direct Path Load Method” on page 4-24 for an example. Generally, you specify only one index in the SORTED INDEXES statement because data that is sorted for one index is not usually in the right order for another index. When the data is in the same order for multiple indexes, however, all of the indexes can be specified at once. All indexes listed in the SORTED INDEXES statement must be created before you start the direct path load. 8-16 Oracle8 Utilities Maximizing Performance of Direct Path Loads Unsorted Data If you specify an index in the SORTED INDEXES statement, and the data is not sorted for that index, then the index is left in Index Unusable state at the end of the load. The data is present, but any attempt to use the index results in an error. Any index which is left in Index Unusable state must be re-built after the load. Multiple Column Indexes If you specify a multiple-column index in the SORTED INDEXES statement, the data should be sorted so that it is ordered first on the first column in the index, next on the second column in the index, and so on. For example, if the first column of the index is city, and the second column is last name; then the data should be ordered by name within each city, as in the following list: Albuquerque Adams Albuquerque Hartstein Albuquerque Klein ... ... Boston Andrews Boston Bobrowski Boston Heigham ... ... Choosing the Best Sort Order For the best overall performance of direct path loads, you should presort the data based on the index that requires the most temporary segment space. For example, if the primary key is one numeric column, and the secondary key consists of three text columns, then you can minimize both sort time and storage requirements by pre-sorting on the secondary key. To determine the index that requires the most storage space, use the following procedure: 1. For each index, add up the widths of all columns in that index. 2. For a single-table load, pick the index with the largest overall width. 3. For each table in a multiple table load, identify the index with the largest, overall width for each table. If the same number of rows are to be loaded into each table, then again pick the index with the largest overall width. Usually, the same number of rows are loaded into each table. SQL*Loader: Conventional and Direct Path Loads 8-17 Maximizing Performance of Direct Path Loads 4. If a different number of rows are to be loaded into the indexed tables in a multiple table load, then multiply the width of each index identified in step 3 by the number of rows that are to be loaded into that index. Multiply the number of rows to be loaded into each index by the width of that index and pick the index with the largest result. Infrequent Data Saves Frequent data saves resulting from a small ROWS value adversely affect the performance of a direct path load. Because direct path loads can be many times faster than conventional loads, the value of ROWS should be considerably higher for a direct load than it would be for a conventional load. During a data save, loading stops until all of SQL*Loader’s buffers are successfully written. You should select the largest value for ROWS that is consistent with safety. It is a good idea to determine the average time to load a row by loading a few thousand rows. Then you can use that value to select a good value for ROWS. For example, if you can load 20,000 rows per minute, and you do not want to repeat more than 10 minutes of work after an interruption, then set ROWS to be 200,000 (20,000 rows/minute * 10 minutes). Minimizing Use of the Redo Log One way to speed a direct load dramatically is to minimize use of the redo log. There are three ways to do this. You can disable archiving, you can specify that the load is UNRECOVERABLE, or you can set the NOLOG attribute of the objects being loaded. This section discusses all methods. Disable Archiving If media recovery is disabled, direct path loads do not generate full image redo. Specifying UNRECOVERABLE Use UNRECOVERABLE to save time and space in the redo log file. An UNRECOVERABLE load does not record loaded data in the redo log file, instead, it generates invalidation redo. Note that UNRECOVERABLE applies to all objects loaded during the load session (both data and index segments.) Therefore, media recovery is disabled for the loaded table, although database changes by other users may continue to be logged. Note: Because the data load is not logged, you may want to make a backup of the data after loading. 8-18 Oracle8 Utilities Avoiding Index Maintenance If media recovery becomes necessary on data that was loaded with the UNRECOVERABLE phrase, the data blocks that were loaded are marked as logically corrupted. To recover the data, drop and re-create the data. It is a good idea to do backups immediately after the load to preserve the otherwise unrecoverable data. By default, a direct path load is RECOVERABLE. See “Data Definition Language (DDL) Syntax” on page 5-4 for information on RECOVERABLE and UNRECOVERABLE. NOLOG Attribute If a data or index segment has the NOLOG attribute set, then full image redo logging is disabled for that segment (invalidation redo is generated.) Use of the NOLOG attribute allows a finer degree of control over the objects which are not logged. Avoiding Index Maintenance For both the conventional path and the direct path, SQL*Loader maintains all existing indexes for a table. Index maintenance can be avoided by using one of the following methods: ■ ■ ■ Drop the indexes prior to the beginning of the load. Mark selected indexes or index partitions as Index Unusable prior to the beginning of the load and use the SKIP_UNUSABLE_INDEXES option. Use the SKIP_INDEX_MAINTENANCE option (direct path only, use with caution.) Avoiding index maintenance saves temporary storage while using the direct load method. Avoiding index maintenance minimizes the amount of space required during the load, for the following reasons: ■ ■ You can build indexes one at a time, reducing the amount of sort (temporary) segment space that would otherwise be needed for each index. Only one index segment exists when an index is built, instead of the three segments that temporarily exist when the new keys are merged into the old index to make the new index. SQL*Loader: Conventional and Direct Path Loads 8-19 Direct Loads, Integrity Constraints, and Triggers Avoiding index maintenance is quite reasonable when the number of rows to be loaded is large compared to the size of the table. But if relatively few rows are added to a large table, then the time required to re-sort the indexes may be excessive. In such cases, it is usually better to make use of the conventional path, or use the SINGLEROW option. Direct Loads, Integrity Constraints, and Triggers With the conventional path, arrays of rows are inserted with standard SQL INSERT statements — integrity constraints and insert triggers are automatically applied. But when loading data with the direct path, some integrity constraints and all database triggers are disabled. This section discusses the implications of using direct path loads with respect to these features. Integrity Constraints During a direct path load, some integrity constraints are automatically disabled. Others are not. For a description of the constraints, see the chapter(s) that describe maintaining data integrity in the Oracle8 Application Developer’s Guide. Enabled Constraints The constraints that remain in force are: ■ not null ■ unique ■ primary keys (unique-constraints on not-null columns) Not Null constraints are checked at column array build time. Any row that violates this constraint is rejected. Unique constraints are verified when indexes are rebuilt at the end of the load. The index will be left in Index Unusable state if a violation is detected. See “Indexes Left in Index Unusable State” on page 8-11. Disabled Constraints The following constraints are disabled: 8-20 ■ check constraints ■ referential constraints (foreign keys) Oracle8 Utilities Direct Loads, Integrity Constraints, and Triggers Reenable Constraints When the load completes, the integrity constraints will be re-enabled automatically if the REENABLE clause is specified. The syntax for this clause is as follows: REENABLE DISABLED_CONSTRAINTS EXCEPTIONS tablename The optional keyword DISABLED_CONSTRAINTS is provided for readability. If the EXCEPTIONS clause is included, the table must already exist and, you must be able to insert into it. This table contains the ROWIDs of all rows that violated one of the integrity constraints. It also contains the name of the constraint that was violated. See Oracle8 SQL Reference for instructions on how to create an exceptions table. If the REENABLE clause is not used, then the constraints must be re-enabled manually. All rows in the table are verified then. If Oracle finds any errors in the new data, error messages are produced. The names of violated constraints and the ROWIDs of the bad data are placed in an exceptions table, if one is specified. See ENABLE in Oracle8 SQL Reference. The SQL*Loader log file describes the constraints that were disabled, the ones that were re-enabled and what error, if any, prevented re-enabling of each constraint. It also contains the name of the exceptions table specified for each loaded table. Attention: As long as bad data remains in the table, the integrity constraint cannot be successfully re-enabled. Suggestion: Because referential integrity must be reverified for the entire table, performance may be improved by using the conventional path, instead of the direct path, when a small number of rows are to be loaded into a very large table. Database Insert Triggers Table insert triggers are also disabled when a direct path load begins. After the rows are loaded and indexes rebuilt, any triggers that were disabled are automatically re-enabled. The log file lists all triggers that were disabled for the load. There should not be any errors re-enabling triggers. Unlike integrity constraints, insert triggers are not reapplied to the whole table when they are enabled. As a result, insert triggers do not fire for any rows loaded on the direct path. When using the direct path, the application must ensure that any behavior associated with insert triggers is carried out for the new rows. SQL*Loader: Conventional and Direct Path Loads 8-21 Direct Loads, Integrity Constraints, and Triggers Replacing Insert Triggers with Integrity Constraints Applications commonly use insert triggers to implement integrity constraints. Most of these application insert triggers are simple enough that they can be replaced with Oracle’s automatic integrity constraints. When Automatic Constraints Cannot Be Used Sometimes an insert trigger cannot be replaced with Oracle’s automatic integrity constraints. For example, if an integrity check is implemented with a table lookup in an insert trigger, then automatic check constraints cannot be used, because the automatic constraints can only reference constants and columns in the current row. This section describes two methods for duplicating the effects of such a trigger. Preparation Before either method can be used, the table must be prepared. Use the following general guidelines to prepare the table: 1. Before the load, add a one-character column to the table that marks rows as “old data” or “new data”. 2. Let the value of null for this column signify “old data”, because null columns do not take up space. 3. When loading, flag all loaded rows as “new data” with SQL*Loader’s CONSTANT clause. After following this procedure, all newly loaded rows are identified, making it possible to operate on the new data without affecting the old rows. Using An Update Trigger Generally, you can use a database update trigger to duplicate the effects of an insert trigger. This method is the simplest. It can be used whenever the insert trigger does not raise any exceptions. 1. Create an update trigger that duplicates the effects of the insert trigger. Copy the trigger. Change all occurrences of “new.column_name” to “old.column_name”. 8-22 2. Replace the current update trigger, if it exists, with the new one 3. Update the table, changing the “new data” flag to null, thereby firing the update trigger 4. Restore the original update trigger, if there was one Oracle8 Utilities Direct Loads, Integrity Constraints, and Triggers Note: Depending on the behavior of the trigger, it may be necessary to have exclusive update access to the table during this operation, so that other users do not inadvertently apply the trigger to rows they modify. Duplicating the Effects of Exception Conditions If the insert trigger can raise an exception, then more work is required to duplicate its effects. Raising an exception would prevent the row from being inserted into the table. To duplicate that effect with an update trigger, it is necessary to mark the loaded row for deletion. The “new data” column cannot be used for a delete flag, because an update trigger cannot modify the column(s) that caused it to fire. So another column must be added to the table. This column marks the row for deletion. A null value means the row is valid. Whenever the insert trigger would raise an exception, the update trigger can mark the row as invalid by setting a flag in the additional column. Summary: When an insert trigger can raise an exception condition, its effects can be duplicated by an update trigger, provided: ■ two columns (which are usually null) are added to the table ■ the table can be updated exclusively (if necessary) Using a Stored Procedure The following procedure always works, but it is more complex to implement. It can be used when the insert trigger raises exceptions. It does not require a second additional column; and, because it does not replace the update trigger, and it can be used without exclusive access to the table. 1. 2. Create a stored procedure that duplicates the effects of the insert trigger. Follow the general outline given below. (For implementation details, see PL/SQL User’s Guide and Reference for more information about cursor management.) ■ declare a cursor for the table, selecting all the new rows ■ open it and fetch rows, one at a time, in a processing loop ■ perform the operations contained in the insert trigger ■ if the operations succeed, change the “new data” flag to null ■ if the operations fail, change the “new data” flag to “bad data” Execute the stored procedure using an administration tool such as Server Manager. SQL*Loader: Conventional and Direct Path Loads 8-23 Direct Loads, Integrity Constraints, and Triggers 3. After running the procedure, check the table for any rows marked “bad data”. 4. Update or remove the bad rows. 5. Re-enable the insert trigger. Permanently Disabled Triggers & Constraints SQL*Loader needs to acquire several locks on the table to be loaded to disable triggers and constraints. If a competing process is enabling triggers or constraints at the same time that SQL*Loader is trying to disable them for that table, then SQL*Loader may not be able to acquire exclusive access to the table. SQL*Loader attempts to handle this situation as gracefully as possible. It attempts to re-enable disabled triggers and constraints before exiting. However, the same table-locking problem that made it impossible for SQL*Loader to continue may also have made it impossible for SQL*Loader to finish enabling triggers and constraints. In such cases, triggers and constraints will remain permanently disabled until they are manually enabled. Although such a situation is unlikely, it is possible. The best way to prevent it is to make sure that no applications are running that could enable triggers or constraints for the table, while the direct load is in progress. If a direct load is aborted due to failure to acquire the proper locks, carefully check the log. It will show every trigger and constraint that was disabled, and each attempt to re-enable them. Any triggers or constraints that were not re-enabled by SQL*Loader should be manually enabled with the ENABLE clause described in Oracle8 SQL Reference. Alternative: Concurrent Conventional Path Loads If triggers or integrity constraints pose a problem, but you want faster loading, you should consider using concurrent conventional path loads. That is, use multiple load sessions executing concurrently on a multiple-CPU system. Split the input datafiles into separate files on logical record boundaries, and then load each such input datafile with a conventional path load session. The resulting load has the following attributes: ■ ■ 8-24 Oracle8 Utilities It is faster than a single conventional load on a multiple-CPU system, but probably not as fast as a direct load. Triggers fire, integrity constraints are applied to the loaded rows, and indexes are maintained via the standard DML execution logic. Parallel Data Loading Models Parallel Data Loading Models This section discusses three basic models of concurrency which can be used to minimize the elapsed time required for data loading: ■ concurrent conventional path loads ■ inter-segment concurrency with direct path load method ■ intra-segment concurrency with direct path load method Note: Parallel loading is available only with the Enterprise Edition. For more information about the differences between Oracle8 and the Oracle8 Enterprise Edition, see Getting to Know Oracle8 and the Oracle8 Enterprise Edition. Concurrent Conventional Path Loads Using multiple conventional path load sessions executing concurrently is discussed in the previous section. This technique can be used to load the same or different objects concurrently with no restrictions. Inter-Segment Concurrency with Direct Path Inter-segment concurrency can be used for concurrent loading of different objects. This technique can be applied for concurrent direct path loading of different tables, or to concurrent direct path loading of different partitions of the same table. When direct path loading a single partition, the following items should be considered: ■ local indexes can be maintained by the load. ■ global indexes cannot be maintained by the load ■ referential integrity and check constraints must be disabled ■ triggers must be disabled ■ the input data should be partitioned (otherwise many records will be rejected which adversely affects performance.) Intra-Segment Concurrency with Direct Path SQL*Loader permits multiple, concurrent sessions to perform a direct path load into the same table, or into the same partition of a partitioned table. Multiple SQL*Loader sessions improve the performance of a direct path load given the available resources on your system. SQL*Loader: Conventional and Direct Path Loads 8-25 Parallel Data Loading Models This method of data loading is enabled by setting both the DIRECT and the PARALLEL option to TRUE, and is often referred to as a “parallel direct path load.” It is important to realize that parallelism is user managed, setting the PARALLEL option to TRUE only allows multiple concurrent direct path load sessions. Restrictions on Parallel Direct Path Loads The following restrictions are enforced on parallel direct path loads: ■ neither local or global indexes can be maintained by the load ■ referential integrity and check constraints must be disabled ■ triggers must be disabled ■ Rows can only be appended. REPLACE, TRUNCATE, and INSERT cannot be used (this is due to the individual loads not being coordinated.) If you must truncate a table before a parallel load, you must do it manually. If a parallel direct path load is being applied to a single partition, it is best that the data is pre-partitioned (otherwise the overhead of record rejection due to a partition mismatch slows down the load.) Initiating Multiple SQL*Loader Sessions Each SQL*Loader session takes a different datafile as input. In all sessions executing a direct load on the same table, you must set PARALLEL to TRUE. The syntax is: PARALLEL = FALSE TRUE PARALLEL can be specified on the command line or in a parameter file. It can also be specified in the control file with the OPTIONS clause. For example, to invoke three SQL*Loader direct path load sessions on the same table, you would execute the following commands at the operating system prompt: SQLLOAD USERID=SCOTT/TIGER CONTROL=LOAD1.CTL DIRECT=TRUE PARALLEL=TRUE SQLLOAD USERID=SCOTT/TIGER CONTROL=LOAD2.CTL DIRECT=TRUE PARALLEL=TRUE SQLLOAD USERID=SCOTT/TIGER CONTROL=LOAD3.CTL DIRECT=TRUE PARALLEL=TRUE The previous commands must be executed in separate sessions, or if permitted on your operating system, as separate background jobs. Note the use of multiple con- 8-26 Oracle8 Utilities Parallel Data Loading Models trol files. This allows you to be flexible in specifying the files to use for the direct path load (see the example of one of the control files below). Note: Indexes are not maintained during a parallel load. Any indexes must be (re)created or rebuilt manually after the load completes. You can use the parallel index creation or parallel index rebuild feature to speed the building of large indexes after a parallel load. When you perform a PARALLEL load, SQL*Loader creates temporary segments for each concurrent session and then merges the segments upon completion. The segment created from the merge is then added to the existing segment in the database above the segment’s high water mark. The last extent used of each segment for each loader session is trimmed of any free space before being combined with the other extents of the SQL*Loader session. Options Keywords for Parallel Direct Path Loads When using parallel direct path loads, options are available for specifying attributes of the temporary segment to be allocated by the loader. Specifying Temporary Segments It is recommended that each concurrent direct path load session use files located on different disks to allow for the maximum I/O throughput. Using the FILE keyword of the OPTIONS clause you can specify the filename of any valid datafile in the tablespace of the object (table or partition) being loaded. The following example illustrates a portion of one of the control files used for the SQL*Loader sessions in the previous example: LOAD DATA INFILE ’load1.dat’ INSERT INTO TABLE emp OPTIONS(FILE=’/dat/data1.dat’) (empno POSITION(01:04) INTEGER EXTERNAL NULLIF empno=BLANKS ... You can specify the database file from which the temporary segments are allocated with the FILE keyword in the OPTIONS clause for each object (table or partition) in the control file. You can also specify the FILE parameter on the command line of each concurrent SQL*Loader session, but then it will globally apply to all objects being loaded with that session. Using the FILE Keyword The FILE keyword in Oracle8 has the following restrictions for direct path parallel loads: SQL*Loader: Conventional and Direct Path Loads 8-27 General Performance Improvement Hints 1. For non-partitioned tables: the specified file must be in the tablespace of the table being loaded 2. For partitioned tables, single partition load: the specified file must be in the tablespace of the partition being loaded 3. For partitioned tables, full table load: the specified file must be in the tablespace of all partitions being loaded that is, all partitions must be in the same tablespace. Using the STORAGE Keyword The STORAGE keyword can be used to specify the storage attributes of the temporary segment(s) allocated for a parallel direct path load. If the STORAGE keyword is not used, the storage attributes of the segment containing the object (table, partition) being loaded are used. OPTIONS(STORAGE=(MINEXTENTS n1 MAXEXTENTS n2 INITIAL n3[K|M] NEXT n4[K|M] PCTINCREASE n5) For example, the following STORAGE clause could be used: OPTIONS (STORAGE=(INITIAL 100M NEXT 100M PCTINCREASE 0)) The STORAGE keyword can only be used in the control file, and not on the command line. Use of the STORAGE keyword to specify anything other than PCTINCREASE of 0, and INITIAL or NEXT values is strongly discouraged (and may be silently ignored in the future.) Enabling Constraints After a Parallel Direct Path Load Constraints and triggers must be enabled manually after all data loading is complete. General Performance Improvement Hints This section gives a few guidelines which can help to improve the performance of a load. If you must use a certain feature to load your data, by all means do so. But if you have control over the format of the data to be loaded, here are a few hints which can be used to improve load performance: 1. Make logical record processing efficient: ■ ■ 8-28 Oracle8 Utilities use one-to-one mapping of physical records to logical records (avoid continueif, concatenate) make it easy for the software to figure out physical record boundaries. Use the file processing option string “FIX nnn” or “VAR”. If you use the default General Performance Improvement Hints (stream mode) on most platforms (e.g. UNIX, NT) the loader has to scan each physical record for the record terminator (newline character.) 2. Make field setting efficient. Field setting is the process of mapping “fields” in the datafile to their corresponding columns in the table being loaded. The mapping function is controlled by the description of the fields in the control file. Field setting (along with data conversion) is the biggest consumer of CPU cycles for most loads. ■ ■ 3. avoid delimited fields; use positional fields. If you use delimited fields, the loader must scan the input data to find the delimiters. If you use positional fields, field setting becomes simple pointer arithmetic (very fast!) Don’t trim whitespace if you don’t need to (use PRESERVE BLANKS.) Make conversions efficient. There are several conversions that the loader does for you, character set conversion and datatype conversions. Of course, the quickest conversion is no conversion. ■ ■ Avoid character set conversions if you can. The loader supports four character sets: a) client character set (NLS_LANG of the client sqlldr process); b) datafile character set (usually the same as the client character set, but can be different); c) server character set; and d) server national character set. Performance is optimized if all character sets are the same. For direct path loads, it is best if the datafile character set and the server character set are the same. If the character sets are the same, character set conversion buffers are not allocated. Use single byte character sets if you can. 4. Use direct path loads. 5. Use “sorted indexes” clause. 6. Avoid unnecessary NULLIF and DEFAULTIF clauses. Each clause must be evaluated on each column which has a clause associated with it for EVERY row loaded. 7. Use parallel direct path loads and parallel index create when you can. SQL*Loader: Conventional and Direct Path Loads 8-29 General Performance Improvement Hints 8-30 Oracle8 Utilities Part III NLS Utilities Part III explains how to use the NLS utilities: ■ ■ ■ The NLS Data Installation utility which helps you convert text-format updates to NLS objects that you create or receive with a new Oracle distribution to binary format. It also aids you in merging these converted files into the existing NLS object set. The NLS Configuration utility which helps you configure your NLS boot files so that only the NLS objects that you require will be loaded. NLS Calendar utility which allows you to update existing NLS calendar data with additional ruler eras (imperial calendars) or add deviation days (lunar calendar). 9 National Language Support Utilities This chapter describes three utilities: ■ NLS Data Installation Utility ■ NLS Configuration Utility ■ NLS Calendar Utility For platform-specific details on the use of these utilities, please see your operating system-specific Oracle documentation. National Language Support Utilities 9-1 NLS Data Installation Utility NLS Data Installation Utility Overview When you order an Oracle distribution set, a default set of NLS data objects is included. Some NLS data objects are customizable. For example, starting with Oracle8, you can extend Oracle’s character set definition files to add userdefined characters. These NLS definition files must be converted into binary format and merged into the existing NLS object set. The NLS Data Installation Utility described here will allow you to do this. Along with the binary object files, a boot file is generated by the NLS Data Installation Utility. This boot file is used by the modules to identify and locate all the NLS objects which it needs to load. To facilitate boot file distribution and user configuration, three types of boot files are defined: Installation Boot File The boot file included as part of the distribution set. System Boot File The boot file generated by the NLS Data Installation Utility which loads the NLS objects. If the user already has an installed system boot file, its contents can be merged with the new system boot file during object generation. User Boot File A boot file that contains a subset of the system boot file information. See “NLS Configuration Utility” on page 9-16 for information about how this file is generated. Syntax The NLS Data Installation Utility is invoked from the command line with the following syntax: LXINST [ORANLS=pathname] [SYSDIR=pathname] [DESTDIR=pathname] [HELP=[yes | no]] [WARNING=[0 | 1 | 2 | 3]] 9-2 Oracle8 Server Utilities NLS Data Installation Utility where ORANLS=pathname Specifies where to find the text-format boot and object files and where to store the new binary-format boot and object files. If not specified, NLS Installation Utility uses the value in the environment variable ORA_NLS33 (or the equivalent for your operating system). If both are specified, the command line parameter overrides the environment variable. If neither is specified, the NLS Installation Utility will exit with an error. SYSDIR=pathname Specifies where to find the existing system boot file. If not specified, the NLS Installation Utility uses the directory specified in the initialization file parameter ORANLS. If there is no existing system boot file or the NLS Installation Utility is unable to find the file, it will create a new file and copy it to the appropriate directory. DESTDIR=pathname Specifies where to put the new (merged) system boot file. If not specified, the NLS Installation Utility uses the directory specified in the initialization file parameter ORANLS. Any system boot file that exists in this directory will be overwritten so make a backup first. HELP=[yes | no] If "yes", a help message describing the syntax for the NLS Installation Utility will be displayed. [WARNING= [0 | 1 | 2 | 3]] If you specify "0", no warning messages are displayed. If you specify "1", all messages for level 1 will be displayed. If you specify "2", all messages for levels 2 and 1 will be displayed. If you specify "3", all messages for levels 3, 2 and 1 will be displayed. Return Codes You may receive the following return codes upon executing LXINST: 0 The generation of the binary boot and object files, and merge of the installation and system boot files completed successfully. 1 Installation failed: the NLS Installation Utility will exit with an error message that describes the problem. National Language Support Utilities 9-3 NLS Data Installation Utility Usage You use LXINST to install your customized character sets by completing the following tasks: ■ ■ Create a text-format boot file (lx0boot.nlt) containing references to you new data objects. ■ Data objects can be generated only if they are referenced in the boot file. ■ You can generate only character set object types Create your new text-format data object files. See “Data Object File Names” on page 9-8 for naming convention information. Note: Your distribution set contains a character set definition demonstration file that you can use as a reference or as a template. On unix-based systems, this file is located in $ORACLE_HOME/demo/*.nlt ■ Invoke LXINST as described above (using the appropriate parameters) to generate new binary data object files. These files will be generated in the directory you specified in ORANLS. ■ LXINST also generates both a new installation boot file and system boot file. If you have a previous NLS installation and want to merge the existing information with the new in the system boot file, copy the existing system boot file into the directory you specified in SYSDIR. A new system boot file containing the merged information is generated in the directory specified in DESTDIR. Attention: As always, you should have backups of any existing files you do not want overwritten. NLS Data Object Files This section should be read by those who intend to create their own NLS data objects. It details the formats, contents, and restrictions expected by the NLS Data Installation Utility. Character Set Definition Files Character set information and encoding are defined in text files (with the suffix ".nlt"). Character set definition text files (*.nlt files) contain descriptions of a character set and are specified in a user friendly format so that a database administrator can modify or create a new character set easily. All characters are defined in terms of Unicode 2.0 code points. That is, each character is defined as a Unicode 2.0 character code value. 9-4 Oracle8 Server Utilities NLS Data Installation Utility Conversion between character sets is done by using Unicode as the intermediate form. The following file is a customized character set template character set definition file format you can use in Oracle release 8.0.4: Customized Character Set Definition File Format Template # #The following is a template of an Oracle 8.0.4 customized character set #definition file. # You may use this template to create a user defined character set or copy # and modify an existing one. The convention used for naming character # set definition (.nlt) files is in the format: lx2dddd.nlt, where # dddd = 4 digit character set ID in hex # All letters in the definition file are case-insensitive. # Version number: specify the current loadable data version. VERSION = <x.x.x.x.x> # The following is the body of the definition file DEFINE character_set # In 8.0.4, we support a new feature called 'base_char_set'. It allows you #to extend an existing character set based on an existing oracle supported # standard character set. Generally, you may only need to edit the #following fields: # Name and Id of the character set are required for any character sets. # # # # # # # # # # # # # # # Character set name must be specified in a double quoted string. Rules for choosing a character set name: - Cannot use a character set name that is already in use. (Each character set must be assigned a unique character set name). - Must consist of single-byte ASCII or EBCDIC characters only (single-byte compiler character set). - Cannot contain multibyte characters. - Maximum length of 30 characters. - Must start with an alphabetic character. - Composed of alphanumeric characters only (e.g. no periods, dashes, underscore characters allowed) - The name is case-insensitive. To register a unique character set name, send mail to [email protected]. name = <text_string> National Language Support Utilities 9-5 NLS Data Installation Utility # Character set id is specified as an integer value. # Rules for choosing a character set ID: # - Cannot use a character set ID that is already in use. (Each # character # set must be assigned a unique character set ID.) # - Must be in the decimal range of 10000-20000 # - Character set IDs must be registered with Oracle to receive a # uniquely assigned character set id number. # To register a unique character set id, send mail to [email protected]. id = <integer> # The "base_char_set" feature is in only since version 8.0.4. It allows # users to define the base character set in a new character set definition # file. The new character set will inherit all definitions from the base # character set, therefore, the user only needs to add the customized data #into the new character set definition file. # The syntax of the base character set is: # base_char_set = <id> | <name> # - <id> or <name> should be a valid Oracle NLS character set id or # name. # Example is: base_char_set = "JA16EUC" or base_char_set = 830 base_char_set = <id> | <name> # # # # # # # # If you use base_char_set feature, remember you need to copy your base character set definition file (text or binary format) from $ORA_NLS33 into the working directory specified by $ORANLS so that the new character set can inherit the definition from the base character set. Example: %cp $ORA_NLS33/lx2033e.nlt $ORANLS or %cp $ORA_NLS33/lx*33e.nlb $ORANLS # # # # # # # # # # Character data is defined as a list of <char_value>:<unicode_value> pairs. <char_value> is a hex number specifying the complete character value in this character set (e.g. 0xa1b1), while <unicode_value> is a 16-bit hex number specifying its corresponding Unicode 2.0 character value. Alternatively, a range of characters can be specified with a corresponding range of Unicode values. Each successive character in the <start_char>-<end_char> range will be assigned to each successive character in the <start_unicode>-<end_unicode> range. There must be an equal number of characters in each range. 9-6 Oracle8 Server Utilities NLS Data Installation Utility # User-defined characters must be assigned to characters in Unicode's # private use area, and in particular the range 0xe000 to 0xf4ff. The # remaining 1024 characters in the private use area are reserved for Oracle # private use. # If you already defined "base_char_set", you only need to add the #customized character set mappings. character_data = { <char_value>:<unicode_value>, <start_char>-<end_char>:<start_unicode>-<end_unicode>, ... } # A character classification list is used to specify the type of characters. # Valid values: # UPPER LOWER DIGIT SPACE PUNCTUATION CONTROL # HEX_DIGIT LETTER PRINTABLE # You only need to add customized characters' classification if you defined # base_char_set. classification = { <char_value> = { UPPER, LOWER, DIGIT, SPACE, PUNCTUATION, CONTROL, HEX_DIGIT, LETTER, PRINTABLE }, ... } # # # # Lower-to-Upper case character relationships are defined as pairs, where the first specifies the value of a character in this character set and the second specifies its uppercase value in this character set. You may add the customized case mapping only if needed. uppercase = { <char_value>:<upper_char_value>, <start_char>-<end_char>:<start_upper>-<end_upper>, ... } # # # # Upper-to-Lower case character relationships are defined as pairs, where the first specifies the value of a character in this character set and the second specifies its lowercase value in this character set. You may add the customized case mapping only if needed. lowercase = { <char_value>:<lower_char_value>, <start_char>-<end_char>:<start_lower>-<end_lower>, ... } National Language Support Utilities 9-7 NLS Data Installation Utility # # # # # There are a lot of other fields in Oracle character set definition file. Presumably, you will only need above fields at most. However, you can always refer to our UDC8.0.3 white paper to find out all the information if you want to customization other fields or send email to [email protected] for information. ENDDEFINE character_set Object Types Only character set object types are currently supported for customizing. Object IDs NLS data objects are uniquely identified by a numeric object ID. The ID may never have a zero or negative value. In general, you can define new objects as long as you specify the object ID within the range 10000-20000. Warning: When you want to create a new character set, you must register with Oracle Corporation by sending email to [email protected] which will ensure that your character set has a unique name and ID.. Object Names Only a very restricted set of characters can be used in object names: ABCDEFGHIJKLMNOPQRSTUVWXYZ0123456789_- and <space> Object names can only start with an alphabetic character. Language, territory and character set names cannot contain an underscore character, but linguistic definition names can. There is no case distinction in object names, and the maximum size of an object name is 30 bytes (excluding terminating null). Data Object File Names The system-independent object file name is constructed from the generic boot file entry information: lxtdddd where t 1 digit object type (hex). dddd 4 digit object ID (hex). 9-8 Oracle8 Server Utilities NLS Data Installation Utility The installation boot file name is lx0BOOT; the system boot file name is lx1BOOT; user boot files are named lx2BOOT. The file extension for text format files is .nlt, for binary files, .nlb. Examples: lx22711.nlt Text-format character set definition, ID=10001 lx0boot.nlt Text-format installation boot file lx1boot.nlb Binary system boot file lx22711.nlb Binary character set definition, ID=10001 Example of Character Set Customization This section introduces you to the steps required to create a new character set with an example. For this example, we will create a new character set based on Oracle's JA16EUC character set and add a few user defined characters. Step 1. Register a new Character Set Name and ID In order to maintain unique character set names and ids, you should register the character name with Oracle to receive a uniquely assigned character set id. Requests for character set name and ID registration can be sent to: [email protected] Attention: If the character set name and ID are not unique, you could experience incompatibilities between character sets and potential loss of data. Note the following restrictions on character set names: ■ ■ you cannot use a character set name that is already in use. (Each character set must be assigned a unique character set name) the name must consist of single-byte ASCII or EBCDIC characters only (single-byte compiler character set) ■ there is a maximum length of 30 characters ■ the name must start with an alphabetic character ■ ■ the name must be composed of alphanumeric characters only (e.g. no periods, dashes, underscore characters allowed) the name is case-insensitive National Language Support Utilities 9-9 NLS Data Installation Utility Rules for choosing a character set ID: ■ ■ the ID cannot use a character set ID that is already in use (each character set must be assigned a unique character set ID) the ID must be in the decimal range of 10000-20000 (hexadecimal range of 0x2710-0x3a98) If a character set is derived from an existing Oracle character set, we recommend using the following character set naming convention: <Oracle_character_set_name><organization_name>EXT<version> Example: If a company such as Sun Microsystems was adding user defined characters to the JA16EUC character set, the following character set name might be appropriate: JA16EUCSUNWEXT1 where: JA16EUC is the character set name defined by Oracle SUNW represents the organization name (company stock trading abbreviation for Sun Microsystems) EXT specifies that this is an extension to the JA16EUC character set 1 specifies the version For this example and all further steps, we will use the character set ID 10000 (hex value 0x2710). Step 2. Create a NLS Text Boot File The NLS binary boot files indicate which NLS data objects will be loaded into the database. Therefore, the binary boot file must be updated whenever a new character set is created. To update the binary boot file, you must create an entry for your new character set in a text boot file lx0boot.nlt first. 9-10 Oracle8 Server Utilities NLS Data Installation Utility NLS Boot File Format # The following is a template for an Oracle 8.0.3 NLS boot file. # Version number specifies the current loadable data version. VERSION=<x.x.x.x.x> # List the character set names and ids that will be merged into the existing # system boot file using the $ORACLE_HOME/bin/lxinst utility. # CHARACTER_SET <name> <id> <name> <id> ... Example: Create a text boot file (lx0boot.nlt) in the working directory. % vi /tmp/lx0boot.nlt To add JA16EUCSUNWEXT1, set: VERSION=2.1.0.0.0 CHARACTER_SET "JA16EUCSUNWEXT1" 10000 where version number is based on the Oracle 8.0.4 release. Refer to the version number listed in the existing lx2*.nlt files for the latest version number. Note that it is possible to list multiple user defined character sets in a single lx0boot.nlt file. For example: VERSION=2.1.0.0.0 CHARACTER_SET "JA16EUCSUNWEXT1" 10000 "ZH16EUCSUNWEXT1" 10001 National Language Support Utilities 9-11 NLS Data Installation Utility Step 3. Create a Character Set Definition File (lx2dddd.nlt) The convention used for naming character set definition (.nlt) files is in the format: lx2dddd.nlt, where dddd = 4 digit Character Set ID in hex. A few things to note when editing a character set definition file: ■ you can only extend (add characters to) an existing Oracle character set ■ you should not remap existing characters ■ all character mappings must be unique ■ one-to-many character mapping is not allowed ■ many-to-one character mapping is not allowed ■ ■ new characters should be mapped into the Unicode private use range: e000f4ff. (Note that the actual Unicode 2.0 private use range is e000-f8ff, however, Oracle reserves f500-f8ff for it's own private use.) no line can be longer than 80 characters in the character set definition file Starting with Oracle release 8.0.4, there is a feature, 'BASE_CHAR_SET', that can make customized character set support easier. Since you are extending an existing Oracle character set, the easiest thing to do is to use 'BASE_CHAR_SET' feature which causes the new character set to inherit all definitions from the base character set and the user only need add user-specific customized character set data. Example: Assume you are extending JA16EUC character set and have added some new customized character set data to it. Based on the character set ID of 10000 you specified in Step 1, name the new character set definition file lx22710.nlt (based on the character set id hex value of 0x2710). This example uses /tmp as the working directory. Edit the new character definition file using your favorite editor. % vi /tmp/lx22710.nlt VERSION = 2.1.0.0.0 DEFINE character_set name = "JA16EUCSUNWEXT1" id = 10000 base_char_set = 830 character_data = { 9-12 Oracle8 Server Utilities NLS Data Installation Utility 0x9a41 : 0xe001, 0x9a42 : 0xe002, } classification = { 0x9a41 = { LETTER, LOWER }, 0x9a42 = { LETTER, UPPER }, } uppercase = { 0x9a41 : 0x9a42, } lowercase = { 0x9a42 : 0x9a41, } ENDDEFINE character_set Refer to “Customized Character Set Definition File Format Template” on page 9-5 for more information about the format of the character set definition files. Minimally you will need to set the character set name, character set Id and, base character set, add customized character data and classification fields. Step 4. Backup the NLS binary boot files We recommend that you backup the NLS installation boot file (lx0boot.nlb) and the NLS system boot file (lx1boot.nlb) in the $ORA_NLS33 directory prior to generating and installing .nlb files. % cd $ORA_NLS33 % cp lx0boot.nlb lx0boot.nlb.orig % cp lx1boot.nlb lx1boot.nlb.orig Step 5. Generate and install the .nlb files Now you are ready to generate and install the new .nlb files. The .nlb files are platform dependent, so you must make sure to regenerate them on each platform and you must also install these files on both server and clients. You use the LXINST utility to create both the binary character definition files (lx2dddd.nlb) and update the NLS boot file (lx*boot.nlb). Example: The LXINST utility will make use of the existing system boot file. Therefore, copy the existing binary system boot file into the directory specified by SYSDIR. For this example, specify SYSDIR to the working directory (/tmp). % cp lx1boot.nlb /tmp National Language Support Utilities 9-13 NLS Data Installation Utility The new character set definition file (lx22710.nlt) and the text boot file containing the new character set entry (lx0boot.nlt) that you created in Step 2 & 3 should reside in the directory specified by ORANLS, for this example, specify it to be /tmp. Also, since we define JA16EUC (Id 830 in hex value 033e) as "BASE_CHAR_SET", the base definition file, text-format (lx2033e.nlt) or binary format (lx*033e.nlb), should be in the directory ORANLS too, so that the new character set can inherit all definition from it. % cp lx2033e.nlt /tmp or % cp lx*033e.nlb /tmp Use the LXINST utility to generate a binary character set definition file (lx22710.nlb) in the directory specified by ORANLS and an updated binary boot file (lx1boot.nlb) in the directory specified by DESTDIR. For this example, define ORANLS, SYSDIR and DESTDIR all to be /tmp. % $ORACLE_HOME/bin/lxinst oranls=/tmp sysdir=/tmp destdir=/tmp Then, install the newly generated binary boot file (lx1boot.nlb) into the ORA_NLS33 directory: % cp /tmp/lx1boot.nlb $ORA_NLS33/lx1boot.nlb Finally, install the new character set definition file lx2*.nlb into the ORA_NLS33 directory. If there is lx5*.nlb or lx6*.nlb or both, install them too: % cp /tmp/lx22710.nlb $ORA_NLS33 % cp /tmp/lx52710.nlb $ORA_NLS33 % cp /tmp/lx62710.nlb $ORA_NLS33 Step 6. Repeat for Each Platform You must repeat Step 5 on each hardware platform since the .nlb file is a platform-specific binary. It must also be repeated for every system that must recognize the new character set. Therefore, you should compile and install the new .nlb files on both server and client machines. 9-14 Oracle8 Server Utilities NLS Data Installation Utility Step 7. Create the Database Using New Character Set After installing the .nlb files you must shutdown and restart the database server in order to initialize NLS data loading. After bringing the database server back up, create the new database using the newly created character set. To use the new character set on the client side, simply exit the client (such as Enterprise Manager or SQL*Plus) and reinvoke it after installing the .nlb files. National Language Support Utilities 9-15 NLS Configuration Utility NLS Configuration Utility Overview At installation, all available NLS objects are stored and referenced in the system boot file. This file is used to load the available NLS dam. The NLS Configuration Utility allows you to configure your boot files such that only the NLS objects that you require will be loaded. It does this by creating a user boot file, which contains a subset of the system boot file. Data loading by the kernel will then be performed according to the contents of this user boot file. The NLS Configuration Utility allows you to configure a user boot file, either by selecting NLS objects from the installed system boot file which will then be included in a new user boot file, or by reading entries from an existing user boot file and possibly removing one or more of them and saving the remaining entries into a new user boot file. Note that you will not be allowed to actually “edit” an existing boot file as it may be in use by either the RDBMS or some other Oracle tool (that is, saving of boot file entries is never done to an existing one). You may also use the NLS Data Installation Utility to check the integrity of an existing user boot file. This is necessary since the contents of existing NLS objects may change over time, and the installation of a new system boot file may cause user boot files to become out of date. Thus, a comparison function will notify you when it finds that the file is out of date and will allow you to create a new user boot file. Syntax The NLS Configuration Utility is invoked from the command line with the following syntax: LXBCNF [ORANLS=pathname] [userbootdir=pathname] [DESTDIR=pathname] [HELP=[yes |no]] 9-16 Oracle8 Server Utilities NLS Configuration Utility where: ORANLS=pathname Specifies where to find the text-format boot and object files and where to store the new binary-format boot and object files. If not specified, NLS Installation Utility uses the value in the environment variable ORA_NLS (or the equivalent for your operating system). If both are specified, the command line parameter overrides the environment variable. If neither is specified, the NLS Installation Utility will exit with an error. SYSDIR=pathname Specifies where to find the existing system boot file. If not specified, the NLS Installation Utility uses the directory specified in the initialization file parameter ORANLS. If there is no existing system boot file or the NLS Installation Utility is unable to find the file, it will create a new file and copy or move it to the appropriate directory. DESTDIR=pathname Specifies where to put the new (merged) system boot file. If not specified, the NLS Installation Utility uses the directory specified in the initialization file parameter ORANLS. Any system boot file that exists in this directory will be overwritten so make a backup first. HELP=[yes | no] If "yes", a help message describing the syntax for the NLS Installation Utility will be displayed. Menus When the NLS Configuration Utility is started you are presented with the following top-level menu: ■ File Menu ■ Edit Menu ■ Action Menu ■ Windows Menu ■ Help National Language Support Utilities 9-17 NLS Configuration Utility File Menu The file menu contains choices pertaining to file operations. Options are: Table 9–1 File Menu Options Menu Item Options Description System Boot File Open This will open the current system boot file. Note that the Open menu item will be “grayed out” as soon as a system Boot File has been successfully read. Also note that you cannot perform any other functions until you have opened a system boot file. User Boot File New Open a new user boot file. Read Read the contents of an existing user boot file. Save Save changes to the new user boot file. Revert Undo the changes to the currently open user boot file made since the last “Save.” Choose Printer Not implemented in this release. Page Setup Not implemented in this release. Print Not implemented in this release. Quit Exit from the file. Note: As long as the system boot file has not been opened and read, all these menu items will remain “grayed out”. That is, you cannot build a user boot file as long as there is no system boot file information available. As soon as you select New to create a new user boot file, the following NLS objects will be created in the new file by default: If you choose to read the contents of an existing user boot file, the entries read will be checked against the entries of the system boot file. If an entry is found which does not exist in the system boot file, you will receive a warning, and the entry will not be included. Edit Menu The Edit Menu contains choices for editing information that you enter in any of the dialogs and/or windows of the NLS Configuration Utility. 9-18 Oracle8 Server Utilities NLS Configuration Utility Action Menu The Action Menu contains choices for performing operations on the user boot file. Note that this menu is available only in the character mode NLS Configuration Utility. Copy Item Copies the selected item from the system boot file to the user boot file. Delete Item Deletes the selected item from the user boot file. Windows Menu The Windows Menu allows you to either activate certain windows or set the focus to an already open window (the latter is meant for character-mode platforms). Whenever a new window is opened, its name will be added to the Windows Menu automatically. NLS Defaults Not implemented in this release. Help Menu This menu provides functions which allow the user to retrieve various levels of help about the NLS Configuration Utility. About Shows version information for the NLS Configuration Utility. Help System Not implemented in this release. National Language Support Utilities 9-19 NLS Calendar Utility NLS Calendar Utility Overview A number of calendars besides Gregorian are supported. Although all of them are defined with data linked directly into NLS, some of them may require the addition of ruler eras (in the case of imperial calendars) or deviation days (in the case of lunar calendars) in the future. In order to do this without waiting for a new release, you can define the additional eras or deviation days in an external file, which is then automatically loaded when executing the calendar functions. The calendar data is first defined in a text-format definition file. This file must be converted into binary format before it can be used. The Calendar Utility described here allows you to do this. Syntax The Calendar Utility is invoked directly from the command line: LXEGEN There are no parameters. Usage The Calendar Utility takes as input a text-format definition file. The name of the file and its location is hard-coded as a platform-dependent value. On UNIX platforms, the file name is lxecal.nlb, and its location is $ORACLE_HOME/ocommon/nls. An example calendar definition file is included in the distribution. Note: The location of files is platform dependent. Please see your platform-specific Oracle documentation for information about the location of files on your system. The LXEGEN executable produces as output a binary file containing the calendar data in the appropriate format. The name of the output file is also hard-coded as a platform-dependent value; on UNIX the name would be lxecal.nlt were you to define deviation days for the Arabic Hijirah calendar. The file will be generated in the same directory as the text-format file, and an already-existing file will be overwritten. Once the binary file has been generated, it will automatically be loaded during system initialization. Do not move or rename the file, as it is expected to be found in the same hard-coded name and location. 9-20 Oracle8 Server Utilities Part IV Offline Database Verification Utility Part IV explains how to use the offline database verification utility, a commandline utility that performs a physical data structure integrity check on an offline database. 10 Offline Database Verification Utility This chapter describes how to use the off-line database verification utility, DB_VERIFY. The chapter includes the following topics: ■ Functionality ■ Restrictions ■ Usage ■ ■ Command-Line Syntax ■ Parameters Server Manager Compatibility Offline Database Verification Utility 10-1 DB_VERIFY DB_VERIFY DB_VERIFY is an external command-line utility that performs a physical data structure integrity check on an offline database. It can be used against backup files and online files (or pieces of files). You use DB_VERIFY primarily when you need to insure that a backup database (or datafile) is valid before it is restored or as a diagnostic aid when you have encountered data corruption problems. Because DB_VERIFY can be run against an offline database, integrity checks are significantly faster. Additional Information: The name and location of DB_VERIFY is dependent on your operating system (for example, dbv on Sun/Sequent systems). See your operating system-specific Oracle documentation for the location of DB_VERIFY for your system. Restrictions DB_VERIFY checks are limited to cache managed blocks. Syntax DB_VERIFY 10-2 Oracle8 Utilities FILE filename START block_address END BLOCKSIZE block_address block_size LOGFILE logfile_name FEEDBACK n HELP Y/N PARFILE parfile_name DB_VERIFY Parameters FILE The name of the database file to verify, START The starting block address to verify. Specify block addresses in Oracle blocks (as opposed to operating system blocks). If you do not specify START, DB_VERIFY defaults to the first block in the file. END The ending block address to verify. If you do not specify END, DB_VERIFY defaults to the last block in the file. BLOCKSIZE BLOCKSIZE is required only if the file to be verified has a non2kb block size. If you do not specify BLOCKSIZE for non-2kb files, you will see the error DBV-00103. LOGFILE Specifies the file to which logging information should be written. The default sends output to the terminal display. FEEDBACK Specifying the keyword FEEDBACK causes DB_VERIFY to send a progress display to the terminal in the form of a single dot "." for n number of pages verified during the DB_VERIFY run. If n = 0, there will be no progress display. HELP Provides onscreen help. PARFILE Specifies the name of the parameter file to use. You can store various values for DB_VERIFY parameters in flat files allowing you to have parameter files customized for specific types of integrity checks and/or for different types of datafiles. Enterprise Manager Enterprise Manager can be used to perform the verification process as well. The verification of the entire database or a tablespace will be managed by Enterprise Manager in that it will invoke the verification process on each individual file. For more information, see your Enterprise Manager documentation. Offline Database Verification Utility 10-3 DB_VERIFY Sample DB_VERIFY Output The following example shows how to get online help: % dbv help=y DBVERIFY: Release 7.3.1.0.0 - Wed Aug 2 09:14:36 1995 Copyright (c) Oracle Corporation 1979, 1994. All rights reserved. Keyword Description (Default) ---------------------------------------------FILE File to Verify (NONE) START Start Block (First Block of File) END End Block (Last Block of File) BLOCKSIZE Logical Block Size (2048) LOGFILE Output Log (NONE) This is sample output of verification for the file, t_db1.f. The feedback parameter has been given the value 100 to display one dot onscreen for every 100 pages processed: % dbv file=t_db1.f feedback=100 DBVERIFY: Release 7.3.1.0.0 - Wed Aug 2 09:15:04 1995 Copyright (c) Oracle Corporation 1979, 1994. All rights reserved. DBVERIFY - Verification starting : FILE = t_db1.f ............................................................................ .... DBVERIFY - Verification complete Total Total Total Total Total Total Total Pages Pages Pages Pages Pages Pages Pages Examined : Processed (Data) : Failing (Data) : Processed (Index): Failing (Index): Empty : Marked Corrupt : Total Pages Influx 10-4 Oracle8 Utilities 9216 2044 0 733 0 5686 0 : 0 A SQL*Loader Reserved Words This appendix lists the words reserved for use by the Oracle utilities. It also explains how to avoid problems that can arise from using reserved words as names for tables and columns, which normally should not be named using reserved words. SQL*Loader Reserved Words A-1 Generally you should avoid naming your tables and columns using terms that are reserved by any of the languages or utilities you are likely to use at your installation. Refer to the various language and reference manuals and to this appendix for lists of reserved words. Consult the Oracle8 SQL Reference for a list of words that are reserved by SQL. Tables and columns that have these names must have these names specified in double quotation marks. When using SQL*Loader, you must follow the usual rules for naming tables and columns. A table or column’s name cannot be a reserved word, a word having special meaning for SQL*Loader. The following words must be enclosed in double quotation marks to be used as a name for a table or column: AND A-2 FLOAT RECOVERABLE APPEND FORMAT REENABLE BADFILE GENERATED REPLACE BADDN GRAPHIC RESUME BEGINDATA INDDN SEQUENCE BLANKS INDEXES SINGLEROW BLOCKSIZE INFILE SKIP BY INSERT SMALLINT BYTEINT INTEGER SORTDEVT CHAR INTO SORTED CHARACTERSET LAST SORTNUM CONCATENATE LOAD SQL/DS CONSTANT LOG STORAGE CONTINUE_LOAD MAX STREAM CONTINUEIF MLSLABEL SYSDATE COUNT NEXT TABLE DATA NO TERMINATED DATE NULLCOLS THIS DECIMAL NULLIF TRAILING DEFAULTIF OPTIONALLY TRUNCATE DELETE OPTIONS UNLOAD DISABLED_CONSTRAINTS PARALLEL UNRECOVERABLE DISCARDDN PART USING Oracle8 Utilities DISCARDFILE PARTITION VARCHAR DISCARDMAX PIECED VARGRAPHIC DISCARDS POSITION VARIABLE DOUBLE PRESERVE WHEN ENCLOSED RAW WHITESPACE EXCEPTIONS READBUFFERS WORKDDN EXTERNAL RECLEN YES FIELDS RECNUM ZONED FIXED RECORD SQL*Loader Reserved Words A-3 A-4 Oracle8 Utilities B DB2/DXT User Notes This appendix describes differences between SQL*Loader DDL syntax and DB2 Load Utility/DXT control file syntax. The topics discussed include: ■ SQL*Loader Extensions to the DB2 Load Utility ■ Using the DB2 RESUME Option ■ Inclusions for Compatibility ■ Restrictions ■ SQL*Loader Syntax with DB2-compatible Statements DB2/DXT User Notes B-1 SQL*Loader Extensions to the DB2 Load Utility SQL*Loader Extensions to the DB2 Load Utility SQL*Loader can use any DB2 Load Utility control file. SQL*Loader also offers numerous extensions to the DB2 loader by supporting the following features: ■ The DATE datatype ■ The automatic generation of unique sequential keys ■ The ability to specify the record length explicitly ■ Loading data from multiple data files of different file types ■ Fixed-format, delimited-format, and variable-length records ■ ■ The ability to combine multiple physical records into one logical record via CONCATENATE, CONTINUEIF NEXT, and CONTINUEIF THIS (IBM supports only CONTINUEIF THIS) ■ More thorough error reporting ■ Bad file (DB2 stops on first error) ■ B-2 The ability to treat a single physical record as multiple logical records Control over the number of records to skip, the number to load, and the number of errors to allow ■ ANDed WHEN clause ■ FIELDS clause for default field characteristics ■ Direct path loads ■ Parallel loads Oracle8 Utilities Inclusions for Compatibility Using the DB2 RESUME Option You can use the DB2 syntax for RESUME, but you may prefer to use SQL*Loader’s equivalent keywords. See “Loading into Empty and Non-Empty Tables” on page 5-25 for more details about the SQL*Loader options summarized below. Table B–1 DB2 Functions and Equivalent SQL*Loader Operations DB2 SQL*Loader Options Result RESUME NO or no RESUME clause INSERT Data loaded only if table is empty. Otherwise an error is returned. RESUME YES APPEND New data is appended to existing data in the table, if any. RESUME NO REPLACE REPLACE New data replaces existing table data, if any. A description of the DB2 syntax follows. If the tables you are loading already contain data, you have three choices for the disposition of that data. Indicate your choice using the RESUME clause. The argument to RESUME can be enclosed in parentheses. RESUME { YES | NO [ REPLACE ] } where: In SQL*Loader you can use one RESUME clause to apply to all loaded tables by placing the RESUME clause before any INTO TABLE clauses. Alternatively, you can specify your RESUME options on a table-by-table basis by putting a RESUME clause after the INTO TABLE specification. The RESUME option following a table name will override one placed earlier in the file. The earlier RESUME applies to all tables that do not have their own RESUME clause. Inclusions for Compatibility The IBM DB2 Load Utility contains certain elements that SQL*Loader does not use. In DB2, sorted indexes are created using external files, and specifications for these external files may be included in the load statement. For compatibility with the DB2 loader, SQL*Loader parses these options, but ignores them if they have no meaning for Oracle. The syntactical elements described below are allowed, but ignored, by SQL*Loader. DB2/DXT User Notes B-3 Restrictions LOG Statement This statement is included for compatibility with DB2. It is parsed but ignored by SQL*Loader. (This LOG option has nothing to do with the log file that SQL*Loader writes.) DB2 uses the log file for error recovery, and it may or may not be written. SQL*Loader relies on Oracle’s automatic logging, which may or may not be enabled as a warm start option. [ LOG { YES | NO } ] WORKDDN Statement This statement is included for compatibility with DB2. It is parsed but ignored by SQL*Loader. In DB2, this statement specifies a temporary file for sorting. [ WORKDDN filename ] SORTDEVT and SORTNUM Statements SORTDEVT and SORTNUM are included for compatibility with DB2. These statements are parsed but ignored by SQL*Loader. In DB2, these statements specify the number and type of temporary data sets for sorting. [ SORTDEVT device_type ] [ SORTNUM n ] DISCARD Specification Multiple file handling requires that the DISCARD clauses (DISCARDDN and DISCARDS) be in a different place in the control file — next to the datafile specification. However, when loading a single DB2 compatible file, these clauses can be in their old position — between the RESUME and RECLEN clauses. Note that while DB2 Load Utility DISCARDS option zero (0) means no maximum number of discards, for SQL*Loader, option zero means to stop on the first discard. Restrictions Some aspects of the DB2 loader are not duplicated by SQL*Loader. For example, SQL*Loader does not load data from SQL/DS files nor from DB2 UNLOAD files. SQL*Loader gives an error upon encountering the DB2 Load Utility commands described below. B-4 Oracle8 Utilities SQL*Loader Syntax with DB2-compatible Statements FORMAT Statement The DB2 FORMAT statement must not be present in a control file to be processed by SQL*Loader. The DB2 loader will load DB2 UNLOAD format, SQL/ DS format, and DB2 Load Utility format files. SQL*Loader does not support these formats. If this option is present in the command file, SQL*Loader will stop with an error. (IBM does not document the format of these files, so SQL*Loader cannot read them.) FORMAT { UNLOAD | SQL/DS } PART Statement The PART statement is included for compatibility with DB2. There is no Oracle concept that corresponds to a DB2 partitioned table. In SQL*Loader, the entire table is read. A warning indicates that partitioned tables are not supported, and that the entire table has been loaded. [ PART n ] SQL/DS Option The option SQL/DS=tablename must not be used in the WHEN clause. SQL*Loader does not support the SQL/DS internal format. So if the SQL/DS option appears in this statement, SQL*Loader will terminate with an error. DBCS Graphic Strings Because Oracle does not support the double-byte character set (DBCS), graphic strings of the form G’**’ are not permitted. SQL*Loader Syntax with DB2-compatible Statements In the following listing, DB2-compatible statements are in bold type: OPTIONS (options) { LOAD | CONTINUE_LOAD } [DATA] [ CHARACTERSET character_set_name ] [ { INFILE | INDDN } { filename | * } [ ”OS-dependent file processing options string” ] [ { BADFILE | BADDN } filename ] [ { DISCARDFILE | DISCARDDN } filename ] [ { DISCARDS | DISCARDMAX } n ] ] [ { INFILE | INDDN } ] ... [ APPEND | REPLACE | INSERT | DB2/DXT User Notes B-5 SQL*Loader Syntax with DB2-compatible Statements RESUME [(] { YES | NO [REPLACE] } [)] ] [ LOG { YES | NO } ] [ WORKDDN filename ] [ SORTDEVT device_type ] [ SORTNUM n ] [ { CONCATENATE [(] n [)] | CONTINUEIF { [ THIS | NEXT ] [(] ( start [ { : | - } end ] ) | LAST } operator { ’char_str’ | X’hex_str’ } [)] } ] [ PRESERVE BLANKS ] INTO TABLE tablename [ CHARACTERSET character_set_name ] [ SORTED [ INDEXES ] ( index_name [ ,index_name... ] ) ] [ PART n ] [ APPEND | REPLACE | INSERT | RESUME [(] { YES | NO [REPLACE] } [)] ] [ REENABLE [DISABLED_CONSTRAINTS] [EXCEPTIONS table_name] ] [ WHEN field_condition [ AND field_condition ... ] ] [ FIELDS [ delimiter_spec ] ] [ TRAILING [ NULLCOLS ] ] [ SKIP n ] (.column_name { [ RECNU | SYSDATE | CONSTANT value | SEQUENCE ( { n | MAX | COUNT } [ , increment ] ) | [[ POSITION ( { start [ {:|-} end ] | * [+n] } ) ] [ datatype_spec ] [ NULLIF field_condition ] [ DEFAULTIF field_condition ] [ ”sql string” ] ] ] } [ , column_name ] ...) [ INTO TABLE ] ... [ BEGINDATA ] [ BEGINDATA] B-6 Oracle8 Utilities Index A B access privileges Export, 1-3 Import, 2-12 advanced queue (AQ) tables exporting, 1-49 importing, 2-61 aliases directory exporting, 1-47 importing, 2-60 ANALYZE Import parameter, 2-19 APPEND keyword SQL*Loader, 5-37 APPEND to table example, 4-11 SQL*Loader, 5-26 AQ (advanced queue) tables exporting, 1-49 importing, 2-61 arrays committing after insert Import, 2-20 exporting, 1-47 importing, 2-59 ASCII fixed-format files exporting, 1-3 ASCII character set Import, 2-55 backslash (\) escape character in quoted strings SQL*Loader, 5-13 quoted filenames and SQL*Loader, 5-14 backups restoring dropped snapshots Import, 2-51 BAD SQL*Loader command-line parameter, bad file rejected records SQL*Loader, 3-13 specifying bad records, 6-3 SQL*Loader, 5-19 BADDN keyword SQL*Loader, 5-19 BADFILE keyword SQL*Loader, 5-19 base backup Export, 1-37 base tables incremental export and, 1-41 BEGINDATA control file keyword SQL*Loader, 5-15 BFILE columns exporting, 1-47 bind array determining size SQL*Loader, 5-65 6-3 Index-1 determining size of SQL*Loader, 5-67 minimizing memory requirements SQL*Loader, 5-70 minimum requirements SQL*Loader, 5-65 no space required for generated data SQL*Loader, 5-71 performance implications SQL*Loader, 5-66 size with multiple INTO TABLE clauses SQL*Loader, 5-70 specifying number of rows conventional path load SQL*Loader, 6-6 specifying size SQL*Loader, 6-3 BINDSIZE SQL*Loader command-line parameter, 6-3 BINDSIZE command-line parameter SQL*Loader, 5-66 blanks BLANKS keyword for field comparison SQL*Loader, 5-7, 5-38 loading fields consisting of blanks SQL*Loader, 5-72 preserving SQL*Loader, 5-78 trailing loading with delimiters SQL*Loader, 5-63 trimming SQL*Loader, 5-72 whitespace SQL*Loader, 5-72 BLANKS keyword SQL*Loader, 5-38 BUFFER Export parameter, 1-13 direct path export, 1-34, 1-36 Import parameter, 2-19 buffers calculating for export, 1-13 calculating for import, 2-19 Index-2 space required by LONG DATA SQL*Loader, 5-58 VARCHAR data SQL*Loader, 5-56 specifying with BINDSIZE parameter SQL*Loader, 5-67 BYTEINT datatype, 5-51 specification SQL*Loader, 5-8 SQL*Loader, 5-52 C cached sequence numbers Export, 1-46 case studies SQL*Loader, 4-1 associated files, 4-3 file names, 4-3 preparing tables, 4-4 CATALOG.SQL preparing database for Export, 1-6 preparing database for Import, 2-7 CATEXP7.SQL preparing database for Export, 1-50 CATEXP.SQL preparing database for Export, 1-6 preparing database for Import, 2-7 CATLDR.SQL setup script SQL*Loader, 8-9 CHAR columns Version 6 export files, 2-63 CHAR datatype delimited form SQL*Loader, 5-60 reference SQL*Loader, 5-58 specification SQL*Loader, 5-9 trimming whitespace SQL*Loader, 5-73 character datatypes conflicting fields SQL*Loader, 5-63 character fields datatypes SQL*Loader, 5-58 delimiters SQL*Loader, 5-60 determining length SQL*Loader, 5-63 specified with delimiters SQL*Loader, 5-58 character sets conversion between during Export/Import, 1-45, 2-55 SQL*Loader, 5-24 direct path export, 1-36, 1-45 eight-bit to seven-bit conversions Export/Import, 1-46, 2-56 multi-byte Export/Import, 1-46, 2-56 SQL*Loader, 5-24 NCHAR data Export, 1-45 single-byte Export/Import, 1-46, 2-55 Version 6 conversions Import/Export, 2-56 character strings as part of a field comparison SQL*LOader, 5-7 padded when shorter than field SQL*Loader, 5-39 CHARACTERSET keyword SQL*Loader, 5-24 CHARSET Import parameter, 2-20 check constraints Import, 2-48 clusters Export, 1-42 columns exporting LONG datatypes, 1-47 naming SQL*Loader, 5-40 null columns at the end of a record SQL*Loader, 5-72 reordering before Import, 2-15 setting to a constant value SQL*Loader, 5-46 setting to a unique sequence number SQL*Loader, 5-48 setting to datafile record number SQL*Loader, 5-47 setting to null SQL*Loader, 5-71 setting to null value SQL*Loader, 5-47 setting to the current date SQL*Loader, 5-47 setting value to zero SQL*Loader, 5-71 specifiying as PIECED SQL*Loader, 8-14 specifying SQL*Loader, 5-39 combining partitions, 2-31 command-line parameters description SQL*Loader, 6-2 Export, 1-11 Import, 2-16 specifying defaults SQL*Loader, 5-11 Comments in Export parameter file, 1-10 in Import parameter file, 2-11 in SQL*Loader control file, 4-12 COMMIT Import parameter, 2-20 complete exports, 1-37, 1-39 restrictions, 1-37 specifying, 1-17 completion messages Export, 1-33 COMPRESS Export parameter, 1-13, 2-53 COMPUTE option STATISTICS Export parameter, 1-19 CONCATENATE keyword SQL*Loader, 5-29 Index-3 concurrent conventional path loads, 8-24 connect string Net8, 1-44 CONSISTENT Export parameter, 1-14 nested table and, 1-14 partitioned table and, 1-14 consolidating extents Export parameter COMPRESS, 1-13 CONSTANT keyword no space used in bind array SQL*Loader, 5-71 SQL*Loader, 5-40, 5-46 CONSTRAINTS Export parameter, 1-15 constraints automatic SQL*Loader, 8-22 check Import, 2-48 direct path load, 8-20 disabling during a direct load, 8-20 disabling referential constraints Import, 2-15 enabling after a direct load, 8-20 enforced on a direct load, 8-20 failed Import, 2-48 load method SQL*Loader, 8-8 not null Import, 2-48 preventing Import errors due to uniqueness constraints, 2-21 referential integrity Import, 2-48 uniqueness Import, 2-48 continuation fields SQL*Loader, 3-9 CONTINUE_LOAD keyword SQL*Loader, 5-29 CONTINUEIF keyword example SQL*Loader, 4-14 Index-4 SQL*Loader, 5-29 continuing interrupted loads SQL*Loader, 5-27 CONTROL SQL*Loader command-line parameter, 6-4 control files CONTROL SQL*Loader command-line parameter, 6-4 creating SQL*Loader, 3-3 data definition language syntax SQL*Loader, 5-4 data definitions basics SQL*Loader, 3-3 definition SQL*Loader, 3-3 editing SQL*Loader, 3-3 field delimiters SQL*Loader, 5-10 guidelines for creating SQL*Loader, 3-4 location SQL*Loader, 3-5 specifying data SQL*Loader, 5-15 specifying discard file SQL*Loader, 5-21 storing SQL*Loader, 3-5 conventional path Export compared to direct path Export, 1-33 conventional path loads basics, 8-2 bind array SQL*Loader, 5-66 compared to direct path loads, 8-7 using, 8-3 CREATE SESSION privilege Export, 1-3 Import, 2-12 CREATE USER command Import, 2-14 CTIME column SYS.INCEXP table, 1-43 cumulative exports, 1-37, 1-38 recording, 1-18 restrictions, 1-37 specifying, 1-17 SYS.INCFIL table, 1-44 SYS.INCVID table, 1-44 D DATA SQL*Loader command-line parameter, data binary versus character format SQL*Loader, 3-9 delimiter marks in data SQL*Loader, 5-62 distinguishing different input formats SQL*Loader, 5-43 enclosed SQL*Loader, 3-10 exporting, 1-19 formatted data SQL*Loader, 4-27 generating unique values SQL*Loader, 5-48 including in control files SQL*Loader, 5-15 loading in sections SQL*Loader, 8-14 loading into more than one table SQL*Loader, 5-43 loading LONG SQL*Loader, 5-58 loading without files SQL*Loader, 5-46 mapping to Oracle format SQL*Loader, 3-3 maximum length of delimited data SQL*Loader, 5-63 methods of loading into tables SQL*Loader, 5-25 moving between operating systems SQL*Loader, 5-65 saving in a direct path load, 8-12 6-4 saving rows SQL*Loader, 8-18 terminated SQL*Loader, 3-10 unsorted SQL*Loader, 8-17 values optimized for performance SQL*Loader, 5-46 data conversion description SQL*Loader, 3-10 data definition language basics SQL*Loader, 3-3 BEGINDATA keyword, 5-15 BLANKS keyword SQL*Loader, 5-38 CHARACTERSET keyword, 5-24 column_name SQL*Loader, 5-8 CONCATENATE keyword, 5-29 CONSTANT keyword, 5-40, 5-46 CONTINUEIF keyword, 5-29 datatype_spec SQL*Loader, 5-9 date mask SQL*Loader, 5-10 DEFAULTIF keyword SQL*Loader, 5-71 delimiter_spec SQL*Loader, 5-10 description SQL*Loader, 3-5 DISABLED_CONSTRAINTS keyword SQL*Loader, 8-21 DISCARDDN keyword, 5-21 DISCARDMAX keyword SQL*Loader, 5-23 example definition SQL*Loader, 3-5 EXCEPTIONS keyword SQL*Loader, 8-21 EXTERNAL keyword, 5-60 field_condition SQL*Loader, 5-7 Index-5 FILE keyword SQL*Loader, 8-27 FLOAT keyword, 5-60 INDDN keyword, 5-16 INFILE keyword, 5-16 length SQL*Loader, 5-10 loading data in sections SQL*Loader, 8-14 NULLIF keyword SQL*Loader, 5-71 parallel keyword SQL*Loader, 8-26 pos_spec SQL*Loader, 5-7 POSITION keyword, 5-40 precision SQL*Loader, 5-10 RECNUM keyword, 5-40 REENABLE keyword SQL*Loader, 8-21 reference keywords and parameters SQL*Loader, 5-1 SEQUENCE keyword, 5-48 syntax diagrams expanded SQL*Loader, 5-7 high-level SQL*Loader, 5-4 syntax reference SQL*Loader, 5-1 SYSDATE keyword, 5-47 TERMINATED keyword, 5-61 UNRECOVERABLE keyword SQL*Loader, 8-18 WHITESPACE keyword, 5-61 data definition language (DDL), 3-3 data field specifying the datatype SQL*Loader, 5-40 data mapping concepts SQL*Loader, 3-3 Index-6 data path loads direct and conventional, 8-2 data recovery direct path load SQL*Loader, 8-13 database administrator (DBA) privileges for export, 1-3 database objects export privileges, 1-3 exporting LONG columns, 1-47 transferring across a network Import, 2-50 databases data structure changes incremental export and, 1-41 full export, 1-16 full import, 2-23 importing into secondary Import, 2-21 incremental export, 1-37 preparing for Export, 1-6 preparing for Import, 2-7 privileges for exporting, 1-3 privileges for importing, 2-11 reducing fragmentation via full export/ import, 2-47 reusing existing data files Import, 2-21 datafiles preventing overwrite during import, 2-21 reusing during import, 2-21 specifying SQL*Loader, 5-16, 6-4 specifying buffering SQL*Loader, 5-18 specifying format SQL*Loader, 5-18 storage SQL*Loader, 3-6 datatypes BFILE Export, 1-47 BYTEINT, 5-52 SQL*Loader, 5-8 CHAR, 5-58 Import, 2-63 SQL*Loader, 5-9 conflicting character datatype fields, 5-63 converting SQL*Loader, 3-10, 5-50 DATE, 5-58 determining length, 5-64 SQL*Loader, 5-9 DECIMAL, 5-53 SQL*Loader, 5-9 default SQL*Loader, 5-40 determining character field lengths SQL*Loader, 5-63 DOUBLE, 5-52 SQL*Loader, 5-8 FLOAT, 5-52 SQL*Loader, 5-8 GRAPHIC, 5-54 SQL*Loader, 5-9 GRAPHIC EXTERNAL, 5-54 INTEGER, 5-51 SQL*Loader, 5-8 LONG Export, 1-47 Import, 2-61 MLSLABEL Trusted Oracle7 Server, 5-59 native conflicting length specifications SQL*Loader, 5-57 inter-operating system transfer issues, 5-65 SQL*Loader, 3-9, 5-51 NUMBER SQL*Loader, 5-50 numeric EXTERNAL, 5-60 trimming SQL*Loader, 5-73 RAW, 5-54 SQL*Loader, 5-9 SMALLINT, 5-51 SQL*Loader, 5-8 specifications SQL*Loader, 5-8 specifying SQL*Loader, 5-50 specifying the datatype of a data field SQL*Loader, 5-40 VARCHAR, 5-56 SQL*Loader, 5-9 VARCHAR2 Import, 2-63 SQL*Loader, 5-50 VARGRAPHIC, 5-55 SQL*Loader, 5-9 ZONED, 5-52 SQL*Loader, 5-9 DATE datatype delimited form SQL*Loader, 5-60 determining length SQL*Loader, 5-64 mask SQL*Loader, 5-64 specification SQL*Loader, 5-9 SQL*Loader, 5-58 trimming whitespace SQL*Loader, 5-73 date mask SQL*Loader, 5-10 DB2 Load utility use with SQL*Loader, 3-4 DB2 load utility, B-1 different placement of statements DISCARDDDN, B-4 DISCARDS, B-4 restricted capabilities of SQL*Loader, B-4 RESUME keyword SQL*Loader equivalents, 5-26 SQL*Loader compatibility ignored statements, B-3 DBA role EXP_FULL_DATABASE role, 1-7 DBCS (DB2 double-byte character set) not supported by Oracle, B-5 DDL, 3-5 SQL*Loader data definition language, 3-3 DECIMAL datatype Index-7 (packed), 5-51 EXTERNAL format SQL*Loader, 5-60 trimming whitespace SQL*Loader, 5-73 length and precision SQL*Loader, 5-10 specification SQL*Loader, 5-9 SQL*Loader, 5-53 DEFAULT column values Oracle Version 6 export files, 2-63 DEFAULTIF keyword field condition SQL*Loader, 5-37 SQL*Loader, 5-71 DELETE ANY TABLE privilege SQL*Loader, 5-27 DELETE CASCADE SQL*Loader, 5-26, 5-27 DELETE privilege SQL*Loader, 5-26 delimited data maximum length SQL*Loader, 5-63 delimited fields field length SQL*Loader, 5-64 delimited files exporting, 1-3 delimiter_spec SQL*Loader, 5-10 delimiters and SQL*Loader, 3-10 control files SQL*Loader, 5-10 enclosure SQL*Loader, 5-74 field specifications SQL*Loader, 5-74 initial and trailing case study, 4-27 loading trailing blanks SQL*Loader, 5-63 marks in data Index-8 SQL*Loader, 5-62 optional enclosure SQL*Loader, 5-74 specifying SQL*Loader, 5-35, 5-60 termination SQL*Loader, 5-74 DESTROY Import parameter, 2-21 DIRECT Export parameter, 1-15, 1-34 SQL*Loader command-line parameter, 6-4 direct path export, 1-33 BUFFER parameter, 1-36 character set and, 1-45 invoking, 1-34 performance, 1-36 RECORDLENGTH parameter, 1-36 direct path load , 8-10 advantages, 8-6 case study, 4-24 choosing sort order SQL*Loader, 8-17 compared to convetional path load, 8-7 conditions for use, 8-7 data saves, 8-12, 8-18 DIRECT SQL*Loader command-line parameter, 6-4 DIRECT command line parameter SQL*Loader, 8-9 DISABLED_CONSTRAINTS keyword, 8-21 disabling media protection SQL*Loader, 8-18 dropping indexes, 8-19 to continue an interrupted load SQL*Loader, 5-28 EXCEPTIONS keyword, 8-21 field defaults, 8-8 improper sorting SQL*Loader, 8-17 indexes, 8-9 instance recovery, 8-13 loading into synonyms, 8-9 LONG data, 8-14 media recovery, 8-13 partitioned load SQL*Loader, 8-24 performance, 8-15 performance issues, 8-9 preallocating storage, 8-15 presorting data, 8-16 recovery, 8-13 REENABLE keyword, 8-21 referential integrity constraints, 8-20 ROWS command line parameter, 8-12 setting up, 8-9 specifying, 8-9 specifying number of rows to be read SQL*Loader, 6-6 SQL*Loader data loading method, 3-16 table insert triggers, 8-21 temporary segment storage requirements, 8-10 triggers, 8-20 using, 8-7, 8-9 version requirements, 8-9 directory aliases exporting, 1-47 importing, 2-60 DISABLED_CONSTRAINTS keyword SQL*Loader, 8-21 DISCARD SQL*Loader command-line parameter, 6-4 discard file basics SQL*Loader, 3-15 DISCARDDN keyword different placement from DB2, B-4 SQL*Loader, 5-21 DISCARDFILE keyword example, 4-14 DISCARDMAX keyword example, 4-14 SQL*Loader, 5-23 DISCARDS control file clause different placement from DB2, B-4 DISCARDS keyword SQL*Loader, 5-23 DISCRDMAX keyword SQL*Loader, 5-23 SQL*Loader, 5-21 discarded records causes SQL*Loader, 5-23 discard file SQL*Loader, 5-21 limiting the number SQL*Loader, 5-23 SQL*Loader, 3-13 DISCARDMAX SQL*Loader command-line parameter, DISCARDMAX keyword discarded records SQL*Loader, 5-23 discontinued loads continuing SQL*Loader, 5-27 DOUBLE datatype, 5-51 specification SQL*Loader, 5-8 SQL*Loader, 5-52 dropped snapshots Import, 2-51 dropping indexes to continue a direct path load SQL*LOader, 5-28 6-5 E EBCDIC character set Import, 2-55 eight-bit character set support, 1-46, 2-56 enclosed fields and SQL*Loader, 3-10 ENCLOSED BY control file clause SQL*Loader, 5-10 specified with enclosure delimiters SQL*Loader, 5-61 whitespace in SQL*Loader, 5-77 enclosure delimiters and SQL*Loader, 3-10 SQL*Loader, 5-74 error handling Index-9 Export, 1-32 Import, 2-48 error messages caused by tab characters in data SQL*Loader, 5-42 Export, 1-32 export log file, 1-17 fatal errors Export, 1-33 generated by DB2 load utility, B-4 row errors during import, 2-48 warning errors Export, 1-32 ERRORS SQL*Loader command-line parameter, errors fatal Export, 1-33 Import, 2-49 Import resource errors, 2-49 LONG data, 2-48 object creation Import parameter IGNORE, 2-23 object creation errors, 2-49 warning Export, 1-32 escape character Export, 1-20 Import, 2-28 quoted strings SQL*Loader, 5-13 ESTIMATE option STATISTICS Export parameter, 1-19 EXCEPTIONS keyword SQL*Loader, 8-21 EXP_FULL_DATABASE role, 1-16 assigning, 1-7 Export, 1-3 Import, 2-12 EXPDAT.DMP Export output file, 1-16 EXPID column SYS.INCEXP table, 1-43 Export base backup, 1-37 Index-10 6-5 BUFFER parameter, 1-13 CATALOG.SQL preparing database for Export, 1-6 CATEXP7.SQL preparing the database for Version 7 export, 1-50 CATEXP.SQL preparing database for Export, 1-6 command line, 1-7 complete, 1-17, 1-37, 1-39 privileges, 1-37 restrictions, 1-37 COMPRESS parameter, 1-13 CONSISTENT parameter, 1-14 CONSTRAINTS parameter, 1-15 creating necessary privileges, 1-7 creating Version 7 export files, 1-49 cumulative, 1-17, 1-37, 1-38 privileges required, 1-37 restrictions, 1-37 data structures, 1-41 database optimizer statistics, 1-19 DIRECT parameter, 1-15 direct path, 1-33 displaying help message, 1-17 eight-bit vs. seven-bit character sets, 1-46 establishing export views, 1-6 examples, 1-22 full database mode, 1-22 partition-level, 1-27 table mode, 1-25 user mode, 1-24 exporting an entire database, 1-16 exporting indexes, 1-17 exporting sequence numbers, 1-46 exporting to another operating system RECORDLENGTH parameter, 1-18, 2-26 FEEDBACK parameter, 1-16 FILE parameter, 1-16 full database mode example, 1-22 FULL parameter, 1-16 GRANTS parameter, 1-16 HELP parameter, 1-17 incremental, 1-17, 1-37 command syntax, 1-17 example, 1-42 privileges, 1-37 restrictions, 1-37 system tables, 1-43 INCTYPE parameter, 1-17 INDEXES parameter, 1-17 interactive method, 1-8, 1-29 invoking, 1-7 kinds of data exported, 1-41 last valid export SYS.INCVID table, 1-44 log files specifying, 1-17 LOG parameter, 1-17 logging error messages, 1-17 LONG columns, 1-47 message log file, 1-32 modes, 1-4 multi-byte character sets, 1-46 network issues, 1-44 NLS support, 1-46 NLS_LANG environment variable, 1-46 objects exported, 1-4 online help, 1-9 OWNER parameter, 1-17 parameter conflicts, 1-21 parameter file, 1-7, 1-10, 1-17 maximum size, 1-10 parameters, 1-11 PARFILE parameter, 1-7, 1-10, 1-17 POINT_IN_TIME_RECOVER, 1-18 preparing database, 1-6 previous versions, 1-49 RECORD parameter, 1-18 RECORDLENGTH parameter, 1-18 RECOVERY_TABLESPACES parameter, 1-19 redirecting output to a log file, 1-32 remote operation, 1-44 restrictions, 1-3 rollback segments, 1-42 ROWS parameter, 1-19 sequence numbers, 1-46 STATISTICS parameter, 1-19 storage requirements, 1-7 SYS.INCEXP table, 1-43 SYS.INCFIL table, 1-44 SYS.INCVID table, 1-44 table mode example, 1-25 table name restrictions, 1-20 TABLES parameter, 1-19 tracking exported objects, 1-43 transferring export files across a network, 1-44 user access privileges, 1-3 user mode examples, 1-24 specifying, 1-17 USER_SEGMENTS view, 1-7 USERID parameter, 1-21 using, 1-6 warning messages, 1-32 export file displaying contents, 1-3 importing the entire file, 2-23 listing contents before importing, 2-27 reading, 1-3 specifying, 1-16 extent allocation FILE SQL*Loader command line parameter, 6-5 extents consolidating into one extent Export, 1-13 importing consolidated, 2-53 EXTERNAL datatypes DECIMAL SQL*Loader, 5-60 FLOAT SQL*Loader, 5-60 GRAPHIC SQL*Loader, 5-54 INTEGER, 5-60 numeric determining length SQL*Loader, 5-63 SQL*Loader, 5-60 trimming SQL*Loader, 5-73 Index-11 SQL*Loader, 3-9 ZONED SQL*Loader, 5-60 external files exporting, 1-47 EXTERNAL keyword SQL*Loader, 5-60 F fatal errors Export, 1-33 Import, 2-48, 2-49 FEEDBACK Export parameter, 1-16 Import parameter, 2-22 field conditions specifying SQL*Loader, 5-37 field length specifications SQL*Loader, 5-73 fields and SQL*Loader, 3-10 character data length SQL*Loader, comparing SQL*Loader, 5-7 comparing to literals SQL*Loader, 5-39 continuation SQL*Loader, 3-9 DECIMAL EXTERNAL trimming whitespace SQL*Loader, delimited determining length SQL*Loader, specifications SQL*Loader, SQL*Loader, 5-60 enclosed SQL*Loader, 5-61 Index-12 5-63 5-73 5-64 5-74 FLOAT EXTERNAL trimming whitespace SQL*Loader, 5-73 INTEGER EXTERNAL trimming whitespace SQL*Loader, 5-73 length of SQL*Loader, 5-10 loading all blanks SQL*Loader, 5-72 location SQL*Loader, 5-40 numeric and precision versus length SQL*Loader, 5-10 numeric EXTERNAL trimming whitespace SQL*Loader, 5-73 precision SQL*Loader, 5-10 predetermined size length SQL*Loader, 5-64 SQL*Loader, 5-73 relative positioning SQL*Loader, 5-74 specification of position SQL*Loader, 5-7 specified with a termination delimiter SQL*Loader, 5-61 specified with enclosure delimiters SQL*Loader, 3-10, 5-61 specifying SQL*Loader, 5-39 specifying default delimiters SQL*Loader, 5-35 terminated SQL*Loader, 5-61 VARCHAR never trimmed SQL*Loader, 5-73 ZONED EXTERNAL trimming whitespace SQL*Loader, 5-73 FIELDS clause SQL*Loader, 5-35 terminated by whitespace SQL*Loader, 5-76 FILE Export parameter, 1-16 Import parameter, 2-22 keyword SQL*Loader, 8-27 SQL*Loader command-line parameter, FILE columns Import, 2-60 filenames bad file SQL*Loader, 5-19 quotation marks SQL*Loader, 5-13 specifying more than one SQL*Loader, 5-17 SQL*Loader, 5-12 files file processing options string SQL*Loader, 5-18 logfile SQL*Loader, 3-15 SQL*Loader bad file, 3-13 discard file, 3-15 storage SQL*Loader, 3-6 fixed format records SQL*Loader, 3-6 fixed-format records vs. variable SQL*Loader, 3-6, 3-7 FLOAT datatype, 5-51 EXTERNAL format SQL*Loader, 5-60 trimming whitespace SQL*Loader, 5-73 specification SQL*Loader, 5-8 SQL*Loader, 5-52 FLOAT EXTERNAL data values SQL*Loader, 5-60 6-5 FLOAT keyword SQL*Loader, 5-60 foreign function libraries exporting, 1-47 importing, 2-60 FORMAT statement in DB2 not allowed by SQL*Loader, B-5 formats and input records SQL*Loader, 5-44 formatting errors SQL*Loader, 5-19 fragmentation reducing database fragmentation via full export/ import, 2-47 FROMUSER Import parameter, 2-22 FTP Export files, 1-44 FULL Export parameter, 1-16 Import parameter, 2-23 full database mode Import, 2-23 G GRANTS Export parameter, 1-16 Import parameter, 2-23 grants exporting, 1-16 importing, 2-13, 2-23 GRAPHIC datatype, 5-51 EXTERNAL format SQL*Loader, 5-54 specification SQL*Loader, 5-9 SQL*Loader, 5-54 GRAPHIC EXTERNAL datatype, 5-51 Index-13 H HELP Export parameter, 1-17 Import parameter, 2-23 help Export, 1-9 Import, 2-10 hexadecimal strings as part of a field comparison SQL*Loader, 5-7 padded when shorter than field SQL*Loader, 5-39 I IGNORE Import parameter, 2-23 existing objects, 2-49 object identifiers and, 2-57 IMP_FULL_DATABASE role, 2-23 created by CATEXP.SQL, 2-7 Import, 2-12, 2-29 Import, 2-1 ANALYZE parameter, 2-19 backup files, 2-51 BUFFER parameter, 2-19 CATALOG.SQL preparing the database, 2-7 CATEXP.SQL preparing the database, 2-7 character set conversion, 1-45, 2-55 character sets, 2-55 CHARSET parameter, 2-20 COMMIT parameter, 2-20 committing after array insert, 2-20 compatibility, 2-5 complete export file, 2-43 consolidated extents, 2-53 controlling size of rollback segments, 2-21 conversion of Version 6 CHAR columns to VARCHAR2, 2-63 creating an index-creation SQL script, 2-25 cumulative, 2-43 Index-14 data files reusing, 2-21 database reusing existing data files, 2-21 DESTROY parameter, 2-21 disabling referential constraints, 2-15 displaying online help, 2-23 dropping a tablespace, 2-54 error handling, 2-48 errors importing database objects, 2-48 example session, 2-33 export COMPRESS parameter, 2-53 export file importing the entire file, 2-23 listing contents before import, 2-27 failed integrity constraints, 2-48 fatal errors, 2-48, 2-49 FEEDBACK parameter, 2-22 FILE parameter, 2-22 FROMUSER parameter, 2-22 full database mode specifying, 2-23 FULL parameter, 2-23 grants specifying for import, 2-23 GRANTS parameter, 2-23 HELP parameter, 2-10, 2-23 IGNORE parameter, 2-23, 2-49 IMP_FULL_DATABASE role, 2-12 importing grants, 2-13, 2-23 importing objects into other schemas, 2-14 importing rows, 2-27 importing tables, 2-27 incremental, 2-43 specifying, 2-24 INCTYPE parameter, 2-24 INDEXES parameter, 2-25 INDEXFILE parameter, 2-25 INSERT errors, 2-48 interactive method, 2-41 into a secondary database, 2-21 invalid data, 2-48 invoking, 2-7 length of Oracle Version 6 export file DEFAULT columns, 2-63 log files LOG parameter, 2-26 LONG columns, 2-61 manually ordering tables, 2-15 modes, 2-5 NLS considerations, 2-55 NLS_LANG environment variable, 2-56 object creation errors, 2-23 objects imported, 1-4 OPTIMAL storage parameter, 2-52 Oracle Version 6 integrity constraints, 2-63 parameter file, 2-11, 2-26 parameters, 2-16 PARFILE parameter, 2-26 POINT_IN_TIME_RECOVER parameter, 2-26 preparing the database, 2-7 privileges required, 2-11, 2-12 read-only tablespaces, 2-53 recompiling stored procedures, 2-60 RECORDLENGTH parameter, 2-26 records specifying length, 2-26 reducing database fragmentation, 2-47 refresh error, 2-51 reorganizing tablespace during, 2-54 resource errors, 2-49 restrictions, 2-53 rows specifying for import, 2-27 ROWS parameter, 2-27 schema objects, 2-12, 2-14 schemas specifying for import, 2-22 sequences, 2-49 SHOW parameter, 1-3, 2-27 single-byte character sets, 2-55 SKIP_UNUSABLE_INDEXES parameter, 2-27 snapshot log, 2-50 snapshot master table, 2-51 snapshots, 2-50 restoring dropped, 2-51 specifying by user, 2-22 specifying index creation commands, 2-25 specifying the export file, 2-22 SQL*Net See Net8 statistics on imported data, 2-62 storage parameters overriding, 2-53 stored functions, 2-60 stored packages, 2-60 stored procedures, 2-60 system objects, 2-14, 2-23 table objects import order, 2-4 tables created before import, 2-15 TABLES parameter, 2-27 tablespaces, 2-21 TOUSER parameter, 2-29 transferring files across networks, 2-50 Trusted Oracle and, 2-2 unique indexes, 2-24 uniqueness constraints preventing import errors, 2-21 user definitions, 2-14 user mode specifying, 2-29 USERID parameter, 2-29 using Oracle Version 6 files, 2-63 incremental export, 1-37 backing up data, 1-42 command syntax, 1-17 data selected, 1-41 recording, 1-18 restrictions, 1-37 session example, 1-42 specifying, 1-17 SYS.INCFIL table, 1-44 SYS.INCVID table, 1-44 incremental import parameter, 2-24 specifying, 2-24 INCTYPE Export parameter, 1-17 Import parameter, 2-24 INDDN keyword SQL*Loader, 5-16 index options SINGLEROW keyword SQL*Loader, 5-37 SORTED INDEXES Index-15 SQL*Loader, 5-36 Index Unusable state indexes left in Index Unusable state, 8-11 INDEXES Export parameter, 1-17 Import parameter, 2-25 indexes creating manually, 2-25 direct path load left in direct load state, 8-11 dropping before continuing a direct path load SQL*Loader, 5-28 SQL*Loader, 8-19 exporting, 1-17 importing, 2-25 index-creation commands Import, 2-25 left direct load state SQL*Loader, 8-17 multiple column SQL*Loader, 8-17 presorting data case study, 4-24 SQL*Loader, 8-16 skipping unusable, 2-27 SQL*Loader, 5-36 state after discontinued load SQL*Loader, 5-27 unique, 2-24 INDEXFILE Import parameter, 2-25 INFILE keyword SQL*Loader, 5-16 INIT.ORA file Export, 1-36 insert errors Import, 2-48 specifying allowed number before termination SQL*Loader, 6-5 INSERT into table SQL*Loader, 5-26 INTEGER datatype, 5-51 EXTERNAL format, 5-60 trimming whitespace Index-16 SQL*Loader, 5-73 specification SQL*Loader, 5-8 integrity constraints failed on Import, 2-48 load method SQL*Loader, 8-8 Oracle Version 6 export files, 2-63 interactive method Export, 1-29 Import, 2-41 interrupted loads continuing SQL*Loader, 5-27 INTO TABLE clause effect on bind array size SQL*Loader, 5-70 INTO TABLE statement column names SQL*Loader, 5-40 discards SQL*Loader, 5-23 multiple SQL*Loader, 5-43 SQL*Loader, 5-33 invalid data Import, 2-48 invalid objects warning messages during export, 1-32 invoking Export, 1-7 direct path, 1-34 invoking Import, 2-7 ITIME column SYS.INCEXP table, 1-43 K key values generating SQL*Loader, key words, A-2 5-48 L language support Export, 1-45 Import, 2-55 leading whitespace definition SQL*Loader, 5-72 trimming SQL*Loader, 5-75 length specifying record length for export, 1-18, 2-26 length indicator determining size SQL*loader, 5-68 length of a numeric field SQL*Loader, 5-10 length subfield VARCHAR DATA SQL*Loader, 5-56 libraries foreign function exporting, 1-47 importing, 2-60 LOAD SQL*Loader command-line parameter, 6-5 loading combined physical records SQL*Loader, 4-14 datafiles containing TABs SQL*Loader, 5-41 delimited, free-format files, 4-11, 4-32 fixed-length data, 4-8 negative numbers SQL*Loader, 4-14 variable-length data, 4-5 LOB data, 1-7 compression, 1-13 Export, 1-47 LOG Export parameter, 1-17, 1-32 Import parameter, 2-26 SQL*Loader command-line parameter, 6-6 log file specifying SQL*Loader, 6-6 log files after a discontinued load SQL*Loader, 5-28 datafile information SQL*Loader, 7-4 example, 4-25, 4-30 Export, 1-17, 1-32 global information SQL*Loader, 7-2 header Information SQL*Loader, 7-2 Import, 2-26 SQL*Loader, 3-15 summary statistics SQL*Loader, 7-5 table information SQL*Loader, 7-3 table load information SQL*Loader, 7-4 logical records consolidating multiple physical records into SQL*Loader, 5-29 versus physical records SQL*Loader, 3-9 LONG data exporting, 1-47 importing, 2-61 loading SQL*Loader, 5-58 loading with direct path load, 8-14 LONG FLOAT C language datatype, 5-52 LXBCNF executable, 9-16 LXEGEN executable, 9-20 LXINST executable, 9-2 M master table snapshots Import, 2-51 media protection disabling for direct path loads SQL*Loader, 8-18 Index-17 media recovery direct path load, 8-13 SQL*Loader, 8-13 memory controlling usage SQL*Loader, 5-18 merging partitions in a table, 2-7, 2-31 messages Export, 1-32 Import, 2-47 migrating data across partitions, 2-31 missing data columns SQL*Loader, 5-35 MLSLABEL datatype SQL*Loader Trusted Oracle7 Server, 5-59 mode full database Export, 1-16, 1-22 Import, 2-23 objects exported by each, 1-4 table Export, 1-19, 1-25 Import, 2-27 user Export, 1-17, 1-24 multi-byte character sets blanks SQL*Loader, 5-39 Export and Import issues, 1-46, 2-56 SQL*Loader, 5-24 multiple CPUs SQL*Loader, 8-24 multiple table load control file specification SQL*Loader, 5-43 discontinued SQL*Loader, 5-28 generating unique sequence numbers for SQL*Loader, 5-49 multiple-column indexes SQL*Loader, 8-17 Index-18 N NAME column SYS.INCEXP table, 1-43 National Language Support SQL*Loader, 5-24 National Language Support (NLS) data object files, 9-4 Export, 1-45 Import, 2-20, 2-55 NLS Configuration Utility, 9-16 NLS Data Installation Utility, 9-2 native datatypes and SQL*Loader, 5-51 binary versus character data SQL*Loader, 3-9 conflicting length specifications SQL*Loader, 5-57 delimiters SQL*Loader, 5-51 inter-operating system transfer issues SQL*Loader, 5-65 NCHAR data Export, 1-45 Import, 2-57 negative numbers loading SQL*Loader, 4-14 nested tables exporting, 1-49 consistency and, 1-14 importing, 2-58 networks Export, 1-44 Import and, 2-50 transporting Export files across a network, NLS See National Language Support (NLS) NLS Calendar Utility, 9-20 NLS Data Installation Utility, 9-2 NLS_LANG environment variable SQL*Loader, 5-24 NLS_LANG environment variable Export, 1-46 1-44 Import, 2-56 NONE option STATISTICS Export parameter, 1-19 non-fatal errors warning messages, 1-32 normalizing data during a load SQL*Loader, 4-18 NOT NULL constraint Import, 2-48 load method SQL*Loader, 8-8 null columns at end of record SQL*Loader, 5-72 setting SQL*Loader, 5-71 null data missing columns at end of record SQL*Loader, 5-35 unspecified columns SQL*Loader, 5-39 NULLIF keyword field condition SQL*Loader, 5-37 SQL*Loader, 5-71, 5-72 NULLIF...BLANKS case study, 4-25 NULLIF...BLANKS keyword SQL*Loader, 5-38 NUMBER datatype SQL*Loader, 5-50 numeric EXTERNAL datatypes binary versus character data SQL*Loader, 3-9 delimited form SQL*Loader, 5-60 determining length SQL*Loader, 5-63 SQL*Loader, 5-60 trimming SQL*Loader, 5-73 trimming whitespace SQL*Loader, 5-73 numeric fields precision versus length SQL*Loader, 5-10 O object identifiers Export, 1-48 Import, 2-57 object names SQL*Loader, 5-12 object tables Import, 2-58 object type definitions exporting, 1-48 importing, 2-58 objects considerations for Importing, 2-57 creation errors, 2-48, 2-49 identifiers, 2-57 ignoring existing objects during import, import creation errors, 2-23 privileges, 2-12 restoring sets Import, 2-43 online help Export, 1-9 Import, 2-10 operating systems moving data to different systems SQL*Loader, 5-65 OPTIMAL storage parameter, 2-52 optimizing direct path loads, 8-15 input file processing SQL*Loader, 5-18 OPTIONALLY ENCLOSED BY SQL*Loader, 5-10, 5-74 OPTIONS keyword for parallel loads SQL*Loader, 5-34 SQL*Loader, 5-11 Oracle Version 6 exporting database objects, 2-63 2-23 Index-19 Oracle7 creating export files with, 1-50 ORANLS option, 9-2, 9-16 output file specifying for Export, 1-16 OWNER Export parameter, 1-17 OWNER# column SYS.INCEXP table, 1-43 P packed decimal data SQL*Loader, 5-10 padding of literal strings SQL*Loader, 5-39 PARALLEL SQL*Loader command-line parameter, 6-6 PARALLEL keyword SQL*Loader, 8-26 parallel loads allocating extents FILE SQL*Loader command-line parameter, 6-5 PARALLEL SQL*Loader command-line parameter, 6-6 parameter file comments, 1-10, 2-28 Export, 1-10, 1-17 Import, 2-11, 2-26 maximum size Export, 1-10 parameters ANALYZE Import, 2-19 BUFFER Export, 1-13 Import, 2-19 CHARSET Import, 2-20 COMMIT Import, 2-20 COMPRESS, 1-13 conflicts between export parameters, 1-21 Index-20 CONSTRAINTS Export, 1-15 DESTROY Import, 2-21 DIRECT Export, 1-15 Export, 1-11 FEEDBACK Export, 1-16 Import, 2-22 FILE Export, 1-16 Import, 2-22 FROMUSER Import, 2-22 FULL Export, 1-16 Import, 2-23 GRANTS Export, 1-16 Import, 2-23 HELP Export, 1-17 Import, 2-23 IGNORE Import, 2-23 INCTYPE Export, 1-17 Import, 2-24 INDEXES Export, 1-17 Import, 2-25 INDEXFILE Import, 2-25 LOG, 1-32 Export, 1-17 Import, 2-26 OWNER Export, 1-17 PARFILE Export, 1-7, 1-17 Import, 2-26 POINT_IN_TIME_RECOVER Export, 1-18 Import, 2-26 RECORD Export, 1-18 RECORDLENGTH Export, 1-18 Import, 2-26 RECOVERY_TABLESPACES Export, 1-19 ROWS Export, 1-19 Import, 2-27 SHOW Import, 2-27 SKIP_UNUSABLE_INDEXES Import, 2-27 STATISTICS Export, 1-19 TABLES Export, 1-19 Import, 2-27 TOUSER Import, 2-29 USERID Export, 1-21 Import, 2-29 PARFILE Export command-line option, 1-7, 1-10, 1-17 Import command-line option, 2-11, 2-26 SQL*Loader command-line parameter, 6-6 PART statement in DB2 not allowed by SQL*Loader, B-5 partitioned load concurrent conventional path loads, 8-24 SQL*Loader, 8-24 partitioned table export consistency and, 1-14 exporting, 1-6 importing, 2-6, 2-31, 2-33 partitioned tables in DB2 no Oracle equivalent, B-5 partition-level Export, 1-6 examples, 1-27 partition-level Import, 2-30 guidelines, 2-30 merging partitions, 2-31 reconfiguring partitions, 2-32 specifying, 1-19 passwords hiding, 2-8 performance direct path Export, 1-33, 1-36 direct path loads, 8-15 Import, 2-21 optimizing reading of data files SQL*Loader, 5-18 partitioned load SQL*Loader, 8-24 performance improvement conventional path for small loads, 8-21 physical versus logical records SQL*Loader, 3-9 PIECED keyword SQL*Loader, 8-14 POINT_IN_TIME_RECOVER Export parameter, 1-18 Import parameter, 2-26 POSITION keyword specification of field position SQL*Loader, 5-7 SQL*Loader, 5-40 tabs, 5-41 with multiple INTO TABLE clauses SQL*Loader, 5-42, 5-45 precision of a numeric field versus length SQL*Loader, 5-10 predetermined size fields SQL*Loader, 5-73 preface Send Us Your Comments, xix prerequisites SQL*Loader, 3-16 PRESERVE BLANKS keyword SQL*Loader, 5-78 presorting data for a direct path load case study, 4-24 primary keys Import, 2-48 privileges complete export, 1-37 creating for Export, 1-7 cumulative export, 1-37 Index-21 DELETE SQL*Loader, 5-26 DELETE ANY TABLE SQL*Loader, 5-27 Export and, 1-3 granted to others, 2-13 Import, 2-11, 2-12 incremental export, 1-37 required for SQL*Loader, 3-16 See also grants, roles SQL*Loader and Trusted Oracle7 Server, Q quotation marks backslash escape character SQL*Loader, 5-13 in filenames SQL*Loader, 5-14 filenames SQL*Loader, 5-13 SQL string SQL*Loader, 5-13 table names and, 1-20, 2-28 use with database object names SQL*Loader, 5-12 R RAW datatype, 5-51 specification SQL*Loader, 5-9 SQL*Loader, 5-54 READBUFFERS keyword SQL*Loader, 5-18, 8-15 read-consistent export, 1-14 read-only tablespaces Import, 2-53 RECNUM keyword no space used in bind array SQL*Loader, 5-71 SQL*Loader, 5-40 use with SKIP SQL*Loader, 5-47 Index-22 3-16 recompiling stored functions, procedures, and packages, 2-60 reconfiguring partitions, 2-32 RECORD Export parameter, 1-18 RECORDLENGTH Export parameter, 1-18 direct path export, 1-34, 1-36 Import parameter, 2-26 records consolidating into a single logical record SQL*Loader, 5-29 discarded DISCARD SQL*Loader command-line parameter, 6-4 DISCARDMAX SQL*Loader command-line parameter, 6-5 SQL*Loader, 5-21 discarded by SQL*Loader, 3-13, 5-23 distinguishing different formats SQL*Loader, 5-44 extracting multiple logical records SQL*Loader, 5-43 fixed format SQL*Loader, 3-6 null columns at end SQL*Loader, 5-72 physical versus logical SQL*Loader, 3-9 rejected SQL*Loader, 5-19 rejected by Oracle SQL*Loader, 3-15 rejected by SQL*Loader, 3-13 setting column to record number SQL*Loader, 5-47 short missing data columns SQL*Loader, 5-35 skipping SQL*Loader, 6-8 specifying how to load LOAD SQL*Loader command-line parameter, 6-5 specifying length for export, 1-18, 2-26 specifying length for import, 2-26 stream format SQL Loader, 3-8 SQL*Loader, 3-6 variable format SQL*Loader, 3-8 RECOVERABLE keyword SQL*Loader, 5-12 recovery direct path load SQL*Loader, 8-13 replacing rows, 5-26 RECOVERY_TABLESPACES parameter Export, 1-19 redo log files direct path load, 8-13 instance and media recovery SQL*Loader, 8-13 saving space direct path load, 8-18 REENABLE keyword SQL*Loader, 8-21 REF data exporting, 1-13 importing, 2-59 referential integrity constraints disabling for import, 2-15 Import, 2-48 SQL*Loader, 8-20 refresh error snapshots Import, 2-51 reject file specifying SQL*Loader, 5-19 rejected records SQL*Loader, 3-13, 5-19 relative field positioning where a field starts SQL*Loader, 5-74 with multiple INTO TABLE clauses SQL*Loader, 5-44 remote operation Export/Import, 1-44 REPLACE table example, 4-14 to replace table during a load SQL*LOader, 5-26 reserved words, A-2 SQL*Loader, A-2 resource errors Import, 2-49 RESOURCE role, 2-12 restrictions DB2 load utility, B-4 Export, 1-3 Import, 2-53 importing grants, 2-13 importing into another user’s schema, 2-14 importing into own schema, 2-12 table names in Export parameter file, 1-20 table names in Import parameter file, 2-28 RESUME DB2 keyword SQL*Loader equivalents, 5-26 roles EXP_FULL_DATABASE, 1-3, 1-7 IMP_FULL_DATABASE, 2-7, 2-12, 2-23, 2-29 RESOURCE, 2-12 rollback segments CONSISTENT Export parameter, 1-14 controlling size during import, 2-21 during loads SQL*Loader, 5-20 Export, 1-42 Import, 2-53 row errors Import, 2-48 ROWID Import, 2-51 ROWS command line parameter SQL*Loader, 8-12 Export parameter, 1-19 Import parameter, 2-27 performance issues SQL*Loader, 8-18 SQL*Loader command-line parameter, 6-6 Index-23 rows choosing which to load SQL*Loader, 5-34 exporting, 1-19 specifying for import, 2-27 specifying number to insert before save SQL*Loader, 8-12 updates to existing SQL*Loader, 5-26 S schemas export privileges, 1-3 specifying for Export, 1-19 specifying for import, 2-22 scientific notation for FLOAT EXTERNAL, script files preparing database for Import, 2-7 running before Export, 1-6, 1-50 secondary database importing, 2-21 segments temporary FILE keyword SQL*Loader, 8-27 Send Us Your Comments boilerplate, xix SEQUENCE keyword SQL*Loader, 5-48 sequence numbers cached, 1-46 exporting, 1-46 for multiple tables SQL*Loader, 5-49 generated by SEQUENCE clause example, 4-11 SQL*Loader, 5-48 generated, not read SQL*Loader, 5-40 no space used in bind array SQL*Loader, 5-71 setting column to a unique number SQL*Loader, 5-48 sequences, 2-49 Index-24 5-60 exporting, 1-46 short records with missing data SQL*Loader, 5-35 SHORTINT C Language datatype, 5-52 SHOW Import parameter, 1-3, 2-27 SILENT SQL*Loader command-line parameter, 6-7 single table load discontinued SQL*Loader, 5-28 single-byte character sets Import, 2-55 SINGLEROW SQL*Loader, 5-37 SKIP control file keyword SQL*Loader, 5-66 effect on RECNUM specification SQL*Loader, 5-47 SQL*Loader, 5-29 SQL*Loader command-line parameter, 6-8 SKIP_UNUSABLE_INDEXES parameter Import, 2-27 SMALLINT datatype, 5-51 specification SQL*Loader, 5-8 SQL*Loader, 5-51 snapshot log Import, 2-51 snapshots importing, 2-50 log Import, 2-50 master table Import, 2-51 restoring dropped Import, 2-51 SORTED INDEXES case study, 4-24 direct path loads SQL*Loader, 5-36 SQL*Loader, 8-16 sorting multiple column indexes SQL*Loader, 8-17 optimum sort order SQL*Loader, 8-17 presorting in direct path load, 8-16 SORTED INDEXES statement SQL*Loader, 8-16 special characters, A-2 SQL key words, A-2 reserved words, A-2 special characters, A-2 SQL operators applying to fields SQL*Loader, 5-78 SQL string applying SQL operators to fields SQL*Loader, 5-78 example of, 4-27 quotation marks SQL*Loader, 5-13 SQL*Loader appending rows to tables, 5-26 BAD command-line parameter, 6-3 bad file, 3-13 BADDN keyword, 5-19 BADFILE keyword, 5-19 basics, 3-2 bind arrays and performance, 5-66 BINDSIZE command-line parameter, 6-3 BINDSIZE command-line parameter, 5-66 case studies, 4-1 associated files, 4-3 direct path load, 4-24 extracting data from a formatted report, 4-27 loading combined physical records, 4-14 loading data into multiple tables, 4-18 loading delimited, free-format files, 4-11, 4-32 loading fixed-length data, 4-8 loading variable-length data, 4-5 preparing tables, 4-4 choosing which rows to load, 5-34 command-line arguments, 6-3 command-line parameters, 6-2 summary, 6-2 CONCATENATE keyword, 5-29 concepts, 3-1 concurrent sessions, 8-26 CONTINUE_LOAD keyword, 5-29 CONTINUEIF keyword, 5-29 CONTROL command-line parameter, 6-4 control file creating, 3-3 controlling memory usage, 5-18 conventional path loads, 8-2 DATA command-line parameter, 6-4 data conversion, 3-10 data definition language expanded syntax diagrams, 5-7 high-level syntax diagrams, 5-4 data definition language (DDL), 3-5 data definition language syntax, 5-4 data mapping concepts, 3-3 datafiles specifying, 5-16 datatype specifications, 3-10 DB2 load utility, B-1 DDL syntax reference, 5-1 delimiters, 3-10 DIRECT command-line parameter, 6-4 DIRECT command line parameter, 8-9 DISCARD command-line parameter, 6-4 discard file, 3-15 discarded records, 3-13 DISCARDFILE keyword, 5-21 DISCARDMAX command-line parameter, 6-5 DISCARDMAX keyword, 5-23 DISCARDS keyword, 5-23 enclosed data, 3-10 ERRORS command-line parameter, 6-5 errors caused by tabs, 5-41 Index-25 example sessions, 4-1 exclusive access, 8-24 fields, 3-10 FILE command-line parameter, 6-5 filenames, 5-12 index options, 5-36 INTO TABLE statement, 5-33 keywords and parameters reference, 5-1 LOAD command-line parameter, 6-5 load methods, 8-2 loading data direct path method, 3-16 loading data without files, 5-46 loading LONG data, 5-58 LOG command-line parameter, 6-6 log file datafile information, 7-4 global information, 7-2 header information, 7-2 summary statistics, 7-5 table information, 7-3 table load information, 7-4 log file entries, 7-1 log files, 3-15 mapping data, 3-3 methods for loading data into tables, 5-25 methods of loading data, 3-16 multiple INTO TABLE statements, 5-43 National Language Support, 5-24 native datatype handling, 3-9 NULLIF...BLANKS clause case study, 4-25 object names, 5-12 PARALLEL command-line parameter, 6-6 parallel data loading, 8-25, 8-29 parallel loading, 8-26 PARFILE command-line parameter, 6-6 READBUFFERS keyword, 5-18 rejected records, 3-13 Index-26 replacing rows in tables, 5-26 required privileges, 3-16 reserved words, A-2 ROWS command-line parameter, 6-6 rows inserting into tables, 5-26 SILENT command-line parameter, 6-7 SINGLEROW index keyword, 5-37 SKIP command-line parameter, 6-8 SKIP keyword, 5-29 SORTED INDEXES case study, 4-24 direct path loads, 5-36 specifying a single load method for all tables, 5-27 specifying columns, 5-39 specifying data format, 3-5 specifying data location, 3-5 specifying datatypes, 5-50 specifying field conditions, 5-37 specifying fields, 5-39 specifying more than one data file, 5-17 suppressing messages SILENT, 6-7 terminated data, 3-10 updating rows, 5-27 USERID command-line parameter, 6-8 SQL*Net See Net8 SQL/DS option (DB2 file format) not supported by SQL*Loader, B-5 STATISTICS Export parameter, 1-19 statistics generating on imported data, 2-62 specifying for Export, 1-19 storage parameters, 2-52 estimating export requirements, 1-7 exporting tables, 1-13 OPTIMAL parameter, 2-52 overriding Import, 2-53 preallocating direct path load, 8-15 temporary for a direct path load, stored functions importing, 2-60 stored packages importing, 2-60 stored procedures direct path load, 8-23 importing, 2-60 stream format records, 3-8 SQL*Loader, 3-6 string comparisons SQL*Loader, 5-7, 5-39 synonyms direct path load, 8-9 Export, 1-42 syntax data definition language SQL*Loader, 5-1 Export command, 1-7 Import command, 2-7 syntax diagrams SQL*Loader expanded, 5-7 high-level, 5-4 SYSDATE datatype case study, 4-27 no space used in bind array SQL*Loader, 5-71 SYSDATE keyword SQL*Loader, 5-47 SYSDBA, 1-8, 1-29, 2-42 SYS.INCEXP table Export, 1-43 SYS.INCFIL table Export, 1-44 SYS.INCVID table Export, 1-44 system objects importing, 2-14, 2-23 system tables incremental export, 1-43 T 8-10 table-level Export, 1-6 table-level Import, 2-30 table-mode Export specifying, 1-19 table-mode Import examples, 2-33 tables advanced queue (AQ) exporting, 1-49 advanced queue (AQ) importing, 2-61 appending rows to SQL*Loader, 5-26 continuing a multiple table load SQL*Loader, 5-28 continuing a single table load SQL*Loader, 5-28 defining before Import, 2-15 definitions creating before import, 2-15 exclusive access during direct path loads SQL*Loader, 8-24 exporting specifying, 1-19 importing, 2-27 insert triggers direct path load SQL*Loader, 8-21 inserting rows SQL*Loader, 5-26 loading data into more than one table SQL*Loader, 5-43 loading data into tables SQL*Loader, 5-25 loading method for individual tables SQL*Loader, 5-34 maintaining consistency, 1-14 manually ordering for import, 2-15 master table Import, 2-51 name restrictions Export, 1-20 Import, 2-27 Index-27 nested exporting, 1-49 importing, 2-58 object import order, 2-4 partitioned, 1-6, 2-6, 2-30 partitioned in DB2 no Oracle equivalent, B-5 replacing rows in SQL*Loader, 5-26 size USER_SEGMENTS view, 1-7 specifying a single load method for all tables SQL*Loader, 5-27 specifying table-mode Export, 1-19 system incremental export, 1-43 truncating SQL*Loader, 5-27 updating existing rows SQL*Loader, 5-26 TABLES parameter Export, 1-19 Import, 2-27 tablespaces dropping during import, 2-54 Export, 1-42 pre-created, 2-21 read-only Import, 2-53 reorganizing Import, 2-54 tabs loading data files and SQL*Loader, 5-41 trimming SQL*Loader, 5-72 whitespace SQL*Loader, 5-72 temporary segments FILE keyword SQL*Loader, 8-27 not exported during backup, 1-42 temporary storage in a direct path load, 8-10 TERMINATED BY SQL*Loader, 5-10, 5-61 Index-28 WHITESPACE SQL*Loader, 5-61, 5-75 with OPTIONALLY ENCLOSED BY SQL*Loader, 5-74 terminated fields specified with a delimiter SQL*Loader, 5-61, 5-74 TOUSER Import parameter, 2-29 trailing whitespace trimming SQL*Loader, 5-76 trailing blanks loading with delimiters SQL*Loader, 5-63 TRAILING NULLCOLS case study, 4-27 control file keyword SQL*Loader, 5-36 triggers , 8-22 database insert triggers , 8-21 permanently disabled , 8-24 update triggers SQL*Loader, 8-22 trimming summary SQL*Loader, 5-77 trailing whitespace SQL*Loader, 5-76 VARCHAR fields SQL*Loader, 5-73 Trusted Oracle migrating with export/import, 2-2 Trusted Oracle7 Server privileges for SQL*Loader, 3-16 TYPE# column SYS.INCEXP table, 1-43 U unique indexes Import, 2-24 unique values generating SQL*Loader, 5-48 uniqueness constraints Import, 2-48 preventing errors during import, 2-21 UNLOAD (DB2 file format) not supported by SQL*Loader, B-5 UNRECOVERABLE keyword SQL*Loader, 5-12, 8-18 unsorted data direct path load SQL*Loader, 8-17 updating rows in a table SQL*Loader, 5-27 user definitions importing, 2-14 USER_SEGMENTS view Export and, 1-7 USERID Export parameter, 1-21 Import parameter, 2-29 SQL*Loader command-line parameter, 6-8 user-mode Export specifying, 1-17 user-mode Import specifying, 2-29 V VARCHAR datatype, 5-51 specification SQL*Loader, 5-9 SQL*Loader, 5-56 trimming whitespace SQL*Loader, 5-73 VARCHAR2 datatype, 2-63 SQL*Loader, 5-50 VARGRAPHIC datatype, 5-51 specification SQL*Loader, 5-9 SQL*Loader, 5-55 variable format records vs. fixed SQL*Loader, 3-6 views creating views necessary for Export, Export, 1-42 1-7 W warning messages, 1-32 WHEN clause discards resulting from SQL*Loader, 5-23 example, 4-18 field condition SQL*Loader, 5-37 SQL*Loader, 5-34 whitespace included in a field, or not SQL*Loader, 5-75 leading SQL*Loader, 5-72 preserving SQL*Loader, 5-78 terminating a field with SQL*Loader, 5-75 trailing, 5-72 trimming SQL*Loader, 5-72 WHITESPACE SQL*Loader, 5-10 WHITESPACE keyword SQL*Loader, 5-61 Index-29 Z ZONED datatype, 5-51 EXTERNAL format SQL*LOader, 5-60 trimming whitespace SQL*Loader, 5-73 length versus precision SQL*Loader, 5-10 specification SQL*Loader, 5-9 SQL*Loader, 5-52 Index-30