1
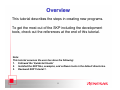
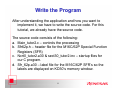
SKP16C62P Tutorial 2 Creating A New Project Using TM Renesas Technology America Inc. 1 Overview This tutorial describes the steps in creating new programs. To get the most out of the SKP including the development tools, check out the references at the end of this tutorial. Note: This tutorial assumes the user has done the following: 1. Followed the ‘Quickstart Guide’ 2. Installed the SKP files, examples, and software tools in the default directories. 3. Reviewed SKP Tutorial 1. 2 The Development Process M16C/62P MCU RAM 5. Correct errors & repeat process Flash User RAM Monitor RAM I/O Connector 1. Write programs using text editor User Flash Monitor Flash 2. Tool Manager automates compile & link SIO UART1 ICD SKP16C62P Board Host PC Editor Editor (eg. Notepad) (eg. Notepad) Correct Errors Project files Tool Manager Project Bar Project Bar and Project and Project Editor Editor 3. KD30 sends the machine code to the SKP16C62P during downloads and uses the symbols for source level debugging .c .h .a30 .inc Build command USB 4. Debugging info sent back & forth Builder: Error reporting Builder: Error reporting NC30 Compiler NC30 Compiler AS30 Assembler AS30 Assembler Options and Settings 3 .r30 files Machine Machine Code Code LN30 Linker LN30 Linker Absolute Absolute file file “.x30” “.x30” KD30 Debugger Debug Debug Symbols Symbols Start Tool Manager From the Windows Start menu, click on Programs > Renesas-tools > TM V3.X > TM 4 Tool Manager Project Bar Open project button Rebuild button Start new project wizard Build button Partial build button Project currently loaded Run debugger button Tool register button Open project editor button Map Viewer button Start default editor button Tool Manager customize button 5 Help button Steps in Creating a New Program The style and approach in developing new programs vary from one engineer to another and may also depend on experience and know-how. The basic steps are shown below. 1. 2. 3. 4. 5. Application and Method of Implementation Write the program Compile/link the program Debug the program1 Write program documentation1 Note: 1. Steps 4 and 5 are not discussed in this tutorial as the focus is on how to create new programs with Renesas M16C software development tools. 6 Application and Implementation A new program starts from an idea of an application. For this tutorial, our application is an LED-Switch demo. The application will blink the user LED’s (D1, D2, & D3) sequentially and pressing S1 will stop or re-start the sequence. After knowing the application, we need to think on how to implement the application. These includes the processes, what peripherals are needed, the programming language to use, etc. Other factors such as development time, cost, hardware, etc. also affect the way an application is implemented. We will implement our application with the following: a. C Programming Language b. Peripherals - GPIO, Timers c. SKP16C62P Board as hardware 7 Write the Program After understanding the application and how you want to implement it, we have to write the source code. For this tutorial, we already have the source code. The source code consists of the following: a. Main_tutor2.c – controls the processing b. Sfr62p.h – header file for the M16C/62P Special Function Registers (SFR) c. Ncrt0_tutor2.a30 & sect30_tutor2.inc – startup files for our C program. d. Sfr_62p.a30 – label file for the M16C/62P SFR’s so the labels are displayed on KD30’s memory window. 8 Build the Program Now that we have the source codes, we need to compile/link the program so we can run and test our application. Building the program consists of several steps and these are listed below. a. Open a new project in Tool Manager b. Selecting startup files1 c. Add source codes and header files d. Building (compile & link) the program e. Generate .mot files for Programmer Note 1. This step is only necessary when the program is written in C. Skip this step when the program is written/developed in Assembly. 9 Open a New Project in Tool Manager Start a new project by clicking on this icon. Note: You can also start a new project from the File menu of the Project Editor. 10 Open a New Project in Tool Manager 2. Enter the name of the project, “Tutor2”. 3. For the working directory, browse your machine or enter “C:\MTOOL\SKP16C62P \Sample_Code\tutor2” 4. Click on “Next” 1. You must click here to select the Target Chip. Select “M16C Family”. 11 Open a New Project in Tool Manager 1. Select “C Project” 2. Click on “Next” 12 Selecting Startup Files 1. Select the compiler, “KNC30WA V2001”. 2. Select “Custom” and browse until you find “ncrt0_tutor2.a30” (in C:\MTOOL\SKP16C62P \Sample_code\tutor2). 3. Leave the default setting as is. 4. Click on “Next”. Note: A discussion on the differences between default startup program and custom SKP startup program we used will follow after opening the new project. 13 Open a New Project in Tool Manager This completes the setup of the new project. Click on “Finish” 14 Default and Custom Startup Files Except for comments, the differences between the default (ncrt0.a30 and sect30.inc) and custom (ncrt0_62pskp.a30 and sect30_62pskp.inc) startup files are listed below: Ncrt0.a30 BCLK – Set to f1 (div by 1) of Xin (BCLK = Xin frequency) in custom file. Stack sizes – Smaller (0x100) on custom file. Heap size – No heap size on custom file. Vector Base Address – 0xFD000 for custom(M16C/62P) and 0xFFD00 for default (M16C/62) Section Allocation – Calls custom sect30 file (sect30_62pskp.inc) instead of default sect30 file. Standard I/O Initialization – No initialization on custom file (done in main()) but default file calls _init routine. Sect30.inc Variable Vector Definition – Simplified and described in custom file Note: You can use the default startup files but ensure that you understand the how to make the necessary modifications. The custom startup files for the SKP can be found under C:\MTOOL\SKP16C62P\Sample_Code\Startup_files directory. 15 Changing the Default Startup Files As you get accustomed to the way the custom startup files are setup, you may want to use these custom startup files as default startup files. The steps to do this are shown below. 1. 2. 3. 4. 5. Open Windows Explorer. Locate C:\MTOOL\SRC30\Startup directory. Rename the ncrt0.a30 and sect30.inc to ncrt0_original.a30 and sect30_original.inc respectively. Copy ncrt0_62pskp.a30 and sect30_62pskp.inc from C:\MTOOL\SKP16C62P\Sample_Code\Startup_Files directory. Rename ncrt0_62pskp.a30 to ncrt0.a30. Do NOT rename sect30_62pskp.inc. Now, every time you use the default startup when you create a new project, it will use the custom startup files. Note: As the custom startup files are setup for the M16C/62P, ensure that you review these files when you use a different MCU or create a new project. 16 Adding Source & Header Files 3. Add the source files (main_tutor2.c and sfr_62p.a30) by clicking on “Add File” icon. - main_tutor2.c in C:\MTOOL\SKP16C62P\Sample_Code\tutor2 - sfr_62p.a30 in C:\MTOOL\SKP16C62P\Sample_Code\Common 1. Click on the “+” by “all” to view the “tutor2.x30” output file 2. Click to highlight “tutor2.x30” NOTE: In most cases, your project will consist of one output file, with an .x30 (i.e. Tutor2.x30) extension. You add source files TO THIS file and NOT to “all”. 17 Adding Source & Header Files After adding the main_tutor2.c and sfr_62p.a30 source file, the Project Editor should look like the like the figure below. Click on this icon to check for dependencies (header files). 18 Adding Source & Header Files After checking dependencies, with the ‘branches’ extended, the Project Editor should look like the figure below. Header files used in the source files are shown in these ‘branches’. Save the project and let’s build the program… 1. Click this icon to save the project Source and header files for main_tutor2.c 19 Building (compile & link) the Program Click on this icon to ‘Build’ the program. Look at the Builder window and check whether any errors or warnings occurred. If there are no errors, you can try running the program on the SKP16C62P Board using the ICD and KD30 Debugger… ooppsss, don’t forget to connect your hardware. 20 Generate .mot Files for Programmer After building a program, a file with an .x30 is generated. For this example, ‘tutor2.x30’ is generated. This .x30 file can be downloaded using KD30 but not device programmers, including the FoUSB Programmer, which uses hex files in Motorola or Intel format. To generate a .mot file from the .x30 file, we use the lmc30.exe program. It can be done automatically (or manually from the command prompt). To do it automatically, click on ‘Information’ from the Project menu of the Project Editor. From the Tool tab, click on ‘lmc30’ under ‘Package Information’ to enable the feature. 21 End of Tutorial 2 This is the end of the tutorial. You can try modifying or downloading other sample programs from the \Sample_Code directory. The completely built tutor2 project can be found in the Zip file within the tutor2 project folder. Be sure to check out the references on the following pages. Have Fun!! 22 References and Recommended Reading All documents that came with the SKP can be found using the “Document Description” from the Start > Programs > Renesas-Tools > SKP16C62P menu. • • • • • • SKP16C62P User’s Manual: This is a “must read” document! It details all the things you need to know on how to use the Starter Kit. Tool Manager V3.X User’s Manual: To fully understand and get the most out of “Tool Manager”, this is recommended reading. KD30 Version X.XX User’s Manual: The tutorial only covered the basics of KD30. Read this manual to find out all of KD30’s features. NC30 Version X.XX User’s Manual: Check this manual out for features specific to the NC30 compiler. M16C/62P Datasheet and SKP16C62P Board Schematic: These are required to write user application programs for the SKP. RTA-FoUSB-MON User’s Manual: Read this manual to understand how the ICD works. 23 References and Recommended Reading • • • • M16C/10/20/60 Series C Language Programming Manual: This is a great document for any level of programmer. The first chapter is an intro to C programming. The next chapter explains the memory map of C programs on microcontrollers and the role of startup programs. M16C/10/20/60 Series Software Manual: This document describes the instruction set and timing information for the M16C/20/60 series CPU cores. AS30 Version X.XX User’s Manual: Read this manual if you plan on writing programs in Assembly or when making changes to the startup file. Application Notes and Sample Programs: Application notes and other sample programs can be accessed from Renesas Technology America’s website: http://www.renesas.com. 24


![E^YB?= ce``_bd VY\Uc V_b @QbQTYW] 4UReW BD](http://vs1.manualzilla.com/store/data/005839928_1-81490c34e940fa2480ecad1c81f1b8b0-150x150.png)