1
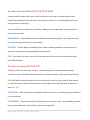
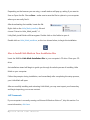
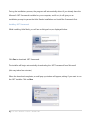
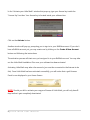
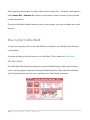
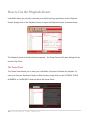
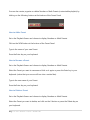
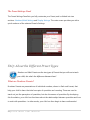
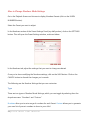
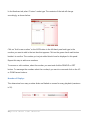
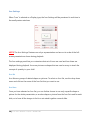
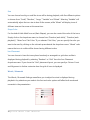
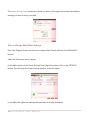
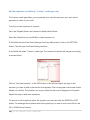
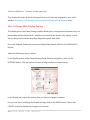
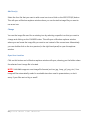
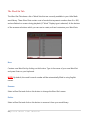
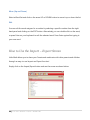
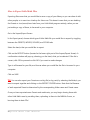
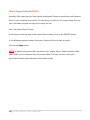
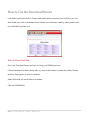
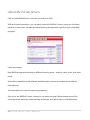
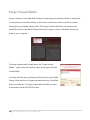
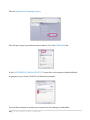
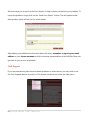
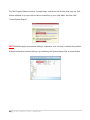
Little Math User Manual Learn how to Maximize your Little Math System Get to know more about the important features and screens Our help manuals feature step-by-step guides on how to navigate all the new functions, and is an excellent knowledgebase for anyone seeking easy-to-understand answers to questions from installation to usage, and customization to language packs! What Makes this System Effective? The key to why our system works – YOU The Little Math Learning System is designed with PARENTAL INTERACTION in mind, making it more powerful and effective compared to other preschool programs. We understand that you know your child best, and this is why we have developed our system to incorporate you into your child’s education. Your child will learn in the way that suits her needs, truly maximizing her potential and building a foundation she will benefit from for the rest of her life. We make learning ENGAGING FOR YOUR BABY. Learning math is easier when your child can have fun with math concepts shown using colorful presentations with real voice pronunciations, which you can personalize with your own pictures or recordings. You control what your baby sees and hears, making lessons meaningful, exciting, and fun – each and every time! MEANINGFUL - Personalize lessons to make them more meaningful to your baby by using your very own pictures and voice recordings! EXCITING - There's always something new to learn: random generation of numbers and equations means there are potentially limitless lessons! FUN - Your baby will have so much fun learning math with real voice pronunciations and color-filled lessons! We make teaching EASY FOR YOU. Teaching math has never been so easy - we’ve developed a complete early education curriculum which includes additional resources, content and tips to help you along the way! The Little Math Learning System curriculum shows you a day-by-day guide of what lessons to teach and how to present these lessons to your baby. Now, teaching math is indeed as easy as 1, 2, 3! EFFORTLESS - With every lesson prepared and laid out for you, your baby’s early education is just a click away! CONVENIENT - Gone are the days of gluing dots onto clumsy cards – automatically generate lesson presentations for any number, sequence or equation! 2|Little Math User Manual EASY - Your baby can learn numeral and mathematical concepts in the most fun and exciting way – all you need is 10 minutes a day! Installing Little Math To download and install BrillKids Little Math, first make sure that your computer has a working Internet connection and that you have an active BrillKids subscription. To sign up for an account, go to the BrillKids website. How to Download and Install Little Math via Your BrillKids Account Open your browser and log in to your BrillKids account with your user name and password. Go to your Account Management Page and click on the Purchases tab. In the Little Math tab, go to the SOFTWARE DOWNLOAD section and click on the download button, as shown below: 3|Little Math User Manual Depending on the browser you are using, a small window will pop up, asking if you want to Save or Open the file. Choose Save – make sure to save the file to a place in your computer where you can easily find it. After downloading the installer, locate the file. Right-click on the Little_Math_install.zip file and choose “Extract to Little_Math_install\.” A Little_Math_install folder will then appear. Double click on this folder to open it. Double click on Little_Math_install.exe, or the icon shown below, to begin the installation. How to Install Little Math via Your Installation Disc Insert the BrillKids Little Math Installation Disc in your computer's CD drive. Close your CD drive. An installation wizard will begin to guide you through the whole process of installing Little Math on your computer. Follow the prompts during installation, and immediately after completing the setup process, your Little Math will open. After successfully installing and activating Little Math, you may now import your license key and begin importing your course content. .NET Framework If your computer is currently running on Microsoft Windows Vista or 7, skip this section. For more information, click here. 4|Little Math User Manual During the installation process, the program will automatically detect if you already have the Microsoft .NET Framework installed on your computer, and if not, it will give you an installation prompt to pause the Little Reader installation and install the Framework first. Installing .NET Framework While installing Little Math, you will see a dialogue box, as displayed below: Click Yes to download .NET Framework. The installer will begin automatically downloading the .NET Framework from Microsoft (this may take a few minutes.) When the download completes, a small pop-up window will appear, asking if you want to run the .NET installer. Click on Run. 5|Little Math User Manual Continue to follow the installation prompts from Microsoft. Finish the installation. Continuing with the Installation Return to the Little Math installation. Click on Next. On the next screen you will be shown the License Agreement. If you agree to the conditions stated, choose “I accept the terms in the license agreement” and click Next. Continue with the installation by clicking Next and Install in the next screens. Finish the installation and launch BrillKids Little Math. 6|Little Math User Manual How to Activate Little Math To activate your Little Math, you must make sure that you have completed the software installation first. After you have successfully imported your license key, Little Math will automatically communicate with the BrillKids system to activate it (you must be online to do this). How to Import the Little Math License Key via Your BrillKids Account To download your license key, log in to your BrillKids account and go to the Software Systems tab of your Account Management Page. Proceed to the Little Math tab’s LICENSE KEYS + ACTIVATION section and download the license key for your Little Math software. DO NOT OPEN YOUR LICENSE KEY WITHOUT COMPLETING THE SOFTWARE INSTALLATION FIRST! After downloading your license key, locate the file and double click on it to begin importing your license key. A small pop up window will appear, asking if you want to import the license key – choose Yes. How to Key in the Little Math License Key (Included in Your Software Box) After installing Little Math, you will notice that upon opening Little Math your license key is not active. Click on the Enter License Key button in the Home Screen. 7|Little Math User Manual In the "Activate your Little Math" window that pops up, type your license key inside the "License Key" text box. Your license key is located inside your software box. Click on the Activate button. Another window will pop up, prompting you to sign in to your BrillKids account. If you don't have a BrillKids account yet, you may create one by clicking on the Create A New Account button and following the instructions. The activation process will start once you've signed in to your BrillKids account. You may take out the Little Math Installation Disc once your software has been activated. Activating Little Math may take a few seconds (you must be connected to the Internet to do this). Once Little Math has been activated successfully, you will notice that a gold License Panel is now displayed in your Home Screen. NOTE: Should you fail to activate your copy and license of Little Math, you will only have 2 days before it gets completely deactivated. 8|Little Math User Manual How to Import Course Content After installing and activating your Little Math, you may then proceed to downloading and importing curriculum content. How to Import Course Content from Your BrillKids Account You must be connected to the Internet to download your course content! Log in to your BrillKids account and go to the Software Systems tab of your Account Management Page. In the Little Math tab, proceed to the CONTENT DOWNLOAD section and find the course content that you want to download. To download content, simply click on the green DOWNLOAD button for the file you want to download. After downloading, locate the file and double-click on it to begin importing your content (your BrillKids software will open automatically). Make sure that you have completely downloaded the file before attempting to open it! A pop-up window will appear, asking if you want to import the content file - choose Yes (this may take some time). How to Import Course Content from Your Little Math Content Discs Open your CD drive and insert Little Math Content Disc - Semester 1. Close your CD drive. A pop-up dialogue will appear, asking if you want to import your Semester 1 lesson content. Select Yes. 9|Little Math User Manual After importing the Semester 1 content, take out the Content Disc - Semester 1 and replace it with Content Disc - Semester 2 to import your Semester 2 lesson content (if your purchase includes Semester 2). Once your Little Math finishes importing your course content, you may now begin your math lessons! How to Start Little Math To open your program, click on the Little Math icon located on your Desktop, Quick Launch, or Start Menu. A window will pop up the first time you run Little Math. This is called your Start Guide. The Start Guide The Little Math Start Guide introduces you to the Little Math System, featuring Tutorials on how to use the program’s features, Frequently Asked Questions (FAQs) about the software, and a Tips section that you can use to maximize your Little Reader experience. 10 | L i t t l e M a t h U s e r M a n u a l Tutorials To begin viewing a video tutorial, simply click on the video which you want to play, and you can immediately watch the tutorial you selected. Make sure to turn your speakers on, so you won’t miss the tutorial narrations! Frequently Asked Questions (FAQs) Do you have a question about Little Math? Check out the FAQs tab for ready answers to frequently asked questions about Little Math and even your BrillKids membership. Helpful Tips Visit the Tips tab to get useful information on how to maximize you and your baby’s Little Math experience. NOTE: You may choose not to show the Start Guide whenever Little Math is launched by unchecking the box at the lower left corner of the Start Guide. To open the Start Guide again, click on the Start Guide button. 11 | L i t t l e M a t h U s e r M a n u a l The Home Screen The Home Screen is the starting screen of your Little Math. The Home Screen consists of 3 important areas: The Quickplay Panel The Quickplay Panel is your shortcut to playing Courses, Numbers and Math Presets in your Little Math. Simply toggle between the three tabs, select what you want to play for your childand click the PLAY button at the bottom of the panel to begin your Little Math lesson. 12 | L i t t l e M a t h U s e r M a n u a l The License Display If you have imported your license key and successfully activated your Little Math, your Home Screen should display a gold panel containing your BrillKids information, as shown below: The Latest News Window The Latest News Window provides you with updates and announcements from BrillKids, such as new releases, special offers, discounts, and new downloads, so be sure to check this area regularly! How to Play Lessons You can begin playing three types of lessons on your Little Math as soon as you install and start it up! You can customize these lessons by going to the Playback Screen. How to Play Course Lessons If you purchased a Little Math curriculum, your Courses tab will be pre-populated with the lessons for the course duration you selected. These lessons are designed to be played back at least once or twice per day, five days a week. Go to the Playback Screen and choose to display Courses. Select the Lesson day you are in. 13 | L i t t l e M a t h U s e r M a n u a l Click on the PLAY button. Continue to play the lessons under the day number you are in. How to Play Numbers and Math Presets Presets are playlists that have certain saved settings, which will take effect whenever you play them. Go to the Playback Screen and choose to display Numbers or Math Presets. Select the Preset you want to play back. Click on the PLAY button. 14 | L i t t l e M a t h U s e r M a n u a l Keys to Use During Playback During playback (your Little Math lessons), you will need to know what keys and mouse clicks to use to navigate your way through a lesson. To advance to the next slide, use the left-click on your MOUSE, or press the right arrow, SPACEBAR or ENTER on your keyboard. To repeat the slide, click on your mouse-wheel or press the down arrow on your keyboard. To go back, use the right-click on your mouse or press the left arrow on your keyboard. To exit the playback, click on the ESC key on your keyboard, and you'll return to your Little Math. 15 | L i t t l e M a t h U s e r M a n u a l How to Use the Playback Screen Little Math allows you to fully customize your child’s learning experience via the Playback Screen. Simply click on the Playback button to open the Playback Screen, as shown below: The Playback Screen is divided into three panels – the Preset Panel, the Preset Settings Panel, and the Play Panel. The Preset Panel The Preset Panel allows you to view your Little Math Courses and Presets for playback. To view your Courses, Numbers Presets or Math Presets, simply click on the COURSES, LEARN NUMBERS, or LEARN MATH buttons above the Preset Panel. 16 | L i t t l e M a t h U s e r M a n u a l You can also create, organize or delete Number or Math Presets (customizable playlists) by clicking on the following buttons at the bottom of the Preset Panel: How to Add a Preset Go to the Playback Screen and choose to display Numbers or Math Presets. Click on the NEW button at the bottom of the Preset Panel. Type in the name of your new Preset. Press the Enter key on your keyboard. How to Rename a Preset Go to the Playback Screen and choose to display Numbers or Math Presets. Select the Preset you want to rename and click on it again or press the Enter key in your keyboard (notice that your cursor will turn into a vertical bar). Type in the new name of your Preset. Press the Enter key on your keyboard. How to Delete a Preset Go to the Playback Screen and choose to display Numbers or Math Presets. Select the Preset you want to delete, and click on the X button or press the Delete key on your keyboard. 17 | L i t t l e M a t h U s e r M a n u a l A prompt will pop up, asking if you want to delete the selected Preset. Click YES to confirm or NO to cancel. How to Organize your Preset Library You can create folders to help you better organize your Little Math lessons, especially as you create more Presets or as you download additional Presets that other users have created. Numbers and Math Presets are already organized for you, but you can choose to re-organize these by renaming folders or making your own folders. To create a folder: Go to the Playback Screen and choose to display Numbers or Math Presets. Click on the NEW FOLDER button at the bottom of the Preset Panel. Type in the name of your new Preset. Press the Enter key on your keyboard. To rename a folder, select the folder you want to rename and click on it again or press the Enter key on your keyboard. To delete a folder, select the folder you want to delete and click on the X button or press the Delete key on your keyboard. You can also rearrange your presets and folders by selecting a preset or folder and clicking on the UP or DOWN arrow buttons on the bottom right of the Preset Panel. Editing Presets Editing a Preset means that you would like to change something about an existing Preset –be it to configure Math settings like the type of operation or the number range, or Display settings like the icon set or pronunciation played back. To edit a Preset: Go to the Playback Screen and choose to display Courses, Numbers or Math Presets. 18 | L i t t l e M a t h U s e r M a n u a l Click on the SETTINGS button for Math or Display Settings (located on the right hand side of the Playback Screen). This will open the Preset Settings window. In the Preset Settings window, configure the settings you want to modify and click on the SAVE button. The Play Panel The Play Panel along the bottom of the Playback Screen provides options for customizing how your Little Math lesson presentations and your Presets play back for your child. Lock When the Lock buttons for the Mouse and Keyboard are turned on (green light), all power will be removed from your keyboard and mouse during playback (except the ESC key to exit the presentation). This is useful if your baby often likes to play with the keyboard keys or the mouse buttons. Override When the Override button is turned on (green light), all preset settings set in the Override Settings window will take effect during playback, disregarding any preset settings previously set in the Preset Settings Panel of each Course lesson or Preset. 19 | L i t t l e M a t h U s e r M a n u a l Click on the cog button next to the Override button to configure and save universal preset settings in the Override Settings window, as shown below: You may also choose to turn on only specific settings so that only those settings will override all of the preset settings and leave the rest of the preset settings as previously configured for each Course lesson or Preset. For example, if the “Basic Shapes” Icon Set override setting is turned on, all the slides played back will display the “Basic Shapes” icon set for all numbers or equations flashed on the screen, even for lessons or Presets originally configured to display a different icon set. Auto Forward Enabling the Auto Forward setting (green light) allows you to playback presentations continuously, without needing to click a mouse button or press the spacebar to proceed to the next slide. 20 | L i t t l e M a t h U s e r M a n u a l To adjust the Auto Forward settings, click on the cog button next to the Auto Forward button. This will pop up a small window where you can set the speed of continuous playback by adjusting the Auto Forward Delay bar. You can also set how fast equations are flashed during continuous playback by adjusting the Delay Between Equations bar. Volume This lets you control the volume of all voice recordings during playback. NOTE: You can further increase or decrease volume through your computer and speaker volume control. Subtitles Enabling this setting (green light) places small subtitles during playback for the Current Slide, and/or a preview of the Next Slide that will play. To adjust the font size of your subtitles, click on the cog button next to the CURRENT and NEXT subtitle buttons. This will pop up a small window where you can select a font size and preview how small or large the text would appear on screen during playback. 21 | L i t t l e M a t h U s e r M a n u a l The Preset Settings Panel The Preset Settings Panel lets you fully customize your Preset, and is divided into two sections: Numbers/Math Settings and Display Settings. The main screen provides you with a quick rundown of the selected Preset’s Settings. FAQ: About the Different Preset Types Number and Math Presets are the two types of Presets that you will use to teach your child, but what’s the difference between them? What are Numbers Presets? Numbers Presets are presentations of individual numbers, shown in flash card format, that help your child to learn the initial concepts of quantities and counting. These are used to teach not just the perception of quantities, but also the names of quantities. By developing this foundation, your child can then learn about the relationships between quantities and how to work with quantities – in other words, your child can then begin to learn mathematics! 22 | L i t t l e M a t h U s e r M a n u a l What are Math Presets? Math Presets are presentations of equations, shown in flash card format, that give your child a solid foundation in the basic concepts of mathematics. With Math Presets you can specify whether you want to show long equations involving multiple integers (e.g. 1 + 2 + 3 + 4 = 10) or shorter equations (e.g. 3 + 5 = 8), and you can also specify whether you want to teach addition, subtraction, multiplication or division. Number Preset Settings Little Math allows you to fully customize the playback of Numbers presentations. Settings are built-in to enable you to show your baby Word or Dot presentations as well as mixed presentations. All you have to do is adjust the settings according to how you want your number playback to be. The Preset Settings Panel shows you a quick run-down of the numbers and display settings you wish to show your child. 23 | L i t t l e M a t h U s e r M a n u a l How to Change Numbers Mode Settings Go to the Playback Screen and choose to display Numbers Presets (click on the LEARN NUMBERS button). Select the Preset you want to adjust. In the Numbers section of the Preset Settings Panel (top half portion), click on the SETTINGS button. This will open the Preset Settings window, as shown below: In the Numbers tab, adjust the settings that you want to change as desired. Once you’re done modifying the Numbers settings, click on the SAVE button. Click on the CANCEL button to discard the changes you’ve made. The following are the Number Settings that you can customize: Type There are two types of Number Mode Settings, which you can toggle by selecting from the dropdown menu: “Numbers” and “Custom.” Numbers allow you to set a range of numbers for each Preset. Custom allows you to generate your own list of pre-set numbers to show to your child. 24 | L i t t l e M a t h U s e r M a n u a l Number Range (available for “Numbers” mode type only) The Number Range is the main setting of each Preset that marks the range of possible numbers that will be flashed on screen during playback. To adjust the range values, you can move the sliders, click on the up or down arrow buttons, or type in a value in the text box for the “From” and “To” values. From – the lowest possible number to be displayed To – the highest possible number to be displayed Add New Number (available for “Custom” mode type only) The Custom mode type allows you to generate your own lists and input your own sets of numbers to show to your child. This can be useful for teaching specific sequences such as Prime Numbers, or Multiplication Tables. To add your own numbers to a preset: Go to the Playback Screen and choose to display Numbers Presets. Select the Preset that you would like to insert numbers to. In the Numbers section of the Preset Settings Panel (top half portion), click on the SETTINGS button. This will open the Preset Settings window. 25 | L i t t l e M a t h U s e r M a n u a l In the Numbers tab, select “Custom” mode type. The contents of the tab will change accordingly, as shown below: Click on “Add a new number” or the ADD button in the left hand panel and type in the number you want to add in the text box that appears. Click on the green check mark button beside it to confirm. The number you’ve just added should now be displayed in this panel. Repeat this step to add more numbers. To remove or edit numbers, select the number you want and click the REMOVE or EDIT button. To rearrange the numbers select the number/s you want to move and click on the UP or DOWN arrow buttons. Number of Displays This determines how many number slides are flashed on screen for every playback (maximum is 50). 26 | L i t t l e M a t h U s e r M a n u a l Order This dictates the order in which the numbers in your Preset are displayed to your child, whether in Numerical (forward), Numerical (backward), or Random order. How to Change Number Display Settings The Display tab of the Preset Settings window allows you to change and customize how your presentation will be played back – whether only numerals are shown, only shapes, or any combination that you choose, along with the audio language played along with each slide. Go to the Playback Screen and choose to display Numbers Presets (click on the LEARN NUMBERS button). Select the Preset you want to adjust. In the Display section of the Preset Settings Panel (bottom half portion), click on the SETTINGS button. This will open the Preset Settings window, as shown below: In the Display tab, adjust the settings that you want to change as desired. Once you’re done modifying the Display settings, click on the SAVE button. Click on the CANCEL button to discard the changes you’ve made. 27 | L i t t l e M a t h U s e r M a n u a l The following are the Display Settings that you can customize: Display Order Each Number Preset may display up to 3 individual representations of a number in any order: Icon, Numeral, and Word. Sound Under each Display preview there is a small speaker icon, with a name showing what Sound Set will be played along with the slide. Click on the dropdown menu beside this icon to change the Sound Set that will be played with each slide. You may choose to use an individual Sound Set or a Sound Group (a collection of different Sound Sets having a specific playback setting) for your lesson. If you choose a Sound Group, you can further specify what playback setting to use: According to Group Setting – Use the playback setting as previously set in the Sound Set tab of the Numbers Library Screen Random (each slide) – Play a different sound set for every lesson slide flashed on screen Random (each playback) – Play a different sound set for every lesson playback We have provided you with male and female voices in two languages (English and Chinese) for you to choose from! 28 | L i t t l e M a t h U s e r M a n u a l Icon Settings When “Icon” is selected as a Display type, the Icon Settings will be previewed in real-time in the small preview windows. NOTE: The Icon Settings Previews are only a representation and are not to scale of the fullscreen presentations shown during playback. The Icon settings panel lets you customize what set of icons are used and how these are displayed during playback. Icons are pictures or shapes that are used as a way to teach the concept of quantity to your child. Icon Set Icon Sets are groups of related shapes or pictures. To select an Icon Set, use the drop-down menu and click on the name of the Icon Set that you want to use. Icon Item Once you have selected an Icon Set, you can further choose to use only a specific shape or picture for the whole presentation, a random shape or picture from the Icon Set used for each slide, or to have all the images in the Icon set mixed together on each slide. 29 | L i t t l e M a t h U s e r M a n u a l Size You can choose how big or small the icons will be during playback, with five different options to choose from: “Small,” “Medium,” “Large,” “Variable” and “Mixed.” Selecting “Variable” will automatically adjust the icon size to best fit the screen, while “Mixed” will display icons of different sizes on the screen at the same time. Shape Color For the default Little Math Icon set (Basic Shapes), you can also control the color of the icons. Simply click on the dropdown menu to choose from “Random (each slide),” “Random (each playback),” “Mixed” and “Set Color.” If you selected “Set Color,” you can specify the color you want to be used by clicking on the colored square beside the dropdown menu. ”Mixed” color means the icons in a slide will be shown having different colors. Icon Placement You can choose to have the icons placed randomly or arranged in a grid when a slide is displayed during playback by selecting “Random” or “Grid” from the Icon Placement dropdown menu. If you chose the “Grid” placement layout, you can specify a Column Count and Alignment to further customize how the grid of icons is displayed. Words / Numerals The Words / Numerals Settings area allows you to adjust how text is displayed during playback. Any selections you make in the font and color options will affect both words and numerals in the presentation. 30 | L i t t l e M a t h U s e r M a n u a l Word Set – This is the language that Word Displays are written in during playback. Font – You can choose to select from 4 fonts (Arial, Times New Roman, Comic Sans MS, or Tahoma) or a random font in which text will be displayed during playback. Font Size – You can specify how large words and numerals will be displayed during playback. Color – You can choose what color the text will be during playback by clicking on the colored square or you can check the “Random” box to automatically assign random font colors to each slide. Background The Background Color setting will affect all three types of Displays – Icon, Word and Numeral. To select a background color, click on the colored square or check the “Random” box to automatically assign random font colors to each slide during playback. Math Preset Settings Little Math allows you to fully customize the playback of Math presentations. Settings are built-in to enable you to show your baby various icon, word and numerical equations. All you have to do is adjust the settings according to how you want your playback to be. 31 | L i t t l e M a t h U s e r M a n u a l The Preset Settings Panel shows you a quick run-down of the types of equations and display settings you wish to show your child. How to Change Math Mode Settings Go to the Playback Screen and choose to display Math Presets (click on the LEARN MATH button). Select the Preset you want to adjust. In the Math section of the Preset Settings Panel (top half portion), click on the SETTINGS button. This will open the Preset Settings window, as shown below: In the Math tab, adjust the settings that you want to change as desired. 32 | L i t t l e M a t h U s e r M a n u a l Once you’re done modifying the Math settings, click on the SAVE button. Click on the CANCEL button to discard the changes you’ve made. The following are the Math Settings that you can customize: Type There are four types of Math Mode Settings, which you can toggle by selecting from the “Type” dropdown menu: “Addition,” “Subtraction,” “Multiplication,” “Division,” “Mixed,” and “Custom.” Choose Addition, Subtraction, Multiplication or Division to show addition, subtraction, multiplication or division equations. Mixed allows you to show equations using different operations. Custom allows you to create your own set of equations. Number Range (not available for “Custom” mode type) The Number Range is the main setting of each Preset that marks the range of possible numbers that will be flashed on screen during playback. To adjust the range values, you can move the sliders, click on the up or down arrow buttons, or type in a value in the text box for the “From” and “To” values. From – the lowest possible number to be displayed To – the highest possible number to be displayed 33 | L i t t l e M a t h U s e r M a n u a l How many integers on left side of equation? (not available for “Custom” mode type) This indicates how many operands each equation will have. For example, if you select “3,” the equations shown during playback will have 3 numbers for your baby to add, subtract, multiply or divide (e.g., 10 + 10 + 10 = 30). Adjust how many integers you want to show in each equation using the drop-down menu. Max Value of Solution (not available for “Custom” mode type) This allows you to limit how big the solution of each equation can be during playback, which you can use as an additional control with the Number Range setting. For example, with a Number Range of “0 to 10,” equations such as “10 + 10 = 20” are still possible, but with the Max Value of Solution set to “10”, you will be able to maintain the number range you want without having equations that are too large or too complicated for your baby’s level. Number of Equations/Displays This determines how many equation slides are flashed on screen for every playback (maximum is 50). Select operations(s) to include (available for “Mixed” mode type only) This determines which operations will be used in the equations shown during playback. You can select the operations you want your equations to show by ticking the boxes corresponding to addition, subtraction, multiplication, and division. 34 | L i t t l e M a t h U s e r M a n u a l Add New Equation (available for „‟Custom‟‟ mode type only) The Custom mode type allows you to generate your own lists and input your own sets of equations to show to your child. To add your own equations to a preset: Go to the Playback Screen and choose to display Math Presets. Select the Preset that you would like to insert equations to. In the Math section of the Preset Settings Panel (top half portion), click on the SETTINGS button. This will open the Preset Settings window. In the Math tab, select “Custom” mode type. The contents of the tab will change accordingly, as shown below: Click on “Add new equation” or the ADD button in the left hand panel and type in the equation you want to add in the text box that appears. Click on the green check mark button beside it to confirm. The equation you’ve just added should now be displayed in this panel. Repeat this step to add more equations. To remove or edit equations, select the equation you want and click the REMOVE or EDIT button. To rearrange the equations select the equation/s you want to move and click on the UP or DOWN arrow buttons. 35 | L i t t l e M a t h U s e r M a n u a l Order (available for “Custom” mode type only) This dictates the order in which the equations in your Preset are displayed to your child, whether According to list (forward), According to list (backward), or Random order. How to Change Math Display Settings The Display tab of the Preset Settings window allows you to change and customize how your presentation will be played back – whether only numerals are shown, only shapes, or only words, along with the audio language played along with each slide. Go to the Playback Screen and choose to display Math Presets (click on the LEARN MATH button). Select the Preset you want to adjust. In the Display section of the Preset Settings Panel (bottom half portion), click on the SETTINGS button. This will open the Preset Settings window, as shown below: In the Display tab, adjust the settings that you want to change as desired. Once you’re done modifying the Display settings, click on the SAVE button. Click on the CANCEL button to discard the changes you’ve made. 36 | L i t t l e M a t h U s e r M a n u a l The following are the Display Settings that you can customize: Display Each Math Preset may display up to 1 individual representation of a number. To change between Icon, Numeral and Word Display types, click on the dropdown menu. Sound Under each Display preview there is a small speaker icon, with a name showing what Sound Set will be played along with the slide. Click on the dropdown menu beside this icon to change the Sound Set that will be played with each slide. You may choose to use an individual Sound Set or a Sound Group (a collection of different Sound Sets having a specific playback setting) for your lesson. If you choose a Sound Group, you can further specify what playback setting to use: According to Group Setting – Use the playback setting as previously set in the Sound Set tab of the Numbers Library Screen Random (each slide) – Play a different sound set for every lesson slide flashed on screen Random (each playback) – Play a different sound set for every lesson playback We have provided you with male and female voices in two languages (English and Chinese) for you to choose from! 37 | L i t t l e M a t h U s e r M a n u a l Icon Settings When “Icon” is selected as a Display type, the Icon Settings will be previewed in real-time in the small preview windows. NOTE: The Icon Settings Previews are only a representation and are not to scale of the fullscreen presentations shown during playback. The Icon settings panel lets you customize what set of icons are used and how these are displayed during playback. Icons are pictures or shapes that are used as a way to teach the concept of quantity to your child. Icon Set Icon Sets are groups of related shapes or pictures. To select an Icon Set, use the drop-down menu and click on the name of the Icon Set that you want to use. Icon Item Once you have selected an Icon Set, you can further choose to use only a specific shape or picture for the whole presentation, a random shape or picture from the Icon Set used for each slide, or to have all the images in the Icon set mixed together on each slide. 38 | L i t t l e M a t h U s e r M a n u a l Size You can choose how big or small the icons will be during playback, with five different options to choose from: “Small,” “Medium,” “Large,” “Variable” and “Mixed.” Selecting “Variable” will automatically adjust the icon size to best fit the screen, while “Mixed” will display icons of different sizes on the screen at the same time. Shape Color For the default Little Math Icon set (Basic Shapes), you can also control the color of the icons. Simply click on the dropdown menu to choose from “Random (each slide),” “Random (each playback),” “Mixed” and “Set Color.” If you selected “Set Color,” you can specify the color you want to be used by clicking on the colored square beside the dropdown menu. ”Mixed” color means the icons in a slide will be shown having different colors. Icon Placement You can choose to have the icons placed randomly or arranged in a grid when a slide is displayed during playback by selecting “Random” or “Grid” from the Icon Placement dropdown menu. If you chose the “Grid” placement layout, you can specify a Column Count and Alignment to further customize how the grid of icons is displayed. 39 | L i t t l e M a t h U s e r M a n u a l Words / Numerals The Words / Numerals Settings area allows you to adjust how text is displayed during playback. Any selections you make in the font and color options will affect both words and numerals in the presentation. Word Set – This is the language that Word Displays are written in during playback. Font – You can choose to select from 4 fonts (Arial, Times New Roman, Comic Sans MS, or Tahoma) or a random font in which text will be displayed during playback. Font Size – You can specify how large words and numerals will be displayed during playback. Color – You can choose what color the text will be during playback by clicking on the colored square or you can check the “Random” box to automatically assign random font colors to each slide. Background The Background Color setting will affect all three types of Displays – Icon, Word and Numeral. To select a background color, click on the colored square or check the “Random” box to automatically assign random font colors to each slide during playback. 40 | L i t t l e M a t h U s e r M a n u a l General Settings The General settings panel contains additional options that you may choose to enable during playback. To enable an option, simply click on the corresponding box so that an “x” mark appears inside it. Display numerals instead of icons after “x” or “÷” This will display operands in numbers to further clarify the concept of multiplying or dividing a quantity, rather than multiplying by an icon (e.g., you cannot multiply an “apple” by an “apple”). Do not display math symbols if showing icons When this option is enabled, math operators (i.e., “+,” “–,” “x,” and “÷”) will not be shown when icons are flashed during playback. Exclude “0” in Operands This will ensure that all the equations flashed during playback will not have “0” as an operand. For example, if this option is enabled, an equation like “8 + 0 = 8” or “0 + 0 = 0” will never be shown during the Math presentation. Exclude “0” in Solution This will ensure that all the equations flashed during playback will not have “0” as their solution. For example, if this option is enabled, an equation like “2 – 2 = 0” will never be shown during the Math presentation. 41 | L i t t l e M a t h U s e r M a n u a l How to Use the Numbers Library Screen Little Math is fully customizable – you can edit and create Icon, Sound and Word sets to personalize your baby’s number and math lessons! Armed with your imagination, you can virtually create an unlimited number of lessons for your baby via the Numbers Library Screen. Simply click on the NUMBERS LIBRARY button and you will see the Numbers Library Screen as shown below: To toggle between Icon, Sound, and Word sets, simply click on the ICONS, SOUNDS, or WORDS tabs at the top of the Numbers Library Screen. You will notice that the left hand panel contains a list of available Icon/Sound/Word Sets while the right hand panel shows a preview of the selected Icon/Sound/Word Set. 42 | L i t t l e M a t h U s e r M a n u a l The Icon Set Tab The Icon Set Tab shows a list of Icon Sets that are currently available in your Little Math icon library. At the bottom of the screen are buttons which you can use to create, edit and organize your Icon Sets. New Create a new Icon Set by clicking on this button. Type in the name of your new Icon Set and press Enter on your keyboard. Rename Select an Icon Set and click on this button to change the Icon Set’s name. Delete Select an Icon Set and click on this button to remove it from your icon library. Move (Up and Down) Select an Icon Set (or a specific Icon) and click on the arrow UP or DOWN button to move it up or down the list. 43 | L i t t l e M a t h U s e r M a n u a l Add Icon(s) Select the Icon Set that you want to add a new icon to and click on the ADD ICON(S) button. This will open a Windows explorer window where you can locate the image file you want to use as an icon. Change You can the image file used for an existing icon by selecting a specific icon that you want to change and clicking on the CHANGE button. This will open a Windows explorer window where you can locate the image file you want to use instead of the current one. Alternatively you can double-click on the icon preview (in the right hand panel) to open the explorer window. Open Icon Location Click on this button and a Windows explorer window will open, showing you the folder where the selected icon’s image file is located. NOTE: Little Math supports most image file formats (such as .jpg, .bmp, .gif, .png, etc.). Your image will be automatically scaled to a suitable size when used in presentations, so don’t worry if your files are too big or small! 44 | L i t t l e M a t h U s e r M a n u a l The Sound Set Tab The Sound Set Tab shows a list of Sound Sets that are currently available in your Little Math sound library. These Sound Sets contain sets of sound files that are played alongside the numbers and math symbols they are assigned to during playback. At the bottom of the screen are buttons which you can use to create, edit and customize your Sound Sets. New Create a new Sound Set by clicking on this button. Type in the name of your new Sound Set and press Enter on your keyboard. NOTE: By default, the new Sound Set will be empty, without any media attached to the numbers. New Sound Group A Sound Group is a collection of different Sound Sets that has a specific playback setting – Sound Sets included in a Group can be played randomly for each slide/equation OR for each playback. In effect, using Sound Groups lets you randomize the voices played along with your Course lessons and Presets! 45 | L i t t l e M a t h U s e r M a n u a l Create a new Sound Group by clicking on this button. Type in the name of your new Sound Group and press Enter on your keyboard. To add existing Sound Sets to your new Sound Group, simply select the Sound Set you want from the upper part of the Sound Sets list and drag it towards your new Sound Group folder. Notice that the names of Sound Sets included in Sound Groups are displayed in font. To remove a Sound Set from a Sound Group, select the Sound Set and click on the X button (or press Delete on your keyboard). To change a Sound Group's playback setting, select the Sound Group you want to modify and select the kind of playback you want from options listed in the right hand panel: Random each slide/equation Random each playback NOTE: Using the X and Delete buttons on Sound Group contents will not remove the Sound Set from your Little Math sound library; rather, the Sound Set will only be taken out of the Sound Group. However, using these buttons on unclassified Sound Sets (with non-italicized names) will permanently delete the Sound Sets. Rename Select a Sound Set and click on this button to change the Sound Set’s name. 46 | L i t t l e M a t h U s e r M a n u a l Delete Select a Sound Set and click on this button to remove it from your sound library. Move (Up and Down) Select a Sound Set or Group and click on the arrow UP or DOWN button to move it up or down the list. Play Selected Sound Select a number from the right hand panel and click on the PLAY SELECTED SOUND button to preview the sound file for that number. Alternatively you can click on the small play button corresponding to the selected number to preview the sound file. Save After adding or changing a sound file for a specific number in a Sound Set, click on this button to save the modification you made. Change You can change the sound file used for a number by selecting a specific number from the right hand panel and clicking on the CHANGE button. This will open a Windows explorer window where you can locate the sound file you want to use instead of the current one. Alternatively you can double-click on the sound file you want to change to open the explorer window. 47 | L i t t l e M a t h U s e r M a n u a l The Word Set Tab The Word Set Tab shows a list of Word Sets that are currently available in your Little Math word library. These Word Sets contain a set of words that represent numbers from 0 to 100, and are flashed on screen during playback (if “Word” Display type is selected). At the bottom of the screen are buttons which you can use to create, edit and customize your Word Sets. New Create a new Word Set by clicking on this button. Type in the name of your new Word Set and press Enter on your keyboard. NOTE: By default, the word for each number will be automatically filled in using English names. Rename Select a Word Set and click on this button to change the Word Set’s name. Delete Select a Word Set and click on this button to remove it from your word library. 48 | L i t t l e M a t h U s e r M a n u a l Move (Up and Down) Select a Word Set and click on the arrow UP or DOWN button to move it up or down the list. Edit You can edit the word assigned to a number by selecting a specific number from the right hand panel and clicking on the EDIT button. Alternatively you can double-click on the word, or press Enter on your keyboard to edit the selected word. Press Enter again after typing in your new word. How to Use the Import – Export Screen Little Math allows you to share your Presets and media sets with other parents and children through an easy-to-use Import and Export function! Simply click on the Import/Export button and see the screen as shown below: 49 | L i t t l e M a t h U s e r M a n u a l How to Export Little Math Files Exporting files mean that you would like to save a copy of your library so you can share it with other people, or to save it as a backup for future use. This doesn’t mean that you are deleting the Presets or icon/sound/word sets from your Little Math program entirely; rather you are just making a copy of these, to be saved in your computer. Go to the Import/Export Screen. In the Export panel, choose which type of Little Math file you would like to export by toggling between the PRESETS, WORDS, SOUNDS, and ICONS tabs. Select the item/s that you would like to export. Click on the EXPORT button (located in the lower right part of the Import/Export Screen). A confirmation window will pop up, showing you the item/s that you’ve selected. If the list is correct, click YES to proceed or click NO if you want to make changes. Type in a filename for your file, and choose where you would like the file to be saved in your computer. Click on SAVE. TIP: You can also export your Presets as one big file (or by parts) by selecting the folder/s you want to export together and clicking on the EXPORT FOLDER button. Note that the filename of each exported Preset is determined by the corresponding folder name and Preset name. Once you have exported some Presets and media sets, you may begin sharing these with other Little Math users by emailing them, uploading to them to the BrillKids Forum, or burning them to data CDs! 50 | L i t t l e M a t h U s e r M a n u a l How to Import Little Math Files Importing files mean that you have already downloaded Presets or media sets, and these are saved in your computer’s hard drive. The next thing you need to do is import these files into your Little Math program, so they can be ready for use! Go to the Import/Export Screen. In the Import panel (top part of the Import/Export screen), click on the IMPORT button. In the Windows explorer window that opens, locate the file you want to import. Click on the Open button. NOTE: By default, all exported files are saved in the “Import-Export” folder inside the Little Math folder in your computer’s My Documents folder. You may choose to store your downloaded Presets and media sets in this folder as well. 51 | L i t t l e M a t h U s e r M a n u a l How to Use the Download Screen Little Math comes with built-in Presets and media sets for you and your child, but you can also create your own or download other Presets and media sets made by other parents who use Little Math, just like you! How to Download Files Go to the Download Screen and sign in using your BrillKids account. Choose between the three Library tabs, or jump to the Presets or media sets (Word, Sound and Icon Sets) pages, to view its contents. Select a file that you would like to download. Click on DOWNLOAD. 52 | L i t t l e M a t h U s e r M a n u a l How to Upload Files to the BrillKids Forums It’s always fun to share what you’ve created, and you can do exactly that by uploading your Little Math Presets and media sets to the BrillKids Forum Lesson Library! Here’s how to upload your files: Go to the Forum and sign in using your BrillKids Forum account. In your MY PROFILE box, click on the “Add a Download” link. In the File Type selection, select “Little Math Library File.” In the Category section, select which type of Little Math file you are going to upload: “Presets,” “Word sets,” “Sound sets,” or “Icon sets.” Fill in a short description about your file. In the Upload File section, click on the Browse button and locate the file on your computer. Select the file you want and click on the Open button. When you’re done, click on the Add Download button. 53 | L i t t l e M a t h U s e r M a n u a l About the Forum Screen Find out what BrillKids has in store for you and your child! With an Internet connection, you can easily access the BrillKids Forums, giving you the latest updates on new posts, software and early learning developments right from your Little Math program! Learn more about: New BrillKids programs focusing on different learning areas – reading, math, music, and much more! Subscribe to newsletters with relevant breakthroughs concerning research and studies on early learning! Join beta testing for new and upcoming programs! Sign up for the BrillKids Forums, where you can meet and greet fellow parents around the world and share word lists, swap teaching techniques, and ask for tips on child education! 54 | L i t t l e M a t h U s e r M a n u a l Purge Unused Media As you continue to use Little Math’s features, importing and removing Presets or media sets to customize your Numbers Library, it will not be uncommon for left-over files to remain, cluttering up your Media Library folder. The Purge Unused Media function removes any media files found in the Media Library that are no longer in use by Little Math, freeing up space in your computer. To purge unused media, simply select the “Purge Unused Media…” option from the Options menu in the upper-left part of Little Math. A window will then pop up listing any files found in your Media Library folder that are no longer associated with any Little Math Preset or media set. To purge, simply select the files you want to remove and click the DELETE button. 55 | L i t t l e M a t h U s e r M a n u a l How to Use Little Math with Different Languages Teaching your child a foreign language is easy! Little Math supports foreign languages that use the standard Roman alphabet and other characters (provided you have installed the additional language packs in your computer), so you can create and edit Sound and Word Sets using other languages to teach your baby If you have not installed the additional language packs yet, follow the directions below to unlock full language support for your Little Math. In your computer, click on Start and open the Control Panel. Note that some menu items that will be mentioned in the next steps may not have the same name, depending on your computer’s operating system: Instructions for Windows XP In your Control Panel (Category View), click on Date, Time, Language, and Regional Options. 56 | L i t t l e M a t h U s e r M a n u a l Click on Regional and Language Options. This will open a pop-up window as shown below. Go to the LANGUAGES tab. In the SUPPLEMENTAL LANGUAGE SUPPORT area, tick on the boxes to install additional languages of your choice. Click OK, and follow the prompts. You may be prompted to restart your computer for the changes to take effect. 57 | L i t t l e M a t h U s e r M a n u a l Instructions for Windows Vista and Windows 7 In your Control Panel (View by Category), click on Clock, Language, and Region. Click on Region and Language. This will open a pop-up window as shown below. Go to the Keyboards and Languages tab. 58 | L i t t l e M a t h U s e r M a n u a l In the Display Language area, click on the Install/uninstall languages… button and follow the prompts. You may be prompted to restart your computer for the changes to take effect. How to Get Technical Support If you encounter a problem with your Little Math, there are two ways in which you may report it: Application Crash If Little Math has encountered an unrecoverable crash, you may see an error message pop up as displayed below: 59 | L i t t l e M a t h U s e r M a n u a l We encourage you to send us the Error Report, to help us know more about your problem. To report the problem, simply click on the “Send Error Report” button. This will open another dialogue box, which will ask you for more details: After adding your additional information about the error, remember to type in your email address or your forum username so that a customer representative of the BrillKids Team can get back to you as soon as possible. Tech Support If you are experiencing less critical software problems or minor errors, you may wish to use the Tech Support feature to notify us. This feature can be found under the Help menu. 60 | L i t t l e M a t h U s e r M a n u a l The Tech Support feature involves 3 simple steps, outlined in the window that pops up. First, choose whether or not you wish to take a screenshot of your Little Math, and then click “Create System Report”. NOTE: BrillKids highly recommends taking a screenshot, as it can help us isolate the problem. A Windows Explorer window will pop up containing the System Report File, as shown below. 61 | L i t t l e M a t h U s e r M a n u a l Leave the window open and proceed back to Little Math. Click on the Tech Support button and you will be taken to the Tech Support form. Follow the instructions and attach the System Report file, then click Post. NOTE: You must be logged in using your BrillKids forum account to use this feature. 62 | L i t t l e M a t h U s e r M a n u a l