Download WR882R-IB
Transcript
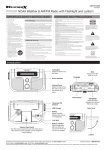
USER’S GUIDE
V:1624-0103-12
WR882R
Multi-Function Power Station
For the most up-to-date version of this User’s Guide, go to www.weather-x.net
Warnings and Precautions
• WARNING: To reduce the risk of fire or electric shock, do not
expose this apparatus to rain or moisture.
• AVERTISSEMENT: Pour réduire le risque d’incendie ou de choc
électrique, ne pas exposer cet appareil sous la pluie et l’humidité.
• WARNING: Changes or modifications to this unit not expressly
approved by the party responsible for compliance could void the
user’s authority to operate the equipment.
• WARNING: Do not place the unit on top of any soft, porous, or
sensitive surfaces to avoid damaging the surface. Use a protective
barrier between the unit and surface to protect the surface.
• WARNING: The battery, batteries, and battery pack shall not be
exposed to excessive heat such as sunshine, fire, or the like.
• WARNING: Lithium batteries, like all rechargeable batteries
are recyclable and should be recycled or disposed of in normal
household waste. Contact your local government for disposal or
recycling practices in your area. They should never be incinerated
since they might explode.
• WARNING: Shock hazard - Do Not Open.
• AVIS: RISQUE DE CHOC ÉLECTRIQUE - NE PAS OUVRIR
• When the the unit indicates low battery, it is important to charge
the unit immediately or turn it off.
• Should the DC-AC boost converter not work properly, it is
important to charge unit immediately.
• Unit must be charged for a minimum of 10 hours before initial use.
• CAUTION: Lead acid batteries must be charged at least every 3
months, especially in a warm environment. Leaving a battery in
a discharged state, or not recharging every 3 months, may result
in permanent battery damage. The Power switch should be in the
OFF position to recharge the internal Lead acid battery.
• Because the internal battery contains lead, which can be hazardous
if exposed to the environment, the old internal battery should be
recycled or safely disposed of at your local recycling depot. Do not
dispose of the old internal battery with common household waste.
Please ask your local authorities about recycling services that are
available in your area.
• It is important to know the continuous wattage of the device you
plan to use with the inverter. It must be used with devices drawing
60 watts or less.
• NOTE: In the event of a power overload, the inverter is designed
to automatically shut down. This safety feature prevents damaging
the inverter while testing devices and equipment with the 60-watt
limit.
• Mains Plug or Direct plug-in adapter is used as disconnect device
and it should remain readily operable during intended use. In order
to disconnect the apparatus from the mains completely, the Mains
Plug or Direct plug-in adapter should be disconnected from the
mains socket outlet completely.
La fiche d’alimentation ou adaptateur de courant est utilisé
comme dispositif de déconnexion et doit rester accessible pendant
l’utilisation. Pour mettre l’appareil hors tension, la fiche ou
adaptateur de courant doit être débranché de la prise
de courant.
Do not mix old and new batteries.
Do not mix alkaline, standard (carbon-zinc), or rechargeable (nicad, ni-mh, etc) batteries.
No mezcle baterías viejas y nuevas.
No mezcle baterías alcalinas, estándar (carbono-zinc) o
recargables (ni-cad, ni-mh, etc.).
2
FCC Warnings
WARNING: Changes or modifications to this unit not
expressly approved by the party responsible for compliance
could void the user’s authority to operate the equipment.
NOTE: This equipment has been tested and found to comply with
the limits for a Class B digital device, pursuant to Part 15 of the FCC
Rules. These limits are designed to provide reasonable protection
against harmful interference in a residential installation. This
equipment generates, uses, and can radiate radio frequency energy
and, if not installed and used in accordance with the instructions,
may cause harmful interference to radio communications. However,
there is no guarantee that interference will not occur in a particular
installation. If this equipment does cause harmful interference to
radio or television reception, which can be determined by turning
the equipment off and on, the user is encouraged to try to correct
the interference by one or more of the following measures:
•
•
•
•
Reorient or relocate the receiving antenna.
Increase the separation between the equipment and receiver.
Connect the equipment into an outlet on a circuit different
from that to which the receiver is connected.
Consult the dealer or an experienced radio/TV technician for help.
CAUTION
RISK OF ELECTRIC SHOCK
DO NOT OPEN
ATTENTION
RISQUE D' ÉLECTROCUTION
NE PAS OUVRIR
WARNING: TO REDUCE THE RISK
OF ELECTRIC SHOCK, DO NOT
REMOVE COVER (OR BACK).
NO USER-SERVICEABLE PARTS
INSIDE. REFER SERVICING TO
QUALIFIED SERVICE PERSONNEL.
The lightning flash with arrowhead symbol,
within an equilateral triangle, is intended to
alert the user to the presence of uninsulated
"dangerous voltage" within the product's
enclosure that may be of sufficient magnitude to
constitute a risk of electric shock to persons.
The exclamation point within an equilateral
triangle is intended to alert the user to
the presence of important operating and
maintenance (servicing) instructions in the
literature accompanying the appliance.
WARNING: This product contains a button-cell battery
that could be accidentally ingested by children. Do not
leave button-cell batteries accessible to children. If
swallowed, promptly see doctor and call (202) 625-3333.
Introduction
Power
Adjust to power
the unit on or off.
FM/WB/AM
Adjust to switch
between FM, WB and
AM radio modes.
Siren
Press to turn the
siren on or off.
Hour
Press to adjust
the hour when
setting the time.
Set
Press to begin
setting the time.
Tuning
Adjust the dial to
tune the radio.
Line In
USB Output
Circuit Breaker
Charge Indicators
DC Output
Volume
Adjust the dial to
turn the volume
up or down.
DC Input
Backlight
Press to turn the
backlight on.
Min
Press to adjust
the min when
setting the time.
Customer Support: 1-888-999-4215
3
Mosquito Repellent
Press to turn the
mosquito repellent
sound on or off.
Telescopic FM
Antenna
Storage
Compartment
Compass
Flashlight/Lantern
Adjust the
switch to switch
between flashlight,
emergency, lantern,
and off modes.
AC Output
Adjust the switch
to turn the AC
power on or off.
Dynamo
Hand Crank
Turn the crank to
power the unit
when there are
no other power
sources available,
and to charge the
internal battery.
Flashlight
Release Latch
Release latch to
remove flashlight
Flashlight
4
Lantern
Pull upwards gently
to adjust the position
of the lantern.
Power
AC Power
To power the unit, plug the included AC/
DC adapter into a standard AC outlet.
Note: Unit must be charged for a
minimum of 10 hours before initial use.
DC Power
To power the unit, plug the included DC
adapter into the 12V/4A DC output (car
cigarette lighter socket).
Flashlight
Requires 3 AA batteries (not included).
Customer Support: 1-888-999-4215
5
Power
Clock Battery Backup
Requires 2 AG-13 button cell
batteries (included).
The clock battery backup is intended
for powering the clock only. The
unit’s primary functions cannot run
off of the battery backup alone.
Remove plastic strip before use.
Dynamo Hand-Crank
The Dynamo Hand-Crank is
for emergency situations only. It
is recommended to use the DC
Output to charge most devices.
In case of an emergency situation,
crank the Dynamo Hand-Crank
at 100-150 revolutions per minute
to charge the internal battery.
Charging Indicators
The indicators represent the level of
charge held by the internal rechargeable
battery, which can also be charged
by the Dynamo Hand-Crank.
Status
Fully Charged
Charge
Need Recharge
Ready To Use
WARNING: The unit’s button cell battery contains mercury. Do not put
in the trash, instead recycle or dispose of as hazardous waste.
6
Clock, Radio and Weatherband
Setting the Clock
Playing Weatherband
1.
If the radio is on, turn the
Volume dial to Off.
1.
Adjust the Power switch to On.
2.
Press and hold the Set button.
2.
Adjust FM/WB/AM switch
to the WB position.
3.
While holding the Set button,
press the Min button repeatedly
to adjust the minutes.
3.
Turn the Volume dial to turn on the
radio and adjust to the desired volume.
4.
While holding the Set button,
press the Hour button repeatedly
to adjust the hour.
4.
Adjust the Tuning dial
to tune the radio.
5.
Release the Set button to
set the adjusted time.
For a list of which areas receive
which frequency, visit http://www.
weather.gov/nwr/nwrbro.htm.
Playing the AM/FM Radio
1.
Adjust the Power switch to On.
2.
Adjust FM/WB/AM switch to
the AM or FM position.
3.
Turn the Volume dial to turn on the
radio and adjust to the desired volume.
4.
Adjust the Tuning dial
to tune the radio.
Radio Reception
Adjust the position of the Telescopic FM
Antenna to improve FM radio reception.
An AM antenna is built into the
clock radio. To improve AM radio
reception, adjust the position of the
unit.
Customer Support: 1-888-999-4215
7
Charging, Circuit Breaker and
3.5mm Audio Input
Charging Devices
1.
2.
Using the appropriate charging
cable (USB to mini-USB cable
included), connect one end to
the device and the other to the
corresponding output on the unit.
The device will now charge.
Circuit Breaker
Should the unit short circuit or experience
excess current, the circuit breaker
will trip automatically to protect the
circuit and the unit from damage.
After unplugging the cause of the
faulty current, press the Circuit Breaker
button to restore normal operation.
Using the Audio Input
8
Company Information
International Support
To download this User’s Guide in English,
Spanish, or French, or to get answers
to frequently asked questions, visit the
support section at www.weather-x.net.
Para descargar este Manual del Usuario en
inglés, español y francés, o para obtener
respuestas a preguntas frecuentes, visite la
sección de apoyo en www.weather-x.net.
Pour télécharger ce guide de l’utilisateur
en anglais, espagnol ou français, ou pour
obtenir des réponses à des questions
fréquemment posées, consultez la rubrique
d’assistance sur www.weather-x.net.
Contact Information
Phone: 1-888-999-4215
Email: [email protected]
Parts Email: [email protected]
Website: www.weather-x.net
Requires a 3.5mm audio cable (included)
Warranty
1.
Connect a 3.5mm audio cable
to the 3.5mm Audio Input and
the audio output on an MP3
player or other audio device.
For Warranty Information and the
most up-to-date version of this User’s
Guide, go to www.weather-x.net
2.
Adjust the Power switch to On.
3.
Turn the Volume dial to turn
on the audio and adjust to
the desired volume.
4.
Use the native controls on the
connected MP3 player or other
audio source to play your audio
through the power station.
Green Initiative


