1
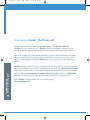
Train_The_Trainer_combo_rv.qxd
1/11/05
11:54 AM
Page 2
inside i-Guide
™
Trainer’s Manual
The Power of i™.
Train_The_Trainer_combo_rv.qxd
1/11/05
11:54 AM
Page 3
2
Introducing i-Guide: The Power of i
3
i-Guide Training: Purpose & Preparation
4
Introducing i-Guide: Team Training
5
Segment One: Navigating i-Guide
11
Segment Two: i-Guide Features
15
Segment Three: Digital Pay-Per-View (PPV)
17
Segment Four: On Demand (OND)
20
SINGLE TUNER
Segment Five: Digital Video Recording (DVR)
23
DUAL TUNER
Segment Six: Digital Video Recording (DVR)
29
Segment Seven: Installation & Troubleshooting
32
Final Activity: Test Your i-Guide i.Q.
CONTENTS
Table of Contents
1
Train_The_Trainer_combo_rv.qxd
1/11/05
11:54 AM
Page 4
Introducing i-Guide : The Power of i™
TM
Introducing the all new interactive program guide – TV Guide’s i-Guide™.
i-Guide gives you the power of i. i-Guide is intuitive, intelligent, inspiring. And, it
unlocks a world of greater choice, convenience and control as you watch television.
With digital cable, you have more programming choices than ever before. And now,
you can effortlessly find the television entertainment you want to see. Now faster,
easier and completely enhanced, i-Guide puts you in control, all at the touch of a
button.
INTRODUCING i-GUIDE:
THE POWER OF i
2
i-Guide displays a full 90 minutes of program listings. Best of all, it’s so easy to use, you
won’t need a degree in computer science to find out what’s on. i-Guide’s Quick Menu
allows you to move easily to the programming and information you want. In no time,
you’ll be able to Set Reminders, Favorites, Parental Locks, and use our Mini Guide
to find out what’s on and what’s next, all while you continue to enjoy great TV.
With i-Guide, a world of television is at your fingertips.
That’s the Power of i.
Train_The_Trainer_combo_rv.qxd
1/11/05
11:54 AM
Page 5
i-Guide Training: Purpose & Preparation
Purpose:
This training is designed to provide an overview of TV Guide’s i-Guide™ and the new features that are available to
enhance a customer’s television entertainment experience.
Materials Needed:
• i-Guide Instructional Video
• Live digital set-top or a demo set-top with DVR (and OND if appropriate)
• One live remote control (with batteries)
• i-Guide User’s Manual for each participant
• Handouts for each participant (CSR Quick Reference Card, Installer Reference Card and CSR Quiz)
• Pens
• Small prizes (optional)
Training Segments:
This training program is divided into six separate segments. The segments are designed to be presented together, in
order, however you may choose to deliver only select segments.
• Navigating i-Guide
• i-Guide Features
• Digital Pay-Per-View (PPV)
• On Demand (OND)
• Digital Video Recording (DVR)
• Installation & Troubleshooting
• Guide Menus vary depending on the services the system offers. Make sure you familiarize yourself with your
system’s services and how the menus are set up. NOTE: Some screens in the materials and video may be different
than what the system has.
• Read through the entire i-Guide Trainer’s Manual, User’s Reference Manual and activity handouts.
• Prepare any additional examples, stories, or activities that you would like to include to enhance participant learning.
• Watch the video and follow along in the Trainer’s Manual to prepare for the video activities.
• Gather all necessary materials.
• Find a comfortable spot to hold the workshop. You will need a room with large tables arranged in a U-shape, a flip
chart stand, a TV, DVR set-top and VCR.
i-GUIDE TRAINING:
PURPOSE AND PREPARATION
Preparation:
3
Train_The_Trainer_combo_rv.qxd
1/11/05
11:54 AM
Page 6
Introducing i-Guide: Team Training
Introduce Topic
Welcome everybody! Today we are going to discuss a really exciting
new addition to digital cable. The purpose of this training session is
to get you up to speed with TV Guide’s i-Guide, the interactive
program guide. There are a lot of great new features that our
customers will be very excited about. And, with full knowledge of
these products, you will be able to better serve your customers.
Ask
Before we begin, let’s take this time to learn about i-Guide’s features
and how they will help you on the job. Can anyone tell me how they
think this will improve their performance?
Possible Answers:
1. All system employees will be better able to educate customers
and to answer customer questions.
2. It will be easier to sell and upgrade customers to digital cable by
talking about the new features.
3. Informed customers will be less likely to call the office with
complaints or problems, or worse, drop the cable service.
I know that your job keeps you very busy and you may be concerned
about the time it takes to explain a new set of features to your
customers. That’s why taking the time to familiarize yourself with
i-Guide now will make your job a whole lot easier in the long run –
because a customer who fully understands their program guide is
much less likely to call later or require another visit to their home.
I’ll be asking for volunteers to help me use the live product (or
product demo) we have here. We also have handouts and some fun
activities built in, so let’s get started.
INTRODUCING i-GUIDE:
TEAM TRAINING
4
Train_The_Trainer_combo_rv.qxd
1/11/05
11:54 AM
Page 7
Segment One: Navigating i-Guide
(FOR SYSTEMS BRAND NEW
TO TV Guide INTERACTIVE).
Introduce Basic Navigation
(FOR PREVIOUS USERS OF
TV Guide INTERACTIVE).
Moving around in i-Guide is actually really easy. We are going to get
started today by taking a look at some of the basics of using the
guide that everyone should know. Installers are the first face-to-face
contact with the customer, so it is important that you show the
customers the new features. That way, they will understand the
benefits of their new service and be less likely to call customer care
with questions.
Basic navigation with i-Guide is easy and very similar to the Blue
Guide you have today. We are going to start by reviewing how to
move around and we’ll be taking a look at some of the new features
and changes to our Main Menu. Installers are the first face-to-face
contact with the customer, so it is important that you show the
customers the new features. That way, they will understand the
benefits of their new service and be less likely to call customer care
with questions.
Distribute CSR & Installer Quick
Reference Cards, and User
Manual if available
Everything I cover is in your i-Guide User’s Manual, but you may also
want to take notes and refer to your Quick Reference Card. There are
some key terms listed, so as we discuss them, taking notes may help
you remember.
Explain
As we check out the different features of i-Guide, I’m going to ask all
of you to take turns using the live remote. I’ll walk you through what
to do and which buttons to push.
Ask for Volunteer
Explain
NOTE: If participants are totally new to the
remote, make sure you are descriptive when
directing them on which buttons to push
– i.e.:“The channel up and down buttons
are the blue buttons midway down the right
side of the remote.”
If participants struggle to find buttons on the
remote, they may be discouraged with i-Guide.
*It will help for you to have prizes for your
volunteers
Who would like to be my first volunteer to handle the remote?
Let’s start by taking a look at what happens when the customer first
turns on the TV. They immediately see programming (the last
channel they were viewing with they turned off the TV); we don’t
force the customer to go through any complicated menu system. Go
ahead and tune to channel 4 using the number keys on the remote.
Remember to enter a 3-digit number, 004.
Of course, this setting can be changed. In the Setup Menu there is
an Auto-tune option. The system automatically defaults to “No.”
If you change the setting to “Yes,” you will be able to enter just the 4
instead of 004 or 23 instead of 023. Auto-tune will not automatically
tune the customer to the channel, it reduces the number of buttons
to enter.
Now, I’d like you to slowly start moving through the channels, using
the CHANNEL UP button. Note that every time you change the
channel a bar appears on the bottom of the screen. This is called the
Flip Bar.
The Flip Bar comes up at the bottom or top of the screen,
depending on your settings, as you flip through channels. The Flip
Bar provides information about the program that is currently
playing on that channel. One of the cool things about the Flip Bar is
that it displays programming information even during a commercial,
so you can always see what’s on when you tune to a channel.
SEGMENT ONE
Introduce Basic Navigation
5
Train_The_Trainer_combo_rv.qxd
1/11/05
11:54 AM
Page 8
Ask
Acknowledge Answers
Explain
What information do you see on the Flip Bar?
Possible Answers:
Start and end time, channel, program title, description and rating
The Flip Bar will automatically disappear after 3 to15 seconds,
depending on the customer’s settings.
Now, go to a channel and, while the Flip Bar is up, press the UP or
DOWN ARROW button, not the CHANNEL button.
Ask
Explain
What happens?
Answer:
The program information showing on the bar changes to a mini TV
listings grid.
That’s right. We are still tuned to the channel, but now we have a
Mini Guide. From here, we can use the UP and DOWN ARROWS to
see what is on other channels, and the RIGHT ARROW to see what is
on later in the day. All without ever leaving the program we are
currently watching.
Unlike the Flip Bar, the Mini Guide does not automatically go away.
Just press EXIT on your remote and the Mini Guide will be removed
from the screen.
Acknowledge Volunteer
SEGMENT ONE
6
Great job controlling the remote. Why don’t you pick our next
volunteer?
Explain
Now that we’ve looked at Flip and Mini Guide, let’s take a look at
the Main Menu. To tune to the Main Menu, press the MENU button
twice, which will bring up the Quick Menu first, then the Main
Menu. We’ll take a look at Quick Menu in a minute.
Explain
The Main Menu is where we access all the great features of i-Guide.
To move around in the menu simply use the UP, DOWN, RIGHT and
LEFT ARROWS on the remote. Note the yellow highlight. When
we’ve highlighted the item we want to select, simply press the
OK or SELECT button that is located in the middle of the
directional arrows.
Explain
Let’s briefly talk about each of these Main Menu items. We’ll be
looking at several of them a little later.
As you move through the Main Menu, the selected item will be
described in the Instant Information that appears at the top of the
menu. If you have highlighted a program or information, Instant
Information will give you a brief explanation about what will
happen if you select the currently highlighted icon. More
information will be provided about this feature later in the training.
Train_The_Trainer_combo_rv.qxd
1/11/05
11:54 AM
NOTE: Give a brief description of each menu
item. The labels given here are the Best
Practices labels; your system may have
customized the menu options. Be sure to
customize your presentation accordingly.
Page 9
By Time: Brings up programming listings by Time. The Time is listed
at the top; the channels are listed down the side. You can press the
GUIDE button on your remote as a shortcut to this feature.
By Channel: Brings up programming listings by Channel. The
Channel is listed at the top; the times are listed down the side.
Pay-Per-View (PPV): Brings up additional PPV options, allowing
you to view listings, search for titles and order PPV movies and
events.
On Demand (OND): Provides convenient access to the system’s
On Demand video services.
Digital Video Recording (DVR): Gives you all the options for using
your set-top’s new DVR capabilities, including access to My
Recordings, Set a Recording and Future Recordings which we’ll
discuss later in this course.
Favorites: Brings up listings for your Favorite Channels. This menu
is user selectable, so customers can choose which channels
they want!
Movies/Sports/Kids: Each of these takes you to an enhanced search
area by the specific category, where you can search and view listings
for just Movies, just Sports, or just Children’s programming.
This enhanced way to search will let you drill down to the type of
sport or movie you want to watch. For example, you can now find
just “soccer” or “football”,“comedies” or “dramas” without having to
search through all the sports or movies available.
Digital Music: Provides easy access to all the digital music channels
carried by the system. These channels are commercial and DJ free.
Messages: Gives the customer access to any text Messages sent by
the cable system.
Help: Provides more information on i-Guide. If this feature is active
in the system it will actually take the customer to a channel or set of
channels that are designated by the system to display help content.
Explain
We’ll be looking at many of these features later on in the training. For
now, let’s take a brief look at one of the ways customers can access
programming titles.
Describe the look and location of
the Page Down and Day
Forward/Day Back buttons
on remote.
Go ahead and select By Time. To move around in here, use the
DOWN ARROW button or the PAGE DOWN button. There is also a
DAY FORWARD and a DAY BACK button that will allow you to jump
ahead 24 hours at a time. Notice that the program listings are color
coded for easy reference:
Blue – Regular programming
Purple – Movies
Green – Sports
Light Blue – Children’s programming
SEGMENT ONE
Set-Up: Allows the viewer to customize the Guide settings, the
converter settings and parental control settings.
7
Train_The_Trainer_combo_rv.qxd
1/11/05
11:54 AM
Page 10
Describe the look and location of
the INFO button.
Highlight a title and you’ll see Instant Information on that title on
the top of the screen. Instant Information supplies brief details
about the program on screen without clicking another remote
control button. If you want more information, press the INFO button
on the remote.
If you highlight a listing that is currently on and press OK, you’ll
immediately tune to that program. If you highlight a program that is
on later and press OK, you’ll be taken to an information screen that
provides you with further options.
Describe the look and location of
the LOCK button.
Describe the look and the location
of the LAST and EXIT buttons.
If you’ve set up a Parental Lock (covered later) and you see a title
you wish to block, simply press the LOCK button on the remote.
If at any time you want to back out a screen at a time, press the LAST
button. To exit the menu completely, and go back to watching TV,
press the EXIT button.
Explain
Now let’s look at the Quick Menu. The Quick Menu is where we can
access all the great features of i-Guide and digital cable. To access
Quick Menu, press MENU on the remote. The Quick Menu will
appear over any video or guide screens. To move around in the
Quick Menu simply use the RIGHT and LEFT ARROWS on the
remote. Note the yellow highlight. When we’ve highlighted the item
we want to select, simply press the OK or SELECT button that is
located in the middle of the directional arrows.
Explain
Let’s briefly talk about a few of these Quick Menu Icons. We’ll be
looking at several of them a little later.
NOTE: Give a brief description of each menu
item. The labels given here are the Best Practices
labels; your MSO may have customized the
menu options. Be sure to customize your
presentation accordingly.
Describe the look and location of
the i-Guide Main Menu Icon
Describe the look and location of
the i-Guide Search Icon
SEGMENT ONE
Describe the look and location of
the i-Guide Favorites Icon
Describe the look and location of
the i-Guide PPV Icon
Describe the look and location of
the i-Guide Movies Search Icon
Ask
8
Introduce New Features
We’ll be taking a look at other screens and features as we continue
throughout the training. What questions do you have on the basics?
Let’s move on to some of i-Guide’s features. I think you’ll agree,
we’ve got some pretty exciting new features and benefits to offer
customers that will allow them to get even more value from their
digital cable experience.
Train_The_Trainer_combo_rv.qxd
1/11/05
11:54 AM
Introduce Video
NOTE: Trainer may opt to either introduce video
segment by segment during the training
process, or to view entire video at this time.
Page 11
Now, we’re going to watch a video that describes some of the new
elements of i-Guide. Be prepared to list some of the new features
and benefits after watching. Feel free to take notes.
Before we move on, are there any questions on anything we’ve
talked about so far?
Show Video
Review Video
As you can see from the video there are some really exciting
developments that went into i-Guide. Let’s take a moment to list a
few of them now.
Ask
Who can tell me one of the new features mentioned in the video?
Answers:
Quick Menu, Instant Access, Enhanced Searching,
Instant Program Information
Ask
What are some other new features of i-Guide?
Answers:
Mini Guide, 90-minute grid, Easy PPV Ordering,
Video On Demand, DVR
Direct Question & Answer Session
NOTE: For this activity, you can also use the “CSR
Quick Reference” document as a handout for
discussion.
Make sure you jot these features down in your notes. Now, of course,
knowing about the new features is one thing, talking about the
benefit of these new features with customers, another. I’m going to
name a few of the i-Guide features and I want you to tell me about
their benefits…
NOTE: If your system has not deployed certain
features such as OND, instruct the participants
to skip over those features during the activity.
Conduct Q&A
Okay let’s hear some of those great answers you came up with.
Possible Answers:
Feature: Quick Menu
Benefits: Ease of use, time savings, convenient access to popular
features
Feature: Instant Information
Benefits: Program information available at a glance, no additional
button pushing
Feature: Program Information and Action Icons
Benefits: An easy way to watch, order, lock or other actions with
programs
Feature: Digital Video Recorder
Benefits: Convenience, no hassles of setting up VCR, no worries
about missing scenes or programs, control live TV with pause, FF,
REW, more entertainment choices no matter what the customer’s
schedule
Feature: Faster download and navigation
Benefits: In-home customer education, convenience, time savings
SEGMENT ONE
Review Q&A
9
Train_The_Trainer_combo_rv.qxd
1/11/05
11:54 AM
Page 12
Feature: OND
Benefits: Convenience, no hassles of setting up VCR, no rental fees,
no worries about missing scenes or programs, control (Pause, REW,
FF), more entertainment choices no matter what the customer’s
schedule, money and time savings over renting videos, avoiding late
return fees or going to the movies.
Ask
SEGMENT ONE
10
Before we move on, are there any questions on anything we’ve
talked about so far?
Train_The_Trainer_combo_rv.qxd
1/11/05
11:54 AM
Page 13
Segment Two: i-Guide Features
Introduce Topic
As we’ve seen, i-Guide has all kinds of other features that make the
viewer’s television experience easier and more enjoyable.
Introduce Video Segment #2
Let’s watch another video segment to learn a little bit more about
them. Some of these features will be a review to you if you’ve
worked with TV Guide Interactive before. Pay close attention to the
information in the video, we’ll be discussing it in just a moment.
(Only if applicable, and video hasn’t already
been shown in its entirety)
Show Video Segment
What questions do you have on the video?
Explain
i-Guide provides a lot of shortcuts so the customer can move
throughout the guide quickly and easily. One of these shortcuts is
the Quick Menu, which appears at the bottom of the guide screens
to help you jump around the guide. Plus, the Info screens contain
Action Icons that let you do something with a particular program,
like set a Reminder.
Ask
Although these two things look very similar, they actually perform
two different functions. Can anyone explain the difference between
the Quick Menu and the Action Icons?
Answer:
The Quick Menu is a navigation toolbar that helps you move
through the guide quickly. For example, you can select the MUSIC
NOTE to go straight to the digital music section of the guide. Once
you get to the Information screens in the guide, the Action Icons
are available to perform an action or carry out a task such as
recording, setting a Reminder, adding a Favorite, purchasing a PPV
movie and so on.
Explain
There are a lot of different icons to learn but usually the icon picture
makes its function fairly obvious. To make it even easier, all you have
to do is highlight the icon and a description appears below it in the
Instant Information area.
Introduce Activity
Up here, I have pictures of all of the Quick Menu Icons and Action
Icons. Use your Reference Manual to look up and list the function of
each icon.
Have printout sheets of icons available to
pass out to entire room. Discuss icons,
what they are and what they do.
Quick Menu should be
customized for this exercise
SEGMENT TWO
Ask
11
Train_The_Trainer_combo_rv.qxd
1/11/05
11:54 AM
Page 14
Review Answers
Action Icons
Go back to the previous screen
Record/Change Record Options
Tune to a program
Place a lock on the program to
restrict viewing
Display all the times the program
will be airing
Set a Reminder for this program
Save the channel in your Favorites list
Order PPV and other pay services
Indicates the program is part
of a package
Preview
Resume play of the video
Restart the video from the beginning
Delete the title from your rented
titles list
View listings for the channel
View all the programs included
in the package
Cancel
Confirm
Change the delete priority rule
Change recording options
Series Record Options
Quick Menu Icons
SEGMENT TWO
12
On Demand Menu
i-Guide Main Menu
Listings By Time
Movies Listings
Search Menu
Digital Music Listings
Listings By Channel
Digital Video Recordings
Kids Listings
Message Center
Favorites Listings
Locks
Pay Per View Listing
Guide Setup Menu
Sports Listings
High Definition Menu
1/11/05
11:54 AM
Page 15
Transition to Parental Lock
Great job on that activity everyone! Another feature I want to cover
is Parental Lock.
Ask
Why is this feature so important?
Possible Answer:
Digital cable carries some programming which may not be suitable
for children, and the Parental Lock feature ensures that kids aren’t
going to access anything inappropriate, or purchase anything
without approval.
Select a volunteer to demonstrate
with the live remote.
Who wants to volunteer to use the remote to take us through the
use of Parental Lock?
First, you need to create a pin number. Select Setup from the Main
Menu, then PINS. Here you can enter a Lock PIN, which restricts the
VIEWING of programming and/or a Purchase PIN, which restricts the
PURCHASING of Pay-Per-View or On Demand content. The
customer can set one, both or neither.
It is important to note that if a customer only enters a Lock PIN, a
child can still order Pay-Per-View or On Demand. They may not be
able to watch it, because it will be blocked with the Lock PIN, but
the customer will still be charged.
Now, enter a four-digit number for a Purchase PIN using the
number pad on the remote. We are going to use 1234.
Before we leave this screen, we need to talk about the option on the
bottom of the screen that is asking about power loss.
When the set-top loses power, the Guide loses its program data.
However, video is still available for viewing while the data is being
downloaded. i-Guide will automatically reload as soon as power is
restored, but there may be a short period of time when no listing
information is available for a given channel.
If the Guide has no listing information available, it doesn’t know
whether to block the programming or not.
In order to prevent little Jimmy or Suzy from unplugging the set-top
to watch R-rated programming, i-Guide has a safety option. The
default asks that if the DCT loses power ALL programming will be
blocked until program title and rating information is restored. The
default option is “Yes”. You can easily change this so programming
will be available at the push of a button.
Installers, make sure customers understand that in the event of a
power loss, if they have a Purchase PIN set, all of their programming
will be blocked until the Guide data starts filling in. Once the Guide
receives the programming information for say, channel 4, that
channel will be unblocked (unless it is carrying programming that
the customer wants blocked). Customers can still watch TV during
this time; they just have to enter their codes.
Ask
What questions do you have on the power option?
Now that we have created our PIN let’s see how we can actually
create a lock on a program. Let’s go into a listings screen – use the
Quick Menu on the bottom of the screen to go into Movie listings.
SEGMENT TWO
Train_The_Trainer_combo_rv.qxd
13
Train_The_Trainer_combo_rv.qxd
1/11/05
11:54 AM
Page 16
Find a program in the listings and access program information for it.
Note the channel it is on and then select the Lock Action icon at the
bottom of the screen. From here you can choose to lock this title, this
channel or this rating. You may also lock the program by actually
tuning to the program and pressing the LOCK button on your
remote.
Let’s lock the channel.
Now that the channel is locked, every time that you try to watch the
locked channel you will have to enter your PIN. Let’s try that. Exit the
menu and go back to watching TV. Tune to the channel we just
locked. It tells us that we need a PIN to watch it. Enter our PIN, 1234,
and now the channel is unblocked. If we tune off this channel and
then back on, the channel is blocked again.
Ask
SEGMENT TWO
14
What questions do you have on Parental Lock?
Train_The_Trainer_combo_rv.qxd
1/11/05
11:54 AM
Page 17
Segment Three: Pay-Per-View (PPV)
Introduce Topic
Ask
Pay-Per-View is a great feature that digital cable has had for some
time now.
What are some of the features and benefits of PPV service?
Possible Answers:
You can order movies and events from the comfort of your own
home.
There is no hassle with renting videos and staying in with a PPV
movie is much cheaper than going out to the movies.
You have movies, sports and events to choose from.
PPV can easily be ordered with i-Guide and your remote control.
Introduce Video Segment #3
Let’s watch another video segment to find out more. Be prepared to
list some of the benefits of Pay-Per-View. Feel free to take notes.
(Only if applicable, and video hasn’t already
been shown in its entirety)
View Video Segment
Summarize Segment
As you can see, Pay-Per-View remains the same great product,
however with i-Guide it’s a whole lot easier. Let’s walk through
ordering a PPV and review some of the features.
Ask for a volunteer to control the
live remote.
This will take us into an information screen that shows the cost for
the program, the time and channel it is playing on, the names of the
primary stars, the year the program was made and it’s rating (if it is a
movie), plus a description of the program.
One new feature of i-Guide is the set of Action Icons available at
the bottom of this screen. If I want to purchase this title, all I have to
do is select the Buy icon at the bottom of the screen.
If I want to record this title, I could press the Record icon. Note that
for non-DVR set tops (e.g., DCT2000 and DCT2500), the Record
feature sets a timer for the set-top to tune to a specific channel and
makes for easier recording to a VCR. Note the customer must set up a
VCR separately.
The Clock icon will allow me to see all the times this program is
airing, the Heart icon will allow me to set the channel that the
program is airing on as a Favorite and the Box icon indicates the
program is part of a package.
SEGMENT THREE
From the Main Menu and Quick Menu select Pay-Per-View to go to
the PPV Search Menu. Then select any of the PPV options and see a
list of all the programs currently available to order. Let’s select a title
by highlighting it and hitting OK or SELECT on the remote.
15
Train_The_Trainer_combo_rv.qxd
1/11/05
11:54 AM
Page 18
Explain
(Only applies for impulse ordering; for
systems with phone ordering, customer
must call to cancel order.)
As always, I’m not charged for a Pay-Per-View selection until I
actually tune in. If I don’t tune in to the program I’m never charged.
Of course, if I tune in for just a second or two, I will be charged the
full amount.
Canceling a Pay-Per-View selection is just as easy as ordering. You
simply walk through the same steps as you did when ordering.
Instead of being asked if you want to confirm your order, you’ll be
asked if you want to cancel.
Introduce Activity
Review Possible Answers
NOTE: The answers listed here are only
examples of possible answers. Your participants
may come up with other, equally acceptable
answers.
Let’s review some of the benefits of ordering Pay-Per-View. For each
of the Pay-Per-View features listed here, write a benefit statement.
Remember that a benefit statement explains what the feature will do
or provide for the customer.
1. With Pay-Per-View, you can order a movie or event simply by
pressing a few buttons on your remote.
Benefit: Easy access to the entertainment choices you are looking
for.
2. With Pay-Per-View, you can choose from a wide variety of pre-set
start times.
Benefit: Scheduling convenience.
3. With Pay-Per-View your whole family can enjoy a movie at one
low price.
Benefit: Save over renting videos, paying late fees or taking the
family out to the movies. NOTE: PPV purchases are only available on
the set-top box from which the order was placed.
Ask
SEGMENT THREE
16
What questions do you have on Pay-Per-View before we move on?
Train_The_Trainer_combo_rv.qxd
1/11/05
11:54 AM
Page 19
Segment Four: On Demand (OND)
Introduce Topic
Ask
Now we are going to discuss another exciting new feature: O-N-D.
That’s right; another three letter acronym.
Does anyone know what this one stands for?
Acknowledge Answer
Explain
That’s right, On Demand. Much like Pay-Per-View this new feature
to digital cable allows the customer to order movies and programs
from the comfort of their own home through their digital cable box.
The advantages of OND over traditional Pay-Per-View are that you
choose the start time and you can watch the movie or event as
many times as you want in your rental period. Plus, you can pause,
rewind and fast forward the program.
Explain
Note: Only explain the OND options available at
this system.
Explain
It is important to understand the different types of On Demand
programming. First, we have movies On Demand. This option allows
the customer to choose On Demand programs, all delivered at the
touch of a button to the comfort of your own home.
With On Demand, you can get a movie instantly. There are no preset start times. You have access to new releases, archived titles and
adult features, and you only pay for the movies you order.
You may have also heard about SVOD, or Subscription Video On
Demand. SVOD allows you to pull up programming from your
favorite premium channel like HBO or Showtime. With SVOD you can
watch new or classic episodes of shows like “The Sopranos,” at your
convenience. To get access to SVOD, you must subscribe to that
premium network.
Unlike movies On Demand, with SVOD you pay one monthly price
for unlimited access to all the programming the premium has to
offer.
We also offer some titles under our Free On Demand service. Free
On Demand gives you free access to programming titles from a
variety of networks.
Introduce Video Segment #4
(Only if applicable, and video hasn’t already
been shown in its entirety)
View Video Segment
Let’s take a look at another segment of our video and get a more
detailed look at the benefits of On Demand.
SEGMENT FOUR
For example, if you are a Showtime customer, you can pay one low
monthly price, which includes Showtime On Demand. This will give
you access to all the titles on Showtime, On Demand. You can watch
as many as you want, as often as you want.
17
Train_The_Trainer_combo_rv.qxd
1/11/05
11:54 AM
Page 20
Summarize Segment
Ask
Explain
Customize for system: Walk through all the
ways to access OND (options may include:
Main Menu, Quick Menu, By Channel,
from Listings or Flip and Mini-Guide)
NOTE: Some MSO’s and networks may provide
artwork which overlays the traditional blue
guide background in the OND Menu Area
Ask for a new volunteer
for the remote.
Now, let’s walk through how to order and use the different functions
for On Demand.
Who would like to volunteer to control the remote?
Access the Main Menu and select On Demand. Now highlight a
video category to select it. Depending on available content, you can
move further through multiple category levels to see a list of
available videos. As you can see, each program has more detailed
information once you select it.
This information screen gives a synopsis of the program, actors,
rating, the rental price (if any) and the rental period (if any).
Here again, we see the Action Icons, which I mentioned earlier. To
purchase the program you would select the BUY button. For Free
On Demand, the Watch icon (the eyeball) would appear instead of
the BUY button. Again, as we learned earlier, you are able to control
the programming with your digital remote just like a DVD player or
VCR with the playback controls in the corner of the screen. You can
make the playback control appear by pressing OK. You can access
any programs you ordered as long as the rental period allows from
the My Rentals category in the On Demand Menu. Let’s take a look
at that.
Go into the On Demand Main Menu and select My Rentals. Here
you can see the programs that have been ordered.
You have two different ways of playing a movie. You can either play it
from the beginning or, if you have already started watching it, you
can start where you last left off. From here you can also tell how far
along you are if you’ve already started the movie.
Ask
Why do you think it is so critical to make sure customers are
comfortable with ordering and viewing On Demand?
Possible Answers:
Customers who know how to order OND, will order it, which means
more revenue for the system.
OND provides tremendous convenience to the customer and helps
our customers feel good about us and our service.
SEGMENT FOUR
18
A customer that does not fully realize and utilize the features of
digital cable with i-Guide will be more likely to believe that they do
not need this service. If we keep the customers properly informed,
we will cut down on digital churn due to lack of understanding of
the product.
Very important for Installers: This is why a demo is so important
before you leave the home. Many customers believe they will be
charged if they hit the OND button – which is not the case – that
button takes them to the On Demand Main Menu. The installers
are crucial in helping to dispel this myth. Customers will use On
Demand more if you show them how.
Train_The_Trainer_combo_rv.qxd
1/11/05
11:54 AM
Introduce Q&A
Page 21
Because OND is such an important selling feature of digital cable, it
is important that customers understand its benefits. Let’s do a quick
Q&A on OND. For each of the OND features I list, you will write a
benefit statement. Remember, a benefit statement explains what the
feature will do or provide for the customer.
Conduct Q&A
Review Possible Answers
NOTE: The answers listed here are only
examples of possible answers. Your participants
may come up with other, equally acceptable
answers.
1. With On Demand, you can order a movie simply by pressing a few
buttons on your remote.
What this means to you is, you get easy access to the
entertainment choices you are looking for.
2. With On Demand, there are no pre-set start times.
What this means to you is, you get the convenience of
entertainment on your schedule.
3. With SVOD you can view your favorite premium titles for one low
monthly fee.
What this means to you is, you get more entertainment value
for your dollar, plus the convenience of setting your own
viewing schedule.
Before we move on, what questions do you have on what we’ve
learned so far?
SEGMENT FOUR
Ask
19
Train_The_Trainer_combo_rv.qxd
1/11/05
11:54 AM
Page 22
Segment Five: Digital Video Recording (DVR) Single Tuner
Introduce Topic
DVR is one of the newest services offered with digital cable and
helps us compete with satellite. We want to be sure customers
know how to use this great feature, so that they get the most out of
their television entertainment.
Ask
I’m sure some of you have heard the term DVR (or PVR) before. Does
anyone remember from the first video segment what it stands for?
Answer:
Digital Video Recording
Ask
Have any of you heard about some of the features that make this
new product so exciting?
Acknowledge Answers
Explain
In the past, when your customers wanted to have access to DVR
technology, they had to buy a separate piece of equipment from a
manufacturer like TiVO. Now, we are giving customers convenient
access to DVR technology built into our digital set-top.
A DVR digital set-top with i-Guide allows you to tape programming
from your TV onto a hard drive, allowing you to create your own
video library. You can then easily access the programs at your leisure.
This technology also allows you to stop, pause, fast forward and
rewind live TV. It will totally change the way you and your customers
watch TV.
Introduce Video Segment #5
(Only if applicable, and video hasn’t already
been shown in its entirety)
Let’s take a look at another video segment and get a more detailed
look at exactly what DVR can do for you. Be prepared to list some of
the DVR’s functions and benefits. Feel free to take notes.
View Video Segment
Summarize Segment
SEGMENT FIVE
20
Ask
I’m sure you all can see why this is a feature of digital cable and iGuide that customers will absolutely love.
What are some of the things that DVR technology will allow
customers to do?
Possible Answers:
Build a personal library of programs and movies that you can watch
whenever and as many times as you want.
Never miss a moment of your favorite program.
Record up to sixty hours of digital programming.
Control live TV – pause, rewind, fast forward and instant replay. You
can even rewind and fast forward in up to 4 different speeds. To
activate Slow Motion, press PAUSE and then FAST FORWARD.
Train_The_Trainer_combo_rv.qxd
1/11/05
11:54 AM
Explain
Ask
Explain
Give live remote to a volunteer.
Page 23
That was a lot of information to take in at once. So, I’m going to
put one of you in control of the remote and we’ll all walk through
it together.
The video first talked about the ability to control live TV. Does
anyone remember why it is that we can do that?
Answer:
The DVR automatically starts digitally downloading whatever
program you are watching into temporary storage called a “live
buffer.” Because the programming is stored, you are able to pause
live TV and rejoin the program whenever you want or rewind if you
missed a scene.
Remember that the storage of this program is temporary and will
only be available while you are watching the show or until you
change the channel. If you want to save the programming, you have
to choose to RECORD it. You cannot record from the buffer. Make
sure customers understand this!
Let’s try it now.
First let’s tune to a channel. We’ll have to let it play for a couple
minutes in order to have the DVR download a little bit of
the program.
Describe the look and location of
the PAUSE button on the remote.
Now, press the PAUSE button. See, it works just like a VCR pause
button would. We can rejoin the live programming at any time by
selecting the LIVE button or DOWN ARROW on the remote.
Describe the look and location of
the PLAY, REWIND and REPLAY
functions on the remote.
Say we walked away from the television and now want to watch
what we have paused. Just press PLAY and start where you left off,
REWIND or INSTANT REPLAY to go back. Let’s do that.
Use LIVE or DOWN ARROW button
Ask
Want to see your own Instant Replay? All you have to do is press
PAGE DOWN and it will automatically replay the last 15 seconds. You
can also press it multiple times to get a longer playback.
To return to live TV, just press the LIVE or DOWN ARROW button.
How will this feature benefit customers?
Possible Answers:
Customers who have children running in and out during their
favorite programs will love this feature. Not to mention all you sports
fans. You have an Instant Replay at your fingertips and you can
easily catch up to live programming by fast forwarding through
commercials or pressing the LIVE button.
As I mentioned, live TV is only stored temporarily unless we choose
to Record the program. Let’s take a look at how to do that now.
Ask
Who remembers one of the four ways that you can Record using
your DVR?
Answers:
1. One touch recording while watching a program.
2. Record from the Program Listings.
3. Record from the Info Screen.
4. Record from Set a Recording (or Manual Recording).
SEGMENT FIVE
Use INSTANT REPLAY button or
PAGE DOWN button.
21
Train_The_Trainer_combo_rv.qxd
1/11/05
11:54 AM
Page 24
Have volunteer demonstrate.
Describe the look and location
of the RECORD button on
the remote.
Have volunteer demonstrate.
#1. Recording while watching a program:
That’s right; you can record at any time while watching a program
with one touch record.
All right, select a channel and press the RECORD button on the
remote. A notice will appear to verify that the program is now being
recorded.
#2. Record from Program Listings:
You can also record right from the program listings.
Go to the Main Menu and go into By Time. Now, select a program
airing later today or later this week. Great. Now all you have to do is
press RECORD. As you can see a little red dot has appeared next to
the listing that shows the DVR is now scheduled to record.
Have a volunteer demonstrate.
#3. Record from Info Screen:
First, we again select a program through the listings and press the
INFO button. This information screen provides a program synopsis,
actors, rating, run time and other details. All we have to do is select
the Record Action Icon at the bottom of the screen.
This is a good one to know if you just happen to be reading about a
show and then decide you want to record it.
These Action Icons allow us to quickly accomplish common tasks
while working in i-Guide. Once you select the Record icon, confirm
the Recording or set up Recording Options. These options let you
schedule multiple recordings at once – for example, if you wanted to
record the same show on every Thursday night at 8 pm.
At this time, three red dots will appear next to the program’s Instant
Information to indicate a repeating or multiple recording.
Have a volunteer demonstrate.
#4. Record from Set a Recording (or Manual Recording):
All right, let’s demonstrate the last option. You know there’s a
program on Tuesday from 8pm – 9pm on Ch 7, but you don’t know
the name of the program or can’t find it in the program listing.
From the DVR Menu we need to select Set a Recording. Set the
start time, end time and record date by using the right and left arrow
keys and select Confirm at the bottom of the screen.
SEGMENT FIVE
Select the channel to be recorded and you are good to go.
Keep in mind that with the Single Tuner DVR scheduled recordings
are not associated with a program title. This means that the DVR will
record whatever is on the channel at the time and date you set. If for
some reason a network changes the time that a program will air,
your DVR will not automatically know this because it is not
automatically tied to individual program information.
22
When you try to schedule a recording that overlaps with another
scheduled recording, the DVR will alert you to the “conflict.”The DVR
can only record one program at a time. The “conflict resolution
screen” will allow you to choose which one you want to record.
Ask
Excellent job on that activity everyone! What questions do you have
on anything we’ve covered so far?
Train_The_Trainer_combo_rv.qxd
1/11/05
11:54 AM
Page 25
Segment Six: Digital Video Recording (DVR) - Dual Tuner
Introduce Topic
Dual Tuner DVR is one of the newest services offered with digital
cable and helps us compete with satellite. We want to be sure
customers know how to use this great feature, so that they get the
most out of their television entertainment.
Ask
I’m sure some of you have heard the term DVR (or PVR) before. Does
anyone remember from the first video segment what it stands for?
Answer:
Digital Video Recording
Ask
Have any of you heard about some of the features that make this
new product so exciting?
Acknowledge Answers
Explain
In the past, when your customers wanted to have access to DVR
technology, they had to buy a separate piece of equipment from a
manufacturer like TiVO. Now, we are giving customers convenient
access to DVR technology built into our digital set-top.
A DVR digital set-top with i-Guide allows you to tape programming
from your TV onto a hard drive, allowing you to create your own
video library. You can then easily access the programs at your leisure.
This technology also allows you to stop, pause, fast forward and
rewind live TV. It will totally change the way you and your customers
watch TV.
Ask
Who can tell me what Dual Tuner means?
Answer:
It means that you can watch one show and record another or record
two shows at the same time!
Introduce Video Segment #5
(Only if applicable, and video hasn’t already
been shown in its entirety)
Let’s take a look at our final video segment and get a more detailed
look at exactly what Dual Tuner DVR can do for you. Be prepared to
list some of the DVR’s functions and benefits. Feel free to take notes.
SEGMENT SIX
25
Summarize Segment
I’m sure you all can see why this is a feature of digital cable and iGuide that customers will absolutely love.
Ask
What are some of the things that Dual Tuner DVR technology will
allow customers to do?
Possible Answers:
Record two programs at the same time.
Build a personal library of programs and movies that you can watch
whenever and as many times as you want.
Never miss a moment of your favorite program.
SEGMENT SIX
View Video Segment
23
Train_The_Trainer_combo_rv.qxd
1/11/05
11:54 AM
Page 26
Watch one program while recording another.
Record up to ninety hours of digital programming.
Control live TV – pause, rewind, fast forward and instant replay. You
can even rewind and fast forward in up to 4 different speeds. To
activate Slow Motion, press PAUSE and then FAST FORWARD.
Explain
Ask
Explain
Give live remote to a volunteer.
That was a lot of information to take in at once. So, I’m going to
put one of you in control of the remote and we’ll all walk through
it together.
The video first talked about the ability to control live TV. Does
anyone remember why it is that we can do that?
Answer:
The DVR automatically starts digitally downloading whatever
program you are watching into temporary storage called a “live
buffer.” Because the programming is stored, you are able to pause
live TV and rejoin the program whenever you want or rewind if you
missed a scene.
Remember that the storage of this program is temporary and will
only be available while you are watching the show or until you
change the channel. If you want to save the programming, you have
to choose to RECORD it. You cannot record from the buffer. Make
sure customers understand this!
Let’s try it now.
First let’s tune to a channel. We’ll have to let it play for a couple
minutes in order to have the DVR download a little bit of
the program.
Describe the look and location of
the PAUSE button on the remote.
Now, press the PAUSE button. See, it works just like a VCR pause
button would. We can rejoin the live programming at any time by
selecting the LIVE button or DOWN ARROW on the remote.
Describe the look and location of
the PLAY, REWIND and REPLAY
functions on the remote.
Say we walked away from the television and now want to watch
what we have paused. Just press PLAY and start where you left off,
REWIND or INSTANT REPLAY to go back. Let’s do that.
SEGMENT SIX
24
Use LIVE or DOWN ARROW button
Ask
Want to see your own Instant Replay? All you have to do is press
PAGE DOWN and it will automatically replay the last 15 seconds. You
can also press it multiple times to get a longer playback.
To return to live TV, just press the LIVE or DOWN ARROW button.
How will this feature benefit customers?
Possible Answers:
Customers who have children running in and out during their
favorite programs will love this feature. Not to mention all you sports
fans. You have an Instant Replay at your fingertips and you can
easily catch up to live programming by fast forwarding through
commercials or pressing the LIVE button.
SEGMENT SIX
Use INSTANT REPLAY button or
PAGE DOWN button.
26
Train_The_Trainer_combo_rv.qxd
1/11/05
11:54 AM
Page 27
Explain
Have volunteer demonstrate.
We’ve just talked about one of the two “tuners” available in the Dual
Tuner DVR. If you want to continue to record this program and tune
to another, use the SWAP key to switch tuners. This will keep the
buffer recording in the first tuner and begin a new buffered
recording in the second tuner.
Demonstrate switching from one tuner to another.
As I mentioned, live TV is only stored temporarily unless we choose
to Record the program. Let’s take a look at how to do that now.
Ask
Have volunteer demonstrate.
Describe the look and location
of the RECORD button on
the remote.
Have volunteer demonstrate.
Who remembers the ways that you can Record using your DVR?
Answers:
1. One touch recording while watching a program (or press twice for
series recordings).
2. Record from the Program Listings.
3. Record from the Info Screen.
4. Record from Set a Recording (Manual Recording).
#1. Recording while watching a program:
That’s right; you can record at any time while watching a program
with one touch record .
All right, select a channel and press the RECORD button on the
remote. A notice will appear to verify that the program is now being
recorded.
#2. Record from Program Listings:
You can also record right from the program listings.
Go to the Main Menu and go into By Time. Now, select a program
airing later today or later this week. Great. Now all you have to do is
press RECORD. As you can see a little red dot has appeared next to
the listing that shows the DVR is now scheduled to record.
Remember that if you press the record button twice you can set up a
series recording. If you’ve recorded a series recording there will be
multiple red dots in the listing.
SEGMENT SIX
27
#3. Record from Info Screen:
First, we again select a program through the listings and press the
INFO button. This information screen provides a program synopsis,
actors, rating, run time and other details. All we have to do is select
the Record Action Icon, the red dot, at the bottom of the screen.
This is a good one to know if you just happen to be reading about a
show and then decide you want to record it.
These Action Icons allow us to quickly accomplish common tasks
while working in i-Guide. Once you select the Record icon, confirm
the Recording or set up Recording Options. These options let you
schedule series recordings – for example, if you wanted to record the
same show the first time it airs, every time it airs or first runs and
repeats.
At this time, three red dots will appear next to the program’s Instant
Information to indicate a repeating or multiple recording.
SEGMENT SIX
Have a volunteer demonstrate.
25
Train_The_Trainer_combo_rv.qxd
1/11/05
11:54 AM
Have a volunteer demonstrate.
Page 28
#4. Record from Set A Recording (or Manual Recording):
All right, let’s demonstrate the last option. You know there’s a
program on Tuesday from 8pm – 9pm on Ch 7, but you don’t know
the name of the program or can’t find it in the program listing.
From the DVR Menu we need to select Set a Recording. Set the
start time, end time and record date by using the right and left arrow
keys and select Confirm at the bottom of the screen.
Select the channel to be recorded and you are good to go.
Keep in mind that with the Dual Tuner DVR, scheduled recordings
are associated with the program’s title. This means that the DVR will
detect lineup changes and adjust recording times automatically.
When you try to schedule a recording that overlaps with another
scheduled recording, the DVR will alert you to the “conflict.”The DVR can
only record one program on each tuner at a time.The “conflict resolution
screen”will allow you to choose which one you want to record.
Wow! DVR with i-Guide is convenient, easy-to-use, and gives you tons
of options for recording. Of course, once we have recorded a few
programs we are going to need to know where we go to access them.
Ask
Can anyone tell me how the customer can view the recordings they
have scheduled?
Have a volunteer demonstrate.
First let’s go into DVR from the Main Menu and select My
Recordings. Select any program from the list. All programs that are
currently stored on the DVR will be listed here. From here, we can
play the recording, or start from the beginning. If this were a
program you decided to record after it had already begun, starting
from the beginning would mean starting from the beginning of
recording, not starting at the beginning of the actual program.
Point out and explain the
Action Icons at the
bottom of the screen.
From here, let’s talk for a minute about the delete features. The
storage in the DVR is limited, so occasionally you will need to go in
and delete recordings to make room for new ones.
From these icons on the Information Screen, we can choose to
delete this program or change deletion priority. The Delete Priority
allows you to create an order for things to be deleted if the
recording space in your DVR is full.
SEGMENT SIX
26
For example, you could select “Save this Recording Until: Space is
Needed.” And the DVR would automatically delete the oldest
recordings first when it needs to make room for new recordings.
Ask
Does anyone have any questions about DVR before we do another
quick Q&A?
Introduce Q&A
Here are a series of questions about the DVR functionality of
i-Guide. All of the answers to these questions can be found in your
i-Guide User’s Manual. I’ll ask you the questions, and you give me
the answers.
Call out the questions
and wait for responses.
1/11/05
11:54 AM
Page 29
Conduct Q&A
Review Answers
1. When does the scheduling conflict message appear?
When you try to schedule a recording or a series recording that
overlaps with another scheduled recording. The DVR can only
record one program on each tuner at a time.
2. What are your two options in the event of a scheduling conflict?
To keep the new recording and remove the old one, OR to keep the
old recording and cancel the new one.
3. How do you do an Instant Replay?
Press PAGE DOWN or INSTANT REPLAY on the remote while
watching live TV or a recorded program.
4. How many times can you increase the FAST FORWARD and
REWIND speed while watching live TV or a recorded program?
Up to four.
5. What will changing the channel while recording do?
Stop the recording. You must remain tuned to the channel to
continue recording.
6. How many hours of standard definition recording will the DVR
store?
Single Tuner
Sixty hours for digital, up to 25 for analog OR up to 10 for high
definition programming. Your DVR will alert you when its storage
space is nearly full. If the DVR’s storage space fills while recording, a
message will appear. You can then change the Delete Priorities on
your recordings, or delete saved recordings to make room, or the
DVR will stop recording the current program at that point.
Dual Tuner
Up to 90 hours for digital OR up to 20 for high definition
programming. The total capacity varies depending on the types of
programming recorded. Your DVR will alert you when its storage
space is nearly full. If the DVR’s storage space fills while recording, a
message will appear. You can then change the Delete Priorities on
your recordings, or delete saved recordings to make room, or the
DVR will stop recording the current program at that point.
7. What is the Recording Starting Notice?
An on-screen notice that appears right before a scheduled recording
allowing you to confirm or cancel the recording.
8. Under Recording Options, what are the Save Until Options?
Recordings can be saved until the viewer deletes or may be
automatically deleted when space is needed.
9. How do you activate Slow Motion while watching live TV?
Press PAUSE and then FAST FORWARD.
SEGMENT SIX
Train_The_Trainer_combo_rv.qxd
27
Train_The_Trainer_combo_rv.qxd
1/11/05
11:54 AM
Page 30
10. What does the UP ARROW key do while watching live or
recorded programming?
Acts as a PAUSE and PLAY button.
Ask
SEGMENT SIX
28
Excellent job on that activity everyone! What questions do you have
on anything we’ve covered so far?
Train_The_Trainer_combo_rv.qxd
1/11/05
11:54 AM
Page 31
Segment Seven: Installation & Troubleshooting
Introduce Topic
Ask
Our final topic today is customer education and troubleshooting. As I
mentioned earlier, customer education will actually make your job
easier.
Why do you think that is?
Acknowledge Answers
Mention any other customer education
tactics that may be available in the
system, such as a Help channel, On
Demand tutorials, web tours, or digital
leave-behind print and video pieces.
That’s right; the more information you give the customer up front,
the less likely they are to call and ask why something isn’t working.
Here is where the role of the installer is extremely crucial. The
majority of customer education happens when the installer is inside
the customer’s home and able to walk the customer through the use
of i-Guide.
Installers, when you conduct customer education in the home, you
want to take a similar approach to the one we’ve taken here in class.
You want to break the information down into manageable chunks,
you want to give clear instructions and descriptions on how to find
the buttons on the remote, and most importantly, you want to make
sure the remote is always in the customer’s hand, not yours. Be sure
to cover Basic Guide Navigation, PPV or On Demand and DVR.
Explain
Ask
Luckily, i-Guide has a great Reference Card for installers. This tool will
help walk you through the top areas to cover with a customer before
you leave the home.
Some customers may still encounter problems. When a customer
calls with troubleshooting problems, make sure you take your time
with them to understand both the problem and the solution.
Why is this so important?
Explain
Again, it’s a time saving thing. If a customer is going to call about a
problem you only want them to have to call once. By making sure
they know the solution the first time, you cut down the likelihood of
a repeat call and a dissatisfied customer.
Explain
One of the ways that you can best be prepared to answer a
customer’s troubleshooting call is by knowing the common error
messages and the diagnostic functions of the DVR.
Another great resource is the Q&A section at the back of the User’s
Manual.
Introduce Activity/Refer to
pre-written questions on flip chart
Let’s do a little role-playing. Here are some common questions you
may get from customers. You need to come up with the answers.
You may refer to the Q&A section of your User’s Manual.
Conduct Activity
SEGMENT SEVEN
Refer to Installer
Quick Reference Card
29
Train_The_Trainer_combo_rv.qxd
1/11/05
11:54 AM
Page 32
Review Activity
Let’s review your answers.
1. A message popped up on my television screen that reads: This
feature is currently being restored. Can you tell me what this means?
Answer:
This screen appears when you try to access a feature that is not
available because the set-top box has not received all the necessary
data. This most commonly happens following a power loss.
2. I can’t remember my PIN number. What can the cable company
do for me?
Answer:
I can reset all of your PINs by issuing a clear PIN command or a
Lukewarm Install from the billing system (check with your billing
system). All of the PINs will be cleared. Upon completion, you will
need to re-enter all PINs.
3. The power went out. Did I lose My Recordings or PINs?
Answer:
All recordings that were saved prior to the power loss are preserved,
as well as future recording schedules. You miss only the recordings
scheduled for recording while the power was out. You will not
lose your Parental Control PINs, Favorite Channels, Locks
or Reminders.
4. My menu seems to be locked and none of the buttons on the
remote or the terminal work. What should I do?
Answer:
Try unplugging the terminal and then plugging it back in. This will
reset the terminal and allow for data to be downloaded. It will take
some time for the information to appear.
Excellent job on that activity everyone!
Explain
SEGMENT SEVEN
To Be Announced appears in the Guide listings when program
information is missing or unavailable. It is common for an occasional
listing to say To Be Announced, this means TV Guide was not
supplied the programming information for that channel for that
time.
When all or most of the listings say To Be Announced, the set-top
most likely recently lost power and is currently reloading the Guide
data.
If the set-top did not recently lose power, a CSR can attempt to
restart the Guide by issuing a Warm Install to the set-top from the
billing system.
Explain
30
Now, I’d like to talk briefly about two error messages that the
customer may report – To Be Announced and This Channel Should
Be Available Shortly.
If the Warm Install does not work, the set-top may not be receiving
the Guide data stream (normally carried at 75.25 Mhz). To check to
see if the set-top is receiving the Guide data, select SET-UP from the
Main Menu. Choose Cable Box, and then choose Yes in the bottom
option, Review Configuration. If the number next to Messages is
not increasing, the set-top is not receiving data and the problem
should be referred to a technician.
1/11/05
11:54 AM
Page 33
When a digital channel goes out, the error message that appears is
One Moment Please, This Channel Should Be Available Shortly. This
can indicate a signal problem or a problem with the converter.
To rule out a signal problem, have the customer check one of the
analog channels. If the analog channels are fuzzy, there is a signal
problem. You can have the customer check the fittings at the back of
the set. If this doesn’t resolve the issue, the problem should be
referred to a technician.
If the problem is not due to signal, and other customers are not
experiencing the same problem, attempt to restart the customer’s
set-top by sending a Warm Install from the billing system.
Ask
Okay everyone, what questions do you have on troubleshooting
before we move on to our final activity?
SEGMENT SEVEN
Train_The_Trainer_combo_rv.qxd
31
Train_The_Trainer_combo_rv.qxd
1/11/05
11:54 AM
Page 34
Final Activity: Test Your i-Guide i.Q.
Introduce Final Activity
Handout Quiz
FINAL ACTIVITY
32
Wow, that was a lot of great information and a lot to
take in.
Now you know, and can tell your customers, that i-Guide is the next
generation of interactive programming guide. But, are you ready to
guide a customer through i-Guide? Let’s find out!
Question #1
Many customers will be surprised to get the new Quick Menu
(instead of the Main Menu) when they press the MENU button
once. To get to the Main Menu, viewers must press the MENU
button ___ times.
Answer: two
Question #2
The new Quick Menu provides ________ to the features of the
program guide.
Answer: shortcuts
Question #3
i-Guide’s enhanced searching lets customers sort and view program
listings By _______, By _______, and by category such as Movies,
Sports, Children and more.
Answer: Time, Channel
Question #4
To access information on a program while viewing it, press the
_________ button on the remote. Here, viewers can read a longer
description about the program.
Answer: INFO
Question #5
Parental Locks allow customers to restrict viewing and purchasing
of TV programming based on their preferences. To place a lock on
selected ratings, channels and titles, the viewer must set a 4-digit
______.
Answer: PIN
Question #6
On Demand is an exciting feature that allows customers to watch
movies and programs whenever they want! With On Demand, you
can pause, fast forward, even ________.
Answer: rewind
Train_The_Trainer_combo_rv.qxd
1/11/05
11:54 AM
Question #7
Icon match exercise
Page 35
Can you match the On Demand Action Icons to their function?
Answer: Correct icon match below
- Go back to the previous screen
- Order the program, or cancel an ordered program
- Tune to a program (for some free and
subscription programming)
- Preview
- Place a lock on the program to restrict viewing
- Resume play of the video (appears for
purchased videos)
- Restart the video from the beginning (appears
for purchased videos)
- Delete the title from your rented titles list
(appears for purchased videos)
Question #8
DVR allows customers to record programming, control live TV and
more. DVR stands for ________ __________ __________.
Answer: Digital Video Recording (or Recorder)
Question #9
In i-Guide, ______ is the highlight color on every screen.
Answer: yellow
Question #10
Check Answers
Flip to pre-written i-Guide i.Q.
rankings on flip chart
In i-Guide, TV listings are color-coded to help customers identify
different types of programming. Blue for Regular programs,
purple for Movies, light blue for Children’s programs and green
for ________.
Answer: Sports
How’d you do? Let’s check your answers and see how your i-Guide
i.Q. ranks!
9-10 correct: incredibly intelligent
6-8 correct: impressively bright
3-5 correct: in need of some review
0-2 correct: intoxicated?
FINAL ACTIVITIY
- Indicates the program is available as a package
33
Train_The_Trainer_combo_rv.qxd
1/11/05
Action Icons
Quick Menu Icons
FINAL ACTIVITY
34
11:54 AM
Page 36
Train_The_Trainer_combo_rv.qxd
A22
1/11/05
11:54 AM
Page 1