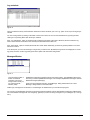
1
OpalisRobot
User’s Manual
OpalisRobot version 3.60
Copyright (c) Opalis, 1995-2000. All rights reserved.
Information in this document is subject to change without notice. (Rev. 1)
Opalis is a registered trademark of Opalis Group b.v.
Microsoft and MS are registered trademarks and Windows and Windows NT are trademarks of Microsoft Corporation. Other
products and company names are trademarks or registered trademarks of their respective holders.
Contact information
Head Office
Opalis Software, Inc.
833 Oxford Street, 2nd floor
Toronto ON, M8Z 5X4
Canada
European Office
Opalis Software B.V.
Engelandlaan180
Zoetermeer 2711 DW
The Netherlands
Tel: (416) 253-9383
Fax: (416) 253-7646
Toll-free: 1-888-OPALIS1
Tel: +31 79 346 2910
Fax: +31 79 346 2911
Opalis website
www.opalis.com
Technical Services
+1 (416) 253-1750
[email protected]
General information
[email protected]
TABLE OF CONTENTS
OPALISROBOT ________________________________________________________________________________ 5
Overview .....................................................................................................................................................5
System Requirements ..................................................................................................................................6
Installation ...................................................................................................................................................7
License Structure .........................................................................................................................................8
COMPONENTS ________________________________________________________________________________ 9
Concept.......................................................................................................................................................9
Multiple Link Creation ................................................................................................................................. 14
OpalisRobot is a Service............................................................................................................................. 15
Remote Administration ............................................................................................................................... 16
Architecture ............................................................................................................................................... 17
Menus ....................................................................................................................................................... 19
Dialog Boxes ............................................................................................................................................. 22
Common Parameters ................................................................................................................................. 27
TASK OBJECTS ______________________________________________________________________________ 29
Program Execution Task ............................................................................................................................ 29
File Management Task ............................................................................................................................... 32
Send E-mail Task....................................................................................................................................... 33
Send Message Task................................................................................................................................... 34
Action on Windows NT Service Task ........................................................................................................... 35
RAS Action Task........................................................................................................................................ 36
Database Execution Task........................................................................................................................... 37
System Restart Task .................................................................................................................................. 39
Ping Computer Task................................................................................................................................... 40
Trigger Opalis Object Task ......................................................................................................................... 41
EVENT OBJECTS _____________________________________________________________________________ 42
Date/Time Event ........................................................................................................................................ 42
Monitor FileSystem Event ........................................................................................................................... 43
Monitor Windows NT Service Event............................................................................................................. 44
Monitor Windows NT Event Log Event......................................................................................................... 46
Monitor Database Event ............................................................................................................................. 49
Monitor Process Event................................................................................................................................ 50
Monitor Computer Event............................................................................................................................. 51
Monitor Disk Space Event........................................................................................................................... 52
Interactive Event ........................................................................................................................................ 53
UTILITIES ____________________________________________________________________________________ 55
SNMP TrapRedirector ................................................................................................................................ 55
ConsoleRunner.......................................................................................................................................... 55
WinEvt3..................................................................................................................................................... 56
GenEvt3 .................................................................................................................................................... 57
StopShut ................................................................................................................................................... 57
Wait .......................................................................................................................................................... 57
ADVANCED OBJECTS _________________________________________________________________________ 58
Link Adder ................................................................................................................................................. 58
Build Task ................................................................................................................................................. 59
Text File Task ............................................................................................................................................ 60
Enable or Disable....................................................................................................................................... 61
Apply Change ............................................................................................................................................ 62
Create Report ............................................................................................................................................ 63
Compare Strings ........................................................................................................................................ 65
Notes Object.............................................................................................................................................. 66
Trigger Object............................................................................................................................................ 67
Service Started .......................................................................................................................................... 68
Service Started After Reboot....................................................................................................................... 69
PAGING TAB _________________________________________________________________________________ 70
Send to Pager............................................................................................................................................ 70
PERFORMANCE MONITORING TAB _____________________________________________________________ 71
Monitor Performance Counter ..................................................................................................................... 71
STATISTICS TAB______________________________________________________________________________ 74
Monitor Counter ......................................................................................................................................... 74
Modify Counter........................................................................................................................................... 78
ADVANCED FILE MANAGEMENT TAB ___________________________________________________________ 79
Advanced File Management Objects ........................................................................................................... 79
File List Management ................................................................................................................................. 80
File Transfer Objects.................................................................................................................................. 81
Folder Management ................................................................................................................................... 82
Internet Transfer ........................................................................................................................................ 83
Compress.................................................................................................................................................. 84
Test if File Exists ....................................................................................................................................... 85
Delete File List Entries................................................................................................................................ 86
INTERNET APPLICATION MONITORING TAB _____________________________________________________ 87
Monitor/Test Internet Application Objects..................................................................................................... 87
ZIP TAB______________________________________________________________________________________ 89
Zip Task .................................................................................................................................................... 89
DYNAMIC DATA ______________________________________________________________________________ 92
Dynamic data............................................................................................................................................. 92
String Manipulation Functions ..................................................................................................................... 93
Triggering Events or Tasks from External Programs ..................................................................................... 95
SECURITY____________________________________________________________________________________ 96
Security Information ................................................................................................................................... 96
External configuration................................................................................................................................. 98
ADD-ONS ____________________________________________________________________________________ 99
Types........................................................................................................................................................ 99
TROUBLESHOOTING_________________________________________________________________________ 101
Common Questions.................................................................................................................................. 101
Messages................................................................................................................................................ 103
Technical Services ................................................................................................................................... 104
Evaluation Version ................................................................................................................................... 105
INDEX ______________________________________________________________________________________ 106
OPALISROBOT
Overview
OpalisRobot is a comprehensive system management and automation solution. It delivers real-time monitoring, notification,
corrective action and event driven job scheduling to provide administrators with proactive management over Windows NT and
Windows 2000 environments.
OpalisRobot provides in-depth monitoring of system resources such as applications, processes, services, Internet applications,
SNMP Traps, event logs, disk space, performance counters, file systems and more. It acts as a 24/7-watch dog to detect and
address system malfunctions, maximizing server availability and performance.
Advanced notification and alerting features via standard communication channels enable immediate response to system
malfunctions. OpalisRobot delivers user-defined corrective actions and multiple methods of notification to detect and fix
problems that can result in downtime.
The robust job-scheduling engine improves productivity by automating routine tasks and multi-step job sequences. It delivers the
sophisticated parallel scheduling capabilities necessary to automate complex IT processes, saving administrators time while
lowering Total Cost of Ownership.
OpalisRobot offers a single solution to automate virtually any network administrative task. The unique combination of jobscheduling, monitoring, notification and corrective action enables IT professionals to design custom automation solutions that
address specific needs in their organization.
OpalisRobot provides today’s IT professional with essential tools to simplify increasingly complex technologies, automate
administrative tasks and manage the IT infrastructure which achieves greater alignment between IT management and business
objectives.
Overview
Page 5
System Requirements
Service
The OpalisRobot automation engine runs as a Windows NT Service and is generally referred to as ‘OpalisRobot Service’.
• Windows 2000 or
• Windows NT 4.0 Service Pack 3
• 14 MB of free disk space
Optional
• TCP/IP if you plan to use SMTP E-mail functions
• ODBC 3.0 if you plan to use ODBC database functions
• Remote Access Service if you plan to use Dial-up Networking functions
ODBC files are available from www.microsoft.com
Client
The OpalisRobot graphical user interface (GUI) is used to view or modify an OpalisRobot Service configuration. It is generally
referred to as ‘OpalisRobot Client’.
• Windows 2000 or
• Windows NT 4.0 Service Pack 3 or
• Windows 98 or Windows 95
Windows 98 or 95: Microsoft Remote Registry Services must be installed. Installation files are located here:
• Windows 98 CD-ROM: ‘tools\reskit\netadmin\remotereg’
• Windows 95 CD-ROM: ‘Admin\Nettools\Remotereg’
Differences between Windows 98 / 95 and Windows NT for the Client: The executable is the same, but some functions are not
available on Windows 98 and 95 because they are part of the advanced Windows NT API (such as restarting the Service
remotely).
System Requirements
Page 6
Installation
When inserting the Opalis CD-ROM, an HTML menu should be presented. From here, the software can be installed. Opalis
products are installed by executing the self-extracting ZIP files. The default installation path is C:\Program
Files\Opalis\OpalisRobot\.
Refer to the ‘README.TXT’ on the CD-ROM for more information on files and their locations.
You must have administrative rights on the computer on which you are installing OpalisRobot.
If you run the setup program from a Windows 98 or 95 computer, you can only install the Client program.
From a Windows NT system, you have three choices
• Client and Service
• Client only
• Remote Installation: choose this option to install the OpalisRobot Service on another Windows NT computer (it will
also work locally if you wish to install just the Service). You must have administrative rights on the remote computer.
Note: the installation does not require a reboot, you can start to work with OpalisRobot immediately after the installation.
Account Used for the Service
The installation program allows customization of the account used by the OpalisRobot Services. It is possible to ignore this
feature and run the Services under the local system account context. However, you must modify this account to a well known
administrative account (for example, yours), if you plan to use ODBC functions. To do so, use the Startup button from the
Services applet of the Control Panel (see the Online help or the full electronic manual on the CD).
Upgrading
You can install the latest version of OpalisRobot on the same system as your current OpalisRobot license; the configuration will
be preserved, however you will require new serial numbers and product keys. Please contact Opalis for more details. As a safe
guard, we recommend you back up your configurations before upgrading. Copy files from Program Files | Opalis | OpalisRobot3
and have a .DV3 extension (these files make up your configurations) into a temporary folder.
Installation
Page 7
License Structure
Server License
OpalisRobot is licensed per Windows NT/2000 server. This means for each Windows NT/2000 computer where OpalisRobot
functionality is required a license is also required. An OpalisRobot license is generally referred to as OpalisRobot Server
License. OpalisRobot runs on both a Windows NT/2000 Workstation and Server.
An OpalisRobot Server License consists of serial number and a product key. They can be entered during installation or at a later
stage by going to Options, Service, Licensing Tab (see the screen shot below).
**Note** If you are using the Internet Transfer option in the Advanced File Management Tab the local and destination computers
require a server license.
Client License
Three client licenses are included by default. Additional client licenses are required if more than 3 ‘entities’ (applications or
users) need to trigger OpalisRobot objects remotely (this includes coping or moving files to remote computers). A Client License
is a paper license and consists of a serial number and product key. They are entered through the OpalisRobot user interface
under Options | Service| Licensing Tab.
Note: if you are using the Advanced File Management features and require OpalisRobot to copy/move files to more than 3
computers you need to purchase additional client licenses. If you are using the Internet Transfer option both the local and
destination computers require a server license. Please call Opalis for more information or to purchase licenses.
If no serial number is entered the product will run in evaluation mode for 30-days
License Structure
Page 8
COM PONENTS
Concept
Tasks
Tasks are the actions OpalisRobot performs. Typically, OpalisRobot will execute tasks in response to events (to be introduced
shortly). You can run any program or system command from OpalisRobot.
OpalisRobot also offers numerous other built-in tasks:
• file and directory operations: copy, move and print files from OpalisRobot;
• SQL and ODBC queries: send SQL and ODBC queries to databases or files from OpalisRobot;
• remote access: connect to other computers from OpalisRobot;
• network messaging: send messages (alerts, etc.) from OpalisRobot;
• Service manipulation: start, stop or pause NT Services from OpalisRobot;
Here are some typical tasks:
• backup disk ‘c:’;
• transfer data from a flat text file to your relational database;
• process EDI messages;
• query a database;
• move files from a public directory to a protected one;
• etc.
Events
Events define the system condition that triggers a task(s). Events are linked to tasks (links are introduced shortly).
OpalisRobot supports numerous events, including:
• periodic: OpalisRobot generates events at certain date/time;
• file system: actions on files or folders (move, copy, etc.) generate events;
• Data queries: OpalisRobot can pool databases (whether SQL server or ODBC) until certain conditions are met;
• task-related: the end of a task is an event so that you can chain tasks.
• and more: it is also possible to interactively trigger events.
Here are some typical events:
• Friday, it’s 9:00 p.m.;
• a file has arrived in the ‘\\opalis\public’ folder;
• the ‘\\opalis\working’ folder contains more than 2Mb;
• the user wants to refresh the data, etc.
Links
Links associate tasks to events. A link enables OpalisRobot to run a task in response to one or more events. Events and tasks
by themselves are not sufficient; it is the combination of one or more events linked to one or more tasks that will perform actual
work.
Separating tasks, events and links maximizes flexibility; you are free to combine tasks and events at will. This means that you
can reuse events or tasks in multiple links. For example, one event can trigger several tasks.
You can also combine two events to express a logical ‘and.’ For example, you can ‘convert files’ (a task) when there are ‘enough
files in the input folder’ (an event) and ‘the time is 10.00 a.m.’ (another event).
Concept
Page 9
OpalisRobot supports three forms of links:
• simple links: one event triggers one task, using one link;
• multiple links: two events trigger one task, using one link. This is equivalent to a conditional ‘and.’
• To express a conditional ‘or,’ create two separate links between two events and the task.
Here are some typical links:
• backup disk ‘c:’ (task) on Friday at 9.00 p.m. (event);
• process EDI message (task) when a file arrives in the ‘\\opalis\public’ folder (first event) and when the ‘\\opalis\public’
folder contains more than 2Mb (second event);
• insert data in a SQL database (task) when the user wants to refresh it (event).
Folders
As an additional convenience, OpalisRobot lets you arrange events, tasks and links in folders. This serves no other purpose
than to help you visually organize your configuration. Also, each folder has an associated log, which logs only the messages
regarding the tasks of the folder.
The scheduler does not use the folders; you are free to organize your configuration to suit your tastes or working habits. Please
note that the objects defined in one folder are available to objects in all folders.
An Example
Automate the backup (disk ‘c:’) every day of the week at 9:00 p.m.
Step 1 – determine what you want the system to do, this is your Task. In this case, you want to start backup, i.e., run the
NTBackup program with ‘c:’ as a parameter.
OpalisRobot supports ‘Program Execution’ Tasks, which run arbitrary programs – including NTBackup, which would be
appropriate in this example.
Step 2 – determine what will trigger the task, this is the Event. In our case, we want to backup everyday at 9:00 p.m.
OpalisRobot’s built-in ‘date/time’ events are perfect for the job.
Step 3 - Associate the event and the task using a link. This creates a configuration that will launch the backup executable when
it’s 9:00 p.m. every day of the week.’ Figure 1 illustrates this configuration
task: backup
drive c:
event: every
day of the week
at 9:00 pm
link: when it's 9:00
pm, backup drive c:
Figure 1
Concept
Page 10
Creating a Configuration
The previous section explained how to create a configuration in conceptual terms, this section explains how to configure the
same job using the OpalisRobot menu items.
First run the OpalisRobot Client program and connect to the OpalisRobot server you want to administer. You can use the Server
| Connect To... menu item and enter the server name in the dialog box. This opens a window with a view of the configuration on
your server (as in Figure 2).
If you cannot connect to the server, make sure that you have sufficient rights.
Figure 2
Step 1 - Right-click in the folder where you want to insert the event, or New in the Edit menu.
This opens the following New Object dialog (
Figure 3). This dialog lists the different objects you can create depending on what is installed on the server.
Figure 3
Step 2 - Select Event and click New.
Fill in the event name (we suggest ‘Backup time’) and select the type of the event (‘Date / time’ in this case, which is actually the
default value). Enter 9:00 p.m. in the Periodicity At field.
Figure 4
Concept
Page 11
Step 3 - Create a task to backup the drive c:
Right-click in the folder where you want to insert the task, or select New in the Edit menu. This opens the New Object dialog
(see
Figure 3).
Step 4 - Select OpalisRobot Task and click New. A window similar to Figure 5 now appears.
Step 5 - Name the task (‘Backup’ seems appropriate) and select the type of task you want (‘Program execution’ in this case).
Program is ‘NTBackup.exe’ and Parameters is ‘c:\’. Select Interactive in the Execution mode list. You may leave the other fields
empty.
Figure 5
Step 6 - Create a link between the event and the task. Don’t forget this last step!
Click on the square at the right of the origin event or task.
Drag the mouse pointer to the square at the left of the destination task. (Do not release the mouse button.)
When the square at the left of the destination task is highlighted, release the mouse button (i.e. drop).
That’s it!
Step 7 - Refresh the OpalisRobot configuration (see Figure 6). To do so, use the ‘Apply Changes’ icon in the toolbar.
Figure 6
That’s all, folks! Congratulations, OpalisRobot will backup your c: drive every day of the week at 9:00 p.m.
Concept
Page 12
Chaining Tasks
In many instances, you will want to chain one or more Tasks. In the example above we automated the backup every night. You
may want to associate a Send Email Task or Write to SQL Server Task to notify or log system activity.
This section explains how to modify the configuration we have created so far so that OpalisRobot emails the system
administrator when the backup is finished.
This section assumes you know how to create tasks and links as explained in the previous section. Please refer to the ‘Concept’
section if you are unsure.
Step 1 - Create a task type of ‘Send Email.’ Let’s call this task ‘Backup completed email.’
Figure 7
Step 2 - Create the link between the ‘Out’ square (at the right of the task icon) of the ‘Backup’ task and the Backup completed
email’ task you just created. This result should look like Figure 8.
Figure 8
Step 3 - Use the Apply Changes command to have your changes taken into account.
You may want to link this task to a different message when it fails. To do it, you will have to create a new link and then edit it
(double-clicking on it) to change its characteristics.
Figure 9
The Edit Link dialog (Figure 9) lets you select which condition you want the link to test: an event occurs, a task completes or
fails.
Depending on its type, a task can return a given value when it completes successfully; using this feature, a link can chain to
another task if this value meets certain criteria.
Concept
Page 13
Multiple Link Creation
When a task requires two or more objects to be triggered so that it can be launched, you need to create a multiple link.
In this example, the tasks ‘First batch’ and ‘Second batch’ are launched at the same time by the ‘Batch time’ event. Thanks to
the multiple link, the ‘Last batch’ task will be launched only when both ‘First batch’ and ‘Second batch’ tasks have completed.
Create a simple link between one of the origin objects and the destination task.
Drag the cursor from the square at the right of the other origin object to the square in the middle of the simple link you just
created.
Link Options
Timeout: the system must receive the two objects in at most Time-out seconds.
Example: A link is waiting for ‘event1’ and ‘event2’ to trigger ‘task1’ with a time-out of 30 seconds.
The order in which events occur is not important. The configuration on the left has the same behavior as the one on the right.
The link properties Timeout option allows you to specify the time-out in seconds:
When the system receives an event (e.g. ‘event2’), it starts waiting for the other event (in
this case ‘event1’).
If ‘event2’ occurs again, it is ignored.
If ‘event1’ is not triggered within 30 seconds, the system will wait again for the two events
to occur. In other words, the two events will have to occur within a new 30 seconds period
so that the task can be launched.
Links enable you to express any conditions between events and tasks. You can combine
links to go beyond the simple ‘If event1 And event2 Then task1’ sequence.
Multiple Link Creation
Page 14
OpalisRobot is a Service
The OpalisRobot automation engine runs as a Windows NT/2000 Service. Services are background processes that normally run
without a console. Services do not necessarily run under the user logged in the system. In fact, Services can run even when no
user is logged into the system. They can also be configured to be started automatically when the system boots (default
configuration).
Starting or stopping
Windows NT Services
requires administrative
privileges.
Like all other Windows NT Services, OpalisRobot can be started, stopped and configured from
the Services applet of the Control Panel (see
Figure 10).
Figure 10
Figure 11
The ‘Startup...’ button brings up the Service dialog box (Figure 12). From the Service dialog box, you can control the behavior of
your Service at system startup. A Windows NT Service can either:
• start automatically when the system boots;
• wait until you manually start it, either from the ‘Start’ button, with the ‘net start’ command or with an ‘Action on NT
Service’ OpalisRobot task.
Figure 12
We recommend that you
do not run OpalisRobot
under the system account
but rather under an
administrative account.
OpalisRobot is a Service
You can also change the user account of the Service from the same dialog. This allows you to
fine-tune the security of the Service. The Service will never be able to bypass the rights of its
user account.
Page 15
Remote Administration
One of the most convenient features of OpalisRobot is that you can manage the OpalisRobot Service remotely. The
OpalisRobot Client program and the OpalisRobot Service work in true client/server fashion.
OpalisRobot consists of two separate programs:
• the OpalisRobot Service, the core of OpalisRobot functionality;
• the OpalisRobot Client, used to view or modify the OpalisRobot Service configuration.
The OpalisRobot Service makes full use of Windows NT/2000 multitasking capabilities. Most objects are implemented in the
form of threads of the OpalisRobot Service, allowing it to carry out many different actions simultaneously.
The OpalisRobot Service consumes practically no system resources for its internal operation. Threads are synchronized by
means of special system objects that guarantee security, robustness and low consumption of resources.
The OpalisRobot Service runs regardless of whether the OpalisRobot Client program is running.
An additional benefit of separating the Service and the Client is that the Client can run remotely from another computer. This is
especially convenient to manage a pool of Windows NT systems running the OpalisRobot Service.
Figure 13
Of course, the OpalisRobot Client and the OpalisRobot Service do not have to run on separate computers. You can administer
the local computer. In this case, in the ‘Connect To’ dialog, simply input the local computer name.
Remote Administration
Page 16
Architecture
OpalisRobot is made up of two distinct programs, the OpalisRobot Service, the automation engine at the heart of OpalisRobot
and the OpalisRobot Client, the graphical user interface to the OpalisRobot Service.
When you execute the OpalisRobot Client for the first time, it is not connected to any Service. The first window should be similar
to Figure 14.
Figure 14
You are not connected to any Service but you can view OpalisRobot messages. See the section ‘Messages Window’ for more
information on OpalisRobot messages.
If you cannot connect to a
Service, check that you
have sufficient rights on
the Windows NT system
where the OpalisRobot
Service is running.
You must connect to a Service before you can administer it. You can use:
• the Service | Connect To... menu item;
• the Connect To button in the toolbar;
• the most recently connected servers in the Service menu.
The Server View window displays the configuration of the server you are connected to. Please note that you can connect to
several servers at the same time, each with its own server view.
The Server View window can be opened in user (low privileges) or administrator (full privileges) mode. See the security section
in the Advanced chapter for more details.
Server View
The Server View is divided into three parts (Figure 15):
• on the left, the Folder Tree;
• in the center, the graph-view of objects;
• on the right, the Properties panel.
The Folder Tree is used to manage folders.
When you click on a folder, the graph-view displays the objects contained in
this folder (if any). Using the right-click popup menu or Objects menu, you can
create or rename folders. Using Drag'n Drop you can move folders to another
location.
You can hide or show this panel using the popup menu.
The graph-view of objects is used to manage objects contained in the selected
folder. You can move objects within or outside of the folder using Drag’n Drop.
You can add or delete objects and folders using menus or shortcuts.
Figure 15
Architecture
The Properties panel displays a summary of the selected object configuration.
You can hide or show this panel using the popup menu.
Page 17
Log and alerts
Figure 16
The log contains the history of task execution. Each time a task is launched (if its “No Log” option is not set) a new log entry is
created.
You can sort log entries by clicking on the label of each column of the list. You can view the detail of a log entry by doubleclicking on it or pressing Enter when the entry is selected.
If the “Log of all folders” option is checked, the list contains all log entries of the server. Otherwise, the list contains the log
entries of the task that are located in the currently selected folder of the Folder Tree.
If the “Show alerts” option is checked, the list will also contain alerts. Alerts keep you aware of general problems or incorrect
execution of events.
In the Priority list, you can select what type of log entries you want to view. By default, all log entries are displayed. To set the
log priority of a task, use the Log priority option of the Options tab of the task configuration.
Messages Window
Figure 17
This messaging system is
based on mail-slots.
Therefore, it will not go
though routers unless you
use a Virtual Private
Network (VPN).
OpalisRobot supports a proprietary network messaging system. The OpalisRobot Client must
be running to receive OpalisRobot messages. In this respect, OpalisRobot messages work like
Network messages (WinPopup).
Users can send messages using the ‘Send Message’ dialog. Please refer to the ‘Send
Message’ dialog section for more information.
Unlike logs, messages are not archived, i.e. all messages are deleted when you close the client program.
You can also use OpalisRobot messages to exchange information between system administrators working from different sites.
You can broadcast messages like: «I’m configuring ‘gateway’to process incoming messages» to your colleagues (or: «Let's go
eat.»).
Architecture
Page 18
Menus
Service Menu
Connect To… Connects to an OpalisRobot Service It opens a dialog box where you can type a computer name or choose it
from a list box.
Reconnect- The Reconnect menu item lists the names of recently connected Services. Select one of them to quickly connect to
the server without using the Connect To… dialog.
Apply Changes applies last modifications or creation of new objects to the running Service.
Start/Stop Starts or stops the OpalisRobot Service. The current status is displayed in the status bar. Please note that the status
does not change immediately depending on the time the Service takes to start or stop. This function is not available on Windows
98 and 95.
If you stop the Service when tasks are being executed, they will be interrupted (except Program Execution tasks).
If you attempt to do so, you will be prompted for confirmation.
Restart - Checks inside the Service that no task is running and that no replacement code is waiting to be used, and then, if
possible, it stops and restarts the OpalisRobot Service. This command can be used to validate changes in Service Options.
This function is not available on Windows 98 and 95.
Print - Prints the content of the currently selected object. It opens a dialog box where you can choose the printer, number of
copies, print to a file, change the printing font and choose precisely the object or list of objects you want to print.
Exit terminates the OpalisRobot Client. Please note that any connected OpalisRobot Service, if started, continues to operate. To
stop the Service, use the Start/Stop command or the Windows NT Control Panel.
Edit Menu
Cut copies the selected object(s) to the clipboard and removes them from the current configuration.
Copy copies the selected object(s) to the clipboard without removing them from the current configuration.
Paste copies the object(s) stored in the clipboard to the current configuration.
Delete removes the selected object(s) from the current configuration.
Select All selects all objects and folder of the currently selected folder.
Purge log erases all entries of the log currently displayed.
Menus
Page 19
Objects Menu
New... brings up the New Object dialog box used to create new objects.
New Folder creates a new folder in the current folder (or the root if no folder is selected in the Folder Tree).
Modify… brings up a dialog to modify the configuration of the selected object.
Active indicates whether or not the selected object is active or not.
Trigger asks the Service to launch the selected task or to simulate that the selected event has occurred.
Show Properties toggles on or off the display of the Properties panel.
Show Folder Tree toggles on or off the display of the Folder Tree.
Options Menu
Service... brings up a dialog box to edit the Service-side options of installed modules.
Log Filter sets filtering options for the log. Depending on which items are checked, Tasks that are
Completed/Failed/Interrupted/Running are displayed in the log.
Client... brings up a dialog box to edit the client-side options of installed modules.
Windows Menu
The Refresh command updates the content of the selected folder or log by requesting new data from the server.
Toolbar: if checked, the Toolbar is visible.
Send Message… brings up a dialog to type and send an OpalisRobot message.
Clear Messages empties the Messages window.
Cascade cascades windows.
Tile Horizontal tiles windows horizontally.
Tile Vertical tiles windows vertically.
Arrange Icons arranges window icons.
The last items in the menu list all opened windows. Selecting one of these items will bring the corresponding window to the front.
Menus
Page 20
Help Menu
Under the Index menu item is listed the name of installed Add-ons. Select one of them to access the corresponding help.
About... displays version, copyright and other information about OpalisRobot and any installed Add-ons.
Popup Menus
Context sensitive popup menus are displayed on the Configuration Tree when you click on the right button of the mouse on
objects.
Menus
Page 21
Dialog Boxes
Send Message
Messages are only
received on those
computers that are
running the client.
The Send Message dialog box sends messages through OpalisRobot proprietary
message protocol. The messages are prompted in the ‘Messages’ window of the
OpalisRobot client.
You can send To a particular computer in the network or to all computers (including yourself).
You can send messages of different types (Information, Warning, Error and Administration). The Message type is informative
only. Please refer to the ‘Messages’ Window section for a more complete discussion of OpalisRobot messages. Depending on
Client settings, a sound can be played when Error or Administration messages are received (see the Client Options dialog).
Edit Event/Task
To create/modify tasks and events, you use the ‘Edit Event/Task’ dialog box (Figure 18).
task/event name
task/event type
configuration
tabs
Figure 18
The screen is divided into three parts: in the Name field, you enter the name of the task/event. Duplicate object names are
allowed but not recommended.
The Type drop-down list allows you to select a type of event/task. All the available types are listed in the ‘Events and Tasks’
chapter with appropriate explanations.
Choose the Type of the event or task at creation time. Please note that you cannot change it when modifying an object.
Tabs
The last part of the screen is the configuration tabs. They will adapt dynamically to the object type.
The directory explains how to configure those parameters. The ‘Properties’ tab holds the most common configuration option for
the task/event.
The other tabs hold specific or advanced options. These options default to a ‘safe’ value. If you are not sure of the meaning of
these options, it is safer to leave the default settings.
You can see the internal number in the ‘Properties’ tab of the object or in the title bar of the ‘Edit Event/Task’ dialog in
modification mode. This number is used in replacement codes, i.e., when you want to share data between tasks. See Using
Replacement Codes in Tasks.
File names for files located on network drives must be expressed into UNC notation.
Dialog Boxes
Page 22
UNC is short for ‘Universal
Naming Convention’.
The UNC notation is independent of drive names and used for files located on network drives.
UNC file names are in the following format:
\\computer_name\share_name\directory\file_name
When you input a password, you must confirm it in the field at the right.
Edit Link
Simple Links
You need to create the
task(s) and/or the event(s)
before creating the link.
To create a link, proceed as described in the Five-Minute Guide chapter.
To modify the options of a link, simply double-click on it. This brings up the Edit Link dialog.
If list:
• When the origin object of a link is an event, the only choice is that the event occurred.
• When the origin object of a link is a task, the If list can contains two different set of items:
• If the task returns a numeric value when it completes, the list has the following items:
Completes: select this item if you want to launch the resulting task when the origin task completes successfully.
Fails: select this item if you want to launch the resulting task when the origin task fails.
Completes or fails: select this item if you want to launch the resulting task when the origin task completes or fails.
Returns: the resulting task is launched if the return value of the origin task equals the entered value.
Returns more than: the resulting task is launched if the return value of the origin task is greater than the entered
value.
Returns less than: the resulting task is launched if the return value of the origin task is lower than the entered value.
Returns a value between: the resulting task is launched if the return value of the origin task is between the entered
values.
Task type
Program execution
File management
Database execution
Dialog Boxes
Return value
Return value of the program
See File Management Task in the Events and Tasks chapter
First row of the first line returned by the query (if a numeric value)
Page 23
Return values are not taken into account when a task fails.
• If the task does not return a numeric value, the list has the following items:
Completes: select this item if you want to launch the resulting task when the origin task completes successfully.
Fails: select this item if you want to launch the resulting task when the origin task failed.
Completes or fails: select this item if you want to launch the resulting task when the origin task completes or fails.
And: see Link in the Advanced chapter.
Options for a link are:
• Inactive: if checked, the link is inactive and will not be evaluated at run-time. This means that the task selected in the
Then field will not be launched if the event or task selected occurs or completes.
• Timeout: see Link in the Advanced chapter.
• Wait before triggering task is a period of time (in seconds) that will be waited by the link before launching the resulting
task.
Service Options
General Options
Log out of activity: when checked, OpalisRobot sends a message to the Windows NT Event Viewer when a task is triggered but
is outside of its activity range. See Activity Templates section later in this chapter.
Extended log: when checked, OpalisRobot logs extended information about its operation in a file named op_robot3.log. This file
may be required for technical support.
Log History: OpalisRobot deletes log entries (and their associated detail file) older than the number specified. 0 means no
purge.
Add-on Options
This tab lists the Service Add-ons installed and their respective version.
If the selected Add-on has Service-side options, the Configure button is enabled and you can use it to access the configuration
dialog of the Add-on.
Licensing
This tab lists the Service Add-ons installed. An Add-on can implement the following licensing schemes:
• Serial number/product key (like the OpalisRobot Service): you directly edit the licensing values and view the edition
name in the fields at the bottom of the Add-on list.
When entering serial numbers and product keys, make sure you use the correct letter case (UPPER and lower case).
• A customized licensing scheme: you edit licensing options of the Add-on using the Licensing button at the right of the
Add-on list.
• If the fields at the bottom of the Add-on list and the Licensing button are disabled, the Add-on has no licensing
options.
Closed Days
The Closed Days tab lets you enter a list of calendar dates that can be used later on activity templates to enter numerous days
in one operation.
Dialog Boxes
Page 24
To add a day on the list, select it using the calendar window that appears when you click on the drop-down arrow of the date
field at the left, then click Add.
To remove a day from the list, select it in the list and click Remove.
Activity Templates
Activity templates are templates describing date and time settings that you want to assign to one or more events/tasks.
To create a template, click Create then fill the template settings as desired.
The Activity dialog is composed of three tabs:
• The Regular days tab, that lets you input a pattern describing when the regular days of the template should occur.
Possibilities are:
• Every week on specific days of the week. For example: Monday and Tuesday.
• Every month, on days selected by week. For example: the first and second Monday of the month.
• Every month, on days selected by number. For example: every 1st, 2 nd, 11th, 12th, 21st and 22nd of the month.
• Exceptional days (for example: the user can select not to run on December 24th but to run on January 1st).
To add a day on the Exceptional days list, select it using the calendar window that appears when you click on the
drop-down arrow of the date field at the left, select Active or Inactive, then click Add. An icon representing a red cross
will appear at the left of an inactive day and a green check mark will appear at the left of an active day.
To add the list of closed days in the Exceptional days in the list, click the Add closed button.
To toggle a day from Active to Inactive, select it on the list and click Invert.
• Hour range (for example: from 8AM to 10AM and from 2PM to 6PM or from 8PM to 6AM).
How it works:
Depending on what you entered, there is a possible conflict between Regular and Exceptional days. Exceptional days will
always be evaluated before the regular days.
If the day should be active thanks to the Regular days options, but is marked as Inactive in the Exceptional days list, then this
day will be skipped. Example: A job that should run every Monday with the first of December 1st, 1997 (a Monday) marked as
inactive: the job will not run during this day.
If the day should not be active thanks to the Regular days settings but is marked as Active in the Exceptional days list, then the
job will run during this day. Example: A job that should run every Monday with the first of December 2nd, 1997 (a Tuesday)
marked as active: the job will run during this day.
The hour range is evaluated at the end. No matter what time it is, a job will not run if the day is not activated by the Days
settings.
Dialog Boxes
Page 25
Client Options
General
Check ‘Reconnect to Previous Session Servers’if you want the client, at startup, to automatically reconnect to the servers that
were opened at the end of the previous session.
If ‘Refresh views every’is checked, the current folder or log is refreshed at the interval specified (in seconds).
If ‘Hide parent folder’is checked, the ‘Parent’ folder icon (that displays the parent folder when you double-click on it) is not
displayed in folders.
If ‘Only folders are allowed in the root folder’is checked, only new folders can be created in the root folder. You cannot add any
new event, tasks or links in the root folder (only in other folders).
Notify
Confirmation Messages: When checked, OpalisRobot asks for a confirmation before executing major commands. You should
leave it to Checked until you become familiar with OpalisRobot.
The Play Sound options control whether a sound is emitted or not when Error or Administration messages are received by the
Messages window.
Sound allows you to change the sound from the default system beep to any WAV file.
Add-ons
This tab lists the client Add-ons installed and their respective version.
If the selected Add-on has client-side options, the Configure button is enabled and you can use it to access the configuration
dialog of the Add-on.
Dialog Boxes
Page 26
Common Parameters
Events & Tasks
The Inactive option is common to all tasks and events. It is used to deactivate the object without deleting it. When it is turned on,
the object won’t be used:
• Event: the event will not be triggered (in fact, the condition is not tested at all). When inactive, the event won’t start
any task;
• Task: the task won’t start even if an event triggers it;
A simple ‘event-link-task’ chain won’t work unless all three objects are active.
The length of names is limited to 60 characters. You should use explicit names. For example, prefer ‘cheap rate’ and
‘connection’ to ‘ev1’ and ‘tk1’.
Duplicate object names are allowed but not recommended.
Object names are not case sensitive, i.e. ‘Test’ and ‘test’ are the same.
Activity tab
The Activity tab lets you assign an activity template to a task or event. This template can be one of the existing global templates
(the ones listed in the Activity Templates tab of the Service Options dialog) or a custom one that will be attached to the current
event or task.
If you need to apply the same activity template to several objects, it is better to create a global template. For more details about
activity templates, read the Activity Templates section.
A first and last date/time can be set. The object will never run before the first date/time and never after the last date/time.
Tasks
In the After block, you can set the task to send a message after it completes and/or fails.
The message can be sent to the Windows NT Event Log, to the screen (Popup message) or to the OpalisRobot client. The two
latter options require a destination. Input a computer or a user name (Popup) or a computer name (OpalisRobot message). If
you input ‘*’, the message will be sent to all computers of the domain.
Common Parameters
Page 27
The Log Priority option controls the level of importance given to the task in the log. Please refer to the “Log and alerts” section
for more details about how to view the OpalisRobot log.
If “No log” is selected, the execution of the task will not generate any trace in the OpalisRobot log.
The Multitask mode option controls the multitasking behavior of multiple instances of a task, i.e., how a task behaves if another
task of the same name is running when it is started:
• when the option is set to ‘Parallel execution’ (default), several tasks with the same name can run concurrently.
• when the option is set to ‘Queued execution,’ only one instance of a given task can run at any time. If more than one
instance of a given task is started, they are serialized. A task must wait for the completion of the running task before
executing.
• when the option is set to ‘Single execution,’ only one instance of a given task can run at any time and, if more than
one instance of a given task is started, newer tasks are simply not executed (i.e., they terminate without executing
any work).
This choice may conflict with the use of dynamic data.
Events
In the After block, you can set the event to send a message when it occurs.
The message can be sent to the Windows NT Event Log, to the screen (Popup message) or to the OpalisRobot client. The two
latter options require a destination. Input a computer or a user name (Popup) or a computer name (OpalisRobot message). If
you input ‘*’, the message will be sent to all computers of the domain.
For many events, the Trigger option lets you decide how the event must act when the Service starts. If the Take account of
existing situation option is selected, the event will be triggered if the monitored part of the system is in the tested state.
Otherwise, the event will wait until the next state change to trigger.
Common Parameters
Page 28
TASK OBJECTS
Program Execution Task
Executes the Program with optional Parameter(s) on the command-line.
The program can be a batch file or any executable that Windows NT can launch (DOS, Windows 16-bit, Windows 32-bit, etc.)
If the file is a batch or command file, you can edit it by clicking on the ‘E’ button at the right of the field.
You can use the
Command mode to run
programs. However, it is
not recommended since it
uses more system
resources.
If the Command execution mode is chosen, the command-line is passed to the Windows NT
command interpreter (CMD.EXE). We recommend using this option for executing .bat or .cmd
files.
Working directory starts the program in a different working directory. By default, the working
directory is the program directory.
After Terminate after minutes, the program is terminated. In this case, the task is considered as Failed.
We recommend that you use this option carefully because a clean exit is not performed and DLLs loaded by the program are not
unloaded, which can lead graphical programs to hazardous graphical behavior on the console.
Program execution mode:
• Background, normal priority: if the program does not need any user input or if the program runs in character mode.
• Background, low priority: if the program does not need any user input or if the program runs in character mode. The
program is started at a lower priority.
• Interactive: only if the program interacts with the user; this option is not recommended because it is possible to
interfere with the execution of the program on the system console.
• Launched by ConsoleRunner: this option is for programs that cannot be launched by a Service (such as some MS
Office, VB programs or 16-bit applications that require shared memory). When the task has been triggered,
OpalisRobot passes information about it to the ConsoleRunner utility that launches the program. In order to launch
the task, it is mandatory for ConsoleRunner to be running on the system console when the task is triggered.
ConsoleRunner must be launched manually or at logon time using the Startup folder.
Example: Return Values
When the Program Execution task completes, it produces a return value. Return values can be used to make decisions.
To find out if a file is available or not, you could use the return values of the ‘dir’ command.
Create a Program Execution task, set ‘Mode’ to ‘Command execution’ and type ‘dir c:\test.txt’ as the command (You can change
‘c:\test.txt’ to something else of course).
Program Execution Task
Page 29
Trigger this task and switch to the ‘Log view’. The log entry detail (double click the log entry) for this task will look similar to this:
Note that the ‘Return Value’ is 2, which means the file does not exist.
Create the file ‘test.txt’ (or rename an existing file) and trigger the task again.
The log entry detail will show you:
Now the ‘Return Value’ is 0, which means the file exists.
OpalisRobot can make decisions based on these return values by evaluating the links originating from a task.
Create two Send Message tasks, which send a message to your computer or user name.
One task should have a message such as ‘file found’, the other should have a message such as ‘file not found’.
Link the Program Execution task to both Send Message tasks:
Double click the link between the Program Execution task and the Send Message task which sends the ‘file found’ message.
The ‘Link properties’ window will open:
Select ‘Returns’ from the drop-down list:
Program Execution Task
Page 30
The ‘Link properties’ window now reads “If dirtest returns 0, then file found”.
Modify the link between the Program Execution task and the Send Message task which sends the ‘file not found’ message. This
time select ‘Returns’ and change the value from 0 (default) to 2.
Apply changes. If the Program Execution task is triggered and the file is available, you’ll get a message ‘file found’. If not, a
message ‘file not found’ will display.
To automate this process, we could add a Date/Time event, which is triggered every 5 seconds:
If we link the Date/Time event to the program execution task we have automated this process:
Every 5 seconds the Program Execution task will be triggered. Depending on the result, a Send Message task will be triggered.
Use of mapped drives is
not recommended, as
they cannot be
guaranteed to be available
to the OpalisRobot
Service.
A process like this could be used to determine the existence of a specific file on a remote
computer connected to the Windows NT network (in this case a path in UNC format would be
entered instead of a local path).
Hints and tips
Not all programs or command produce return values.
Test for return values by creating a situation where you know the result will be ‘good’. Launch the program or command using
the Program Execution task and check the return value in the OpalisRobot log.
Then create a situation where you know the result is ‘bad’. Again, launch the program or command using the Program Execution
task and check the return value in the OpalisRobot log.
If the return values are different, then OpalisRobot can use them to make decisions.
If a task fails, return values are not taken into account. However, you can make decisions if a task fails.
A batch file will only produce a return value for the last program or command executed. Split your batch file into different
Program Execution tasks to evaluate other return values.
Some programs or commands wait for user input.
If such programs or commands are launched by OpalisRobot, they will never terminate. Some commands have optional
‘switches’ to override waiting for user input. Be aware of the fact that OpalisRobot cannot simulate keystrokes directly.
However, it could ‘drive’ a 3rd party application to do so.
NTBackup and automatic mode.
Make sure that a cartridge is loaded in the tape drive before running the program. Otherwise NTBACKUP may be blocked, and
you may have to reboot the system.
We recommend that you set the Execution mode to Interactive for NTBACKUP tasks.
Program Execution Task
Page 31
File Management Task
Copy, move, delete, rename or print the files in the Origin folder that
correspond to the Mask or filename or Filter.
The Origin folder and Destination folder entry fields accept local paths or path
in UNC format. Use of mapped drives is not recommended, as they cannot be
guaranteed to be available to the OpalisRobot Service.
For the Print option, the printer name must be entered in UNC format
(‘\\server_name\printer_name’). Otherwise, the UNC format is required only
when the destination folder resides on a remote computer.
Printing copies the file to the printer. Therefore, the file must have been preformatted for the printer, or must be in ASCII format.
For ASCII files:
• the font name and font size can be selected;
• a line wrapping value can be set: after the specified number of characters, a new line is created for the remaining
characters of the line.
About filters:
• Filters can include wildcards (the ‘*’ or ‘?’ character) but not folder names.
• Order of filters is important: the filters are evaluated from the top to the bottom. As soon as a matching filter is
encountered, the file is taken or not depending on the Include/Exclude value.
When the file already exists in the destination directory, OpalisRobot can:
• overwrite it and the old file is deleted;
• create a new file with a different file name (OpalisRobot appends date/time at the end of the file to create new unique
filenames);
• fail.
Destination file date can be modified to the transfer date or keep its origin date (default). You can add a global filter based on file
age expressed in days.
Because OpalisRobot appends date/time at the end of filename to create new unique filenames, the file system on the target
machine must support long filenames.
This task has following return values:
Situation
File(s) successfully copied, moved,
deleted, renamed or printed
No file(s) to copy, move, delete, rename
or print
Unable to copy, move, delete, rename
or print file(s)
Status in Log
ü (completed)
ü (completed)
û(failed)
Return value
Number of file(s) successfully copied, moved, deleted, renamed
or printed, i.e. a value greater than 0.
0
The task will fail if destination folder is not accessible, i.e.
network problem, insufficient rights or share not available.
Please note that return values are not taken into account
when a task fails.
Hints and Tips
Every task executed by the OpalisRobot Service, is executed under the user account under which the OpalisRobot Service runs.
The File management task is no exception: if a File management task keeps failing with ‘Access Denied’ messages, check if the
user account used by the OpalisRobot Service has sufficient rights on the destination.
You should always use UNC format when specifying a shared drive or folder. Mapped drives cannot be guaranteed to be
available to the OpalisRobot Service.
File Management Task
Page 32
Send E-mail Task
Sends e-mail using:
• SMTP (any SMTP compliant mail server: UNIX based, Lotus cc:Mail, Novell
GroupWise, Microsoft Exchange, etc.)
• MAPI (Microsoft Mail)
• Exchange (Microsoft Exchange servers)
The message can be text that you type in the Message text box (limited to 256
characters) or a text file.
Use the File name option to specify a (plain) text file. The benefit of having a text
file as message text is that the message can be formatted.
Subject is not mandatory but recommended.
SMTP:
The Connect tab is where you enter the SMTP relay address (the name or IP address of your SMTP mail server) and the
Sender address (the name that will identify you as the sender of the mail and at which you will receive the reply).
Use the ‘… ’ button to setup the list of recipients. To add a recipient, enter an e-mail address, select a recipient type: To:, Cc: and
Bcc: (blind carbon copy, addresses in this field are not seen by the recipients), then click Add. At least one recipient must be
entered.
You can attach as many files as you want to the mail by adding them on the Attachment list.
SMTP (simple):
Configuration is the same as SMTP, except that only one recipient can be set and one file can be attached. This allows you to
use dynamic data in these fields (see Advanced Topics, Dynamic Data for more information on dynamic data).
MAPI:
You can send messages to one destination user or to a group. You can attach one file using the Attachment field.
The Connect tab is where you enter the user name for the account of the user who sends the mail. If the account is passwordprotected, enter the password in the Password/confirm field.
Send mode:
• ConsoleRunner (default). To be used when messages cannot be sent from the Service (especially when MS Mail
tasks fail with logon errors). When the task has been triggered, OpalisRobot informs the ConsoleRunner utility, which
then sends the message. In order to launch the task, it is mandatory for ConsoleRunner to be running on the system
console when the task is triggered.
• Service. In general, sending messages through a Windows NT Service is not supported by MAPI. However, in some
situations it can work. We recommend using the default option.
Note that to send MS Mail messages when MS Exchange is installed, you must create a special profile for MS Mail connection
and enter this profile name in the user/profile name field. When used with ConsoleRunner, this profile must exist in the
configuration of the currently logged-on account.
Destination can only include one MS Mail User name, or a group name.
Exchange:
To send messages directly via Microsoft Exchange use this option.
Make sure the user/profile name field on the Connect tab contains a valid profile name. This profile must exist in the
configuration of the account assigned to the OpalisRobot Service.
Send E-mail Task
Page 33
Send Message Task
Send a message to a user, computer or the Windows NT Event Log.
Message type:
• On screen popup: The transport type is WinPopup. The WinPopup program (for Windows computers) or the
Messenger Service (for Windows NT) must be running in order to receive messages. Type ‘*’ in the User/Computer
name field to send the message to all users in the work group. You can enter a computer or a user name.
• OpalisRobot: Sends Message as an OpalisRobot message to all or one computer on the network. The message is
displayed on the Messages window of the OpalisRobot Client. You can choose the Message type on the list. Error
and Administration messages can generate a sound on the OpalisRobot Client. The message type is for information
only. Type ‘*’ in the User field to send the message to all computers in the work group.
• Windows NT Event Log: Sends Message to the Windows NT Application Log.
• You can choose the severity of the message (Information, Warning or Error).
Note: depending on the application, it can be easier to use the After option of the previous task in the job instead of this task.
Send Message Task
Page 34
Action on Windows NT Service Task
Starts, stops or pauses the Windows NT Service identified by Service name.
Use the ‘… ’ button to display the list of installed Services and select the Service name required (not supported on Windows 98
or Windows 95).
Parameters passed to the program are sent to the Service when it starts. (Unlike the Windows NT Service manager, the
parameters are retained after execution of the task.)
If the action is not performed during the Time allowed, then the task is considered as failed.
Hints and Tips
If a Service cannot start within 2 minutes (default value), OpalisRobot considers the Service not started. If a Service has many
dependencies (it needs to start other Services before it can be started), the Time allowed should be incremented.
Of course, the same rule applies to stopping a Service as well.
Starting or stopping a Service requires Administrative privileges. Make sure the OpalisRobot Service runs under an
Administrative account.
Action on Windows NT Service Task
Page 35
RAS Action Task
Establishes or releases a connection with a remote site using the Remote Access Service. (This Service must have been
configured beforehand.)
Connect to the Phonebook entry name (as it appears in the Remote Access Service or Dial-up Networking program).
The Domain is used for user authentication. You can enter the User name and Password/Confirm in the connect information if
they are required by the phonebook entry.
You can specify what happens if the line is busy (or the modem is not available):
• Fail
• Retry: Number of tries
You can test your connection parameters using the Remote Access Service program.
OpalisRobot checks the state of the connections before attempting to establish a new connection or disconnect. The task will
immediately terminate successfully if the connection is already set up when the task is started.
We recommend that you always link the failure of a Connection task with a Disconnection task. Otherwise, it may temporarily
leave the port in an unusable state if the connection is unexpectedly interrupted.
RAS Action Task
Page 36
Database Execution Task
Executes a query or a file containing queries (SQL Server only) in an ODBC or SQL Server database.
The Database type can be any ODBC compliant source or SQL Server.
When using ODBC sources it is the OpalisRobot Service account that is actually making the ODBC connection. In other words
if you define a User Data Source Name then the user is in fact the user account you have defined to run the Service.
The best way to check the connectivity in this situation is to log on to the local Windows NT system (where the OpalisRobot
Service is running) as the account you assigned to the Service and define the DSN from here.
Using a System or File DSN does not require a user specific context for the connection, in other words any user or Service can
access the DSN even if you created it from your own log-on account.
Enter a SQL statement directly in the Query field or you can select a file if the database you are connecting to is a SQL Server.
When using the query field, be aware this is limited to 255 characters. The use of Dynamic Data is supported in this field so you
can substitute values from other Opalis objects such as date or file names. As Dynamic Data is substituted when the task is ran
it is possible to run out of space in this field as the Dynamic Data expands the query over the 255-character limit.
With a data source that supports stored procedures, use parameterized queries instead of full SQL statements so that the query
uses as few characters as possible.
An example Stored Procedure is:
CREATE PROCEDURE CountSales @Var1 INT AS
Select Count(*)
From tblSales
Where SaleType = @Var1
On the Connect tab enter the server name or DSN for the database to be connected to. With SQL Server, leaving the User
Name field blank causes the connection to run in integrated security mode.
Database Execution Task
Page 37
By using multiple Database Execution tasks it is possible to link the creation and deletion of stored queries/procedures together
in the design.
With the combination of Database Execution tasks running SQL scripts from files and parameterized queries it is possible to
extend the functionality of the Dynamic Data in this task.
OpalisRobot does not check the syntax of the query at the time the query is entered, it simply passes it on to the SQL database
or ODBC driver. On execution of the query the status from the server or driver is passed back to the OpalisRobot log.
It is helpful to check your queries with a tool from your data provider before you execute them from within OpalisRobot, e.g. the
Access query builder (the Queries tab) for Access tables or the SQL Query Window/Analyzer for SQL Server. Just copy and
paste the query into a file or the query text box.
The Database Execution task generates Dynamic Data of its own that can be used within other objects in your design. A
common technique is to cascade tasks that can be configured to derive lookup values that can be inserted into later queries
using Dynamic Data codes.
The ‘Populate ReportTable’ task in this example refers to Dynamic Data supplied by the preceding two Database Execution
tasks.
Using the OpalisRobot Counter objects or by designing loops all rows of a table can be processed in this way.
Hints and Tips
SQL Server: If database is left empty, queries will be executed in the default database for the SQL user.
‘Go’ is not a Transact-SQL
order. It is a query
separator used in many
interrogation programs
(such as ISQL).
SQL Server | File: the queries contained in the query file must be separated by the ‘go’ order
(which must be located at the beginning of a new line, do not put ‘go’ in comments).
Warning: stopping due to
an error will not rollback
previously executed
transactions in the same
file.
An SQL execution error or a RAISERROR call may stop a query.
If you choose ‘Continue,’ the number of failed queries will be written into the task execution
log. Furthermore, SQL errors that occur during execution are written into the Windows NT
Event Viewer.
In If an error occurs in query, choose the required behavior if an error occurs in the query either stop or continue.
Note: If you would like output to be returned, use ISQL with a ‘Program execution’ type task.
The output file created by OpalisRobot will contain all the lines returned by file queries.
Database Execution Task
Page 38
System Restart Task
Shuts down the system with automatic reboot.
Message to be displayed will be displayed on the Windows NT systems’ screen when the system shuts down.
Restart options are:
• Delay, force applications to close (after the delay).
• Delay, do not force application to close (after the delay).
Delay is expressed in seconds, with a minimum of 30 seconds.
You can send a general message to inform users that a system shutdown is imminent with a "Send Message" type task.
For safety reasons, if the task is started less than ten minutes after a reboot, it will wait one additional minute before initiating the
system shutdown.
Hints and Tips
You can abort the system shutdown by running the StopShut.exe utility, which can be found in the folder where OpalisRobot
was installed.
System Restart Task
Page 39
Ping Computer Task
Sends Ping packets to a remote TCP/IP host to check its availability.
Input in the Number of packets field, the number of times you want the task to send a Ping packet.
Note that the task completes as soon as an incoming packet is received from the remote computer and the task fails if no
incoming packets were received after sending the packets.
Ping Computer Task
Page 40
Trigger Opalis Object Task
Triggers events, tasks or flows on local or remote OpalisRobot or OpalisRendezVous Services.
Type (or use the ‘… ’ button to browse the network and select ) the Windows NT computer that runs the OpalisRobot Service in
the Server name field.
Type the name of the Event or Task you wish to trigger.
If the OpalisRobot v3 on same server option is selected you can use a drop down list to select the event or task.
A parameter can be passed on by entering one in the Parameter field. This is only possible if the object specified is an
Interactive event (see the Interactive Event paragraph in the OpalisRobot’s Events Explained chapter).
Hints and Tips
Triggering OpalisRobot objects on a remote computer running the OpalisRobot Service requires a Client License on the remote
computer. Refer to the chapter ‘OpalisRobot Licensing Structure’.
The Trigger Opalis Object task is ideal for cascading jobs on multiple Windows NT systems running the OpalisRobot Service.
When used to trigger an object on a local OpalisRobot Service (using the OpalisRobot v3 on same server option) the Trigger
Opalis Object task can be used as a ‘GOTO’ statement.
For more details on OpalisRendezVous, visit our Web site (www.opalis.com) or contact us.
Trigger Opalis Object Task
Page 41
EVENT OBJECTS
Date/Time Event
Triggers the event depending on time or interval.
Select At to trigger the event at a specific time of the day or Every to enter a time interval expressed in hours, minutes or
seconds.
Previous version users: This event has been simplified. Use it in conjunction with Activity templates to implement
sophisticated scheduling sequences.
Trigger Options (for interval expressed in minutes or hours):
At time slices within the hour (interval expressed in minutes only) allows the event to be triggered regularly within the hour. For
example, if the interval is 5 minutes, the event will trigger at 0, 5, 10, 15, 20, etc. (instead of immediately after the Service startup
and then every 5 minutes).
Starting x Minutes after the hour (interval expressed in hours only) allows triggering of the first event using the minutes entered.
For example, if the interval is 2 hours, the Minutes field is ‘45’ and the Service is started at 8:20 a.m., the event will trigger at
8:45 a.m., 10:45 a.m., etc. (instead of immediately after the Service startup and then every two hours).
Date/Time Event
Page 42
Monitor FileSystem Event
Triggers an event when files from the Origin folder and described by the filter
are new or modified, when their size exceeds a given threshold or when the
number of files matching the filter exceeds a given value. The Origin folder
must be located on a local drive, OpalisRobot cannot monitor the Filesystem
of a remote computer.
About filters:
• Filters can include wildcards (the ‘*’ or ‘?’ character) but not folder names.
• Order of filters is important: the filters are evaluated from the top to the
bottom. As soon as a matching filter is encountered, the file is taken or not
depending on the Include/Exclude value.
A history is kept, i.e. the event is only triggered when the file is created or
modified. It will not be triggered for the same file again.
Each Monitor FileSystem event’s history is stored in RAM and on the harddrive. This means the history is kept even if the
OpalisRobot Service has stopped. These files are created in the folder where the OpalisRobot Service was installed and have
following format: ‘number.oprimg’, where ‘number’ is the object number for Monitor FileSystem event
Trigger options:
• File is modified: Each time a file is modified (name change, size change, date/time change) the event will be
triggered.
• Size overpasses (bytes): Each time the total size of files exceeds the threshold the event will be triggered. It is not
triggered again until the size lowers and passes under the threshold.
• Number of files = or >: Each time the total amount of files equals or exceeds the threshold the event will be triggered.
It is not triggered again until the total number of files lowers and passes under the threshold.
Trigger when options:
• Date/Time has changed: Each time a file is modified the event will be triggered.
• Date/Time is more recent: Only if the date/time properties of a file change to something more recent (or later) than the
original date/time properties, the event will be triggered. This option is useful if you want to make sure only the latest
files can trigger the event.
All trigger options apply to files within the filter configuration.
No history: By default, the event keeps a record of the files that triggered it, in order not to trigger a second time for the same
file. If the event is set to trigger each time a file is modified and if no filter is set, the No history option can be checked to prevent
this behavior. If the No history option is set, the event will not record what files triggered it, thus any activity in the folder will
trigger it.
Wait delay: This event is triggered Wait delay seconds after OpalisRobot detects the last creation/copy on this file, unless a new
update occurs. When it receives a notification from the file system, OpalisRobot waits Wait delay seconds before triggering the
event. If OpalisRobot receives another notification during that delay, it will wait again for Wait delay seconds before triggering
the event.
This is very handy for large files/folders or for those applications (like FTP) which first create an empty file and later copy data to
it. If the Wait delay value is set to 0, those applications would trigger two or more events per file.
Do not use very large wait delays in folders that are frequently accessed. Typically 5 seconds is enough for files smaller than 1
MB.
To find the correct value, carry tests on a loaded machine. Start with a small delay (0 or 1 second) and increase the delay until
there's only one event triggered per file copy.
Monitor FileSystem Event
Page 43
Monitor Windows NT Service Event
This event is triggered when the watched Service is started, stopped or paused.
Use the ‘… ’ button to display the list of installed Services and select the Service
name required (not supported on Windows 98 or Windows 95).
It is not possible to test a Service state on a remote Windows NT system.
The Service state is checked every Test Interval seconds. The minimum test
interval is 5 seconds.
Example: Mission Critical Applications
The Monitor Windows NT Service event does not use any system resources,
making it ideal to monitor mission critical applications.
If a Service fails, OpalisRobot would detect this immediately and could take any
action necessary: such as restarting the Service or even restart the Windows NT
system! Such a process could look like this:
The ‘Watch Service’ object, which is a Monitor Windows NT Service event, monitors an application to see whether it is stopped
or not. If the Service stops, the ‘Watch Service’ object is triggered. If this occurs, the ‘Start Service’ object is triggered. This is an
Action on Windows NT Service task, which tries to start the offending Service. If this fails (the offending Service could not be
restarted) the ‘Restart Windows NT’ object is triggered. This object is a System restart task.
Here’s the link properties for the link between ‘Start Service’ and ‘Restart Windows NT’:
It reads “If Start Service fails then Restart Windows NT”. Be sure to change the ‘completes’ (default) value to ‘fails’ otherwise the
Windows NT system will restart every time the Service starts!
The process could be extended even further by adding task to notify the Administrator using on screen pop-up messages, e-mail
or even a make a phone-call and ask for a confirmation before restarting the Windows NT system! (the last option requires the
OpalisRobot Call Add-on):
Hints and Tips
If a Monitor Windows NT Service event is linked to an Action on Windows NT Service task it is recommended to enter a small
delay in the link. As OpalisRobot relies on Windows NT notifications, it will get a notification the moment a Service is stopping. If
OpalisRobot then tries to restart the same Service it could produce an error, because the Service might not be stopped at that
moment.
To add a delay simply open a link’s properties by double clicking the link:
Select Wait before triggering task (secs.) and enter a value.
Monitor Windows NT Service Event
Page 44
The Monitor Windows NT Service event has two trigger options. Select ‘Options’ tab from the object properties:
Trigger option:
• Take account of initial situation: the Service state is compared to the Trigger when option the moment the event
becomes active (after an apply changes or when the OpalisRobot Service starts). If they match the event is triggered.
• Take account of next change: the Service state is compared to the Trigger when option the moment the event
becomes active (after an Apply Changes or when the OpalisRobot Service starts). The event will not trigger until the
Service state changes at least once and matches the Trigger when option.
Monitor Windows NT Service Event
Page 45
Monitor Windows NT Event Log Event
Triggered when a particular message is sent to the Windows NT Event Log by an application, driver or the operating system.
Log name is the Windows NT Event Log to monitor (Application, Security, or System).
You can define the filter Criteria with at least one of the following:
• Event ID is: ID of the message.
• Source is: the application that sends the message to the Event Log.
• Description contains: string sent with the message that contains information specific to the event that occurred (see
below).
• Type: Type of the message (Error, Warning, Information, Success Audit, Failure Audit).
To trigger the Monitor Windows NT Event Log event on a particular message, fill in the Event ID is field.
The message and event ID are available in the Event Detail screen of the Event Viewer:
To look for this particular message, enter 5711 in the Event ID is field, rather than “The partial synchronization request from the
server ALPHA completed successfully. 1 changes(s) has(have) been returned to the caller.”.
To trigger the event on a specific part of the message, enter a string in the Description contains field.
• To trigger the event when a message comes from SQL Server, input "SQLServer" in the Source is field.
• To trigger the event when message number 17555 comes from SQL Server, input "SQLServer" on the Source is field
and 17555 in the Event ID is field.
• To trigger the event when message number 17555 comes from SQL Server and is about NT_SERVER computer,
input "SQLServer" on the Source is field, 17555 in the Event ID is field and "NT_SERVER" in the Description contains
field.
Monitor Windows NT Event Log Event
Page 46
Example: Automated Event Log Notification
Wouldn’t it be great if your Windows NT systems would notify you automatically when certain messages appear in the Event
Log?
OpalisRobot can easily be configured to automate such processes. Imagine you’re interested in errors from the Windows NT
Operating system. If such errors occur, you’d like to receive the error messages via e-mail, automatically of course.
Create a Monitor Windows NT Event Log event:
Select Type Error and Log name system. Now the event will trigger when new errors appear in the Windows NT System Log.
Now, create a Send e-mail task to send an e-mail to your e-mail address:
Instead of typing a message in the Message text field, insert a dynamic data code by clicking the right mouse button:
The Insert code window will open. Select the event you’ve just created. This will produce a list with available dynamic data:
Monitor Windows NT Event Log Event
Page 47
Select ‘Message that triggered the event’ and select ‘OK’:
The Send e-mail task message field will now contain a dynamic data code:
Link the objects and the process will look similar to this:
If a new error occurs in the Event Log, the Monitor Windows NT Event Log event is triggered. The Send e-mail task will then
send you an e-mail containing the actual message as it appears in the Event Log.
For more information on dynamic data codes, refer to the Dynamic Data part of the Advanced Topics chapter.
Monitor Windows NT Event Log Event
Page 48
Monitor Database Event
The monitor database event can simplify designs where you need to periodically check static structures in your database for
changes. The principle of this event is that it polls the database with the query entered in the query field. By structuring the
query so that a numeric value is returned from the SELECT statement, allows a test to be generated.
The Connect tab is where you specify the Server/Source, User and Password for the SQL Server connection.
SQL Server: If you leave Database empty, queries will be executed in the default database of the specified SQL User.
The time interval between two successive tests is defined in the Test Interval field.
Results. The return value from the query can be evaluated against a test value. For instance if you wish to look for ‘NewSales’
and trigger a processing job when this value is greater than 1 create a SELECT statement to check for new records as in the
following example:
SELECT COUNT(*) FROM tblSales WHERE tblSales.IsNewSale=1
Effectively when a new sale is generated a record is created in the sales table tblSales.
Each new record gets a flag on a field called IsNewSale set to True or 1 (by the software that creates the record). Simply count
the number of records that have this flag set.
By then selecting a test type of ‘Is More Than’ with a value of 0, means when new records are created this event will trigger.
For each record that is processed set the flag to 0 so that the event will not re-trigger.
Hints and Tips
This is a polled event.
It is worth indexing the fields you will be declaring in the WHERE clause or declare the indexes in the SQL statement with hints if
your database supports this feature. This will prevent a table scan on your database and will reduce database server load.
Be aware of the trade off’s with polled events. The higher the polling frequency the more accurately in time you receive a result
but the more load there is on the database. A balance is always needed in this situation to match solution performance with
system performance.
The query may be an SQL
command, or a call to a
stored procedure.
Monitor Database Event
The value tested is the first column of the first line returned by the query.
Page 49
Monitor Process Event
Triggers the event when a process is running or does not exist. The event is triggered when a modification of the state is
detected.
The process state is checked every Test process every seconds. The minimum test interval is 5 seconds.
The process name should be entered in the Process name entry field as it appears in the Windows NT Task Manager.
However, when specifying an executable name, do not enter the dot and extension (‘.exe’).
Hints and Tips
The Monitor Process event has two trigger options. Select ‘Options’ tab from the object properties:
Trigger option:
• Take account of initial situation: the Process state is compared to the Trigger when option the moment the event
becomes active (after an apply changes or when the OpalisRobot Service starts). If they match the event is triggered.
• Take account of next change: the Process state is compared to the Trigger when option the moment the event
becomes active (after an apply changes or when the OpalisRobot Service starts). The event will not trigger until the
Process state changes at least once and matches the Trigger when option.
To monitor multiple instances of identical programs or commands, they (the executables) should be copied and renamed so
OpalisRobot can monitor them based on their name.
Monitor Process Event
Page 50
Monitor Computer Event
Triggers the event when a computer is reachable or not. The event is triggered when a modification of the state is detected.
The computer is tested for availability every Test computer every seconds. The minimum test interval is 5 seconds.
When testing using TCP/IP Ping, input the TCP/IP name or IP address of the computer. When testing using Windows Network
layers, input the Windows (or NetBIOS) name of the computer.
Hints and Tips
The Monitor Computer event has two trigger options. Select ‘Options’ tab from the object properties:
Trigger option:
• Take account of initial situation (default): the network state of the computer is compared to the Trigger when option
the moment the event becomes active (after an apply changes or when the OpalisRobot Service starts). If they match
the event is triggered.
• Take account of next change: the network state of the computer is compared to the Trigger when option the moment
the event becomes active (after an apply changes or when the OpalisRobot Service starts). The event will not trigger
until the network state of the computer changes at least once and matches the Trigger when option.
Monitor Computer Event
Page 51
Monitor Disk Space Event
Triggers the event when the disk space test meets the entered criteria.
When the event is triggered once, it is not triggered until the free space returns to a value that does not meet the criteria.
For example, if the tested value is 25% of free disk space:
• Disk is 60% full, nothing happens.
• Disk is 74% full, nothing happens.
• Disk is 80% full, the event is triggered.
• Disk is 85% full, nothing happens because the level has not gone under the threshold.
• Disk is 60% full, nothing happens.
• Disk is 85% full, the event is triggered because the level has gone under then over the threshold.
Hints and Tips
The Monitor Disk Space event can be replaced by a Monitor Performance Counter event. This event provides access to all
Windows NT performance counters, including Free Space.
For more information on the Monitor Performance Counter event refer to the Advanced Topics chapter.
The Monitor Disk Space event has two trigger options. Select ‘Options’ tab from the object properties:
Trigger option:
• Take account of initial situation (default): if the disk space test meets the entered criteria the moment the event
becomes active (after an apply changes or when the OpalisRobot Service starts), the event is triggered.
• Take account of next change: if the disk space test meets the entered criteria the moment the event becomes active
(after an apply changes or when the OpalisRobot Service starts), the event will not trigger until the state changes at
least once and then matches the entered criteria.
Monitor Disk Space Event
Page 52
Interactive Event
Interactive events are entry points that can be used to pass on information (referred to as parameter) from external triggers:
• Any OpalisRobot client, running in user or administrator mode;
• The WinEvt3 and GenEvt3 utilities;
• A remote OpalisRobot or OpalisRendezVous server.
An Interactive event has no configuration other than Activity and Options, which are available for all OpalisRobot objects.
Interactive events are useful when integrating with existing applications.
Most applications have a way of executing a command or program including a parameter: MS Office applications through Visual
Basic, Databases (Oracle, SQL, etc.) or network management applications. By making use of the WinEvt3 or GenEvt3 utilities
and Interactive events, these applications can be made to communicate with automated processes running on OpalisRobot.
Example
Information from an Interactive event can be passed on to another task using dynamic data.
Create an Interactive event and link this to a Send Message task.
Instead of typing a message in the Message text field, insert a dynamic data code by clicking the right mouse button:
The Insert code window will open. Select the Interactive event you’ve just created. This will produce a list with available dynamic
data:
Interactive Event
Page 53
Select ’Parameter’ and select ‘OK’:
The Send message task message field will now contain a dynamic data code:
Link the objects and the process will look similar to this:
If the Interactive event is triggered, the Send message task will display a message containing the actual parameter as it was
send to the Interactive event.
For more information on how to trigger an Interactive event and send a parameter, refer to the OpalisRobot Utilities chapter.
Interactive Event
Page 54
UTILITIES
SNMP TrapRedirector
The Opalis TrapRedirector service is a Windows NT service that automatically redirects SNMP traps received on the computer
to the Event Log. This allows OpalisRobot, through its Monitor Event Log event, to monitor SNMP traps.
To enable this feature, go to Control Panel | Services, select 'Opalis TrapRedirector' and click Startup. Set it to Automatic so that
it starts automatically when the system starts. When done, click Start to launch the TrapRedirector service.
This feature requires the SNMP service to be installed on the computer running the OpalisRobot service.
ConsoleRunner
ConsoleRunner is a graphical application that communicates with OpalisRobot Service and launches tasks from the system
console when the Service requests it.
It is useful for programs that do not run properly when launched by a Windows NT Service (such as some VB programs, MS
Office or 16-bit applications that need to access shared memory).
When the task has been triggered, OpalisRobot Service informs the ConsoleRunner utility, which then executes the task. In
order to launch the task, it is mandatory for ConsoleRunner to be running on the system console when the task is triggered.
To be sure that ConsoleRunner is always running, you may want to add its shortcut in the Startup group of the user usually
logged on the system console.
You can also use the Auto Logon function of Windows NT.
For more details about the Auto Logon feature, consult Microsoft Knowledge Base, article No Q97597 (“How to Enable
Automatic Logon in Windows NT”) and Q114615 (“Bypassing Automatic Logon in Windows NT”).
To protect the logged session against unwanted manipulation, it is possible to lock the console (pressing Ctrl-Alt-Del then Enter)
or to use a password protected screen saver.
**NOTE** When a program is running in ConsoleRunner mode is not possible to use Dynamic Data.
SNMP TrapRedirector
Page 55
WinEvt3
WinEvt3 is a graphical remote activation utility.
It lets you remotely trigger Interactive events from a Windows 95, Windows 98 or Windows NT computer.
It can be found in the folder where OpalisRobot was installed, a shortcut in the Windows taskbar is provided as well.
This utility returns 1 if execution was successful, or 0 if an error occurred.
WinEvt3 can run in automatic mode (it takes its parameters from the command line), or in interactive mode (where you type the
event in a dialog box).
WinEvt3 also allows you to pass a parameter (maximum length of 255) to an Interactive event.
Please note that you cannot trigger more than 333 events interactively with the evaluation version of OpalisRobot. After
triggering 333 events, you must restart the Service to enable remote activation again.
Security
To create a Windows NT
group, use the ‘User
Manager’program from
‘Administrative Tools’or
click on the 'User
Manager' button of the
toolbar.
Access to remote activation of events by WinEvt3 is reserved to users of the ‘OpalisRobot
Users’ Windows NT group, if the latter exists on the server.
If the group does not exist, any network user can trigger events with WinEvt3. Therefore, we
recommend that you define the ‘OpalisRobot Users’ group. See the Security section.
When a user that does not belong to the ‘OpalisRobot Users’ group triggers an event, he
receives an ‘Access denied’ message.
Using WinEvt3 in Interactive Mode
Type the OpalisRobot Server and the Event name and click on the ‘OK’ button. Alternatively, you can select the Event name in
the list of events. Note: The list contains only Interactive events configured on the OpalisRobot server. You can use the optional
Parameter field to transfer an additional parameter (that will be transferred to other tasks as a replacement code).
Using WinEvt3 in Automatic Mode
All information for activation is passed from the command line. When using WinEvt3 in Automatic Mode, any object can be
triggered (any event or task) based on their name. WinEvt3 executes the activation and returns 1 if the execution was
successful, or 0 if an error occurred.
Syntax of WinEvt3 command line is:
• WINEVT3
Runs WinEvt3 in interactive mode.
• WINEVT3 /S=server_name
Runs WinEvt3 in interactive mode, with server_name in the OpalisRobot Server field.
• WINEVT3 /S=server_name/E=event_name
Runs WinEvt3 in automatic mode to activate event event_name on server server_name .
• WINEVT3 /S=server_name/E=event_name/P=parameter
Runs WinEvt3 in automatic mode to activate event event_name on server server_name , with parameter as the
event parameter.
Note: the order of the qualifiers must be respected, and no spaces should be added between tokens.
Hints and Tips
Triggering OpalisRobot objects on a remote computer running the OpalisRobot Service requires a Client License on the remote
computer. Refer to the chapter ‘OpalisRobot Licensing Structure’.
WinEvt3
Page 56
GenEvt3
GenEvt3 is a command line remote activation utility.
It lets you remotely trigger events or tasks from a Windows 95, Windows 98 or Windows NT computer.
OpalisRobot objects can be triggered based on their name or object number.
GenEvt3 can be found in the folder where OpalisRobot was installed.
Syntax of the GenEvt3 command line utility is:
GenEvt3 [\\ComputerName] Event_or_task_name_or_number [Parameter]
Examples:
• GenEvt3 101033
• triggers task No. 101033 on the local computer
• GenEvt3 Job_1 "1 2 3"
• triggers Job_1 on the local computer with parameter 1 2 3
• GenEvt3 \\TheServer Job_1
• triggers Job_1 on computer: TheServer
• GenEvt3 \\TheServer "First Job"
• triggers First Job on computer: TheServer
• GenEvt3 \\TheServer Job_1 c:\Output
• triggers Job_1 on computer: TheServer with parameter c:\Output
Hints and Tips
Triggering OpalisRobot objects on a remote computer running the OpalisRobot Service requires a Client License on the remote
computer. Refer to the chapter ‘OpalisRobot Licensing Structure’.
StopShut
StopShut is a utility that interrupts the system shutdown during the countdown preceding it. A minimum countdown of 30
seconds always occurs when the System Restart is used.
To stop the current system shutdown, run StopShut.exe from the folder where OpalisRobot was installed.
This can be done only on the computer that is performing the shutdown.
Wait
Wait is a command line utility that simply waits a given time.
It can be found in the folder where OpalisRobot was installed.
Syntax of the wait utility is:
Wait <number of seconds to wait>
Example: ‘Wait 30’ will wait for 30 seconds.
The wait utility can be used to delay execution of commands within batch files.
GenEvt3
Page 57
ADVANCED OBJECTS
Link Adder
To combine more than two events or tasks, you can use a ‘Link Adder’ object. The ‘Link Adder’ can be found under ‘Advanced’
in the ‘New Object’ window:
Below are two example uses of Link Adders:
The resulting task (‘Last task’) will be started when the three tasks (‘Backup’, ‘A batch program’ and ‘Another batch program’)
will be completed.
The resulting task (‘Last task’) will be started when ‘Backup’ completes and one of ‘A batch program’ or ‘Another batch program’
also completes.
This example shows how to add an ‘emergency’ procedure to a job. Let’s say that the ‘Backup’ task can only be run once a day.
If the ‘A batch program’ fails, the ‘Last batch’ task can still be launched if the administrator or a user triggers the ‘Another batch
program’ using the ‘User request’ interactive event.
Link Adder
Page 58
Build Task
The Build task allows you to automate the build of your development projects.
The first thing to do is to reference your compiler(s) on the Service Options. To do so, go to Options | Service | Add-ons tab.
Select Build Add-on and click Configure. Then add the name of your compiler and its path in the list (use the right button of your
mouse and the Tab key).
Then, create a Build task. Click on the right button of your mouse where you want to create the task and select New. Click the
Advanced tab, select Build task and press New.
Use the right button of your mouse and the Tab key to add entries to the list of the builds that will be performed.
Selected:
Only the lines with the Selected column set to ‘Yes’ will be run. This allows you to run the task for just the build(s) that failed.
Name:
This is the name that you want to give to the build. It will usually be the name of the project you're compiling.
Once the line has been entered, double-click it to edit its properties (this opens the Edit Build dialog). In this dialog, you have to
select the compiler that you want to use (which is defined in the Service Options, see the previous point). This is also where you
select the project to be compiled and add additional parameters.
Hints for Microsoft Visual C++ users:
In the Project Path, enter or select the project you want to compile (the .dsw file).
In the Parameters box, enter '/make "MyProject - Win32 Release"' to compile the "Win32 Release" target of MyProject. If you
want the build task to perform a "Rebuild All", add "/REBUILD" to the parameters.
The program to add in the Service Options is "C:\Program Files\Microsoft Visual Studio\Common\MSDev98\Bin\MSDEV.EXE"
(in this example, "C:\Program Files\Microsoft Visual Studio" is the folder where Microsoft Visual C++ is installed).
Build Task
Page 59
Text File Task
The Text File task provides simple yet powerful functions to work with text files from OpalisRobot.
The task has 5 functions:
• Insert line: Inserts the entered line at the beginning of the file.
• Append line: Appends the entered line at the end of the file.
• Read line: Reads the line whose number is entered in the 'Line Number' field.
• Delete line: Deletes the line whose number is entered in the 'Line Number' field.
• Find first line: Returns the first line where the 'String to Find' string is found.
• Find all lines: Returns the number of lines where the 'String to Find' string is found. This information is also exported
as dynamic data.
• Find and replace: Finds and replaces a string by another one.
Line feeds: Both <CR><LF> and <LF> are processed as ending characters for a line.
Dynamic data: Dynamic data published by other tasks can be inserted into all fields. If you insert a code inside a numeric field,
make sure the published data is numeric.
The task exports the following data:
• 'text file name': The full path of the text file.
• 'line': The full line (without carriage return and line feed characters).
• 'line number': Number of the line read, deleted or found (always 0 for Insert and Append line tasks).
Text File Task
Page 60
Enable or Disable
With this Task objects (Events or Tasks), on a local or remote OpalisRobot Service, can be set to Active (Type: Enable
Object(s)).
Use the ‘… ’ button to browse the network for systems running the OpalisRobot Service or just enter the computer name in the
Computer name field.
Use the
button to connect to the selected computer, it will display all available objects including the hierarchy (folder
structure).
Use your mouse to select any of the checkboxes left of the object names.
Click ‘OK’ when finished.
Upon execution of this Task, all selected objects on the specified computer will be set to Active.
The other type (Disable Object(s)) sets objects (Events or Tasks) to Inactive on a local or remote OpalisRobot Service.
Use the ‘… ’ button to browse the network for systems running the OpalisRobot Service or just enter the computer name in the
Computer name field.
Use the
button to connect to the selected computer, it will display all available objects including the hierarchy (folder
structure).
Use your mouse to select any of the checkboxes left of the object names.
Click ‘OK’ when finished.
Upon execution of this Task, all selected objects on the specified computer will be set to Inactive.
Enable or Disable
Page 61
Apply Change
This object will execute the ‘Apply Changes’ function on a local or remote OpalisRobot Service.
Any changes made (active / inactive settings for example) to one or more objects will be saved once ‘Apply Changes’ is
performed.
Use the ‘… ’ button to browse the network for systems running the OpalisRobot Service or just enter the computer name in the
Computer name field.
Hints and Tips
Applying changes to an OpalisRobot Service on a remote computer requires a Client License on the remote computer. Refer to
the chapter ‘OpalisRobot Licensing Structure’.
Apply Change
Page 62
Create Report
With the Create report Task extensive reports in various text formats can be created.
Reports can be made for single or multiple objects, folders or entire OpalisRobot configurations.
Use the ‘… ’ button to browse the network for systems running the OpalisRobot Service or just enter the computer name in the
Computer name field.
Use the
button to connect to the selected computer, it will display all available objects including the hierarchy (folder
structure).
Use your mouse to select any of the checkboxes left of the object names.
The report will be generated for the selected objects only.
The Advanced tab is used to select the time frame for which the report needs to be created and which types of information to
include in the report.
Report tasks options
• Executed during the last: here a period in days, hours, minutes or even seconds can be set.
• Executed between: here you can set a period between calendar dates and 24 hour time periods.
Insert in this report options
• The name of the object(s): will output the name of the object as it appears in the OpalisRobot Client Interface.
• The number of the object(s): will output the object number as it appears in Object properties’ top right-hand corner.
• The log status: will output the log status (running, completed or failed).
• The log detail: will output the detailed log information.
• The start date: will output the date & time on which the object was triggered.
• The end date: will output the date & time on which the object execution completed.
Create Report
Page 63
The Output tab is used to specify the output file name and format.
Use the ‘… ’ to bring up a file browser or enter the path and name in the Report file name field.
If the report file already exists options
• Overwrite: will replace an existing output file.
• Append: will append the new output file to an existing output file.
• Fail: will not create a new output file if one with the same name exists.
• Create a file with a unique name: will create a new output file with a unique name using following format:
nameYearMonthDayHourMinuteSecondMillisecond.extension (where name & extension are the same as entered in
Report file name).
File format options
CSV Delimited: the report will be stored as plain text with all values separated by a comma.
TAB Delimited: the report will be stored as plain text with all values separated by a tab.
Custom Delimited: the report will be stored as plain text with all values separated by a user definable separator. Use the
‘delimiter’ field to enter any character as separator.
Insert a line with column titles option: this option inserts column titles as first line of the output file.
Create Report
Page 64
Compare Strings
The Compare strings task is a logical operator that can be used to compare strings. Strings can be Dynamic Data produced as a
result of a database query or file management task.
Enter the string to be tested in the ‘Test that’ entry field. Use the right mouse-button to enter Dynamic Data.
The available logical operators are:
• is equal to
• is different than
• matches the following pattern
• does not match the following pattern
Enter the string to be compared to in the bottom text entry field. Again, you can insert Dynamic Data instead of typing a string.
The ‘matches the following pattern’ and ‘does not match the following pattern’ operators accept ‘*’ and ‘?’ as wildcards.
The ‘Case sensitive test’ option can be enabled to make each string comparison case sensitive.
By default the Compare strings object returns 1 if true, and 0 if false. This may be customized by using the ‘Task return value’
option.
Compare Strings
Page 65
Notes Object
The Notes object is neither a Task nor an Event. It acts as a convenient way to add notes (comments, remarks, etc.) to
OpalisRobot automated solutions.
The Notes objects has no configuration, other than a text entry field:
The text that has been entered becomes visible when:
• modifying the notes object
• enabling the Properties panel
Notes Object
Page 66
Trigger Object
The Trigger Object Task allows you to trigger objects on a local or remote OpalisRobot Service.
With this Task objects (Events or Tasks), on a local or remote OpalisRobot Service, can be set to Active (Type: Enable
Object(s)).
Use the ‘… ’ button to browse the network for systems running the OpalisRobot Service or just enter the computer name in the
Computer name field.
Use the
button to connect to the selected computer, it will display all available objects including the hierarchy (folder
structure).
Use your mouse to select any of the checkboxes left of the object names.
Click ‘OK’ when finished.
Upon execution of this Task, all selected objects on the specified computer will be set to Active.
The other type (Disable Object(s)) sets objects (Events or Tasks) to Inactive on a local or remote OpalisRobot Service.
Use the ‘… ’ button to browse the network for systems running the OpalisRobot Service or just enter the computer name in the
Computer name field.
Use the
button to connect to the selected computer, it will display all available objects including the hierarchy (folder
structure).
Use your mouse to select any of the checkboxes left of the object names.
Click ‘OK’ when finished.
Upon execution of this Task, all selected objects on the specified computer will be set to Inactive.
Trigger Object
Page 67
Service Started
The ‘Service Started’ event is triggered when the OpalisRobot Service is started.
You can use this event to start or continue an automation sequence as soon as the OpalisRobot Service starts.
Use the ‘… ’ button to browse the network for systems running the OpalisRobot Service or just enter the computer name in the
Computer name field.
Use the
button to connect to the selected computer, it will display all available objects including the hierarchy (folder
structure).
Use your mouse to select any of the checkboxes left of the object names.
Click ‘OK’ when finished.
Upon execution of this Task, all selected objects on the specified computer will be triggered.
Hints and Tips
Triggering OpalisRobot objects on a remote computer running the OpalisRobot Service requires a Client License on the remote
computer. Refer to the chapter ‘OpalisRobot Licensing Structure’.
Service Started
Page 68
Service Started After Reboot
The ‘Service Started after Reboot’ event is triggered when the OpalisRobot Service is started within 10 minutes after a system
reboot.
You can use this event to continue or start an automation sequence after a system reboot.
Service Started After Reboot
Page 69
PAGING TAB
Send to Pager
The send to Pager task requires a modem supported by Windows NT to be installed on the system running the OpalisRobot
service.
The Send to Pager task provides paging capabilities to OpalisRobot. It can send alphanumeric messages to paging services
supporting the TAP protocol (they almost all do) and numeric messages to paging services supporting DTMF sequences only.
To configure the task:
• In the Message tab, enter the information necessary to connect to the paging service as well as the message you
want to send.
• In the Connection tab, you may change the protocol settings and select which modem you want to use for the
connection to the service.
Hints:
• When using the DTMF protocol, you can add one or two commas (the "," without the quotes) to add a delay between
the pick up of the line by the paging service and the sending of the Message. You add these commas at the
beginning of the Message field.
• Depending on the DTMF service you are using, you may need to add a '#' sign (without the quotes) at the end of the
Message field.
Send to Pager
Page 70
PERFORM ANCE M ONITORING TAB
Monitor Performance Counter
With this event you have the tools for measuring the performance of a local computer (the computer running the OpalisRobot
Service).
On a Windows NT system you can view the behavior of objects, such as processors, memory, cache, threads, and processes.
Each of these objects has an associated set of counters that provide information about device usage, queue lengths, delays,
and information used to measure throughput and internal congestion.
For more information on Windows NT Performance Monitor refer to the Windows NT documentation or the Windows NT
Resource Kit.
Performance Counters are ideal to monitor a mission-critical system’s or application’s condition at regular intervals. By
integrating performance monitoring functions with OpalisRobot’s rich messaging features, powerful alerting processes can be
created with ease.
Object
Use the ‘… ’ button to select an object to monitor on the local computer.
The ‘Counter from’ window appears.
From this window (which is very similar to the Windows NT Performance Monitor, ‘Add to ‘ window) you can select the Object,
Name (name of the counter) and Instances. The Definition text field shows the definition of the selected counter.
Once an Object and Counter have been selected click ‘OK’.
The main window will now show the selected Object, Counter and Instance.
Monitor Performance Counter
Page 71
Use the drop-down list to define a threshold rule. Following rules are available:
• Is different then
• Is equal to
• Is lower than
• Is lower than or equals to
• Is more than
• Is more than or equals to
Enter a value in the numeric entry field on the right side of the drop-down list. The value entered relates to the counter selected
(i.e. % Processor Time can have a value between 0 and 100). Click ‘Add’ to enable the rule.
It is possible to create multiple rules. Just select another Object or Counter, select a rule, set a threshold value and click ‘Add’:
‘AND’logic applies for multiple rules entered. This means all rules have to be true (meet the rule’s requirements) at the same
time for the Event to trigger.
Under the ‘Advanced’ tab the Trigger option and Interval can be configured.
The Trigger only when the threshold is passed option’s behavior is as followed:
Selected (Default): each time that the conditions on counters are tested: if the rule’s new state is TRUE while previously FALSE,
the event is triggered.
Example: imagine you measure your server’s performance using the % Processor Time counter. You’ve created a threshold rule
‘if more than or equals to 80’. If the counter’s value changes to 80% the Event is triggered. If the counter’s value then changes to
90%, the Event not triggered. If the counter’s value changes back to 20% nothing will happen (it does not meet the threshold
rule’s requirements). If the counter’s value changes back to 80% or more, the Event is triggered.
Monitor Performance Counter
Page 72
Not selected: each time that the conditions on counters are tested: if the rule’s requirements are met, the event is triggered.
Example: imagine you measure your server’s performance using the % Processor Time counter. You’ve created a threshold rule
‘if more than or equals to 80’. If the counter’s value changes to 80% the Event is triggered. If the counter’s value then changes to
90%, the Event is triggered again. If the counter’s value changes back to 20% nothing will happen (it does not meet the
threshold rule’s requirements). If the counter’s value changes back to 80% or more, the Event is triggered.
The Periodicity option sets the interval each time the selected performance counter(s) are tested.
Please note that testing rules for multiple performance counters at short intervals produces extra CPU load.
Monitor Performance Counter
Page 73
STATISTICS TAB
Monitor Counter
With statistics functions you can analyze the occurrence of a certain Event or Task (or even groups of Events or Tasks).
You can use counters to store any numeric data that you want and manipulate it during the execution of the automated jobs.
A counter can be used to allow or block access to a certain resource. If the counter value is 1, then access is granted and the
counter is set to 0. When the resource is released by the job, it sets the counter back to 1.
Access to statistical information makes it possible to create very powerful automated processes.
Examples:
“If this error occurs more than 3 times per day, warn the Network Administrator on his mobile telephone”
“If this product is out of stock more than 2 times per month, inform the Purchase Department via e-mail”
The Statistics Add-on also provides features to modify collected statistical data (see). Obviously this enables you to create even
more powerful automated processes.
Example:
“If this product is out of stock more than 2 times per month, increase the amount of products ordered from the manufacturer by
10 and inform the Purchase Department of the fact that they should negotiate a better price!”
Configuration
Counters are defined globally for the OpalisRobot Service.
To configure the Statistics Add-on go to: Options, Service, Add-ons.
Select the Statistics Add-on and click ‘Configure… ’.
Name: Enter the name of your counter here.
Default value: a numeric value can be entered here. It will be used as initial value.
The Save counter values when the Service is stopped option can be set for each counter individually. It will store all counter
values so they will not be lost the next time the OpalisRobot Service restarts.
Monitor Counter
Page 74
The Counters field will display the counter name, default value and the fact that the counter value is saved or not if the
OpalisRobot Service stops.
Use the ‘Add’ button to add a counter to the Counters list.
Use the ‘Remove’ button to remove a selected counter from the Counters list.
By double clicking a counter from the list, its options can be changed. Select ‘Set’ to accept the changes, select ‘Cancel’ to
cancel the operation.
Note that counter values must be integers ranging from
-2147483647 to 2147483647. Entering an invalid value will warn you about this fact.
With the Statistics Add-on you can also define groups of counters.
Select the Groups tab to open the Groups window:
Define a group name and use the ‘-->’ and ‘<--‘ symbols to add or remove any of the available counters to the Member(s) list.
Use the ‘Add’ and ‘Remove’ buttons to add or remove groups.
Monitor Counter
The Monitor Counter Event can be used to test the value of one or multiple counters using threshold rules.
Counter Test
The default window (Type: Counter Test) looks like this:
Monitor Counter
Page 75
Use the drop-down list to define a threshold rule. Following rules are available:
• Is different then
• Is equal to
• Is lower than
• Is lower than or equals to
• Is more than
• Is more than or equals to
Enter a value in the numeric entry field on the right side of the drop-down list. Click ‘Add’ to enable the rule.
It is possible to create multiple rules. Just select another Counter, select a rule, set a threshold value and click ‘Add’.
‘AND’logic applies for multiple rules entered. This means all rules have to be true (meet the rule’s requirements) at the same
time for the Event to trigger.
The behavior of the Counter Test can be altered using the Advanced tab:
The Trigger only when the threshold is passed option’s behavior is as followed:
Selected (Default): if the counter’s rule state is changed, the Event is triggered.
Example: imagine a counter with a value of 9 and the threshold rule ‘if more than or equals 10’. If the counter’s value changes to
10 the Event is triggered. If the counter’s value then changes to 11, the Event is not triggered (the threshold is not passed, has
not gone under 10). If the counter’s value changes back to 9 nothing will happen (it does not meet the threshold rule’s
requirements). If the counter’s value changes back to 10 or more, the Event is triggered.
Not selected: if the counter meets the rule’s requirements, the Event is triggered.
Example: imagine a counter with a value of 9 and the threshold rule ‘if more than or equals 10’. If the counter’s value changes to
10 the Event is triggered. If the counter’s value then changes to 11, the Event is triggered again. If the counter’s value changes
back to 9 nothing will happen (it does not meet the threshold rule’s requirements). If the counter’s value changes back to 10 or
more, the Event is triggered.
Statistical Test
The other Monitor Counter Event type (Statistical Test) can be used to perform a statistical test on the value of all the counters
belonging to a group. It is a very handy way to check a set of conditions on multiple counters and to build a new kind of logic in
OpalisRobot3.
For instance, you can check if the percentage of counters in a group that have a value between 10 and 100 is more, less or
equal to 50%.
Monitor Counter
Page 76
In the Counter Test tab, create rules to be checked on counters from the group that will be selected in the Statistical Test tab.
The following rules are available:
• Is different then
• Is equal to
• Is lower than
• Is lower than or equals to
• Is more than
• Is more than or equals to
In the Statistical Test tab, use the drop-down list to choose the group of counters you want to perform a statistical test on. Then,
create rules on the statistic threshold. Available rules are identical to ones above.
A practical application could be : “Check if the number of unexpected returned values of a set of task is acceptable or not”.
Say you make a lot of queries in a database. You want to verify that they don’t return an unexpected value more than an
average 10 times per day.
Define a counter to count the number of unexpected values returned by a task. Make a link from a database execution task to a
counter task incrementing your counter. Condition on the link is « return < 0 ».
Create one counter for each of your database execution tasks.
Define a group called “UnexpectedValues” and make all those counters member of this group.
Now define your statistical test event as « If more than 10% of counter from group “UnexpectedValues” have values more than
10, send an e-mail to the administrator » by:
• Adding rule “more than 10” in Counter Test tab” that will be applied to every counter of the group,
• Selecting “UnexpectedValues” group in the statistic Test tab and adding rule: “If more than 10%”.
Monitor Counter
Page 77
Modify Counter
The Modify Counter Task can be used to Increment, Decrement and Set the value of a Counter.
The default window (Type: Modify Counter) looks like this:
Use the Counter drop down list to select a counter.
Use the Action drop down list to select the action you like to perform.
Use the Step value field to enter the desired value.
Note that counter values must be integers ranging from
–2147483647 to 2147483647. Entering an invalid value will warn you about this fact.
The other Modify Counter or Get Value Task type (Get counter value) can be used to retrieve the value of a specified counter.
Executing this Task will produce a return value (which will be the value of the specified counter).
Modify Counter
Page 78
ADVANCED FILE M ANAGEM ENT TAB
Advanced File Management Objects
The Advanced File Management add-on offers advanced ways to transfer files. Each task performs one of three basic functions
managing file lists, transferring files or manipulating files. Each object offers scheduling, logging and the ability to trigger another
object based on the return value (or completion status) of the object.
The add-on includes 7 tasks:
• File List Management (create, load, save, merge, compare file lists)
• File Transfer (copy or move the files contained in a list)
• Delete File List (delete files or folders contained in a list)
• Folder Management (create or delete folders)
• Internet Transfer (transfer files contained in a list using the RDV protocol)
• Compress (compress files from a list into a zip archive file)
• Test if File Exists (checks if a file exists)
Advanced File Management Objects
Page 79
File List Management
In order to use the file transfer tasks provided with the add-on, it is important to
understand what a file list is and how it works. A file list is a named list of files.
**Note** A file list does not contain the actual files (i.e. the data) but their name and path
as well as information like their size, timestamp, attributes, a security checksum.
File lists are memory objects existing during the context of a specific OpalisRobot job.
When the job (a sequence of tasks linked together) ends, the file lists information is
removed from memory. To make file lists persistent and reuse them across jobs, you
can use the File List Management task to save a file list.
Each job usually holds several lists. It is important to clearly name the lists in order to
select the one that contains the exact files you are interested in manipulating.
The File List Object has 6 Types of Tasks:
Create List
This task creates a list of the files and sub-folders contained in a specified folder. It creates a snapshot of the specified folder on
the hard drive. You have to name the list, this name is used to reference and access the files in the list. **Note** Two lists
cannot have the same name. If you use the name for two lists when using the Create List task, the second list will be merged to
the first.
Save List
This task saves a file list to a disk. The file is saved in a binary format. If the ‘Save As Text’ box is checked, the file will be in text
format with a file name per line. Additional options let you add a header, footer and prefix or append a string to each line.
Load List
This task loads a list in memory from a file. The file has to be saved by a previous Save List task (not using the Save As Text
option).
Merge Lists
This task merges two selected lists. A file name already present in the resulting list is not added a second time (no duplicates).
Compare Lists
This task compares two lists. Typically, you will choose to compare different snapshots of a folder in order to know what files to
transfer or to delete. The task can create the list of new or modified files, of deleted files, of files with modified attributes or
security, or the list of unchanged files. The timestamp is used to determine differences in a file.
Add File to List
This task adds a single file to a list.. The actual file is not added to the list but its name, timestamp, size, attributes, etc.
Publish List
This task publishes the contents of the selected list through dynamic data. For more information on dynamic data, please read
the Dynamic Data section.
Subtract List
This task removes content from a list into another. It outputs a list with the entries that were removed and a list of entries that
were not found.
Compare 2 Sites
This task compares two similar folders on two different locations (different folders or different computers) and generates all the
necessary “to do” file lists in order to replicate changes that occurred in the folders. The ‘Conflicts’ Tab inside this object
provides optional lists that will receive the name of conflicting files. Possible conflicts are: Files updates on both sites or Files
updated on one site and deleted on the other one. The resolution of conflicts depends on the intended application, it can be
saving the files from one site and updating it with the ones of the other, alerting the administrator for a manual update, etc.
File List Management
Page 80
File Transfer Objects
**NOTE** The Copy and Move functions require client licenses. To determine the number
of client license you require count the number of destination computers you are
transferring files to. Once a client license has been allocated to a destination computer
you cannot reuse that client license in another file flow.
Copy File(s)
Copy files from a specified list to another destination.
Move File(s)
Move files from a specified list to another destination.
**Note** both Copy File(s) and Move File(s) items have unique name, fail and overwrite
options as well as the ability to copy attributes and security information.
Copy Security
Copy the security of specified files only.
Copy Attributes
Copy the attributes of specified files only.
Copy to Multiple Recipients
Copy files to several destinations. The destination folders (whether local or remote) must be listed (one per line) in a text file.
Remote folders must use the UNC notation (‘\\server\shared-folder\sub-folders\’).
**Note** OpalisRobot comes with 3 client licenses. This means it will only copy to 3 destinations (assuming the client licenses
are not being used by another function such as remote administration). If you wish to open distribution privileges to more
computers you will need more client licenses. Please contact your Opalis dealer for more information.
File Transfer Objects
Page 81
Folder Management
Create Folder
Allows you to create new folders or to delete a folder and/or its contents.
Delete Folder
The Delete Folder task has 3 delete options: delete if empty, delete empty sub-folders
and delete files and sub-folders. Use caution when using the third option as there is no
undelete option.
Replicate Tree
Replicates an entire file list to a specified location.
Examples
Periodically transfer new or modified files:
To set up this solution, use a Date/time event or a Monitor File-system event to trigger the job. If you use a Monitor File-system
event, make sure you enter no filter and select the No History option. This will avoid the history to be kept in memory.
After this starting point, create the following task:
• a Create List task, that will create a snapshot of the folder that contains the file to transfer inside a list named 'current
state'.
• a Load List task, that will load a file named 'previous.bin' inside a list named 'previous state'.
• a Compare List task, that will compare the 'current state' and 'previous state' lists and generate a list of the new and
modified files (called 'new/modified files').
• a File Management task, that will transfer the files of the 'new/modified files' list to the destination folder. In order to
implement a retry mechanism, the failed files will be sent to a list called 'failed files'
• a Save List task, that will save the 'current state' list to the file 'previous.bin'. This way, next time the job is launched
the current state will be taken as the previous situation and only the new/modified files will be transferred.
Note: to prevent the job to transfer all the files the first time it is launched, you can create a Create List task directly linked to a
Save List task. These two tasks would list the files and save them inside the previous.bin file so that the file be present the first
time the job is launched and only transfers the files that have been created or modified since the execution of this two-task job.
Folder Management
Page 82
Internet Transfer
**NOTE** The Internet Transfer Object requires the OpalisRobot service to be
installed on the originating and destination computer.
The Internet Transfer Object enables you to transfer files from a file list using the RDV
protocol (file transfers between dial-up computers through the Internet) or via a direct
connection (through the LAN, the Internet or dial-up connection through RAS).
In the ‘Source’ section select the file list name (one that you have already created).
In the ‘Destination’ section enter the folder name and select whether you want to allow
incoming transfers. If allowed, incoming transfers can be restricted to specific hours
and days of the week. If an incoming password is set, this password will be required to
set up the RDV Transfer task on the remote computer that will send files to the local
computer.
In the ‘Transfer Mode’ section select the RDV protocol mode or Direct Connection
option.
**Note** If you choose the RDV protocol you need to configure the protocol settings in
the service options prior to use the RDV Transfer task.
To configure these options, go to Options | Service, click the Add-ons tab and select
Advanced File Management in the list. Press the Configure button and input the
settings in the tabs.
The RDV ID is a unique string that identifies computers exchanging files through the
RDV protocol. The primary and secondary RDV servers can also be entered in this
tab, only the primary server is mandatory.
Please note that this task does not allow transfers to or from OpalisRendezVous. To
use the RDV protocol the destination computer must also have the OpalisRobot v3.6
service running with a unique serial number and product key.
The RDV ID is the OpalisRobot serial number. During the evaluation process, unique
RDV IDs can be requested by sending an e-mail to [email protected].
Internet Transfer
Page 83
Compress
The Compress object compresses files from a selected file list. It uses a PkZipcompatible algorithm so you’ll be able to view and extract files generated with this task
using tools like PKZip or WinZip.
The Compress object is ideal for archiving files, minimizing size for file transfer and adds
more security to replicated files.
Compress
Page 84
Test if File Exists
The Test If File Exists task simply checks whether a file exists. If the file does not
exist, it fails. If the file exists, it completes successfully. Modify the link properties to
select which condition you want to test.
Test if File Exists
Page 85
Delete File List Entries
The Delete File List Entries task deletes entries (files or folders) from the selected file
list. It does not delete the list from the memory, just the files or folders contained in
that list.
Delete File List Entries
Page 86
INTERNET APPLICATION M ONITORING TAB
Monitor/Test Internet Application Objects
The Monitor Internet Application and the Test Internet Application objects work
the same way. The only difference is that the Monitor Object has an additional
Frequency field that allows you to select how frequently the test will be done.
The other difference is that the Test object features a Custom application type
that lets you test any Internet application, even if it's not included in the
predefined tests.
When you create a Monitor Internet Application event or a Test Internet
Application task, you first select the type of application you wish to test. There is
5 predefined Internet applications you can monitor using the add-on:
Web (HTTP protocol)
The test is done by requesting the default page of the Web server. Enter the server name or IP address, and the IP port if it's not
the default one (80 for the HTTP protocol).
Outgoing Mail (SMTP protocol)
The test is done by connecting to the IP port of the mail server. Enter the server name or IP address, and the IP port if it's not
the default one (25 for the SMTP protocol). Additionally a message can be sent to verify that the SMTP relay works. This test
doesn't check that the mail goes through to the destination e-mail address (this can be done using the OpalisRobot
E-mail Add-on, visit www.opalis.com for more information).
Incoming Mail (POP protocol)
The test is done by connecting to the IP port of the mail server. Enter the server name or IP address, and the IP port if it's not
the default one (110 for the POP protocol). Additionally a connection can be done to verify that a specific mailbox can be
accessed. This test doesn't read messages waiting in the mailbox (this can be done using the OpalisRobot E-mail Add-on, visit
www.opalis.com for more information).
FTP
The test is done by connecting to the IP port of the mail server. Enter the server name or IP address, and the IP port if it's not
the default one (21 for the FTP protocol). Additionally a connection can be done to verify that a specific account can be logged
on. This test doesn't exchange any file.
DNS
There two possible tests: Either checking a specific server and the accuracy of its results (by checking that a specific name
query returns a specific IP address), or checking that the default DNS is accessible on a port different than the default one (53
for the DNS protocol).
Monitor/Test Internet Application Objects
Page 87
Custom test
A custom test is a set of actions that allow you to test any Internet protocol or application. You add actions to the list by clicking
the Add or the Insert buttons. Actions are:
• Open Port opens a connection to the specified server on the specified IP port.
• Send Data sends the specified data. If the data is not a text or if it's too big, save it inside the file and click the Send
data from file option.
• Receive Data receives data from the other end of the connection. If the data has to be tested or used on a
subsequent OpalisRobot task, check the Publish as dynamic data option and select the generic slot that will be used
for the data. You can also save the data inside a file and decide on what the task should do if the file already exists.
• Close Port: closes the IP connection. This is usually the last step of the test.
Hints on how to implement a test:
• Start by creating a Date/time event that you link to the first task implementing your test.
• The Date/time event will contain the frequency of your test (e.g. every 5 minutes).
• When you have added the action that is receiving the data that you want to test, make sure the received data is
published as dynamic data and save the task. Then link the task to a
• Compare strings task (from the Advanced tab) and select the proper dynamic data code to be compared to the value
that you want. Based on the result of this test, you can link to different tasks.
• Make sure the Send data and Receive data are executed at thre right moment. The application can be temporarily
blocked and data can be lost if the both ends are trying to send or receive data at the same time.
Note: You can have actions on several tasks. For example, you can have an Open Port and a Send Data in one task. Then a
Receive Data in another task linked to the processing of the received data, then a Close port action on a third task. Just link the
task together and the connection will be carried from one task to another.
Monitor/Test Internet Application Objects
Page 88
ZIP TAB
Zip Task
The Zip task gives you all the basic functionality of the well-known PKZip or WinZip utilities. However, instead of calling an
external program, all Zip related functions are now available directly from within OpalisRobot.
Using the Zip task, you can Compress files into an archive, Decompress archives and Test archives using the ‘Type:’ drop-down
menu.
Compress Files
With this function you can compress one or more files into an archive.
Action:
• ‘Add’: Adds files to the given archive name. If the archive contains a file with identical filename it will be overwritten
(updated).
• ‘Move’: Adds files to the given archive name. Since this function moves files, all existing files will be deleted from the
origin folder. If the archive contains a file with identical filename it will be overwritten (updated).
• ‘Update’: Replaces (updates) an existing entry in the Zip archive only if it has been modified more recently than the
version already in the Zip archive. Please note: this function will only work on existing Zip archives.
• ‘Refresh’: Replaces (freshens) an existing entry in the Zip archive only if it has been modified more recently than the
version already in the Zip archive. Unlike the update option this will not add files that are not already in the Zip
archive. Please note: this function will only work on existing Zip archives.
Folder:
• ‘Origin Folder’: Enter the path that contains the files you wish to add to the Zip archive. The ‘… ’ button will bring up a
file browser.
• ‘Include sub-folders’: Select this option if you want sub-folders to be scanned for files as well. The Zip Add-on will
include the sub-folder information in the archive.
• ‘Mask or file name’: Use this field to enter a mask (* and ? are supported) or file name. Example: *.xls will only add
files with the .xls extension to the archive.
Zip Task
Page 89
• ‘Filter(s)’: Use the filter option to create more complex filter rules. Example: in cases you wish to include all files with
the .xls extension except *97.xls.
• ‘Archive name’: Enter the path and name of the Zip archive. The ‘… ’ button will bring up a file browser. If no path is
given (i.e. only a filename) the Zip Add-on cannot create the archive.
Compression options:
The Zip Add-on supports 4 compression levels: ‘None’, ‘Low’, ‘Medium’ (default value), ‘High’.
If you only need to create an archive without compression select the ‘None’ option. Because the files are not compressed this is
also the fastest option.
If you need maximum level of compression select the ‘High’ option. This is the slowest method of compression, but achieves the
smallest possible Zip archive.
For general use the ‘Medium’ option will give the best speed/compression ratio.
Decompress archive
With this function you can Decompress one or more Zip archives to a specified folder.
Folder:
• ‘Archive name’: Enter the path and name of the Zip archive. The ‘… ’ button will bring up a
file browser.
• ‘Mask or file name’: Use this field to enter a mask (* and ? are supported) or file name.
• ‘Filter(s)’: Use the filter option to setup more complex filter rules.
• ‘Destination folder’: Enter the path where the Zip archive(s) should be extracted. The ‘… ’
button will bring up a file browser.
• ‘Create folders if does not exist’: Select this option if you want the Zip Add-on to create subfolders in the folder specified in ‘Destination folder’.
If destination file exists:
• ‘Overwrite’: This option will overwrite existing files when Decompressing the Zip archive.
• ‘Fail’: This option will skip files that already exist in the ‘Destination folder’.
• ‘Unique name’: This option will give a unique name to a file, if the file name already exists in
the ‘Destination folder’.
Zip Task
Page 90
Test archive
With this function, Zip archives can be tested.
The Test archive function provides information about compression type, level and possible errors. All information will be entered
in the OpalisRobot log.
Enter the path and name of the archive you wish to test in the ‘Archive name’ field. Use the ‘… ’ button to bring up a file browser.
Zip Task
Page 91
DYNAM IC DATA
Dynamic data
Dynamic data lets you create dynamic jobs, i.e. jobs that have a generic configuration and can adapt to the context dynamically.
Let’s take an example. Say you have a file-processing program that requires the name of the file to process as a parameter in its
command-line and you want to launch it each time a file is new or modified in a monitored folder.
Unless the file name is always the same (which is a big limitation in functionality in nowadays-powerful platforms), you would
need to create a job for each possible file name. This is OK if there’s only 3 different possibilities but what if the file name
changes ten times a day?
Thanks to the dynamic data feature, you do not need to know the name of the files when you create the job. You just have to
insert a special code (using the Insert dynamic data dialog) and the code will be replaced at run-time by the actual name of the
new or modified file.
How it works:
Don’t worry, there is no
waste. The dynamic data
information is saved
internally only if a task is
using it.
Each event or task publishes data that can be of use for the following tasks.
You can use dynamic data
codes only in tasks.
To insert a dynamic data code, use the right button of the mouse when the cursor is in a
character field of the configuration of a task and select ‘Insert code’: This opens the Insert
code dialog:
Unless you are familiar
with OpalisRobot, it is
better to use the Insert
code dialog to add a code
to a field.
In this upper list of the Insert code dialog, click on the event or task from which you want to use
dynamic data. Then, select in the lower list of the dialog, the type of dynamic data that you
want to use and click OK.
For example: all events and tasks publish information about the time at which they were
triggered. File management events and tasks publish information about the file they manage
(name, folder, size). Service management tasks publish information about the Service they
manage (name, status), and so on.
A special code is then inserted in the configuration field of the task. This code will be replaced
where it is by the run-time value of the given data.
The code is composed of
the event or task number
and a variable-length code
that identifies the type of
the data.
You can use dynamic data codes in all character fields of the configuration of tasks.
If there are several instances of the same code (say several new files), the given task will be launched once for each instance of
the data.
If a task uses several dynamic data codes from different events or tasks and if any one particular piece of information is missing,
the task is not launched.
Viewing the result of the ‘Process files automatically’ Wizard is a good way to learn how to use dynamic data.
Dynamic data
Page 92
String Manipulation Functions
OpalisRobot’s string manipulation functions can be used to extract parts of a dynamic data code.
You can use these functions in all character fields.
Instr
Instr() function and arguments are replaced by the position of the first occurrence of one string within another.
Syntax: Instr(string1, string2)
String1
String2
String expression being searched.
String expression sought.
If string2 is not found, the function and arguments are replaced by 0.
If string2 is found within string1, the function and arguments are replaced by the position at which
match is found.
Right
Right() function and arguments are replaced by a specified number of characters from the right side of a string.
Syntax: Right(string, length)
String
Length
String expression from which the rightmost characters are returned.
If string is empty, the function and arguments are replaced by an empty string.
Numeric expression indicating how many characters to return.
If 0, function and arguments are replaced by an empty string.
If greater than or equal to the number of characters in string, the function and arguments are
replaced by the entire string.
Left
The Left() function and arguments are replaced by a specified number of characters from the left side of a string.
Syntax: Left(string, length)
String
Length
String expression from which the leftmost characters are returned.
If string is empty, the function and arguments are replaced by an empty string.
Numeric expression indicating how many characters to return.
If 0, function and arguments are replaced by an empty string.
If greater than or equal to the number of characters in string, the function and arguments are
replaced by the entire string.
Trim functions
The trim functions and arguments are replaced by a copy of a string without leading spaces (LTrim), trailing spaces (RTrim), or
both leading and trailing spaces (Trim).
Syntax:
LTrim(string)
RTrim(string)
Trim(string)
The string argument is any valid string expression. If string is empty, the trim function and arguments are replaced by an empty
string.
String Manipulation Functions
Page 93
Mid
The Mid() function and arguments are replaced by a specified number of characters from a string.
Syntax: Mid(string, start, length)
String
Start
Length
String expression from which characters are returned.
If string is empty, the function and arguments are replaced by an empty string.
Character position in string at which the part to be taken begins.
If start is greater than the number of characters in string, the function and arguments are replaced by
an empty string.
Number of characters to return.
If there are fewer than length characters in the text, the function and arguments are replaced by all
characters from the start position to the end of the string.
Len
The Len() function return the number of characters in a supplied string.
Syntax: Len(string)
String
String expression for which the length is sought. If string is empty, the function returns zero.
Example
A good example of a string manipulation function in use, can be found in the ‘Execute commands received by e-mail’ wizard.
This wizard builds a job that allows you to send e-mails containing commands to your NT system. OpalisRobot will read the email, execute the command and even reply with the output!
By sending an e-mail with a subject starting with ‘execute’ followed by the command, OpalisRobot will try and execute the text
after ‘execute ‘:
To take ‘execute’ out of the dynamic data, a string manipulation function is used in the Program Execution task:
Install the E-mail Add-on and run this wizard to see how it works.
The E-mail Add-on can be found on the Opalis CD-ROM or downloaded from www.opalis.com.
String Manipulation Functions
Page 94
Triggering Events or Tasks from External Programs
Thanks to OpalisRobot’s WinEvt3 and GenEvt3 utilities, it is possible to trigger OpalisRobot objects from many applications.
Most applications have a way of executing a command or program including a parameter: MS Office applications through Visual
Basic, Databases (Oracle, SQL, etc.) or network management applications.
By making use of the WinEvt3 or GenEvt3 utilities and Interactive events, these applications can be made to communicate with
automated processes running on OpalisRobot.
Hints and Tips
Triggering OpalisRobot objects on a remote computer running the OpalisRobot Service requires a Client License on the remote
computer. Refer to the OpalisRobot Licensing Structure chapter.
Triggering Events or Tasks from External Programs
Page 95
SECURITY
Security Information
Service
Windows NT provides the security for actions performed by the OpalisRobot automation engine. File access rights and other
permissions (system shutdown, etc.) depend on the account assigned to the OpalisRobot Service.
If you do not enter a valid user name or press Cancel in the Service account dialog at install-time, the account assigned to the
Service is the ‘System’ account. It is recommended that you change this user because it has rights on the local machine only.
Client
The OpalisRobot Client can run in administrator mode (where everything is possible) or in user mode (only “read” operations are
accessible: the user can read the log, view objects’ properties, trigger interactive events; it is not possible to create, modify or
delete objects or log entries).
By default, the security is not activated and anyone running the OpalisRobot Client will have administrator access to a freshly
installed OpalisRobot Service.
By creating a registry key on the server (called “OpalisRobot Security key”) and managing security of this key, the system
administrator manages accesses allowed to the OpalisRobot Clients. The access can be denied, in user mode or in
administrator mode.
To create and modify the rights of the OpalisRobot Security key, use the REGEDT32.EXE program (warning: be cautious when
editing the registry) and create a key (not a value) called “Security” under HKEY_LOCAL_MACHINE\Software\Opalis\Robot3.
To manage security once the key is created, select the key and use the Security | Permissions command.
How it works:
When the key does not exist, the user has access in administrator mode.
If the key exists, the access depends on how the user can open the key. If the access assigned to the user account is:
• Full control: the server window of the OpalisRobot Client is opened in administrator mode
• Read: the server window of the OpalisRobot Client is opened in user mode.
• If the user is not listed or not a member of any authorized Windows NT group, the access is denied.
Summary
To access OpalisRobot in administrator mode, a user must have:
• Access to the OpalisRobot Security key with Full control access (if it exists).
• Either a Read/Write access to the hidden “$” share of the drive on which the OpalisRobot Service is installed or to the
OpalisRobot3 folder using a share named “OpalisRobot”.
• To remotely trigger events and tasks, the user must also have the right to use the remote activation, see next section.
To access OpalisRobot in user mode, a user must have:
• Access to the Security registry key (the key MUST exist).
• Either a Read access to the hidden “$” share of the drive on which the OpalisRobot Service is installed or to the
OpalisRobot3 folder using a share named “OpalisRobot”.
• To remotely trigger interactive events, the user must also have the right to use the remote activation, see next
section.
Security Information
Page 96
Remote Activation
The remote activation is the ability to:
• trigger events and tasks from the OpalisRobot Client in administrator mode;
• or to trigger interactive events from the OpalisRobot Client in user mode or from the WinEvt3 program.
The ‘OpalisRobot Users’ Windows NT group controls the access to the remote activation. Beware! If the ‘OpalisRobot Users’
group does not exist (as a local group on the computer on which the OpalisRobot Service is installed), any user can use
WinEvt3, GenEvt3 or the OpalisRobot Client to trigger interactive events.
Also note that the ‘OpalisRobot Users’ group is first checked for as a local group, if it does not exist and one is present on the
domain then this is used instead.
Remember that the OpalisRobot Client, WinEvt3 and GenEvt3 are very powerful tools because a user can indirectly perform
many actions on the server.
Security Information
Page 97
External configuration
Remote Access Service
To install Remote Access Service, use the Network icon in the Control Panel (Add Software command, select ‘Remote Access
Service’). For more information on installing Remote Access Service, see Windows NT documentation.
Input names used in the configuration of RAS tasks are the names that you input in the Windows NT "Remote Access Service"
(also called Dial-up Networking) program.
ODBC
The latest ODBC drivers can be obtained from http://www.microsoft.com/data/odbc/
SQL Server
The SQL Server pack
contains a client kit.
Please call your Microsoft
or Sybase dealer if you
would like more
information about SQL
Server licenses.
An SQL Server for Windows NT client must be installed before you can use OpalisRobot ‘SQL
Server’ functions. The Microsoft Windows NT SQL Client can connect to Microsoft or Sybase
databases.
The purchase of OpalisRobot does not include any SQL Server client licenses.
If you use TCP/IP sockets to connect to the SQL Server, the name to input in the ‘Server’ field
in the ‘Edit event / task’ screen is the name set up in the ‘SQL Client configuration utility’
program in the ‘SQL Server for Windows NT’ group.
MS Mail
The MS Mail user input in the task configuration must exist when the task is executed. The ‘OpalisRobot Interface’ program
does not check that this user exists at the time of the input.
Because of MS Mail for Windows NT development kit availability, the ‘Simple MAPI’ interface is used to send MS Mail letters.
Experience shows that sending several mails simultaneously can cause errors.
The use of ConsoleRunner is recommended when you want to send E-mails using MAPI. When setting up an MS Exchange
task, input the profile name in the user name field. The profile must exist in the configuration of the account assigned to the
Service.
External configuration
Page 98
ADD-ONS
Types
An OpalisRobot Add-on is a file that resides in the OpalisRobot folder and that extends the OpalisRobot Service and/or Client.
An Add-on can add new events and tasks to OpalisRobot, it can add wizards to the New Object dialog, modify the OpalisRobot
Client program by adding menus, buttons and dialogs, etc.
Visit www.opalis.com for information about the Add-ons available for OpalisRobot.
You can also develop your own Add-on using the OpalisRobot Add-on SDK. See Add-on SDK section later in this chapter.
You can view the name and properties of the Add-on installed in several places depending on what they do.
Installed Add-ons
Service Add-ons
If the Add-on adds functionality to the OpalisRobot Service (for example new events and tasks) it is listed in the ‘Add-ons’ and
‘Licensing’ tabs of the Options | Service dialog.
If the Add-on has Service-side options, you can view or modify them using the Configure button. If the Add-on does not have
such options, the button is disabled. To view a short description of what the Add-on is doing, click on its name in the list.
If the Add-on has licensing options, you can view or modify these options using the Licensing tab:
Client Add-ons
If the Add-on adds functionality to the OpalisRobot client (for example, dialogs to edit new events or tasks, or wizards), it is listed
in the 'Add-ons’ tab of the Options | Client dialog. To view a short description of what the Add-on is doing, click on its name in
the list.
If the Add-on has client-side options, you can view or modify them using the Configure button. If the Add-on does not have such
options, the button is disabled.
Types
Page 99
Automatic installation of Client side
An Add-on can require some specific program extensions to be installed in order to run.
It is usually the job of an installation program to make sure that every needed part of the program will be there when you want to
run it.
To free you from running the setup program 10 times if you have 10 workstations, this installation process has been added to
the OpalisRobot Client.
Please note that this
function is not available in
all Add-ons
The OpalisRobot Client can automatically install
(i.e. retrieve necessary program extensions) the Client-side of an
Add-on when the user connects to a server.
This process takes place when the OpalisRobot Client detects new
or upgraded Add-ons.
Checking the status of installed and required program extensions is done when the ‘Connecting… ’ window is displayed, right
after you pressed the Connect button in the Connect To dialog.
If you do not want this auto-installation to be done, check the ‘Disable Add-on auto-installation’ option. If you do so, please note
that you will not be able to use the Client-side functionality offered by Add-ons unless you install the required program
extensions in the client computer.
The auto-installation frees the network administrator from installing the Client portion of an Add-on in all the computers where
the OpalisRobot Client is installed. For example, if there is one server and 25 client computers, the Add-on has to be installed
once on the server and that’s all. If this function is disabled, the network administrator will have to install 25 times the Client
portion of the Add-on.
SDK (Software Development Kit) Add-on
The Add-on SDK lets you develop your own OpalisRobot Add-ons. This is a powerful way to write server-based applications or
simply to extend the functionality of OpalisRobot.
An evaluation version of the Add-on SDK is available on our web site at http://www.opalis.com.
For more information about the Add-on SDK, please contact your Opalis reseller.
For more information about OEM options available, please email to [email protected].
Types
Page 100
TROUBLESHOOTING
Common Questions
If OpalisRobot Fails to Start
Please check the following points:
• Check recent error messages on the Windows NT Event Viewer. See Messages.
• The server is running Windows NT version 3.5 or later.
• Contact us. See Technical Support.
If OpalisRobot Runs in Evaluation Mode instead of Retail
To be sure that the OpalisRobot license information is properly enter:
• In the Client, connect to the server (in administrator mode). Select Options | Service | Licensing, click on the
OpalisRobot line and input the serial number and key. If the key is correct, there is no message when you click OK. If
the key is incorrect, you get an error message.
• Restart the Service.
If You Cannot Connect to a Server
Please check the following points:
• If you’re using Windows 95, check that Microsoft Remote Registry Services is installed on the system. It is available
on Windows 95 CD-ROM: folder ‘Admin\Nettools\Remotereg’.
• If you’re using Windows 98, check that Microsoft Remote Registry Services is installed on the system. It is available
on Windows 98 CD-ROM: folder tools\reskit\netadmin\remotereg’
You have sufficient rights to connect: see the
• Security section.
• Contact us. See Technical Services.
If a Task Does Not Start or Fails
Please check the following points:
• OpalisRobot Services can be configured to execute under the LocalSystem account. This account is not a regular
one and has limitations (for example, it cannot connect to remote computer).
• Change the account used by the Service with an Administrator’s account or one of your accounts. To do so, use the
Services applet of the Control Panel (Startup button, select Log On As, This Account).
• Check that the required software for this task is installed on the server (RAS for RAS functions, TCP/IP for SMTP
email and ODBC for ODBC functions). If required software is not installed, the log will display an alert log entry for
each object that failed to start.
• The "Active / Inactive" option for objects in the automation sequence.
• Incorrect dynamic data codes can prevent the task from being started when they are not replaced. Make sure that
the codes used in the task configuration actually correspond to the events or tasks that triggers it.
• If you are using the OpalisRobot evaluation version, the program will only run the first three active tasks in the
"Events, tasks and links" list. Use the "Active / Inactive" option to enable the tasks that you want to test.
Common Questions
Page 101
If You Have Orphaned Nodes
An orphaned node is an event or task that cannot be modified because the Add-on that created it is not installed anymore. You
can view the name of the Add-on that created it in the Properties panel.
If it is not useful anymore because the Add-on was permanently removed you can safely delete it.
If you want to keep it, you can leave it where it is. As soon as the Add-on is re-installed again, the object will be displayed again
as an Add-on event or task. However, take care not to keep it in a middle of a job, because the Service will not run it and all
tasks located after it in the job chain will also not be run.
If You Cannot Obtain the Results You Want
Please contact us! We will be pleased to help you set up whatever you want to do.
We have all the experience and knowledge that you need. Please do not hesitate to let us know about your problems,
regardless of whether you are a novice, an experienced user or in the process of evaluating OpalisRobot.
See Technical Services.
Common Questions
Page 102
Messages
The messages described in this section may occur in the OpalisRobot Client or in the Event Viewer.
OpalisRobot Client Messages
The message number is located in the title of the message window.
OpalisRobot Service Messages
The Event Viewer is
located in the
"Administrative Tools"
group. You can also click
on its toolbar button.
OpalisRobot Service messages are sent to the Application section of the Windows NT Event
Viewer.
The message number is displayed between square brackets at the beginning of the text
message, for example: [173].
Task Log Messages
When a task fails to execute, an explanation of the failure is added in parenthesis in the task execution status.
Messages Beginning with INT
Messages that have a name beginning with INT should not occur during normal use of OpalisRobot.
If you see such a message, please write down all the steps that preceded it and then contact Technical Services.
Messages From SQL Server
Messages from SQL Server are identified by the "SQL_error" code. These messages contain a severity number and a message
explaining the error.
For more information about SQL Server error messages, please refer to the Microsoft SQL Server for Windows NT
documentation, and especially the "SQL Server Troubleshooting Guide."
Messages From ODBC
Messages from ODBC are displayed on the Task Log. The message is usually preceded by the ODBC driver name.
Messages
Page 103
Technical Services
The OpalisRobot free Technical Assistance Service is available in several ways. We will strive to answer your question as
quickly as possible in all cases.
Please note that Technical Support is accessible to users of the OpalisRobot evaluation version. We are happy to help you
evaluate OpalisRobot.
Electronic Mail
Contact Opalis engineers directly by sending electronic mail to the following address:
[email protected]
World Wide Web
Browse updated technical and marketing information, get the latest files and goodies from our Web site at:
www.opalis.com
Phone
See contact details on the first page of this manual.
Technical Services
Page 104
Evaluation Version
The evaluation version allows you to test all OpalisRobot functions and determine if OpalisRobot satisfies your needs.
Please check our Web site at www.opalis.com or call us to obtain the most recent version.
The evaluation version is limited in the number of objects that you can use simultaneously and the maximum time during which
the Service can be run:
• When it starts, the evaluation version of the OpalisRobot Service will only take into account a limited number of
objects, namely the first 33 active events, the first 33 active tasks and the first 33 active links;
• The OpalisRobot Service will stop after 30 days of operation. After these 30 days, the Service cannot be restarted;
• You can remotely trigger 333 events with the Client, WinEvt3 or GenEvt3 utility.
Evaluation Version
Page 105
INDEX
C
Connect, 17, 19
ConsoleRunner, 54
Control Panel, 15
E
Evaluation Version, 98
Event, 9, 21, 26
Date/Time Event, 41
Interactive, 52
Example, 10, 14
Execution mode, 28
F
Multiple, 23, 57
Log
Filter, 20
M
Mail, 32, 91
Messages window, 33
Messages Window, 17, 18, 20
Multitask mode, 27
N
NTBackup, 10, 30
O
ODBC, 6, 91, 96
Folder, 10
G
P
Print, 19
GenEvt3, 56
I
Information, 2
R
RAS, 35
Refresh, 20
Requirements, 6
S
Scheduler, 15
Security, 15, 90
Shutdown, 38, 56
SQL, 36, 91, 96
Start/Stop, 19
StopShut, 56
T
Task, 9, 21, 26
Chaining, 13
Technical Services, 2
Troubleshooting, 94
U
UNC, 22
W
Wait, 56
Windows NT Event Viewer, 96
WinEvt, 55
L
Link, 9
Evaluation Version
Page 106