1
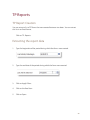
TP Form
Disclaimer notice
This document only includes background information provided strictly for information, and its
content may change without notice. It does not replace the provisions of collective agreements,
the University’s policies and practices or its official interpretations of these documents, which
prevail at all times. For any alternative concerning accessibility, please contact Human
Resources.
For more information
Human Resources
550 Cumberland St.
Room 019
K1N 6N5
Tel.: 613-562-5832
Fax. : 613-562-5206
[email protected]
© Human Resources, University of Ottawa
Version : 1.0.2527
3
Table of contents
Introduction . . . . . . . . . . . . . . . . . . . . . . . . . . . . . . . . . . . . . . . . . . . . . . . . . . . . . . . . . . . . . . . . . . . . . . . . . .7
Introduction . . . . . . . . . . . . . . . . . . . . . . . . . . . . . . . . . . . . . . . . . . . . . . . . . . . . . . . . . . . . . . . . . . . . . . . . . . . 7
Help . . . . . . . . . . . . . . . . . . . . . . . . . . . . . . . . . . . . . . . . . . . . . . . . . . . . . . . . . . . . . . . . . . . . . . . . . . . . . . . . . . 7
Connection to EPAF Forms . . . . . . . . . . . . . . . . . . . . . . . . . . . . . . . . . . . . . . . . . . . . . . . . . . . . . . . . . . . . .9
Login information related to EPAF Forms. . . . . . . . . . . . . . . . . . . . . . . . . . . . . . . . . . . . . . . . . . . . . . . . . . 9
Connection to Epaf Form. . . . . . . . . . . . . . . . . . . . . . . . . . . . . . . . . . . . . . . . . . . . . . . . . . . . . . . . . . . . . . .10
Error message when logging in to EPAF Forms. . . . . . . . . . . . . . . . . . . . . . . . . . . . . . . . . . . . . . . . . . . .11
Password modification. . . . . . . . . . . . . . . . . . . . . . . . . . . . . . . . . . . . . . . . . . . . . . . . . . . . . . . . . . . . . . . . .12
Configuration . . . . . . . . . . . . . . . . . . . . . . . . . . . . . . . . . . . . . . . . . . . . . . . . . . . . . . . . . . . . . . . . . . . . . . . 15
Modifying your Internet Explorer configuration. . . . . . . . . . . . . . . . . . . . . . . . . . . . . . . . . . . . . . . . . . .15
Language of preference modification. . . . . . . . . . . . . . . . . . . . . . . . . . . . . . . . . . . . . . . . . . . . . . . . . . . .22
My Forms and usage of the TP . . . . . . . . . . . . . . . . . . . . . . . . . . . . . . . . . . . . . . . . . . . . . . . . . . . . . . . 25
My Forms. . . . . . . . . . . . . . . . . . . . . . . . . . . . . . . . . . . . . . . . . . . . . . . . . . . . . . . . . . . . . . . . . . . . . . . . . . . . .25
TP Form and it’s usage . . . . . . . . . . . . . . . . . . . . . . . . . . . . . . . . . . . . . . . . . . . . . . . . . . . . . . . . . . . . . . . . .25
Rate Type, Pclass and 4 % . . . . . . . . . . . . . . . . . . . . . . . . . . . . . . . . . . . . . . . . . . . . . . . . . . . . . . . . . . . . . .26
Information related to all electronic forms. . . . . . . . . . . . . . . . . . . . . . . . . . . . . . . . . . . . . . . . . . . . 31
Notes concerning all electronic forms . . . . . . . . . . . . . . . . . . . . . . . . . . . . . . . . . . . . . . . . . . . . . . . . . . .31
Notes specific to academic forms . . . . . . . . . . . . . . . . . . . . . . . . . . . . . . . . . . . . . . . . . . . . . . . . . . . . . . .32
Notes specific to TP Forms . . . . . . . . . . . . . . . . . . . . . . . . . . . . . . . . . . . . . . . . . . . . . . . . . . . . . . . . . . . . .32
Important information on Person creation . . . . . . . . . . . . . . . . . . . . . . . . . . . . . . . . . . . . . . . . . . . . . . .33
Person Creation Section - specific to S and TP forms . . . . . . . . . . . . . . . . . . . . . . . . . . . . . . . . . . . . . . .33
Important Information concerning the Address and telephone number . . . . . . . . . . . . . . . . . . . .34
The address in academic forms (S and TP) . . . . . . . . . . . . . . . . . . . . . . . . . . . . . . . . . . . . . . . . . . . . . . . .34
Information related to the Job in TP Forms . . . . . . . . . . . . . . . . . . . . . . . . . . . . . . . . . . . . . . . . . . . . . . .35
Important information concerning the Job Labour Distribution . . . . . . . . . . . . . . . . . . . . . . . . . . . .37
Employee Information . . . . . . . . . . . . . . . . . . . . . . . . . . . . . . . . . . . . . . . . . . . . . . . . . . . . . . . . . . . . . . . . .39
Important information concerning the work permit . . . . . . . . . . . . . . . . . . . . . . . . . . . . . . . . . . . . . . .40
Work Permits and academic forms (S and TP) . . . . . . . . . . . . . . . . . . . . . . . . . . . . . . . . . . . . . . . . . . . . .41
Information concerning the banking information . . . . . . . . . . . . . . . . . . . . . . . . . . . . . . . . . . . . . . . . .42
TP Form . . . . . . . . . . . . . . . . . . . . . . . . . . . . . . . . . . . . . . . . . . . . . . . . . . . . . . . . . . . . . . . . . . . . . . . . . . . . 49
Creation of a TP Form . . . . . . . . . . . . . . . . . . . . . . . . . . . . . . . . . . . . . . . . . . . . . . . . . . . . . . . . . . . . . . . . . .49
Entering the offer number. . . . . . . . . . . . . . . . . . . . . . . . . . . . . . . . . . . . . . . . . . . . . . . . . . . . . . . . . . . . . .49
4
Finding the offer number . . . . . . . . . . . . . . . . . . . . . . . . . . . . . . . . . . . . . . . . . . . . . . . . . . . . . . . . . . . . . .49
Creation of a person . . . . . . . . . . . . . . . . . . . . . . . . . . . . . . . . . . . . . . . . . . . . . . . . . . . . . . . . . . . . . . . . . . .51
Creation of a person, additional information . . . . . . . . . . . . . . . . . . . . . . . . . . . . . . . . . . . . . . . . . . . . .52
Address and Telephone Number Entry. . . . . . . . . . . . . . . . . . . . . . . . . . . . . . . . . . . . . . . . . . . . . . . . . . .53
Creation of the job . . . . . . . . . . . . . . . . . . . . . . . . . . . . . . . . . . . . . . . . . . . . . . . . . . . . . . . . . . . . . . . . . . . .55
Modification of the Job Labour Distribution FOAP . . . . . . . . . . . . . . . . . . . . . . . . . . . . . . . . . . . . . . . .56
Suppression of a Job Labour Distribution . . . . . . . . . . . . . . . . . . . . . . . . . . . . . . . . . . . . . . . . . . . . . . . .57
Addition of a Labour Distribution . . . . . . . . . . . . . . . . . . . . . . . . . . . . . . . . . . . . . . . . . . . . . . . . . . . . . . .57
Remuneration Section . . . . . . . . . . . . . . . . . . . . . . . . . . . . . . . . . . . . . . . . . . . . . . . . . . . . . . . . . . . . . . . . .58
Remuneration information entry . . . . . . . . . . . . . . . . . . . . . . . . . . . . . . . . . . . . . . . . . . . . . . . . . . . . . . . .62
Semi-Monthly Payment Information. . . . . . . . . . . . . . . . . . . . . . . . . . . . . . . . . . . . . . . . . . . . . . . . . . . . .63
Employee Information Entry . . . . . . . . . . . . . . . . . . . . . . . . . . . . . . . . . . . . . . . . . . . . . . . . . . . . . . . . . . . .64
Work or study permit entry . . . . . . . . . . . . . . . . . . . . . . . . . . . . . . . . . . . . . . . . . . . . . . . . . . . . . . . . . . . . .64
Duties and Teaching Information. . . . . . . . . . . . . . . . . . . . . . . . . . . . . . . . . . . . . . . . . . . . . . . . . . . . . . . .66
Insertion of a Special Clause or a Contract Comment . . . . . . . . . . . . . . . . . . . . . . . . . . . . . . . . . . . . . .67
Insertion of a comment . . . . . . . . . . . . . . . . . . . . . . . . . . . . . . . . . . . . . . . . . . . . . . . . . . . . . . . . . . . . . . . .67
The saving, submission for approval or cancellation of a form . . . . . . . . . . . . . . . . . . . . . . . . . . . . . .68
Confirmation of late notification . . . . . . . . . . . . . . . . . . . . . . . . . . . . . . . . . . . . . . . . . . . . . . . . . . . . . . . .69
PDF Form and EMAIL sent to the professor. . . . . . . . . . . . . . . . . . . . . . . . . . . . . . . . . . . . . . . . . . . . 71
Form PDF version . . . . . . . . . . . . . . . . . . . . . . . . . . . . . . . . . . . . . . . . . . . . . . . . . . . . . . . . . . . . . . . . . . . . .71
Email sent after form is sent to Banner . . . . . . . . . . . . . . . . . . . . . . . . . . . . . . . . . . . . . . . . . . . . . . . . . . .71
Form cancellation during approval . . . . . . . . . . . . . . . . . . . . . . . . . . . . . . . . . . . . . . . . . . . . . . . . . . . 73
Form cancellation while pending approval . . . . . . . . . . . . . . . . . . . . . . . . . . . . . . . . . . . . . . . . . . . . . . .73
Modification or termination of a TP . . . . . . . . . . . . . . . . . . . . . . . . . . . . . . . . . . . . . . . . . . . . . . . . . . 75
Important notes on forms modifications and terminations . . . . . . . . . . . . . . . . . . . . . . . . . . . . . . . . .75
Modification of contract . . . . . . . . . . . . . . . . . . . . . . . . . . . . . . . . . . . . . . . . . . . . . . . . . . . . . . . . . . . . . . .77
Form modification for increase in work hours . . . . . . . . . . . . . . . . . . . . . . . . . . . . . . . . . . . . . . . . . . . . .77
Form modification for work hours reduction . . . . . . . . . . . . . . . . . . . . . . . . . . . . . . . . . . . . . . . . . . . . . .80
Termination of contract . . . . . . . . . . . . . . . . . . . . . . . . . . . . . . . . . . . . . . . . . . . . . . . . . . . . . . . . . . . . . . . .82
Creation of a TP form for course cancellation . . . . . . . . . . . . . . . . . . . . . . . . . . . . . . . . . . . . . . . . . . . . .82
TP termination after it was sent to Banner. . . . . . . . . . . . . . . . . . . . . . . . . . . . . . . . . . . . . . . . . . . . . . . .87
TP Reports . . . . . . . . . . . . . . . . . . . . . . . . . . . . . . . . . . . . . . . . . . . . . . . . . . . . . . . . . . . . . . . . . . . . . . . . . 89
TP Report Creation . . . . . . . . . . . . . . . . . . . . . . . . . . . . . . . . . . . . . . . . . . . . . . . . . . . . . . . . . . . . . . . . . . . .89
Extracting the report data . . . . . . . . . . . . . . . . . . . . . . . . . . . . . . . . . . . . . . . . . . . . . . . . . . . . . . . . . . . . . .89
TP Report Data . . . . . . . . . . . . . . . . . . . . . . . . . . . . . . . . . . . . . . . . . . . . . . . . . . . . . . . . . . . . . . . . . . . . . . . .92
Search Tool . . . . . . . . . . . . . . . . . . . . . . . . . . . . . . . . . . . . . . . . . . . . . . . . . . . . . . . . . . . . . . . . . . . . . . . . . 95
Search Tool . . . . . . . . . . . . . . . . . . . . . . . . . . . . . . . . . . . . . . . . . . . . . . . . . . . . . . . . . . . . . . . . . . . . . . . . . . .95
Search by Employee Number . . . . . . . . . . . . . . . . . . . . . . . . . . . . . . . . . . . . . . . . . . . . . . . . . . . . . . . . . . .98
5
Search by employee name . . . . . . . . . . . . . . . . . . . . . . . . . . . . . . . . . . . . . . . . . . . . . . . . . . . . . . . . . . . . .99
Search by form number . . . . . . . . . . . . . . . . . . . . . . . . . . . . . . . . . . . . . . . . . . . . . . . . . . . . . . . . . . . . . . . .99
Search by user id . . . . . . . . . . . . . . . . . . . . . . . . . . . . . . . . . . . . . . . . . . . . . . . . . . . . . . . . . . . . . . . . . . . . 100
Approvers and proxies . . . . . . . . . . . . . . . . . . . . . . . . . . . . . . . . . . . . . . . . . . . . . . . . . . . . . . . . . . . . . 101
Approvers . . . . . . . . . . . . . . . . . . . . . . . . . . . . . . . . . . . . . . . . . . . . . . . . . . . . . . . . . . . . . . . . . . . . . . . . . . 101
Electronic form approval . . . . . . . . . . . . . . . . . . . . . . . . . . . . . . . . . . . . . . . . . . . . . . . . . . . . . . . . . . . . . 101
Configuration of a proxy . . . . . . . . . . . . . . . . . . . . . . . . . . . . . . . . . . . . . . . . . . . . . . . . . . . . . . . . . . . . . 101
Removal of a proxy . . . . . . . . . . . . . . . . . . . . . . . . . . . . . . . . . . . . . . . . . . . . . . . . . . . . . . . . . . . . . . . . . . 102
Error Messages. . . . . . . . . . . . . . . . . . . . . . . . . . . . . . . . . . . . . . . . . . . . . . . . . . . . . . . . . . . . . . . . . . . . . 103
Error Messages. . . . . . . . . . . . . . . . . . . . . . . . . . . . . . . . . . . . . . . . . . . . . . . . . . . . . . . . . . . . . . . . . . . . . . 103
Error messages during the person creation part . . . . . . . . . . . . . . . . . . . . . . . . . . . . . . . . . . . . . . . . 103
Error message from the Address section . . . . . . . . . . . . . . . . . . . . . . . . . . . . . . . . . . . . . . . . . . . . . . . 104
Error messages from the job section. . . . . . . . . . . . . . . . . . . . . . . . . . . . . . . . . . . . . . . . . . . . . . . . . . . 104
Error messages specific to academic forms (S and TP) . . . . . . . . . . . . . . . . . . . . . . . . . . . . . . . . . . . 105
Error messages in the Job Labour Distribution section. . . . . . . . . . . . . . . . . . . . . . . . . . . . . . . . . . . 105
Error messages from the Person Information section . . . . . . . . . . . . . . . . . . . . . . . . . . . . . . . . . . . . 106
Error message in the Approval section . . . . . . . . . . . . . . . . . . . . . . . . . . . . . . . . . . . . . . . . . . . . . . . . . 106
6
Introduction
Introduction
1.
This users’ guide was created as a reference tool in your daily use of this system.
2.
An up-to-date version of this guide in Abode Acrobat (PDF) format may be viewed
on the Human Resources website and downloaded. Simply go to http : //
www.hr.uOttawa.ca/forms/manager/documentation.php.
3.
You are invited to share your comments and questions with us. Please email
[email protected].
Help
Do you need help with the electronic forms? Contact the Payroll Sector, by telephone
at extension 7709 or by email at [email protected].
7
Connection to EPAF Forms
Login information related to EPAF Forms
1.
How do you log into EPAF Forms?
Click on the following URL : https : //web30.uottawa.ca/v3/uoforms/default.aspx
2.
What are my user-id and password? You can use your Banner ID or your Infoweb
account.
3.
How do you request access to this system ?
By filling the Request for Access to Systems form that you will find at the following
url : Forms for Administrators and Managers.
4.
Which section(s) of the form must I fill ?
9
10
You must click on the requested item(s) from the User Roles Section as illustrated
below.
Connection to Epaf Form
1.
Click on the following hyperlink : EPAF Form.
UNIVERSITY OF OTTAWA
Your User Name (which starts with a capital E, followed by your employee number
without the leading « 1» and zeroes). Example: 100010568 = E10568.
And your Password (which is the same as your InfoWeb password, all in capitals)
2.
Type your Username.
3.
Type your Password.
4.
Click on Connexion / Login.
5.
Click on one of the following items:
All electronic forms are accessible by connecting to EPAF Form.
• P3C : Time Sheet
• P3D : Multiple Pay
• LTE : Late Time Entry
• LR : Labour Redistribution
• Corrections (HR or Pay)
• S : Contract - CUPE (2626) (S Form)
• TP : Part Time Teaching (TP Form)
• UC : Unpaid Clinician
• APTPUO Hiring (UOHMS APTPUO)
• CUPE Hiring (2626) (UOHMS CUPE)
Error message when logging in to EPAF Forms
If you get the message : Could not login with the username and password provided
after entering your userid and password, it may be because your password has expired.
To solve this problem, you must change your Banner password. Please refer to the
section Password modification to help you with this task.
11
12
Password modification
1.
Click on Banner Application from the Start menu.
2.
Type your Banner Username.
3.
Type your Password.
4.
Click on CONNECT.
5.
Click on Click to change your password on the right hand side index.
6.
Type your CURRENT password in the Oracle Password field.
7.
Type the NEW password i n the New Oracle Password field.
UNIVERSITY OF OTTAWA
8.
Type the NEW password again in the Verify Password field.
9.
Click on the diskette icon to save your new password.
10. Click on Ok.
11. Click on the X from the top menu to exit Banner.
13
Configuration
Modifying your Internet Explorer configuration
If you need to open a CV or execute a report and you received an error message or
nothing opens, you must modify your Internet Explorer to solve this issue.
1.
Click on Tools from the Internet Explorer top menu.
2.
Select Internet Options.
3.
Click on the Security tab.
4.
Click on Custom Level.
15
16
5.
Using the scroll bar, bring your cursor down until you get to Downloads.
6.
Click on Enable for each of the three following options : Automatic prompting for
file downloads, File download and Font download.
7.
Click on Ok.
UNIVERSITY OF OTTAWA
8.
Click on Ok to confirm the modification.
17
18
9.
Click on Trusted Sites.
10. Click on Sites.
UNIVERSITY OF OTTAWA
11. Type https : //web30.uottawa.ca in the box titled Add this website to the zone.
12. Click on Add.
13. Click on Close.
19
20
14. Click on Ok.
15. Click again on Tools from the top menu.
16. Select Pop-up Blocker.
UNIVERSITY OF OTTAWA
17. Select Pop-up Blocker Settings.
18. Type the followin url : https: //web30.uottawa.ca in the box titled Address of
website to allow and click on Add.
21
22
19. Click on Close.
Language of preference modification
It is possible to use the English version of electronic forms. You must follow the steps to
switch to English forms.
1.
Click on Préférences from the Index.
2.
Select Anglais.
UNIVERSITY OF OTTAWA
3.
Click on Sauvegarder.
4.
The system automatically switches to English.
23
My Forms and usage of the TP
My Forms
When you create electronic forms that you have saved but not submitted for approval,
they are left in My Forms. This means that if you have started working on a form but
have not completed it, you can reopen it later, finish it and then submit it for approval.
• If you open an EPAF session and some of your previous forms have not been
submitted for approval, you will automatically get the My Forms window.
• If you are currently working on a form and you save it as draft, you will be able to go
back to it by clicking on My Forms from the left hand index.
TP Form and it’s usage
The TP Form is used to pay part-time professors that belong to employee classes 1D and
1E. These professors are paid on a semi-monthly basis (SM). Following, is a list of all
PClass codes that can be used in the TP Form.
Employee Class
Pclass Code
Pclass Description
1E - APTPUO
31400
Lecturer - APTPUO
1E - APTPUO
31401
Lecturer- APTPUO Student
1E - APTPUO
31410
Lang. Teacher APTPUO
1E - APTPUO
31411
Lang. Teacher APTPUO Student
25
26
Employee Class
Pclass Code
Pclass Description
1E - APTPUO
31420
APTPUO-Applied Theory
1D - Term Academic - Non Union
31101
Term Professor Non-APUO
1D - Term Academic - Non Union
31111
Term Lang.Teacher Non-APUO
1D - Term Academic - Non Union
31402
Lecturer Non-APTPUO
1D - Term Academic - Non Union
31412
Lang. Teacher Non-APTPUO
1D - Term Academic - Non Union
31422
Term Non Union-Applied
Theory
1D - Term Academic - Non Union
36100
Lecturer Non-APTPUO Student
1D - Term Academic - Non Union
36110
Lang. Teach Non-APTPUO
Student
Rate Type, Pclass and 4 %
The different rate types that can be selected in the TP Form must be used for spectific
cases. The following table contains a list of all rate types that can be selected on the
form.
Rate Type
Utilisation
Accommodatio When an APTPUO member is
requested to assist with
n
accommodation measures for
students during in-class
examination and that such
accommodation is arranged
Paymen Can
t
you
modify
the
hourly
rate ?
(Yes /
No)
Prof
accumula
tes
seniority
points ?
(Yes / No)
Do you
need to
add
4 %to
the
amount
? (Yes /
No)
Flat
No
Amount
No
No
27
UNIVERSITY OF OTTAWA
Rate Type
Utilisation
Paymen Can
t
you
modify
the
hourly
rate ?
(Yes /
No)
Prof
accumula
tes
seniority
points ?
(Yes / No)
Do you
need to
add
4 %to
the
amount
? (Yes /
No)
Applied Theory To be used when a CUPE student
was not hired or used by the
Faculty of Sciences under special
circumstances.
Hourly
Rate
No
No
Yes
Applied Music
Used by the School of Music for
musical instrument course.
Hourly
Rate
Yes
Yes
Yes
APUO Prof additional
teaching
Additional Teaching Load of an
APUO professor.
Hourly
Rate
No
No
No
Clinical
Clinical teaching by a professor
Teaching - prof with a bachelor degree in
has B. Sc.
Sciences.
Hourly
Rate
No
Yes
Yes
Clinical
Clinical teaching by a professor
Hourly
Teaching - prof with a masters degree in Sciences. Rate
has M.Sc.
No
Yes
Yes
According to the article titled
Flat
Yes
PAYMENT IN LIEU OF ASSISTANCE of Amount
the APTPUO collective
agreement.
No
No
through the Student Access
Service Centre and involves
additional e-mail, telephone or
in-person support on the part of
the APTPUO member, he/she
shall be paid an amount for such
accommodation assistance.
Corrections by
Prof
28
Rate Type
Utilisation
Course
Canceled Initial Contract
Not Issued
Paymen Can
t
you
modify
the
hourly
rate ?
(Yes /
No)
Prof
accumula
tes
seniority
points ?
(Yes / No)
Do you
need to
add
4 %to
the
amount
? (Yes /
No)
This code must be used to pay
Flat
Yes
the indemnity to the professor
Amount
because the course was cancelled
and because the initial contract
was not yet issued. The professor
will receive seniority points if
he/she was to teach a credit
course.
Yes
Yes
Deferred Exam
The member will be paid an
amount for each deferred
examination, supplemental
examination or any additional
course work directly related to
the assignment of the final grade
for the course, prepared under
faculty regulations.
Flat
No
Amount
No
No
Large Class
Payment - all
class types
According to article CLASS SIZE of
the APTPUO collective
agreement.
Per
Student
Rate
No
No
No
Law - Other
Used by the Faculty of Law to pay Flat
Yes
a flat amount.
Amount
No
No
Review and
Appeal
When an APTPUO member
participates in an official appeal
of a student’s grade in a course
he/she has taught and that the
department requests that the
member undertake a further
review of the marks after the end
No
No
Flat
No
Amount
29
UNIVERSITY OF OTTAWA
Rate Type
Utilisation
Paymen Can
t
you
modify
the
hourly
rate ?
(Yes /
No)
Prof
accumula
tes
seniority
points ?
(Yes / No)
Do you
need to
add
4 %to
the
amount
? (Yes /
No)
of the contract, he/she will be
paid an amount for such a review.
Teaching manual rate without
seniority points
Regular APTPUO teaching
Hourly
contract but for which the hourly Rate
rate does not apply due to special
reasons. The professor will not
accumulate seniority points.
Yes
No
Yes
Teaching manual rate with seniority
points
Regular APTPUO teaching
Hourly
contract but for which the hourly Rate
rate does not apply due to special
reasons. The professor will
accumulate seniority points.
Yes
Yes
Yes
Teaching Visiting
Professor
Used to hire a visiting professor
Hourly
who will teach a course that has
Rate
not been posted for which the T
Board of Governor forms does not
contain any wage information
Yes
No
Yes
Hourly
Rate
No
No
Yes
Teaching with Usual APTPUO Teaching contract. Hourly
seniority points
Rate
No
Yes
Yes
Flat
Yes
Amount
Yes
Yes
Teaching
APTPUO Teaching Contract for
without
which the professor does not
seniority points accumulate seniority points.
Termination for When a course is canceled for
course
course cancelation and that the
cancellation
initial contract has been sent to
Banner, a termination contract
must be created to stop the
30
Rate Type
Utilisation
Paymen Can
t
you
modify
the
hourly
rate ?
(Yes /
No)
Prof
accumula
tes
seniority
points ?
(Yes / No)
Do you
need to
add
4 %to
the
amount
? (Yes /
No)
Yes
Yes
payments and to terminate the
contract. The termination reason
entered in the form will
determine if the professor keeps
the seniority points or not.
Termination of
contract
This code must be used when you Hourly
are terminating a contract for any Rate
reason except “course canceled”.
The termination reason
determines if the professor will
keep the seniority points
associated to the initial contract
or not.
Yes
Information related to all electronic
forms
Notes concerning all electronic forms
1.
You can create an electronic form for a candidate who does not have an employee
number. Here are the following steps for the employee number creation process in
all electronic forms.
a.
The form creator enters the biographical information in the electronic form.
b.
The form is submitted for approval.
c.
If the candidate is a work permit holder, the form is forwarded to Human
Resources and it will be released once they receive a copy of the work permit.
d.
If the form is late for a period of more than 30 days, it will be forwarded to
Payroll Service and it will be released once they have read the comment
explaining why the form is late.
e.
The form is then sent to Banner and the employee number is created.
f.
Twenty-four hours later, the employee and job records are available in the
FastHR environment.
2.
If you have hired a person that does not have an employee number and for whom
you must create more than one form (TP, Late-time Entry, S etc.) you must start by
creating the first form and wait until the employee number creation process has
been completed to fill the other forms.
3.
You cannot create a form for an inactive employee. To reactivate an employee, you
must fill and HR Correction Form. Please refer to the HR user manual (French only)
for the procedure to reactivate an employee.
4.
If you create a form for a closed pay period, computer processes will be launched
to pay the missed pay periods.
5.
If the person that you are hiring does not have a social insurance number, he or she
will have to obtain one. Service Canada has created an Employment Contract that
you can use to allow the person to obtain a SIN. Please click on the following link
Employment Contract (PDF) and please read the directives by clicking on the
following link Directive to prepare the Employment Contract
31
32
Notes specific to academic forms
1.
You cannot create a form if you have not created an offer in the UOHMS system.
2.
You do not need to print, sign and approve the paper version of the S and TP
forms.
3.
The acceptance of the offer sent by email by the candidate is your proof that he/she
has accepted the offer.
4.
The S and TP forms can be output to a PDF version which can be printed and/or
sent by email to the candidate that requests one.
5.
The academic form will permit the person creation when the candidate does not
have an employee number. If the candidate does not have a SIN number, the
creator will be able to save the form, print the PDF version, have it signed and
approved and give it to the candidate so that he/she can obtain a SIN number. The
form creator will then be able to open the form, enter the SIN number and then
sent for approval.
6.
Once the form is released to Banner, it sends an email to the candidate to give
him/her the contract total amount.
7.
Forms created to pay a flat amount will be paid over one pay period only,
consequently, the system will adjust the job begin and end dates of the contract
accordingly.
Notes specific to TP Forms
The TP electronic form completes the hiring process of part-time professors. The form
serves as the hiring contract and the data entered in the form is sent to Banner trough
various processes.
1.
The offer created in the UOHMS APTPUO must either have an A (accepted) or C
(cancelled) status.
2.
You can create more than one TP forms using the same offer number. For example,
you create the initial contract using a specific offer, then if you must pay a large
class supplemental amount, you would use the same offer number but you would
select the proper rate type. If you must pay another amount for corrections by prof,
you would again use the same offer number but you would select the according
rate type. The system allows you to create more than contract with the same offer
and rate type but it will give you a warning that a contract with the same offer
number and same rate already exists.
UNIVERSITY OF OTTAWA
3.
The seniority points are calculated using the TP form’s data. The seniority points are
sent to UOHMS APTPUO once the form has a status of Completed or Manually
Completed by the Pay. When a contract termination occurs, it is important to
terminate the TP form so that the seniority points be removed (or not) depending
on the termination reason. For example, in the case when a course is cancelled, the
professors keeps the seniority points, however if the professors is fired, the
seniority points are removed.
4.
The payment given to the professor is by hourly rate, flat amount or by number of
students, you cannot pay by the number of credits.
Important information on Person creation
If the candidate does not have an employee number, you must enter the biographic
information in the form to have an employee number created in Banner.
1.
The social insurance number is validated, should it be invalid, you will obtain the
error message : The SIN is invalid.
2.
You must ensure to type the first and last names using the french characters and in
mixed case. It is most important that the names be typed correctly because this
information is sent to Banner.
3.
You must ensure to validate the postal code wether an address has been entered in
the system or not through a UOHMS application form. Human Resources use this
address to send the letter that contains the email address and initial password to
the canditate. Payroll Service use the same address to send the T4/T4A forms. All
the more reasons to validate the address.
Person Creation Section - specific to S and TP forms
1.
You can create an S or TP forms even tough the candidate does note have a sin
number. You can save, and print and have the faculty approver sign the form. You
will then give the form to the candidate so that he or she can obtain a sin number.
When the candidate comes back with the sin number, you simply open the form
saved in My Forms and you will be able to enter the sin number and submit the
form for approval.
33
34
Important Information concerning the Address and
telephone number
1.
If the candidate has an employee number, his or her address is displayed in the
form and you cannot modify it. However, if the candidate does not have an
employee number, you will have to enter the address using the Address Wizard.
You must enter a permanent Canadian address when creating a person otherwise you
will get an error message when you try to save the form.
If you obtain an error message that the postal code is not valid, please ensure to that
the postal code is valid by going on the Canada Post web site to confirm that postal
code does match the street name and number given by the candidate. If the postal
code exists according to Canada Post, you must enter the University’s business address
and then send an email to [email protected] and request that an Information Agent of
the Human Resources adds the correct address of the candidate in Banner.
The address in academic forms (S and TP)
The address displayed in academic forms (S and TP) is taken from Banner when the
candidate has an employee number, however, if the candidate does not have an
employee number, the information is taken from the S.I.S. in the case of the S Form and
taken from the job application in the case of the TP Form.
If the candidate has an international address in S.I.S. (S Form) or in the job
application (TP Form), it will not be imported into the form (S or TP). You will have to
request a canadian address to the candidate so that you can enter it in the form (S or
UNIVERSITY OF OTTAWA
TP). The system does not allow you to enter an international address, therefore, you
will have to enter a canadian address in order to save and submit the form for
approval.
Information related to the Job in TP Forms
Many fields of the TP Form’s Job section are automatically filled by the system.
1.
The TP Form’s Job Class is filled by the Job Classification from the offer.
2.
The Rate Types displayed in the scroll list are directly related to the Job Class field
displayed in the TP. Form.
35
36
3.
The scroll list of the P-Class is generated by the combination of the Rate Type and
the Job Class.
4.
The Position number and Job Suffix are generated by the combination of the
Timesheet Org and P-Class code.
5.
The Actual Job Begin and Actual Job End dates are filled by the dates entered in
Course Star Date and Course End Date on the offer. You can modify those dates on
the TP Form.
6.
TP Cancelation : to cancel a TP for which a course was canceled but for which no
initial contract was created, you must first cancel the offer in UHOMS and create a
new contract with using the rate type Course Cancelation. By creating the contract,
the seniority points will be sent to UHOMS (if it applies) and you will be able to pay
the indemnity to the professor in the case of a contract cancelation (if the situation
UNIVERSITY OF OTTAWA
applies).
7.
Termination contract : please refer to the section titled Important notes on contract
modification and termination for help on how to terminate a contract.
8.
Contract Modification : please refer to the section titled Important notes on
contract modification and termination for help on how to modify a contract.
Important information concerning the Job Labour
Distribution
1.
The labour distribution is created by the following elements: Fund + Org +
Account + Program.
37
38
2.
The FOAP from the Job Labour Distribution section is the job FOAP.
3.
When you select a position and you assign it to the employee in the Job section, it
is the position’s FOAP that is populated by default but you may modify it.
4.
You must specify the percentage that applies to each FOAP if there is more than
one. You must use the percentage box to that effect.
5.
You can never modify the account within the FOAP because the account is directly
related to the position class (P-Class) that you have selected in the Job section.
UNIVERSITY OF OTTAWA
6.
If you have modified the labour distibution and you modify, again. one of the
following fields (faculty, timesheet org, hourly rate or position class) from the Job
Section, the form may modify the labour distbution according to the modified
fields.
7.
If the form creator’s faculty is different from the approver’s faculty, the verification
of the labour distribution will be done when the approver approves the form.
Employee Information
1.
Many fields appearing on the form are automatically populated with the values
that you have entered in the previous sections of the current form.
39
40
2.
The Home and Distribution Orgs will automatically be populated by the values
entered in the Timesheet Org of the Job section. You can modify those fields.
3.
The Current Hire Date field is populated with the Job Begin Date from the Job
section.
4.
The Employee Class field is populated with the Employee Class from the Job
section.
5.
The selection of a value other than Canadian Citizen of the Citizenship field from
the Employee Information section will make the following list of fields appear : Visa
Type, Visa Number, Visa Nation, Visa Start Date et Visa End Date.
6.
The creation of a new person in the form will enable your to enter the banking
information.
Important information concerning the work permit
1.
You must always send a photocopy of either the work/study permit or the proof of
request for extension of the work/study permit.
UNIVERSITY OF OTTAWA
2.
If you have selected Work/Study Permit on the Citizenship field, you must fill the
work/study permit related information in the appropriate fields of the Employee
Information section.
3.
You must always ensure that your employee has a valid work/study permit to work
at the University. You should never enter a job end date greater than the work/
study permit expiration date. You will not be able to do a P3C, LTE nor P3D if the
job begin date is prior to the work/study permit or if the job end date is greater
than the work/study permit.
4.
Should your employee have requested a extension of the current work/study
permit, please request a photocopy that you will then scan and attach to an HR
Correction Form (please refer to the HR Correction user guide (French only).
5.
If the employee exists, you will still be able to see the citizenship in the Person
Information Section of the form. Should the citizenship be work/study permit, you
must ensure that the work permit is valid and you must send a copy of the work/
permit or the proof of request for extension to Human Resources.
Work Permits and academic forms (S and TP)
1.
You may create an academic form even though the work permit has expired but
you will get a warning message.
41
42
2.
The approver will be able to approve the form and a warning message will also
appear but the form will be then sent in the «My Forms» box of Human Resources
and the form will then have an HR waiting for work permit status.
3.
You will then be able to print the PDF version of the form to give to the candidate in
order to obtain an extension of the work permit. When the candidate brings you
the proof of request for extension of the work permits you must follow the next
steps:
a.
Scan and send by email the copy of the work permit or a copy of the proof of
request for work permit extension and the PDF version of the form to the
[email protected].
b.
In the subject of the email, please add the following : Work permit - Electronic
form to approve.
c.
Click on High Importance to indicate that your message is important because a
form is awaiting approval.
Information concerning the banking information
1.
The banking information can only be entered when creating the person in the
EPAF.
2.
Even though you are able to enter the banking information, you must continue to
send a copy of the blank cheque or the bank letter to Human Resources.
3.
The Internal Audit Office requires that the banking information be verified by a
different person than the one that entered it in Banner. A Human Resources
employee will verify the banking information against the copy of the blank cheque
or the bank letter that you will have sent.
4.
If you don’t know the banking information, you must select Not Available as Bank
Account Type. The employee will be paid by cheque until Human Resources receive
a void cheque or a bank letter to enter the banking information in Banner.
5.
You have three layouts that you can use to enter the banking information, if you
have a cheque that has six series of numbers, select Layout #1.
UNIVERSITY OF OTTAWA
6.
If you have a cheque containing five series of numbers, select Layout #2
43
44
7.
If you have a bank letter, select Bank Letter.
UNIVERSITY OF OTTAWA
8.
If the bank account number that appears on the bank letter or the check has a dash
in it, do not write it in the boxes of the check wizard. You must write numbers in
the boxes and the system will apply the emplate specific to the bank.
45
46
9.
If there is not enough space in the box to enter the number of one of the series
appearing on the cheque or the bank letter, you must simply take the rest of the
numbers and put in the following box. In the image below, the bank account
number is 05411 11, however, the fourth box of the layout #2 will only allow the
entry of 4 digits, you must take the rest of the digits and put them at the start of
the fifth box with the rest of the numbers as illustrated below.
10. Certain cheque specimens do not include the cheque number. The cheque number
is a number of three digits and it is usually put at the beginning of the number
showing on the specimen. The following illustration is an example of a specimen
without the cheque number. Because the specimen already contains 5 series of
number, you must use theLayout #1 to enter the bank info. You must input zero (0)
in the first box and fill the next boxes with the numbers appearing on the
specimen.
UNIVERSITY OF OTTAWA
47
TP Form
Creation of a TP Form
Click on TP : Part-Time Teaching from the right hand side index.
Entering the offer number
If you know the offer number, you can enter it in the Contract Offer Information field,
otherwise, you can find it. You can refer to the section «Finding the offer number » to
search the offer number.
1.
Type the offer number.
2.
Click on Retrieve Offer Details.
Finding the offer number
You can find the offer number within the form. You can search using the employee
number, last name, first name, course or session code or a combination of these fields.
1.
Click on Find Offer Number.
2.
Type the search criteria in the appropriate boxes using the mixed cases in the last
and first names.
3.
Click on Search.
49
50
4.
Click on the offer number.
5.
If you have created an offer using the Application Number of UOHMS, the Person
Information and Permanent Address sections will automatically be populated by the
UOHMS job application if the candidate is not an employee or a student.
If the candidate is an employee, the Person Information and Permanent Address
sections will be filled with information taken from Banner.
If the candidate is a student without an employee number, the Person Information
and Permanent Address sections will be filled by information taken from the S.I.S.
APTPUO Professors accumulate seniority points when teaching a course,
consequently you must ensure to enter the employee number of the hired
professor in the offer before doing the form. The seniority points can only be added
when an employee number exists.
UNIVERSITY OF OTTAWA
Creation of a person
1.
Enter the Surname using French characters and mixed cases.
2.
Enter the Given Name using French characters and mixed cases.
3.
Enter the Social Insurance Number without character spacing or dash.
4.
Enter the Date of Birth using the format DD/MM/YYYY.
5.
Select the Gender.
6.
Click on Get Employee Data.
51
52
Creation of a person, additional information
1.
Type the Middle name (if applicable).
2.
Select the Language of correspondence.
3.
Select the Marital Status. If you do not know the marital status, leave it to single.
The marital status is a required field when creating a person. The person that you
are hiring is a casual employee therefore there is no impact on leave the marital
status to single. Should the employee become eligible to benefits, the status would
be modified by Human Resources to reflect the real status of the employee.
4.
Type the Student Number (if you know it).
5.
Select the Citizenship.
You are responsible to ensure that the hired employee has a valid working or study
permit when the citizenship is not Canadian. Moreover, it is important that the
contract end date does not exceed the working permit expiration date.
If you have selected a citizenship other than Canadian, you will need to enter the
work or study permit information in the Employee Information section.
UNIVERSITY OF OTTAWA
Address and Telephone Number Entry
1.
Click on the envelope of the Address wizard.
2.
Enter the Postal Code or the Zip Code (when the permanent address is one from
the United States) without character spacing or dash.
3.
Select Canada or United States.
4.
Click on Validate Postal Code.
5.
Select the street name and numbers corresponding to the candidate’s address.
6.
Enter the Street Address Number.
53
54
7.
(Optional) Enter the Suite/Apt number.
8.
(Optional) Enter the date from which the address is valid in the From Date field.
Banner inserts the current date in the From Date field to show the date from which
the address is valid. Click on the calendar icon to modify it.
9.
Click on Enter Address Information.
10. Enter the Area Code of the Telephone section.
11. Enter the Telephone Number using the following format: 999-9999.
12. (Optional) Enter the Ext. number.
UNIVERSITY OF OTTAWA
Creation of the job
1.
If you are creating a TP that must be approved by a different faculty, using the
scroll list of the Creator’s Faculty/Service field, select the Faculty that must approve
the form otherwise, select your faculty.
2.
Type the Timesheet Org.
3.
Select the Rate Type.
Please refer to the section Rate Type, Pclass and 4 % to help you select the proper
Rate Type.
4.
Select the P-Class if none appear by default.
5.
Modify the Actual Job Start Date (in the case where the date entered in the offer is
incorrect).
6.
Modify the Actual Job End Date (in the case where the date entered in the offer is
incorrect.
The TP will launch automatic processes to pay past paid period if the job start date
belongs to a pas pay period. If the selected rate type will be paid in one installment,
the system will adjust the Actual Job Start and End Dates in order to pay the
amount in one single pay period. For example, if the employee has started a
55
56
contract on May 2nd and you must pay a large class contract, the system will
modify the Actual Job Start and End Dates and replace them with the first and last
day of the pay period of the original Actual Job Start Date.
7.
Click on Save as Draft.
Modification of the Job Labour Distribution FOAP
1.
Click on Edit.
2.
Type the two first digits of your org in the Org field and select the org from the
scroll list.
However, if you need to add a research/grant fund, type the 2 first digits of the
fund in the according box and select the it from the scroll list. The rest of the cost
center will populate automatically.
3.
Click on Update to save the new FOAP.
UNIVERSITY OF OTTAWA
Suppression of a Job Labour Distribution
You cannot erase the cost if there is only one showing. You must begin by creating a
new labour distribution then you can delete the incorrect one.
1.
Click on Delete to remove the incorrect cost center.
2.
Click on OK.
Addition of a Labour Distribution
1.
Click on Add.
57
58
2.
Type the two first digits of the org in the Organization field and select the org from
the scroll list.
However, if you need to add a research/grant fund, type the 2 first digits of the
fund in the according box and select the it from the scroll list. The rest of the cost
center will populate automatically.
3.
Type the Percentage applying to the new Labour Distribution.
4.
Click on Insert.
Remuneration Section
The Remuneration section is used to enter the hourly rate (manual rate), the number of
students (large class) or the flat amount to be paid. The selected rate type is directly
associated to the hourly rate given to the candidate. Some rate types will require that
the hourly rate be manually entered whereas the rest will automatically populate the
UNIVERSITY OF OTTAWA
hourly reate and you will not be able to modify it. Please refer to the section Rate Type,
Pclass and 4 % to see when you must add 4 % to the entered amount.
1.
The Number of Hours is automatically populated using the number of hours taken
from the offer but you can modify it.
If the selected rated type generates a seniority points calculation, it will be based
on the number of hours of the TP form, not on the number of course credits
entered in posting.
2.
The Hourly Rate automatically displays according to the selected Rate Type. Some
Hourly Rate are alterable but most are not. If the Hourly Rate is in a pale grey, it
means that you cannot modify it.
59
60
3.
The vacation pay (4 %) is automatically added to the Hourly Rate when it is
predefined.
UNIVERSITY OF OTTAWA
4.
If the hourly rate is alterable, the default value display zero written in dark black.
Please ensure to add the vacation pay (4 %) that you have typed if it applies. Please
refer to the section Rate Type, Pclass and 4 % to know when you must add 4 % to
the rate.
5.
An alterable rate might display a value different from zero but it will be displayed in
dark black, therefore, you will be able to modify it.
61
62
Remuneration information entry
1.
Type the Number of Hours (the system displays the number of hours taken from the
offer but you can modify it.
2.
Type the hourly rate that includes the vacation pay (4 %) in the Rate (4 % Incl.) field.
This step is made available only if you happen to select a Rate Type that will let you
enter an amount or if the amount displayed is zero.
3.
Click on Calculate (only if you have modified or entered an amount, otherwise, the
system will automatically calculate the amount).
UNIVERSITY OF OTTAWA
Semi-Monthly Payment Information
The system calculates the number payments between the Job Begin and End dates and
distributes the total amount of the contract on each of those payments.
63
64
Employee Information Entry
1.
Click on the Save As Draft icon from the Employee Information section.
The system will automatically populate the Employee Class, Home Org, Current
Hire Date and Distribution Org)
2.
Modify the Home Org. (if necessary).
3.
Modify the Distribution Org (if necessary).
Work or study permit entry
Please refer to the following illustration to enter the data on the work/study permit.
UNIVERSITY OF OTTAWA
1.
Select the permit type using the Visa Type field.
2.
Enter the work/study permit number as it appears on the permit (using capital
letters and character spacing) in the Visa Number field.
3.
Select the country of citizenship from the Visa Nation field.
4.
Enter the date the permit was signed in the Visa Start Date using the format
DD/MM/YYYY format (or click on the calendar icon to enter the date).
65
66
5.
Enter the work/study expiration date using the format DD/MM/YYYY (or click on
the calendar icon to enter the date) in the Visa End Date field.
6.
Have you sent a copy of the work/study permit to Human Resources?
Duties and Teaching Information
The Duties Information and Teaching Information do not require any data entry from the
TP form creator.
1.
The Duties Information indicates the group name in which the position class
belongs.
2.
The Teaching Information contains the course information taken from the UOHMS
posting. If the posting number was not entered in the offer, then the Teaching
Information displays what was entered in the offer.
3.
The number of credits is taken from the SIS, if this number was modified on the
posting, it is the modified number that will display in the offer and on the TP form.
The number of credits should never be modified on the posting because it appears
on the TP form.
UNIVERSITY OF OTTAWA
Insertion of a Special Clause or a Contract Comment
You can insert a special clause or a contract comment that will appear on the PDF
version of the form.
Type the comment or special clause to appear on the form.
Insertion of a comment
1.
Enter a comment.
2.
Click on Add Comment.
67
68
The saving, submission for approval or cancellation
of a form
1.
Select the Next Approver.
2.
Click on Save As Draft to save the timesheet. You will be able to modify it later.
3.
Click on Save and Submit to submit the form for approval.
4.
Click on Cancel to delete the form.
UNIVERSITY OF OTTAWA
Confirmation of late notification
When you create a form for which the payment is late for a period of more than thirty
days, you will get a pop up as illustrated below.
1.
Click in the box I acknowledge that...forwarded to HR for approval.
2.
Type the reason why the form is late in the large box.
3.
Click on Continue Submission.
69
PDF Form and EMAIL sent to the
professor
Form PDF version
Click on Open Contract in PDF version.
Email sent after form is sent to Banner
An email message is sent to the candidate when the form is sent to Banner. This
additional step was asked by the candidates because they wanted to know the total
contract amount. The following illustration is an example of an email sent to a
candidate.
71
72
Form cancellation during approval
Form cancellation while pending approval
You have created a form, you have sent it for approval and you need to terminate it
even though the approval process has not been completed.
1.
Find the form using Search tool. Please refer to the Search Tool section of the
present user guide for help on how to find a form.
2.
The form’ status indicates the approval stage.
You must request the approver to reject the form.
1.
New : the form creator has started a form but has not sent for approval
therefore, he/she can simply click on Cancel to delete the form.
2.
Waiting for approval: the faculty approver must open the from and click on
Reject this request to cancel the form.
3.
HR - Waiting for signed contract : Human Resources have not received the
work permit. You must contact the Payroll Service Client Services at extension
7709 to ask them to cancel the form.
73
74
3.
Once the form has been cancelled, create another one for course cancellation.
Please refer to the section Creation of a TP form for course cancellation
Modification or termination of a TP
Important notes on forms modifications and
terminations
You can modify or terminate a TP form.
1.
If you need to modify or terminate a TP form, you must first find it and then open it.
As soon as you click on Modify Contract or Terminate Contract, the original
contract is displayed in the Referenced Contract Details that can be found at the
very bottom of the form. This section does not appear on the PDF version of the
75
76
form.
UNIVERSITY OF OTTAWA
2.
Even though you must use the TP form to modify or terminate it, the form’s data
that has been modified or terminated is not directly sent to Banner. The payroll
officers of the Payroll Service manually enter the data in Banner and change the
form’ status to completed.
3.
The TP forms generates the calculation of seniority points. The calculation is based
on the number of worked hours therefore you must ensure to modify the form
whenever there is an increase or a reduction in the hours worked. You must also
ensure to terminate the form whenever a professor ceases to teach. The
termination reason selected in the form determines whether the professor will
keep the seniority points or not.
4.
There are four cases for which you will need to terminate a contract. The following
lists explains the those cases. Each cases must be treated differently to please
follow the steps accordingly.
a.
The course has been canceled you have not yet created the original hire form.
b.
The course has been canceled after the form was created but it is still awaiting
approval (Faculty Approver, HR or Payroll).
c.
The course is canceled after the form the original hire form has been sent to
Banner.
d.
The termination reason is not for a Course Cancellation.
Modification of contract
Form modification for increase in work hours
A form can be modified only when Modify Contract is displayed in the upper part of the
form. The form’s status will determine whether the it can be modified or not. If the
status shows Completed, you will be able to modifiy it. Modified forms are not directly
set to Banner. A Payroll Officer is enter the modified form in Banner and will change the
form status to Completed or Manually Completed by the Pay.
1.
Click on Search.
Please refer to the section titled Search Tool of the present user guide for help on
searching forms.
2.
Using the Request ID column, click on the form number that needs to be modified.
77
78
3.
Click on Modify Contract.
4.
Select the modification Reason Code MAH: Modification - Additional Hours.
5.
Type a comment in the Reason Comment field. You must enter a comment that
explains the reason why you are adding hours to the contract. This contract will
help the Payroll Officer to determine what changes need to be done in Banner.
UNIVERSITY OF OTTAWA
6.
(Optional) Type the Actual Job Start Date (only if you need to modify it).
7.
(Optional) Type the Actual Job End Date (only if you need to modify it).
8.
Type the additional Number of Hours that you are adding to the contract.
To add hours to a contract, you must enter the additional hours that will be added
to the original contract. For example, the original contract says 36 hours and you
must add 3 hours, you will enter 3 hours in the contract modification.
9.
Save the form.
10. Select the Next Approver.
11. Click on Save and Submit for approval.
79
80
Form modification for work hours reduction
A form can be modified only when Modify Contract is displayed in the upper part of the
form. The form’s status will determine whether the it can be modified or not. If the
status shows Completed, you will be able to modifiy it. Modified forms are not directly
set to Banner. A Payroll Officer is enter the modified form in Banner and will change the
form status to Completed or Manually Completed by the Pay.
1.
Click on Search.
Please refer to the section titled Search Tool of the present user guide for help on
searching forms.
2.
Using the Request ID column, click on the form number that needs to be modified.
3.
Click on Modify Contract.
4.
Select the modification Reason Code Modification for Reduction in Hours.
5.
Type a comment in the Reason Comment field. You must enter a comment that
explains the reason why you are adding hours to the contract. This contract will
help the Payroll Officer to determine what changes need to be done in Banner.
UNIVERSITY OF OTTAWA
6.
(Optional) Type the Actual Job Start Date (only if you need to modify it).
7.
(Optional) Type the Actual Job End Date (only if you need to modify it).
8.
Type the new total Number of Hours of the contract.
To reduce the hours of a contract, you must enter the new total contract hours. For
example, the original contract says 39 hours and you must reduce 9 hours, you will
enter 30 hours in the contract modification.
9.
Save the form.
10. Select the Next Approver.
11. Click on Save and Submit for approval.
81
82
Termination of contract
Creation of a TP form for course cancellation
A course is cancelled before you had the time to create the TP Form. The APTUO
collective agreement says that you must pay an indemnity to the professor when the
course is canceled after the delay prescribed by the collective agreement. You must first
cancel the offer and then create the initial contract using the le Rate Type Course
cancelled - initial contract not issued to pay the indemnity.
1.
The offer must have a Canceled status.
2.
Click on TP : Part Time Teaching.
3.
Type the Contract Offer Number.
4.
Click on Retrieve Offer Details.
5.
If the professor does not have a University of Ottawa employee number, please
ensure to enter the person creation fields.
You must verify the Citizenship of the Professor. If the professor is not a Canadian,
you must select the Citizenship code that matches his/her status.
UNIVERSITY OF OTTAWA
6.
Note:
Although the address will have been added because the candidate filled an
application, it is important to validate the postal code to ensure that the address
entered is valid. The address entered in the form will be used to send a letter
containing the email address and initial password to the new employee. The
candidate might have entered an incorrect postal code in the application form so
by validating it, you will be able to correct it
.
Click on the envelope on the right side of Open Address Wizard.
You must enter a permanent address otherwise you will get an error message when
you save the form. Go to the Job section once the Permanent Address section is
completed.
83
84
7.
If are you creating a TP form that will be approved by a different faculty, using the
Faculty/Service drop-down list select the faculty that will approve the form.
8.
Type the Timesheet Org.
9.
Select the P-Class code (if it’s not automatically populated.
10. Select Course Cancellation - Initial contract not issued as the Rate Type.
11. The system automatically adjusts the Actual Job Begin Date and the Actual Job End
Date to force the system to pay the amount in one single only pay period.
12. Modify the Job Labour Distribution section.
UNIVERSITY OF OTTAWA
13. The system displays Number of Payments instead of Number of hours because the
amount to be paid is a flat amount paid on one single pay period.
14. Type the flat amount that must be paid to the professor in the field Rate (4 % Incl.)
Please refer to the section titled Rate Type, Pclass and 4 % to know if you must add
the vacation pay or not.
15. Click on Calculate.
16. Click on Save Draft.
85
86
17. (Optional) Enter the Work Permit information in the section Employee Information.
The Work Permit data entry fields will display if you have selected Work or Study
Permit as the Citizenship during the Person Creation step.
18. Click on the Open Bank Wizard to enter the banking information (you will only be
able to enter it if you had to create the person). If you do not have the banking
information, leave the bank account type to Not Available.
19. (Optional) Type a comment in Special Clause / Contract Comment.
20. Click on Add Comments.
21. (Optional) Type a comment in the Internal Comments box.
22. Click on Save as Draft.
23. Select the Next Approver.
UNIVERSITY OF OTTAWA
24. Click on Save and Submit to send the form for approval.
TP termination after it was sent to Banner.
If a course has been cancelled or the professor ceases to teach for some other reason,
you must terminate the form. Please follow the next steps to terminate a form after it
was sent to Banner.
1.
Click on Search.
Please refer to the section titled Search Tool of the present user guide for help on
searching forms.
2.
Using the Request ID column, click on the form number that needs to be modified.
3.
Click on Terminate Contract.
4.
Select the termination Reason Code.
5.
(Mandatory) Type a comment in the Reason Comment field.
6.
(Mandatory) Type the Actual Job End Date.
7.
(Optional) Type the amount given to the professor in the Rate (4 % Incl.) field.
Leave default value to zero (0) if no amount will be given.
87
88
P lease refer to the section titled Rate Type, Pclass and 4 % to know if you must add
the vacation pay or not.
8.
Click on Save as Draft.
9.
Select the Next Approver.
10. Click on Save and Submit for approval.
TP Reports
TP Report Creation
You can extract a list of TP forms that were created between two dates. You can extract
this list in an Excel format.
Click on TP: Reports.
Extracting the report data
1.
Type the begin date of the period during which the forms were created.
2.
Type the end date of the period during which the forms were created.
3.
Click on Apply Filters.
4.
Click on the Excel Icon
5.
Click on Open.
89
90
6.
Click on Yes to confirm that you want to open the file.
7.
Click on the Office button.
UNIVERSITY OF OTTAWA
8.
Select SAVE AS and select Excel Workbook.
9.
Type a name in the filename field File name and click on Save.
91
92
TP Report Data
Variable Name
Description
Request ID
Form Number
Offer ID
Offer Number
1st Approval
Date
Date of approval by the first approver
Contract Type
Code
Contract Type: N = initial contract, M = modified contract - T =
termination contract
93
UNIVERSITY OF OTTAWA
Variable Name
Description
Master Request
ID
Initial contract number if the current one has been modified or terminated
Reason
Description
Contract modification or termination reason
Employee Name
Employee Name
Employee
Number
Employee Number
Course Code
Course Code
Section Code
Section Code
FOAP(s)
FOAP(s) charged
Rate Quantity
Number of hours
Rate
Hourly Rate
Contract Amount Contract total amount
Status
Form status
Last Activity User Last user to have done an operation on the form
Last Activity Date Date on which the last user did an operation on the form
Job Begin Date
Actual Job Begin Date
Job End Date
Actual Job End date
Search Tool
Search Tool
1.
You can find a form that has been created, approved or sent to Banner. To begin
the research, you must click on Search.
2.
You have access to all forms that have been created, approved or sent to Banner for
all the organizations for which you have access. Consequently you have access to
all forms created by the other users of your unit that were created within your
organization range.
3.
You have to access to many selection parameters to search your forms as illustrated
below.
4.
You can combine parameters to search for specific forms. For example, you need to
find P3C forms that have been created for a specific employee, you can select the
P3C Form Type and type the employee number in the Employee Number
parameter.
95
96
5.
The Status of the form indicates the step at which is the form. The Status column
contains the form status.
6.
You must click on the Request ID number to open the form.
UNIVERSITY OF OTTAWA
7.
When a form is saved, a number is assigned to it. The form number can be found in
the upper right corner of the form as illustrated below.
8.
To find a form using it’s number, you must use the Request Id parameter.
9.
If you are looking for a specific type of form, you can use the Form Type parameter.
10. To obtain the list of time sheets ( P3C/LTE) that have been created for a specific BW
pay period, you need to use the Pay Number with the Calendar Year selection
parameters.
97
98
11. To obtain a list of forms created for a specific time sheet organization, you must use
the parameter Timesheet Org.
12. To obtain a list of forms created for a specific position, you must type de position
number in capital letters in the Position paramater.
13. To obtain a list of forms created for a specific employee, you must use the
Employee Number parameter.
14. To obtain a list of forms created by a specific user, you must type the Requestor
(Banner / Fast) Id in capital letters in the Requestor (BAnner Id) parameter.
15. To obtain a list of forms approved by a specific user, you must type the Requestor
(Banner / Fast) Id in capital letters in the Approver (BAnner Id) parameter.
Search by Employee Number
1.
Click on Search.
2.
Type the Employee number.
UNIVERSITY OF OTTAWA
3.
Click on Apply Filter.
4.
Click on the form number that is located under the column Request ID.
Search by employee name
1.
Click on Search.
2.
Type the Last Name.
The last name must begin with capital letter and all other letters in lower case. Do
not forget to add the French accents.
3.
Type the First Name.
The last name must begin with capital letter and all other letters in lower case. Do
not forget to add the French accents.
4.
Click on Apply Filter.
5.
Click on the form number under the column Request ID.
Search by form number
1.
Click on Search.
2.
Type the form number in the Request ID field.
3.
Click on Apply Filter.
4.
Click on the form number under the column Request ID.
99
100
Search by user id
1.
Click on Search.
2.
Type the user id IN CAPITAL LETTERS in the Requestor (Banner ID) or in the
Approver (Banner Id. Banner) field.
3.
Click on Apply Filter.
4.
Click on the form number under the column Request ID.
Approvers and proxies
Approvers
The next sections of the guides refer to approval of forms and the creation/suppression
of proxies when approvers need a replacement during their absence.
Electronic form approval
1.
Click on the form number.
2.
(Optional) Type a Timesheet Org if you need to modify the existing one.
3.
(Optional) Edit the FOAP.
4.
Select one of the four options.
1.
Approve
2.
Appprove and go to next form
3.
Return to requestor
4.
Reject this request
Configuration of a proxy
If you plan to be away for a period of time, you can create a proxy. Adding a proxy will
enable someone to approve your forms in your name while you are absent.
1.
Click on Preferences from the index.
2.
Type the user name in the Proxy User Id field and click on Save.
101
102
Removal of a proxy
You can remove a proxy.
1.
Click on Preferences from the index.
2.
Delete the Proxy Userid Id and click on Save.
Error Messages
Error Messages
The following section of the present user guide explains the different error messages
that you might obtain the different sections of the form.
Error messages during the person creation part
1.
Error Message : Employee age cannot be greater than 100 years.
Note:
You must modify the date of birth to solve this problem.
2.
Error message: Name cannot be all upper case.
Note:
You must type the first and last names using mixed cases.
3.
Error message : All Common Matching fields must be entered.
Note:
You must enter data in all the fields of the Person Creation section.
4.
Error message : The SIN is invalid.
Note:
You must re-enter the social insurance number because the entered number is
not valid.
5.
Error message : Employee must be at least 15 years old.
Note :
You cannot hire an employee that is less than 15 years old. Verify and re-enter
the date of birth.
6.
Error message : The Date of Birth is invalid.
Note:
You have entered an invalid date, please verify and correct it.
103
104
Error message from the Address section
1.
Error message : No adresses found for this postal code.
Note: The postal code does not exist. If Post Canada indicates that this is a
valid postal, please put the University’s postal code, enter the address of your
department and send an email to [email protected] and ask the information
agent to enter the current address in Banner.
2.
Error message : Address number is not in the selected range.
Note:
The number that you have entered in the Stree Address Number is incorrect.
You can only enter a number between the brackets.
Error messages from the job section
1.
Error message : No Positions found for the selected Faculty/Service and EClass
combination. Please contact Financial Planning Services.
Note:
You do not have a pooled position for the type of position that you are hiring.
You must have a new pooled position created by filling the Pooled Postion
Creation Form and you must send it to Finalcial Planning.
2.
Error message : Time Sheet Organization is invalid.
Note: You have entered an organization either does not exist of for which you
do not have access.
3.
Error message : User does not have access to Time Sheet Organisation.
Note :
You do not have access to the Time sheet org that you have entered. Modify it
and re-save your form.
4.
Error message : Job Suffix and Payment Method
Note:
You must select the pclass so thtat the job suffix and payment method be
populated automatically.
5.
Error message : Job End Date format is invalid.
UNIVERSITY OF OTTAWA
Note:
You have either forgotten to enter the job end date or you have entered it in an
incorrect format. Click on the calendar icon to input the job end date.
6.
Error message : Hourly Rate must be equal or greater than minimum wage (10.25).
Note: The hourly rate cannot be less the legal minimun wage.
7.
Error message : Hours Per Pay is too high for the E-Class/P-Class combination (max
is 45).
Note: You cannot enter more than 45 hours per pay when you use the pclass
34142 to pay an employee. You must either select another pclass or enter less
than 45 hours per pay.
8.
Error message : Hours Per Pay is too high (max is 95.33).
Note: The number of hours per pay cannot be more than 95.33. Modify the
hours per pay.
Error messages specific to academic forms (S and TP)
1.
Error message : Request must have an Offer Number and a Rate Type before it can
be saved.
Note:
You have omitted to select the rate type. Select the rate and save the form.
Error messages in the Job Labour Distribution
section
1.
Error message : You do not have acess to organization 120101.
Note:
You do not have access to the organization entered in the Job Labour
Distribution section.
2.
Error Message : Job Labour Distribution does not equal 100 percent (current total
= 90).
Note:
The total sum of the percentages must be equal to 100. Modify the
percentage(s) so that the total sum equals 100 %.
105
106
3.
Error message : The percentage value must be greater than 0.
Note:
You must ensure to enter a pencentage when you are modifiying, adding or
deleting a line from the Job Labour Distribution because the systems defaults the
value to 0. Enter a percentage on the line that shows 0 and click on update.
4.
Error message : Cannot delete the Labour distribution. At least one cost center
must be assigned to the timesheet.
Note:
You cannot delete a line of the Job Labour Distribution if there is only one. You
must create a new line and save it in order to be able to delete the incorrect one.
5.
Error message : A Job Labour Distribution is in edit mode. Please Update, Insert or
Cancel to continue.
Note: You have omitted to save or update the line of Job Labour Distribution
that you have either added, deleted or updated. Click on update or insert.
Error messages from the Person Information section
1.
Error message : User does not have access to Home Org. entered.
Note:
If the faculty of the creator is diffrent from the faculty of the approver, you must
enter an org belonging to the faculty of the form creator.
2.
Error message : User does not have access to Distribution Org. entered.
Note :
If the faculty of the creator is diffrent from the faculty of the approver, you must
enter an org belonging to the faculty of the form creator.
Error message in the Approval section
1.
Error message : An approver is required.
Note: You have omitted to select an approver before submiting your form for
approval. Select the approver and click on Submit for approval.