1
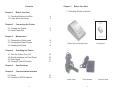
Safety Notice:
PS805
Thermal Receipt Printer
PS
80
5
* Read this manual before operate and/or connect the printer.
* Don't touch the printer head with hard objects.
* Don't touch the cutter blade.
* Don't bend the power cord excessively or place any heavy objects on
* it.
* When connecting or disconnecting the plug, always hold the plug, not
* the cord.
* Keep the printer out of children's reach.
* Use only approved accessories and do not try to disassemble, repair or
* remodel it.
* Place the printer on a stable surface. Choose firm, level surface
* to avoid vibration.
* Don't let water or other foreign objects go inside the printer.
* Don't connect a telephone line into the peripheral drive connector.
* We suggest you unplug the printer from the power outlet if not in use
* for a long period.
* If there is a paper jam, switch off and unplug the printer, wait for 10
* seconds to let the printer head cool down before remove the paper.
* Do not place in a humid and/or dusty environment.
* Only use appropriate paper roll.
* Don't use paper rolls with end-of-roll glued on the reel. The printer
* might not able to track the end and might damage the printer.
* Don't use paper rolls without reel either. It might cause paper jam due
* to not enough weight when running close to the end of the roll.
Main Features:
* Plug-and-play, user friendly.
* Low-noise thermal printing.
* Easy paper-roll installation.
* Easy paper jam clearance.
* Easy maintenance for tasks such as head cleaning.
User Manual
V090319
2
Chapter 1
Contents
Chapter 1
1.1 Checking What's in the Box
Before You Start
1.1 Checking What's in the Box
1.2 Learn about the Printer
Before You Start
4
5
PS805
Chapter 2
Connecting the Printer
Thermal Receipt Printer
6
6
2.1 Connect the Cables
2.2 Install Paper Roll
80
PS
5
5
80
PS
Chapter 3
Maintenance
User Manual
3.1 Cleaning the Printer Head
3.2 Cleaning the Paper Scraps
3.3 Handling the Printer
Chapter 4
8
9
9
PS805 Thermal Receipt Printer
User Manual
Operating the Printer
4.1 Turn the Printer On or Off
4.2 Keys & Indicators on Front Panel
4.3 Error Signal
4.4 Printing & Tear off Position
Chapter 5
Specifications
Chapter 6
Communication Interface
6.1 Printer
6.2 Connect to 805TS Indicator
3
10
10
11
11
13
15
Power Cable
Power Adapter
4
Interface Cable
Chapter 2
1.2 Learn about the Printer
Connecting the Printer
Please make sure the power cord is unpluged and the computer
connected with the inteface cable is turned off.
Paper Output Slot
2.1 Connect the Cables
Cover
Power Indicator
Cover Opening Handle
5
80
PS
Status Indicator
Base
[SEL] Key
[LF] Key
Connect the Power Cable
Connect the Interface Cable
2.2 Install Paper Roll
On/Off Switch
Power Line
RJ-11
Interface Cable
(to 805TS Indicator)
Place the thermal paper roll
as shown in the above figure.
Open the top cover
by lifting the handle.
5
6
Chapter 3
2.2 Install Paper Roll (Con't)
Maintenance
3.1 Cleaning the Printer Head
After using the printer for a period of time, the print out might be
fade or not clear. In this case, a clean up maintenance is
required.
5
80
PS
1. Please make sure the power cord is unplugged and the
1. interface cable is disconnected.
2. Open the top cover, remove the paper roll from the printer.
3. Wait for 10 seconds to let the printer hand cool down naturally.
The Printer won't work probably
if you reversed the paper roll.
Close the cover firmly.
Then press the [SEL] key
to make it on-line.
4. Use a cotton swab, dip with alcohol and wipe the printer head
1. gently.
4. Wait until the alcohol on the printer head completely
1. evaporated, reload the thermal paper roll, close the cover and
1. reconnect all cables.
5. Check if the print out has improved.
Note:
6. Repeat the above steps if necessary. If the problem persist,
PS805
* Only use high quality thermal paper roll with appropriate size
* and specification.
* Paper roll that is too wide or too narrow might cause paper jam.
* Use low quality thermal paper roll might result in poor print out
* and/or reduce the life of the printer head.
* Don't press the [LF] key when out of paper to prevent damage
* to the printer head.
* Don't pull the paper out by hand.
* Please close the top cover gently.
Printer Head
Cleaning Zone
Never use sand paper, cutter, screw driver or any hard object to
scratch the printer head to prevent permanent damage to the
printer head.
7
8
Chapter 4
3.2 Cleaning the Paper Scraps
After using the printer for a period of time, paper scraps will
accumulate around the printer head area. Paper scraps felt into
the gears might result in damaging the gear system. Therefore,
regular clean up is required.
1. Please make sure the power cord is unplugged and the
1. interface cable is disconnected.
2. Use a soft brush to clean up paper scraps around the cutter
1. blade.
Operating the Printer
4.1 Turn the Printer On or Off
After the power cable are plugged in and connected with the
power adapter. The printer can be turn on or off by the switch at
the back.
On/Off Switch
3. Open the top cover, remove the paper roll from the printer.
4. Use air brush to blow away the paper scraps on the gear
1. system. Use soft brush to remove paper scraps around the
1. printer head.
4.2 Keys & Indicators on Front Panel
Note:
* Recommend to do the paper scraps clean up twice a month. If
using low quality thermal paper roll and/or using the printer very
often, can process the clean procedure more frequently.
[SEL] Key
Red Light
[LF] Key
PS805
Green Light
3.3 Handling the Printer
On/Off-line: Switch on or off by pressing the [SEL] key once.
On-line: Green indicator light is on.
PS
80
5
Off-line: Green indicator light is off. Printer will not accept any
data. Press [LF] key will run the paper.
Power On: Red indicator light is on.
Power Off: Red indicator light is off.
Never lift by holding
the top cover
Use both hand to hold the base
9
10
Chapter 5
4.3 Error Signal
A flashing green light on the front panel is an error signal. The
flashing frequency indicates different error message:
Signal
-.-.--.--.--
Error Message
Suggestion
Out of paper
Replace paper roll.
Printer head over heat
Wait until temperature of
printer head drop to 45oC
will resume automatically.
---.---.--- Thermal printer head
resistance error
Non-recoveable. Please
send for repair. Usually due
to cable connection error.
4.4 Printing & Tear off Position
The distance between the tear off position and the printing
position is 12mm.
Specifications
Print Method:
Thermal Line Printing
Paper Roll Width:
57.5 +/- 0.5mm
Paper Roll Diameter:
Max. Ф 50mm; Min. Ф13mm (w/reel)
Paper Thickness:
60~70um; 53~60g/m2
Effective Print Width:
48mm
Print Density:
8 pt/mm; 384 pt/line
Print Speed:
50mm/second
Paper Rolling Speed:
50mm/second
Printer Power Input:
DC 9~12V, 2A
Working Environment:
0~50°C; Dampness 20~85%
(When 34°C, Humidity ≤ 85%)
(When 40°C, Humidity ≤ 58%)
Storage Environment:
-20~60°C; Dampness 5~95%
Reliability (MCBF):
10 X 106 Line
Printer Net Weight:
1.0Kg
Dimensions:
116 (W) X 185 (D) X 140 (H) mm
Tear off Position
Paper Run
Direction
12mm
ANYLOAD TRANSDUCER
Printer Head Position
Date: 13-03-2009
Gross: 33.88lb
11
12
Chapter 6
Communication Interface
6.1 Printer
- RS232C comparable
- Support RTS/CTS and XON/XOFF
- 25-pin female D
Pin
Signal
Direction
1
/STB
In
2
3
4
5
6
7
8
9
Data1
Data2
Data3
Data4
Data5
Data6
Data7
Data8
In
In
In
In
In
In
In
In
When requesting printer status
command, printer transmit status
signal to computer.
10
/ACK
Out
11
BUSY
Out
"MARK" = printer busy, cannot
receive data; "SPACE" = ready, can
receive data.
12
PE
Out
13
SEL
Out
Ground
14
NC
—
15
/ERR
Out
16~17
NC
—
18~25
GND
—
Pin
Signal
Source
Description
3
RXD
Computer
Printer receive data from computer.
2
TXD
Printer
4
7
RTS
GND
Printer
—
PS805 printer can connect with standard RS232C with PC:
Printer
25-pin
base
Printer
25-pin
base
PC
DB-9
13
Description
PC
DB-25
14
6.2 Connect to 805TS Indicator
15