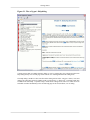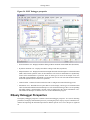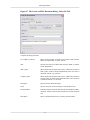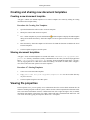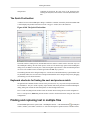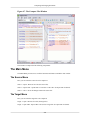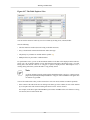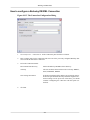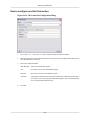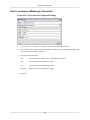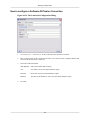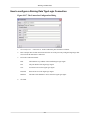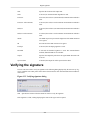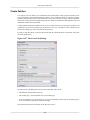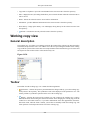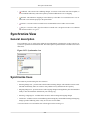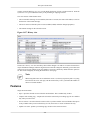
1
<oXygen/> User Manual SyncRO Soft Ltd. Contributor: Sean Wheller <oXygen/> User Manual SyncRO Soft Ltd. Contributor: Sean Wheller Copyright © 2002-2007 SyncRO Soft Ltd. All Rights Reserved. Many of the designations used by manufacturers and sellers to distinguish their products are claimed as trademarks. Where those designations appear in this book, and SyncRO Soft Ltd., was aware of a trademark claim, the designations have been printed in caps or initial caps. While every precaution has been taken in the preparation of this book, the publisher assumes no responsibility for errors or omissions, or for damages resulting from the use of the information contained herein. Third party software components are distributed in the <oXygen/> installation packages, including the Java Runtime Environment (JRE), Docbook DTD and stylesheets. This product includes software developed by the Apache Software Foundation (http://www.apache.org): the Apache FOP, Xerces XML Parser and Xalan XSLT. These products are not the property of SyncRO Soft Ltd.. To the best knowledge of SyncRO Soft Ltd. owners of the aforesaid products granted permission to copy, distribute and/or modify the software and its documents under the terms of the Apache Software License, Version 1.1. Other packages are used under the GNU Lesser General Public License. Users are advised that the JRE is provided as a free software, but in accordance with the licensing requirements of Sun Microsystems. Users are advised that SyncRO Soft Ltd. assumes no responsibility for errors or omissions, or for damages resulting from the use of <oXygen/> and the aforesaid third party software. Nor does SyncRO Soft Ltd. assume any responsibility for licensing of the aforesaid software, should the relevant vendors change their terms. By using <oXygen/> the user accepts responsibility to maintain any licenses required by SyncRO Soft Ltd. or third party vendors. Unless SyncRO Soft Ltd. declares in writing that the <oXygen/> license is inclusive of third party licensing. Table of Contents 1. Introduction .................................................................................................................... 1 Key Features and Benefits ............................................................................................. 1 About the <oXygen/> User Manual ................................................................................. 2 2. Installation ...................................................................................................................... 4 Installation Requirements .............................................................................................. 4 Platform Requirements ......................................................................................... 4 Operating System, Tools and Environment Requirements ............................................ 4 Operating System ........................................................................................ 4 Tools ......................................................................................................... 4 Environment Prerequisites ............................................................................. 4 Installation Instructions ................................................................................................. 5 Starting the application ................................................................................................. 6 Obtaining and registering a license key ............................................................................ 7 Named User license installation .............................................................................. 7 How floating (concurrent) licenses work .................................................................. 8 How to install the <oXygen/> license server as a Windows service ........................ 9 How to release a floating license ................................................................... 10 Unregistering the license key ........................................................................................ 10 Upgrading the <oXygen/> application ............................................................................ 11 Checking for new versions ........................................................................................... 11 Uninstalling the application ......................................................................................... 12 Performance problems ................................................................................................ 12 Large documents ................................................................................................ 12 Display problems on Linux/Solaris ........................................................................ 13 3. Getting started ............................................................................................................... 14 Supported types of documents ...................................................................................... 14 Getting help .............................................................................................................. 14 Perspectives .............................................................................................................. 16 Editor perspective .............................................................................................. 17 XSLT Debugger Perspective ................................................................................ 18 XQuery Debugger Perspective .............................................................................. 19 Tree Editor perspective ....................................................................................... 20 Database perspective .......................................................................................... 21 Dockable views and editors .......................................................................................... 23 4. Editing documents .......................................................................................................... 25 Working with Unicode ................................................................................................ 25 Opening and saving Unicode documents ................................................................. 25 The Unicode toolbar ........................................................................................... 26 Opening and closing documents .................................................................................... 27 Creating new documents ..................................................................................... 27 The New dialog ......................................................................................... 27 Creating Documents based on Templates ........................................................ 33 Saving documents .............................................................................................. 36 Opening existing documents ................................................................................ 36 Opening and Saving Remote Documents via FTP/SFTP/WebDAV ............................... 37 Changing file permissions on a remote FTP server ........................................... 40 WebDAV over HTTPS ................................................................................ 40 Opening the current document in a Web browser ...................................................... 42 Closing documents ............................................................................................. 42 Creating and sharing new document templates ......................................................... 43 Creating a new document template ................................................................ 43 iii <oXygen/> User Manual Sharing document templates ......................................................................... 43 Viewing file properties ........................................................................................ 43 Editing XML documents ............................................................................................. 44 Associate a schema to a document ......................................................................... 44 Setting a schema for the Content Completion .................................................. 44 Setting a default schema ...................................................................... 44 Adding a Processing Instruction ............................................................ 45 Learning document structure ........................................................................ 46 Streamline with Content Completion ..................................................................... 46 Code templates .......................................................................................... 50 Content Completion helper panels ................................................................. 50 The Model panel ................................................................................ 50 The Element Structure panel ........................................................ 51 The Annotation panel .................................................................. 51 The Attributes panel ........................................................................... 52 Correcting XML documents ................................................................................. 52 Checking XML Form ................................................................................. 52 Validating Documents ................................................................................. 53 Validate as you type ............................................................................ 55 References to XML Schema specification ............................................... 56 Custom validation of XML documents ................................................... 57 Document navigation .......................................................................................... 59 Quick document browsing using bookmarks ................................................... 59 Folding of the XML elements ....................................................................... 59 Outliner view ............................................................................................ 60 XML Document Overview ................................................................... 61 Modification Follow-up ....................................................................... 61 Document Structure Change ................................................................. 61 The popup menu of the Outline tree ............................................... 62 Document Tag Selection ...................................................................... 63 Navigation buttons ..................................................................................... 63 Using the Go To dialog ............................................................................... 63 Grid Editor ....................................................................................................... 63 Layouts: Grid and Tree ............................................................................... 64 Navigating the grid ..................................................................................... 65 Expand All Action .............................................................................. 66 Collapse All Action ............................................................................ 66 Expand Children Action ...................................................................... 66 Collapse Children Action ..................................................................... 66 Collapse Others ................................................................................. 66 Specific Grid Actions .................................................................................. 66 Sorting a Table Column ....................................................................... 66 Inserting a row to a table ..................................................................... 67 Inserting a column into a table .............................................................. 67 Clearing the content of a column ........................................................... 67 Adding nodes .................................................................................... 67 Duplicating nodes .............................................................................. 67 Refresh layout ................................................................................... 67 Start editing a cell value ...................................................................... 68 Stop editing a cell value ...................................................................... 68 Drag and Drop(DnD) in the Grid Editor ......................................................... 68 Copy and Paste in the Grid Editor ................................................................. 68 Bidirectional Text Support in the Grid Editor ................................................... 70 Grouping documents in XML projects ................................................................... 71 iv <oXygen/> User Manual Large Documents ....................................................................................... 71 Creating an included part ..................................................................... 71 Using the Project view ................................................................................ 72 Team Collaboration - Subversion .......................................................... 74 Project Level Settings ......................................................................... 75 Including document parts with XInclude ................................................................ 75 Working with XML Catalogs ............................................................................... 77 Converting between schema languages ................................................................... 77 Editing XML tree nodes ..................................................................................... 80 Formatting and indenting documents (pretty print) ................................................... 80 Viewing status information .................................................................................. 82 Image preview ................................................................................................... 82 Making a persistent copy of results ........................................................................ 83 Locking and unlocking XML markup .................................................................... 83 Adjusting the transparency of XML markup ............................................................ 83 XML editor specific actions ................................................................................. 83 Split actions .............................................................................................. 83 Edit actions ............................................................................................... 84 Select actions ............................................................................................ 84 Source actions ........................................................................................... 84 XML document actions ............................................................................... 85 XML Refactoring actions ............................................................................ 86 Smart editing ............................................................................................ 87 Syntax highlight depending on namespace prefix ............................................. 87 Editing XML Schema schemas ..................................................................................... 88 Special content completion features ....................................................................... 88 XML Schema diagram ........................................................................................ 88 Introduction .............................................................................................. 88 Full model view ......................................................................................... 89 Logical model view .................................................................................... 91 Schema components view ............................................................................ 92 References to XML Schema specification ............................................................... 93 Create an XML Schema from a relational database table ............................................ 94 XML Schema Instance Generator .......................................................................... 94 Flatten an XML Schema ...................................................................................... 97 XML Schema regular expressions builder ............................................................. 102 Generating HTML documentation for an XML Schema ........................................... 104 XML Schema editor specific actions .................................................................... 108 Search References and Declarations ..................................................................... 108 XML Schema actions ........................................................................................ 109 Editing Relax NG schemas ......................................................................................... 109 Relax NG schema diagram ................................................................................. 109 Introduction ............................................................................................ 109 Full model view ....................................................................................... 110 Logical model view .................................................................................. 111 Schema components view .......................................................................... 112 Relax NG editor specific actions ......................................................................... 112 Search References and Declarations ..................................................................... 112 Editing NVDL schemas ............................................................................................. 113 NVDL schema diagram ..................................................................................... 113 Introduction ............................................................................................ 113 Full model view ....................................................................................... 114 Schema components view .......................................................................... 115 NVDL editor specific actions ............................................................................. 115 v <oXygen/> User Manual Search References and Declarations ..................................................................... 115 Editing XSLT stylesheets ........................................................................................... 116 Validating XSLT stylesheets ............................................................................... 116 Custom validation of XSLT stylesheets ......................................................... 117 Content Completion in XSLT stylesheets .............................................................. 117 Content Completion in XPath expressions ..................................................... 118 Tooltip Helper for the XPath Functions Arguments ................................. 121 Code templates ........................................................................................ 122 The XSLT/XQuery Input View ............................................................................ 122 The XSLT Input View ............................................................................... 122 The Query Input View ............................................................................... 124 The Stylesheet Templates view ........................................................................... 126 Finding XSLT references and declarations ............................................................ 127 XSLT refactoring actions ................................................................................... 128 Editing XQuery documents ........................................................................................ 130 Folding in XQuery documents ............................................................................ 130 Generating HTML Documentation for an XQuery Document ................................... 131 Editing CSS stylesheets ............................................................................................. 132 Validating CSS stylesheets ................................................................................. 133 Content Completion in CSS stylesheets ................................................................ 133 Folding in CSS stylesheets ................................................................................. 133 Formatting and indenting CSS stylesheets (pretty print) ........................................... 133 Other CSS editing actions .................................................................................. 134 SVG documents ....................................................................................................... 134 The Standalone SVG Viewer. .............................................................................. 134 The Preview Result Pane. ................................................................................... 135 Integrating external tools ........................................................................................... 135 Integrating the Ant tool ...................................................................................... 135 Scratch Buffer ......................................................................................................... 136 Text editor specific actions ......................................................................................... 136 Undoing and redoing user actions ........................................................................ 136 Copying and pasting text ................................................................................... 136 Finding and replacing text in the current file .......................................................... 137 The Find/Replace dialog ............................................................................ 137 The Quick Find toolbar ............................................................................. 139 Keyboard shortcuts for finding the next and previous match ............................. 139 Finding and replacing text in multiple files ............................................................ 139 Using Check Spelling ........................................................................................ 141 Changing the font size ....................................................................................... 143 Dragging and dropping the selected text ............................................................... 144 Inserting a file at caret position ........................................................................... 144 Opening edited file in system application .............................................................. 144 Opening the file at caret position ......................................................................... 144 Exiting the <oXygen/> XML Editor ..................................................................... 144 Changing the user interface language ........................................................................... 144 Printing a file ........................................................................................................... 144 5. Transforming documents ................................................................................................ 146 Output formats ......................................................................................................... 146 Transformation scenario ............................................................................................ 147 Built-in transformation scenarios ......................................................................... 148 Defining a new transformation scenario ................................................................ 148 XSLT Stylesheet Parameters ....................................................................... 153 Additional XSLT Stylesheets ...................................................................... 154 Scenario Editor Variables ........................................................................... 155 vi <oXygen/> User Manual XSLT/XQuery Extensions .......................................................................... 155 Sharing the Transformation Scenarios. Project Level Scenarios. ................................ 156 XSL-FO processors .................................................................................................. 157 Common transformations ........................................................................................... 158 PDF Output ..................................................................................................... 158 PS Output ....................................................................................................... 159 TXT Output .................................................................................................... 159 HTML Output ................................................................................................. 160 HTML Help Output .......................................................................................... 160 JavaHelp Output .............................................................................................. 161 XHTML Output ............................................................................................... 161 Supported XSLT processors ....................................................................................... 161 Configuring custom XSLT processors .......................................................................... 164 Configuring the XSLT processor extensions paths .......................................................... 164 6. Querying documents ...................................................................................................... 166 Running XPath expressions ........................................................................................ 166 What is XPath ................................................................................................. 166 <oXygen/>'s XPath console ................................................................................ 166 The XPath Builder view .................................................................................... 170 Working with XQuery ............................................................................................... 171 What is XQuery ............................................................................................... 171 Syntax Highlight and Content Completion ............................................................ 172 XQuery Validation ............................................................................................ 172 Other XQuery editing actions ............................................................................. 173 Transforming XML Documents Using XQuery ...................................................... 173 7. Debugging XSLT stylesheets and XQuery documents .......................................................... 174 Overview ................................................................................................................ 174 Layout ................................................................................................................... 174 Control Toolbar ................................................................................................ 176 Information views ............................................................................................ 178 Multiple output documents in XSLT 2.0 ............................................................... 178 Working with the XSLT/XQuery Debugger ................................................................... 179 Steps in a typical debug process .......................................................................... 179 Using breakpoints ............................................................................................ 180 Inserting breakpoints ................................................................................. 180 Removing breakpoints ............................................................................... 180 Viewing processing information .......................................................................... 180 Context node view .................................................................................... 181 XPath watch view ..................................................................................... 181 Breakpoints view ..................................................................................... 182 Break conditions view ............................................................................... 183 Messages view ......................................................................................... 183 Stack view .............................................................................................. 184 Trace history view .................................................................................... 185 Templates view ........................................................................................ 186 Node set view .......................................................................................... 187 Variables view ......................................................................................... 188 Determining what XSL/XQuery expression generated particular output ...................... 189 8. Profiling XSLT stylesheets and XQuery documents ............................................................. 192 Overview ................................................................................................................ 192 Viewing profiling information ..................................................................................... 192 Invocation tree view .......................................................................................... 192 Hotspots view .................................................................................................. 193 Working with XSLT/XQuery profiler ........................................................................... 194 vii <oXygen/> User Manual 9. Comparing and merging documents .................................................................................. 196 Directories Comparison ............................................................................................. 196 The directories comparison user interface .............................................................. 197 The Operations Menu ................................................................................ 197 Compare Toolbar ...................................................................................... 198 File Filter options .................................................................................... 198 Directories Selector .................................................................................. 198 The comparison result ....................................................................................... 198 File Comparison ....................................................................................................... 199 The Main Menu ............................................................................................... 200 The Source Menu ..................................................................................... 200 The Target Menu ...................................................................................... 200 Operations Menu ...................................................................................... 201 Compare Toolbar .............................................................................................. 201 Files Selector ................................................................................................... 203 File contents panel ............................................................................................ 203 Word Level Comparison .................................................................................... 203 Character Level Comparison .............................................................................. 204 10. Working with Databases ............................................................................................... 205 Relational Database Support ....................................................................................... 205 Configuring Database Data Sources ..................................................................... 205 How to configure an IBM DB2 Data Source ................................................. 205 How to configure a Generic JDBC Data Source ............................................. 206 How to configure a Microsoft SQL Server Data Source .................................. 206 How to configure a MySQL Data Source ..................................................... 206 How to configure an Oracle 10.2 Data Source ............................................... 207 Configuring Database Connections ...................................................................... 207 How to Configure an IBM DB2 Connection .................................................. 207 How to Configure a JDBC-ODBC Connection ............................................... 208 How to Configure a Microsoft SQLServer Connection .................................... 208 How to Configure a MySQL Connection ...................................................... 208 How to Configure an Oracle 10.2 Connection ................................................ 209 Resource Management ...................................................................................... 210 Database Explorer View ............................................................................. 210 Actions available at connection level .................................................... 211 Actions available at catalog level ......................................................... 211 Actions available at schema level ........................................................ 211 Actions available at table level ............................................................ 211 XML Schema Repository level ........................................................... 211 Oracle's XML Schema Repository Level ....................................... 211 IBM DB2's XML Schema Repository Level .................................. 212 Microsoft SQL Server's XML Schema Repository Level .................. 213 Table Explorer View ................................................................................. 213 SQL Execution Support ..................................................................................... 216 Drag and Drop from Database Explorer ........................................................ 216 SQL Validation ........................................................................................ 218 Executing SQL Statements ......................................................................... 218 Importing from Databases .................................................................................. 218 Creating XML Schema from Databases ................................................................ 218 Native XML Database (NXD) Support ......................................................................... 218 Configuring Database Data Sources ..................................................................... 219 How to configure a Berkeley DB XML datasource .......................................... 219 How to configure an eXist datasource .......................................................... 220 How to configure a MarkLogic datasource .................................................... 220 viii <oXygen/> User Manual How to configure a Software AG Tamino datasource ....................................... 220 How to configure a Raining Data TigerLogic datasource .................................. 221 How to configure an X-Hive/DB datasource .................................................. 221 Configuring Database Connections ...................................................................... 222 How to configure a Berkeley DB XML Connection ........................................ 223 How to configure an eXist Connection ......................................................... 224 How to configure a MarkLogic Connection ................................................... 225 How to configure a Software AG Tamino Connection ...................................... 226 How to configure a Raining Data TigerLogic Connection ................................. 227 How to configure an X-Hive/DB Connection ................................................. 228 Resource Management ...................................................................................... 229 Database Explorer View ............................................................................. 229 Berkeley DB XML Connection ........................................................... 230 Actions available at connection level ............................................ 230 Actions available at container level .............................................. 230 Actions available at resource level ............................................... 232 eXist Connection .............................................................................. 232 Actions available at connection level ............................................ 232 Actions available at container level .............................................. 232 Actions available at resource level ............................................... 232 MarkLogic Connection ...................................................................... 233 Software AG Tamino Connection ........................................................ 233 Actions available at connection level ............................................ 233 Actions available at collection level ............................................. 233 Actions available at schema level ................................................ 233 Actions available at resource level ............................................... 234 Raining Data TigerLogic Connection ................................................... 234 X-Hive/DB Connection ..................................................................... 234 Actions available at connection level ............................................ 234 Actions available at catalog level ................................................. 234 Actions available at schema resource level .................................... 235 Actions available at library level .................................................. 235 Actions available at resource level ............................................... 235 X-Hive parser configuration for adding XML instances ................... 236 XQuery and Databases .............................................................................................. 237 Drag and Drop from Database Explorer ................................................................ 237 XQuery validation ............................................................................................ 237 XQuery transformation ...................................................................................... 238 11. Importing data ............................................................................................................ 239 Introduction ............................................................................................................ 239 Import from database ................................................................................................ 239 Import table content as XML document ................................................................ 239 Convert table structure to XML Schema ............................................................... 242 Import from MS Excel files ........................................................................................ 243 Import from HTML files ............................................................................................ 243 Import from text files ................................................................................................ 244 12. Composing Web Service calls ........................................................................................ 247 Overview ................................................................................................................ 247 Composing a SOAP request ....................................................................................... 247 Testing remote WSDL files ................................................................................ 249 The UDDI Registry browser ............................................................................... 250 Generate WSDL documentation .................................................................................. 251 13. Digital signature .......................................................................................................... 252 Overview ................................................................................................................ 252 ix <oXygen/> User Manual Canonicalizing files ................................................................................................. 253 Certificates ............................................................................................................. 254 Signing files ............................................................................................................ 255 Verifying the signature .............................................................................................. 256 14. The Syncro SVN Client ................................................................................................ 257 Introduction ............................................................................................................ 257 What is Syncro SVN Client ................................................................................ 257 Quick start guide and reference ........................................................................... 257 Main window .......................................................................................................... 258 Starting Syncro SVN Client ................................................................................ 258 Views ............................................................................................................. 259 Main menu ...................................................................................................... 259 Getting started ......................................................................................................... 262 Define a repository location ................................................................................ 262 Add / Edit / Remove repository locations ...................................................... 262 Authentication ......................................................................................... 263 Defining a working copy ................................................................................... 264 Check out a working copy .......................................................................... 265 Use an existing working copy ..................................................................... 266 Manage working copy resources ......................................................................... 267 Edit files ................................................................................................. 267 Add resources to version control ................................................................. 267 Ignore resources not under version control .................................................... 267 Delete resources ....................................................................................... 268 Copy / Move / Rename resources ................................................................ 268 Lock / Unlock resources ............................................................................ 270 Scanning for locks ............................................................................ 270 Locking a file .................................................................................. 271 Unlocking a file ............................................................................... 271 Synchronize with the repository .......................................................................... 271 View differences ...................................................................................... 272 Resolve conflicts ...................................................................................... 274 Real conflicts vs Pseudo conflicts ........................................................ 274 Content conflicts vs Property conflicts .................................................. 274 Revert your changes .......................................................................... 275 Merge conflicted resources ................................................................. 276 Drop incoming modifications ............................................................. 277 Update the working copy ........................................................................... 277 Send your changes to the repository ............................................................. 278 Obtain information for a resource ........................................................................ 279 Request status information for a resource ...................................................... 279 Request history for a resource ..................................................................... 280 Using the resource history view ........................................................................... 281 History actions available for single selection .................................................. 281 History actions available for double selection ................................................. 281 Management of SVN properties .......................................................................... 281 Add / Edit / Remove SVN properties ............................................................ 281 Creation and management of Branches/Tags .......................................................... 282 Create a Branch/Tag .................................................................................. 283 Merge branches ........................................................................................ 284 Create Patches ......................................................................................... 286 Working with repositories .................................................................................. 287 Import / Export resources ........................................................................... 287 Import resources into the repository ..................................................... 287 x <oXygen/> User Manual Export resources from the repository .................................................... 287 Copy / Move / Delete resources from the repository ........................................ 288 Repository view ....................................................................................................... 288 General description ........................................................................................... 288 Toolbar ........................................................................................................... 289 Contextual menu actions .................................................................................... 289 Working copy view ................................................................................................... 290 General description ........................................................................................... 290 Toolbar ........................................................................................................... 290 Contextual menu actions .................................................................................... 291 Icons .............................................................................................................. 293 Synchronize View ..................................................................................................... 294 General description ........................................................................................... 294 Synchronize trees ............................................................................................. 294 Toolbar ........................................................................................................... 295 Contextual menu actions .................................................................................... 295 Icons .............................................................................................................. 296 Compare view ......................................................................................................... 297 Description ..................................................................................................... 297 Toolbar ........................................................................................................... 297 Compare images view ....................................................................................... 298 Editor ..................................................................................................................... 299 Description ..................................................................................................... 299 Finding and replacing text in the editor ................................................................. 299 The Find/Replace dialog ............................................................................ 299 Keyboard shortcuts for finding the next and previous match ............................. 301 Image preview ......................................................................................................... 301 Description ..................................................................................................... 301 History view ............................................................................................................ 301 Description ..................................................................................................... 301 Features .......................................................................................................... 302 Properties view ........................................................................................................ 303 Description ..................................................................................................... 303 Toolbar / Contextual menu ................................................................................. 304 Console view ........................................................................................................... 304 Description ..................................................................................................... 304 Help view ............................................................................................................... 304 Description ..................................................................................................... 304 Syncro SVN Client Preferences ................................................................................... 304 Command line interface cross reference ........................................................................ 305 Actions commands reference .............................................................................. 305 Checkout ................................................................................................ 305 Update ................................................................................................... 305 Commit .................................................................................................. 305 Diff ....................................................................................................... 305 Show History .......................................................................................... 305 Refresh .................................................................................................. 306 Synchronize ............................................................................................ 306 Import .................................................................................................... 306 Export .................................................................................................... 306 Information ............................................................................................. 306 Add ....................................................................................................... 306 Add to svn:ignore ..................................................................................... 306 Delete .................................................................................................... 307 xi <oXygen/> User Manual Copy ...................................................................................................... 307 Move / Rename ........................................................................................ 307 Mark resolved .......................................................................................... 307 Revert .................................................................................................... 307 Cleanup .................................................................................................. 307 Show / Refresh Properties .......................................................................... 308 Branch / Tag ............................................................................................ 308 Merge .................................................................................................... 308 Scan for locks .......................................................................................... 308 Lock ...................................................................................................... 308 Unlock ................................................................................................... 309 Mark as merged ....................................................................................... 309 Override and update .................................................................................. 309 Override and commit ................................................................................ 309 Add / Edit property ................................................................................... 309 Remove property ...................................................................................... 309 Revert changes from this revision ................................................................ 309 Revert changes from these revisions ............................................................. 310 15. How to develop an <oXygen/> plugin ............................................................................. 311 Introduction ............................................................................................................ 311 Requirements .......................................................................................................... 311 Implementing plugins ............................................................................................... 311 General plugins ................................................................................................ 312 Selection plugins .............................................................................................. 312 Document plugins ............................................................................................ 313 Custom protocol plugins .................................................................................... 313 Example - UppercasePlugin ....................................................................................... 313 Example - a custom protocol plugin ............................................................................. 315 Installing the plugin .................................................................................................. 315 16. Configuring the application ........................................................................................... 316 Sharing Preferences .................................................................................................. 316 Preferences ............................................................................................................. 316 Global ............................................................................................................ 317 Fonts ............................................................................................................. 320 Perspectives Layout .......................................................................................... 321 Editor ............................................................................................................. 322 Grid ....................................................................................................... 324 Format ................................................................................................... 325 XML Format ................................................................................... 327 CSS Format .................................................................................... 328 Content Completion .................................................................................. 329 XSL/XPath ..................................................................................... 331 Colors .................................................................................................... 332 Syntax highlight elements by Prefix ............................................................. 334 Save ...................................................................................................... 334 Code Templates ....................................................................................... 335 Diagram ................................................................................................. 336 Spell Check ............................................................................................. 337 Document Checking ................................................................................. 338 Default Schema Association ....................................................................... 339 Custom Validation .................................................................................... 340 CSS Validator .................................................................................................. 342 XML ............................................................................................................. 342 XML Catalog .......................................................................................... 342 xii <oXygen/> User Manual XML Parser ............................................................................................ 343 XML Instances Generator .......................................................................... 345 XSLT/FO/XQuery .................................................................................... 346 XSLT ............................................................................................. 346 Saxon6 ................................................................................... 347 Saxon8 ................................................................................... 347 Saxon8 Advanced options .......................................................... 349 XSLTProc ............................................................................... 350 MSXML ................................................................................. 351 MSXML.NET ......................................................................... 352 XQuery .......................................................................................... 354 Saxon 8 .................................................................................. 355 Saxon8 Advanced options .......................................................... 356 Debugger ........................................................................................ 356 Profiler ........................................................................................... 357 FO Processors ................................................................................. 358 XPath ............................................................................................. 360 Custom engines ............................................................................... 361 Data Sources ................................................................................................... 363 Configuration of Data Sources .................................................................... 363 Download links for database drivers ............................................................. 366 Import .................................................................................................... 367 Date/Time format ............................................................................. 368 Date/Time Patterns ................................................................................... 369 Table Filters ............................................................................................ 370 Diff ............................................................................................................... 370 Diff Colors ...................................................................................................... 373 Plugins ........................................................................................................... 373 External Tools ................................................................................................. 374 Menu Shortcut Keys ......................................................................................... 375 File Types ....................................................................................................... 376 HTTP / FTP / SFTP / Proxy Configuration ............................................................ 377 HTTP / FTP / SFTP / Proxy Configuration/ FTP / SFTP .................................. 379 Certificates ..................................................................................................... 379 View .............................................................................................................. 380 Print .............................................................................................................. 381 Tree editor ...................................................................................................... 381 SVN .............................................................................................................. 381 Automatically importing the preferences from the other distribution ................................... 382 Importing/Exporting Global Options ............................................................................ 382 Reset Global Options ................................................................................................ 383 Scenarios Management .............................................................................................. 383 17. Common problems ...................................................................................................... 384 A. Appendix .................................................................................................................... 387 Accelerator Shortcut Keys .......................................................................................... 387 The Main Editor ............................................................................................... 387 The Tree View Editor ........................................................................................ 388 Unicode Character Encoding ...................................................................................... 389 References .............................................................................................................. 391 xiii Chapter 1. Introduction Welcome to the User Manual of the <oXygen/> XML Editor ! This book explains how to use the 8.1 version of the <oXygen/> XML Editor effectively to develop complex XML applications quickly and easily. Please note that this manual assumes that you are familiar with the basic concepts of XML and its related technologies. The <oXygen/> XML Editor is a cross-platform application for document development using structured mark-up languages such as XML , XSD, Relax NG, XSL, DTD. <oXygen/> offers developers and authors a powerful Integrated Development Environment. Based on proven Java technology the intuitive Graphical User Interface of the <oXygen/> XML Editor is easy-touse and provides robust functionality for editing, project management and validation of structured markup sources. Coupled with XSLT and FOP transformation technologies, <oXygen/> supports output to multiple target formats, including: PDF, PS, TXT, HTML and XML. <oXygen/> is the XML Editor of choice for developers, authors and integrators that demand high-quality output with a flexible and robust, single-source, structured mark-up environment. Key Features and Benefits The <oXygen/> XML Editor offers the following key features and benefits. Multiplatform availability: Windows, Mac OS X, Linux, Multilanguage support: English, German, French, Italian Solaris and Japanese Can be used as standalone desktop application, run Non blocking operations, you can perform validation and through Java Web Start or as an Eclipse plugin transformation operations in background Support for XML, XML Schema, Relax NG , Schematron, Outliner view in sync with a non well-formed document DTD, NRL schemas, NVDL schemas, XSLT, XSL:FO, WSDL, XQuery, HTML, CSS Validate XML Schema schemas, Relax NG schemas, Manual and automatic validation of XML documents DTDs, Schematron schemas, NRL schemas, NVDL against XML Schema schemas, Relax NG schemas, DTDs, schemas, WSDL, XQuery, HTML and CSS Schematron, NRL and NVDL schemas Multiple built-in validation engines (Xerces, libxml, Multiple built-in XSLT transformers (Saxon 6.5, Saxon MSXML 4.0, MSXML.NET) and support for custom 8 B, Saxon 8 SA, Saxon.NET, Xalan, libxslt, MSXML validation engines (Saxon SA, XSV, SQC). 3.0 / 4.0, Microsoft .NET 1.0, Microsoft .NET 2.0) and support for custom JAXP transformers. Visual schema editor with full and logical model views Compare and merge files and directories Ready to use FOP support to generate PDF or PS docu- XInclude support ments Support for editing remote files over FTP, SFTP, HT- Easy error tracking - locate the error source by clicking TP/WebDAV and HTTPS/WebDAV on it Generate HTML documentation from XML Schemas Support for latest versions of document frameworks: Docbook and TEI. Conversions from DTD, Relax NG schema or a set of Context sensitive content assistant driven by XML documents to XML Schema, DTD or Relax NG schema Schema, Relax NG, DTD, NVDL or by the edited document structure enhanced with schema annotation presenter XML Catalog support Unicode support 1 Introduction New XML document wizards to easily create documents Syntax coloring for XML, DTD, Relax NG compact synspecifying a schema or a DTD tax, Java, C++, C, PHP, Perl, etc Pretty-printing of XML files Easy configuration for external FO Processors Apply XSLT and FOP transformations XPath search and evaluation support Preview transformation results as XHTML or XML or in Support for document templates to easily create and share your browser documents Import data from a database, Excel, HTML or text file Convert database structure to XML Schema Canonicalize and sign documents XML project manager Tree view/edit support for XML documents Batch validate selected files in project Fully-fledged client for the Subversion (SVN) versioning Generate large sets of sample XML instances from XML system Schema Configurable external tools Configurable actions key bindings Find and replace support allows regular expressions, is All the usual editor capabilities (cut, copy, paste, find, XML aware, handle multiple files replace, windows management) Associate extensions with <oXygen/> on Windows Bookmark support Mac OS X ready Print documents XSLT Debugger with Backmapping support XSLT Profiler XQuery Debugger with Backmapping support XQuery Profiler Model View Attributes View Multidocument environment XQuery 1.0 support WSDL Support SVG Editor and Viewer XSLT 2.0 full support XPath 2.0 support XSLT refactoring actions Dockable views and editors Document folding Text transparency levels adjuster Spell checking supporting English, German and French Custom protocol plugin support including locals Drag&drop support About the <oXygen/> User Manual This User Manual gives a complete overview of the <oXygen/> XML Editor and describes the basic process of authoring, management, validation of structured mark-up documents and their transformation to multiple target outputs. In this manual it is assumed that you are familiar with the use of your operating system and the concepts related to structured mark-up. The <oXygen/> XML Editor User Manual is comprised of the following parts: • Chapter 1, Introduction: Introduction - you are reading it. • Chapter 2, Installation: Installation - defines the platform and environment requirements of <oXygen/> and instructions for application installation, license installation, starting <oXygen/>, upgrade and uninstalling. • Chapter 3, Getting started: Getting started - provides general orientation and an overview of the <oXygen/>'s editing perspectives. 2 Introduction • Chapter 4, Editing documents: Editing documents - explains how to obtain maximum benefit from the editor, project and validation features. • Chapter 5, Transforming documents: Transforming documents - explains the considerations for transformation of structured sources to multiple target format and how to obtain maximum benefit. • Chapter 6, Querying documents: Querying documents - This chapter explains the support offered by <oXygen/> for querying XML documents. • Chapter 7, Debugging XSLT stylesheets and XQuery documents: Debugging XSLT stylesheets and XQuery documents - This chapter explains how to debug XSLT stylesheets or XQuery documents. • Chapter 8, Profiling XSLT stylesheets and XQuery documents: Profiling XSLT stylesheets and XQuery documents - This chapter explains how to profile the execution of XSLT stylesheets or XQuery documents. • Chapter 9, Comparing and merging documents: Comparing and merging documents - This chapter explains how to find differences and merge files and directories. • Chapter 11, Importing data: Importing data - This chapter explains how to import data from a database, an Excel sheet or text file. • Chapter 12, Composing Web Service calls: Composing Web Service calls - This chapter explains the facilities offered by <oXygen/> for composing and testing WSDL SOAP messages. • Chapter 13, Digital signature: Digital signature - This chapter explains how to canonicalize, sign and verify the signature of documents. • Chapter 14, The Syncro SVN Client: Syncro SVN Client - This chapter explains how to configure and use the Subversion client of <oXygen/>. • Chapter 16, Configuring the application: Configuring the application - explains how to configure preferences of the application. • Chapter 17, Common problems: Common problems - a list of frequent errors and their possible causes and solutions. • Appendix A, Appendix: Appendix - a collection of documents covering topics such as credits, licensing, errors and known problems. Feedback and input to the <oXygen/> User Manual is welcomed. 3 Chapter 2. Installation This section explains platform requirements and installation procedures. It also provides instructions on how to obtain and register a license key, how to perform upgrades and uninstall the application if required. If you need help at any point during these procedures please send email to <[email protected]> Caution If you want to execute <oXygen/> with Java WebStart directly from <oXygen/> Java WebStart page [http://www.oxygenxml.com/javawebstart/] or your intranet server please configure your Java WebStart not to ask for desktop integration (File -> Preferences, Shortcuts), otherwise it will show up a dialog in the same time with the <oXygen/> license registration dialog leading to a blocking situation. Installation Requirements Platform Requirements Minimum run-time requirements are listed below. • Pentium Class Platform • 256 MB of RAM • 200 MB free disk space Operating System, Tools and Environment Requirements Operating System Windows Windows 98 or later. Mac OS minimum Mac OS X 10.0 UNIX/Linux All versions/flavors Tools Installation packages are supplied in compressed archives. Ensure you have installed a suitable archive extraction utility with which to extract the archive. The MD5 sum is available on the Download page [http://www.oxygenxml.com/download.html] for every archive. You should check the MD5 sum of the downloaded archive with a MD5 checking tool available on your platform. Environment Prerequisites Prior to installation ensure that your Operating System environment complies with the following: • <oXygen/> XML Editor supports only official and stable Java virtual machine versions 1.4.2 and later from Sun Microsystems (available at http://java.sun.com) and from Apple Computer (pre-installed on Mac OS X). For Mac OS X, Java VM updates are available at http://www.apple.com/macosx/fea- 4 Installation tures/java/. <oXygen/> XML Editor may work very well with JVM implementations from other vendors but the eventual incompatibilities will not be solved in further <oXygen/> XML Editor releases. <oXygen/> XML Editor does not work with the GNU libgcj Java virtual machine [http://www.oxygenxml.com/forum/ftopic1887.html]. • The PATH environment variable is set to the most current Java VM installation. • References to older Java VM installations are removed from the PATH. Installation Instructions Prior to proceeding with the following instructions, please ensure that your system complies with the prerequisites detailed in the installation requirements. Note The following instructions assume that JRE is installed. If you have downloaded an installation package that contains the JRE, please note that the package will automatically install Java prior to execution of the application. Procedure 2.1. Windows Installation 1. Download the oxygen.exe installation kit and run it. 2. Follow the instructions presented in the installation program. Note In order to specify another Virtual Machine to be used by <oXygen/> XML Editor edit the oxygen8.1.ini file from the installation directory. In the [Java Runtime Environment] section add the following entry: JRE Path = <path_to_jre> where <path_to_jre> is the path to the installed JRE of your choice (e.g.: C:\Program Files\Java\jre1.5.0_03). Procedure 2.2. Mac OS X Installation 1. Create a folder called oxygen on your local disk. 2. Within the oxygen folder, create child folder named in accordance with the version number of the application. The directory structure looks as follows: /../oxygen/8.1/ 3. Download the Mac OS X Installation package ( oxygen.tar.gz ) to this folder. 4. Extract the archive to the same folder. 5. Execute the file named oxygen Procedure 2.3. All Platforms Installation 1. Create a folder called oxygen on your local disk. 5 Installation 2. Within the oxygen folder, create child folder named in accordance with the application version number. The directory structure looks as follows: /../oxygen/8.1/ 3. Download the All Platforms Installation package ( oxygen.tar.gz ) to this folder. 4. Extract the archive to the same folder. 5. On Windows execute oxygen.bat , for Mac execute oxygenMac.sh , and for Unix execute oxygen.sh . Procedure 2.4. Windows NT Terminal Server 1. Install the application on the server, making its shortcuts available to all users. 2. Edit the oxygen8.1.ini file located in the install folder, changing the parameter "Virtual Machine Parameters" to Virtual Machine Parameters = -Xmx256m -Dcom.oxygenxml.MultipleInstances=true The "Xmx" value represents the maximum memory for each application instance. Please make sure you tune them in a way that the multiple editor instances won't use all the available physical memory. Procedure 2.5. Unix Server 1. Install the editor on the server, making sure the oxygen.sh script is executable and the installation directory is in the PATH of the users that need to use the editor. 2. Create a file called oxygen8.1.vmoptions in the <oXygen/><oXygen/> install folder where the oxygen8.1 file is located. The content of the file must be: -Xmx256m -Dcom.oxygenxml.MultipleInstances=true The "-Xmx" value represents the maximum memory for each editor instance. Please make sure you tune it in a way that the multiple editor instances won't use all the available physical memory. 3. Make sure the X server processes located on the workstations allow connections from the server host. For this use the xhost command. 4. Telnet (or ssh) on the server host. 5. Start an xterm process, with display on the workstation. Ex: xterm -display workstationip:0.0 6. Start the application by typing oxygen.sh Starting the application As a Java based application, the <oXygen/> XML Editor can run on all Operating Systems that support the Java Runtime Environment (JRE version 1.4.2 or later). The following instructions assume that JRE and the appropriate <oXygen/> distribution package for your Operating System are installed. To start the application follow the instructions for the installed package: Procedure 2.6. Windows • From the Windows Explorer double-click oxygen.exe . 6 Installation Procedure 2.7. Linux • At the prompt type: sh oxygen.sh . Procedure 2.8. Mac OS X • Double-click the oxygen icon. Procedure 2.9. All Platforms • On Windows run oxygen.bat . On Mac OS X run oxygenMac.sh . On Linux/Unix run oxygen.sh Obtaining and registering a license key The <oXygen/> XML Editor is not free software and requires a license in order to enable the application. For demonstration and evaluation purposes a time limited license is available upon request from the <oXygen/> [http://www.oxygenxml.com/register.html] web site. This license is supplied at no cost for a period of 30 days from date of issue. During this period the <oXygen/> XML Editor is fully functional enabling you to test all aspects of the application. Thereafter, the application is disabled and a permanent license must be purchased in order to use the application. For special circumstances, if a trial period of greater than 30 days is required, please contact <[email protected]> . All licenses are obtained from the <oXygen/> web site [http://www.oxygenxml.com] . For definitions and legal details of the license types available for <oXygen/> you should consult the End User License Agreement received with the license key and available also on the <oXygen/> website at http://www.oxygenxml.com/eula.html Note Starting with version 7.1 <oXygen/> accepts a license key for a newer version in the license registration dialog, e.g. version 7.1 accepts a license key for version 8.0. Once you have obtained a license the installation procedure is described below. Named User license installation 1. Save a backup copy of the message containing the new license key. 2. Start the application. 3. Copy to the clipboard the license text as explained in the message. 4. If this is a new install of the application then it will display automatically the registration dialog when it is started. In the case you already used the application and obtained a new license, use the menu option Help/Register to make the registration dialog appear. 7 Installation Figure 2.1. Registration Dialog 5. Paste the license text in the registration dialog, and press Register. You have the following alternative for the procedure of license install: 1. Save the license key in a file named licensekey.txt. 2. Copy the file in the application folder. In that way the license will not be asked when the application will start. 3. Start the application. How floating (concurrent) licenses work If all the floating licenses are used in the same local network the installation procedure of floating licenses is the same as for the Named User licenses. Within the same network the license management is done by communication between the instances of <oXygen/> that are connected to the same local network and that run at the same time. Any new instance of <oXygen/> that is started after the number of running instances is equal with the number of purchased licenses will display a warning message and will disable the open file action. If the floating licenses are used on machines connected to different local networks a separate license server must be started and the licenses deployed on it. Contact the <oXygen/> Support Team at <[email protected]> to request the license server kit. Procedure 2.10. Floating license server setup 1. Contact the <oXygen/> Support Team at <[email protected]> to request the license server kit. 8 Installation 2. Unzip the zip archive containing the license server in a folder on your server machine. After that if you want to install the license server as a Windows service go to the special section which describes that. 3. You have to configure the server to look into a license directory (by default is [Server License Install Directory]/licenses) and use a certain TCP/IP port for communication (by default port 12346 is used). The license directory will contain the license files to be managed. A license file must begin with "license" and it has to have the extension "txt". It is the job of the license server to sum up the total number of licenses contained in the license files from the licenses directory. To change the default configuration of the license server the following parameters have to be used: • -licenseDir followed by the path of the directory where the license files will be placed; • -port followed by the port number used to communicate with <oXygen/> instances. After the floating license server is set up the <oXygen/> application can be started and configured to request a license from it: Procedure 2.11. Request a floating license from the license server 1. Start the application. 2. Go to Help -> Register... . The license dialog is displayed. 3. Check the Use a license server checkbox. 4. Fill-in the Host text field with the host name or IP address of the license server. 5. Fill-in the Port text field with the port number used for communicating with the license server. Default is 12346. 6. Click the Register button. If the maximum number of available licenses was not exceeded a license key is received from the floating license server and registered in <oXygen/>. If the maximum number of licenses was exceeded a warning dialog will pop up letting the user know about the problem. Figure 2.2. Floating license number exceeded The error message contains information about the users who requested and successfully received the floating licenses. How to install the <oXygen/> license server as a Windows service In order to install the <oXygen/> license server as a Windows service run the following command from the command line in the install folder of the license server: installWindowsService.bat 9 Installation After installing the server as a Windows service, use the following two commands to start and stop the license server: startWindowsService.bat stopWindowsService.bat Uninstallation of the Windows service requires the following command: uninstallWindowsService.bat The installService.bat script installs the <oXygen/> license server as a Windows service with the name "oXygenLicenseServer" and accepts two parameters: the path of the folder containing the floating license key files and the local port number on which the server accepts connections from instances of the <oXygen/> XML Editor. The parameters are optional. The default values are: licenses for the license file folder 12555 for the local port number The JAVA_HOME variable must point to the home folder of a Java runtime environment installed on your Windows system. The startService.bat script starts the Windows service so that the license server can accept connections from <oXygen/> clients. The stopService.bat script stops the Windows service. The license server is shut down and it cannot accept connections from <oXygen/> clients. The uninstallService.bat script uninstalls the Windows service created by the installService.bat script. The license server creates two log files in the directory where the license server is installed: outLicenseServer.log the standard output stream of the server errLicenseServer.log the standard error stream of the server The license server must be installed in a folder which does not contain space characters in the path name. Also the path set as the value of the JAVA_HOME environment variable must not contain space characters. Otherwise the install script fails. How to release a floating license The floating license key registered for the current <oXygen/> instance will be released automatically when the <oXygen/> instance is closed. If you do not have Internet access to connect to the floating license server and you own also an individual license which you want to use in this case instead of the floating license, you have to open the license registration dialog again by going to Help -> Register, uncheck the Use a license server checkbox, press the Paste button to paste the individual license and press OK to switch from the floating license to the pasted individual license. Unregistering the license key Sometimes you need to unregister your license key, for example to release a floating license to be used by other user or to transfer your license key to other computer before other user starts using your current computer. This is done by going to Help → Register to display the license registration dialog, making sure 10 Installation the text area for the license key is empty and the checkbox Use a license server is unchecked, and pressing the Register button of the dialog. This brings up a confirmation dialog in which you select between falling back to the license key entered previously (for the case of releasing a floating license and reverting to the individual license entered previously in the Register dialog) and removing your license key from your user account of the computer. Figure 2.3. Unregister a license key Upgrading the <oXygen/> application From time to time, upgrade and patch versions of <oXygen/> are released to provide enhancements that rectify problems, improve functionality and the general efficiency of the application. This section explains the procedure for upgrading <oXygen/> while preserving any personal configuration settings and customizations. Unless otherwise stated by instructions supplied with a patch or upgrade kit, the following procedure is recommended: Procedure 2.12. Upgrade Procedure 1. Create a new folder under /../oxygen e.g. /../oxygen/8.1 2. Download and extract the upgrade to the new folder. 3. If you have defined <oXygen/> in the system PATH, modify it to the new installation folder. 4. Start <oXygen/> to ensure that the application can start and that your license is recognized by the upgrade installation. 5. If you are upgrading to a major version, for example from 8.3 to 9.0, then you will need to enter the new license text into the registration dialog that is shown when the application is started. 6. Select Help → About to determine the version number. If the previous version was 8.3, the About dialog should now show version 9.0. Checking for new versions <oXygen/> offers the option of checking for new versions at the http://www.oxygenxml.com. . site when the application is started. If this option is enabled a message dialog will notify the user when new versions are released. You can check for new versions manually at any time by going to menu Options → Check for New Versions 11 Installation Uninstalling the application Caution The following procedure will remove <oXygen/> from your system. It will not remove the JRE. If you wish to uninstall JRE please see the instructions provided with the Java product. Please ensure that all valuable data is saved to another location prior to performing this procedure. Procedure 2.13. Uninstall Procedure 1. Backup all valuable data from the <oXygen/> installation folder. 2. On Windows use the appropriate uninstaller shortcut provided with your OS. On Mac OS X and Unix manually delete the installation folder and all its contents. 3. If you wish to completely remove the application directory and any work saved in it, you will have to delete this directory manually. To remove the application configuration and any personal customizations remove the %APPDATA%\com.oxygenxml directory on Windows (usually %APPDATA% has the value [user-home-dir]\Application Data) / .com.oxygenxml on Linux / Library/Preferences/com.oxygenxml on Mac OS X from the user home directory. Performance problems Large documents By default the maximum memory available to <oXygen/> is set to 180 MB. If <oXygen/> is used on large documents (more than 10 MB) and you see that performance slows down considerably after some time then a possible cause is that it needs more memory in order to run properly. You can increase the maximum amount of memory available to <oXygen/> by modifying a parameter in a configuration file specific to the platform that runs the application as specified below. Warning The maximum amount of memory should not be equal to the physical amount of memory available on the machine because in that case the operating system and other applications will have no memory available. Note The amount of memory allocated for the FOP operations is controlled by a different setting available in <oXygen/> Preferences: Memory available to the built-in FOP. On the Windows platform the total amount of memory is specified by the value of the -Xmx parameter on the line Virtual Machine Parameters in the file oxygen8.1.ini found in the installation directory. The default value of the -Xmx parameter has the form: -Xmx40:32:700P That means <oXygen/> takes 40% of the system memory space but the size of the memory space allocated to <oXygen/> will not be less that 32 MB or more than 700 MB. To increase the maximum space for 12 Installation <oXygen/> one must increase the first value, for example from 40 to 60 and also the third value, for example from 700 to 1000. On the Mac OS X platform to change the total amount of memory you have to right-click on the <oXygen/> application icon, in the pop-up menu select Show Package Contents, then in the Contents directory you edit the file Info.plist: in the key VMOptions modify the -Xmx parameter. The number specified in the parameter represents the number of megabytes allocated to the <oXygen/> application. On the Linux platform the total amount of memory is specified by the value of the -Xmx parameter in the Java command line which starts the Java virtual machine at the end of the file oxygen8.1 located in the install directory. If you use the All platforms distribution you can modify the total amount of memory by modifying the Xmx parameter of the java command line in the file oxygen.bat on Windows, oxygenMac.sh on Mac OS X and oxygen.sh on Linux. This file is located in the installation directory. When installed on a multi-user environment such as Windows Terminal Server or Unix/Linux, to each instance of <oXygen/> will be allocated the amount stipulated in the memory value. To avoid depreciating the general performance of the host system, please ensure that the amount of memory available is optimally apportioned for each of the expected instances. Example 2.1. Example of Java command line in startup script (Windows) java -Xmx256m -cp %CP% ro.sync.exml.Oxygen $1 $2 $3 $4 $5 $6 $7 $8 $9 Modifying the value from 256 to 512 changes the memory available from 256 MB to 512 MB. Display problems on Linux/Solaris Display problems like screen freeze or momentary menu pop-ups during mouse movements over screen on Linux or Solaris can be solved by specifying the parameter -Dsun.java2d.pmoffscreen=false for the Java virtual machine. This parameter disables off-screen pixmap support and must be added to the Java command line which starts the Java virtual machine at the end of the file oxygen8.1 located in the install directory. 13 Chapter 3. Getting started Supported types of documents The <oXygen/> XML Editor provides a rich set of features for working with: • XML documents and applications • XSL stylesheets - transformations and debugging • Schema languages: XML Schema, Relax NG (full and compact syntax), NRL, NVDL, Schematron, DTD • Querying documents using XPath and XQuery • Analyzing, composing and testing WSDL SOAP messages Getting help Online help is available at any time while working in <oXygen/> by going to menu Help → Help ... which opens the Help dialog. 14 Getting started Figure 3.1. The <oXygen/> Help dialog Context sensitive help is available from any dialog or view by pressing the F1 key which opens the same Help dialog directly on a relevant page for the current view or dialog which has the editing focus. The Help dialog is modal so it does not allow other editing actions in the <oXygen/> editors, views and dialogs. The same help content is available in the view Perspective → Show View → Dynamic Help (also available from menu Help → Dynamic Help ) which allows editing actions when it is visible on screen and which switches automatically to the relevant help page for the focused editor, view or dialog.. 15 Getting started Figure 3.2. The Dynamic Help view The name and version of the third-party libraries and frameworks used by <oXygen/> are listed in the About dialog box: Help → About ... Also you can see here the values of system properties like the version of the Java virtual machine, the location of the user home directory, the Java classpath, etc. Perspectives The <oXygen/> interface uses standard interface conventions and components to provide a familiar and intuitive editing environment across all operating systems. In <oXygen/> you can work with documents in one of the perspectives: Editor perspective Editing of documents is supported by specialized and synchronized editors and views. XSLT Debugger perspective XSLT stylesheets can be debugged by tracing their execution step by step. 16 Getting started XQuery Debugger perspective XQuery transforms can be debugged by tracing their execution step by step. Tree Editor perspective An XML document is viewed and edited as a tree of XML elements. Editor perspective The Editor perspective is used for editing the content of your documents. The space is organized in: Figure 3.3. Editor perspective When two or more panels are displayed, <oXygen/> provides divider bars. By selecting a divider bar, it can be dragged to a new position, therefore increasing the space occupied by one panel while decreasing it for the other. As majority of the work process centers around the Editor panel, other panels can be hidden from view using the expand and collapse controls located on the divider bars. This perspective organizes the workspace in the following panels: Main menu Provides menu driven access to all the features and functions available within <oXygen/>. Main toolbar Provides easy access to common and frequently used functions. Each icon is a button that acts as a shortcut to a related function. 17 Getting started Editor panel The place where you spend most of your time, reading, editing, applying markup and checking the validity and form of your documents. Outliner view Provides the following functions: XML document overview, modification followup, document structure change, document tag selection. Model view panel Presents the structure of the current edited tag and additional tag documentation. Results panel Displays result messages returned from user operations. The following actions are available: • Hierarchical view - that allows you to see the results in tree-like manner. Clicking on a tree leaf highlights the corresponding line in the document. • Flat view - that will present the errors in a table-like manner. Clicking on a table row highlights the corresponding line in the document. • Remove selected • Remove all - removes the currently selected message from the list. - clears the message list. Navigation to the previous and next message is easy with the shortcuts Ctrl + [ and Ctrl + ] Project view Enables the definition of projects and logical management of the documents it contains. XSLT Debugger Perspective The XSLT Debugger perspective is used for detecting problems in an XSLT transformation process by executing the process step by step in a controlled environment and inspecting the information provided in different special views. The workspace is organized in: 18 Getting started Figure 3.4. XSLT Debugger perspective • Source document view - Displays and allows editing of data or document oriented XML files (documents). • Stylesheet document view - Displays and allows editing of XSL files(stylesheets). • Output document view - Displays the transformed output that results from the input of a selected document (XML) and selected stylesheet (XSL) to the transformer. The result of transformation is dynamically written as the transformation is processed. There are three types of views for the output: a text view (with XML syntax highlight), an XHTML view and one text view for each xsl:result-document element used in the stylesheet (if it is a XSLT 2.0 stylesheet). • Control toolbar - Contains all actions needed in order to configure and control the debug process. • Information views - Distributed in two panes that are used to display various types of information that can be used to understand the transformation process. For each information type there is a corresponding tab. While running a transformation, relevant events are displayed in the various information views. This enables the developer to obtain a clear view of the transformation progress. XQuery Debugger Perspective The XQuery Debugger perspective is similar to the XSLT Debugger perspective. It is used for detecting problems in an XQuery transformation process by executing the process step by step in a controlled environment and inspecting the information provided in different special views. The workspace is organized in: 19 Getting started Figure 3.5. XQuery Debugger perspective • Source document view - Displays and allows editing of data or document oriented XML files (documents). • XQuery document view - Displays and allows editing of XQuery files. • Output document view - Displays the transformed output that results from the input of a selected document (XML) and selected XQuery document to the XQuery transformer. The result of transformation is dynamically written as the transformation is processed. There are two types of views for the output: a text view (with XML syntax highlight) and an XHTML view. • Control toolbar - Contains all actions needed in order to configure and control the debug process. • Information views - Distributed in two panes that are used to display various types of information that can be used to understand the transformation process. For each information type there is a corresponding tab. While running a transformation, relevant events are displayed in the various information views. This enables the developer to obtain a clear view of the transformation progress. Tree Editor perspective The Tree Editor perspective is used for editing the content of a document viewed as a XML tree. The workspace is organized in: 20 Getting started Figure 3.6. Tree Editor perspective • Main menu - provides menu driven access to all the features and functions available in <oXygen/> Tree Editor perspective. • Toolbar - provides easy access to common and frequently used functions. Each icon is a button that acts as a shortcut to a related function. • Editor panel - easy editing of structured mark-up documents. Each token has associated an icon for a easy visual identification of the tokens. • Message panel - display messages returned from user operations. • Model panel - show the detailed information about the attribute or element that you are working on. • All Elements panel - present a list of all defined elements that you can insert within your document. The tree editor does not offer entity support: entities are not presented with a special type of node in the tree and new entity nodes cannot be inserted in the document. Database perspective The Database perspective is similar to the Editor perspective. It allows you to manage a database, offering support for browsing multiple connections at the same time, both relational and native XML databases, SQL execution, XQuery execution and data export to XML. This perspective offers database specific support for: • Sleepycat Berkeley DB XML Database 21 Getting started • eXist XML Database • IBM DB2 (Enterprise edition only) • JDBC-ODBC Bridge (Enterprise edition only) • MarkLogic (Enterprise edition only, XQuery support only) • Microsoft SQL Server (Enterprise edition only) • MySQL (Enterprise edition only) • Oracle 10.2 (Enterprise edition only) • Software AG Tamino (Enterprise edition only) • Tigerlogic (Enterprise edition only, XQuery support only) • X-Hive/DB XML Database (Enterprise edition only) Note Only connections configured on relational data sources can be used to import to XML or to generate XML schemas. Figure 3.7. Database perspective 22 Getting started Main menu Provides menu driven access to all the features and functions available within <oXygen/>. Main toolbar Provides easy access to common and frequently used functions. Each icon is a button that acts as a shortcut to a related function. Editor panel The place where you spend most of your time, reading, editing, applying markup and checking the validity and form of your documents. Database explorer Provides browsing support for the configured connections. Table explorer Provides table content editing support: insert a new row, delete a table row, cell value editing, export to XML file. Dockable views and editors All the <oXygen/> views available in the Editor Perspective, XSLT Debugger Perspective and XQuery Debugger Perspective are dockable. You can drag them to any margin of another view or editor inside the <oXygen/> window to form any desired layout. Also a view can be set to a floating state to enable it to hover over other views and editors. For gaining more editing space in the <oXygen/> window you should set one or more views to the autohideable state: only the title will remain always visible, attached to one of the margins of the <oXygen/> window, the rest of the view will be restored only by the mouse pointer hovering over the title or clicking the title. The view will become hidden again when the mouse pointer goes out of the screen area covered by that view. The editing area can be divided vertically in several editing panels by dragging the title of an editor inside the editing area and dropping it when the frame of the dragged editor is painted in the desired position. In the attached figure you can see how to unsplit the editing area by dragging the title of the personal.xml editor panel over personal-schema.xml until the drop frame painted in dark grey covers all the personalschema.xml editor panel and then dropping it. 23 Getting started Figure 3.8. Split the editing area by drag and drop of the editor title Also the editing area can be divided vertically and horizontally with the split / unsplit actions available on the Split toolbar and the Document → Split menu: Split horizontally, Split vertically, Unsplit. The default layout of any of the Editor Perspective, XSLT Debugger Perspective and XQuery Debugger Perspective can be restored at any time with the action Restore Layout of the Perspective menu. Any <oXygen/> view or toolbar can be opened at any time from the menu items available in the menus Perspective → Show View and Perspective → Show Toolbar 24 Chapter 4. Editing documents Working with Unicode Unicode provides a unique number for every character, no matter what the platform, no matter what the program, no matter what the language. Unicode is an internationally recognized standard, adopted by industry leaders. The Unicode is required by modern standards such as XML, Java, ECMAScript (JavaScript), LDAP, CORBA 3.0, WML, etc., and is the official way to implement ISO/IEC 10646. It is supported in many operating systems, all modern browsers, and many other products. The emergence of the Unicode Standard, and the availability of tools supporting it, are among the most significant recent global software technology trends. Incorporating Unicode into client-server or multi-tiered applications and websites offers significant cost savings over the use of legacy character sets. As a modern XML Editor, <oXygen/> provides support for the Unicode standard enabling your XML application to be targeted across multiple platforms, languages and countries without re-engineering. Internally, the <oXygen/> XML Editor uses 16bit characters covering the Unicode Character set. Opening and saving Unicode documents On loading documents of the type XML, XSL, XSD and DTD, <oXygen/> reads the document prolog to determine the specified encoding type. This is then used to instruct the Java Encoder to load support for and save using the code chart specified. In the event that the encoding type cannot be determined, <oXygen/> will prompt and display the Available Java Encodings dialog. This dialog provides a list of all encodings supported by the Java platform. Figure 4.1. Available Java encodings dialog If the opened document contains a character which cannot be represented with the encoding detected from the document prolog or selected from the Available Java Encodings dialog <oXygen/> applies the policy specified for handling such errors. If the policy is set to REPORT <oXygen/> displays an error dialog about the character not allowed by the encoding. If the policy is set to IGNORE the character is removed from the document displayed in the editor panel. If the policy is set to REPLACE the character will be replaced with a standard replacement character for that encoding. While in most cases you will use UTF-8, simply changing the encoding name will cause the file to be saved using the new encoding. The appendix Unicode Character Encoding provides a matrix that matches 25 Editing documents common names with Java Names. It also explains what you should type in the XML prolog to cause the document to be saved as the required encoding. On saving the edited document if it contains characters not included in the encoding declared in the document prolog <oXygen/> will detect the problem and will signal it to the user who is required to resolve the conflict before he is able to save the document. Figure 4.2. Save with wrong encoding error To edit document written in Japanese or Chinese, you will need to change the font to one that supports the specific characters (a Unicode font). For the Windows platform, use of Arial Unicode MS or MS Gothic is recommended. Do not expect Wordpad or Notepad to handle these encodings. Use Explorer or Word to eventually examine XML documents. If an XML document which specifies the UTF-16 encoding in the prolog using the attribute encoding="UTF16" is edited in <oXygen/> and saved on disk the byte order mark (BOM) which always begins such an XML document is created by the save operation according with the byte order accepted by the CPU of that computer. That means that a UTF-16 document created on a Windows + Intel computer, where the byte order mark is UnicodeLittle and loaded and saved in <oXygen/> running on a Mac OS computer, where the byte order mark is UnicodeBig, is saved with the UnicodeBig encoding. Note The naming convention used under Java does not always correspond to the common names used by the Unicode standard. For instance, while in XML you will use encoding="UTF-8", in Java the same encoding has the name "UTF8". The Unicode toolbar The display of the Unicode toolbar is switched on and off from Perspective → Show Toolbar → Unicode and contains the actions from Character Map Change text orientation with the default shortcut Ctrl + Shift + O and Insert The Change text orientation action enables editing documents in languages with right to left writing (Hebrew, Arabic, etc.) by moving the caret to the left when new characters are inserted in the document. Please note that you may have to set an appropriate Unicode aware font for the editor panel, able to render the characters of the language of the edited file. The Insert from Character Map action opens a dialog in which you can select one character in the matrix of all characters available in a font and insert it in the edited document. The action is available also in the Tools menu. 26 Editing documents Figure 4.3. The Character Map dialog The character selected in the character table or an entity with the decimal code or the hexadecimal code of that character can be inserted in the current editor. You will see it in the editor if the font is able to render it. The Insert button inserts the selected character in the editor. The Copy button copies it to the clipboard without inserting it in the editor. The Character Map dialog cannot be used to insert Unicode characters in the grid version of a document editor. Accordingly the Insert button of the dialog will be disabled if the current document is edited in grid mode. Opening and closing documents As with most editing applications, <oXygen/> lets you open existing documents, save your changes and close them as required. Creating new documents The New dialog <oXygen/> supports a large number of document types. This dialog presents the default associations between a file extension and the type of editor which opens the file for editing. You can override these default associations in the File Types user preferences panel. The New dialog only creates a skeleton document containing the document prolog, a root element and possibly other child elements depending on the options specific for each schema type. If you need to generate full and valid XML instance documents based on an XML Schema schema you should use the XML instance generation tool instead. Use the following procedure to create documents. 27 Editing documents Procedure 4.1. Creating new documents 1. Select File → New (Ctrl+N) or press the New toolbar button. The New dialog is displayed which contains the supported Document Types: XML, XSL, XML Schema, Document Type Definition, Relax NG Schema, XQuery, Web Services Definition Language, Schematron Schema, CSS File , Text File, Java File, JavaScript File, C File, C++ File, Batch File, Shell File, Properties File, SQL File, PHP File and PERL File. Figure 4.4. The New dialog 2. Select a document type, then click OK. If XML was selected the "Create an XML Document" dialog is displayed otherwise a new document is opened in the Editor Panel. 3. The Create an XML Document dialog enables definition of a XML Document Prolog using the system identifier of a XML Schema, DTD, Relax NG (full or compact syntax) schema, NRL (Namespace Routing Language) or NVDL (Namespace-based Validation Dispatching Language) schema. As not all XML documents are required to have a Prolog, you may choose to skip this step by clicking OK. If the prolog is required complete the fields as the following. 28 Editing documents Figure 4.5. The Create an XML Document Dialog - XML Schema Tab Complete the dialog as follows: Use a DTD or a schema When checked enables selection between DTD, XML Schema, Relax NG schema, NRL or NVDL schema. URL Specifies the location of an XML Schema Document (XSD). Namespace Specifies the document namespace. Prefix Specifies the prefix for the namespace of the document root. Document Root Populated from the elements defined in the specified XSD, enables selection of the element to be used as document root. Description Shows a small definition for the currently selected element. 29 Editing documents Figure 4.6. The Create an XML Document Dialog - DTD Tab Complete the dialog as follows: Use a DTD or a schema When checked enables selection between DTD, XML Schema, Relax NG schema, NRL or NVDL schema. System ID Specifies the location of a Document Type Definition (DTD). Public ID Specifies the PUBLIC identifier declared in the Prolog. Document Root Populated from the elements defined in the specified DTD, enables selection of the element to be used as document root. Description Shows a small definition for the currently selected element. 30 Editing documents Figure 4.7. The Create an XML Document Dialog - Relax NG Tab Complete the dialog as follows: Use a DTD or a schema When checked enables selection between DTD, XML Schema, Relax NG schema NRL or NVDL schema. URL Specifies the location of a Relax NG schema in XML or compact syntax (RNG/RNC). XML syntax When checked the specified URL refers to a Relax NG schema in XML syntax. It will be checked automatically if the user selects a document with the .rng extension. Compact syntax When checked the specified URL refers to a Relax NG schema in compact syntax. It will be checked automatically if the user selects a document with the .rnc extension. Namespace Specifies the document namespace. Prefix Specifies the prefix for the namespace of the document root. Document Root Populated from the elements defined in the specified RNG or RNC document, enables selection of the element to be used as document root. Description Shows a small definition for the currently selected element. 31 Editing documents Figure 4.8. The Create an XML Document Dialog - NRL Tab Complete the dialog as follows: Use a DTD or a schema When checked enables selection between DTD, XML Schema, Relax NG schema, NRL or NVDL schema. URL Specifies the location of a NRL schema (NRL). Figure 4.9. The Create an XML Document Dialog - NVDL Tab Complete the dialog as follows: Use a DTD or a schema When checked enables selection between DTD, XML Schema, Relax NG schema, NRL or NVDL schema. 32 Editing documents URL Specifies the location of a Namespace-based Validation Dispatching Language schema (NDVL). Namespace Specifies the document namespace. Prefix Specifies the prefix for the namespace of the document root. Document Root Populated from the elements defined in the specified NVDL document, enables selection of the element to be used as document root. Description Shows a small definition for the currently selected element. Creating Documents based on Templates Templates are documents containing a predefined structure. They provide starting points on which one can rapidly build new documents that repeat the same basic characteristics. <oXygen/> installs a rich set of templates for a number of XML applications. You may also create your own templates and share them with other users. The Templates dialog enables you to select predefined templates or templates that have already been created in previous sessions or by other users. Open a template using the following options: Figure 4.10. The Templates dialog Open a template using the following options: Standard Populates the Templates list to show templates supplied with the <oXygen/> installation package. User defined Populates the Templates list to show previous saved personal templates. From URL Enables definition of a URL location containing Templates. Templates List Displays the available templates for Standard, From File and From URL options. 33 Editing documents Procedure 4.2. Creating Documents based on Standard Templates 1. Select File → New from Templates or press the New from templates toolbar button. The Templates dialog is displayed and is used to discover, select and open a new document based on an existing template document. Template documents act as starting points that have predefined properties such as file type, prolog, root element, containers and even existing content. Figure 4.11. The Templates dialog 2. Select the Standard option from the Load Templates Group. The Templates list displays standard <oXygen/> templates. 3. Scroll the Templates list and select the required Template Type. 4. Click OK. A new document is opened that already contains structure and content provided in the template starting point. Procedure 4.3. Creating Documents based on Personal Template Files 1. Select File → New from Templates or press the dialog is displayed. 34 New from templates toolbar button. The Templates Editing documents Figure 4.12. The Templates dialog 2. Select the User defined option from the Load Templates Group. The Templates list displays person templates. 3. Scroll the Templates list and select the required Template Type. 4. Click OK. A new document is opened that already contains structure and content provided in the template starting point. Procedure 4.4. Creating Documents based on URL Template Files 1. Select File → New from Templates or press the dialog is displayed. New from templates toolbar button. The Templates Figure 4.13. The Templates dialog 2. Select the From URL option from the Load Templates Group. The From URL field is enabled. 35 Editing documents 3. Enter the URL location of the templates, then click Load. The list of templates is retrieved from the URL and displayed in the Templates list. 4. Scroll the Templates list and select the required Template Type. 5. Click OK. A new document is opened that already contains structure and content provided in the template starting point. Saving documents The edited document can be saved with one of the actions: • File → Save (Ctrl+S) or press the Save toolbar button to save the current document. If the document does not have a file, displays the Save As dialog. • File → Save As: Displays the Save As dialog, used to name and save an open document to a file; or save an existing file with a new name. • File → Save To URL or press the Save To URL ... toolbar button to display the Save to URL dialog, used to name and save an open document to a file; or saves an existing file with a new name, using FTP/SFTP/WebDAV. • File → Save All: Saves all open documents. If any document does not have a file, displays the Save As dialog. Opening existing documents Documents can be opened using one of the actions: • File → Open (Ctrl+O) or press the Open toolbar button to display the Open dialog used to discover, select and open one or more files. The start folder of the Open dialog can be either the last folder visited by the Open dialog the last time it was used in <oXygen/> or the folder of the current file edited in <oXygen/> This can be configured in the user preferences. • File → Open URL ... or press the Open URL ... toolbar button to display the Open URL dialog used to open a document using FTP/SFTP/WebDAV. • File → Revert: Loads the last saved file content. All unsaved modifications are lost. • File → Reopen: Displays a list of recently opened document files. Select a file to open. • Project view contextual menu → Open : Opens the selected file from the Project view. • From the command line when the <oXygen/> application is launched. If <oXygen/> is launched from the command line with the startup script installed by the installation wizard you can specify local file names as optional parameters: • multiple XML files to be opened automatically at startup in separate editor panels: scriptName [pathToXMLFile1] [pathToXMLFile2] ... 36 Editing documents where scriptName is the name of the startup script for your platform (oxygen.bat on Windows, oxygen.sh on Unix/Linux, oxygenMac.sh on Mac OS) and pathToXMLFileN is the name of a local XML file • an XML file and a schema file to be associated automatically to the file and used for validation and content completion: scriptName -instance pathToXMLFile -schema pathToSchemaFile -schemaType XML_SCHEMA|DTD_SCHEMA|RNG_SCHEMA|RNC_SCHEMA where scriptName is the name of the startup script for your platform (oxygen.bat on Windows, oxygen.sh on Unix/Linux, oxygenMac.sh on Mac OS), pathToXMLFile is the name of a local XML file, pathToSchemaFile is the name of the schema which you want to associate to the XML file and the four constants (XML_SCHEMA, DTD_SCHEMA, RNG_SCHEMA, RNC_SCHEMA) are the possible schema types (W3C XML Schema, DTD, Relax NG schema in full syntax, Relax NG schema in compact syntax). The two possibilities of opening files at startup by specifying them in the command line are explained also if the startup script receives one of the -h or --help parameters. Note When more files are opened and the tabs names are on a single line, you can change the tab order by clicking and dragging a tab in the desired position. In addition <oXygen/> supports direct opening of files from the command prompt. Use the following command syntax: • On Windows: oxygen.bat FileToOpen.xml • On Unix/Linux: sh ./oxygen.sh FileToOpen.xml • On Mac OS X: sh ./oxygenMac.sh FileToOpen.xml Also when the Tree Editor perspective is activated the current document in the Editor perspective will be opened and displayed as a tree of XML elements. Opening and Saving Remote Documents via FTP/SFTP/WebDAV <oXygen/> supports editing remote files, using the FTP, SFTP and WebDAV protocols. The remote opened files can be edited exactly as the local ones. They can be added to the project, and can be subject to XSL and FO transformations. 37 Editing documents Figure 4.14. Open URL dialog Note The FTP part is using passive access to the FTP servers. Make sure the server you are trying to connect to is supporting passive connections. Also the UTF-8 encoding is supported and can be configured for communication with the FTP server if the server supports it. Files can be opened through the Secure FTP (SFTP) protocol using the regular user/password mechanism or using a private key file and a passphrase. The user/password mechanism has precedence so for using it you have to remove the user and password from the dialog used to browse the server repository. The private key file and the passphrase must be set in the SFTP user preferences. The WebDAV access is implemented using the Slide package of the Apache Software Foundation. The FTP/SFTP/WebDAV capabilities have been extensively tested with various servers running on Windows (IIS), Mac OS X and Linux (Apache). Note If you have set a proxy server to be used by <oXygen/>, make sure it supports the WebDAV protocol. If it does not, make sure you uncheck the "Use proxy server" from the Options/Preferences/Proxy Configuration pane, otherwise you will not be able to connect to a WebDAV server. To open the remote files, choose from the main menu File → Open URL ... The displayed dialog is composed of three parts. 38 Editing documents • The first one is an editable combo box, in which it can be specified directly the URL to be opened or saved. URLs that can be directly opened You can type in here an URL like http://some.site/test.xml, in case the file is accessible through normal HTTP protocol, or ftp://[email protected]/home/test.xml if the file is accessible through anonymous FTP. This combo box is also displaying the current selection when the user changes selection by browsing the tree of folders and files on the server. • The second part is controlling the access credentials. If you want to browse for a file on a server, you have to specify the user and password. This information is bound to the selected URL displayed in the "File URL" combo box, and used further in opening/saving the file. If the check box "Save" is selected, then the user and password are saved between editing sessions. The password is kept encrypted into the options file. Note Your password is well protected. In the case the options file is moved to another installation, on other machine, the password will become unreadable, since the encryption is user and machine dependent. This is also true if you add URLs having user and password to your project. • The third part contains the server combo and the "Autoconnect" check box. Into the server combo it may be specified the protocol (HTTP, HTTPS or FTP), the name or IP of the server and, in case of WebDAV, the path to the WebDAV directory. Server URLs When accessing a FTP server, you need to specify only the protocol and the host, like: ftp://server.com, ftp://ftp.apache.org, or if using a nonstandard port: ftp://server.com:7800/ etc. When accessing a WebDAV server, along with the protocol and the host, it must be specified also the directory of the WebDAV repository. Important Make sure that the repository directory ends in a slash "/". Ex: https://www.some-webdav-server.com:443/webdav-repository/, http://devel:9090/webdav/ By pressing the "Browse" button the directory listing will be shown in the component bellow. When "Autoconnect" is selected then at every time the dialog is shown, the browse action will be performed. • The last part consists of a tree view of the documents stored on the server. You can browse the directories, and make multiple selections. Additionally, you may use the "Rename", "Delete", and "New Folder" to manage the file repository. 39 Editing documents Changing file permissions on a remote FTP server Some FTP servers allow the modification of file permissions on the filesystem for the files that they serve over the FTP protocol. This feature of the protocol is accessible directly in the FTP/WebDAV file browser dialog by right-clicking on a tree node and selecting the Change permissions menu item which brings up the following dialog: Figure 4.15. FTP server - change file permissions The usual Unix file permissions Read, Write and Execute are granted or denied in this dialog for the owner of the file, the group of the owner and the rest of the users. The aggregate number of the current state of the permissions is updated in the Permissions text field when a permission is modified with one of the check boxes. WebDAV over HTTPS If you want to access a WebDAV repository across an insecure network <oXygen/> allows you to load and save the documents over the HTTPS protocol (if the server understands this protocol) so that any data exchange with the WebDAV server is encrypted. When a WebDAV repository is first accessed over HTTPS the server hosting the repository will present a security certificate to <oXygen/> as part of the HTTPS protocol, without any user intervention. <oXygen/> will use this certificate to decrypt any data stream received from the server. For the authentication to succeed you should make sure the security certificate of the server hosting the repository can be read by <oXygen/>. This means that <oXygen/> can find the certificate in the key store of the Java Runtime Environment in which it runs. You know the server certificate is not in the JRE's key store if you get the error "No trusted certificate found" when trying to access the WebDAV repository: 40 Editing documents Figure 4.16. The server certificate is not available You can add a certificate to the key store by exporting it to a local file using any HTTPS-capable Web browser (for example Internet Explorer) and then importing this file into the JRE using the keytool executable bundled with the JRE. The steps are the following using Internet Explorer (if you use other browser the procedure is similar): Procedure 4.5. Import a HTTPS server certificate 1. Export the certificate into a local file a. Point your HTTPS-aware Web browser to the repository URL. If this is your first visit to the repository it will be displayed a security alert stating that the security certificate presented by the server is not trusted. Figure 4.17. Security alert - untrusted certificate b. Press the button "View Certificate". 41 Editing documents 2. 3. c. Select the "Details" tab. d. Press the button "Copy to file ...". This will start the Certificate Export Wizard on Windows e. Follow the indications of the wizard to save the certificate to a local file, for example server.cer . Import the local file into the JRE running <oXygen/> a. Open a text-mode console. b. Go to the lib/security subdirectory of your JRE directory, that is of the directory where it is installed the JRE running <oXygen/>, for example on Windows C:\Program Files\Java\j2re1.4.2\lib\security c. Run the following command:..\..\bin\keytool.exe -import -trustcacerts -file local-file.cer keystore cacerts where local-file.cer is the file containing the server certificate, created during the previous step. keytool requires a password before adding the certificate to the JRE keystore. The default password is "changeit". If somebody changed the default password then he is the only one who can perform the import. As a workaround you can delete the cacerts file, re-type the command and enter as password any combination of at least 6 characters. This will set the password for future operations with the key store. Restart <oXygen/> Opening the current document in a Web browser To open the current document in the default Web browser installed on the computer use the action Open in browser available on menu Document → XML Document and also on the Document toolbar. It is useful for seeing the effect of applying an XSLT stylesheet or a CSS stylesheet on a document which specifies the stylesheet using an xml-stylesheet processing instruction. Closing documents To close documents use one of the following methods: • File → Close (Ctrl+W) : Closes only the selected tab. All other tab instances remain. • File → Close All: Closes all opened documents. If a document is modified or has no file, a prompt to save, not to save, or cancel the save operation is displayed. • Close - accessed by right-clicking on an editor tab: Closes the selected editor. • Close Other Files - accessed by right-clicking on an editor tab: Closes the other files except the selected tab. • Close All - accessed by right-clicking on an editor tab: Closes all open editors within the panel. 42 Editing documents Creating and sharing new document templates Creating a new document template <oXygen/> enables user defined templates to be created. Templates are created by adding an existing document to the Template library. Procedure 4.6. Creating New Templates 1. Open the document that will be used to create the Template. 2. Modify the structure and content as required. 3. File → Add to Templates or press the toolbar button Add to templates to display the Add Templates dialog used to define the name by which the template will be recognized in the New from templates option. 4. Enter the name by which the template will be known. Click OK the document is added to the list of Personal Templates. 5. Test the template using the From File option. Sharing document templates <oXygen/> stores Personal Templates in an XML file called %APPDATA%\com.oxygenxml\templates.xml directory on Windows (usually %APPDATA% has the value [user-home-dir]\Application Data) / .com.oxygenxml\templates.xml on Linux, located in the Home folder of the <oXygen/> user. By copying this file to a Web Server folder and making it accessible via HTTP, other <oXygen/> users can use the From URL option to access the templates. Procedure 4.7. Sharing Templates 1. Create one or more Personal Templates. 2. Copy [user home dir]\com.oxygenxml\templates.xml into an accessible directory on your web server. 3. Test the template using the From URL option. Viewing file properties In the Properties view you can quickly access information about the current edited document like the character encoding, full path on the file system, schema used for content completion and document validation, associated transformation scenario, if bidirectional text (left to right and right to left) is enabled, document's total number of characters, line width, if indent with tabs is enabled and the indent size. The view can be accessed by going to Perspective+Show View → Properties 43 Editing documents Figure 4.18. The Properties view Editing XML documents Associate a schema to a document Setting a schema for the Content Completion In case you are editing document fragments, for instance the chapters from a book each one in a separate file, you can activate the Content Completion for these fragments in two ways: Setting a default schema The table available at Options → Preferences -> Content Completion/Default contains a set of rules for associating a schema with the current document when no schema is specified within the document. The schema is one of the types: XML Schema, XML Schema with embedded Schematron rules, Relax NG, Relax NG with embedded Schematron rules, Schematron, DTD, NRL, NVDL. The rules are applied in the order they appear in the table and take into account the local name of the root element, the default namespace and the file name of the document. Important The editor is creating the Content Completion lists by analysing the specified schema and the current context (the position in the editor). If you change the schema you can observe that the list of tags to be inserted is changing. 44 Editing documents Figure 4.19. Content completion driven by a Docbook DTD Adding a Processing Instruction The same effect is obtained by configuring a processing instruction that specifies the schema to be used. The advantage of this method is that you can configure the Content Completion for each file. The processing instruction must be added at the beginning of the document, just after the XML prologue: <?oxygen RNGSchema="file:/C:/work/relaxng/personal.rng" type="xml"?> Select menu Document+XML Document → Associate schema... or click the toolbar button Associate schema to open a dialog for selecting a schema used for Content Completion and document validation. The schema is one of the types: XML Schema (with or without embedded Schematron rules), DTD, Relax NG (with or without embedded Schematron rules), NRL, NVDL, Schematron. This is a dialog helping the user to easily associate a schema file with the edited document . Enables definition of a XML Document Prolog using the system identifier of a XML Schema, DTD, Relax NG (full or compact syntax) schema, NRL (Namespace Routing Language) schema, NVDL (Namespace-based Validation Dispatching Language) schema or Schematron schema. If you associate an XML Schema with embedded Schematron rules or a Relax NG schema with embedded Schematron rules you have to check the Embedded Schematron rules checkbox available for these two types of schemas. Figure 4.20. Associate schema dialog When associating a XML Schema to the edited document if the root element of the document defines a default namespace URI with a "xmlns" attribute the "Associate schema" action adds a xsi:schemaLocation attribute. Otherwise it adds a xsi:noNamespaceSchemaLocation attribute. The URL combo box contains a predefined set of schemas that are used more often and it also keeps a history of the last used schemas. 45 Editing documents <oXygen/> logs the URL of the detected schema in the Information view. The oxygen processing instruction has the following attributes: RNGSchema specifies the path to the Relax NG schema associated with the current document type specifies the type of Relax NG schema, is used together with the RNGSchema attribute and can have the value "xml" or "compact". NRLSchema specifies the path to the NRL schema associated with the current document NVDLSchema specifies the path to the NVDL schema associated with the current document SCHSchema specifies the path to the SCH schema associated with the current document Learning document structure When working with documents that do not specify a schema, or for which the schema is not known or does not exist, <oXygen/> is able to learn and translate it to a DTD, which in turn can be saved to a file in order to provide a DTD for Content Completion and document validation. In addition to being useful for quick creation of a DTD that will be capable of providing an initialization source for the Content Completion assistant. This feature can also be used to produce DTDs for documents containing personal or custom element types. When it is opened a document that does not specify a schema <oXygen/> automatically learns the document structure and uses it for Content Completion. To disable this feature uncheck the checkbox Learn on open document from Preferences. Procedure 4.8. To create a DTD: 1. Open the structured document from which a DTD will be created. 2. Select menu Document+XML Document → Learn Structure (Ctrl+Shift+L) or click the toolbar button Learn structure to read the mark-up structure of the current document so that it can be saved as a DTD using the Save Structure option. <oXygen/> will learn the document structure, when finished displaying words Learn Complete in the Message Pane of the Editor Status bar. 3. Select menu Document+XML Document → Save Structure (Ctrl+Shift+S) or click the toolbar button Save structure to display the Save Structure dialog, used to name and create DTD documents learnt by the Learn Structure function. Note The resulting DTD is only valid for documents containing the elements and structures defined by the document used as the input for creating the DTD. If new element types or structures are defined in a document, they must be added to the DTD in order for successful validation. Streamline with Content Completion <oXygen/>'s intelligent Content Completion feature is a content assistant that enables rapid, in-line identification and insertion of structured language elements, attributes and in some cases their parameter options. 46 Editing documents Figure 4.21. Content Completion Assistant If the Content Completion assistant is enabled in user preferences (the option Use Content Completion) it is automatically displayed whenever the < character is entered into a document or by pressing CTRL+Space on a partial element or attribute name. Moving the focus to highlight an element and pressing the Enter key or the Tab key, inserts both the start and end tags of the highlighted element into the document. The DTD, XML Schema, Relax NG, NRL or NVDL schema used to populate the Content Completion assistant is specified in the following methods, in order of precedence: • The schema specified explicitly in the document. In this case <oXygen/> reads the beginning of the document and resolves the location of the DTD, XML Schema, Relax NG schema, NRL or NVDL schema. • The default schema rule declared in the Default Schema Associations options which matches the edited document. • For XSLT stylesheets the schema specified in the <oXygen/> Content Completion options. <oXygen/> will read the Content Completion settings when the prolog fails to provide or resolve the location of a DTD, XML Schema, Relax NG or NVDL schema. After inserting, the cursor is positioned directly before the > character of the start tag, if the element has attributes, in order to enable rapid insertion of any attributed supported by the element, or after the > char of the start tag if the element has no attributes. Pressing the space bar, directly after element insertion will again display the assistant. In this instance the attributes supported by that element will be displayed. If an attribute supports a fix set of parameters, the assistant will display the list of valid parameter. If the parameter setting is user defined and therefore variable, the assistant will be closed to enable manual insertion. The values of the attributes can be learned from the same elements in the current document. If you press CTRL + Enter instead of Enter or Tab after inserting the start and end tags in the document <oXygen/> will insert an empty line between the start and end tag and the cursor will be positioned between on the empty line on an indented position with regard to the start tag. If the feature Add Element Content of Content Completion is enabled all the elements that the new element must contain, as specified in the DTD or XML Schema, are inserted automatically in the document. The Content Completion assistant can also add optional content and first choice particle, as specified in the DTD or XML Schema, for the element if the two options are enabled. The content assistant can be started at any time by pressing CTRL+Space Also it can be started with the action Start Content Completion (default shortcut is CTRL + Slash) which can be configured in Preferences → Menu Shortcut Keys : category Content Completion, description Start Content Completion. The effect is that the context-sensitive list of proposals will be shown in the current position of the caret in the edited document if element, attribute or attribute value insertion makes sense. Such positions are: anywhere within a tag name or at the beginning of a tag name in an XML document, XML Schema, DTD or Relax 47 Editing documents NG (full or compact syntax) schema, anywhere within an attribute name or at the beginning of an attribute name in any XML document with an associated schema, and within attribute values or at the beginning of attribute values in XML documents where lists of possible values have been defined for that element in the schema associated with the document. The content of the Content Completion assistant is dependent on the element structure specified in the DTD, XML Schema, Relax NG (full or compact syntax) schema or NRL, NVDL schema associated to the edited document. The number and type of elements displayed by the assistant is dependent on the current position of the cursor in the structured document . The child elements displayed within a given element are defined by the structure of the specified DTD, XML Schema, Relax NG (full or compact syntax) schema or NRL, NVDL schema. All elements that can't be child elements of the current element according to the specified schema are not displayed. Inside Relax NG documents the Content Completion assistant is able to present element values if such values are specified in the Relax NG schema. Also in Relax NG documents the Content Completion assistant presents additional values of type ID for an anyURI datatype. It presents also pattern names defined in the Relax NG schema as possible values for pattern references. For example if the schema defines an enumValuesElem element <element name="enumValuesElem"> <choice> <value>value1</value> <value>value2</value> <value>value3</value> </choice> </element> in documents based on the schema the Content Completion assistant offers the list of values: Figure 4.22. Content Completion assistant - element values in Relax NG documents If the schema for the edited document defines attributes of type ID and IDREF the content assistant will display for IDREF attributes a list of all the ID values already present in the document for an easy insertion of a valid ID value at the cursor position in the document. This is available for documents that use DTD, XML Schema and Relax NG schema. Also values of all the xml:id attributes are treated as ID attributes and collected and displayed by the content completion assistant as possible values for anyURI attributes defined in the schema of the edited document. This works only for XML Schema and Relax NG schemas. For documents that use an XML Schema or Relax NG schema the content assistant offers proposals for attributes and elements values that have as type an enumeration of tokens. Also if a default value or a fixed value is defined in the XML Schema used in validation for an attribute or element then that value is offered in the content completion window. 48 Editing documents If the edited document is not associated with a schema explicitly using the usual mechanisms for associating a DTD or XML Schema with a document or using a processing instruction introduced by the Associate schema action the content assistant will extract the elements presented in the pop-up window from the default schema. If the schema for the document is of type XML Schema, Relax NG (full syntax), NVDL or DTD and it contains element, attributes or attributes values annotations, these will be presented when the content completion window is displayed, if the option Show annotations is enabled. Also the annotation is presented in a small tooltip window displayed automatically when the mouse hovers over an element or attribute annotated in the associated schema of the edited document. The tooltip window can be invoked at any time using the F2 shortcut. In an XML Schema annotations are put in an <xs:annotation> element: <xs:annotation> <xs:documentation> Description of the element. </xs:documentation> </xs:annotation> If the current element / attribute in the edited document does not have an annotation in the schema and that schema is of the type XML Schema <oXygen/> seeks an annotation in the type definition of the element / attribute or, if no annotation is found there, in the parent type definition of that definition, etc. In a Relax NG schema any element outside the Relax NG namespace (http://relaxng.org/ns/structure/1.0) is handled as annotation and the text content is displayed in the annotation window together with the content completion window: For NVDL schemas anotations for the elements / attributes in the referred schemas (XML Schema, RNG, etc) are presented Figure 4.23. Schema annotations displayed at Content Completion For DTD <oXygen/> defines a custom mechanism for annotation using comments enabled from the option Use DTD comments as annotations . The text of a comment with the following format will be presented on content completion: 49 Editing documents <!--doc:Description of the element. --> The operation of the Content Completion assistant is configured by the options available in the group called Content Completion Features. Code templates You can define short names for predefined blocks of code called code templates. The short names are displayed in the content completion window if the word at cursor position is a prefix of such a short name. <oXygen/> comes with a lot of predefined code templates but you can define your own code templates for any type of editor. For more details see the example for XSLT editor code templates. Content Completion helper panels Information about the current element being edited are also available in the Model panel and Attributes panel, located on the left-hand side of the main window. The Model panel and the Attributes panel combined with the powerful Outliner provide spacial and insight information on the edited document. The Model panel The Model panel presents the structure of the current edited tag and tag documentation defined as annotation in the schema of the current document. Figure 4.24. The Model View The Model panel is comprised of: 50 Editing documents • An element structure panel. • An annotation panel. The Element Structure panel The element structure panel shows the structure of the current edited or selected tag in a Tree format. The information includes the name, model and attributes the currently edited tag may have. The allowed attributes are shown along with any restrictions they might possess. Figure 4.25. The Element Structure panel The Annotation panel The Annotation panel shows the annotations that are present in the used schema for the currently edited or selected tag. This information can be very useful to persons learning XML because it has small available definitions for each used tag. Figure 4.26. The Annotation panel 51 Editing documents The Attributes panel The Attributes panel presents all the possible attributes of the current element and allows to insert attributes in the current element or change the value of the attributes already used in the element. The attributes already present in the document are painted with a bold font. Clicking on the Value column of a table row will start editing the value of the attribute from the selected row. If the possible values of the attribute are specified as list in the schema associated with the edited document the Value column works as a combo box where you can select one of the possible values to be inserted in the document. The attributes table is sortable, 3 sorting orders being available by clicking on the columns' names. Thus the table's contents can be sorted in ascending order, in descending order or in a custom order, where the used attributes are placed at the beginning of the table as they appear in the element followed by the rest of the allowed elements as they are declared in the associated schema. Figure 4.27. The Attributes panel Correcting XML documents The W3C XML specification states that a program should not continue to process an XML document if it finds a validation error. The reason is that XML software should be easy to write, and that all XML documents should be compatible. With HTML it was possible to create documents with lots of errors (like when you forget an end tag). One of the main reasons that HTML browsers are so big and incompatible, is that they have their own ways to figure out what a document should look like when they encounter an HTML error. With XML this should not be possible. However, when creating an XML document, errors are very easily introduced. When working with large projects or many files, the probability that errors will occur is even greater. Determining that your project is error free can be time consuming and even frustrating. For this reason <oXygen/> provides functions that enable easy error identification and rapid error location. Checking XML Form XML with correct syntax is Well Formed XML. A Well Formed XML document is a document that conforms to the XML syntax rules. • All XML elements must have a closing tag. • XML tags are case sensitive. • All XML elements must be properly nested. • All XML documents must have a root element. 52 Editing documents • Attribute values must always be quoted. • With XML, white space is preserved. If you select menu Document+XML Document → Check document form (Ctrl+Shift+W) or click the toolbar button Check document form <oXygen/> checks your current document for any deviation from these rules. If any error is found the result is returned to the Message Panel. Each error is one record in the Result List and is accompanied by an error message. Clicking the record will open the document containing the error and highlight the approximate location. Example 4.1. Check XML Form Error Message In our example we will use the case where an end tag is missing from a Docbook listitem element. In this case running Check XML Form will return the following error. F The element type "listitem" must be terminated by the matching end-tag "</listitem>". To resolve the error, click in the result list record which will locate and highlight the errors approximate position. Review the "listitem" elements, identify which is missing an end tag and insert </listitem>. Also the files contained in the current project and selected with the mouse in the Project view can be checked for well-formedness with one action available on the popup menu of the Project view : well form Check Validating Documents A Valid XML document is a Well Formed XML document, which also conforms to the rules of a schema which defines the legal elements of an XML document. The schema type can be: XML Schema, Relax NG (full or compact syntax), Schematron, Document Type Definition (DTD), Namespace Routing Language (NRL) or Namespace-based Validation Dispatching Language (NVDL). The purpose of the schema is to define the legal building blocks of an XML document. It defines the document structure with a list of legal elements. The <oXygen/> Validate document function ensures that your document is compliant with the rules defined by an associated DTD, XML Schema, Relax NG or Schematron schema. XML Schema or Relax NG Schema can embed Schematron rules. For Schematron it is possible to select the validation phase. A line with a validation error or warning will be marked in the editor panel by underlining the error region with a red color. Also a red sign will mark the position in the document of that line on the right side ruler of the editor panel. The same will happen for a validation warning, only the color will be yellow instead of red. The ruler on the right of the document is designed to display the errors found during the validation process and also to help the user to locate them more easily. The ruler contains the following areas: • top area containing a success validation indicator that will turn green in case the validation succeeded or red otherwise. A more detailed report of the errors is displayed in the tool tip. In case there are errors, only the first three of them will be presented in the tool tip; 53 Editing documents • middle area where the errors markers are depicted in red (with a darker color tone for the current selected one). The number of markers shown can be limited by modifying the setting Options → Preferences+Editor / Document checking+Limit error markers to Clicking on a marker will highlight the corresponding text area in the editor. The error message is displayed both in the tool tip and in the error area on the bottom of the editor panel. The Document checking user preferences are easily accessible from the button displayed at the beginning of the error message on the bottom of the editor panel. • bottom area containing two navigation arrows that will go to the next or to the previous error and a button for clearing all the error markers from the ruler. The same actions can be triggered from Document → Validate as you type (Ctrl + .)-> Next error and Document → Validate as you type (Ctrl + ,)-> Previous error. If you don't change the active editor and you don't switch to other application the schema associated to the current document is parsed and cached at the first validate action and is reused by the next Validate document actions without reparsing it. This increases the speed of the validate action starting with the second execution if the schema is large or is located on a remote server on the Web. To reset the cache and reparse the schema you have to use the Reset cache and validate action. Use one of the actions for validating the current document: • Select menu Document+XML Document → Validate document (Ctrl+Shift+V) or click the button Validate document available in the Validate toolbar to return an error result-list in the Message panel. Mark-up of current document is checked to conform with the specified DTD, XML Schema or Relax NG schema rules. It caches the schema and the next execution of the action uses the cached schema. • Select menu Document+XML Document → Reset cache and validate or click the button Reset cache and validate available in the Validate toolbar to reset the cache with the schema and validate the document. It returns an error result-list in the Message panel. Mark-up of current document is checked to conform with the specified DTD, XML Schema or Relax NG schema rules. • Select menu Document+XML Document → External Validation or click the button External validation available in the Validate toolbar to display the External Validation dialog, used to select the external schemas (XML Schema, DTD, Relax NG, NRL, NVDL, Schematron schema) and to execute the Validation operation on the current document using the selected schemas. Returns an error result-list in the Message panel. Mark-up of current document is checked to conform with the specified schemas rules. The External Validation action does not work for files loaded through an <oXygen/> custom protocol plugin developed independently and added to <oXygen/> after installation. Figure 4.28. The External validation dialog 54 Editing documents • Select menu Document+XML Document → Open external schema or click the button Open external schema available in the Document toolbar to open the schema used for validating the current document in a new editor. • Select contextual menu of Project Panel,Validate Selection to validate all selected files with their declared schemas. • Select contextual menu of Project Panel,Validate Selection with ... to select a schema and validate all selected files with that schema. The button Validation options available on the Validate toolbar allows quick access to the validation options of the built-in validator in the <oXygen/> user preferences. The validation status area is the line at the bottom of the editor panel that presents the message of the current validation error. Clicking on opens the document checking page in <oXygen/> user preferences. Also you can select several files in the Project panel and validate them with one click by selecting the action Validate selection or the action Validate selection with ... available from the contextual menu of the Project view. If there are too many validation errors and the validation process is long you can limit the maximum number of reported errors. Validation of an XML document against an XML Schema containing a type definition with a minOccurs or maxOccurs attribute having a value larger than 256 limits the value to 256 and issues a warning about this restriction in the Message panel at the bottom of the <oXygen/> window. Otherwise for large values of the minOccurs and maxOccurs attributes the validator fails with an OutOfMemory error which practically makes <oXygen/> unusable without a restart of the entire application. Status messages from every validation action are logged into the Information view. Validate as you type <oXygen/> can be configured to mark validation errors in the edited document as you modify it using the keyboard. If you enable the Validate as you type option any validation errors and warnings will be highlighted automatically in the editor panel after the configured delay from the last key typed, with underline markers in the editor panel and small rectangles on the right side ruler of the editor panel, in the same way as for manual validation invoked by the user. 55 Editing documents Figure 4.29. Automatic validation of the edited document If the error message is long and it is not displayed completely in the error line at the bottom of the editing area double-clicking on the error icon at the left of the error line or on the error line displays an information dialog with the full error message. The arrow buttons of the dialog enable the navigation to other errors issued by the validation as you type feature. Figure 4.30. Full error message for validate as you type errors <oXygen/> logs status messages of the validation action into the Information view. References to XML Schema specification If validation is done against XML Schema <oXygen/> indicates a specification reference relevant for each validation error. The error messages contain an Info field that when clicked will open the browser on the "XML Schema Part 1:Structures" specification at exactly the point where the error is described thus allowing you to understand the reason for that error. 56 Editing documents Figure 4.31. Link to specification for XML Schema errors Example 4.2. Validate document error message In our example we will use the case where a Docbook listitem element does not match the rules of the docbookx.dtd. In this case running Validate document will return the following error. E The content of element type "listitem" must match"(calloutlist|glosslist|itemizedlist|orderedlist|segmentedlist| simplelist|variablelist| caution|important|note|tip|warning| literallayout|programlisting|programlistingco|screen| screenco|screenshot|synopsis|cmdsynopsis| funcsynopsis|classsynopsis|fieldsynopsis| constructorsynopsis| destructorsynopsis|methodsynopsis|formalpara|para|simpara| address|blockquote|graphic|graphicco|mediaobject| mediaobjectco|informalequation| informalexample| informalfigure|informaltable|equation|example| figure|table|msgset|procedure|sidebar|qandaset|anchor| bridgehead|remark|highlights|abstract|authorblurb|epigraph| indexterm|beginpage)+". As you can see, this error message is a little more difficult to understand, so understanding of the syntax or processing rules for the Docbook XML DTD's "listitem" element is required. However, the error message does give us a clue as to the source of the problem, but indicating that "The content of element type "listitem" must match". Luckily most standards based DTD's, XML Schema's and Relax NG schemas are supplied with reference documentation. This enables us to lookup the element and read about it. In this case we would want to learn about the child elements of "listitem" and their nesting rules. Once we have correctly inserted the required child element and nested it in accordance with the XML rules, the document will become valid on the next validation test. Custom validation of XML documents If you need to validate the edited document with other validation engine than the built-in one you have the possibility to configure external validators as custom validation engines in <oXygen/>. After such a custom validator is properly configured in Preferences it can be applied on the current document with just one click on the External Validation toolbar. The document is validated against the schema declared in the document. 57 Editing documents Figure 4.32. External validation toolbar Some validators are configured by default: LIBXML included in <oXygen/> (Windows edition), associated to XML Editor, able to validate the edited document against XML Schema, Relax NG schema full syntax, internal DTD (included in the XML document) or a custom schema type. For validation against an external DTD specified by URI in the XML document the parameter --dtdvalid ${ds} must be added manually to the DTD validation command line. ${ds} represents the detected DTD declaration in the XML document. Saxon SA not included in <oXygen/>, the jar file and license key file of Saxon 8 SA must be placed in the lib subdirectory of the installation directory After that <oXygen/> must be restarted. It is associated to XML Editor and XSD Editor. MSXML 4.0 included in <oXygen/> (Windows edition). It is associated to XML Editor, XSD Editor and XSL Editor. It is able to validate the edited document against XML Schema, internal DTD (included in the XML document), external DTD or a custom schema type. MSXML.NET included in <oXygen/> (Windows edition). It is associated to XML Editor, XSD Editor and XSL Editor. It is able to validate the edited document against XML Schema, internal DTD (included in the XML document), external DTD or a custom schema type. XSV not included in <oXygen/>. A Windows distribution of XSV can be downloaded from: ftp://ftp.cogsci.ed.ac.uk/pub/XSV/XSV210.EXE [ftp://ftp.cogsci.ed.ac.uk/pub/XSV/XSV210.EXE] A Linux distribution can be downloaded from ftp://ftp.cogs c i . e d . a c . u k / p u b / X S V / X S V- 2 . 1 0 - 1 . n o a r c h . r p m . [ftp://ftp.cogsci.ed.ac.uk/pub/XSV/XSV-2.10-1.noarch.rpm] The executable path is configured already in <oXygen/> for the installation directory [oXygen-install-dir]/xsv. If it is installed in a different directory the predefined executable path must be corrected in Preferences. It is associated to XML Editor and XSD Editor. It is able to validate the edited document against XML Schema or a custom schema type. SQC (Schema Quality Checker from not included in <oXygen/>. It can be downloaded from here IBM) [http://www.alphaworks.ibm.com/tech/xmlsqc?open&l=xml-dev,t=grx,p=shecheck] (it comes as a .zip file, at the time of this writing SQC2.2.1.zip is about 3 megabytes). The executable path and working directory are 58 Editing documents configured already for the SQC installation directory [oXygeninstall-dir]/sqc. If it is installed in a different directory the predefined executable path and working directory must be corrected in Preferences. It is associated to XSD Editor. It must be used with a Java 1.4 virtual machine because it does not work with Java 1.5. A custom validator cannot be applied on files loaded through an <oXygen/> custom protocol plugin developed independently and added to <oXygen/> after installation. Document navigation Navigating between XML elements located in various parts of the currently edited document is easy due to several powerful features. Quick document browsing using bookmarks The concept of bookmark is the same as in other IDEs: the user can mark a position in one edited document so that he can quickly return after further editing and browsing through one or more documents opened at the same time. Up to nine distinct bookmarks can be placed in any opened document. Configurable shortcut key strokes are available for placing bookmarks and for quick return to any of the marked positions. Figure 4.33. Editor Bookmarks The key strokes can be configured from Options → Preferences->Menu shortcut keys. A bookmark can be placed from Edit → Bookmarks->Create, from Edit → Bookmarks (F7)->Bookmarks quick creation, by clicking the toolbar button Bookmarks quick creation and by clicking in the margin of the editing area, to the left of the line number area, reserved for bookmarks. Quickly switching to a position marked by a bookmark can be done by Edit → Bookmarks->Go to. Folding of the XML elements XML documents are organized as a tree of elements. When working on a large document you can collapse some elements leaving in the focus only the ones you need to edit. Expanding and collapsing works on individual elements: expanding an element leaves the child elements unchanged. 59 Editing documents Figure 4.34. Folding of the XML Elements An unique feature of <oXygen/> is the fact that the folds are persistent: the next time you will open the document the folds are restored to the last state so you won't have to collapse the uninteresting parts again. To toggle the folded state of an element click on the special mark displayed in the left part of the document editor next to the start tag of that element or click on the action Toggle fold available from the context menu or from the menu Document+Folding → Toggle fold The element extent is marked with a grey line displayed in the left part of the edited document. The grey line covers always the lines of text comprised between the start tag and end tag of the element where it is positioned the cursor. Other menu actions related to folding of XML elements are available from the context menu of the current editor or from the menu Document → Folding: • Document+Folding+ element. → Close Other Folds (Ctrl+NumPad+/) Fold all the sections except the current • Document+Folding+ → Collapse Child Folds (Ctrl+NumPad+-): Fold the sections indented with one level inside the current element. • Document+Folding+ → Expand Child Folds (Ctrl+Equals): Unfold the sections indented with one level inside the current element. • • Document+Folding+ element. → Expand All (Ctrl+NumPad+*): Unfold all the sections inside the current Document+Folding+ → Toggle Fold: Toggles the state of the current fold. Outliner view The Outliner view has the following available functions: • the section called “XML Document Overview” • the section called “Modification Follow-up” • the section called “Document Structure Change” • the section called “Document Tag Selection” 60 Editing documents Figure 4.35. The Outliner view XML Document Overview The Outliner displays a general tag overview of the current edited XML Document. It also shows the correct hierarchical dependencies between the tag elements, making it easier for the user to be aware of the document's structure and the way tags are nested. The Expand more and Collapse all items of the popup menu available on the outliner tree enlarge or reduce the set of nodes of the edited document currently visible in the view. The tree expansion action is a faster alternative to mouse clicks on the plus signs of the tree when one wants to access quickly a node deeply nested in the hierarchy of document nodes. When a large number of nodes become expanded and the document structure is not clear any more the collapsing action clears the view quickly by reducing the depth of the expanded nodes to only one child of the currently selected node. Modification Follow-up When editing, the Outliner dynamically follows the modifications introduced by the user, showing in the middle of the panel the node which is currently being modified .This gives the user better insight on location where in the document one is positioned and how the structure of the document is affected by one's modifications. Document Structure Change Entire XML elements can be moved or copied in the edited document using only the mouse in the Outliner view in drag-and-drop operations. If you drag an XML element in the Outliner view and drop it on another one in the same panel then the dragged element will be moved after the drop target element. If you hold the mouse pointer over the drop target for a short time before the drop then the drop element will be expanded first and the dragged element will be moved inside the drop one after its opening tag. If you hold down the CTRL key it will be performed a copy operation instead a move one. The drag and drop action in the Outliner view can be disabled and reenabled from the Preferences dialog. 61 Editing documents The popup menu of the Outline tree Figure 4.36. Popup menu of the Outline tree The Add Child, Insert - Before and Insert - After submenus of the outline tree popup menu allow to quickly insert new tags in the document at the place of the element currectly selected in the Outline tree. The Add Child submenu lists the names of all the elements which are allowed by the schema associated with the current document as child of the current element. The effect is the same as typing the '<' character and selecting an element name from the popup menu offered by the content completion assistant. The Insert Before and Insert - After submenus of the Outline tree popup menu list the elements which are allowed by the schema associated with the current document as siblings of the current element inserted immediately before respectively after the current element. The Edit attributes action opens a dialog with a table containing all the attributes of the current element. Figure 4.37. Edit attributes dialog The Toggle comment item of the outline tree popup menu is the same item as in the editor popup menu with the same name. It encloses the currently selected element of the outline tree in an XML comment, if the element is not commented, or uncomments it if it is commented. 62 Editing documents The Cut, Copy and Delete items of the popup menu execute the same actions as the Edit menu items with the same name on the elements currently selected in the outline tree. Document Tag Selection The Outliner can also be used to search for a specific tag's location and contents in the edited document. Intuitively, by selecting with the left mouse button the desired tag in the Outliner view, the document is scrolled to the position of the selected tag. Moreover, the tag's contents are selected in the document, making it easy to notice the part of the document contained by that specific tag and furthermore to easily copy and paste the tag's contents in other parts of the document or in other documents. Navigation buttons These buttons are available in editor's main toolbar: • • • Go to last modification : Moves the caret to the last modification in any opened document. Back :Moves the caret to the previous position. Forward :Moves the caret to the next position. Enabled after at least one press of "Back" button. Using the Go To dialog The "Go to" dialog available from Find → Go to ... (Ctrl+L (Cmd+L on Mac)) enables you to go to a precise location in the current edited file specified by line and column or by offset relative to the beginning of the file. Figure 4.38. Go to Complete the dialog as follows: Line The destination line in the current document. Column The destination column in the current document. Offset The destination offset relative to the beginning of document. Grid Editor In the grid editor the XML document is displayed as a structured grid of nested tables in which the text content can be modified by non technical users without editing directly the XML tags. The tables can be expanded and collapsed with a mouse click to show or hide the elements of the document as needed. Also the document structure can be changed easily with drag and drop operations on the grid components. 63 Editing documents Figure 4.39. The Grid Editor You can switch between the text tab and the grid tab of the editor panel with the two buttons Text and Grid available at the bottom of the editor panel. Also the switch can be performed with the actions Document+Edit mode → Grid and Document+Edit mode → Text If the edited document is associated with a schema (DTD, XML Schema, Relax NG, etc.), the editor offers content completion popups for the element and attributes names and values. If you choose to insert an element that has required content, it will be inserted automatically including the subtree of needed elements and attributes. To display the content completion popup you have to start editing, for example by duble clicking the cell. When editing, pressing CTRL SPACE redisplays the popup. Figure 4.40. Content Completion in Grid Editor Layouts: Grid and Tree The grid editor has two modes for the layout. The default one is the "grid" layout. This smart layout of the grid editor detects the recurring elements in the XML document and creates tables having as columns the children (including the attributes) of these elements. In this way it is possible to have tables nested in other tables, reflecting the structure of your document. 64 Editing documents Figure 4.41. Grid Layout The other layout mode is "tree"-like. This layout does not create any table, it presents the structure of the document directly. Figure 4.42. Tree Layout You can switch between the two modes using the menu: Document+Grid Layout → Grid mode/Tree mode Navigating the grid When you open a document first in the grid tab, the document is collapsed so that it shows just the root element and its attributes. Figure 4.43. Initial configuration of grid tab The grid disposition of the node names and values are very similar to a web form or a dialog. The same set of key shortcuts used to select dialog components are used in the grid. For instance moving to the next editable value in a table row is done using the TAB key. Moving to the previous cell employs the SHIFT+TAB key. Changing a value assumes pressing the ENTER key or start typing directly the new value, and, when the editing is finished, pressing ENTER again to commit the data into the document. The arrows and the PAGE UP/DOWN keys can be used for navigation. By pressing SHIFT while using these keys you can create a selection zone. To add other nodes that are not close to this zone, you can use the mouse and the CTRL (COMMAND on Mac OS X) key. The folowing key combination may be used to scroll the grid: 65 Editing documents • CTRL + UP Scrolls the grid upwards • CTRL + DOWN Scrolls the grid downwards • CTRL + LEFT Scrolls the grid to the left • CTRL + RIGHT Scrolls the grid to the right A left arrow sign displayed to the left of the node name indicates that this node has child nodes. You can click this sign to display the children subgrid. The expand/collapse actions can be also invoked by pressing the NUMAPD + PLUS and NUMPAD + MINUS keys. A set of expand/collapse actions can be accessed from the submenu Expand/Collapse of the contextual menu. The same actions can be accessed from the menu: Document+Grid Expand/Collapse Expand All Action Expands all the children of the selection and the selection. Collapse All Action Collapses all the children of the selection and the selection. Expand Children Action Expands all the children of the selection but not the selection. Collapse Children Action Collapses all the children of the selection but not the selection. Collapse Others Collapses all the siblings of the current selection but not the selection. Specific Grid Actions In order to access these actions you can click the column header and choose from the contextual menu the item: Table The same set of actions are available in the menu: Document and the first ones in the grid toolbar: Perspective+Show Toobar → Grid Sorting a Table Column You can sort the table by a specific column. The sorting can be either ascending or descending. The icons for this pair of actions are: The sorting result depends on the data type of the column content and it can be different in case of number or text information. The editor analyses automatically the content and decides what type of sorting to apply. If there is present a mixed set of valus in the column, a dialog will be displayed allowing to choose the correct type. 66 Editing documents Figure 4.44. Sort Type Dialog Inserting a row to a table You can add a row by either a copy/paste operation over a row, or directly, by invoking the action from the contextual menu: Table → Insert row The icon is: A shorter way of inserting a new row is to move the selection over the row header, and then to press ENTER. The row header is the zone in the left of the row that holds the row number. The inserted row will be bellow the selection. Inserting a column into a table You can insert a column after the selected one, using the action from the contextual menu: Table → Insert column The icon is: Clearing the content of a column You can clear all the cells from a column, using the action from the contextual menu: Table → Clear content Adding nodes Using the contextual menu you can add nodes before, after, or as last child of the currently selected node. The sub-menus containing detailed actions are: Insert beforeInsert afterAppend child Duplicating nodes A quicker way of creating new nodes is to duplicate the existing ones. The action is available in the contextual menu: Duplicate The same actions may be found in the menu: Document+Grid Edit → Duplicate Refresh layout When using drag and drop to reorganize the document, the resulted layout may be different from the expected one. For instance, the layout may be contain a set of sibling tables where could be joined together. To force the layout to be recomputed you can use the Refresh action . The action is available in the contextual menu: Refresh selected 67 Editing documents The same action can be found in the menu: Document+Grid Edit → Refresh selected Start editing a cell value You can simply press ENTER after you have selected the grid cell. The action is found in the menu: Document+Grid Edit → Start Editing Stop editing a cell value You can either press ENTER when already in cell editing. The action is found in the menu: Document+Grid Edit → End Editing To cancel the editing without saving in the document the current changes, you have to press the ESC key. Drag and Drop(DnD) in the Grid Editor The DnD features of the grid editor make easy the arrangement of the different sections in your XML document. Using DnD you can: • Copy or move a set of nodes. • Change the order of columns in the tables. • Move the rows from the tables. These operations are available for single selection and multiple selection. Note that when dragging the editor paints guide-lines showing accepted locations where the nodes can be dropped. Nodes can be dragged outside the grid editor and text from other applications can be dropped inside the grid. See Copy and Paste in the Grid Editor for details. Copy and Paste in the Grid Editor The selection in the grid is a bit complex relative to the selection in a text component. It consists of a current selected cell and additional selected cells. These additional cells are either "hand picked" by the user using the mouse, or are implied by the current selected cell. To be more specific, let's consider you click the name of the column - this becomes the current selected cell; the editor automatically extends the selection so it contains also all the cells from that column. The current selected cell is painted with a color that is different from the rest of the selection. You can select discontinuous regions of nodes and place them in the clipboard using the copy action. Pasting these nodes may be done in two ways, relative to the current selected cell: by default as brother, just bellow (after) , or as last child of the selected cell. The paste as child action is available in the contextual menu: Paste as Child The same action can be found in the menu: Document+Grid Edit → Paste as Child 68 Editing documents The copied nodes from the grid can be pasted also into the text editor or other applications. When copying from grid into the text editor or other text based applications the inserted string represents the nodes serialization. The nodes from tables can be copied using HTML or RTF in table format. The resulting cells contain only the concatenated values of the text nodes. Figure 4.45. Copying from grid to other editors In the grid editor you can paste wellformed xml content or tab separated values from other editors. If you paste xml content the result will be the insertion of the nodes obtained by parsing this content. Figure 4.46. Copying XML data into grid If the pasted text contains multiple lines of tab separated values it can be considered as a matrix of values. By pasting this matrix of values into the grid editor the result will be a matrix of cells. If the operation is performed inside existing cells the values from these cells will be overwritten and new ones will be created if needed. This is useful for example when trying to transfer data from Excel like editors into grid editor. 69 Editing documents Figure 4.47. Copying tab separated values into grid Bidirectional Text Support in the Grid Editor If you are editing documents employing a different text orientation you can change the way text is rendered and edited in the grid cells. For this, you can use the shortcut CTRL SHIFT O to toggle from the default left to right text orientation to the right to left orientation. Note that this change applies only to the text from the cells, not to the layout of the grid editor. Figure 4.48. Default left to right text orientation Figure 4.49. Right to left text orientation 70 Editing documents Grouping documents in XML projects Large Documents Let's consider the case of documenting a large project. It is likely to be several people involved. The resulting document can be few megabytes in size. How to deal with this amount of data in such a way the work parallelism would not be affected ? Fortunately, XML provides a solution for this. It can be created a master document, with references to the other document parts, containing the document sections. The users can edit individually the sections, then apply FOP or XSLT over the master and obtain the result files, let say PDF or HTML. Two conditions must be fulfilled: • The master should declare the DTD to be used and the external entities - the sections. A sample document is: <?xml version="1.0" encoding="UTF-8"?> <!DOCTYPE book SYSTEM "../xml/docbookx.dtd" [ <!ENTITY testing SYSTEM "testing.xml" > ] > <book> <chapter> ... At a certain point in the master document there can be inserted the section "testing.xml" entity: ... &testing; ... • The document containing the section must not define again the DTD. <section> ... here comes the section content ... </section> Note The indicated DTD and the element names ( "section", "chapter" ) are used here only for illustrating the inclusion mechanism. You can use any DTD and element names you need. When splitting a large document and including the separate parts in the master file using external entities, only the master file will contain the Document Type Definition (the DTD) or other type of schema. The included sections can't define again the schema because the main document will not be valid. If you want to validate the parts separately you have to use XInclude for assembling the parts together with the master file. Creating an included part Open a new document of type XML, with no associated schema. Make sure that in the Content Completion / Default preferences you have chosen the correct schema. Now you can type in the edited document the root element of your section. For example, if you are using docbook it can be "<chapter></chapter>" or "<section></section>". Now if you are moving the cursor between the tags and press "<", you will see the list of element names that can be inserted. 71 Editing documents Figure 4.50. Content Completion list over a document with no schema Note The validation will not work on a included file, as no DTD is set. The validation can be done only from the master file. At this point you can only check the document to be well-formed. Using the Project view The Project view, located on the left-hand side of the main window, is designed to assist the user in organizing and managing related files grouped in the same XML project. The actions available on the context menu and toolbar associated to this panel enable the creation of XML projects and shortcuts to various operations on the project documents. On Windows the context menu can be displayed with the mouse on a right click or with the keyboard by pressing the special context menu key available on Windows keyboards. Figure 4.51. The Project view The default layout initialized by the Perspective → Reset Layout menu item arranges the Project view on the left side of the <oXygen/> window, above the Outline view. If you closed the view at some time to get more editing space you can reopen it quickly at any time with the Project → Show Project View menu item. To create a new project select File → New Project or click the toolbar button New Project To open an existing project select File → Open Project ... (Ctrl+F2) or click the toolbar button Open Project or select File → Reopen Project (displays a list of recently opened project files, select a project file to open). To save a project on disk select File → Save Project (Ctrl+F3) or click the toolbar button 72 Save Project Editing documents The files are organized in a XML project usually as a collection of folders. There are two types of folders: • Logical folders - they are marked with a blue icon and do not have any connection with folders on the disk, creating and deleting them in <oXygen/> does not affect the file system on disk. • Linked folders - they are marked with a yellow icon and their name and content mirror a real folder existing in the file system on disk. To create a new logical or physical folder (depending on the selected resource) select in the contextual menu New Folder or Import Folders or Import Remote Folders or click the Project view toolbar button New Folder You can create linked folders by dragging and dropping a folder from the Windows Explorer / Mac OS X Finder over the project tree or by selecting in the contextual menu Link to External Folders However you cannot drag and drop other files or folders over a linked folder. To create a new linked folder inside another linked folder, or inside one of its children, right click on the linked folder where you want to create it and select New Folder from the contextual menu. To add one or more files to a folder, right click on it, and choose Add files or Add Edited File or click the toolbar button Add Edited File or right-click on the title of an opened editor and select from the popup menu Add to project or Add all to project. The default target when adding files to a project is the project root. Selecting a folder changes the target to the selected folder. Files may have multiple instances, within the folder system but cannot appear twice within the same folder. To remove one or more files and/or folders select them with the mouse in the project tree, right-click to invoke the contextual menu and select the Remove action or press the DELETE key. A child (folder or file) of a linked folder can be renamed by right-clicking on it and accessing the Rename action from the contextual menu. The file or folder will be renamed both in the <oXygen/> Project view and on the local disk. If a project folder contains many documents a certain document can be quickly located in the project tree if the user selects with the mouse the folder containing the desired document (or some arbitrary document in this folder) and types the first characters of the document name. The desired document will be automatically selected as soon as the typed characters uniquely identify its name in the folder. The selected document can be opened by pressing the ENTER key, by double-clicking on it and with one of the Open actions from the popup menu. For opening a file of known type with other editor than the default use the Open as action. Also the selected document can be deleted by pressing the DELETE key or by choosing Remove from the context menu. The currently selected files in the Project view can be validated against a schema of type Schematron, XML Schema, Relax NG, NRL, NVDL, or a combination of the later with Schematron with one of the actions Validate Selection and Validate Selection with ... available on the right-click menu of the Project view. This together with the logical folder support of the project allows you to group your files and validate them very easily. If the resources from a linked folder in the project have been changed outside the view you can refresh the content of the folder by using the Refresh action from the contextual menu. The action is also performed when selecting the linked resource and pressing F5 key A list of useful file properties similar to the ones available in the Properties view can be obtained with the Properties action of the popup menu invoked on a file node of the Project view tree, in a dialog like below: 73 Editing documents Figure 4.52. The Properties dialog The full path to the project files is hidden by default. Click the toolbar button the file path on or off. Show/Hide Path to toggle The files and folders that appear as visible in the Project view can be filtered. Click the toolbar button Filters to set filter patterns for the files you want or do NOT want to show. Figure 4.53. Project filters dialog In the dialog you can introduce filter patterns for the files that will be shown, files that will be hidden and filter patterns for the linked directories of the Project view that will be hidden. Right-clicking any object in the tree-view displays the Project menu with functions that can be performed on, or from the selected object. Options available from the Project menu are specific to the object type selected in the tree-view. Team Collaboration - Subversion There is a SVN (Subversion) Client application embedded in <oXygen/>. You may start it from the Tools menu and use it for synchronizing your working copy with a central repository. 74 Editing documents Another way of starting it is by using the contextual menu of the project tree: Team → Open in SVN Client. This action displays the Syncro SVN Client and shows the selected project file in the working copy view. Project Level Settings You can store into the project not only lists of files and directories, but also transformation scenarios and other setting. For more information see the Preference Sharing and Sharing the Transformation Scenarios sections. Including document parts with XInclude XInclude is a standard for assembling XML instances into another XML document through inclusion. It enables larger documents to be dynamically created from smaller XML documents without having to physically duplicate the content of the smaller files in the main file. XInclude is targeted as the replacement for External Entities. The advantage of using XInclude is that, unlike the entities method, each of the assembled documents is permitted to contain a Document Type Declaration (DocType Decl.). This means that each file is a valid XML instance and can be independently validated. It also means that the main document to which smaller instances are included can be validated without having to remove or comment the DocType Decl. as is the case with External Entities. This is makes XInclude a more convenient and effective method for managing XML instances that need to be stand-alone documents and part of a much larger work. The main application for XInclude is in the document orientated content frameworks such as manuals and Web pages. Employing XInclude enables authors and content managers to manage content in a modular fashion that is akin to Object Orientated methods used in languages such as Java, C++ or C#. The advantages of modular documentation include: reusable content units, smaller file units that are easier to edited, better version control and distributed authoring. An example: create a chapter file and an article file in the samples folder of the <oXygen/> install folder and include the chapter file in the article file using XInclude. Chapter file introduction.xml: <?xml version="1.0"?> <!DOCTYPE chapter PUBLIC "-//OASIS//DTD DocBook XML V4.3//EN" "http://www.oasis-open.org/docbook/xml/4.3/docbookx.dtd"> <chapter> <title>Getting started</title> <section> <title>Section title</title> <para>Para text</para> </section> </chapter> Main article file: <?xml version="1.0"?> <!DOCTYPE article PUBLIC "-//OASIS//DTD DocBook XML V4.3//EN" "http://www.docbook.org/xml/4.3/docbookx.dtd" [ <!ENTITY % xinclude SYSTEM "../frameworks/docbook/dtd/xinclude.mod"> %xinclude; 75 Editing documents ]> <article> <title>Install guide</title> <para>This is the install guide.</para> <xi:include xmlns:xi="http://www.w3.org/2001/XInclude" href="introduction.xml"> <xi:fallback> <para> <emphasis>FIXME: MISSING XINCLUDE CONTENT</emphasis> </para> </xi:fallback> </xi:include> </article> In this example the following is of note: • The DocType Decl. defines an entity that references a file containing the information to add the xi namespace to certain elements defined by the Docbook DTD. • The href attribute of the xi:include element specifies that the introduction.xml file will replace the xi:include element when the document is parsed. • If the introduction.xml file cannot be found the parse will use the value of the xi:fallback element - a message to FIXME. If you want to include only a fragment of other file in the master file the fragment must be contained in a tag having an xml:id attribute and you must use an XPointer expression pointing to the xml:id value. For example if the master file is: <?xml version="1.0" encoding="UTF-8"?> <?oxygen RNGSchema="test.rng" type="xml"?> <test> <xi:include href="a.xml" xpointer="a1" xmlns:xi="http://www.w3.org/2001/XInclude"/> </test> and the a.xml file is: <?xml version="1.0" encoding="UTF-8"?> <test> <a xml:id="a1">test</a> </test> after resolving the XPointer reference the document is: <?xml version="1.0" encoding="UTF-8"?> <?oxygen RNGSchema="test.rng" type="xml"?> <test> <a xml:id="a1" xml:base="a.xml">test</a> 76 Editing documents </test> The XInclude support in <oXygen/> is turned off by default. You can turn it on by going to the entry Enable XInclude processing in the menu Options → Preferences ...+XML / XML Parser When enabled <oXygen/> will be able to validate and transform documents comprised of parts added using XInclude. Working with XML Catalogs When Internet access is not available or the Internet connection is slow the OASIS XML catalogs [http://www.oasis-open.org/committees/entity/spec.html] present in the list maintained in the XML Catalog Preferences panel will be scanned trying to map a remote system ID (at document validation) or a URI reference (at document transformation) pointing to a resource on a remote Web server to a local copy of the same resource. If a match is found then <oXygen/> will use the local copy of the resource instead of the remote one. This enables the XML author to work on his XML project without Internet access or when the connection is slow and waiting until the remote resource is accessed and fetched becomes unacceptable. Also XML catalogs make documents machine independent so that they can be shared by many developers by modifying only the XML catalog mappings related to the shared documents. <oXygen/> supports any XML catalog file that conforms to one of: • the OASIS XML Catalogs Committee S p e c i fi c a t i o n [http://www.oasis-open.org/committees/entity/specs/cs-entity-xml-catalogs-1.0.html] • the OASIS Technical Resolution 9401:1997 [http://www.oasis-open.org/specs/a401.htm] including the plain-text flavor described in that resolution User preferences related to XML Catalogs can be configured from Options → Preferences ... +XML / XML Catalog Converting between schema languages The Trang converter allows you to convert a DTD or Relax NG (full or compact syntax) schema or a set of XML files to an equivalent XML Schema, DTD or Relax NG (full or compact syntax) schema. Where perfect equivalence is not possible due to limitations of the target language <oXygen/> will generate an approximation of the source schema. The conversion functionality is available from Tools → Trang Converter... (Ctrl+Alt+T) from the Project view contextual menu - the action Open with → Trang Converter and from the toolbar button to ... Convert A schema being edited can be converted with just one click on a toolbar button if that schema can be the subject of a supported conversion. 77 Editing documents Figure 4.54. Convert a schema to other schema language The language of the source schema is specified with one of the four radio buttons of the Input panel. If the XML Documents button is selected more than one file selection is allowed in the list below the group of radio buttons in case the conversion is based on a set of XML files instead of a single file. The language of the target schema is specified with one of the four radio buttons of the Output panel. The encoding, the maximum line width and the number of spaces for one level of indentation can be also specified in this panel. The conversion can be further fine-tuned by specifying more advanced options available from the Advanced options button. For example if the input is a DTD and the output is an XML Schema the advanced options are: 78 Editing documents Figure 4.55. Convert a schema to other schema language - advanced options For the Input panel: xmlns field specifies the default namespace, that is the namespace used for unqualified element names. xmlns table Each row specifies in the prefix used for a namespace in the input schema. colon-replacement Replaces colons in element names by the specified chars when constructing the names of definitions used to represent the element declarations and attribute list declarations in the DTD. element-define Specifies how to construct the name of the definition representing an element declaration from the name of the element. The specified value must contain exactly one percent character. This percent character is replaced by the name of element (after colon replacement) and the result is used as the name of the definition. inline-attlist Specifies not to generate definitions for attribute list declarations and instead move attributes declared in attribute list declarations into the definitions generated for element declarations. This is the default behavior when the output language is XSD. attlist-define This specifies how to construct the name of the definition representing an attribute list declaration from the name of the element. The specified value must contain exactly one percent character. This percent character is replaced by the name of element (after colon replacement) and the result is used as the name of the definition. any-name Specifies the name of the definition generated for the content of elements declared in the DTD as having a content model of ANY. 79 Editing documents strict-any Preserves the exact semantics of ANY content models by using an explicit choice of references to all declared elements. By default, Trang uses a wildcard that allows any element. generate-start Specifies whether Trang should generate a start element. DTDs do not indicate what elements are allowed as document elements. Trang assumes that all elements that are defined but never referenced are allowed as document elements. annotation-prefix Default values are represented using an annotation attribute prefix:defaultValue where prefix is the specified value and is bound to http://relaxng.org/ns/compatibility/annotations/1.0 as defined by the RELAX NG DTD Compatibility Committee Specification. By default, Trang will use a for prefix unless that conflicts with a prefix used in the DTD. For the Output panel: disable-abstract-elements Disables the use of abstract elements and subsitution groups in the generated XML Schema. This can also be controlled using an annotation attribute. any-process-contents One of the values: strict, lax, skip. Specifies the value for the processContents attribute of any elements. The default is skip (corresponding to RELAX NG semantics) unless the input format is dtd, in which case the default is strict (corresponding to DTD semantics). any-attribute-process-contents Specifies the value for the processContents attribute of anyAttribute elements. The default is skip (corresponding to RELAX NG semantics). Editing XML tree nodes A well-formed XML document can be viewed and edited in <oXygen/> also as a tree of XML elements. This is possible in the Tree Editor perspective available from Perspective → Tree Editor... (Ctrl+T) or the toolbar button Tree Editor that provides specially designed views and toolbars and an editable tree allowing you to execute common actions for nodes of a tree like create and delete nodes, edit node names, move nodes with drag and drop. If you want to be able to edit XML documents that are not well-formed all the time and still have a tree view of the document you should use the Outliner view in the Editor perspective. Formatting and indenting documents (pretty print) In structured markup languages, the whitespace between elements that is created by use of the Space bar, Tab or multiple line breaks insertion from use of the Enter, is not recognized by the parsing tools. Often this means that when structured markup documents are opened, they are arranged as one long, unbroken line, what seems to be a single paragraph. While this is perfectly acceptable practice, it makes editing difficult and increases the likelihood of errors being introduced. It also makes the identification of exact error positions difficult. Formatting and Indenting, also called Pretty Print, enables such documents to be neatly arranged, in a manner that is consistent and promotes easier reading on screen and in print output. Pretty print is in no way associated with the layout or formatting that will be used in the transformed document. This layout and formatting is supplied by the XSL style sheet specified at time of transformation. 80 Editing documents Procedure 4.9. To format and indent a document: 1. Open or focus on the document that is to be formatted and indented. 2. Select menu Document → XML Document → Format and Indent (Ctrl+Shift+P) or click the toolbar button Format and indent . While in progress the Status Panel will indicate Pretty print in progress. On completion, this will change to Pretty print successful and the document will be arranged. Note Pretty Print can format empty elements as an auto-closing markup tag (ex. <a/>) or as a regular tag (ex. <a></a> ). It can preserve the order or attributes or order them alphabetically. Also the user may specify a list of elements for which white spaces are preserved exactly as before Pretty print and a one with elements for which white space is stripped. These can be configured from Options → Preferences+Editor / Format. Pretty Print requires that the structured document is well formed. If the document is not well formed an error message is displayed. The message will usually indicate that a problem has been found in the form and will hint to the problem type. It will not highlight the general position of the error, to do this run the well formed action by selecting Document → Check document form (Ctrl+Shift+W). To change the formatting of just one XML element see the action Pretty print element . To change the indenting of the current selected text see the action Indent selection . For user preferences related to formatting and indenting like Detect indent on open and Indent on paste see the corresponding Preferences panel. XML elements can be excepted from the reformatting performed by the pretty-print operation by including them in the Preserve space elements (XPath) list. That means that when the Format and Indent (prettyprint) action encounters in the document an element with the name contained in this list the whitespace is preserved inside that element. This is useful when most of the elements must be reformatted with the exception of a few ones which are listed here. For the situation when whitespace should be preserved in most elements with the exception of a few elements, the names of these elements must be added to the Strip space elements (XPath) list. In addition to simple element names both the Preserve space elements (XPath) list and the Strip space elements (XPath) one accept a restricted set of XPath expressions for covering a pattern of XML elements with only one expression. The allowed types of expressions are: //xs:documentation the XPath descendant axis can be used only at the beginning of the expression; the namespace prefix can be attached to any namespace, no namespace binding check is performed when aplying the prettyprint operation /chapter/abstract/title note the use of the XPath child axis //section/title the descendant axis can be followed by the child axis The value of an xml:space attribute present in the XML document on which the pretty-print operation is applied always takes precedence over the Preserve space elements (XPath) and the Strip space elements (XPath) lists. 81 Editing documents Viewing status information Status information generated by the Schema Detection, Validation, Validate as you type and Transformation threads are fed into the Information view allowing the user to monitor how the operation is being executed. Figure 4.56. Information view messages Messages contain a timestamp, the name of the thread that generated it and the actual status information. The number of displayed messages can be controlled from the options panel. In order to make the view visible go to Perspective+Show View → Information Image preview Images and SVG files from the Project view can be previewed in a separate panel. Figure 4.57. The Preview panel 82 Editing documents To preview an image one has to either double click the image name or click the Preview action from the Project's tree contextual menu. Supported image types are GIF, JPEG/JPG, PNG, BMP. Once the image is displayed in the Preview panel using the actions from the contextual menu one can scale the image at its original size (1:1 action) or scale it down to fit in the view's available area (Scale to fit action). To preview a SVG file click the Preview action from the Project's tree contextual menu. Once the SVG is displayed in the Preview panel the following actions are available on the contextual menu: Zoom in, Zoom out and Rotate. Making a persistent copy of results To make a persistent copy of the results displayed in the Results panel from operations like document validation, checking the form of documents, XSLT or FO transformation, find all occurances of a string, applying an XPath expression to the current document use one of the actions: • File → Save Results - displays the Save Results dialog, used to save the result-list of the current message tab. • File → Print Results - displays the Page Setup dialog used to define the page size and orientation properties for printing the result-list of the current message tab. Locking and unlocking XML markup For documents with fixed markup such as forms in which the XML tags are not allowed to be modified but only their text content, editing of the XML tag names can be disabled and re-enabled with an action available from Document+XML Document → Locks/Unlocks the XML Tags or from the toolbar button Locks/Unlocks the XML tags Adjusting the transparency of XML markup Most of the time you want the content of a document displayed on screen with zero transparency. When you want to focus your attention only on editing text content inside XML tags <oXygen/> offers the option of reducing the visibility of the tags by increasing their transparency when they are displayed. There are two levels of tag transparency: semi-transparent markup and transparent markup. For the opposite case, when you want to focus on the tag names, the text transparency can be set to one of two levels: semitransparent text and transparent text. To change the level of transparency: • Click the toolbar button Adjust contrast to adjust the contrast of markup in Editor perspective. XML editor specific actions <oXygen/> offers groups of actions for working on single XML elements. They are available from the Document menu and the context menu of the main editor panel. On Windows the context menu can be displayed with the mouse on a right click or with the keyboard by pressing the special context menu key available on Windows keyboards. Split actions Also the editing area can be divided vertically and horizontally with the split / unsplit actions available on the Split toolbar, the Document → Split menu and the popup menu of the editor panel for XML files: Split horizontally, Split vertically, Unsplit. 83 Editing documents Edit actions • Document+Edit → Toggle Line Wrap (Ctrl + Shift + Y): Turns on line wrapping in the editor panel if it was off and viceversa. It has the same effect as the Line wrap preference. • Document+Edit → Toggle comment (Ctrl + Shift + ,): Comment the current selection of the current editor. If the selection already contains a comment the action uncomments the selection. If there is no selection in the current editor and the cursor is not positioned inside a comment the current line is commented. If the cursor is positioned inside a comment then the commented text is uncommented. The action is also available on the popup menu of the editor panel. Select actions The Select actions are enabled when the caret is positioned inside a tag name. • Document+Select → Select element: Selects the entire current element; • Document+Select → Select content: Selects the current element, excluding the start tag and end tag; • Document+Select → Select attributes: Selects all the attributes of the current element; • Document+Select → Select parent: Selects the parent element of the current element; Source actions • Document+Source+ → Locks / Unlocks the XML Tags: Disable / Enable editing of XML tags • Document+Source → To lower case: Converts the selection's content to lower case characters. • Document+Source → To upper case: Converts the selection's content to upper case characters. • Document+Source → Capitalize lines: Converts to upper case the first character of every selected line. • • • Document+Source+ → Shift Right (Tab): Shifts the selected block to the right; Document+Source+ → Shift Left (Shift+Tab): Shifts the selected block to the left; Document+Source+ → Escape Selection ...: Escapes a range of characters by replacing them with the corresponding character entities. 84 Editing documents • • • • Document+Source+ characters; → Unescape Selection ...: Replaces the character entities with the corresponding Document+Source+ lines. → Indent selection (Ctrl + I):Corrects the indentation of the selected block of Document+Source+ the caret position; → Format and Indent Element (Ctrl + I): Pretty prints the element that surrounds Document+Source+ → Import entities list : Shows a dialog that allows you to select a list of files as sources for external entities. The DOCTYPE section of your document will be updated with the chosen entities. For instance, if choosing the file chapter1.xml, and chapter2.xml, the following section is inserted in the DOCTYPE: <!ENTITY chapter1 SYSTEM "chapter1.xml"> <!ENTITY chapter2 SYSTEM "chapter2.xml"> • Triple click on an element or processing instruction - If the triple click is done before the start tag of an element or after the end tag of an element then all the element is selected by the triple click action. If it is done after the start tag or before the end tag then only the element content without the start tag and end tag is selected. • Document+Source → To Lower Case : The action works on the selection converting all upper case letters to lower case. • Document+Source → To Upper Case : The action works on the selection converting all lower case letters to upper case. • Document+Source → Capitalize lines: It capitalizes the first letter found on every new line that is selected. Only the first letter is affected, the rest of the line remains the same. If the first character on the new line is not a letter then no changes are made. • Document+Source → Join and normalize: The action works on the selection. It joins the lines by replacing the line separator with a single space character. It also normalizes the whitespaces by replacing a sequence of such characters with a single space. XML document actions • Document+XML Document → Show Definition (also available on the contextual menu of the editor panel) : move the cursor to the definition of the current element in the schema associated with the edited XML document (DTD, XML Schema, Relax NG schema, NRL schema). 85 Editing documents • Document+XML Document → Copy XPath (Ctrl+Alt+.): Copy XPath expression of current element from current editor to clipboard. • Document+XML Document+ → Go to the matching tag (Ctrl+Shift+G): Moves the cursor to the end tag that matches the start tag, or vice versa. • Document+XML Document → Go after Next Tag (Ctrl+Close Bracket): Moves the cursor to the end of the next tag. • Document+XML Document → Go after Previous Tag (Ctrl+Open Bracket): Moves the cursor to the end of the previous tag. • Document+XML Document → Associate XSLT Stylesheet (Ctrl+Open Bracket): Inserts an xmlstylesheet processing instruction at the beginning of the document for rendering the document in a Web browser when the action Open in browser is executed. XML Refactoring actions • Document+XML Refactoring+ → Surround with tag... (Ctrl+E): Selected Text in the editor is marked with the specified start and end tags. • Document+XML Refactoring+ → Surround with <tag> (Ctrl+/): Selected Text in the editor is marked with start and end tags of the last 'Surround in' action. • Document+XML Refactoring+ → Rename element (Alt+Shift+R): The element from the caret position and the elements that have the same name as the current element can be renamed according with the options from the Rename dialog. • Document+XML Refactoring+ → Rename prefix (Alt+Shift+P): The prefix of the element from the caret position and the elements that have the same prefix as the current element can be renamed according with the options from the Rename dialog. Figure 4.58. Rename Prefix Dialog Selecting the Rename current element prefix option the application will recursively traverse the current element and all its children. For example, to change the xmlns:p1="ns1" association existing in the current element to xmlns:p5="ns1" just select this option and press OK. If the association xmlns:p1="ns1" is applied on the parent of the current element, then <oXygen/> will introduce a new declaration xmlns:p5="ns1" in the current element and will change the prefix from p1 to p5. If p5 is already associated in the current element with another namespace, let's say ns5, then a dialog showing the conflict will be displayed. Pressing the OK button, the prefix will be modified from p1 to p5 without inserting a new declaration xmlns:p5="ns1". On Cancel no modification is made. 86 Editing documents Selecting the "Rename current prefix in all document" option the application will apply the change on the entire document. To apply the action also inside attribute values one must check the Rename also attribute values that start with the same prefix checkbox. • Document+XML Refactoring+ → Split element (Ctrl+Alt+D): Split the element from the caret position in two identical elements. The caret must be inside the element • Document+XML Refactoring+ → Join elements (Ctrl+Alt+J): Joins the left and the right elements relative to the current caret position. The elements must have the same name, attributes and attributes values. • Document+XML Refactoring+ tag of the current element. → Delete element tags (Ctrl+Alt+X): Deletes the start tag and end Smart editing Closing tag auto-expansion If you want to insert content into an auto closing tag like <tag/> deleting the / character saves some keystrokes by inserting a separate closing tag automatically and placing the cursor between the start and end tags: <tag></tag> Auto-breaking the edited line The Hard line wrap option breaks the edited line automatically when its length exceeds the maximum line length defined for the prettyprint operation. Smart Enter The Smart Enter option inserts an empty line between the start and end tags and places the cursor in an indented position on the empty line automatically when the cursor is between the start and end tag and Enter is pressed. Triple click A triple click with the left mouse button selects a different region of text of the current document depending on the position of the click in the document: if the click position is inside a start tag or an end tag then the entire element enclosed by that tag is selected if the click position is immediately after a start tag or immediately before an end tag then the entire content of the element enclosed by that tag is selected, including all the child elements but excluding the start tag and the end tag of the element otherwise the triple click selects the entire current line of text Syntax highlight depending on namespace prefix The syntax highlight scheme of an XML file type allows the configuration of a color per each type of token which can appear in an XML file. Distinguishing between the XML tag tokens based on the namespace prefix brings additional visual help in editing some XML file types. For example in XSLT stylesheets elements from different namespaces like XSLT, XHTML, XSL:FO or XForms are inserted in the same document and the editor panel can become cluttered. Marking tags with different colors based on the namespace prefix allows easier identification of the tags. 87 Editing documents Figure 4.59. Example of coloring XML tags by prefix Editing XML Schema schemas <oXygen/> provides a special type of editor for XML Schema schemas. This editor presents the usual text view of an XML document synchronized in real time with a graphical view of the schema components. Special content completion features The XML Schema editor of <oXygen/> enhances the content completion of the XML editor with special support for the elements and attributes of a Schematron schema inside the xs:annotation/xs:appinfo elements of an XML Schema. Figure 4.60. Schematron support in XML Schema content completion XML Schema diagram Introduction <oXygen/> provides a simple, expressive and easy to read Schema Diagram View for XML Schema schemas. With this new feature you can easily develop complex schemas, print them on multiple pages or save them as JPEG, PNG and BMP images. It helps both schema authors in developing the schema and content authors that are using the schema to understand it. 88 Editing documents <oXygen/> is the only XML Editor to provide a side by side source and diagram presentation and have them synchronized in real-time: • the changes you make in the Editor will immediately be visible in the Diagram (no background parsing). • changing the selected element in the diagram will select the underlaying code in the source editor. The diagram image can be zoomed with one of the predefined factors available on the Schema toolbar: 25%, 50%, 75%, 100%, 200%, 300% or with a custom factor that can be defined on the same toolbar. Also the zoom factor is used by the print and save actions applied on the diagram. Full model view When you create a new schema document or open an existing one the Editor Panel is divided in two sections: one containing the Schema Diagram and the second the source code. The Diagram View has two tabbed panes offering a Full Model View and a Logical Model View. Figure 4.61. XML Schema editor - full model view 89 Editing documents The Full Model View renders all the XML Schema elements with intuitive icons. The following references can be expanded in place: elements, attributes, groups, assigned types, base types, substitution elements and identity constraints. This coupled with the synchronization support makes the schema navigation easy. At the top of the diagram view there are buttons corresponding to the following actions: Show only the selected component It is a two state button. When it is turned on the diagram view presents only the top level definition of the schema from the cursor position and it is updated when the cursor goes to another definition. When it is turned off the view presents all the schema definitions. Expand to references This option controls how the schema diagram is automatically expanded. For instance if you select it and then edit a top level element or you make a refresh, the diagram will be expanded until it reaches referred components. If this is left unchecked, only the first level of the diagram is expanded, showing the top level elements. For large schemas, the editor disables this option automatically. Refresh Refreshes the Schema Diagram according to the changes in your code (changes in your imported documents or those that are not reflected automatically in the compiled schema) Show/Hide Annotations Depending on its state (selected/not selected), the documentation nodes are shown or hidden. Show/Hide Comments Depending on its state (selected/not selected), the comment nodes are shown or hidden. The contextual menu offers quick access to: • Add Child: offers a list of possible items to be added as children of the current node. • Insert - Before: offers a list of possible items to be added before the current node. • Insert - After: offers a list of possible items to be added after the current node. • Edit attributes: allows the user to edit the attributes of the current node. This action can also be triggered by double-clicking an element. Figure 4.62. Edit attributes of current XML Schema element 90 Editing documents • Remove: allows the user to remove the current element. • Collapse Children action and Expand Children action to collapse and expand all the children of the current element with only one action • Print action and Print Selection action to print the schema or only the currently selected components of the schema on paper • Save as Image action and Save Selection as mage action to save the schema or the currently selected schema components as an image on disk • Generate Sample XML Files action to launch the XML instance generation tool [95] • Refresh action to rebuild the model of the currently selected element from the schema file on disk. Also, the contextual menu offers access to the Collapse children, Expand children, Print, Print selection, Save as Image, Save Selection as Image and Refresh actions. The diagram can be saved as JPEG, PNG and BMP image. Logical model view The Logical Model View displays a diagram of the compiled schema. This is not synchronized automatically with the source editor and it is obtained after resolving the references, type extensions and type restrictions, redefinitions etc. It presents the global elements that when expanded show the types and identity constraints. If an element has a simple type then the type name is rendered. If an element has a complex type then the content type and attributes are presented. 91 Editing documents Figure 4.63. Logical Model View for XML Schema If the schema is not valid you will see an error message in the Logical Model View instead of the diagram. A double click on a schema diagram component takes the cursor of the text editor to the definition of that component. Schema components view The Diagram View also contains a Schema Components View showing the global components grouped by their namespaces and types. It allows a quick access to a component by knowing its name. 92 Editing documents Figure 4.64. Schema components view for XML Schema The view content depends on the selected view: in Full Model View it contains the global elements, attributes, simple types, complex types, groups, attribute groups. In Logical Model View it contains the global elements, grouped by their namespaces. It can be opened from Perspective → Show View → Schema Components A double click on a schema component presented in the view takes the cursor of the text editor to the definition of that component. References to XML Schema specification The same as in editing XML documents, the message of an error obtained by validation of an XML Schema document includes a specification reference to the W3C specification for XML Schema. An error message contains an Info field that when clicked will open the browser on the "XML Schema Part 1:Structures" specification at exactly the point where the error is described thus allowing you to understand the reason for that error. Figure 4.65. Link to specification for XML Schema errors 93 Editing documents Validation of an XML Schema containing a type definition with a minOccurs or maxOccurs attribute having a value larger than 256 limits the value to 256 and issues a warning about this restriction in the Message panel at the bottom of the <oXygen/> window. Otherwise for large values of the minOccurs and maxOccurs attributes the validator fails with an OutOfMemory error which practically makes <oXygen/> unusable without a restart of the entire application. Create an XML Schema from a relational database table To create an XML Schema from the structure of a relational database table use the special wizard available in the Tools menu. XML Schema Instance Generator To generate sample XML files from an XML Schema use the Generate Sample XML Files... dialog. It is opened with the action Tools → Generate Sample XML Files... Figure 4.66. The Generate Sample XML Files dialog Complete the dialog as follows: URL Schema's URL. Last used URLs are displayed in the drop-down box. Namespace Displays the namespace of the selected schema. Document root After the list is selected, a list of elements is displayed in the combo box. The user should choose the root of the XML documents to be generated. Output folder Path to the folder where the generated XML instances will be saved. 94 Editing documents Filename prefix and Extension Generated files' names have the following format: prefixN.extension, where prefix and extension are specified by the user and N represents an incremental number from 0 upto Number of instances - 1. Number of instances The number of XML files to be generated. Open first instance in editor When checked, the first generated XML file will be opened in editor. Namespaces Here the user can specify the default namespace as well as the proxies (prefixes) for namespaces. The Options tab becomes active only after the URL field is filled-in and a schema is detected. It allows the user to set specific options for different namespaces and elements. Figure 4.67. The Generate Sample XML Files dialog Namespace / Element Allows the user to define settings for: • All elements from all namespaces. This is the default setting and it can also be accessed from Options -> Preferences -> XML / XML Instance Generator. • All elements from a specific namespace. • A specific element from a specific namespace. Generate optional elements When checked, all elements will be generated, including the optional ones (having the minOccurs attribute set to 0 in the schema). 95 Editing documents Generate optional attributes When checked, all attributes will be generated, including the optional ones (having the use attribute set to optional in the schema.) Values of elements and attributes Controls the content of generated attributes and elements. Several choices are available: • None - No content is inserted; • Default - Inserts a default value depending of data type descriptor of the respective element/attribute. The default value can be either the data type name or an incremental name of the attribute or element (according to the global option from the XML instance generator preferences page); • Random - Inserts a random value depending of data type descriptor of the respective element/attribute. Preferred number of repetitions Allows the user set the preferred number of repeating elements related with minOccurs and maxOccurs defined in XML Schema. • If the value set here is between minOccurs and maxOccurs, that value will be used; • If the value set here is less than minOccurs, the minOccur value will be used; • If the value set here is greater than maxOccurs, that value will be used. Maximum recursivity level Option to set the maximum allowed depth of the same element in case of recursivity. Choice strategy Option to be used in case of xs:choice or substitutionGroup. The possible strategies are: • First - the first branch of xs:choice or the head element of substritutionGroup will be always used; • Random - a random branch of xs:choice or a substitute element or the head element of a substitutionGroup will be used. Generate the other options as comments Option to generate the other possible choices or substitutions (for xs:choice and substitutionGroup). These alternatives will be generated inside comments groups so you can uncomment them and use later. Use this option with care (for example on a restricted namespace and element) as it may generate large result files. The XML instance generation tool can be launched also directly from the XML Schema editor from a shortcut action available on the popup menu of the Full Model View of the schema diagram view. [90] The Options tab is activated by default as the Schema tab is filled with the data of the currently selected element of the diagram. 96 Editing documents Flatten an XML Schema If an XML Schema is organized on several levels linked by xs:include statements sometimes it is more convenient to work on the schema as a single flat file. To flatten schema <oXygen/> recursively adds included files to the master one. That means <oXygen/> replaces the xs:include elements with the ones coming from the included files. This action can be accessed from the schema editor's contextual menu -> Refactoring -> Flatten Schema. In the following example master.sxd includes slave.xsd. This, in turn, includes slave1.xsd which includes both slave2.xsd and slave3.xsd. Listing of master.xsd <?xml version="1.0" encoding="UTF-8"?> <xs:schema xmlns:xs="http://www.w3.org/2001/XMLSchema" targetNamespace="tns" xmlns: <!-- included elements from slave.xsd --> <xs:include schemaLocation="slave.xsd"></xs:include> <!-- master.xsd --> <xs:element name="element1"> <xs:complexType> <xs:sequence> <xs:element ref="tns:element2" /> </xs:sequence> </xs:complexType> </xs:element> </xs:schema> Listing of slave.xsd <?xml version="1.0" encoding="UTF-8"?> <xs:schema xmlns:xs="http://www.w3.org/2001/XMLSchema" targetNamespace="tns" xmlns: <!-- included elements from slave1.xsd --> <xs:include schemaLocation="slave1.xsd"></xs:include> <!-- slave --> <xs:element name="element2" xmlns:c="x"/> </xs:schema> Listing of slave1.xsd <?xml version="1.0" encoding="UTF-8"?> <xs:schema xmlns:xs="http://www.w3.org/2001/XMLSchema" targetNamespace="tns" xmlns: <!-- included elements from slave2.xsd --> <xs:include schemaLocation="slave2.xsd"></xs:include> <!-- included elements from slave3.xsd --> <xs:include schemaLocation="slave3.xsd"></xs:include> <!-- slave1 --> <xs:element name="element0"/> <xs:element name="element7"/> 97 Editing documents <xs:element name="element7Substitute" substitutionGroup="tns:element7" <xs:element name="element6"> <xs:complexType> <xs:sequence> <xs:element ref="tns:element7"/> </xs:sequence> </xs:complexType> </xs:element> <xs:complexType name="type1"> <xs:sequence> <xs:element ref="tns:element0"/> </xs:sequence> </xs:complexType> </xs:schema> block="ex Listing of slave2.xsd <?xml version="1.0" encoding="UTF-8"?> <xs:schema xmlns:xs="http://www.w3.org/2001/XMLSchema" targetNamespace="tns" xmlns:tns="tns" elementFormDefault="qualified" attributeFormDefault="qualified"> <!-- slave2 --> <xs:element name="a"></xs:element> <a:element name="element9" xmlns:a="http://www.w3.org/2001/XMLSchema"> <xs:complexType> <xs:sequence> <!-- This element is from the target namespace --> <xs:element name="element3" xmlns:b="http://www.w3.org/2001/XMLSchema"/> <!-- Element from no namespace --> <xs:element name="element4" form="unqualified"/> <a:element ref="tns:a"></a:element> </xs:sequence> <!-- Attribute from the target namespace --> <b:attribute name="attr1" type="xs:string" xmlns:b="http://www.w3.org/2001/XM <!-- Attribute from the no namespace --> <xs:attribute name="attr2" type="xs:string" form="unqualified"/> </xs:complexType> </a:element> </xs:schema> Listing of slave3.xsd <?xml version="1.0" encoding="UTF-8"?> <xs:schema xmlns:xs="http://www.w3.org/2001/XMLSchema" targetNamespace="tns" finalD <!-- slave3 --> <xs:complexType name="ct1"/> <xs:complexType name="ct2" final="extension"> <xs:complexContent> 98 Editing documents <xs:extension base="tns:ct1"/> </xs:complexContent> </xs:complexType> <xs:simpleType name="st1" final="union"> <xs:restriction base="xs:integer"/> </xs:simpleType> <xs:simpleType name="st2" final="union"> <xs:restriction base="tns:st1"> <xs:enumeration value="1"/> <xs:enumeration value="2"/> </xs:restriction> </xs:simpleType> <xs:element name="e1" type="tns:c1" final="restriction"/> <xs:element name="e2ext" type="tns:c2" substitutionGroup="tns:e1"></xs:element> <xs:complexType name="c1"> <xs:sequence> <xs:element ref="tns:e1"/> </xs:sequence> </xs:complexType> <xs:complexType name="c2"> <xs:complexContent> <xs:extension base="tns:c1"> <xs:sequence> <xs:element ref="tns:e1"/> </xs:sequence> </xs:extension> </xs:complexContent> </xs:complexType> </xs:schema> Listing of master.xsd after it has been flattened <?xml version="1.0" encoding="UTF-8"?> <xs:schema targetNamespace="tns" xmlns:a="a" xmlns:b="b" xmlns:c="c" xmlns:tns="tns xmlns:xs="http://www.w3.org/2001/XMLSchema"> <!-- included elements from slave.xsd --> <!-- included elements from slave1.xsd --> <!-- included elements from slave2.xsd --> <!-- slave2 --> <xs:element block="restriction" name="a"/> <a:element block="restriction" name="element9" xmlns:a="http://www.w3.org/2001/XM <xs:complexType> <xs:sequence> <!-- This element is from the target namespace --> <xs:element block="restriction" form="qualified" name="element3" xmlns:b="http://www.w3.org/2001/XMLSchema"/> <!-- Element from no namespace --> <xs:element block="restriction" form="unqualified" name="element4"/> <a:element ref="tns:a"/> </xs:sequence> <!-- Attribute from the target namespace --> <b:attribute form="qualified" name="attr1" type="xs:string" 99 Editing documents xmlns:b="http://www.w3.org/2001/XMLSchema"/> <!-- Attribute from the no namespace --> <xs:attribute form="unqualified" name="attr2" type="xs:string"/> </xs:complexType> </a:element> <!-- included elements from slave3.xsd --> <!-- slave3 --> <xs:complexType block="restriction" final="restriction" name="ct1"/> <xs:complexType block="restriction" final="extension" name="ct2"> <xs:complexContent> <xs:extension base="tns:ct1"/> </xs:complexContent> </xs:complexType> <xs:simpleType final="union" name="st1"> <xs:restriction base="xs:integer"/> </xs:simpleType> <xs:simpleType final="union" name="st2"> <xs:restriction base="tns:st1"> <xs:enumeration value="1"/> <xs:enumeration value="2"/> </xs:restriction> </xs:simpleType> <xs:element block="restriction" final="restriction" name="e1" type="tns:c1"/> <xs:element block="restriction" final="restriction" name="e2ext" substitutionGrou type="tns:c2"/> <xs:complexType block="restriction" final="restriction" name="c1"> <xs:sequence> <xs:element ref="tns:e1"/> </xs:sequence> </xs:complexType> <xs:complexType block="restriction" final="restriction" name="c2"> <xs:complexContent> <xs:extension base="tns:c1"> <xs:sequence> <xs:element ref="tns:e1"/> </xs:sequence> </xs:extension> </xs:complexContent> </xs:complexType> <!-- slave1 --> <xs:element block="restriction" name="element0"/> <xs:element block="restriction" name="element7"/> <xs:element block="extension" name="element7Substitute" substitutionGroup="tns:el <xs:element block="restriction" name="element6"> <xs:complexType> <xs:sequence> <xs:element ref="tns:element7"/> </xs:sequence> </xs:complexType> </xs:element> <xs:complexType block="restriction" name="type1"> <xs:sequence> <xs:element ref="tns:element0"/> </xs:sequence> 100 Editing documents </xs:complexType> <!-- slave --> <xs:element name="element2" xmlns:c="x"/> <!-- master.xsd --> <xs:element name="element1"> <xs:complexType> <xs:sequence> <xs:element ref="tns:element2"/> </xs:sequence> </xs:complexType> </xs:element> </xs:schema> The case of XML Schema redefinitions is also handled as the example below shows. Listing of master.xsd <?xml version="1.0" encoding="UTF-8"?> <xs:schema xmlns:xs="http://www.w3.org/2001/XMLSchema"> <xs:redefine schemaLocation="slave1.xsd"> <xs:complexType name="tp"> <xs:complexContent> <xs:extension base="tp"> <xs:choice> <xs:element name="el2" type="xs:NCName"/> <xs:element name="el3" type="xs:string"/> </xs:choice> </xs:extension> </xs:complexContent> </xs:complexType> </xs:redefine> <xs:element name="el" type="tp"/> </xs:schema> Listing of slave1.xsd <?xml version="1.0" encoding="UTF-8"?> <xs:schema xmlns:xs="http://www.w3.org/2001/XMLSchema"> <xs:redefine schemaLocation="slave2.xsd"> <xs:complexType name="tp"> <xs:complexContent> <xs:extension base="tp"> <xs:attribute name="a"/> </xs:extension> </xs:complexContent> </xs:complexType> </xs:redefine> </xs:schema> Listing of slave2.xsd 101 Editing documents <?xml version="1.0" encoding="UTF-8"?> <xs:schema xmlns:xs="http://www.w3.org/2001/XMLSchema"> <xs:complexType name="tp"> <xs:sequence> <xs:element name="el" type="xs:string"/> </xs:sequence> </xs:complexType> </xs:schema> Listing of master.xsd after it has been flattened> <?xml version="1.0" encoding="UTF-8"?> <xs:schema xmlns:xs="http://www.w3.org/2001/XMLSchema"> <xs:complexType name="tp"> <xs:complexContent> <xs:extension base="tp_Redefined1"> <xs:choice> <xs:element name="el2" type="xs:NCName"/> <xs:element name="el3" type="xs:string"/> </xs:choice> </xs:extension> </xs:complexContent> </xs:complexType> <xs:complexType name="tp_Redefined1"> <xs:complexContent> <xs:extension base="tp_Redefined0"> <xs:attribute name="a"/> </xs:extension> </xs:complexContent> </xs:complexType> <xs:complexType name="tp_Redefined0"> <xs:sequence> <xs:element name="el" type="xs:string"/> </xs:sequence> </xs:complexType> <xs:element name="el" type="tp"/> </xs:schema> The references to the included schema files can be resolved through an XML Catalog. XML Schema regular expressions builder To generate XML Schema regular expressions use the action Tools → XML Schema Regular Expressions Builder It will open a dialog which allows you to build and test regular expressions. 102 Editing documents Figure 4.68. XML Schema regular expressions builder dialog The dialog contains the following sections: • Regular expressions editor - allows you edit the regular expression to be tested and used. Content completion is available and presents a list with all the predefined expressions. It is accessible by pressing Ctrl + Space. • Category combo box - here you can choose from several categories of predefined expressions. The selected category influences the displayed expressions in the Available expressions table. • Available expressions table - it consists of two columns. The first one presents the regular expressions, the second displays a short description of the expressions. The set of expressions depend on the category selected in the previous combo box. You can add an expression in the Regular expressions editor by double-clicking on the expression row in the table You will notice that in the case of Character categories and Block names the expressions are also listed in complementary format. For example: \p{Lu} - Uppercase letters; \P{Lu} - Complement of: Uppercase letters. • Evaluate expression on radio buttons - there are available two options: Evaluate expression on each line and Evaluate expression on all text . If the first option is selected the edited expression will be applied on each line from the Test area. If the second option is selected the expression will be applied on the whole text. • Test area - it is a text editor which allows you to enter a text sample on which the regular expression will be applied. The matches of the expression will be highlighted. After editing and testing your regular expression you can insert it in the current editor. The Insert button will become active when an editor is opened in the background and there is an expression in the Regular expressions editor. 103 Editing documents The regular expression builder cannot be used to insert regular expressions in the grid version of a document editor. Accordingly the Insert button of the dialog will be disabled if the current document is edited in grid mode. Generating HTML documentation for an XML Schema To generate HTML documentation for a XML Schema document similar with the Javadoc documentation for Java classes use the dialog Schema documentation. It is opened with the action Tools → Generate Documentation → Schema Documentation... (Ctrl+Alt+S). It can be also opened from the Project Tree contextual menu: Generate Documentation → Schema Documentation... The dialog enables the user to configure a large set of parameters of the process of generating the HTML documentation. The HTML documentation contains images corresponding to the schema definitions as the ones displayed by the schema diagram view. These images are divided in clickable areas which are linked to the definitions of the clicked names of types or elements. The documentation of a definition includes a Used By section with links to the other definitions which refer to it. Also the HTML or XHTML tags used inside the xs:documentation elements of the input XML Schema for formatting the documentation text (for example <b>, <i>, <u>, <ul>, <li>, etc.) are preserved in the generated HTML documentation. 104 Editing documents Figure 4.69. The XML Schema documentation dialog The text field of the Input panel must contain the full path to the XML Schema (XSD) file, if the schema is composed of only one file, or the full path to the main XSD file of the XML Schema document, that is the file that includes or imports other modules of the document. <oXygen/> is able to include images of the XML Schema components in the final HTML result. The supported image formats are PNG and JPG. The image of an XML Schema component contains the graphical representation of that component as it is rendered in the Schema Diagram panel of the <oXygen/>'s XSD editor panel. The parameters related to images are: Full model diagrams Include in the HTML result the representation of each schema component in the <oXygen/>'s Full Model View of the schema. Logical model diagrams Include in the HTML result the representation of each schema component in the <oXygen/>'s Logical Model View of the schema. Hide comments When checked the comments are not included in the generated schema documentation. 105 Editing documents Hide annotations When checked the annotations are not included in the generated schema documentation. Image type One of the PNG or JPG formats. The Options panel contain parameters for the level of details included in the documentation: Title The title displayed at the beginning of the HTML document and in the title bar of the web browser. Sort by component If this parameter is set to "true", the schema components are presented sorted by type and name. Otherwise, they are presented in the order that they appear in the schema. By default, this parameter is set to "true." Use JavaScript The generated XHTML document uses JavaScript to hide some details like the underlying schema component XML representation, which can be made to appear with a button press. Since some people have ideological objections to JavaScript, this feature can be turned off. If this parameter is set to "true", JavaScript will be used in the generated documentation. Otherwise, it won't. By default, this parameter is set to "true." Search Included Schemas If this parameter is set to "true", xs3p will search for components in "included" schemas when creating links and generating the XML Instance Representation table. When this parameter is set to "true", the "linksFile" parameter must also be set, which is described below. Otherwise, an error will be raised. This search is recursive, so schemas "included" in the current schema's "included" schemas will also be searched. Search Imported Schemas If this parameter is set to "true", xs3p will search for components in "imported" schemas when creating links and generating the XML Instance Representation table. The above discussion for the "searchIncludedSchemas" parameter also applies to this parameter. Also, when this parameter is set to "true", the "linksFile" parameter must also be set. Print all super-types The type hierarchy of a global type definition is displayed in its section. If this parameter is set to "true", all super-types of the current type are shown in the type hierarchy. Otherwise, only the immediate parent type is displayed. By default, this parameter is set to "true." Print all sub-types This parameter has a similar concept as printAllSuperTypes. If it is set to "true", all sub-types of the current type are shown in the type hierarchy. Otherwise, only the direct sub-types are displayed. By default, this parameter is set to "true." Print legend If this parameter is set to "true", the Legend section is included. Otherwise, it isn't. By default, this parameter is set to "true." Print glossary If this parameter is set to "true", the Glossary section is included. Otherwise, it isn't. By default, this parameter is set to "true." Print NS prefixes If this parameter is set to "true", namespace information is provided when displaying sample instances and references. This is done by 106 Editing documents providing a prefix in front of tags and references, which when clicked, will take the user to the declared namespace. The prefix matches the prefix in the namespace declaration in the schema. If not set to "true", namespace prefixes are not displayed. By default, this parameter is set to "true." The Output panel contains parameters for the output folder and output file: Output folder The path of the folder containing the HTML result and the image files. Diagrams folder The folder where the images are going to be saved relative to the output file. If there is no folder specified, the images will be saved in the same directory as the output file. Generate chunks (Recommended for If it is true the HTML result is organized as a main file containing large schemas) only a table of contents with links to other HTML documents containing descriptions of the schema components. If it is false all the documentation will be stored in one HTML file. Use hash codes for component names If enabled then the anchors and links will be generated using the hashcode of the component identifier instead of using the identifier itself. This is useful when the schema component names contain characters that are not directly supported by the browsers or by the file system. Generate documentation also for in- It will be generated HTML documentation also for the XML cluded and imported schemas Schemas included or imported by the schema specified in the Input panel. The documentation can be navigated from a schema to the included/imported ones and back to the first schema following HTML hyperlinks. Generate documentation only for this It will not be generated HTML documentation for the XML schema Schemas included or imported by the schema specified in the Input panel. Output file name The name of the HTML file containing the documentation of the XML Schema Links file the file which maps from file locations of "included" and "imported" schemas to the file locations of their xs3p-generated documentation. This file must be provided if either "searchIncludedSchemas" or "searchImportedSchemas" is set to true. If relative addresses are used to specify the location of external xs3p-generated documentation, they must be relative to documentation file currently generated. Note The external documentation files does not need to exist at the time of generating the documentation for the current schema. The mapping is specified in XML. The dtd and schema for this mapping syntax are "links.dtd" and "links.xsd" respectively. 107 Editing documents Note The "xmlns" namespace attribute with the correct namespace must be provided in the mapping file for the xs3p stylesheet to work. CSS file The path to a CSS file which will be referred from the result HTML. This is useful for specifying a custom CSS stylesheet to be used in the generated HTML documentation instead of the default one. Open in browser If it is true the HTML result will be opened with the default Internet browser set in Preferences or with the system application for HTML files. The same HTML documentation can be generated for an XML Schema from the command line by running the script schemaDocumentation.bat (on Windows) / schemaDocumentation.sh (on Mac OS X / Unix / Linux) located in the <oXygen/> installation folder. The script can be integrated in an external batch process launched from the command line. The command line parameters of the script are the same as the parameters that can be set in the dialog described above and are also explained inside the script file. XML Schema editor specific actions The list of actions specific for the XML Schema editor of <oXygen/> is: • Document+XML Document → Show Definition (also available on the contextual menu of the editor panel) : move the cursor to the definition of the current element in this XSD schema. Search References and Declarations All the following actions can be applied on xs:element, xs:attribute, xs:attributeGroup, xs:complexType, xs:simpleType, xs:group, xs:key, xs:unique or xs:notation parameters only. • Document+References+ → References in Project (Ctrl+Shift+R): Searches in the project all references of the item found at current cursor position. Note This action and the following ones can also be accessed from XSD editor's contextual menu -> Search. • Document+References → References in File: Searches in the current file all references of the item found at the current cursor position. • Document+References → References Starting from File: Searches all references of the item at the cursor position in the current edited file and all its included and imported files. • Document+References → References Starting from...: Opens a dialog that allows the user to specify the list of files used to start searching from. Pressing OK begins searching all references of the item at the cursor position in the selected files and their included and imported files. 108 Editing documents • Document+References+ → Declarations in Project (Ctrl+Shift+D): Searches in the project all declarations of the item found at current cursor position. Note This action and the following ones can also be accessed from XSD editor's contextual menu -> Search. • Document+References → Declarations in File: Searches in the current file all declarations of the item at the current cursor position. • Document+References → Declarations Starting from File: Searches all declarations of the item at the cursor position in the current edited file and all its included and imported files. • Document+References → Declarations Starting from...: Opens the Start locations dialog that allows the user to specify the list of files used to start searching from. Pressing OK begins searching all declarations of the item at the cursor position in the selected files and all their included and imported files. • Document+References → Occurrences in File (Ctrl+Shift+U): Searches all occurrences of the item at the caret position in the currently edited file. XML Schema actions • Document+Schema → Show definition (Ctrl + Shift + ENTER): Move the cursor to the definition of the referenced XML Schema item - element, group, simple or complex type. The same action is executed on a double click on a component name in the Logical Model View of the schema or in the Schema Components view. Note The actions are available when the current editor is of XML Schema type. Editing Relax NG schemas <oXygen/> provides a special type of editor for Relax NG schemas. This editor presents the usual text view of an XML document synchronized in real time with a graphical view of the schema components. Relax NG schema diagram Introduction <oXygen/> provides a simple, expressive and easy to read Schema Diagram View for Relax NG schemas. With this new feature you can easily develop complex schemas, print them on multiple pages or save them as JPEG, PNG and BMP images. It helps both schema authors in developing the schema and content authors that are using the schema to understand it. <oXygen/> is the only XML Editor to provide a side by side source and diagram presentation and have them synchronized in real-time: • the changes you make in the Editor will immediately be visible in the Diagram (no background parsing). 109 Editing documents • changing the selected element in the diagram will select the underlaying code in the source editor. Full model view When you create a new schema document or open an existing one the Editor Panel is divided in two sections: one containing the Schema Diagram and the second the source code. The Diagram View has two tabbed panes offering a Full Model View and a Logical Model View. Figure 4.70. Relax NG schema editor - full model view The Full Model View renders all the XML Schema elements with intuitive icons. The following references can be expanded in place: patterns, includes and external references. This coupled with the synchronization support makes the schema navigation easy. All the element and attribute names are editable: double-click on any name to start editing it. 110 Editing documents Logical model view The Logical Model View presents the compiled schema which is a single pattern. The patterns that form the element content are defined as a top level pattern with a generated name. The name is generated depending of the name class of the elements. Figure 4.71. Logical Model View for a Relax NG schema At the top of the diagram view there are buttons corresponding to the following actions: Expand to references This option controls how the schema diagram is automatically expanded. For instance if you select it and then edit a top level element or you make a refresh, the diagram will be expanded until it reaches referred components. If this is left unchecked, only the first level of the diagram is expanded, showing the top level elements. For large schemas, the editor disables this option automatically. Refresh Refreshes the Schema Diagram according to the changes in your code (changes in your imported documents or those that are not reflected automatically in the compiled schema) Show/Hide Annotations Depending on its state (selected/not selected), the documentation nodes are shown or hidden. Show/Hide Comments Depending on its state (selected/not selected), the comment nodes are shown or hidden. The contextual menu offers quick access to the Collapse children, Expand children, Print, Save as Image, Save Selection as Image and Refresh actions. The diagram can be saved as JPEG, PNG and BMP image. If the schema is not valid you will see an error message in the Logical Model View instead of the diagram. 111 Editing documents Schema components view The Schema Components View presents a list with the patterns that appear in the diagram in both the Full Model View and Logical Model View cases. It allows a quick access to a component by knowing its name. It can be opened from Perspective → Show View → Schema Components Figure 4.72. Schema components view for Relax NG Relax NG editor specific actions The list of actions specific for the Relax NG (full syntax) editor of <oXygen/> is: • Document+XML Document → Show Definition (also available on the contextual menu of the editor panel) : move the cursor to the definition of the current element in this Relax NG (full syntax) schema. Search References and Declarations All the following actions can be applied on ref and parentRef parameters only. • Document+References+ → References in Project (Ctrl+Shift+R): Searches in the project all references of the item found at current cursor position. Note This action and the following ones can also be accessed from RNG editor's contextual menu -> Search. • Document+References → References in File: Searches in the current file all references of the item found at the current cursor position. 112 Editing documents • Document+References → References Starting from File: Searches all references of the item at the cursor position in the current edited file and all its included and imported files. • Document+References → References Starting from...: Opens a dialog that allows the user to specify the list of files used to start searching from. Pressing OK begins searching all references of the item at the cursor position in the selected files and their included and imported files. All the following actions can be applied on named define parameters only. • Document+References+ → Declarations in Project (Ctrl+Shift+D): Searches in the project all declarations of the item found at current cursor position. Note This action and the following ones can also be accessed from RNG editor's contextual menu -> Search. • Document+References → Declarations in File: Searches in the current file all declarations of the item at the current cursor position. • Document+References → Declarations Starting from File: Searches all declarations of the item at the cursor position in the current edited file and all its included and imported files. • Document+References → Declarations Starting from...: Opens the Start locations dialog that allows the user to specify the list of files used to start searching from. Pressing OK begins searching all declarations of the item at the cursor position in the selected files and all their included and imported files. • Document+References → Occurrences in File (Ctrl+Shift+U): Searches all occurrences of the item at the caret position in the currently edited file. Editing NVDL schemas <oXygen/> provides a special type of editor for NVDL schemas. This editor presents the usual text view of an XML document synchronized in real time with a graphical view of the schema components. NVDL schema diagram Introduction <oXygen/> provides a simple, expressive and easy to read Schema Diagram View for NVDL schemas. With this new feature you can easily develop complex schemas, print them on multiple pages or save them as JPEG, PNG and BMP images. It helps both schema authors in developing the schema and content authors that are using the schema to understand it. <oXygen/> is the only XML Editor to provide a side by side source and diagram presentation and have them synchronized in real-time: • the changes you make in the Editor will immediately be visible in the Diagram (no background parsing). • changing the selected element in the diagram will select the underlaying code in the source editor. 113 Editing documents Full model view When you create a new schema document or open an existing one the Editor Panel is divided in two sections: one containing the Schema Diagram and the second the source code. The Diagram View has two tabbed panes offering a Full Model View and a Logical Model View. The Logical Model View is not available for NVDL. Figure 4.73. NVDL schema editor - full model view The Full Model View renders all the NVDL elements with intuitive icons. This coupled with the synchronization support makes the schema navigation easy. Double click on any diagram component in order to edit its properties. At the top of the diagram view there are buttons corresponding to the following actions: Expand to references This option controls how the schema diagram is automatically expanded. For instance if you select it and then edit a top level element or you make a refresh, the diagram will be expanded until it reaches referred components. If this is left unchecked, only the first level of the diagram is expanded, showing the top level elements. 114 Editing documents For large schemas, the editor disables this option automatically. Refresh Refreshes the Schema Diagram according to the changes in your code (changes in your imported documents or those that are not reflected automatically in the compiled schema) Show/Hide Annotations Depending on its state (selected/not selected), the documentation nodes are shown or hidden. Show/Hide Comments Depending on its state (selected/not selected), the comment nodes are shown or hidden. The contextual menu offers quick access to the Collapse children, Expand children, Print, Save as Image, Save Selection as Image and Refresh actions. The diagram can be saved as JPEG, PNG and BMP image. If the schema is not valid you will see an error message in the Logical Model View instead of the diagram. Schema components view The NVDL Schema Components View presents a list with the named or anonymous rules that appear in the diagram. It allows a quick access to a rule by knowing its name. It can be opened from Perspective → Show View → Schema Components Figure 4.74. Schema components view for NVDL NVDL editor specific actions The list of actions specific for the NVDL editor of <oXygen/> is: • Document+XML Document → Show Definition (also available on the contextual menu of the editor panel) : move the cursor to its definition in the schema used by NVDL to validate it. Search References and Declarations All the following actions can be applied on mode name, useMode and startMode attributes only. • Document+References+ → References in Project (Ctrl+Shift+R): Searches in the project all references of the item found at current cursor position. 115 Editing documents Note This action and the following ones can also be accessed from NVDL editor's contextual menu -> Search. • Document+References → References in File: Searches in the current file all references of the item found at the current cursor position. • Document+References → References Starting from File: Searches all references of the item at the cursor position in the current edited file and all its included and imported files. • Document+References → References Starting from...: Opens a dialog that allows the user to specify the list of files used to start searching from. Pressing OK begins searching all references of the item at the cursor position in the selected files and their included and imported files. All the following actions can be applied on named define parameters only. • Document+References+ → Declarations in Project (Ctrl+Shift+D): Searches in the project all declarations of the item found at current cursor position. Note This action and the following ones can also be accessed from NVDL editor's contextual menu -> Search. • Document+References → Declarations in File: Searches in the current file all declarations of the item at the current cursor position. • Document+References → Declarations Starting from File: Searches all declarations of the item at the cursor position in the current edited file and all its included and imported files. • Document+References → Declarations Starting from...: Opens the Start locations dialog that allows the user to specify the list of files used to start searching from. Pressing OK begins searching all declarations of the item at the cursor position in the selected files and all their included and imported files. • Document+References → Occurrences in File (Ctrl+Shift+U): Searches all occurrences of the item at the caret position in the currently edited file. Editing XSLT stylesheets <oXygen/> provides special support for developing XSLT 1.0 / 2.0 stylesheets. Validating XSLT stylesheets Validation of XSLT stylesheets documents is performed with the help of an XSLT processor configurable from user preferences according to the XSLT version: 1.0 or 2.0. For XSLT 1.0 the options are: Xalan, Saxon 6.5.5, Saxon 8B, Saxon 8SA (if the user installs it as additional package), MSXML 4.0, MSXML.NET, a JAXP transformer specified by the main Java class. For XSLT 2.0 the options are: Saxon 8B, Saxon 8SA (if the user installs it as additional package), a JAXP transformer specified by the main Java class. 116 Editing documents The Validate toolbar provides a button <oXygen/> user preferences. Validation options for quick access to the XSLT options in the Custom validation of XSLT stylesheets If you need to validate an XSLT stylesheet with other validation engine than the built-in ones you have the possibility to configure external engines as custom XSLT validation engines in <oXygen/>. After such a custom validator is properly configured in Preferences it can be applied on the current document with just one click on the External Validation toolbar. The document is validated against the schema declared in the document. Figure 4.75. External validation toolbar There are two validators configured by default: MSXML 4.0 included in <oXygen/> (Windows edition). It is associated to the XSL Editor type in Preferences. MSXML.NET included in <oXygen/> (Windows edition). It is associated to the XSL Editor type in Preferences. Content Completion in XSLT stylesheets The content completion assistant adds special features for editing XSLT stylesheets. Inside XSLT templates of an XSLT stylesheet the content completion presents also all the elements allowed in any context by the schema associated to the result of applying the edited stylesheet. That schema is defined by the user in the Content Completion / XSL preferences. There are presented all the elements because in a template there is no context defined for the result document so the user is allowed to insert any element defined by the schema of the result document. Namespace prefixes in scope for the current context are presented at the top of the content completion window to speed the insertion of prefixed elements into the document. 117 Editing documents Figure 4.76. Namespace prefixes in the content completion window Content Completion in XPath expressions In XSLT stylesheets the content completion assistant provides all the features available in the editor for XML documents and also adds some enhancements. In XPath expressions used in attributes of XSLT stylesheets elements like match, select and test it offers XPath functions, XSLT functions, XSLT axes and user defined functions. If a transformation scenario was defined and associated to the edited stylesheet the content completion assistant computes and presents elements and attributes based on the input XML document selected in the scenario and on the current context in the stylesheet. The associated document is displayed in the XSLT/XQuery input view. Content Completion for XPath expressions is started: • on XPath operators detected in one of the match, select and test attributes of XSLT elements: ", ', /, //, (, [, |, :, ::, $ • for attribute value templates of non XSLT elements, that is the '{' character is detected as the first character of the attribute value • on request if the combination CTRL + Space is pressed inside an edited XPath expression The items presented in the content completion window are dependent on the context of the current XSLT element, the XML document associated with the edited stylesheet in the transformation scenario of the stylesheet and the XSLT version of the stylesheet (1.0 or 2.0). For example if the document associated with the edited stylesheet is: <personnel> <person id="Big.Boss"> <name> <family>Boss</family> <given>Big</given> </name> <email>[email protected]</email> <link subordinates="one.worker"/> </person> <person id="one.worker"> <name> <family>Worker</family> 118 Editing documents <given>One</given> </name> <email>[email protected]</email> <link manager="Big.Boss"/> </person> </personnel> and you enter an element xsl:template using the content completion assistant the match attribute is inserted automatically, the cursor is placed between the quotes and the XPath content completion assistant automatically displays a popup window with all the XSLT axes, XPath functions and elements and attributes from the XML input document that can be inserted in the current context. The set of XPath functions depends on the XSLT version declared in the root element - xsl:stylesheet (1.0 or 2.0). Figure 4.77. Content Completion in the match attribute If the cursor is inside the select attribute of an xsl:for-each, xsl:apply-templates, xsl:value-of or xsl:copyof element the content completion proposals are dependent of the path obtained by concatenating the XPath expressions of the parent XSLT elements xsl:template and xsl:for-each like the following figure shows: Figure 4.78. Content Completion in the select attribute Also XPath expressions typed in the test attribute of an xsl:if or xsl:choose / xsl:when element benefit of the assistance of the content completion. 119 Editing documents Figure 4.79. Content Completion in the test attribute XSLT variable references are easier to insert in XPath expressions with the help of the content completion popup triggered by the $ character which signals the start of such a reference in an XPath expression. Figure 4.80. Content Completion in the test attribute The same content completion assistant is available also in attribute value templates of non XSLT elements if the '{' character is the first one in the value of the attribute. Figure 4.81. Content Completion in attribute value templates 120 Editing documents Tooltip Helper for the XPath Functions Arguments When editing the arguments of an XPath/XSLT function, <oXygen/> keeps track of the current entered argument by displaying a tooltip above the function containing the function signature. The currently edited argument is bolded. When moving the caret through the expression, the tooltip is updated to reflect the argument that is found at the caret position. Let's consider the folowing example. We are concatenating the absolute value of two variables: v1 and v2. <xsl:template match="/"> <xsl:value-of select="concat(abs($v1), abs($v2))"></xsl:value-of> </xsl:template> When moving the caret before the first "abs" function, the editor will identify that it represent the first argument of the "concat" function, and will show in bold that the first argument is named "$arg1" and is of type "xdt:anyAtomicType" and it is optional. The function takes also other arguments, having the same type, and returns a "xs:string". Figure 4.82. XPath Tooltip Helper - Identify the concat function first argument Moving the caret on the first variable "$v1", the editor identifies the "abs" as context function and shows its signature: Figure 4.83. XPath Tooltip Helper - Identify the abs function argument Further, clicking on the second "abs" function name, the editor detects that it represents the second argument of the "concat function". It redisplays the correct tooltip, bolding the second argument. Figure 4.84. XPath Tooltip Helper - Identify the concat function second argument The tooltip helper is present also in the XPath Toolbar and the XPath Builder. 121 Editing documents Code templates When the content completion is invoked by pressing CTRL+Space it also presents a list of code templates specific to the type of the active editor. Such a code template provides a shortcut for inserting a small document fragment at the current caret position. <oXygen/> comes with a large set of ready-to use templates for XSL and XML Schema documents. Example 4.3. The XSL code template called Template-Match-Mode Typing t in an XSL document and selecting tmm in the content assistant pop-up window will insert the following template at the caret position in the document: <xsl:template match="" mode=""> </xsl:template> Other templates can be easily defined by the user. Also the code templates can be shared with other users. The XSLT/XQuery Input View The structure of the XML document associated to the edited XSLT stylesheet , or of the source documents of the edited XQuery is displayed in a tree form in a view called XSLT/XQuery Input. The tree nodes represent the elements of the documents. The XSLT Input View If you click on a node, the corresponding template from the stylesheet will be highlighted. A node can be dragged and dropped in the editor area for quickly inserting xsl:template, xsl:for-each or other XSLT elements with the match / select / test attribute already filled with the correct XPath expression referring to the dragged tree node and based on the current editing context of the drop spot. Figure 4.85. XSLT input view For example for the following XML document 122 Editing documents <personnel> <person id="Big.Boss"> <name> <family>Boss</family> <given>Big</given> </name> <email>[email protected]</email> <link subordinates="one.worker"/> </person> <person id="one.worker"> <name> <family>Worker</family> <given>One</given> </name> <email>[email protected]</email> <link manager="Big.Boss"/> </person> </personnel> and the following XSLT stylesheet <?xml version="1.0" encoding="UTF-8"?> <xsl:stylesheet xmlns:xsl="http://www.w3.org/1999/XSL/Transform" version="2.0"> <xsl:template match="personnel"> <xsl:for-each select="*"> </xsl:for-each> </xsl:template> </xsl:stylesheet> if you drag the given element and drop it inside the xsl:for-each element a popup menu will be displayed. Figure 4.86. XSLT Input drag and drop popup menu Select for example Insert xsl:value-of and the result document will be: 123 Editing documents Figure 4.87. XSLT Input drag and drop result The Query Input View A node can be dragged and dropped in the editor area for quickly inserting doc() or other XQuery expressions. Figure 4.88. XQuery input view For example for the following XML documents <movies> <movie id="1"> <title>The Green Mile</title> <year>1999</year> </movie> <movie id="2"> <title>Taxi Driver</title> <year>1976</year> </movie> </movies> and <reviews> <review id="100" movie-id="1"> <rating>5</rating> <comment>It is made after a great Stephen King book.</comment> <author>Paul</author> </review> 124 Editing documents <review id="101" movie-id="1"> <rating>3</rating> <comment>Tom Hanks does a really nice acting.</comment> <author>Beatrice</author> </review> <review id="104" movie-id="2"> <rating>4</rating> <comment>Robert De Niro is my favorite actor.</comment> <author>Maria</author> </review> </reviews> and the following XQuery let $review := doc("reviews.xml") for $movie in doc("movies.xml")/movies/movie let $movie-id := $movie/@id return <movie id="{$movie/@id}"> {$movie/title} {$movie/year} <maxRating> { } </maxRating> </movie> if you drag the rating element and drop between the braces a popup menu will be displayed. Figure 4.89. XQuery Input drag and drop popup menu Select for example FLWOR rating and the result document will be: Figure 4.90. XQuery Input drag and drop result 125 Editing documents The Stylesheet Templates view The list of all templates of the edited stylesheet is presented in the view called Stylesheet Templates. Figure 4.91. The Stylesheet Templates view It has two operation modes: the name and match attributes of templates presented in separate columns of the table, and the name and match attributes presented in the same column. In the second case the entry in the Name + Match column is composed of the value of the name attribute followed by a space character and the value of the match attribute. The operation mode is switched from the action Join/Split name and match columns available on the toolbar of the view. The view provides three levels of syncronization with the editor panel: No selection update The templates list selection is not synchronized with the caret position in the editor panel. Selection update on document change The templates list selection is synchronized with the caret position in the editor panel when the document is modified by an editing action. Selection update on caret move The templates list selection is synchronized with the caret position in the editor panel in real time, that is the list selection is updated for every move of the caret in the editor panel. 126 Editing documents All the columns of the table with the templates are sortable in ascending and descending order. The first click on the column name sorts the rows of the table in ascending order after the clicked column, the second click sorts the table in descending order and the third click returns to the unsorted state, that is the order of the templates in the stylesheet. A template can be located easily in the list using only the keyboard. If the focus is in the Name column, type the first characters of the template name and the selection moves to that template in the list. In a similar way if the focus is in the Match or Mode column, typing the first characters of the value of the match attribute or the mode attribute moves the selection to that template in the list. When a template in the list is selected, the corresponding template fragment from the editor is selected allowing the user to easily navigate between the different templates in the editor Finding XSLT references and declarations Note All the following actions can be applied on named templates, attribute sets, functions, decimal formats, keys, variables or parameters only. In case they are applied on other items, a warning message will pop-up. • Document+XSL References+ → References in project (Ctrl+Shift+R): Searches in the project all references of the item found at current cursor position. Note For faster access, a shortcut to this action is also added in the XSL References toolbar. • Document+XSL References → References in file: Searches in the current file all references of the item at the current cursor position. • Document+XSL References → References starting from file: Searches all references of the item at the cursor position in the current edited file and all its included and imported files. • Document+XSL References → References starting from...: Opens a dialog that allows the user to specify the list of files used to start searching from. Pressing OK begins searching all references of the item at the cursor position in the selected files and their included and imported files. • Document+XSL References+ → Declarations in project (Ctrl+Shift+D): Searches in the project all declarations of the item found at current cursor position. 127 Editing documents Note For faster access, a shortcut to this action is also added in the XSL References toolbar. • Document+XSL References → Declarations in file: Searches in the current file all declarations of the item at the current cursor position. • Document+XSL References → Declarations starting from file: Searches all declarations of the item at the cursor position in the current edited file and all its included and imported files. • Document+XSL References → Declarations starting from...: Opens the Start locations dialog that allows the user to specify the list of files used to start searching from. Pressing OK begins searching all declarations of the item at the cursor position in the selected files and all their included and imported files. • Document+XSL References → Occurrences in file (Ctrl+Shift+U): Searches all occurrences of the item at the caret position in the currently edited file. XSLT refactoring actions • Document+XSL Refactoring+ → Create template from selection...: Opens a dialog that allows the user to specify the name of the new template to be created. After pressing OK, the template is created and the selection is replaced by a xsl:call-template instruction referring the just created template. Note The selection must contain wellformed elements only. • Document+XSL Refactoring+ → Create stylesheet from selection...: Creates a separate stylesheet and replaces the selection with a xsl:include instruction referring the just created stylesheet. Note The selection must contain a well formed top level element. • Document+XSL Refactoring → Extract attributes as xsl:attributes...: Extracts the attributes from the selected element and represents each of them with a 128 Editing documents xsl:attribute instruction. For example from the following element <person id="Big{test}Boss"/> you would obtain <person> <xsl:attribute name="id"> <xsl:text>Big</xsl:text> <xsl:value-of select="test"/> <xsl:text>Boss</xsl:text> </xsl:attribute> </person> • Document+XSL Refactoring+ → Rename occurrences in project...: Renames all occurrences of the item at current cursor position in the entire project. The possible changes to be performed on the documents can be previewed prior to documents altering. In the upper part of the Rename template dialog there are displayed all the project files in which the item was found, while in the central part of the dialog it can be seen where the replacements will be performed. The user has the possibility to allow or deny the altering of a file. 129 Editing documents • Document+XSL Refactoring → Rename occurrences in file...: Renames all occurrences of the item at current cursor position in the entire file. The possible changes to be performed on the current file can be previewed prior to document altering. • Document+XSL Refactoring → Rename occurrences starting from file...: Renames all occurrences of the item at current cursor position in the currently edited file and all its included and imported files. The possible changes to be performed can be previewed prior to document(s) altering. • Document+XSL Refactoring → Rename occurrences starting from ...: Opens a dialog that allows the user to select the files to begin searching from, then renames all occurrences of the item at current cursor position in the selected files and all their included and imported files. The possible changes to be performed can be previewed prior to document(s) altering. Editing XQuery documents Folding in XQuery documents In a large XQuery document the instructions enclosed in the '{' and '}' characters can be collapsed so that only the needed instructions remain in focus. The same folding features available for XML documents are also available in XQuery documents. 130 Editing documents Figure 4.92. Folding in XQuery documents Generating HTML Documentation for an XQuery Document To generate HTML documentation for an XQuery document similar with the Javadoc documentation for Java classes use the dialog XQuery Documentation. It is opened with the action Tools → Generate Documentation → XQuery Documentation... (Ctrl+Alt+Q). It can be also opened from the Project Tree contextual menu: Generate Documentation → XQuery Documentation... . The dialog enables the user to configure a set of parameters of the process of generating the HTML documentation. The parameters are: 131 Editing documents Figure 4.93. The XQuery Documentation dialog Input The Input panel allows the user to specify either the File or the Folder which contains the files for which to generate the documentation. One of the two text fields of the Input panel must contain the full path to the XQuery file. Extensions for the xquery files contained in the specified directory can be added as comma separated values. Default there are offered xquery, xq, xqy. Default function namespace Optional URI for the default namespace for the submitted XQuery if it exists. Predefined function namespaces Optional engine dependent, predefined namespaces that the submitted XQuery refers to. They allow the conversion to generate annotation information to support the presentation component's hypertext linking if the predefined modules have been loaded into the local xqDoc XML repository. Open in browser When checked, the generated documentation will be opened in an external browser. Output Allows the user to specify where the generated documentation will be saved on disk. Editing CSS stylesheets <oXygen/> provides special support for developing CSS stylesheet documents. 132 Editing documents Validating CSS stylesheets <oXygen/> includes a built-in CSS validator integrated with the general validation support. This brings the usual validation features to CSS stylesheets. When the current editor is of CSS type the Validate toolbar provides a button quick access to the CSS validator options in the <oXygen/> user preferences. Validation options for Content Completion in CSS stylesheets A content completion assistant similar to the one of XML documents offers the CSS properties and the values available for each property. It is activated on the CTRL + Space shortcut and it is context sensitive when it is invoked for the value of a property. Figure 4.94. Content Completion in CSS stylesheets Folding in CSS stylesheets In a large CSS stylesheet document some styles may be collapsed so that only the needed styles remain in focus. The same folding features available for XML documents are also available in CSS stylesheets. Figure 4.95. Folding in CSS stylesheets Formatting and indenting CSS stylesheets (pretty print) If the edited CSS stylesheet becomes unreadable because of the bad alignment of the text lines the prettyprint operation available for XML documents is also available for CSS stylesheets. It works in the same way as for XML documents and is available as the same menu and toolbar action. 133 Editing documents Other CSS editing actions The CSS editor type offers a reduced version of the popup menu available in the XML editor type, that means only the split actions,the folding actions,the edit actions and a part of the source actions (only the actions To lower case, To upper case, Capitalize lines). SVG documents SVG is a platform for two-dimensional graphics. It has two parts: an XML-based file format and a programming API for graphical applications. Just to enumerate some of the key features: shapes, text and embedded raster graphics with many painting styles, scripting through languages such as ECMAScript and support for animation. SVG is a vendor-neutral open standard that has important industry support. Companies like Adobe, Apple, IBM and others have contributed to the W3C specification. Many documentation frameworks, including Docbook have support for SVG by means of defining the graphics directly in the document. Figure 4.96. SVG Content Completion <oXygen/> XML Editor adds SVG support by using the Batik [http://xml.apache.org/batik/] package, an open source project developed by the Apache Software foundation. The SVG DTD is solved by <oXygen/>'s default XML catalog. <oXygen/> can render SVG by two means: The Standalone SVG Viewer. You may use the action Tools → SVG Viewer ... to browse and open any SVG file having the extension .svg or .svgz. If the file is included in the current project then you can open it by right-clicking on it and selecting Open with → SVG Viewer 134 Editing documents Figure 4.97. SVG Viewer The Preview Result Pane. This panel can render the result of an XSL transformation that generates SVG documents. Figure 4.98. Integrated SVG Viewer The basic use-case of <oXygen/> consists in the development of the XSL stylesheets capable of producing rich SVG graphics. For example when you have an XML document describing the evolution of a parameter over time and you need to create a graphic from it. You can start with a static SVG, written directly in <oXygen/> or exported from a graphics tool like the Adobe suite. Extract then the parts that are dependent of the data from the XML document and create the XSL templates. Integrating external tools When your XML project requires to run an external tool different than a FO processor and which can be launched from the command line <oXygen/> offers you the option of integrating the tool by specifying just the command line for starting the executable file of the tool and its working directory. To integrate such a tool go to Options → Preferences+External Tools If the external tool is applied on one of the files opened in <oXygen/> you should enable the option for saving all edited files automatically when an external tool is applied. Integrating the Ant tool As example let us integrate the Ant build tool [http://ant.apache.org/] in <oXygen/>. The procedure for this purpose is: 1. Download [http://ant.apache.org/bindownload.cgi] and install [http://ant.apache.org/manual/install.html] Ant on your computer. 135 Editing documents 2. Test your Ant installation from the command line in the directory where you want to use Ant from <oXygen/>, for example run the clean target of your build.xml file C:\projects\XMLproject\build.xml: ant clean 3. Go to Options → Preferences+External Tools 4. Create a new external tool entry with the name Ant tool, the working directory C:\projects\XMLproject and the command line "C:\projects\XMLproject\ant.bat" clean obtained by browsing to the ant.bat file from directory C:\projects\XMLproject 5. Run the tool from Tools → External Tools → Ant tool. You can see the output in the Command results panel: Started: "C:\projects\XMLproject\ant.bat" clean Buildfile: build.xml clean: [echo] Delete output files. [delete] Deleting 5 files from C:\projects\XMLproject BUILD SUCCESSFUL Total time: 1 second Scratch Buffer A handy addition to the document editing is the Scratch Buffer view used for storing fragments of arbitrary text during the editing process. It can be used to drop bits of paragraphs (including arbitrary xml markup fragments) while rearranging and editing the document and also to drag and drop fragments of text from the scratch buffer to the editor panel. The Scratch Buffer is basically a text area offering XML syntax highlight. The view contextual menu contains basic edit actions: Cut, Copy, Paste a. o. Text editor specific actions <oXygen/> provides user actions common in any text editor: Undoing and redoing user actions • Edit → Undo (Ctrl+Z)or the toolbar button Undo to reverse a maximum of 100 editing actions to return to the preceding state. Complex operations like "Replace All", "Indent selection", etc are treated as a single undo event. • Edit → Redo (Ctrl+Shift+Z)or the toolbar button that were undone by the Undo function. Redo to recreate a maximum of 100 editing actions Copying and pasting text • Edit → Cut (Ctrl+X)or the toolbar button and places it in the clipboard. Cut to remove the current selected node from the document 136 Editing documents • Edit → Copy (Ctrl+C)or the toolbar button Copy to place a copy of the current selection in the clipboard as RTF. All text attributes such as color, font or syntax highlight are preserved when pasting into another application. • Edit → Paste (Ctrl+V)or the toolbar button document at the cursor position. Paste to place the current clipboard content into the • Edit → Select All (Ctrl+A) selects the entire body of the current document, including whitespace preceding the first and following the last character. Finding and replacing text in the current file The Find/Replace dialog The Find/Replace dialog opened with the menu entry Find → Find/Replace... (Ctrl+F) or the toolbar button Find/Replace enables you to define "search for" or "search for and replace" operations on the current document. The find works at line level, which means a find match cannot cover characters on more than one line. The replace operation can bind Perl 5 regular expression group variables ($1, $2, etc.) from the find match. For example to replace the tag with attributes called tag-name with the tag tag-name1 use as text to find <tag-name(\s+)(.*)> and as replace text <tag-name1$1$2>. • find occurrences of a word or string of characters including white spaces and highlight the position in the editor. • replace occurrences of target defined in the Find field with a word or string of characters, including white spaces, defined in the Replace field. • find all occurrences of a word or string of characters including white spaces and return a result list to the Message Panel. • replace all occurrences of a word or string of characters including white spaces. Figure 4.99. Find/Replace Dialog 137 Editing documents Complete the dialog as follows: Text to find The target character string to search for. Replace with The character string with which to replace the target. It may contain '{$NEWLINE}' which at the replace time will insert a new line character. XPath The XPath 2.0 expression entered in this combo is used to restrict the search scope. It is applied only at the first search command (Find, Replace, Find all, Replace to end) after the user changes the content of this combo so that he is able to replace tag names covered by the current XPath expression. The content completion assistant that helps in entering XPath expressions in attributes of XSLT stylesheets elements is also available in the XPath console and offers always proposals dependent of the current context of the cursor inside the edited document. Direction Specify if the search direction is from current position to end of file (forward direction) or to start of file (backward direction). Scope Specify if the search is executed on all file or only on the lines that were selected when the dialog was invoked. If the selection was on a single line the search is executed on all the file. Find Execute a find operation for the next occurrence of the target and stop. Replace Execute a replace operation for the target followed by a find operation for the next occurrence. Find all Executes a find operation and returns all results to the Message Panel. Replace to end Execute a replace operation starting from current target until the end of the document, in the direction specified by the current selection of the Direction switch (forward or backward). Replace all Execute a replace operation in the entire scope of the document. Case sensitive When checked, operations are case sensitive. Whole words only When checked only whole occurrences of a word will be included in the operation. Find in tags When checked, operation will include content of the start and end tags of the XML elements. Incremental When checked, search operation is started for every letter typed in or deleted. The first match that obeys the checked conditions will be highlighted. Regular Expression When checked allows using any regular expression in PERL syntax. 138 Editing documents Wrap around Continues the find from the start (end) of the document after reaching the end (start) if the search is in forward (backward) direction. The Quick Find toolbar A reduced version of the Find/Replace dialog is available as a toolbar, activated by the shortcut Ctrl + Alt + F and displayed by default at the bottom of the <oXygen/> window, above the status bar. Figure 4.100. The Quick Find toolbar The Find, Find next, Find previous, Incremental and Case sensitive controls work in the same way as in the Find/Replace dialog. Also the search process works as if the Find in tags option of the Find/Replace dialog is true, the Whole words only one is false, the Regular expression one is false and the Wrap around one is true. The toolbar becomes invisible again when the ESC key is pressed. The enabling shortcut can be changed in Options → Preferences+Menu Shortcut Keys+Quick FindAs with any dockable toolbar, the screen location of the Quick Find toolbar can be changed at any time by dragging (and docking) it to the desired location. Keyboard shortcuts for finding the next and previous match Navigation from a find match to the next one or the previous one is very easy with two keyboard shortcuts: F3 and Shift F3. They are useful to quickly repeat the last find action performed with the Find/Replace dialog, taking into account the same find options set there through check boxes. Find → Find next (F3) performs another search in forward direction using the last search configuration. Find → Find previous (Shift+F3) performs another search in backward direction using the last search configuration. Finding and replacing text in multiple files The Find and Replace in Files option ( Find → Find/Replace in Files... or the toolbar button Find/Replace in Files ) enables you to define "search for" or "search for and replace" operations across a number of files. 139 Editing documents The find works at line level, which means a find match cannot cover characters on more than one line. The replace operation can bind Perl 5 regular expression group variables ($1, $2, etc.) from the find match. For example to replace the tag with attributes called tag-name with the tag tag-name1 use as text to find <tagname(\s+)(.*)> and as replace text <tag-name1$1$2>. The encoding used to read and write the files is detected from the XML header or from the BOM. If a file does not have an XML header or BOM <oXygen/> uses the UTF-8 encoding for files of type XML, that is one of the extensions: xml, xsl, fo, xsd, rng, nvdl, nrl, sch, wsdl or an extension associated with the XML editor type, or the encoding configured for non XML files. You can cancel a long operation at any time by pressing the Cancel button of the progress dialog displayed when the operation is executed. Figure 4.101. Find/Replace in Files Complete the dialog as follows: Text to Find The target character string to search for. Case Sensitive When checked, operations are case sensitive. Whole words only When checked only whole occurrences of a word will be included in the operation. Find in tags When checked, operation will include content of the start and end tags of the XML elements. 140 Editing documents Regular Expression When checked allows using any regular expression in PERL syntax. Replace with The character string with which to replace the target. It may contain '{$NEWLINE}' which at the replace time will insert a new line character. Make Backups with extension In the replace process <oXygen/> makes backup files of the modified files. The default extension is *bak, but you can change extension as you prefer. Specified Path Choose the search path Directory of the current edited file The search is done in the directory of the file opened in the current editor panel. If there is no opened file this option is disabled in the dialog. Project Files (File Filter) Search the files from the current project using the specified file filter. Selected project files Search only in the selected files of the current opened project Note The search is performed only on local files. If you have added to the project remote files from an FTP or Webdav server these will be skipped from the search. Recurse subdirectories The search is performed recursively in the sub-directories found in the specified directory path only when this option is checked. Recurse subdirectories When checked, the search is performed recursively in the sub-directories found in the specified directory path. Find All Executes a find operation and returns the result list to the Message Pane Replace All Replaces all occurrences of the target contained in the specified files. Use this option with caution. Global search and replace across all project files does not open the files containing the targets, nor does it prompt on a per occurrence basis, to confirm that a replace operation must be performed. As the operation simply matches the string defined in the find field, this may result in replacement of matching strings that were not originally intended to be replaced. Using Check Spelling The Check Spelling option ( Edit → Check Spelling (F4) or the toolbar button you to perform the check spelling on the current document: 141 Check spelling ) enables Editing documents Figure 4.102. Check Spelling Dialog Complete the dialog as follows: Unrecognized Word Contains the word that cannot be found in the selected dictionary. The word is also highlighted in the XML document. Replace with The character string which is suggested to replace the unrecognized word. Guess Displays a list of words suggested to replace the unknown word. Double clicking a word in this list automatically inserts it in the document and continues the spell checking process. Dictionary Displays a list with the available dictionaries. Replace Replaces the currently highlighted word in the XML document, with the selected word in the "Replace with" field. Replace All Replaces all occurrences of the currently highlighted word in the XML document, with the selected word in the "Replace with" field. Ignore Allows you to continue checking the document while ignoring the first occurrence of the unknown word. The same word will be flagged again if it appears in the document. Ignore all Ignores all instances of the unknown word in the whole document. Learn Includes the unrecognized word in the list of valid words so that the spell checker will not consider it for correction. Options Sets the configuration options of the Spell Checker. Begin at caret position When checked, the spell checker begins checking from the current cursor position. OK Closes the Spell Checker dialog. 142 Editing documents <oXygen/> provides dictionaries only for the languages English (EN, GB, CA, US), French (FR, BE, CA, CH) and German in the form of .dar files located in the directory [oXygen-install-dir]/dicts. A pre-built dictionary can be added by copying the corresponding .dar archive to the same directory and restarting <oXygen/>. A dictionary can be built with the tool available at http://www.xmlmind.com/spellchecker/dictbuilder.shtml. Learned words are stored into an persistent learned-words dictionary with the .tdi extensions located in [user-home-dir]/spell directory ([user-home-dir]/.spell directory on Mac OS X). There is one dictionary for each language-country variant combination. If the Learn button is pressed by mistake the only possibility to delete the learned word from the learned-words dictionary is to edit this dictionary manually and restart <oXygen/> because the spell-check component does not allow its editing by the user interface. Note The Czech check spelling tp://www.kosek.cz/sw/xxe/cs.dar dictionary may be downloaded from ht- Spell checking feature can be also used as you type by enabling it from the Preferences panel. Also for words with wrong spelling the suggestions of the Spelling dialog are available on the context menu of the editor panel in the Spell check suggestions submenu: Figure 4.103. Spell check suggestions in the editor context menu Note Words with lengths in excess of 100 characters are ignored by the spell checker. Changing the font size The font size of the editor panel can be changed with the following actions: 143 Editing documents Document → Font size → Increase editor font (Ctrl + NumPad + +) Increase the font size with one point for each execution of the action. Document → Font size → Decrease editor font (Ctrl + NumPad + -) Decrease the font size with one point for each execution of the action. Document → Font size → Normal editor font (Ctrl + 0) Reset the font size to the value of the editor font set in Preferences. Dragging and dropping the selected text To move a whole region of text to other location in the same edited document just select the text, drag the selection by holding down the left mouse button and drop it to the target location. Inserting a file at caret position Document+File → Insert file... inserts in a file under the current position of the caret in the current document. Opening edited file in system application Document+File → Open in system application opens edited file with default application associated on current machine. Opening the file at caret position Document+File → Open file at cursor : Opens in a new panel the file with the name under the current position of the caret in the current document. Exiting the <oXygen/> XML Editor File → Exit (Ctrl+Q) : Terminates the <oXygen/> XML Editor. Session information such as the current Project, open Documents and Option settings is made persistent. When the <oXygen/> editor is re-opened, the persistence information returns to the last saved state. Changing the user interface language <oXygen/> comes with the user interface translated in English, French, German, Italian, Japanese and Dutch. If you want to use <oXygen/> in other language you have to translate all the messages and labels available in the user interface (menu action names, button names, checkbox texts, view titles, error messages, status bar messages, etc.) and provide a text file with all the translated messages to <oXygen/> in the form of a Java properties file. Such a file contains pairs of the form message key - translated message displayed in the user interface. In order to install the new set of translated messages you must copy this file to the [oXygen-install-folder]/lib folder, restart <oXygen/> and set the new language in the <oXygen/> preferences. You can get the keys of all the messages that must be translated from the properties file containing the English translation used in <oXygen/>. To get this file contact us at [email protected]. Printing a file File → Print (Ctrl+P) displays the Page Setup dialog used to define the page size and orientation properties for printing. 144 Editing documents Printing is supported for both Text and Grid page of the editor. 145 Chapter 5. Transforming documents XML is designed to store, carry, and exchange data, not to display data. When we want to view the data we must either have an XML compliant user agent or transform it to a format that can be read by other user agents. This process is known as transformation. Status messages generated during transformation are displayed in the Information view. Output formats Within the current version of <oXygen/> you can transform your XML documents to the following formats without having to exit from the application. For transformation to formats not listed simply install the tool chain required to perform the transformation and process the xml files created with <oXygen/> in accordance with the processor instructions. PDF Adobe Portable Document Format (PDF) is a compact binary file format that can be viewed and printed by anyone, anywhere across a broad range of hardware and software using the free PDF Viewer from Adobe [http://www.adobe.com/products/acrobat/readstep.html]. PS PostScript is the leading printing technology from Adobe [http://www.adobe.com:80/products/postscript/main.html] for high-quality, best-inclass printing solutions ranging from desktop devices to the most advanced digital presses, platemakers, and large format image setters in the world. Postscript files can be viewed using viewers such as GhostScript, but are more commonly created as a prepress format. TXT Text files are Plain ASCII Text and can be opened in any text editor or word processor. XML XML stands for eXtensible Markup Language and is a W3C [http://www.w3c.org/XML/] standard markup language, much like HTML, which was designed to describe data. XML tags are not predefined in XML. You must define your own tags. XML uses a Document Type Definition (DTD), an XML Schema or a Relax NG schema to describe the data. XML with a DTD, XML Schema or Relax NG schema is designed to be self-descriptive. XML is not a replacement for HTML. XML and HTML were designed with different goals: • XML was designed to describe data and to focus on what data is. • HTML was designed to display data and to focus on how data looks. • HTML is about displaying information, XML is about describing information. XHTML XHTML stands for eXtensible HyperText Markup Language, a W3C [http://www.w3c.org/MarkUp/] standard. XHTML is aimed to replace HTML. While almost identical to HTML 4.01, XHTML is a stricter and cleaner version of HTML. XHTML is HTML defined as an XML application. All formatting during a transformation is provided under the control of an Extensible Stylesheet (XSLT). Specifying the appropriate XSLT enables transformation to the above formats and preparation of output files for specific user agent viewing applications, including: 146 Transforming documents HTML HTML stands for Hyper Text Markup Language and is a W3C Standard [http://www.w3c.org/MarkUp/] for the World Wide Web. HTML is a text file containing small markup tags. The markup tags tell the Web browser how to display the page. An HTML file must have an htm or html file extension. An HTML file can be created using a simple text editor. HTML Help M i c r o s o f t H T M L H e l p [http://msdn.microsoft.com/library/default.asp?url=/library/en-us/htmlhelp/html/vsconHH1Start.asp?frame=true] is the standard help system for the Windows platform. Authors can use HTML Help to create online help for a software application or to create content for a multimedia title or Web site. Developers can use the HTML Help API to program a host application or hook up context-sensitive help to an application. JavaHelp JavaHelp software is a full-featured, platform-independent, extensible help system from Sun Microsystems [http://java.sun.com/products/javahelp/index.html] that enables developers and authors to incorporate online help in applets, components, applications, operating systems, and devices. JavaHelp is a free product and the binaries for JavaHelp can be redistributed. Eclipse Help Eclipse Help is the help system incorporated in the Eclipse platform [http://www.eclipse.org/] that enables Eclipse plugin developers to incorporate online help in their plugins. Many other target formats are possible, these are the most popular. The basic condition for transformation to any format is that your source document is well-formed. Always, make sure that the XSL used for the transformation is the right one according to the desired output format and with the input source definition. For example, if you want to transform to HMTL format using a DocBook html stylesheet, your source xml document should respect the DocBook DTD. An XSL stylesheet specifies the presentation of a class of XML documents by describing how an instance of the class is transformed into an output document by using special formatting vocabulary. XSL consists of three parts: XSL Transformations (XSLT) XSLT is a language for transforming XML documents. XML Path (XPath) Language XPath is an expression language used by XSLT to access or refer parts of an XML document. (XPath is also used by the XML Linking specification). XSL Formatting Objects (XSL:FO) XSL:FO is an XML vocabulary for specifying formatting semantics. <oXygen/> supports XSLT/XPath version 1.0 using Saxon 6.5.5, Xalan, Xsltproc, MSXML (3.0, 4.0, .NET) and XSLT/XPath 2.0 by using Saxon 8.8.0.4 B, Saxon 8.8.0.4 SA and Saxon.NET. Also the validation is done in function of the stylesheet version. Transformation scenario Before transforming the current edited XML document in <oXygen/> you must define a transformation scenario to apply to that document. A scenario is a set of values for various parameters defining a transformation. It is not related to any particular document but to a document type: Scenarios that apply to XML files Such a scenario contains the location of an XSLT stylesheet that is applied on the edited XML document and other transform parameters. 147 Transforming documents Scenarios that apply to XSL files Such a scenario contains the location of an XML document that the edited XSL file is applied on and other transform parameters. In order to apply a transformation scenario one has to press the Apply transformation scenario button from the toolbar. Alternatively, transform actions can be applied from the Project view's contextual menu without having to open the files: • Configure transformation scenario - allows the configuration of file's associated transformation scenario. If no transformation scenario is associated with the file, then the menu action is disabled. • Apply transformation scenario - applies the associated transformation scenario on the selected files. If the currently processed file does not have an associated transformation scenario then the Configure transformation scenario dialog is opened. • Transform with... - allows the user to select a transformation scenario to be applied on the currently selected files. Built-in transformation scenarios If the Apply Transformation Scenario toolbar button is pressed, currently there is no scenario associated with the edited document and the edited document contains a "xml-stylesheet" processing instruction referring to a XSLT stylesheet (commonly used for display in Internet browsers), then <oXygen/> will prompt the user and offer the option to associate the document with a default scenario containing in the XSL URL field the URL from the href attribute of the processing instruction. This scenario will have the "Use xml-stylesheet declaration" checkbox set by default, will use Saxon as transformation engine, will perform no FO processing and will store the result in a file with the same URL as the edited document except the extension which will be changed to html. The name and path will be preserved because the output file name is specified with the help of two editor variables: ${cfd} and ${cfn}. <oXygen/> comes with preconfigured built-in scenarios for usual transformations that enable the user to obtain quickly the desired output: associate one of the built-in scenarios with the current edited document and then apply the scenario with just one click. Defining a new transformation scenario The Configure Scenario dialog is used to associate a scenario from the list of all scenarios with the edited document by selecting an entry from the list. The dialog is opened by pressing the Configure Transformation Scenario button on the toolbar of the document view. Once selected the scenario will be applied with only one click on the Apply Transformation button on the same toolbar. Pressing the Apply Transformation button before associating a scenario with the edited document will invoke first the Configure Scenario dialog and then apply the selected scenario. Open the Configure Transformation dialog by selecting Document+ XML Document → Configure transformation scenario. (Ctrl+Shift+C) Complete the dialog as follows: 148 Transforming documents Figure 5.1. The Configure Transformation Dialog - XSLT Tab XML URL Specifies an input XML file to be used for the transformation. Please note that this URL is resolved through the catalog resolver. If the catalog does not have a mapping for the URL, then the editor will try to use the file directly. The following buttons are shown immediately after the input field: XSL URL Insert editor variables button Opens a dialog allowing to introduce special <oXygen/> editor variables in the XSL URL field. Button Browse for local input XSL file Opens a file browser dialog allowing to select a local file name for the XSL URL field. Button Browse for remote input XSL file Opens a file browser dialog allowing to select a remote file name for the XSL URL field. Button Open XSL file Opens the file with the path specified in the XSL URL path in a the editor. Specifies an input XSL file to be used for the transformation. Please note that this URL is resolved through the catalog resolver. If the catalog does not have a mapping for the URL, then the editor will try to use the file directly. 149 Transforming documents The above set of browsing buttons are available also for this input. Checkbox Use "xml-stylesheet" declaration Use the stylesheet declared with an "xml-stylesheet" declaration instead of the stylesheet specified in the XSL URL field. Combo box Transformer This combo box contains all the transformer engines available for applying the stylesheet. If you want to change the default selected engine just select other engine from the drop down list of the combo box. Button Parameters Opens the dialog for configuring the XSLT parameters. Button Append header and footer Opens a dialog for specifying a URL for a header HTML file added at the beginning of the result of an HTML transformation and a URL for a footer HTML file added at the end of the HTML result. Button Additional XSLT stylesheets Opens the dialog for adding XSLT stylesheets which are applied on the result of the main stylesheet specified in the XSL URL field. Button Extensions Opens the dialog for configuring the XSLT/XQuery extension jars or classes which define extension functions called from the XSLT/XQuery transformation. When creating a scenario that applies to an XML file, <oXygen/> fills the XML URL with the default variable "${currentFile}". This means the input for the transformation is taken from the currently edited file. You can modify this value to other file path. This is the case of currently editing a section from a large document, and you want the transformation to be performed on the main document, not the section. You can specify in this case either a full absolute path: file:/c:/project/docbook/test.xml or a path relative to one of the editor variables, like the current project file: ${pdu}/docbook/test.xml . When the scenario applies to XSL files, the field XSL URL is containing ${currentFile}. Just like in the XML case, you can specify here the path to a master stylesheet. The path can be configured using the editor variables. Note If you are sharing the scenarios by saving them into the project file (see Transformation Scenario Sharing) it is recommended that the URL fields to have path values relative to the project editor variable ${pdu}. 150 Transforming documents Figure 5.2. The Configure Transformation Dialog - FO Processor Tab Checkbox Perform FO Processing Enable or disable the use of FOP during the transformation. Radio button XSLT result as input The FO processor is applied to the result of applying the XSLT stylesheet. Radio button Edited document as input The FO processor is applied directly to the current edited document. Combo box Method The output format of the FO processing: PDF, PostScript or plain text. Combo box Processor The FO processor, which can be the built-in Apache FOP processor or an external processor. 151 Transforming documents Figure 5.3. The Configure Transformation Dialog - Output Tab Radio button Prompt for file At the end of the transformation it will be displayed a file browser dialog for specifying the path and name of the file which will store the transformation result. Text field Save As The path of the file where it will be stored the transformation result. The path can include special <oXygen/> editor variables. Check box Open in browser If this is checked <oXygen/> will open automatically the transformation result in a browser application specific for the type of that result (HTML/XHTML, PDF, text). Radio button Saved file When Open in browser is selected this button can be selected to specify that <oXygen/> should open the file specified in the Save As text field. Radio button Other location When Open in browser is selected this button can be used to specify that <oXygen/> should not open the file specified in the Save As text field, it should open the file specified in the text field of the Other location radio button. The file path can include special <oXygen/> editor variables. Check box Open in editor When checked the transformation result set in the Save As field is opened in a new editor panel in <oXygen/> with the appropriate built-in editor type: if the result is an XML file it is opened with the built-in XML editor, if it is an HTML file it is opened with the builtin HTML editor, etc. Check box Show As XHTML It is enabled only when Open in browser is disabled and if this is checked <oXygen/> will display the transformation result in a builtin XHTML browser panel of the <oXygen/> window. 152 Transforming documents Important When transforming very large documents you should be aware that enabling this feature will result in a very long transformation time. This drawback appears due to the Java XHTML browser implementation. In this situations if you wish to see the result of the transformation you should use an external browser. Check box Show As XML If this is checked <oXygen/> will display the transformation result in an XML viewer panel with syntax highlight specific for XML documents. Check box Show As SVG If this is checked <oXygen/> will display the transformation result in a SVG viewer panel by rendering the result as a SVG image. Text field Image URLs are relative to If Show As XHTML is checked this text field specifies the path for resolving image paths contained in the transformation result. XSLT Stylesheet Parameters The parameters of the XSLT stylesheet used in the transformation scenario are configured from the dialog available from the Parameters button: Figure 5.4. Configure parameters dialog The table presents all the parameters of the XSLT stylesheet and all imported and included stylesheets with their current values. If a parameter value was not edited then the table presents its default value. The 153 Transforming documents bottom panel presents the default value of the parameter selected in the table and the system ID of the stylesheet that declares it. For setting the value of a parameter declared in the stylesheet in a namespace, for example: <xsl:param name="p:param" xmlns:p="namespace">default</xsl:param> use the following expression in the Name column of the Parameters dialog: {namespace}param Additional XSLT Stylesheets The list of additional XSLT stylesheets can be edited in the dialog opened by the button "Additional XSLT Stylesheets". Figure 5.5. Edit additional XSL stylesheets list dialog Add Adds a stylesheet in the "Additional XSLT stylesheets" list using a file browser dialog , also you can type an editor variable in the file name field of the browser dialog. The name of the stylesheet will be added in the list after the current selection. New Opens a dialog in which you can type the name of a stylesheet. The name is considered relative to the URL of the current edited XML document. You can use editor variables in the name of the stylesheet. The name of the stylesheet will be added in the list after the current selection. Remove Deletes the selected stylesheet from the "Additional XSLT stylesheets" list. Open Opens the selected stylesheet in a separate view . Up Move the selected stylesheet up in the list. Down Move the selected stylesheet down in the list. This dialog allows the user to add additional XSLT stylesheets to the transformation. Figure 5.6. Add a new stylesheet 154 Transforming documents The path specified in the URL text field can include special <oXygen/> editor variables. Scenario Editor Variables In the fields reserved for: input URL (XSL URL or XML URL, depending on scenario type), header URL, footer URL, the URLs in the list of additional XSLT stylesheets, image base URL, the user can use an editor variable as described below. An editor variable is a shorthand notation for a file path or directory path which will be expanded when the transformation is applied. ${frameworks} the path of the frameworks subdirectory of the <oXygen/> install directory ${home} the path of the user home directory ${pdu} Project directory as URL ${cfdu} current file directory url - the path of the current edited document up to the name of the parent directory as URL ${cfn} current file name - the name of the current edited document without extension and parent directory ${currentFileURL} current file name as URL - the name of the current edited document as a URL In the Save As field from the Output tab, the user can use the following editor variables: ${frameworks} the path of the frameworks subdirectory of the <oXygen/> install directory ${home} the path of the user home directory ${pd} project directory - the path of the current directory ${cfd} current file directory - the path of the current edited document up to the name of the parent directory ${cfn} current file name - the name of the current edited document without extension and parent directory The editor variables defined here can also be used in the values set for the parameters of the transformation (e.g. base.dir). XSLT/XQuery Extensions The edit extensions dialog is used to specify the jars and classes containing extension functions called from the XSLT/XQuery file of the current transformation scenario. 155 Transforming documents Figure 5.7. The XSLT/XQuery Extension Edit Dialog An extension function called from the XSLT or XQuery file of the current transformation scenario will be searched in the specified extensions in the order of the list displayed in the dialog. For changing the order of the items the user must select the item that must be moved to other position in the list and press the up and down buttons. Use the following procedure to create a scenario. 1. Select Document+ XML Document → Configure transformation scenario (Ctrl+Shift+C) to open the Configure Transformation dialog. 2. Click the Duplicate Scenario button of the dialog to create a copy of the current scenario. 3. Click in the Name field and type a new name. 4. Click OK or Transform Now to save the scenario. Sharing the Transformation Scenarios. Project Level Scenarios. In the upper part of the dialog showing the list of scenarios you will find two radio buttons controlling where the scenarios are stored. 156 Transforming documents Figure 5.8. Transformation Scenario List Dialog Selecting "Global Scenarios" ensures that the scenarios are saved in the user home directory. After changing the selection to "Project Scenarios", the scenario list will be stored in the project file. If your project is saved on a source versioning/sharing system (CVS, SVN, Source Safe, etc..) then your team can use the scenarios you defined. Predefined scenarios like Docbook HTML, Docbook PDF, TEI HTML, XML Spec PDF which are added initially by default to the list of global scenarios are not added by default to the list of scenarios stored in a project. Other preferences can also be stored at the project level. For more information, see the Preference Sharing section. XSL-FO processors The <oXygen/> installation package is distributed with the Apache [http://www.apache.org]FOP [http://xml.apache.org/fop/index.html] (Formatting Objects Processor) for rendering your XML documents to PDF. FOP is a print and output independent formatter driven by XSL Formatting Objects. FOP is implemented as a Java application that reads a formatting object tree and renders the resulting pages to a specified output. Tip To include PNG images in the final PDF document you need the JIMI [http://java.sun.com/products/jimi/] or JAI [http://java.sun.com/products/java-media/jai/] libraries. For TIFF images you need the JAI [http://java.sun.com/products/java-media/jai/] library. The JIMI and JAI libraries are not bundled with <oXygen/> due to Sun's licensing. Using them is as easy as downloading them and copying the necessary jar files (required by the library documentation) in the lib subdirectory of the <oXygen/> installation directory. This means JimiProClasses.zip for JIMI and jai_core.jar, jai_codec.jar and mlibwrapper_jai.jar for JAI. For the JAI package you also need to include the directory containing the native libraries (mlib_jai.dll and mlib_jai_mmx.dll on Windows) in the PATH system variable. The MacOS X version of the JAI library can be downloaded from http://www.apple.com/downloads/macosx/apple/java3dandjavaadvancedimagingupdate.html. In order to use it, install the downloaded package. 157 Transforming documents Other FO processors can be configured in the Preferences -> FO Processors panel. Common transformations The following examples use the DocBook XSL Stylesheets to illustrate how to configure <oXygen/> for transformation to the various target formats. Note <oXygen/> comes with the latest versions of the DocBook and TEI frameworks including special XSLT stylesheets for DocBook and TEI documents. DocBook XSL extensions for the Saxon and Xalan processors are included in the frameworks/docbook/xsl/extensions directory. Also the FXSL (Functional Programming Library for XSLT) stylesheets [http://fxsl.sourceforge.net/] are shipped with <oXygen/>. The following steps are common to all the example procedures below. 1. Set the editor focus to the document to be transformed. 2. Select Document+ XML Document → Configure transformation scenario (Ctrl+Shift+C) to open the Configure Transformation dialog. 3. If you want to edit an existing scenario select that scenario in the list and press the Edit button. If you want to create a new scenario press the New button. If you want to create a new scenario based on an existing scenario select the scenario in the list and press the Duplicate button. 4. Select the XSLT tab. 5. Click the "Browse for an input XSL file button". The Open dialog is displayed. Note During transformations the Editor Status Bar will show "Transformation - in progress". The transformation is successfully complete when the message "XSL transformation successful" displays. If the transform fails the message "XSL transformation failed" is displayed as an error message in the Messages Panel. The user can stop the transformation process, if the transformer offers such support, by pressing the "Stop transformation" button. In this case the message displayed in the status bar will be "Transformation stopped by user". For the specific case of an XQuery transformation, if you chose an NXD transformer, pressing the "Stop transformation" button will have no effect, as NXD transformers offer no such support. PDF Output 1. Change directory to [oxygen]/frameworks/docbook/xsl/fo/. 2. Select docbook.xsl, click Open. The dialog closes. 3. Select the FOP tab. 4. Check the Perform FOP option. The remaining options are enabled. 5. Select the following options: a. XSLT result as input. 158 Transforming documents b. PDF as method. c. Built-in(Apache FOP) as processor. 6. Select the Output tab. 7. In the Save As field enter the output file name relative to the current directory (YourFileName.pdf ) or the path and output file name (C:\FileDirectory\YourFileName.pdf). 8. Optionally, uncheck the XHTML and XML check boxes in the Show As group. 9. Click Transform Now. The transformation is started. PS Output 1. Change directory to [oxygen]/frameworks/docbook/xsl/fo/. 2. Select docbook.xsl, click Open. The dialog closes. 3. Select the FOP tab. 4. Check the Perform FOP option. The remaining options are enabled. 5. Select the following options: a. XSLT result as input. b. PS as method. c. Built-in(Apache FOP) as processor. 6. Select the Output tab. 7. In the Save As field enter the output file name relative to the current directory (YourFileName.ps ) or the path and output file name (C:\FileDirectory\YourFileName.ps). 8. Optionally, uncheck the XHTML and XML check boxes in the Show As group. 9. Click Transform Now. The transformation is started. TXT Output 1. Change directory to [oxygen]/frameworks/docbook/xsl/fo/. 2. Select docbook.xsl, click Open. The dialog closes. 3. Select the FOP tab. 4. Check the Perform FOP option. The remaining options are enabled. 5. Select the following options: a. XSLT result as input. b. TXT as method. 159 Transforming documents c. Built-in(Apache FOP) as processor. 6. Select the Output tab. 7. In the Save As field enter the output file name relative to the current directory (YourFileName.txt ) or the path and output file name (C:\FileDirectory\YourFileName.txt). 8. Optionally, uncheck the XHTML and XML check boxes in the Show As group. 9. Click Transform Now. The transformation is started. HTML Output 1. Change directory to [oxygen]/frameworks/docbook/xsl/html/. 2. Select docbook.xsl, click Open. The dialog closes. 3. Select the FOP tab. 4. Uncheck the Perform FOP option. The FOP options are disabled. 5. Select the Output tab. 6. In the Save As field enter the output file name relative to the current directory (YourFileName.html ) or the path and output file name (C:\FileDirectory\YourFileName.html). 7. a. If your pictures are not located relative to the out location, check the XHTML check box in the Show As group. b. Specify the path to the folder or URL where the pictures are located Click Transform Now. The transformation is started. HTML Help Output 1. Change directory to [oxygen]/frameworks/docbook/xsl/htmlhelp/. 2. Select htmlhelp.xsl, click Open. The dialog closes. 3. Set the XSLT parameter base.dir, it identifies the output directory. (If not specified, the output directory is system dependent.) Also set the manifest.in.base.dir to 1 in order to have the project files copied in output as well. 4. Select the FOP tab. 5. Uncheck the Perform FOP option. The FOP options are disabled. 6. Click Transform Now. The transformation is started. 7. At the end of the transformation you should find the html, hhp and hhc files in the base.dir directory. 8. Download Microsoft's HTML Help Workshop and install it. 9. Integrate HTML Help Workshop as an external tool. Go to Options → Preferences+External Tools 160 Transforming documents 10. Create a new external tool entry named HTMLHelp with Working directory being the same with the base.dir parameter defined above and Configure command set to [path to installed HTML Help Workshop]\hhc.exe <filename>, where <filename> is the name of the html help project file (for example htmlhelp.hhp). 11. Run the tool from Tools → External Tools → HTMLHelp. JavaHelp Output 1. Change directory to [oxygen]/frameworks/docbook/xsl/javahelp/. 2. Select javahelp.xsl, click Open. The dialog closes. 3. Set the XSLT parameter base.dir, it identifies the output directory. (If not specified, the output directory is system dependent.) 4. Select the FOP tab. 5. Uncheck the Perform FOP option. The FOP options are disabled. 6. Click Transform Now. The transformation is started. XHTML Output 1. Change directory to [oxygen]/frameworks/docbook/xsl/xhtml/. 2. Select docbook.xsl, click Open. The dialog closes. 3. Select the FOP tab. 4. Uncheck the Perform FOP option. The FOP options are disabled. 5. Select the Output tab. 6. In the Save As field enter the output file name relative to the current directory (YourFileName.html ) or the path and output file name (C:\FileDirectory\YourFileName.html). 7. a. If your pictures are not located relative to the out location, check the XHTML check box in the Show As group. b. Specify the path to the folder or URL where the pictures are located Click Transform Now. The transformation is started. Supported XSLT processors The <oXygen/> distribution comes with the following XSLT processors: Xalan 2.7.0 Xalan-Java http://xml.apache.org/xalan-j/ is an XSLT processor for transforming XML documents into HTML, text, or other XML document types. It implements XSL Transformations (XSLT) Version 1.0 and XML Path Language (XPath) Version 1.0. 161 Transforming documents Saxon 6.5.5 Saxon 6.5.5 [http://saxon.sourceforge.net/saxon6.5.5/] is an XSLT processor, which implements the Version 1.0 XSLT and XPath with a number of powerful extensions. This version of Saxon also includes many of the new features that were first defined in the XSLT 1.1 working draft, but for conformance and portability reasons these are not available if the stylesheet header specifies version="1.0". Saxon 8.8.0.4 B Saxon-B http://saxon.sf.net/ implements the "basic" conformance level for XSLT 2.0 and XQuery. The term basic XSLT 2.0 processor is defined in the draft XSLT 2.0 specifications: it is a conformance level that requires support for all features of the language other than those that involve schema processing. Besides the above list <oXygen/> supports the following processors: Xsltproc (libxslt) Libxslt http://xmlsoft.org/XSLT/ is the XSLT C library developed for the Gnome project. Libxslt is based on libxml2 the XML C library developed for the Gnome project. It also implements most of the EXSLT set of processor-portable extensions functions and some of Saxon's evaluate and expressions extensions. The libxml2 version included in <oXygen/> is 2.6.23 and the libxslt version is 1.1.15 <oXygen/> uses Libxslt through its command line tool (Xsltproc). The XSLT processor is included into the distribution kit of the stand-alone version for Windows and Mac OS X. Because there are differences between different Linux distributions, on Linux you must install Libxslt on your machine as a separate application and set the PATH variable to contain the Xsltproc executable. MSXML 3.0/4.0 MSXML 3.0/4.0 http://msdn.microsoft.com/xml/ is available only on Windows 2000, Windows NT and Windows XP platforms. It can be used for transformation and validation of XSLT stylesheets. <oXygen/> use the Microsoft XML parser through its command line tool m s x s l . e x e [http://msdn.microsoft.com/library/default.asp?url=/library/en-us/dnxml/html/msxsl.asp] Because msxsl.exe is only a wrapper, Microsoft Core XML Services (MSXML) must be installed on the computer otherwise you get an corresponding warning. You can get the latest Microsoft XML parser from Microsoft web-site http://www.microsoft.com/downloads/details.aspx?FamilyId=3144B72B-B4F2-46DA-B4B6-C5D7485F2B42&displaylang=en [http:/www.microsoft.com/downloads/details.aspx?FamilyId=3144B72B-B4F2-46DA-B4B6-C5D7485F2B42&displaylang=en] MSXML .NET MSXML .NET http://msdn.microsoft.com/xml/ is available only on Windows NT4, Windows 2000 and Windows XP platforms. It can be used for transformation and validation of XSLT stylesheets. <oXygen/> performs XSLT transformations and validations using .NET Framework's XSLT implementation (System.Xml.Xsl.XslTransform class) through the nxslt [http://www.tkachenko.com/dotnet/nxslt.html] command line utility.The nxslt version included in <oXygen/> is 1.6. You should have the .NET Framework version 1.0 already installed on your system otherwise you get this warning: MSXML.NET requires .NET Framework version 1.0 to be installed. Exit code: 128 162 Transforming documents You can get the .NET Framework version 1.0 from Microsoft web-site http://www.microsoft.com/downloads/details.aspx?FamilyID=d7158dee-a83f4e21-b05a-009d06457787&displaylang=en [http://www.microsoft.com/downloads/details.aspx?FamilyID=d7158dee-a83f-4e21-b05a-009d06457787&displaylang=en] .NET 1.0 A transformer based on the System.Xml 1.0 library available in the .NET 1.0 and .NET 1.1 frameworks from Microsoft (http://msdn.microsoft.com/xml/). It is available only on Windows. You should have the .NET Framework version 1.0 or 1.1 already installed on your system otherwise you get this warning: MSXML.NET requires .NET Framework version 1.0 to be installed. Exit code: 128 You can get the .NET Framework version 1.0 from Microsoft web-site http://www.microsoft.com/downloads/details.aspx?FamilyID=d7158dee-a83f4e21-b05a-009d06457787&displaylang=en [http://www.microsoft.com/downloads/details.aspx?FamilyID=d7158dee-a83f-4e21-b05a-009d06457787&displaylang=en] .NET 2.0 A transformer based on the System.Xml 2.0 library available in the .NET 2.0 framework from Microsoft (http://msdn.microsoft.com/xml/). It is available only on Windows. You should have the .NET Framework version 2.0 already installed on your system otherwise you get this warning: MSXML.NET requires .NET Framework version 2.0 to be installed. Exit code: 128 You can get the .NET Framework version 2.0 from Microsoft web-site http://www.microsoft.com/downloads/details.aspx?FamilyID=9655156b-356b4a2c-857c-e62f50ae9a55&DisplayLang=en [http:/www.microsoft.com/downloads/details.aspx?FamilyID=9655156b-356b-4a2c-857c-e62f50ae9a55&DisplayLang=en] Saxon 8SA Saxon-8SA http://www.saxonica.com/ is the schema-aware edition of Saxon8B and it is available on a commercial license from the Saxonica [http://www.saxonica.com/] site. Saxon-SA includes an XML Schema processor, and schema-aware XSLT, XQuery, and XPath processors In order to use it with <oXygen/> you have to place the saxon8sa.jar and the license key from Saxonica in the [oXygen-install-folder]/lib folder Saxon.NET Saxon.NET http://weblog.saxondotnet.org/ is the port of Saxon-8B XSLT processor to the .NET platform and it is available on a Mozilla Public License 1.0 (MPL) from the Mozilla [http://www.mozilla.org/MPL/MPL-1.0.html] site. In order to use it with <oXygen/> you have to unzip the Saxon.NET distribution http://www.saxondotnet.org/saxon.net/downloads/Saxon.NET-1.0R C 1 . z i p [http://www.saxondotnet.org/saxon.net/downloads/Saxon.NET-1.0-RC1.zip] in the <oXygen/> install folder. You should have the .NET Framework version 1.1 already installed on your system otherwise you get this warning: Saxon.NET requires .NET Framework 1.1 to be installed. You can get the .NET Framework version 1.1 from Microsoft web-site http://www.microsoft.com/downloads/ThankYou.aspx?familyId=262d25e3- 163 Transforming documents f589-4842-8157-034d1e7cf3a3&displayLang=en [http:/www.microsoft.com/downloads/ThankYou.aspx?familyId=262d25e3-f589-4842-8157-034d1e7cf3a3&displayLang=en] Note There is no integrated XML Catalog support for MSXML 3.0/4.0 and .NET processors. The button Transformation options available on the Transformation toolbar allows quick access to the XSLT options in the <oXygen/> user preferences. Configuring custom XSLT processors One can configure other XSLT transformation engines than the ones which come with the <oXygen/> distribution. Such an external engine can be used for XSLT transformations within <oXygen/>, in the Editor perspective, and is available in the list of engines in the dialog for editing transformation scenarios. However it cannot be used in the XSLT Debugger perspective. Configuring the XSLT processor extensions paths The Xalan and Saxon processors support the use of extension elements and extension functions. Unlike a literal result element, which the stylesheet simply transfers to the result tree, an extension element performs an action. The extension is usually used because the xslt stylesheet fails in providing adequate functions to the user for accomplishing a more complex task. Extensions for Xalan and Saxon are included in [<oXygen/> install directory] \frameworks\docbook\xsl\extensions. If you want to use the extensions group for Xalan, you have to rename the file "xalan25.jar.ext" to "xalan25.jar". Same specifications for Saxon: rename "saxon653.jar.ext" to "saxon653.jar". You can only use one group of extensions at a time. Samples on how to use extensions can be found at: • for Xalan - http://xml.apache.org/xalan-j/extensions.html • for Saxon 6.5.5 - http://saxon.sourceforge.net/saxon6.5.5/extensions.html • for Saxon 8.8.0.4 - http://www.saxonica.com/documentation/extensions/intro.html In order to ease the configuration of XSLT processor extension path, you can use the Extensions button of the scenario edit dialog. As alternative the manual configuration must be performed with the following steps in order to find and use successfully the Java extension classes: • Set the property "com.oxygenxml.additional.classpath" to contain the additional paths to the directories containing the used Java extension classes or jars. Example of setting a directory called "test1" containing extension classes and a jar "test2/ext.jar" located in the directory C:\work\ext\ : • For users who use a script ( bat or sh ) to start <oXygen/> add the following parameter "-Dcom.oxygenxml.additional.classpath=C:/work/ext/test1;C:/work/ext/test2/ext.jar" to the java command line in 164 Transforming documents your script file (oxygen.bat or oxygen.sh). Example: "java -Xmx256m -Dcom.oxygenxml.additional.classpath=C:/work/ext/test1;C:/work/ext/test2/ext.jar -cp %CP% ro.sync.exml.Oxygen %1 %2 %3 %4 %5" . • For users who use an executable ( exe ) to start <oXygen/> add the following parameter "com.oxygenxml.additional.classpath=C:/work/ext/test1;C:/work/ext/test2/ext.jar" to the oxygen8.1.ini file situated in the <oXygen/> root directory. After the parameter is set, Java classes and jars from the extension paths are dynamically loaded by <oXygen/> 165 Chapter 6. Querying documents Running XPath expressions What is XPath XPath is a language for addressing specific parts of an XML document. XPath, like the Document Object Model (DOM), models an XML document as a tree of nodes. An XPath expression is a mechanism for navigating through and selecting nodes from the XML document. An XPath expression is in a way analogous to a Structured Query Language (SQL) query used to select records from a database. XPath models an XML document as a tree of nodes. There are different types of nodes, including element nodes, attribute nodes and text nodes. XPath defines a way to compute a string-value for each type of node. XPath defines a library of standard functions for working with strings, numbers and Boolean expressions. Examples: child: : * Select all children of the root node. .//name Select all elements having the name "name", descendants of the current node. /catalog/cd[price>10.80]Selects all the cd elements that have a price element with a value larger than 10.80 To find out more about XPath, the following URL is recommended: http://www.w3.org/TR/xpath <oXygen/>'s XPath console To use XPath effectively requires at least an understanding of the XPath Core Function Library [http://www.w3.org/TR/xpath#corelib]. If you have this knowledge the <oXygen/> XPath expression field part of the current editor toolbar can be used to aid you in XML document development. In <oXygen/> a XPath 1.0 or XPath 2.0 expression is typed and executed on the current document from the XPath console available on the XPath toolbar for every open XML document. The content completion assistant that helps in entering XPath expressions in attributes of XSLT stylesheets elements is also available in the XPath console and offers always proposals dependent of the current context of the cursor inside the edited document. The set of XPath functions proposed by the assistant depends on the XPath version selected from the drop-down menu of the XPath button (1.0 or 2.0). In the following example the cursor is on a person element and the content completion assistant offers all the child elements of the person element and all XPath 2.0 functions: 166 Querying documents Figure 6.1. Content Completion in the XPath console The evaluation of the XPath expression tries to resolve the locations of documents referred in the expression through the XML catalogs which are configured in Preferences and the current XInclude preferences, for example when evaluating the collection(URIofCollection) function (XPath 2.0). The results of an XPath query are returned in the Message Panel. Clicking a record in the result list highlights the nodes within the text editor panel with a character level precision. Results are returned in a format that is a valid XPath expression: - [FileName.xml] /node[value]/node[value]/node[value] - 167 Querying documents Figure 6.2. XPath results highlighted in editor panel with character precision When using the Grid Editor, clicking a result record will highlight the entire node. Figure 6.3. XPath results highlighted in the Grid Editor 168 Querying documents Note XPath 2.0 queries are executed using Saxon 8 B transformation engine and they are not schema aware. If you try to impose type restrictions in a XPath 2.0 query they are ignored. When the limit of long expressions is reached (60 characters) a dialog pops up and offers to switch the focus to the XPath builder view. This is a view specially designed to assist you with typing and testing complex XPath 1.0 / 2.0 expressions. Figure 6.4. Popup dialog to switch to the XPath Builder view Example 6.1. XPath Utilization with DocBook DTD Our example is taken from a DocBook book based on the DocBook XML DTD. The book contains a number of chapters. DocBook defines that chapters as have a <chapter> start tag and matching </chapter> end tag to close the element. To return all the chapter nodes of the book enter //chapter into the XPath expression field, then Enter. This will return all the chapter nodes of the DocBook book, in the Message Panel. If your book has six chapters, their will be six records in the result list. Each record when clicked will locate and highlight the chapter and all sibling nodes contained between the start and end tags of the chapter. If we used XPath to query for all example nodes contained in the section 2 node of a DocBook XML document we would use the following XPath expression //chapter/sect1/sect2/example. If an example node is found in any section 2 node, a result will be returned to the message panel. For each occurrence of the element node a record will be created in the result list. In our example an XPath query on the file oxygen.xml determined that: - [oxygen.xml] /chapter[1]/sect1[3]/sect2[7]/example[1] Which means: In the file oxygen.xml, first chapter, third section level 1, seventh section level 2, the example node found is the first in the section. Note If your project is comprised of a main file with ENTITY references to other files, you can use XPath to return all the name elements of a certain type by querying the main file. The result list will query all referenced files. Note When the edited document is of type XSL the XPath expression typed in the XPath console is applied over the XML document specified in the transformation scenario associated with 169 Querying documents the XSL document. <oXygen/> provides a user preference to be set if you want to apply the XPath expression over the XSL document itself. Important If the document defines a default namespace then <oXygen/> will bind this namespace to the first free prefix from the list: default, default1, default2, etc. For example if the document defines the default namespace xmlns="something" and the prefix default is not associated with a namespace then you can match tags without prefix in a XPath expression typed in the XPath console by using the prefix default. For example to find all the level elements when the root element defines a default namespace you should execute in the XPath console the expression: //default:level To define default mappings between prefixes that can be used in the XPath console and namespace URIs go to the XPath Options user preferences panel and enter the mappings in the Default prefix-namespace mappings table. The same preferences panel allows also the configuration of the default namespace used in XPath 2.0 expressions entered into the XPath toolbar and the creation of different results panels for XPath queries executed on different XML documents. To apply a XPath expression relative to the element on which the caret is positioned use the action Document → XML Document → Copy XPath (Ctrl+Alt+.) (also available on the context menu of the main editor panel) to copy the XPath expression of the element to the clipboard and the Paste action of the contextual menu of the XPath console to paste this expression in the console. Then add your relative expression and execute the resulting complete expression. On Windows the context menu can be displayed with the mouse on a right click or with the keyboard by pressing the special context menu key available on Windows keyboards. The XPath Builder view Complex XPath expressions can be composed with the help of the content completion assistant available for XPath expressions in a special view called XPath Builder. Also the expressions can be tested in the view by execution on the edited document. The view is opened from menu Perspective -> Show View. 170 Querying documents Figure 6.5. The XPath Builder view The Execute button runs the expression on the edited document and takes into account the value selected in the combo box with the XPath version number: 1.0 or 2.0. The XPath preferences panel is accessible from the XPath Options shortcut button near the Execute button. A history list with the XPath expressions evaluated in the past on all documents opened in the current <oXygen/> session is also available in the bottom area of the view so that new expressions can be composed based on old ones without re-entering the whole expression. The evaluation of the XPath expression tries to resolve the locations of documents referred in the expression through the XML catalogs which are configured in Preferences and the current XInclude preferences, for example when evaluating the collection(URIofCollection) function (XPath 2.0). The results of the XPath query are displayed in the same Message Panel as for the XPath console and are computed with the same character level precision. The usual edit actions (Cut, Copy, Paste, Select All, Undo, Redo) are available in the popup menu of the top part of the view, where XPath expressions are entered. For the history list area of the view the popup menu contains two actions: • Execute - to execute again the expression selected in the list. • Remove - to remove the selected expression from the list. Working with XQuery What is XQuery XQuery is the query language for XML and is currently under development at the W3C. The many benefits of XQuery include: • XQuery allows you to work in one common model no matter what type of data you're working with: relational, XML, or object data. 171 Querying documents • XQuery is ideal for queries that must represent results as XML, to query XML stored inside or outside the database, and to span relational and XML sources. • XQuery allows you to create many different types of XML representations of the same data. • XQuery allows you to query both relational sources and XML sources, and create one XML result. Syntax Highlight and Content Completion To create a new XQuery document select File → New (Ctrl+N) and when the New Document dialog appears select XQuery entry. Once you created the new document <oXygen/> provides syntax highlight for keywords and all known XQuery functions and operators. Also for these there is available a content completion component that can be activated by pressing Ctrl+Space keys. The functions and operators are presented together with a comment about parameters and functionality. Figure 6.6. XQuery Content Completion XQuery Validation With <oXygen/> you can validate your documents before using them in your transformation scenarios. The validation uses the Saxon 8.8.0.4 B processor or the 8.8.0.4 SA, IBM DB2, eXist, Software AG Tamino, Berkeley DB XML or X-Hive/DB if you installed them. This is in conformance with the XQuery Working Draft http://www.w3.org/TR/xquery/. The processor is used in two cases: validation of the expression and execution. Although the execution implies a validation, it is faster to syntactically check the expression without executing it. The errors that occurred in the document are presented in the messages view at the bottom of editor window, with a full description message. As with all error messages, if you click on one entry, the line where the error appeared is highlighted. 172 Querying documents Figure 6.7. XQuery Validation Please note that if you choose a processor that doesn't support XQuery validation you will receive a warning when trying to validate. The Validate toolbar provides a button the <oXygen/> user preferences. Validation options for quick access to the XQuery options in Note If there is no transformation scenario associated with the current document, the validation will be performed using the processor or connection specified in the XML / XSLT - FO / XQuery Preferences page. Otherwise, the xquery document will be validated using the Transformer from the associated scenario. Other XQuery editing actions The XQuery editor type offers a reduced version of the popup menu available in the XML editor type, that means only the split actions,the folding actions,the edit actions a part of the source actions (only the actions To lower case, To upper case, Capitalize lines) and Open file at cursor, Open in system application. Transforming XML Documents Using XQuery XQueries are very similar to the XSL stylesheets in the sense they both are capable of transforming an XML input into another format. You can define transformation scenarios that specify the input URL, the preview mode, XML or XHTML. The result can be saved and opened in the associated application. You can even run a FO processor on the output of an XQuery. The transformation scenarios may be shared between many XQuery files, and are exported at the same time with the XSLT scenarios. The transformation performed can be based on the XML document specified in the Input field, or, if this field is empty, the documents referred from the query expression are used instead. The parameters of XQuery transforms must be set in the Parameters dialog. Parameters that are in a namespace must be specified using the qualified name, for example a param parameter in the http://www.oxygenxml.com/ns namespace must be set with the name {http://www.oxygenxml.com/ns}param. The transformation uses the processor Saxon 8.8.0.4 B, Saxon 8.8.0.4 SA or a database connection (details can be found in the Working with Databases chapter - in the XQuery transformation section). 173 Chapter 7. Debugging XSLT stylesheets and XQuery documents Overview The Debugger perspectives enables you to test and debug XSLT 1.0 /2.0 stylesheets and XQuery 1.0 documents. The interface presents simultaneous views of the source XML document, the XSLT/XQuery document and the result document. As you go step by step through the XSLT/XQuery document the corresponding output is generated step by step, and the corresponding position in the XML file is highlighted for each step. At the same time, special views in the interface provide various types of debugging information and events useful for understanding the transformation process. The user benefits of a rich set of features for testing and solving XSLT/XQuery problems: • Support for XSLT 1.0 stylesheets (through the Saxon 6.5.5 and Xalan XSLT engines) , XSLT 2.0 stylesheets (through the Saxon 8B XSLT engine) and XQuery 1.0 (through the Saxon 8B XQuery engine). • Stepping capabilities: step in, step over, step out, run, run to cursor, run to end, pause, stop. • Back mapping between every piece of output and instruction element /source context who generate it . • Breakpoints on both source and XSLT/XQuery documents. • Call stack view on both source and XSLT/XQuery documents. • Trace history on both source and XSLT/XQuery documents. • Support for XPath expression evaluation during debugging. • Step into imported/included stylesheets as well as included source entities. • Available templates and hits count. • Variables view. • Dynamic output generation. Layout The Debugger perspective interface looks like below. This interface is comprised of 4 panes as follows: 174 Debugging XSLT stylesheets and XQuery documents Figure 7.1. Debugger Mode Interface Source document view (XML) Displays and allows editing of data or document oriented XML files (documents). XSL/XQuery document view (XSL/XQuery) Displays and allows editing of XSL files(stylesheets) or XQuery documents. Output document view Displays the transformed output that results from the input of a selected document (XML) and selected stylesheet (XSL) or XQuery document to the transformer. The result of transformation is dynamically written as the transformation is processed. There are two views for the output: a text view (with XML syntax highlight) and an XHTML view. For large output the XHTML view can be can disabled (see Debugger Settings ). Control view The control view provides functionality for configuration and control of debugging operations. It also provides a series of Information views types. This pane is comprised of two parts: • Control Toolbar • Information views 175 Debugging XSLT stylesheets and XQuery documents XML documents and XSL stylesheets or XQuery documents that were opened in Editor perspective are automatically sorted into the first two panes. When multiple files of each type are opened, the individual documents and stylesheets are separated using the familiar tab management system of the Editor perspective. Selecting a tab brings the document or stylesheet into focus and enables editing without toggling back to the Editor perspective. When editing in the Editor perspective the editor toolbar is displayed. In Debugger mode this toolbar is not available, however the functions are still accessible from the Document menu same as the context menus that are activated by a right click of the mouse. On Windows the context menu can be displayed with the mouse on a right click or with the keyboard by pressing the special context menu key available on Windows keyboards. Bookmarks are replaced by breakpoints in Debugger perspective. During debugging the current execution node is highlighted on both document (XML) and XSL/XQuery views. Control Toolbar The toolbar contains all actions needed in order to configure and control the debug process. Items are described below from left to right as they appear in the toolbar. Figure 7.2. Control Toolbar XML source selector The selection represents the source document to be used as input by the transformation engine. The selection list is filled-in with all opened files (the XML ones being emphasized). This gives you the possibility to use other file types as source. In case of XQuery debugging session this selection field can be set to default value NONE, as usually XQuery documents do not require an input source. XSL/XQuery selector The selection represents the stylesheet or XQuery document to be used by the transformation engine. The selection list is filled-in with all opened files (the XSL/XQuery ones being emphasized). XSLT/XQuery engine selector Lists the available XSLT/XQuery processors XSLT/XQuery parameters Edit extensions Enable profiling Enable XHTML output XSLT/XQuery parameters to be used by the transformation. Add and remove the Java classes and jars used as XSLT extensions. Enable/Disable current transformation profiling. Enable or disable rendering of output to the XHTML Output document View during the transformation process. For performance issues, it is advisable to disable XHTML output for large jobs. Also, the XHTML area is only able to render XHTML documents. In order to view the output result of other formats, such as HTML, save the Text output area to a file and use the required external browser for viewing. 176 Debugging XSLT stylesheets and XQuery documents When starting a debug session from the editor perspective using the Debug Scenario action, the state of this toolbar button reflects the state of the "Show as XHTML" output option from the scenario. Step into Step over Step out Run Run to cursor Run to end Pause Stop Starts the debugging process and runs until the next stylesheet node (next step in transformation). Executes the current stylesheet node (including its sub-elements) and goes to next node in document order (usually the next sibling of the current node). Steps out to the parent node (equivalent to the Step over on the parent). Starts the debugging process and runs until the first breakpoint is encountered or until the end of transformation occurs, if no breakpoints are encountered (see the section called “Breakpoints view”). Starts the debugging process and runs until one of the following conditions occur: the line of cursor is reached, a valid breakpoint is reached or end of execution. Runs the transformation until the end, without taking into account any enabled breakpoints that might be set. Interrupts the current transformation. This is useful for long transformations (Docbook for instance) when you want to find out what point the transformation has reached. The transformation can be resumed after. Ends the transformation process. 177 Debugging XSLT stylesheets and XQuery documents Note Accelerator key combinations can be associated with debugger actions in the <oXygen/> preference dialog called Menu Shortcut Keys . Information views The information view is comprised of two panes that are used to display various types of information used to understand the transformation process. For each information type there is a corresponding tab. While running a transformation, relevant events are displayed in the various information views. This enables the developer to obtain a clear view of the transformation progress. Using the Debug controls developers can easily isolate parts of stylesheet therefore they may be understood and modified. The information types include (for a more detailed discussion on each information type see Viewing processing information): Left side information views • Context Node View • XWatch View • Breakpoints View • Break Conditions View • Messages View (XSLT only) • Variables View Right side information views • Stack View • Trace View • Templates View (XSLT only) • Nodeset View Multiple output documents in XSLT 2.0 For XSLT 2.0 stylesheets that store the output in more than one file by using the xsl:result-document instruction the content of the file created in this way is displayed dynamically while the transformation is running in an output view. There is one view for each xsl:result-document instruction so that the output of different instructions is not mixed but is presented in different views. 178 Debugging XSLT stylesheets and XQuery documents Figure 7.3. Multiple output documents in XSLT 2.0 Working with the XSLT/XQuery Debugger The following topics are present about how to follow XSLT/XQuery processing and detect errors in your stylesheets or XQuery documents: • Steps in a typical debug process • Using breakpoints • Viewing processing information • Determining what XSL/XQuery expression generated particular output Steps in a typical debug process To debug a stylesheet or XQuery document follow the procedure: 1. Open the source XML document and the XSLT/XQuery document. 2. If you are in the Editor perspective switch to the desired Debugger perspective (XSLT or XQuery) with one of the actions (here explained for XSLT): • Menu Perspective → Debugger or the toolbar button Debugger • Menu Document → XML Document → Debug scenario or the toolbar button Debug scenario 3. Select the source XML document in the XML source selector of the Control toolbar In case of XQuery debugging if your XQuery document has no implicit source set the source selector value to NONE. 4. Select the XSL/XQuery document in the XSL/XQuery selector of the Control toolbar. 5. Set XSLT/XQuery parameters from the button available on the Control toolbar. 6. Set one or more breakpoints. 179 Debugging XSLT stylesheets and XQuery documents 7. Step through the stylesheet using the buttons available on the Control toolbar: over, Step out, Run, Run to cursor, Run to end, Pause, Stop 8. Examine the information in the Information Views to find the bug in the transformation process. Step into, Step Using breakpoints The <oXygen/> XSLT/XQuery Debugger allows you to interrupt XSLT/XQuery processing to gather information about variables and processor execution at particular points. Inserting breakpoints To insert a breakpoint: 1. In the XML source document or the XSLT/XQuery document that you want to set a breakpoint, place your cursor on the line where you want the breakpoint to be. You can set breakpoints on XML source only for XSLT debugging sessions. 2. Select Edit → Breakpoints → Create or directly click with the mouse the left side stripe of the editor window on the line where you want the breakpoint to be. Note If the start tag of the element you want to set a breakpoint is spanning on multiple rows, then you have to place the breakpoint on the line containing the end of the start tag. In the following example if you try to place a breakpoint on the call-template line, the editor will show an error dialog, explaining that you must place the breakpoint at the end of the start tag. This means you have to place the breakpoint on the line containing the text: ">" , just after the "name" attribute. <xsl:template match="chapter"> <xsl:call-template name="title" > </xsl:call-template> </xsl:template> Removing breakpoints To remove a breakpoint: • Click with the mouse the left side stripe of the editor window on the line with the breakpoint or select Edit → Breakpoints → Remove all Viewing processing information Detailed information about the debugger status are provided using the information views. 180 Debugging XSLT stylesheets and XQuery documents Context node view The context node is valid only for XSLT debugging session and is a source node corresponding to the XSL expression being evaluated. It is also called the context of execution. The context node implicitly changes as the processor hits various steps (at the point where XPath expressions are evaluated). This node has the same value as evaluating '.' (dot) XPath expression on XWatch View. The value of the context node is presented as a tree in the view. Figure 7.4. The Context node view The context node is presented in a tree-like fashion. The value of the selected attribute or node are shown in the right side panel. XPath watch view Shows XPath expressions to be evaluated during debugging. Expressions are evaluated dynamically as the processor changes its source context. Figure 7.5. The XPath watch view Table 7.1. XWatch details Column Description Expression XPath expression to be evaluated (should be XPath 1.0 or 2.0 compliant). Value Result of XPath expression evaluation. Value has a type (see Possible Values in the section the section called “Variables view”). For Node Set results the number of nodes in the set is shown in parenthesis. 181 Debugging XSLT stylesheets and XQuery documents Remarks • Expressions referring to variables names are not evaluated. In case of an XPath error, you get an Error line. • The expression list is not deleted at the end of transformation (it is preserved during sessions). • To insert a new expression click the last line on the expression column and enter it or right click and select the Add action. Press enter on cell to add and evaluate. • To delete an expression click on its Expression column and delete its content or right click and select the Remove action. Press enter on cell to commit changes. • If the expression result type is a Node Set you can click on it (Value column) and you will see on the right side its value. (see Nodeset View). • Copy, Add, Remove and Remove All actions are offered in every row's contextual menu. Breakpoints view Lists all breakpoints set on opened documents. Once you set a breakpoint it is automatically added in this list. Breakpoints can be set on XSL/XQuery documents and in XML documents for XSLT debugging sessions. Figure 7.6. The Breakpoints view Table 7.2. Breakpoints details Column Description Enabled If checked, the current condition is evaluated and taken into account. Resource Resource file where the breakpoint is set. Entire path of resource file is available as tooltip. Line Line number inside resource where the breakpoint is set. Valid Breakpoint • Not all set breakpoints are valid. For example if the breakpoint is set on one empty or commented line or the line is not reached by the processor (no template to match it, line containing only an end tag), that breakpoint is invalid. 182 Debugging XSLT stylesheets and XQuery documents • The contextual menu on table has the Go to, Remove, Remove All, Enable All, Disable All options. • Clicking a record highlights the breakpoint line into the document. Break conditions view Lists all defined break conditions. Unlike breakpoints, break conditions are not associated with a document, but they represent XPath expressions evaluated in the current debugger context. In order to be processed their evaluation result should be a boolean value. Figure 7.7. The Break conditions view Table 7.3. Break conditions details Column Description Enabled If checked, the current condition is evaluated and taken into account. Condition XSLT/XQuery expression to be evaluated during debugging. The expression will be evaluated at every debug step. Value Boolean result of the evaluated condition or error message if the condition expression cannot be evaluated. When the Debugger hits an active break condition it pauses the execution of the transformation and places a small marker on the left side of the line where the break condition occured. The tooltip of the marker explains the cause of the pause. To disable further pauses when the same condition occurs you have to uncheck the Enabled column of the corresponding line in the Break conditions view. Important • The contextual menu on table has the Add, Remove, Remove All, Enable All, Disable All options. Messages view <xsl:message> instructions are one way to signal special situations encountered during transformation as well as a raw way of doing the debugging. This view is available only for XSLT debugging sessions and shows all <xsl:message> calls executed by the XSLT processor during transformation. 183 Debugging XSLT stylesheets and XQuery documents Figure 7.8. The Messages view Table 7.4. Messages details Column Description Message Message content. Terminate Signals if processor will terminate the transformation or not once it encounters the message (true/false respectively) Resource Resource file where <xsl:message> instruction is defined. The complete path of the resource is available as tooltip. Remarks • Clicking a record from the table highlights the <xsl:message> declaration line. • Message table values can be sorted by clicking the corresponding column header (ascending, descending, no sort) Stack view Shows the current execution stack of both source and XSL/XQuery nodes. During transformation two stacks are managed: one of source nodes being processed and the other for XSL/XQuery nodes being processed. <oXygen/> shows both node types into one common stack. The source (XML) nodes are preceded by a red color icon while XSL/XQuery nodes are preceded by a green color icon. The advantage of this approach is that you can always see the source scope on which a XSL/XQuery instruction is executed (the last red color node on the stack). The stack is oriented upside down. Figure 7.9. The Stack view 184 Debugging XSLT stylesheets and XQuery documents Table 7.5. Stack details Column Description # Order number, represents the depth of the node (0 is the stack base). XML/XSL/XQuery Node Node from source or stylesheet document currently being processed. One particular stack node is the document root, noted as #document. Attributes Attributes of the node (list of id="value" pairs). Resource Resource file where the node is located. Entire path is available as tooltip. Remarks • Clicking a record from the stack highlights that node's location inside resource. • Using Saxon, the stylesheet elements are qualified with XSL proxy, while on Xalan you only see their names. (example <xsl:template> on Saxon and template on Xalan). • Only Saxon processor shows element attributes. • Xalan processor shows the "built-in" rules. Trace history view Usually the XSLT/XQuery processors signal the following events during transformation: • entering a source (XML) node. • leaving a source (XML) node. • entering a XSL/XQuery node. • leaving a XSL/XQuery node. The trace history catches all these events, so you can see how the process evolved. The red icon lines denote source nodes while the green icon lines denote XSL/XQuery nodes. It is possible to save the element trace in a structured XML document. It is available on the context menu of the view. In this way you have the possibility to compare the trace results from different debug sessions. Figure 7.10. The Trace History View 185 Debugging XSLT stylesheets and XQuery documents Table 7.6. Trace History details Column Description Depth Starts from 0 and represents the level of overlapping for that node. This is similar with the # order number from stack at the moment the node was processed. XML/XSL/XQuery Node Represents the node from the processed source or stylesheet document. One particular node is the document root, noted as #document. Every node has an arrow in front of it representing what action was performed on it (entering or leaving). Attributes Attributes of the node (list of id="value" pairs). Resource Resource file where the node is located. Complete path to resource file is provided as tooltip. Remarks • Clicking a record highlights that node's location inside the resource. • Only Saxon processor shows element attributes. • Xalan processor shows the "built-in" rules. Templates view The <xsl:template> is the basic element for stylesheets transformation. This view is only available during XSLT debugging sessions and shows all <xsl:template> instructions used by the transformation. By seeing the number of hits for each of the templates you get an idea of the stylesheet coverage by template rules with respect to the input source. Figure 7.11. The Templates view 186 Debugging XSLT stylesheets and XQuery documents Table 7.7. Templates details Column Description Match Match attribute of the <xsl:template>. Hits Number of hits for the <xsl:template>. Shows how many times the XSLT processor used this particular template. Priority Template priority as established by XSLT processor. Mode Mode attribute of the <xsl:template>. Name Name attribute of the <xsl:template>. Resource Resource file where template is located. Complete path of resource file is available as tooltip. Remarks • Clicking a record highlights that template definition inside resource. • Saxon only shows the applied templates having at least one hit from the processor. Xalan shows all defined templates, with or without hits. • Template table values can be sorted by clicking the corresponding column header (ascending, descending, no sort) • Xalan shows the "built-in" rules. Node set view This view is always used in relation with Variables View and XWatch View and shows a nodeset value in a tree form. Once you click a variable having as value a nodeset or tree fragment or an XPath expression evaluated to a nodeset in the above views the node set view gets updated with the respective value. Figure 7.12. The Node Set view The nodes/values set is presented in a tree-like fashion. The value of the selected attribute or node are shown in the right side panel. 187 Debugging XSLT stylesheets and XQuery documents Remarks • In case of longer values for Value/Attributes column content, the interface shows three suspension points (...) at the end. A more detailed value is available as tooltip. • Clicking a record highlights the location of that node into the source or stylesheet view. Variables view During transformation variables and parameters play an important role. <oXygen/> uses the following icons to differentiate variables/parameters: • Global variable. • Local variable. • Global parameter. • Local parameter. The values types of a variable are marked by icons explained below: Possible Values • Boolean. • String. • Numeric. • Node set. • Tree fragment. • Date. (XSLT 2.0 only) • Object. • Any. Figure 7.13. The Variables view 188 Debugging XSLT stylesheets and XQuery documents Table 7.8. Variables details Column Description Name Name of the variable/parameter. Value Current value for the variable/parameter. Remarks • Clicking a record highlights the variable definition line. • Variable values could differ depending on the transformation engine used or stylesheet version set. • If the value of the variable is a node-set or a tree-fragment, clicking on it causes the Node set view to be shown with corresponding set of values. • Variable table values can be sorted by clicking the corresponding column header (ascending, descending, no sort) Determining what XSL/XQuery expression generated particular output In order to quickly spot the XSL templates or XQuery expressions with problems it is important to know what XSL template in the XSL stylesheet or XQuery expression in the XQuery document and what element in the source XML document generated a specified area in the output. Some of the debugging capabilities, for example "Step in" can be used for this purpose. Using "Step in" you can see how output is generated and link it with the XSL/XQuery element being executed in the current source context. However, this can become difficult on complex stylesheets or XQuery documents that generates a large output. Output to source mapping is a powerful feature that makes this output to source mapping persistent that is you can click on the text from the Output document view and the editor will select the XML source context and the XSL/XQuery element that generated the text. 189 Debugging XSLT stylesheets and XQuery documents Figure 7.14. Output to Source Mapping 1. If you are in the Editor perspective switch to the XSLT or XQuery Debugger perspective with one of the actions (here explained for XSLT): • Perspective → Debugger or the toolbar button Debugger • Document → XML Document → Debug scenario or the toolbar button Debug scenario 2. Select the source XML document in the XML source selector of the Control toolbar. In case of XQuery debugging without an implicit source choose the NONE value. 3. Select the XSL/XQuery document in the XSL/XQuery selector of the Control toolbar 4. Select the XSLT/XQuery engine in the XSLT/XQuery engine selector of the Control toolbar 5. Set XSLT/XQuery parameters from the button available on the Control toolbar 6. Apply the stylesheet or XQuery transformation using the button toolbar: 7. Inspect the mapping by clicking a section of the output from the Text view tab or from the XHTML view tab of the Output document view to have the XSL/XQuery element and the source context highlighted. 190 Run to end available on the Control Debugging XSLT stylesheets and XQuery documents Figure 7.15. XHTML Output Mapping 191 Chapter 8. Profiling XSLT stylesheets and XQuery documents Overview Whether you are trying to identify a performance issue that is causing your production XSLT/XQuery transformation to not meet customer expectations or you are trying to proactively identify issues prior to deploying your XSLT/XQuery transformation, using the XSLT/XQuery profiler feature is essential to helping you save time and ultimately ensure a better performing, more scalable XSLT/XQuery transformation. The XSLT/XQuery profiling feature can use any available XSLT/XQuery processors that could be used for debugging and it is available from the editor debugging perspective. Enabling/disabling the profiler is controlled by the Profiler button from the debugger control toolbar. The XSLT/XQuery profiler is off by default. This option is not available during a debugger session so you should set it before starting the transformation. Viewing profiling information Detailed profiling information for the current transformation is provided using the information views: Invocation tree view The invocation tree view shows a top-down call tree representing how XSLT instructions or XQuery expressions are processed. Figure 8.1. Invocation tree view The entries in the invocation tree have different meanings which are indicated by the displayed icons: • • This points to a call whose inherent time is insignificant compared to its call tree time. This points to a call whose inherent time is significant compared to its call tree time. (greater than 1/3rd of its call tree time). Every entry in the invocation tree has textual information attached which depends on the XSLT/XQuery profiler settings 192 Profiling XSLT stylesheets and XQuery documents • a percentage number of total time which is calculated with respect to either the root of the tree or the calling instruction; • a total time measurement in ms or µs. This is the total execution time that includes calls into other instructions; • a percentage number of inherent time which is calculated with respect to either the root of the tree or the calling instruction; • an inherent time measurement in ms or µs. This is the inherent execution time of the instruction; • an invocation count which shows how often the instruction has been invoked on this path; • an instruction name which contains also the attributes description. Note All nodes having their call tree time less than the one specified in the XSLT/XQuery profiler settings are cumulated and shown as Others node. Hotspots view The hotspots view shows a list of all instruction calls which lie above the threshold defined in the XSLT/XQuery profiler settings . Figure 8.2. Hotspots view By opening a hotspot instruction entry, the tree of back-traces leading to that instruction call are calculated and shown. Every hotspot is described in several columns: • the instruction name; • the inherent time in ms or µs of how much time has been spent in the hotspot together with a bar whose length is proportional to this value. All calls into this instruction are summed up regardless of the particular call sequence; • the invocation count of the hotspot. If you click on the handle on the left side of a hotspot, a tree of back-traces will be shown. 193 Profiling XSLT stylesheets and XQuery documents Every entry in the backtrace tree has textual information attached to it which depends on the XSLT/XQuery profiler settings . • a percentage number which is calculated with respect either to the total time or the called instruction; • a time measured in ms or µs of how much time has been contributed to the parent hotspot on this path; • an invocation count which shows how often the hotspot has been invoked on this path; Note This is not the number of invocations of this instruction. • an instruction name which contains also its attributes. Working with XSLT/XQuery profiler Profiling activity is linked with Debugging activity, so the first step in order to profile is to switch to debugging perspective and follow the corresponding procedure (see Working with XSLT Debugger). Immediately after turning the profiler on two new information views are added to the current debugger information views (Invocation tree view on left side, Hotspots view on right side). Profiling data is available only when the transformation ends successfully. Note Breakpoints/step capabilities may influence the result of profiling so their usage should be restricted to minimum. Looking to right side (Hotspots view), you can immediately spot the time the processor spent in each instruction. As instruction usually calls other instructions the used time of the called instruction is extracted from the duration time of the caller (the hotspot only presents the inherent time of the instruction). Looking at left side (Invocation tree view), you can examine how style instructions are processed. This result view is also named call-tree, as it represents the order of style processing. The profiling result shows the duration time for each of the style-instruction including the time needed for its called children. 194 Profiling XSLT stylesheets and XQuery documents Figure 8.3. Source backmapping In any of the above views you can use the backmapping feature in order to find the XSLT stylesheet or XQuery expression definition. Clicking on the selected item cause oXygen to highlight the XSLT stylesheet or XQuery expression source line where the instruction is defined. When navigating through the trees by opening instruction calls, oXygen automatically expands instructions which are only called by one other instruction themselves. The profiling data can be saved into XML and HTML format. On any view you should right click , use the pop-up menu and select the corresponding choice. Basically saving HTML means saving XML and applying an XSLT stylesheet to render the report as XML. These stylesheets are also available on distribution (see the subdirectory frameworks/profiler/ of the <oXygen/> installation directory) so you can make your own report based on the profiling raw data. If you like to change the XSLT/XQuery profiler settings you should right click on view, use the pop-up menu and choose the corresponding "View settings" entry. Note Precision: For Java virtual machine versions less than 1.4 we provide a time measurement in milliseconds while for greater versions (1.5) the time resolution is provided in microseconds. Caution Profiling exhaustive transformation may run into an OutOfMemoryException due to the large amount of information being collected. If this is the case you can close unused projects when running the profiling or use high values for Java VM options -Xms and -Xmx. If this does not help you can shorten your source xml file and try again. 195 Chapter 9. Comparing and merging documents In large teams composed either of developers or technical writers, the usage of a shared repository for the source or document files is a must. Often many authors are changing the same file at the same time. Finding what has been modified in your files and folders can be hard. If your data is changing, you can benefit from accurate identification and processing of changes in your files and folders with <oXygen/>'s new features: Compare files and Compare directories. These are powerful and easy to use tools that will do the job fast and thoroughly. With the new possibilities of differencing and merging, it is now easy to manage multiple changes. <oXygen/> provides a simple means of performing file and folder comparisons. You can see the differences in your files and folders and also you can merge the changes. There are two levels on which the comparison can be done, namely comparing directories or comparing individual files. These two operations are available from the Tools menu. Also the comparison tool can be started using command line arguments. In the Oxygen installation folder there are 2 executable shells (diffFiles.bat and diffDirs.bat if running on Windows). You can give one or two command line arguments to each of these shells. For example, to start the comparison between 2 directories on Windows use: diffDirs.bat "c:\Program Files" "c:\ant" Note that if there are spaces in the path names, the paths need to be surrounded by quotes. Also one argument can be missing in which case the second directory will be chosen manually by the user. The same goes for the files diff utility as well. Directories Comparison The directories comparison result is presented as a tree of files and directories.The directories that contain different files are expanded automatically, so you can focus directly on the differences. You can merge the directories' contents using the copy actions or you can compare and merge the different files by doubleclicking on them. 196 Comparing and merging documents Figure 9.1. The Compare directories window The directories comparison user interface The directory comparison user interface is comprised of the following components: The Operations Menu This menu contains the functions available for directories comparison: Figure 9.2. The Operations Menu Operations → Perform directories differencing : Performs the comparison of the directories. Operations → Perform files differencing : Performs the comparison of the files. Operations → Copy change from left to right : Copies the selected file or folder to the corresponding directory from the right (only available if the file or folder to be copied exists in the left directory) 197 Comparing and merging documents Operations → Copy change from right to left : Copies the selected file or folder to the corresponding directory from the left (only available if the file or folder to be copied exists in the right directory) Operations → Close (Ctrl+W) : Closes the Compare directories window. Compare Toolbar Figure 9.3. The Compare toolbar The available functions are presented in the Operations menu. For the Algorithm and Diff Options buttons look below at File Comparison / Compare Toolbar File Filter options File filters are available; you can choose to see the differences only for XML files, or XSL files for instance. Figure 9.4. File filter Directories Selector Figure 9.5. The Directories Selector To open the directories you want to compare, select a folder from each "Browse for local file" button. <oXygen/> keeps track of the folders you are currently working with and those you opened in this window. You can see and select them from the two combo-boxes. The comparison result The directory comparison result is presented using a tree of files and directories. 198 Comparing and merging documents Figure 9.6. Comparison result For the files and folders from the compared directories you can see their name, size and their modification date. If a file or a folder exists only in one of the compared directories, the name of the file or folder will be blue and marked with an "X". If a file exists in both directories but the content is different, the name of the file will be red and marked with a "not-equal" sign. <oXygen/> offers an useful option here: you can double-click the line marked with the "not-equal" sign and a new "File Content Comparison" Window will be opened, showing the differences between the two files. File Comparison The comparison of a pair of files MODIF is done by opening them in two editors arranged in a side-byside layout. You can edit either the source or the target file. The differences are refreshed when you save the modified document. 199 Comparing and merging documents Figure 9.7. The Compare Files Window The window is comprised of the following components: The Main Menu The Main Menu provides access to all the functions and features available in this window: The Source Menu Here you can select the source file to be compared. Source → Open : Browses for a file (the source file). Source → Open URL : Opens URL to be used as a source file. See Open URL for details. Source → Save : Saves the changes made in the source file. The Target Menu Here you can select the target file to be compared. Target → Open : Browses for a file (the target file). Target → Open URL : Opens URL to be used as a target file. See Open URL for details. 200 Comparing and merging documents Target → Save : Saves the changes made in the target file. Operations Menu Operations → Perform files differencing : Performs the comparison of the source and the target files. Operations → Go to first modification : Selects the first difference in the files. (The button becomes available if the selection is not on the first modification) Operations → Go to previous modification : Selects the previous difference in the files. (The button becomes available if the selection is not on the first modification) Operations → Go to next modification : Selects the next difference in the files. (The button becomes available if the selection is not on the last modification) Operations → Go to last modification : Selects the last difference in the files. (The button becomes available if the selection is not on the last modification) Operations → Copy all non-conflicting changes from left to right : Copies the non-conflicting changes from the source to the target. Operations → Copy all non-conflicting changes from right to left : Copies the non-conflicting changes from the target to the source. Operations → Copy change from left to right : Copies the selected difference from the source to the target. Operations → Copy changes from right to left : Copies the selected difference from the target to the source. Operations → Show modification details at word level : Provides Word Level Comparison Operations → Show modification details at char level : Provides Character Level Comparison Compare Toolbar This is where you'll find the operations that can be performed on the source and target files. Figure 9.8. The Compare Toolbar The available functions are presented at the Operations menu. Perform files differencing Diff Options Run the diff algorithm selected in the Algorithm combo box on the two selected files. Opens the Diff Options page [preferences-diff]. Go to first modification Scroll the two-way comparison panel to the first difference marked in the two-way comparison panel. Go to previous modification Scroll the two-way comparison panel to the previous difference marked in the two-way comparison panel. Go to next modification Scroll the two-way comparison panel and select the next difference marked in the two-way comparison panel. 201 Comparing and merging documents Go to last modification Scroll the two-way comparison panel and select the last difference marked in the two-way comparison panel. Copy all non-conflicting changes from left to right All the nodes present in the left side file and not present in the right side file are copied to the right side file. Copy change from left to right Copy the current difference marked in the two-way comparison panel from the left side file to the right side file. Copy change from right to left Copy the current difference marked in the two-way comparison panel from the right side file to the left side file. Copy all non-conflicting changes from right to left All the nodes present in the right side file and not present in the left side file are copied to the left side file. Show modification details at word level The Word algorithm is applied to the current difference marked in the two-way comparison panel and the result is displayed in a separate dialog. Show modification details at char level The Characters algorithm is applied to the current difference marked in the two-way comparison panel and the result is displayed in a separate dialog. When one of the two panels is scrolled up or down the other panel Enable scrolling synchronization is scrolled in the same direction so that corresponding match of the current difference from the other panel is displayed at the same time as in the scrolled panel. Disable scrolling synchronization When one of the two panels is scrolled up or down the other panel is not scrolled. The effect is that the corresponding match of the current difference from the other panel is not displayed at the same time as in the scrolled panel. Also, <oXygen/> offers you the complete diff solution: • two XML diff algorithms • XML Accurate works on small files and it is very precise. • XML Fast works on larger files but it is less precise than XML Accurate. • Syntax Aware for the file types known by <oXygen/>, it computes the differences taking into consideration the syntax of the documents. • three all-purpose algorithms: • Lines algorithm computes the differences at line level • Words algorithm computes the differences at word level • Characters algorithm computes the differences at character level • an automatic selection of the algorithm: • Auto selects the most appropriate algorithm, based on the files' content and size. 202 Comparing and merging documents Diff Options button It provides quick access to the Diff preferences pane where you set Diff parameters that will be saved for the next time when you open the Compare Files dialog. Files Selector To open the source and target files where you want to see the differences, select a file from the "Open" or "Open URL" button. <oXygen/> keeps track of the files you are currently working with and those you opened in this window. You can see and select them from the two combo-boxes. You can also save the changes in the source file or the target file by clicking the corresponding "Save" button. File contents panel The files are opened in two side-by-side editors. The text view is used, offering a better view of the changes. The two editors are kept in sync, if you scroll the text in one of them, the other will also scroll to show the difference. The differences are indicated using highlights connected through colored areas. You can use the "Go to modification" buttons to navigate between differences or simply select a change by clicking on it in the overview ruler located in the right-most part of the window. Also the overview ruler contains a success indicator in its upper part that will turn green in case the are no differences and red if differences are found. You can also do this by clicking on a colored area between the text editors. You can edit either the source or the target file. The differences are refreshed when you save the modified document. You can right-click the text editors for the "Cut", "Copy", "Paste" and "Select all" actions. The Find/Replace dialog is displayed by pressing the (Ctrl+F (Cmd+F on Mac )) Also there are available the Find/Replace options: (F3) used to perform another search using the last search configuration, and (Shift+F3) to perform another search in backward direction using the last search configuration. If the compared blocks of text are too large and you want to see the differences at a finer level, you can use the comparison at "Word" or "Character" level. Word Level Comparison This option is only available if modifications exist between the source and the target file. You can go to Word Level Comparison by clicking the "Show modification details at word level" button from the Compare Panel or from the Operations menu. 203 Comparing and merging documents Figure 9.9. Word Level Comparison Character Level Comparison This option is only available if modifications exist between the source and the target file. You can go to Character Level Comparison by clicking the "Show modification details at char level" button from the Compare Panel or from the Operations menu. Figure 9.10. Character Level Comparison 204 Chapter 10. Working with Databases XML is a storage and interchange format for structured data and it is supported by all major database systems. <oXygen/> offers the means of managing the interaction with some of the widely used databases, both relational ones and Native XML Databases. By interaction, one should understand browsing, querying, SQL execution support, content editing, importing from databases, generating XML Schema from database structure. Relational Database Support Relational databases use a relational model and are based on tables linked by a common key. <oXygen/> offers support for the following relational databases: IBM DB2, JDBC-ODBC Bridge, MySQL, Microsoft SQL Server, Oracle 10.2. In the following sections one can find the tools that <oXygen/> offers for working with relational databases and a description on how to configure a relational data source, a connection to a data source and also the views where connections can be browsed and results are displayed. Configuring Database Data Sources How to configure an IBM DB2 Data Source 1. Go to Preferences -> Data Sources. In the Data Sources panel click the New button. 2. Enter a unique name for this data source and select DB2 from the driver type combo box. Figure 10.1. Data Source Drivers Configuration Dialog Add the following IBM DB2 specific files: 205 Working with Databases • db2jcc.jar • db2jcc_license_cisuz.jar • db2jcc_license_cu.jar In the Download links for database drivers section there are listed the URLs from where to download the drivers necessary for accessing IBM DB2 databases in <oXygen/>. You can manually manage the Driver Files using Add, Remove, Detect and Stop(detection) buttons. 3. Select the most suited Driver class. 4. Click OK to finish the data source configuration. How to configure a Generic JDBC Data Source <oXygen/>'s default configuration already contains a generic JDBC data source called JDBC-ODBC Bridge. 1. Go to Preferences -> Data Sources. In the Data Sources panel click the New button. 2. Enter a unique name for this data source and select Generic JDBC from the driver type combo box. Click the Add button and find the driver file on your file system. You can manage the Driver Files using Add, Remove, Detect and Stop(detection) buttons. 3. Select the most suited Driver class. 4. Click OK to finish the data source configuration. How to configure a Microsoft SQL Server Data Source 1. Go to Preferences -> Data Sources. In the Data Sources panel click the New button. 2. Enter a unique name for this data source and select SQLServer from the driver type combo box. 3. Add the following Microsoft SQL Server specific files: • sqljdbc.jar In the Download links for database drivers section there are listed the URLs from where to download the drivers necessary for accessing Microsoft SQL Server databases in <oXygen/>. You can manage the Driver Files using Add, Remove, Detect and Stop(detection) buttons. 4. Select the most suited Driver class. 5. Click OK to finish the data source configuration. How to configure a MySQL Data Source <oXygen/>'s default configuration already contains a generic JDBC data source called MySQL. 1. Go to Preferences -> Data Sources. In the Data Sources panel click the New button. 206 Working with Databases 2. Enter a unique name for this data source and select Generic JDBC from the driver type combo box. Add the following MySQL specific files: • mysql-com.jar You can manage the Driver Files using Add, Remove, Detect and Stop(detection) buttons. 3. Select the most suited Driver class. 4. Click OK to finish the data source configuration. How to configure an Oracle 10.2 Data Source 1. Go to Preferences -> Data Sources. In the Data Sources panel click the New button. 2. Enter a unique name for this data source and select Oracle from the driver type combo box. Add the following Oracle 10.2 specific files: • ojdbc14.jar In the Download links for database drivers section there are listed the URLs from where to download the drivers necessary for accessing Oracle 10.2 databases in <oXygen/>. You can manage the Driver Files using Add, Remove, Detect and Stop(detection) buttons. 3. Select the most suited Driver class. 4. Click OK to finish the data source configuration. Configuring Database Connections This section presents a set of procedures describing how to configure connections that use relational data sources. How to Configure an IBM DB2 Connection Figure 10.2. The Connection Configuration Dialog 207 Working with Databases 1. Go to Preferences -> Data Sources. In the Connections panel click the New button. 2. Enter a unique name for this connection and select one of the previously configured DB2 data sources from the Data Source combo box. 3. Fill-in the Connection Details: 4. URL URL to the installed IBM DB2 engine. User User name to access the IBM DB2 database engine. Password Password to access the IBM DB2 engine. Click OK. How to Configure a JDBC-ODBC Connection 1. Go to Preferences -> Data Sources. In the Connections panel click the New button. 2. Enter a unique name for this connection and select one of the previously configured Generic JDBC data sources from the Data Source combo box. 3. Fill-in the Connection Details: 4. URL URL to the configured ODBC source. User User name to access the configured ODBC source. Password Password to access the configured ODBC source. Click OK. How to Configure a Microsoft SQLServer Connection 1. Go to Preferences -> Data Sources. In the Connections panel click the New button. 2. Enter a unique name for this connection and select one of the previously configured SQLServer data sources from the Data Source combo box. 3. Fill-in the Connection Details: 4. URL URL to the installed SQLServer engine. User User name to access the SQLServer database engine. Password Password to access the SQLServer engine. Click OK. How to Configure a MySQL Connection 1. Go to Preferences -> Data Sources. In the Connections panel click the New button. 208 Working with Databases 2. Enter a unique name for this connection and select one of the previously configured MySQL data sources from the Data Source combo box. 3. Fill-in the Connection Details: 4. URL URL to the installed MySQL engine. User User name to access the MySQL database engine. Password Password to access the MySQL engine. Click OK. How to Configure an Oracle 10.2 Connection 1. Go to Preferences -> Data Sources. In the Connections panel click the New button. 2. Enter a unique name for this connection and select one of the previously configured Oracle data sources from the Data Source combo box. 3. Fill-in the Connection Details: 4. URL URL to the installed Oracle engine. User User name to access the Oracle database engine. Password Password to access the Oracle engine. Click OK. Note Registering,unregistering or updating a schema might involve dropping/creating types. For schema-based XMLType tables or columns in schemas, you need privileges like • CREATE ANY TABLE • CREATE ANY INDEX • SELECT ANY TABLE • UPDATE ANY TABLE • INSERT ANY TABLE • DELETE ANY TABLE • DROP ANY TABLE • ALTER ANY TABLE • DROP ANY INDEX 209 Working with Databases To avoid granting these privileges to the schema owner, Oracle recommends that the operations requiring these privileges be performed by a DBA if there are XML schema-based XMLType table or columns in other users' database schemas. Resource Management Database Explorer View This view presents in a tree-like fashion the database connections configured in Preferences -> Data Sources. You can connect to a database simply by expanding the connection node. The database structure can be expanded up to column level. <oXygen/> supports multiple simultaneous database connections and the connections tree provides an easy way to browse them. Figure 10.3. Database Explorer View The following objects are displayed by the Database Explorer view: • Connection • Catalog • XML Schema Repository • XML Schema Component • Schema • Table • System Table 210 Working with Databases • Table Column The following actions are available in the view's toolbar: • • The Filters button opens the Data Sources / Table FiltersPreferences page, allowing you to decide which table types will be displayed in the Database Explorer view. The Configure Database Sources button opens the Data Sources preferences page where you can configure both data sources and connections. Below you can find a description of the contextual menu actions available on the Database Explorer levels. Please note that you can also open an XML schema component in the editor by double-clicking it. To view the content of a table in the Table Explorer view double-click one of its fields. Actions available at connection level • • Refresh - performs a refresh of the selected node's subtree. Configure Database Sources - opens the Data Sourcespreferences page where you can configure both data sources and connections. Actions available at catalog level • Refresh - performs a refresh of the selected node's subtree. Actions available at schema level • Refresh - performs a refresh of the selected node's subtree. Actions available at table level • Refresh - performs a refresh of the selected node's subtree. • Edit - opens the selected table in the Table Explorer View. • Export to XML - opens the Export Criteria dialog (a thorough description of this dialog can be found in the Import from database chapter). View. XML Schema Repository level For relational databases that support XML schema repository (XSR) in their database catalogs, the actions available at this level are presented in the following sections. Oracle's XML Schema Repository Level • Refresh - performs a refresh of the selected node's subtree. • Register - Opens a dialog for adding a new schema file in the DB XML repository. 211 Working with Databases Figure 10.4. Register Dialog To add an XML Schema, enter the schema URI and location on your file system. Local scope means that the schema will be visible only to the user who registers it. Global scope means that the schema is public. IBM DB2's XML Schema Repository Level • Refresh - performs a refresh of the selected node's subtree. • Register - opens a dialog for adding a new schema file in the XML Schema repository. Figure 10.5. Register Dialog The XSR Information section of the above figure contains the following fields: • XML schema file - location on your file system. • XSR name - schema name. • Comment - short comment (optional). • Schema location - primary schema name (optional). Decomposition means that parts of the XML documents are stored into relational tables. Which parts map to which tables and columns is specified into the schema annotations. 212 Working with Databases Schema dependencies management is done by using the Add and Remove buttons. Actions available at schema level: • Refresh - performs a refresh of the selected node (and it's subtree). • Unregister - removes the selected schema from the XML Schema Repository. • View - opens the selected schema in <oXygen/>. Microsoft SQL Server's XML Schema Repository Level • Refresh - performs a refresh of the selected node's subtree. • Register - Opens a dialog for adding a new schema file in the DB XML repository. Figure 10.6. Register Dialog To register a new schema, enter a collection name and the necessary schema files in the above dialog. XML Schema files management is done by using the Add and Remove buttons. Actions available at schema level: • Refresh - performs a refresh of the selected node (and it's subtree). • Add - adds a new schema to the XML Schema files. • Unregister - removes the selected schema from the XML Schema Repository. • View - opens the selected schema in <oXygen/>. Table Explorer View Every table from the Database Explorer can be displayed and edited by pressing the Edit button from the contextual menu or by double-clicking one of its fields. To modify a cell's content, double click it and start typing. When editing is finished, <oXygen/> will try to update the database with the new cell content. 213 Working with Databases Figure 10.7. The Table Explorer View You can sort the content of a table by one of its columns by clicking on its (column) header. Note the following: • The first column is an index (does not belong to the table structure). • Every column header contains the field name and its data type. • The primary key columns are marked with this symbol: . • Multiple tables are presented in a tabbed manner For performance issues, you can set the maximum number of cells that will be displayed in the Table Explorer view ( the "Limit the number of cells" field from the Data Sources Preferences page ). If a table having more cells than the value set in <oXygen/>'s options is displayed in the Table Explorer view, a warning dialog will inform you that the table is only partially shown. Note A custom validator cannot be applied on files loaded through an <oXygen/> custom protocol plugin developed independently and added to <oXygen/> after installation. This applies also on columns of type XML. You will be notified if the value you have entered in a cell is not valid ( and thus it cannot be updated). • If the content of the edited cell does not belong to the data type of the column, the cell will be marked by a red square and it will remain in editing state until a correct value is inserted. For example, in the above figure DEPARTMENT_ID contains NUMBER values. If a character or string was inserted, the cell will look like this: 214 Working with Databases Figure 10.8. Cell containing an invalid value. • If the constraints of the database aren't met (like primary key constraints for example), an Information dialog will appear, notifying you of the reason the database hasn't been updated. For example, if you'd try to set the primary key DEPARTMENT_ID for the second record in the table to 10 also, you would get the following message: Figure 10.9. Duplicate entry for primary key The usual edit actions (Cut, Copy, Paste, Select All, Undo, Redo) are available in the popup menu of the edited cell The contextual menu available on every cell has the following actions: • Set NULL - sets the content of the cell to (null). This action is disabled for columns that cannot be null. • • • Insert row - inserts an empty row in the table. Duplicate row - makes a copy of the selected row and adds it in the Table Explorer view. You should note that the new row will not be inserted in the database table until all conflicts are solved. Commit row - commits the selected row. 215 Working with Databases • Delete row - deletes the selected row. • Copy - copies the content of the cell. • Paste - performs paste in the selected cell Some of the above actions are also available on the Table Explorer toolbar: • Export to XML - opens the Export Criteria dialog (a thorough description of this dialog can be found in the Import from database chapter). View. • Refresh - performs a refresh of the selected node's subtree. • Insert row - inserts an empty row in the table. • Duplicate row - makes a copy of the selected row and adds it in the Table Explorer view. You should note that the new row will not be inserted in the database table until all conflicts are solved. • Commit row - commits the selected row. • Delete row - deletes the selected row. SQL Execution Support <oXygen/>'s support for writing SQL statements includes syntax highlight, folding and drag&drop(DND) from the Database Explorer View. It also includes transformation scenarios for executing the statements and the results are displayed in the Table Explorer View. Drag and Drop from Database Explorer Configure a database connection as it was shown previously in this chapter and browse to the table you will use in your statement and drag it into the editor (where a sql file is open). 216 Working with Databases Figure 10.10. SQL statement editing with DND Next, select the type of statement from the popup menu that appears in the sql editor. Depending on your choice, one of the following statements will be inserted into the document: • SELECT `field1`,`field2`, .... FROM `catalog`. `table` (for this example: SELECT `DEPT`,`DEPTNAME`,`LOCATION` FROM `test`.`department` ) • UPDATE `catalog`. `table` SET `field1`=, `field2`=,.... (for this example: UPDATE `test`.`department` SET `DEPT`=, `DEPTNAME`=, `LOCATION`=) • INSERT INTO`catalog`. `table` ( `field1`,`field2`, ....) VALUES (, , ) (for this example: INSERT INTO `test`.`department` (`DEPT`,`DEPTNAME`,`LOCATION`) VALUES (, , )) • DELETE FROM `catalog`. `table` (for this example: DELETE FROM `test`.`department`) DND is available both on the table and on its fields. Click on the column and drag it into the editor. The same popup menu as above will appear. Depending on your choice, one of the following statements will be inserted into the document: • SELECT `field` FROM `catalog`. `table` (for this example: SELECT `DEPT` FROM `test`.`department` ) • UPDATE `catalog`. `table` SET `field`= (for this example: UPDATE `test`.`department` SET `DEPT`=) • INSERT INTO`catalog`. `table` ( `field1) VALUES () (for this example: INSERT INTO `test`.`department` (`DEPT`) VALUES ()) • DELETE FROM `catalog`. `table` (for this example: DELETE FROM `test`.`department` WHERE `DEPT`=) 217 Working with Databases SQL Validation Currently, SQL validation support is offered for IBM DB2. Please note that if you choose a connection that doesn't support SQL validation you will receive a warning when trying to validate. The SQL document will be validated using the connection from the associated transformation scenario. Executing SQL Statements First configure a transformation scenario. Click on the Configure Transformation Scenario button from the Transformation toolbar. The dialog that appears contains the list of existing scenarios that apply to SQL documents. To configure a new scenario, click the New button. Figure 10.11. New SQL scenario dialog Enter a name for the scenario and choose one of the available database connections. To configure a new connection click on Configure Database Sources . Placeholders(?) for parameters are supported by <oXygen/>. For the following example SELECT * FROM `test`.`department` where DEPT = ? or DEPTNAME = ? two parameters can be configured for the transformation scenario. To do this, in the previous dialog click the Parameters button and add a new parameter for each placeholder. When the sql statement will be executed, the first placeholder will be replaced with the value set for the first parameter in the scenario, the second placeholder will be replaced by the second parameter value and so on. The result of a SQL transformation will be displayed in the Table Explorer view. Importing from Databases This feature is explained in detail in the Import from database section of Importing Data chapter. Creating XML Schema from Databases This feature is explained in detail in the Convert table structure to XML section of Importing Data chapter. Native XML Database (NXD) Support Native XML databases have an XML-based internal model and their fundamental unit of storage is XML. <oXygen/> offers support for: Berkeley DB XML, eXist, MarkLogic, Software AG Tamino, Raining Data TigerLogic, X-Hive/DB. 218 Working with Databases Configuring Database Data Sources This section presents a set of procedures describing how to configure NXD data sources. How to configure a Berkeley DB XML datasource The latest instructions on how to configure Berkeley DB XML support in <oXygen/> can be found on our w e b s i t e [http://www.oxygenxml.com/doc/ug-standalone/native-xml-database-support.html#configure-berkeley-datasource]. The following directory definitions shall apply: • OXY_DIR - oXygen installation root directory. (for example on Windows C:\Program Files\Oxygen 7.0) • DBXML_DIR - Berkeley DB XML database root directory. (for example on Windows C:\Program Files\Sleepycat Software\Berkeley DB XML 2.2.13) • DBXML_LIBRARY_DIR (usually on Mac and Unix is DBXML_DIR/lib and on Windows is DBXML_DIR/bin) 1. Go to Preferences -> Data Sources. In the Data Sources panel click the New button. 2. Enter a unique name for this data source and select Berkeley DBXML from the driver type combo box. Figure 10.12. Data Source Drivers Configuration Dialog 3. Add the following Berkeley DB specific files: • db.jar (check for it into DBXML_DIR/lib or DBXML_DIR/jar) • dbxml.jar (check for it into DBXML_DIR/lib or DBXML_DIR/jar) 4. Click OK to finish the data source configuration. 219 Working with Databases How to configure an eXist datasource The latest instructions on how to configure eXist support in <oXygen/> can be found on our website [http://www.oxygenxml.com/doc/ug-standalone/native-xml-database-support.html#configure-exist-datasource]. The eXist database server versions supported by <oXygen/> are 1.0 and 1.1. 1. Go to Preferences -> Data Sources. In the Data Sources panel click the New button. 2. Enter a unique name for this data source and select eXist from the driver type combo box. 3. Add the following eXist specific files: • exist.jar (check for it into your eXist installation root directory) • xmldb.jar (check for it into /lib/core subdirectory of your eXist installation root directory) • xmlrpc-1.2-patched.jar (check for it into /lib/core subdirectory of your eXist installation root directory) 4. Click OK to finish the data source configuration. How to configure a MarkLogic datasource The latest instructions on how to configure MarkLogic support in <oXygen/> can be found on our website [http://www.oxygenxml.com/doc/ug-standalone/native-xml-database-support.html#configure-marklogic-datasource]. 1. Go to Preferences -> Data Sources. In the Data Sources panel click the New button. 2. Enter a unique name for this data source and select MarkLogic from the driver type combo box. 3. Add the following MarkLogic specific files: • xdbc.jar • xdmp.jar In the Download links for database drivers section there are listed the URLs from where to download the drivers necessary for accessing MarkLogic databases in <oXygen/>. 4. Click OK to finish the data source configuration. How to configure a Software AG Tamino datasource The latest instructions on how to configure Software AG Tamino support in <oXygen/> can be found on o u r w e b s i t e [http://www.oxygenxml.com/doc/ug-standalone/native-xml-database-support.html#configure-tamino-datasource]. 1. Go to Preferences -> Data Sources. In the Data Sources panel click the New button. 2. Enter a unique name for this data source and select Tamino from the driver type combo box. 3. Using the Add button add the following jar files available in the SDK\TaminoAPI4J\lib subdirectory of the Tamino 4.4.1 database install directory: 220 Working with Databases • TaminoAPI4J.jar • TaminoAPI4J-l10n.jar • TaminoJCA.jar Note You must use the jar files from the version 4.4.1 of the Tamino database. 4. Click OK to finish the data source configuration. How to configure a Raining Data TigerLogic datasource The latest instructions on how to configure TigerLogic support in <oXygen/> can be found on our website [http://www.oxygenxml.com/doc/ug-standalone/native-xml-database-support.html#configure-tigerlogic-datasource]. 1. Go to Preferences -> Data Sources. In the Data Sources panel click the New button. 2. Enter a unique name for this data source and select TigerLogic from the driver type combo box. 3. Add the following TigerLogic specific files (found in the TigerLogic JDK lib directory from the server side): • connector.jar • jca-connector.jar • tlapi.jar • tlerror.jar • utility.jar • xmlparser.jar • xmltypes.jar 4. Click OK to finish the data source configuration. How to configure an X-Hive/DB datasource The latest instructions on how to configure X-Hive/DB support in <oXygen/> can be found on our website [http://www.oxygenxml.com/doc/ug-standalone/native-xml-database-support.html#configure-xhive-datasource]. 1. Go to Preferences -> Data Sources. In the Data Sources panel click the New button. 2. Enter a unique name for this data source and select X-Hive from the driver type combo box. 3. Add the following X-Hive/DB specific files (found in the X-Hive/DB lib directory from the server side): • antlr.jar • icu4j.jar 221 Working with Databases • retroweaver-rt.jar • xhive.jar If you like to use a bootstrap file when connecting to the database you need to additionaly add the following JAR files found in the same place: • fop.jar • jsr173_api.jar • lucene.jar • mx4j.jar • serializer.jar • w3c.jar • xalan.jar • xbean.jar • xercesImpl.jar • xml-apis.jar 4. Click OK to finish the data source configuration. Configuring Database Connections This section presents a set of procedures describing how to configure connections that use Native XML Database data sources. 222 Working with Databases How to configure a Berkeley DB XML Connection Figure 10.13. The Connection Configuration Dialog 1. Go to Preferences -> Data Sources. In the Connections panel click the New button. 2. Enter a unique name for this connection and select one of the previously configured Berkeley data sources from the Data Source combo box. 3. Fill-in the Connection Details: 4. Environment home directory Path to the Berkeley DB XML's home directory. Verbosity The user can choose between four levels of verbosity: DEBUG, INFO, WARNING, ERROR. Join existing environment If checked, an attempt will be made to join an existing environment in the specified home directory and all the original environment settings will be preserved. If that fails, you should consider reconfiguring the connection with this option unchecked. Click OK. 223 Working with Databases How to configure an eXist Connection Figure 10.14. The Connection Configuration Dialog 1. Go to Preferences -> Data Sources. In the Connections panel click the New button. 2. Enter a unique name for this connection and select one of the previously configured eXist data sources from the Data Source combo box. 3. Fill-in the Connection Details 4. XML DB URI URI to the installed eXist engine. User User name to access the eXist database engine. Password Password to access the eXist database engine. Collection eXist organizes all documents in hierarchical collections. Collections are like directories. They are used to group related documents together. This text field allows the user to set the default collection name. Click OK. 224 Working with Databases How to configure a MarkLogic Connection Figure 10.15. The Connection Configuration Dialog 1. Go to Preferences -> Data Sources. In the Connections panel click the New button. 2. Enter a unique name for this connection and select one of the previously configured MarkLogic data sources from the Data Source combo box. 3. Fill-in the Connection Details: 4. Host The hostname or ip address of the installed MarkLogic engine. Port The port number of the MarkLogic engine. User User name to access the MarkLogic engine. Password Password to access the MarkLogic engine. Click OK. 225 Working with Databases How to configure a Software AG Tamino Connection Figure 10.16. The Connection Configuration Dialog 1. Go to Preferences -> Data Sources. In the Connections panel click the New button. 2. Enter a unique name for this connection and select one of the previously configured Tamino data sources from the Data Source combo box. 3. Fill-in the Connection Details: 4. XML DB URI URI to the installed Tamino engine User User name to access the Tamino database engine Password Password to access the Tamino database engine Database The name of the database to access from the Tamino database engine. Click OK. 226 Working with Databases How to configure a Raining Data TigerLogic Connection Figure 10.17. The Connection Configuration Dialog 1. Go to Preferences -> Data Sources. In the Connections panel click the New button. 2. Enter a unique name for this connection and select one of the previously configured TigerLogic data sources from the Data Source combo box. 3. Fill-in the Connection Details: 4. Host The hostname or ip address of the installed TigerLogic engine. Port The port number of the TigerLogic engine. User User name to access the TigerLogic engine. Password Password to access the TigerLogic engine. Database The name of the database to access from the TigerLogic engine. Click OK. 227 Working with Databases How to configure an X-Hive/DB Connection Figure 10.18. The Configure Connection Dialog 1. Go to Preferences -> Data Sources. In the Connections panel click the New button. 2. Enter a unique name for this connection and select one of the previously configured X-Hive DB data sources from the Data Source combo box. 3. Fill-in the Connection Details: URL The URL property for X-Hive connection. It is also called xhive.bootstrap and specifies the location of the X-Hive/DB federation. This property can be used in two different ways: If the property is a URL of the form xhive://host:port, the X-Hive/DB connection will attempt to connect to an XHive/DB server running behind the specified TCP/IP port. If the property is the complete (or relative) path to an XhiveDatabase.bootstrap file, an X-Hive/DB server will be started in the current JVM. Depending on the application, this can be much faster than using a remote server because the communication overhead is avoided. However, only one JVM can run an X-Hive/DB server for a specific federation at the same time. For the second case (using a bootstrap file to connect) you need to add additional JAR files when you configure the data source. User User name to access the X-Hive/DB database engine. Password Password to access the X-Hive/DB database engine. 228 Working with Databases 4. Database The name of the database to access from the X-Hive/DB database engine. Run XQuery in read/write session (with committing) If checked the X-Hive session ends with a commit, otherwise it ends with a rollback. Click OK. Resource Management Database Explorer View This view presents in a tree-like fashion the database connections configured in Preferences -> Data Sources. You can connect to a database simply by expanding the connection node. The database structure can be expanded up to column level. <oXygen/> supports multiple simultaneous database connections and the connections tree provides an easy way to browse them. Some of the basic components employed by the XML:DB API are collections and resources, and they appear in the tree sorted in alphabetical order. A collection is a hierarchical container for resources and further sub-collections. There are two types of resources: XML resource and non XML resource . An XML resource represents an xml document or a document fragment, selected by a previously executed XPath query. Figure 10.19. The Database Explorer View Below you can find a description of the contextual menu actions available on the Database Explorer levels (explained for each connection). Please note that you can open in the editor a resource or a schema component by double-clicking it. 229 Working with Databases Berkeley DB XML Connection Actions available at connection level • • Refresh - performs a refresh of the selected node's subtree. Configure Database Sources - opens the Data Sources preferences page where you can configure both data sources and connections. • Add container - allows adding a new container. Actions available at container level • Refresh - performs a refresh of the selected node's subtree. • Add Resource - adds a new XML resource to the selected container. • Rename - allows you to specify a new name for the selected container. • Delete - removes the selected container from the database tree. • Edit indices - allows you to edit the indices for the selected container. Figure 10.20. Container indices • Specifying the granularity: • Document granularity is good for retrieving large documents 230 Working with Databases • Node granularity is good for retrieving nodes from within documents • Adding/editing indices: Figure 10.21. Adding/editing indices • Node - the node name • Namespace - the index namespace • Index strategy: • Index type: • Uniqueness - indicates whether the indexed value must be unique within the container • Path type: • node - indicates that you want to index a single node in the path • edge - indicates that you want to index the portion of the path where two nodes meet • Node type: • element - an element node in the document content • attribute - an attribute node in the document content • metadata - a node found only in a document's metadata content. • Key type: • equality - improves the performances of tests that look for nodes with a specific value • presence - improves the performances of tests that look for the existence of a node regardless of its value • substring - improves the performance of tests that look for a node whose value contains a given substring 231 Working with Databases • Syntax types - the syntax describes what sort of data the index will contain and is mostly used to determine how indexed values are compared Actions available at resource level • Refresh - performs a refresh of the selected resource. • Open - opens the selected resource in the editor. • Rename - allows you to change the name of the selected resource. • Move - allows you to move the selected resource in a different container in the database tree. • Delete - removes the selected resource from the container. • Copy location - allows you to copy to clipboard an application specific URL for the resource which can then be used for various actions like opening or transforming the resources. eXist Connection Actions available at connection level • • Refresh - performs a refresh of the selected node's subtree. Configure Database Sources - opens the Data Sources preferences page where you can configure both data sources and connections. Actions available at container level • Refresh - performs a refresh of the selected node's subtree. • Add Resource - adds a new XML resource to the selected container. • Add Container - creates a new collection in the selected one. • Delete - removes the selected collection. • Rename - allows you to change the name of the selected collection. • Move - allows you to move the selected collection in a different location in the database tree. Actions available at resource level • Refresh - performs a refresh of the selected resource. • Open - opens the selected resource in the editor. • Rename - allows you to change the name of the selected resource. • Move - allows you to move the selected resource in a different collection in the database tree. • Delete - removes the selected resource from the collection. • Copy location - allows you to copy to clipboard an application specific URL for the resource which can then be used for various actions like opening or transforming the resources. 232 Working with Databases • Properties - allows the user to view various useful properties associated with the resource. • Save As - allows you to save the name of the selected binary resource as a file on disk. MarkLogic Connection Note Resource management is unavailable (no browsing support is offered). The interaction with the database is made using XQuery (more on this topic can be found in the XQuery section). Software AG Tamino Connection Actions available at connection level • • Refresh - performs a refresh of the selected node's subtree. Configure Database Sources - opens the Data Sources preferences page where you can configure both data sources and connections. • Add container - allows you to create a new collection in the database. Actions available at collection level For every new Tamino collection, you can specify if a schema is required, optional or prohibited. The following actions are available: • Refresh - performs a refresh of the selected node's subtree. • Insert XML instance - allows you to load a new XML document. • Insert non XML instance - allows you to load a non XML document. • Modify Collection Properties - allows you to change the schema usage for the selected collection to optional. This action is available on collections with required and prohibited schema usage. • Define schema - allows you to add a new schema in the Schema Repository. This action is available on collections with optional and required schema usage. • Delete - removes the selected collection. • Set default - Sets this collection as the default collection for running queries with the input() function. Actions available at schema level • • • Refresh - performs a refresh of the selected schema. Open - opens the selected schema in the editor. There are supported schema changes that preserve the validity relative to the existent instances. Delete - removes the selected schema from the Schema Repository. 233 Working with Databases Actions available at resource level • Refresh - performs a refresh of the selected resource. • Open - opens the selected resource in the editor. • Rename - allows you to change the name of the selected resource. • Delete - removes the selected resource. • Copy location - allows you to copy to clipboard an application specific URL for the resource which can then be used for various actions like opening or transforming the resources. • Properties - allows the user to view various useful properties associated with the resource. • Save As - allows you to save the name of the selected binary resource as a file on disk. Raining Data TigerLogic Connection Note Resource management is unavailable (no browsing support is offered). The interaction with the database is made using XQuery (more on this topic can be found in the XQuery section). X-Hive/DB Connection Actions available at connection level • • Refresh - performs a refresh of the selected node's subtree. Configure Database Sources - opens the Data Sources preferences page where you can configure both data sources and connections. • Add library - allows you to add a new library. • Insert XML Instance - allows you to add a new xml resource directly into the database root. See XHive Parser Configuration for more details. • Insert non XML Instance - allows you to add a new non xml resource directly into the database root. • Properties - displays the connection properties. Actions available at catalog level • Refresh - performs a refresh of the selected catalog. • Add AS models - allows you to add a new abstract schema model to the selected catalog. • Set default schema - allows you to set a default DTD to be used for parsing. It is not possible to set a default XML Schema. • Clear default schema - allows you to clear the default DTD. The action is available only if there is a DTD set as default. • Properties - displays the catalog properties. 234 Working with Databases Actions available at schema resource level • Refresh - performs a refresh of the selected schema resource. • Open - opens the selected schema resource in the editor. • Rename - allows you to change the name of the selected schema resource. • Save As - allows you to save the selected schema resource as a file on disk. • Delete - removes the selected schema resource from the catalog • Copy location - allows you to copy to clipboard the URL of the selected schema resource. • Set default schema - allows you to set the selected DTD to be used as default for parsing. The action is available only for DTD. • Clear default schema - allows you to unset the selected DTD. The action is available only if the selected DTD is the current default to be used for parsing. Actions available at library level • Refresh - performs a refresh of the selected library. • Add library - adds a new library as child of the selected library. • Add local catalog - adds a catalog to the selected library. By default, only the root-library has a catalog, and all models would be stored there. • • Insert XML Instance - allows you to add a new xml resource to the selected library. See X-Hive Parser Configuration for more details. Insert non XML Instance - allows you to add a new non xml resource to the selected library. • Rename - allows you to specify a new name for the selected library. • Move - allows you to move the selected library to a different one. • Delete - removes the selected library. • Properties - displays the library properties. Actions available at resource level • Refresh - performs a refresh of the selected resource. • Open - opens the selected resource in the editor. • Rename - allows you to change the name of the selected resource. • Move - allows you to move the selected resource in a different library in the database tree. • Save As - allows you to save the selected binary resource as a file on disk. • Delete - removes the selected resource from the library. 235 Working with Databases • Copy location - allows you to copy to clipboard the URL of the selected resource. • Add AS model - allows you to add an XML schema to the selected XML resource. • Set AS model - allows you to set an active AS model for the selected XML resource. • Clear AS model - allows you to clear the active AS model of the selected XML resource. • Properties - displays the resource properties. Available only for XML resources. X-Hive parser configuration for adding XML instances Figure 10.22. Parser configuration • DOM Level 3 parser configuration parameters. More about each parameter can be found here: DOM L e v e l 3 C o n fi g u r a t i o n [http://www.w3.org/TR/2004/REC-DOM-Level-3-Core-20040407/core.html#DOMConfiguration] • X-Hive specific parser parameters (for more information please consult the X-Hive manual): • xhive-store-schema - During validated parsing, the corresponding DTD's or XML schemas are or are not stored in the catalog. • xhive-store-schema-only-internal-subset - Store only the internal subset of the document (not any external subset). Modifier for xhive-store-schema (only has a function when that parameter is set to true, and when DTDs are involved). Use this option if you only want to store the internal subset of the document (not the external subset). • xhive-ignore-catalog - During validated parsing, the corresponding DTD's and XML schemas in the catalog are ignored. • xhive-psvi - Store psvi information on elements and attributes. Documents parsed with this feature turned on, give access to psvi information and enable support of data types by XQuery queries. 236 Working with Databases • xhive-sync-features - Convenience setting. With this setting turned on, parameter settings of XhiveDocumentIf are synchronized with the parameter settings of LSParser. Note that parameter settings "xhive-psvi" and "schema-location" are always synchronized. XQuery and Databases XQuery is a native XML query language and it can be used to query XML views of relational data to create XML results. It provides the mechanism to efficiently and easily extract information from Native XML Databases (NXD) and relational data as well. The following database systems offer XQuery support: • Native XML Databases: • Berkeley DB XML • eXist • MarkLogic (validation support not available) • Software AG Tamino • Raining Data TigerLogic (validation support not available) • X-Hive/DB • Relational Databases: • IBM DB2 • Microsoft SQL Server (validation support not available) • Oracle (validation support not available) Drag and Drop from Database Explorer You can use <oXygen/>'s DND support when you are querying relational databases. Configure the relational data source and the database connection (as it was previously shown in this chapter), browse the connection up to table or column level and drag it in the editor (where an xquery file is open). An XPath expression of the selection will be inserted in the xquery document (at caret position). XQuery validation Please note that if you choose a processor that doesn't support XQuery validation you will receive a warning when trying to validate. Note If there is no transformation scenario associated with the current document, the validation will be performed using the processor or connection specified in the XML / XSLT - FO / XQuery Preferences page. Otherwise, the xquery document will be validated using the Transformer from the associated scenario. 237 Working with Databases XQuery transformation Data is stored in relational databases but often it is required that data is extracted and transformed as XML when interfacing to other components and services Also, it is an XPath-based querying language supported by most NXD vendors. XQuery is designed to retrieve and interpret XML data from any source, whether it is a database or a document. To perform a query database you will first need to configure a data source and a connection (details can be found in the Relational Database Support and Native XML Database Support sections). Next, configure a transformation scenario and associate it with your XQuery document: 1. Open the Configure Transformation Scenario dialog. 2. Click the New button. 3. In the Edit Scenario dialog insert the scenario's name. Then, from the list of available Transformers choose the database connection you need. Configure any other parameters if necessary. 4. Click OK to finish editing the scenario. To query the database, apply the transformation scenario associated with your XQuery document. 238 Chapter 11. Importing data Introduction XML was designed to describe data. Computer systems and databases contain data in incompatible formats and one of the most time-consuming activities has been to exchange data between these systems. Converting the data to XML can greatly reduce complexity and create data that can be read by many different types of applications. This is why <oXygen/> now offers you support for importing text files, MS Excel files, Database Data and HTML files into XML documents, that can be further converted into other formats using the Transform features. Import from database Import table content as XML document To import the content of a database table, select File → Import → Database Data… Next, in the "Select database table" choose the connection you want to use. Note Only connections configured on relational data sources can be used to import to XML or to generate schemas. You can edit, delete or add a new data source and connection: click on the "Configure Database Sources" button and the "Preferences" dialog will open at Data Sources section. Click Connect. Figure 11.1. Select database table Dialog 239 Importing data From the catalogs list click on a schema and choose the required table. Click Ok. The "Import criteria" Dialog will open next, showing a default Query string like "select * from table" in SQL Query. You can click the "SQL Preview" button to see the input data displayed in a tabular form and the XML Import Preview containing an example of what the generated XML will look like. The SQL Query message is editable. You can specify which fields should be taken into consideration. Figure 11.2. Import from Database Criteria Dialog If you edit the query string so that the query does a join of two or more tables and selects columns with the same name from different tables you should use an alias for the columns like in the following example. That will avoid a confusion of two columns mapped to the same name in the result document of the importing operation. select s.subcat_id, s.nr as s_nr, s.name, q.q_id, q.nr as q_nr, q.q_text from faq.subcategory s, faq.question q where ... 240 Importing data SQL Preview Displays the labels that will be used in the XML document and its preview. Import setting: If the "SQL Preview" button is pressed, it shows the labels that will be used in the XML document and the first 5 lines from the database. All data items in the input will be converted by default to element content, but this can be over-ridden by clicking on the individual column headers. Clicking once on a column header (ex Heading0) will cause the data from this column to be used as attribute values on the row elements. Clicking a second time - the column's data will be ignored when generating the XML file. You can cycle through these three options by continuing to click on the column header. If the data column will be converted to element content, the header will contain the "<>" symbol. If the data column will be converted to attribute content, the header will contain the "=" symbol, and if it will be skipped, the header will contain "x". Change labels This button opens a new dialog, allowing you to edit the names of the root and row elements, change the XML name and the conversion criterion. The XML names can be edited by double-clicking on the desired item and entering the required label. The conversion criterion can also be modified by selecting from the drop-down list ELEMENT, ATTRIBUTE or SKIPPED. Open in editor If checked, the new XML document created from the imported text file will be opened in the editor. Save in file If checked, the new XML document will be saved at the specified path. Note If only Open in editor is checked, the newly created document will be opened in the editor, but as an unsaved file. Generate XML Schema Allows you to specify the path of the generated XML Schema file. 241 Importing data Convert table structure to XML Schema Figure 11.3. Select database table Dialog Next, in the "Select database table" choose the connection you want to use. Note Only connections configured on relational data sources can be used to import to XML or to generate schemas. You can edit, delete or add a new data source and connection: click on the "Configure Database Sources" button and the "Preferences" dialog will open at the Data Sources section. Click Connect. Format Enables you to choose a format for the structure. • Flat - Generates an XML Schema according to the ISO-ANSI Working draft (Part 14: XML Related Specifications SQL/XML). • Hierarchical - Represents the database structure as a tree hierarchy taking into account the relationship between tables. Criterion The Criterion options allow the user to specify the name of the selected database column and also how it should be converted into XML. The following options are available: 242 Importing data • Element: When checked the selected column will be converted into an XML element. • Attribute: If checked the selected column will be converted into an XML attribute. • Skipped: Is to be selected if the intention is to skip that column from being imported. • Name: Allows you to specify the name of the column to be imported. Implicitly <oXygen/> suggests an import name that is according to SQL/XML Specification. • Type: Displays the data type of the imported column. Import from MS Excel files <oXygen/> can also import MS (Microsoft) Excel files into XML format documents. To do this, select File → Import → MS Excel File... In the "Select Excel Sheet" dialog provide the URL of the Excel document, choose one of the available sheets and click Ok. Figure 11.4. Select Excel Sheet The input data is displayed next in the "Import Criteria" Dialog in a tabular form and the XML Import Preview contains an example of what the generated XML will look like. The Import Criteria Dialog has a similar behaviour with the one shown in case of "Import from text files". Note Please note that Excel sheets saved with versions later that Excel 2002 may not be handled correctly by the Import operation. Import from HTML files Another format that can be imported in an XML document is HTML. Procedure 11.1. Import from HTML 1. Select File → Import → Import HTML ... The Import HTML dialog is displayed. 243 Importing data Figure 11.5. The Import HTML dialog 2. Complete the HTML document name, select the type of the result document - XHTML 1.0 Transitional or XHTML 1.0 Strict, then click the OK button. The resulted document will be an XHTML file containing a DOCTYPE declaration referring to the XHTML DTD definition on the Web and the parsed content of the imported file as XHTML Transitional or Strict depending on what radio button the user chose when performing the import operation. Import from text files To import from a text file you'll have to select File → Import → Text File... In the "Select text file" dialog choose the URL and the encoding to be used and click OK. Figure 11.6. Select text file Dialog • URL: Specifies the location of the text file to be imported. • Encoding: Specifies the encoding (Unicode character encoding) Next, in the "Import Criteria" Dialog select the field delimiter for the import settings. The input data is displayed here in a tabular form and the XML Import Preview contains an example of what the generated XML will look like. 244 Importing data Figure 11.7. Import Text Criteria Dialog The above table shows the labels that will be used in the XML document and the first 5 lines from the text file in a tabular form. All data items in the input will be converted by default to element content, but this can be over-ridden by clicking on the individual column headers. Clicking once on a column header will cause the data from this column to be used as attribute values on the row elements. Clicking a second time - the column's data will be ignored when generating the XML file. You can cycle through these three options by continuing to click on the column header. If the data column will be converted to element content, the header will contain the "<>" symbol. If the data column will be converted to attribute content, the header will contain the "=" symbol, and if it will be skipped, the header will contain "x". First row contains field names If the option is checked, you'll notice that the table has moved up; the default column headers are replaced (where there is information) by the content of the first row. In other words, the first row is interpreted as containing the field names. The changes are also visible in the preview of the XML document. To return to default (where the first row is interpreted as not containing field names), simply uncheck the option. Change labels If the above option is set, the first row of the input file contains presentation names and these will be used as tokens in the created XML files, otherwise some generic heading names will be used. This button opens a new dialog, allowing you to edit the names of 245 Importing data the root and row elements, change the XML name and the conversion criterion. Figure 11.8. Presentation Names The XML names can be edited by double-clicking on the desired item and entering the required label. The conversion criterion can also be modified by selecting from the drop-down list ELEMENT, ATTRIBUTE or SKIPPED. Open in editor If checked, the new XML document created from the imported text file will be opened in the editor. Save in file If checked, the new XML document will be saved at the specified path. Note If only Open in editor is checked, the newly created document will be opened in the editor, but as an unsaved file. Note Click Back to return to Select text file Dialog. 246 Chapter 12. Composing Web Service calls Overview Web Services Description Language (WSDL) is an XML format for describing network services as a set of endpoints operating on messages containing either document-oriented or procedure-oriented information. The WSDL files contain information about the published services, like the name, the message types and the bindings. The editor is offering a way to edit the WSDL files that is similar to editing XML, the content completion being driven by a mix of the WSDL and SOAP schemas. After you edit and validate your Web service descriptor against a mix of the XML Schemas for WSDL and SOAP it is very easy to check if the defined SOAP messages are accepted by the remote Web Services server using <oXygen/>'s WSDL SOAP Analyser integrated tool. Composing a SOAP request To design, compose, and test Web service calls in <oXygen/> follow the procedure: 1. Create a new document or open an existing document of type WSDL. 2. Design the Web Service descriptor in the WSDL editor pane where the content completion is driven by a mix of the WSDL and SOAP schemas. You do not need to specify the schema location for the WSDL standard namespaces because <oXygen/> comes with these schemas and uses them by default to assist the user in editing Web Service descriptors. Figure 12.1. Content completion for WSDL documents 3. While editing the Web-Services descriptors check their conformance to the WSDL and SOAP schemas. In the following example you can see how the errors are reported. 247 Composing Web Service calls Figure 12.2. Validating a WSDL file 4. Check if the defined messages are accepted by the Web Services server. <oXygen/> is providing two ways of testing, one for the currently edited WSDL file and other for the remote WSDL files that are published on a web server.For the currently edited WSDL file open the WSDL SOAP Analyser tool by pressing the toolbar button WSDL SOAP Analyser or use the menu item Document → Tools → WSDL SOAP Analyser or from the Project view contextual menu select Open with → WSDL SOAP Analyser Figure 12.3. WSDL SOAP Analyser It contains a SOAP analyser and sender for Web Services Description Language file types.The analyser fields are: • The List of Services. The list of services defined by the WSDL file. 248 Composing Web Service calls • The List of Ports. The ports for the selected service. • The List of Operations. The list of available operations for the selected service. • The Action URL. Shows the script that serves the operation. • The SOAP Action. Identifies the action performed by the script. • The Request Editor. It allows you to compose the web service request. When an action is selected, <oXygen/> tries to generate as much content as possible for the call skeleton. Usually you just have to change few values in order for the request to be valid. The content completion is available for this editor and is driven by the schema that defines the type of the current message. • The Attachments List. You can define a list of file's URLs to be attached to the request. • The Response Area. Initially it displays an auto generated server sample response so you can have an idea about how the response will look like. After pressing the Send button it will present the message received from the server in response to the Web Service request. It may show also error messages. In case the response message contains attachments, <oXygen/> will prompt you to save them, then will try to open them with the associated system application. • The Errors List. There may be situations in which the WSDL file is respecting the WSDL XML Schema, but it fails to be valid for example in the case of a message that is defined by means of an element that is not found in the types section of the WSDL. In such a case, the errors will be listed here. This list is presented only when there are errors. • The Send Button. Executes the request. A status dialog is shown when <oXygen/> is connecting to the server. The testing of a WSDL file is straight-forward, you just have to click on the WSDL analysis button, then select the service, the port and the operation. The editor will generate the skeleton for the request. You can edit the request, eventually attach files to it and send it to the server. Watch the server response in the response area. For testing remote WSDL files see the next section. 5. Once defined, a request derived from a Web Service descriptor can be saved with the Save button to a Web Service SOAP Call(WSSC) file for later reuse. In this way you will save time in configuring the URLs and parameters. 6. You can open the result of a Web Service call in an editing view. In this way you can save it or process it further. Testing remote WSDL files To open and test a remote WSDL file use the menu item Tools → WSDL SOAP Analyser ... Figure 12.4. WSDL File Opener 249 Composing Web Service calls and in the WSDL File tab enter the URL of the remote WSDL file by typing or by browsing the local filesystem, a remote filesystem or even a UDDI Registry. Pressing OK will open the WSDL SOAP Analyser tool. In the Saved SOAP Request tab you can open directly a previously saved Web Service SOAP Call(WSSC) file thus skipping the analysis phase. The UDDI Registry browser Pressing the button opens the UDDI Registry Browser dialog. Figure 12.5. UDDI Registry Browser dialog • In the URL combo box type the URL of an UDDI registry or choose one list. • In the Keywords field enter the string you want to be used when searching the selected UDDI registry for available Web services. • Optionally, you may change: • Rows to fetch - The maximum number of rows to be displayed in the result list. • Search by - you can choose to search whether by company or by provided service. • Case sensitive - When checked, the search will take into account the Keywords' case. • Click the Search button. WSDLs that matched the search criteria are added in the result list. • Select a WSDL from the list and click OK. The UDDI Registry Browser dialog is closed and you are returned to the WSDL File Opener dialog. 250 Composing Web Service calls Generate WSDL documentation To generate documentation for a WSDL document use the action Tools → Generate Documentation → WSDL Documentation. The WSDL documentation dialog can be also opened from the Project Tree contextual menu: Generate Documentation → WSDL Documentation... Figure 12.6. WSDL Documentation dialog • In the Input URL field type the URL of the file or click on the browse button and select it from the file system. • In the Output file(HTML) field you will have to enter the path and the filename where the documentation will be generated. • If you want the result to be opened in a browser, select the corresponding checkbox. • Click the Generate button and the documentation for the WSDL file will be generated. 251 Chapter 13. Digital signature Overview Digital signatures are widely used as security tokens, not just in XML. A digital signature provides a mechanism for assuring integrity of data, the authentication of its signer, and the nonrepudiation of the entire signature to an external party. • a digital signature must provide a way to verify that the data has not been modified or replaced to ensure integrity. • the signature must provide a way to establish the identity of the data's signer for authentication. • the signature must provide the ability for the data's integrity and authentication to be provable to a third party for nonrepudiation. A public key system is used to create the digital signature and it's also used for verification. The signature binds the signer to the document because digitally signing a document requires the originator to create a hash of the message and then encrypt that hash value with his own private key. Only the originator has that private key and he is the only one can encrypt the hash so that it can be unencrypted using his public key.The recipient, upon receiving both the message and the encrypted hash value, can decrypt the hash value, knowing the originator's public key.The recipient must also try to generate the hash value of the message and compare the newly generated hash value with the unencrypted hash value received from the originator. If the hash values are identical, it proves that the originator created the message, because only the actual originator could encrypt the hash value correctly. XML Signatures can be applied to any digital content (data object), including XML (see W3C Recommendation, XML-Signature Syntax and Processing [http://www.w3.org/TR/xmldsig-core/ ] ). An XML Signature may be applied to the content of one or more resources. • Enveloped or enveloping signatures are over data within the same XML document as the signature. • Detached signatures are over data external to the signature element; the signature is "detached" from the content it signs. This definition typically applies to separate data objects, but it also includes the instance where the Signature and data object reside within the same XML document but are sibling elements. The XML Signature is a method of associating a key with referenced data; it does not normatively specify how keys are associated with persons or institutions, nor the meaning of the data being referenced and signed. The original data is not actually signed; instead, the signature is applied to the output of a chain of canonicalization and transformation algorithms, which are applied to the data in a designated sequence. This system provides the flexibility to accommodate whatever "normalization" or desired preprocessing of the data that might be required or desired before subjecting it to being signed. To canonicalize something means to put it in a standard format that everyone generally uses. Because the signature is dependent on the content it is signing, a signature produced from a not canonicalized document could possibly be different from one produced from a canonicalized document. The canonical form of an XML document is physical representation of the document produced by the method described in this specification. The term canonical XML refers to XML that is in canonical form. The XML canonicalization method is the algorithm defined by this specification that generates the canonical form of a given XML document or document subset. The term XML canonicalization refers to the process of applying the XML 252 Digital signature canonicalization method to an XML document or document subset. XML canonicalization is designed to be useful to applications that require the ability to test whether the information content of a document or document subset has been changed. This is done by comparing the canonical form of the original document before application processing with the canonical form of the document result of the application processing. A digital signature over the canonical form of an XML document or document subset would allows the signature digest calculations to be oblivious to changes in the original document's physical representation. During signature generation, the digest is computed over the canonical form of the document. The document is then transferred to the relying party, which validates the signature by reading the document and computing a digest of the canonical form of the received document. The equivalence of the digests computed by the signing and relying parties (and hence the equivalence of the canonical forms over which they were computed) ensures that the information content of the document has not been altered since it was signed. The following canonicalization algorithms are used in <oXygen/>: Canonical XML (or Inclusive XML Canonicalization)(XMLC14N [http://www.w3.org/TR/2001/REC-xml-c14n-20010315]) and Exclusive XML Canonicalization(EXCC14N [http://www.w3.org/TR/2002/REC-xml-exc-c14n-20020718/]). The first is used for XML where the context doesn't change while the second was designed for canonicalization where the context might change. Inclusive Canonicalization copies all the declarations, even if they are defined outside of the scope of the signature. In this way all the declarations you might use will be unambiguously specified. A problem appears when the signed XML is moved into another XML document which has other declarations because the Inclusive Canonicalization will copy then and the signature will be invalid. Exclusive Canonicalization finds out what namespaces you are actually using (the ones that are a part of the XML syntax) and just copies those. It does not look into attribute values or element content, so the namespace declarations required to process these are not copied. This type of canonicalization is useful when you have a signed XML document that you wish to insert into other XML documents and it will insure the signature verifies correctly every time, so it is required when you need self-signed structures that support placement within different XML contexts. Inclusive Canonicalization is useful when it is less likely that the signed data will be inserted in other XML document and it's the safer method from the security perspective because it requires no knowledge of the data that are to be secured in order to safely sign them. The canonicalization method can specify whether or not comments should be included in the canonical form output by the XML canonicalization method. If a canonical form contains comments corresponding to the comment nodes in the input node-set, the result is called canonical XML with comments. In an uncommented canonical form comments are removed, including delimiter for comments outside document element. These three operations: Digital Signing, Canonicalization and Verification of the signature are available from the Tools menu or from the Editor contextual menu->Source. Canonicalizing files The user can select the canonicalization algorithm to be used for his document from the following dialog displayed by the action Canonicalize available from editor panel context menu+Sourceand also from menuToolsand from menuDocument+Tools 253 Digital signature Figure 13.1. Canonicalization settings dialog URL Specifies the location of the input URL Exclusive If selected, the exclusive (uncommented) canonicalization method is used. Exclusive with comments If selected, the exclusive with comments canonicalization method is used. Inclusive If selected, the inclusive (uncommented) canonicalization method is used. Inclusive with comments If selected, the inclusive with comments canonicalization method is used. XPath The XPath expression provides the fragments of the XML document to be signed. Output Specifies the output file path where the signed XML document will be saved. Open in editor If checked, the output file will be opened in the editor. Certificates A certificate is a digitally signed statement from the issuer (an individual, an organization, a website or a firm), saying that the public key (and some other information) of some other entity has a particular value. When data is digitally signed, the signature can be verified to check the data integrity and authenticity. Integrity means that the data has not been modified. Authenticity means the data comes indeed from the entity that claims to have created and signed it. Certificates are kept in special repositories called Keystores. 254 Digital signature A Keystore is an encrypted file that contains private keys and certificates. All keystore entries (key and trusted certificate entries) are accessed via unique aliases. An alias must be assigned for every new entry of either a key or certificate as a reference for that entity. No Keystore can store an entity if it's "alias" already exists in that Keystore and no KeyStore can store trusted certificates generated with keys in it's KeyStore. In <oXygen/> there are provided two types of keystores: Java Key Store (JKS) and Public-Key Cryptography Standards version 12 (PKCS-12). A keystore file is protected by a password. In a PKCS 12 keystore you should not store a certificate without alias together with other certificates, with or without alias, as in such a case the certificate without alias cannot be extracted from the keystore. To set the options for a certificate or to validate it, go to Options → Preferences → Certificates . Note A certificate without alias stored in a PKCS 12 keystore together with other certificates, with or without alias, cannot be always extracted correctly from the keystore due to the missing alias. Such a certificate should be the only certificate of a PKCS 12 keystore. Signing files The user can select the type of signature to be used for his document from the following dialog displayed by the action Sign available from editor panel context menu+Sourceand also from menuToolsand from menuDocument+Tools Figure 13.2. Signature settings dialog 255 Digital signature URL Specifies the location of the input URL None If selected, no canonicalization algorithm is used. Exclusive If selected, the exclusive (uncommented) canonicalization method is used. Exclusive with comments If selected, the exclusive with comments canonicalization method is used. Inclusive If selected, the inclusive (uncommented) canonicalization method is used. Inclusive with comments If selected, the inclusive with comments canonicalization method is used. XPath The XPath expression provides the fragments of the XML document to be signed. ID Provides ID of the XML element to be signed. Envelope If selected, the enveloping signature is used. Detached If selected, the detached signature is used. The canonicalization methods, XPath and ID are not available. Output Specifies the output file path where the signed XML document will be saved. Open in editor If checked, the output file will be opened in the editor. Verifying the signature The user can select a file to verify its signature in the following dialog displayed by the action Verify Signature available from editor panel context menu+Sourceand also from menuToolsand from menuDocument+Tools Figure 13.3. Verifying signature dialog URL Specifies the location of the document for which to verify the signature. If the signature is valid, a dialog displaying the name of the signer will be opened. 256 Chapter 14. The Syncro SVN Client Introduction What is Syncro SVN Client Syncro SVN is a client for the Subversion version control system. It manages files and directories that change over time and are stored in a central repository. The version control repository is much like an ordinary file server, except that it remembers every change ever made to your files and directories. This allows you to access older versions of your files and examine the history of how and when your data changed. Quick start guide and reference The Main window section will provide a short description of the application main window layout, general functions, views and menus. A Getting started chapter will take you through the basic operations, such as: • Define a repository location • Define a working copy • Manage working copy resources • Synchronize with a repository • Obtain information for a resource • Using the log history of a resource • Adding and changing the properties of a resource • Creating and maintaining branches and tags • Some more advanced repository operations The next few chapters refer to the views of the application: • Repository view • Working copy view • Synchronize view • Compare resources view • Editor • Image preview • History view • Properties view 257 The Syncro SVN Client • Console view • Help view • Preferences dialog Main window Figure 14.1. The Syncro SVN Client main window Starting Syncro SVN Client The Syncro SVN Client can be used as a standalone application. To start the client follow the instructions for the installed package: Procedure 14.1. Windows • From the Windows Explorer double-click svnClient.exe . 258 The Syncro SVN Client Procedure 14.2. Linux • At the prompt type: sh svnClient.sh . Procedure 14.3. Mac OS X • Double-click svnClient . Procedure 14.4. All Platforms • On Windows run svnClient.bat. On Mac OS X run svnClientMac.sh. On Linux/Unix run svnClient.sh. The client can be started from inside <oXygen/> by using Tools → SVN Client action or the Project view contextual menu → Team → Open in SVN Client action. When the action from the Project view is performed, if the selected resource is under version control, its working copy root will be determined and opened in the SVN client Working copy view. Views The main window consists of the following views: • Repository view allows you to define and manage Subversion repository locations. • Working copy view allows you to manage with ease the content of the working copy. • Synchronize view displays the modified resources from your working copy (outgoing) and from the repository (incoming). • Compare view displays the differences between two revisions of a text file. • Compare images view displays the compared images side by side. • Editor view allows you to modify and save a file from the working copy. • Image preview allows you to view the image files from the Synchronize view, Working copy view, Synchronize view or from the History view. • History view displays the log messages for a given resource. • Properties view displays the SVN properties for the currently selected resource from the Synchronize view or from the Working copy view. • Console view shows the start and progress of an operation as if a Subversion command was run from the shell. • Help view dynamically shows the help for the currently selected view. The main window's Status bar presents in the left side the operation in progress or the final result of the last performed action. In the right side there is a progress bar for the running operation and a stop button to cancel the operation. Main menu The main menu of the Syncro SVN Client is composed of the following submenus: 259 The Syncro SVN Client • File • Save - Saves the local file currently opened in the Editor view or the Compare view. • Exit - Exits the Subversion client. • Edit • • • • • • Undo - undos edit changes in the local file currently opened in the Editor view or the Compare view. Redo - redos edit changes in the local file currently opened in the Editor view or the Compare view. Cut - cut selection to clipboard from the local file currently opened in the Editor view or the Compare view. Copy - copy selection to clipboard from the local file currently opened in the Editor view or the Compare view. Paste - paste selection from clipboard in the local file currently opened in the Editor view or the Compare view. Find/Replace - perform find/replace operations in the local file currently opened in the Editor view or the Compare view. • Repository - operations from the Repository view: • New Repository Location - allows you to enter a new repository location by means of the Add SVN Repository dialog. • Edit Repository Location - context dependent, allows you to edit the selected repository location by means of the Edit SVN Repository dialog. It is active only when a repository location root is selected. • Remove Repository Location - allows you to remove the selected repository location from the view. It shows you a confirmation dialog before removal. It is active only when a repository location root is selected. • Working copy - operations from the Working copy view: • Add/Remove Working Copy - opens the Working copies list dialog which displays the working copies the Subversion client is aware of. In this dialog you can add existing or remove no longer needed working copies. • Synchronize - contacts the repository and determines the changes made by you to the working copy and by others to the repository. The synchronize result will be displayed in the Synchronize view. The action performs a synchronize operation on the root of the working copy. • Refresh - refreshes (rescans) the content of the working copy. The action performs a refresh operation on the root of the working copy. 260 The Syncro SVN Client • Cleanup - performs a maintenance cleanup operation on the working copy. • Synchronize - operations from the Synchronize view: • Update all - updates all resources with incoming changes. It is disabled when Outgoing mode is selected or the synchronization result does not contain resources with incoming changes. It will perform a recursive update on the synchronized resources. • Commit all - commits all resources with outgoing changes. It is disabled when Incoming mode is selected or the synchronization result does not contain resources with outgoing changes. It will perform a recursive commit on the synchronized resources. • Compare - operations from the Compare view: • Perform Files Differencing - used to perform file differencing on request. • Go to First Modification - used to navigate to the first difference. • Go to Previous Modification - used to navigate to the previous difference. • Go to Next Modification - used to navigate to the next difference. • Go to Last Modification - used to navigate to the last difference. • Copy All Non-Conflicting Changes from Right to Left - this action copies all non-conflicting changes from the right editor to the left editor. A non-conflicting change from the right editor is a change that does not overlap with a left editor change. • Copy Change from Right to Left - this action copies the selected change from the right editor to the left editor. • Show Modification Details at Word Level - because the differences are computed using a line differencing algorithm sometimes is useful to see exactly what words are different in a changed section. • Show Modification Details at Character Level - useful when you want to find out exactly what characters are different between the two analyzed sections. • Ignore Whitespaces - Enables or disables the whitespace ignoring feature. • Layout - layout control actions: • Reset Layout - resets all the views to their default position. • Show View - Brings to front the specified view. • Options • Preferences - opens the preferences dialog. • Reset Options - resets all your options to the default ones. • Import Options - allows you to import options you have previously exported. • Export Options - allows you to export the current options to a file. 261 The Syncro SVN Client • Reset Authentication - resets the Subversion authentication information. • Help • Dynamic Help - shows the Dynamic Help dialog. • Help - opens the Help dialog. Note In order to avoid unusual situations you can currently execute only one action that involves operations with the working copy or with the repository at a time. Getting started Define a repository location Usually team members do all of their work separately, in their own working copies and need to share their work. This is done via a Subversion repository. Figure 14.2. Repository View Add / Edit / Remove repository locations Before you can begin working with a Subversion repository, you must define a repository location in the Repository View. To create a new repository location, click the New Repository Location toolbar button or right click inside the view and select New Repository Location... from the popup menu. On Windows the context menu can be displayed with the mouse on a right click or with the keyboard by pressing the special context menu key available on Windows keyboards. The Add SVN Repository dialog will prompt you for the URL of the repository you want to connect to. No authentication information is requested at the time the location is defined; it is left to the Subversion client to request the user and password information when it is needed. The main benefit of allowing Subversion to manage your password in this way is that it will prompt you for a new password only when your password changes. 262 The Syncro SVN Client Figure 14.3. The Add SVN Repository dialog To edit a repository location, click the Edit Repository Location toolbar button or right click inside the view on a repository entry and select Edit Repository Location... from the popup menu. The Edit SVN Repository dialog works in the same way as the Add SVN Repository dialog. It will show the previously defined repositories URL and it will allow you to change them. To remove a repository location, click the Remove Repository Location toolbar button or right click inside the view on a repository entry and select Remove Repository Location... from the popup menu. A confirmation dialog will appear in order to make sure you don't accidentally remove locations. Authentication Four protocols are supported: HTTP, SVN, HTTPS and SVN + SSH. If the repository that you are trying to access is password protected, the Enter authentication data dialog will request a username and a password. If the Store authentication data checkbox is checked the credentials will be stored in Subversion's default directory: • Windows - %HOME%\Application Data\Subversion\auth. Example: C:\Documents and Settings\John\Application Data\Subversion\auth • Linux & Mac OS X - $HOME/.subversion/auth. Example: /home/John/.subversion/auth There will be one file for each server that you access. If you want to make Subversion forget your credentials, you can use the Reset authentication command from the Options menu. This will cause Subversion to forget all your credentials. Note When you reset the authentication data, you will have to restart the application in order for the change to take effect. Figure 14.4. User & Password authentication dialog 263 The Syncro SVN Client When using a secure http (https) protocol for accessing a repository, a Certificate information dialog will pop up and ask you whether you accept the certificate permanently, temporarily or simply deny it. If the repository used has svn+ssh protocol the authentication can also be made with a private key and a pass phrase. Figure 14.5. User & Private key authentication dialog Defining a working copy A Subversion working copy is an ordinary directory tree on your local system, containing a collection of files. You can edit these files however you wish, your working copy being your private work area. In order to make your own changes available to others or incorporate other people's changes, you must explicitly tell Subversion to do so. You can even have multiple working copies of the same project. Figure 14.6. Working Copy View A Subversion working copy also contains some extra files, created and maintained by Subversion, to help it keep track of your files. In particular, each directory in your working copy contains a subdirectory named .svn, also known as the working copy administrative directory. This administrative directory contains an unaltered copy of the last updated files from the repository. This copy is usually referred to as the pristine copy or the BASE revision of the working copy. These files help Subversion recognize which files contain unpublished changes, and which files are out-of-date with respect to others' work. 264 The Syncro SVN Client A typical Subversion repository often holds the files (or source code) for several projects; usually, each project is a subdirectory in the repository's filesystem tree. In this arrangement, a user's working copy will usually correspond to a particular subtree of the repository. Check out a working copy Check out is the term used to describe the process of making a copy of a project from a repository into your local filesystem. This checked out copy is called a working copy. A Subversion working copy is a specially formatted folder structure which contains additional .svn folders that store Subversion information, as well as a pristine copy of each item that is checked out. You check out a working copy from the Repository View. If you have not yet defined a connection to your repository, you will need to add a new repository location. To check out a new working copy, navigate inside the repository to the desired directory, right click on it and select Check Out... from the popup menu. In the Check out dialog click on the Browse button and choose the location where the working copy will be checked out. Figure 14.7. Check out dialog By default the last (HEAD) revision will be checked out. If you need another revision you can select the Revision radio button and then click on the History button and choose a desired revision from the new dialog. Or you can simply type the revision number in the corresponding text field. 265 The Syncro SVN Client Figure 14.8. History dialog The History dialog presents a list of revisions for a resource. There are presented information about revision, commit date, author and commit comment. The number of entries in the list is limited by default to 50. This can be adjusted in application's options page. The Affected Paths area displays all paths affected by the commit of that revision. After a check out, the new working copy will be added to the list in the Working Copy view and its content will be displayed in that view. Use an existing working copy This is the process of taking an working copy that exists on your filesystem and connecting it to Subversion. If you have a brand new project that you want to import into your repository, then see the section Import resources into the repository This assumes that you have an existing valid working copy on your filesystem. In the Working Copy View click on the Add/Remove Working Copy toolbar button. Figure 14.9. Add/Remove Working Copy dialog In the Working copies list dialog press the add button(+) and choose the working folder copy from the filesystem. Select the new working copy from the list and press the OK button. The selected working copy will be loaded and presented in the Working Copy View. 266 The Syncro SVN Client Manage working copy resources Edit files You can edit files from the Working Copy View by double clicking them or by right clicking them and choosing Open from the popup menu, or from the Synchronize View by using Open from the popup menu. Please note that only one file can be edited at a time; if you try to open another file it will be opened in the same editor window. The editor has syntax highlighting for known file types, meaning that a different color will be used for each type of recognized token in the file. If the selected file is an image, then it will be previewed in the editor, with no access to modifying it. Figure 14.10. Editor view When you edit a file from your working copy, you will notice that after modifying and saving it, a modified marker - an asterisk(*) - will appear on the file's icon in the Working Copy View. Add resources to version control The new file(s) or folder(s) you create during your development process must be added to Version Control, using the Add command from the context menu in Working Copy View or Synchronize View. If you do not do this, the resource will be marked with a question mark (?), meaning that it is unversioned (unknown). After you have added it to version control, the resource will be marked as added(+) which means you first have to commit your working copy to make those resources available to other developers. Adding a resource to version control does not affect the repository. If you try to add to version control an unversioned directory the entire subtree starting with that directory will be added. When you commit your changes, if you forgot to add a resource, it will still be presented in the commit dialog, but will be de-selected by default. When you commit the unversioned resource, it will be automatically added to version control before being committed and the marking will also be removed. Figure 14.11. Unversioned / Added Ignore resources not under version control Sometimes you will have files and folders inside your working copy that should not be subject to version control. These might include files created by the compiler, *.obj, *.class, *.lst, maybe an output directory 267 The Syncro SVN Client used to store the executable. Whenever you commit changes, Subversion shows your modified files but also the unversioned files, which fills up the file list in the commit dialog. Though the unversioned files will not be committed unless otherwise specified, it is difficult to see exactly what you are committing. The best way to avoid these problems is to add the derived files to the Subversion's ignore list. That way they will never show up in the commit dialog and only genuine unversioned files which must be committed will be shown. You can choose to ignore a resource by using the Add to svn:ignore action in the context menu from Working Copy View or Synchronize View. In the Add to svn:ignore dialog you can specify the resource to be ignored by name or by a custom pattern. The custom pattern can contain wildcard characters such as: • * - Matches any string of characters of any size, including the empty string. • ? - Matches any single character. For example you may choose to ignore all text documents by using the pattern: *.txt The action adds a predefined Subversion property called svn:ignore to the parent directory of the specified resource. In this property there are specified all the child resources of that directory that must be ignored. The result will be visible in the Working Copy view. The ignored resources will be represented with grayed icons. Delete resources The delete command can be found in the context menu from the Working Copy View. When you delete a resource from the Subversion working copy it will be removed from the filesystem and it will be also marked as deleted. If unversioned, added or modified resources will be encountered, a dialog will prompt you to confirm their deletion. The delete command will not delete from the filesystem the directories under version control, it will only mark them as deleted. This is because the directories also contain the pristine copy of that directory content. In the Working Copy View this is transparent as all resources will have the deleted mark(-). The directories will be removed from the filesystem when you commit them to the repository. You can also change your mind completely and revert the deleted files to their initial, pristine state. If a resource is deleted from the filesystem without Subversion's knowledge, your working copy will be in an inconsistent state. The resource will be considered and marked as missing (!). If a file was deleted, it will be treated in the same way as if it was deleted by Subversion. However if a directory is missing you will be unable to commit. If you update your working copy, Subversion will replace the missing directory with the latest version from the repository and you can then delete it the correct way using the Delete command. The Delete action is not enabled when the selection contains missing resources. Copy / Move / Rename resources Copy resources You can copy several resources from different locations of the working copy. You select them in the Working Copy View and then you initiate the copy command from the context menu. This is not a simple file system copy but a Subversion command. It will copy the resource and the copy will also have the original resource's history. This is one of Subversion's very important features, as you can keep track of where the copied resources originated. 268 The Syncro SVN Client Please note that you can only copy resources that are under version control and are committed to the repository or unversioned resources. You cannot copy resources that are added but not yet commited. Figure 14.12. Copy files dialog In the Copy File(s) dialog you can navigate through the working copy directories in order to choose a target directory. If you try to copy a single resource you are also able to change that resource's name in the corresponding text field. If an entire directory is copied the Override and update action will be enabled only for it and not for its descendants. In the Synchronize view and the Commit dialog will appear only the directory in question without its children. Move resources As in the case of the copy command you can perform the operation on several resources at once. Just select the resources in the Working Copy View and choose the Move command from the context menu. The move command actually behaves as if a copy followed by a delete command were issued. You will find the moved resources at the desired destination and also at their original location but marked as deleted. If you try to move a directory that contains unversioned resources you will need to force the move operation by selecting the appropriate checkbox in the dialog. Rename a resource The rename action can be found in the context menu in the Working Copy View. This action can only be performed on a single resource. The rename command acts as a move command with the destination being the same as the original location of the resource. A copy of the original resource will be made with the new name and the original will be marked as deleted. As in the case of the move command, if you try to rename a directory that contains unversioned resources, you will need to force the operation by selecting the appropriate checkbox in the dialog. Note Because the rename and move commands act as a copy followed by delete, when you want to commit a renamed or moved resource you must also commit the deleted original. It is also 269 The Syncro SVN Client recommended that you commit the renamed or moved resources before changing their contents in order to avoid difficulties in resolving conflicts. Lock / Unlock resources The idea of version control is based on the copy-modify-merge model of file sharing. This model states that each user contacts the repository and creates a local working copy(check out). Users can then work independently and make modifications to their working copies as they please. When their goal has been accomplished it is time for the users to share their work with the others, to send them to the repository(commit). When a user has modified a file that has been also modified on the repository the two files will have to be merged. The version control system assists the user with the merging as much as it can, but in the end the user is the one that must make sure it is done correctly. The copy-modify-merge model only works when files are contextually mergeable: this is usually the case of line-based text files (such as source code). However this is not always possible with binary formats, such as images or sounds. In these situations, the users must each have exclusive access to the file, ending up with a lock-modify-unlock model. Without this, one or more users could end up wasting time on changes that cannot be merged. A Subversion lock is a piece of metadata which grants exclusive access to a user. This user is called the lock owner. A lock is uniquely identified by a lock token (a string of characters). If someone else attempts to commit the file (or delete a parent of the file), the repository will demand two pieces of information: • User authentication. The user performing the commit must be the lock owner. • Software authorization. The user's working copy must have the same lock token as the one from the repository, proving that it is the same working copy where the lock originated from. Scanning for locks When starting to work on a file that is not contextually mergeable (usually a binary file), it is better to verify if someone else isn't already working on that file. You can do this in the Working Copy View by selecting one or more resources, then right clicking on them and choosing the Scan for locks action from the context menu. Figure 14.13. The locked items dialog The Locked items dialog contains a table with all the resources that were found locked on the repository. For each resource there are specified: resource path, state of the lock, owner of the lock, lock comment, creation and expiration date for the lock (if any). The state of the lock can be one of: • Other - if someone else locked the file. 270 The Syncro SVN Client • Locked - if you locked the file. • Broken - if you locked the file but it was forcefully unlocked by someone else afterwards. • Stolen - if you locked the file but it was forcefully locked by someone else afterwards. You can unlock a resource by selecting it and pressing the Unlock button. Locking a file A locked file allows you exclusive write access to a file from the repository, meaning that you are the only one who can modify and commit the file to the repository. You can lock a file from the context menu in Working Copy View. Note that you can only lock several files at once but no directories. This is a restriction of Subversion which is used to discourage the use of the lock-modify-unlock model at large scale or when unnecessary. Figure 14.14. The lock dialog In the Lock dialog you can write a comment for the lock and if necessary steal (force) the lock. Note that you should only steal a lock after you made sure that the previous owner no longer needs it, otherwise you may cause an unsolvable conflict which is exactly why the lock was put there in the first place. The Subversion server can have a policy concerning lock stealing, it may not allow you to steal a lock if a certain condition is not satisfied. The lock will stay in place until you commit the locked file or until someone unlocks it. There is also the possibility that the lock will expire after a period of time specified in the Subversion server policy. Unlocking a file A file can be unlocked from the context menu in the Working Copy View. A dialog will prompt you to confirm the unlocking and it will also allow you to break the lock (unlock it by force). Synchronize with the repository In the work cycle you will need to incorporate other people's changes(update) and to make your own work available to others(commit). This is what the Synchronize View was designed for, to help you send and receive modifications from the repository. 271 The Syncro SVN Client Figure 14.15. Synchronize View In the synchronize view you can see the overall status of your working copy resources when compared to the repository resources. The view focuses on incoming and outgoing changes, where incoming changes are the changes that other users have committed since you last updated your working copy. The outgoing changes are the modifications you made to your working copy as a result of editing, removing or adding resources. The view presents the status of the working copy resources against the BASE revision after a Refresh operation. You can view the state of the resources versus a repository HEAD revision by using the Synchronize actions from the Working Copy view. View differences One of the most common requirements in project development is to see what changes have been made to the files from your Working Copy or to the files from the repository. You can examine these changes after a synchronize operation with the repository, by using the Open in compare editor action from the contextual menu. There are two types of files that can be compared: text files and binary files. The text files are compared using a built-in Compare View which uses a line differencing algorithm. When a file with outgoing status is involved, the compare is performed between the file from the working copy and the BASE revision of the file. When a file with incoming or conflict status is involved, the differences are computed using a three-way algorithm which means that the local file and the repository file are each compared with the BASE revision of the file. The results are displayed in the same view. The differences obtained from the local file comparison are considered outgoing changes and the ones obtained from the repository file comparison are considered incoming changes. If any of the incoming changes overlap outgoing changes then they are in conflict. A special case of difference is a diff pseudo-conflict. This is the case when the left and the right sections are identical but the BASE revision does not contain the changes in that section. By default this type of changes are ignored. If you want to change this you can go to SVN Preferences and change the corresponding option. The right editor presents either the BASE revision or a revision from the repository of the file so its content cannot be modified. By default when opening a synchronized file in the Compare View, a compare is automatically performed. After modifying and saving the content of the local file presented in the left editor, another compare is performed. You will also see the new refreshed status in the Working copy view. 272 The Syncro SVN Client Figure 14.16. Compare View There are three types of differences: • incoming changes - changes committed by other users and not present yet in your working copy file. They are marked with a blue highlight and on the middle divider the arrows point from right to left. • outgoing changes - changes you have done in the content of the working copy file. They are marked with a gray highlight and the arrows on the divider are pointing from left to right. • conflicting changes - this is the case when the same section of text which you already modified in the local file has been modified and committed by some other person. They are marked with a red highlight and red diamonds on the divider. There are numerous actions and options available in the Compare View toolbar or in the Compare menu from the main menu. You can decide that some changes need adjusting or that new ones must be made. After you perform the adjustments, you may want to perform a new compare between the files. For this case there is an action called Perform files differencing. After each files differencing operation the first found change will be selected. You can navigate from one change to another by using the actions Go to first / Go to previous / Go to next / Go to last modification. If you decide that some incoming change needs to be present in your working file you can use the action Copy change from right to left. This is useful also when you want to override the outgoing modifications contained in a conflicting section. The Copy all non-conflicting changes from right to left copies all incoming changes which are not contained inside a conflicting section in your local file. Let us assume that only a few words or letters are changed, considering that the differences are performed taking into account whole lines of text, the change will contain all the lines involved. For finding exactly what words or letters have changed there are available two dialogs which present a more detailed compare result: Word Details and Character Details. 273 The Syncro SVN Client Figure 14.17. Word details dialog When you want to examine only the changes in the real text content of the files disregarding the changes in the number of white spaces between words or lines there is available an option which allows you to enable or disable the white space ignoring feature of the compare algorithm. The binary files are always compared two way (working file and HEAD revision file) byte to byte and the location of the first different byte is reported. Resolve conflicts Once in a while, you will get a conflict when you update your files from the repository. A conflict occurs when two or more developers have changed the same few lines of a file or the properties of the same file. As Subversion knows nothing of your project, it leaves resolving the conflicts to the developers. Whenever a conflict is reported, you should open the file in question, and try to analyse and resolve the conflicting situation. Real conflicts vs Pseudo conflicts There are two types of conflicts. The real conflict(conflicted state) is obtained when a resource in the working copy has incoming and outgoing changes in the same section. When updated the differences cannot be merged automatically so the file is marked as conflicted. A file can be in real conflict state when its content or its properties are in conflict. A folder can be in real conflict only when its properties are in conflict. A resource is in a pseudo conflict state when it contains both incoming and outgoing changes not necessarily in the same sections. A file can be in pseudo conflict when its content has both incoming and outgoing changes and before an update operation is performed. A folder can be in pseudo conflict when it contains files in pseudo conflict and / or real conflict themselves. After an update it is possible that the state of conflict can be resolved automatically by merging the incoming changes into the working copy resource. A conflicting resource cannot be committed. In the conflict case the resource will be marked with a conflict icon and will appear in all the Synchronization trees. Content conflicts vs Property conflicts On the other hand depending on the situation the conflicts are separated in two categories: Content conflicts and Properties conflicts. Content conflicts - this type refers to the fact that the conflict appears in the content of a file. A merge occurs for every inbound change to a file which is also modified in the working copy. In some cases, if the local change and the incoming change intersect each other, Subversion cannot merge these changes without intervention. So if the conflict is real when updating the file in question the conflicting area is marked like this: 274 The Syncro SVN Client <<<<<<< filename your changes ======= code merged from repository >>>>>>> revision Also, for every conflicted file Subversion places three additional temporary files in your directory: • filename.ext.mine - This is your file as it existed in your working copy before you updated your working copy - that is, without conflict markers. This file has your latest changes in it and nothing else. • filename.ext.rOLDREV - This is the file that was the BASE revision before you updated your working copy. That is, the file revision that you updated before you made your latest edits. • filename.ext.rNEWREV - This is the file that Subversion client just received from the server when you updated your working copy. This file corresponds to the last synchronized revision of the repository. OLDREV and NEWREV are revision numbers. If you have conflicts with binary files, Subversion does not attempt to merge the files by itself. The local file remains unchanged (exactly as you last changed it) and you will get filename.ext.r* files also. Properties conflicts - refer to the conflicts that are obtained when two people modify the same property of the same file or folder. When updating such a resource a file named filename.ext.prej is created in your working copy containing the nature of the conflict. Your local file property that is in conflict will not be changed. After resolving the conflict one should use the Mark resolved action in order to be able to commit the file. Note that the Mark resolved action does not really resolve the conflict. It just removes the conflicted flag of the file and deletes the temporary files. Revert your changes If you want to undo all changes you made in a file since the last update you need to select the file, right click to pop up the context menu and then select Revert. A dialog will pop up showing you the files that you have changed and can be reverted. Select those you want to revert and click the OK button. Revert will only undo your local changes. It does not undo any changes which have already been committed. If you choose to revert the file to the pristine copy which resides in the administration folders then the eventual conflict is solved by losing your outgoing modifications. If you try to revert a resource not under version control, the resource will be deleted from the file system. If you want some of your outgoing changes to be overridden you must first open the file in Compare view and choose the sections to be replaced with ones from repository file. This can be achieved either by editing directly the file or by using the action Copy change from right to left from Compare view toolbar. After editing the conflicting file you have to use Mark as merged before committing it. If you want to drop all local changes and in the same time bring all incoming changes into your working copy resource you can use the Override and update action which discards the changes in the local file and updates it from the repository. A dialog will show you the files that will be affected. 275 The Syncro SVN Client Figure 14.18. Override and update dialog In the first table in the dialog you will be able to see the resources that will be overridden. You can also select or deselect them as you wish. In the second table you will find the list of resources that will be updated. Only resources that have an incoming status in the Synchronize view will be updated. Merge conflicted resources Before you can safely commit your changes to the repository you must first resolve all conflicts. In the case of pseudo-conflicts they can be resolved in most cases with an Update operation which will merge the incoming modifications into your working copy resource. In the case of real conflicts, conflicts that persist after an update operation, it is necessary to resolve the conflict using the built-in compare view and editor or, in the case of properties conflict, the Properties view. Before you can commit you must mark as resolved the affected files. Both pseudo and real conflicts can be resolved without an update. You can: • open the file in the compare editor • analyze the changes • edit the changes • decide which incoming changes need to be copied locally • decide which outgoing changes must be overridden or modified After saving your local file you have to use the Mark as merged action from the contextual menu before committing. 276 The Syncro SVN Client Drop incoming modifications In the situation when your file is in conflict but you decide that your working copy file and its content is the correct one, you can decide to drop some or all of the incoming changes and commit afterwards. The action Mark as merged proves to be useful in this case too. After opening the conflicting files with Compare view, Editor or editing their properties in the Properties view and deciding that your file can be committed in the repository replacing the existing one, you should first use Mark as merged action. When you want to override completely the remote file with the local file you can use Override and commit which drops any remote changes and commits your file. Figure 14.19. Override and commit dialog In general it is much safer to analyze all incoming and outgoing changes using Compare view and only after to update and commit. Update the working copy While you are working on a project, other members of your team may be committing changes to the project repository. To get these changes, you have to update your working copy. Updating may be done on single files, a set of selected files, or recursively on entire directory hierarchies The update operation can be performed either from Working Copy view or Synchronize view. The Update action in the Working Copy view is different from the Update action in the Synchronize view. The Update action from the Working Copy view updates the selected resources to the HEAD revision on the repository. The Synchronize view action updates the selected resources to the revision against which the Synchronize operation was performed. There are three different kinds of incoming changes: • Non-conflicting - A non-conflicting change occurs when a file has been changed remotely but has not been modified locally. • Conflicting, but auto-mergeable - An auto-mergeable conflicting change occurs when a text file has been changed both remotely and locally (i.e. has non-committed local changes) but the changes are on different lines. • Conflicting - A conflicting change occurs when one or more of the same lines of a text file have been changed both remotely and locally. Binary files are never auto-mergeable and are conflicting by default. 277 The Syncro SVN Client If the resource contains only incoming changes or the outgoing changes do not intersect with incoming ones then the update will end normally, the Subversion system merging incoming changes into the local file. In the case of conflicting situation the update will have as result a file with conflict status. The Syncro SVN Client allows you to update your working copy files to a specific revision, not only the most recent one. This can be done by using Update to revision action from the History view contextual menu. If you select multiple files and folders and then you perform an Update, all of those files/folders are updated one by one. The Subversion client makes sure that all files/folders belonging to the same repository are updated to the exact same revision, even if between those updates another commit occurred. When the update fails with a message saying that there is already a local file with the same name Subversion tried to checkout a newly versioned file, and found that an unversioned file with the same name already existed in your working folder. Subversion will never overwrite an unversioned file unless you specifically do this with Override and update. If you get this error message, the solution is simply to rename the local unversioned file. After completing the update, you can check whether the renamed file is still needed. Send your changes to the repository Sending the changes you made to your working copy is known as committing the changes. If your working copy is up to date and there are no conflicts, you are ready to commit your changes. The Commit action sends the changes in your local working copy to the repository. After selecting the action from the contextual menu you will see a dialog displaying the resources that can be committed. Figure 14.20. Commit dialog Enter a comment to associate with the commit or choose a previously entered comment from the list. The dialog will list modified, added, deleted and unversioned resources. All modified, added and deleted resources will be selected by default. If you don't want a changed file to be committed, just uncheck that file. 278 The Syncro SVN Client The unversioned items are not selected by default unless you have selected them specifically before issuing the commit command. To select all resources, click Select All. To deselect all resources, click Deselect All. Checking the Keep locks option will preserve any locks you have on repository resources. Your working copy must be up-to-date with respect to the resources you are committing. This is ensured by using the Update action prior to committing, resolving conflicts and re-testing as needed. If your working copy resources you are trying to commit are out of date you will get an appropriate error message. If you have modified files which have been included from a different repository using svn:externals, those changes cannot be included in the same commit operation. Obtain information for a resource Request status information for a resource While you are working you often need to know which files you have changed, added, removed or renamed, or even which files got changed and committed by others. That's where the Synchronize action from Working Copy view comes in handy. The Working Copy View will show you every file that has changed in any way in your working copy, as well as any unversioned files you may have. If you use Synchronize view then you can also look for changes in the repository. That way you can check before an update if there's a possible conflict. If you want more detailed information about a given resource you can use Information action from the Working copy viewcontextual menu or the Synchronize viewcontextual menu. A dialog will pop up showing remote and local information regarding the resource, such as: • local path and repository location • revision number • last change author, revision and date • commit comment • information about locks, etc. A less detailed list of information is also presented when you hover with the mouse pointer over a resource and the tooltip window is displayed. Figure 14.21. Tooltip for a resource 279 The Syncro SVN Client Request history for a resource In Subversion, both files and directories are versioned and have a history. If you want to examine the history for a selected resource and find out what happened at a certain revision, what has been changed regarding that resource and who did the changes, drop the modifications made in a certain revision, check out / update the resource to a selected revision, compare two revisions of the same file and other actions, you have to use the Show history action. This is available from any of the three views: Repository view menu, Working copy view menu or Synchronize view menu. From the Repository view you can display the log history regarding any remote resource residing in repository. From the Working copy view you can display the history of local versioned resources. From the Synchronize view you can show the history of any incoming or outgoing resources. The view itself consists of three distinct areas: • The revision table showing revision numbers, date/time of revision, name of the author, as well as the first line of the commit message. You can click on any revision to show its full details. • The list of resources affected by this revision (modified, added, deleted or changed properties). • The commit message for the selected revision. Figure 14.22. History view The Resource history view does not always show all the changes ever made to a resource because for a large repository there may be thousands of changes and retrieving the entire list can take a long time. Normally you are interested in the more recent ones and that is why the number of revisions is limited by default from the options to 50. This can be changed by accessing the Preferences->SVN page. Note When using Subversion servers older than version 1.2, a history request may take a very long time because the server will reply with the entire history even if you limited the number of entries to a smaller number. 280 The Syncro SVN Client Using the resource history view The History view provides a set of actions you can use to get even more information about the project history and make changes to your working copy related with older revisions. History actions available for single selection • Open - opens the selected revision of the file into the Editor. This is enabled only for files. • Save revision as - saves the selected revision to a file so you have an older version of that file. This option is only available when you access the history of a file, and it saves a version of that one file only. • Compare with working copy - compares the selected revision with your working copy file. It is enabled only when you select a file. • Update to revision - updates your working copy resource to the selected revision. Useful if you want to have your working copy reflect a time in the past. It is best to update a whole directory in your working copy, not just one file, otherwise your working copy will be inconsistent and you will be unable to commit your changes. • Check out from revision - gets the content of the selected revision for the resource into local file system. • Revert changes from this revision - reverts changes which were made in the selected revision. The changes are reverted in your working copy so this operation does not affect the repository file! The action will undo the changes made only in selected revision. It does not replace your working copy file with the entire file at the earlier revision. This is useful for undoing an earlier change when other unrelated changes have been made since the date of the revision. This option is enabled when the resource history was launched for a local working copy resource. History actions available for double selection • Compare revisions - compares the two selected revisions using the Compare view. It is enabled when the resource is a file. • Revert changes from these revisions - similar to the svn-merge command, it merges two selected revisions into the working copy resource. This action is only enabled when the resource history was requested for a working copy item. Management of SVN properties In the Properties view you can read and set the Subversion properties of a file or folder. There is a set of predefined properties with special meaning to Subversion. For more information about properties in Subversion see the SVN Subversion specification. Subversion properties are revision dependent. After you change, add or delete a property for a resource, you have to commit your changes to the repository. Add / Edit / Remove SVN properties If you want to change the properties of a given resource you need to select that resource from the Working copy view or the Synchronize view and access the Show properties action from the contextual menu. The properties view will show the local properties for the resource in the working copy. Once the Properties View is visible, it will always present the properties of the currently selected resource. 281 The Syncro SVN Client In the Properties view toolbar there are available actions which allow you to add, change and delete the properties. If you choose the Add a new property action, a new dialog will pop-up. The sections in the dialog are: • Name - it is a combo box which allows you to enter the name of the property. The drop down list of the combo box presents the predefined Subversion properties such as svn:ignore, svn:externals, svn:needslock, etc. • Current value - it is a text area which allows you to enter the value of the new property. If the selected item is a directory, you can also set the property recursively on its children by checking the Set property recursively checkbox. Figure 14.23. Edit property dialog If you want to change the value for a previously set property you can use Edit property action which will display a dialog where you can set: • Name - the property name. It cannot be changed; only its value can. • Current value - presents the current value and allows you to change it. • Base value - the value of the property, if any, from the resource in the pristine copy. It cannot be modified. If you want to completely remove a property previously set you can choose Remove property action. It will display a confirmation dialog in which you can choose also if the property will be removed recursively. In the Properties view there is a Refresh action which can be used when the properties have been changed from outside the view. This can happen, for example, when the view was already presenting the properties of a resource and they have been changed after an Update operation. Creation and management of Branches/Tags One of the fundamental features of version control systems is the ability to create a new line of development from the main one. This new line of development will always share a common history with the main line if you look far enough back in time. This line is known as a branch. Branches are mostly used to try out features or fixes. When the feature or fix is finished, the branch can be merged back into the main branch (trunk). 282 The Syncro SVN Client Another feature of version control systems is the ability to take a snapshot of a particular revision, so you can at any time recreate a certain build or environment. This is known as tagging. Tagging is especially useful when making release versions. In Subversion there is no difference between a tag and a branch. On the repository both are ordinary directories that are created by copying. The trick is that they are cheap copies instead of physical copies. Cheap copies are similar to hard links in Unix, which means that they merely link to a specific tree and revision without making a physical copy. As a result branches and tags occupy little space on the repository and are created very quickly. As long as nobody ever commits to the directory in question, it remains a tag. If people start committing to it, it becomes a branch. Create a Branch/Tag In the Working Copy view, select the resource which you want to copy to a branch or tag, then select the command Branch/Tag.... Figure 14.24. The Branch/Tag dialog The default target URL for the new branch/tag will be the repository URL of the selected resource from your working copy. You will need to change that URL to the new path for your branch/tag. To do this, click on the Browse button and choose a repository target directory for your resource. 283 The Syncro SVN Client Figure 14.25. Repository Browser dialog You can also specify the source of the copy. There are three options: • HEAD revision in the repository The new branch/tag will be copied in the repository from the HEAD revision. The branch will be created very quickly as the repository will make a cheap copy. • Specific revision in the repository The new branch will be copied in the repository but you can specify exactly the desired revision. This is useful for example if you forgot to make a branch/tag when you released your application. If you click on the History button on the right you can select the revision number from the History dialog. This type of branch will also be created very quickly. • Working copy The new branch will be a copy of your local working copy. If you have updated some files to an older revision in your working copy, or if you have made local changes, that is exactly what goes into the copy. This involves transferring some data from your working copy back to the repository, more exactly the locally modified files. When you are ready to create the new branch/tag, write a commit comment in the corresponding field and press the OK button. Merge branches At some stage during the development you will want to merge the changes made on one branch back into the trunk, or vice versa. Merge is closely related to Diff. The merge is accomplished by comparing two points (branches or revisions) in the repository and applying the obtained differences to your working copy. It is a good idea to perform a merge into an unmodified working copy. If you have made changes to your working copy, commit them first. If the merge does not go as you expect, you may want to revert the changes and Revert cannot recover your uncommitted modifications. The Merge command can be found in the context menu in the Working Copy view. The directory selected when you issued the command will be the result directory of the merge operation. 284 The Syncro SVN Client Figure 14.26. The Merge dialog By default the start URL will be the URL of the selected file in the working copy. You can browse the repository and select a start URL and then choose a revision. If you want to merge a range of revisions, leave the Use 'From' URL checkbox checked and simply choose the end revision. Be careful when using the HEAD revision. It may not refer to the revision you think it does if someone else committed changes. If you want to merge a different branch uncheck the Use 'From' URL checkbox, browse the repository for the desired branch, and choose a revision. You can choose to do a Dry run of the Merge operation in order to see what files are affected and how, without modifying the working copy at all. This is very helpful in detecting where conflicts will occur. You can also perform a Unified diff and obtain the diff patch file without doing a merge in the working copy. The diff file is not always easy to read out of context, but for small scale changes it is sometimes useful. The target panel of the dialog reminds you the location of the target resource from the working copy where the merge result will be saved and its corresponding repository URL. Press the Merge button in order for the operation to take place. You will obtain the result in the selected resource from the working copy. When the merge is completed it's a good idea to look at the result of the merge and see if it meets your expectations. Because merging is sometimes complicated, when there are major changes, conflicts may appear. 285 The Syncro SVN Client Create Patches Let's suppose you are working to a set of XML files, that you distribute to other people. From time to time you are tagging the project and distribute the releases. If you continue working for a period correcting problems, you may find yourself in the situations to notify your users that you have corrected a problem. In this case you may prefer to distribute them a patch, a collection of differences that applied over the last distribution would correct the problem. Creating patches in Subversion implies the access to two states (revisions) of your project. If you have not commited yet your current working copy and prefer not to do it, it is possible to create a patch between the current working copy and a revision from the repository. In order to create the patch, you will use the action from the contextual menu: Create Patch. This opens the Create patch dialog. Figure 14.27. The Create Patch Dialog The first section in the dialog shows the start state of the diff, and it can be: • The HEAD revision from the repository • The working copy - the current files from your working copy • A revision number. If you do not know it, you can press the History button and see the history log for the root of the patch, including the commit messages. The second section shows the end state of the diff, and it can be: 286 The Syncro SVN Client • An URL from the repository, indicating a tag or a branch. • The HEAD revision from the repository • A revision number. The target panel of the dialog reminds you the location of the target resource from the working copy on which the patch will be created and its corresponding repository URL. The output section lets you choose the patch file that will store the differences. Working with repositories Import / Export resources Import resources into the repository This is the process of taking a project and importing it into a repository so that it can be managed by Subversion. If you have already been using Subversion and you have an existing working copy you want to use, then you will likely want to follow the procedure for Use an existing working copy. A dialog will ask you to select a directory that will be imported into the selected repository location. The complete directory tree will be imported into the repository including all files. The name of the imported folder will not appear in the repository, but only the contents of the folder will. Export resources from the repository This is the process of taking a resource from the repository and saving it locally in a clean form, with no version control information. This is very useful when you need a clean build for an installation kit. Figure 14.28. The export dialog The export dialog is very similar to the check out dialog. You can choose the target directory from the file system by pressing the Browse button. If you need to export a specific revision, you can select the Revision radio button and then click on the History button and choose a revision from the new dialog. Or you could simply type the revision number in the corresponding text field. Please note that the content of the selected directory from the repository and not the directory itself will be exported to the file system. 287 The Syncro SVN Client Copy / Move / Delete resources from the repository Once you have a location defined in the Repository view you can execute commands like copy, move and delete directly on the repository. The commands correspond to the following actions in the contextual menu. The Copy action allows you to copy individual or multiple resources. After invoking the action the Copy file dialog will pop up. Figure 14.29. Copy files dialog The dialog displays the tree structure of the repository allowing you to choose the destination directory. The path of this target directory will be presented in the text field Target directory. If you choose to copy a single resource then an additional text field allows you to choose the new name of the copied resource. The Move action will display a similar dialog allowing you to move the selected resources to a different folder. If you choose to move a single resource you can also change its name. This will allow you to rename a resource by moving it into the same parent directory but choosing a different name. The move operation is basically a copy operation followed by a delete operation. If you select a directory, any other selected descendants will be ignored when you have issued the move command. Another useful action is Delete. This action allows you to delete resources directly from the repository. After choosing the action from the Repository view contextual menu a confirmation dialog will be displayed. All three actions are commit operations and you will be prompted with the Commit message dialog. Repository view General description The repository view allows you to define and manage Subversion repository locations. Repository files and folders are presented in a tree view with the repository locations at the first level, where each location represents a connection to a specific Subversion Repository. When hovering with the mouse over a repos- 288 The Syncro SVN Client itory resource a tooltip window will display more detailed information regarding: URL, last change revision, last change author, last change date. Toolbar The toolbar for the repository view contains the following buttons: • New Repository Location - allows you to enter a new repository location by means of the Add SVN Repository dialog. • Check Out - checks out a working copy from the selected directory in the repository. Displays the new working copy in the Working Copy view. • Edit Repository Location - context dependent, allows you to edit the selected repository location by means of the Edit SVN Repository dialog. It is active only when a repository location root is selected. • Remove Repository Location - allows you to remove the selected repository location from the view. It shows you a confirmation dialog before removal. It is active only when a repository location root is selected. Contextual menu actions The repository view has one contextual menu for the repository locations (roots) and another contextual menu for the repository resources. Besides the actions described above, the locations context menu from the repository view contains the following actions: • Import - imports a directory from the file system into the selected directory from the repository. • Export - exports a directory from the repository to the local file system. • New Folder - allows you to create a new folder in the selected repository path. • Information - provides additional information for the selected resource from the repository • Show History - brings up the History view and displays the log history for the selected resource from the repository. • Copy URL to Clipboard - copies the encoded URL for the selected resource from the repository. • Refresh - refreshes the currently selected resources from the repository The repository resources context menu from the view contains the following actions: • Check Out - checks out a working copy from the selected directory in the repository. • Import - imports a directory from the file system into the selected directory from the repository. • Export - exports a directory from the repository to the local file system. • Open - opens the selected file in the Editor view in read only mode. • Copy - displays the Copy files dialog which allows you to select the location where the selected resources will be copied. 289 The Syncro SVN Client • Copy URL to Clipboard - copies the encoded URL for the selected resource from the repository. • Move - displays the Move files dialog which allows you to select the location where the selected resources will be moved. • Delete - deletes the selected resources. It will ask for confirmation. • Information - provides additional information for the selected resource from the repository • Show History - brings up the History view and displays the log history for the selected resource from the repository. • Refresh - refreshes the currently selected resources from the repository Working copy view General description The working copy view allows you to manage with ease the content of the working copy. Resources(files and folders) are presented in a tree view with the root of the tree representing the location of the working copy on the file system. Each resource has an icon representation which describes the type of resource and also depicts the state of that resource with a small overlay icon. Figure 14.30. Toolbar The toolbar from the working copy view contains the following buttons: • Synchronize - contacts the repository and determines the changes made by you to the working copy and by others to the repository. The synchronize result will be displayed in the Synchronize view. The actions performs a synchronize operation on the root of the working copy. • Refresh - refreshes the content of the working copy. The content of the working copy is always scanned(refreshed) when starting the Subversion client or when changing the working copy from the combo box in the toolbar. However, if you make modifications from other applications outside the Subversion client, while the client is started, you will have to manually refresh the working copy. The action performs a refresh operation on the root of the working copy. 290 The Syncro SVN Client • Cleanup - performs a maintenance cleanup operation on the working copy. Sometimes, when an operation fails, the working copy will enter an inconsistent state in which some resources will remain locked by SVN. Cleanup removes those maintenance locks and allows you to continue your work. When the SVN client determines that an operation failed because the working copy is locked by SVN you will be asked if a Cleanup operation should be performed first. • Combo box - The combo box list contains all the working copies the Subversion client is aware of. When you select another working copy from the combo, the newly selected working copy content will be scanned and displayed in the view. • Add/Remove Working Copy - opens the Working copies list dialog which displays the working copies the Subversion client is aware of. In this dialog you can add existing or remove no longer needed working copies. If you try to add a directory which is not a valid Subversion working copy, a warning dialog will inform you that the selected directory is not under version control. Please note that removing a working copy from this dialog will NOT remove it from your file system; you will have to do that manually. • Show ignored files - shows in the working copy tree the resources that were listed in the svn:ignore property of their parents. This option is off by default. • Show deleted files - shows in the working copy tree the resources that were marked to be deleted but are not yet commited. This option is off by default. Contextual menu actions The contextual menu in the Working Copy view contains the following actions: • Open - This action will open the selected file in an editor where you can make modifications to it. The action is active only when a single file is selected. • Synchronize - it contacts the repository and determines the working copy and the repository changes made to the selected resources. It displays the result of the operation in the Synchronize view. This is useful when you have a large working copy and you only want to verify the changes to a specific part you are currently working on. • Update - This command updates your selected resources from the working copy to the HEAD revision from the repository (latest modifications). It differs from the update action from the Synchronize view in that it always brings you the HEAD revision from the repository. If a directory is involved it will be updated recursively. The action is active only on resources that are under version control. • Commit - This action collects the outgoing changes from the selected resources in the working copy and presents them in a dialog. Then you can choose exactly what to commit by selecting or deselecting resources accordingly. A directory will always be committed recursively. The unversioned resources will be deselected by default. In the commit dialog you will also have to enter a commit comment before sending your changes to the repository. • Add - This operation adds the selected resources to version control. A directory will be added recursively to version control. It is not mandatory to explicitly add resources to version control but it is recommended. At commit time unversioned resources will have to be manually selected in the commit dialog. It is only active on unversioned resources. 291 The Syncro SVN Client • Add to svn:ignore - This action can only be performed on resources not under version control. It allows you to keep inside your working copy, files that should not participate to the version control operations. The action actually modifies the value of the svn:ignore property of the resource's parent directory. • New Folder - This operation creates a new folder and adds it to version control. If the selected path is not under version control, the newly created directory will not be added to version control. • Delete - This action allows you to delete resources from the Subversion working copy. If unversioned, added or modified resources will be encountered, a dialog will prompt you to confirm their deletion. This is because their content cannot be recovered. The action it is not enabled when the selection contains missing resources. • Copy - This action copies resources from the working copy. Each copy will also have the original resource's history. For more details please read the section Copy / Move / Rename resources • Move - This command actually performs as if a copy and then a delete command were issued. You will find the moved resources at the desired destination and also at their original location but marked as deleted. • Rename - You can only rename a resource at a time. As for the move command, a copy of the original resource will be made with the new name and the original will be marked as deleted. • Mark resolved - This action is only enabled on conflicted resources and its function is to tell the Subversion system that you resolved the conflict. See the section Merge conflicts. • Revert - Undoes all local changes for the selected resources. It does not contact the repository, the files will be obtained from Subversion's pristine copy. It is enabled only for modified resources. Read the Revert your changes section for more information. • Cleanup - performs a maintenance cleanup operation to the selected resources from the working copy. This operation removes the Subversion maintenance locks that were left behind. Useful when you already know where the problem originated and want to fix it as quickly as possible. Only active for resources under version control. • Information - provides additional information for the selected resource from the working copy. For more details please see the section Obtain information for a resource. • Show history - It will display the History view where the log history for the selected resource will be presented. For more details about resource history see the sections Using the resource history view and Request history for a resource. • Show properties - brings up the Properties view and displays the SVN properties for the selected resource. • Branch/Tag - This action displays the Branch/Tag dialog where you can select the revision of the resource and the destination URL in the repository. For more details about creating branches and tags see the section Create a branch/tag. • Merge - The selected resource will be considered the destination for the merge operation. From the displayed Merge dialog you will be able to specify the start URL and revision and also the end URL and revision. See section Merge branches for more details. • Create patch - The selected resource will be used to create a patch. From the displayed Create patch dialog you will be able to specify the two sources of the patch, the first one being either the working copy files or a revision/tag and the second a repository URL or a revision/tag. See section Create patches for more details. 292 The Syncro SVN Client • Scan for locks - This action contacts the repository and recursively obtains the list of locks for the selected resources. A dialog containing the locked files and the lock description will be displayed. Only active for resources under version control. For more details see the section Scanning for locks. • Lock - It allows you to lock certain files for which you need exclusive access. You can write a comment describing the reason for the lock and you can also force(steal) the lock. The action is active only on files under version control. For more details on the use of this action please read the section Locking a file. • Unlock - This action releases(unlocks) the exclusive access to a file from the repository. You can also choose to unlock it by force(break the lock). • Compare with: • Latest from Head - This action will perform a compare between the selected file and the HEAD revision from the repository and will display the result in the Compare view. • Base revision - This will compare the working copy file with the file from the pristine copy (BASE revision). • Revision - This command will bring to front the History view with the log history for that resource. These actions are enabled only if the selected resource is a file. • Refresh - This action will rescan the selected resources recursively and refresh their status in the working copy view. Icons The icons in the working copy view have a small overlaid icon which describes the current state of the resource in the working copy. These state icons are: • • • • • • Unversioned - The resource marked with this symbol is not under version control. This is how new files are represented when they are created or copied from the file system. Added - This resource has been added to version control but has not been committed. This state is obtained after issuing an Add command on an unversioned resource. Added with history - This resource has been copied with history. This state is obtained by copying, moving or renaming a resource from the working copy. Modified - The resource has been locally modified since the last update. This is obtained after editing a file and making changes. Deleted - This resource has been deleted from the working copy. This state appears after deleting, moving or renaming files with Subversion. Missing/Incomplete - This resource is in an inconsistent state. If it's missing, it means it has been deleted from the file system without Subversion's knowledge. If it's incomplete, a check out or update action has probably failed or has been interrupted before finishing. A directory in such a state must be restored with an update action before any other action can be performed. 293 The Syncro SVN Client • • • • Conflicted - This resource has conflicting changes. A resource can be in this state after an update, if it was modified both locally and on the repository and the modifications were overlapping. External - This indicates a mapping of a local directory to the URL of a versioned resource. It is declared with a svn:externals property in the parent folder. Normal - A resource with no overlaid icon is an unmodified resource under version control. Grayed - A resource with a grayed icon but no overlaid icon is an ignored resource. It is obtained with the action Add to svn:ignore. Synchronize View General description The synchronize view is visible in the default layout configuration. It displays the result of a Refresh or Synchronize operation in a hierarchical form. The nodes represent synchronized or refreshed resources and their status. Figure 14.31. Synchronize view Synchronize trees The results are presented using four tree structures: • Incoming changes tree - presents items which contain incoming changes. This includes resources modified and committed by others or resources newly added or newly deleted from the repository. • Outgoing changes tree - presents resources with outgoing changes meaning that they have been modified locally or have been added or deleted from your working copy. • Incoming - Outgoing tree - includes all the resources with incoming and outgoing changes • Conflict tree - includes resources with conflicting state meaning they contain both incoming and outgoing changes (pseudo-conflicting state) or they are in a state of real conflict. A resource which is in a real conflict state will not appear in the Incoming tree. 294 The Syncro SVN Client Toolbar The Synchronize view toolbar consists of the following buttons: • Incoming mode - filters synchronized resources displaying only the ones with incoming changes. • Outgoing mode - filters synchronized resources displaying the ones with outgoing changes. • • In-Out mode - displays resources with incoming or outgoing changes, basically all resources with any type of change. Conflicts mode - filters synchronized resources displaying the ones in pseudo or real conflict state. • Update all - updates all resources with incoming changes. It is disabled when Outgoing mode is selected or the synchronization result does not contain resources with incoming changes. It will perform a recursive update on the synchronized resources. • Commit all - commits all resources with outgoing changes. It is disabled when Incoming mode is selected or the synchronization result does not contain resources with outgoing changes. It will perform a recursive commit on the synchronized resources. Contextual menu actions The contextual menu contains the following actions: • Open in compare editor - if the selected file has a text content type it will be opened in the Compare view and a file differencing will be performed. If the file has a binary content type then the position of the first different byte will be displayed. It is disabled for directories. See also View differences section. • Open - it is enabled only for existing local files and opens the selected one into the Editor. See also Edit files section. • Update - it is enabled for resources with incoming changes. Updates all selected resources to the synchronized revision. If one of the selected resources is a directory then the update for that resource will be recursive. • Commit - it is enabled for resources with outgoing changes. Commits all selected resources, recursively in the case of directories, to the repository. This action collects the outgoing changes from the selected resources and presents them in a dialog. You can choose exactly what items will be committed by checking or unchecking them in the table. Also you will have to enter a commit comment. See also Sending your changes to the repository section. • Add - it is enabled for unversioned resources. It performs a svn add command by adding the resources to version control. You can directly commit unversioned items because in this case the Commit action will perform first a svn add command. • Add to svn:ignore - it is also enabled for unversioned resources. It is useful when you decide that some resources, for example some compiler generated Java classes, should be ignored by the Subversion system. The action modifies the value of the svn:ignore property of the parent directory. For more information read the section Ignore resources not under version control. • Revert - it is useful when you want to undo all local changes made to a resource. It is enabled on resources which contain outgoing changes. Read the Revert your changes section for more information. 295 The Syncro SVN Client • Mark resolved - it is enabled on real conflicting resources. Its function is to tell the Subversion system that you resolved the conflict and the resource can be committed. See also Merge conflicts part. • Mark as merged - the action is enabled on pseudo-conflicting resources. It is used after you resolved the pseudo-conflict by merging the changes and you want to commit the resource. Read the Merge conflicts section for more information on methods to solve the pseudo-conflicts. • Override and update - it is enabled on resources with outgoing changes including the conflicting ones. It is used for dropping any outgoing change and replacing the local resource with the synchronized revision. See Revert your changes section. • Override and commit - it is enabled on conflicting resources. The action will drop any incoming changes and will send your local version of the resource to the repository. See also Drop incoming modifications. • Information - the action will display detailed information about the selected resource. See Show information section. • Show history - the action will display into the History view the revision history of the selected resource. For more information read Request history for a resource and Using the resource history view sections. • Show properties - displays the SVN properties for the selected resource into the Properties view. • Expand all - expands the selected directories to leaf level. Icons The icons for the items displayed into the synchronized trees are the same icons used in the <oXygen/> XML Editor decorated with overlay images. The overlay icons correspond to the status of the resource as follows: • • • • • • • Incoming resource - resource with incoming changes. Remote added resource - resource that was added on the repository and is not present in your working copy. Remote deleted resource - resource that no longer exists in the repository. Outgoing resource - resource with outgoing changes. Locally added or unversioned resource - resource added locally to version control or a resource not yet under version control. Locally deleted or missing resource - a resource that you deleted with Delete action or that was deleted from the file system in some other way. Conflicting resource - resource in a pseudo or real conflicting state. 296 The Syncro SVN Client Compare view Description In the Syncro SVN Client there are three types of files that can be checked for differences: text files, image files, and binary files. For the text files and image files you can use the built-in Compare view. Figure 14.32. Compare view When comparing text, the differences are computed using a line differencing algorithm. The view can be used to show the differences between two files in the following cases: • After obtaining the outgoing status of a file with a Refresh operation, the view can be used to show the differences between your working file and the pristine copy. In this way you can find out what changes you will be committing. • After obtaining the incoming and outgoing status of the file with the Synchronize operation, you can examine the exact differences between your local file and the synchronized revision file. • You can use the Compare view from the History view to compare the local file and a selected revision or compare two revisions of the same file. If in any of the cases one of the involved files cannot be loaded then you will be prompted with a dialog informing you about the file that cannot be opened. The Compare view contains two editors. Edits are allowed only in the left editor and only when it contains the working copy file. To learn more about how the view can be used in the day by day work you can read the section View differences. Toolbar The list of actions available in the toolbar consists of: • Save action - it allows you to save the content of the left editor when it can be edited. • Perform files differencing - used to perform files differencing on request. 297 The Syncro SVN Client • Go to first modification - used to navigate to the first difference. • Go to previous modification - used to navigate to the previous difference. • Go to next modification - used to navigate to the next difference. • Go to last modification - used to navigate to the last difference. • Copy change from right to left - this action copies the selected change from the right editor to the left editor. • Copy all non-conflicting changes from right to left - this action copies all non-conflicting changes from the right editor to the left editor. A non-conflicting change from the right editor is a change that does not overlap with a left editor change. • Show modification details at word level - because the differences are computed using a line differencing algorithm sometimes is useful to see exactly what words are different in a changed section. • Show modification details at character level - useful when you want to find out exactly what characters are different between the two analyzed sections. • Ignore whitespaces - Enables or disables the whitespace ignoring feature. These actions are available also from the Compare menu. Compare images view The images are compared using the Compare images view. The images are presented in the left and right part scaled to fit the view's available area. You can use the contextual menu actions to scale the images at its original size or scale it down to fit in the view's available area. The supported image types are: GIF, JPG / JPEG, PNG, BMP. Figure 14.33. Compare images view 298 The Syncro SVN Client Editor Description You can edit your local files by using the built-in Editor. The editor can be accessed either from the Working copy view or from the Synchronize view. The editor can also be used from the History view to view a selected revision of a file. In this case there are no edits allowed. Figure 14.34. Editor view Only one file can be edited at a time, if you try to open another file it will be opened in the same editor window. The editor has syntax highlighting for known file types. This means that a different color will be used for each type of recognized token in the file. If the content type of the file is unknown you will be prompted to choose the proper way the file should be opened. After editing the content of the file you can save it to disk by using the Save action from the File menu or the Ctrl + S key shortcut. After saving your file you can see the file changed status into Working copy view and Synchronize view. Finding and replacing text in the editor The Find/Replace dialog The Find/Replace dialog opened with the menu entry Edit → Find/Replace... (Ctrl+F) enables you to define "search for" or "search for and replace" operations on the current document. The find works at line level, which means a find match cannot cover characters on more than one line. The replace operation can bind Perl 5 regular expression group variables ($1, $2, etc.) from the find match. For example to replace the tag with attributes called tag-name with the tag tag-name1 use as text to find <tag-name(\s+)(.*)> and as replace text <tag-name1$1$2>. • find occurrences of a word or string of characters including white spaces and highlight the position in the editor. • replace occurrences of target defined in the Find field with a word or string of characters, including white spaces, defined in the Replace field. • replace all occurrences of a word or string of characters including white spaces. 299 The Syncro SVN Client Figure 14.35. Find/Replace Dialog Complete the dialog as follows: Text to find The target character string to search for. Replace with The character string with which to replace the target. It may contain '{$NEWLINE}' which at the replace time will insert a new line character. Direction Specify if the search direction is from current position to end of file (forward direction) or to start of file (backward direction). Scope Specify if the search is executed on all file or only on the lines that were selected when the dialog was invoked. If the selection was on a single line the search is executed on all the file. Find Execute a find operation for the next occurrence of the target and stop. Replace Execute a replace operation for the target followed by a find operation for the next occurrence. Replace to end Execute a replace operation starting from current target until the end of the document, in the direction specified by the current selection of the Direction switch (forward or backward). Replace all Execute a replace operation in the entire scope of the document. Case sensitive When checked, operations are case sensitive. Whole words only When checked only whole occurrences of a word will be included in the operation. Find in tags When checked, operation will include content of the start and end tags of the XML elements. Incremental When checked, search operation is started for every letter typed in or deleted. The first match that obeys the checked conditions will be highlighted. 300 The Syncro SVN Client Regular Expression When checked allows using any regular expression in PERL syntax. Wrap around Continues the find from the start (end) of the document after reaching the end (start) if the search is in forward (backward) direction. Keyboard shortcuts for finding the next and previous match Navigation from a find match to the next one or the previous one is very easy with two keyboard shortcuts: F3 and Shift F3. They are useful to quickly repeat the last find action performed with the Find/Replace dialog, taking into account the same find options set there through check boxes. (F3) performs another search in forward direction using the last search configuration. (Shift+F3) performs another search in backward direction using the last search configuration. Image preview Description You can view your local files by using the built-in Image preview component. The view can be accessed either from the Working copy view, Synchronize view or from the Repository view. It can also be used from the History view to view a selected revision of a image file. Figure 14.36. Image preview Only one image file can be opened at a time. If an image file is opened in the Image preview and you try to open another one it will be opened in the same window. Supported image types are GIF, JPEG/JPG, PNG, BMP. Once the image is displayed in the Image preview panel using the actions from the contextual menu one can scale the image at its original size (1:1 action) or scale it down to fit in the view's available area (Scale to fit action). History view Description In Subversion, both files and directories are versioned and have a history. If you want to examine the history for a selected resource and find out what happened at a certain revision you can use the History view that can be accessed from any of the three views: Repository view menu, Working copy view menu or Synchronize view menu. From the Repository view you can display the log history regarding any repository 301 The Syncro SVN Client resource. From the Working copy view you can display the history of local versioned resources. From the Synchronize view you can show the history of any incoming or outgoing resources. The view consists of three distinct areas: • The revision table showing revision numbers, date/time of revision, the name of the author, as well as the first line of the commit message. • The list of resources affected by this revision (modified, added, deleted or changed properties). • The commit message for the selected revision. Figure 14.37. History view The Resource history view does not always show all the changes ever made to a resource because there may be thousands of changes and retrieving the entire list can take a long time. Normally you are interested in the more recent ones and that is why the number of revisions is limited by default from the options to 50. This can be changed by accessing the Preferences->SVN page. Note When using Subversion servers older than version 1.2, a history request may take a very long time because the server will reply with the entire history even if you limited the number of entries to a smaller number. Features Single selection actions: • Open - opens the selected revision of the file into the Editor. This is enabled only for files. • Compare with working copy - compares the selected revision with your working copy file. It is enabled only when you select a file. • Save revision as - saves the selected revision to a file so you have an older version of that file. This option is only available when you access the history of a file, and it saves a version of that one file only. • Update to revision - updates your working copy resource to the selected revision. 302 The Syncro SVN Client • Check out from revision - gets the content of the selected revision for the resource into local file system. • Revert changes from this revision - reverts changes made in the selected revision. Double selection actions: • Compare revisions - compares the two selected revisions using the Compare view. It is enabled when the resource is a file. • Revert changes from these revisions - similar to the svn-merge command, it merges two selected revisions into the working copy resource. This action is only enabled when the resource history was requested for a working copy item. For more information about the History view and its features please read the sections Request history for a resource and Using the resource history view Properties view Description The properties view presents the Subversion properties for the currently selected resource from either the Working copy view or the Synchronize view. Figure 14.38. The properties view Above the table it is specified the currently active resource for which the properties are presented. Here you will also find a warning when an unversioned resource is selected. The table in which the properties are presented has four columns: • State - can be one of • (empty) - normal unmodified property, same current and base values. • *(asterisk) - modified property, current and base values are different. • +(plus) - new property. • -(minus) - removed property. • Name - the property name. 303 The Syncro SVN Client • Current value - the current value of the property. • Base value - the base(original) value of the property. Toolbar / Contextual menu The properties view toolbar and contextual menu contain the following actions: • Add a new property - This button invokes the Add property dialog in which you can specify the property name and value. • Edit property - This button invokes the Edit property dialog in which you can change the property value and also see its original(base) value. • Remove property - This button will prompt a dialog to confirm the property deletion. You can also specify if you want to remove the property recursively. • Refresh - This action will refresh the properties for the current resource. Console view Description The Console View shows the communication between your client and the Subversion repository. The output is expressed as subcommands to the Subversion server and simulates the Subversion command line notation. For a detailed description of the Subversion console output read the SVN User Manual. In the right toolbar there is available a Remove all action which clears the content of the view. The maximum number of lines displayed in the console (the length of the buffer) can be modified from Preferences. By default this is set to 100. Help view Description The Help view is a dynamic help window. It changes its content displaying the help section referring to the currently selected view. As you change the focused view you will be able to read a short description of it and its functionality. Syncro SVN Client Preferences The options used in the SVN client are saved and loaded independently from the <oXygen/> XML Editor options. However if at the Syncro SVN Client's first startup it cannot be determined a set of SVN options to be loaded, some of the preferences are imported from the XML Editor options (e.g. License and HTTP Proxy settings). The preferences dialog can be accessed from the Options -> Preferences. The preferences panels are called Global , SVN , Diff colors and HTTP/Proxy Configuration. 304 The Syncro SVN Client Command line interface cross reference This section specifies the equivalent Subversion commands for each action in the Syncro SVN Client action. Actions commands reference Checkout svn checkout [--revision rev] URL PATH --revision rev specifies the desired revision(if necessary). URL is the repository URL you want to check out from. PATH is the location on the file system. Update svn update [--revision rev] PATH --revision rev specifies the desired revision(if necessary). PATH is the location on the file system of the resource to update. There are two behaviours for the update action in Syncro SVN client. If invoked from the Synchronize View, it updates the resources to the synchronized revision. If invoked from the Working Copy view it always updates to the HEAD revision. Commit svn commit -m "log message" [--nounlock] PATH... -m "log message" specifies the commit comment. --no unlock specifies that the resource should keep locks after commit if this is the case. PATH is the location on the file system of the resource to commit. Can be more than one. Diff svn diff --revision rev1:rev2 PATH --revision rev1:rev2 specifies the desired revisions to be compared. PATH is the location on the file system of the resource to be compared. If you use the Compare with latest from HEAD from the Working copy view you will be comparing the local file with the HEAD revision file. If you use Compare with BASE revision the local file will be compared with the pristine copy. From the Synchronize view you can compare the working copy file with the synchronized revision file. You can choose to compare the local file with an older revision or two revisions of the same file from the History view. Show History svn log [--revision rev1:rev2] [-limit N] --verbose PATH --revision rev1:rev2 - specifies the range of revisions for which to obtain the log. --limit N - limits the number of log messages to N. 305 The Syncro SVN Client --verbose - gives detailed information about the operation. Syncro SVN Client uses by default the --limit option in order to obtain only 50 log messages. Refresh svn status --verbose PATH --verbose - specifies that the status of all files should be reported. PATH - The location on the file system to get status for. Synchronize svn status --show-updates PATH --show-updates - get the resource status by contacting the repository. PATH - The location on the file system to get status for. Import svn import -m "log message" PATH URL -m "log message" - specifies the commit log message PATH - the local path to the resource on the file system. URL - the URL on the repository where the resource will be imported. Export svn export [--revision rev] URL PATH --revision rev specifies the desired revision(if necessary). URL is the repository URL you want to export from. PATH is the location on the file system where to export. Information svn info [--revision HEAD] PATH | URL --revision HEAD - specifies that the information will be for the HEAD revision of the resource. PATH - the local file system path to the resource. URL - the repository URL for the resource. This command can obtain information for a resource from a working copy or from a Subversion repository. Add svn add PATH... PATH- the local file system path for the unversioned resources to be added to version control. More than one can be specified. Add to svn:ignore svn propset svn:ignore PATH PARENTPATH svn:ignore - the predefined property name for ignoring resources. PATH - the relative path from the working copy root for the resource to be ignored. 306 The Syncro SVN Client PARENTPATH - the path to the parent of the resource to be ignored. Delete svn delete --recursive PATH | URL --recursive - specifies that he operation should be performed recursively. PATH- the local file system path for the resource to delete. URL- the repository URL for the resource to delete. This command can delete resources from a working copy or from a Subversion repository. Copy svn copy (SRCPATH DSTPATH) | (SRCURL DSTURL) SRCPATH - the working copy path of the resource to be copied. DSTPATH - the working copy path to be copied to. SRCURL - the repository path of the resource to be copied. DSTURL - the repository path to be copied to. Move / Rename svn move (SRCPATH DSTPATH) | (SRCURL DSTURL) SRCPATH - the working copy path of the resource to be moved. DSTPATH - the working copy path to be moved to. SRCURL - the repository path of the resource to be moved. DSTURL - the repository path to be moved to. Mark resolved svn resolved --recursive PATH --recursive - specifies that he operation should be performed recursively. PATH - the path to the resource in the local working copy. Revert svn revert [--recursive] PATH --recursive - specifies that he operation should be performed recursively. PATH - the local working copy path to revert. Cleanup svn cleanup PATH PATH - the working copy path to cleanup. 307 The Syncro SVN Client Show / Refresh Properties svn proplist PATH & svn propget PROPNAME PATH PATH - the local path for the resource PROPNAME - the property name. First you can discover the property names with svn proplist, then you can obtain their values with svn propget. Branch / Tag svn copy -m "log message" URL1 -m "log message" - the commit comment URL2 or svn copy -m "log message" URL1 - the source repository URL. URL1@rev1 URL2 or svn copy -m "log message" PATH URL rev1 - the revision of the source. URL2 - the destination repository URL. PATH - the source working copy path. URL - the destination repository URL. Merge Merge - svn merge [--dry-run] rev1:rev2 URL PATH or svn merge [--dry-run] URL1@rev1 URL2@rev2 PATH --dry-run - specifies that the operation will be simulated without making any modifications. URL - the repository URL for the resource to merge. URL1 - the repository URL for the start branch to merge. rev1 - the start revision for the resource to merge. URL2 - the repository URL for the end branch to merge. rev2 - the end revision for the resource to merge. PATH - the destination path in the working copy for the result of the merge Scan for locks svn status --show-updates --verbose PATH --show-updates - get the resource status by contacting the repository. --verbose - specifies that the status of all files should be reported. PATH - The location on the file system to get status for. The command will obtain the repository status for all the resources in the path. Lock svn lock [--force] [-m "log message"] --force - forces(steals) the lock PATH -m "log message" - the lock comment. 308 The Syncro SVN Client PATH - the path to the file from the working copy.. Unlock svn unlock [--force] PATH --force - forces(breaks) the lock PATH - the path to the file from the working copy.. Mark as merged Mark as merged - rename FILE FILE.TMP, svn update FILE and rename FILE.TMP FILE FILE - the file to be marked as merged. FILE.TMP - a temporary filename. Override and update svn revert PATH, svn update PATH PATH - the path of the resource to be overridden. Override and commit If the resource is in conflict it per-m "log message" specifies the commit comment. forms first mark resolved and if the resource has incoming changes mark --no unlock specifies that the resource should keep locks after commit if this is the case. as merged and then svn commit -m "log message" [--no-unlock] PATH PATH is the location on the file system of the resource to be committed. Add / Edit property svn propset [--recursive] PROPNAME PROPVALUE PATH --recursive - specifies that the property should be set recursively. PROPNAME - the property name. PROPVALUE - the property value. PATH - the resource path. Remove property svn propdel [--recursive] PROPNAME PATH --recursive - specifies that the property should be deleted recursively. PROPNAME - the property name. PATH - the resource path. Revert changes from this revision svn merge rev:rev-1 URL rev - revision whose changes must be reverted. URL - The SVN URL corresponding to the resource. 309 The Syncro SVN Client Revert changes from these revisions svn merge rev1:rev2 URL rev1 - first revision number. rev2 - second revision number. URL - The SVN URL corresponding to the resource. 310 Chapter 15. How to develop an <oXygen/> plugin This chapter explains how to write and install a plugin for <oXygen/> XML Editor 8.1 or higher. It treats the standalone version, that is not the Eclipse plugin. Introduction <oXygen/> defines a couple of extension points to allow providing custom functionality via plugins. The plugin support is simple and rather limited at this time, it was developed at user requests, and includes four types of plugins • General plugins • Selection plugins • Document plugins • Custom protocol plugins Requirements In order to develop a plugin a Java development environment must be installed. Apart from any library that the specific plugin will require the file oxygen.jar is necessary for plugin compilation. Also an <oXygen/> installation will be helpful for testing the deployment and plugin the functionality. Implementing plugins On the <oXygen/> website there is a plugin development kit [http://www.oxygenxml.com/InstData/Plugins/OxygenPluginsDevelopmentKit.zip] with some sample plugins (source code and compiled code) and the Javadoc API necessary for developing custom plugins. On the Plugins page [http://www.oxygenxml.com/plugins.html] there is a developer manual [http://www.oxygenxml.com/doc/HowToDevelopOxygenPlugins.pdf] with instructions for developing custom plugins. The minimal implementation of a plugin must provide two classes: one that extends the Plugin class and another that implements the plugin extension and a plugin descriptor file. There are four available extensions SelectionPluginExtension, DocumentPluginExtension, GeneralPluginExtension and URLStreamHandlerPluginExtension. A PluginDescriptor object is passed to the plugin class on constructor containing information about the plugin • basedir - File - the base directory of the plugin. • description - String - the description of the plugin. • name - String - the name of the plugin. • vendor - String - the vendor name of the plugin. 311 How to develop an <oXygen/> plugin • version - String - the plugin version. The PluginDescriptor fields are filled with information from the plugin descriptor file. The plugin descriptor defines how the plugin will be integrated in <oXygen/> and what libraries should be loaded. The structure of the plugin descriptor file is given below: <!-- the document root --> <!ELEMENT plugin (#PCDATA | runtime | extension)*> <!-- the name of the plugin --> <!ATTLIST plugin name CDATA #IMPLIED> <!-- the description of the plugin --> <!ATTLIST plugin description CDATA #IMPLIED> <!-- the plugin version --> <!ATTLIST plugin version CDATA #IMPLIED> <!-- the plugin vendor --> <!ATTLIST plugin vendor CDATA #IMPLIED> <!-- the plugin class --> <!ATTLIST plugin class CDATA #IMPLIED> <!ELEMENT runtime (#PCDATA | library)*> <!ELEMENT library (#PCDATA)> <!-- the jar archive --> <!ATTLIST library name CDATA #IMPLIED> <!ELEMENT extension (#PCDATA)> <!-- the extension type. Currently are available three types: selectionProcessor, documentProcessor and generalExtension --> <!ATTLIST extension type CDATA #IMPLIED> <!-- the class that implements PluginExtension and contains the method process --> <!ATTLIST extension class CDATA #IMPLIED> General plugins GeneralPluginExtension - this interface is intended for general purpose plugins - kind of external tools but triggered from the Plugins main menu. The implementing classes must contain the method process(GeneralPluginContext) which should provide the plugin processing. This method takes as a parameter an GeneralPluginContext object. GeneralPluginContext - represents the context in which the general plugin extension does its processing. The only method available is getFrame() which returns the currently editing frame (java.awt.Frame). It is useful if the plugin wants to display graphical components as they in general need a parent in order to appear properly on screen. Selection plugins SelectionPluginExtension - This interface is intended for selection processing plugins. It works as follows: the user makes a selection in the editor and then goes to the contextual menu and selects from the Plugins 312 How to develop an <oXygen/> plugin section the corresponding entry. The context containing the selection is passed to the extension and the processed result is going to replace the initial selection. The context is represented by an SelectionPluginContext object, this provides two methods: • getSelection() - String - returns the current selection of text. • getFrame() - Frame - returns the currently editing frame. The process method must return a SelectionPluginResult object which contains the result of the processing. Document plugins DocumentPluginExtension - This interface is intended for document processing plugins. This type of plugins can be started from the contextual menu, Plugins section, by selecting the corresponding entry. The context containing the current document is passed to the extension in order to be processed. The context is represented by an DocumentPluginContext object, this provides two methods: • getDocument() - Document - returns the current document. • getFrame() - Frame - returns the currently editing frame. The process method can return a DocumentPluginResult object containing a new document. Custom protocol plugins URLStreamHandlerPluginExtension allows the developer to work with a protocol that he designed for retrieving and storing files.There is one method that has to be implemented: getURLStreamHandler(). It takes as an argument the name of the protocol and returns the handler for it, or null if it wasn’t able to find it. With the help of the URLChooserPluginExtension interface, it is possible to write your own dialog that will work with the custom protocol. This interface provides two methods: • chooseURL() - URL - returns the URL with the custom protocol • getMenuName() - String - returns the name of the entry that will be added in the File submenu of the editor Example - UppercasePlugin The following plugin is an example. It is used in <oXygen/> for capitalizing the characters in the current selection. This example consist of two classes and the plugin descriptor: package ro.sync.sample.plugin.uppercase; import ro.sync.exml.plugin.Plugin; import ro.sync.exml.plugin.PluginDescriptor; public class UppercasePlugin extends Plugin { /** * Plugin instance. 313 How to develop an <oXygen/> plugin */ private static UppercasePlugin instance = null; /** * UppercasePlugin constructor. * * @param descriptor Plugin descriptor object. */ public UppercasePlugin(PluginDescriptor descriptor) { super(descriptor); if (instance != null) { throw new IllegalStateException("Already instantiated !"); } instance = this; } /** * Get the plugin instance. * * @return the shared plugin instance. */ public static UppercasePlugin getInstance() { return instance; } } package ro.sync.sample.plugin.uppercase; import import import import ro.sync.exml.plugin.selection.SelectionPluginContext; ro.sync.exml.plugin.selection.SelectionPluginExtension; ro.sync.exml.plugin.selection.SelectionPluginResult; ro.sync.exml.plugin.selection.SelectionPluginResultImpl; public class UppercasePluginExtension implements SelectionPluginExtension { /** * Convert the text to uppercase. * *@param context Selection context. *@return Uppercase plugin result. */ public SelectionPluginResult process(SelectionPluginContext context) { return new SelectionPluginResultImpl( context.getSelection().toUpperCase()); } } <!DOCTYPE plugin SYSTEM "../plugin.dtd"> <plugin name="UpperCase" 314 How to develop an <oXygen/> plugin description="Convert the selection to uppercase" version="1.0.0" vendor="SyncRO" class="ro.sync.sample.plugin.uppercase.UppercasePlugin"> <runtime> <library name="lib/uppercase.jar"/> </runtime> <extension type="selectionProcessor" class="ro.sync.sample.plugin.uppercase.UppercasePluginExtension"/> </plugin> Example - a custom protocol plugin 1. Write the handler class for your protocol (implement the java.net.URLStreamHandler interface) Note You must be carefull to provide ways to correct and uncorrect the URLs of your files. 2. Write the plugin class (the (ro.sync.exml.plugin.)Plugin class must be extended in order to create the new plugin) 3. Write the plugin extension class. It is necessary that the plugin extension for the custom protocol implements the URLStreamHandlerPluginExtension interface. Without it, you can’t use your plugin,because <oXygen/> will not be able to find the protocol handler. You can choose to implement also the URLChooserPluginExtension interface. It will allow you to write and use your own customized dialog for this protocol. 4. Write the plugin.xml file (remember to change the name of the plugin class to the one from the second step and the plugin extension class name with the one you’ve chosen at step 3) 5. Create a .jar archive and install your new plugin. Installing the plugin In the directory where <oXygen/> is installed there exists a directory called plugins. This contains all the available plugins. In order for <oXygen/> to use the new functionality you provided follow the next steps: 1. In the directory plugins create a new directory, generally named after your plugin. For instance in the uppercase plugin example this can be Uppercase. 2. Put in this new folder the plugin descriptor file, "plugin.xml" and the plugin files. 3. Restart <oXygen/> and try your plugin. 315 Chapter 16. Configuring the application Sharing Preferences Figure 16.1. Controlling the Storage of the Preferences By default all the settings are global and are stored in the user home directory. The values from each preference page can also be stored in the current project file. This allows you to create and share with your team an <oXygen/> project already configured. For instance you may decide that the default schema associations and catalogs must be shared. In this case you simply click the radio button "Project options", edit the values and then save your project. If you want to drop a option page from being stored into the project, you select the radio button "Global options". Note The project settings have precedence over the global ones. For instance, if you have changed a global option value, let say the line width used for prettyprint, and then you load a project that also defines a different line width for the pretty-print, <oXygen/> will use the value from the project. Note If you change the global options and decide to move the current page to the project level, you need to press Apply to save your current changes. Otherwise, the current changes will be lost from the global options. Note If you select "Global options" on a page that was at the project level, then the option values are removed from the project file when the project is saved. Preferences Once the application is installed you can use the Preferences dialog accessed from Options → Preferences to customize the application for your requirements and network environment. There is a search field available in the dialog for selecting only the preferences panels containing required words in the panel title or in the text of a label or a button contained in the panel. 316 Configuring the application Figure 16.2. The Search field from the Preferences dialog You can always revert modifications to their default values by using the Restore Defaults button, available in each preference page. Global Figure 16.3. The Global preferences panel 317 Configuring the application Automatic Version Checking When enabled, checks the availability of new <oXygen/> versions at http://www.oxygenxml.com. . Language The application supports a number of languages for localization of the GUI. Select Options → Preferences → Global+Language droplist to display the language choices. Note After restarting the application, if some GUI labels are not rendered correctly you will need to install the corresponding language pack from your OS installation kit. Other language To change the user interface language of <oXygen/> you must set here the properties file with all the user interface messages and labels translated to your preferred language. For details about creating this file see the section describing the creation process. After setting the file you have to restart <oXygen/> in order to change the user interface language to your preferred language. Look and Feel Use this option to change graphic style (look and feel) of the GUI. Styles On Windows there are available the following styles: • Office 2003 • Vsnet • Eclipse • Xerto • Default Note After changing the style one has to restart the application in order for the modification to take effect. On Linux there are available the following styles: • Eclipse • Default Note After changing the style one has to restart the application in order for the modification to take effect. On Mac OS X this option is not available. Themes On Windows this option is enabled only if the Office 2003 or Default styles. In these cases, the following themes are available: 318 Configuring the application • NormalColor • HomeStead • Metallic • Default • Gray On Linux this option is not available. On Mac OS X this option is not available. Encoding for non XML files This option defines the default encoding to be used when opening non XML documents. BOM handling This option defines how to handle the BOM (Byte Order Mark) on document save. The available options are: • Don't Write - Don't write the BOM bytes, the loaded BOM bytes are ignored; • Write - Write the BOM bytes accordingly with chosen encoding; • Keep - If the loaded document has BOM then write them accordingly with chosen encoding. This is the default option. Encoding errors handling This option defines how to handle characters that cannot be represented in the specified encoding of the document when the document is opened. The available options are: • REPORT - Show an error dialog with the character that cannot be represented in the specified encoding and allow the user to decide how to continue (ignore that character, replace it with a standard replacement character). This is the default option. • IGNORE - The character is ignored and it will not be included in the document displayed in the editor panel. • REPLACE - Replace the character with a standard replacement character. For example if the encoding is UTF-8 the replacement character has the Unicode code FFFD, and if the encoding is ASCII the character code is 63. Line separator This option defines line separator to be used. The System Default choice sets the line separator from the platform. Detect the line separator on file open When this option is checked the editor will detect the line separator when the edited file is loaded and it will use it when the file is saved. The new files are saved using the line separator defined by the "Line separator" option. Default Internet browser The path to a web browser executable. The browser is used to open XSLT or PDF transformation results, to open the <oXygen/> home 319 Configuring the application page or to point to specific paragraphs in the W3C recommendation of XML Schema on the W3C website in case of validation errors. Open last edited files from project When enabled, <oXygen/> will open the last edited files from project at start-up. Filer larger than 50 KB are not opened. Beep on operation finished If checked, it notifies the user through a beep that an action has ended. It will notify the user only at the end of validate, wellformed and transform actions. Show fatal errors When checked, all internal fatal errors are displayed in an error dialog. Show Java vendor at startup Sun Microsystems Java VM or Apple Computer Java VM (on Mac OS X) is required to run <oXygen/>. If a different VM is used, then a warning is generated. This option allows the user to choose whether the warning dialog is shown in this case or not. Auto synchronize unmodified editors with file system changes If checked, the synchronization of the unmodified editors with the system changes is done automatically, without the user's interaction. Last visited directory The dialog used for opening files remembers the last visited directory and the next time it starts directly in this directory. Directory of the edited file The dialog used for opening files starts always in the directory where the currently edited file is stored. Fonts Figure 16.4. The Fonts preferences panel Editor Use this option to select the font family and size used to display text in the editor. This option affects both the text and grid page of the editor. Text antialiasing Enable text antialiasing at the specified level. On JVM versions prior to 1.6 this combo box contains only the values Default, On and Off. Default means that <oXygen/> will not set anything special for text antialiasing but the JVM will use the setting of the operating system if it is available. The On option sets the text antialiasing to pixel level and the Off option disables it. Starting with version 1.6 the combo contains also values specific for subpixel antialiasing, like GASP, LCD_HRGB, LCD_VRGB which sets the respective antialiasing mode for the text displayed in the <oXygen/> editors and views. 320 Configuring the application Text components Use this option to select the font family and size used to display text in text components. After changing the font one has to restart the application. GUI Use this option to select the font family and size used to display GUI labels. After changing the font one has to restart the application. Perspectives Layout <oXygen/> has a large number of helper views that can be arranged in different layouts. Use this options to select a different layout for the editor. Figure 16.5. The Perspectives Layout preferences panel Use default layout This option is checked by default. It indicates that the editor must use the default layout for all the perspectives. Any modification of this layout (for instance closing/showing views or a new view arrangement) is saved when the program exits and is reloaded at the next start up. Used fixed layout Check this when you want the editor to always start with a certain view layout. Modifications of the selected layout are lost when the program exists. There are two kinds of fixed layout: Predefined <oXygen/> has several predefined layouts to choose from, depending on the type of work you intend to do: Advanced All the views are visible. Basic Just the project view and the outliner are visible. This is recommended when you edit XML content and you need screen space. Intermediate The project, outliner, attributes and model view are visible. Schema development The project, outliner, attributes, model view and schema components are visible. Schema development The project, outliner, attributes, model view and schema components are visible. 321 Configuring the application Specified XQuery development Only the project and the editing area are visible. XSLT development The project, outliner, attributes, model view and XSLT input are visible. You can choose an existing layout file from disk. In order to create such a file, you can arrange the views in the desired order and then use the action: Perspective → Save layout.. Editor Use these options to configure the visual aspect of the text editor. Figure 16.6. The Editor preferences panel Editor background color Use this option to set the background color of the editor. Editor caret color Use this option to set the background color of the editor. Selection foreground color Use this option to set the text color of selected text. Selection background color Use this option to set the background color of selected text. 322 Configuring the application Completion proposal background Use this option to set the background color for the content completion window. Completion proposal foreground Use this option to set the foreground color for the content completion window. Documentation window background Use this option to set the background color for the window containing documentation for the content completion elements. Documentation window foreground Use this option to set the foreground color for the window containing documentation for the content completion elements. Line number foreground Use this option to set the foreground color for the line numbers displayed at the right of editor panel. Line Wrap (disables folding) This option will do a soft wrap of long lines, that is automatically wrap lines in edited documents. When this option is checked line folding will be disabled. Show fold bar This options enables the display of the document folding bar. Highlight current line Enables highlight for the current line. Line highlight color Use this option to set the highlight color for the line on which the caret is situated. Highlight matching tag This option enables highlight for the tag matching the one on which the caret is situated. Matching tag highlight color Use this option to set the color of the matching tag highlight. Show print margin Enables displaying a vertical line in the editor panel representing the paper margin if the current content of the editor panel is printed with the action File → Print Print margin column The number of characters included on a line which the print format allows. Print margin color The color used to paint the print margin line in the <oXygen/>'s editor panel. Show line numbers in editor This option enables the line numbers column located in the left part of the editing space. When unchecked, line numbers option is disabled. Show line numbers in results This option enables the line numbers column located in the left part of the Results panel in the Debugger perspective. Show TAB/NBSP/EOL/EOF marks Marks the TAB/NBSP/EOL/EOF using small icons, for a better visualisation of the document. 323 Configuring the application Grid Figure 16.7. The Grid editor preferences panel Compact representation If checked a child element is displayed at the same height level with the parent element. If unchecked a child elements is presented nested with one level in the parent container, that is lower than the parent with one row. Format and indent when passing from grid to text or on save The content of the document is formatted by applying the Format and Indent action on every switch from the grid editor to the text editor of the same document. Default column width (characters) The default width in characters of a table column of the grid. A column can hold an element name and its text content, an attribute name and its value. If the total width of the grid structure is too large you can resize any column with the mouse but the change is not persistent. To make it persistent set the new column width in this user option. the Current selection color The background color used in the focused selected cell of the grid to make it different in the set of selected cells. For example when an entire row is selected only one cell of the row is the focused selected one. Selection color The background color used in the selected cells of the grid except the focused selected cell which uses a different background color. 324 Configuring the application Border color The color used for the lines that separate the grid cells. Background color The background color of grid cells that are not selected. Foreground color The color of the text used for the element names, text content of elements, attribute names and attribute values. Row header colors - Background color The background color of row headers that are not selected. Row header colors - Current selection color The background color of the row header that is currently selected and has the focus. Row header colors - Selection color The background color of the row header that is currently selected and does not have the focus. Column header colors - Background The background color of column headers that are not selected. color Column header colors - Current selec- The background color of the column header that is currently selected tion color and has the focus. Column header colors - Selection color The background color of the column header that is currently selected and does not have the focus. The column headers are painted with two color gradients, one for the upper 1/3 part of the header and the other for the lower 2/3 part. The start and end colors of the first gradient are set with the first two color buttons. The start and end colors of the second gradient are set with the last two color buttons. Format Figure 16.8. The Format preferences panel 325 Configuring the application Detect indent on open The editor tries to detect the indent settings of the opened XML document. In this way you can correctly format (pretty-print) files that were created with different settings, without changing your options. More than that you can activate the advanced option for detecting the maximum line width to be used for formatting and hard wrap. These features were designed to minimize the differences created by the pretty print operation when working with a versioning system, like CVS for example. Indent with tabs When checked enables 'Indent with tabs' to sets the indent to a tab unit. When unchecked, 'Indent with tabs' is disabled and the indent will measure as many spaces as defined by the 'Indent size' option. Indent size Sets the number of spaces or the tab size that will equal a single indent. The Indent can be spaces or a tab, select the preference using the Indent With Tabs option. If set to 4 one tab will equal 4 white spaces or 1 tab with size of 4 characters depending on which option was set in the Indent With Tabs option. Indent on paste Indent paste text corresponding to the indent settings set by the user. This is useful for keeping the indent style of text copied from other document. Hard line wrap This feature saves time when writing a reach text XML document. You can set a limit for the length of the lines in your document. When this limit is exceeded the editor will insert a new line before the word that breaks the limit, and indent the next line. This will minimize the need of reformatting the document. Enable Smart Enter If checked, it inserts a new indented line between start and end tag. Detect line width on open If checked, it detects the line width automatically when the document is opened. Line width - Format and Indent Defines the point at which the "Format and Indent" (Pretty-Print) function will perform hard line wrapping. So if set to 100 PrettyPrint will wrap lines at the 100th space inclusive of white spaces, tags and elements. Clear undo buffer before Format and Indent If checked, the undo buffer is cleared. The undo action can now only undo the Format and Indent action 326 Configuring the application XML Format Figure 16.9. The XML format preferences panel Format and indent the document on open When checked, the Format and indent the document on open operation will format and indent the document before opening it in the editor panel. Expand empty elements When checked the Format and Indent operation will output empty elements with a separate closing tag, ex. <a atr1="v1"></a>. When not checked the same operation will represent an empty element in a more compact form: <a atr1="v1"/> Add space before slash in empty elements When checked the Format and Indent operation will add a space before the closing slash of an empty element, for instance an empty br will appear as <br />. Sort attributes When checked the Format and Indent operation will sort the attributes of an element alphabetically. When not checked the same operation will leave them in the same order as before applying the operation. Preserve empty lines When checked the Format and Indent operation will preserve all empty lines found in the document on which the pretty-print operation os applied. 327 Configuring the application Preserve text as it is If checked, the "Format and Indent" (Pretty-Print) function will preserve text nodes as they are without removing or adding any whitespace. Preserve line breaks in attributes If checked, the "Format and Indent" (Pretty-Print) function will preserve the line breaks found in attributes. When this option is checked, Break long lines option will be disabled. Break long attributes If checked, the "Format and Indent" (Pretty-Print) function will break long attributes. Break line before attribute's name If checked, the "Format and Indent" (Pretty-Print) function will break the line before the attribute's name. Preserve space elements (XPath) This list contains simplified XPath expressions for the names of the elements for which the contained white spaces like blanks, tabs and newlines are preserved by the Format and Indent operation exactly as before applying the operation. The allowed XPath expressions are of one of the form: • author • //listing • /chapter/abstract/title • //xs:documentation The namespace prefixes like xs in the previous example are treated as part of the element name without taking into account its binding to a namespace. Strip space elements (XPath) This list contains the names of the elements for which contiguous white spaces like blanks, tabs and newlines are merged by the Format and Indent operation into one blank. Indent (when typing) in preserve space elements If checked, automatic tags indentation while editing will take place for all elements including the ones that are excluded from Pretty Print (default behaviour). When unchecked, indentation while editing will not take place in elements that have the 'xml:space' attribute set on 'preserve' or are in the list of Preserve Space Elements. CSS Format Figure 16.10. The CSS format preferences panel Indent class content If checked, the class content is indented during a "Format and Indent" (Pretty-Print) operation. 328 Configuring the application Class body on new line If checked, the class body (including the curly brackets) are placed on a new line after a Pretty-Print operation. Add new line between classes If checked, an empty line is added between two classes after a PrettyPrint operation is performed. Content Completion The Content Completion feature enables inline syntax lookup and Auto Completion of mark-up elements and attributes to streamline mark-up and reduce errors while editing. These settings define the operating mode of the content assistant. Figure 16.11. The Content Completion Features preferences panel Auto close the last opened tag If the Use Content Completion option is not checked and if this option is checked, <oXygen/> will close the last opened tag when </ is typed. Use Content Completion This option enables Content Completion feature. When unchecked, all Content Completion features are disabled. Close the inserted element When inserting elements from the Content Completion assistant, both start and end tags are inserted. 329 Configuring the application If it has no matching tag When checked, the end tag of the inserted element will be automatically added only if it is not already present in the document. Add element content When checked, <oXygen/> will insert automatically the required elements from the DTD or XML Schema. Add optional content When checked, <oXygen/> will insert automatically the optional elements from the DTD or XML Schema. Add first Choice particle When checked, <oXygen/> will insert automatically the first Choice particle from the DTD or XML Schema. Case sensitive search When it is checked the search in the content completion window when you type a character is case sensitive ('a' and 'A' are different characters). Cursor position between tags When checked, <oXygen/> will set the cursor automatically between tags. Even if the auto-inserted elements have attributes that are not required, the position of cursor can be forced between tags. Show all entities When checked, <oXygen/> will display a list with all the internal and external entities declared in the current document when the user types the start character of an entity reference (i.e. &). Insert the required attributes When checked, <oXygen/> will insert automatically the required attributes from the DTD or XML Schema for an element inserted with the help of the Content Completion assistant. Insert the fixed attributes When checked, <oXygen/> will insert automatically any FIXED attributes from the DTD or XML Schema for an element inserted with the help of the Content Completion assistant. Show annotations When checked, <oXygen/> will display the annotations that are present in the used schema for the current element, attribute or attribute value. Show annotations as tooltip If checked, it shows the annotations of elements and attributes as tooltips. Use DTD comments as annotation When checked, <oXygen/> will use all DTD comments as annotation. Show recently used items When checked, <oXygen/> will remember the last inserted items from the Content Completion window. The number of items to be remembered is limited by Maximum number of recent items shown combo box. These most frequently used items are displayed on the top of Content Completion window and are separated from the rest of the suggestions by a thin grey line. Learn attributes values When checked, <oXygen/> will display a list with all attributes values learned from the current document. Learn on open document When checked, <oXygen/> will automatically learn the document structure when the document is opened. 330 Configuring the application Learn words (Dynamic Abbreviations, available on CTRL+SPACE) When checked, <oXygen/> will automatically learn the typed words and will make them available in a Content Completion fashion by pressing CTRL+SPACE. Note In order to be learned, the words need to be separated by space characters. XSL/XPath These settings define what elements are suggested by the content assistant in addition to the XSL ones. Figure 16.12. The Content Completion XSL/XPath preferences panel None The Content Completion will offer only the XSL information. XHTML transitional Includes XHTML Transitional elements as substitutes for xsl:element. Formating objects Includes Formating Objects elements as substitutes for xsl:element. Other Includes elements from a DTD file, a XML Schema file or a RNG Schema file specified from a URL as substitutes for xsl:element. 331 Configuring the application Enable content completion for XPath Disables and enables content completion in XPath expressions expressions entered in the XSL attributes match, select and test and also in the XPath toolbar. Options are available to allow the user to include XPath functions, XSLT functions or axes in the content completion suggestion list. The XPath section controls if the functions, axes are presented in the content completion list when editing XPath expressions. Show signatures of XSLT/XPath functions If checked, the editor will indicate in a tooltip helper the signature of the XPath function located at the caret position. See the XPath Tooltip Helper section for more information. Function signature window background The background color of the tooltip window. Function signature window foreground The foreground color of the tooltip window. Colors <oXygen/> supports Syntax Highlight for XML, DTD, Relax NG (XML and Compact Syntax), Java, JavaScript, XQuery, C++, C, PHP,CSS, Perl, Properties, SQL, Shell and Batch documents. While <oXygen/> provides a default color configuration for highlighting the tokens, you may choose to customize, as required, using the Colors dialog. 332 Configuring the application Figure 16.13. The Colors preferences panel Open the Colors dialog by selecting Options->Preferences->Colors and choose one of the supported Document Types. Each document type contains a set of Tokens. When a Document Type node is expanded, the associated tokens are listed. Selecting a token displays the current color properties and enables you to modify them. You can also select a token by clicking directly in the preview area on that type of token. Use Swatches, HSB or RGB models from the Color dialog to define the color properties. Modifications are saved when the OK button is clicked. Cancel discards changes. Reset button changes the color to the default value. Swatches Displays a color palette containing a variety of colors from across the color spectrum and shades thereof. Select a color. HSB Hue, Saturation and Brightness (HSB) enables you to specify a color by describing it using hue, saturation and brightness. RGB Red, Green and Blue (RGB) enables you to specify a color using triplets of red, green and blue numbers. Preview Displays the color properties of the current token and results of customization. 333 Configuring the application Syntax highlight elements by Prefix Figure 16.14. The Elements by Prefix preferences panel One row of the table contains the association between a namespace prefix and the color used to mark start tags and end tags in that prefix. Note that the marking mechanism does not look at the namespace bound to that prefix. If the prefix is bound to different namespaces in different XML elements of the same file all the tags with the prefix will be marked with the same color. One can choose that only the prefix to be displayed in the chosen color by checking the Draw only the prefix with a separate color option. Save Figure 16.15. The Save preferences panel Make backup copy on save If checked, a backup copy is made when saving the edited document. Enable automatic save Automatic save is a useful feature that ensures your work is being saved in the background. You can specify the time intervals between automatic saves. If checked it enables Automatic Save. When unchecked, Automatic Save is disabled. Automatic save interval (minutes) Selects the period in minutes for Auto Save intervals. 334 Configuring the application Save all files before transformation or validation Save all opened files before validating or transforming an XML document. In this way the dependencies are resolved, for example when modifying both the XML document and its XML Schema. Check errors on save If checked, a checking for errors is done when saving the edited document. Save all files before calling external tools If checked, all files will be saved before executing an external tool. Clear undo buffer on save If checked, the undo action has no effect after you've saved your document. You can only undo the modifications made after you've saved it. Code Templates Code templates are small document fragments that can be reused in other editing sessions. <oXygen/> comes with a large set of ready-to use templates for XSL and XML Schema. You can even share your code templates with your colleagues using the Export and Import functions. To obtain the template list you have use the Content Completion on request shortcut key (usually CTRL-SPACE). Figure 16.16. The Code Templates preferences panel New Define a new code template. Edit Edit the selected code template. 335 Configuring the application Delete Delete the selected code template. Import Import a file with code templates. Export Export a file with code templates. Diagram If operation is slow for very large schemas disabling the schema diagram view will improve the speed of navigation through the edited schema. Figure 16.17. Schema diagram preferences panel Enable XML Schema diagram and related views If this option is disabled the schema diagram for XML Schemas will not be generated and displayed, also the related views that present the schema components are not populated with data. In case you need the related views to be active, you can let this option checked and unckeck the following one. Show XML Schema diagram If this option is disabled the schema diagram for XML Schemas will not be generated and displayed. Enable Relax NG diagram and related views If this option is disabled the schema diagram for Relax NG will not be generated and displayed, also the related views that present the schema components are not populated with data. In case you need the related views to be active, you can let this option checked and unckeck the following one. Show Relax NG diagram If this option is disabled the schema diagram for Relax NG schemas will not be generated and displayed. Enable NVDL diagram and related views If this option is disabled the schema diagram for NVDL will not be generated and displayed, also the related views that present the schema components are not populated with data. In case you need the related views to be active, you can let this option checked and unckeck the following one. Show NVDL diagram If this option is disabled the schema diagram for NVDL schemas will not be generated and displayed. 336 Configuring the application Location relative to editor The location of the diagram panel in the editing area can be: North, East, South, West. For example North means that the diagram panel takes the North part of the editing area and the text editor panel takes the rest of the editing area. Spell Check Figure 16.18. Spell check preferences panel Automatic Spell Check When checked, the spell checker is activated. Spell errors will be highlighted as you type. Spell check highlight color Use this option to set the color of the spell check errors. Apply spell checking on whole docu- When checked, a spell check action will be performed on entire ment document, highlighting all encountered errors. Note On large documents, spell checking the entire content may take a lot of time. Dictionary The dictionary combo allows you to choose the dictionary you need. XML spell checking in These options allow the user to specify if the spell checker will be enabled inside Comments, Attribute values, Text and CDATA sections. Case sensitive When checked, operations ignore capitalization errors. 337 Configuring the application Ignore mixed case words When checked, operations do not check words containing case mixing (e.g. "SpellChecker"). Ignore words with digits When checked, the Spell Checker does not check words containing digits (e.g. "b2b"). Ignore Duplicates When checked, the Spell Checker does not signal two successive identical words as an error. Ignore URL When checked, ignores words looking like URL or file names (e.g. "www.oxygenxml.com" or "c:\boot.ini") . Check punctuation When checked, punctuation checking is enabled: misplaced white space and wrong sequences, like a dot following a comma, are detected. Enable auto replace Enables the "Replace Always" feature. Allow compounds words When checked, all words formed by concatenating two legal words with an hyphen are accepted. If the language allows it, two words concatenated without hyphen are also accepted. Allow general prefixes When checked, a word formed by concatenating a registered prefix and a legal word is accepted. For example if "mini-" is a registered prefix, accepts "mini-computer". Allow file extensions When checked, accepts any word ending with registered file extensions (e.g. "myfile.txt", "index.html" etc.). Suggestion This option indicates the type of spell checker accuracy, which may be: "Favour speed over quality", "Normal" and "Favour quality over speed". Document Checking Figure 16.19. Document checking preferences panel Validate as you type Validation of edited document is executed as the document is modified by editing in <oXygen/>. Delay after the last key event (s) The period of keyboard inactivity which starts a new validation (in seconds). 338 Configuring the application Maximum number of errors reported If there are many validation errors the process of marking them in per document the document is long. You should limit the maximum number of reported errors with this setting to keep the time for error marking short Validation error highlight color The color used to mark validation errors in the document. Validation warning highlight color The color used to mark validation warnings in the document. Validation success color The color used to mark the success of the validation in the vertical ruler bar. Always show validation status If this option is checked the line at the bottom of the editor panel which presents the message of the current validation error is always visible. This is useful to avoid scrolling problems when Validate as you type is enabled and the vertical scroll bar may change position when the document is edited and the line with the validation error message is made visible. Default Schema Association When no schema is specified in the edited document, <oXygen/> will try to use one of the default association rules set. It will try to use the association rules in the order presented in the Editor/Default Schema Association pane. Figure 16.20. The Default Schema Association preferences panel Namespace Specifies the namespace of the root element from the association rules set (any by default). If you want to apply the rule only when the root element is in no namespace you must leave this field empty (remove the <ANY> string). Root local name Specifies the local name of the root element (any by default). File name Specifies the name of the file (any by default). Schema type Specifies the type of schema to be used in the association rules for the document. Schema URI Specifies the location from where to load the schema to be used in the current association rule. The editor variable ${frameworks} can be used and it will be expanded to the path of the subdirectory frameworks of the <oXygen/> installation directory. New Opens a new dialog allowing you to specify a new association rule. 339 Configuring the application Figure 16.21. The Schema mapping dialog Edit Opens a new dialog allowing you to edit an existing association rule. Delete Deletes one of the existing association rule. Up Moves the selected association rule one level up (the order is important because the first schema mapping in the list that can be associated with the document will be associated. Down Moves the selected association rule one level down. Custom Validation Figure 16.22. Custom validation preferences panel If you want to add a new custom validation tool or edit the properties of an exiting one you can use the Custom Validator dialog displayed by pressing New or Edit buttons. 340 Configuring the application Figure 16.23. Custom validator dialog Name The name of the custom validation tool displayed in the External Validation toolbar Executable path The path to the executable file of the external validation tool. The following editor variables can be used: Working directory ${home} The path to user home directory ${pd} Project directory ${oxygenInstallDir} Oxygen installation directory The working directory of the external validation tool. The following editor variables can be used: ${home} The path to user home directory ${pd} Project directory ${oxygenInstallDir} Oxygen installation directory Associated editors The editors which can perform validation with the external tool. Command line arguments for detected schemas Command line arguments used to validate the current edited file against different types of schema (W3C XML Schema, Relax NG full syntax, Relax NG compact syntax, Namespace Routing Language, Schematron, DTD, other schema type). The arguments can include any custom switch (like -rng) and the editor variables: 341 Configuring the application ${cf} The path of the currently edited file ${cfu} Path of current file (URL) ${ds} The path of detected schema file ${dsu} The path of detected schema file (URL) CSS Validator Figure 16.24. CSS Validator preferences panel Profile Choose one of the available validation profiles: CSS 1, CSS 2, CSS 2.1, CSS 3, SVG, SVG Basic, SVG Tiny, Mobile, TV Profile, ATSC TV Profile Media Type Choose one of the available mediums: all, aural, braille, embossed, handheld, print, projection, screen Warning Level Set the minimum severity level for reported validation warnings. It is one of: all, normal, most important, no warnings. XML XML Catalog Figure 16.25. The XML Catalog preferences panel 342 Configuring the application When using catalogs it is sometimes useful to see what catalog files are parsed, if they are valid or not, and what identifiers are resolved by the catalogs. The Verbosity option is used to control the output of such messages. By default it is not selected. If the Use default catalog option is checked the first XML catalog which <oXygen/> will use to resolve system IDs at document validation and URI references at document transformation will be a default builtin catalog which maps such references to the built-in local copies of the local DocBook and TEI frameworks and the schemas for XHTML, SVG and JSP documents. The Prefer option is used to specify if <oXygen/> will try to resolve first the PUBLIC or SYSTEM reference using the specified XML catalogs. If a PUBLIC reference is not mapped in any of the catalogs then a SYSTEM reference is looked up. When you add/delete or edit an XML catalog to/from the list you must sometimes reopen the current edited files which use the modified catalog so that the changes take full effect. XML Parser Figure 16.26. The XML Parser preferences panel Maximum number of problems repor- Limit the number of errors reported at validation or well-formed ted per file check. Use this option when the total number of errors is big and the time of displaying is too large. http://apache.org/xml/features/validation/schema - This option sets the 'schema' feature to true. http://apache.org/xml/features/validation/schema-full-checking - This option sets the 'schema-full-checking' feature to true. 343 Configuring the application http://apache.org/xml/features/validation/honour-all-schema-location - This option sets the 'honour-allschema-location' feature to true. This means all the schemas that are imported for a specific namespace are used to compose the validation model. If this is false, only the first schema import is taken into account. Ignore the DTD for validation if a schema is specified This option forces validation against a referred schema (XML Schema, Relax NG schema, Schematron schema) even if the document includes also a DTD declaration. It is useful when the DTD declaration is used to declare entities and the schema reference is used for validation. Enable XInclude processing Enable XInclude processing - if checked the XInclude support in <oXygen/> is turned on. Base URI fix-up [Xerces XML Parser documentation:] According to the specification for XInclude, processors must add an xml:base attribute to elements included from locations with a different base URI. Without these attributes, the resulting infoset information would be incorrect. Unfortunately, these attributes make XInclude processing not transparent to Schema validation. One solution to this is to modify your schema to allow xml:base attributes to appear on elements that might be included from different base URIs. If the addition of xml:base and/or xml:lang is undesired by your application, you can disable base URI fix-up. Language fix-up [Xerces XML Parser documentation:]The processor will preserve language information on a top-level included element by adding an xml:lang attribute if its include parent has a different [language] property. If the addition of xml:lang is undesired by your application, you can disable the Language fix-up. Check ID/IDREF Checks the ID/IDREF matches when the Relax NG document is validated. Check feasibly valid Checks the Relax NG to be feasibly valid when this document is validated. Schematron XPath Version 1.0 - Allows XSLT 1.0 expressions for Schematron assertion tests. 2.0 - Allows XSLT 2.0 expressions for Schematron assertion tests. 2.0 - Allows XSLT 2.0 expressions for Schematron assertion tests. 344 Configuring the application XML Instances Generator Figure 16.27. The XML Instances Generator preferences panel Generate optional elements If checked the elements declared optional in the schema will be generated in the XML instance Generate optional attributes If checked the attributes declared optional in the schema will be generated in the XML instance Values of elements and attributes Specifies what values are generated in elements and attributes of the XML instance. It can have one of the values: None (no values for elements and attributes), Default (the value is like the element name or attribute name), Random (a random value). Preferred number of repetitions The number of repetitions for an element that has a big value of the maxOccurs attribute. Maximum recursivity level For recursive type definitions this parameter specifies the number of levels of recursive elements inserted in the parent element with the same name. Choice strategy For choice element models specifies what choice will be generated in the XML instance. It can be First (the first choice is generated) or Random (a random choice is generated). Generate the other options as comments If checked the other options of the choice element model which are not selected will be generated inside a comment in the XML instance. Use incremental attribute/element names as default If checked the value of an element/attribute is like the name of that element/attribute. For example the values of a elements are a1, a2, a3, etc. If not checked the value is the name of the type of that element /attribute, for example string, decimal, etc. 345 Configuring the application Maximum length The maximum length of string values generated for elements and attributes. XSLT/FO/XQuery Figure 16.28. The XSLT/FO/XQuery preferences panel Check the option Create transformation temporary files in system temporary directory when creating transformation temporary files in the same folder as the source of the transformation breaks the transformation, for example the transformation processes all the files located in the same folder as the source of the transformation, which will include the temporary files, which you probably do not want. XSLT Figure 16.29. The XSLT preferences panel If you want to use an XSLT transformer different than the ones that ship with <oXygen/> namely Apache Xalan and Saxon all you have to do is to specify the name of the transformer's factory class which <oXygen/> will set as the value of the Java property "javax.xml.transform.TransformerFactory". To perform an XSLT transformation with Saxon 7 for instance you have to place the Saxon 7 jar file in the <oXygen/> libraries directory (the lib subdirectory of the installation directory), set "net.sf.saxon.TransformerFactoryImpl" as the property value and select JAXP as the XSLT processor in the transformation scenario associated to the transformed XML document. Value Allows the user to enter the name of the transformer factory Java class. XSLT 1.0 Validate with Allows the user to set the XSLT Engine used for validation of XSL 1.0 documents. If the validated file has an associated transformation scenario then the processor specified by the scenario has precedence over this setting. XSLT 2.0 Validate with Allows the user to set the XSLT Engine used for validation of XSL 2.0 documents. If the validated file has an associated transformation scenario then the processor specified by the scenario has precedence over this setting. 346 Configuring the application Saxon6 The XSLT options which can be configured for the Saxon 6 transformer are: Figure 16.30. The Saxon 6 XSLT preferences panel • Line numbering: If checked line numbers are maintained for the source document. • Allow calls on extension functions: If checked external functions called is allowed. Not checking this is recommended in an environment where untrusted stylesheets may be executed. Also disables userdefined extension elements, together with the writing of multiple output files, all of which carry similar security risks. • Policy for handling recoverable errors in the stylesheet: Allows the user to choose how dynamic errors will be handled. Either one of the following options can be selected: recover silently, recover with warnings or signal the error and do not attempt recovery. Saxon8 The XSLT options which can be configured for the Saxon 8 transformer (both the Basic and the Schema Aware versions) are: 347 Configuring the application Figure 16.31. The Saxon 8 XSLT preferences panel • Version warnings: If checked a warning will be output when running an XSLT 2.0 processor against an XSLT 1.0 stylesheet. The XSLT specification requires this to be done by default. • Allow calls on extension functions: If checked external functions called is allowed. Not checking this is recommended in an environment where untrusted stylesheets may be executed. Also disables userdefined extension elements, together with the writing of multiple output files, all of which carry similar security risks. • DTD based validation of the source file: If checked XML source documents are validated against their DTD. • Line numbering: If checked line numbers are maintained for the source document. • Policy for handling recoverable errors in the stylesheet: Allows the user to choose how dynamic errors will be handled. Either one of the following options can be selected: recover silently, recover with warnings or signal the error and do not attempt recovery. • Strip whitespaces feature can be one of the three options: All, Ignorable, None. All strips all whitespace text nodes from source documents before any further processing, regardless of any xsl:strip-space declarations in the stylesheet, or any xml:space attributes in the source document. 348 Configuring the application Ignorable strips all ignorable whitespace text nodes from source documents before any further processing, regardless of any xsl:strip-space declarations in the stylesheet, or any xml:space attributes in the source document. Whitespace text nodes are ignorable if they appear in elements defined in the DTD or schema as having element-only content. None strips no whitespace before further processing. (However, whitespace will still be stripped if this is specified in the stylesheet using xsl:strip-space). Saxon8SA specific options • Schema based validation of the source file: This determines whether source documents should be parsed with schema-validation enabled. • Lax schema based validation of the source file: This determines whether source documents should be parsed with schema-validation enabled. • Validation errors in the result tree treated as warnings: If checked, all validation errors are treated as warnings, otherwise they are treated as fatal. Saxon8 Advanced options The advanced XSLT options which can be configured for the Saxon 8 transformer (both the Basic and the Schema Aware versions) are: Figure 16.32. The Saxon 8 XSLT Advanced preferences panel • URI Resolver class name: Allows the user to specify a custom implementation for the URI resolver used by the XSLT Saxon 8 transformer ("-r" option when run from the command line). The class name must be fully specified and the corresponding jar or class extension must be configured from the dialog for configuring the XSLT extension for the particular scenario • Collection URI Resolver class name: Allows the user to specify a custom implementation for the Collection URI resolver used by the XSLT Saxon 8 transformer ("-cr" option when run from the command line). The class name must be fully specified and the corresponding jar or class extension must be configured from the dialog for configuring the XSLT extension for the particular scenario 349 Configuring the application XSLTProc Figure 16.33. The XSLTProc preferences panel The options of the XSLTProc processor are the same as the ones available in the command line for the XSLTProc processor: Enable XInclude processing If checked XInclude references will be resolved when XSLTProc is used as transformer in the transformation scenario. Skip loading the document's DTD If checked the DTD specified in the DOCTYPE declaration will not be loaded. Do not apply default attributes from document's DTD If checked the default attributes declared in the DTD and not specified in the document are not included in the transformed document. Do not use Internet to fetch DTD's, entities or docs If checked the remote references to DTD's and entities are not followed. Maximum depth in templates stack If the limit of maximum templates is reached the transformation ends with an error. Verbosity If checked the transformation will output detailed status messages about the transformation process in the Warnings view. Show version of libxml and libxslt used If checked <oXygen/> will display in the Warnings view the version of the libxml and libxslt libraries invoked by XSLTProc. Show time information If checked the Warnings view will display the time necessary for running the transformation. 350 Configuring the application Show debug information If checked the Warnings view will display debug information about what templates are matched, parameter values, etc. Show all documents loaded during processing If checked <oXygen/> will display in the Warnings view the URL of all the files loaded during transformation. Show profile information If checked <oXygen/> will display in the Warnings view a table with all the matched templates, and for each template: the match XPath expression, template name, number of template modes, number of calls, execution time. Show the list of registered extensions If checked <oXygen/> will display in the Warnings view a list with all the registered extension funtions, extension elements and extension modules. Refuses to write to any file or resource If checked the XSLTProc processor will not write any part of the transformation result to an external file on disk. If such an operation is requested by the processed XSLT stylesheet the transformation ends with a runtime error. Refuses to create directories If checked the XSLTProc processor will not create any directory during the transformation process. If such an operation is requested by the processed XSLT stylesheet the transformation ends with a runtime error. MSXML Figure 16.34. The MSXML preferences panel The options of the MSXML 3.0 and 4.0 processors are the same as the ones available in the command l i n e f o r t h e M S X M L p r o c e s s o r s : [http://msdn.microsoft.com/library/default.asp?url=/library/en-us/dnxml/html/msxsl.asp] Validate documents during parse phase If checked and either the source or style sheet document has a DTD or schema against which its content should be checked, validation is performed. Do not resolve external definitions during parse phase By default, MSXSL instructs the parser to resolve external definitions such as document type definition (DTD), external subsets or external entity references when parsing the source and style sheet documents. If this option is checked the resolution is disabled. Strip non-significant whitespaces If checked strip non-significant white space from the input XML document during the load phase. Enabling this option can lower 351 Configuring the application memory usage and improve transformation performance while, in most cases, creating equivalent output. Show time information If checked the relative speed of various transformation steps can be measured: time to load, parse, and build the input document; time to load, parse, and build the style sheet document; time to compile the style sheet in preparation for the transformation; time to execute the style sheet. Start transformation in this mode Although style sheet execution usually begins in the empty mode, this default may be changed by specifying another mode. Changing the start mode allows execution to jump directly to an alternate group of templates. MSXML.NET Figure 16.35. The MSXML.NET preferences panel The options of the MSXML.NET processor are the same as the ones available in the command line for the MSXML.NET processor: [http://www.xmllab.net/Products/nxslt/tabid/62/Default.aspx] Enable XInclude processing If checked XInclude references will be resolved when XSLTProc is used as transformer in the transformation scenario. Validate documents during parse phase If checked and either the source or style sheet document has a DTD or schema against which its content should be checked, validation is performed. Do not resolve external definitions during parse phase By default MSXML.NET resolves external definitions such as DTD external subsets or external entity references when parsing source XML document and stylesheet document. Using this option you can 352 Configuring the application disable this behaviour. (Note, that it may affect also the validation process.) Strip non-significant whitespaces If checked strip non-significant white space from the input XML document during the load phase. Enabling this option can lower memory usage and improve transformation performance while, in most cases, creating equivalent output. Show time information If checked the relative speed of various transformation steps can be measured: time to load, parse, and build the input document; time to load, parse, and build the style sheet document; time to compile the style sheet in preparation for the transformation; time to execute the style sheet. Forces ASCII output encoding There is a known problem with .NET 1.X XSLT processor (System.Xml.Xsl.XslTransform class) - it doesn't support escaping of characters as XML character references when they cannot be represented in the output encoding. That means that when you output a character that cannot be represented in output encoding, it will be outputted as '?'. Usually this happens when output encoding is set to ASCII. With this option checked the output is forced to be ASCII encoded and all non-ASCII characters get escaped as XML character references (&#nnnn; form). Allow multiple output documents This option allows to create multiple result documents using the exsl:document extension element. [http://www.exslt.org/exsl/elements/document/index.html] Use named URI resolver class This option allows to specify a custom URI resolver class to resolve URI references in xsl:import/xsl:include instructions (during XSLT stylesheet loading phase) and in document() function (during XSL transformation phase). Assembly file name for URI resolver class The previous option specifies partially or fully qualified URI resolver class name, e.g. Acme.Resolvers.CacheResolver. Such name requires additional assembly specification using this option or the next option, but fully qualified class name (which always includes an assembly specifier) is all-sufficient. See MSDN for more info about fully q u a l i fi e d c l a s s n a m e s . [http:/msdn.microsoft.com/library/default.asp?url=/library/en-us/cpguide/html/cpconspecifyingfullyqualifiedtypenames.asp] This option specifies a file name of the assembly, where the specified resolver class can be found. Assembly GAC name for URI resolv- This option specifies partially or fully qualified name of the assembly er class in the global assembly cache [http://msdn.microsoft.com/library/default.asp?url=/library/en-us/cpguide/html/cpconglobalassemblycache.asp] (GAC), where the specified resolver class can be found. See MSDN for more info about partial assembly names. [http://msdn.microsoft.com/library/default.asp?url=/library/en-us/cpguide/html/cpconpartialassemblyreferences.asp] Also see the previous option. List of extension object class names This option allows to specify extension object [htp:/msdn.microsoft.com/library/default.asp?url=/library/en-us/cpguide/html/cpconxsltargumentlistforstylesheetparametersextensionobjects.asp] classes, whose public methods then can be used as extension functions in an XSLT stylesheet. It is a comma-separated list of 353 Configuring the application namespace-qualified extension object class names. Each class name must be bound to a namespace URI using prefixes as when providing X S LT parameters. [http://www.xmllab.net/Products/nxslt/tabid/62/Default.aspx#parameters] Use specified EXSLT assembly MSXML.NET supports rich library of the EXSLT [ h t t p : / / w w w. ex s l t . o rg / ] and E X S LT. N E T [http://www.xmllab.net/exslt] extension functions via embedded or plugged in EXSLT.NET [http://workspaces.gotdotnet.com/exslt] library. EXSLT support is enabled by default and cannot be disabled in this version. If you want to use an external EXSLT.NET implementation instead of a built-in one use this option. Credential loading source xml This option allows to specify user credentials to be used when loading XML source documents. The credentials should be provided in the "username:password@domain" format (all parts are optional). Credential loading stylesheet This option allows to specify user credentials to be used when loading XSLT stylesheet documents. The credentials should be provided in the "username:password@domain" format (all parts are optional). XQuery Figure 16.36. The XQuery preferences panel XQuery validate with Allows you to select the processor to validate the XQuery. In case you are validating an XQuery file that has an associated execution scenario, <oXygen/> uses the processor specified in the scenario. If the processor does not support validation, then the file will not be validated and a warning will be displayed in the results panel. If no scenario is associated then the value from this combo box will be used as validation processor. Format transformer output When checked the transformer's output is formatted and indented (pretty printed). Create structure indicating the type nodes If checked, <oXygen/> takes the results of a query and creates an XML document containing copies of all items in the sequence, suitably wrapped. 354 Configuring the application Saxon 8 Figure 16.37. The Saxon XQuery preferences panel Saxon8 options: Allow calls on extension functions If checked external functions called is allowed. Not checking this is recommended in an environment where untrusted stylesheets may be executed. Also disables user-defined extension elements, together with the writing of multiple output files, all of which carry similar security risks. Policy for handling recoverable errors in the stylesheet Allows the user to choose how dynamic errors will be handled. Either one of the following options can be selected: recover silently, recover with warnings or signal the error and do not attempt recovery. Strip whitespaces Can have one of the three values: All, Ignore, None. All - strips all whitespace text nodes from source documents before any further processing, regardless of any xml:space attributes in the source document. Ignore - strips all ignorable whitespace text nodes from source documents before any further processing, regardless of any xml:space attributes in the source document. Whitespace text nodes are ignorable if they appear in elements defined in the DTD or schema as having element-only content. None - strips no whitespace before further processing. Saxon8SA specific options: 355 Configuring the application Schema based validation of the source This determines whether source documents should be parsed with schema-validation enabled. Lax schema based validation of the source This determines whether source documents should be parsed with schema-validation enabled. Validation errors in the result tree treated as warnings If checked, all validation errors are treated as warnings, otherwise they are treated as fatal. Saxon8 Advanced options The advanced XQuery options which can be configured for the Saxon 8 transformer (both the Basic and the Schema Aware versions) are: Figure 16.38. The Saxon 8 XQuery Advanced preferences panel • URI Resolver class name: Allows the user to specify a custom implementation for the URI resolver used by the XQuery Saxon 8 transformer ("-r" option when run from the command line). The class name must be fully specified and the corresponding jar or class extension must be configured from the dialog for configuring the XQuery extension for the particular scenario • Collection URI Resolver class name: Allows the user to specify a custom implementation for the Collection URI resolver used by the XQuery Saxon 8 transformer ("-cr" option when run from the command line). The class name must be fully specified and the corresponding jar or class extension must be configured from the dialog for configuring the XQuery extension for the particular scenario Debugger This section explains the settings available for Debugger mode. To display settings select Options → Preferences → XSLT/FO+Debugger Options (see the section called “Debugger”). Figure 16.39. The Debugger preferences panel The following settings are available: Show xsl:result-document output If checked, the debugger presents the output of xsl: result-document instruction into the debugger output view. Infinite loop detection Set this option to receive notifications when an infinite loop occurs during transformation. 356 Configuring the application Maximum depth in templates stack How many templates (<xsl:templates>) instructions can appear on the current stack. This setting is used by the infinite loop detection. Profiler This section explains the settings available for XSLT Profiler mode. To display settings select Options → Preferences → XML → XSLT/FO+Profiler (see the section called “Debugger”). Figure 16.40. The Profiler preferences panel The following settings are available: Show time Show the total time that was spent in the node. Show inherent time Show the inherent time that was spent in the node. Show invocation count Show how many times the node was called in this particular call sequence. Time scale The time scale options determine the unit of time measurement, which may be milliseconds (ms) or microseconds (µs). Hotspot threshold The threshold below which hot spots are ignored is entered in milliseconds (ms). Ignore invocation less than The threshold below which invocations are ignored is entered in microseconds (µs). Percentage calculation The percentage base determines against what time span percentages are calculated. • Absolute: Percentage values show the contribution to the total time. 357 Configuring the application • Relative: Percentage values show the contribution to the calling node. FO Processors Besides the built-in formatting objects processor (Apache FOP) the user can use other external processors. <oXygen/> has implemented an easy way to add RenderX XEP as external FO processor if the user has the XEP installed. Figure 16.41. The FO Processors preferences panel Enable the output of the built-in FOP When checked all FOP output will be displayed in a results pane at the bottom of the editor window including warning messages about FO instructions not supported by FOP. Memory available to the built-in FOP If your FOP transformations fail with an "Out of Memory" error select from this combo box a larger value for the amount of memory reserved for FOP transformations. Configuration file for the built-in FOP You should specify here the path to a FOP configuration file, necessary for example to render to PDF using a special true type font a document containing Unicode content. The users can configure the external processors for use with <oXygen/> in the following dialog. 358 Configuring the application Figure 16.42. The external FO processor configuration dialog Name The name that will be displayed in the list of available FOP processors on the FOP tab of the Transforming Configuration dialog. Description The description of the FO processor displayed in the Preferences->FO Processors option. Working directory The directory in which the intermediate and final results of the processing will be stored. Here you can use one of the following editor variables: Command line ${home} The path to user home directory. ${cfd} The path of current file directory. ${pd} The project directory. The command line that will start the FO processor, specific to each processor. Here you can use one of the following editor variables: ${method} The FOP transformation method (pdf, ps, txt). ${fo} The input FO file. ${out} The output file. 359 Configuring the application XPath Figure 16.43. The XPath preferences panel Unescape XPath expression When checked, unescapes the entities found in the XPath expression. For example the expression //varlistentry[starts-with(@os,'s')] is equivalent with //varlistentry[starts-with(@os,'s')] . Multiple XPath results When checked, results of different XPath expressions executed on the same file are written in separate result set tabs. No namespace If checked <oXygen/> will consider unprefixed element names in XPath expressions evaluated in the XPath console as belonging to no namespace. Use the namespace of the root If checked <oXygen/> will consider unprefixed element names in XPath expressions evaluated in the XPath console as belonging to the same namespace as the root element of the document. Only if it is declared as default If checked the namespace of the root element will be applied to the unprefixed elements in the XPath console only if it is set as default namespace on the root element. Other The user has the possibility to enter here the namespace of the unprefixed elements used in the XPath console Default prefix-namespace mappings Associates prefixes to namespaces. These mappings are useful when applying an XPath in XPath console and you don't have to define these mappings for each document separately. 360 Configuring the application The New button creates an editable prefix-namespace mapping. The Delete button deletes the selected mapping. Custom engines One can configure other transformation engines than the ones which come with the <oXygen/> distribution. Such an external engine can be used for XSLT / XQuery transformations within <oXygen/>, in the Editor perspective, and is available in the list of engines in the dialog for editing transformation scenarios. However it cannot be used in the Debugger perspective. Figure 16.44. Configuration of custom transformation engines The following parameters can be configured for a custom engine: 361 Configuring the application Figure 16.45. Parameters of a custom transformation engine Engine type Combo box allowing you to choose the transformer type. There are two options: XSLT engines and XQuery engines. Name The name of the transformer displayed in the dialog for editing transformation scenarios Description Text description of the transformer Output encoding The encoding of the characters sent to the output stream of the transformer Error encoding The encoding of the characters sent to the error stream of the transformer Working directory The start directory of the transformer executable program. The following editor variables are available for making the path to the working directory independent of the input XML file: • ${home} - the user home directory in the operating system • ${cfd} - the path to the directory of the current file • ${pd} - the path to the directory of the current project • ${oxygenInstallDir} - the <oXygen/> install directory Command line The command line that must be executed by <oXygen/> to perform a transformation with the engine. The following editor variables are available for making the items of the command line (the transformer executable, the input files) independent of the input XML file: 362 Configuring the application • ${xml} - the XML input document as a file path • ${xmlu} - the XML input document as a URL • ${xsl} - the XSL / XQuery input document as a file path • ${xslu} - the XSL / XQuery input document as a URL • ${out} - the output document as a file path • ${outu} - the output document as a URL Data Sources Configuration of Data Sources Here you can configure data sources and connections to relational databases as well as native XML databases. You can check the list of drivers (http://www.oxygenxml.com/database_drivers.html) available for the major database servers. Figure 16.46. The Data Sources preferences panel New Opens the Data Sources Drivers dialog, allowing you to configure a new driver. 363 Configuring the application Figure 16.47. The Data Sources Drivers dialog Name Allows you to name the new data source driver. Type Select data source type from the supported driver types. Help Open the User Manual at the list of the the sections where the configuration of supported data sources is explained and the URLs for downloading the database drivers are specified. Driver Class Provide the Driver Class for the data source driver Add Adds the driver class library. Remove Removes driver class library from the list. Detect Detects driver candidates. Stop Stops the detection of the driver candidates. Edit Opens the Data Sources Drivers dialog, allowing you to edit the selected driver. See above the specifications for the Data Sources Drivers dialog (in order to edit a data source , there must be no connections using that data source driver). Delete Deletes the selected Data Source Driver (in order to delete a data source , there must be no connections using that data source driver). 364 Configuring the application Figure 16.48. The Connections preferences panel Note Checked connections will be visible in the Database Explorer View. For performance issues, you can set the maximum number of cells that will be displayed in the Table Explorer view. Leave the field "Limit the number of cells" empty if you want the entire content of the table to be displayed. By default this field is set to 2000. If a table having more cells than the value set here is displayed in the Table Explorer view, a warning dialog will inform you that the table is only partially shown. New Opens the Connection dialog. Figure 16.49. The Connection dialog Name Allows you to name the new connection. Data Source Select data source defined in the Data Source Drivers dialog. 365 Configuring the application Depending upon the selected Data Source, you can set some of the following parameters in the Connection details area: URL: The URL used to connect. User: Provide the database user . Password: Provide the database password. Host: Provide the host address. Port: Provide a port to connect. XML DB URI: Provide the database URI to connect. Database: Provide the initial database. Collection: Select one of the available collections for the specified data source. Environment home directory: Specify the home directory for a Berkeley database. Verbosity: Set the verbosity level for a Berkeley database. Edit Opens the Connection dialog, allowing you to edit the selected connection. See above the specifications for the Connection dialog. Delete Deletes the selected connection. Download links for database drivers You can find below the locations where you have to go to get the drivers necessary for accessing databases in <oXygen/> Berkeley DB XML database Copy the jar files from the Berkeley database install directory to the <oXygen/> install directory as described in the procedure for configuring a Berkeley DB data source. IBM DB2 Pure XML database Go to the IBM website: http://www-306.ibm.com/software/data/db2/express/download.html, in the DB2 Clients and Development Tools category select the DB2 Driver for JDBC and SQLJ download link, fill the download form and download the zip file. Unzip the zip file and use the db2jcc.jar and db2jcc_license_cu.jar files in <oXygen/> for configuring a DB2 data source. eXist database Copy the jar files from the eXist database install directory to the <oXygen/> install directory as described in the procedure for configuring an eXist data source. MarkLogic database Download Java and .NET XDBC distributions (XDBC Connectivity Packages) from http://xqzone.marklogic.com/svn/xdbc/releases/MarkXDBC.Java-3.0-6.zip available on the page http://xqzone.marklogic.com/download/. Details about configuring a MarkLogic data source are here. 366 Configuring the application Microsoft SQLServer 2005 database Download the SQL Server 2005 JDBC driver called sqljdbc.jar from the Microsoft website: http://msdn.microsoft.com/data/ref/jdbc/ and use it for configuring an SQL Server data source. Oracle 10g R2 database Download the Oracle 10 JDBC driver called ojdbc14.jar from the Oracle website: http://otn.oracle.com/software/tech/java/sqlj_jdbc/index.html and use it for configuring an Oracle data source. RainingData TigerLogic XDMS database Copy the jar files from the TigerLogic JDK lib directory from the server side to the <oXygen/> install directory as described in the procedure for configuring an X-Hive data source. SoftwareAG Tamino database Copy the jar files from the SDK\TaminoAPI4J\lib subdirectory of the Tamino database install directory to the <oXygen/> install directory as described in the procedure for configuring an X-Hive data source. X-Hive XML database Copy the jar files from the X-Hive database install directory to the <oXygen/> install directory as described in the procedure for configuring an XHive data source. Import Here it is configured how empty values and null values are handled when they are encountered in an import operation. Figure 16.50. The data sources import preferences panel Create empty elements for empty values If this option is enabled an empty value from a database column will be imported as an empty element. 367 Configuring the application Create empty elements for null values If this option is enabled a null value from a database column will be imported as an empty element. Add annotations for generated XML Schema If checked, the generated XML Schema will contain an annotation for each of the imported table's columns. The documentation inside the annotation tag will contain the remarks of the database columns (if available) and also information about the conversion between the column type and the generated XML Schema type. Date/Time format The section Date/Time format specifies the format used for importing date and time values from Excel spreadsheets or database tables and in the generated XML schemas. Unformatted If this option is selected the date and time formats specific to the database will be used for import. When importing data from Excel a string representation of date or time values will be used. The type used in the generated XML Schema will be xs:string. XML Schema date format If this option is checked, the XML Schema specific format ISO8601 will be used for imported date/time data (yyyy-MM-dd'T'HH:mm:ss for datetime, yyyy-MM-dd for date and HH:mm:ss for time). The types used in the generated XML Schema will be xs:datetime, xs:date and xs:time. Custom format If this is selected, the user can define a custom format for date/time values or choose from the predefined formats. A preview of the values is presented when a format is used. The type used in the generated XML Schema is xs:string. 368 Configuring the application Date/Time Patterns Table 16.1. Pattern letters Letter Date or Time Component Presentation Examples G Era designator Text AD y Year Year 1996; 96 M Month in year Month July; Jul; 07 w Week in year Number 27 W Week in month Number 2 D Day in year Number 189 d Day in month Number 10 F Day of week in month Number 2 E Day in week Text Tuesday; Tue a Am/pm marker Text PM H Hour in day (0-23) Number 0 k Hour in day (1-24) Number 24 K Hour in am/pm (0-11) Number 0 h Hour in am/pm (1-12) Number 12 m Minute in hour Number 30 s Second in minute Number 55 S Millisecond Number 978 z Time zone General time zone Pacific Standard Time; PST; GMT-08:00 Z Time zone RFC 822 time zone -0800 Pattern letters are usually repeated, as their number determines the exact presentation: • Text: If the number of pattern letters is 4 or more, the full form is used; otherwise a short or abbreviated form is used if available. • Number: the number of pattern letters is the minimum number of digits, and shorter numbers are zeropadded to this amount. • Year: If the number of pattern letters is 2, the year is truncated to 2 digits; otherwise it is interpreted as a number. • Month: If the number of pattern letters is 3 or more, the month is interpreted as text; otherwise, it is interpreted as a number. • General time zone: Time zones are interpreted as text if they have names. For time zones representing a GMT offset value, the following syntax is used: GMTOffsetTimeZone: GMT Sign Hours : Minutes Sign: one of + - Hours: Digit Digit Digit 369 Configuring the application Minutes: Digit Digit Digit: one of 0 1 2 3 4 5 6 7 8 9 Hours must be between 0 and 23, and Minutes must be between 00 and 59. The format is locale independent and digits must be taken from the Basic Latin block of the Unicode standard. • RFC 822 time zone: The RFC 822 4-digit time zone format is used: RFC822TimeZone: Sign TwoDigitHours Minutes TwoDigitHours: Digit Digit TwoDigitHours must be between 00 and 23. Table Filters Here you can choose which of the table types will be displayed in the Database Explorer view. Figure 16.51. Table Filters Preferences Page Note Table types filtering depends on the driver implementation. Diff <oXygen/> offers both directory and file comparison, six different diff algorithms to choose from for file comparison and multiple levels of comparison. The complete diff solution includes two XML diff algorithms (XML Fast and XML Accurate), one Syntax Aware algorithm that gives very good results on all file types known by <oXygen/> and three all-purpose algorithms: line based, word based and character based. Any algorithm can be used to perform differences on request, but <oXygen/> offers also an automatic selection of the algorithm, selecting the most appropriate one based on the files' content and size. 370 Configuring the application Figure 16.52. The Diff preferences panel Perform diff with <oXygen/> If enabled <oXygen/>'s Diff tool will be used for all diff operations performed on XML documents. Disabling this option will disable <oXygen/>'s Diff tool Default algorithm Select from the list the algorithm that will be used as default when you open the Compare files dialog • Auto makes an automatic selection of the diff algorithm, based on the files' content and size. • Characters computes the differences at character level. • Words computes the differences at word level.. • Lines computes the differences at line level. • Syntax aware : for the file types known by <oXygen/>, this algorithm computes the differences taking into consideration the syntax of the documents. • XML Fast is designed for XML documents. It works better than XML Accurate on large files, but it is less precise. • XML Accurate is designed for XML documents. It works best on smaller XML files and it is most precise. 371 Configuring the application Note XML Fast and XML Accurate work for XML documents. If you'll try to use them for other types of files, you'll be prompted with the message "content not allowed in prolog" Ignore whitespaces This option, if checked, allows the diff algorithm to ignore the whitespaces. LCS - Maximum number of differences This option allows you to specify the maximum number of differences between your documents that you might be interested to see. If the number of differences is larger than the one specified here, you'll be notified by the message "Too many differences". XML Diff Options This set of options allows you to specify the types of differences that will be ignored in the XML Fast and XML Accurate algorithms: • in node / type: • Processing instructions • Comments • CDATA • DOCTYPE • Text • in namespaces / prefixes • Namespaces • Prefixes • Namespace declarations • in the attributes order Merge adjacent differences If checked, it considers adjacent differences as one and they are presented in this way in the side-by-side editors. If unchecked, every difference is represented separately. Mark end tags as different for modi- If checked, end tags of modified elements are presented as differfied elements ences. Ignore expansion state for empty elements If checked, empty elements in both expansion states are considered matched. For the directories comparison you can specify the criterion for the component files comparison and a default file filter. Compare files by: • Content • Timestamp (last modified date/time) Default file filter specifies the default type of files that will be compared in Diff Directories 372 Configuring the application Diff Colors Figure 16.53. The Diff Colors preferences panel Incoming color The color used for incoming changes on the vertical bar that shows the differences between the files compared. Outgoing color The color used for outgoing changes on the vertical bar that shows the differences between the files compared. Conflict color The color used for conflicts on the vertical bar that shows the differences between the files compared. Plugins <oXygen/> provides the ability to add plugins that extend the functionality of the application. The plugins are shipped as separate packages; check for new plugins on <oXygen/> site: http://www.oxygenxml.com. One plugin consists of a separate sub-folder in the Plugins folder in the <oXygen/> installation folder. This sub-folder must contain a valid plugin.xml in accordance with the plugin.dtd file from the Plugins folder. <oXygen/> automatically detects and loads plugins correctly installed in the Plugins folder and displays them in the Plugin option from the Preferences dialog. Figure 16.54. The Plugins preferences panel A short description of the plugin can be obtained with a click on the plugin name. 373 Configuring the application External Tools The user can run within <oXygen/> other tools as if from the command line of the operating system shell. The configuration of such a tool is done in the following dialog. Figure 16.55. The external tools configuration dialog Name The name of the menu entry corresponding to this tool that will be displayed in the External Tools menu and in the external tools combo box on the toolbar. Description The description of the tool displayed in the Preferences->External Tools option. Output Encoding The encoding that <oXygen/> uses to read the output stream data of the external tool. Error Encoding The encoding that <oXygen/> uses to read the error stream data of the external tool. Shortcut key The keyboard shortcut that launches the external tool. Working directory The directory the external tool will use to store intermediate and final results. Here you can use one of the following editor variables: ${home} The path to user home directory. ${cfd} The path of current file directory. ${pd} The project directory. 374 Configuring the application Command line The command line that will start the external tool. Here you can use one of the following editor variables: ${dbgXML} The path to the current Debugger source selection. ${dbgXSL} The path to the current Debugger stylesheet selection. ${home} The path to user home directory. ${cfn} The current file name without extension. ${cfne} The current file name with extension. ${cf} The path of the currently edited file. ${cfd} The path of current file directory. ${tsf} Transformation result file. ${pd} The project directory. Note The quote character (") is used to delimit parameters and files that have spaces in their names. cmd /c dir "c:\samples\dir with spaces" Note There are cases in which you need to specify in the command line a parameter that contains a quote. You will need to escape the quote by using the character:^. cmd /c dir "c:\samples\dir with ^"quotes^" and Menu Shortcut Keys The user can configure in one place all the keyboard shortcuts of the menu items available in <oXygen/>. The current shortcuts assigned to menu items are displayed in the following table. 375 Configuring the application Figure 16.56. The Menu Shortcut Keys preferences panel Description A short description of the menu item operation. Category The shortcuts are classified in categories for easier management. For example the "Cut" operation for the source view is distinguished from the tree view one by assigning it to a separate category. Shortcut key The keyboard shortcut that launches the operation. Double-clicking on a table row or pressing the "Edit" button allows the user to register a new shortcut for the operation displayed on that row. File Types <oXygen/> offers support for a wide variety of file types, but users are free to add new file types specified by extension and associate them with the editor type which fits better. The associations set here between a file extension and the type of editor which opens the file for editing have precedence over the default associations available in the File → Newdialog. 376 Configuring the application Figure 16.57. The File Types preferences panel Extension The new file types. Editor The type of editor which the extensions will be associated with. Some editors provide easy access to frequent operations via toolbars (e.g. XML editor, XSL editor, DTD editor) while other provide just a syntax highlight scheme (e.g. Java editor, SQL editor, Shell editor, etc.) HTTP / FTP / SFTP / Proxy Configuration Some networks use Proxy servers to provide Internet Services to LAN Clients. Clients behind the Proxy may therefore, only connect to the Internet via the Proxy Service. The Proxy Configuration dialog enables this configuration. If you are not sure whether your computer is required to use a Proxy server to connect to the Internet or the values required by the Proxy Configuration dialog, please consult your Network Administrator. Open the Proxy Configuration dialog by selecting Options → Preferences → HTTP / FTP / SFTP / Proxy Configuration. 377 Configuring the application Figure 16.58. The Proxy Configuration preferences panel Complete the dialog as follows: Use proxy server When checked enables the application to use the specified Proxy Server. When unchecked, Proxy Server is disabled. Web Proxy (HTTP) The IP address or Fully Qualified Domain Name (FQDN) of the Proxy Server. Port The TCP Port Number, normally set to 80 or 8080. User The Name of the user if required. Can be empty. Password The Password for authentication. Can be empty. No proxy for Specify domains for which no proxy should be used. SOCKS When checked enables SOCKS using the specified host and port for the server. When unchecked, SOCKS is disabled. Host The SOCKS host you wish to connect to. Port The SOCKS port you wish to connect to. Automatic retry on recoverable error If enabled, if a HTTP error occurs when <oXygen/> communicates with a server via HTTP, for example sending/receiving a SOAP request/response to/from a Web services server, and the error is recoverable, <oXygen/> tries to send again the request to the server. Enable HTTP 'Expect: 100-continue Activates 'Expect: 100-Continue' handshake. The purpose of the ' handshake for HTTP/1.1 protocol 'Expect: 100-Continue' handshake is to allow a client that is sending a request message with a request body to determine if the origin server is willing to accept the request (based on the request headers) 378 Configuring the application before the client sends the request body. The use of the 'Expect: 100-continue' handshake can result in noticable peformance improvement when working with databases. 'Expect: 100-continue' handshake should be used with caution, as it may cause problems with HTTP servers and proxies that do not support HTTP/1.1 protocol. Read Timeout (s) The period in seconds after which the application will consider a HTTP server is unreachable if it does not receive any response to a request sent to that server. The Proxy settings are first looked up in the options. If there were no previous options set then the settings are loaded from the "servers" file located in the "%HOME%\Application Data\Subversion\" folder on Windows and %HOME%\.subversion\ folder on Linux and Mac OS X. HTTP / FTP / SFTP / Proxy Configuration/ FTP / SFTP Figure 16.59. The FTP / SFTP Configuration preferences panel Encoding for FTP control connection The encoding used to communicate with FTP servers. It is one of ISO-8859-1 and UTF-8. If the server supports the UTF-8 encoding <oXygen/> will use it for communication. Otherwise it will use ISO-8859-1. Private key file The path to the file containing the private key used for the private key method of authentication of the secure FTP (SFTP) protocol. The user/password method of authentication has precedence if it is used in the Open URL dialog. Passphrase The passphrase used for the private key method of authentication of the secure FTP (SFTP) protocol. The user/password method of authentication has precedence if it is used in the Open URL dialog. Certificates In <oXygen/> there are provided two types of Keystores: Java KeyStore (JKS) and Public-Key Cryptography Standards version 12 (PKCS-12). A keystore file is protected by a password. 379 Configuring the application Figure 16.60. The Certificates preferences panel Keystore type Represents the type of keystore to be used. Keystore file Represents the location of the file to be imported. Keystore password The password which is used to protect the privacy of the stored keys. Certificate alias The alias to be used to store the key entry (the certificate and /or the private key) inside the keystore. Private key password It is only necessary in case of JKS keystore. It represents the certificate's private key password. Validate Verifies the entries from the fields; assures that the certificate is valid. View Figure 16.61. The View preferences panel Maximum number of lines This option sets the maximum number of lines of the output console where the external tools place their output. Enable outline drag and drop When drag and drop is disabled for the tree displayed by the outline view there is no possibility to accidentally change the structure of the document. Enable project drag and drop This option enables the drag and drop support in Project view. When it is disabled there is no possibility to accidentally change the structure of the project. 380 Configuring the application Print Figure 16.62. The Printing Scale preferences panel It is sometimes useful to print out the contents of a document on paper. <oXygen/> allows you to adjust the scale of the print output to make it easier to read on a page. Printing Scale Displays a slide allowing the user to adjust the printing scale between 40% and 100%. Tree editor Figure 16.63. The Tree Editor preferences panel Format and indent on save Check if the document should be formatted and indented (prettyprint) on save. SVN The Syncro SVN Client preferences are: 381 Configuring the application Figure 16.64. The SVN preferences panel • Working copy administrative directory - allows you to customize the directory name where the svn entries are kept for each directory in the working copy. • Compare - allows you to specify if you want to see pseudo-conflicts in the Compare view. You can also change the maximum number of differences allowed in the view. There is also available a link to quickly customize the used compare colors. • History View - you can set the maximum number of messages retrieved from the log history. • Results Console - here you can specify the maximum number of lines displayed in the Console View. Automatically importing the preferences from the other distribution If you want to use the settings from “standalone” in the Eclipse plugin just delete the file with the Eclipse plugin settings [user-home-dir]/Application Data/com.oxygenxml/optionsEc8.1.xml on Windows / [user-home-dir]/.com.oxygenxml/optionsEc8.1.xml on Linux, start Eclipse and the “standalone” settings will be automatically imported in Eclipse. The same for importing the Eclipse plugin settings in “standalone”: delete the file [user-home-dir]/com.oxygenxml/optionsSa8.1.xml, start the <oXygen/> “standalone” distribution and the Eclipse settings will be automatically imported. Importing/Exporting Global Options In the Options menu you can find the Import/Export preferences operations which allow you to move your global preferences in XML format from one computer to another. Note Starting with version 8, there is support for project level options. In this way sharing the options with your team becomes simpler, as you can choose to store the settings directly into 382 Configuring the application the project file, with no need for export/import operations. We recommend to use the project level options. See the Preferences Sharing section for more details. Reset Global Options To reset all custom user settings of the application that are stored in a local file (not in the project), to the installation defaults go to: Options → Reset Global Options The list of transformation scenarios will be reset to the default scenarios. Scenarios Management You can import, export and reset the scearios stored in the global options. • The action Options → Restore Default Global Transformation Scenarios restores the default transformation scenarios (the ones applying to Docbook, TEI, etc). Note The scenarios are restored in the global options, not in the project options. So be aware that the list of scenarios at the project level are not affected. • The action Options → Import Global Transformation Scenarios loads a properties file with scenarios. • The action Options → Export Global Transformation Scenarios stores all the scenarios in a separate properties file. The option to Export Transformation Scenarios is used to store all the scenarios in a separate file , a properties file. In this file will also be saved the associations between document URLs and scenarios. The saved URLs are absolute. You can load the saved scenarios using Import Transformation Scenarios option. All the imported scenarios will have added to the name the word 'import'. Note The scenarios are exported/imported from/in the global options, not from the project options. So be aware that the list of scenarios kept at the project level are not affected. Note Starting with version 8, there is support for project level options. In this way sharing the options and scenarios with your team becomes simpler, as you can choose to store the settings directly into the project file, with no need for export/import operations. We recommend to use the project level options. See the Preferences Sharing and Sharing the Transformation Scenarios sections for more details. 383 Chapter 17. Common problems 17.1. <oXygen/> opens a XML document after a long time. Why does it happen ? ........................ 384 17.2. My file was created with other application and and it contains special characters like é, ©, ®, etc. Why does <oXygen/> display a square for these characters ? ..................................... 384 17.3. When I run a transformation in the XSLT Debugger perspective it is very slow. Can I increase the speed ? ............................................................................................................ 384 17.4. <oXygen/> crashed the JVM, what happened ? ............................................................... 384 17.5. When I do a keyword search in the User Manual the search highlights the wrong word in the text, often several words after the keyword. Is this a bug? ............................................... 385 17.6. Why can't I access a remote file by HTTP in <oXygen/> while in Internet Explorer it works just fine ? I am sure my proxy settings are correct. ........................................................ 385 17.7. How do I set the version X of the Java virtual machine for <oXygen/> on Mac OS X ? .......... 385 17.8. On my Mac OS X machine when I double-click on the <oXygen/> icon the application doesn't start / gives a Segmentation fault error. ........................................................................ 385 17.9. After upgrading my OS X version to 10.4.x / my <oXygen/> version to 6.x <oXygen/> is not associated to the file types XML, XSL, XSD, etc. This worked in the previous version of <oXygen/>. ........................................................................................................... 385 17.10. After upgrading my Mac OS X to version 10.4.1 Tiger I am not able to set all XML files to open with <oXygen/> when I click Change All in the Get Info dialog. This worked in OS X 10.3.x. ................................................................................................................. 386 17.1. <oXygen/> opens a XML document after a long time. Why does it happen ? All the content of your document is on a single line or the document is very large. If the content is on a single line please enable the Format and indent the document on open preference from Options → Preferences+Editor / Format before opening the document. If the document is very large (above 10 MB) you should increase the memory available to <oXygen/>. 17.2. My file was created with other application and and it contains special characters like é, ©, ®, etc. Why does <oXygen/> display a square for these characters ? You must set a font able to render the special characters from Font preferences. If it is a text file you must set also the encoding used for non XML files. If a TrueType font installed on the computer is not accessible in the Font preferences the Java virtual machine is not able to load the system fonts. It is a problem of the Java virtual machine and a possible solution is to copy the files of the font in the [JVM-home-folder]/lib/fonts folder. 17.3. When I run a transformation in the XSLT Debugger perspective it is very slow. Can I increase the speed ? Disable rendering of output to the XHTML Output view during the transformation process if the transformation produces HTML or XHTML output. In order to view the output result run the transformation in the Editor perspective with the option "Open in browser" or run it in the Debugger perspective, save the Text output area to a file and use an external browser for viewing. 17.4. <oXygen/> crashed the JVM, what happened ? Java applications can't do this. The problem is a bug in the JVM. Depending of your platform, there is information logged about what caused the crash. For Unix type systems you will get an error in the console (and for Mac OS X you may also get a report in ~/Library/Logs/CrashReporter/JavaApplicationStub.crash.log). Some problems with Java 1.4.x and Windows were the result of a bug in the JVM and certain graphics card drivers. 384 Common problems 17.5. When I do a keyword search in the User Manual the search highlights the wrong word in the text, often several words after the keyword. Is this a bug? You get wrong highlights only when <oXygen/> runs with a Java 1.4 virtual machine. The search highlights are correct when <oXygen/> runs with a Java 1.5 virtual machine. It is a problem of the JavaHelp indexer supplied by Sun Microsystems. In order to see correct highlights you have to use Java 1.5. 17.6. Why can't I access a remote file by HTTP in <oXygen/> while in Internet Explorer it works just fine ? I am sure my proxy settings are correct. If the same proxy settings work in Internet Explorer but not in <oXygen/> probably the proxy server or the HTTP server which hosts the remote file requires NTLM authentication. The <oXygen/> HTTP client does not support this type of authentication. You should set as proxy in <oXygen/> a proxy server capable of using standard HTTP credentials (basic authentication, digest authentication) to authenticate with a NTLM server. 17.7. How do I set the version X of the Java virtual machine for <oXygen/> on Mac OS X ? <oXygen/> uses the first JVM from the list of preferred JVM versions set on your Mac computer that has the version number not less than 1.4.0. You can move your desired JVM version up in the preferred list by dragging it with the mouse on a higher position in the list of JVMs available from Applications -> Utilities -> Java -> Java Preferences. 17.8. On my Mac OS X machine when I double-click on the <oXygen/> icon the application doesn't start / gives a Segmentation fault error. Install the latest Java update from the Apple website. If that doesn't solve the problem copy the file JavaApplicationStub from the /System/Frameworks folder to the oxygen.app/Contents/MacOS folder. For browsing the folder oxygen.app Meta + click on the <oXygen/> icon and select Show Package Contents 17.9. After upgrading my OS X version to 10.4.x / my <oXygen/> version to 6.x <oXygen/> is not associated to the file types XML, XSL, XSD, etc. This worked in the previous version of <oXygen/>. The upgrade damaged the file associations registry on your Mac OS X machine. Please rebuild the registry with the following procedure. This will reset all file associations and will rescan the entire file system searching for applications that declare file associations and collecting them in a database used by Finder. Procedure 17.1. Rebuild file associations registry 1. Find all the <oXygen/> installations on your hard drive. 2. Delete them by dragging them to the Trash. 3. Clear the Trash. 4. Unarchive the installation kit on your desktop. 5. Copy the contents of the archive into the folder /Applications/Oxygen. 6. Run the command 385 Common problems /System/Library/Frameworks/ApplicationServices.framework/Frameworks/ LaunchServices.framework/Support/lsregister -kill -r -domain local -domain system -domain user dump from the Terminal. 7. Restart Finder with killall Finder from the Terminal. 8. Create a XML or XSD file on your desktop. It should take the <oXygen/> icon. 9. Double click it. After accepting the confirmation dialog <oXygen/> will be start up. 17.10. After upgrading my Mac OS X to version 10.4.1 Tiger I am not able to set all XML files to open with <oXygen/> when I click Change All in the Get Info dialog. This worked in OS X 10.3.x. On Mac OS X Tiger you must add an entry to the Info.plist file. Tiger was released after <oXygen/> version 6.0 so we could not include the change in the release. Please close <oXygen/>, press Meta + click on the <oXygen/> icon, select Show package contents, go to Contents, edit the Info.plist file, add the entry <key>CFBundleIdentifier</key> <string>ro.sync.exml.Oxygen</string> and restart <oXygen/>. Select Change All in the Get Info dialog to make the association. 386 Appendix A. Appendix Table of Contents Accelerator Shortcut Keys .................................................................................................. The Main Editor ....................................................................................................... The Tree View Editor ................................................................................................ Unicode Character Encoding .............................................................................................. References ...................................................................................................................... 387 387 388 389 391 Accelerator Shortcut Keys The Main Editor File → New (Ctrl+N) : Displays the New dialog from which to select the document file type. File → Open (Ctrl+O) : Displays the Open dialog used to discover, select and open one or more files. File → Save (Ctrl+S) : Saves the current document. If the document does not have a file, displays the Save As dialog. File → Save Results : Displays the Save Results dialog, used to save the result-list of the, currently in focus, message tab. File → Open Project (Ctrl+F2) : Displays the Open Project dialog used to discover, select and open a project file. File → Save Project (Ctrl+F3 (Cmd+G on Mac)) : Saves the current project. If the project does not have a file, displays the Save Project As dialog. File → Print (Ctrl+P) : Displays the Page Setup dialog used to define the page size and orientation properties for printing. File → Close (Ctrl+W) : Closes only the selected tab. All other tab instances remain. File → Exit (Ctrl+Q) : Terminates the <oXygen/> XML Editor. Session information such as the current Project, open Documents and Option settings is made persistent. When the <oXygen/> editor is re-opened, the persistence information returns to the last saved state. Edit → Undo (Ctrl+Z) : Reverses, a maximum of 100, editing actions to return to the preceding state. Edit → Redo (Ctrl+Shift+Z) : Recreates, a maximum of 100, editing actions that where undone by the Undo function. Edit → Cut (Ctrl+X) : Removes the current selected node from the document and places it in the clipboard. Edit → Copy (Ctrl+C) : Places a duplicate copy of the current selection in the clipboard. Edit → Paste (Ctrl+V) : Places the current clipboard content into the document at the cursor position. 387 Appendix Edit → Select All (Ctrl+A) : Selects the entire body of the current document, including whitespace preceding the first and following the last character. Edit → Check Spelling (F4) : Checks the spelling in your document. Find → Find/Replace... (Ctrl+F) : Displays the Find/Replace dialog, used to define "search for" or "search for and replace" operations on the current document. The replace operation can bind Perl 5-like regexp group variables ($1, $2, etc.) from the find match. Find → Go to Line (Ctrl+L (Cmd+L on Mac)) : Displays the Go to Line dialog used to move the cursor directly to the position specified. Find → Search again (F3) : Performs another search using the last search configuration. Tree Editor → Show... (Ctrl+T) : Opens the window for editing a document displayed as a structured tree. Help → Help (F1) : Opens the <oXygen/> XML Editor Online Help System. Document → Validate document (Ctrl+Shift+V) : Executes the Validation operation on the current document using a validating parser. Returns an error result-list in the Message panel. Mark-up of current document is checked to conform with the specified DTD rules. Document → Check document form (Ctrl+Shift+W) : Executes the XML Form check operation on the current document using a non-validating parser. Returns an error result-list in the Message panel. Document → Apply transformation scenario (Ctrl+Shift+T) : Executes the transformation process using the configuration properties defined in the Configure Transformation dialog. Document+ XML Document → Configure transformation scenario (Ctrl+Shift+C) : Displays the Configure Transformation dialog, used to define properties for conversion of documents to multiple output targets. Also enables saving of "Scenarios". Each scenario, can store a unique configuration ready to be used in the future. Document → Format and Indent (Ctrl+Shift+P) : Also referred to as "Pretty Print", Format and Indent performs layout functions to make mark-up easier to read on screen and in print output. Document → Learn Structure (Ctrl+Shift+L) : Reads the mark-up structure of the current document so that it can be saved as a template using the Save Structure option. Document → Save Structure (Ctrl+Shift+S) : Displays the Save Structure dialog, used to name and create DTD documents learnt by the Learn Structure function. Document → Find All (Ctrl+Shift+F) : Finds all occurrences of selected word in current file. The Tree View Editor File → New (Ctrl+N) : Creates a new empty document and displays it in the Tree View Editor. File → Open (Ctrl+O) : Displays the Open dialog used to discover, select and open a file to be edited. File → Save (Ctrl+S) : Saves the current document. If the document does not have a file, displays the Save As dialog. File → Close (Ctrl+W) : Closes the Tree View Editor. Edit → Copy (Ctrl+C) : Places a duplicate copy of the current node in the clipboard. 388 Appendix Edit → Cut (Ctrl+X) : Removes the current selected node from the document and places it in the clipboard. Edit → Paste (Ctrl+V) : Places the node from clipboard as a child of the selected node. Edit → Delete (Delete) : Delete the selected node from the document. Edit → Start Editing (F5) : Starts editing the selected node from the document. Edit → End Editing (F6) : Ends editing the selected node. Edit → Undo (Ctrl+Z) : Reverses, a maximum of 100, editing actions to return to the preceding state. Edit → Redo (Ctrl+Shift+Z) : Recreates, a maximum of 100, editing actions that where undone by the Undo function. Insert → Insert (F7) : Insert a new node of the same type like the selected one as its sibling. Move → Move Up (Ctrl+Up) : Move up the selected node with one position. Move → Move Down (Ctrl+Down) : Move down the selected node with one position. Unicode Character Encoding The table below provides a matrix from which to match Unicode names with the names shown by the Java Encoder when it cannot identify encoding. 389 Appendix Table A.1. Unicode to Java Name Matrix Common Name Name in XML files Name Type Java Encoder Name 8 bit Unicode UTF-8 IANA UTF8 16 bit Unicode UTF-16 IANA Unicode 16 bit Unicode little endian UTF-16LE IANA UnicodeLittle 16 bit Unicode big endian UTF-16BE IANA UnicodeBig ISO Latin 1 ISO-8859-1 MIME ISO-8859-1 ISO Latin 2 ISO-8859-2 MIME ISO-8859-2 ISO Latin 3 ISO-8859-3 MIME ISO-8859-3 ISO Latin 4 ISO-8859-4 MIME ISO-8859-4 ISO Latin Cyrillic ISO-8859-5 MIME ISO-8859-5 ISO Latin Arabic ISO-8859-6 MIME ISO-8859-6 ISO Latin Greek ISO-8859-7 MIME ISO-8859-7 ISO Latin Hebrew ISO-8859-8 MIME ISO-8859-8 ISO Latin 5 ISO-8859-9 MIME ISO-8859-9 EBCDIC: US ebcdic-cp-us IANA cp037 EBCDIC: Canada ebcdic-cp-ca IANA cp037 EBCDIC: Netherlands ebcdic-cp-nl IANA cp037 EBCDIC: Denmark ebcdic-cp-dk IANA cp277 EBCDIC: Norway ebcdic-cp-no IANA cp277 EBCDIC: Finland ebcdic-cp-fi IANA cp278 EBCDIC: Sweden ebcdic-cp-se IANA cp278 EBCDIC: Italy ebcdic-cp-it IANA cp280 EBCDIC: Spain, Latin America ebcdic-cp-es IANA cp284 EBCDIC: Great Britain ebcdic-cp-gb IANA cp285 EBCDIC: France ebcdic-cp-fr IANA cp297 EBCDIC: Arabic ebcdic-cp-ar1 IANA cp420 EBCDIC: Hebrew ebcdic-cp-he IANA cp424 EBCDIC: Switzerland ebcdic-cp-ch IANA cp500 ebcdic-cp-roece IANA cp870 EBCDIC: Yugoslavia ebcdic-cp-yu IANA cp870 EBCDIC: Iceland ebcdic-cp-is IANA cp871 ebcdic-cp-ar2 IANA cp918 Chinese for PRC, mixed 1/2 byte gb2312 MIME GB2312 Extended Unix Code, packed for Japanese euc-jp MIME eucjis iso-2020-jp MIME JIS Shift_JIS MIME SJIS Big5 MIME Big5 euc-kr MIME iso2022kr EBCDIC: Roece EBCDIC: Urdu Japanese: iso-2022-jp Japanese: Shift JIS Chinese: Big5 Extended Unix Code, packed for Korean 390 Appendix Common Name Name in XML files Name Type Java Encoder Name koi8-r MIME koi8-r Cyrillic References Organization for the Advancement of Structured Information Standards (OASIS) [http://www.oasis.org/] OASIS is a not-for-profit, global consortium that drives the development, convergence and adoption of ebusiness standards. Members themselves set the OASIS technical agenda, using a lightweight, open process expressly designed to promote industry consensus and unite disparate efforts. OASIS produces worldwide standards for security, Web services, XML conformance, business transactions, electronic publishing, topic maps and interoperability within and between marketplaces. World Wide Web Consortium (W3C) XML Specifications [http://www.w3.org/] The World Wide Web Consortium (W3C) develops inter operable technologies (specifications, guidelines, software, and tools) to lead the Web to its full potential. W3C is a forum for information, commerce, communication, and collective understanding. DocBook [http://www.docbook.org/] DocBook is an XML/SGML vocabulary particularly well suited to books and papers about computer hardware and software (though it is by no means limited to these applications). DocBook is officially available as a Document Type Definition (DTD) for both XML and SGML and enjoys the support of a broad user base throughout 100's of organizations around the world. IBM Developer Works XML Zone [http://www-106.ibm.com/developerworks/xml/] A gateway to all things XML and home of the Darwin Information Typing Architecture (DITA) [http://www-106.ibm.com/developerworks/xml/library/x-dita1/] is an XML-based, end-to-end architecture for authoring, producing, and delivering technical information. This architecture consists of a set of design principles for creating "information-typed" modules at a topic level and for using that content in delivery modes such as online help and product support portals on the Web. The Unicode Consortium [http://www.unicode.org] The Unicode Consortium is responsible for defining the behavior and relationships between Unicode characters, and providing technical information to implementers. The Consortium cooperates with ISO in refining the specification and expanding the character set. It has liaison status "C" with ISO/IEC/JTC 1/SC2/WG2, which is responsible for ISO/IEC 10646. 391