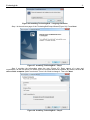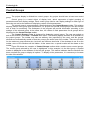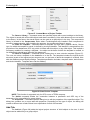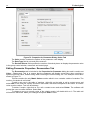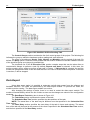
1
TechnologSoft
Control System
Version 2.00.00
Administrator’s Manual
TechnologSoft
3
Contents
SHORT DESCRIPTION ........................................................................................................................................................ 5
ОRGANIZATION OF RS485 COMMUNICATION LINE ................................................................................................. 6
HOW TO SET UP THE MONITORING SYSTEM ............................................................................................................. 8
INSTALLATION OF CONTROL SYSTEM ........................................................................................................................ 9
GENERAL INFORMATION AND RECOMMENDATION ................................................................................................................. 9
INSTALLATION PACK OVERVIEW ........................................................................................................................................... 9
STARTUP INTERFACE OF INSTALLATION DISK ...................................................................................................................... 10
FIREBIRD ............................................................................................................................................................................ 11
FIREBIRD CONFIGURATION WIZARD .................................................................................................................................... 16
ОРС-SERVER...................................................................................................................................................................... 17
TECHNOLOGSOFT ............................................................................................................................................................... 20
TBUS OPC SERVER INSTALLATION ............................................................................................................................. 25
DEVICE MEMORY CARDS LIBRARY ..................................................................................................................................... 25
SERVER GENERAL SETTINGS ............................................................................................................................................... 25
NAMESPACE ....................................................................................................................................................................... 25
Device Network Setup Wizard ........................................................................................................................................ 26
Configurator.................................................................................................................................................................. 26
CONFIGURING LOCATION OF DATABASES ............................................................................................................... 27
CONFIGURATION DATABASE ............................................................................................................................................... 27
SOFTWARE ARCHIVE DATABASE ......................................................................................................................................... 28
HARDWARE ARCHIVE DATABASE ....................................................................................................................................... 28
TEMPLATES’ DATABASE ..................................................................................................................................................... 29
ADMINISTRATION OF USER RIGHTS ........................................................................................................................... 30
EDITING USER GROUPS ....................................................................................................................................................... 31
EDITING USERS ................................................................................................................................................................... 33
CHANGING THE USER PASSWORD ........................................................................................................................................ 34
ARCHIVE TYPES ................................................................................................................................................................ 36
TEMPLATE MANAGER .................................................................................................................................................... 37
PROJECT STRUCTURE..................................................................................................................................................... 39
TYPES OF DATA VIEW ..................................................................................................................................................... 40
MNEMONIC ......................................................................................................................................................................... 40
GRAPH................................................................................................................................................................................ 41
DATA TABLE ...................................................................................................................................................................... 41
CONTROL PAGE .................................................................................................................................................................. 42
CONTROL GROUPS ........................................................................................................................................................... 43
SETTING A PROJECT WITH TECHNOLOGSOFT CONFIGURATION WIZARD .................................................... 44
MANUALLY SETTING A PROJECT ................................................................................................................................ 48
DATA SOURCE .................................................................................................................................................................... 48
Context Menu of Datasource Toolbar ............................................................................................................................ 49
Context Menu of Computer Object ................................................................................................................................. 50
Context Menu of OPC Server Object ............................................................................................................................. 50
Context Menu of OPC Group Object ............................................................................................................................. 50
Context Menu of OPC Tag Object ................................................................................................................................. 51
LOGICAL PROJECT STRUCTURE ........................................................................................................................................... 52
General Information ...................................................................................................................................................... 52
Context Menu of Project Toolbar................................................................................................................................... 52
Add Tab ......................................................................................................................................................................... 53
Properties for Project Dialog ........................................................................................................................................ 55
Editing Parameter Properties. Common Tab ................................................................................................................. 56
Editing Parameter Properties. Value Tab ...................................................................................................................... 57
Editing Parameter Properties. Enumeration Tab ........................................................................................................... 58
Editing Parameter Properties. Logic State Tab.............................................................................................................. 59
Alarm Conditions .......................................................................................................................................................... 60
4
TechnologSoft
LINK OF LOGICAL PROJECT STRUCTURE WITH DATA SOURCE .............................................................................................. 64
DISPLAY LEVEL .................................................................................................................................................................. 65
General Information ...................................................................................................................................................... 65
Control Group Windows Display Settings ...................................................................................................................... 65
Control Groups Menu .................................................................................................................................................... 65
Edit Control Group Dialog ............................................................................................................................................ 66
Changing the Order of Control Groups ......................................................................................................................... 71
Graph Settings ............................................................................................................................................................... 71
Table Settings ................................................................................................................................................................ 72
ALARMS .............................................................................................................................................................................. 73
ALARM ACKNOWLEDGEMENT DIALOG ................................................................................................................................ 73
ALARM ACKNOWLEDGEMENT ............................................................................................................................................. 73
LOSS OF COMMUNICATION WITH DEVICES ............................................................................................................. 75
COMMUNICATION DIALOG .................................................................................................................................................. 75
COMMUNICATION MONITOR SETTINGS ................................................................................................................................ 76
SMS ALARM ........................................................................................................................................................................ 77
SMS ALARM ALGORITHM ................................................................................................................................................... 77
SMS GENERATOR ............................................................................................................................................................... 78
SMS ALARM MODULE ........................................................................................................................................................ 78
SMS ALARM SETTINGS ....................................................................................................................................................... 78
SCHEDULED TASKS.......................................................................................................................................................... 84
REPORT PRINTING ............................................................................................................................................................... 85
SMS MAILING .................................................................................................................................................................... 86
READING HARDWARE ARCHIVE .......................................................................................................................................... 89
DATA EXPORT .................................................................................................................................................................... 90
TechnologSoft
5
Short Description
The TechnologSoft Control System, further the TCS, is a software product and is part of the
hardware-software complex.
The TCS allows the user to control, monitor and manage devices in remote locations in real
time, and view historical data and generate reports for a selected period of time. The TSC can work with
devices from any manufacturer, for which there is an OPC server (supports DA1, DA2, DA3
specifications).
Device communication with the TCS can be both wired (Ethernet, RS485, MicroLAN etc.) and
wireless (X-Bee, GSM, etc.). It allows controlling the objects located at a considerable distance from the
dispatch centers.
The TCS has a flexible differentiation of user access rights. Available simultaneous data access
for multiple users on the local network.
This document is the Administrator's Manual and contains only information on configuring the
TCS. How to work with the TCS, please refer to the User’s Manual. Before reading this guide is
recommended to study the User's Manual.
System Requirements:
• Windows 2000/XP pro/2003/Vista/7/8 (for Light/Net versions)
• Windows ХР Home (only for Light version)
• Processor 1 GHz
• Memory 512 MB RAM
• Free hard disk: 50 MB (for program files)
• Free hard disk: 10 GB (for database)1
• Protocol TCP/IP
• Printer for reports (or/and if printing module is installed)
• GSM modem (if alarm SMS module is installed).
1
Database size depends on many factors such as the number of used devices, data archiving period, data hold
time, etc. As soon as TechnologSoft is installed, the database size is very small, but over time the files will grow.
Depending on the intensity of program use, database file size can reach a lot more than indicated in this manual.
6
TechnologSoft
Оrganization of RS485 Communication Line
It is important to perform a quality installation of RS485 communication lines. In the process of
wiring it is forbidden branching link. The network topology for the connection of devices is a common
bus. See the example in Figure 1.
Figure 1. Example of RS485 Installation
The wiring circuit is shown in Figure 2.
The ends of the link must be terminated. Terminator in this case is a resistor of 120 ohms, which
is connected between two signal lines A and B.
Figure 2. Wire Connection
The line is connected to the computer via RS485/RS232 adapter directly to a physical COM port
or via RS485/USB adapter into the USB port (virtual COM port).
TechnologSoft
7
For critical facilities with continuous polling of devices it is strongly recommended to connect the
link to the physical COM port using RS485/RS232 adapter, as virtual COM ports can “hang” sometimes
because of Windows. It stops the data exchange and it cannot be retrieved without human intervention.
8
TechnologSoft
How to Set Up the Monitoring System
Before setting up the TCS, first install all the used devices and pave links (if devices require a
wired connection).
This is the order how to set up the TCS:
1) Install the TCS
2) Set up OPC Server
3) Set up database location
4) Create and configure the TechnologSoft project.
TechnologSoft
9
Installation of Control System
General Information and Recommendation
The TCS consists of 3 parts: database management system (DBMS), ОРС-Server, set of
TechnologSoft modules. Freely distributed Firebird, further Firebird, is used as DBMS. Each is installed
separately. Depending on the particular problem, all parts may be installed either on the same computer
or on separate computers in the network. The purpose and installation recommendations for each part
are described below.
It is recommended to install the TCS with the help of interface startup installation disk.
ATTENTION! Installation of TechnologSoft requires administrator’s rights.
Installation Pack Overview
A list of folders and files of TechnologSoft installation pack is shown in Figure 3 and described in
TableTable 1.
Figure 3. List of folders and files of TechnologSoft installation pack
Table 1. List of folders and files of TechnologSoft installation pack
Addons
Set of third-party support programs
Drivers
Folder with drivers
Firebird
Folder with Firebird installation files
InstallDBHelper
Folder with database templates and Firebird configuration wizard
Manual
Folder with program documentation
OPC
Folder with OPC-Server installation files
Folder for files with predetermined settings, files of device memory cards and
Preset Configuration
image files which were not included to the installation pack
TS
Folder with TechnologSoft module installation files
setup.bat
Batch file with the help of which you can run the startup disk interface
setup.dbd
Other files required to run the startup disk interface
setup.txt
10
TechnologSoft
run.exe
autorun.inf
Startup Interface of Installation Disk
The installation is recommended to perform via startup interface of installation disk. If the
interface does not open automatically, it can be opened using a setup.bat batch file from the root of the
installation pack (Figure 3).
NOTE. You can install without using the startup interface, simply run the setup file manually.
Startup interface begins with language selection (Figure 4). Select your language from the list
and click OK. The Main Menu will open.
Figure 4. Startup Interface of Installation Disk (Language)
The Main Menu of startup interface is shown in Figure.
Figure5. Startup Interface of Installation Disk (Main Menu)
To start the installation, choose the Install option which opens the Install Submenu (Figure 6).
This menu contains three items. Each of them corresponds to one of the TCS parts. To install
one or another part of the TCS, click on the appropriate menu item.
TechnologSoft
11
Figure 6. Startup Interface of Installation Disk (Install)
Firebird
Firebird is used as database management system (DBMS). Installation file is in the same folder in
the root of the distribution.
Firebird should be installed on a PC with a reliable hard drive. This computer will store the
database files (TCS configuration), as well as stored data and logs.
After starting the Firebird installation, the following dialog box will appear. Select the language
when prompted for a language selection and click OK (Figure 7).
Figure 7. Installing Firebird - Select Language
The Welcome to the Firebird Setup Wizard window will appear (Figure 8). This is the first step
of the installation. Click Next.
12
TechnologSoft
Figure 8. Installing Firebird - Step 1
The License Agreement is Step 2 (Figure 9). Choose I accept the agreement and click Next.
Figure 9. Installing Firebird - Step 2
In Step 3 the information about installation is provided (Figure 10). To continue, click Next.
TechnologSoft
13
Figure 10. Installing Firebird - Step 3
The next step provides a choice of installation directory (Figure 11). In most cases there is no
need to change it. Simply click Next.
Figure 11. Installing Firebird - Step 4
Step 5 allows you to choose which program components to install (Figure 12). By default, this is a
full install version and Super Server binaries. In most cases, this is the best choice. However, if you are
not connected to the local network, it makes sense to choose Classic Server binaries. In this case, the
database will work more efficiently. Click Next to move to another step.
14
TechnologSoft
Figure 12. Installing Firebird - Step 5
Step 6 allows you to select a folder in the Start Menu to place the shortcuts (Figure 13). Name,
which is offered by default, is quite acceptable. To continue, click Next.
Figure 13. Installing Firebird - Step 6
Step 7 is the choice of additional post-installation tasks (Figure 14). All necessary parameters are
selected by default. To change anything is not necessary. Just click Next.
TechnologSoft
15
Figure 14. Installing Firebird - Step 7
Step 8 is the page which shows all the selected installation options (Figure 15). If there was a
mistake somewhere in your choice, you can go back to that page and fix it. If everything is correct, then
click Install to start the installation process.
Figure 15. Installing Firebird - Step 8
Step 9 offers to review the information for your Firebird (Figure 16). To continue, click Next.
16
TechnologSoft
Figure 16. Installing Firebird - Step 9
Step 10 is the final step of installation (Figure 17). It displays information about the installation
and offers two tasks to perform after the wizard has been completed. Check Start Firebird Service
now? and uncheck After installation - What Next? To complete the wizard, click the Finish button.
Figure 17. Installing Firebird - Step 10
The Firebird is now installed on your PC.
Firebird Configuration Wizard
For TechnologSoft operation, it is necessary to create the database and configure Firebird. To
facilitate this process, the Firebird Configuration Wizard program is used (Figure 18). This program is
launched automatically after Firebird has been installed, if Firebird installation was launched via startup
interface of installation disk.
TechnologSoft
17
If the wizard does not start automatically, it must be run manually. To do this, open the folder in
the InstallDBHelper root directory and double-click the idh.exe.
The Wizard creates the necessary databases and configures Firebird to operate with them.
The upper part of the Wizard window displays the Firebird state. If the server is OK, the OK green
LED labeled lights. If there is a problem with the server, the red LED labeled ERROR lights. In this case,
pay attention to the message and fix the problem.
In the central part of the wizard the user specifies the folder for the database files. By default, it is
Databases folder on the D: drive. Optionally, it is possible to specify a different folder, however, it is
strongly recommended not to choose a folder on the C: drive (system drive). As when reinstalling the
operating system, most likely, these files will be lost.
Figure 18. Firebird Configuration Wizard for TechnologSoft
To make the Wizard perform all the necessary actions, click OK. The installation progress will be
displayed in the bottom part of the window. After that the Finish button will appear. Click it to complete
the Wizard.
The result of the Wizard success will be the following files in the specified directory:
- configuration database file (stores all settings of the TCS)
MAINDB.FDB
ARCHDB.FDB
- software archive database file
DEVARCHDB.FDB
- hardware archive database file
- template database file of TechnologSoft configuration to work with devices
DEVTEMPLATEDB.FDB
manufactured by TERA.
ОРС-Server
The TCS supports OPC DA 3 specification, and the communication is organized by the OPC
servers. The distribution includes the OPC server of TERA production which communicates with the
devices by the TBus protocol (TBus OPC Server).
Most often, devices are connected to the computer via COM port. In this case, the OPC server
should be installed on the computer connected with the devices. If the devices are connected by
Ethernet, install OРС-server on any computer in the local network. Please note that if it is required to
maintain a continuous communication, the computer must be turned on permanently.
TBus OPC Server installation file is in the ОРС folder in the root directory
(TeraTBusOpcServer_setup.exe). You can start the installation using this file or via the startup
interface of installation disk.
After starting the installation of TBus OPC Server, the software will prompt the user to select a
language (Figure 19). Select the language and click ОK.
18
TechnologSoft
Figure 19. Installing TBus OPC Server – Language Selection
The Wizard welcome page opens (Figure 20). To go to the next page, click Next.
Figure 20. Installing TBus OPC Server – Step 1
In step 2 select the folder for the OPC Server installation (Figure 20). By default, it will be
installed on the C: drive C:\Program Files\TERA\TBus OPC Server\. In most cases there is no need to
change it. Simply click Next.
Figure 21. Installing TBus OPC Server – Step 2
TechnologSoft
19
Step 3 is a summary page which displays the selected installation options (Figure 21). To start
the installation process, click Next. During this process the DCOM component of ОРС server will be
registered. The Wizard will inform about the result of registration with the help of message (Figure 23).
In addition, the (__tera_opc__) local user group and the (__tera_opc_user__) local user will be
created. The Wizard will inform about identification with the help of message (Figure 24). In case of
successful installation, both of these messages will appear. After that the Wizard will go to the final page
(Figure 22). To complete the Wizard, click Finish.
Figure 22. Installing TBus OPC Server – Step 3
Figure 23. Installing TBus OPC Server – Step 4
20
TechnologSoft
Figure 24. Registration Message
Figure 25. Identification Message
TechnologSoft
TechnologSoft is a set of modules. Each of the modules is a separate program and performs its
functions. All modules are synchronized using the configuration database. Depending on the particular
problem, the required modules can be installed either on the same computer or on separate computers
in the local network. The list of TechnologSoft modules is shown in Table 2.
Table 2. List of TechnologSoft Modules
Program with a graphical user interface. It is used for the TCS configuration,
Display Module
process monitoring, device control in real-time, analysis of stored data.
Archive Module
Program which can operate interactively or as a service. Designed to maintain the
software archive, as well as to perform tasks of reading hardware archive on
schedule according to the settings of the TCS.
Print Module
Service which is designed to perform print tasks on schedule, i.e. automatic print
reports. The module requires a printer.
SMS Alarm
Service which is responsible for sending SMS messages. The module requires a
Module
GSM modem.
Data Export
Service that performs data export tasks on a schedule according to the settings of
the TCS.
Module
TechnologSoft installation file is located in the TS in the root directory
(TechnologSoft_setup.exe). It can be installed using the file or via the startup interface of installation
disk.
After starting the installation of TechnologSoft, the software will prompt the user to select a
language (FigureFigure 25).
TechnologSoft
21
Figure 26. Installing TechnologSoft – Language Selection
Step 1 is the welcome page of the TechnologSoft Setup Wizard (Figure 26). Press Next.
Figure 27. Installing TechnologSoft – Step 1
Step 2 provides the information about the user (Figure 27). Enter names of a user and
organization, as well as specify for which users the program should be installed. By default, the For all
users of this computer option is selected. There is no need to change it. Then click Next.
Figure 28. Installing TechnologSoft – Step 2
22
TechnologSoft
Step 3 is a selection of the installation type (Figure 28). There are three options: Typical,
Compact and Custom. The Typical and Compact options allow the user to skip the next 2 steps but
differ in the set of modules included. The first one includes the entire set of modules, and the second one
includes only display and archive modules. The Custom option offers the user to specify manually the
required set of modules. Select the appropriate type of installation and click Next.
Figure 29. Installing TechnologSoft – Step 3
Step 4 is a selection of the program installation folder (Figure 29). This step is only available for
the Custom option. By default, TechnologSoft is installed on the C: drive in the folder
C:\Program Files\TERA\TechnologSoft\. There is no need to change the installation folder in most of
the cases. To continue, click Next.
Figure 30. Installing TechnologSoft – Step 4
Step 5 is a selection of modules (Figure 30). This step is only available for the Custom option.
Select the checkboxes next to the modules to be installed and click Next to continue.
TechnologSoft
23
Figure 31. Installing TechnologSoft – Step 5
Step 6 is a review of the selected installation options (Figure 31). If there is a mistake
somewhere, return to the appropriate step by clicking the Back button and correct it. To continue, click
Next.
Figure 32. Installing TechnologSoft – Step 6
Step 7 is the last page of the installation (Figure 32). Press Finish and the Wizard is finished.
24
TechnologSoft
Figure 33. Installing TechnologSoft – Step 7
TechnologSoft
25
TBus OPC Server Installation
Installation of the TBus OPC Server consists of three components. They are a device memory
cards library, server general settings file and namespace configuration file. All settings are located in the
installation folder of the server.
NOTE. Before configuring the OPC Server, first install all the used devices and pave links (if
devices require a wired connection).
Device Memory Cards Library
The Device Memory Cards Library is a set of files and is located in the devmaps folder. Each
file is a memory card per a single device.
To configure the server for operation with a specific device, the device memory card is required.
The OPC Server installation package includes memory cards of many devices. However, if you
bought the device which has not been previously produced, it is likely that a memory card for it will not
be in the library. To check for the memory card, use the Device Network Setup Wizard (please refer to
the Device Network Setup Wizard section of the manual).
If there is no memory card of the required device in the library, check for it on the installation CDROM in the folder \Preset Configuration\TBus OPC Server\devmaps\. If there is no card there, please
contact us ([email protected]) and we will send it by e-mail. After receiving the required memory
card, copy it to the library.
Server General Settings
In most of the cases there is no need to change server general settings.
The server general settings file (settings.ini) is in the root. It is ini-file. It contains three sections:
[Log], [CheckSumTypes], [FixReadError].
The [Log] Section is logging options.
The Level option is a level of logging detail or minimum severity of the messages which will be
included in the log. Possible values are from 0 to 4, inclusive. 0 if logging the most detailed.
The [CheckSumTypes] section is a list of all types of checksums allowed to use.
The server supports four types of checksums and this section contains four relevant parameters:
CRC16, CRC8, XOR, SUM. To allow the use of a particular type of the checksum, set the corresponding
parameter to 1. A value of 0 prohibits the use of this type of checksum. By default, it is possible to use all
types of checksums. However, most of the devices use the CRC16 checksum. If you do not have
devices with another type of checksum, it makes sense to prohibit the use of other types of checksums.
In this case, the server will quickly find your devices after launch.
The [FixReadError] section is action parameters used to correct read errors.
The Repeate parameter is the number of repeat readings. Possible values are 0 and more. If
failed reading the tag value from the device, the server performs as many attempts to re-read as this
parameter indicates. The default value is 2.
NameSpace
The namespace configuration file (Config.xml) is located in the root directory of the server.
26
TechnologSoft
The structure of the server includes two tools to configure the namespace. These are Device
Network Setup Wizard and Configurator. The first one can significantly reduce the human involvement
in the process of setting up the server, and the second gives the most flexible configuration. In addition,
the Device Network Setup Wizard includes the ability to scan RS485 communication line to search for
connected devices and determine their type and function of device address change. It is recommended
to use Device Network Setup Wizard for the first configuration of namespace.
Device Network Setup Wizard
Before running the Setup Wizard, it is necessary to mount RS485 communication line, to
connect devices to the line, to power devices as well as to energize the RS485/RS232 adapter.
The user can run the Setup Wizard using the appropriate shortcut in the Start-All programsTERA-TBus OPC Server menu.
The user manual for the Device Network Setup Wizard is in the Doc folder where the server is
installed.
Configurator
The Configurator is designed for manual adjustment of the OPC server namespace, or change
of the existing configuration.
The user can run the Configurator using the appropriate shortcut in the Start-All programsTERA-TBus OPC Server menu.
The user manual for the Configurator is in the Doc folder where the server is installed.
TechnologSoft
27
Configuring Location of Databases
The TCS uses four databases:
MAINDB
- Configuration database (stores all TCS settings)
ARCHDB
- Software archive database
DEVARCHDB
- Hardware archive database
DEVTEMPLATEDB - Device template database
It is necessary to inform to each module of TechnologSoft where the configuration database is.
The DB coordinates are in the ini-file. The coordinates of the remaining bases are stored in the
configuration database and are configured using the display module.
Database coordinates are an IP-address or the name of the computer that hosts the database
and the database name. Database names are fixed and do not require changes.
By default, the coordinates of all databases refer to the local computer. If the TCS is not installed
on the same computer, it is not required to configure location of databases.
After the location of the database has been configured, restart all modules of TechnologSoft.
o
o
o
o
Configuration Database
The Configuration Database is the basic and most important database. It stores all TCS
settings. These are coordinates of other databases, project settings, display settings, tasks for each
module. In addition, all modules of TechnologSoft are synchronized through this database. Therefore,
each module must know the coordinates of the configuration database.
The coordinates of database are specified in the MainDB section of the settings.ini file. This file
is
in
the
root
folder
where
TechnologSoft
is
installed.
By
default,
it
is
C:\Program Files\TERA\TechnologSoft\. Below are the contents of the MainDB section of the
settings.ini file by default.
[MainDB]
- Section of configuration database parameters;
server=127.0.0.1
- IP address and name of the computer with the database;
database=MainDB
- Database name.
If the TechnologSoft modules are distributed by local network, then the server parameter must
be assigned to the address or name of the computer where the configuration database is installed. After
that, restart all Technologsoft modules which were installed on the computer.
Figure 34. Configuration Database Settings
If the display module is installed on the computer, it is possible to change configuration of the
database location using the graphical user interface. To do this, run the display module (menu Start-All
Programs-TERA-TechnologSoft-TechnologSoft) and the command in the Settings - Configuration
Database... main menu. As a result, the Configuration Database Settings dialog box will appear
28
TechnologSoft
(Figure 33). In the dialog box, specify the required coordinates and click OK. In addition, there is a button
in the dialog to check the connection to the database, the coordinates of which are specified.
Software Archive Database
The software archive database collects data on certain parameters with a certain logging period.
The list of points and logging period is specified in the configuration database. The archive module
stores data from time to time. The data is logged in software whenever the archive module is working. If
the archive module is not working, the software archive does not accumulate. If the user changed the
settings of logging, then the archive module must be restarted.
The coordinates of the software archive database are stored in the configuration database. They
can be changed using the display module. To do this, run the display module (menu Start-All
Programs-TERA-TechnologSoft-TechnologSoft) and the command in the Settings – Software
Archive Database... main menu. As a result, the Software Archive Database Settings dialog box will
appear (Figure 34). This dialog is similar to the Configuration Database Settings dialog.
Figure 35. Software Archive Database Settings
Hardware Archive Database
The hardware archive database stores the data downloaded from the devices that support
hardware archive.
The coordinates of the hardware archive database are stored in the configuration database. They
can be changed using the display module. To do this, run the display module (menu Start-All
Programs-TERA-TechnologSoft-TechnologSoft) and the command in the Settings – Hardware
Archive Database... main menu. As a result, the Hardware Archive Database Settings dialog box will
appear (Figure 35). This dialog is similar to the Configuration Database Settings dialog.
TechnologSoft
29
Figure 36. Hardware Archive Database Settings
Templates’ Database
The templates’ database stores all templates of TechnologSoft settings to work with the devices
manufactured by TERA company.
The coordinates of templates’ database are stored in the configuration database. They can be
changed using the display module. To do this, run the display module (menu Start-All Programs-TERATechnologSoft-TechnologSoft) and the command in the Settings – Templates’ Database... main
menu. As a result, the Templates’ Database Settings dialog box will appear (Figure 36). This dialog is
similar to the Configuration Database Settings dialog.
Figure 37. Templates’ Database Settings
30
TechnologSoft
Administration of User Rights
The TCS has a flexible system for allocating user rights. All users are divided into groups
depending on the authority. Each group is assigned individual rights. The user who belongs to the group
automatically receives all the rights of the group. The user may belong simultaneously to several groups,
and thus he receives the rights of all groups. In addition, the user can assign additional personal rights
(besides group rights).
After the TCS has been installed, there is only one user, Administrator. The default password
for this user is admin. This user is a part of the Administrators group which has full rights. Accordingly,
the Administrator user has also full rights, too. This user is used to administer the rights of users and
program settings.
WARNING! It is strongly recommended to change the password for the Administrator user
to avoid unauthorized access and change of settings.
To administer user rights, log in to the program as the Administrator user (or another user with
the same rights) and run the Settings -> User Rights... command in the main menu. As a result, the
Administration of user rights dialog box will open (Figure 37).
Figure 38. Administration of User Rights
There is a tree with a list of user groups in the left part of the dialog, and a tree with a list of users
in the right part of the dialog.
When opening the node of User Groups in the tree, the user can see two child nodes: Group
Members and Group Permissions. Group Members contains all users included in this group. Group
Permissions contains a list of actions allowed for the group.
When opening the node of Users in the tree, the user can see two child nodes: Group
Memberships and User Permissions. Group Memberships contains a list of groups in which the user
is a member. User Permissions contains a list of actions that are allowed to the user in addition to the
group permissions.
TechnologSoft
31
Three buttons are located under each tree. Their availability depends on which node in the tree is
currently selected. All three buttons are active if the group node or user node is selected respectively in
the tree.
If the user presses the Create... or Edit... button under the User Groups tree, the Edit a User
Group dialog box opens (Figure 38) to create a new group or edit an existing one. If the user presses
the Delete button, the program will ask to confirm deletion of the user group and in the case of
confirmation, the group will be deleted.
If the user presses the Create... or Edit... button under the Users tree, the Edit a User dialog
box opens (Figure 40) to create a new user or edit an existing one. If the user presses the Delete button,
the program will ask to confirm deletion of the user and in the case of confirmation, the user will be
deleted.
NOTE. It is forbidden to delete the user who is logged in the program at the moment.
The + and - buttons between the trees are used to add users to the groups and delete users from
the group, respectively. The activity of these buttons depends on which nodes are highlighted in the
trees at the moment.
If the user selects the Groups node on the left and the Users node on the right, the + button will
be active. Clicking this button adds the selected user on the right to the group highlighted on the left.
The program preliminary asks for confirmation.
If the user opens the Group Members node and selects the user in the appearing list, the –
button will be active. Clicking this button removes the user from the group. The program preliminary asks
for confirmation.
Editing User Groups
A user group is edited by using the dialog box which is shown in Figure 38. The title of the dialog
specifies what action is being performed, either creating a new group or editing an existing one.
In the User Group Name section, enter the group name.
The main part of the dialog box has two lists: List of unauthorized actions and List of allowed
actions. The actions allowed for a group should be moved to the list of allowed actions. To move actions
from one list to another, use the buttons between the lists. The > and < buttons move only those actions
that are selected at the moment. The >> and << move immediately all actions. Also the user can move
an action from one list to another by left double-clicking on the action list.
Click OK to save changes. Click Cancel to close the dialog box without saving changes.
32
TechnologSoft
Figure 39. Editing Administrators User Group
For the Control action (remote change of parameters in the devices), specify additional settings
(Control... button at the bottom of the dialog). It is possible to distinguish control of different devices
between different groups of users.
If the Control action is allowed for the group, then the Control button is active. Clicking this
button opens the Extended Control Rights dialog box (Figure 39). The dialog contains the list of all
parameters which are active for control. Check the boxes next to those parameters which should be
allowed for control for a group of users.
Figure 40. Extended Control Rights
TechnologSoft
33
Editing Users
Users are edited by using the dialog box which is shown in Figure 40. The title of the dialog
specifies what action is being performed: creating a new user or editing an existing one.
In the User Data section, enter the user’s name and initials but the last name is the only required.
Also there is the Set Password... or Change Password... button in this section depending on what
action the dialog was opened for.
If the dialog box is opened to create a new user, set a password for a new user by clicking the
Set Password... button. It opens the Change Password dialog box (Figure 43).
If the dialog box is opened to edit an existing user, change the user’s password by clicking the
Change Password... button. It opens Authorization Check dialog box (Figure 42). For more
information please refer to the Changing the User Password section of the manual.
Figure 41. Editing Administrator’ User
The dialog box also has two lists: List of unauthorized actions and List of allowed actions. If
the user needs to set personal permissions, place the appropriate actions to the list of allowed actions.
The actions are transferred between the lists in the same way as for a user group (please refer to the
Editing a User Group section of the manual).
Click OK to save changes. Click Cancel to close the dialog box without saving changes.
If the dialog box was opened to create a new user but the password was not set, then when the
changes are being saved, the program prompts to set a password (Figure 41). Click No to create a user
without a password. Click Yes to set a password in the dialog box (Figure 43).
34
TechnologSoft
Figure 42. Request for password setting
For the Control action (remote change of parameters in the devices), specify additional settings
(Control... button at the bottom of the dialog). It is possible to distinguish control of different devices
between different users.
If the Control action is allowed for the user, then the Control button is active. Clicking this button
opens the Extended Control Rights dialog box (Figure 39). The dialog contains the list of all
parameters which are active for control. Check the boxes next to those parameters which should be
allowed for control for this user.
Changing the User Password
Any user can change his password. Besides, the password of any user can be changed by a user
with permissions of administration of user rights (please refer to the Administration of User Rights
section of the manual).
To change the password, the user must log in to the program and run the User→Change
Password command in the main menu. In response, the Authorization Check dialog box opens (Figure
42). Enter the password and click OK. If the password is correct, the dialog box closes.
Figure 43. Authorization Check
If the user's authority is confirmed successfully, the Change Password dialog box opens (Figure
43).
TechnologSoft
35
Figure 44. Change Password
Enter the new password twice and click OK. If the entered passwords match, the dialog box
closes and the message about successful change of password appears.
36
TechnologSoft
Archive Types
There are two types of archive: software and hardware. The first one means a constant
connection between the computer and devices, continuous operation of archive module and is used in
cases where process technology is continuously monitored, or there is a need for operational archiving
or devices do not support archiving. The second one is used in cases where there is no way to ensure
constant communication between the computer and devices or there is a need for duplication of
information for greater reliability.
A software archive is formed by continuous communication with devices and recording the
current values in the archive database. It provides operational update of data in the archive and does not
require from devices to support the archiving function. Moreover, a software archive does not depend on
the device settings and has its own highly flexible configuration. However, a software archive is
completely dependent on the stable link with the devices. In case of lack of communication or computer
failure, current readings do not fall into the archive database, and so-called holes, areas of time with no
data, will appear.
A hardware archive is maintained by the device and stored in its internal memory. This is a more
reliable way to archive because the data is always saved until the device is turned on. The holes have
much smaller probability to appear than in the software archive. There is also no need for constant
communication between computer and devices. However, the hardware archive should be read from
time to time and stored in the database. Besides, this type of archive depends on device settings which
do not provide sufficient flexibility.
Depending on the object of control, either software or hardware archive, or both together can be
used.
TechnologSoft
37
Template Manager
Template Manager is a tool for manipulating templates of devices that are stored in the
database. Device template is a typical TechnologSoft setup for working with a specific device. Templates
are used for initial configuration as the starting material.
Templates for device are selected by a device ID. The device identifier is a unique string that
consists of an internal device name and its version. A device may have multiple templates.
To access the template manager, a user should be logged in to the program as a user who has
administrative rights (please refer to the Administration of User Rights section of the manual).
The template manager is a part of the display module. To open it, launch the display module
(menu Start-All Programs-TERA-TechnologSoft-TechnologSoft), log in as a user with administrative
rights (main menu User – Login) and select the command Tools – Template Manager in the main
menu. After starting, the template manager loads from the database available templates and presents
them in a list. The Template Manager dialog box is shown in Figure 44.
Figure 45. Template Manager
The Template Manager dialog contains a list of templates, buttons and status bar.
The list of templates has the ability to sort and filter by each column. To sort the list, left-click on
the first line of the column header. Double-clicking on the same column changes the sort direction. To
create a filter, left-click on the second line of the column header. The cell displays an input field for
entering the characters of the filter. Text case in the filter is ignored.
To specify the coordinates of templates’ database, click the Templates’ Database… button and
the dialog box with the parameters will open (Figure 36). In the dialog box, specify the computer on
which the database is installed, and the name of the database.
To download a template from the database file, click Load From File... This opens a standard file
selection dialog. Templates’ files have *.tmpl resolution. Select the file and click Open. The template
from the file will be added to the database.
To edit the parameters of the template from the database, select it in the list and click Edit... This
opens the dialog box for editing the template (Figure 45). The template name and device name can be
changed. The device identifier cannot be changed. Click Save To Database to save changes to the
database. Click Save To File to save this template to the file. This opens a standard file selection dialog.
Specify the file and click Save.
38
TechnologSoft
Figure 46. Save Device Template
To remove a template from the database, select it in the list and click Remove. Then select Yes
to confirm the deletion.
TechnologSoft
39
Project Structure
Project is the TCS configuration for a particular object or process. Projects are stored in the
configuration database. At the same time there may be several projects in the configuration database.
The project has a layered structure. These are the lower level or the data source level, the logic
level or the logical structure level, the upper level or the display level. The data is exchanged by the
communication channels which are created between adjacent levels.
The data source level is a hardware configuration that is used in the project. It includes
computers, which are connected to devices or which communicate with devices, the devices themselves
and the namespace of the devices (measuring channels, variables).
The logical structure level is the intermediary between the data source and display. This level is
created for two main reasons. Firstly, to get away from operating such specific terms as a device, a
measuring channel, a variable, etc. And replace them with more common and familiar to the working
stuff abstract concepts, such as air temperature, fan power, valve position, etc. Secondly, the existence
of such a level allows the user to make changes to the data source without modification of the project.
For example, the replacement of a device for a similar instrument or changes in the scheme of
connecting devices to the computer will not affect the logical project structure and the existing display
settings.
The Point to point connection type is created between the logical level and data source and it
indicates to the logical object from which device and using which variable it should receive the data.
The display level is display settings of the logical project structure. At this level, the entire project
is divided into groups of controls enabling to control process in the most convenient form. For each of the
control group, the list of logical objects is set to display in one or another type of data view: graph, data
table, mnemonic and control page. A set of logical objects in each control group can be completely
arbitrary. The same logical object can be included in several control groups.
The task of project configuration includes setting all levels of the project and creating links
between them, setting the parameters for all types of data view, and, if necessary, setting tasks on
schedule, and SMS alarm.
40
TechnologSoft
Types of Data View
TechnologSoft display module can display data in a graph, a data table, a mnemonic and a
control page.
The types of data view are switched in the View main menu between the commands: Table,
Graph, Mnemonic, Control Page.
Mnemonic
Mnemonic allows the user to present real-time information in the usual human form. This may be
an image of room, control equipment, sensors, etc. Image schematically reflects the actual equipment.
In some places the image displays the sensor readings and control signals, the state of control
equipment and others. The example of the mnemonic is shown in Figure 46.
For setting a mnemonic, it is necessary to create an image, open it in TechnologSoft and place
the sensor readings and other objects of the logical project structure to the desired locations.
Figure 47. Mnemonic
TechnologSoft
41
Graph
The example of graph is shown in Figure 47. The example shows how the parameter is changing
during the specified period.
There is always X-axis, the axis of time, in the graph. Axis values are created by the
administrator. There may be several. In the real-time mode, graph is dynamically shifted to the left along
the time axis at a speed corresponding to the selected scale. The most recent data are added to the right
side. The time interval, which is shown on the X axis, is indicated in the settings.
The graph has two modes: auto scale and a scale specified for each value axis. The default
mode is auto scale.
Figure 48. Graph
Data Table
Data table view also allows the user to monitor how parameters are changing numerically. Table
columns are control parameters, and table rows are the values of these parameters at specific times.
The most recent data are in the top row, and the oldest are at the bottom. When new data is added to
the data table, the rows will move downward. If necessary, a new line is added at the top and the last
line is removed at the bottom. The example of data table is shown in Figure 48.
42
TechnologSoft
Figure 49. Data Table
Control Page
Control page realizes the possibility of remote device control. It displays a list of parameters
available for control. The example of control page is shown in Figure 49.
Figure 50. Control Page
TechnologSoft
43
Control Groups
The project display is divided into control groups. Any project should have at least one control
group.
Control group is a control object of display level, which represents a logical grouping of
parameters and their display settings. Each control group has its own display settings for each type of
data view, as well as the window for displaying values of main parameters.
The control group is represented as a small window on the Control Groups toolbar. This window
displays values of the group main parameters. If a project has several control groups, the user selects
one of them for monitoring. The workspace of the program will provide information according to the
settings of the selected group. At the same time, the values of main parameters for all groups will be
displayed on the Control Groups toolbar.
The Control Groups toolbar is designed for displaying control groups. The user can switch on
and off this toolbar in the View – Toolbars main menu. This toolbar displays windows of all available in
the project groups. The toolbar may take an arbitrary size (specified by the user), and the groups’
windows are automatically scaled so that they occupy the entire area of the toolbar. There are no limits
for the maximum group window size, but there are minimum size limits. If the windows do not fit on the
toolbar, some of the windows will be hidden. At the same time, a special marker will be drawn on the
toolbar.
Figure 50 shows the example of Control Groups toolbar which contains seven control groups.
The current group selected by the user is highlighted. In this example it is the third group. A special
marker is displayed in the windows of the last two groups. This marker indicates that the window size
does not allow the group to display all options. To display all the parameters, it is necessary to increase
the size of the window.
Figure 51. Control Groups Toolbar
44
TechnologSoft
Setting a Project with TechnologSoft Configuration Wizard
TechnologSoft Configuration Wizard, hereinafter Master, can facilitate the process of setting the
TCS and significantly reduce the time spent on this process. The Wizard will walk through six installation
steps to install the project.
To set up the project, log in to the program as a user who has administrative rights (please refer
to the Administration of User Rights section of the manual).
ATTENTION! First, set up ОРС Server, then TechnologSoft.
The Wizard will launch automatically when creating a new project.
Figure 52. TechnologSoft Configuration Wizard – Step 1
The first step of Configuration Wizard is shown in Figure 51. In this step select the computers
which are connected to the devices. Find them in the list of available computers. For quick selection of
the local computer, click the My Computer >> button. When the computers are selected, click the
Next>> button.
The second step of Configuration Wizard (Figure 52) is the search and selection of OPC servers
among those which are installed on the selected computers. By default, the Wizard includes all OPC
servers found on the selected computers. To remove OPC server, select it in the tree and click the
Remove button. To repeat the search and select all the servers found on the computer, select the
computer in the tree and click the Refresh button. When the selection is finished, click the Next>>
button.
TechnologSoft
45
Figure 53. TechnologSoft Configuration Wizard – Step 2
The third step of Configuration Wizard (Figure 53) is the selection of templates to be used in the
devices. The Wizard scans the namespace of the selected OPC servers and specifies a list of connected
devices. Next, the template is searched in the database for each device. The user will see the result of
these actions in the form of a data table, each row of which describes one device. If the template for the
device is found, the row will be green. If the template for the device is not found, the row will be red.
There can be several templates for each device. In this case, the Template column will have a dropdown list with suitable templates.
Figure 54. TechnologSoft Configuration Wizard – Step 3
To go to the next step, click Next >>.
46
TechnologSoft
The fourth step of Configuration Wizard (Figure 54) is logging settings. In this step, specify the
parameter of software archive – logging period in seconds. The default value is 10 minutes.
Figure 55. TechnologSoft Configuration Wizard – Step 4
To go to the next step, click Next >>.
The fifth step of Configuration Wizard (Figure 55) is display settings. Specify the time interval for
which data is to be displayed in the graph and table. The default value is 8 hours. It means that the user
will see the data for the last eight hours on the real time graph at any time.
To go to the next step, click Next >>.
Figure 56. TechnologSoft Configuration Wizard – Step 5
The sixth and the last step of Configuration Wizard (Figure 56) is communication control settings.
If the communication monitor is enabled, TechnologSoft will show the Loss of Communication alarm
TechnologSoft
47
dialog in the event of communication failure with any of the devices. Also, TechnologSoft will record the
events in the loss of communication log.
If the communication monitor is disabled, communication failures will not be logged. Besides, the
user specifies the time during which the loss of communication is allowed (by default, it is 1200
seconds). This parameter is entered in the event of short-term communication failures. If communication
with the device was broken, but then was restored before the expiration of that time, such a case is not
registered as a loss of communication.
Figure 57. TechnologSoft Configuration Wizard – Step 6
Click Ready to finish the Configuration Wizard. The wizard creates the configuration of all three
levels of the project and the links between them according to the template settings.
After finishing the Wizard, save the project in the database. To do this, run the Project – Save in
the database as… command in the main menu and name the project.
The Configuration Wizard does not include setting user rights, SMS alarm and tasks on schedule.
48
TechnologSoft
Manually Setting a Project
To set up the project, log in to the program as a user who has administrative rights (please refer
to the Administration of User Rights section of the manual).
ATTENTION! First, set up ОРС Server, then TechnologSoft.
To create a project manually, launch a display module and run the Project – New command in
the main menu. The new project will be created and the Configuration Wizard will start. Next, run the
Project – Save in the database command in the main menu to name the new project. Enter the name
in the dialog box and click Save.
The project setup includes setting the data source, the logical project structure, the links between
them and display.
Data Source
Setting the level of the data source includes the following:
1) Specifying the list of computers which are connecting to devices.
2) Specifying ОРС servers on the selected computers.
3) Receiving of the namespace of the OPC servers.
The structure of this level is a tree of objects. At the root of the tree there are objects that
correspond to computers. The root objects can be several. On the second level there are objects that
correspond to OPC servers. The next levels contain group objects and tags of the OPC server
namespace.
The example of data source setting is shown in Figure 57. In this example, the data source is a
single computer that has one OPC server. The namespace of the OPC server has three nested OPC
groups and about two dozen OPC tags. Some of OPC tags are arrays.
The Datasource toolbar is used for configuring and displaying Datasource object tree (Figure
57). The user can open it via the View – Toolbar – Datasource command in the main menu. All
operations with the tree are performed using the context menu. Select the object in the tree and rightclick to call the context menu.
TechnologSoft
49
Figure 58. Example of Datasource Setting
Context Menu of Datasource Toolbar
The context menu of Datasource Toolbar is shown in Figure 58.
The Add menu is used for adding new computers to the datasource. The Add – My Computer
command adds a local computer to the tree. The Add – Computer… command opens a dialog box to
edit properties of a new computer (Figure 59). In this dialog box, enter computer parameters and click
OK. Name is the name of computer within the project. This name will be used for the node signature in
the tree. IP-addr is a computer address according to IP protocol.
Figure 59. Context Menu of Datasource Toolbar
When adding a new computer, it automatically searches for the OPC servers. If any are found,
they are also added to the tree.
The Refresh All command repeats the search for OPC servers on all computers available in the
data source. At the same time, all existing nodes of OPC servers are first deleted and then the new ones
are created.
The Delete All command deletes all computers at once, i.e. cleans the datasource.
50
TechnologSoft
Figure 60. New Computer Dialog
Context Menu of Computer Object
The context menu of computer object is shown in Figure 60.
The Rename command renames a computer name. It opens the edit field in the place of the
computer node.
The Refresh command repeats the search for OPC servers on this computer.
Figure 61. Context Menu of Computer Object
The Delete command deletes a computer from the tree.
The Properties command changes parameters of this computer. It opens the dialog box to edit
properties of a computer (Figure 59).
Context Menu of OPC Server Object
The context menu of OPC server object is shown in Figure 61.
Figure 62. Context Menu of OPC Server Object
The Connect and Disconnect commands are used in this menu to verify communication with the
OPC server.
The Get Namespace command allows the user to receive the namespace of OPC server and
save it in the datasource tree. At the same time, the nodes of OPC groups and OPC tags are created in
the tree.
The Delete command deletes OPC server node from the tree.
Context Menu of OPC Group Object
The context menu of OPC group object is shown in Figure 62. This context menu is called only
for OPC group that does not have any other nested OPC groups.
Figure 63. Context Menu of OPC Group Object
TechnologSoft
51
The Find Template command opens the dialog box to select a template for work with a definite
device (Figure 63). Device type is determined by a unique identifier which is available in the properties of
the OPC tags of the OPC group.
NOTE. This function is supported only for ОРС server of TERA company.
The Template Selection dialog box contains the list of templates which are available in the
database for this type of devices. If there are several of these templates, select one of them. To apply
the selected template, click OK. As a result, the settings for the selected template will be added to the
project. The template includes the logical project structure for the device, links between OPC tags of the
OPC group and the logical project structure, as well as the display settings. If there are no templates for
the specified device type in the database, the program will show the appropriate message about it.
Figure 64. Template Selection
The Configuration Wizard performs similar actions in the process.
Context Menu of OPC Tag Object
The context menu of OPC tag object is shown in Figure 64.
The Unlink command breaks the links between this OPC tag and the object from the logical
project structure. If the tag does not have such a link, this command is ignored.
Figure 65. Context Menu of OPC Tag Object
52
TechnologSoft
Logical Project Structure
General Information
The logical project structure is the object tree, the root of which contains the object of the project.
The object tree of the new project consists only of the root object.
The task of setting the logical project structure is to create such an object tree and the formation
of alarm conditions.
The tree objects are divided into two types: group and listed. Group objects can contain other
objects as children. Child objects can be both: group and listed. Listed objects can not contain other
objects; they can only be child objects. Listed objects are also called parameters.
To display the object tree of the logical project structure, use the Project toolbar (Figure 65). The
user can open it using the View – Toolbar – Project command in the main menu. All tree operations are
performed through the context menu. Select the tree node and right-click to call the context menu.
Figure 66. Example of Logical Project Structure
Context Menu of Project Toolbar
The context menu is used for all objects of the Project toolbar (Figure 66-b). The only exception
is the menu for the Project object. This menu is shown in Figure 66-а.
The Rename command opens the edit field in the place of the tree node.
The Delete command deletes the object from the tree. If it is a group object and contains child
objects, at the same time all child objects will be deleted.
The Add submenu is used to add child objects to the tree. A child object can be added only to the
group object. This menu will be viewed later.
The Offline command disconnects the specified object and all its child objects from the survey. If
the object is already offline, it will have a tick and the repeated command will make it online again. If the
command is inactive, it means that one of the parent objects was disconnected.
TechnologSoft
53
a)
b)
Figure 67. Context Menu of Project Toolbar
The Save to Library… command saves the specified object with current settings to the library.
The object is saved with all its child objects and alarms conditions. Links with datasource are not saved
to the library. In the future, the stored object can be used as a child object in the tree. The components
library is located in the Components folder where TechnologSoft was installed. Each component is
stored in *.cmp extension. After installing the program, the components library is empty.
The Save as Template… command saves a template for work with a specific device. Device
type, for which the template is saved, is defined by a unique identifier. This identifier is extracted from the
properties of the datasource OPC tag, which is linked with this object or any child object. This implied a
necessary condition for creating a template – the object on the base of which the template is created, or
its child objects should have links with the datasource.
The Save as Template… command opens a dialog box to save a device template (Figure 67).
The user can store a template in the database or in the file. The template includes the logical device
structure (a part of the logical project structure tree, on the base of which the template is created), links
with the datasource and display settings. Template specification includes a template name, device name
and device identifier. Template name can be arbitrary.
Figure 68. Save Device Template
NOTE. This function is supported only for OPC server of TERA company.
The Unlink command breaks the connection between a parameter and OPC tag of the
datasource. It is not available for group objects.
The Properties… command opens a dialog box to edit the properties of the specified object. The
dialog box contains one or more tabs with properties. Depending on the type of object, the dialog will
contain a different set of tabs. Below is an explanation of each of these tabs.
Add Tab
The Add tab (Figure 68) adds the logical project structure of child objects to the tree. A child
object can be added only to a group object.
54
TechnologSoft
The menu contains a list of commands, with the help of which the user can add main components
to the tree, and the Library submenu, which contains a list of components from the library.
The library can have both the components which are the one object and the components which
consist of a plurality of objects. The component library is filled by the user at runtime. After installing the
software, the component library is empty.
Main components may also consist of one object or set of objects. Components differ from each
other by behavior and display. Let’s consider each component in detail:
Growing Chamber
- Group of objects which describe a growing chamber
Device 8channel
- Group of objects which consists of eight sensors and eight values describing
the state of sensors
Time
- Object which displays device date and time
Group
- Group object
Value
- Object which displays a device variable as a value
Sensor
- Object which displays a device variable as a sensor value
Humidity Sensor
- Group of objects which describes a humidity sensor. The group consists of
two temperature sensors, two values describing temperature sensors, and a
humidity sensor
Temperature Sensor - Object which displays a device variable as a temperature sensor value
СО2 Sensor
- Object which displays a device variable as CO2 sensor value
Setting
- Object which displays a device variable as well as records a new value to a
device variable
Array of Settings
- Similar to the Setting component with the difference that the device variable
is an array
Enumeration
- Object which displays a device variable as a text description of each value
String
- Object which displays an array variable as a set of symbols
Logical State
- Object which displays a device variable as an ON-OFF switch
Percent State
- Object which displays a device variable as a program animation from 0 to
100%
Clock
- Object which displays the system time of the computer
TechnologSoft
55
Figure 69. Add Tab
Properties for Project Dialog
The Properties for Project dialog box is shown in Figure 69. There is only the Properties tab in
the dialog box. It contains all parameters of the Project object. The user specifies the name of the
project node in the tree and the software archive properties.
56
TechnologSoft
Figure 70. Properties for Project Dialog
The Common section allows the user to enter the name for the project node in the tree.
The Software Archive section allows the user to enter the type and period of logging for archive
module. The available options are Immediate Value, Average Value, Maximum Value and Minimum
Value.
The Hardware Archive section allows the user to enter a logging period. It displays only
hardware archive but it does not affect the device archiving settings.
Editing Parameter Properties. Common Tab
The Common tab contains a set of basic parameters of the parameter, so it is included to the
Properties for Parameter dialog box. The example of this tab is shown in Figure 70.
In the Name section, enter full and short names of the parameter. Full name is used in the logical
structure tree, as well as in a variety of settings dialogs. Short name is displayed in the mnemonic,
graph, data table and other places where you want to save a space. If necessary, short and full names
may be the same.
In the Software Archive and Hardware Archive sections, the user specifies archive settings. By
default, archive settings are inherited from a parent parameter. They can be redefined for software
archive. To do this, in the Software Archive section, select the checkbox next to Individually, specify
one of the logging types and the logging period. Hardware archive settings cannot be redefined for a
parameter, only for a group object.
The Display section contains the Show On Mnemonic checkbox which enables/disables the
display of the parameter in the mnemonic.
TechnologSoft
57
Figure 71. Properties for Parameter Dialog. Common Tab
The Alarm Conditions… button opens the Alarm Conditions dialog box (Figure 74).
Editing Parameter Properties. Value Tab
The Value tab contains all parameter properties associated with its value, so this tab is included
to the Properties for Parameter dialog box. The example of this tab for Temperature Sensor
parameter is shown in Figure 71.
The Data Source section contains information about the OPC tag connected with the parameter,
as well as the settings that allow you to use a single bit of the tag value as the parameter value.
The Host field specifies the name and IP of the personal computer where the OPC server
containing the tag connected with the parameter is installed.
The OPC Server field specifies the name of OPC server containing the tag connected with the
parameter.
The Tag field specifies the full name of the OPC tag connected with the parameter.
The Index field specifies the value index from the OPC tag array whose value gets the
parameter. This option makes sense if the OPC tag is an array. Otherwise, the Index field will be set to
0.
The Data Type field specifies the value type of the OPC tag connected with the parameter. If the
OPC tag is an array, it will be also specified in the field.
The Cut Single Bit option allows the user to extract a single bit from the OPC tag value and use
it as the parameter value.
The Bit Number parameter is activated when the Cut Single Bit option is selected. This
parameter is used to select the bit that you want to extract from the OPC tag value.
58
TechnologSoft
Figure 72. Properties for Parameter Dialog. Value Tab
The Value section contains the options of the parameter value display.
The Data Type field is not used at the moment.
The Decimal Places field specifies the number of decimal places to display the parameter value
in the group control window, mnemonic and control page.
Editing Parameter Properties. Enumeration Tab
The Enumeration tab is included to the Properties for Parameter dialog box and is used to set
Value – Text match. This is to ensure that the parameter will display some string when receiving a
specific numerical value, another string when receiving the second string, etc. The example of this tab is
shown in Figure 72.
This tab contains the only Match Values section which in turn contains a table of matches. The
number of matches is not limited.
To add a new row in the table of matches, right-click on the table to call a context menu and
select Add. In the new row, specify a numeric value and a text that corresponds to this value. A numeric
value must be unique. Text can be arbitrary.
To delete a match, right-click on it to call a context menu and select Delete. The software will
prompt the user to confirm deletion. Select Yes.
To change a text or a numeric value of the existing match, left double-click on it. The table cell
will enter an edit mode. Make your changes and press Enter to save.
TechnologSoft
59
Figure 73. Properties for Parameter Dialog. Enumeration Tab
Editing Parameter Properties. Logic State Tab
The Logic State tab is included to the Properties for Parameter dialog box and is used to
specify text values to on and off parameter state. The example of this tab is shown in Figure 73.
This tab contains the only Switch Position section where there are two fields: On State and Off
State. In each of these fields, enter the text to be displayed as the parameter value in a certain state.
The parameter is in on state if it received a non-zero numeric value from the data source.
The parameter is in off state if it received a zero numeric value from the data source.
60
TechnologSoft
Figure 74. Properties for Parameter Dialog. Logic State Tab
Alarm Conditions
General Information
Alarm conditions can be set to the parameters. Depending on the result of the check, alarm can
be activated or deactivated. Activation and deactivation events are recorded in the alarm log. The
condition may contain the value of the parameter for which the condition is created, the value of other
parameters and constants.
Alarm Conditions Dialog
Alarm conditions are controlled using the Alarm Conditions dialog box which is shown in Figure
74. This dialog can be called via the Settings – Alarms and Alerts – Alarm Conditions… command in
the main menu.
There is a list of parameters at the top of the dialog, in the Parameter section. At the bottom of
the dialog, in the Alarm conditions for selected parameter section, there is a list of alarm conditions
for selected parameter and control buttons.
The Add… button opens the Edit Alarm Condition dialog box to create a new condition (Figure
75).
The Edit… button opens the Edit Alarm Condition dialog box to edit an existing alarm condition
(Figure 75). To activate the button, select the condition in the list.
The Delete button deletes the existing alarm condition. To activate the button, select the
condition in the list.
TechnologSoft
61
Figure 75. Alarm Conditions Dialog
The Additionally section contains the global parameters, which affect all alarm conditions and
their process.
The Bounce Protection… button opens the Bounce Protection Settings dialog box (please
refer to the Bounce Protection section of the manual and Figure 76).
Edit Alarm Condition Dialog
The Edit Alarm Condition dialog box (Figure 75) contains a lot of parameters and requires
special attention while setting. At the top of the dialog, there is a parameter for which the alarm condition
is created.
The Alarm Name field specifies the name of the alarm condition. This name will appear in the
alarm log and in the alarm acknowledgement dialog box.
The importance level of alarm type is a priority of condition. Several alarm conditions with
different alarm types can be set for a single parameter. Conditions are checked in order of decreasing
importance level of alarm type. If a condition with a high level of importance activated the alarm, the
conditions with a lower priority will not be checked. However, conditions with the same level of
importance will be checked all. It is possible that several alarms with the same importance level will be
activated for a single parameter.
The drop-down menu lists the importance levels of alarm types in decreasing order:
o Fault
o Offline
o Upper bound violated
o Lower bound violated
The importance level also affects the display of the parameter for which the condition is created.
If the alarm condition with the Fault alarm type is activated, then fault will be displayed instead of
the parameter. In the group control window, this word will be displayed in the Alarm 1 color (Figure 77).
If the alarm condition with the Offline alarm type is activated, then off will be displayed instead of
the parameter. Conditions with this type of alarm do not appear in the alarm log.
62
TechnologSoft
If the alarm condition with the Upper bound violated or Lower bound violated type is activated,
then the parameter will be displayed in the Alarm 3 or Alarm 4 color relatively in the group control
window (Figure 77).
Figure 76. Edit Alarm Condition Dialog
The Alarm is off when next condition is satisfied section specifies the condition itself. The
name of the condition says that the condition must be satisfied. If the condition is not satisfied, the alarm
will be activated.
This section contains an area which displays the condition, logical project structure tree, list with
the signs of equality, inequality and comparison, list of users, constant field, bit buttons, and buttons for
editing conditions.
Condition consists of atoms. Atom may be a parameter, comparison sign, user or a constant.
The current atom is highlighted. If no atom is highlighted, then the current atom is the last atom of the
condition. The new atom is added after the current. The Delete button deletes the current atom. The
<<Back and >>Forward buttons make current the previous or next atom.
To add a parameter to the condition, find it in the logical project structure tree and left double
click.
To add a comparison sign or user to the condition, left double click on it.
To add a constant to the condition, enter the required value in the Constant section and press
the Add button or press one of the buttons in the Add Bit section.
The Requires Acknowledgement checkbox enables or disables the user control for this alarm. If
the checkbox is on, the alarm acknowledgement dialog will open while alarm activation. And the events
of activation/deactivation and acknowledgment will be logged in the alarm log. If the checkbox is off, the
alarm acknowledgement dialog box will not open while alarm activation, and the event of
activation/deactivation will not be logged in the alarm log. But the display of the parameter at any type of
checkbox will vary according to the importance level of the condition. By default, this checkbox is
unchecked.
TechnologSoft
63
The Under the SMS alarm checkbox is used to place this condition under the SMS alarm. If the
checkbox is checked, then the condition is under the SMS alarm. By default, this checkbox is
unchecked. The Under the SMS alarm checkbox is on only when the Requires Acknowledgement
checkbox is selected.
The Critical checkbox enables/disables the critical level of alarm importance within the SMS
alarm. This checkbox is activated only when the Under the SMS alarm checkbox is checked. If the
checkbox is activated, then the alarm is assigned to a critical level. If the checkbox is not activated, the
alarm is assigned to a general level. By default, this checkbox is unchecked.
Some devices support hardware alarm acknowledgement. I.e. alarm can be acknowledged by
pressing one of the buttons on the device. The Hardware Acknowledgement section is used to support
these devices. The hardware acknowledgement may be activated only when the Requires
Acknowledgement checkbox is checked. By default, this checkbox is unchecked.
There is a special variable, Word of acknowledgement, in the device used to realize hardware
acknowledgment. Every bit in this variable corresponds to a specific alarm acknowledgement (please
refer to the user’s manual for the device).
To enable a hardware acknowledgement, activate the checkbox inside the section, press the …
button, select the parameter of hardware acknowledgement and specify the bit number (numbered from
zero). The parameter of hardware acknowledgement is a parameter connected with the Word of
acknowledgement variable from the device.
If the hardware acknowledgement is enabled, the software acknowledgement event will be
transferred to the device via the Word of acknowledgment. Similarly, the hardware acknowledgement
event will be fixed by the control system, logged in the alarm log, and the alarm acknowledgement dialog
box closes.
The Deny Software Acknowledgement checkbox is necessary when the alarm is allowed to
acknowledge only from the device. This checkbox is active only if the hardware acknowledgement is
enabled. By default, the checkbox is unchecked. If the checkbox is on, the software acknowledgement is
prohibited. At the same time, the acknowledgment dialog box will still appear, but the software
acknowledgement event will not be transferred to the device and appear in the alarm log.
Bounce Protection
The Bounce Protection Settings dialog box is shown in Figure 76. To open this dialog box,
press the Bounce Protection… button in the Alarm Conditions dialog box.
The Alarm Delay section contains the Delta t1 parameter which is a violation of time allowed
before the alarm appearing. The alarm delay is set in seconds. If Delta t1 is zero, the alarm appears
immediately after the violation. If Delta t1 is greater than zero, the alarm will appear only after the
duration of the violation exceeds the specified delay. If the parameter is back to normal earlier than the
Delta t1 delay time has expired, then there will be no alarm.
64
TechnologSoft
Figure 77. Bounce Protection Settings
The Alarm Cancel Delay section contains the Delta t2 parameter which is a minimum time
needed to cancel an alarm after returning a parameter back to normal. The alarm delay is set in
seconds. If Delta t2 is zero, the alarm appears immediately after the violation. If Delta t2 is greater than
zero, the alarm will be cancelled only after the parameter is normal for longer than specified in this delay.
If the parameter is again out of the norm before the Delta t2 delay time expires, the alarm will not be
cancelled.
Link of Logical Project Structure with Data Source
Links between the data source and the logical project structure are the channels through which
the data is transferred.
Links are established between the data source OPC tags and the parameters of the logical
project structure. I.e. the parameter will receive its values from the OPC tag. One OPC tag may be linked
with multiple parameters. To create these links, it is necessary to open two panels: Data Source and
Project (Figures 57 and 65).
The links are created with the help of drag-and-drop technology. I.e. to create a link between the
OPC tag and the parameter, left-click the OPC tag in the Data Source panel and while holding the
button drag the tag to the Project panel. Move the mouse to the desired parameter and release the
button. As soon as the link is created, the colors of the OPC tag and parameter icons will be changed.
To delete a link, call the context menu on either the OPC tag (Figure 64) or the parameter (Figure
66-b) and select the Unlink command. As soon as the link is deleted, the colors of the OPC tag and
parameter icons will be changed.
To define which OPC tag the parameter is linked with, select the Properties… command in its
context menu (Figure 66). This command opens the Properties for Parameter dialog box. The
information about the linked OPC tag is in the Value tab, in the Data Source section (Figure 71).
TechnologSoft
65
Display Level
General Information
Project display is divided into control groups. The project must have at least one control group.
(please refer to the Control Groups section of the manual).
To set the display level means to create the required number of control groups and their
configuration.
The Control Group panel is used for work with control groups (Figure 50). Open or close it using
the View – Toolbars – Groups command in the main menu.
Control Group Windows Display Settings
The Control Group Windows Display Settings dialog box is shown in Figure 77. To open it, run
the Settings – Control Groups… command in the main menu. The window’s minimal width and height,
colors and fonts are set in this dialog.
Figure 78. Control Group Windows Display Settings
Fonts are specified separately for the group header, parameter names, parameter values and
parameter values while alarm.
Color settings consist of two groups: background color and font alarm color. The group window
background sets the base color. This color will fill the windows of all groups in the normal state. The
background color when selected is the background color of the group which is selected by the user.
The window background color while alarm is not yet used. There are four font alarm colors:
Alarm 1, Alarm 2, Alarm 3 and Alarm 4. The parameter value will be in Alarm 1 color if the fault alarm
type is activated. The parameter value will be in Alarm 2 color if the offline alarm type is activated. The
parameter value will be in Alarm 3 or Alarm4 colors relatively, if the upper bound violated or lower
bound violated alarm type is activated.
Control Groups Menu
Groups can be controlled using the context menu of the Group panel or the Control Groups
main menu. These menus are identical. The Group context menu is shown in Figure 78.
66
TechnologSoft
Figure79. Groups Context Menu
The Add… command opens the Edit Control Group dialog box (Figure 79) to create a new
group.
The Edit… command opens the Edit Control Group dialog box (Figure 79) to change the
current group.
The Delete command deletes the current control group.
Edit Control Group Dialog
The Edit Control Group dialog box (Figure 79) is used to create new control group and edit the
current control groups.
The Group Name section specifies the name of the group.
The Project Tree section is used to select the group project from the logical project tree. Leftclick selects the group project. Double left-click minimizes and maximizes the group project. When
selecting the group project, the Parameters section forms a data table containing parameters with the
group project.
The Mnemonic section contains mnemonic display parameter for the group. The When a group
is selected, display on mnemonic field displays the group project which mnemonic will be used for the
group. To specify this project, select it in the tree of the Project Tree section and press the -> button in
the Mnemonic section. To cancel mnemonic display for the group, select the .. node in the project tree
and press the -> button in the Mnemonic section.
The Parameters section contains a list of parameters of the group project selected in the Project
Tree section. This section is used for the parameters that should appear in the group window, graph,
data table and control page of the group. The table contains the names of the parameters and the
checkboxes for each type of data view. If the checkbox is selected, then this parameter will display in the
appropriate type of data view.
TechnologSoft
67
Figure 80. Edit Control Group Dialog
The Settings section contains the buttons to set individual parameters of all types of data view
for the group. These parameters redefine the general settings (please refer to the Types of Data View
section of the manual). By default, the values of these parameters inherit the general settings.
The Group… button opens the Control Group Settings dialog box (Figure 80). The Graph…
button opens the Graph View Settings dialog box (Figure 81). The Table… button opens the Table
View Settings dialog box (Figure 83). The Control… button opens the Control Page View Settings
dialog box (Figure 84). The Alarm Conditions… opens the Alarm Conditions dialog box with the filter
for the control group (Figure 74).
Control Group Settings Dialog
The example of the Control Group Settings dialog box is shown in Figure 80. The dialog
contains a list of parameters which will be displayed in the group window. The parameters in the list are
in the order in which they are displayed. This order corresponds to the sequence in which the
checkboxes were selected in the Parameters section of the Edit Control Group dialog box. To change
this order, select the parameter in the list and press the Up or Down button at the bottom of the dialog.
68
TechnologSoft
Figure 81. Control Group Settings Dialog
Graph View Settings Dialog
The example of the Graph View Settings dialog box is shown in Figure 81.
The dialog contains a table with the list of parameters which will be displayed in the graph for the
group. The parameters in the list are in the order in which they are displayed. This order corresponds to
the sequence in which the checkboxes were selected in the Parameters section of the Edit Control
Group dialog box. To change this order, select the parameter in the list and click the Up or Down button
at the bottom of the dialog.
Each parameter in the list of the dialog box is a graph channel. Each channel has individual
display settings: line color and width, marker and axis to which it is attached. If the channel is not
attached to the axis, it will not be displayed in the graph.
By default, channels have pre-defined line colors, the second line width and the Without marker
type of marker. By default, the channel is not attached to the axis.
To change the channel color, press the … button in the Color column. The dropdown color panel
will appear (Figure 82). Select the pre-defined color in the panel or press the Custom… button to open
the standard Color Selection dialog box. Specify a desired width and click Enter.
To select a marker for channel parameters, open the dropdown list in the Marker column and
select one of the available options. The dropdown list is opened by the
button. Available marker
options: Without marker, Circle, Square, Rhomb and Cross. If Without marker is selected, the
channel parameters are not marked in the graph.
TechnologSoft
69
Figure 82. Graph View Settings Dialog
To attach a channel to the axis, open the dropdown list in the Axis column and select the desired
axis. The dropdown list is opened by the
button. The list of axes is edited in the Graph Settings
dialog box (please refer to the Types of Data View section of the manual and Figure 85).
Figure 83. Dropdown Color Panel
Table View Settings Dialog
The example of the Table View Settings dialog box is shown in Figure 83.
The dialog contains a list of parameters which will be displayed in the table for the group. The
parameters in the list are in the order in which they are displayed. This order corresponds to the
sequence in which the checkboxes were selected in the Parameters section of the Edit Control Group
dialog box. To change this order, select the parameter in the list and click the Up or Down button at the
bottom of the dialog.
The Use own settings checkbox redefines the time interval during which the data is displayed in
the table. By default, the general settings set in the Table View Settings dialog box are used (please
refer to the Types of Data View section of the manual and Figure 86). If the checkbox is off, the general
settings are used. If the checkbox is on, the buttons are activated in the Time range which must be
shown section. With the help of these buttons specify the required time interval. The *2 and /2 buttons
double and halve the specified time interval.
70
TechnologSoft
Figure 84. Table View Settings Dialog
Control Page View Settings Dialog
The example of the Control Page View Settings dialog box is shown in Figure 84.
Figure 85. Control Page View Settings Dialog
The dialog contains a table with the list of parameters which will be displayed in the control page
of the group. The parameters in the list are in the order in which they are displayed. This order
corresponds to the sequence in which the checkboxes were selected in the Parameters section of the
Edit Control Group dialog box. To change this order, select the parameter in the list and click the Up or
Down button at the bottom of the dialog.
TechnologSoft
71
Changing the Order of Control Groups
The list of available control groups is displayed in the Group panel. New control groups are
added to the end of the list. But the order of groups in the list can be changed using a drag-and-drop
technology.
To change the order of groups, the user must have the right to configure the project.
To change the order of the group:
1. Select the group you need to move
2. Hold down the left mouse button over the group
3. Without releasing the left mouse button, drag the pointer
4. Release the left mouse button over the place the group is to be moved
NOTE. Only the current group can be dragged. While moving the mouse, the new position of the
group is highlighted by special markers.
Graph Settings
The Graph Settings dialog box is shown in Figure 85. To open it, run the Settings – Graph…
command in the main menu. This dialog creates and sets the graph axes (Axes Section), time axis
(Time range which must be shown on X axis section) and other graph parameters.
Figure 86. Graph Settings
There is a list of axes values in the Axes section. As soon as a new project is created, the four
axes are automatically created. They are Humidity, CO2, Temperature and Management. If it not
enough, the user can create additional axis.
To add a new axis, click the Add button and enter the name.
To delete the axis, select it in the list and click Delete.
To change the name of the axis, select it in the list and click Rename.
Each axis has its specified name, color, decimal places on the scale and the Display Axis Name
option. To edit these parameters, select the axis in the list and specify the required value.
Time X axis parameters are specified in the Time range which must be shown on X axis
section. Click one of the buttons 10 min, 30 min, 1 h, 3 h and 8h which set the appropriate time interval
and the buttons * 2 and / 2, which double and halve the specified time interval.
72
TechnologSoft
In the Title section, there is the Display Title checkbox which is responsible for displaying the
graph title. If this option is chosen, the graph displays the title graph that corresponds to the name of the
current control group.
Table Settings
The Table View Settings dialog box is shown in Figure 86. To open it, run the Settings –
Table… command in the main menu.
Figure 87. Table View Settings
The Time range which must be shown section specifies a time interval during which the data in
the table must be shown. Click one of the buttons 1 Hour, 8 Hours, 12 Hours, 1 Day, 3 Days or 7 Days
which set the appropriate time range and the buttons * 2 and / 2, which double and halve the specified
time range.
In the Decimal places field, choose the number of decimal places to display the values in the
table. In the Maximum Rows field, specify the maximum rows in the table. If there is a need in more
rows to display the data for the specified time range, it will show as many first rows as permissible, and
the rest will be dropped.
TechnologSoft
73
Alarms
Alarm conditions are set for the parameters. These conditions are checked by the control system
in the data collection mode. Depending on the results, the events of alarm activation and
acknowledgement are generated and logged in the alarm log.
Each alarm must be acknowledged by the user.
Alarm Acknowledgement Dialog
When the alarm is activated, it sounds through the built-in speaker of PC system unit and
external speakers if they are connected to the PC sound card. Also, the dialog box of alarm
acknowledgement will appear on top of all windows (Figure 87). It cannot be minimized or blocked by
another window. The frame of the dialog will be flashing, drawing the attention of the user.
The Alarm Acknowledgement dialog contains a list of active alarms and cannot be closed until
the user acknowledges all alarms. Each alarm is acknowledged separately. Even if the alarm has been
cancelled, it must still be acknowledged. This ensures that the user will be informed about all alarms.
When all alarms are acknowledged, the dialog box automatically closes and the audible alarm will
turn off.
Press the Acknowledge button to generate the event of software acknowledgement.
Figure 88. Alarm Acknowledgement Dialog
NOTE. The Alarm Acknowledgement dialog will not appear if the current user is not allowed to
acknowledge the alarm (please refer to the Administration of User Rights section of the manual).
NOTE. The Alarm Acknowledgement dialog will not appear if there is no connection with the
database.
Alarm Acknowledgement
Alarm acknowledgement is a confirmation that the user is notified of active alarms. Only the user
can confirm that he is notified by pressing the button.
The TCS supports hardware and software alarm acknowledgement.
Alarm acknowledgement through the dialog box is called software acknowledgement.
Alarm acknowledgement from the device keyboard is called hardware acknowledgement.
74
TechnologSoft
If a device supports hardware alarm acknowledgement, the same alarm message can be
acknowledged either by hardware or software. If the alarm is acknowledged by hardware, software
acknowledgement is not required and the dialog box will close without a user (if there are no more
alarms in the list which require acknowledgment).
If the alarm is acknowledged by software, the device will turn off the alarm sound. It is true only
under the condition that no more alarms require acknowledgment.
There is a special variable called Word of acknowledgement in the device for hardware
acknowledgement. Each bit in this variable is responsible for acknowledgement of a specific alarm
(please refer to the user’s manual of the specific device). If the value of the bit is one, the alarm is
acknowledged. If the value of the bit is zero, the alarm is not yet acknowledged. TechnologSoft controls
the value of the specified bit.
When the user acknowledges the alarm from the device keyboard, the Word of
acknowledgement changes bit to 1.
TechnologSoft reads the Word of acknowledgement, finds that the bit was changed to 1 and
generates the event of hardware acknowledgement. This event is written in the alarm log and if there are
no other unacknowledged alarms, the Alarm Acknowledgement dialog closes without a user.
When the user acknowledges the alarm by hardware, the Word of acknowledgement with the
changed bit is recorded in the device. The device turns off the alarm sound. The alarm log records the
event of hardware acknowledgement.
If hardware acknowledgment is supported, the software acknowledgment can be disabled. In this
case, when the alarm appears, the user can click Acknowledge in the Alarm acknowledgement dialog
and thus close the dialog box, but this event will not be recorded in the alarm log and device. Event
acknowledgment will be logged only if it is the hardware acknowledgment.
If hardware acknowledgment is supported, cancellation of unacknowledged alarm is at the same
time hardware acknowledgment. This rule is based on the fact that the device does not cancel the alarm
without acknowledgement.
TechnologSoft
75
Loss of Communication with Devices
For various reasons, the communication with the devices can be disrupted, for example, the loss
of device power, break or interference in the communication line, and others. The TCS reveals the loss
of communication with data sources and reports it to the user through the Loss of Communication
dialog box. This dialog does not appear immediately but only after a specified time.
If during this time the parameter fails to obtain a new value of the data source, the TCS generates
a communication event regarding this parameter. If the connection has been restored, it is considered
that there was no break.
The information about loss of communication is written in the loss of communication log. The
information is similar to the alarm information. These are time of loss and restoration, time of
acknowledgement, as well as the user who was on duty when the event occurred.
If the parameter which has loss of communication with its data source is displayed in the group
window, its value will be displayed in Alarm Color 2 (Figure 77b).
Communication Dialog
The Communication dialog box (Figure 88) is very similar to the Alarm Acknowledgement
dialog box. It appears on top of all windows and cannot be minimized or blocked by another window. The
frame of the dialog flashes, drawing the attention of the user. At the same time, this alarm sounds
through the built-in speaker of PC system unit and external speakers if they are connected to the PC
sound card.
Figure 89. Communication Dialog
The dialog box contains a list of parameters which have loss of communication. The list contains
the names of parameters, time of start, and recovery of communication if it was restored before the user
acknowledged the event. The dialog box will not be closed until the user acknowledges the loss of
communication, even if the connection has been restored. This ensures that the user will be informed
76
TechnologSoft
about all communication problems. All the parameters in the list are acknowledged. As soon as the user
acknowledges the alarm, the dialog will automatically close and the audible alarm will turn off.
Communication Monitor Settings
The Communication Monitor Settings dialog box is called by the Settings – Alarm and Alerts
– Loss of Communication… command in the main menu (Figure 89).
Figure 90. Communication Monitor Settings
The Enable communication monitor checkbox disables communication monitor. If the
checkbox is on, the communication will be monitored. If the checkbox is off, the communication will not
be monitored. In this case, losses of communication will not be fixed in the communication log and the
communication dialog box will not appear. But the color of the parameter value in the group windows will
change all the same. By default, this option is enabled.
The Time during which the loss of communication is allowed box specifies the time in
seconds. If loss of communication lasted less than the time specified in the box, this event is not
recorded.
TechnologSoft
77
SMS Alarm
SMS alarm consists of:
SMS generator
SMS alarm module
GSM-modem
NOTE. GSM-modem is not supplied with the TCS. GSM-modem must be purchased separately.
In addition to SMS alarm settings, a number of conditions should be performed to send SMS
messages:
o PIN-less SIM-card with a positive balance in the account must be installed in GSM modem
o GSM-modem should be connected to a COM port on your computer and powered
o SMS alarm module must be configured to work with the COM port connected to the GSM-modem
o SMS alarm module must be launched
o Display module should operate in the real time mode.
o
o
o
SMS Alarm Algorithm
SMS alarm system is designed with top priority on minimizing the number of messages and, at
the same time, with the possibility of a more flexible configuration.
There are two levels of SMS alarms: general and critical alarms.
During configuration of the TCS, administrator specifies a list of alarms for SMS. Alarms that
were not included in this list will not be sent by SMS.
All other alarms that are not marked as critical are considered as general alarms.
The length of the message in the SMS alarm module is limited to one SMS. The maximum length
of SMS is 70 characters.
Critical Alarms
Every critical alarm is processed separately and immediately by SMS. A separate message is
sent immediately after the event was recorded.
The Administrator sets the number of message repeats for active unacknowledged alarms and
the interval between such repeats.
The following messages can be sent for critical alarms depending on the settings:
o messages about a new alarm
o repeated messages about the active alarm if it has not yet been acknowledged by the user
o messages about alarm acknowledgment if at the moment of acknowledgment the alarm has not
yet been cancelled or if the option of sending messages about alarm cancel is disabled
o message about alarm cancellation
The message text of a new alarm will include the name of the project, the time of message
creation, the current value of the parameter for which the alarm was triggered, the code and text name of
the alarm.
The text of repeated messages of active alarms will contain the same information, as well as the
number of repetitions.
The message text of alarm acknowledgment will include the name of the project, the time of
message creation, the alarm code and the user who performed the acknowledgment. In the case of
hardware acknowledgment, the user is not specified.
The message text of alarm cancellations will contain the same information, except for the current
value of the parameter for which the alarm was triggered.
General Alarms
The alarms of general level are processed together. Only one message is sent for all active
general alarms.
78
TechnologSoft
The SMS Alarm Reaction Time and Minimum SMS Pause parameters are set for general level
of alarms (please refer to the SMS Alarm Settings section of the manual). Also, the administrator sets
the number of SMS repetitions for the active unacknowledged alarms and the interval between
repetitions.
The SMS regarding new alarms and repeated messages about current unacknowledged alarms
are only sent for general level of alarms. Messages about alarm acknowledgement and cancellation are
not sent. Messages of active alarms that have been acknowledged by the user are not sent. Messages
of unacknowledged alarms that have already been canceled are not sent either.
The SMS text of the general alarm will contain the name of the project, the time of message
creation, the number of active unacknowledged alarms and codes of these alarms. The text of repeated
messages will contain the same information, as well as the number of repetition.
SMS Generator
SMS generator monitors active alarms and forms SMS text according to SMS alarm settings.
SMS generator sets tasks and SMS alarm modules perform them. SMS generator is included in the
display module, and starts/stops simultaneously with the real time mode. Tasks of SMS sending are
transferred to the SMS alarm module through the configuration database.
SMS Alarm Module
SMS tasks are performed by SMS alarm module. Messages are sent via GSM modem.
SMS alarm module is a service and can be installed on any computer in the local network. By
default, this service starts automatically with Windows. After starting the module reads from the
settings.ini file parameters of the COM port to communicate with the modem and configures the modem.
At the end of this operation, the module is ready to send SMS messages. As soon as the task of sending
SMS to the configuration database appears, the module reads and executes it.
Settings for SMS alarm module are in the settings.ini file, in the SMSModule section. The
following are the default settings.
[SMSModule]
- section of SMS alarm module parameters
port=COM1
- serial port connected to the modem
boud=115200
- serial port baud rate
parity=none
- parity
data_bits=8
- data bits
stop_bits=1.0
- stop bits
flow_control=none
- flow control
Usually the changes are only required for the serial port parameter.
SMS Alarm Settings
Basic settings of SMS alarm are required for SMS generator. This setting is done from the display
module by using the Settings – SMS Alarm… command in the main menu.
NOTE! Before setting SMS alarm, it is required to stop the real-time mode.
The SMS Alarm Settings dialog box has four tabs: parameters, phones, phone groups and
alarms.
The Parameters tab is shown in Figure 90. The description of the parameters is below.
TechnologSoft
79
Figure 91. SMS Alarm Settings. Parameters Tab
Turn On SMS Alarm. There is a checkbox to enable/disable SMS alarm. If the checkbox is on,
the SMS alarm will work. If the checkbox is off, the SMS alarm will not work. By default, the checkbox is
off.
Number of Repeated Messages. It is a number of repeated messages of active
unacknowledged alarms. Repeated messages are sent in a time equal to the interval between retries.
This option is used for both general and critical alarms. By default, the number of repeated messages is
two.
Interval Between Repeated Messages. For general alarms this is the time since the last
message sent, after which the repeated message of active alarms will be sent, if there are still any, and
they are not acknowledged by the user. For critical alarms, this is the time since the previous message of
the alarm was sent after which the repeated message will be sent. By default, the interval between
repeated messages is an hour.
Include project name to the SMS text. There is a checkbox to include or exclude the name of
the project from the message text. Project name in the text increases the information content of the
message, but on the other hand it takes place. This option is used for both general and critical alarms.
By default, the checkbox is off.
SMS Alarm Reaction Time. For general alarms this is the time since the alarm appeared, after
which the message of active alarms will be sent, if there are still any, and they are not acknowledged by
the user during this time. If before the expiration of this time the user acknowledges all active alarms, the
message will not be sent. If before the expiration of this time all alarms are cancelled, the message will
not be sent. For critical alarms, reaction time is ignored as the message of critical alarm is sent
immediately. By default, the reaction time is 15 minutes.
Minimum SMS Pause. This is the minimum time before sending the next message that should
pass since the last message sent or the last event of any alarm acknowledged by the user. The
minimum SMS pause must be less than the interval between repeated messages. For critical alarms, the
minimum SMS pause is ignored as the message of new critical alarm is sent immediately regardless of
whether other messages have been recently sent or not. By default, the minimum SMS pause is 10
minutes.
80
TechnologSoft
Send messages about alarm acknowledgement. There is a checkbox to enable/disable
sending messages about alarm acknowledgement. This option is active only for critical level of alarms.
By default, this checkbox is off.
Send messages about alarm cancel. There is a checkbox to enable/disable sending messages
about alarm cancel. This option is active only for critical level of alarms. By default, this checkbox is off.
Send messages about loss of communication. If the checkbox is on, the Loss of
Communication alarm will be added to the list of alarms set for SMS alarm. This alarm has a special
DCF code. By default, this checkbox is off.
Critical level of loss of communication messages. This checkbox sets the importance level for
Loss of Communication alarm. If the checkbox is on, the alarm will have a critical level. If the checkbox
is off, the alarm will have a general level. By default, this checkbox is off.
The Phones tab is shown in Figure 91. In this tab, the user specifies all phone subscribes to
which SMS messages should be sent. Phone number and text description are specified for each
subscriber. It is also possible to temporarily deactivate subscriber without removing it from the list.
To add a new subscriber, right click the table area and select Add from the context menu. There
will be a new line and the cursor to enter the phone, in the table.
To change the phone number, left double click the phone or right click it and select Edit in the
context menu.
To change the text description, left double click the Description cell.
To delete the subscriber from the list, right click the desired line and select Delete in the context
menu.
To temporarily disable the sending SMS messages to a certain number, select the checkbox in
the Off column.
Figure 92. SMS Alarm Settings. Phones Tab
The Phone Groups tab (Figure 92) is used to separate groups of subscribers. The group
includes one or more subscribers and specifies a list of alarms to be monitored by this group of
subscribers. Each message about one of these alarms will be duplicated to all subscribers of the group.
TechnologSoft
81
Figure 93. SMS Alarm Settings. Phone Groups Tab
The group can include any number of subscribers. Any subscriber can be included to one or
more groups. The same alarm can be controlled by one or more groups.
NOTE. Before setting up the groups, it is recommended to create all subscribers, as well as set
all codes, names and importance level of all required alarms.
To add a new group, click the Add button. The Edit Phone Group dialog box will open (Figure
93).
To change an existing group, select it in the list and click the Edit button. The Edit Phone Group
dialog box will open (Figure 93).
To delete an existing group, select it in the list, click the Delete button and answer Yes when
prompted for confirmation of deletion.
The Edit Phone Group dialog box is shown in Figure 93. This dialog specifies the group name,
list of subscribers and list of alarms.
82
TechnologSoft
Figure 94. Edit Phone Group Dialog Box
The left part of the dialog contains the lists of all available subscribers and alarms. The right part
contains the lists of the subscribers and alarms of the selected group.
To add a subscriber to the group, select it in the list and click the > button. To delete the
subscriber from the group, select it in the list and click the < button. To add or delete all the subscribers,
click >> or <<, respectively.
To add or delete the alarm from the group, do the same actions as described above but with the
list of alarms.
The OK button confirms the changes and the Cancel button cancels them.
The Alarms tab is shown in Figure 94. The tab contains the list of all project alarms. Each alarm
has its code, name, level of importance and the Signaling checkbox. All these parameters can be
changed in this tab.
TechnologSoft
83
Figure 95. SMS Alarm Settings. Alarms Tab
Alarm codes are unique codes of the project. The unique code is automatically assigned to each
alarm. This code will be included in the text of the message about this alarm. Automatically assigned
code is always a five-digit identifier, the first character is i, and the remaining four characters are digits. If
necessary the administrator can change these codes so that they induce a certain association. Entered
code can consist of letters and numbers, a maximum length of four characters. The Loss of
communication alarm has its own DCF code.
To change the alarm code, double left click the cell with the identifier. The edit box will appear.
The Signaling column contains the checkbox which enables/disables SMS alarm.
To change the importance level of the alarm, open the drop-down list in the Level column and
select the required level.
To save the changes of the SMS alarm settings, click OK and save the project (Project – Save
to Database).
ATTENTION! Do not forget to save the project after changing the SMS alarm settings.
84
TechnologSoft
Scheduled Tasks
Scheduled tasks are set by using the Scheduled Tasks dialog box (Figure 95). This dialog is
called by the Settings – Scheduled Tasks… command in the main menu.
Figure 96. Scheduled Tasks
The dialog box contains the table of already created tasks which show name, start time,
frequency and task type. If the task has been finished, the Start Time column shows Stopped instead of
time, otherwise it shows date and time of the task start. The start delay is specified in parentheses,
immediately after the time. The Frequency column specifies the task period. If the task is not periodic,
this column will show One-time. The tasks modified by the user and not yet stored in the database, are
marked by * before the name of the task.
The Create… button opens the context menu to select the type of the task for creation (Figure
96).
Figure 97. Context Menu
The following tasks are available in the menu:
Print Task
SMS Mailing Task
Hardware Archive Downloading Task
Data Export Task
Below we will consider each of these types of the tasks in detail.
The Delete button deletes the selected task.
The Edit… button opens the dialog to change the task.
The Close button closes the dialog box.
ATTENTION! Do not forget to save the project (Project – Save To Database). The tasks which
are not stored in the database after modification, are marked by * before the name of the task.
o
o
o
o
TechnologSoft
85
Report Printing
Print task allows you to configure the automatic printing of reports at a specified time. These
tasks are performed by the printing module which is a service. This service must be running. Besides, it
is necessary to have a printer on the computer where the printing module is installed.
After printing task settings have been changed, there is no need to restart the printing module.
The module automatically refreshes the list of tasks as soon as the changes are stored to the
configuration database.
The Report Printing Task dialog box is shown in Figure 97.
Figure 98. Report Printing Task
The Task Name field indicates the name of the printing task.
The dropdown list of the Printer field contains the list of printers available on the computer. The
printer selected in the list will print the tasks.
The dropdown list of the Report field contains the list of reports available in the project. If the list
is empty, switch to the archive view mode and create an arbitrary report (please refer to the User’s
Manual of the TCS). As a result, the Default Report appears in the project.
The Archive Type section indicates the type of the archive from which the data is taken. By
default, the hardware archive type is chosen. The information about archive types is described in the
Archive Types section of the manual.
The Print section specifies the form in which data should be presented in the report: table or
graph. If the Table checkbox is on, the report will include the table with the data for the specified period.
If the checkbox is off, there will be no table with the data in the report. Similarly, the Graph checkbox
enables/disables the display of the graph in the report. At least, one of the checkboxes should be turned
on. By default, both of them are on.
86
TechnologSoft
The Page Orientation section specifies the page orientation for the report. By default, the
Portrait option is selected.
The Period section specifies the period during which the report is created. There are several
checkboxes in this section. By default, the Day checkbox is selected, which means that the report will
include the data per day. Also, the section contains the Repeat checkbox. If the checkbox is on, the task
will be periodic (the task is performed repeatedly with a specified period). If the checkbox is off, the task
is considered one-time and will be stopped after finish. By default, the checkbox is off.
The Scheduled Run Time section represents the date and time of the task.
Figure 99. Parameter List Selection
The List Of Parameters section displays the list of the parameters which will be included in the
report. To change the list, click the … button and the Parameter List Selection dialog box will open
(Figure 98). There are two lists in the dialog. The left window contains the list of all parameters of the
project, the right window contains the list of the parameters selected for the project. The parameter is
moved from one list to another by the > and < buttons or by double left click on the parameter. The OK
buttons saves the changes.
The dropdown list of the If Execution Fails section contains steps that can be taken after an
unsuccessful attempt to perform a task. By default, Repeat until done is selected. In this case, the
printing module will try again to print a report until it is printed. If Skip period is selected, the printing
module will postpone the time of the next task start as in the case of its successful completion. If the task
is one-time, it will be stopped.
SMS Mailing
SMS mailing tasks allow you to configure the periodic sending of SMS messages with the critical
parameters. These tasks are performed by SMS alarm module paired with SMS mailing task manager.
SMS alarm module is a service. SMS mailing task manager is a part of display module and starts/stops
simultaneously with the real time mode. To perform the tasks, the service of SMS alarm module must be
running and display module should operate in the real time mode. Besides, GSM-modem is required.
TechnologSoft
87
After changing the settings of SMS mailing tasks, there is no need to restart the service of SMS
alarm module. The module will automatically refresh the list of tasks as soon as the changes are stored
to the configuration database.
The text of SMS message includes a project name, time stamp of message creation, current
value of the parameter and text name of the parameter or task according to the settings.
SMS message should be limited to one SMS. The maximum SMS length is 70 characters.
SMS Mailing Task dialog box is shown in Figure 99.
Figure 100. SMS Mailing Task
The Task Name section represents the name of the task. The name can be used in the text of
SMS message.
The Parameter section is used to select the parameter, the value of which must be included in
the message. To select a parameter, click the … button of the section which opens the Parameter
Selection dialog box (Figure 100).
The Scheduled Run Time section specifies the date and time of the task.
The Period section specifies the period of sending the message. The section contains the
Repeat checkbox. If the checkbox is on, the task will be periodic (the task is performed repeatedly with a
specified period). If the checkbox is off, the task is considered one-time and will be stopped after finish.
By default, the checkbox is off. Also, there are several checkboxes to select the period in this section. By
default, the Day checkbox is selected, which means that the message will be sent every day at a
specified time if the task is periodic.
The Include To SMS Text section indicates the name which should be included to the SMS
message text. Three options are available. They are Task Name (specified in the Task Name section),
Full Parameter Name and Short Parameter Name (specified in the Parameter section). By default, the
Task Name option is selected.
NOTE. When choosing the option, don’t forget that the maximum SMS length is 70 characters.
88
TechnologSoft
The Phone Groups section is used to select the subscribers of SMS mailing. Choose one or
more telephone groups in the section by pressing the … button which opens the Phone Groups
Selection dialog box (Figure 101).
NOTE. Creating a list of subscribers and their distribution by groups is described in the SMS
Alarm Settings section of the manual.
The dropdown list of the If Execution Fails section contains steps that can be taken after an
unsuccessful attempt to perform a task. By default, Repeat until done is selected. In this case, the SMS
alarm module will try again to send a message. If Skip period is selected, the SMS alarm module will
postpone the time of the next task start as in the case of its successful completion. If the task is onetime, it will be stopped.
Figure 101. Parameter Selection
The Parameter Selection dialog box is shown in Figure 100. This dialog contains the object tree
of the logical project structure. To select a parameter, find it in the tree and click OK.
TechnologSoft
89
Figure 102. Phone Groups Selection
The Phone Groups Selection dialog box is shown in Figure 101. The left window contains the
list of all groups available in the project. The right window contains the list of the selected groups. To
select a group, find it in the left list and click the > button. To cancel the selection, select the group in the
right list and click the < button. The >> button selects all the groups at once, and the << button cancels
the selection of all the groups. Click OK to confirm.
NOTE. Creating a list of subscribers and their distribution by groups is described in the SMS
Alarm Settings section of the manual.
Reading Hardware Archive
Hardware archive reading tasks allow you to automate the process of reading the archive from
the devices. The tasks are performed by the archive module. To perform the tasks, the archive module
must be running. The archive module can operate as an interactive application or as a service.
After changing the settings of hardware archive reading tasks, there is no need to restart the
archive module. The module will automatically refresh the list of tasks as soon as the changes are stored
to the configuration database.
The Hardware Archive Reading Task dialog box is shown in Figure 102.
The Task Name section represents the name of the hardware archive reading task.
The Scheduled Run Time section specifies the date and time of the task. The Repeat checkbox
controls the period of the task. If the checkbox is on, the task will be periodic (the task is performed
repeatedly with a specified period). If the checkbox is off, the task is considered one-time and will be
stopped after finish. By default, the checkbox is off.
90
TechnologSoft
Figure 103. Hardware Archive Reading Task
The Control Groups section contains the list of all control groups of the project. The following list
indicates the group to which the hardware archive reading task must be done.
The group of checkboxes (Hourly, Daily, Weekly and Monthly) sets the period of the task. By
default, the Daily option is selected, which means that the archive module will read the hardware archive
of the specified group every day at a specified time.
The dropdown list of the If Execution Fails section contains steps that can be taken after an
unsuccessful attempt to perform a task. By default, Repeat until done is selected. In this case, the
archive module will try again to perform a task until it is done. If Skip period is selected, the archive
module will postpone the time of the next task start as in the case of its successful completion. If the task
is one-time, it will be stopped.
Data Export
Using data export tasks it is possible to automate periodic data export from the software and
hardware archives. The tasks are performed by the data export module. To perform the tasks, the
module must be running. The data export module is a service.
After changing the settings of tasks, there is no need to restart the data export module. The
module will automatically refresh the list of tasks as soon as the changes are stored to the configuration
database.
The Data Export Task dialog box is shown in Figure 103.
The Task Name section represents the name of the task.
The Scheduled Run Time section specifies the date and time of the task.
NOTE. The actual time of the task may be different from that specified in the Scheduled Run
Time section.
The Start Delay section specifies the start delay of the task in hours and minutes. The actual
time of the task will be equal to the amount of time that is specified in the Scheduled Run Time section,
and the time specified in the Start Delay section.
TechnologSoft
91
Figure 104. Data Export Task
The Period section specifies the period of the task. The section contains the Repeat checkbox. If
the checkbox is on, the task will be periodic (the task is performed repeatedly with a specified period). If
the checkbox is off, the task is considered one-time and will be stopped after finish. By default, the
checkbox is off. Also, in the section there are several checkboxes to select the units and the field to enter
the period. By default, the period of one day is selected, which means that the message will be sent
every day at a specified time if the task is periodic. Besides, the period also defines the time interval
during which data will be exported.
EXAMPLE. The following parameters are defined: Scheduled Run Time 14:00, Start Delay 5
minutes, Period 1 hour. The task will start at 14:05. In this case, the data will be exported for 1 hour,
from 13:00 to 14:00.
The File Name With Full Path section specifies the file in which the export data will be stored. It
is necessary to indicate the full path to the file and make sure that the file is writeable. If the file doesn’t
exist, it will be created during the task.
The File Rotation section contains the checkbox to select the way of file rotation when the task
is periodic. The following options available:
o Overwrite File. The file with the previous data will be overwritten during the next task.
o Add Timestamp. The new file will be created during each task. The file will consist of the
name which is indicated in the File Name With Full Path section and the timestamp of the
next task.
92
TechnologSoft
The File Format section contains the csv checkbox. CSV is a delimited text file format in which
the export data should be saved. This is a common file format that can be opened with any text editor or
by using MS Excell.
The Archive Type section contains two checkboxes to select the type of the archive from which
data will be exported.
The List of Parameters To Export section represents the list of parameters which data will be
exported. To change the list, click the … button, which opens the Parameter List Selection dialog box
(Figure 98). There are two lists in the dialog. The left window contains the list of all parameters of the
project, the right window contains the list of the parameters selected for export. The parameter is moved
from one list to another by the > and < buttons or by double left click on the parameter. The OK buttons
saves the changes.
The dropdown list of the If Execution Fails section contains steps that can be taken after an
unsuccessful attempt to perform a task. By default, Skip period is selected. In this case, the time of the
next task will be postponed as in the case of its successful completion. If the task is one-time, it will be
stopped. If Repeat until done is selected, the data export module will try again to perform a task until it
is done.